GeeBee
-
Posts
4,030 -
Joined
-
Last visited
Content Type
Profiles
Forums
Events
Gallery
Everything posted by GeeBee
-
 Bought this from Modelzone, I know I supposed to be on a buying sabbatical, but I met up with a friend last weekend, I built him a Monte Carlo rally mini 3 years ago, and he mentioned he'd like me to build another model for him, and he showed interest in a samba bus I had in the stash, but I already have plans for that, I found out Modelzone are having one of there silly sales, and got another for £14.99 with free delivery, it arrived this morning ....
 -
I did a 'How To' on my website, after having a go at the resin molding, I now have to remake the molds as they have worn out, who would have thought the stuff I was casting would have been so popular, I've even sent a few sets as far away as New Zealand http://geoff-brown.webs.com/resin-casting-how-to If I can help you further, just PM me
-
Did a little more to the engine before I shut up for the day,
-
I use a fine 10/0 brush for fine detail work, but I try to use an airbrush as much as I can on a build, Thank you, I'm really enjoying this build, even though there's still a long way to go yet ....
-
Interesting subject, and that resin casting looks very clean, looking forward to seeing more on this build
-
Have a look here :- http://www.eddylenders.nl/homepage%20modelbouw.htm
-
also got the steering wheel done, again it was painted using Tamiya XF-59 desert yellow, dry brushed with Tamiya bronze and then given a couple of coats of Tamiya clear orange

-
Well the Tamiya Panel line accent paint arrived the weekend, so today I thought I would give it a go on the door panel lines, I did use it over the weekend on the cooling fan for the engine, it really made the fan blades stand out, I also got the engine 99% finished as well ....
-
I only cast a few parts, mainly wheels, front grills etc, but it didn't cost a great deal to get under way, the small digital scales cost me around £8 from Hong Kong, the RTV is around £18 for just over a Kilo of the stuff, and the 2 part resin was around the same for a kilo of Polycraft 2 part resin, I've never needed a vacuum pump or anything fancy, and my casting success is around 75% I did a small piece on my website to give you an idea of what you need and how to do it, or at least, how I do it ... http://geoff-brown.webs.com/resin-casting-how-to
-
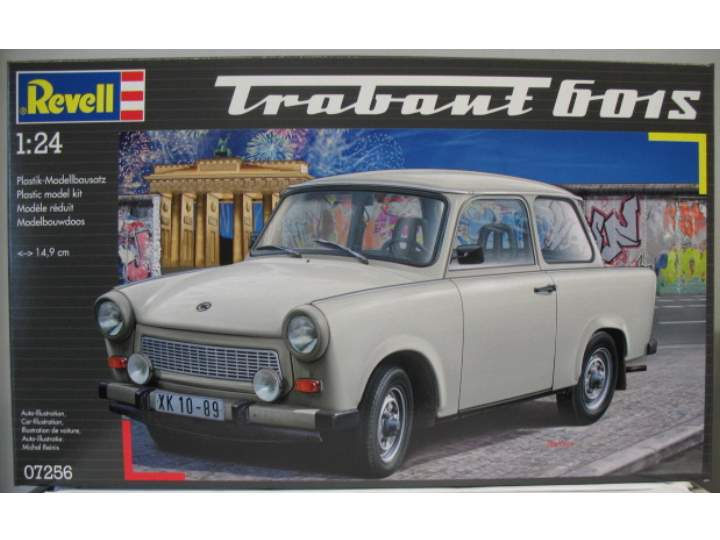
The older Trabant kit released by Revell nearly 24 years ago was actually developed by the Danish company, Heljan, I had a few of these years ago, and gave up building them, as the mold was pretty bad, with very bad fitting parts, and the wheels and tyres were molded as one, it didn't have an engine or much detail to speak of, however the newer release by Revell, which I have a couple, is a totally different kit, opening boot and bonnet, full engine and gearbox detail seperate wheels and vinyl tyres, and is a much better kit, and is available over here for around £16.00, so I suggest if you want to actually build it, go for the later model,
-
Lacquer Thinner for Stripping Paint
GeeBee replied to Miatatom's topic in Model Building Questions and Answers
It will not only soften the plastic, but will melt it, use something like oven cleaner, or even dawn power spray, much safer, and won't damage the plastic -
Very impressive work you've done there, and a beautiful model you've ended up with .....
-
Well I had a look for some flocking to match the interior, but I didn't have any in stock, looking on the 'net, what I needed was some 'Buff' coloured flocking, no one in the U.K had any in stock, so I've had to order some from BNA Model World, so I will start building the engine up, just a few small parts to paint before I can do that, so I started to work on the dashboard, top dash rail was masked off and airbrushed the same colour I had mixed up for the seats and door cards, then the dials were done using BMF, when the decals go on, you'll only see the chrome rings, a little bit of detail painting yet before it's finished
-
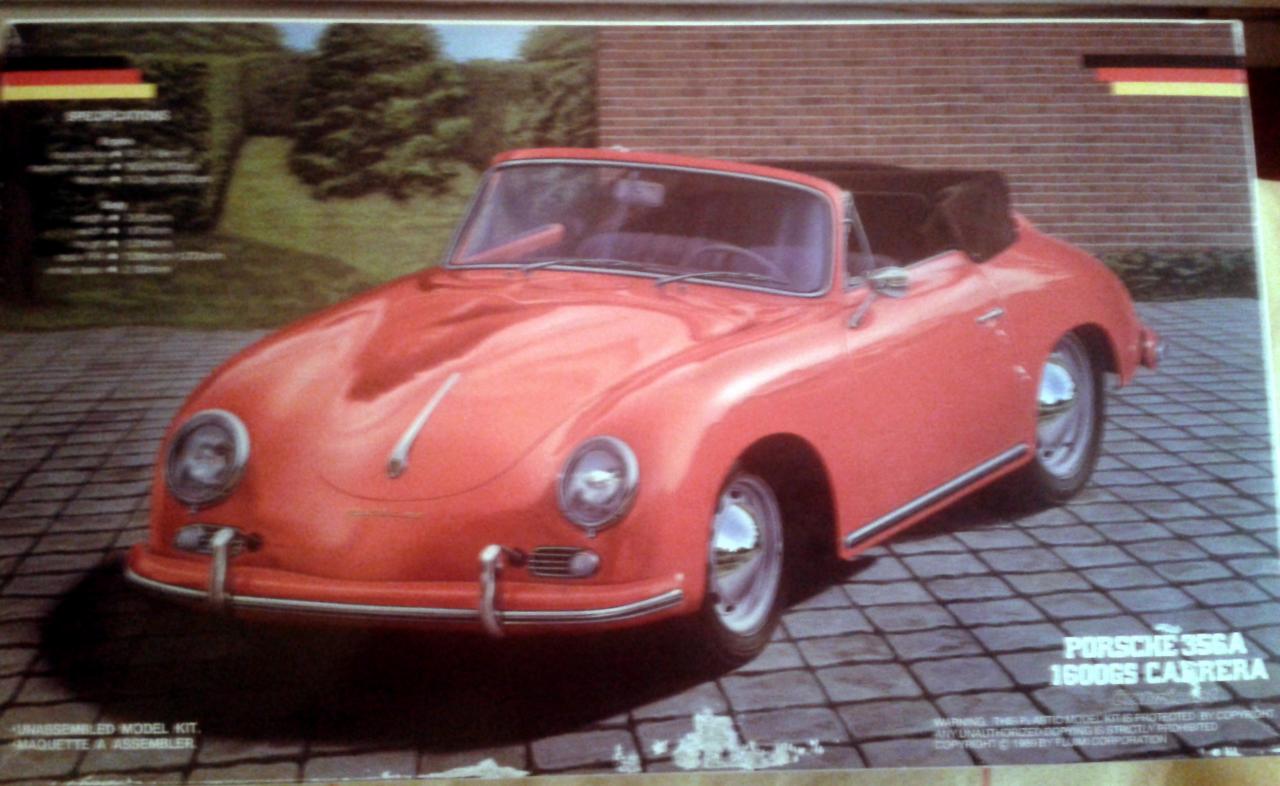
My 356A Cabriolet finally arrived from Japan ...
-
A fine model, seeing these little Frog eye sprites, always puts a smile on my face ....
-
What a brilliant story, and a lovely well made model, congratulations to your daughter, she's done a very fine job ....
-
Got the chassis/fllorpan masked up over the weekend and sprayed this morning, I'm still not 100% happy with the floor, as like the 911 Fujimi mold the floor as though it has no carpet or covering on it, as you can see all the strengthening ribs in it, I may make some panels out of sheet yet, as most 356's had a rubber covering on the floor and carpet around the sides, although it might be a lot easier just to flock the complete interior ....
-
should I clear coat black ?
GeeBee replied to NHRA715's topic in Model Building Questions and Answers
If the black is a solid colour and not a basecoat, then there's no need or reason to clearcoat it, just let it dry, wet sand it and polish it out, if your doing the chrome trim using BMF, then I always do it after the paint has been applied and polished, but before putting any wax on .... -
To build, or not to build? WWYD
GeeBee replied to dantewallace's topic in General Automotive Talk (Trucks and Cars)
If you really want to build them, then do just that, they were made to be built, not to collect .... -
Superb build, love that colour ....
-
No clearcoat was used, it was painted in cellulose lacquer, like the real thing would have been painted back in the 60's, and was wetsanded and polished.
-
Very nice work, and your right, there not easy to build, but do look good once there finished, I've got one of these in the stash, nice to see how it comes out .....
-
For the body ?? I had it mixed by Paints4u, http://www.paints4u.com/ I've been using them for a few years now, and can pretty much any shade I want, they even managed to mix up some of the metallic blue that Carlisle trucking use, luckily I managed to get the colour code, and they found it, cost's me £11.99 for 100mls, either cellulose lacquer or basecoat.
-
Superb work as usual Harry, very nice subject ....
-
Your right, the drums in the Fujimi kit are just superb, they even have the brake linings inside .....