AmericanMuscleFan
-
Posts
3,058 -
Joined
-
Last visited
Content Type
Profiles
Forums
Events
Gallery
Everything posted by AmericanMuscleFan
-
Hi Tim, Glad to see you back!!! This dry sump is totally amazing! Your ability to make such small parts with all those details will always amazed me! That's FANTASTIC!!! The carbs setup you will attempt to make is very nice, rarely seen and intriguing and I can't wait to see your magic operate again... Very inspiring subject! I do love these old Pro Stock so much. Francis
-

64 Dodge D100 Pickup Pro Street
AmericanMuscleFan replied to AmericanMuscleFan's topic in WIP: Drag Racing Models
Thanks to be a loyal visitor Mark! Always a pleasure to help (whenever possible)! Cheers, Francis -
64 Dodge D100 Pickup Pro Street
AmericanMuscleFan replied to AmericanMuscleFan's topic in WIP: Drag Racing Models
Merci M. St-Martin! It all started with just a Dremel, a small drill bit set and the desire to do better next time! It's a fun hobby where each of us make things their own ways and is active on this forum to learn and share! Thanks again for your visit and come back soon, Francis -
64 Dodge D100 Pickup Pro Street
AmericanMuscleFan replied to AmericanMuscleFan's topic in WIP: Drag Racing Models
Thanks for your comments Brian, more to come soon! Cheers, Francis -
70 Plymouth HEMI GTX 1/25 Scale
AmericanMuscleFan replied to AmericanMuscleFan's topic in WIP: Drag Racing Models
Hello Mark, I did check my notes and double check by measuring the slots on the wheels and they are 1/16 inch (0.0625") but you can go until 5/64 inch (0.0781") if you want them a little bit larger (I don't have access to a real set of mags to take accurate measurements). Hope it helps, Francis -
70 Plymouth HEMI GTX 1/25 Scale
AmericanMuscleFan replied to AmericanMuscleFan's topic in WIP: Drag Racing Models
Thanks for your good comment John, I do appreciate! Cheers, Francis -
70 Plymouth HEMI GTX 1/25 Scale
AmericanMuscleFan replied to AmericanMuscleFan's topic in WIP: Drag Racing Models
Thanks for your positive comments on this build, I really appreciate! The Roadrunner/GTX is one of my favorite Mopar B-body of that era. I also have some other built models that I will post pics later so check back soon. Take care, Francis -
70 Plymouth HEMI GTX 1/25 Scale
AmericanMuscleFan replied to AmericanMuscleFan's topic in WIP: Drag Racing Models
Hello Mark, I will have to check and take some measurement with my digital caliper for the slots size and come back to you but I recall that the lug nuts (from Scale Hardware) have 0.8mm hex head size. -
70 Plymouth HEMI GTX 1/25 Scale
AmericanMuscleFan replied to AmericanMuscleFan's topic in WIP: Drag Racing Models
Thanks for you visit and comments on my builds John, you are more than welcome to check the progress on my current build the '64 Dodge D100 if you are interested. Cheers, Francis -
64 Dodge D100 Pickup Pro Street
AmericanMuscleFan replied to AmericanMuscleFan's topic in WIP: Drag Racing Models
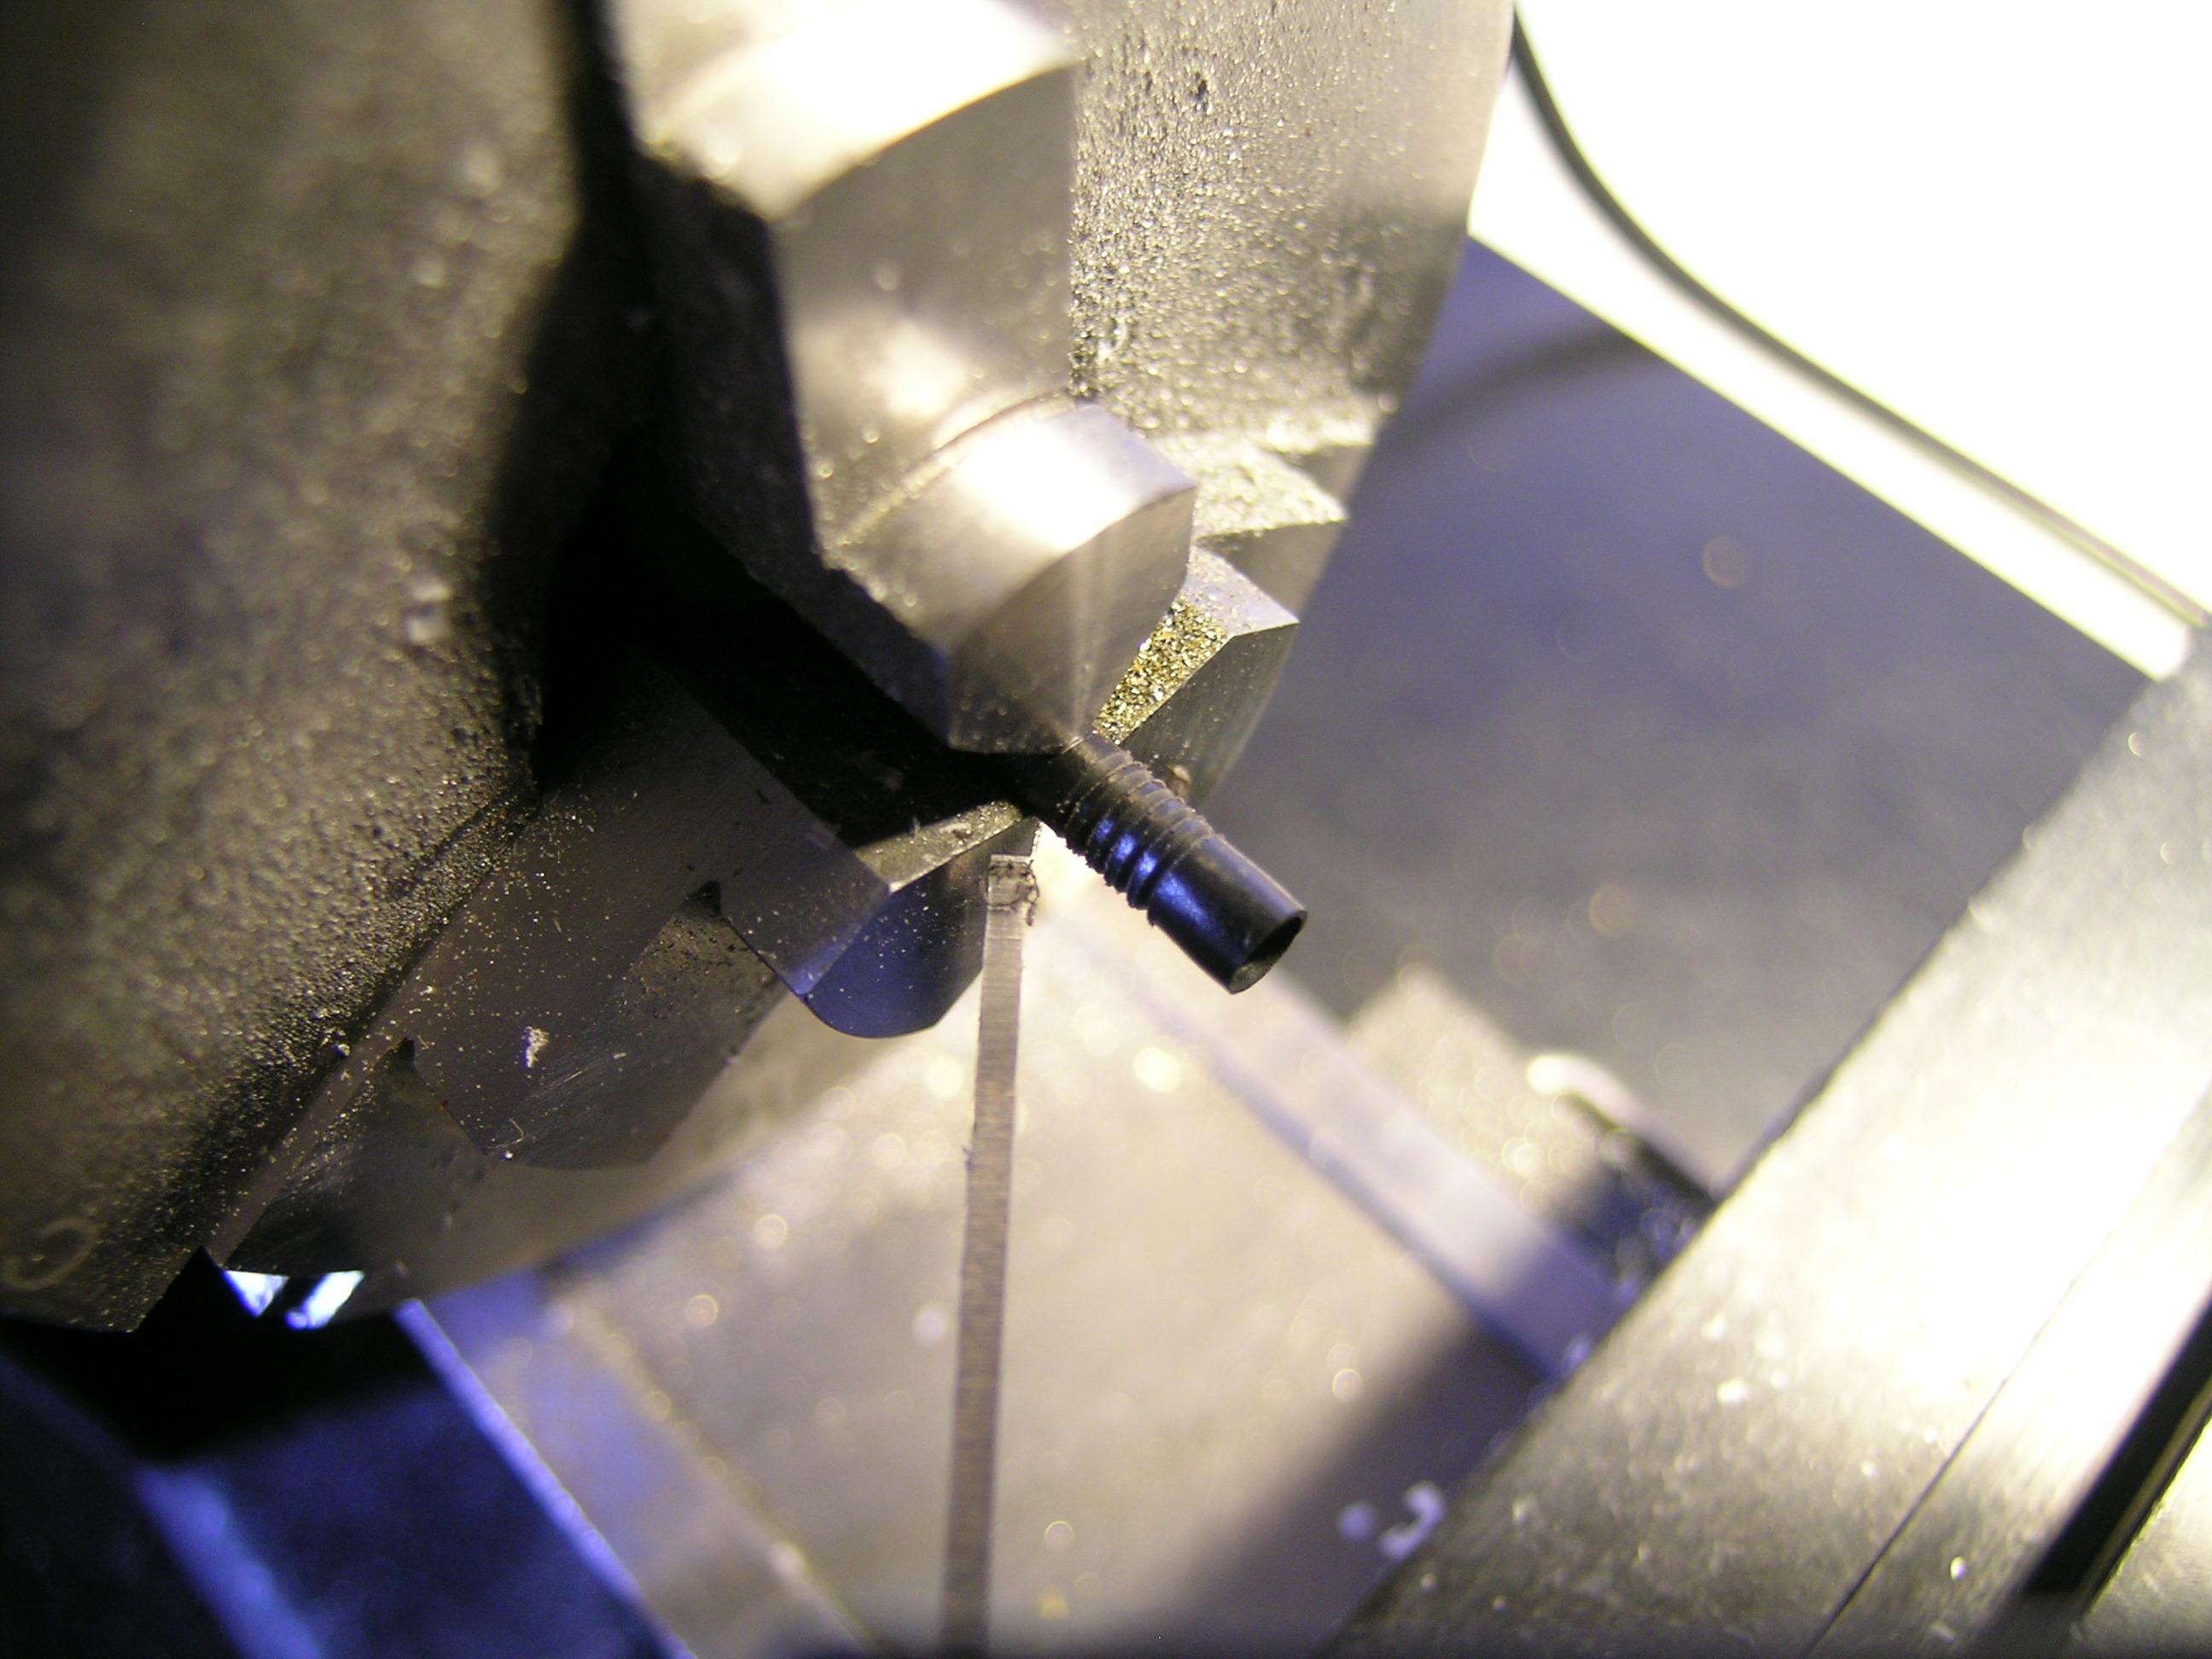
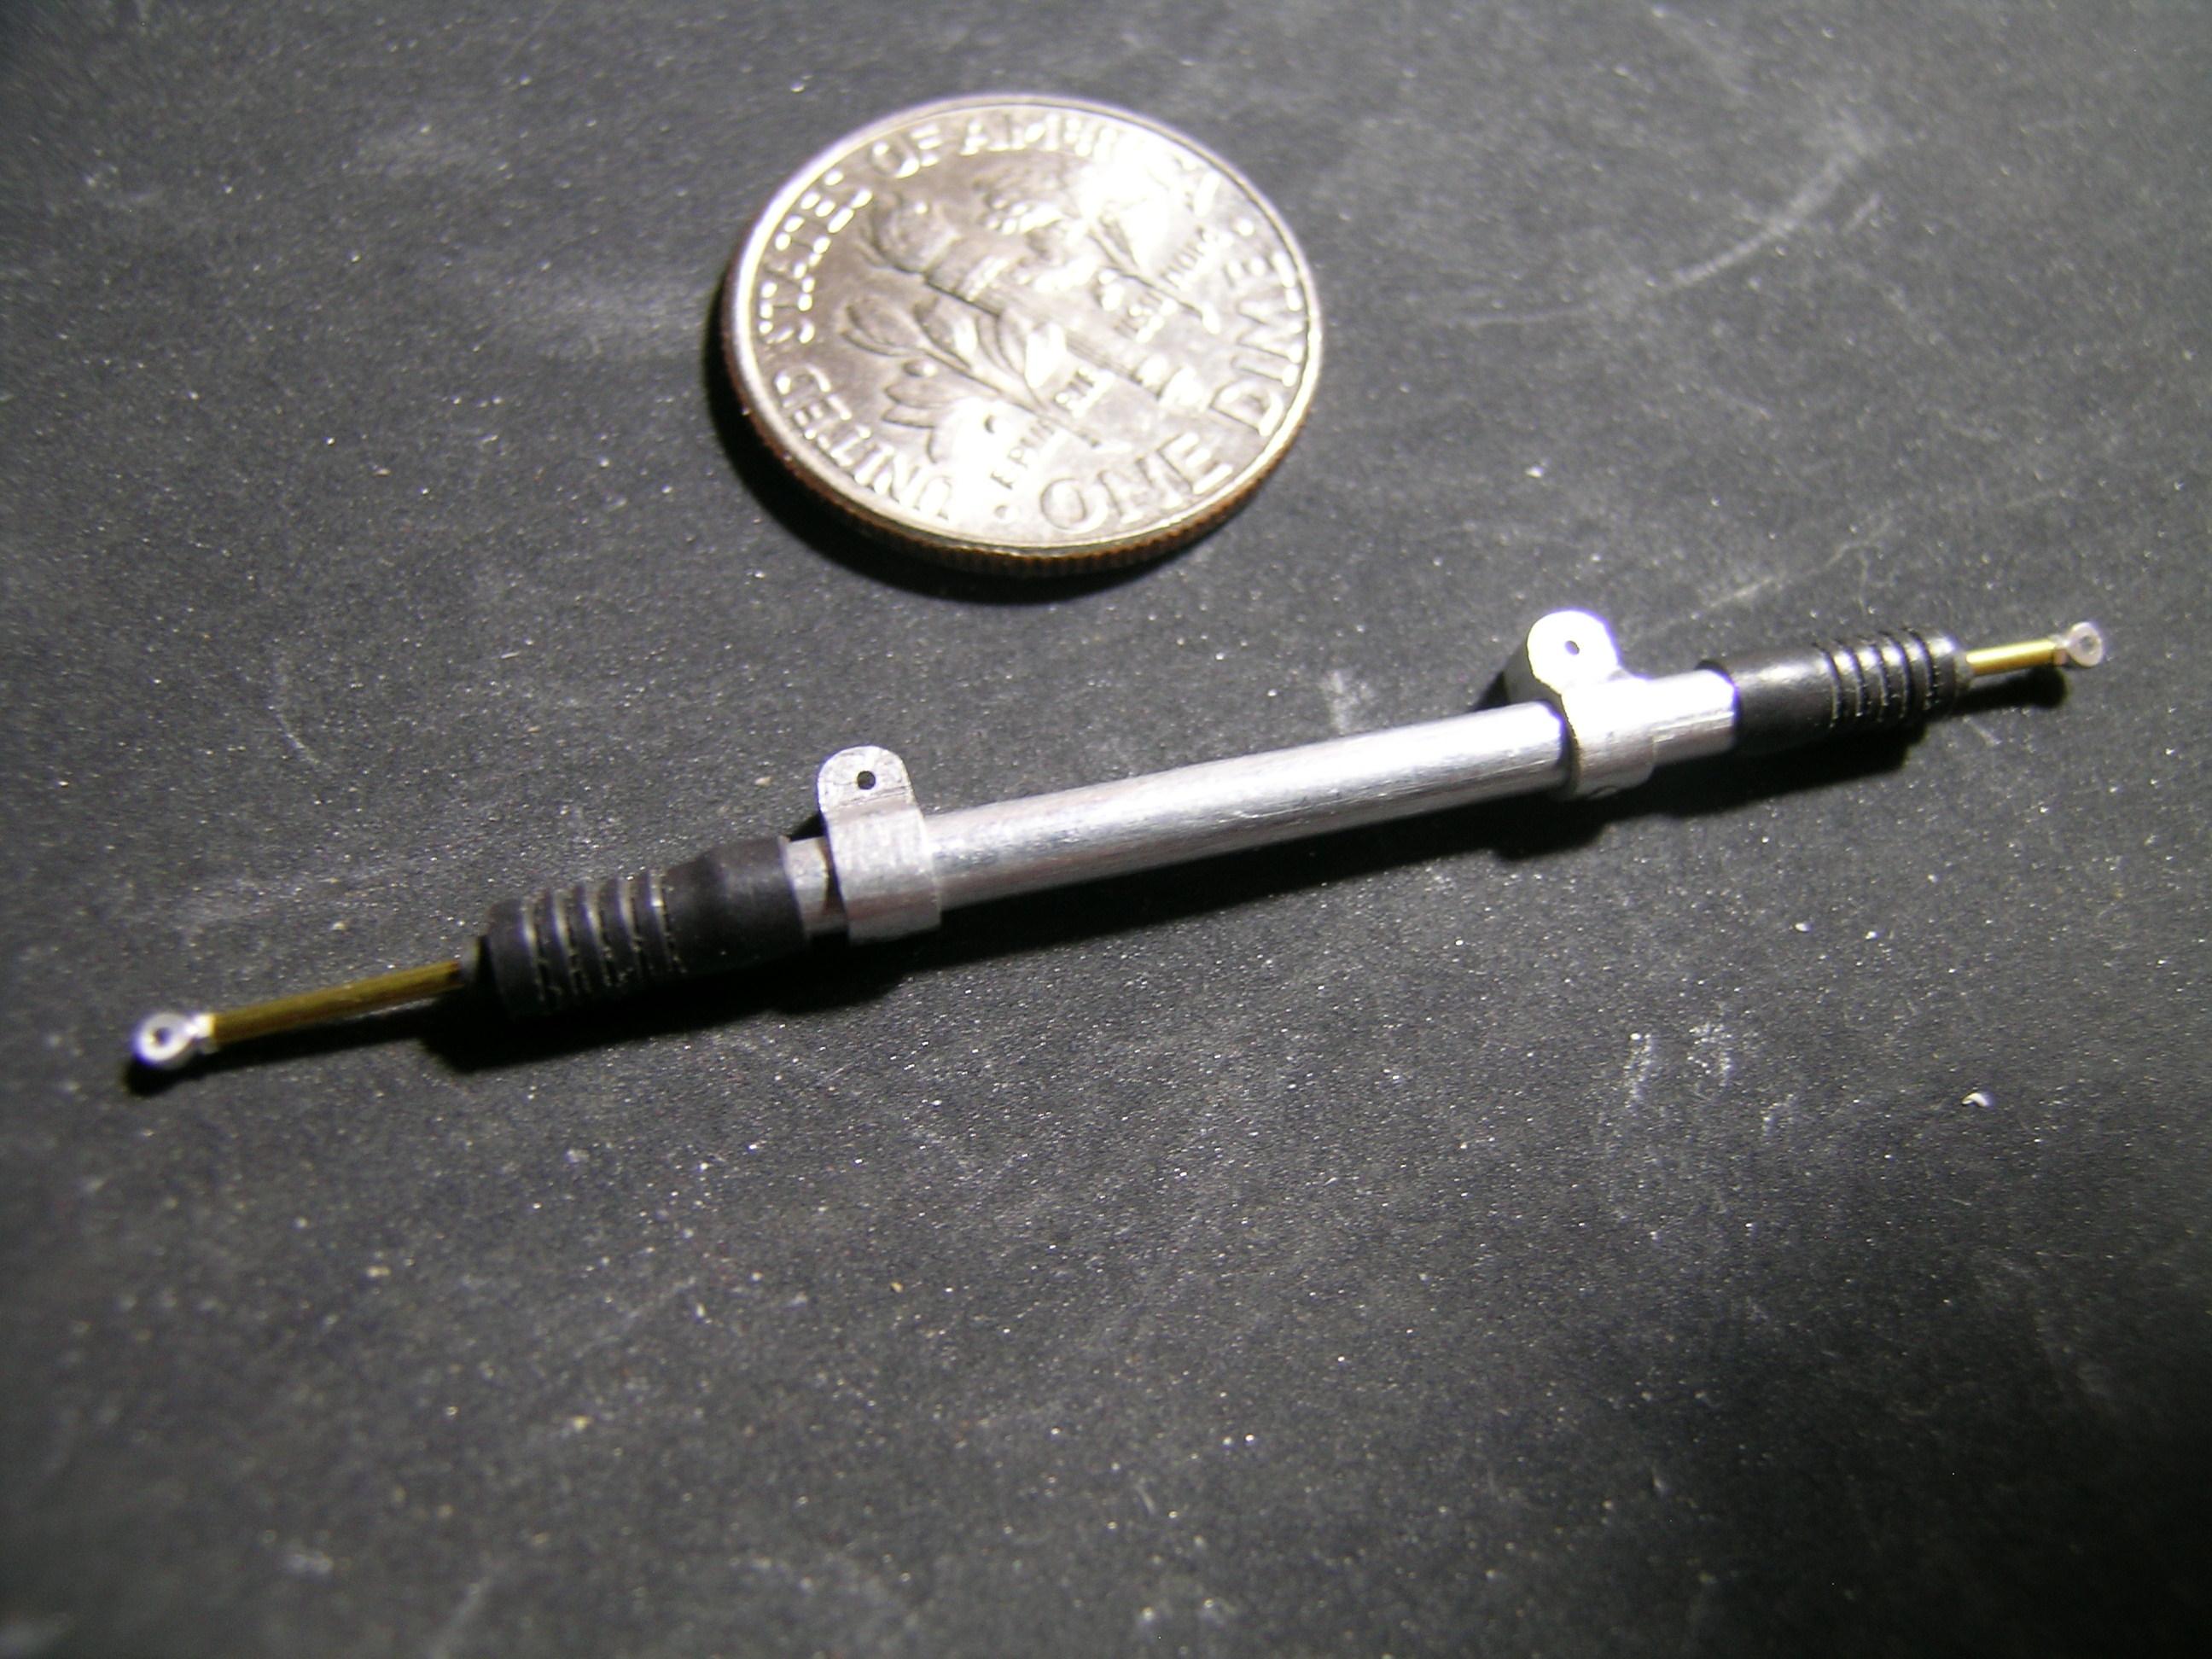
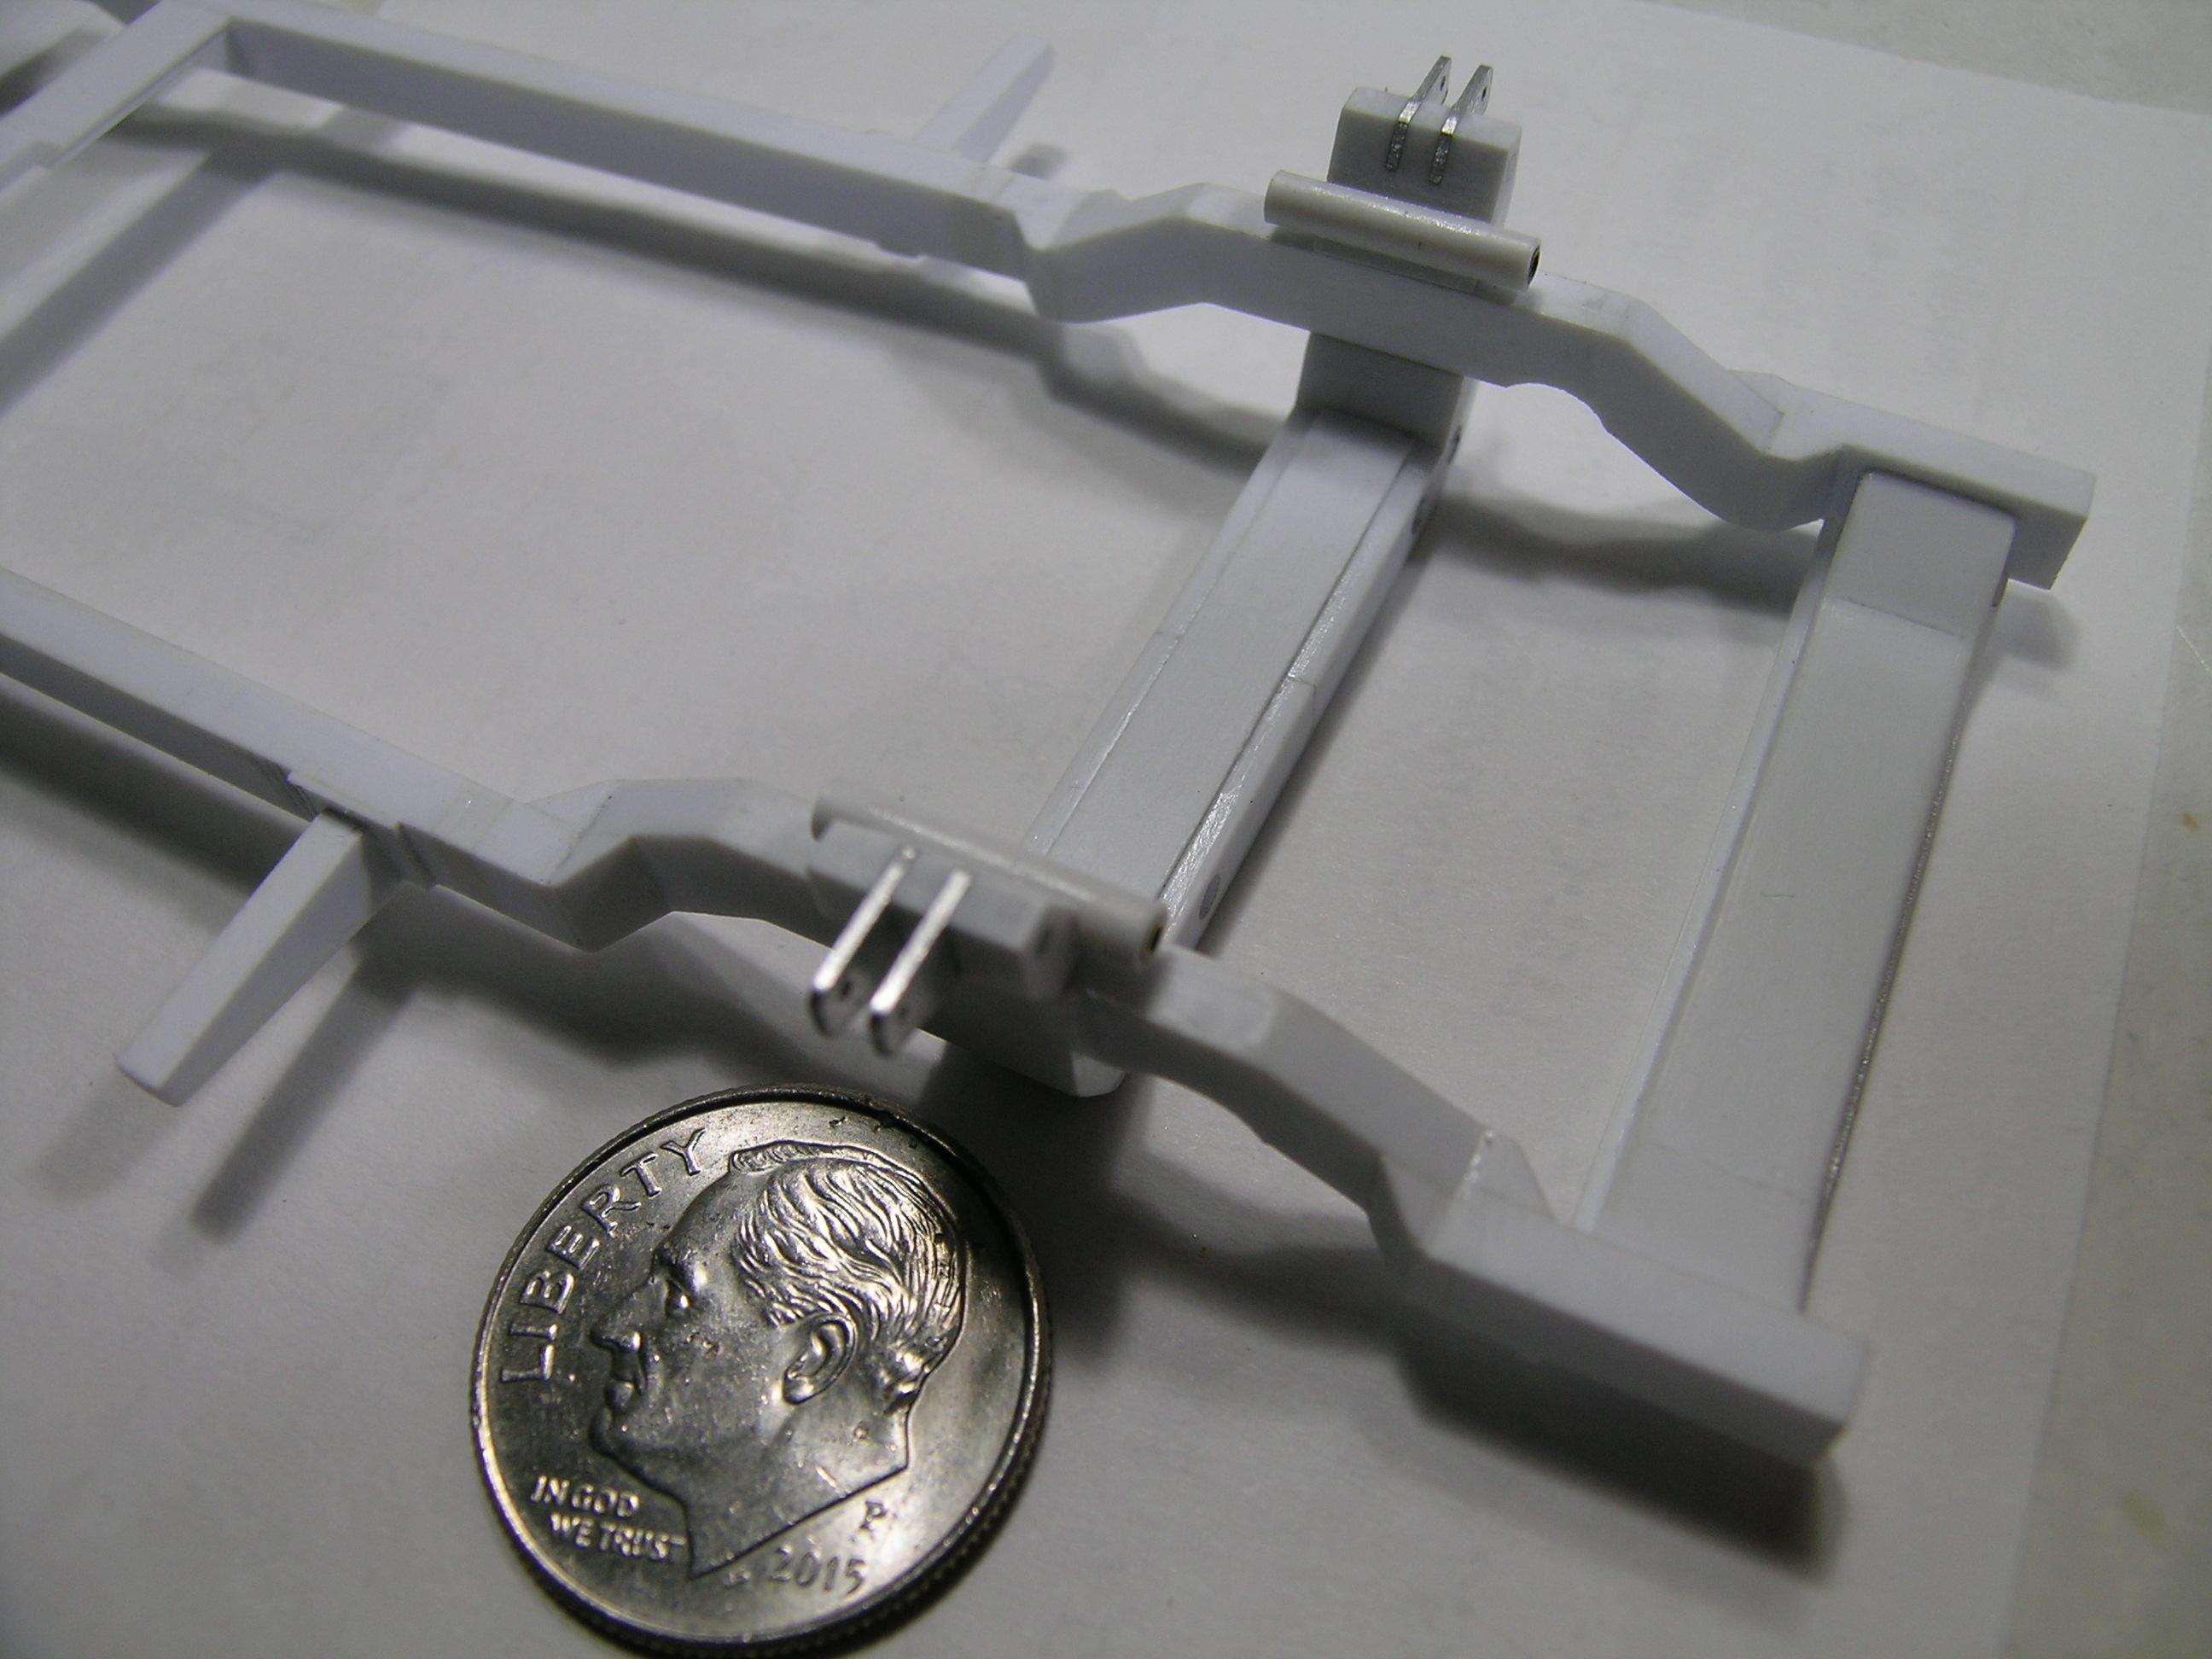
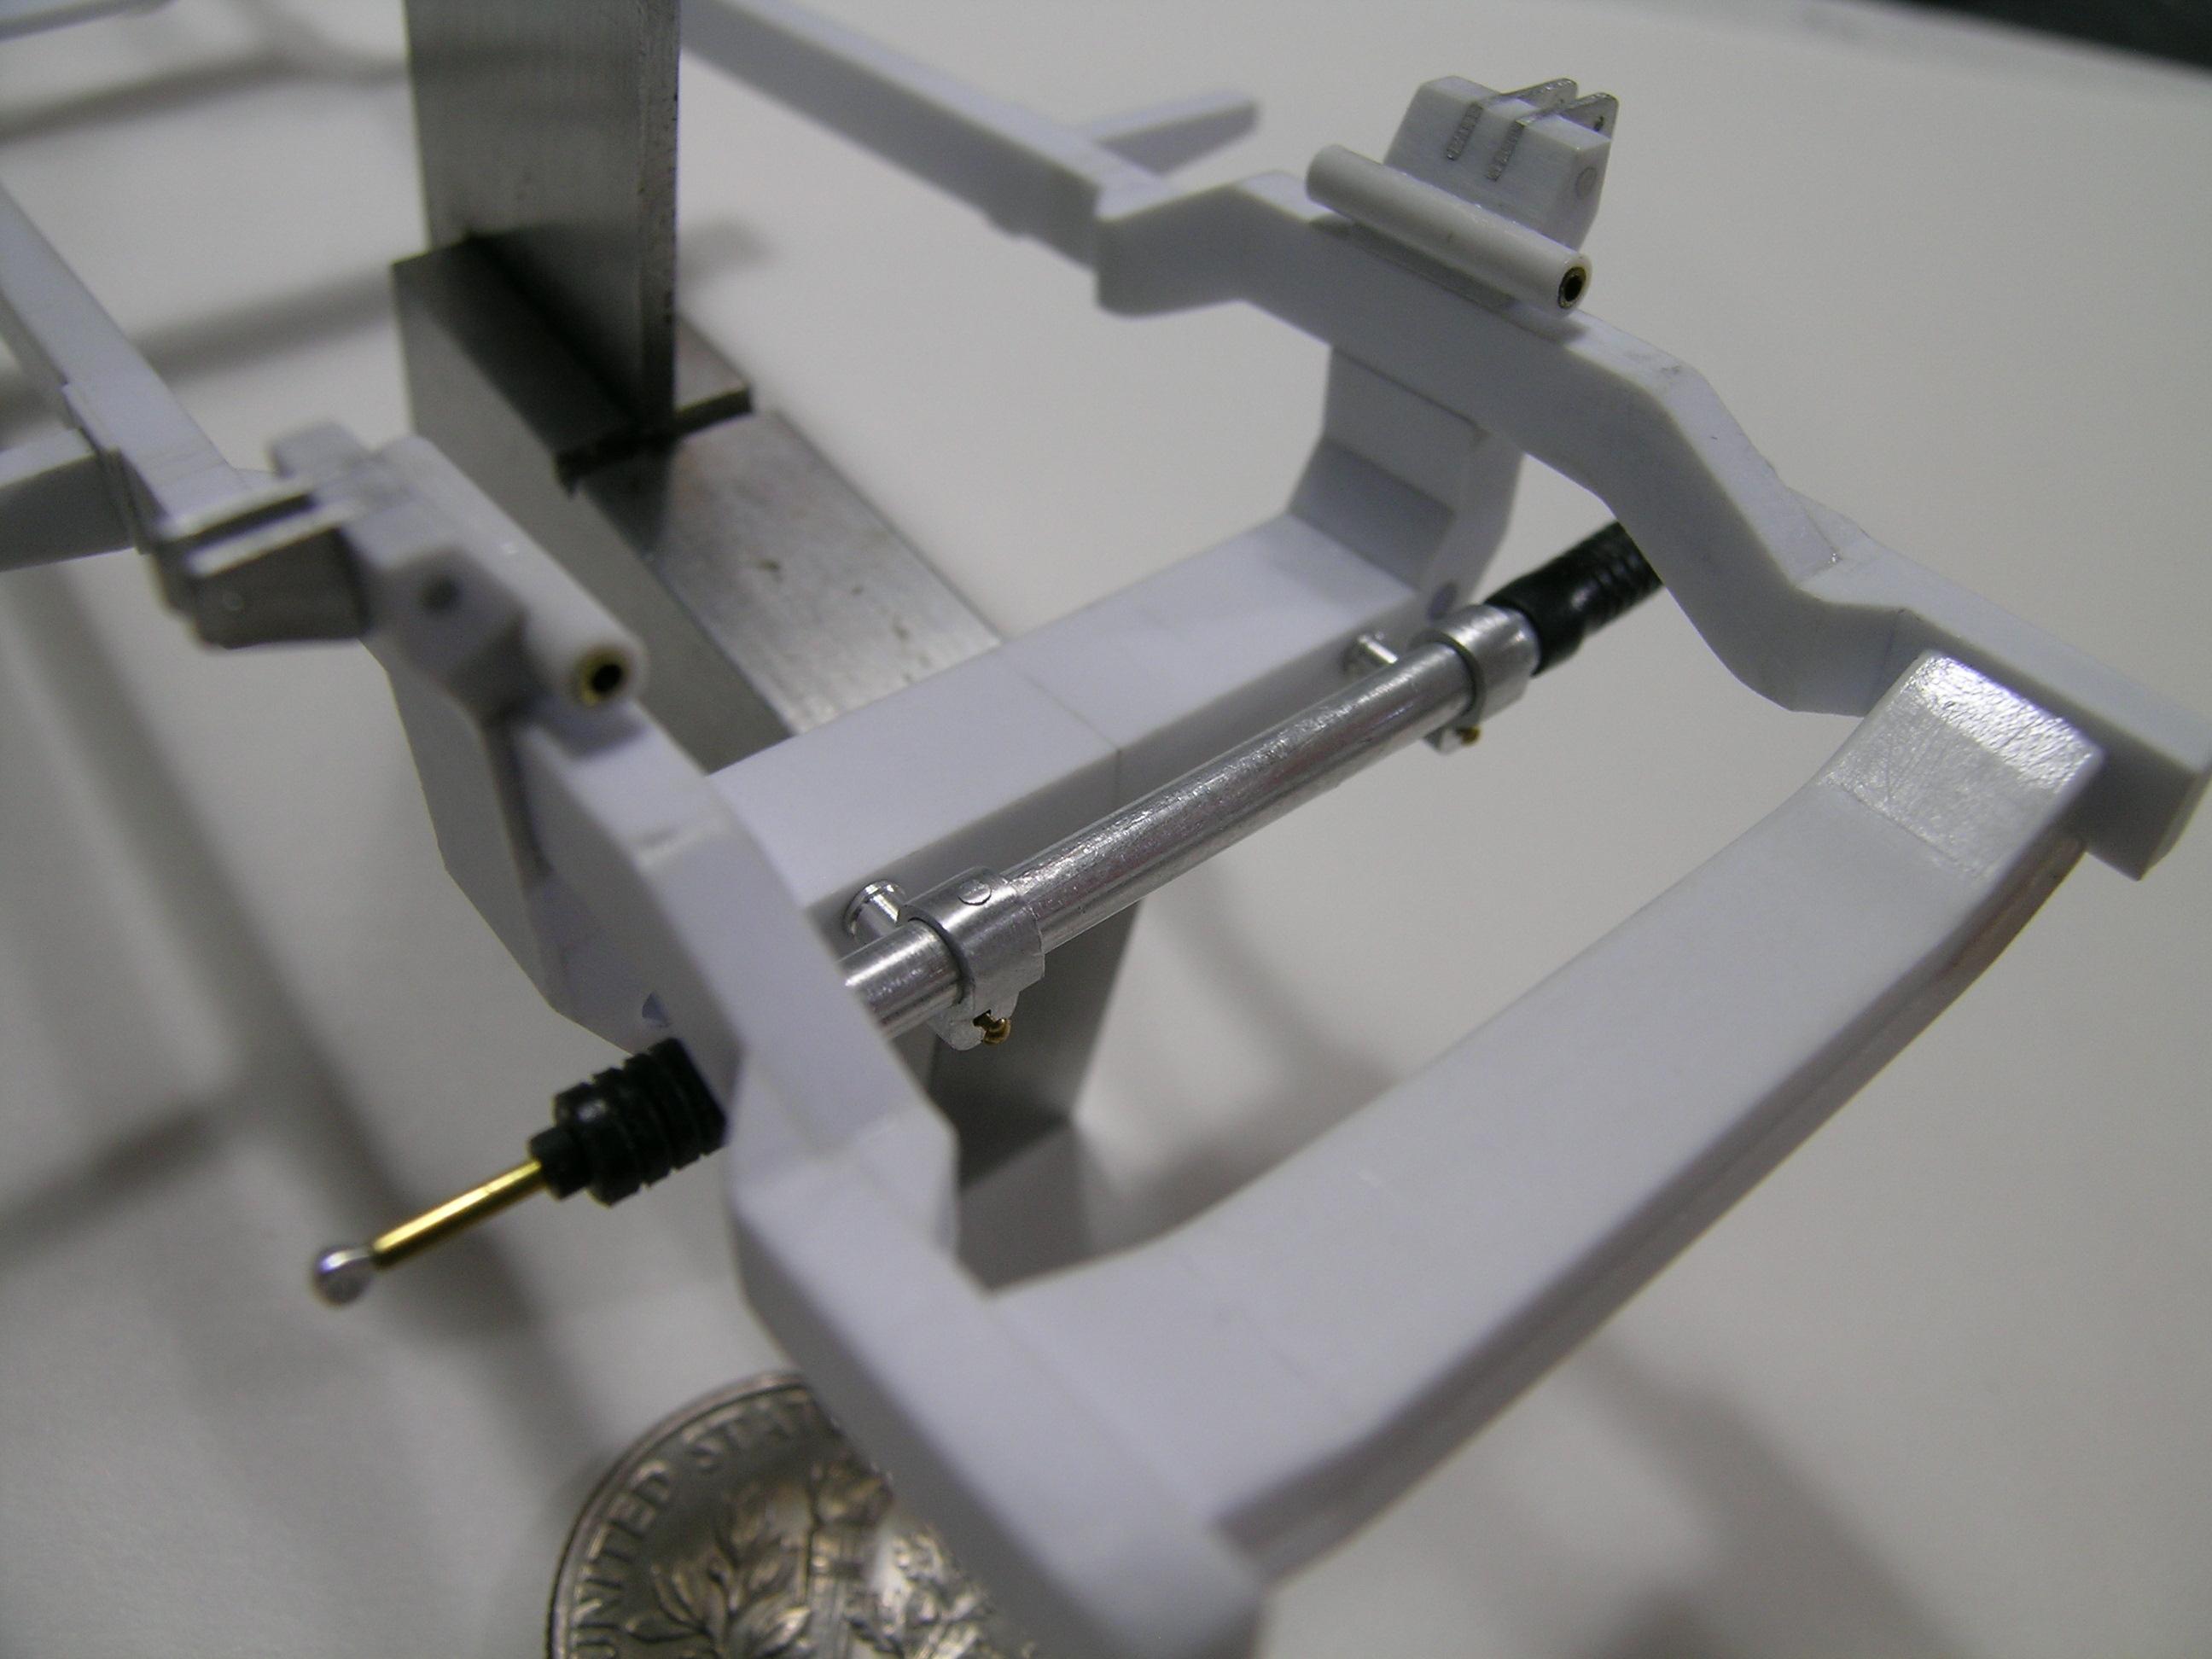
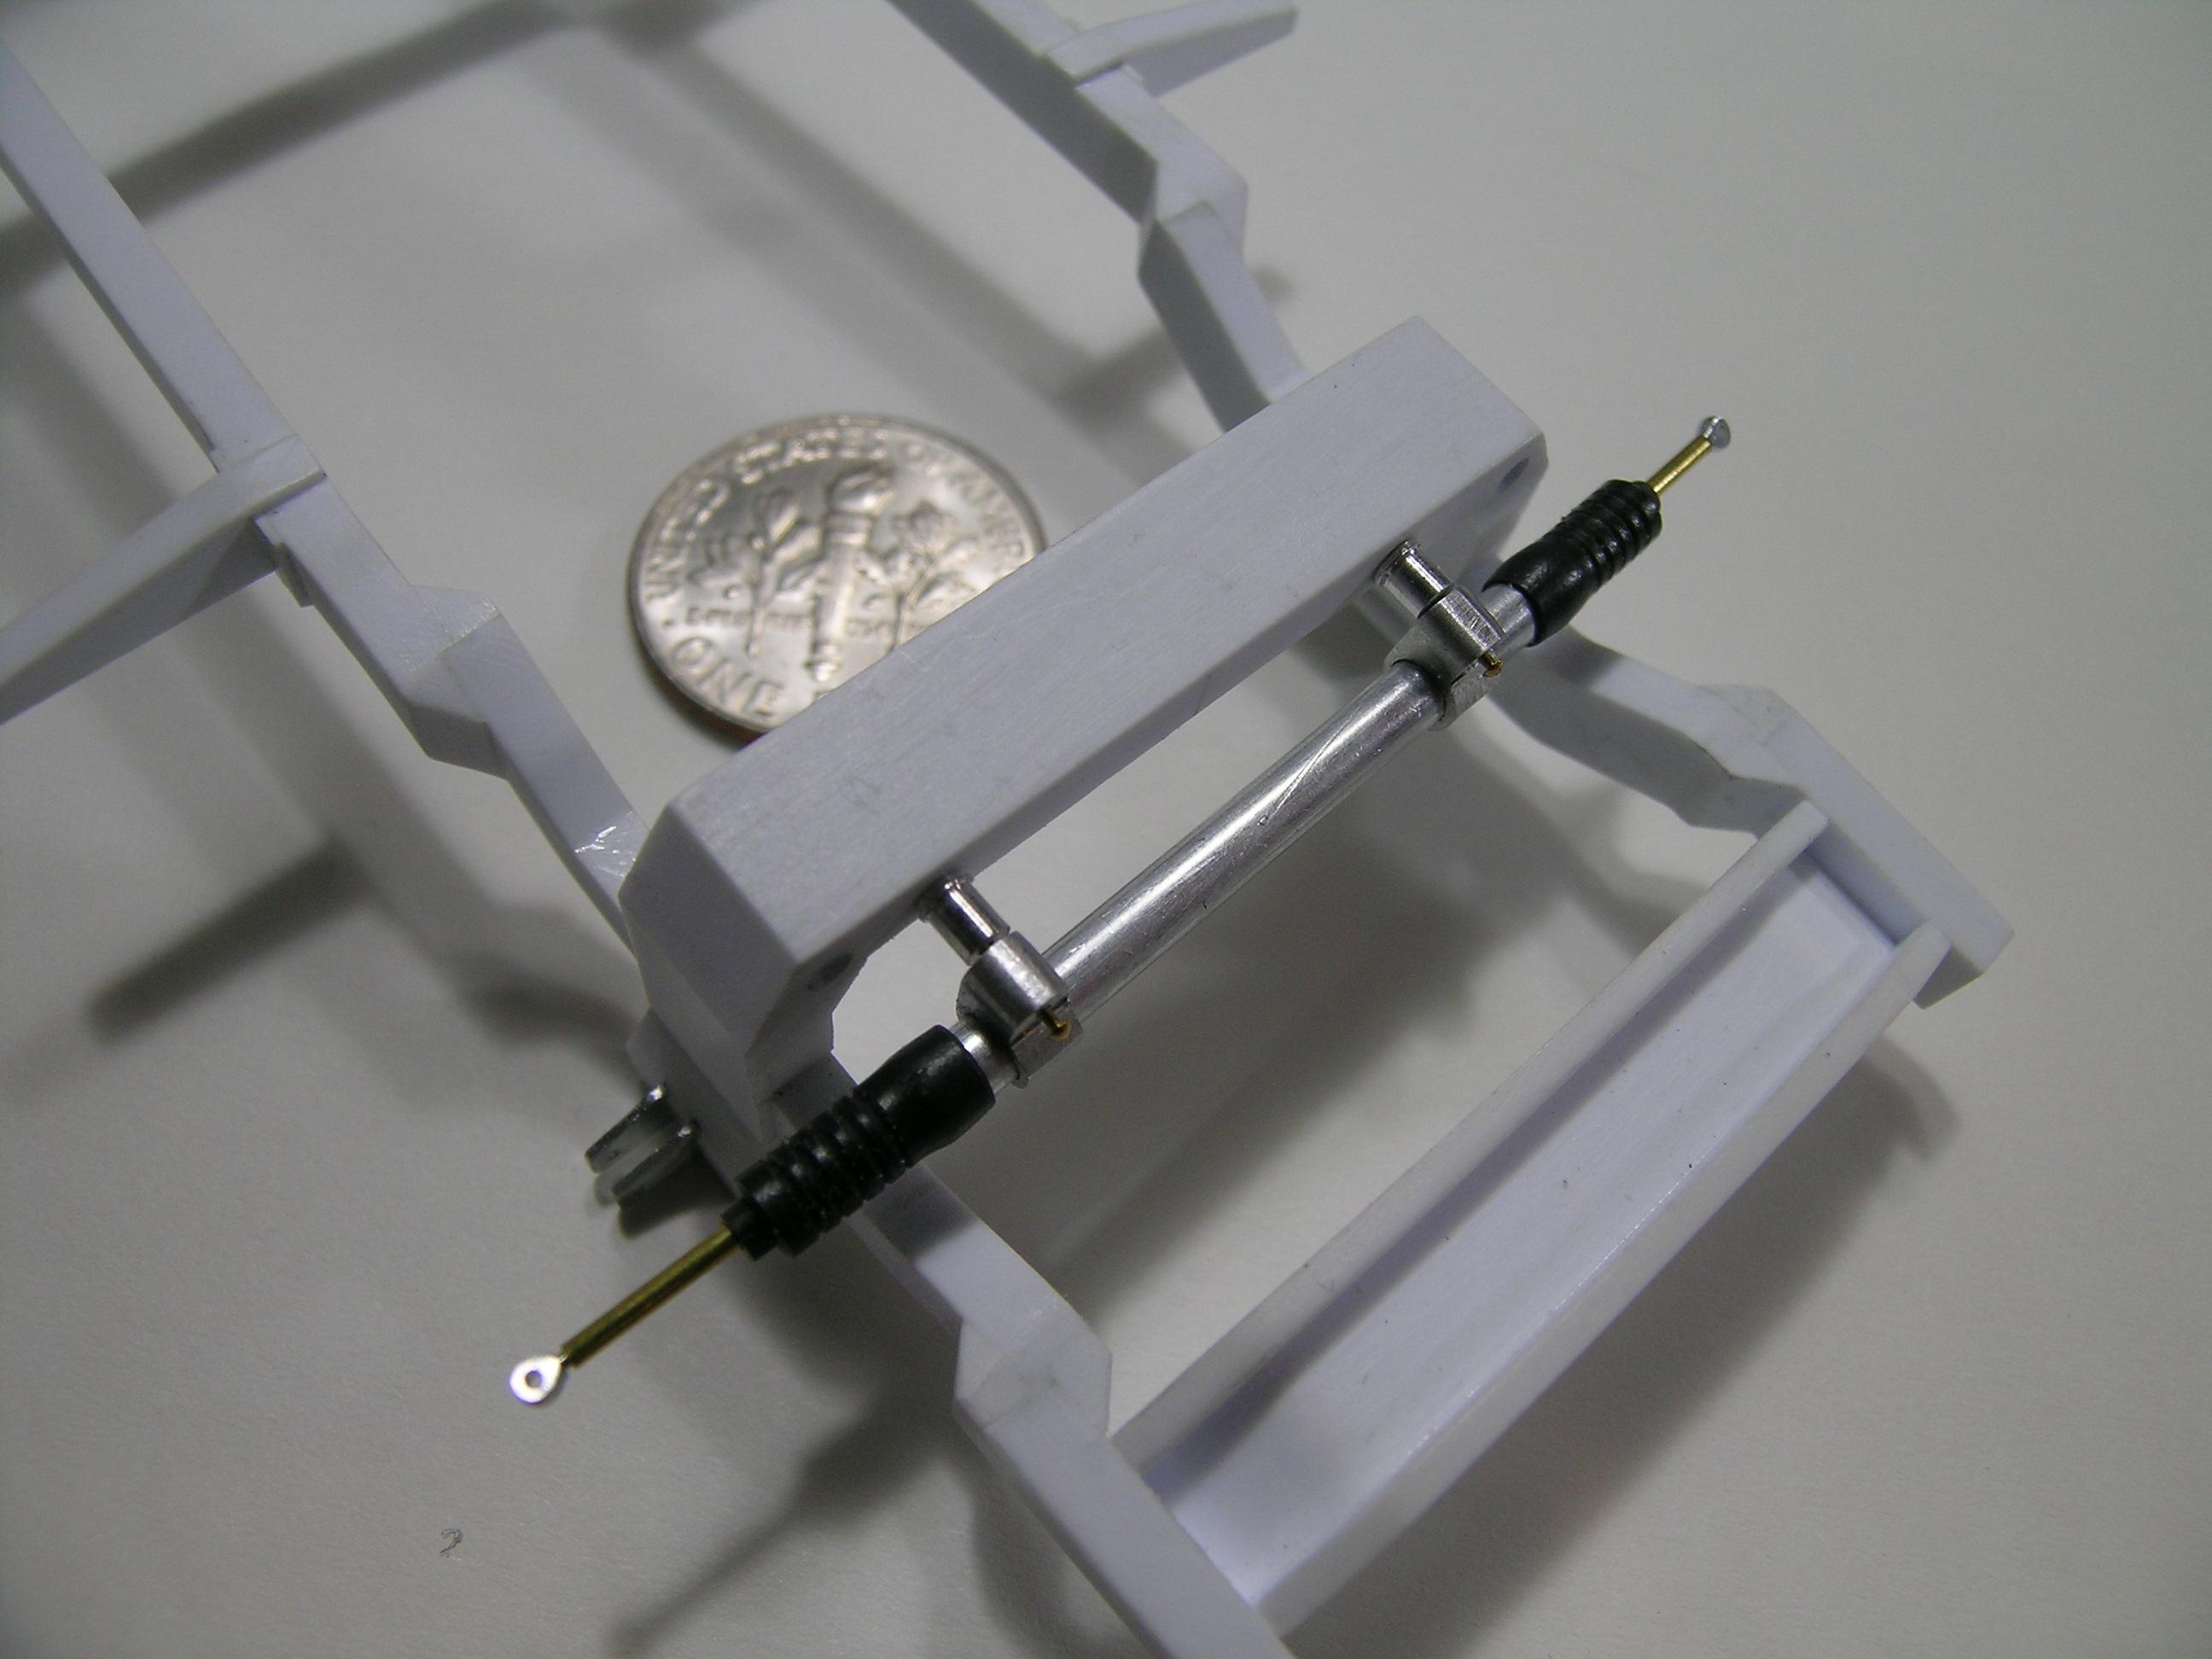
Hello to everybody, This is a small update on the front direction and the next coming updates will be on mechanical aspect of the build. I want to push this as far I can before the nice season when the build will comes to a very slow progress (too much works all around the house)... Cheers, Francis Using a thick and hard electric sheath, I made grooves on the lathe to simulate the ribs on rubber boots for the Mustang II style direction. I turned the cutting tool at 45 degrees angle for this operation. I drilled on both ends to fit over the aluminum tube and the small brass tubes that connect with the direction arms. Boots on Mustang II style direction. The main body is made with 2 soft aluminum tubes (0.093’’ inserted inside a 0.125’’). The brass rod is 0.063’’ and move freely inside the main body. RB Motion rod ends will attach to the arms on direction components so the wheels will steer. I machined 2 mounting brackets on the milling using T6 aluminum. After some test fit I realized that the frame section between the front wheels was too wide (the wishbones pushes the wheels outside the front fenders… DOH!?!…) so I was forced to make some modification. I did cut the frame just after the cabin support brackets and before the radiator protection (end of front section of the frame). I also slice the main member (K member) and removed 0.180’’ to shorten the part. I re-glued the 2 parts of the frame and add plastic pieces to create 45 degrees angles to create the bents where the frame go toward the inside. Lot of work for a conception error but looks way better and more realistic that way. Note: This pic was taken earlier and the K member was modified to accept the oil pan (previous pics on last week last update) Test fit (K member modified). Test fit (view from under).
-
Jo-Han Maverick-Dyno Don's Ride
AmericanMuscleFan replied to mustang1989's topic in WIP: Drag Racing Models
Good job Joe! It wasn't a big flaws but I understand how you feel about this (we always focus on the small defect and forgot all the good work done...). Do you plan to add clear coat all over the body to protect the decals? -
Thanks for your kind comments John! Personally I think that the build of my 70 Plymouth GTX is superior but as we say "the beauty is in the eye of the beholder"! You can see it at: http://www.modelcarsmag.com/forums/topic/148434-70-plymouth-hemi-gtx-125-scale/ Cheers, Francis
-
It's not like dinosaur! Someone must still using these especially in an area as big as New York. I would be happy to help you more!!! Good luck with your search, Francis
-
Maybe there still some old school printer in your area that still used imagesetter and negative films for plate making. If you have access to a vector drawing software (like Adobe Illustrator) you might be able to create the drawing and ask them to output your file on film and do the same thing I have done?
-
Thanks for your greats comments on my build Jim! I was fortunate to work in the field of graphic arts and to have access to all these high level devices. With the advent of digital presses, these devices are now obsolete, but I don't know more precisely how to reproduce these gauges faces. Even with a 40x magnifier you cannot see the slightest staircase effect in the figures. Thanks again for your visit! Cheers, Francis
-
Thanks Jerry, I very appreciate your kind words! Cheers, Francis
-
Thanks for your good words José. I really appreciate! Talking drive line loop I must now admit that I can never again say that I was not aware of the position required by the NHRA. There are serious connoisseurs on this forum!!! Cheers, Francis
-
1970 Sox & Martin 'Cuda Pro Stock
AmericanMuscleFan replied to Guy Beaudette's topic in WIP: Drag Racing Models
Another superb job on the Cuda, killer build! I'm a Mopar guy and it's one of my favorite body. I agree with you about all the work of posting all the build up pics. I got myself into this process with the '64 Dodge D100 Pickup I'm actually building and it's really time consuming but I do think it worth it. Again, great work here! Cheers, Francis -
Thanks again for you good words Scott, you're always welcome! Cheers, Francis
-
1970 Don Nicholson Ford Maverick Pro Stock
AmericanMuscleFan replied to Guy Beaudette's topic in WIP: Drag Racing Models
Amazing build! A lot of attention to the details. This Maverick is simply fantastic and you are a seriously good builder. I do love those Maverick and all the small body cars with big block engines. I think that was the best era for Pro Stock cars. I will check back for your other builds, Cheers, Francis -
Hello Trevor and thanks for your interest on my build! These gauge faces are custom made by me on a computer using professional drawing software (Adobe Illustrator). I used a picture of the real gauge that I found online a did use that picture as a template to recreate them in Adobe Illustrator. I scale down the drawing at 1/25 scale and printed the electronic file on negative film. The output device was an AGFA imagesetter for platemaking (print industry) and printed at 2400 lpi (line per inch). I worked 32 years as a graphic designer and had access to those devices back then but I'm no longer in this market. I don't think you can find something more accurate than this since I had even use the exact same typefaces for the numbers (the odometer read 24034). I know It's very technical but I hope it's helpful! Cheers, Francis
-
Don't worry Alan, I can accept advice from other members and your info from the NHRA are greatly appreciated! This build is a little bit outdated (from 2011) and I don't know if the rules were like that back then and I haven't check to be honest with you. I would be more careful on the details for a tribute car but mine are all done for the pleasure of the subject and the passion for muscle cars. Welcome anytime! Cheers, Francis
-
Thanks for the comments Glen! I think that every piece of aluminum or brass hide a part, just have to dig a little bit to find them... Cheers, Francis Thanks Jim, Not as extreme in details as for the GTX but I'm still proud of it for a model that I started 9 years ago!
-
Thanks for the comment Larry! Thanks Robert! Hello Mark, The transmission and rear end are original styrene parts but I did machined the transmission oil pan. Thanks for your kind comments! Cheers, Francis Thanks for your visit Ray!
-
Alan: Thanks for your kind words! You may be right about the safety loop but I've seen it in different locations (front, middle or back) and I did refer to a '70 Roadrunner under restauration for the Dart build (see pictures attached). Thanks anyway to pointed this! Cheers, Francis