AmericanMuscleFan
-
Posts
3,058 -
Joined
-
Last visited
Content Type
Profiles
Forums
Events
Gallery
Everything posted by AmericanMuscleFan
-
Very nice job Bruce! Super nice rendition of an iconic car! That blue paint fits like a glove to this sport car. All your improvements to the kit are top notch! Well done sir!!!
-
 Very very very nice job Mark! The weathering job is simply fantastic... looks real! I particularly like the bump you made on the hood. Well done sir!!!
 -
You're right Kurt! There's always a small last detail that need to be done to clear your head! The extra time invested was certainly insignifiant anyway and worth it when you have made all this good work on this build! Well done sir!!!
-
64 Dodge D100 Pickup Pro Street
AmericanMuscleFan replied to AmericanMuscleFan's topic in WIP: Drag Racing Models
You are more than welcome Kerry! I'm still working on that thing so more update to come... Take care, Francis Thanks Joe! You give some good shots to your Maverick too my friend! Take care, Francis -
64 Dodge D100 Pickup Pro Street
AmericanMuscleFan replied to AmericanMuscleFan's topic in WIP: Drag Racing Models
Thanks for your kind comments Mike! I purchase most of my tooling on eBay. I was fortunate enough to buy a small storage box full of end mills for a retired machinist few years ago so now I buy the missing sizes to expand my options. Speaking of drills, it is not impossible to break them (the smallest of course ...) but I work slowly with small progress at a time and if I no longer see new chip around the hole, I stop and I clean the bit before resuming drilling. The key of success is "working slowly" and listen to your equipment, you will be able to feel what happen or about to happen... Hope it help and take care, Francis -
64 Dodge D100 Pickup Pro Street
AmericanMuscleFan replied to AmericanMuscleFan's topic in WIP: Drag Racing Models
Thanks for the compliment Kerry! Take care, Francis -
That's a mean looking Camaro Nick! I do love the stance and the nice Ray Barton mill under the hood! Good choice for the wheels too! Well done!!!
-
They shoot horses, don't they?
AmericanMuscleFan replied to STYRENE-SURFER's topic in WIP: Drag Racing Models
Good technique to fine tune the wheel openings Kurt! Thanks for sharing this ingenious trick!! I do like your approach on improving things. Keep doing your great work!!! -
Very good start on the frame and on the cage so far! Nice procharger too! That's my kind of build... I do love drag cars no matter the brand! What scale it is?
-
Great idea Tim! No matter the way, the goal is to find a way to make those parts and find satisfaction in making them. Good job!!!
-
Hi from Nova Scotia, Canada
AmericanMuscleFan replied to Adecoste's topic in Welcome! Introduce Yourself
Welcome Adam! This is a fantastic hobby so I wish that you will find it as rewarding and satisfying as it is for me! -
Welcome Rob! This forum is a great place to learn and share. Hope to see some of your work soon.
-
64 Dodge D100 Pickup Pro Street
AmericanMuscleFan replied to AmericanMuscleFan's topic in WIP: Drag Racing Models
Thanks for the sentiment you feel about my work Pat! Greatly appreciated! Take care, Francis Thanks for your visit Tim! Take care, Francis -
64 Dodge D100 Pickup Pro Street
AmericanMuscleFan replied to AmericanMuscleFan's topic in WIP: Drag Racing Models
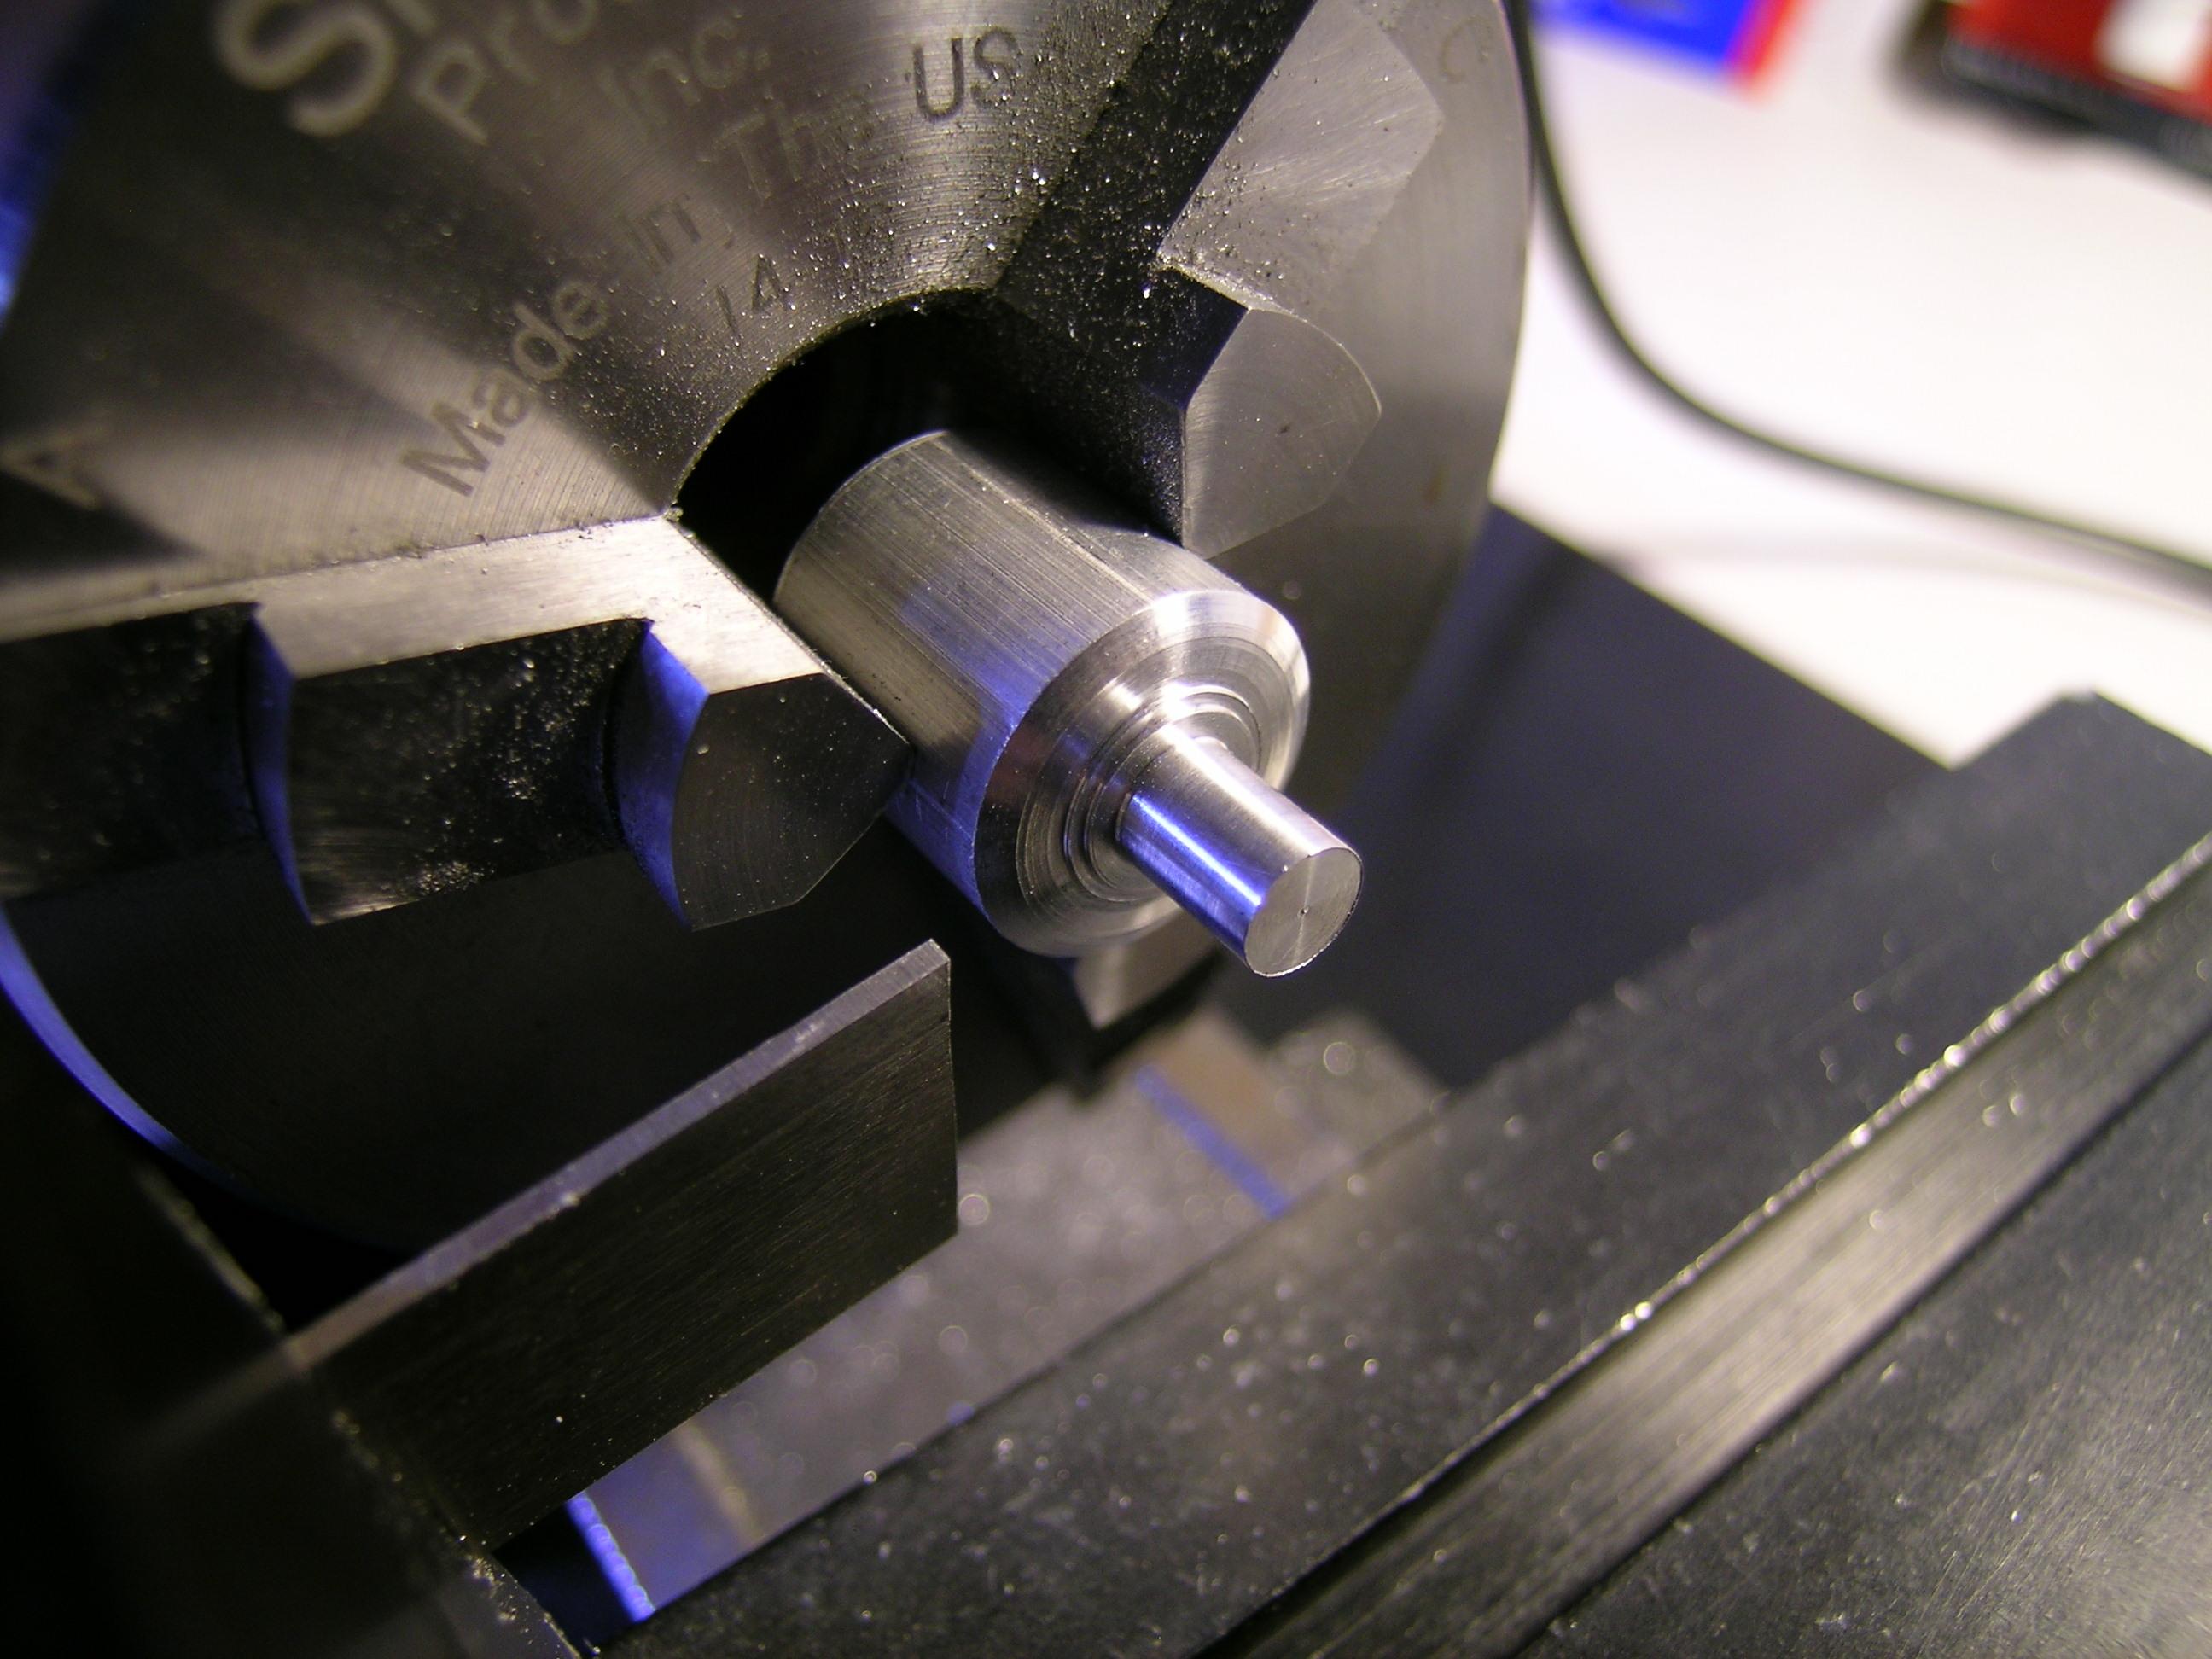
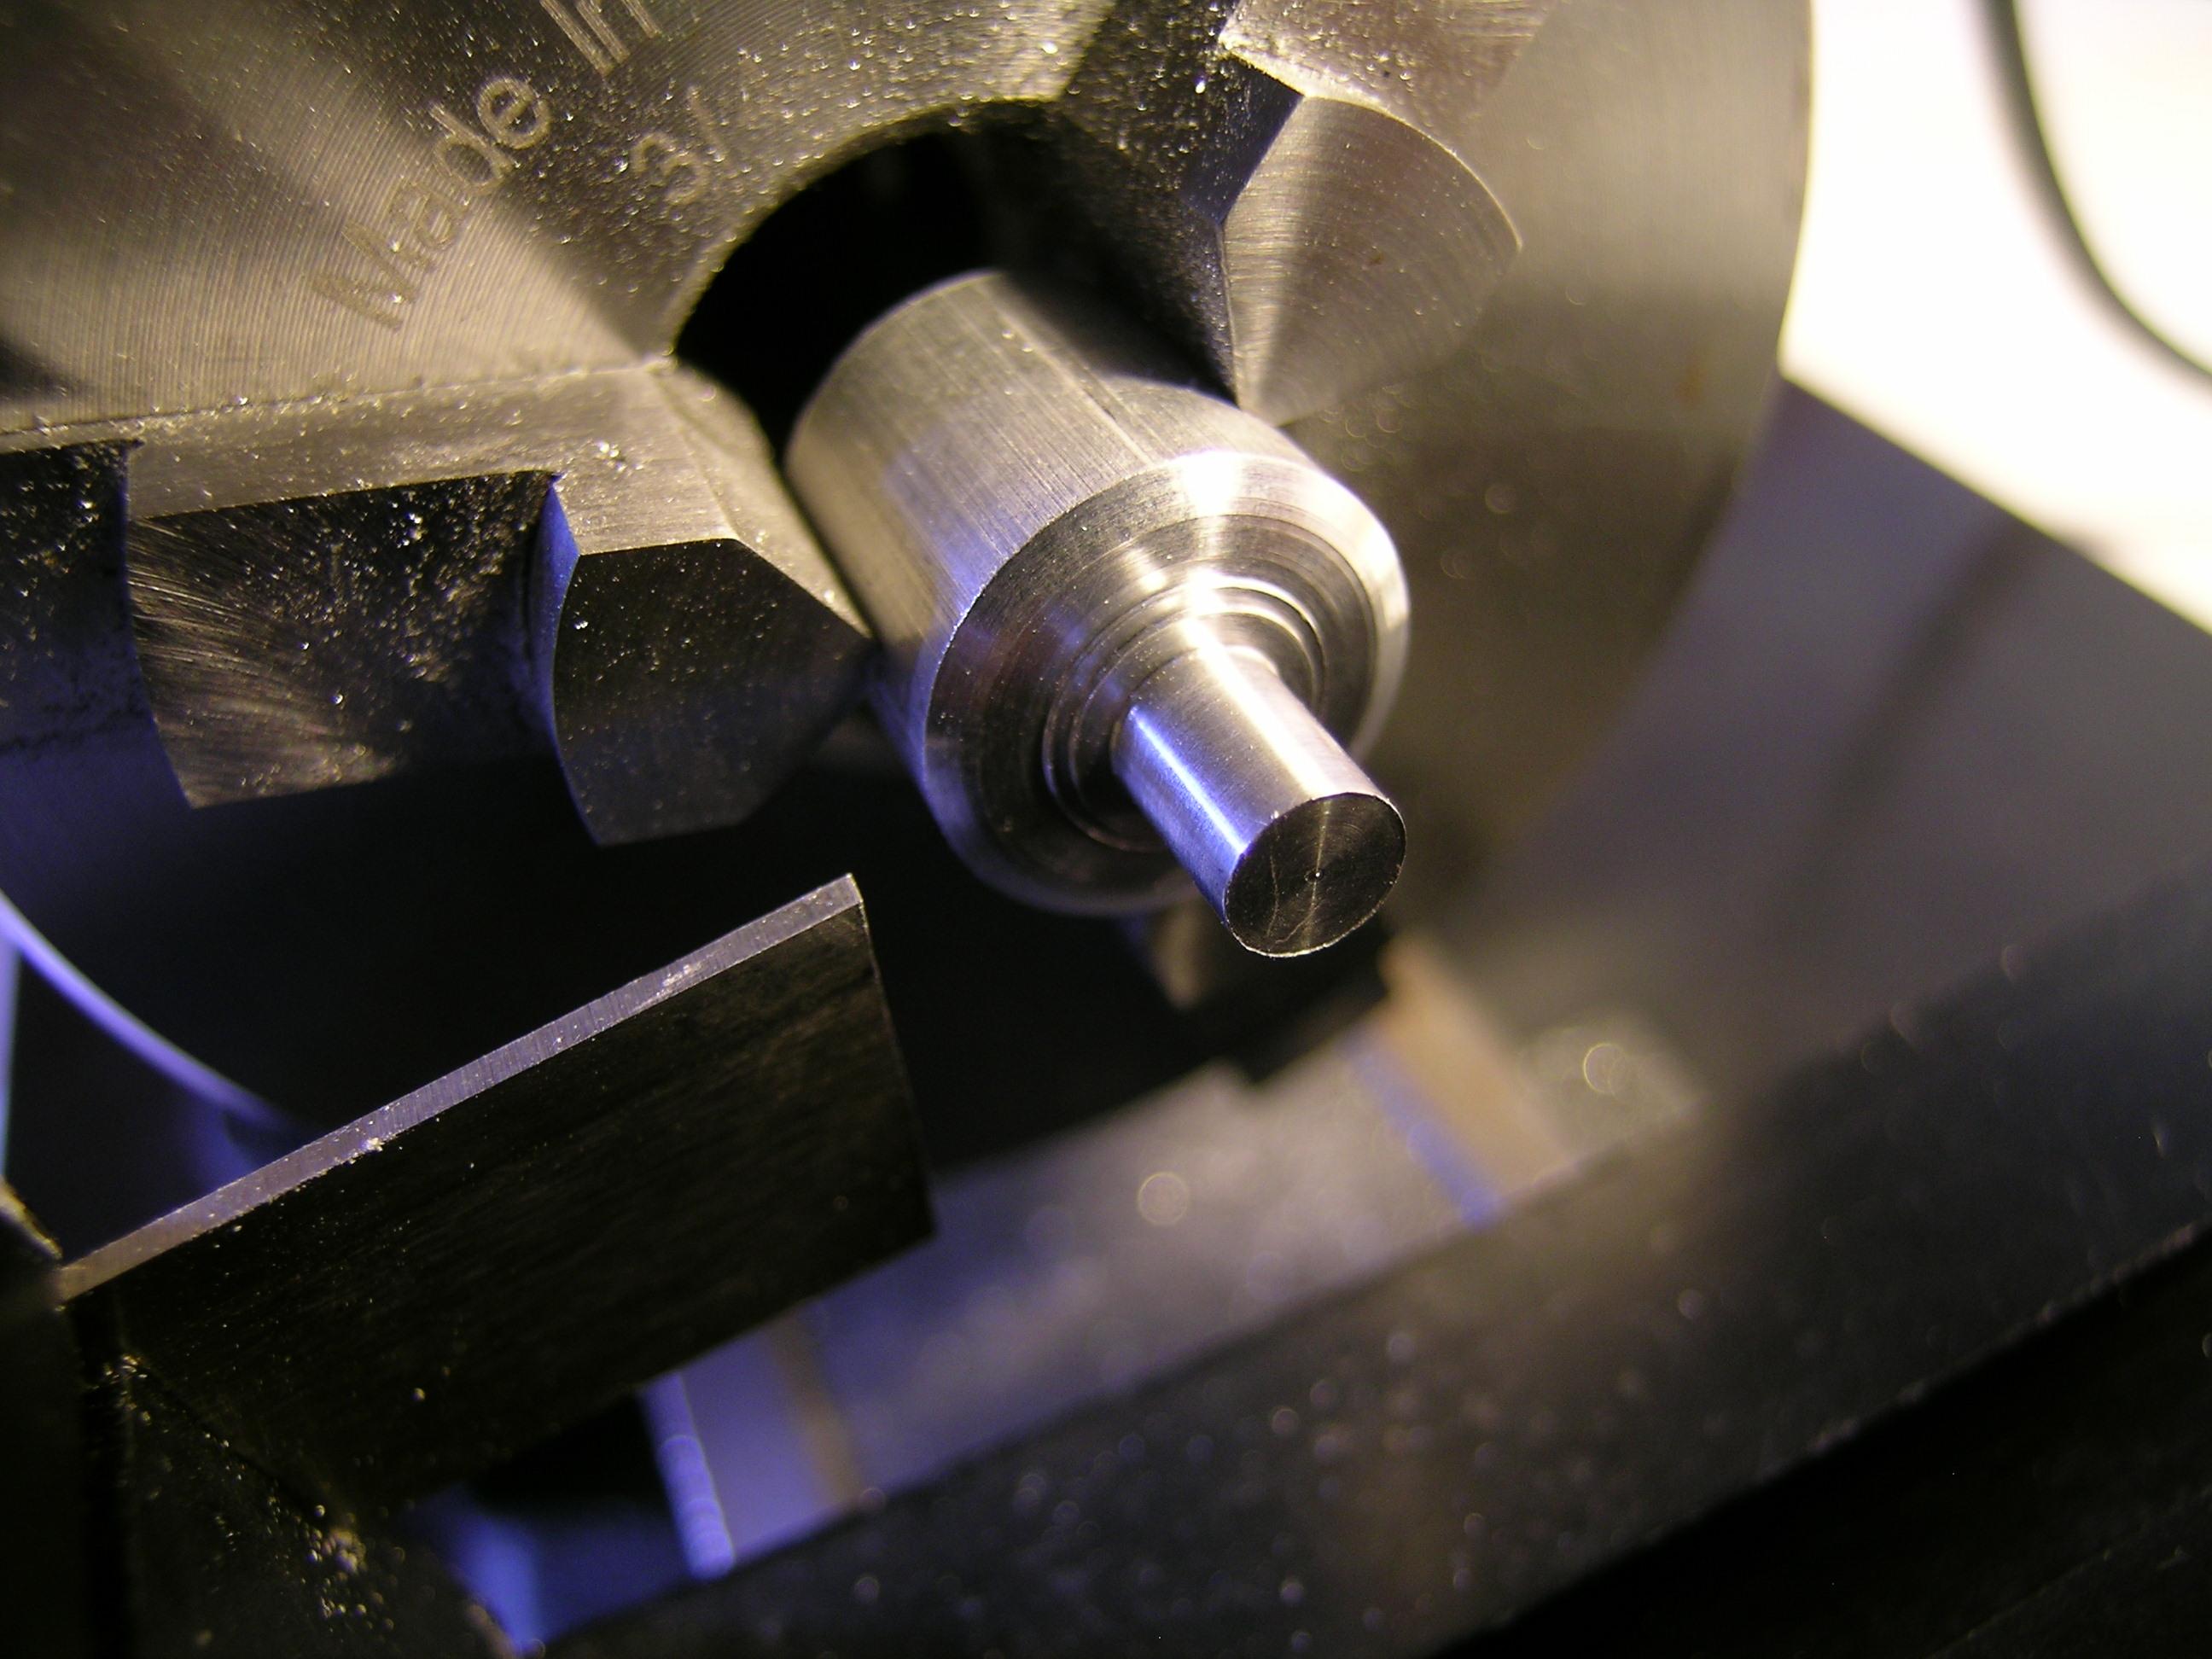
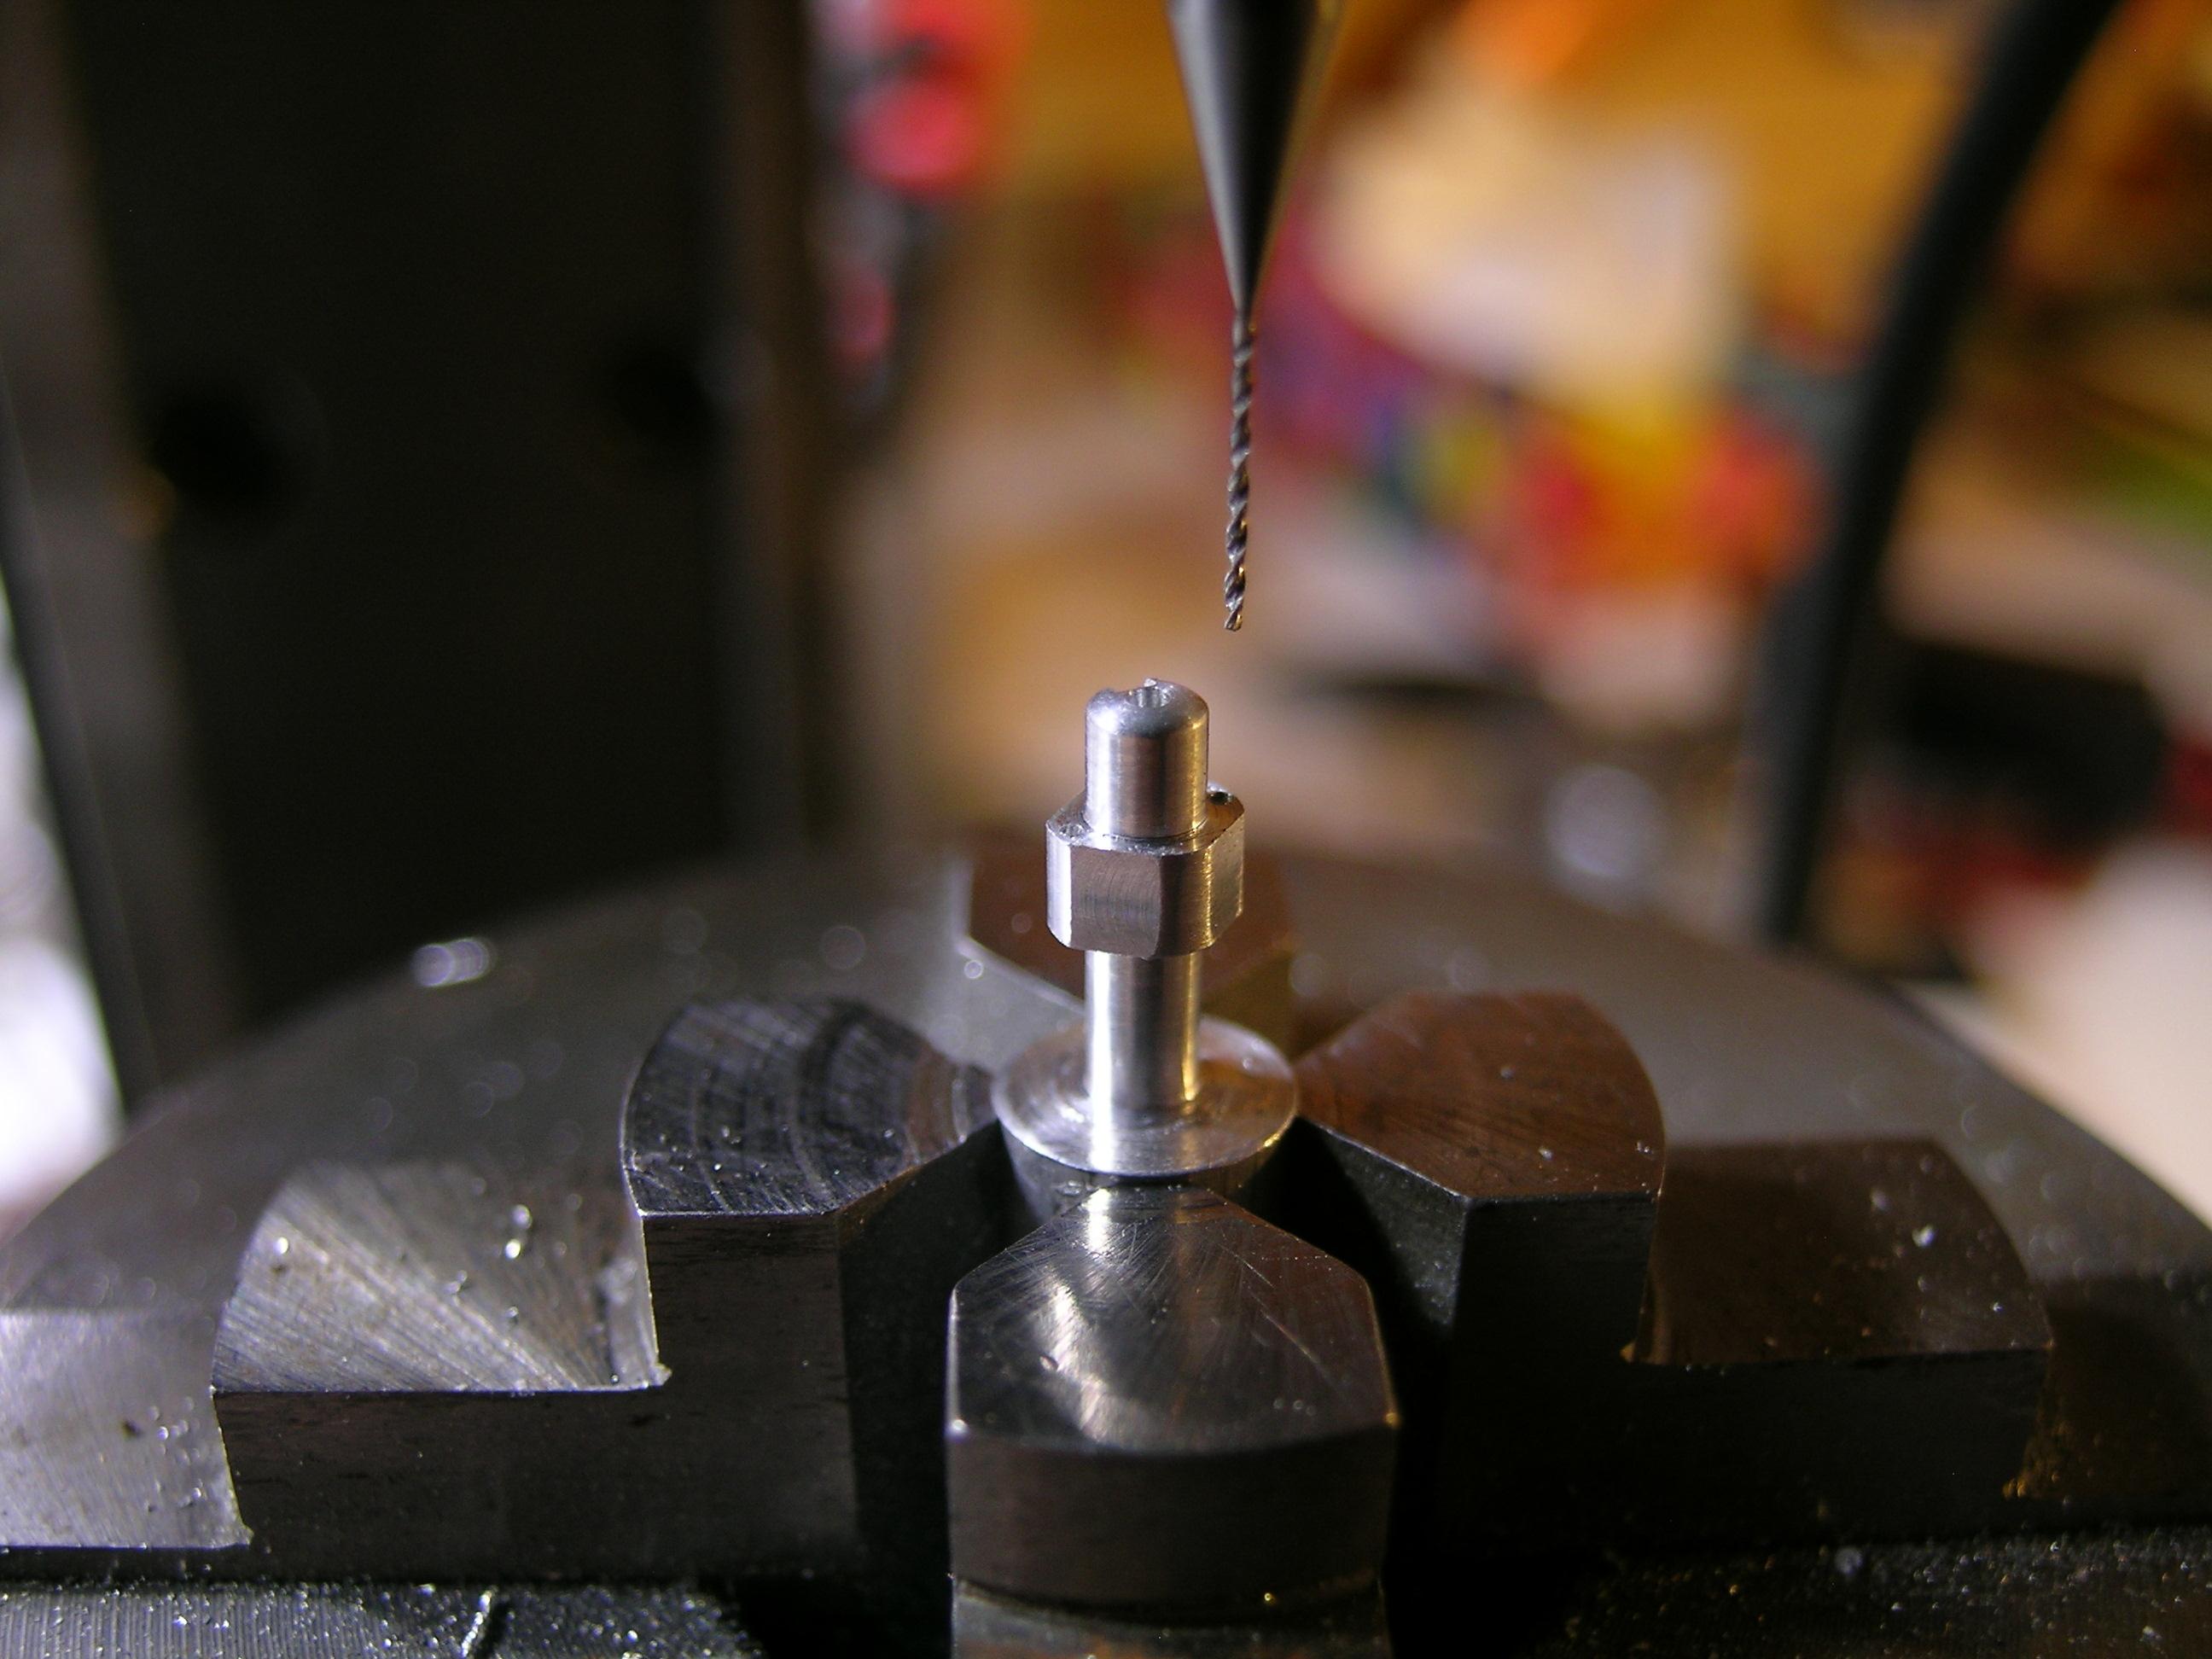
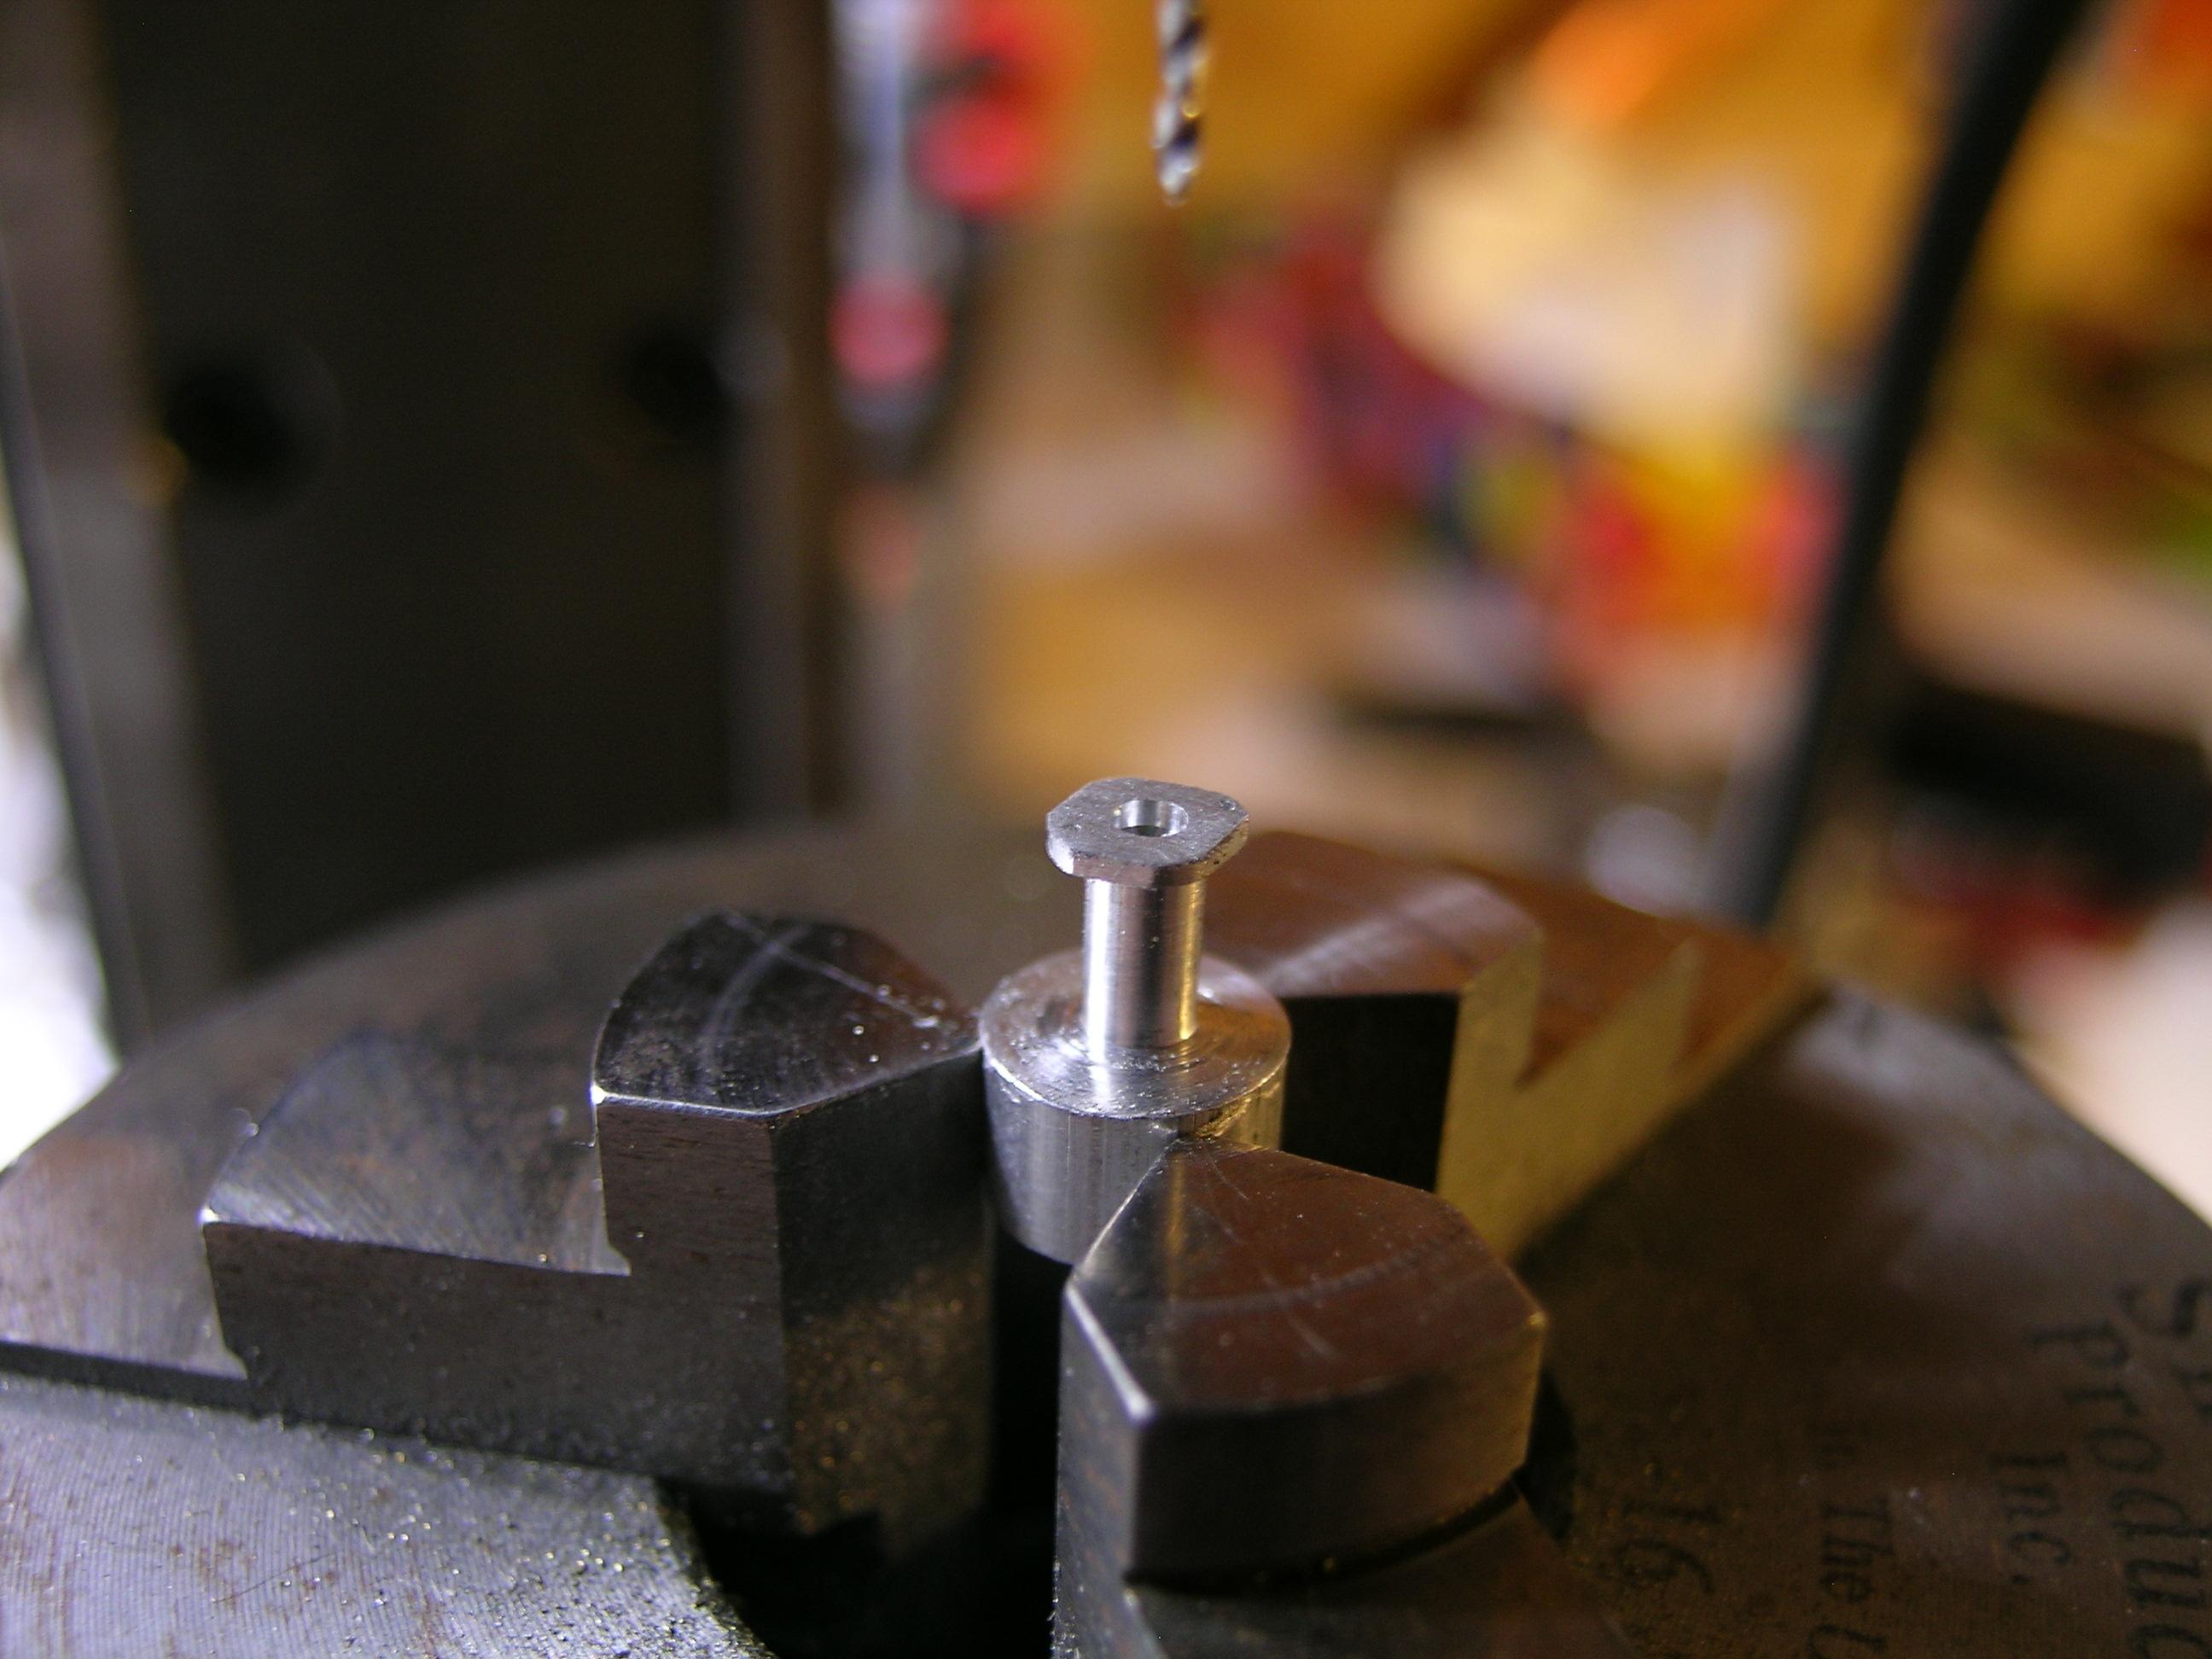
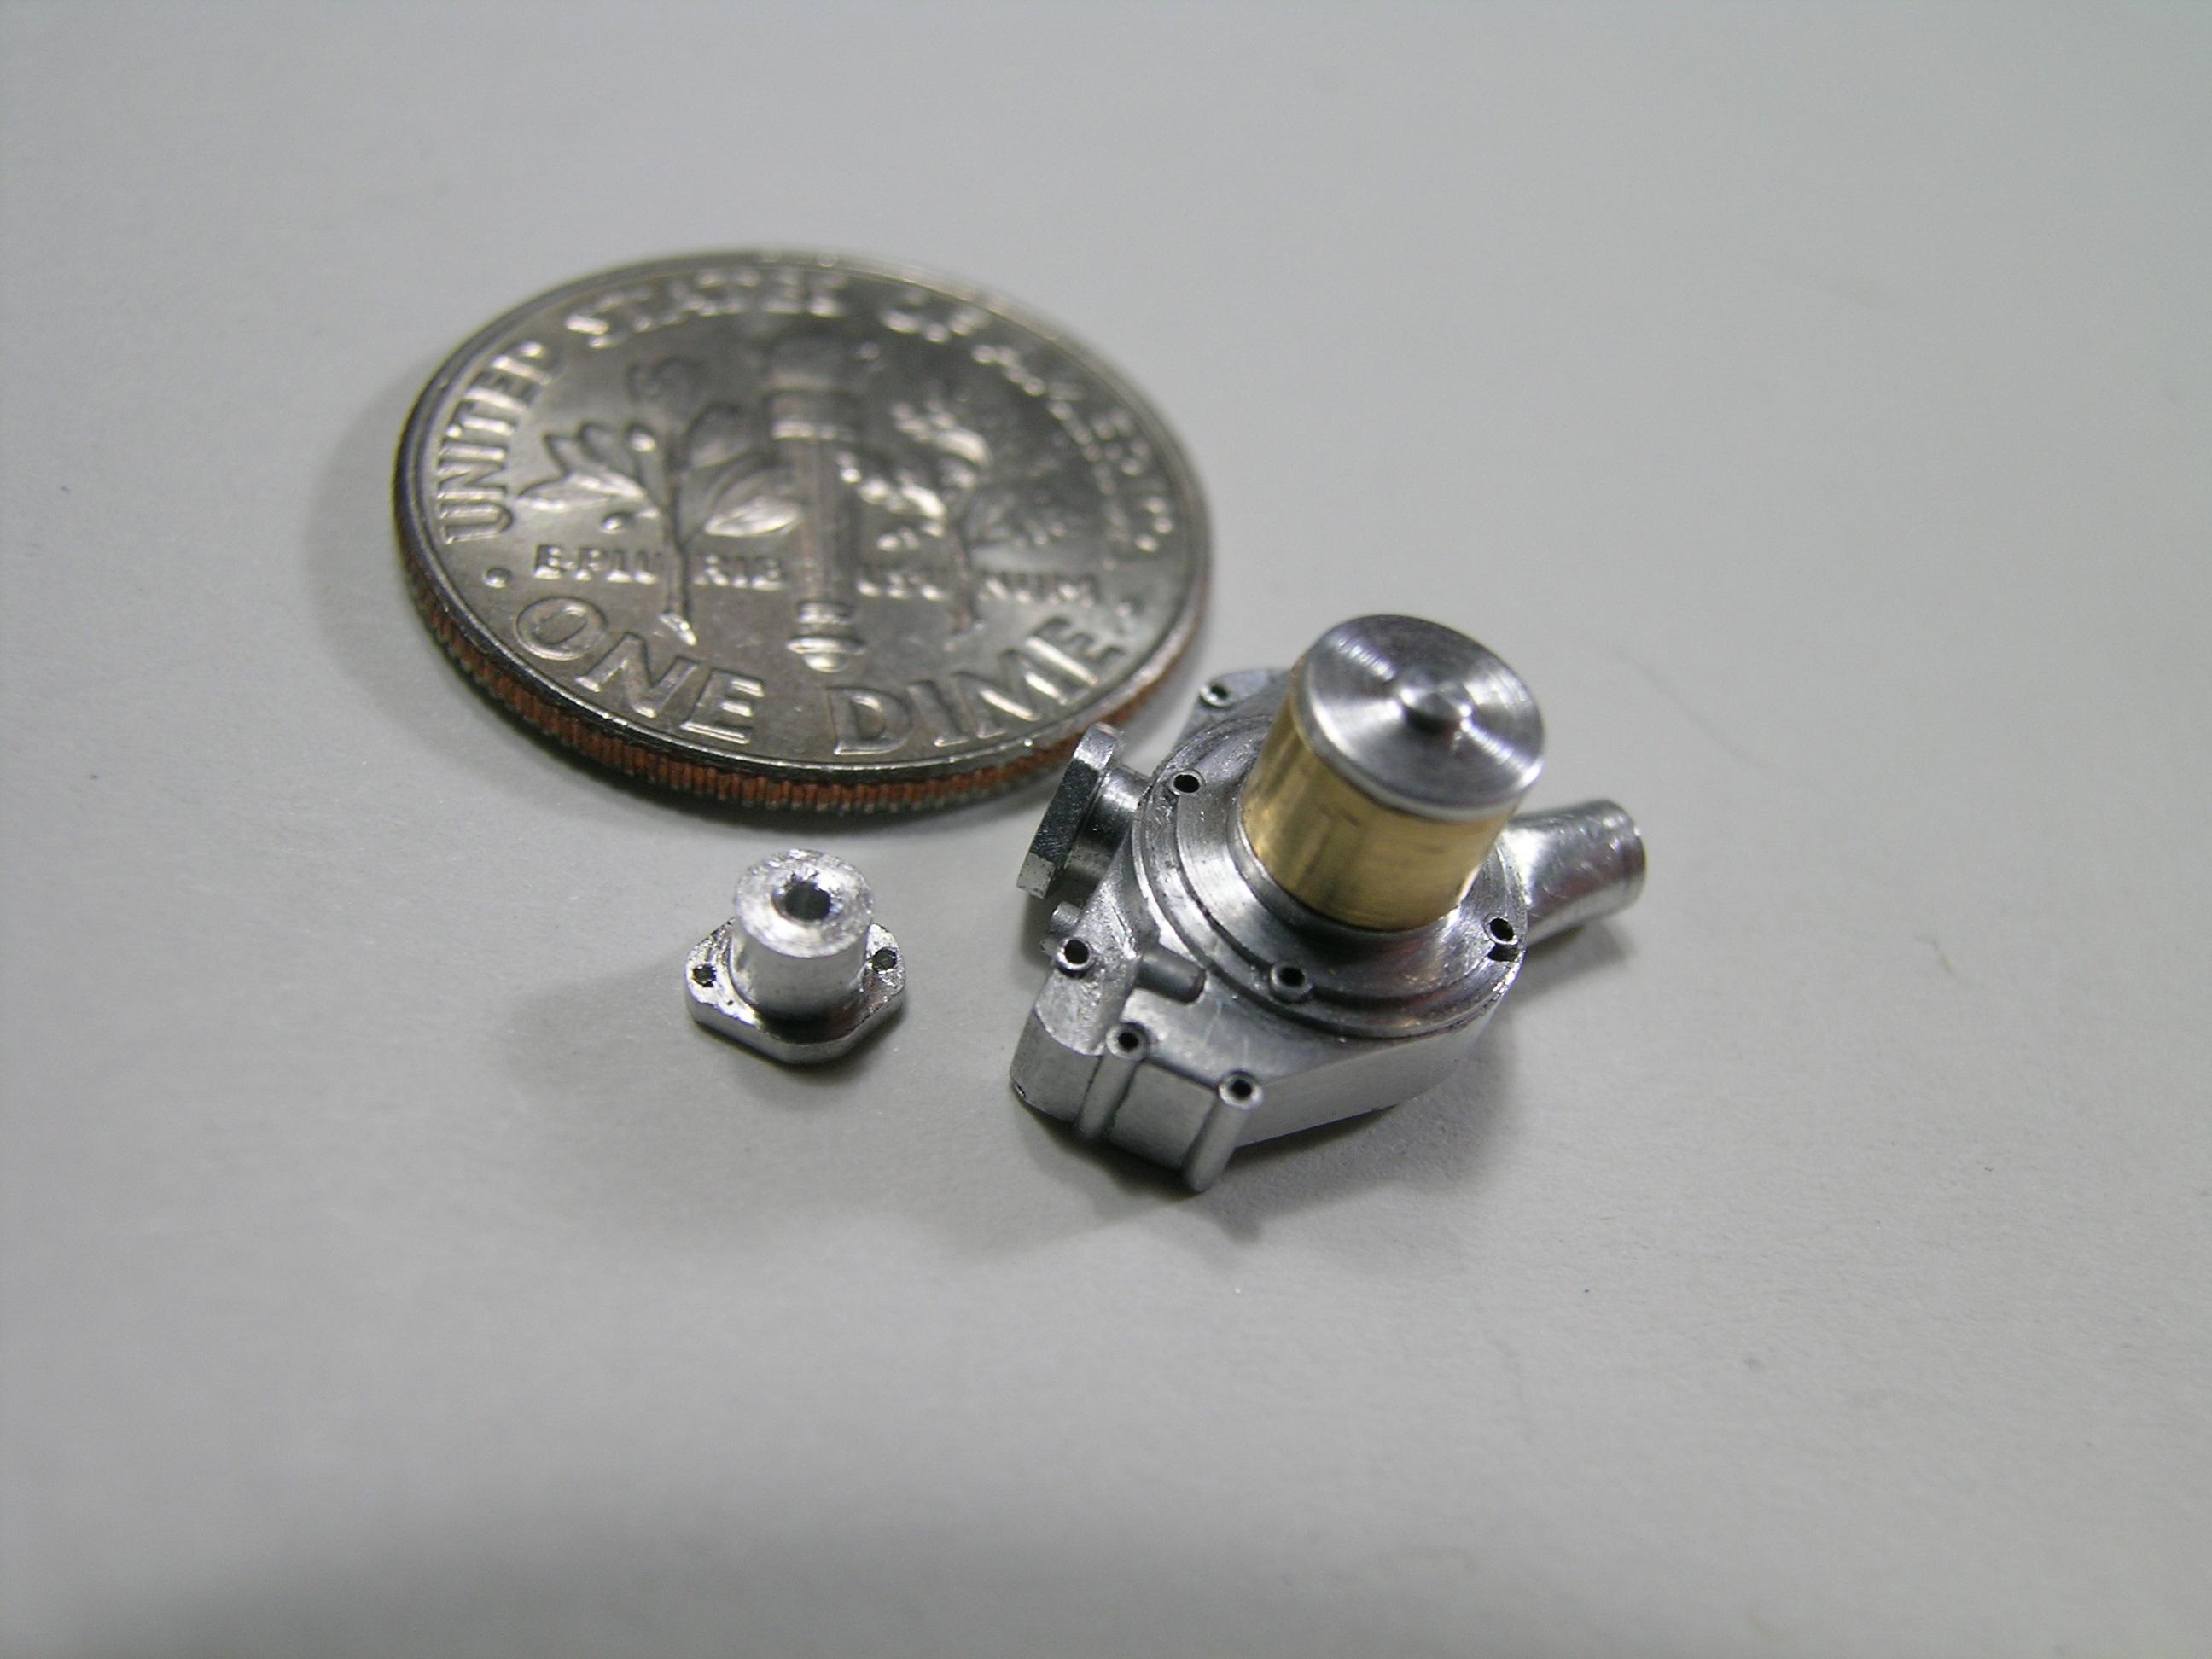
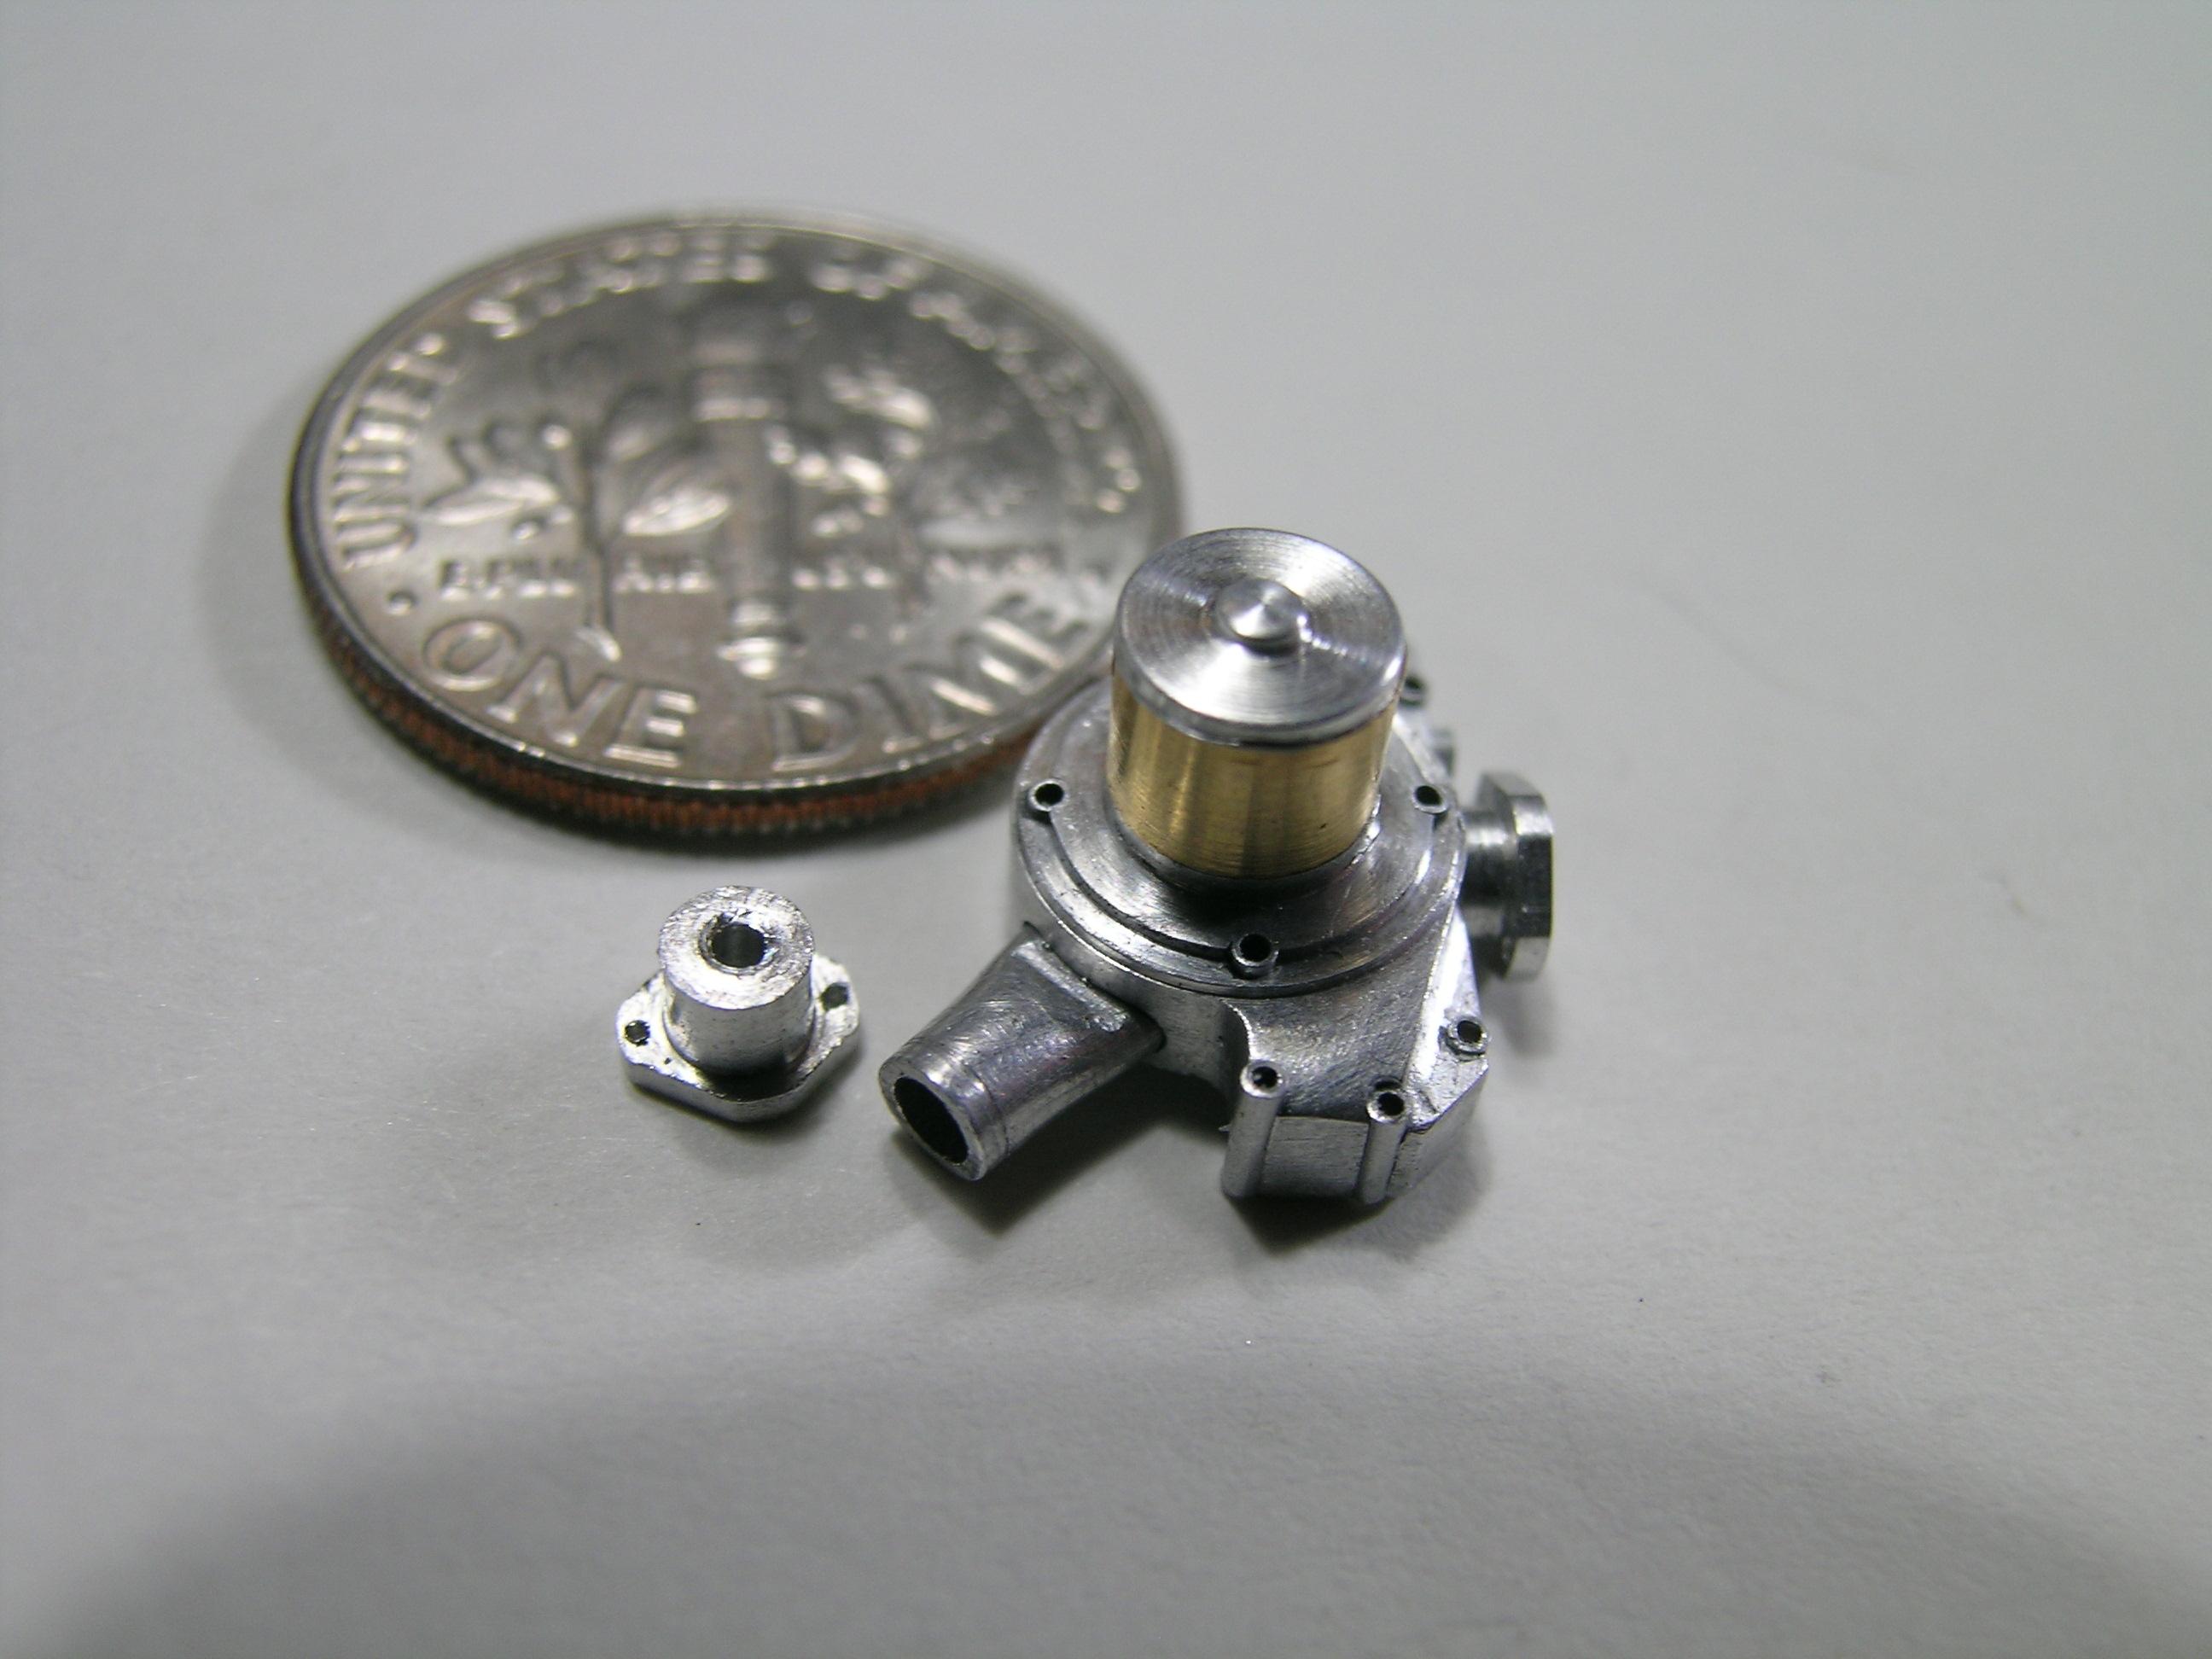
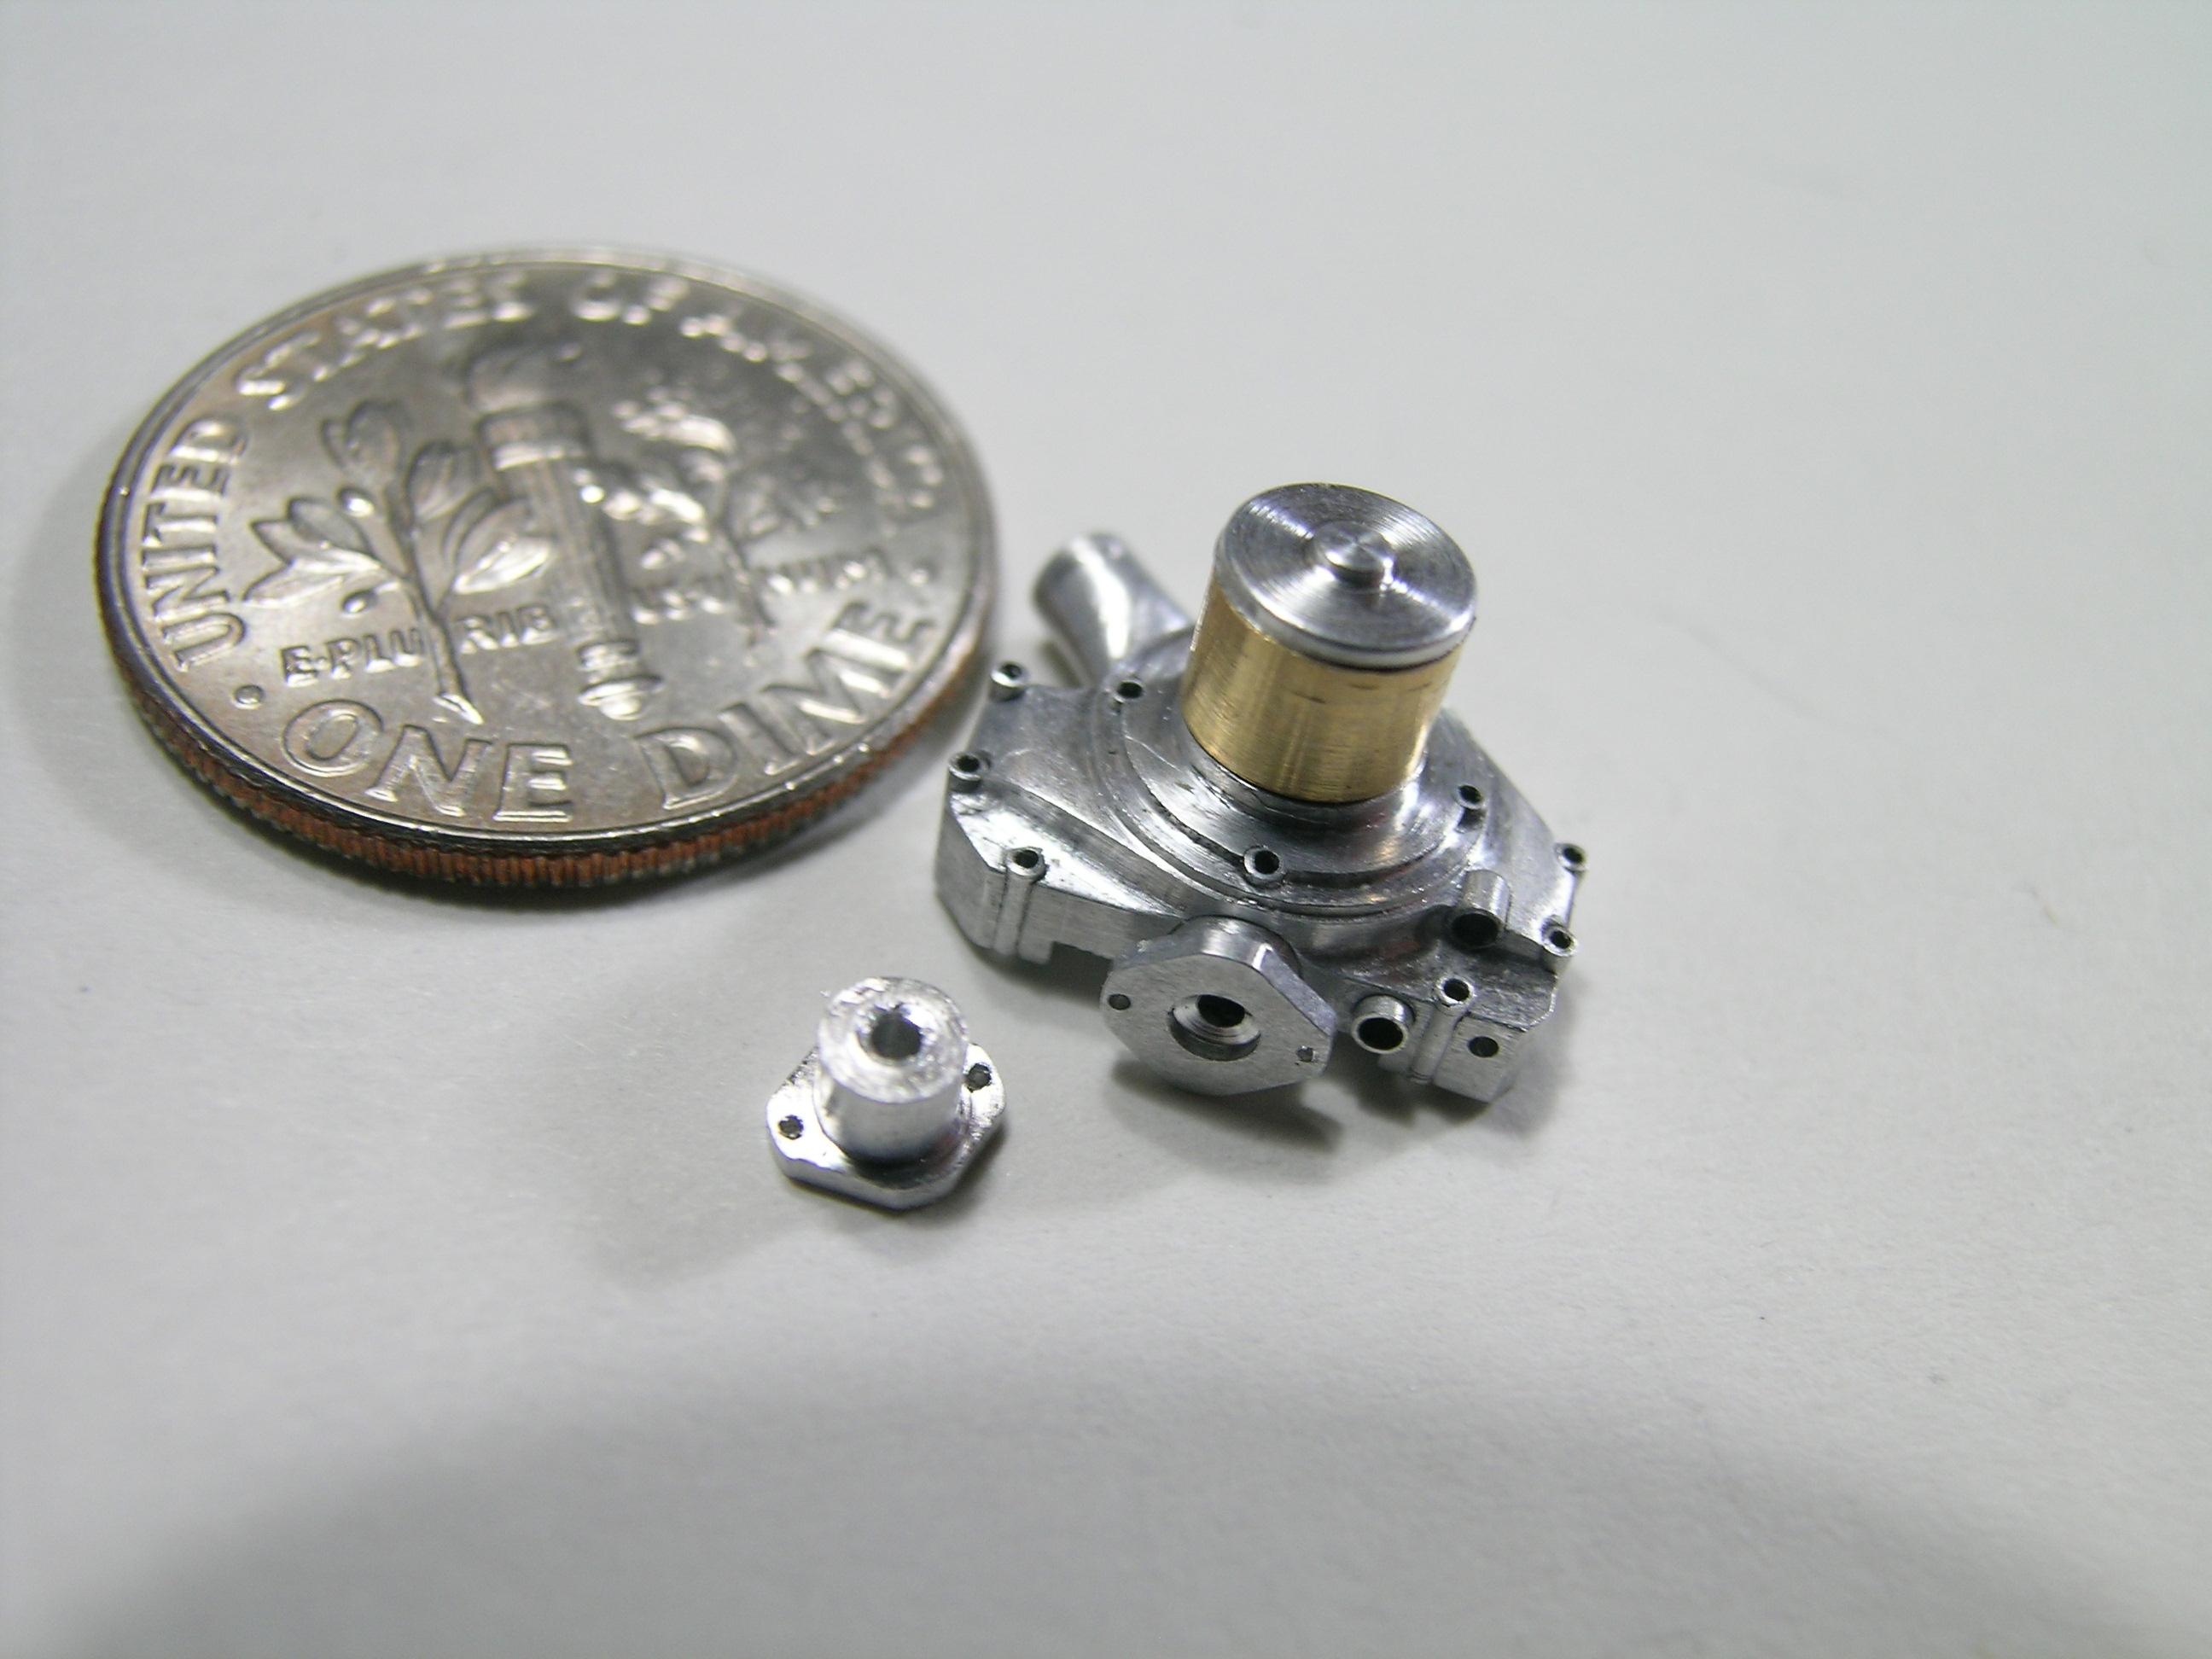
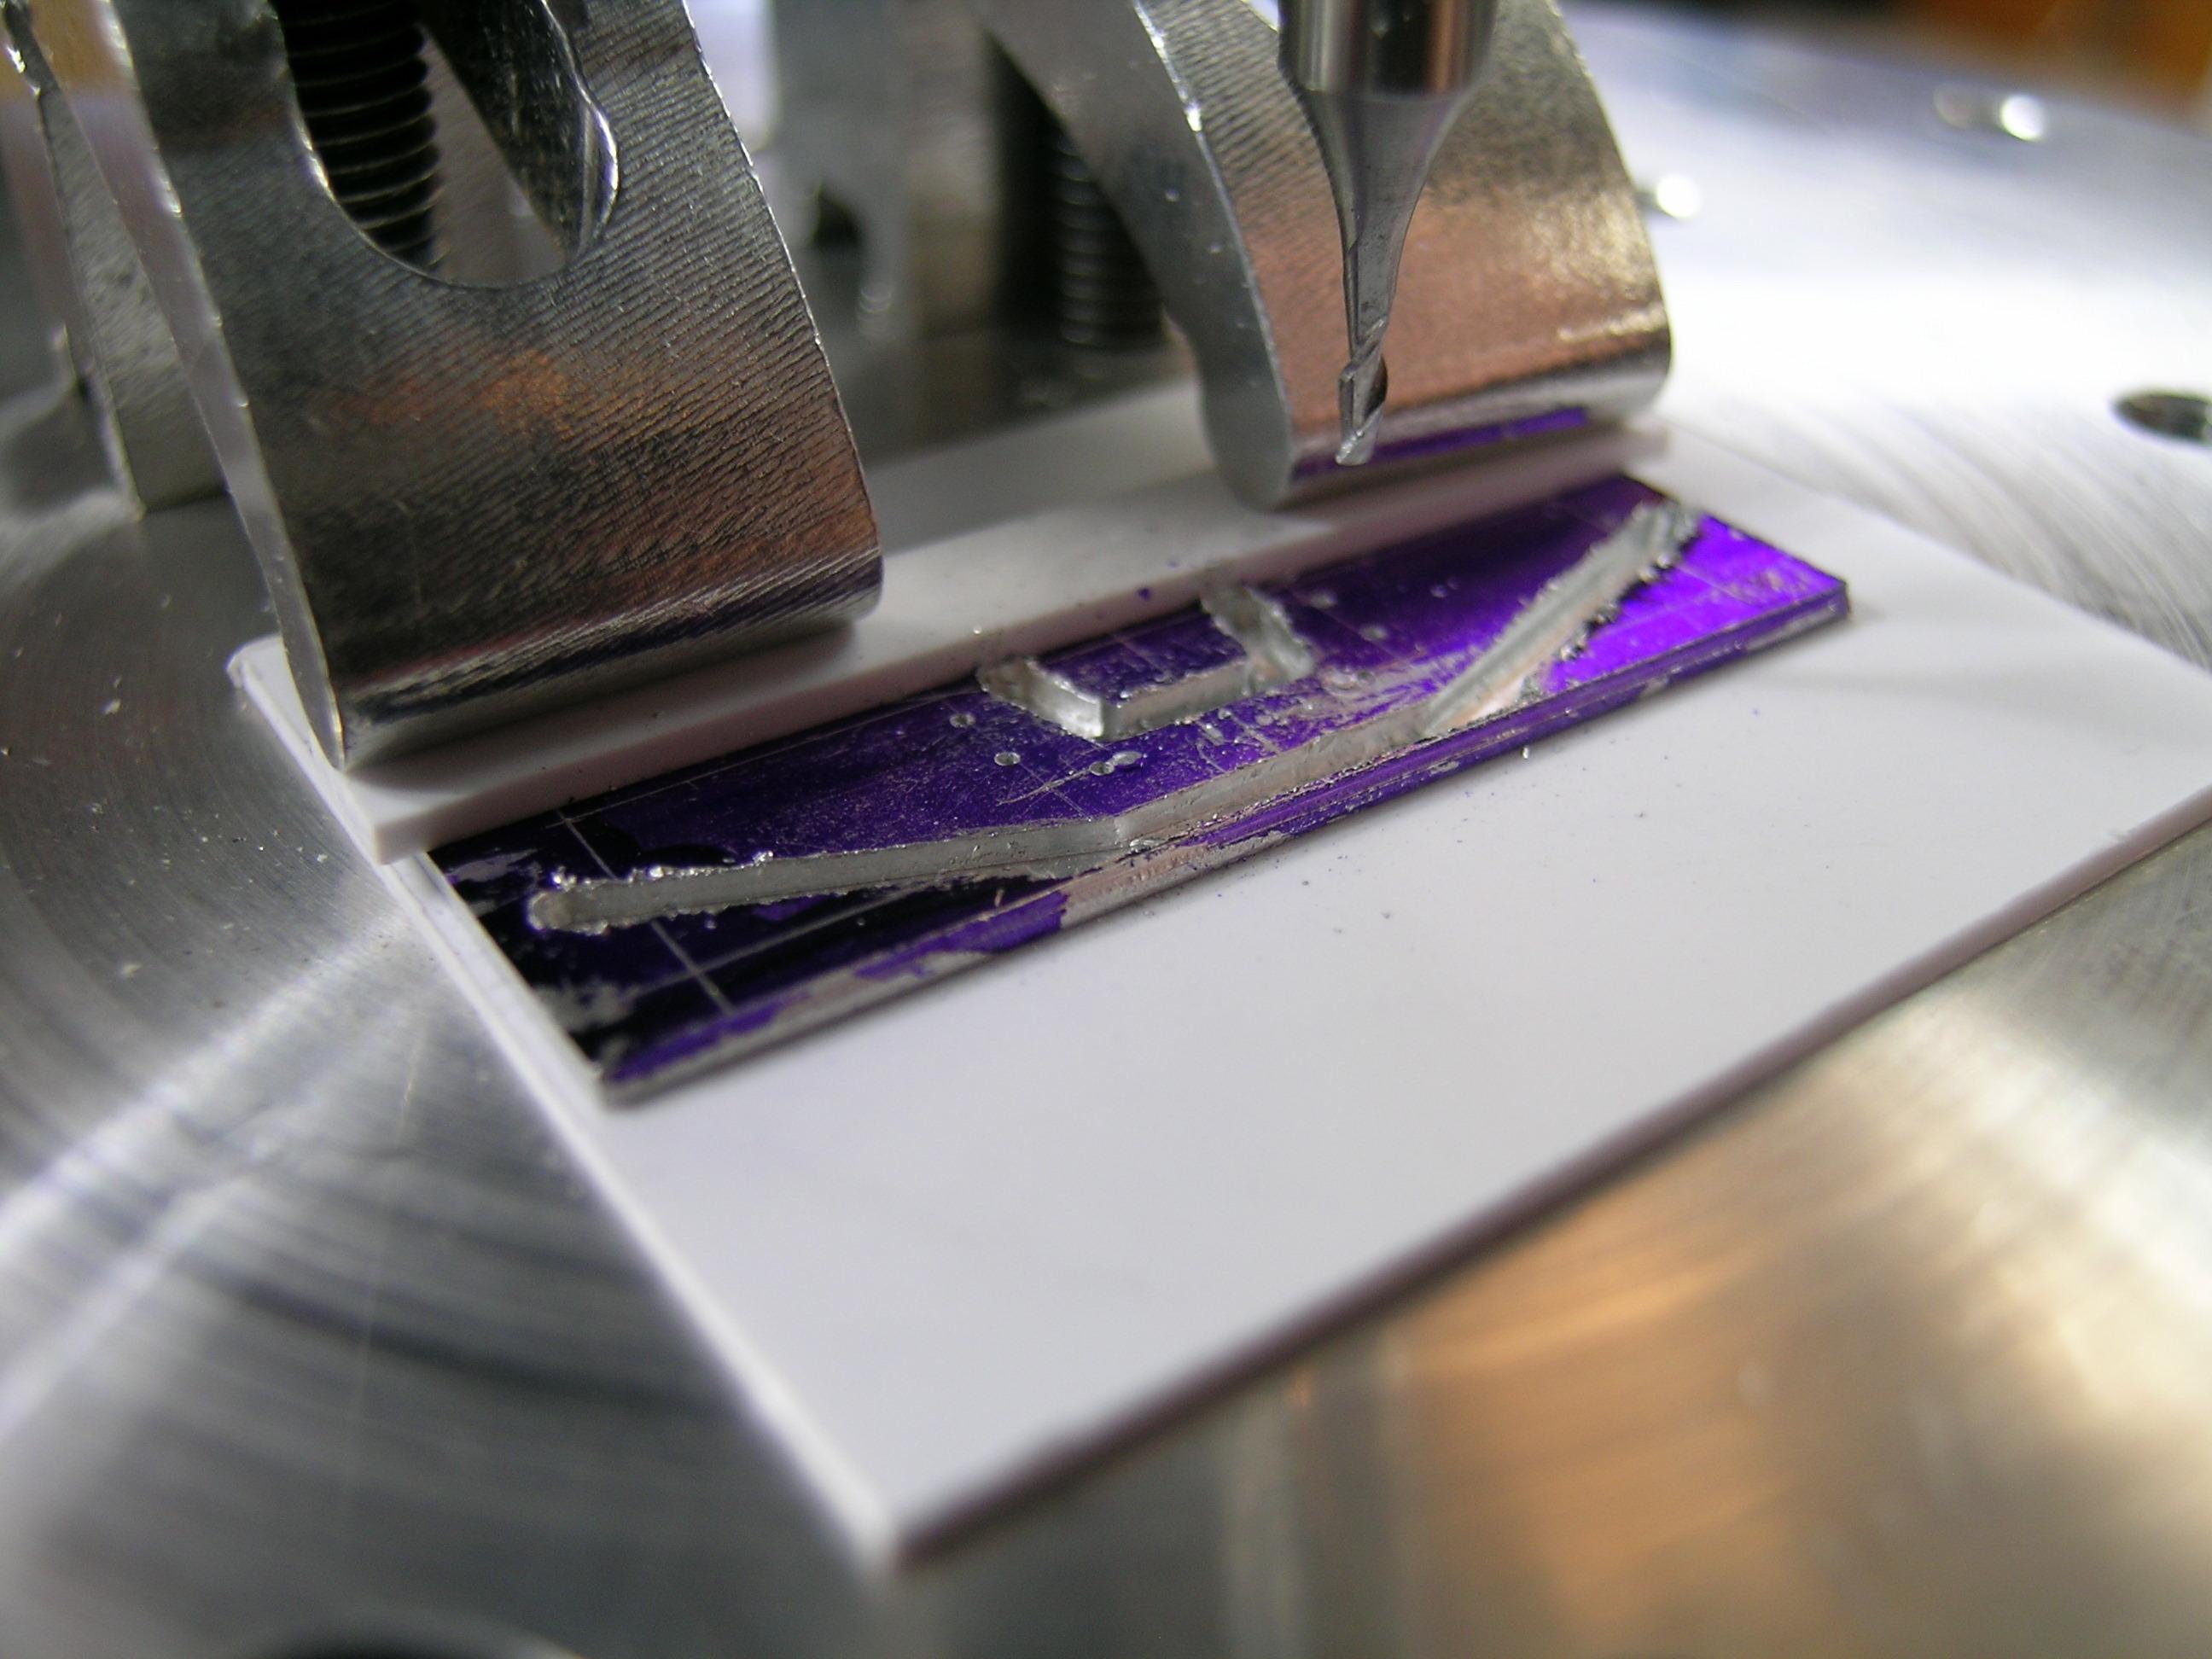
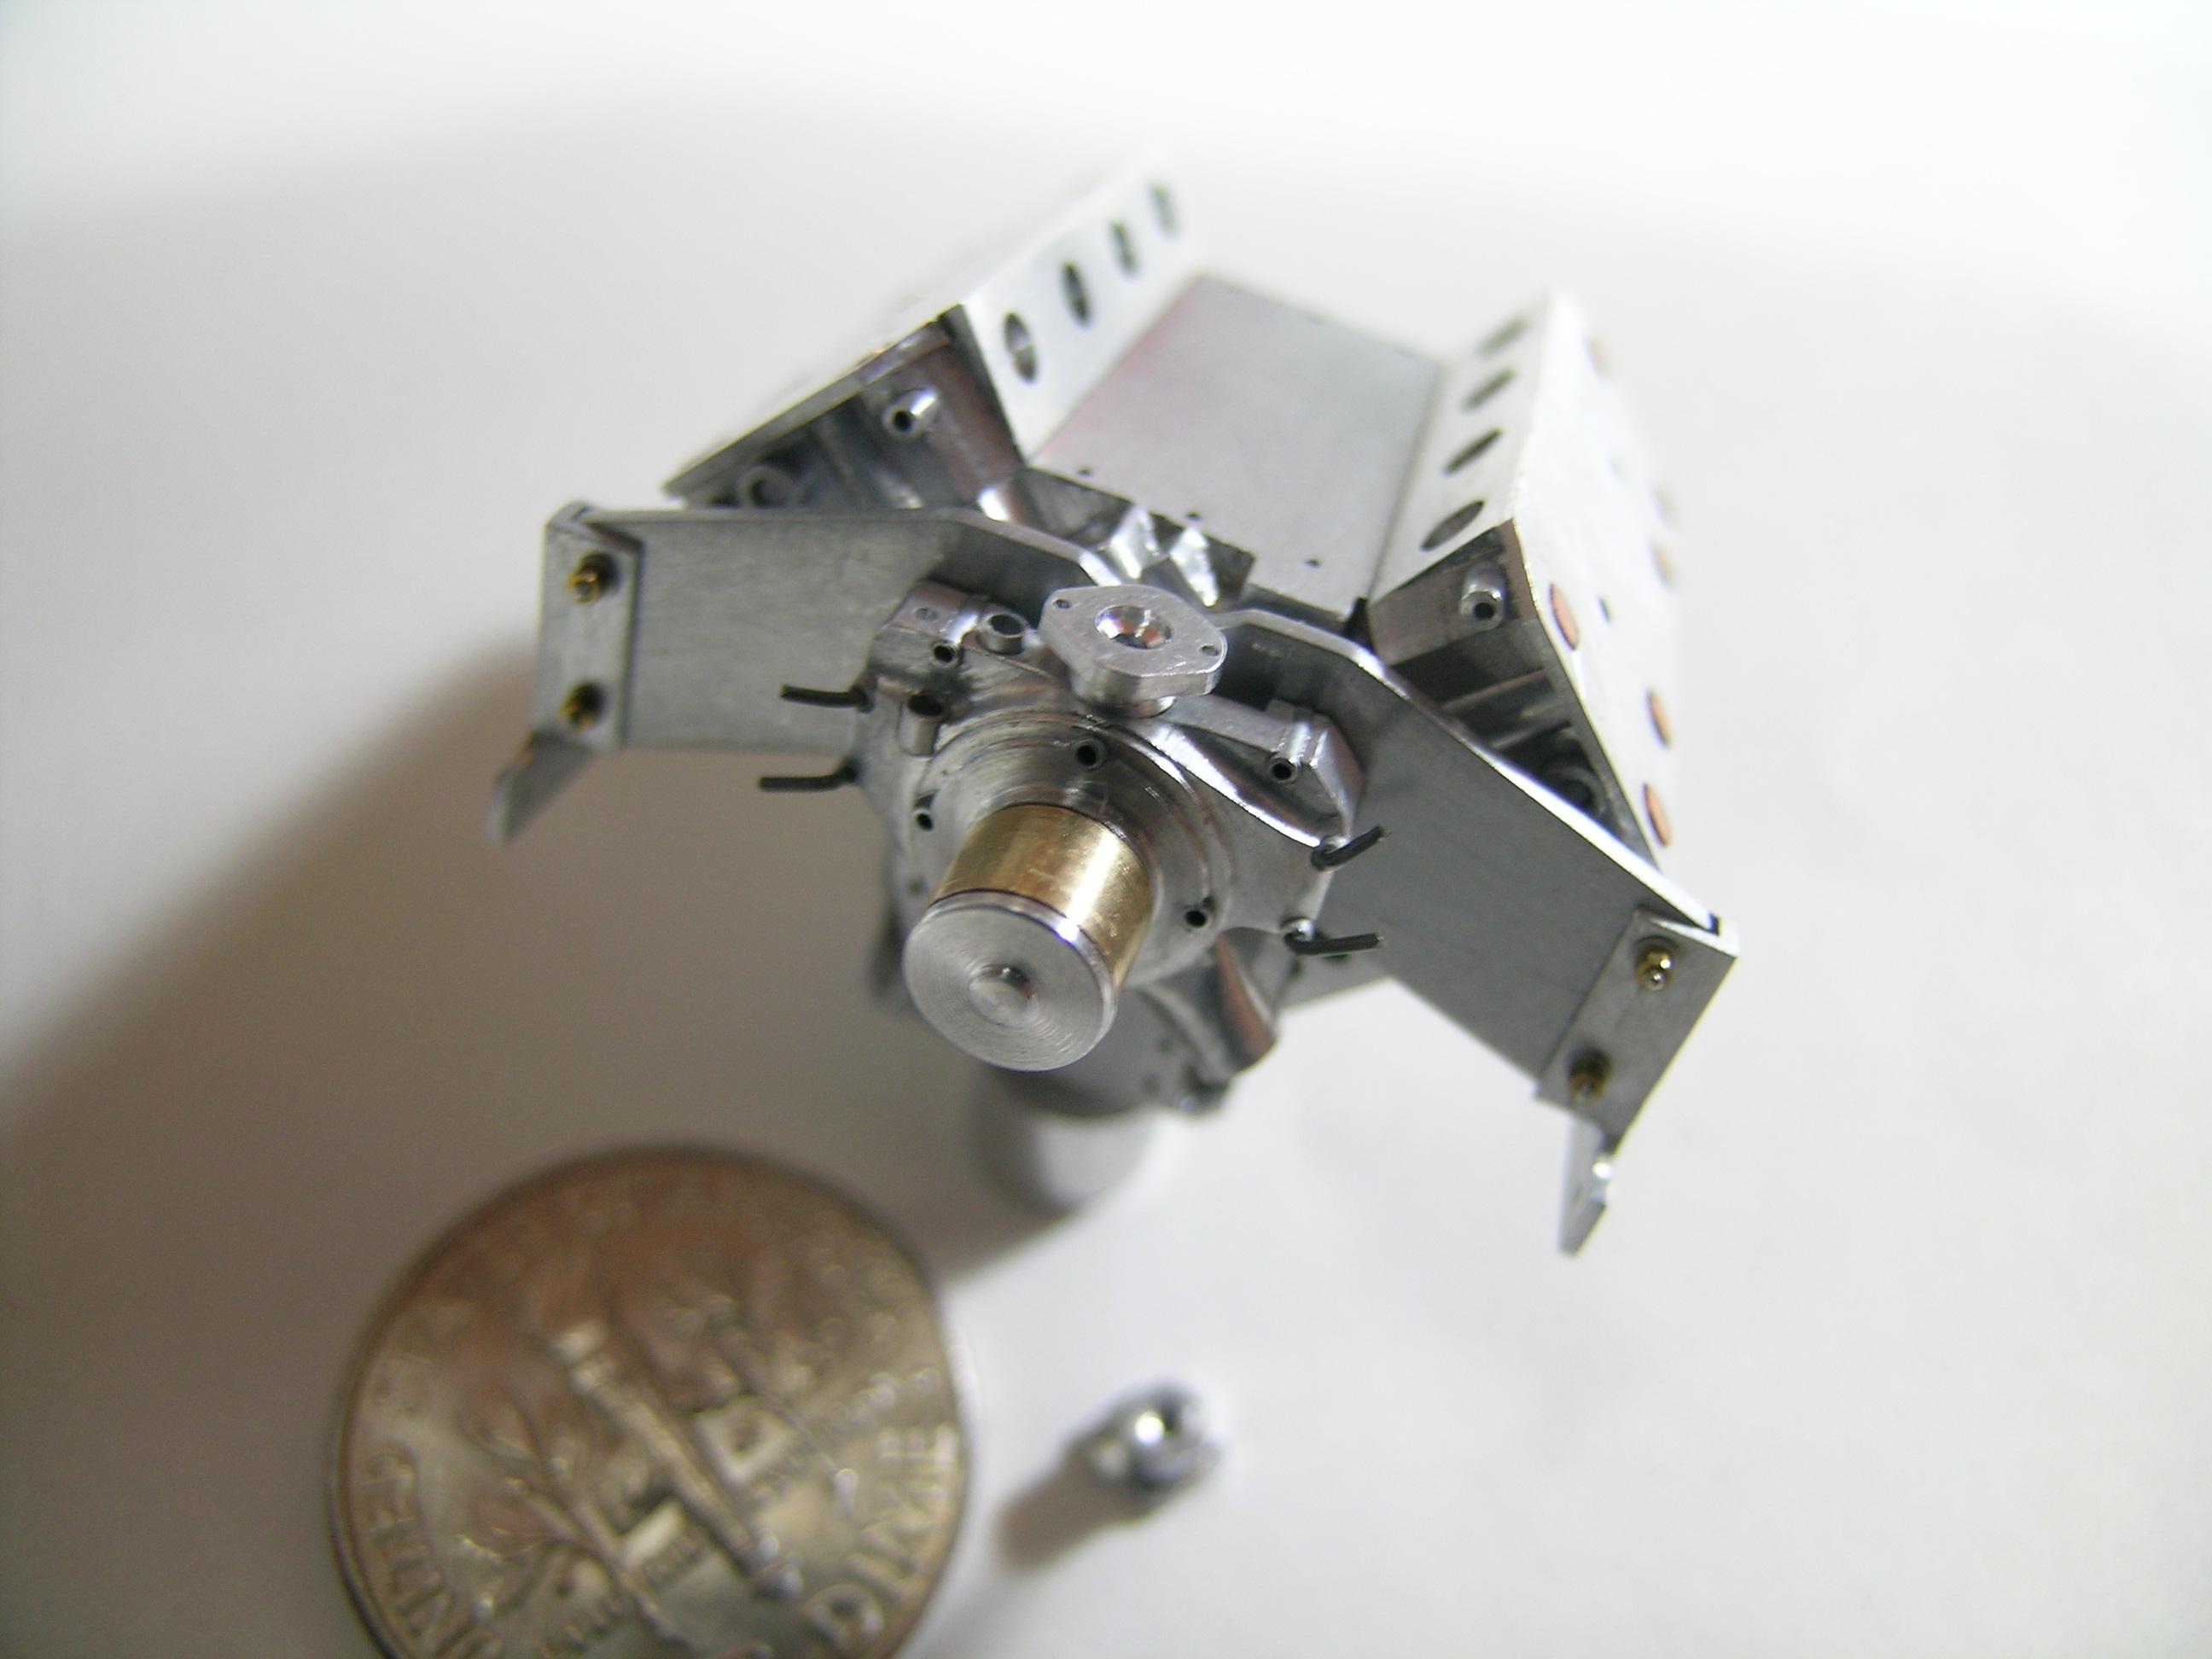
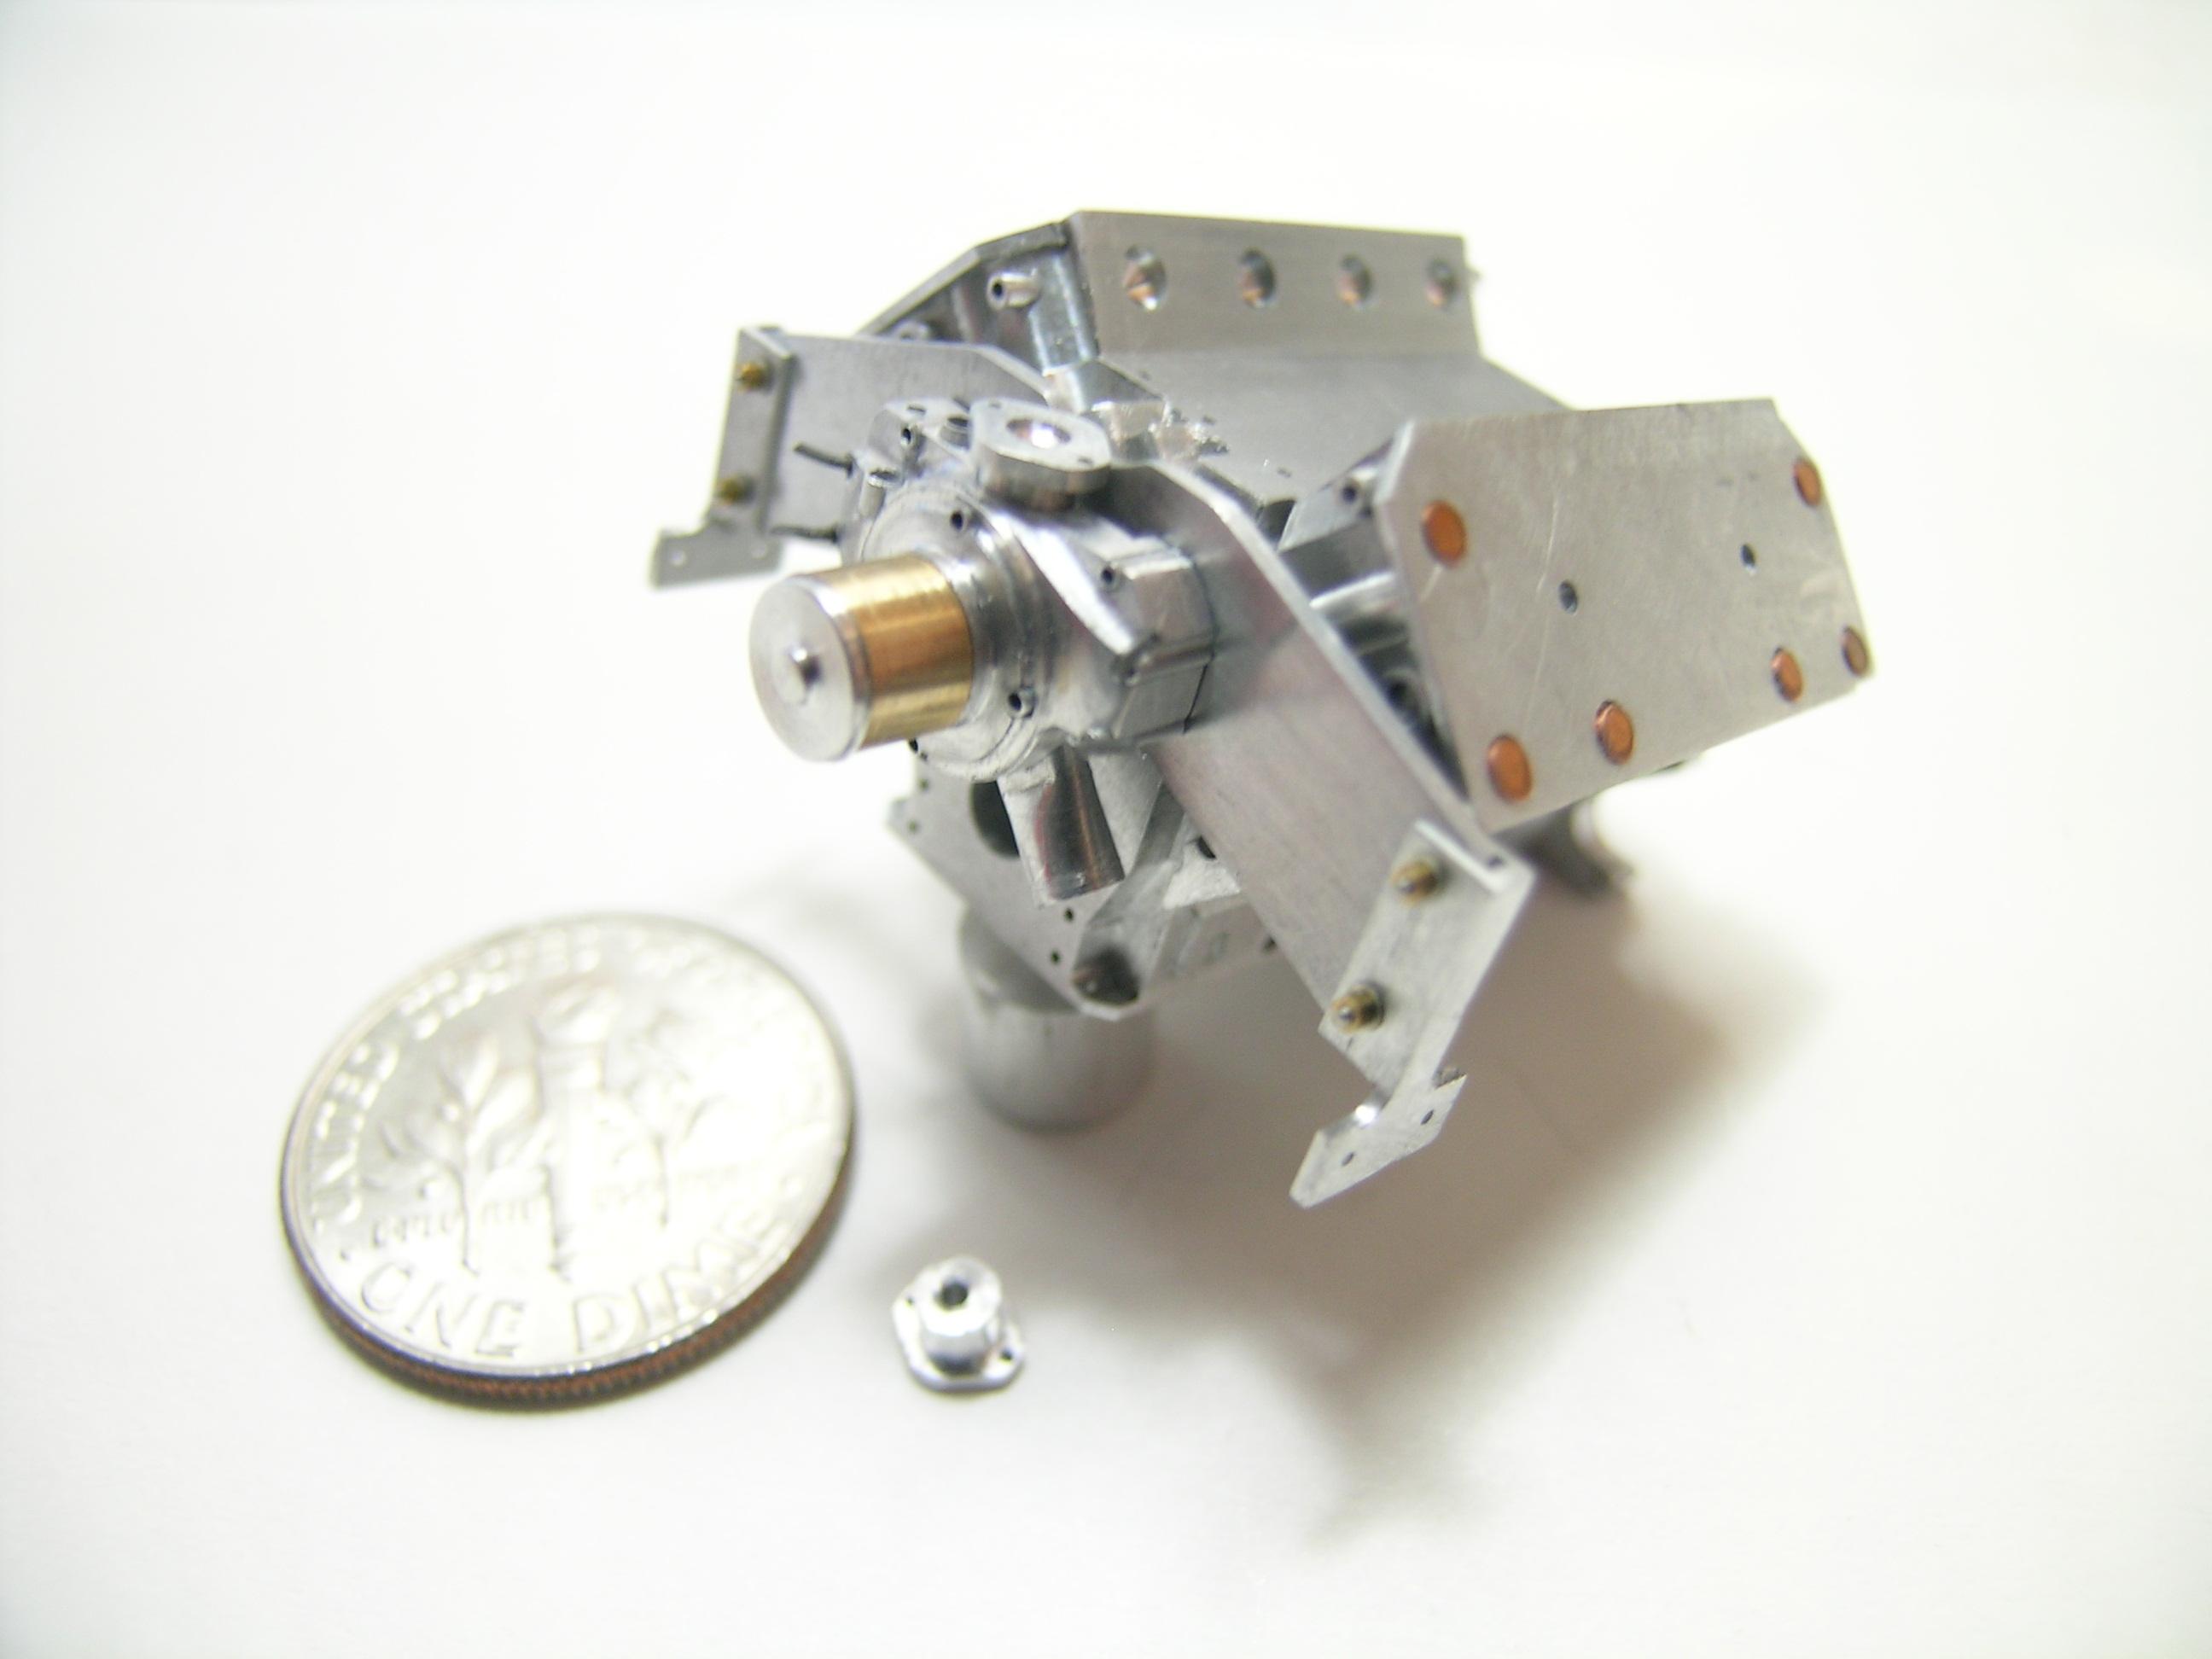
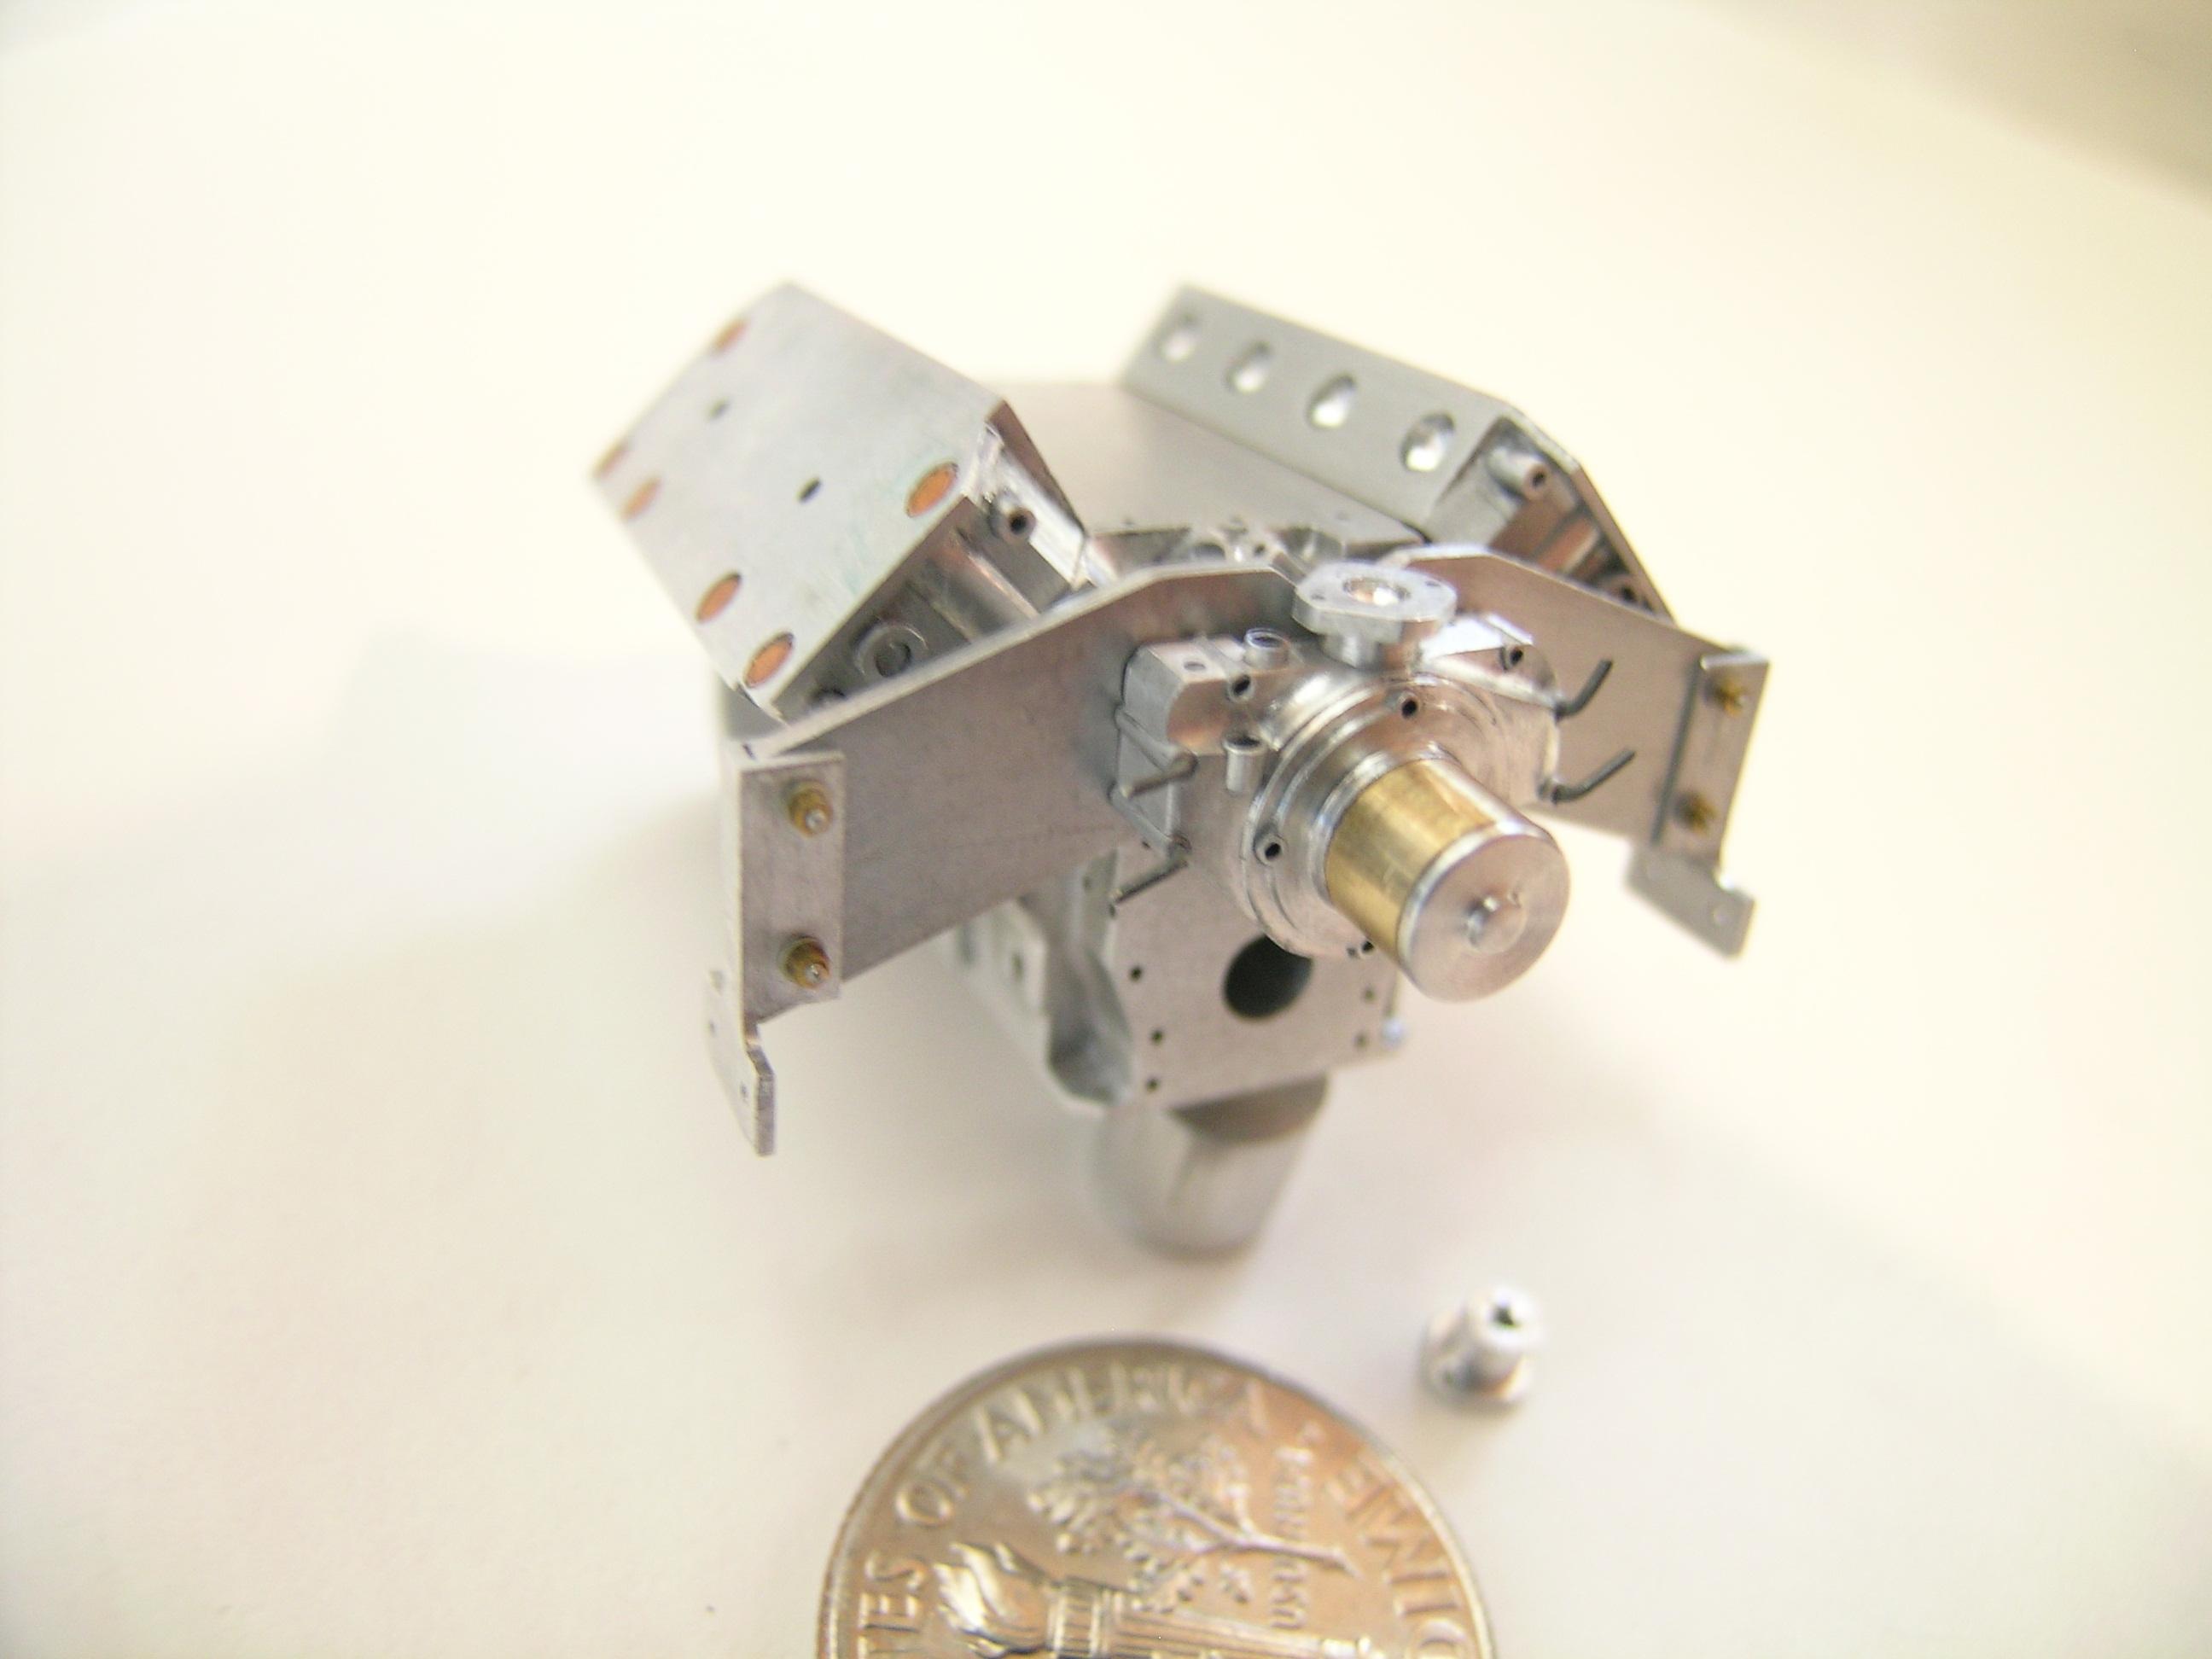
Hello to everyone! As I mentioned in my last update, I need to make parts for the drivetrain in order to set-up the correct position for the big HEMI in the engine bay. I continue with the water pump and the front motor plate. For the water pump housing, I tried to make it as close as possible to the original one but I added an electric motor instead of a standard fan to continue with the drag racing soul that I want to implant to this truck. As usual, your comments are welcome and very appreciated so feel free to leave some!!! Take care and happy building in your own projects, Francis With a 0.500’’ T6 Aluminum rod on the lathe I started the machining of the water pump housing. The first operation was to make the motor armature that will serve as anchor point when the time has come to separate the part from the rod and work on the other side (facing the timing gear housing).Closer viewAfter drilling holes for the fixing bolts on the milling using the same pattern as for the front of the engine block (timing chain housing), I settled-up the chuck at 90 degrees and made the cuts to create the shape. I will slip some 0.7mm Albion tubing to emulate reinforcement for the bolts like the 1:1 water pump housing. I did used this technique for the GTX engine and it looks pretty realistic.Thermostat housing in progress. I made both the filler for the water pump housing and the thermostat cover at the same time so I just had to cut in the middle to get two identical parts for a perfect fit when they will be mounted face to face.The filler is separated from the other side and I drilled an hole in the middle. I will insert a brass rod to fit inside the rubber hose running to the radiator.Water pump final.I made the electric pump armature in brass to add more contrast.You can see the tiny Albion tubes that created the desired effect. I will add 4 brass bolts heads around the armature to simulate the mounting bolts.Using a 0.031’’ thick sheet of soft aluminum (K&S) I sketched the lines for the motor mount plate and I did cut partially the contour using a 0.031’’ end mill. The holes for the bolts are drilled as per the front timing chain housing with a 0.018’’ drill bit.View of the mounting plate after some finition using 600 grit sand paper and a ScotchBrite.Machining of the motor plate anchors using a 0.375’’ aluminum rod.Anchors bolted on the motor plate with threaded bolts from Scale Hardware.Same part from different angle. The anchors will be bolted on the front frame using 2 bolts on each side.Water pump installed temporary with small pieces of wire to test fit.Different view.Different view.Different view.
-
Very nice Tow Truck! Very realistic, well detailed and clean build! Great job Tommy!!!
-
70 Chevy Pulling truck
AmericanMuscleFan replied to DrKerry's topic in Model Trucks: Pickups, Vans, SUVs, Light Commercial
That's a very nice looking and unusual subject! I do love this early '70 Chevy body style! Well done Kerry!!! -
64 Dodge D100 Pickup Pro Street
AmericanMuscleFan replied to AmericanMuscleFan's topic in WIP: Drag Racing Models
Thanks Mike! Better late than never... I try to be as informative as possible with some infos with every pics but I don't think that I will make videos! It's already pretty time consuming to take all those pictures and I need to keep most of my time in this long shot project. Don't hesitate to send me a PM if you need some help on a particular aspect of the build, I will try to answer to the best of my knowledge! New update soon. Take care, Francis -
64 Dodge D100 Pickup Pro Street
AmericanMuscleFan replied to AmericanMuscleFan's topic in WIP: Drag Racing Models
Thanks Joe! Great work on the Maverick my friend! Take care, Francis Thanks for the info Frank! I already bought from this company and yes, they do have a great selection. Take care, Francis -
64 Dodge D100 Pickup Pro Street
AmericanMuscleFan replied to AmericanMuscleFan's topic in WIP: Drag Racing Models
Thanks Jimmy! Methodical and relaxing... you couldn't have said it better, it's pure pleasure and accomplishment with every new part made! Welcome back and take care, Francis -
64 Dodge D100 Pickup Pro Street
AmericanMuscleFan replied to AmericanMuscleFan's topic in WIP: Drag Racing Models
Thanks Kerry! I hope to keep doing the same impression on you with my next updates... More pics soon! Take care, Francis -
Jo-Han Maverick-Dyno Don's Ride
AmericanMuscleFan replied to mustang1989's topic in WIP: Drag Racing Models
Hi Joe! I know exactly what you talking about! I put the same in my '70 HEMI GTX and it was a real challenge to assemble... However, this shifter and the Liberty transmission from Futurattraction is one of the the best after market kit I've seen so far. You nailed it my friend!!! -
I understand now why a DODGE or a FORD donor kit makes no difference for you Sir... Killer start!!!
-
64 Dodge D100 Pickup Pro Street
AmericanMuscleFan replied to AmericanMuscleFan's topic in WIP: Drag Racing Models
Thanks Dave! Sad that I'm not living closer to your location, I would be more than happy to show you the whole thing in person! Stay tuned, more pics soon! Take care, Francis -
Vintage FED, 1:25 WIP, motor is finished...
AmericanMuscleFan replied to Mike Williams's topic in WIP: Drag Racing Models
WOW! Superb job on the engine (especially this outstanding fuel delivery set-up), you have good hands and good eyes my friend!!! Concerning the front wheels, I'm not too worry about your ability to made some after what I seen from your post for the wire wheel lacing (simply stunning...)! Just hope you will be back with the build of another of your gems when this one will be done. Thanks for sharing Mike! -
64 Dodge D100 Pickup Pro Street
AmericanMuscleFan replied to AmericanMuscleFan's topic in WIP: Drag Racing Models
Hello Lorne, Supporting this hobby is not a person's business but a collective work and I am honored that you consider me as one of them, be sure that you too are part of it like all those who support and keep it going this forum! Eastern Habs ?