.jpg.b9265433dc8c3b550370b1d0e4e4d2fc.jpg)
MarkJ
-
Posts
4,702 -
Joined
-
Last visited
Content Type
Profiles
Forums
Events
Gallery
Everything posted by MarkJ
-
.jpg.b9265433dc8c3b550370b1d0e4e4d2fc.thumb.jpg.915f5b46e3c9402eeaa6972073121c87.jpg) Thanks, Kevin . I really appreciate you stopping by for a comment.
Thanks, Kevin . I really appreciate you stopping by for a comment. -
Andrew, again, that dash looks superb and the engine is going to look superb too. You are the only builder I know that's not in a big hurry to finish. And it shows in the final photos.
-
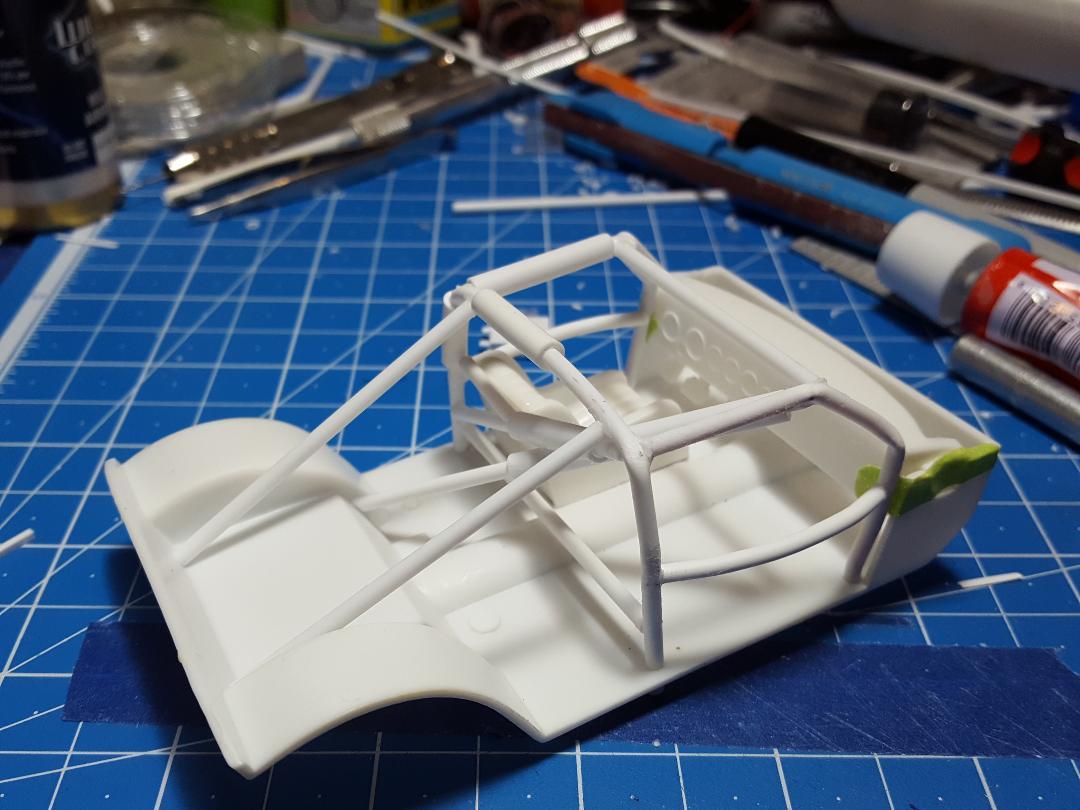
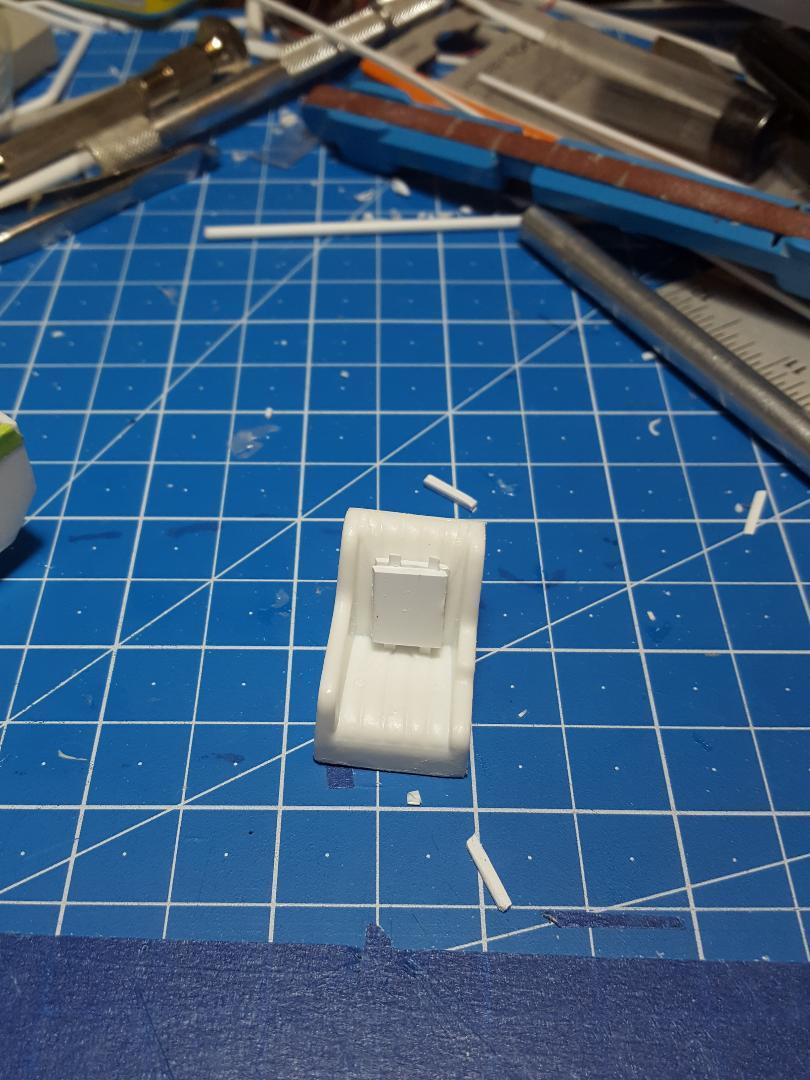
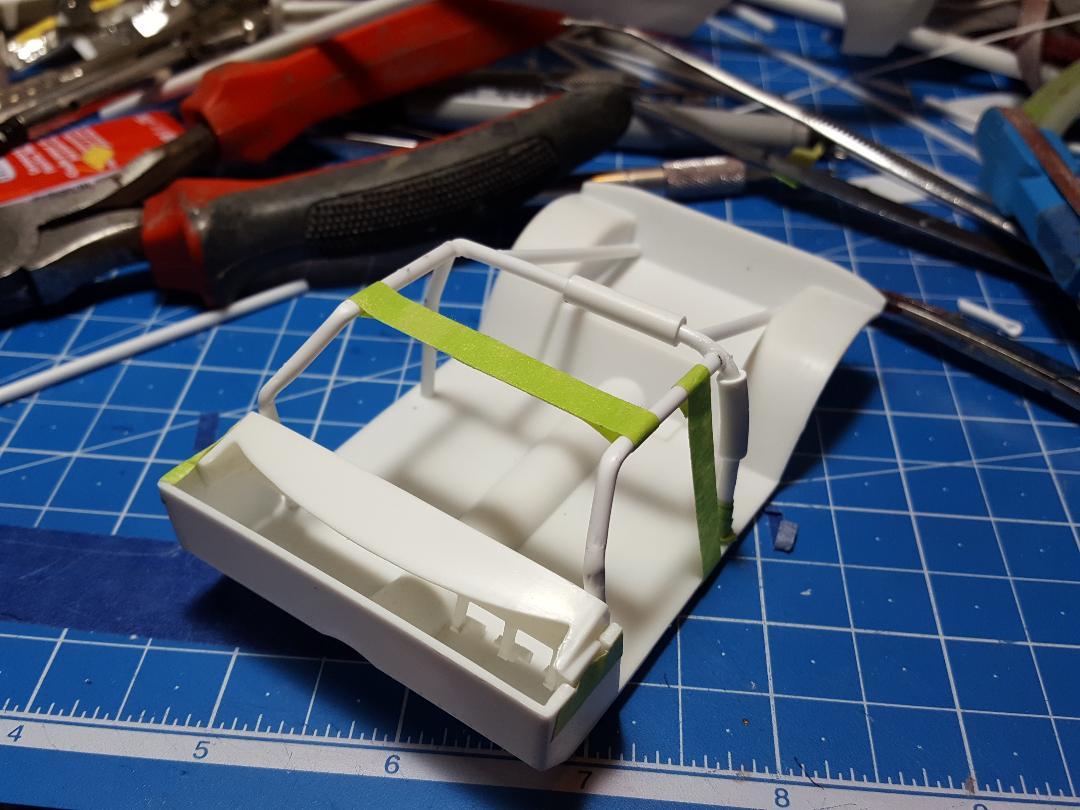
Got the head restraint installed. Now on to the triple bars in the doors.

-
Thanks, Donato. Always appreciate your positive comments on the builds.
-
Thanks, Bob but that cage looks nothing like the cage I need. I'm really not looking for a way to save time. If I did I would have just used the kit cage.
-
With no nascar race to watch today because of the greed of nascar to take away the next 5 races in hopes that most Nascar fans will try to stream with televisions that aren't set up for steaming. I should have time to work on this build when I would normally be watching a Nascar race. Thanks Nascar.
-
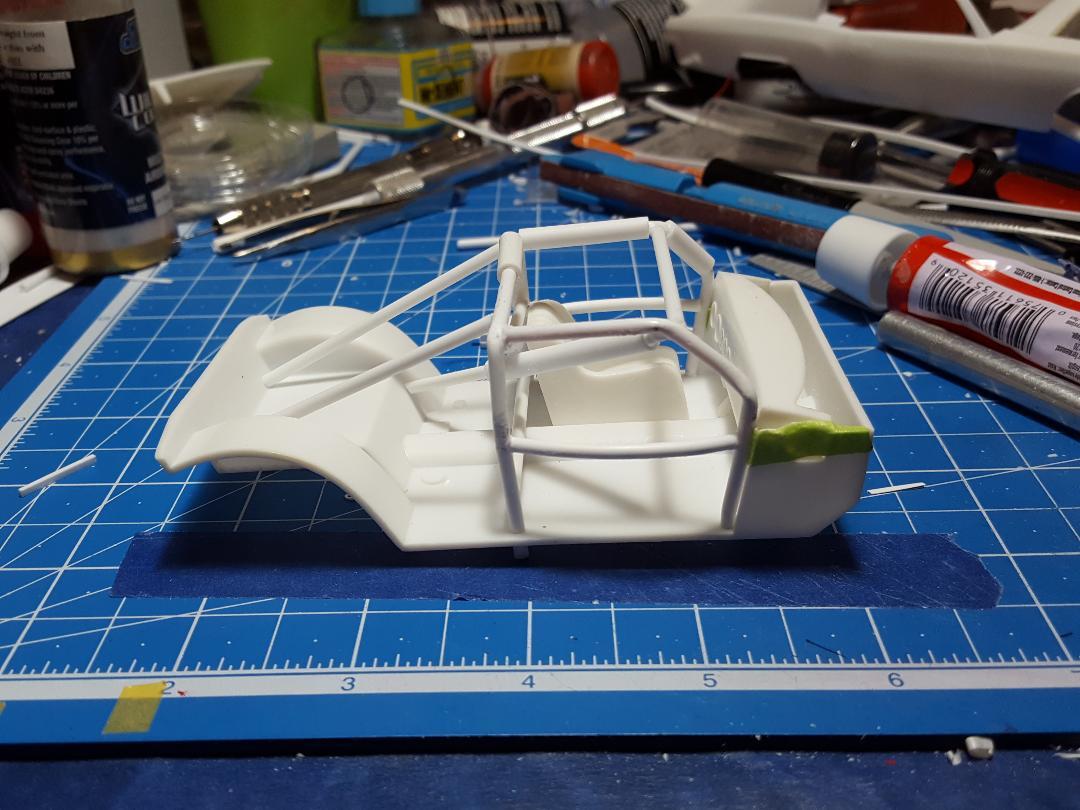
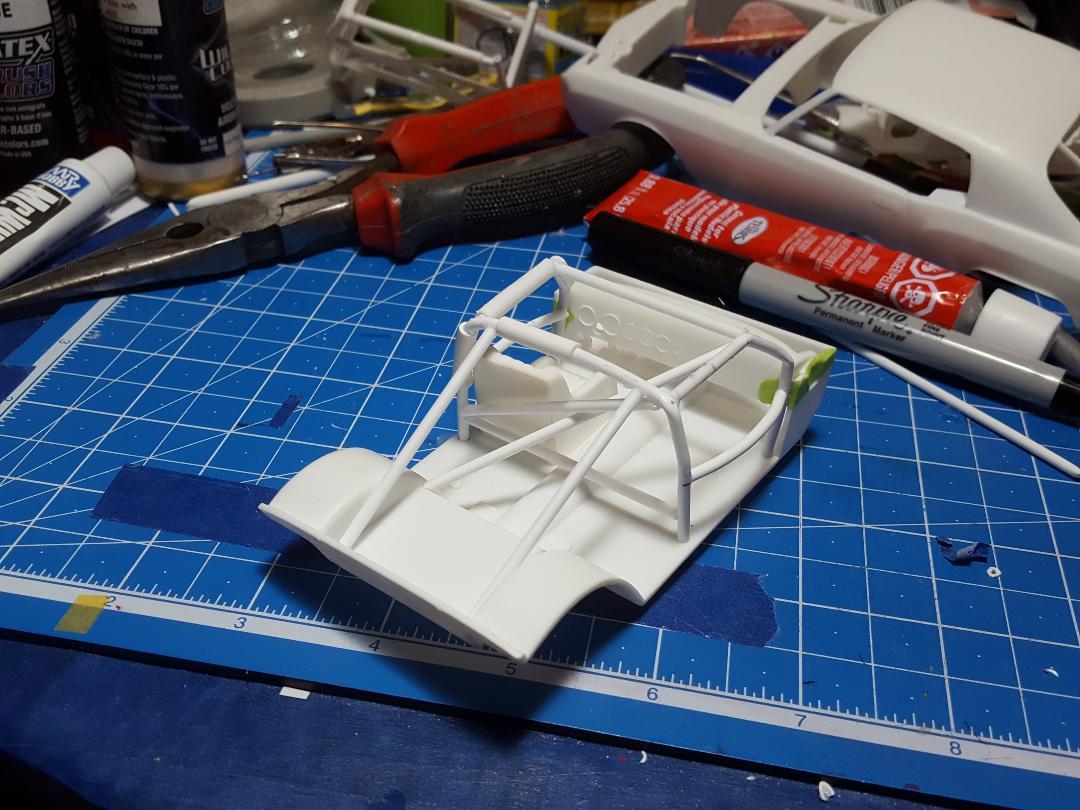
Some more work done on cage. All that's left is the head restraint pad and the triple horizontal bars in the sides of the cage at the doors.
-
Got to the point I don't need my friend Mr. tape to help me anymore on the cage. Just a few more bars, padding and a head support to prevent whiplash and I should be done.
-
Carl, I told you wrong. The skinny tubing is 3/32 not 1/8 of an inch. the padding is 5/32, that was correct. I put a small piece of wire in the tubing and just bend it cold with my fingers. The wire inside the tubing keeps it from breaking as you bend it. You can do a 45 degree angle if you want to.
-
Carl it is 1/8-inch tube and 5/32 tube for the padding. Thanks for the comment.
-
Got started on the cage. I begin off the midpoint of the model right at the door opening at the rear of the door and build on to that, eventually ending up with what I have in the final photo below. Then I go back and add all the other bars. I'm adding a tube over the main size bar to represent the padding. I split it down the middle spread it, and it slips over the main bar wherever I need to have padding. I'm not gluing the cage to the tub. It's just a tight fit at 4 spots around the cage and will remove it to paint it black and also paint the tub red. I will glue it at final assembly. These bars fit tight to the roof and A pillars in the front like the real car has it. There is still enough adjustment space to make room for the windshield......I hope. Thin masking tape is my friend during this beginning phase of the cage build
-
I'm so jealous of your wealth of ref pictures that you actually took yourself knowing some day you were going to need them and appreciate you sharing them with us.
-
Thanks, Steve. I tried to fix it, but it is beyond fixable. Thanks for stopping by with your thoughts on the build. Yes, Carl. I was trying to keep this build as oob as I could, but the cage is just too ridiculous to keep. Thanks for asking about the build. Thanks, Kevin. That's why I decided to do my own cage. I was having trouble incorporating the kit cage with the quarter glass fairings. Thanks for your props on the fairings.
-
I was trying to use the kit cage but try as I might it's not going to look good at all. If you look at the box art on the kit box if you build it the way you would end up doing there is way too big a gap between the cage and the roof. I will do a scratch-built cage like I always do. Plus, the bars are just too thick and there are too many compared to the actual car I'm doing. But I'm not doing anything under the hood except a scratch-built air cleaner. I have no ref pictures under the hood at all and basically the air cleaner I'm not even sure about except know it's not like the one that comes in the kit. It has dual snorkels going to the firewall kind of like the Junior Johnson 63 chevy had. But it only had one snorkel
-
Bruce, you and me both. Plus, they made the bars too fat throughout the whole cage. But I don't think I want to scratch build a cage just to fix that. I think I know how the cage is supposed to look so I just need to add one bar to do that and live with the fat bars everywhere else. It's like they padded the bars on the right side of the car which wasn't done in real life. There was no reason to pad the bars at the right window.
-
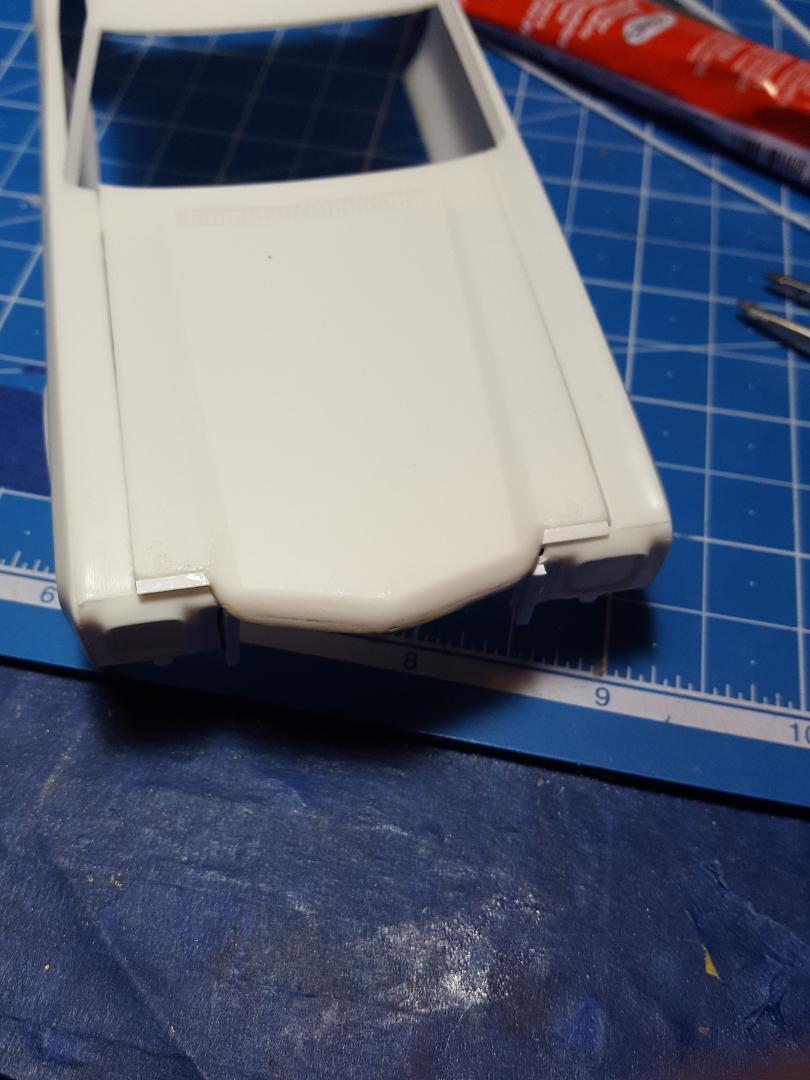
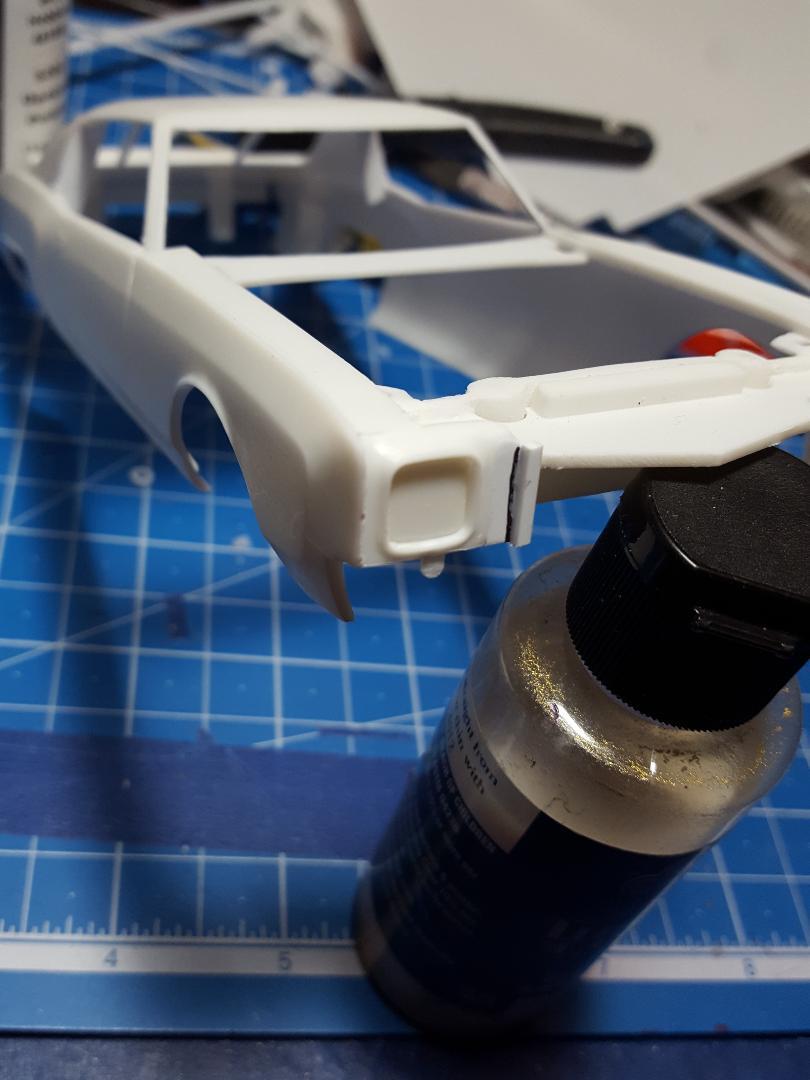
I believe I'm finally finished with the front of the build as far as building goes. Now it's time for primer and paint. That adding material to the front pins makes the parts all hold together tightly but I'm still able to take it back apart. Of course, I will glue it at final assembly.
-
Oops, that's no seat. That's your work surface. Very fancy.
-
Yes, the car seemed to change a lot from race to race or maybe they had a two or three car fleet but I kind of doubt that. I'm actually thinking the car he had all year was actually the same car Charlie Glotzchbach used in the 71 season. They just kept working on it and hoping they never had a bad wreck in it that would have forced a new car to be built but I don't think he actually had one of those even though he had many fender-to-fender battles with King Richard all season long at the short tracks.
-
Thank you, Steve. I always appreciate your takes on the builds. I too really like the Monte Carlo as a race car especially the gen 1 from 1970 to 1972. Did you know that only about 3 or 4 Gen 1 Monte Carlos competed in the 1972 season and none of them were 1972 Monte Carlos. They were Bobby Allison, Coo Coo Marlin, Fred Lorenzen and Buck Baker.
-
The pins at the front of the chassis that go into the tubes at the front to hold everything together are just the right size for sliding in and out easily. I have decided to add a little styrene material right at the end of the travel of the pin and make it increasingly fatter so when the chassis is put together right at the end of the travel the pins will get tight in the tube and hold everything together tightly without having to glue it. I should still be able to take it back apart by prying with a small screwdriver. I will just make it snug so its tight without getting too tight which could become a problem if I'm not really ready to actually install chassis to body. I'm having to mock the fit a lot on this thing to get it right.
-
Yes, Bruce. On that car it does for sure. On the Southern 500 car, I'm not so sure. I'm working on the roll cage to see how much room I have to add some more fairing to the a-pillar. The door number on your photo is not the same font as the Southern 500 car. I wish I had a better picture of the real roll cage and the bars where they start and end. the kit cage is not very accurate from what I can tell so far. But I might just leave it that way instead of guess.
-
I found another captured image from the Southern 500 video itself. This one shows that the fairing is probably raw aluminum not painted at all.
-
Andrew, absolutely love the polished guage enclosures and the seat. Talk about putting huge effort into a build. You are all into this one big time. Really looking forward to showroom for sure on this one.
-
I found a photo of the car at the rebel race in the spring and the fairing appears to be body color gold, so it was probably still gold by the time they got to September.
-
Added some material to the front of the build to shore up some gaps here and there and finished the fairing at the quarter glasses. I can't tell if the fairing is raw aluminum or body color gold. Thats the trouble with captured you tube video photos. The colors get washed out a bit.