.jpg.b9265433dc8c3b550370b1d0e4e4d2fc.jpg)
MarkJ
-
Posts
4,698 -
Joined
-
Last visited
Content Type
Profiles
Forums
Events
Gallery
Everything posted by MarkJ
-
.jpg.b9265433dc8c3b550370b1d0e4e4d2fc.thumb.jpg.915f5b46e3c9402eeaa6972073121c87.jpg)
1963 Super Torque Ford
MarkJ replied to MarkJ's topic in WIP: Stock Cars (NASCAR, Super Stock, Late Model, etc.)

-
1963 Super Torque Ford
MarkJ replied to MarkJ's topic in WIP: Stock Cars (NASCAR, Super Stock, Late Model, etc.)
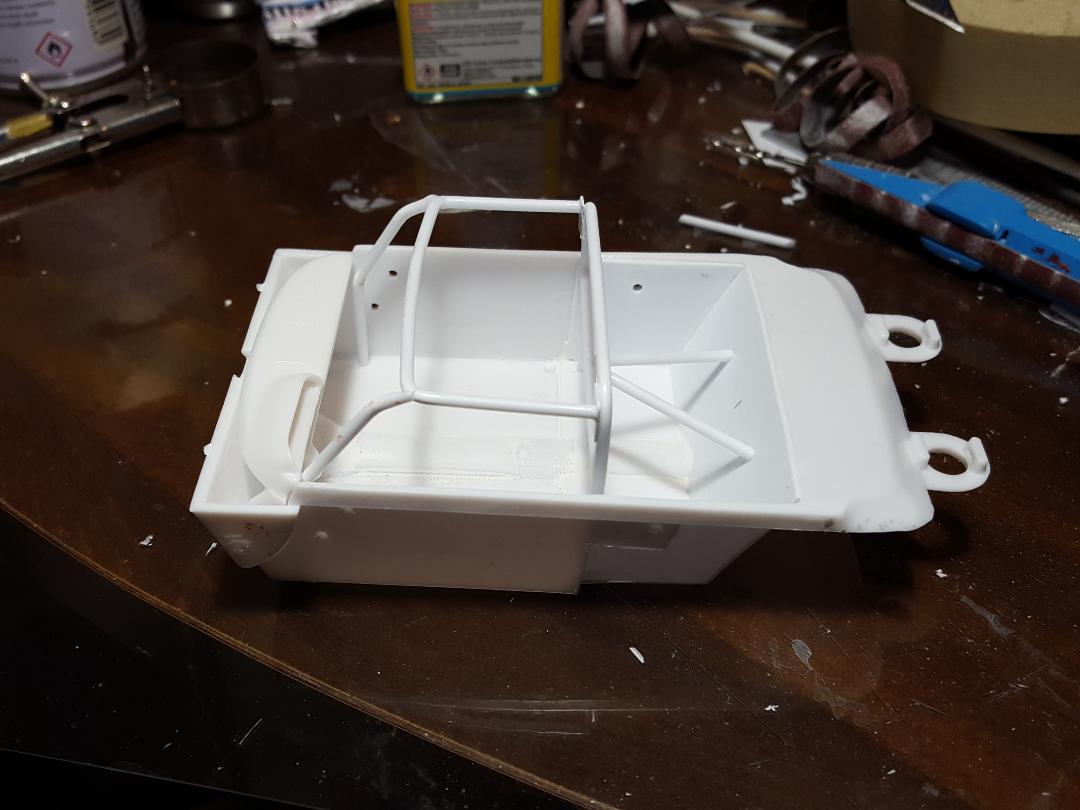
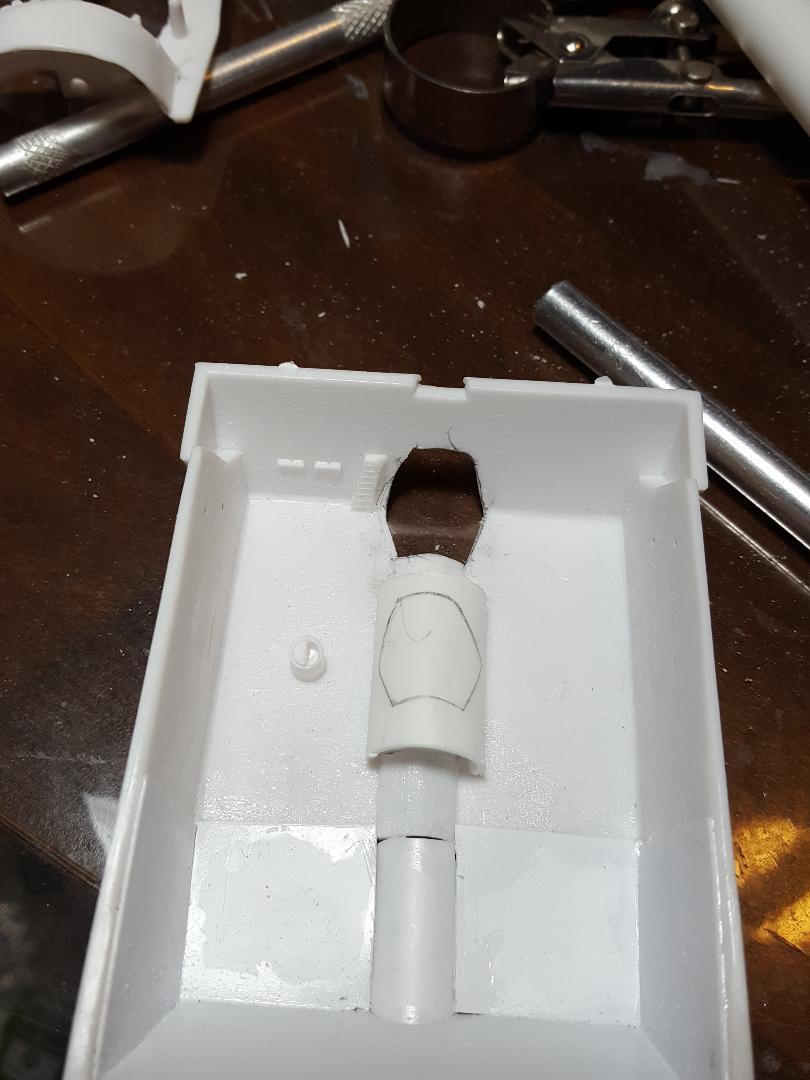
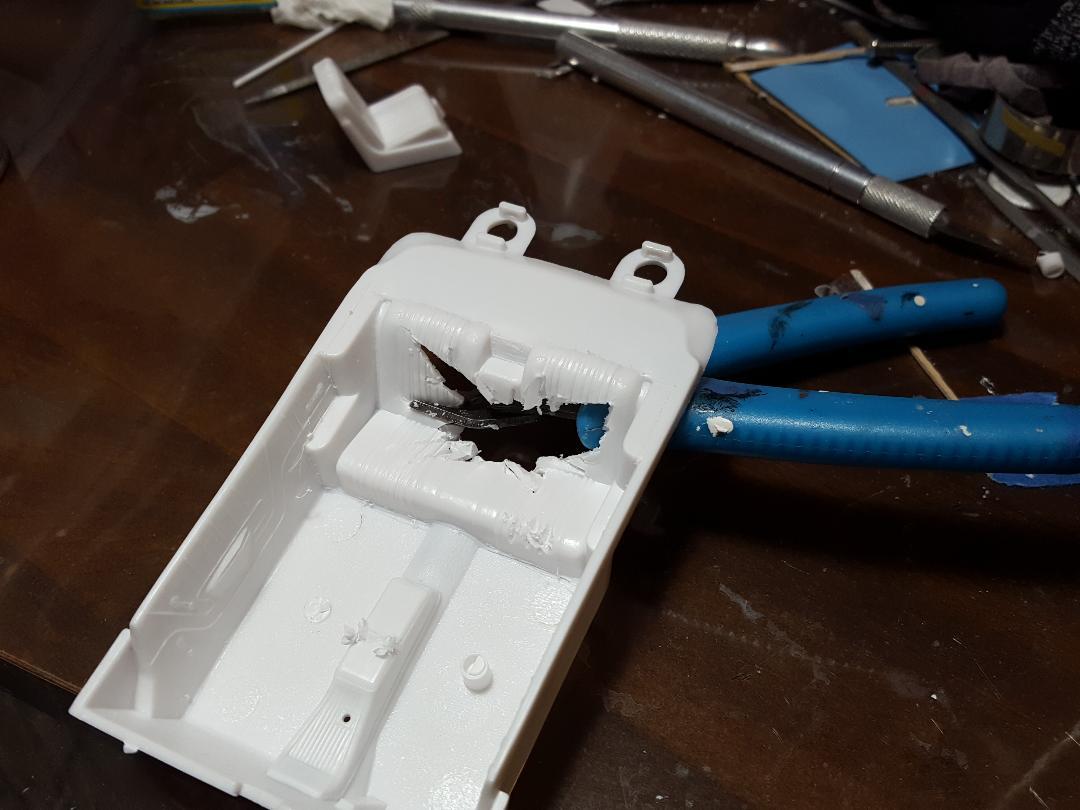
Got most of the cage done. Just a couple of more bars. I also started on the dash removing all the switches and opening up the area where the guages will go. There will be no handles on the door panels because all the side glass was removed from this car.
-
1963 Super Torque Ford
MarkJ replied to MarkJ's topic in WIP: Stock Cars (NASCAR, Super Stock, Late Model, etc.)
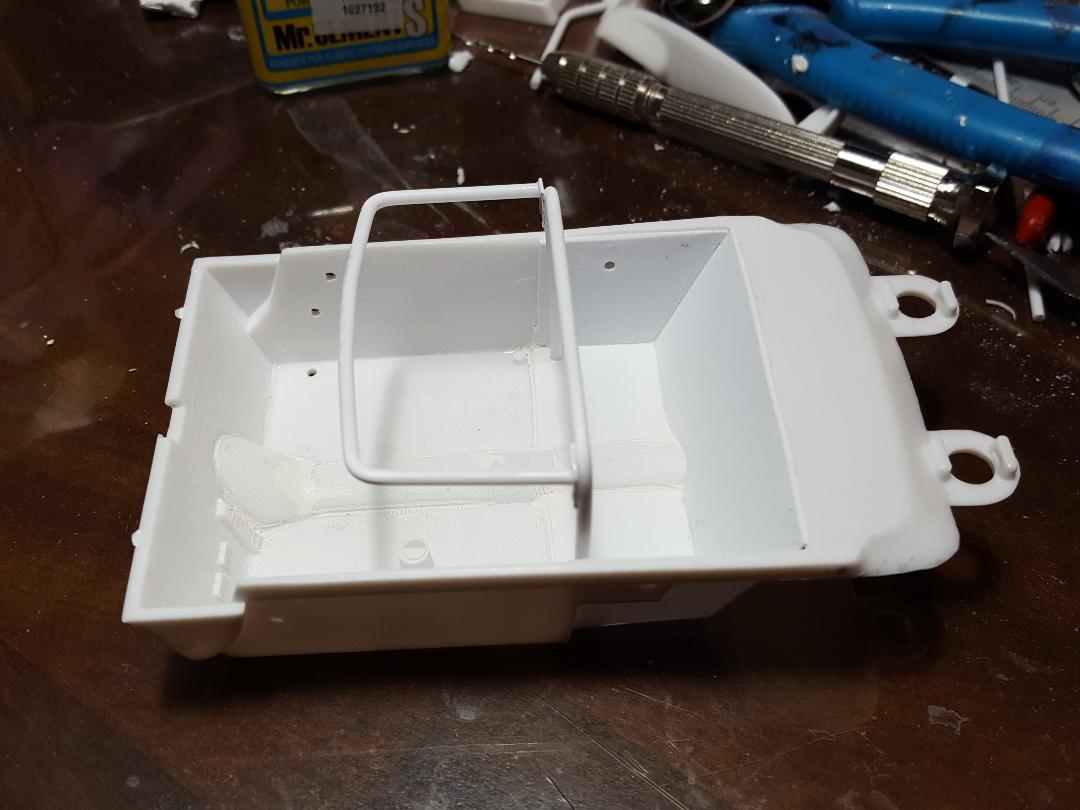
Got started on the cage. I'm using .080 rod this time because I feel it's closer to scale then the 7/32 tube, I was using.
-
1963 Super Torque Ford
MarkJ replied to MarkJ's topic in WIP: Stock Cars (NASCAR, Super Stock, Late Model, etc.)
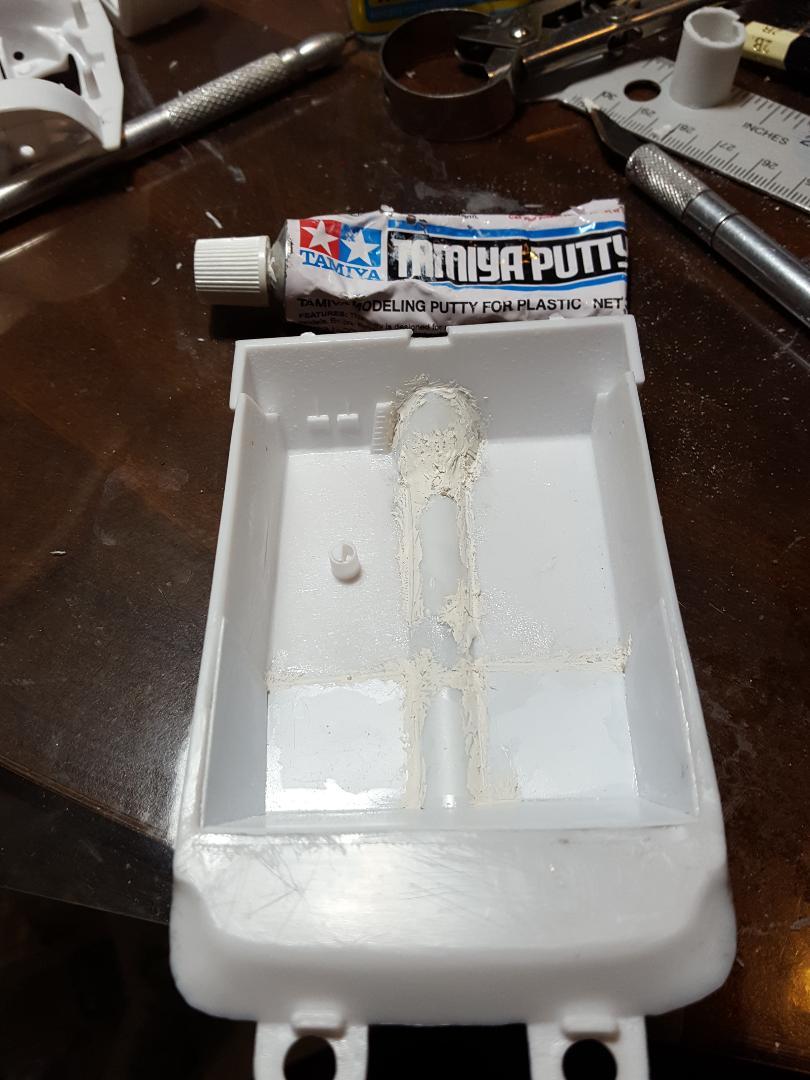
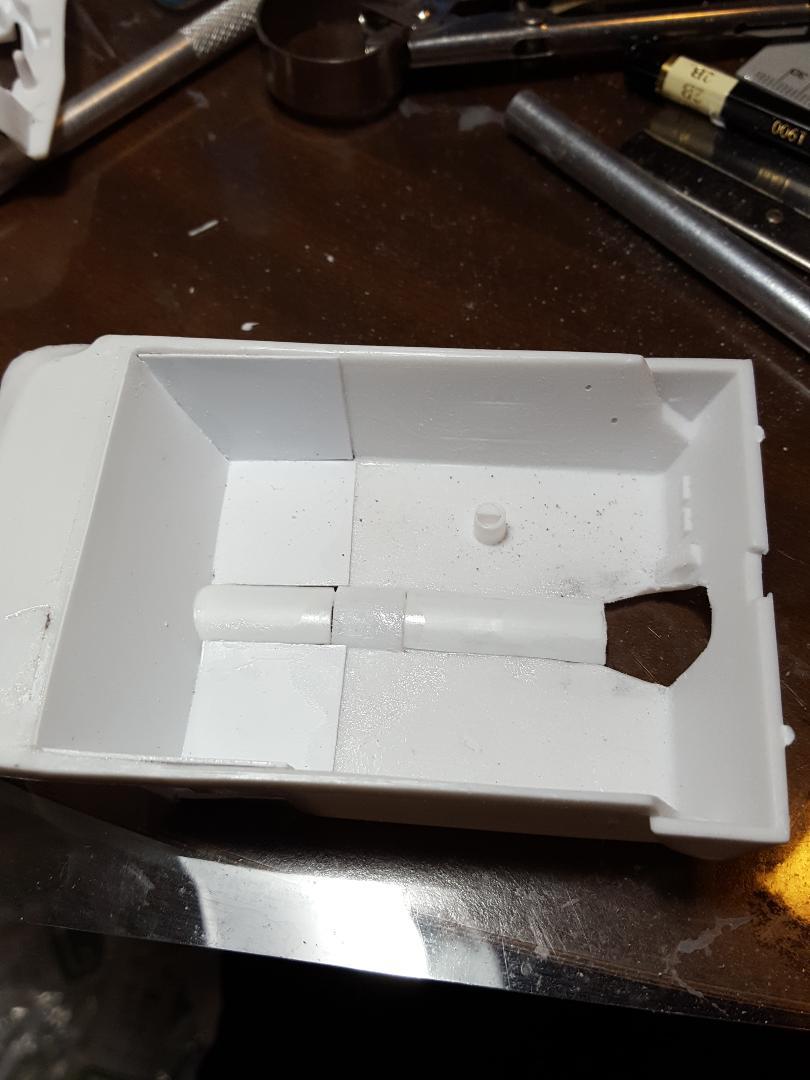
Finished the tunnel and added some putty. Next will be the cage and dash. Eventually the shifter and fire extinguisher and seat after it has the harnesses and bolster attached.
-
Salvinos JR 1971 Petty Plymouth
MarkJ replied to TooOld's topic in Stock Cars (NASCAR, Super Stock, Late Model, etc.)
Yes, I have a link and I will P.M. it to you so as not to ruffle any feathers here at MCM. A lot of guys over there that don't frequent here would love to see your build. -
1963 Super Torque Ford
MarkJ replied to MarkJ's topic in WIP: Stock Cars (NASCAR, Super Stock, Late Model, etc.)
Thanks, Jim. Yes, it would. I guess some kits come with the rear seat separate and you can choose to leave it off, but usually its the way this one is. And sometimes you can choose to install a console or leave it off. -
Salvinos JR 1971 Petty Plymouth
MarkJ replied to TooOld's topic in Stock Cars (NASCAR, Super Stock, Late Model, etc.)
I don't know how I missed this. I followed the wip very carefully. Maybe I just caught it at Randy's. Anyhoo , fabulous build, Bob. The detail is amazing and the paint and cleanliness of build is through the roof. A really spectacular build and I learned of a good source of aluminum to use on my current build and beyond. Thanks for posting this fine model. -
1963 Super Torque Ford
MarkJ replied to MarkJ's topic in WIP: Stock Cars (NASCAR, Super Stock, Late Model, etc.)
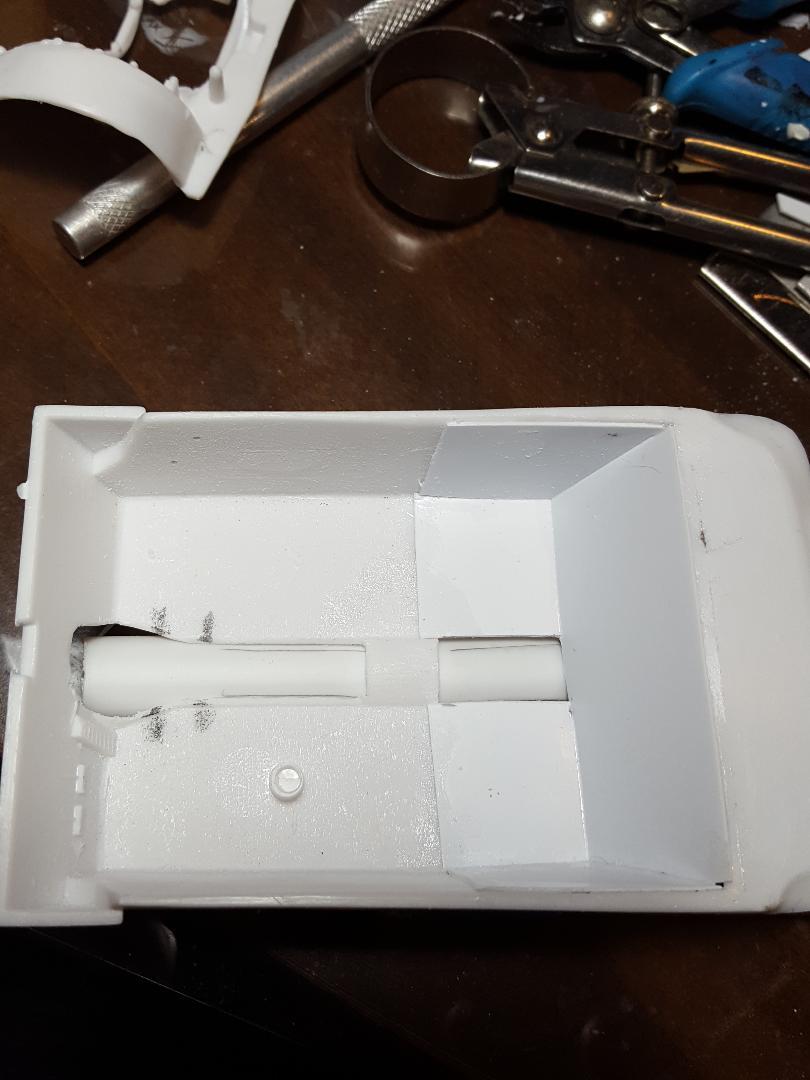
Moving right along. Almost have the tunnel completed.
-
1963 Super Torque Ford
MarkJ replied to MarkJ's topic in WIP: Stock Cars (NASCAR, Super Stock, Late Model, etc.)
Thanks, Johnny and Bob. I appreciate your interest in the build. -
1963 Super Torque Ford
MarkJ replied to MarkJ's topic in WIP: Stock Cars (NASCAR, Super Stock, Late Model, etc.)
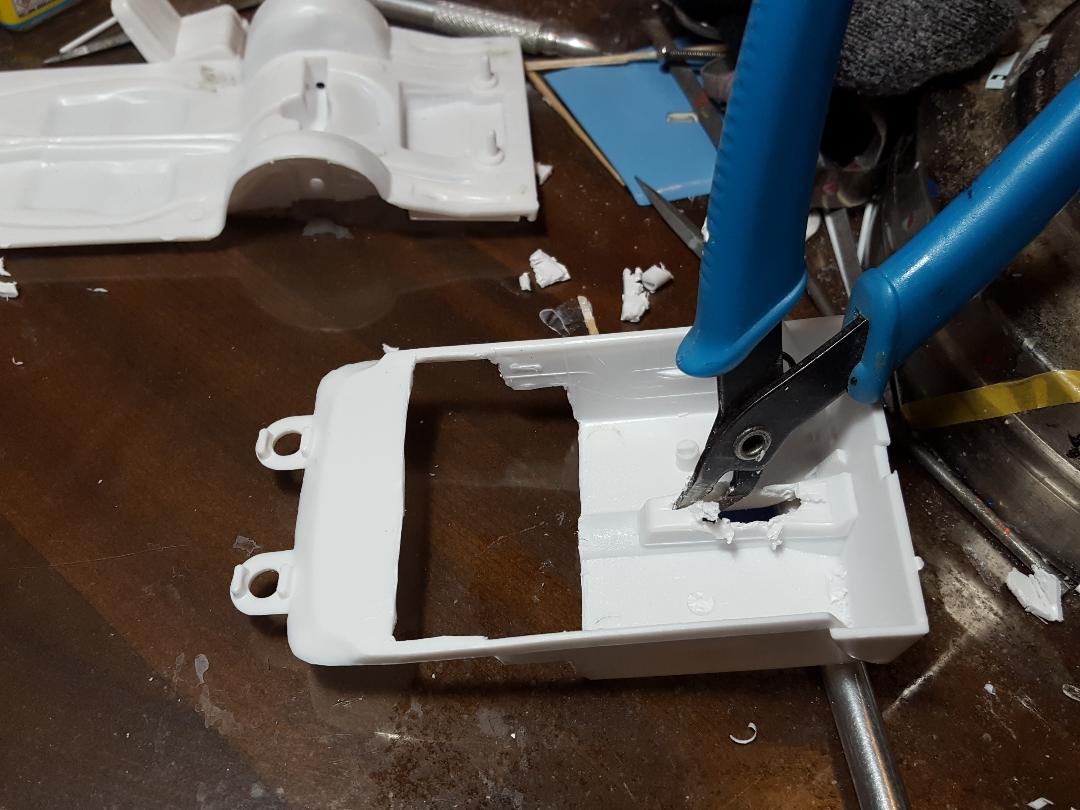
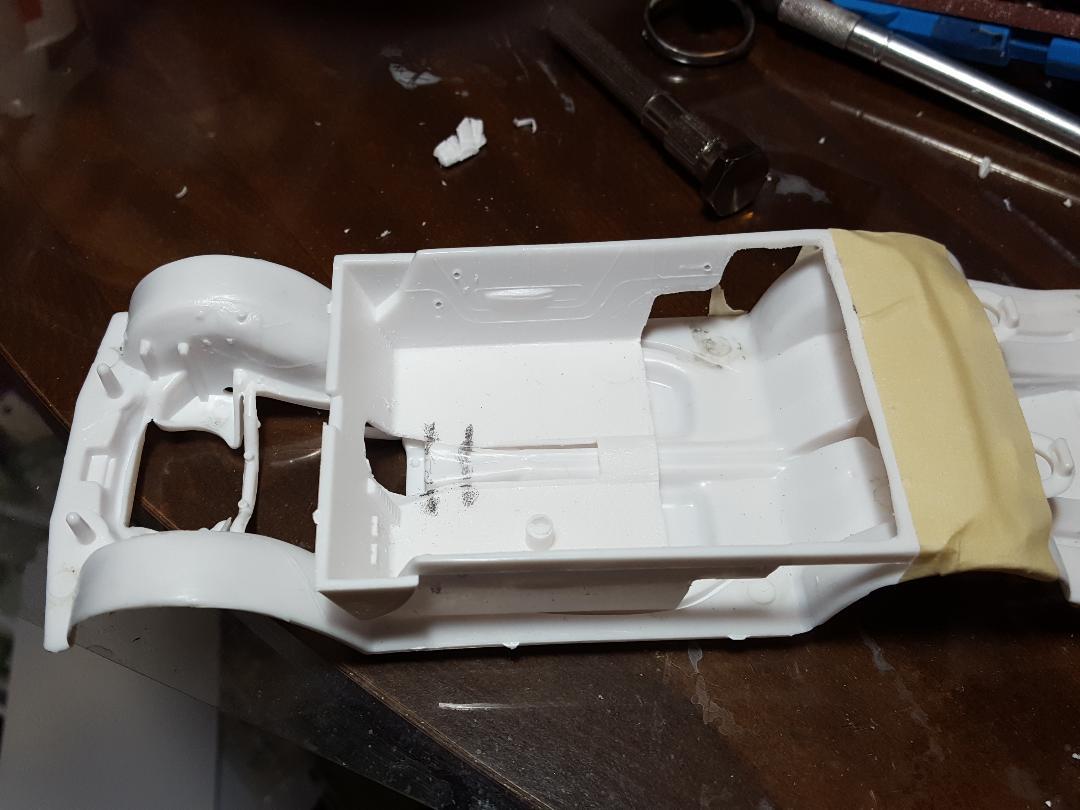
Removed the console and that portion of the drive shaft tunnel. Will rebuild the tub with styrene sheet and tube material for the tunnel. the demo went a lot faster using the sprue cutter.
-
Ferrari 275P - 1964 Le Mans Winner
MarkJ replied to Pierre Rivard's topic in Other Racing: Road Racing, Salt Flat Racers
October? Well, take care. Both of those projects sound great. -
Ferrari 275P - 1964 Le Mans Winner
MarkJ replied to Pierre Rivard's topic in Other Racing: Road Racing, Salt Flat Racers
So, Pierre. What's next on the agenda? And where will you be posting it? Inquiring minds need to know. -
1963 Super Torque Ford
MarkJ replied to MarkJ's topic in WIP: Stock Cars (NASCAR, Super Stock, Late Model, etc.)
Thanks, Gerald. Glad I'm basically through with the painting. Didn't turn out as well as I hoped, but I think the final product will be okay. -
1963 Super Torque Ford
MarkJ replied to MarkJ's topic in WIP: Stock Cars (NASCAR, Super Stock, Late Model, etc.)
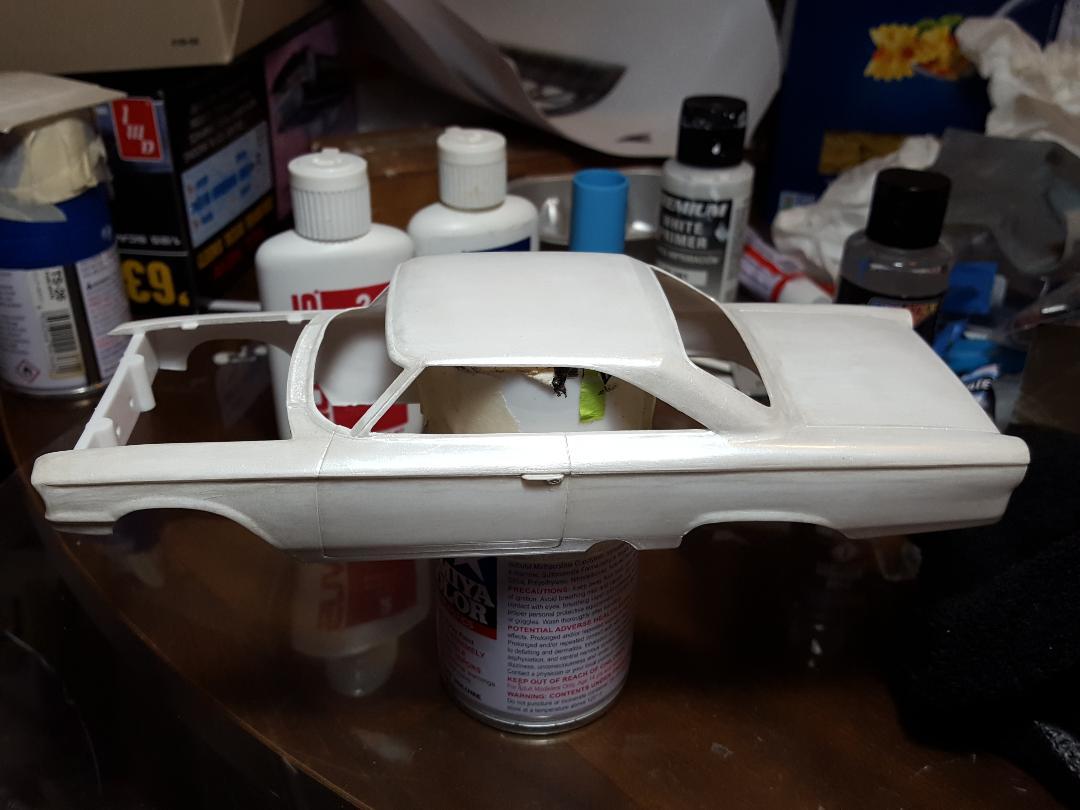
I put the second and final coat of clear on the body and will just let it sit for a while before I polish it with novus 2 and 3. I'm really going to try hard not to go through the clear into the paint. I started on the interior and decided to use the sprue cutter instead of an exacto knife to remove the back seat and the console. It went a lot quicker on the back seat doing this. I will clean it up with exacto and sanding sticks before I reform the tub with styrene sheets.
-
1963 Super Torque Ford
MarkJ replied to MarkJ's topic in WIP: Stock Cars (NASCAR, Super Stock, Late Model, etc.)
Thanks, Bob. I did just that. I will put another coat of clear on the whole model today and then let it sit a couple of days before I polish it. Will finally start on the interior tub. -
1963 Super Torque Ford
MarkJ replied to MarkJ's topic in WIP: Stock Cars (NASCAR, Super Stock, Late Model, etc.)
Thanks, Pierre. This Createx paint is thinner than Vallejo, so I had to adjust the thinning ratio to 50/50. I bought a wider brush also to do the body. It's a 3/4 inch. Both changes seemed to help. I will definitely be glad to get back to opaque paint for my next build. This pearlized paint is pretty but a lot more difficult to get on consistently. -
1963 Super Torque Ford
MarkJ replied to MarkJ's topic in WIP: Stock Cars (NASCAR, Super Stock, Late Model, etc.)
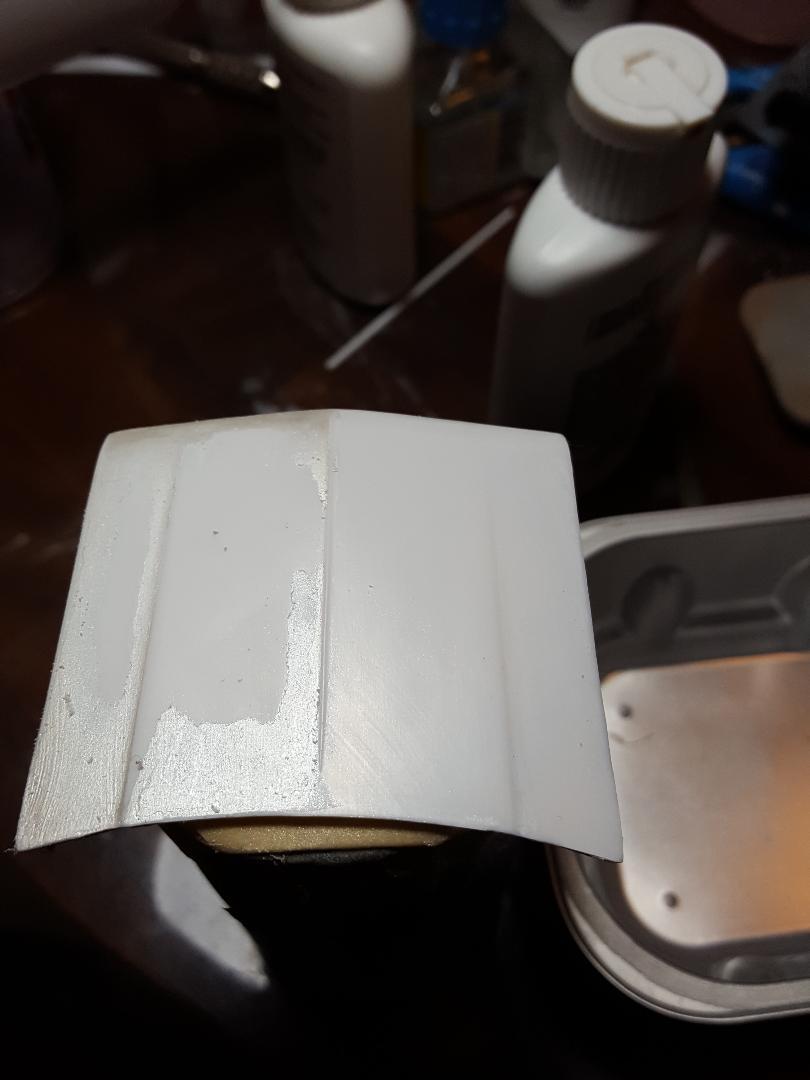
Primed and painted the hood. I thought I would put another coat of paint on, but I think I will go straight to clear. I don't want to mess the hood up again and so far, it looks pretty good.
-
1963 Super Torque Ford
MarkJ replied to MarkJ's topic in WIP: Stock Cars (NASCAR, Super Stock, Late Model, etc.)
Thanks, Gerald. Now let's see if I can keep from messing it up again. That's another good thing about acrylic paint. You can strip it rather easily with a toothbrush and some non-caustic nail polish remover. Right where you sit to build the model. -
Ferrari 275P - 1964 Le Mans Winner
MarkJ replied to Pierre Rivard's topic in Other Racing: Road Racing, Salt Flat Racers
There are no words to describe how absolutely beautiful and excellent this build really is. And to top it off this excellent paint job was delivered with a brush, a real brush, not an air brush. Pierre, you have done it again. Thank you for letting us mortals view your work. It is pure joy to look at. -
1963 Super Torque Ford
MarkJ replied to MarkJ's topic in WIP: Stock Cars (NASCAR, Super Stock, Late Model, etc.)
Yes, me too. I'm using nail polish remover, the less caustic type. Came off in about 30 minutes using a toothbrush.
-
1963 Super Torque Ford
MarkJ replied to MarkJ's topic in WIP: Stock Cars (NASCAR, Super Stock, Late Model, etc.)
I've come to the realization that I am going to have to strip the hood. There is no fixing it in the condition it's in now. -
Camaro Late Model
MarkJ replied to raisin27's topic in Stock Cars (NASCAR, Super Stock, Late Model, etc.)
Excellent build, Mike. Super clean build, beautiful paint and decal work. -
Looks perfect to me as usual, Pierre. Like Helmut says, can't wait to see the finished model.
-
1963 Super Torque Ford
MarkJ replied to MarkJ's topic in WIP: Stock Cars (NASCAR, Super Stock, Late Model, etc.)
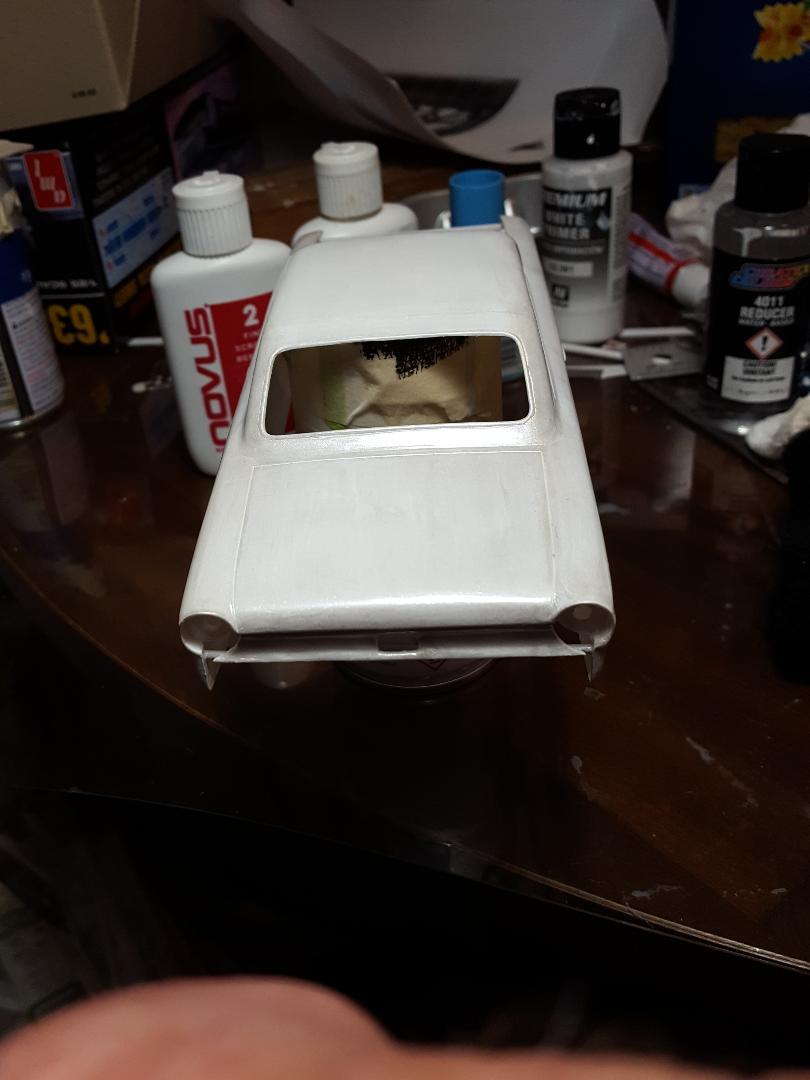
Got two coats of clear on and polished with novus 1&2. Still trying to fix the hood that the thinner messed up. I really want to put the body aside so I can get on the interior.
-
Another superb upgrade to this build. That dash is one of a kind and awesome.

.jpg.95d6fdf11bf2968e51141c4248d09c8f.jpg)