.jpg.b9265433dc8c3b550370b1d0e4e4d2fc.jpg)
MarkJ
-
Posts
4,693 -
Joined
-
Last visited
Content Type
Profiles
Forums
Events
Gallery
Everything posted by MarkJ
-
.jpg.b9265433dc8c3b550370b1d0e4e4d2fc.thumb.jpg.915f5b46e3c9402eeaa6972073121c87.jpg)
Jaguar E-Type 1962 Le Mans
MarkJ replied to Pierre Rivard's topic in WIP: Other Racing: Road Racing, Land Speed Racers
Wow, Yes, I understand not polishing the color coat but to get it on that smooth with just the paint and the clear is phenomenal. A light polish of the clear will make it extremely nice. You could probably just use some liquid polish. Its more forgiving than the paper or the pads. Just don't go through the clear and the paint into the primer. I have done that before. But it's pretty easy to fix if you do. Another plus about brush painting. -
Jaguar E-Type 1962 Le Mans
MarkJ replied to Pierre Rivard's topic in WIP: Other Racing: Road Racing, Land Speed Racers
Oh, Yeah. You did it again Pierre. Looks like a perfect match to me. I knew the polishing would deepen the color and make it just right. -
Jaguar E-Type 1962 Le Mans
MarkJ replied to Pierre Rivard's topic in WIP: Other Racing: Road Racing, Land Speed Racers
Looks like it will be perfect when you get it glass smooth. No brush strokes that I can see at all. -
Jaguar E-Type 1962 Le Mans
MarkJ replied to Pierre Rivard's topic in WIP: Other Racing: Road Racing, Land Speed Racers
Good. I'm very glad to hear that. Sometimes being exactly right about a build actually detracts from the overall look of the build. -
Jaguar E-Type 1962 Le Mans
MarkJ replied to Pierre Rivard's topic in WIP: Other Racing: Road Racing, Land Speed Racers
Oops, I guess you're stuck with the red ones. Were they actually red, or red oxide primered, and never got the silver or gray or whatever it was put on them? -
Jaguar E-Type 1962 Le Mans
MarkJ replied to Pierre Rivard's topic in WIP: Other Racing: Road Racing, Land Speed Racers
I'd go the elegance route. Those wheels could not have stayed on the car for the whole 24 hours, could they? -
Please don't laugh..
MarkJ replied to Stocks05's topic in Stock Cars (NASCAR, Super Stock, Late Model, etc.)
Blake, I tried hard to find something to laugh about but all I saw was something to enjoy looking at. Excellent build. Welcome to the forum and hope to see any new builds you want to do in the wip forum. -
Jaguar E-Type 1962 Le Mans
MarkJ replied to Pierre Rivard's topic in WIP: Other Racing: Road Racing, Land Speed Racers
Thats some awesome modeling you got going on there. Webers always look super fine on any engine. -
2022 NextGen Camaro part deux
MarkJ replied to MarkJ's topic in WIP: Stock Cars (NASCAR, Super Stock, Late Model, etc.)
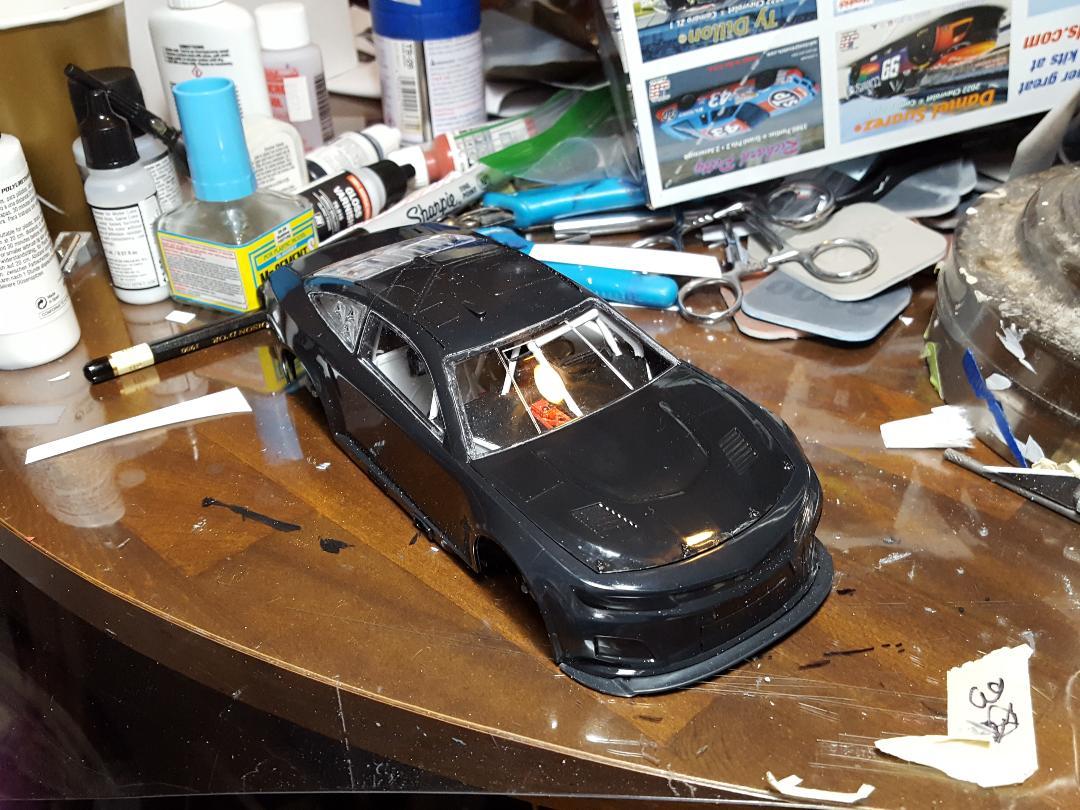
These decals are getting really frustrating. It takes a lot of daubing with micro sol to get them to lay down properly and don't use future as a color coat. or apply future before you decal. Micro sol attacks it and turns it white if you let it stay on the surface too long. So much for that experiment. I will soldier on and finish this thing but I'm pretty sure this will be the last Nextgen model I do. -
Jaguar E-Type 1962 Le Mans
MarkJ replied to Pierre Rivard's topic in WIP: Other Racing: Road Racing, Land Speed Racers
I'm loving the very top picture if you could duplicate that. That really pops to me, as they say. I know you will get it right. You always do. -
Richard Petty's 1971 Roadrunner
MarkJ replied to Merkur XR4Ti's topic in Stock Cars (NASCAR, Super Stock, Late Model, etc.)
Excellent build as always, Steve. It's great that Salvino's brought this car back for us to build. The old MPC's are hard to find and very expensive if you do. -
Excellent, super clean work, Chris. Always like all the Buicks that competed back then. I have an old Buick kit I need to do, and this is giving me much inspiration.
-
Old Nascar Rookie division car
MarkJ replied to presnell's topic in Stock Cars (NASCAR, Super Stock, Late Model, etc.)
Glad to see your work posted, Jim. The 49 Ford and Garage diorama looks great, and you know its authentic, because you lived that life and witnessed it all. -
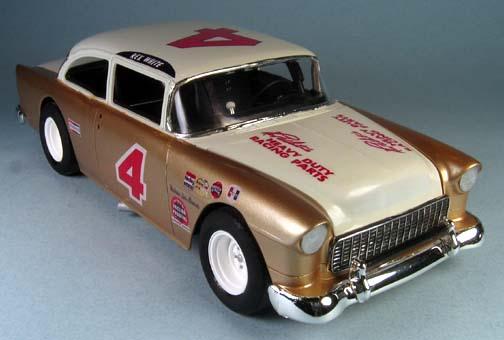
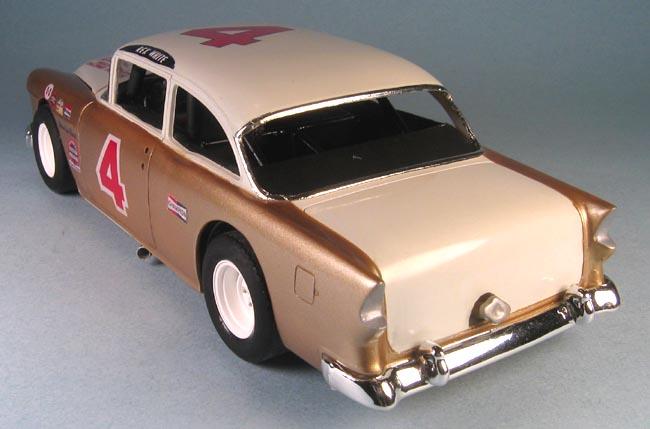
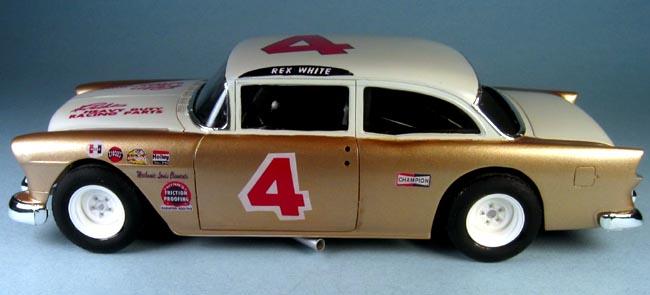
Great looking models and garage. Rex White ran the X on one of his 56 Chevys when he first got into Grand National racing which is now cup.
-
Great job on this, and I like the wear and tear damage you added that is not over the top, but adds realism.
-
2022 NextGen Camaro part deux
MarkJ replied to MarkJ's topic in WIP: Stock Cars (NASCAR, Super Stock, Late Model, etc.)
Ok, I'm decaling the model and I get to the right roof rail panel Grey scale camo decal. I had already put on the left side, and it fit perfectly. The right side had no chance of fitting. They really messed up on it. Somehow by cutting it in 2 places I was able to fit it together and make it work. Maybe Salvino's knows about this or maybe I'm the first to do one of these or maybe everybody has realized they have to cut the decal in 2 places to get it to work, but its definitely not right. I built the sister car to this one already which has the same grey scale camo decals and the right roof rail camo decal fit perfectly on that model. I don't know if I should tell Salvino's about this or wait for somebody else to tell them. Hopefully this is the only one that doesn't fit. -
Jaguar E-Type 1962 Le Mans
MarkJ replied to Pierre Rivard's topic in WIP: Other Racing: Road Racing, Land Speed Racers
Thanks for those tips. I need to focus on getting it on smoother because like you said it's not really a good filler primer. I don't think I have used water at those percentages so maybe that will be the solution to my problems. -
1991 Harry Gant Oldsmobile
MarkJ replied to MarkJ's topic in Stock Cars (NASCAR, Super Stock, Late Model, etc.)
Post away, Jim. We all love reference pictures around here. They are getting harder and harder to find. Especially from the 50's and 60's -
Jaguar E-Type 1962 Le Mans
MarkJ replied to Pierre Rivard's topic in WIP: Other Racing: Road Racing, Land Speed Racers
Man, you're right. That primer looks perfect. Is that Vallejo or did you find something better? I'm not real impressed with the Vallejo primers. Need to find something else to brush on. -
1991 Harry Gant Oldsmobile
MarkJ replied to MarkJ's topic in Stock Cars (NASCAR, Super Stock, Late Model, etc.)
Thanks, Jim. Again, it's great to have some input from a guy who really lived this sport back in the day. Looking forward to you posting some builds here at the forum. -
1991 Harry Gant Oldsmobile
MarkJ replied to MarkJ's topic in Stock Cars (NASCAR, Super Stock, Late Model, etc.)
Here is a model I did of that car.
-
1991 Harry Gant Oldsmobile
MarkJ replied to MarkJ's topic in Stock Cars (NASCAR, Super Stock, Late Model, etc.)
Thanks, Jim, for that inside story. No wonder he dominated so much in that 55. I heard he won over 20 some races in 1965 in that car. But he probably didn't have that setup he had in 1967 yet. -
1991 Harry Gant Oldsmobile
MarkJ replied to MarkJ's topic in Stock Cars (NASCAR, Super Stock, Late Model, etc.)
Thanks for weighing in Jim. I feel honored that a real person from the sport we are so interested in, Nascar racing, shared some real-life info about one of my builds. Thank you very much for your comment. It is so much appreciated. -
Jaguar E-Type 1962 Le Mans
MarkJ replied to Pierre Rivard's topic in WIP: Other Racing: Road Racing, Land Speed Racers
I'm really liking the extra goodies. Especially the cool looking mudflaps. Can't wait to see some color coats on this baby. -
2022 NextGen Camaro part deux
MarkJ replied to MarkJ's topic in WIP: Stock Cars (NASCAR, Super Stock, Late Model, etc.)
Got the glass installed except for the left front side glass. I wanted to keep the body set down over the chassis till I'm sure the windshield glue is cured completely. If you try to install the windshield on the body with it not in place, it will not fit correctly. At least that is what I have discovered. The body has to be bowed out a bit to get the windshield to fit flush.