.jpg.b9265433dc8c3b550370b1d0e4e4d2fc.jpg)
MarkJ
-
Posts
4,688 -
Joined
-
Last visited
Content Type
Profiles
Forums
Events
Gallery
Everything posted by MarkJ
-
.jpg.b9265433dc8c3b550370b1d0e4e4d2fc.thumb.jpg.915f5b46e3c9402eeaa6972073121c87.jpg)
1974 Camaro , continued
MarkJ replied to MarkJ's topic in WIP: Other Racing: Road Racing, Land Speed Racers
Thanks, Carl. Yes, those are the wheels I made. I couldn't find any minilites that looked like these in the aftermarket. Too bad P.P.P. doesn't offer them. I started on the decaling yesterday, so it shouldn't be too much longer. -
1974 Camaro , continued
MarkJ replied to MarkJ's topic in WIP: Other Racing: Road Racing, Land Speed Racers
As long as your model is from the seventies, it will be great. That's when the rope type window nets were used. You can borrow anything I do. it would be an honor if you did. They might have been used in the eighties too. I'm not really sure. -
1974 Camaro , continued
MarkJ replied to MarkJ's topic in WIP: Other Racing: Road Racing, Land Speed Racers
Just need to paint it.
-
1974 Camaro , continued
MarkJ replied to MarkJ's topic in WIP: Other Racing: Road Racing, Land Speed Racers
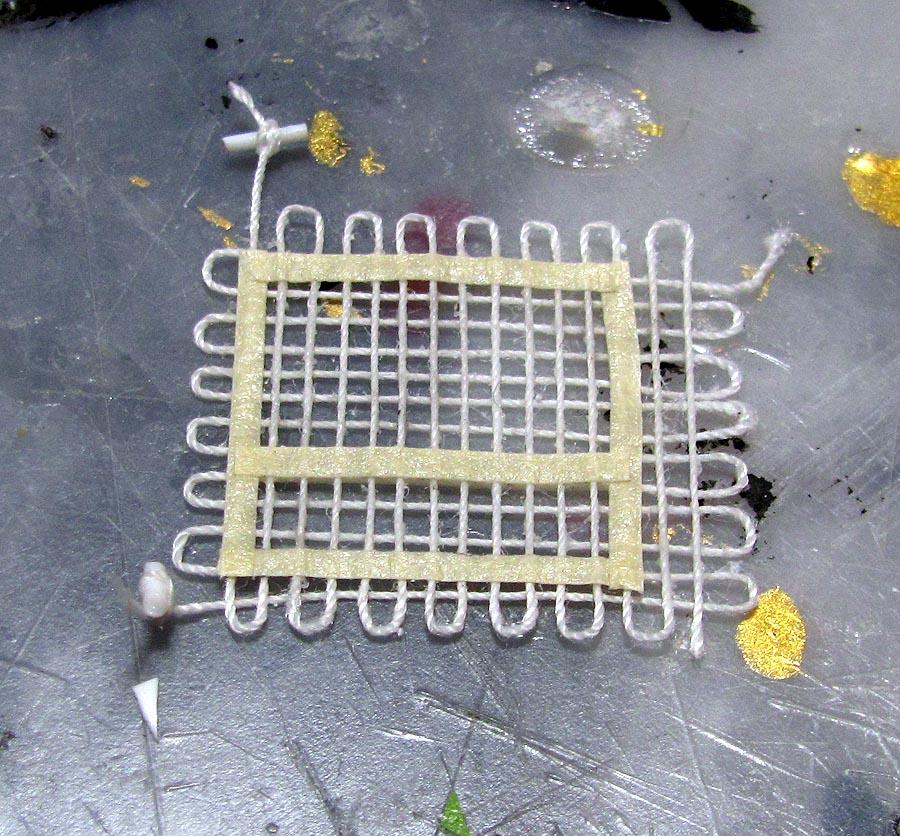
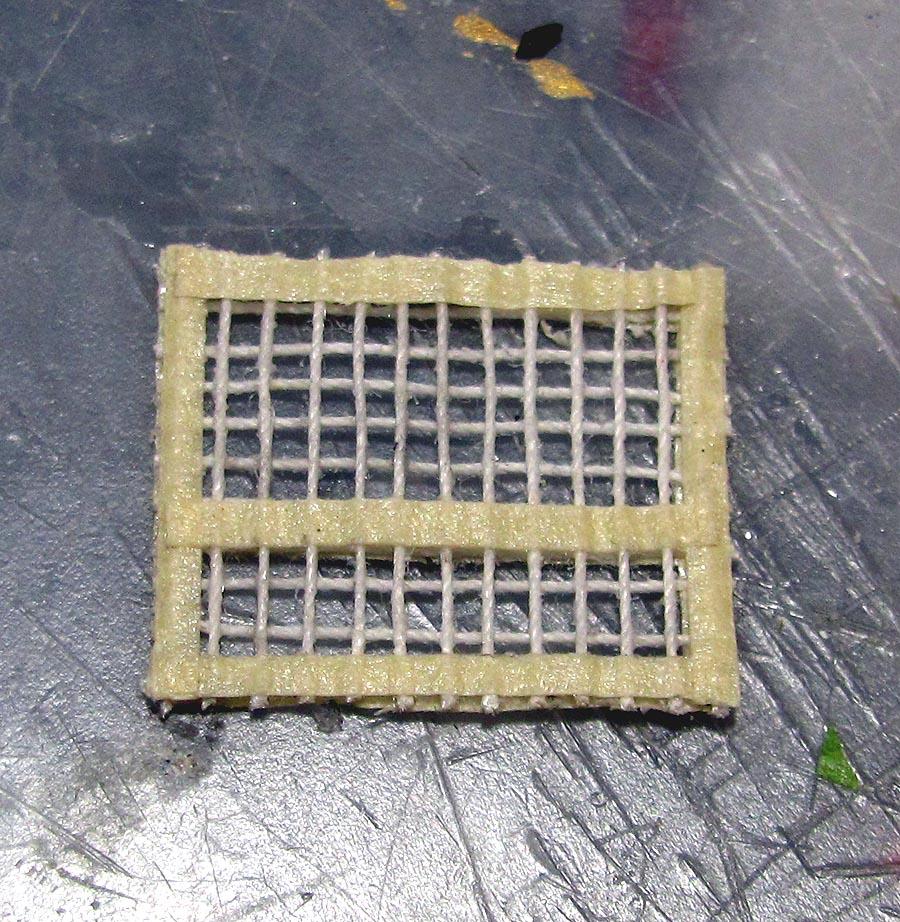
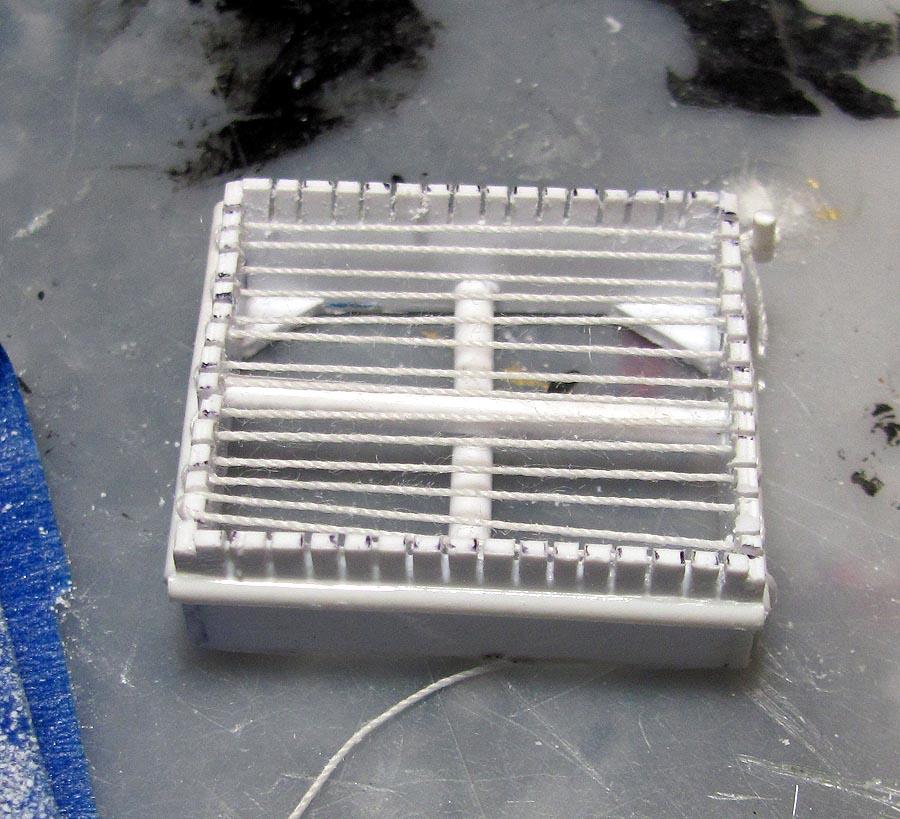
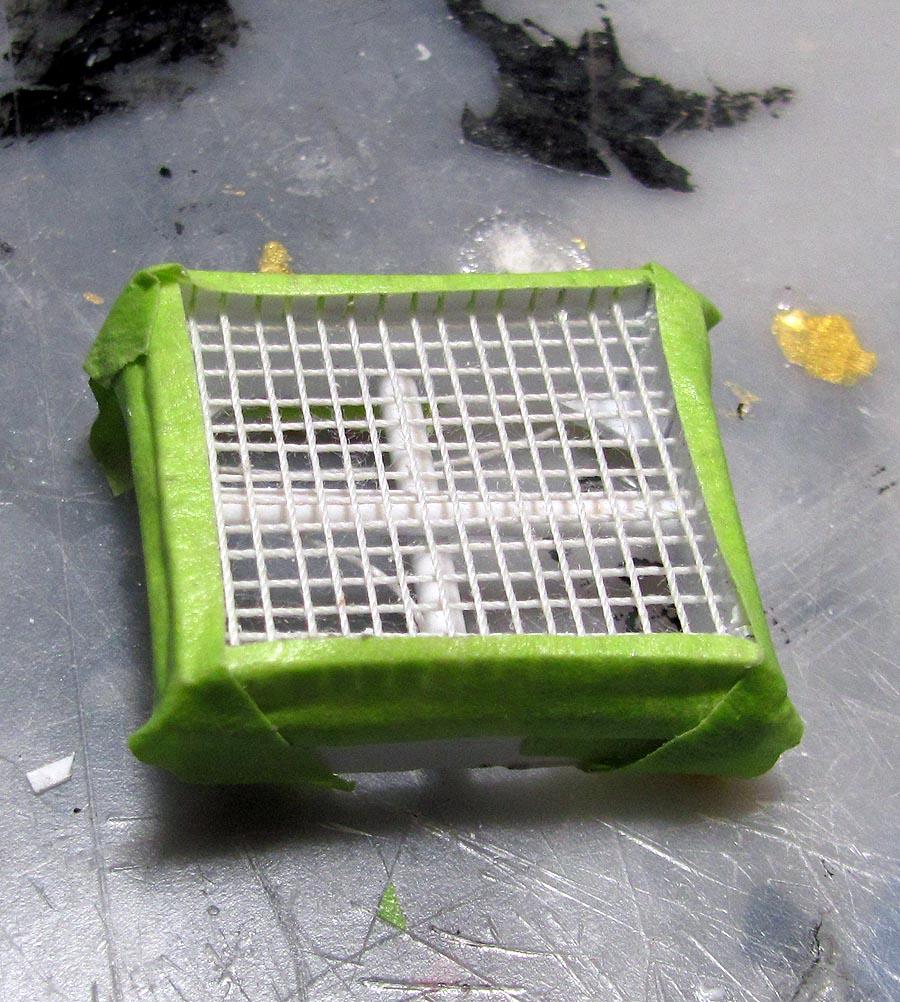
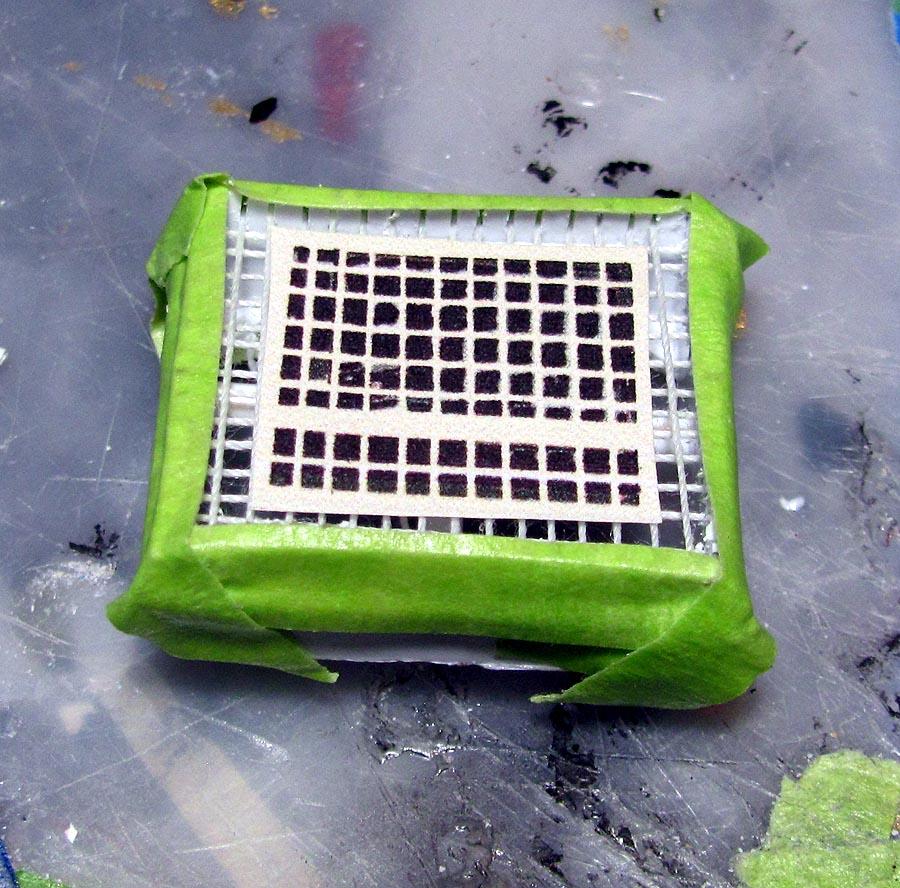
I should have explained, that is a printed-out paper version of the real size of the window net, scaled down from a photo of the real net in the car I am building. The loom is an inch tall and wide, and the scale size of the net is about 3/4 of an inch tall and wide. The borders are 1/16 an inch tape I will cut out from some tan masking tape and then paint with white vallejo acrylic primer and paint. I coated the net with elmers glue to get all the threads to adhere to each other. Makes the net stiff and flat but it would fall apart when I take it out of the loom if I didn't. I was thinking about weaving it so to speak using a needle, but the loom is so small that would be impossible for me. Maybe a young guy with an enormous amount of finger dexterity could get it done. -
Thats pretty neat. I had no idea all those things were available. Great job on the bench and pallets.
-
Wow, Pierre. I am so impressed with this diorama in progress. Did you scratch build all these items I am seeing? This is going to be awesome for sure when finished.
-
Awesome Torino, Pierre. Glad to see your post over here. Your work definitely needs to be shared at more forums.
-
1974 Camaro , continued
MarkJ replied to MarkJ's topic in WIP: Other Racing: Road Racing, Land Speed Racers
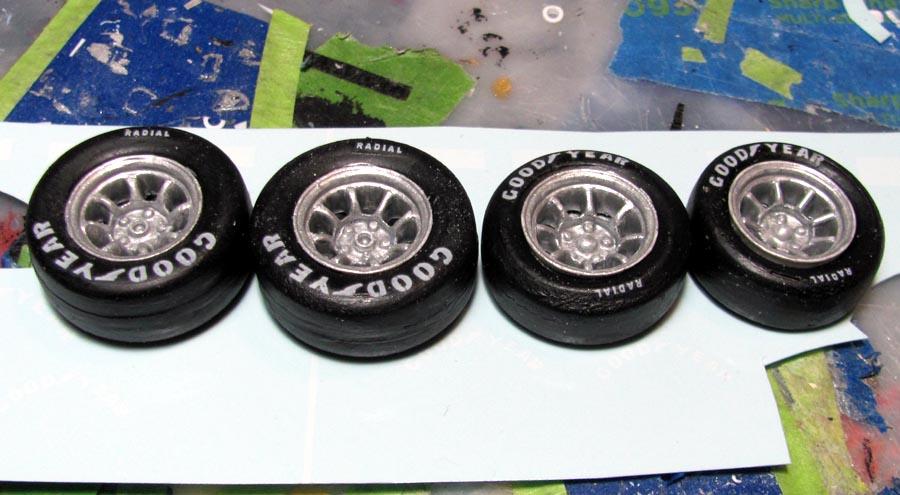
I know I said no more wip pictures, but I wanted to share the finished tire/wheel assemblies and the loom I made to make the window net. I borrowed Drew Hierwaters creation from an article he wrote for Scale Auto Magazine. I added a few features to mine to stiffen it up. This rope type net was used in the seventies.
-
1974 Camaro , continued
MarkJ replied to MarkJ's topic in WIP: Other Racing: Road Racing, Land Speed Racers
Thanks, Pierre. I thought I would be finished with the build part today, but I'm not pleased with the window net I made and will make a new jig to create another one. So hopefully tomorrow I can decal it. -
1964 SCCA Corvette W.I.P.
MarkJ replied to MarkJ's topic in WIP: Other Racing: Road Racing, Land Speed Racers
Thats good. I still see some in Hobby Lobby. That's what I used. -
1964 SCCA Corvette W.I.P.
MarkJ replied to MarkJ's topic in WIP: Other Racing: Road Racing, Land Speed Racers
Maxx, be sure to post a wip so we can follow along on your journey. Thanks for the kind word. -
The rest of the 2021 field
MarkJ replied to satterwhite78's topic in Stock Cars (NASCAR, Super Stock, Late Model, etc.)
All excellent builds. Never seen the Robbins green version before. -
1974 Camaro , continued
MarkJ replied to MarkJ's topic in WIP: Other Racing: Road Racing, Land Speed Racers
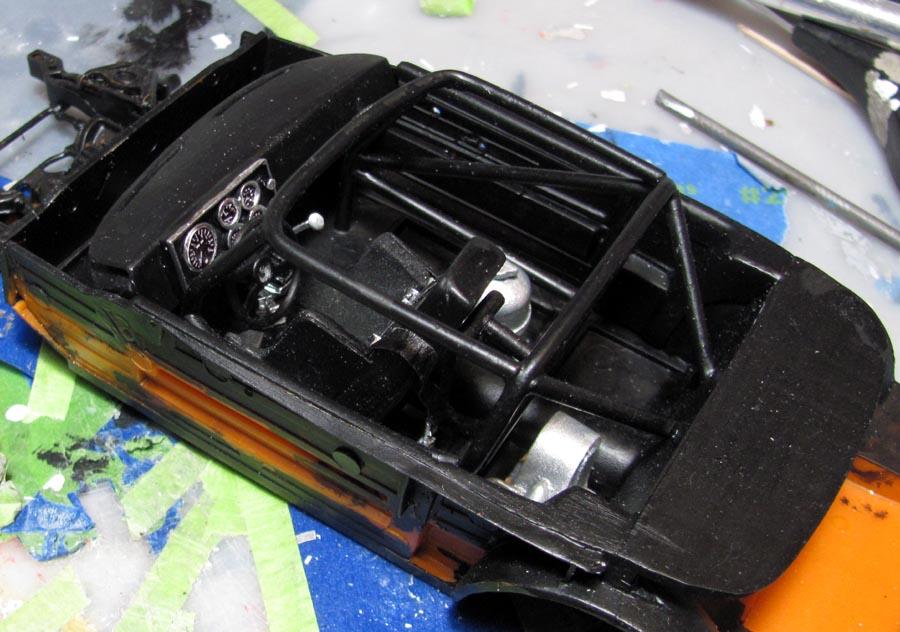
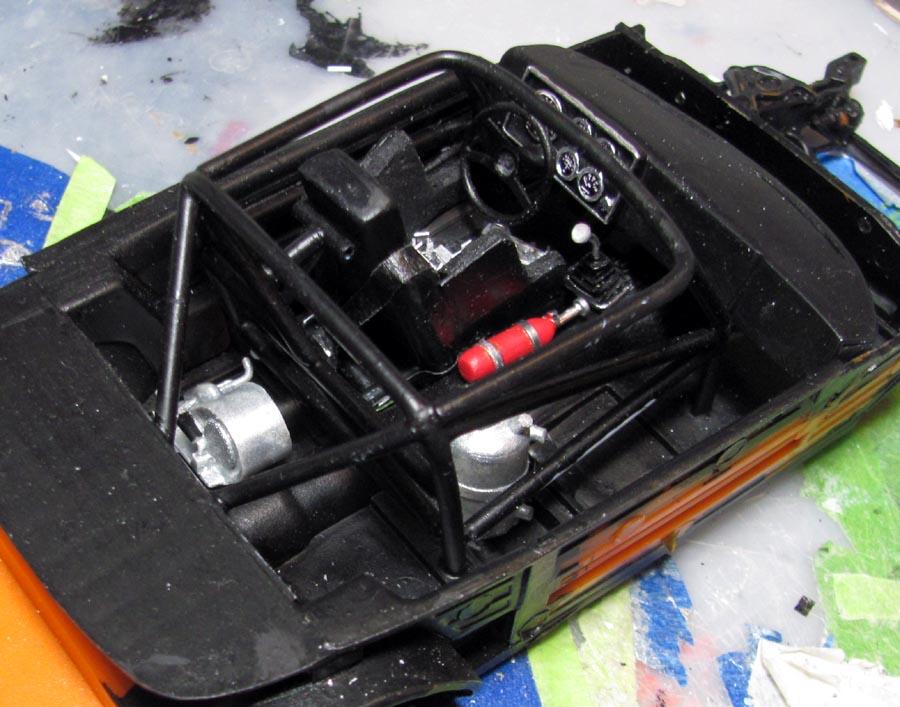
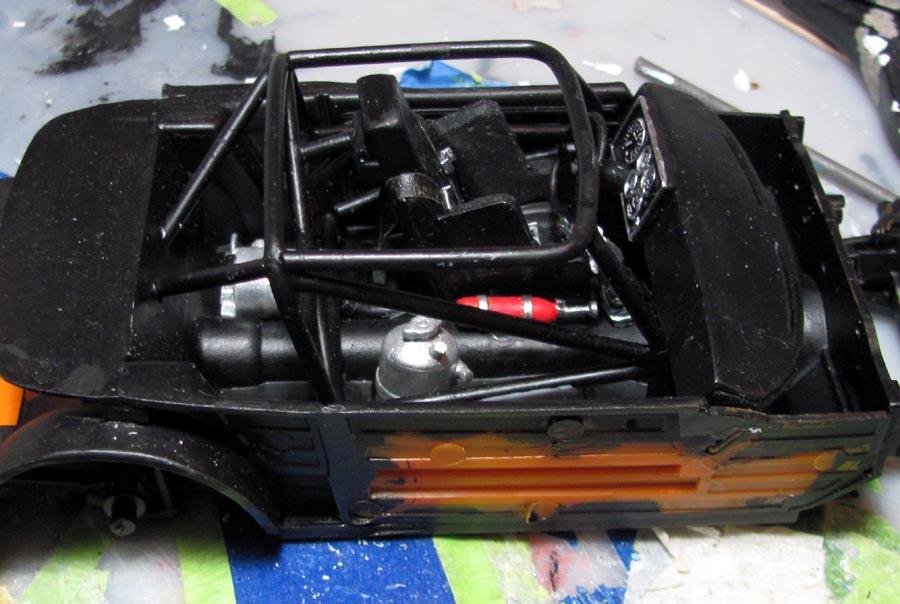
Almost finished. Just have to finish the rear axle oil pump. Install the taillight lenses. Install the left front headlight pod. Install the grille. Install the front bumper and air dam. Install the rear bumper. install the back glass straps. Decal the model and then future the model. -
Excellent build. I've always wanted to do an alternate history putting Rex White in a 64 Chevy that happened when Chevy decided not to drop out of nascar in 1963. Can't get enough inspiration to get it done.
-
+Finished Jimmy Means build
MarkJ replied to Mike Stem's topic in Stock Cars (NASCAR, Super Stock, Late Model, etc.)
Wow, That's beautiful. Super clean build. -
1974 Camaro , continued
MarkJ replied to MarkJ's topic in WIP: Other Racing: Road Racing, Land Speed Racers
I'm finally at the put the model together stage, so no more wip pictures. the next picture you will see, will be a finished photo and a link to the rest of them. -
1974 Camaro , continued
MarkJ replied to MarkJ's topic in WIP: Other Racing: Road Racing, Land Speed Racers
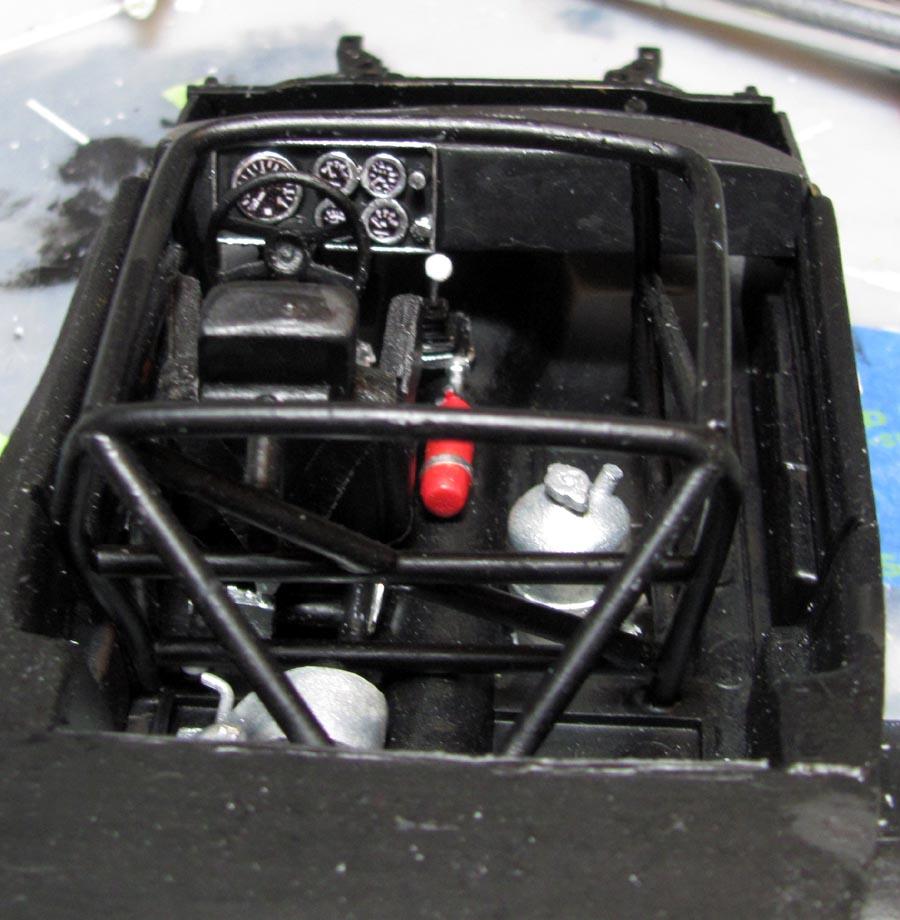
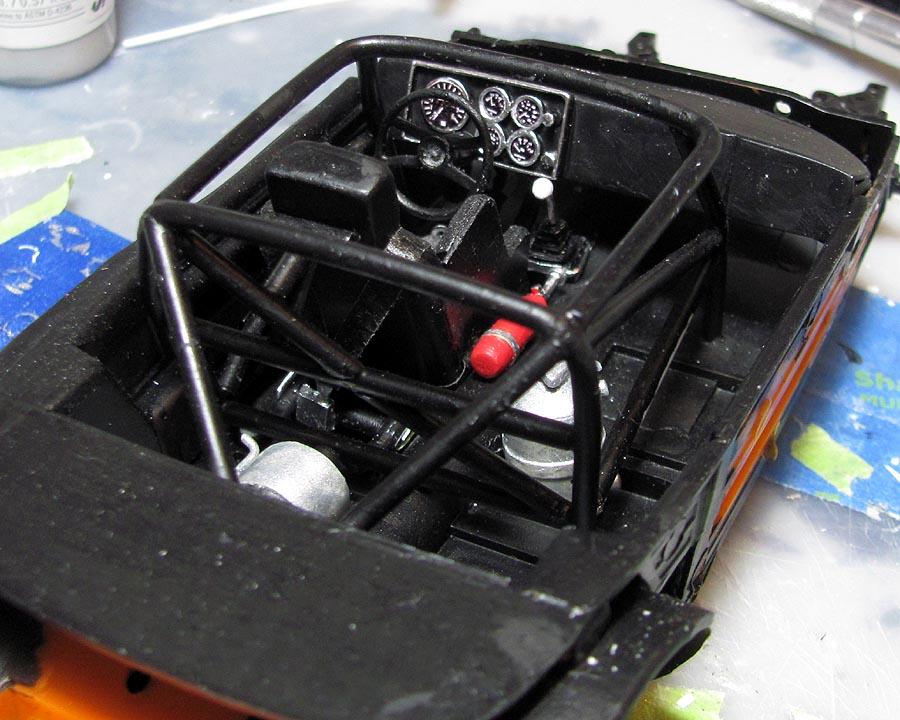
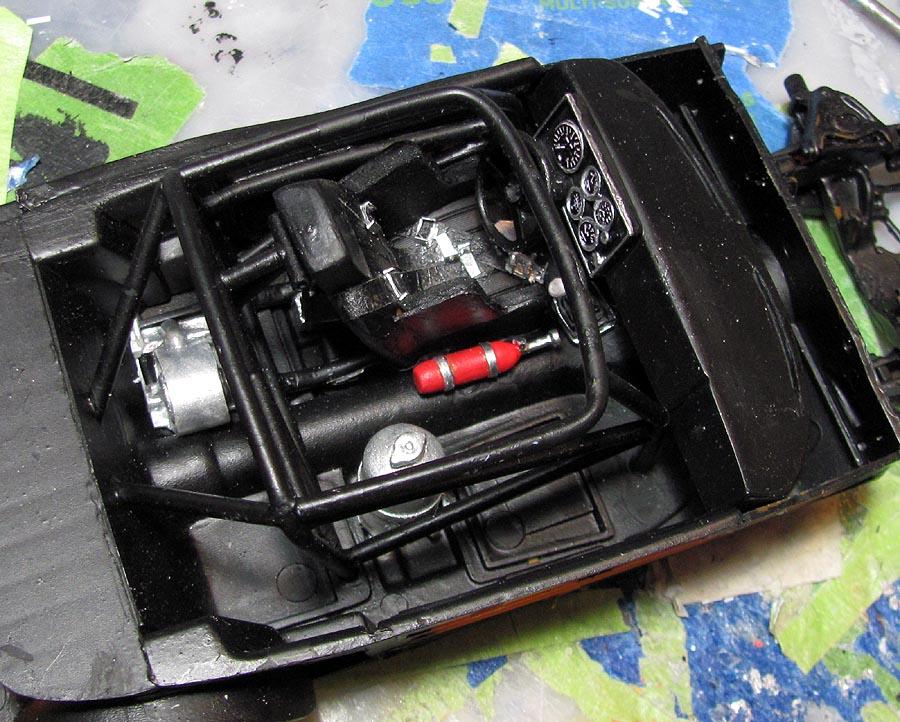
Thanks, Pierre. I know the cage looks funny but that's the way the real car was built. Go figure -
1974 Camaro , continued
MarkJ replied to MarkJ's topic in WIP: Other Racing: Road Racing, Land Speed Racers
Thank you, Carl. Much appreciated. -
1974 Camaro , continued
MarkJ replied to MarkJ's topic in WIP: Other Racing: Road Racing, Land Speed Racers
-
1974 Camaro , continued
MarkJ replied to MarkJ's topic in WIP: Other Racing: Road Racing, Land Speed Racers
Thanks guys. -
1974 Camaro , continued
MarkJ replied to MarkJ's topic in WIP: Other Racing: Road Racing, Land Speed Racers
-
1974 Camaro , continued
MarkJ replied to MarkJ's topic in WIP: Other Racing: Road Racing, Land Speed Racers
-
1974 Camaro , continued
MarkJ replied to MarkJ's topic in WIP: Other Racing: Road Racing, Land Speed Racers
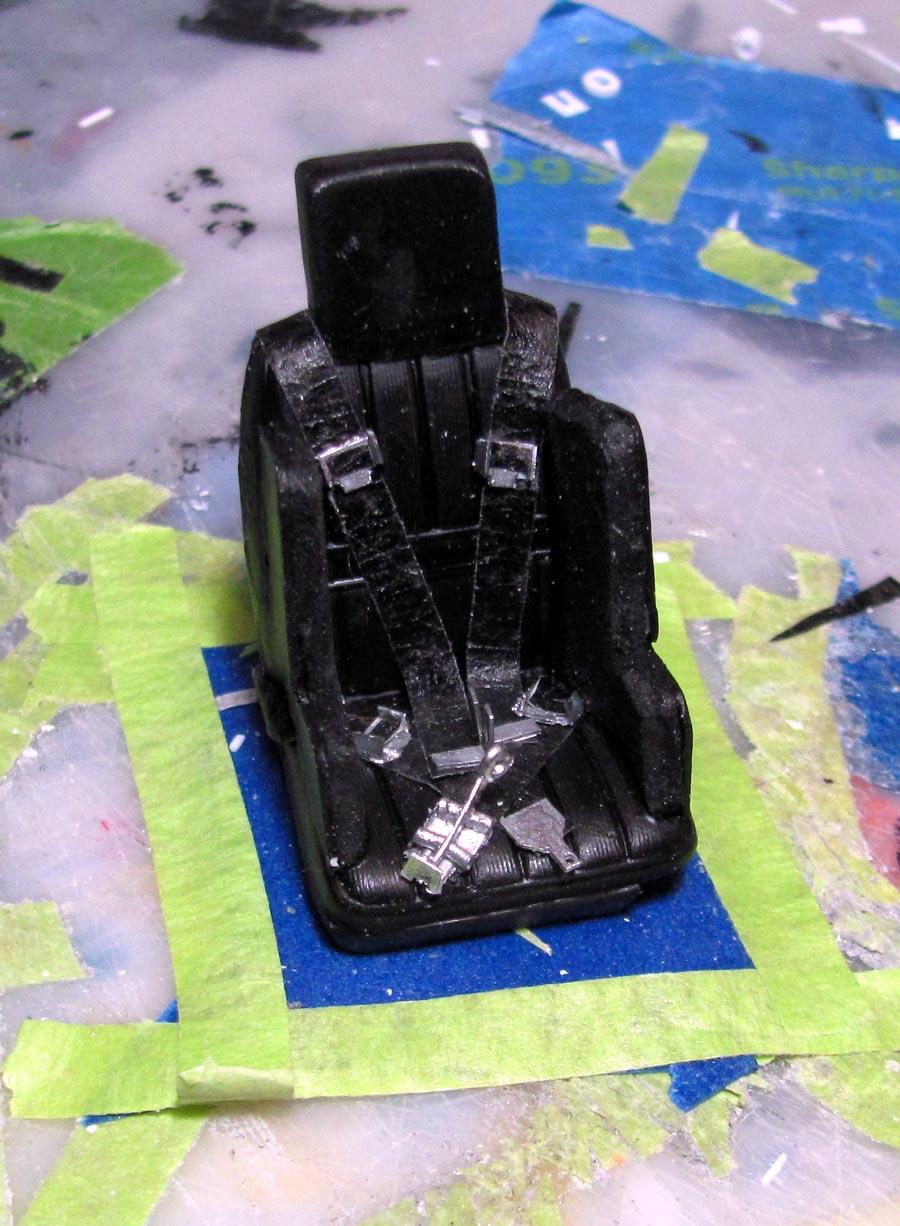
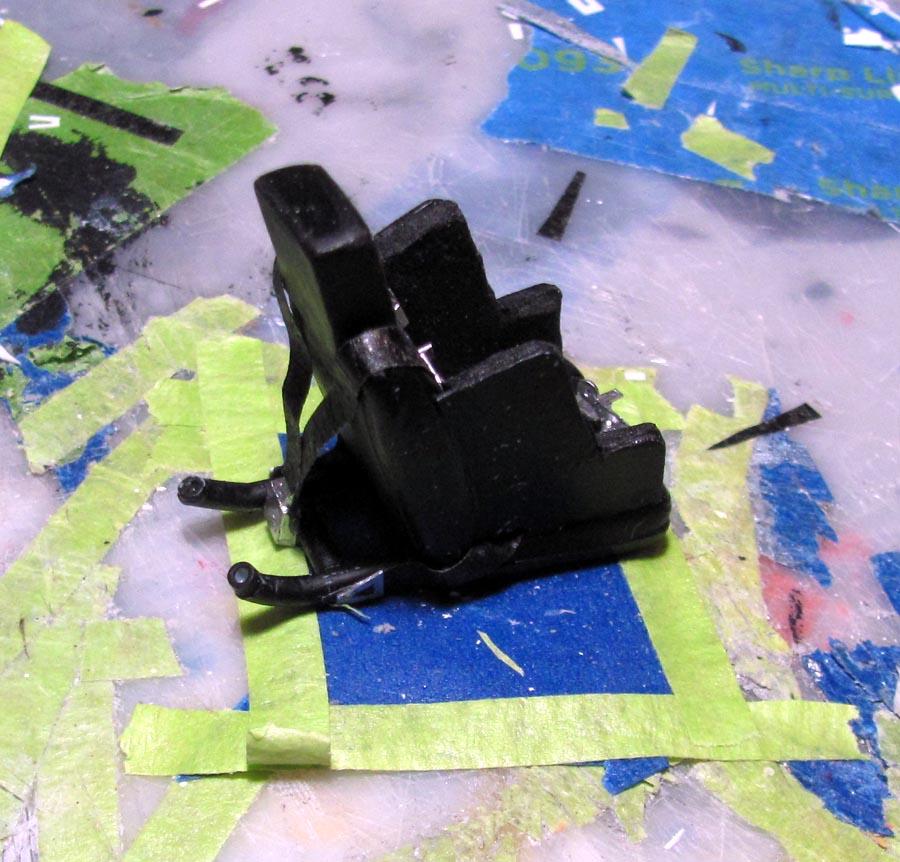
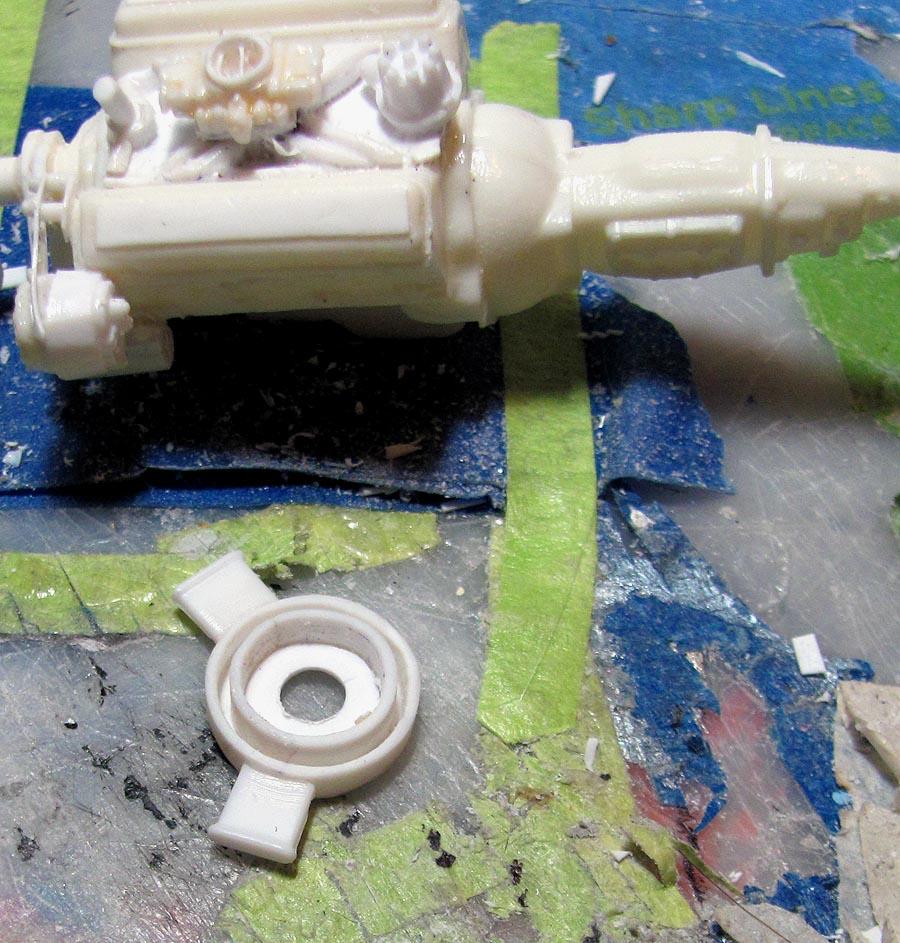
Thanks Carl. Just need to find the right size tube or rod and put a top on it and some sort of bracket. -
1974 Camaro , continued
MarkJ replied to MarkJ's topic in WIP: Other Racing: Road Racing, Land Speed Racers
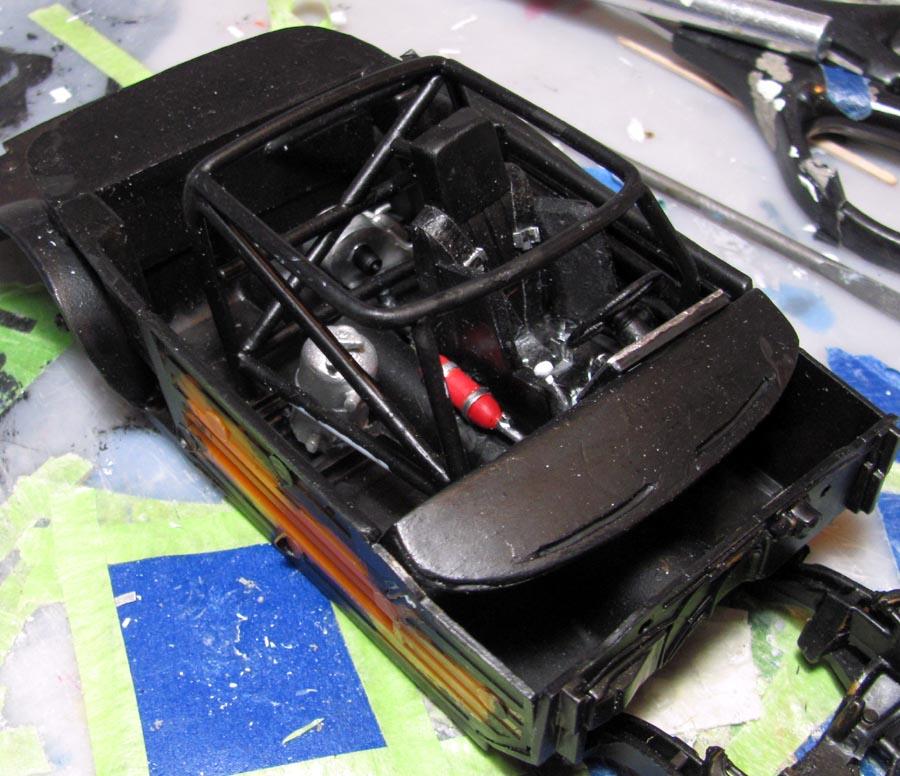
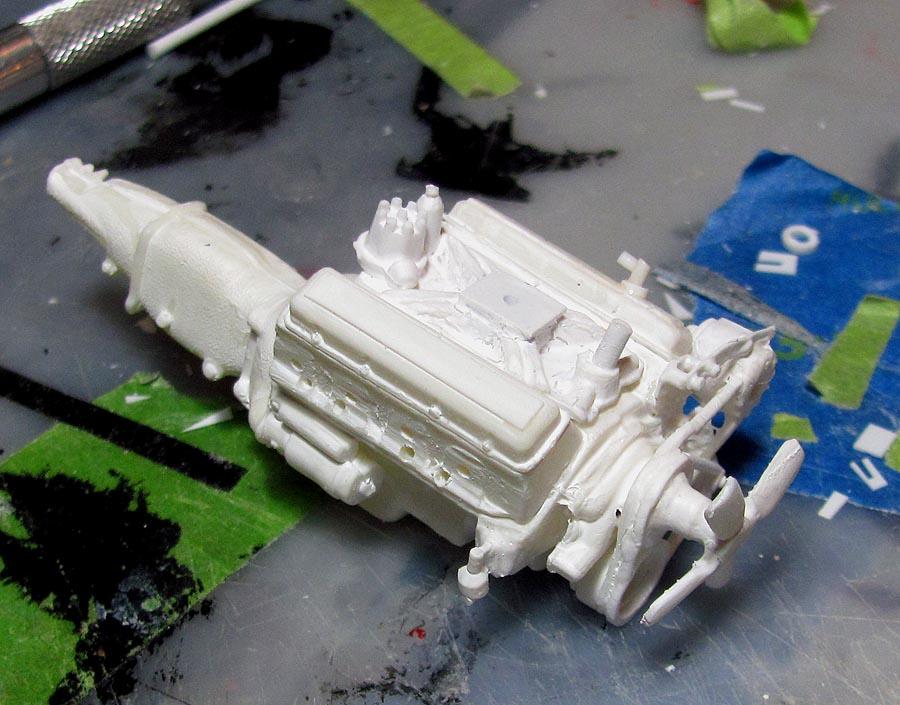
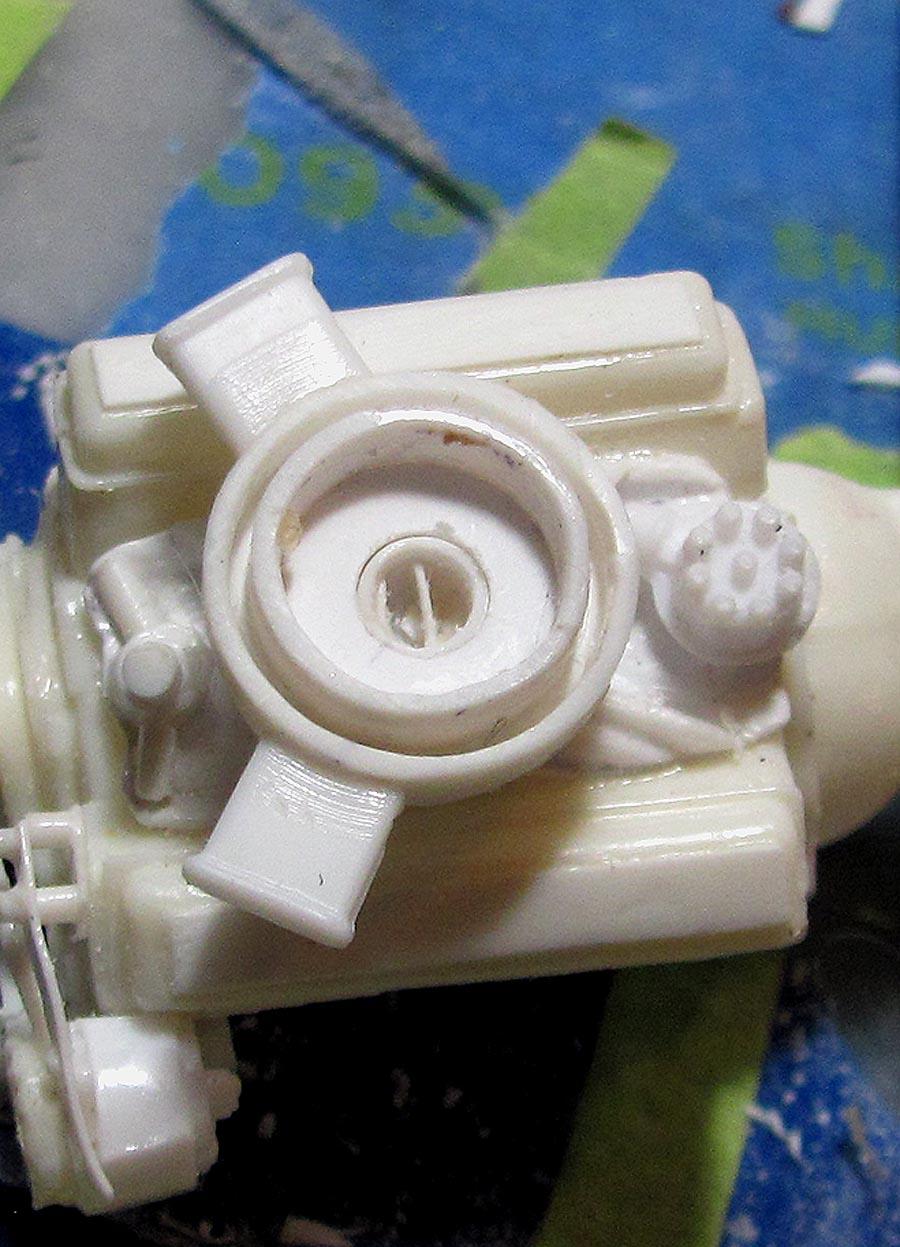
Thanks, Carl. I can't seem to find the coil in the Corvette kit so I might have to make one, But I think the engine might be complete except for painting it and adding spark plug wires. That's all the plumbing I do. I need to put the blades back on the fan too. -
1974 Camaro , continued
MarkJ replied to MarkJ's topic in WIP: Other Racing: Road Racing, Land Speed Racers
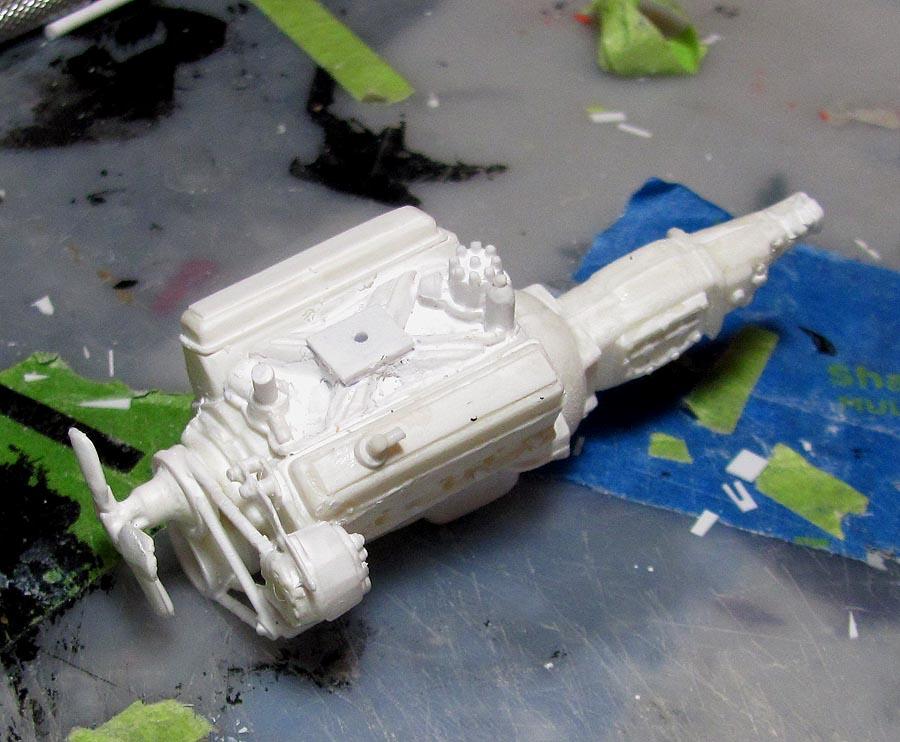
Thats it, folks. There is no top for the air cleaner. The hood with a duct built into it was the top for the air cleaner. Whenever they opened the hood, they would throw a rag on top of the carb. I'm not going to model the duct in the hood because I have no ref pictures about how it looked.