.jpg.b9265433dc8c3b550370b1d0e4e4d2fc.jpg)
MarkJ
-
Posts
4,686 -
Joined
-
Last visited
Content Type
Profiles
Forums
Events
Gallery
Everything posted by MarkJ
-
.jpg.b9265433dc8c3b550370b1d0e4e4d2fc.thumb.jpg.915f5b46e3c9402eeaa6972073121c87.jpg)
1974 Camaro , continued
MarkJ replied to MarkJ's topic in WIP: Other Racing: Road Racing, Land Speed Racers
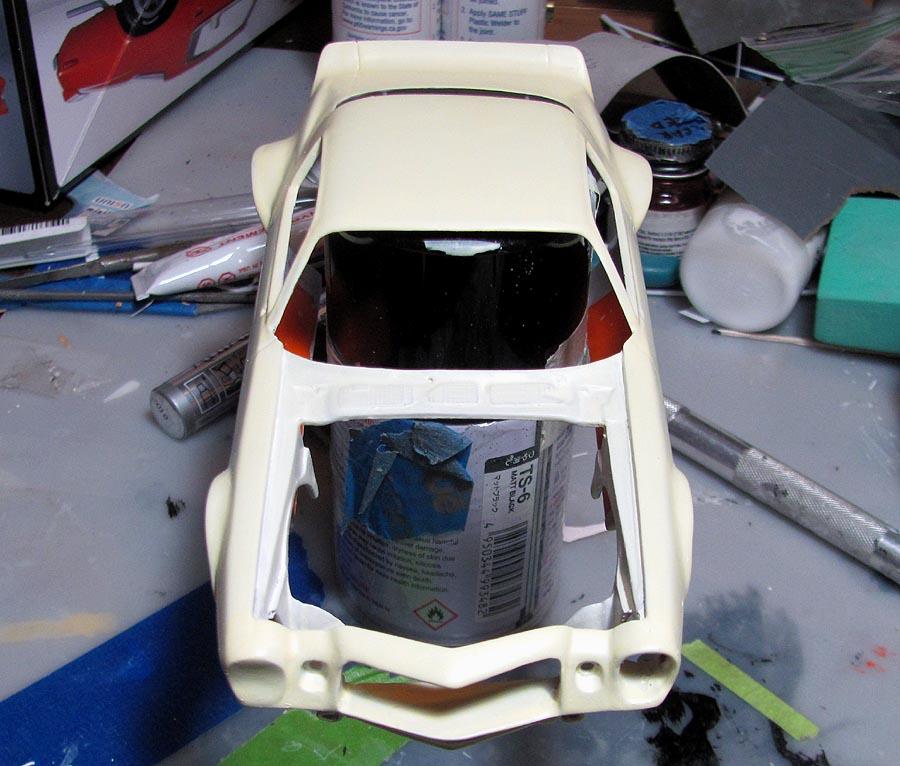
Thanks, Carl. It's pretty close to what I was looking for. When you see the roll cage you're going to think I messed up . The right side of the cage is not close to the right door at all. I Have no idea why they did it that way, but I'm going to have to do it. I think it has to do with the unibody construction because they used the stock Camaro to make this race car. Seems pretty unsafe to me. -
1974 Camaro , continued
MarkJ replied to MarkJ's topic in WIP: Other Racing: Road Racing, Land Speed Racers
Pierre, If I can make decals, you can make decals. You just need a vector graphics program like Photoshop. I was lucky . I got my Adobe Photodeluxe 2.0 bundled with the scanner I bought back in the 90's. So it was basically free. It just takes a while playing with it to take an image from the internet and turn it into a decal image that is 600 pixels per inch. you then print it on decal paper, future the decal paper with a brush and then cut them out and put them on the model. the program basically cleans up the image so you can use it as a decal. You just have to find side shots of cars so you will have a flat image to work with. It also helps to have a Laser printer with a ghost white printer cartridge, so you can make white background decals to place your color decals on top of. If not the decal disappears on a dark colored car . If its a white car the decal works fine without the white background decal. I hear that vector graphics programs nowadays are very expensive. You could do it ,my friend, if you really want to. Sometimes you just cant find the decals you want, because the professional decal maker doesn't choose to make them. There are some out there that will do a one off special sheet for you but they are few and far between. Dont rule out making your own, you could make it happen. Thanks for the kind words. -
1974 Camaro , continued
MarkJ replied to MarkJ's topic in WIP: Other Racing: Road Racing, Land Speed Racers
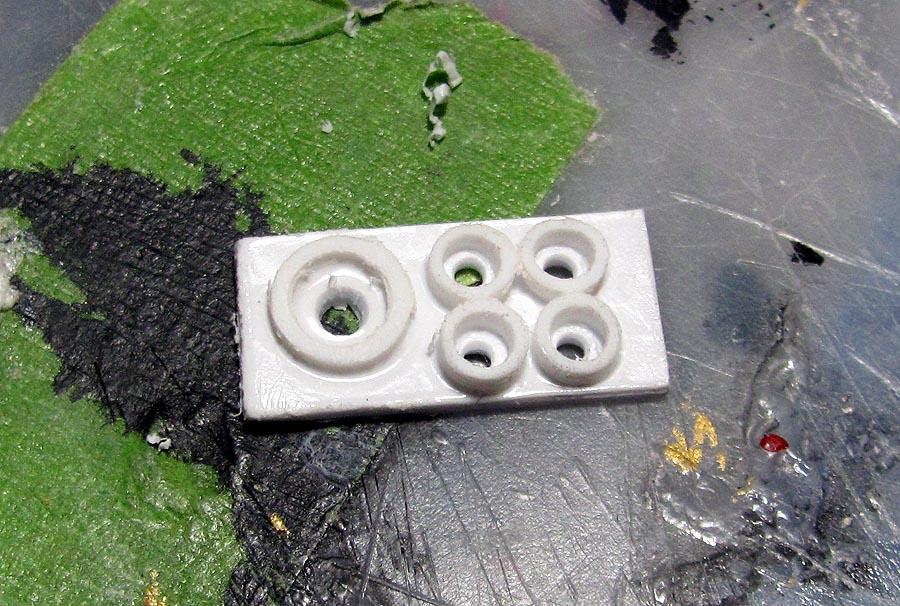
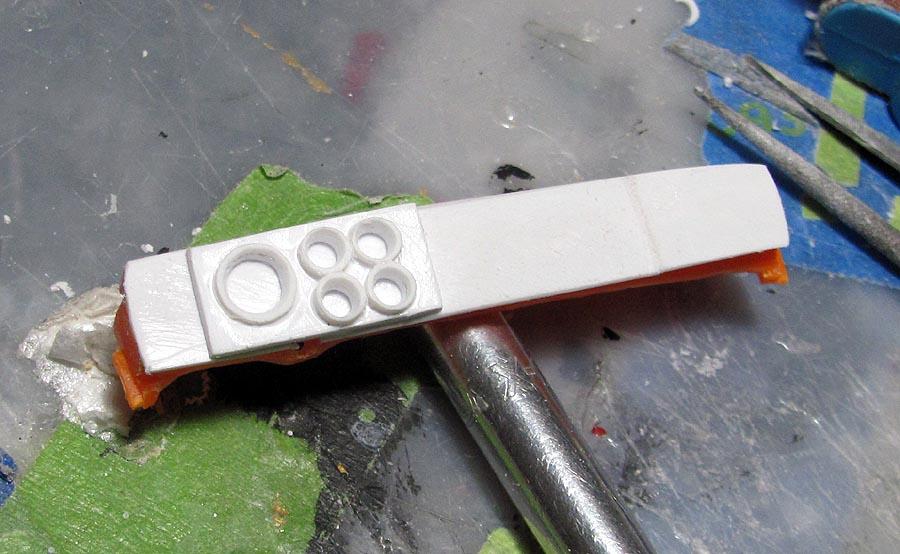
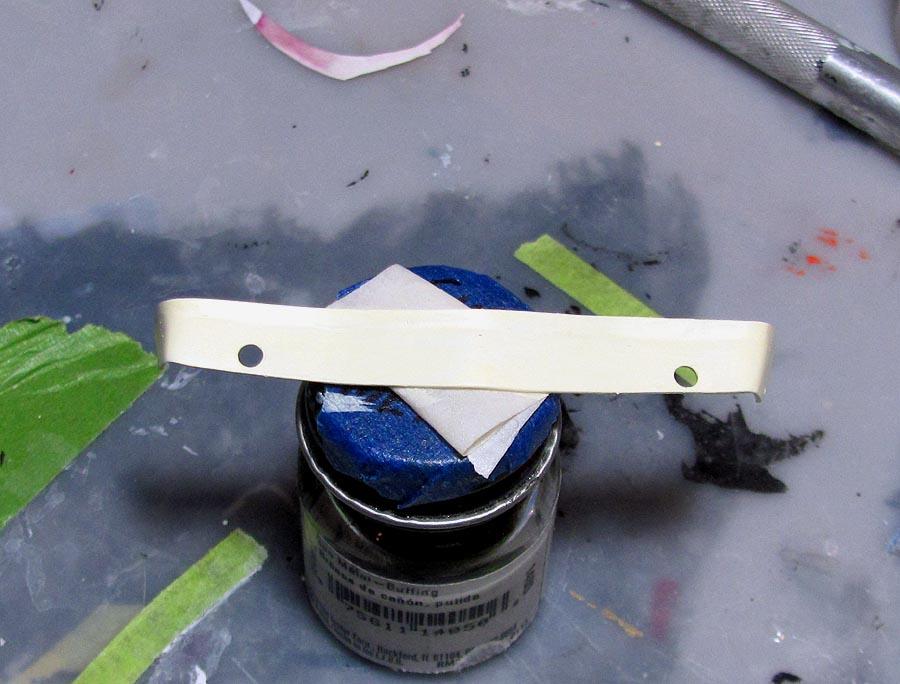
Thanks , Scott and Matti. I finally got my guage decals printed. Not that great, but you can tell they are guages. -
1974 Camaro , continued
MarkJ replied to MarkJ's topic in WIP: Other Racing: Road Racing, Land Speed Racers
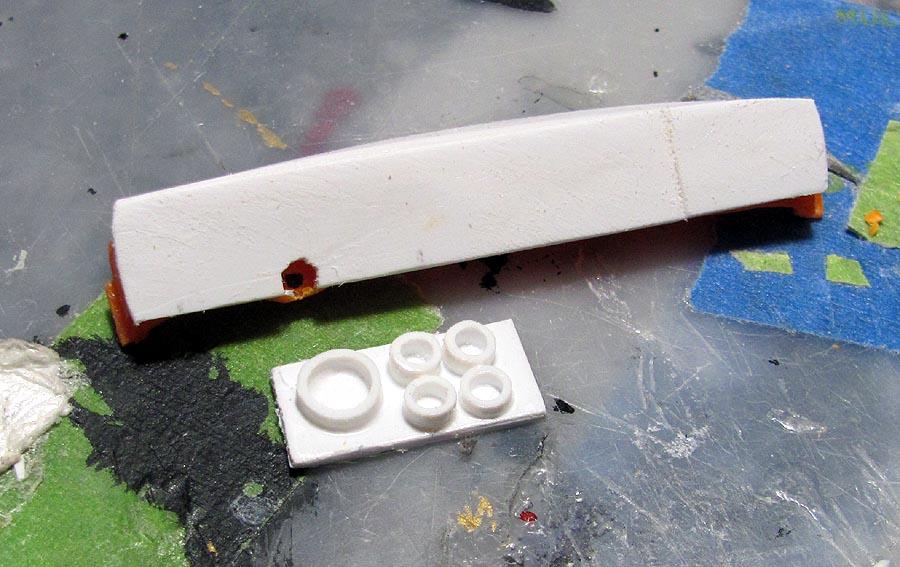
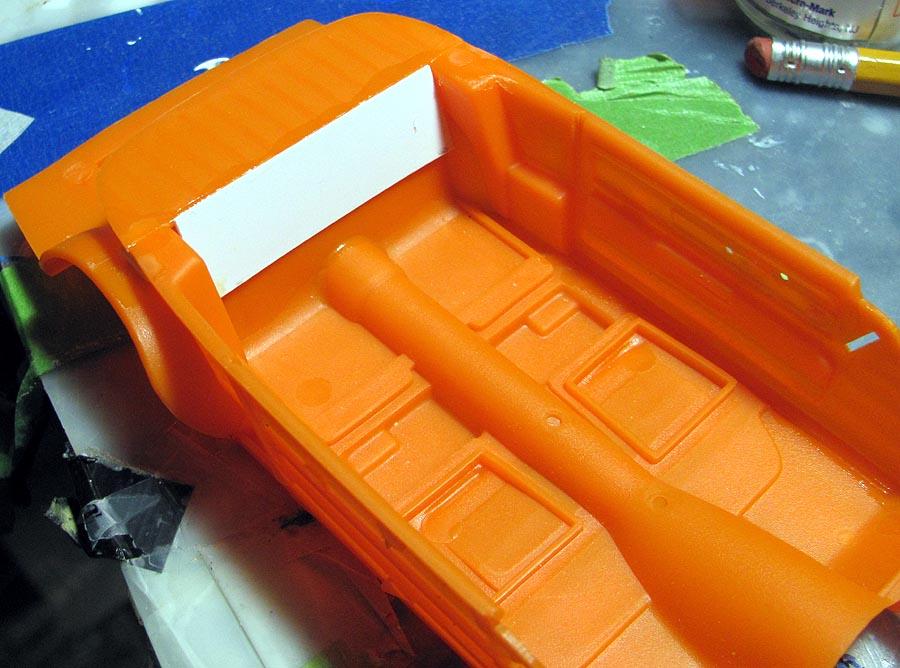
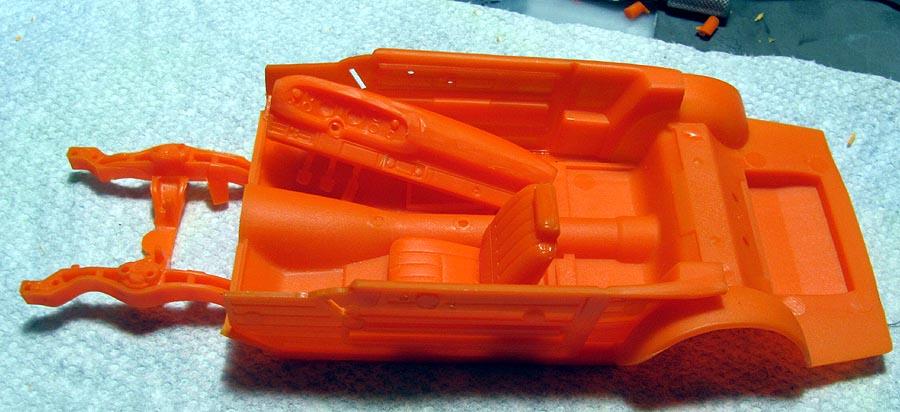
Got some more done on the dash. Spent yesterday making guage decals for it. Hoping I have them sized right. Also added the rear foundation after I cut it loose from the rear seat, and filled the void left where the seat would have gone.
-
1974 Camaro , continued
MarkJ replied to MarkJ's topic in WIP: Other Racing: Road Racing, Land Speed Racers
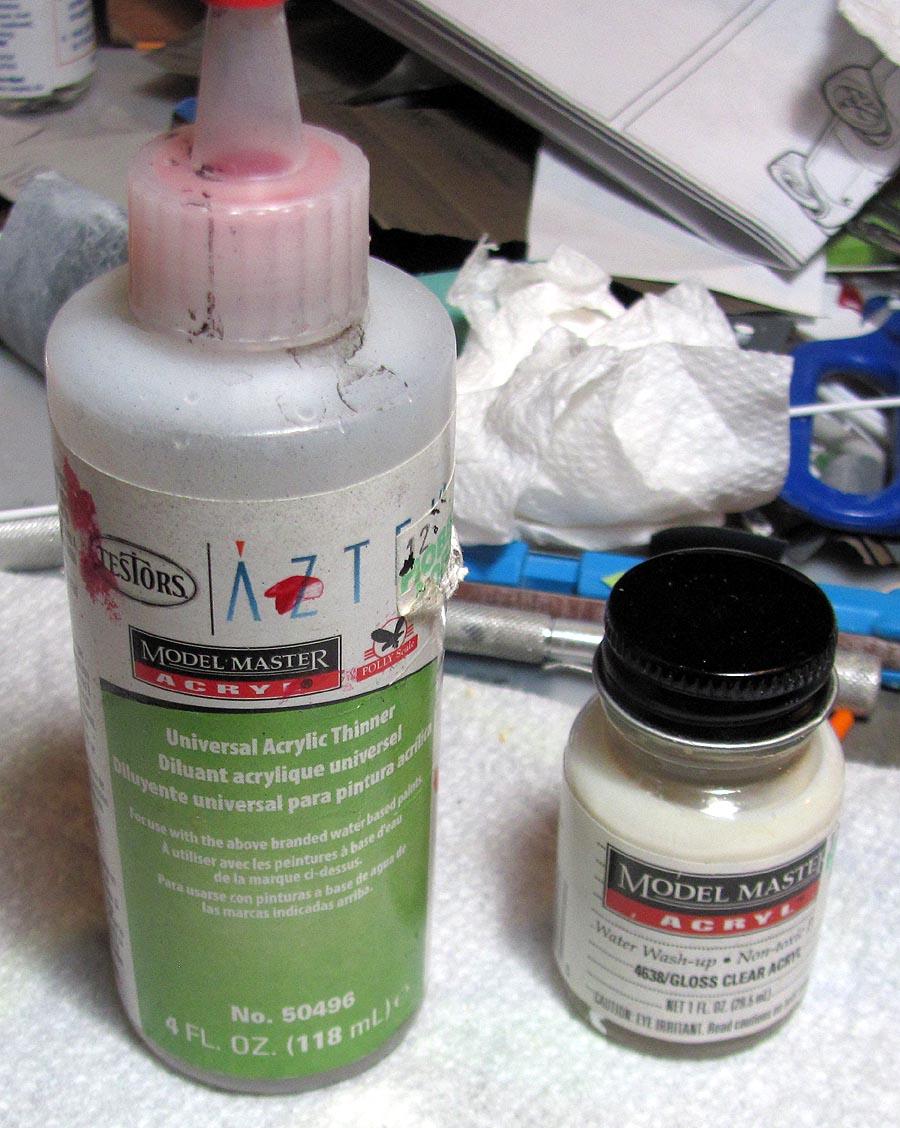
Pierre, Yes, I lightly sanded the MM gloss clear acrylic with 8000 and 12000 grit cloths just to knock the high points off the brush strokes down. You can no longer see any brush strokes with the future . I'm thinking if I thin the MM gloss clear next time I can get it on smoother and not have to polish it at all before the Future. Now that I found those bottles I should be able to thin the MM in a more accurate way. I didn't even try to thin it on this model. -
1974 Camaro , continued
MarkJ replied to MarkJ's topic in WIP: Other Racing: Road Racing, Land Speed Racers
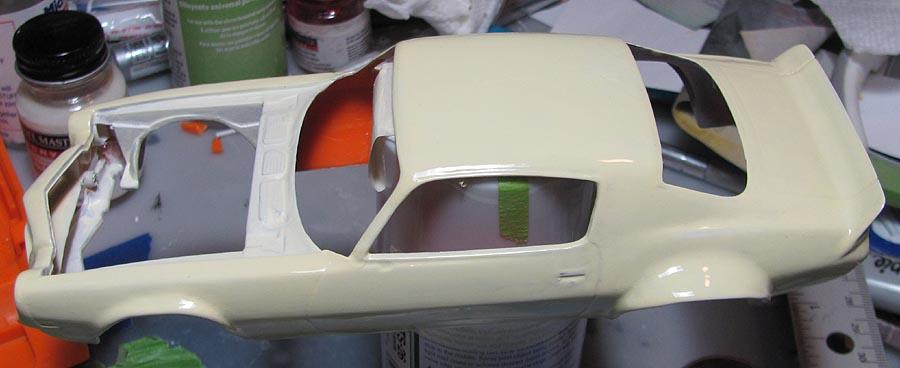
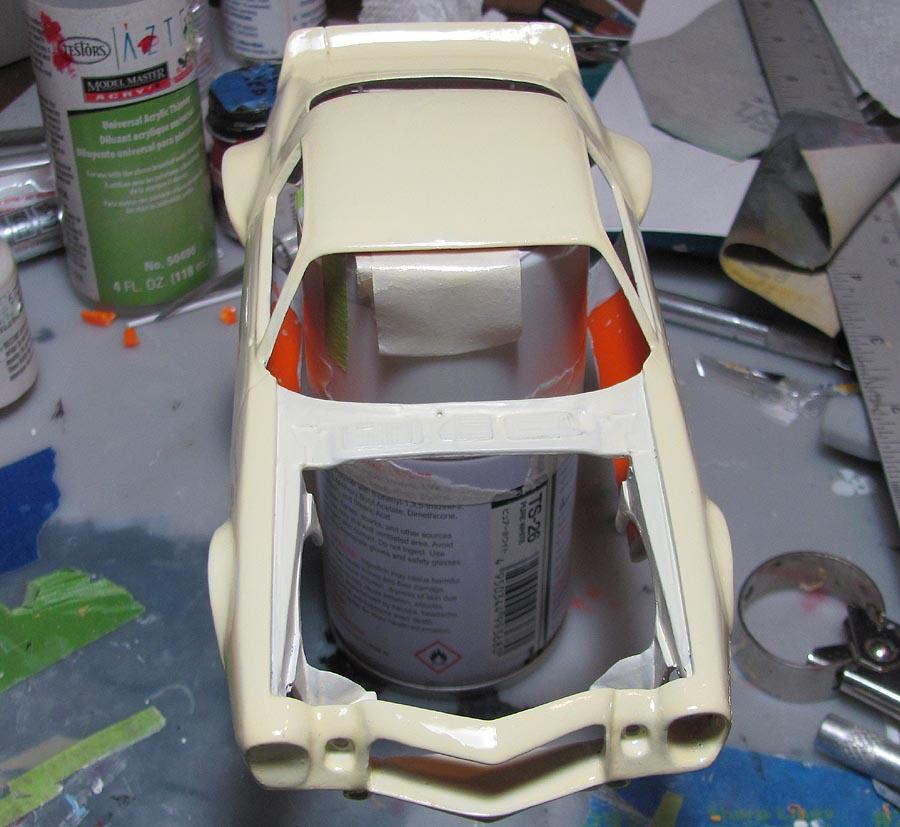
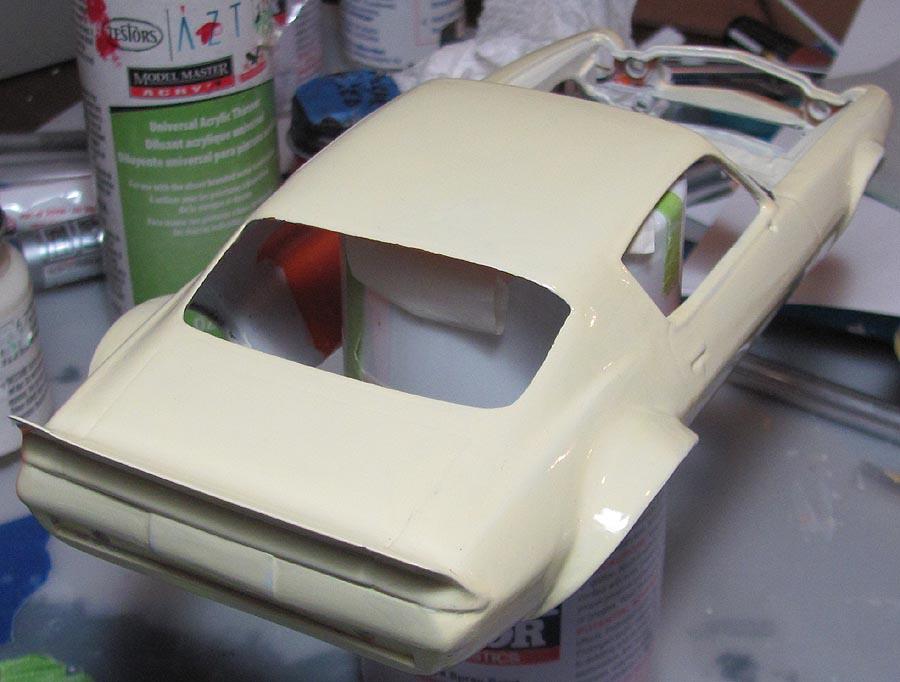
I finally got the Pledge/Future on the model and am very pleased. I can go ahead and work on the rest of the model now. After the model is decalled, I will apply one more coat of future to seal them on. I got some more work on the interior done by starting on the dash conversion to what the real car had. The under hood area is going to be black. That's why I didn't bother to add anymore paint to it .
-
1974 Camaro , continued
MarkJ replied to MarkJ's topic in WIP: Other Racing: Road Racing, Land Speed Racers
Thanks , Pierre. I don't know why the body looks duller then the hood but it has the same shine in real life. The gloss clear also brought more color out of the paint. It looks yellower then shots taken before the gloss clear was applied. Like you said after polishing and putting on the future I would be happy with it looking like models I sprayed with tamiya and then finished with future. We shall see. -
1974 Camaro , continued
MarkJ replied to MarkJ's topic in WIP: Other Racing: Road Racing, Land Speed Racers
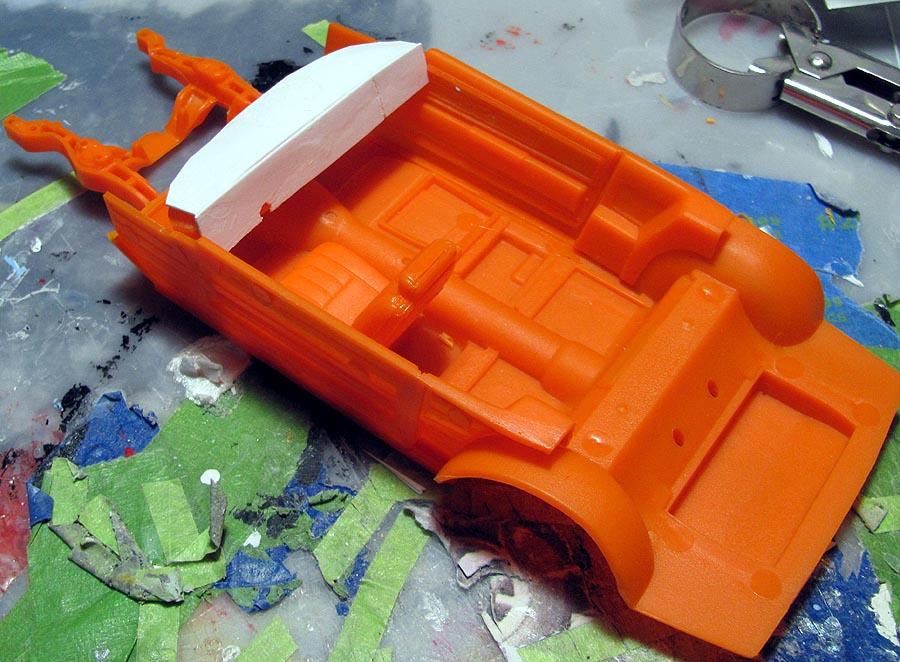
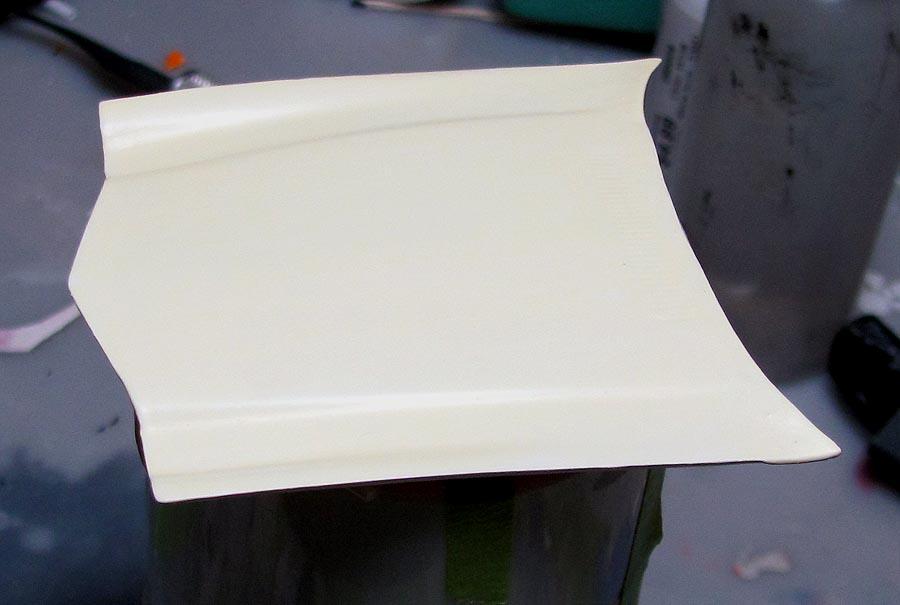
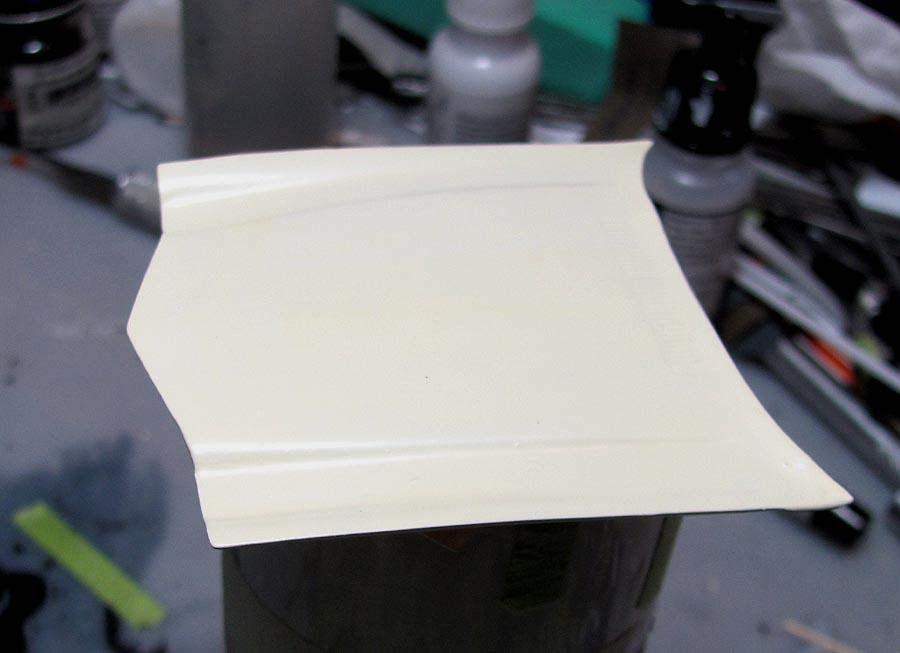
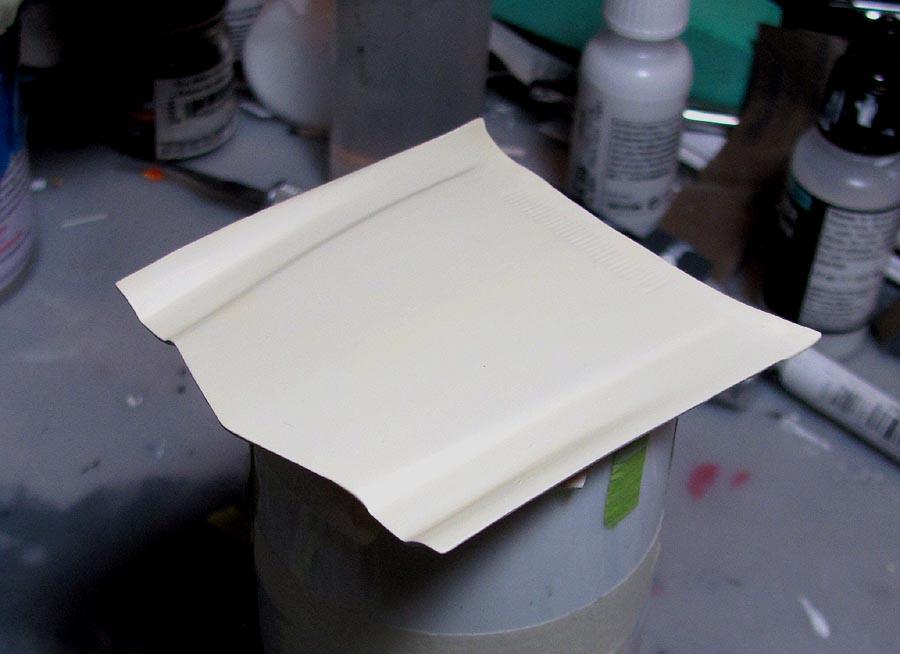
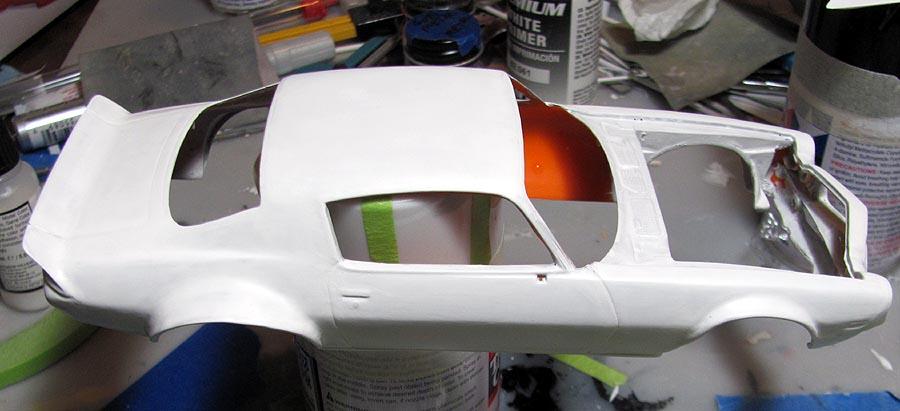
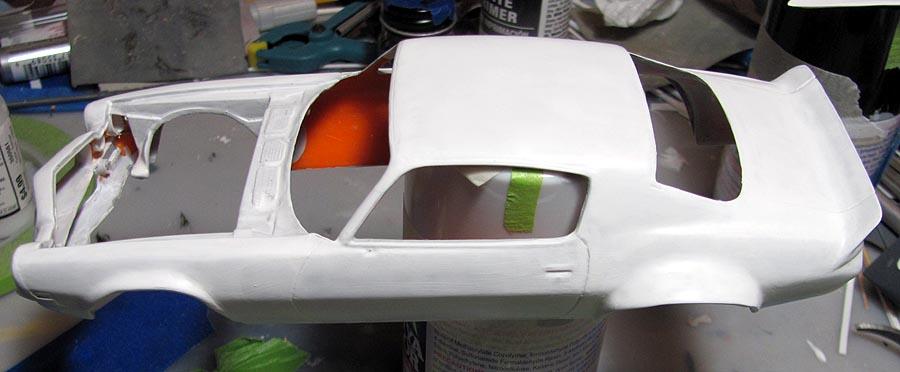
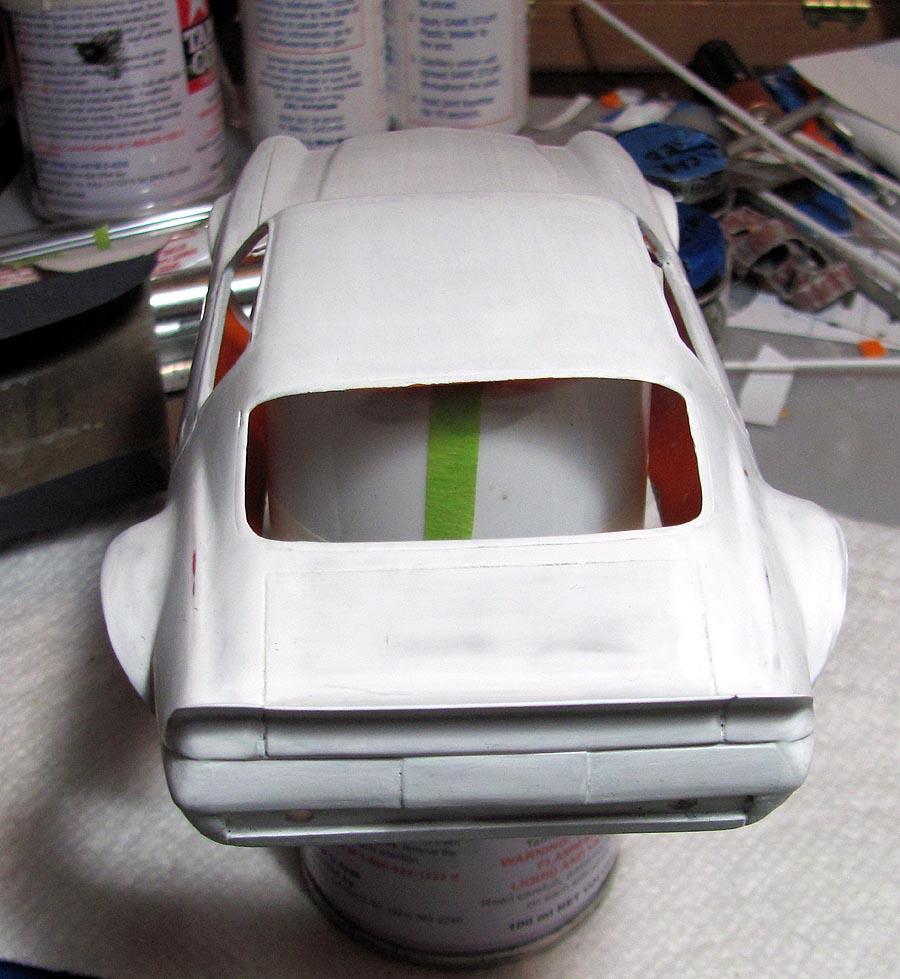
Well I decide to go ahead and brush some Model Master gloss clear acryl on the body to see how it would polish out. I just put it on full strength and actually the brush marks weren't too bad. I think the polishing should remove them ,and the future should give me the gloss I'm looking for. I also started on the interior. The dash and seat will need to be modified quite a bit. However the stock door trim panels were actually used on this car. But the door handles were removed. I will also have to install a weird looking roll cage, that I don't have really good reference pictures for. Some of it will be an edjucated guess.
-
1974 Camaro , continued
MarkJ replied to MarkJ's topic in WIP: Other Racing: Road Racing, Land Speed Racers
Thanks, Anton and Josh. With each coat of paint I'm learning more about this brush painting deal. One cool thing I've learned is, if I get a little piece of trash or a bristle or a hair ends up in the paint, after ten minutes, the paint drys and these things can easily be removed with a wooden tooth pic with no damage to the paint. It is important though that you clean the brush well before using it . If there's any little thing left in the brush like a spot of dryed paint that didnt get cleaned out it will find its way to the next coat of paint you apply to the model. I am very pleased with the brush painting and will never go back to spraying. -
1974 Camaro , continued
MarkJ replied to MarkJ's topic in WIP: Other Racing: Road Racing, Land Speed Racers
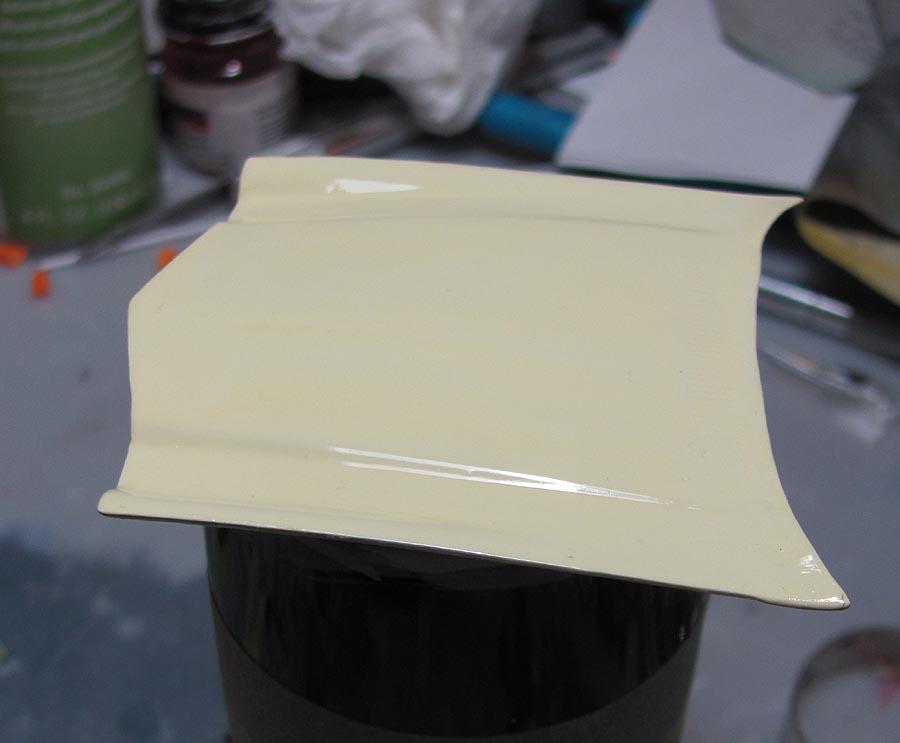
I decided to polish with 6000,8000, and 12000 grit sanding cloths but I went through to primer in a couple of spots, so I added another coat of paint. This time I added one more drop of yellow in the mix which was, 10 drops of white, 2 drops of yellow, 12 drops of medium thinner, and 2 drops of distilled water. It was much more yellow in real life but the photos don't show how actually yellow it is. It matches my reference photos even better though, so I'm sticking with it. I use a lot more light when photographing the finished pictures of the model and I think the color should show up better on those photos. The polishing did not improve the overall smoothness of the paint that much , so I believe I will just future what I have now and it should look okay. If not I can always remove the future and add some clear that I can polish and see if I get a more mirror like appearance before I add another coat of future. Trouble is the layers are starting to get a little thick so I hope the future on what I have now will give me enough gloss to be satisfied.
-
1974 Camaro , continued
MarkJ replied to MarkJ's topic in WIP: Other Racing: Road Racing, Land Speed Racers
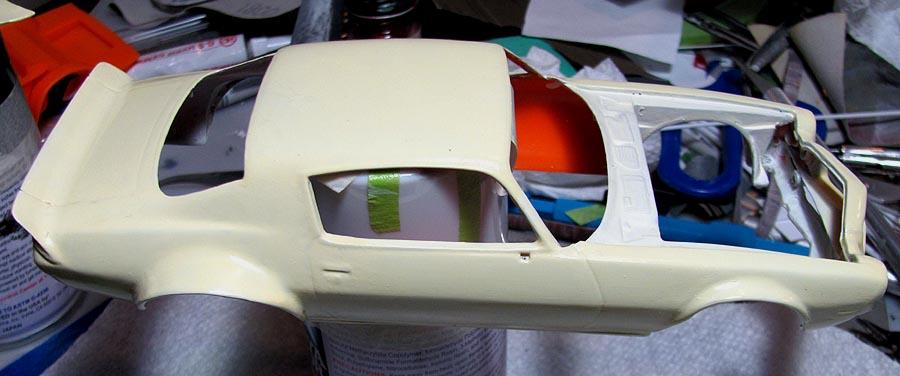
Got three color coats on and I'm very pleased with the results. The model is a very pale yellow, but these pictures make it look even more pale then it actually is. The model matches my reference picture of the real car very well. Now I can finally move on to the interior.
-
1974 Camaro , continued
MarkJ replied to MarkJ's topic in WIP: Other Racing: Road Racing, Land Speed Racers
Actually the color coat goes on better then the primer. you thin it 100 percent and add two drops of distilled water. The brush stokes disappear. -
1974 Camaro , continued
MarkJ replied to MarkJ's topic in WIP: Other Racing: Road Racing, Land Speed Racers
Thanks, David. Yes I really want to see if I can make this brush painting deal work. It would be so much better then having to work with my air brush or rattle cans, that I end up polishing anyway. The spraying has to be done outside and conditions for spraying down here in all this heat and humidity is never optimal. Even in the winter, it's still very humid. -
1974 Camaro , continued
MarkJ replied to MarkJ's topic in WIP: Other Racing: Road Racing, Land Speed Racers
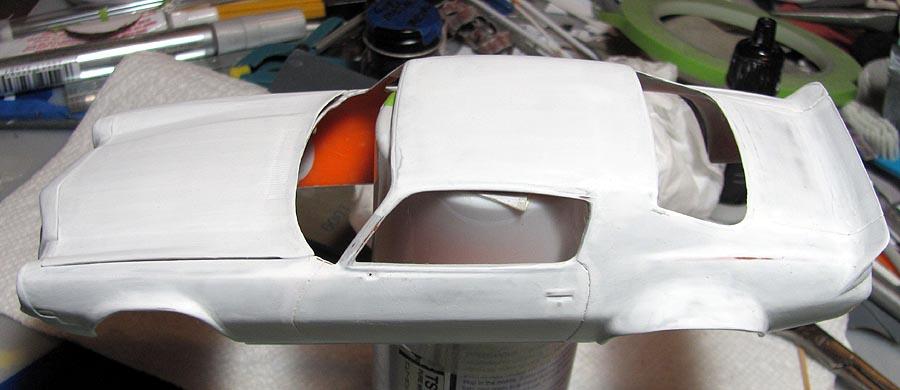
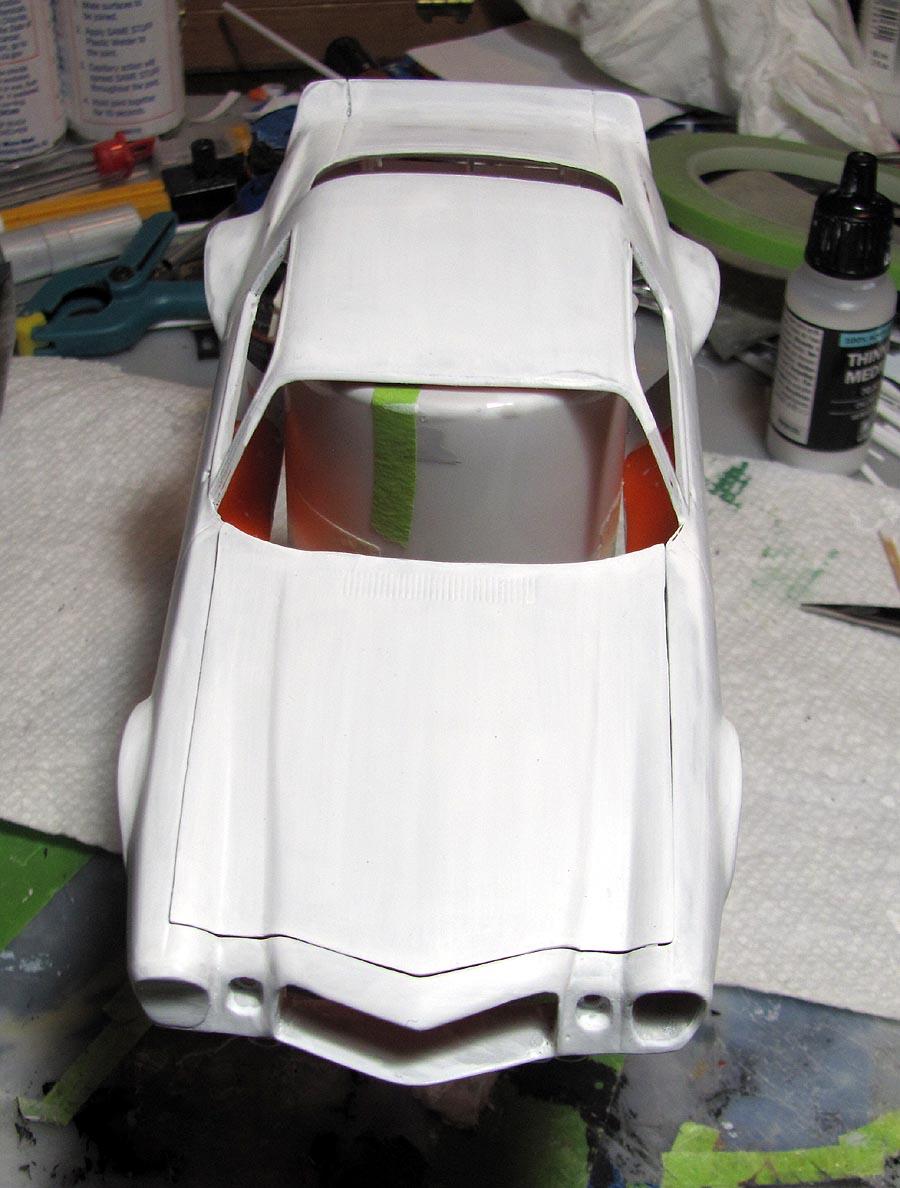
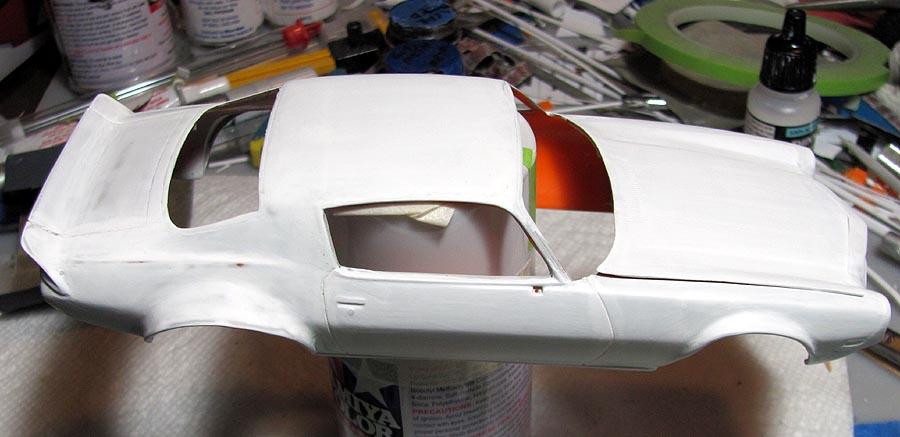
I followed Pierre's advice, and thinned the primer more, and got much better results. I'm hoping one more round of primer and sanding will allow me to start putting some color on the model. The brush stokes almost were gone on this latest application, so I wont have to sand as hard to get a smooth surface for paint.
-
1974 Camaro , continued
MarkJ replied to MarkJ's topic in WIP: Other Racing: Road Racing, Land Speed Racers
That makes perfect sense, Pierre. I've been playing with different strokes and thinning of paint and finally started getting good results when I got to 7 drops of thinner to 7 drops of primer. I used a smaller brush and made short dabby strokes just trying to get the paint on without any brush marks. kind of pushing the paint along watching it carefully to keep it wet. knowing that when it dried it would be less thick and no brush marks. Hopefully I wont have to sand as much when this primer drys. Thanks for your input. If this works out okay I will report about it in the brush painter society thread. -
1974 Camaro , continued
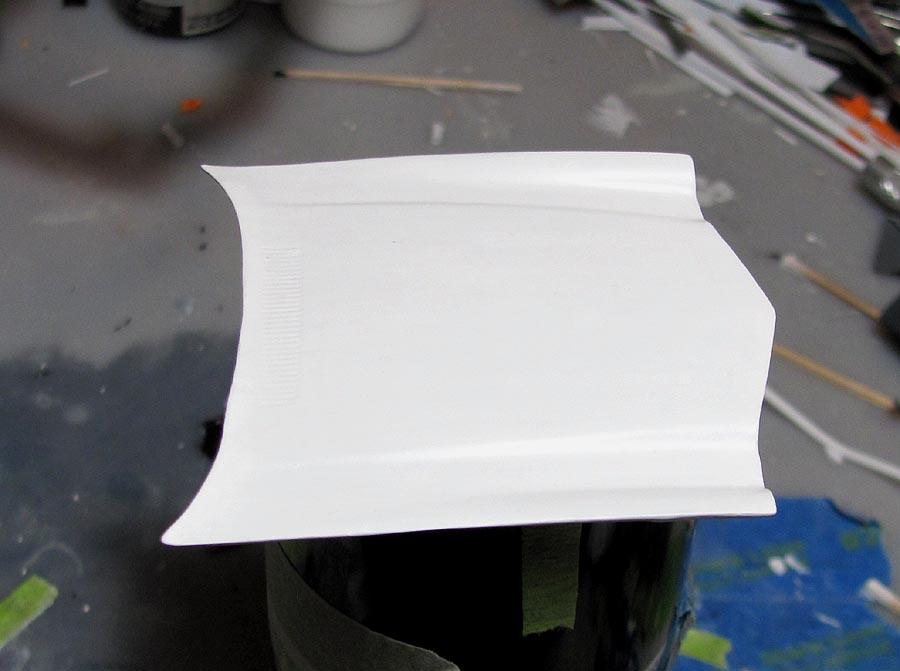
MarkJ replied to MarkJ's topic in WIP: Other Racing: Road Racing, Land Speed Racers
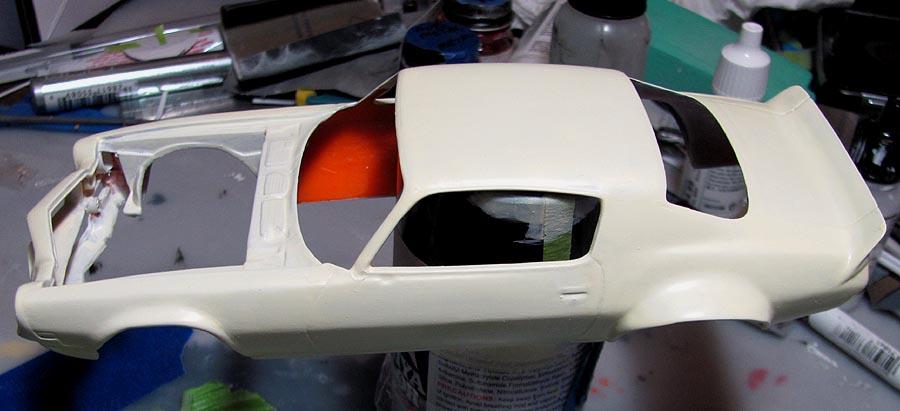
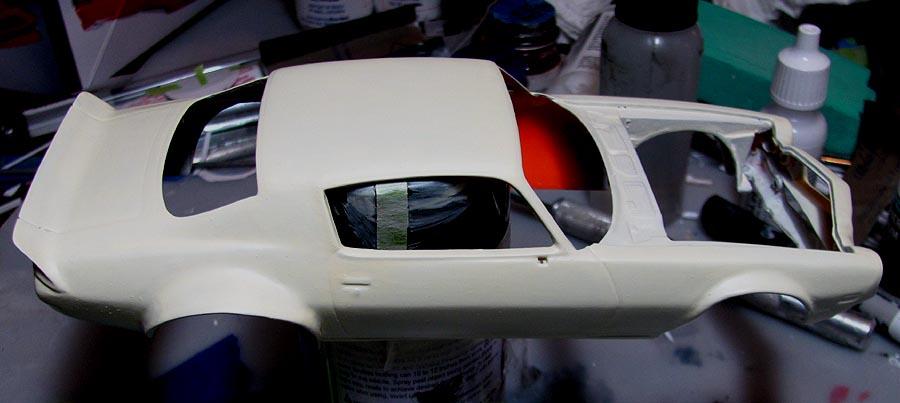
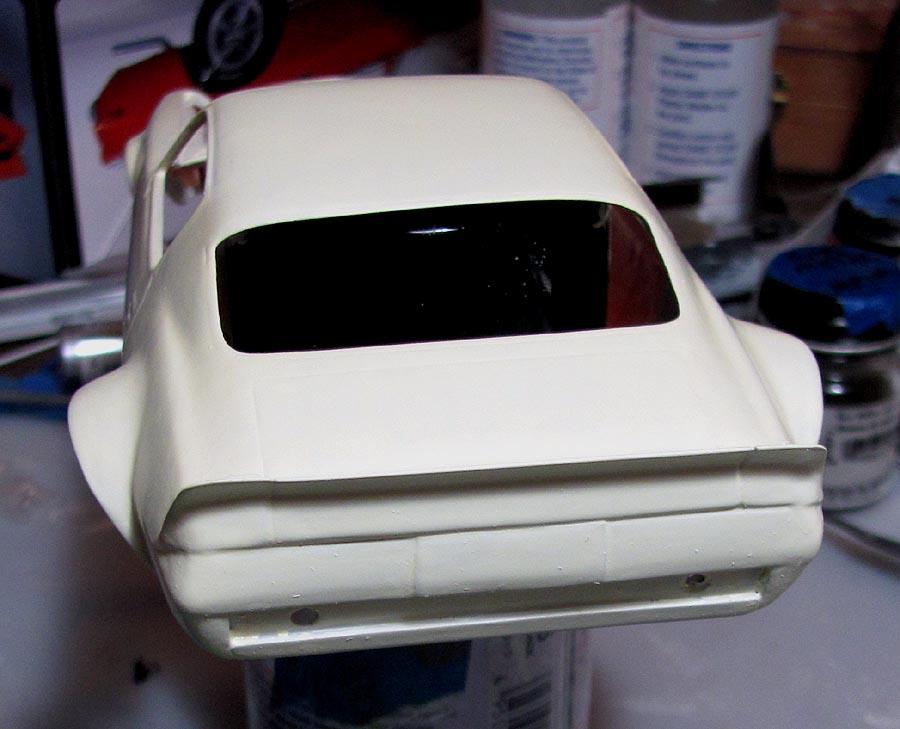
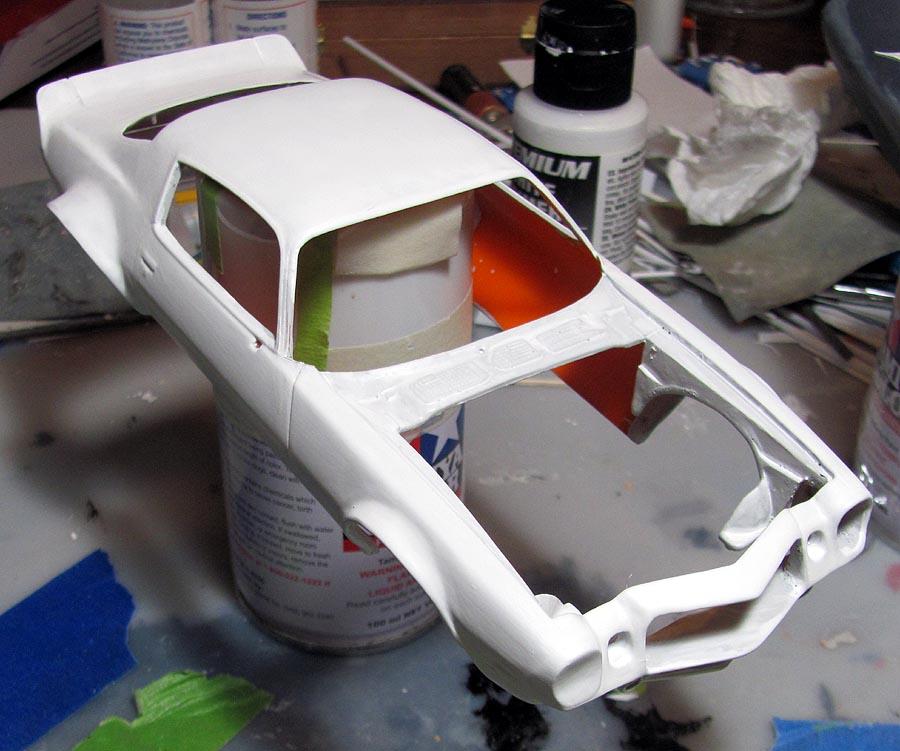
I've been having a problem with priming which you will see in the latest photos. I put the primer on with the brush and then to get rid of the brush strokes I wet sand. In order to get rid of the stokes, I end up sanding back down to the gray primer or even the orange body. I have decided on my next attempt to dab the primer on instead of brush it on. Maybe it will flow out better and I wont have to sand as hard to get a smooth surface to apply the color coat. I'm not giving up on using a brush.
-
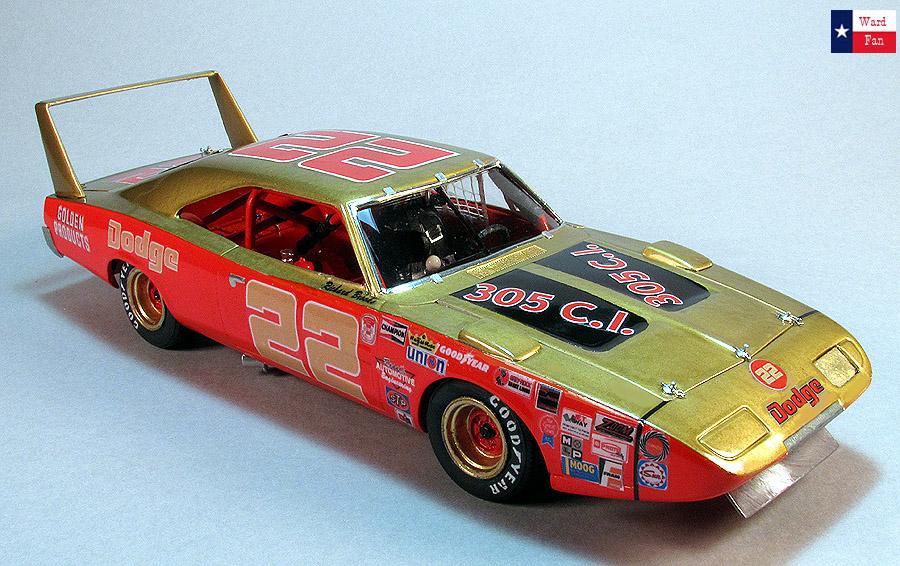
"Correct" color codes #22 Dodge Daytona
MarkJ replied to Khils's topic in Stock Cars (NASCAR, Super Stock, Late Model, etc.)
I for one do not have a clue. Junior Johnson built the Monte Carlos. -
Beautiful paint.
-
Another fine build by the Master. As always the model looks just like the real car. Really beautifully done.
-
"Correct" color codes #22 Dodge Daytona
MarkJ replied to Khils's topic in Stock Cars (NASCAR, Super Stock, Late Model, etc.)
The car pictured is actually the 305 cubic inch Charger Dick Brooks drove at 1971 Daytona 500. It was built by Mario Rossi who also built the Dodge Daytona's that Allison drove in 1969 , so The colors are probably the same . Dont know what the correct colors are though. I just used tamiya rattle can gold and red on the Brook's Charger I built. Wasn't real happy with the gold. Came out real dull. Does rattle can tamiya have a shelf life?
-
(HRM) Shelby Cobra Daytona Coupe
MarkJ replied to Venom's topic in WIP: Other Racing: Road Racing, Land Speed Racers
After I went to the trouble of putting the jacks on the model, I found out that the jacking system was not used in the car that I modeled from the Nassau tourist trophy race that he won in. All that work for nothing. -
(HRM) Shelby Cobra Daytona Coupe
MarkJ replied to Venom's topic in WIP: Other Racing: Road Racing, Land Speed Racers
I believe that i discovered that, that is the fuel overflow vent. why its facing to the front makes no sense. the tube runs up the right quarter sail panel from the oversized tank right behind the seats. -
1974 Camaro , continued
MarkJ replied to MarkJ's topic in WIP: Other Racing: Road Racing, Land Speed Racers
Thanks, David. I know one thing. There is no way I'm stripping and starting over. -
1974 Camaro , continued
MarkJ replied to MarkJ's topic in WIP: Other Racing: Road Racing, Land Speed Racers
Thanks, Josh. Hopefully its just a bump in the road. I will know better after the coat of white primer goes on. -
1974 Camaro , continued
MarkJ replied to MarkJ's topic in WIP: Other Racing: Road Racing, Land Speed Racers
Thanks, Mike. I think I can fix it . Just have to not lose my patience at this juncture of the build.