Biggu
-
Posts
1,714 -
Joined
-
Last visited
Content Type
Profiles
Forums
Events
Gallery
Everything posted by Biggu
-

Mid 60s Peterbilt Unilite COE
Biggu replied to RoninUtah's topic in WIP: Model Trucks: Big Rigs and Heavy Equipment
We are neck and neck Ron! I’m TRYING to figure the masking of my cab ….what a nerve wracking exercise this is ! I can’t wait to see what you are going to do with yours ….. you are flying through this build. I’m really lovin what I’m seeing !! -
The Same but “ a little “ Different
Biggu replied to Biggu's topic in WIP: Model Trucks: Big Rigs and Heavy Equipment
Now, under a splash of paint ….. hangers and straps then fuel lines …..
-
Freightliner COE (yes, another one!)
Biggu replied to Jürgen M.'s topic in Model Trucks: Big Rigs and Heavy Equipment
Great Job JM!! I'm with Lucas, great color combination, one I never would have even thought of or would look ok together but this really pops ! And the exact right amount of each color. Nice build , I like this …. Going to keep this paint idea for a future build …. Jeff -
M-9 45 Ton Trailer Build
Biggu replied to Chariots of Fire's topic in WIP: Model Trucks: Big Rigs and Heavy Equipment
Precision is the word on this build. And yes the results more than speak, they scream. Beautiful craftsmanship and it takes a real craftsman to make such excellent pieces …. More than a joy and pleasure to watch come together. Jeff -
Only if you weren’t paying attention and didn’t double check. Lol
-
M-9 45 Ton Trailer Build
Biggu replied to Chariots of Fire's topic in WIP: Model Trucks: Big Rigs and Heavy Equipment
What talent ! How do you make the sheaves so clean and accurate ? Incredible. Absolutely beautiful fine detailed work. Real eye candy ! Jeff -
Mid 60s Peterbilt Unilite COE
Biggu replied to RoninUtah's topic in WIP: Model Trucks: Big Rigs and Heavy Equipment
So , Ron are you telling us that there are a herd of ‘Nauga’s’ running around in the forest nekked???? ???? I agree we are neck and neck so to speak but….. you , my friend are WAY ahead of me, buddy. I’m just glueing stuff to plastic , where as you are doing major surgery and working with JM designing and making your own parts, far exceeds what I’m doing. I’ glad the Nauga’s donated their hides to the look of your cab. Looks just right and yea that color is it for sure. Your surgery and tach-o- graphs are spot on and look Really COOL! Your back dating skills are masterful. Love the update …. Can’t wait to see what’s next. Keep going, this is good stuff ! Jeff -
Pete 359 tanker with trailer
Biggu replied to Jürgen M.'s topic in WIP: Model Trucks: Big Rigs and Heavy Equipment
I think that’s exactly what it is, sure looked like it up close -
Roanoke Railhouse Beer GMC General
Biggu replied to Gary Chastain's topic in WIP: Model Trucks: Big Rigs and Heavy Equipment
That loading ramp look spot on. Sure didn’t take you long to fabricate. Perfect addition … -
The Same but “ a little “ Different
Biggu replied to Biggu's topic in WIP: Model Trucks: Big Rigs and Heavy Equipment
Me too fellas. This could be a bit of a game changer for some kits for me for sure ….. a few more details to the tanks and then to the paint shop …. As always, thanks for checking in and the comments .. -
The Same but “ a little “ Different
Biggu replied to Biggu's topic in WIP: Model Trucks: Big Rigs and Heavy Equipment
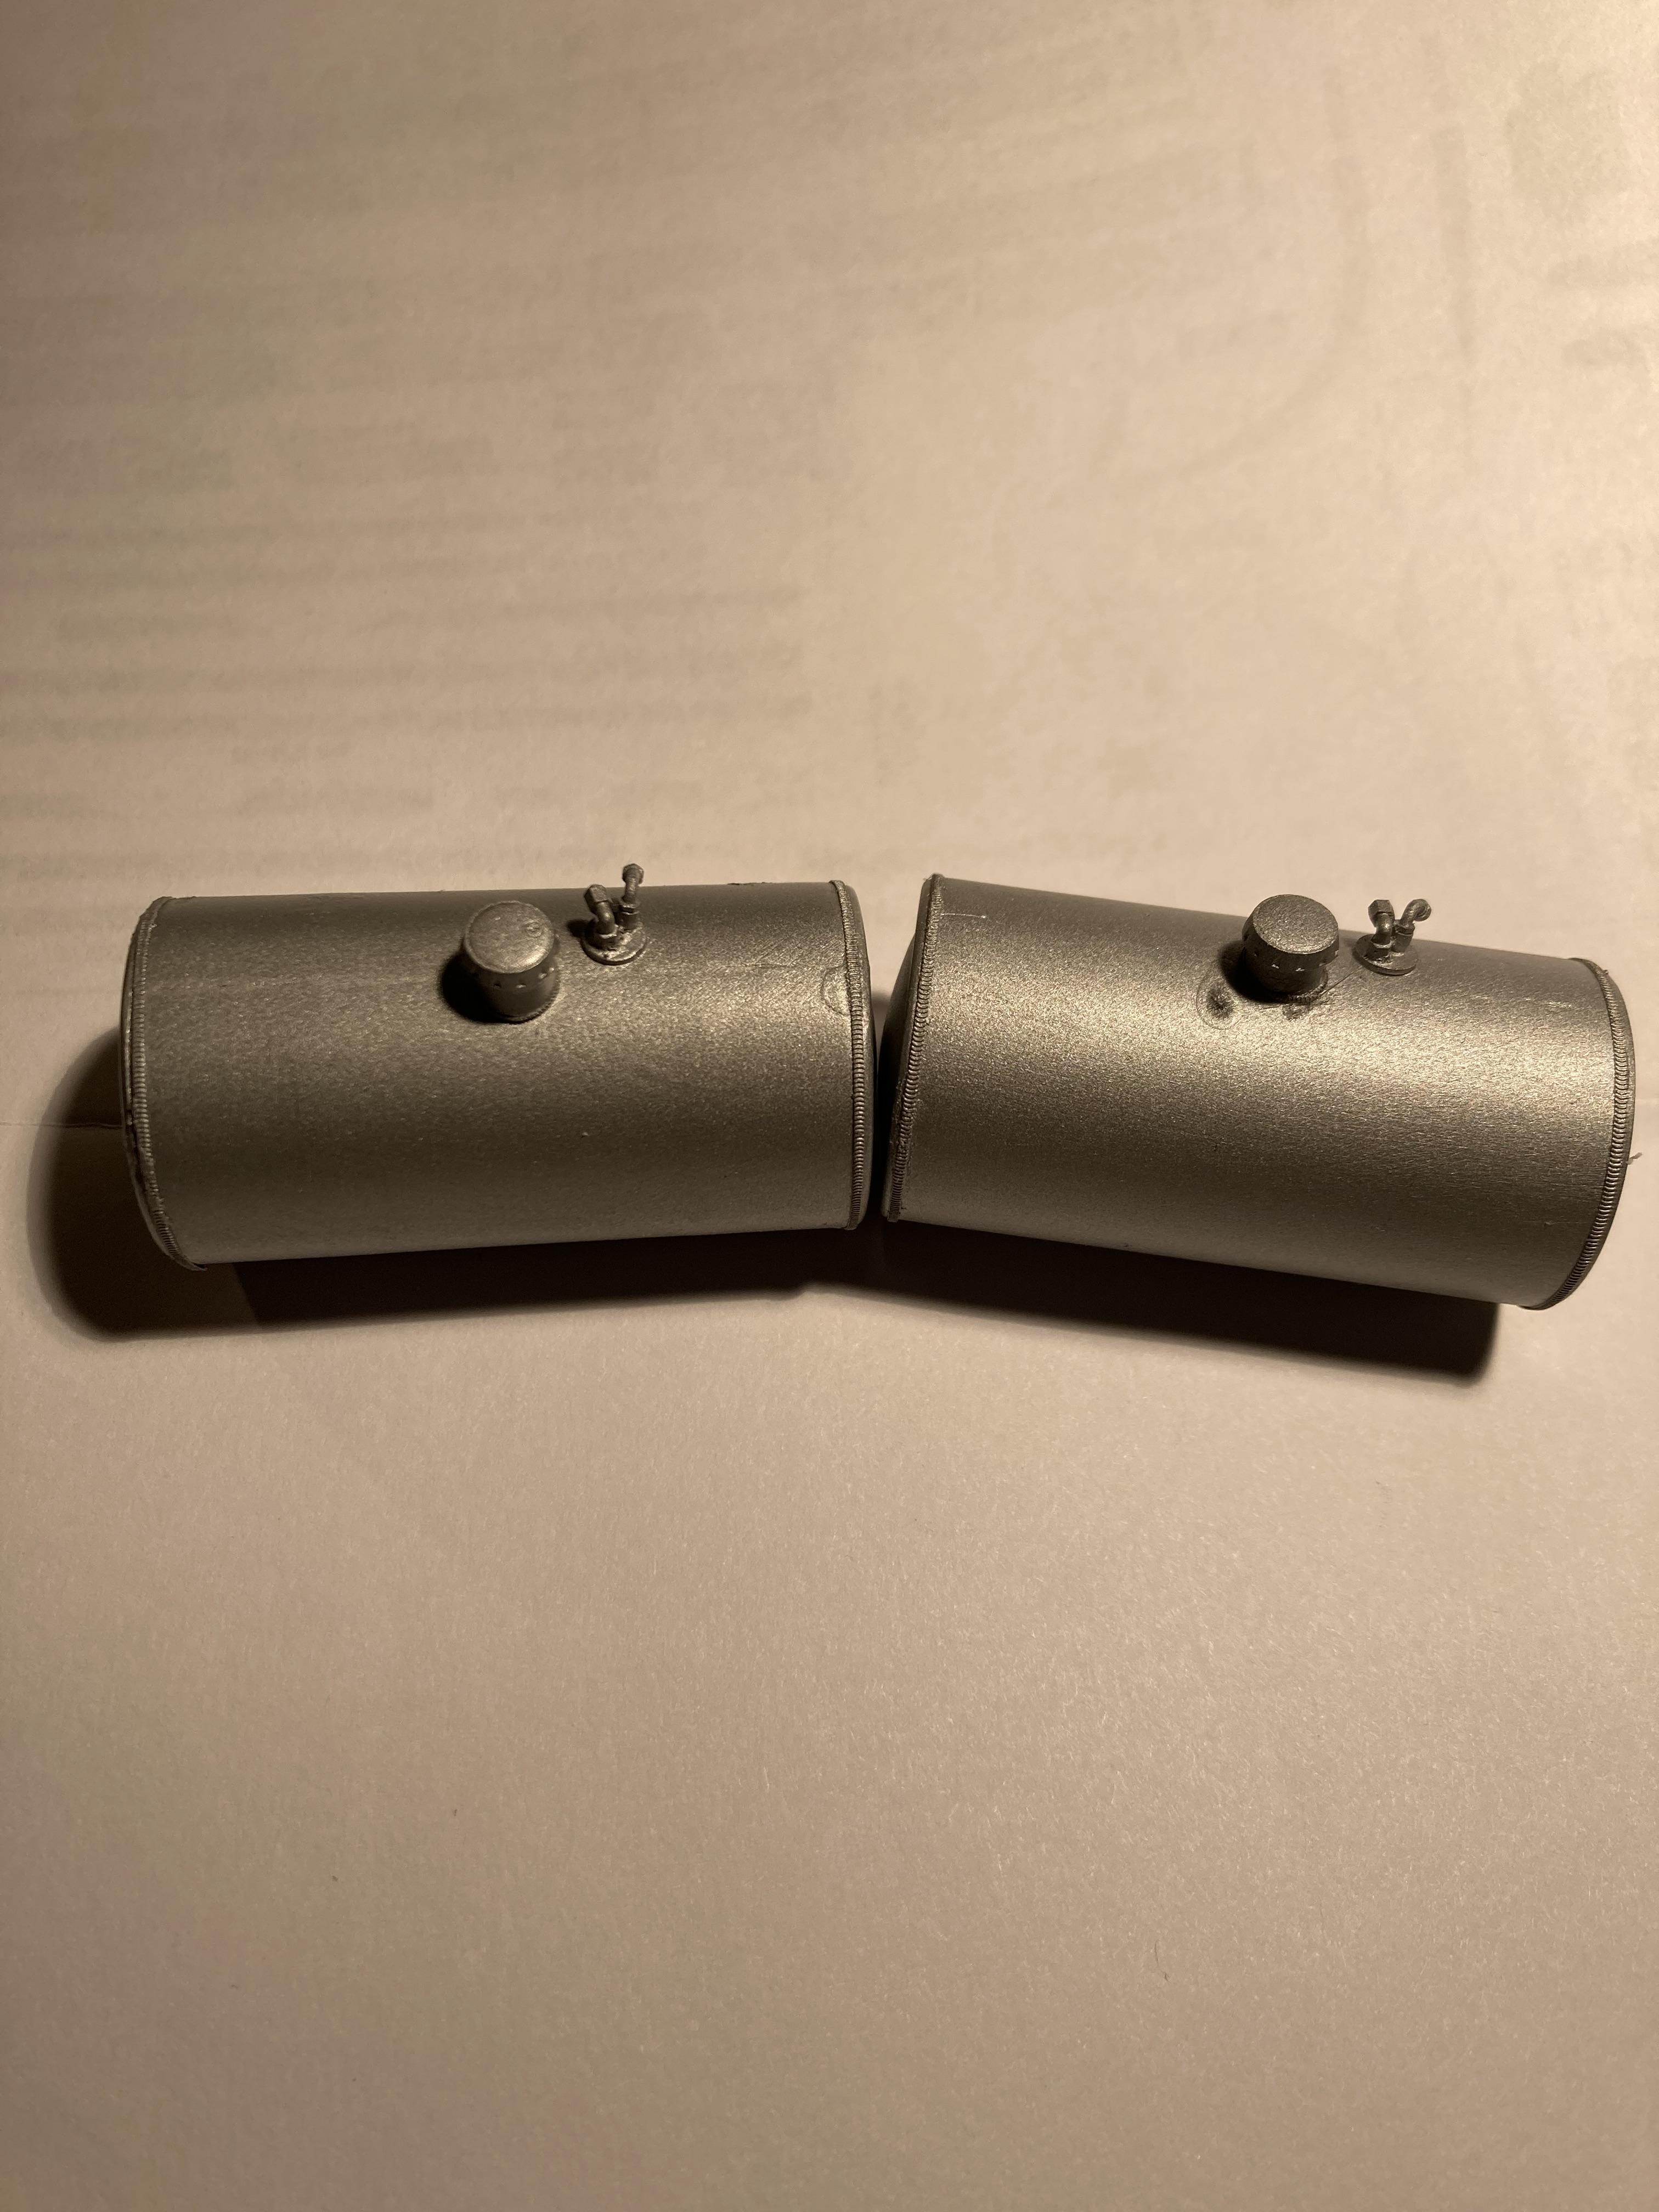
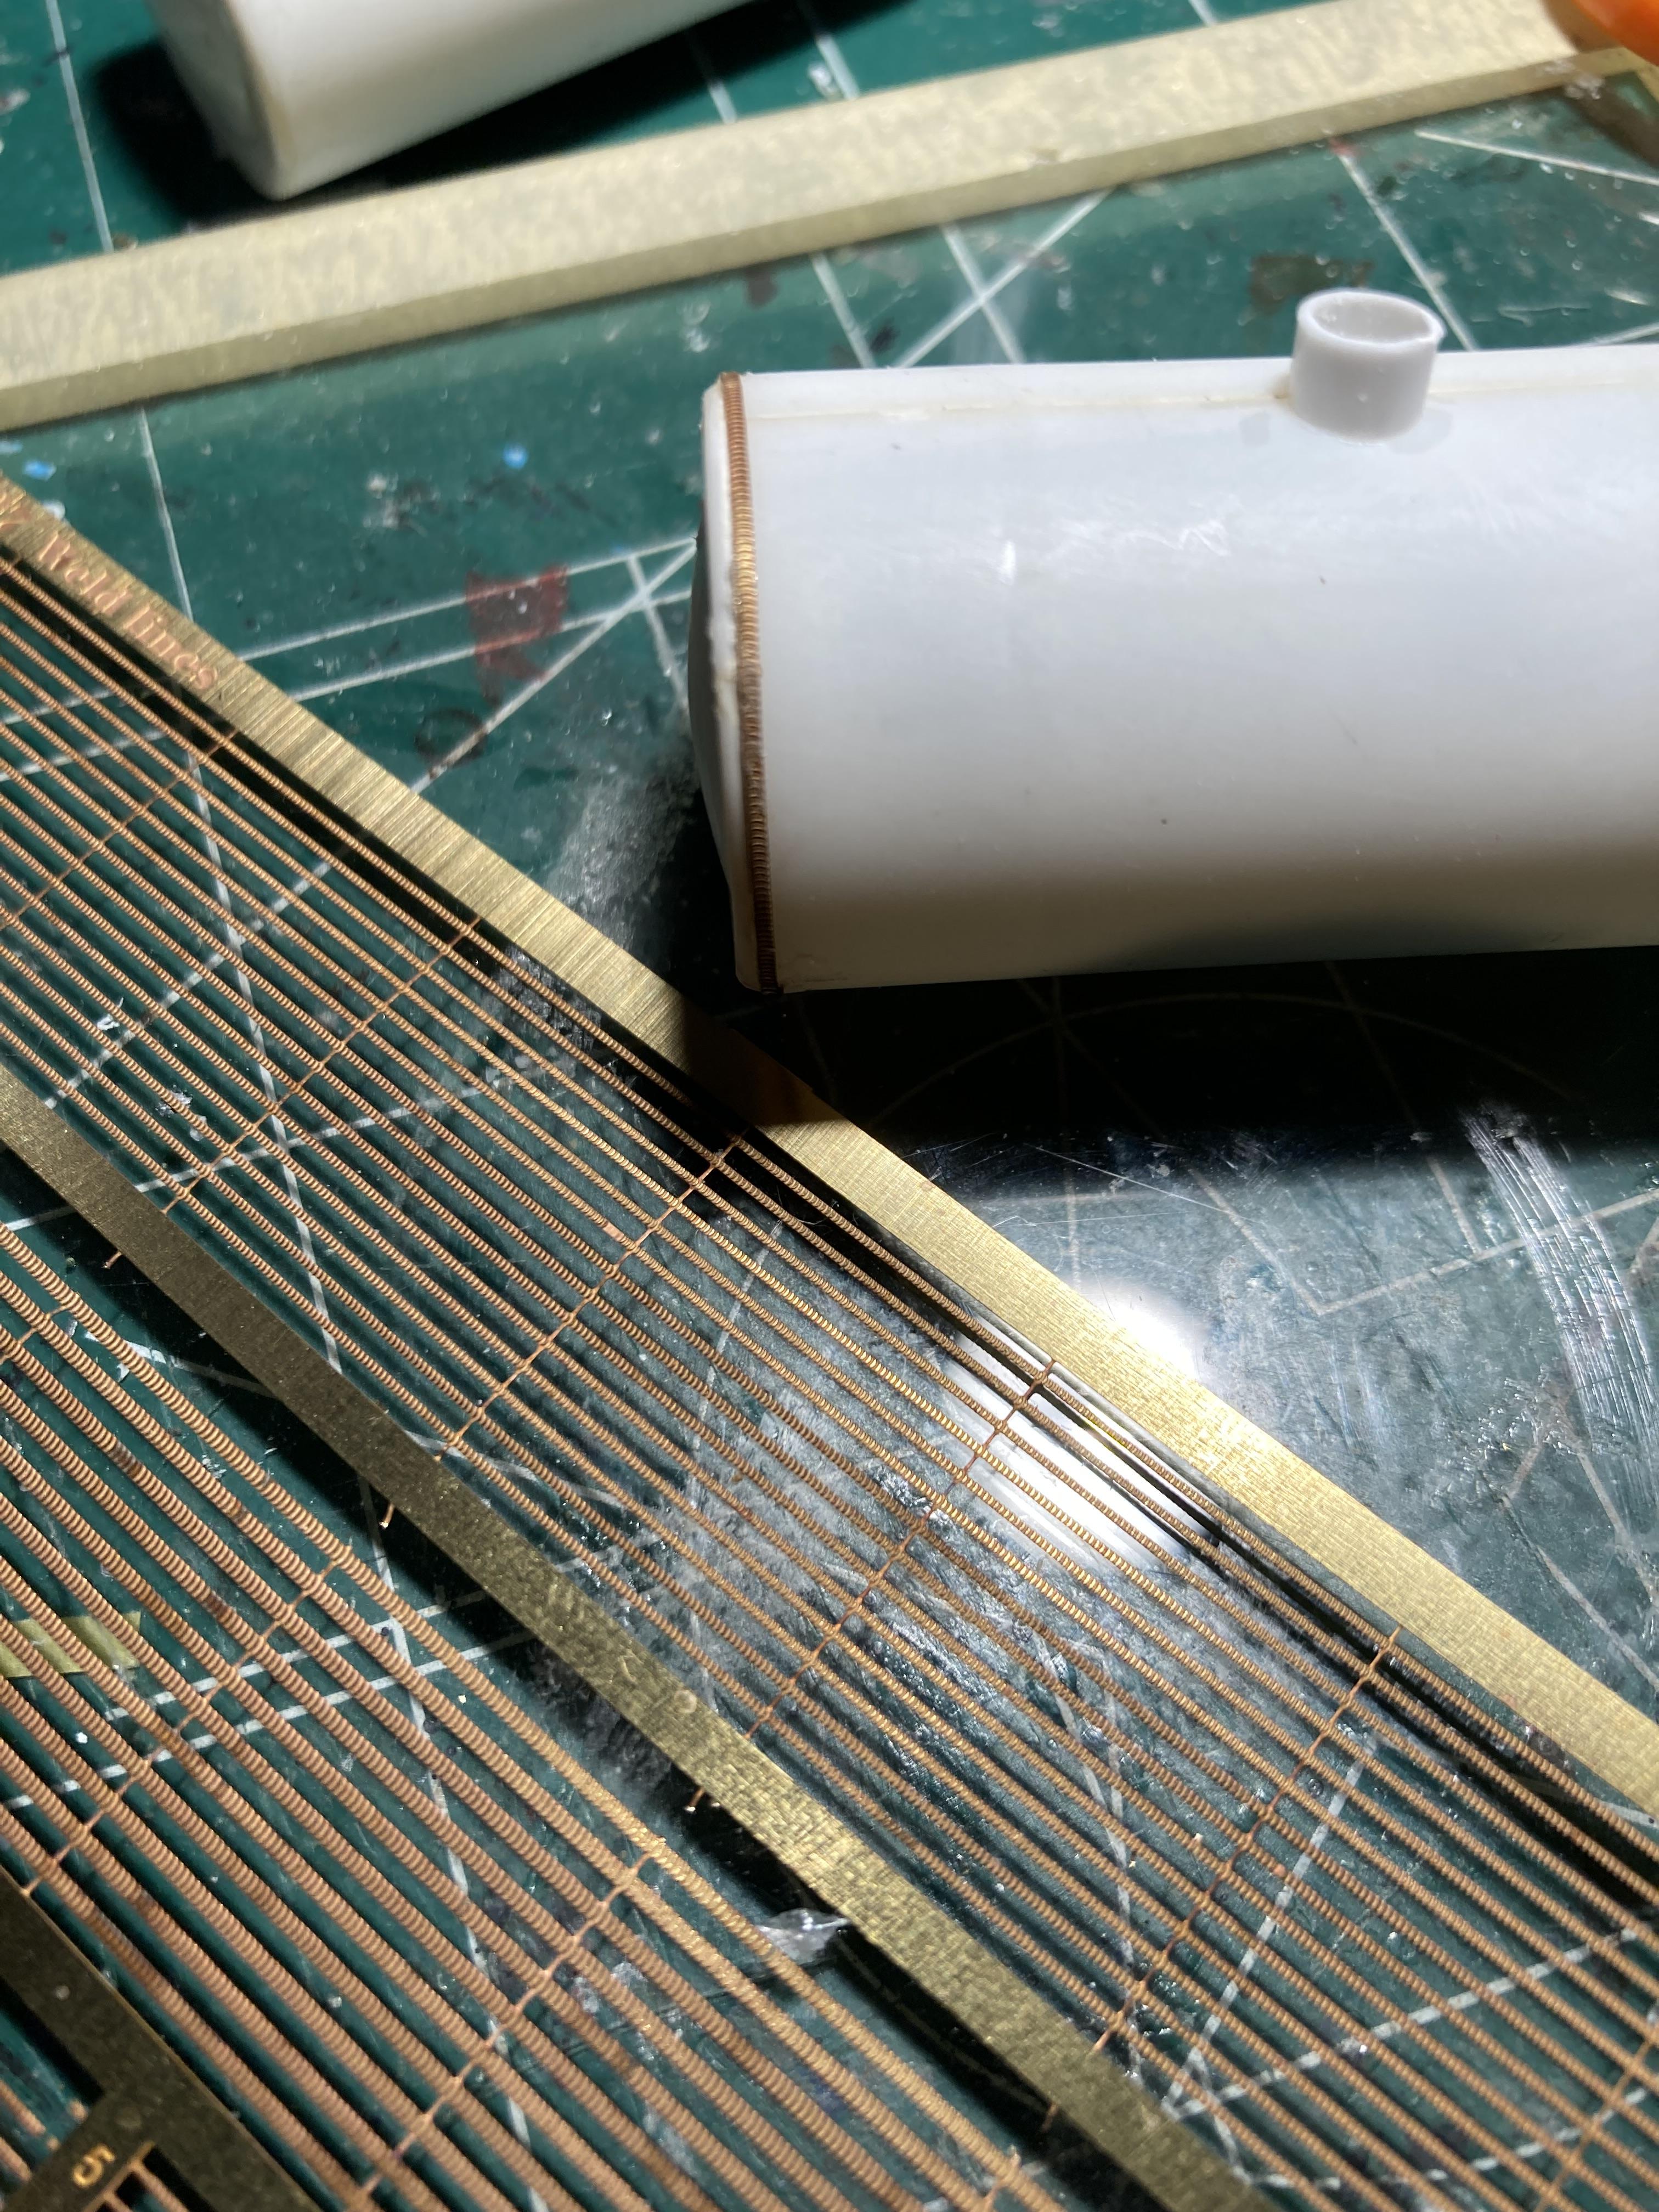
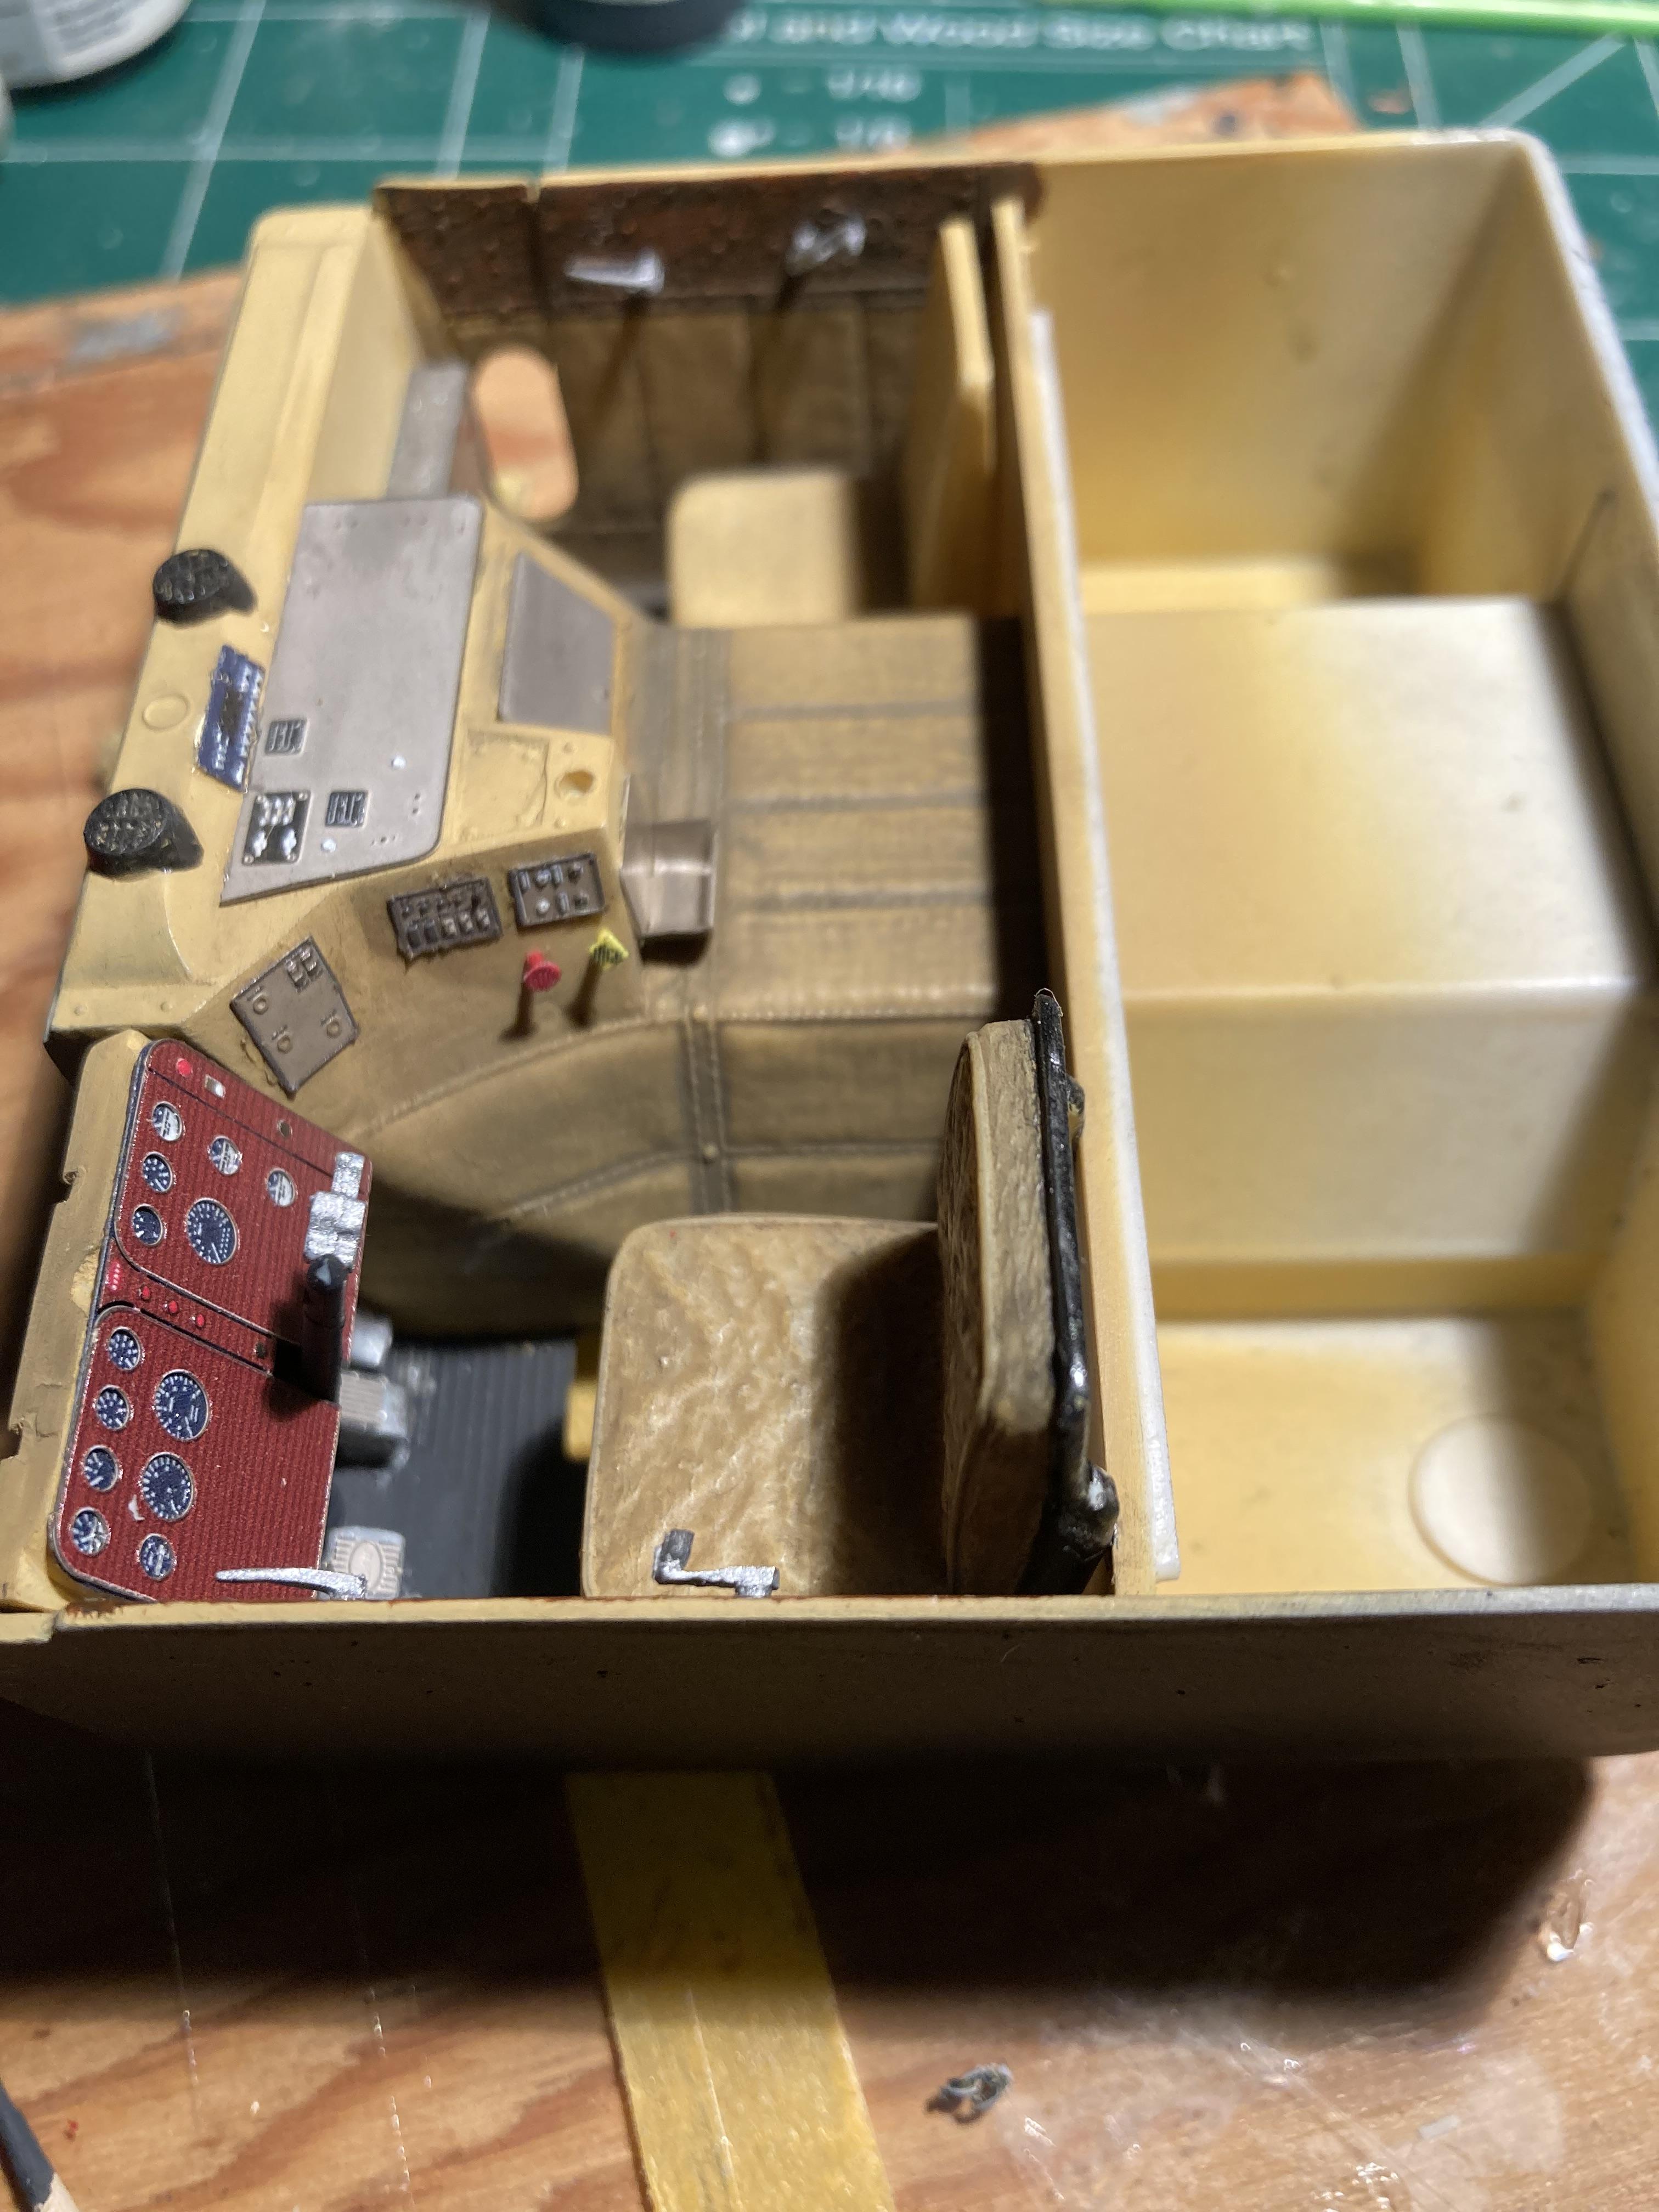
Well , here is another first for me. In trying to go the extra yard here, I thought I would try CTM’s pe ‘weld beads’ ……. Although a bit tedious as they are such a fine piece to work with, but beautifully detailed and are soft enough to go around some very tight curves and still lay reasonably flat, I think they may quite well be worth the effort. The tanks I’m using in the conversion are old ones from an AMT Kenworth cabover kit that bace been in my stash since about 1978….. I did say old …. As previously mentioned, they were de-chromed and sanded smooth, the weld seams on the ends cover up the seam from the end cap to the tank beautifully. I am hoping under a coat of paint these will pop ….. we’ll see I guess ….
-
Western Star 4900 FA plow truck
Biggu replied to BK9300's topic in WIP: Model Trucks: Big Rigs and Heavy Equipment
FAT fingers STRIKE again !!!? -
The Same but “ a little “ Different
Biggu replied to Biggu's topic in WIP: Model Trucks: Big Rigs and Heavy Equipment
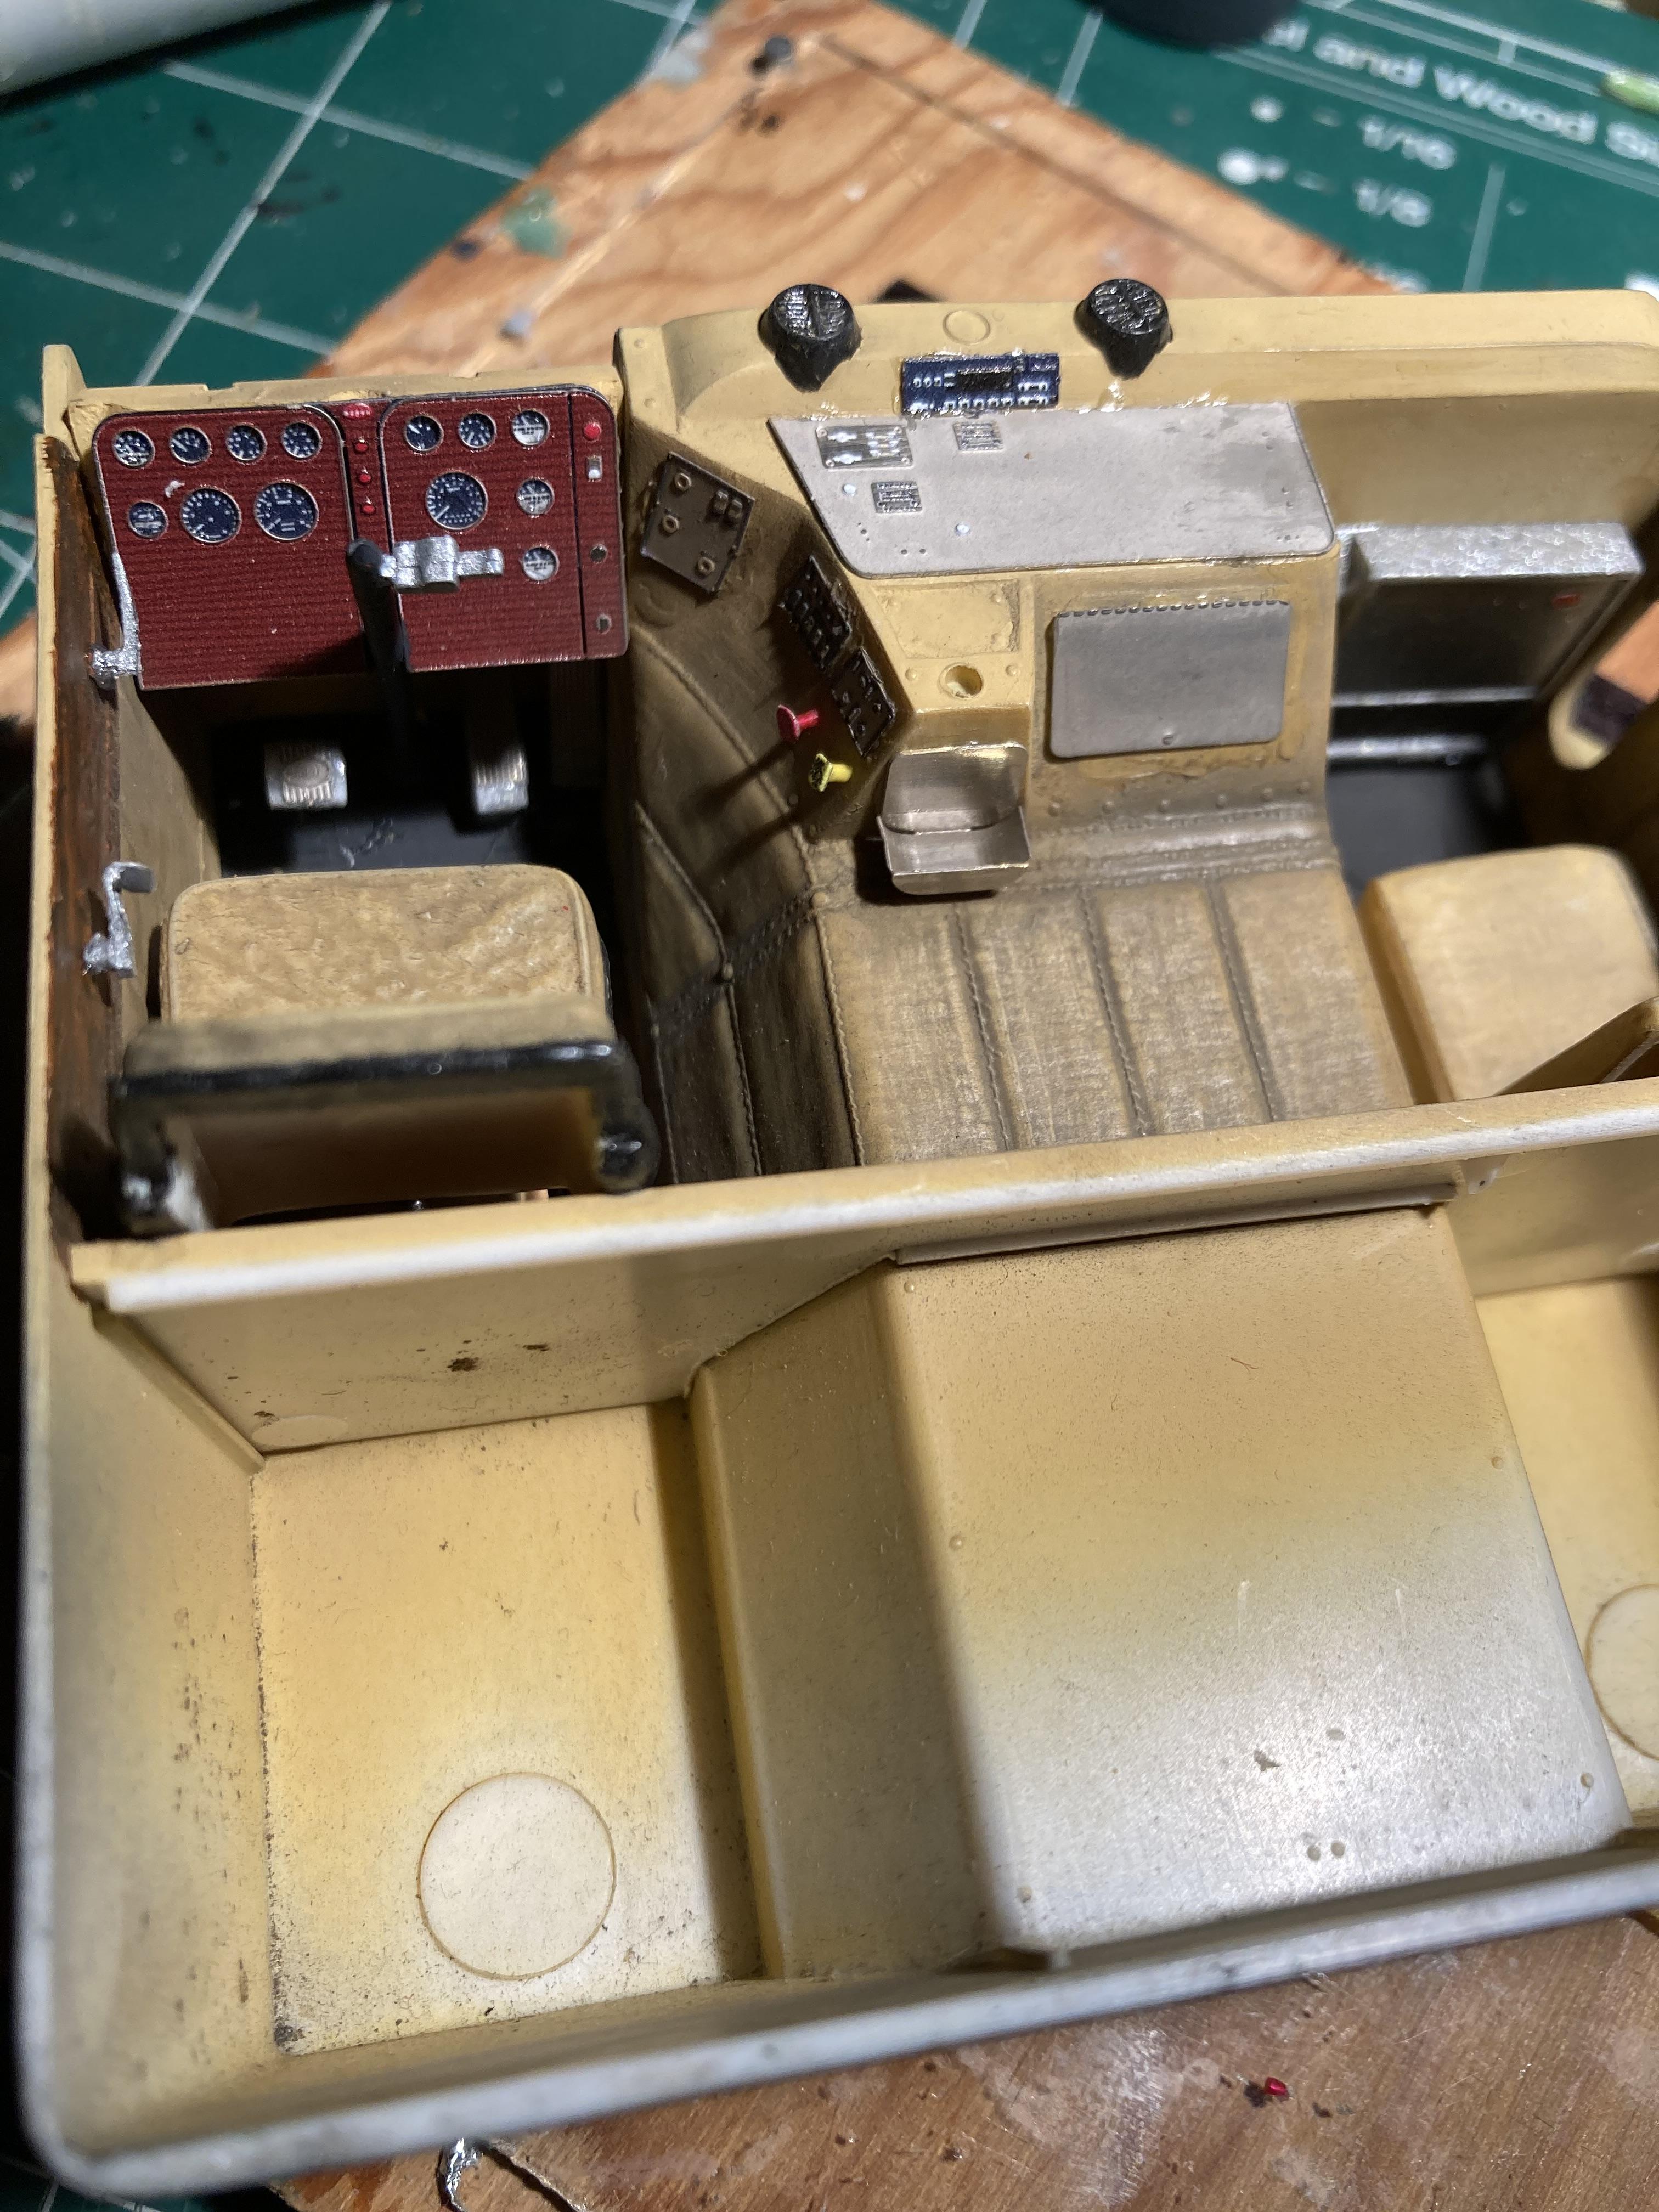
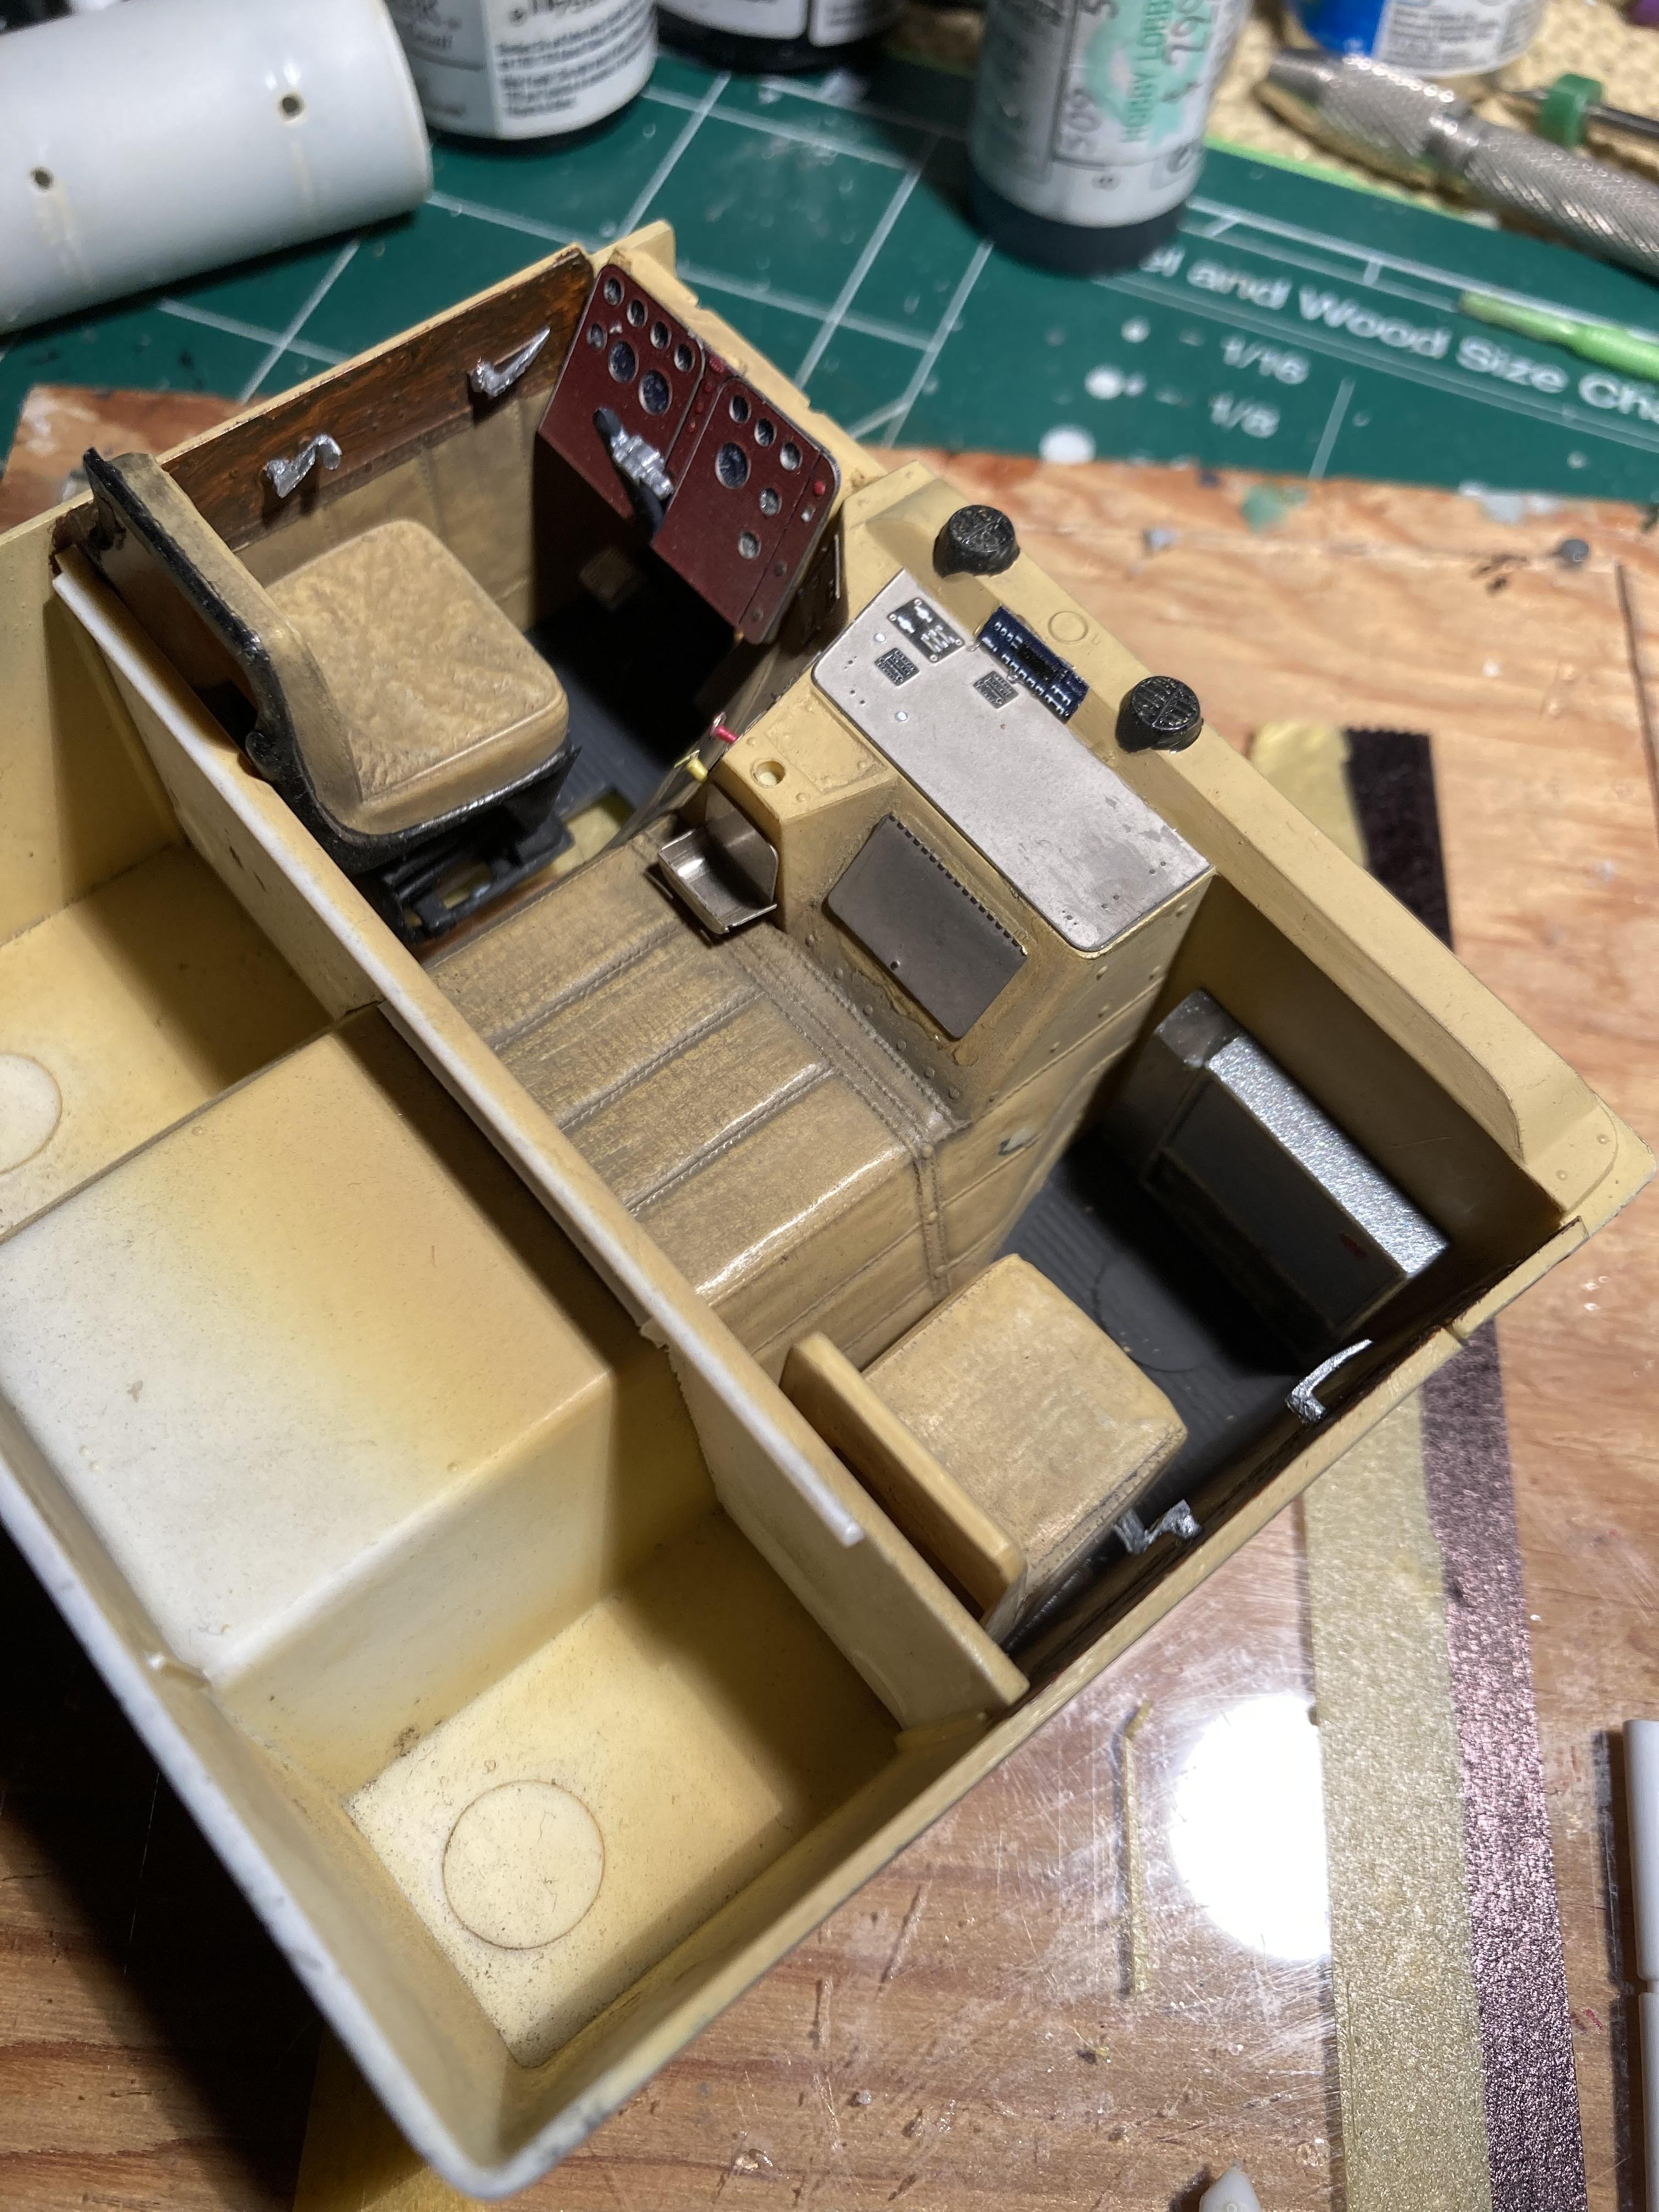
Another little update ….. here is the interior tub , almost done … just have to add the steering wheel, pretty much….. CTM pe is the hero here ….. their dash work is beautiful and the small ash tray had to be bent to shape?and the brake valves are as big as the head of a pin, but they son’t look right glued flat to the dash, so they should be made to give a 3d effect, I thought a small piece of wire would give that effect of what the real valve would be like on the dash. It also gave it the look of the actual valve, also as this is an older working truck, going with the theme of a worker and not a show truck, some dust and wear should be seen. So again with the pigments, dirties up the seats a bit and as the dog house is a leather or vinyl it can be dirty but has to have a bit of a ‘sheen’ and I think I managed that illusion. Also resin door handles and window cranks. I also dirtied up the sleeper curtain and it will be installed just before the tub goes in to the cab. Same as the steering wheel , I just don’t want to break them off with my clumsy hands…… she is slowly coming along…..
-
The Same but “ a little “ Different
Biggu replied to Biggu's topic in WIP: Model Trucks: Big Rigs and Heavy Equipment
I have a set of AK pigments for dirt and grime and I also have a set of Doc O’Brien’s pigments from MicroMark tools. You can mix and make any color mud or dirt or dust that you fancy. A little seems to go a long way and the pigments from Micro Mark are fairly reasonably priced although you don’t get quite as much as in the AK bottles. But they are perfect for starting out with out a huge investment…. -
The Same but “ a little “ Different
Biggu replied to Biggu's topic in WIP: Model Trucks: Big Rigs and Heavy Equipment
Thanks Ron, the thing is with the pigments, if you don’t like what you have done, just wash it off and start again , I’m still practising as well. I’d be excited to see what you do… -
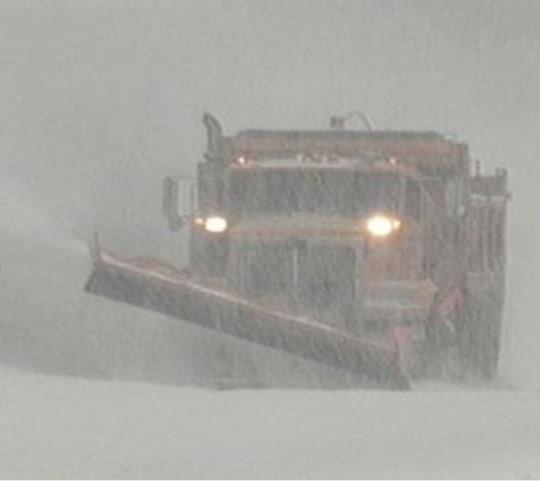
Western Star 4900 FA plow truck
Biggu replied to BK9300's topic in WIP: Model Trucks: Big Rigs and Heavy Equipment
The generosity here is off the clock. The exchange of ideas, information and help…… This is so cool. Makes this a nice place to bang out….. Jeff -
Western Star 4900 FA plow truck
Biggu replied to BK9300's topic in WIP: Model Trucks: Big Rigs and Heavy Equipment
Those decals are beauty’s !! And I will have to look for that material. Thanks ! -
Western Star 4900 FA plow truck
Biggu replied to BK9300's topic in WIP: Model Trucks: Big Rigs and Heavy Equipment
Oh my Lord , Brian. This makes my eyes water…… your attention to detail is staggering. Where did you get the mud flap material? It looks really good and right to scale. Also did STS do the YRB decals? Love the update -
Mid 60s Peterbilt Unilite COE
Biggu replied to RoninUtah's topic in WIP: Model Trucks: Big Rigs and Heavy Equipment
Lookin GOOD Ron !!!! -
Tigercat 880E longer 1/48 scale
Biggu replied to François's topic in WIP: Model Trucks: Big Rigs and Heavy Equipment
Oh my ……….???? spectacular !!!! -
The Same but “ a little “ Different
Biggu replied to Biggu's topic in WIP: Model Trucks: Big Rigs and Heavy Equipment
Hahahaaa. Wasn’t that how you knew that you had to add oil?????? -
The Same but “ a little “ Different
Biggu replied to Biggu's topic in WIP: Model Trucks: Big Rigs and Heavy Equipment
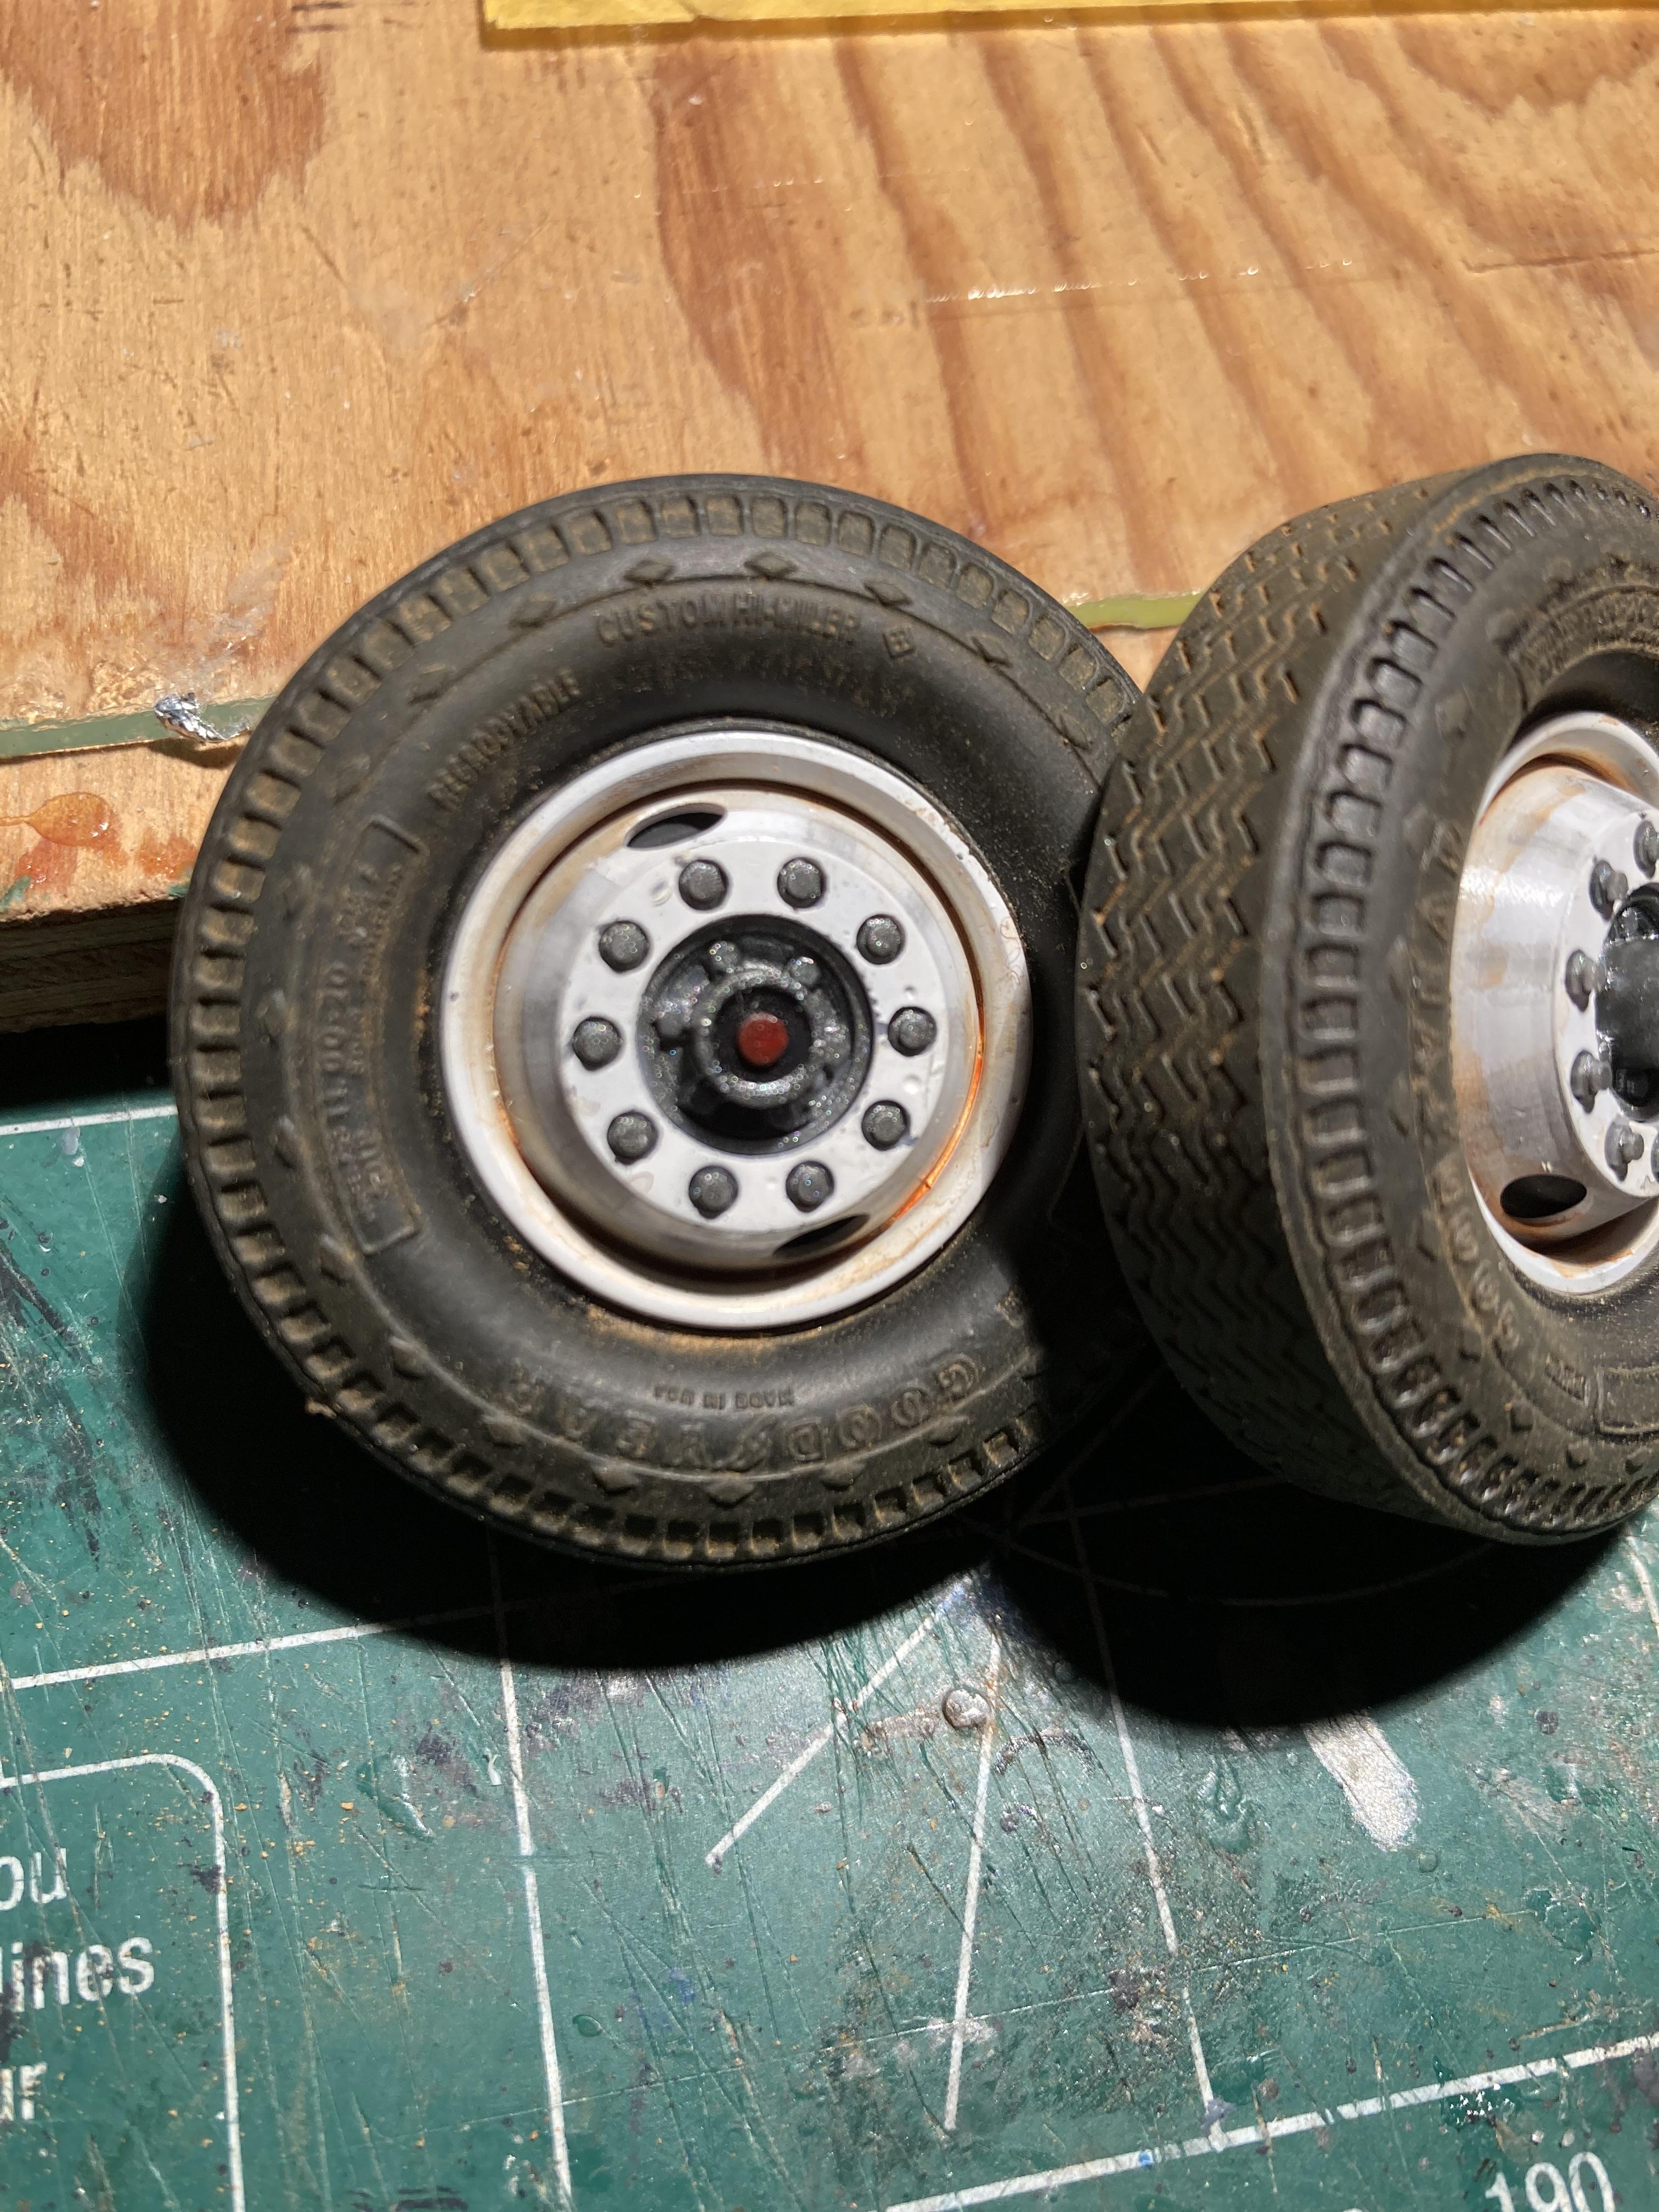
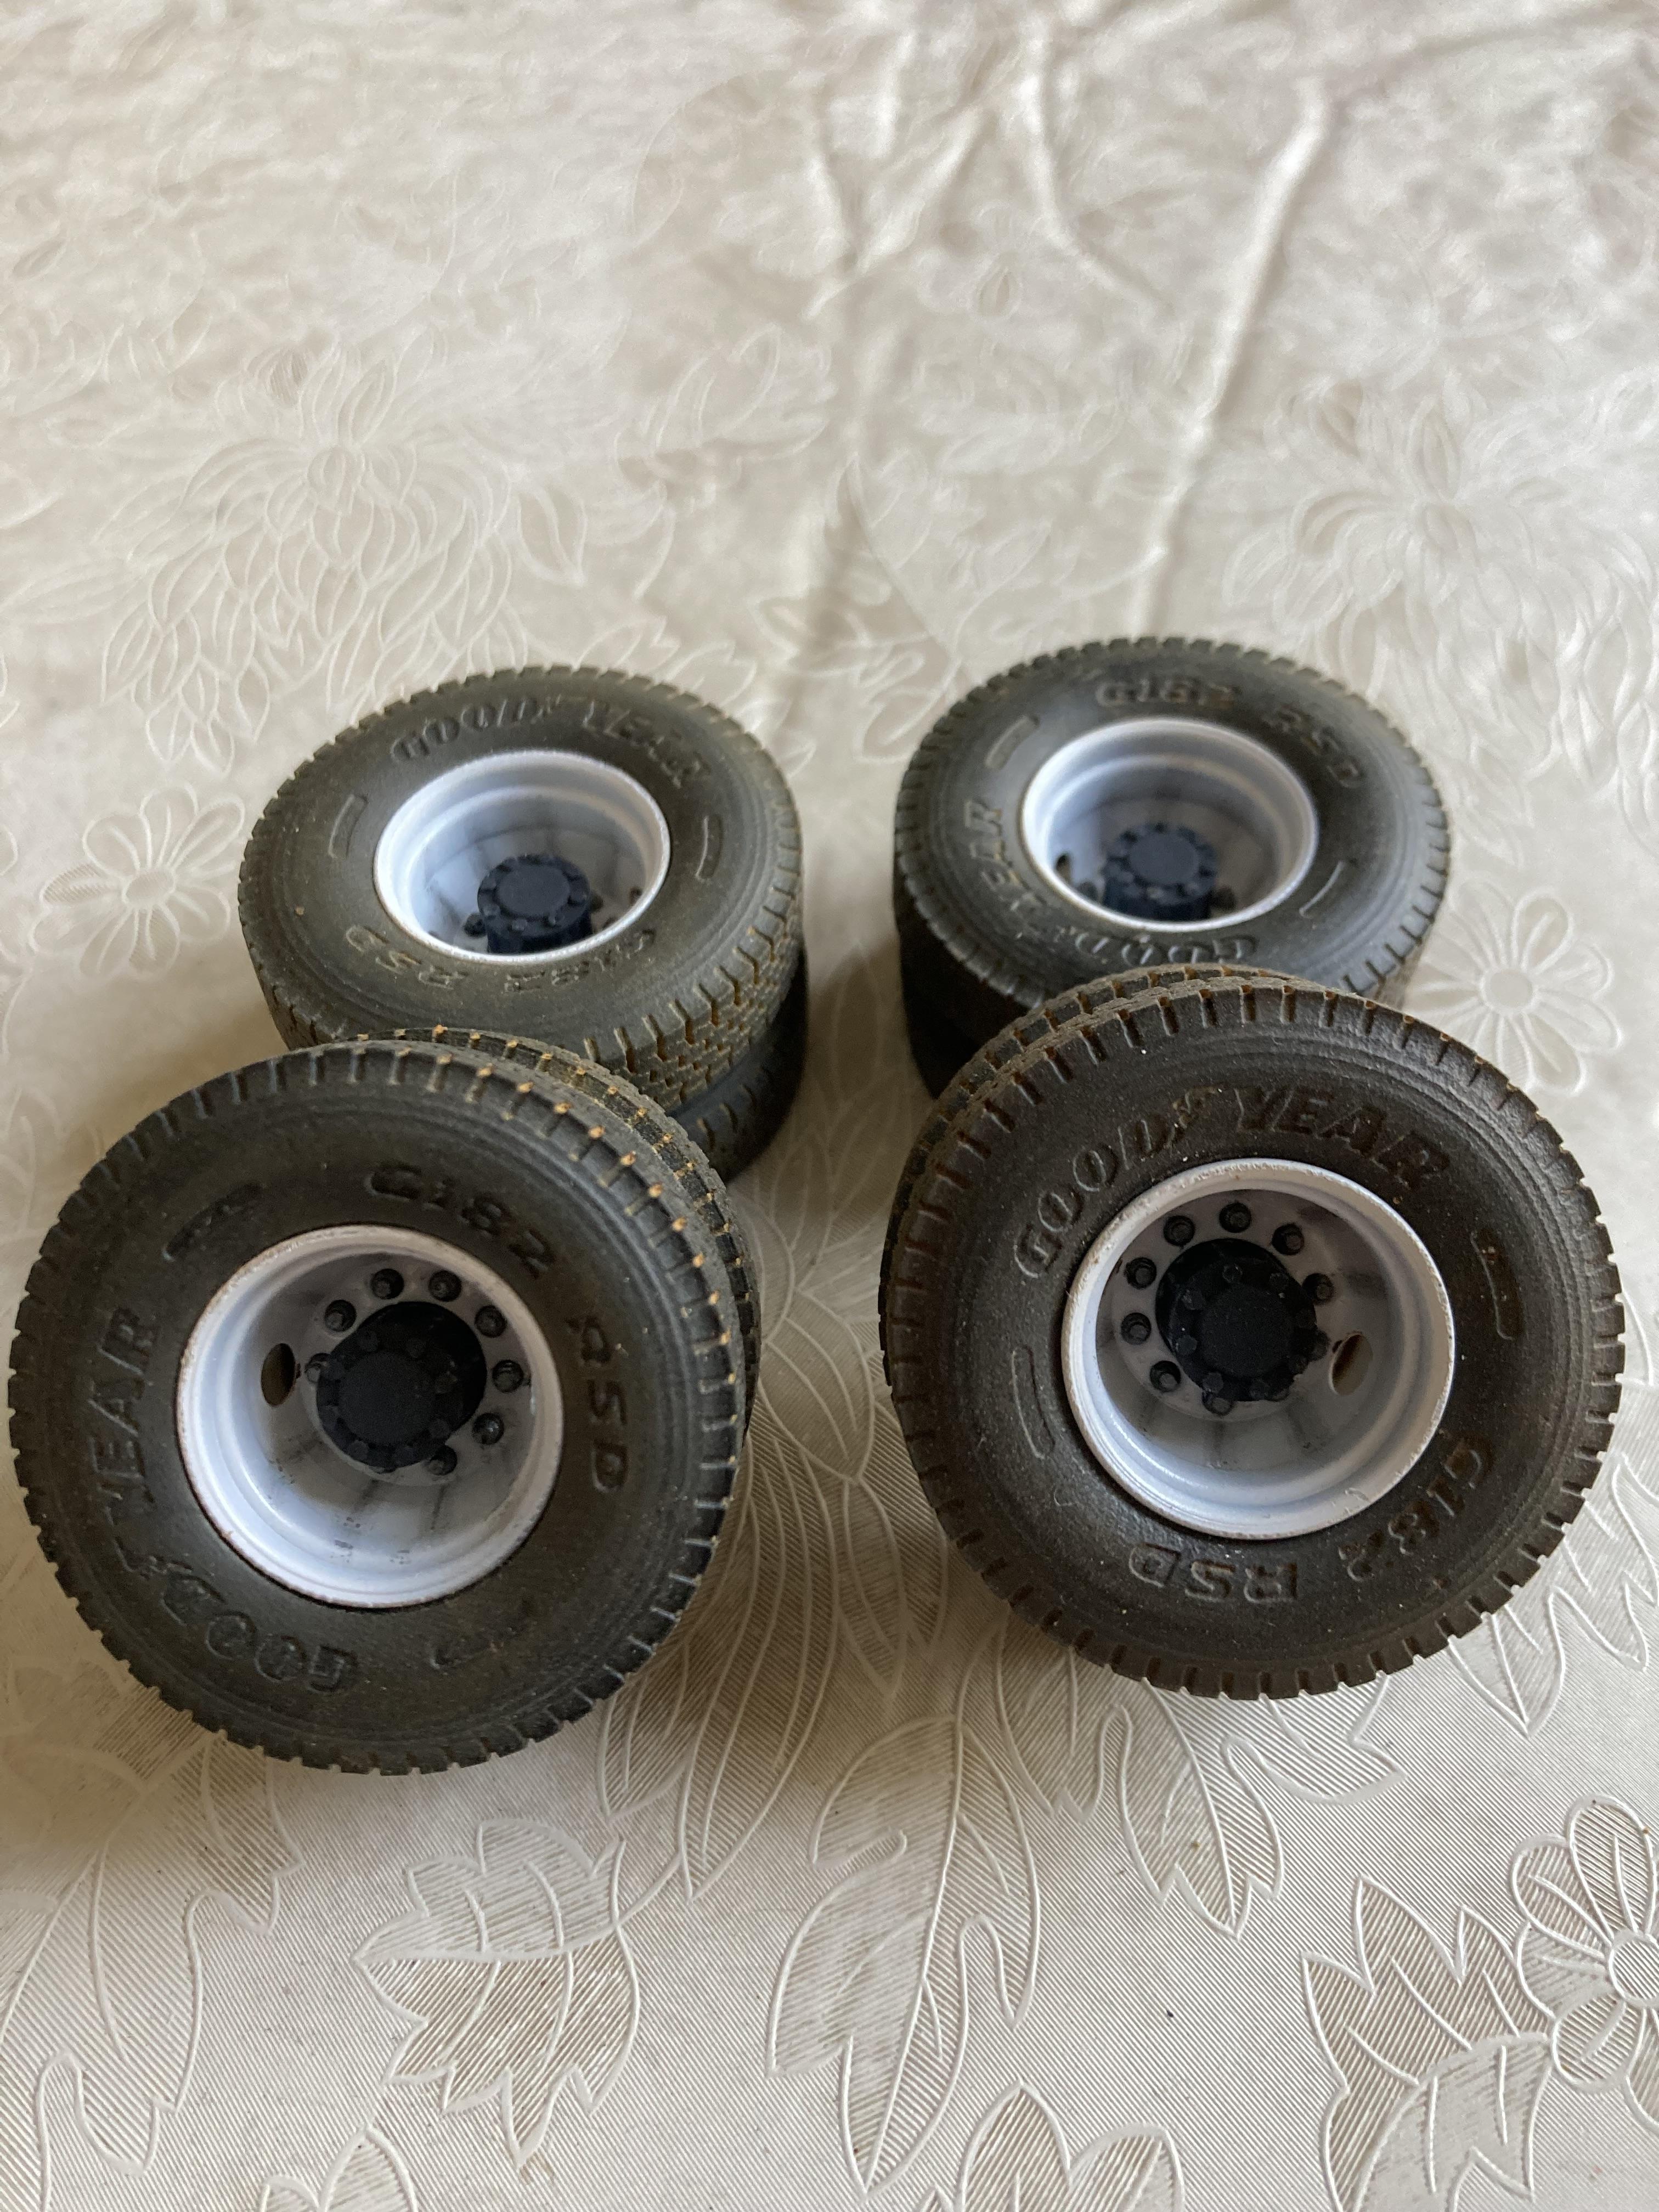
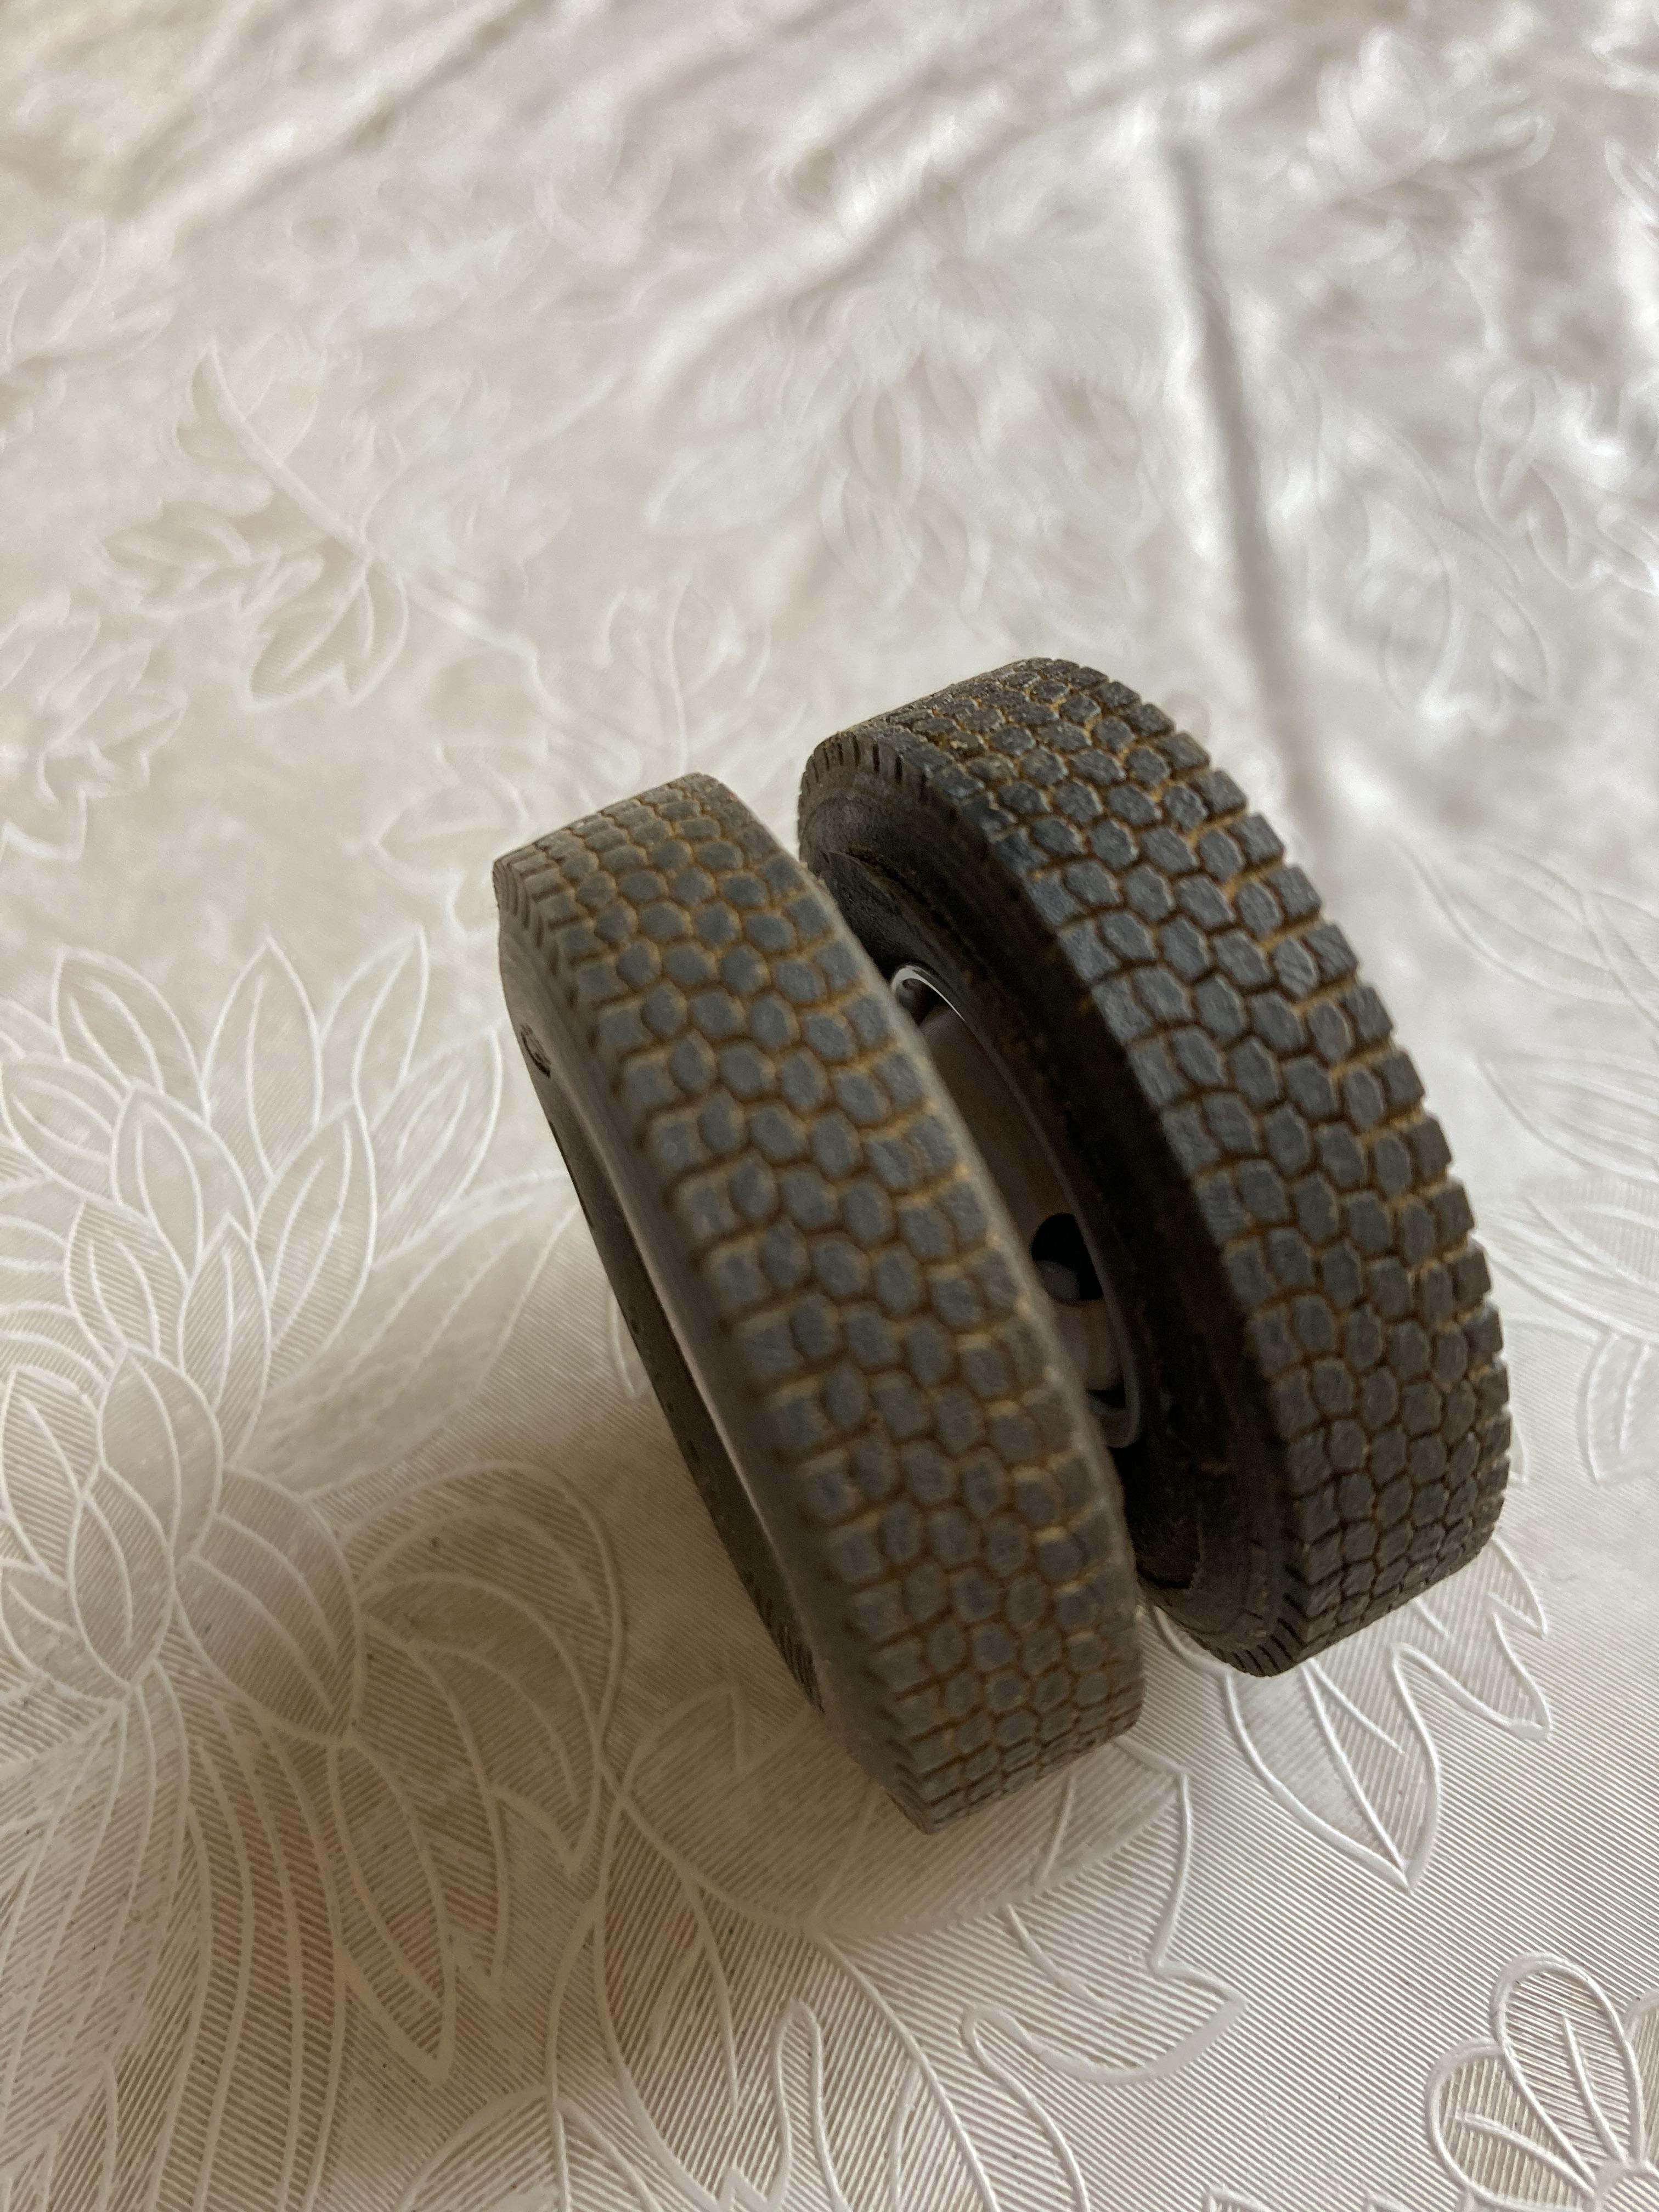
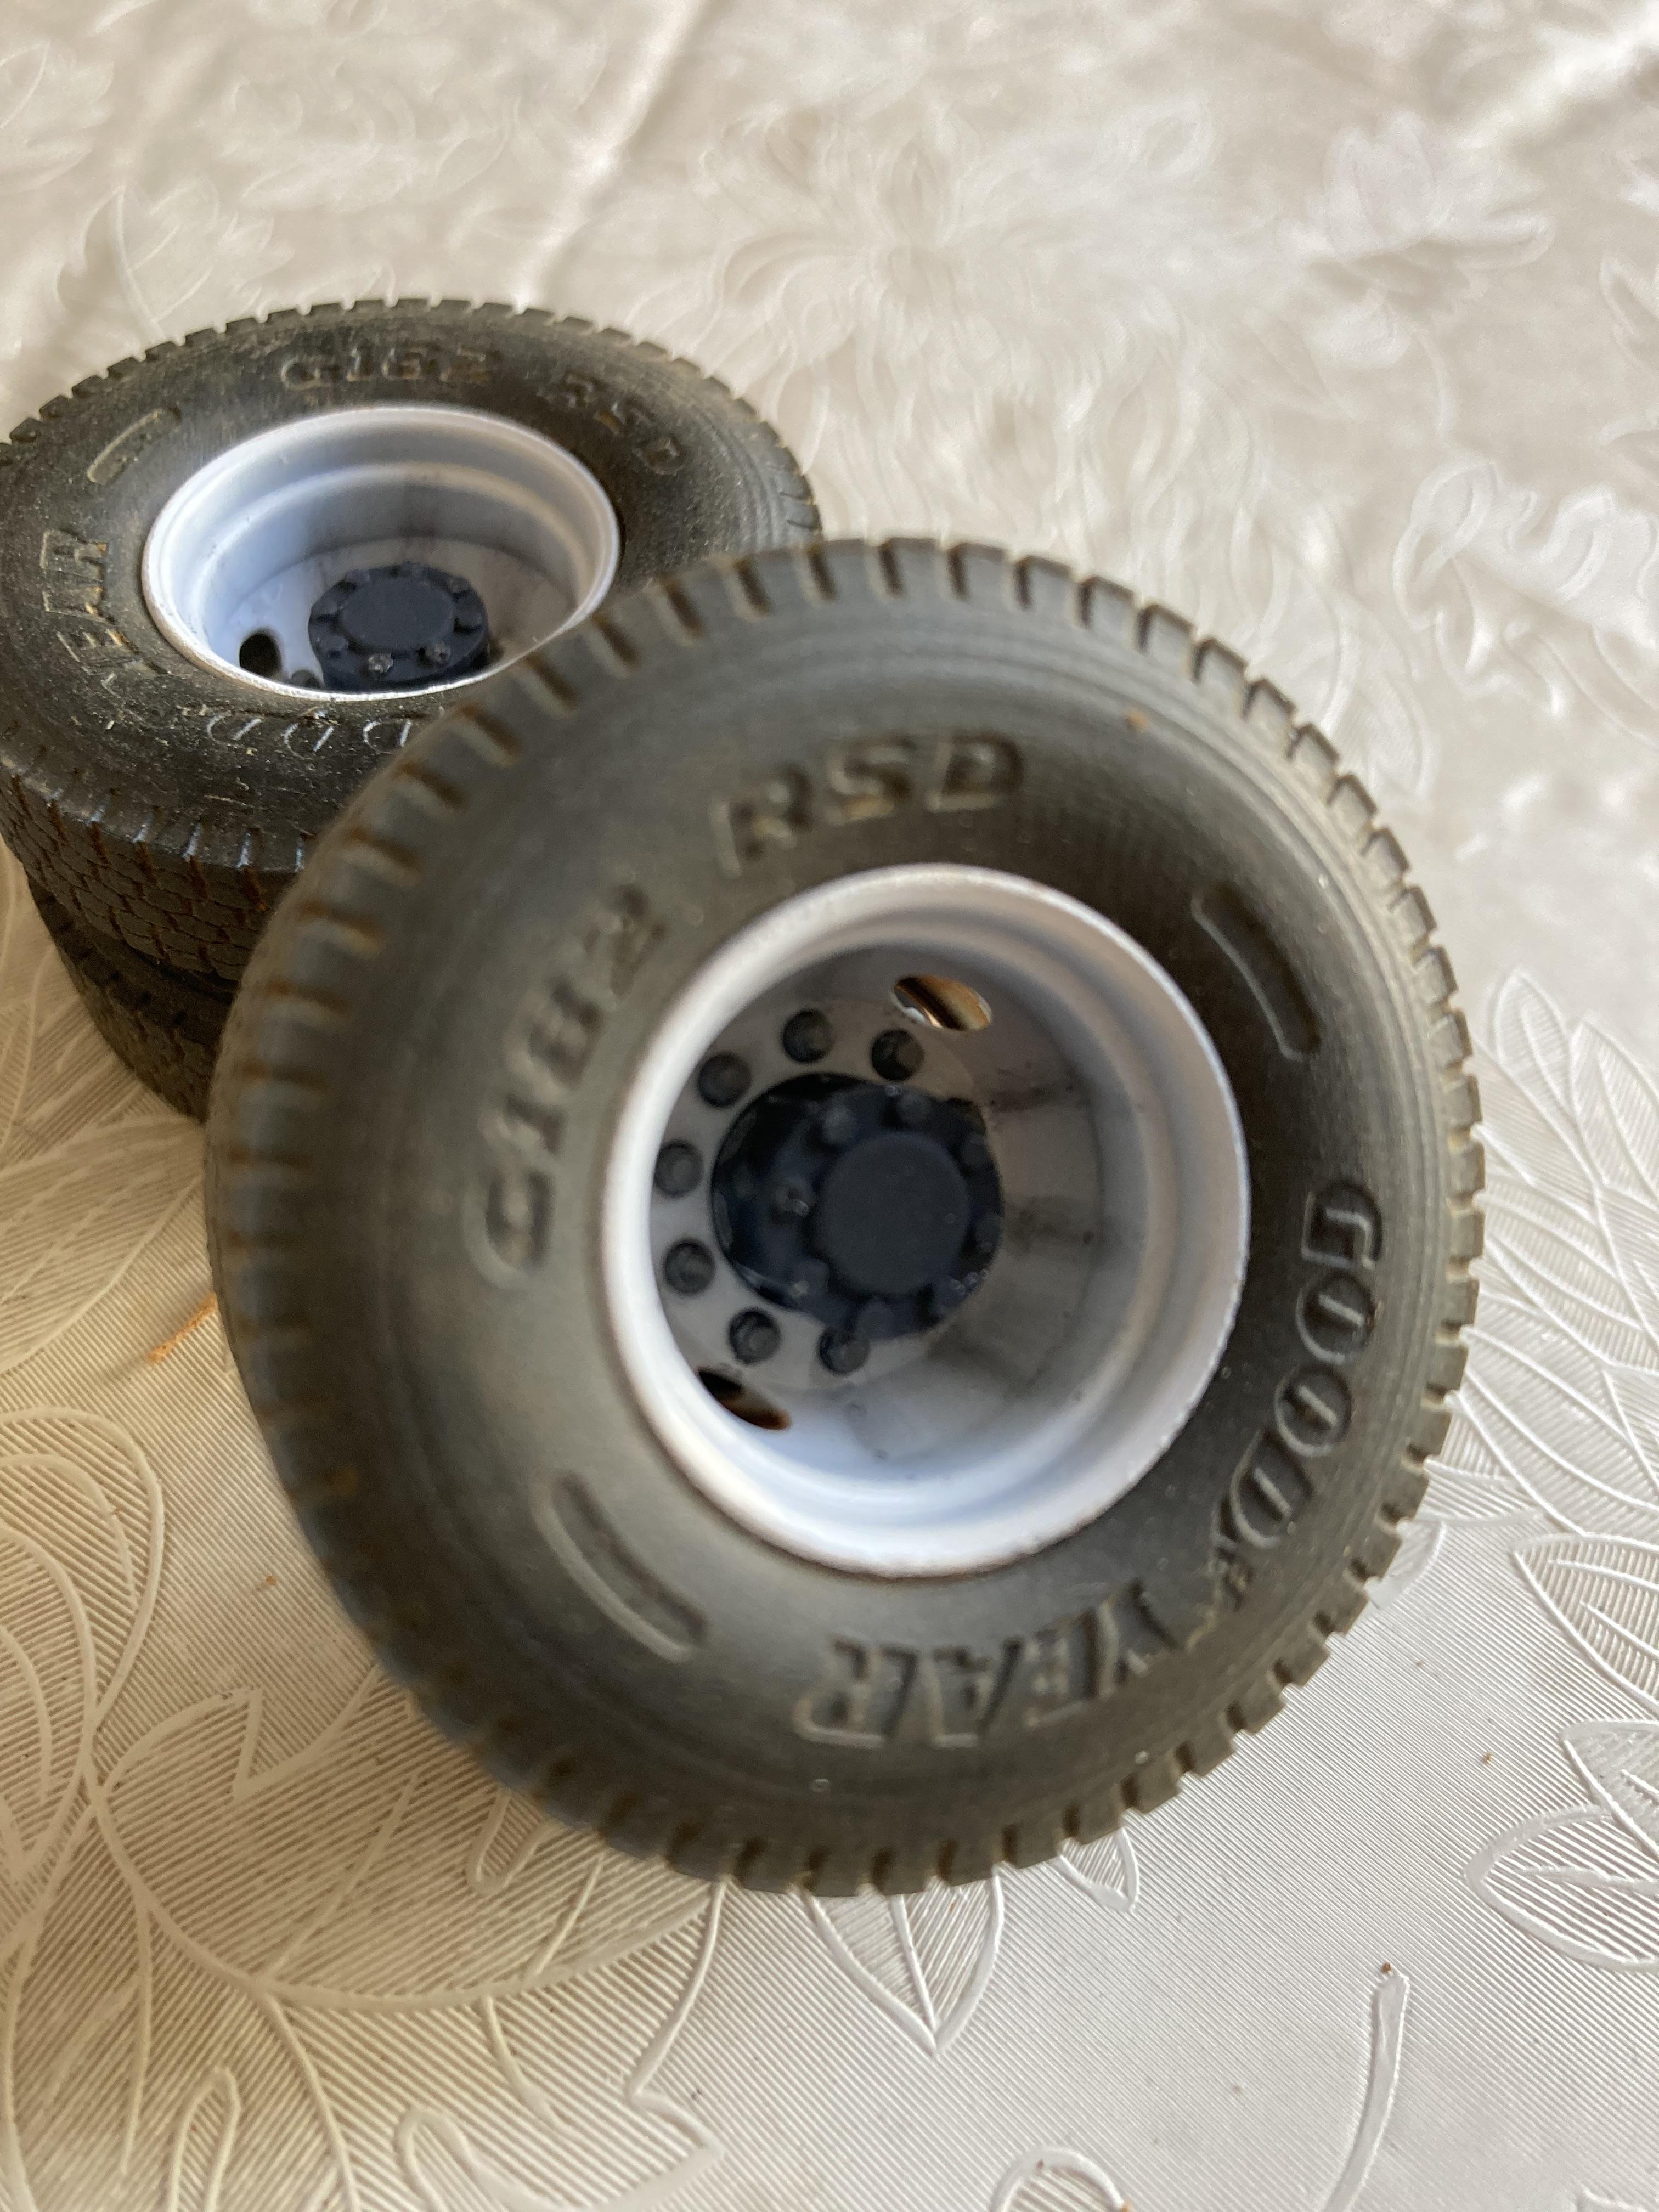
Thanks Randy !! The wheels are 20” 2 hole Budd rims I bought from Paul at STSupplyco.com and they are little gems. The come with the rims and separate hubs for the steering axle and a set for the drivers. Worth every penny. As far as the ‘mud’ in the treads, I do a real simple thing ,…. I take dry pigments and wet them down, take a good thick firm brush and apply heavily to the tread area and generally make a mess. Lol , I let it dry over night and then next day take the same brush , clean it and keep it damp and rub the excess off the treads until the “ rubber “ shows and then rub with my finger to clean off the tread area cleaner and then streak the side walls with the damp brush dabbing it on a paper towel to get the excess off the brush. Let it dry and then rub it gently again with a fine towel or my hands until I get the desired result… does that make sense and paint a picture for you? -
The Same but “ a little “ Different
Biggu replied to Biggu's topic in WIP: Model Trucks: Big Rigs and Heavy Equipment
Thanks Brian, I think who ever wrote that article was surly correct. Its fun though but real easy to over do it. For me, I have to keep the whole picture in mind, like if the tires are heavy mud then the rest of the truck has to match. And of course vice versa. Its a real fun experiment. Thanks for checking in. -
The Same but “ a little “ Different
Biggu replied to Biggu's topic in WIP: Model Trucks: Big Rigs and Heavy Equipment
Sorry the pics are lousy. It’s my phine ? -
The Same but “ a little “ Different
Biggu replied to Biggu's topic in WIP: Model Trucks: Big Rigs and Heavy Equipment
I was’t going to post these as I thought no big deal, but they were very time consuming , rims and tires done. Lots of detail painting and weathering….