Steve H
-
Posts
2,535 -
Joined
-
Last visited
Content Type
Profiles
Forums
Events
Gallery
Everything posted by Steve H
-
Thank you very much for looking, and all the compliments guys. Much appreciated. I know pro street is out of style, but pretty much everything looks better tubbed in my opinion. I have a few pro touring builds in my head now too though....
-
Jim, I love the build no matter what, my vote is for the blower though. Krylon has quite a few pastel colours... Beautiful work, looking forward to see it complete Cheers, Steve
-
All in on this one. I love pro street, and pro stock early-mid eighties Monte Carlos, Grand prix', and Cutlass. Nice work.
-

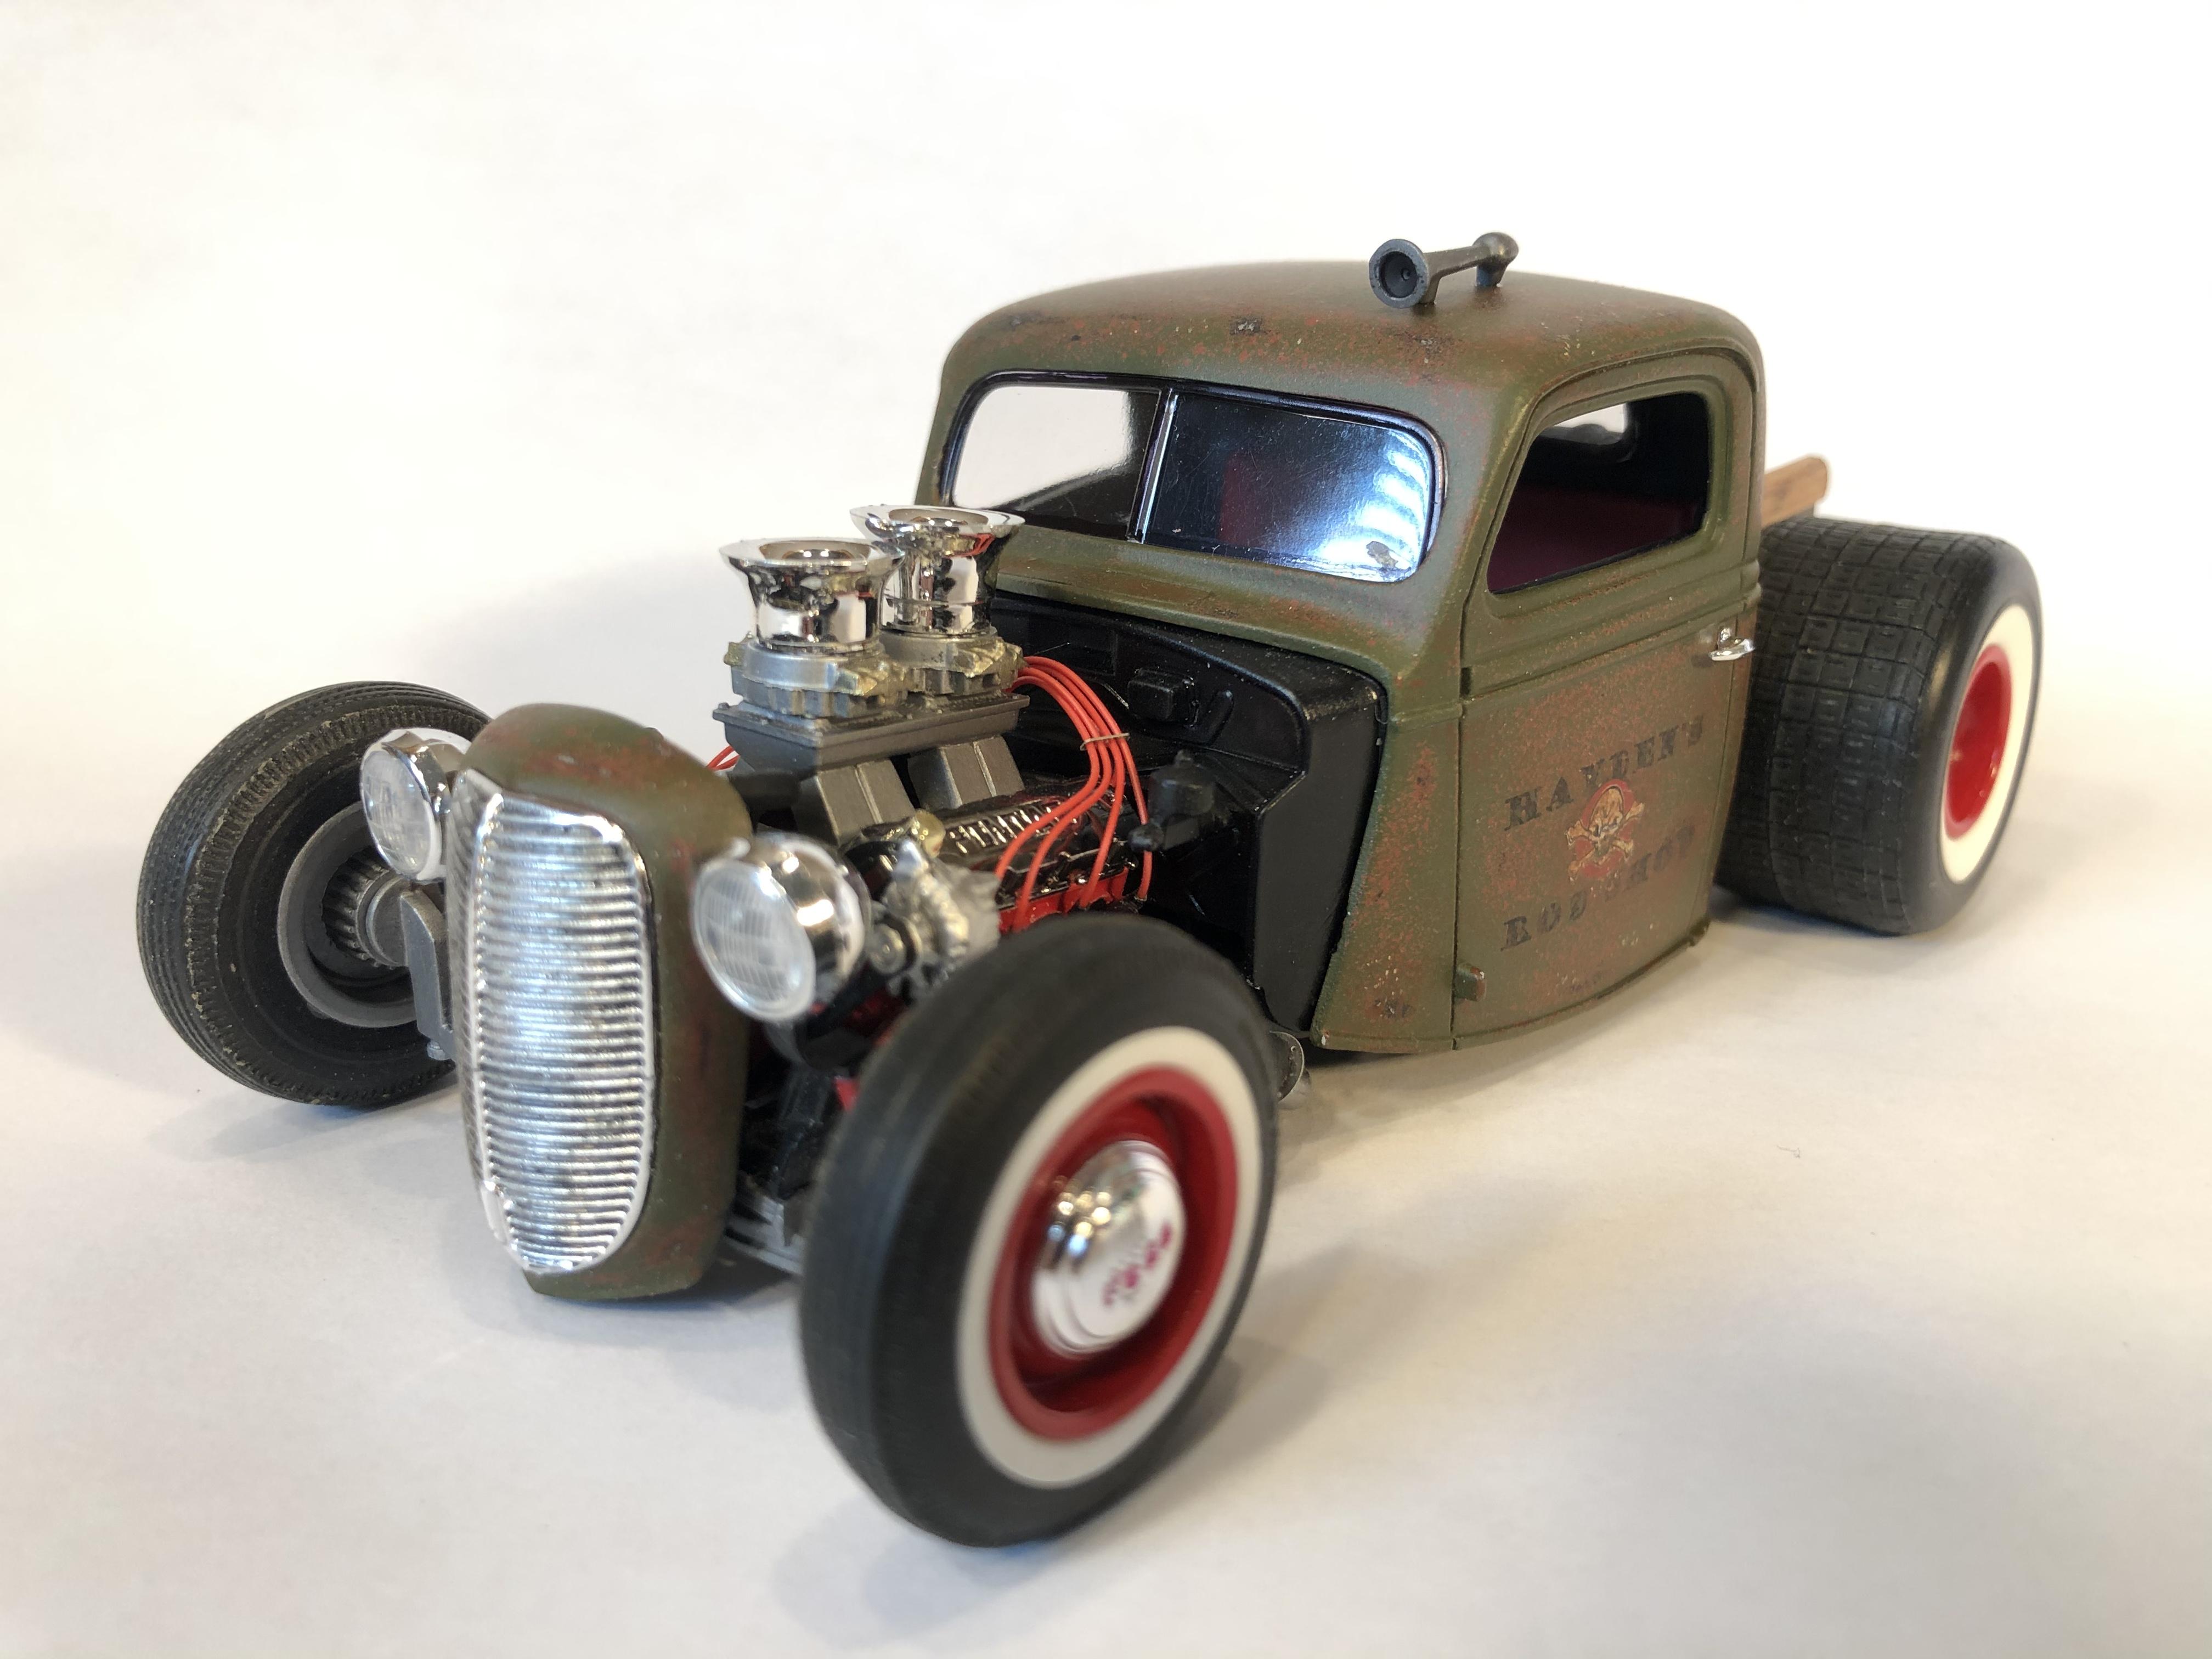
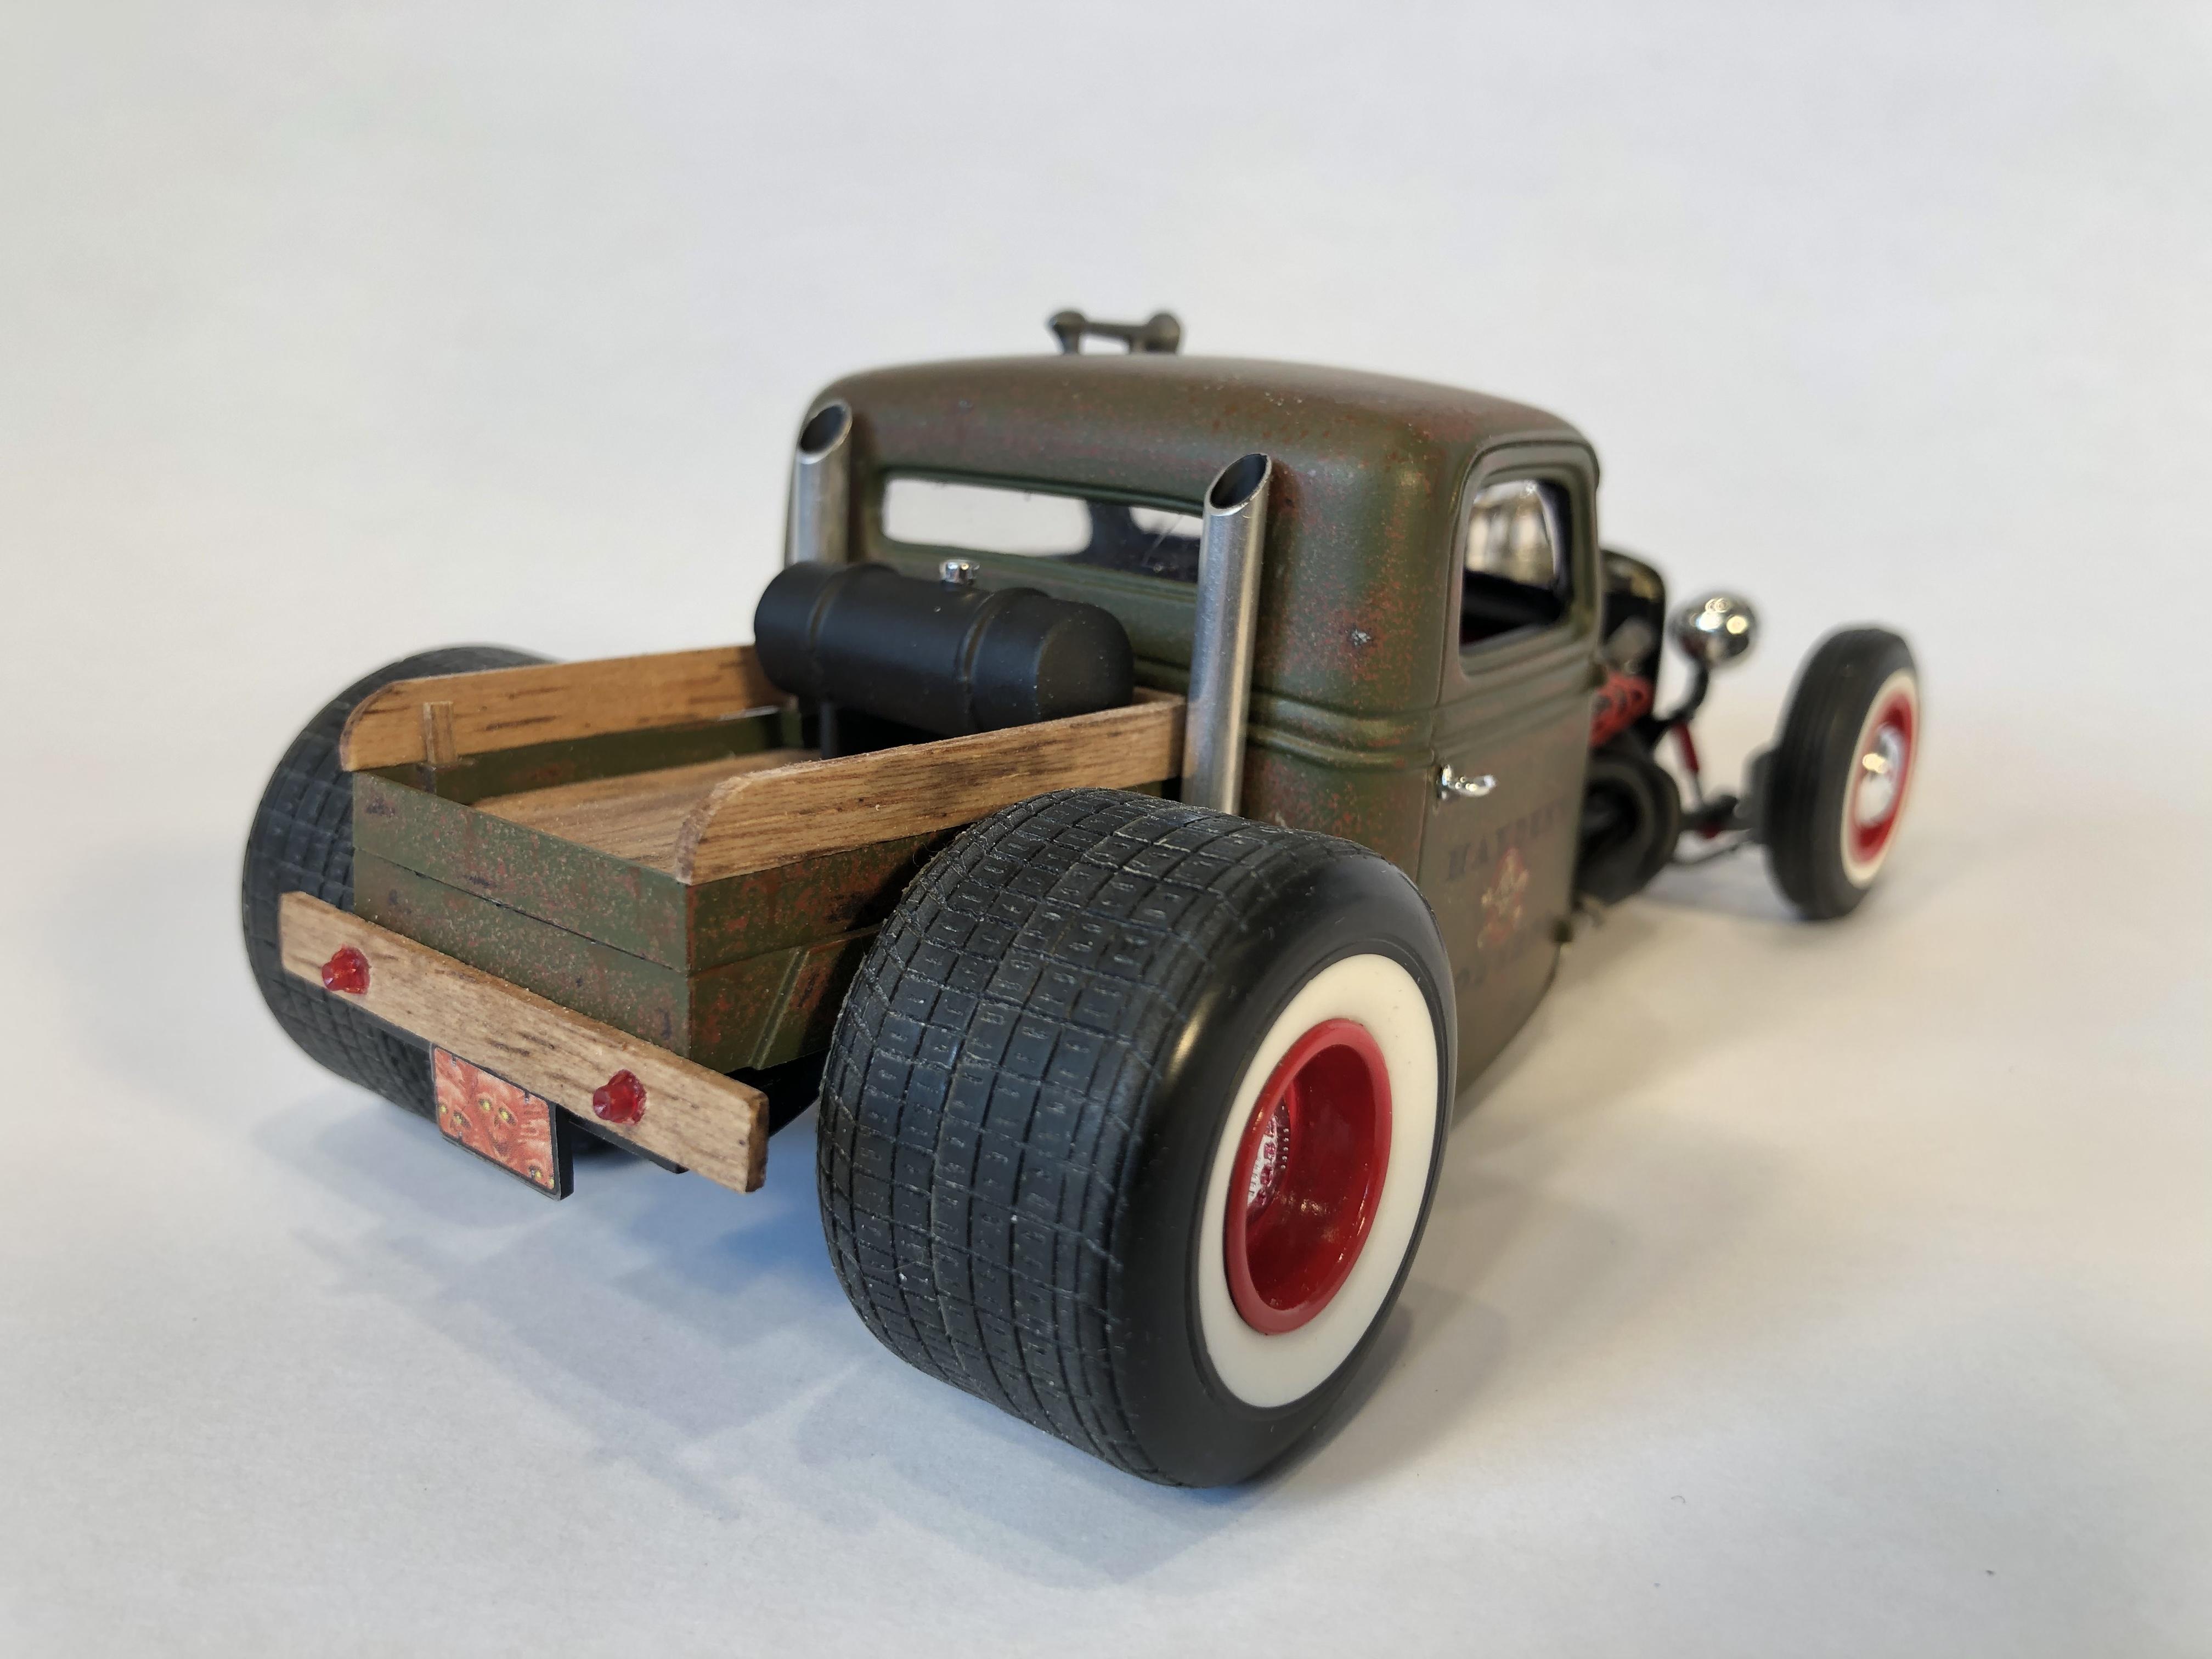
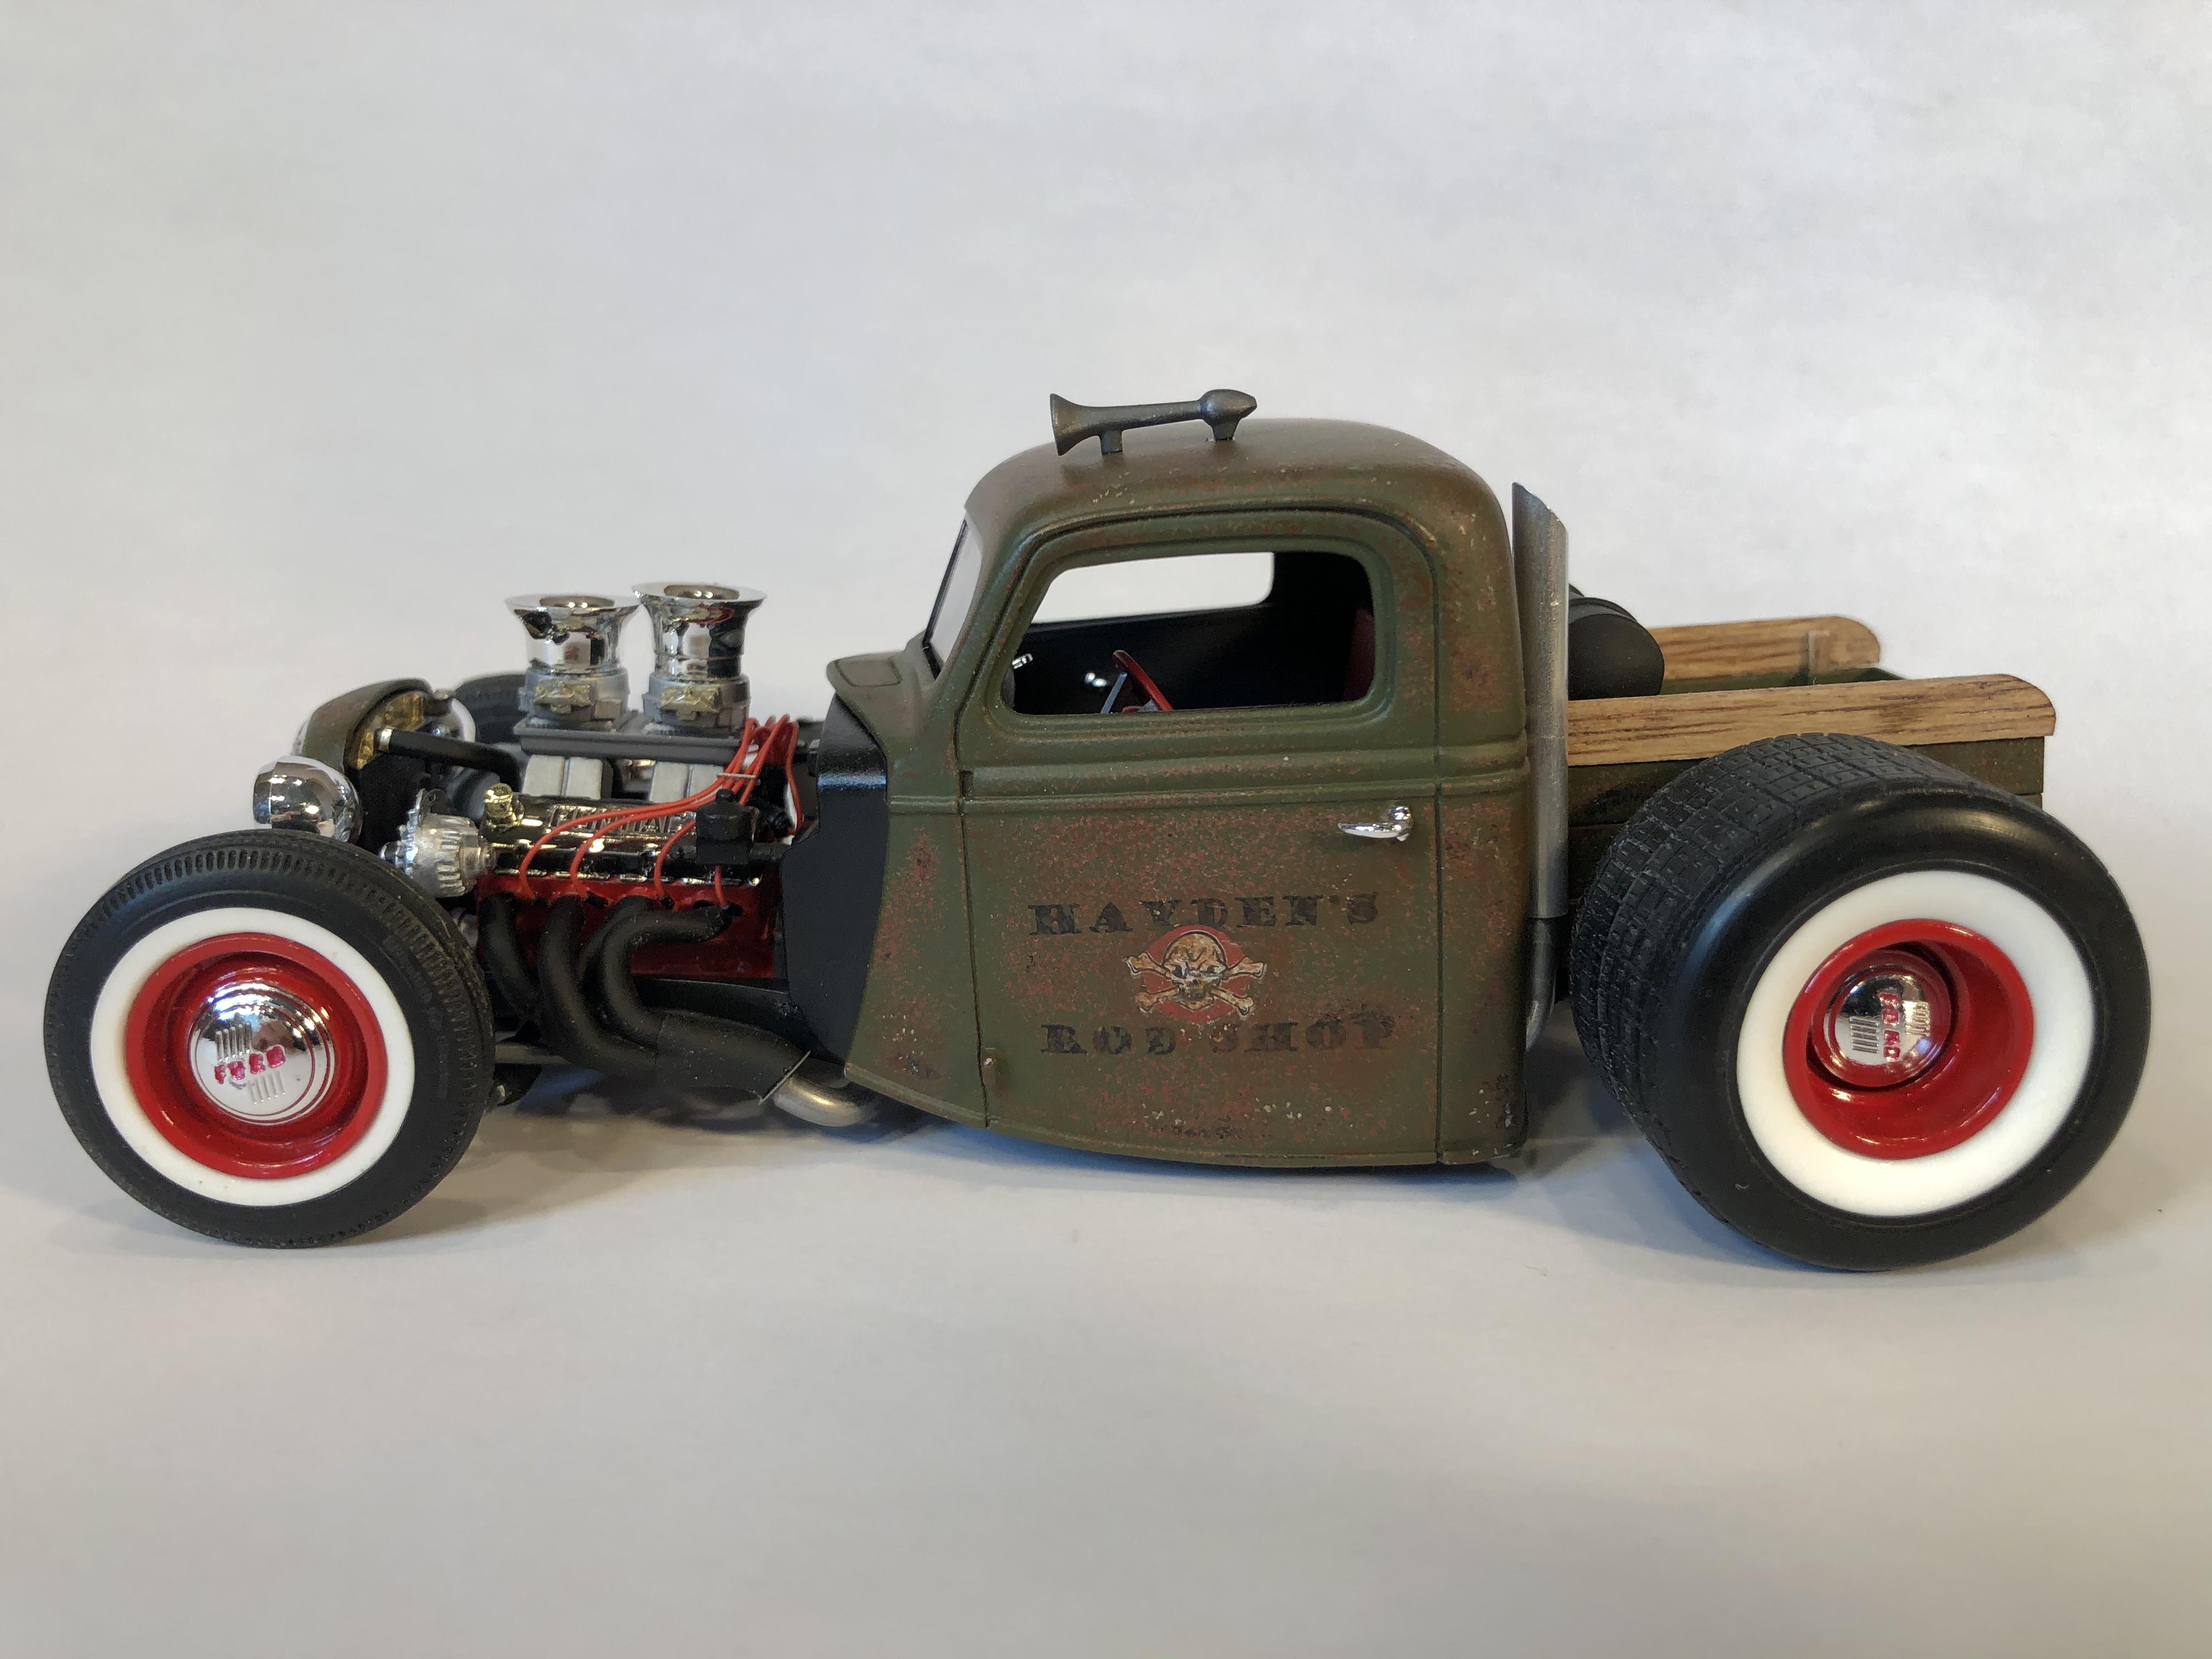
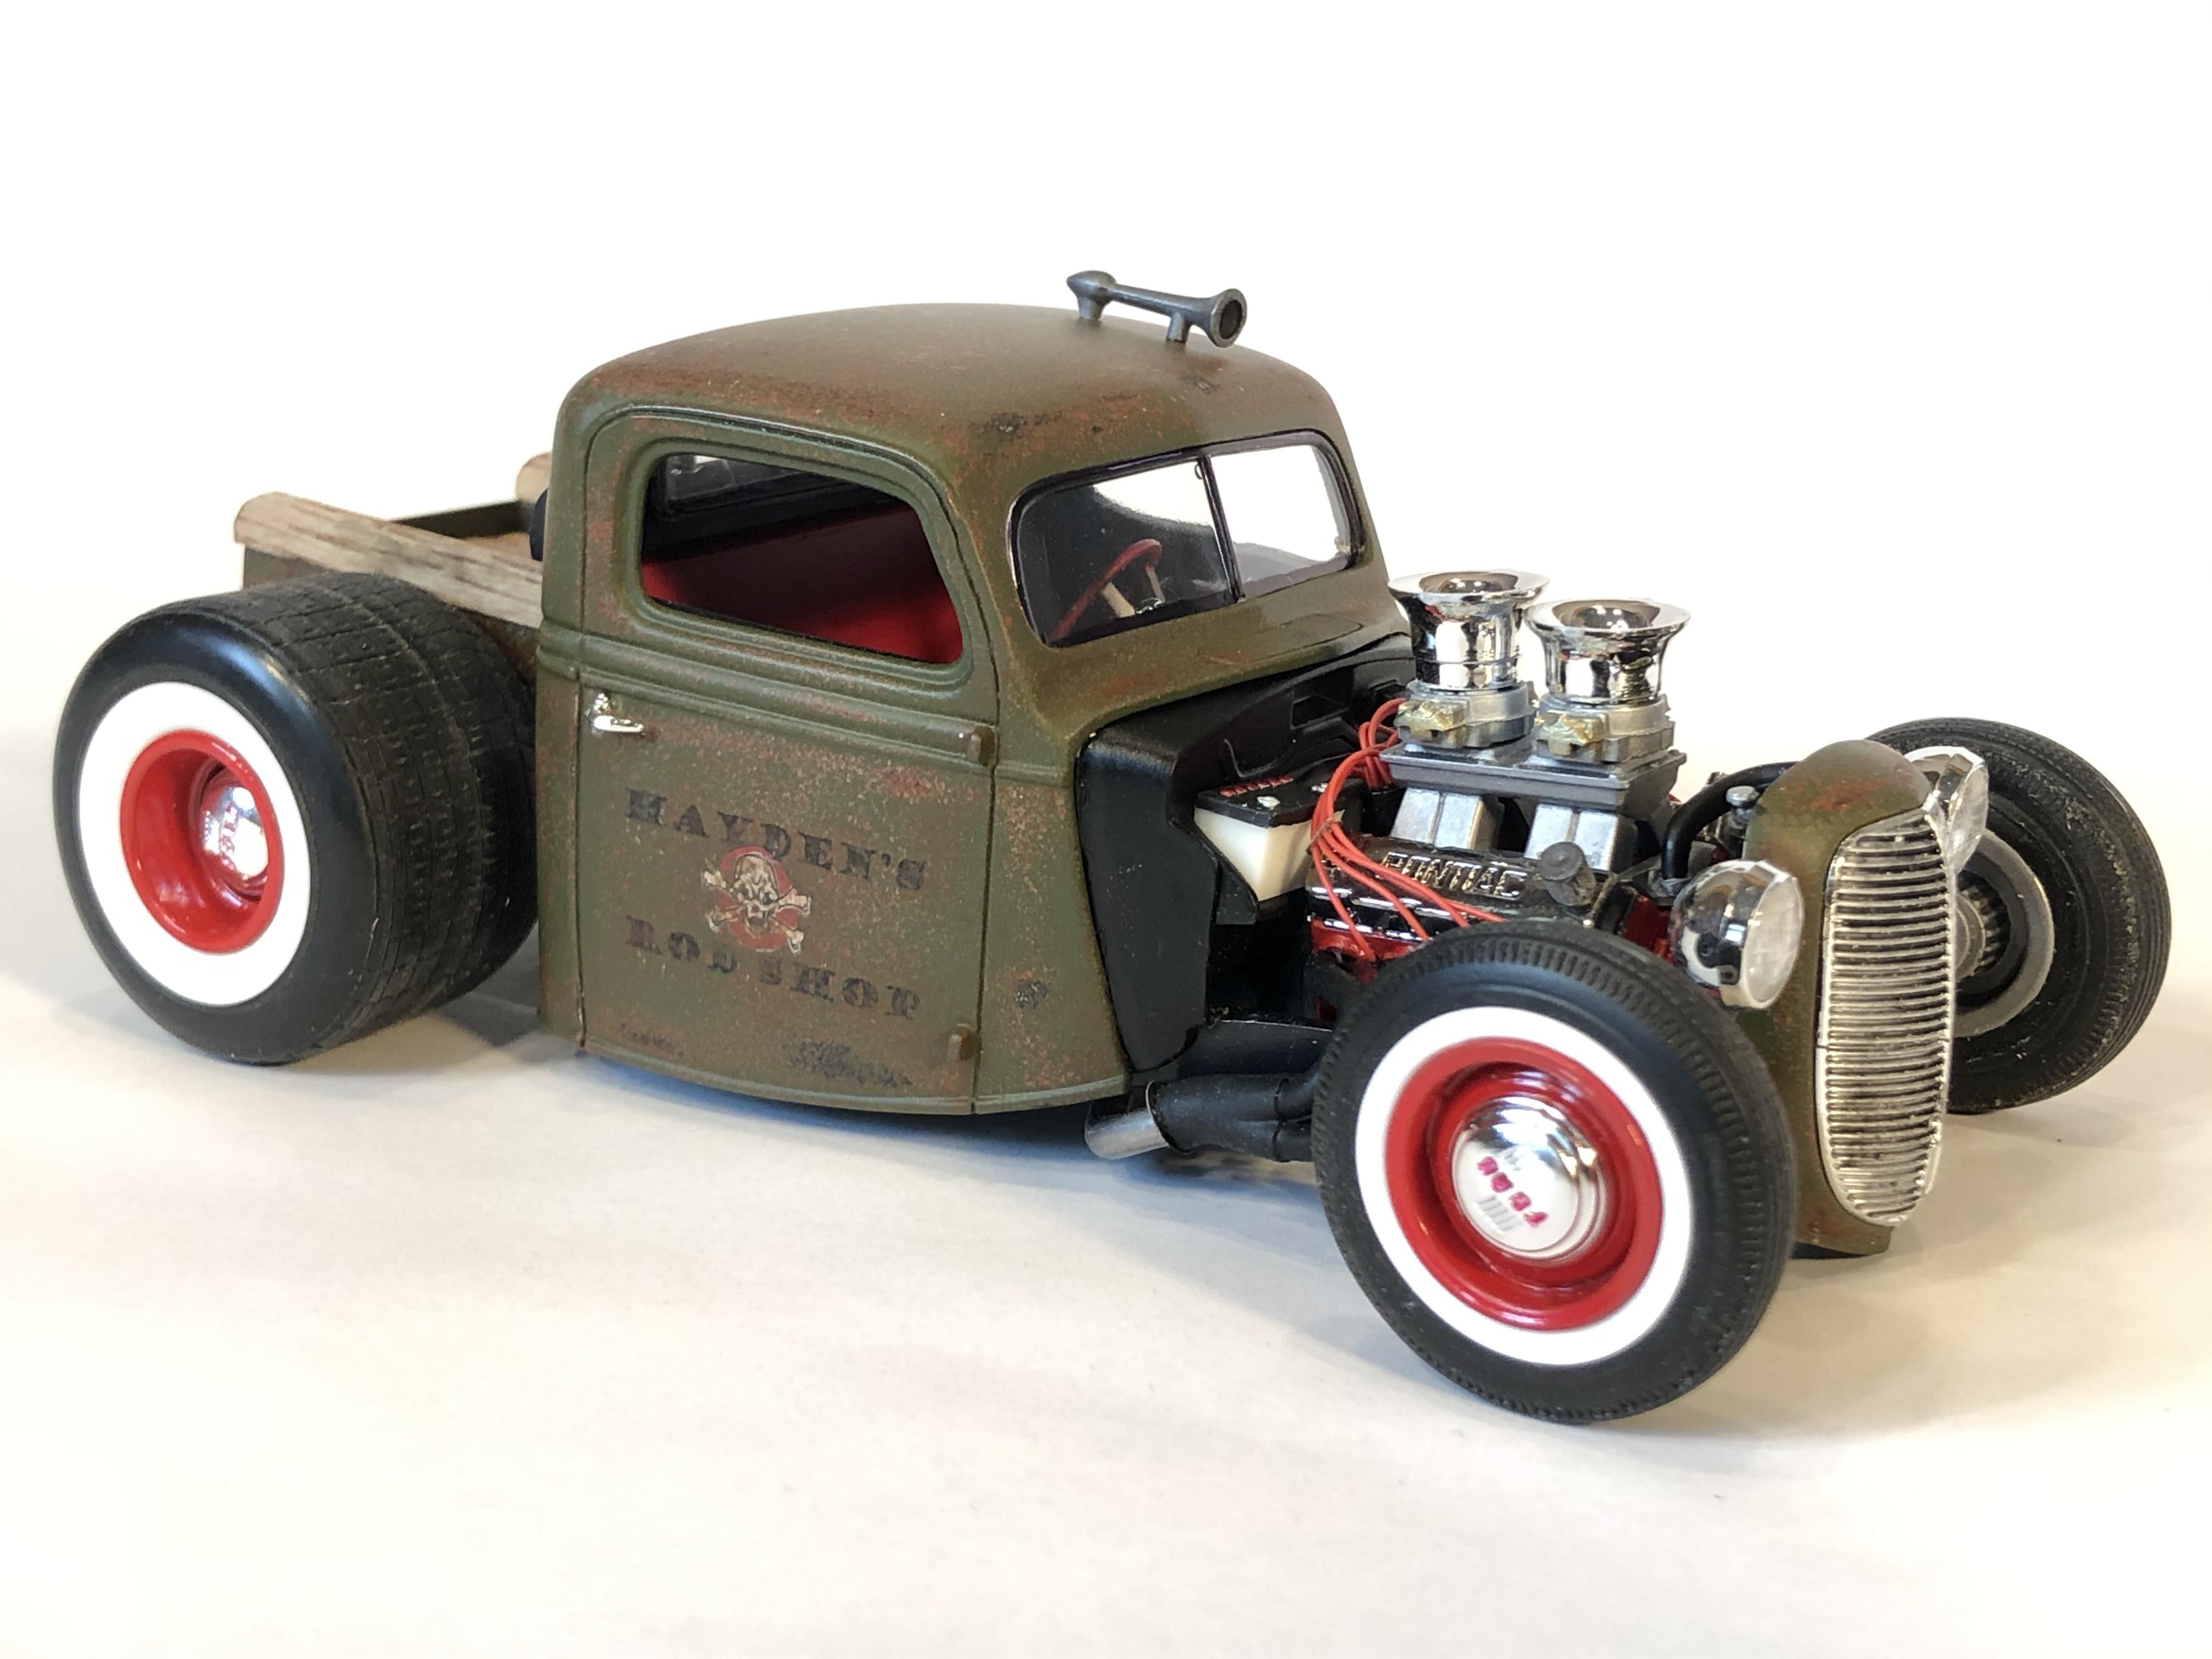
37 Ford “ rat rod” shop truck
Steve H replied to Steve H's topic in Model Trucks: Pickups, Vans, SUVs, Light Commercial
Thanks for the comments guys. It was a fun build. The rear tires do make the truck in my opinion, and yes, they are HUGE. Cheers, Steve -
That's what I'm talkin bout!!!! Yaaaa. A motor that will "scuff" the rear tires... sweet! one of the coolest things about this build, no matter what colour you paint it, it will,look awesome. Cheers, Steve
-
Hi Mattijs, yes, indeed it is a baby seat. It is still in my parts box though, waiting for another build. Several years ago at a local 1:1 car show, there was a pro street '57 Chev that had a baby seat wedged between the tubs. It put a big smile on my face, and I thought exactly what you thought, "what a lucky kid!!" The seat will end up in something one day. Cheers, Steve
-
Hi Martin, actually, I think I may have cursed you once.... or more. Also very thankful for the input! I had considered doing hidden hinges and maybe suicide style, but likely would have chickened out without the nudge. And yes, it will definitely be worth it in the end. So thanks...I think. No hobby desk time yet this week. Cheers, Steve
-
Well played Jim, love the sense of humour.
-
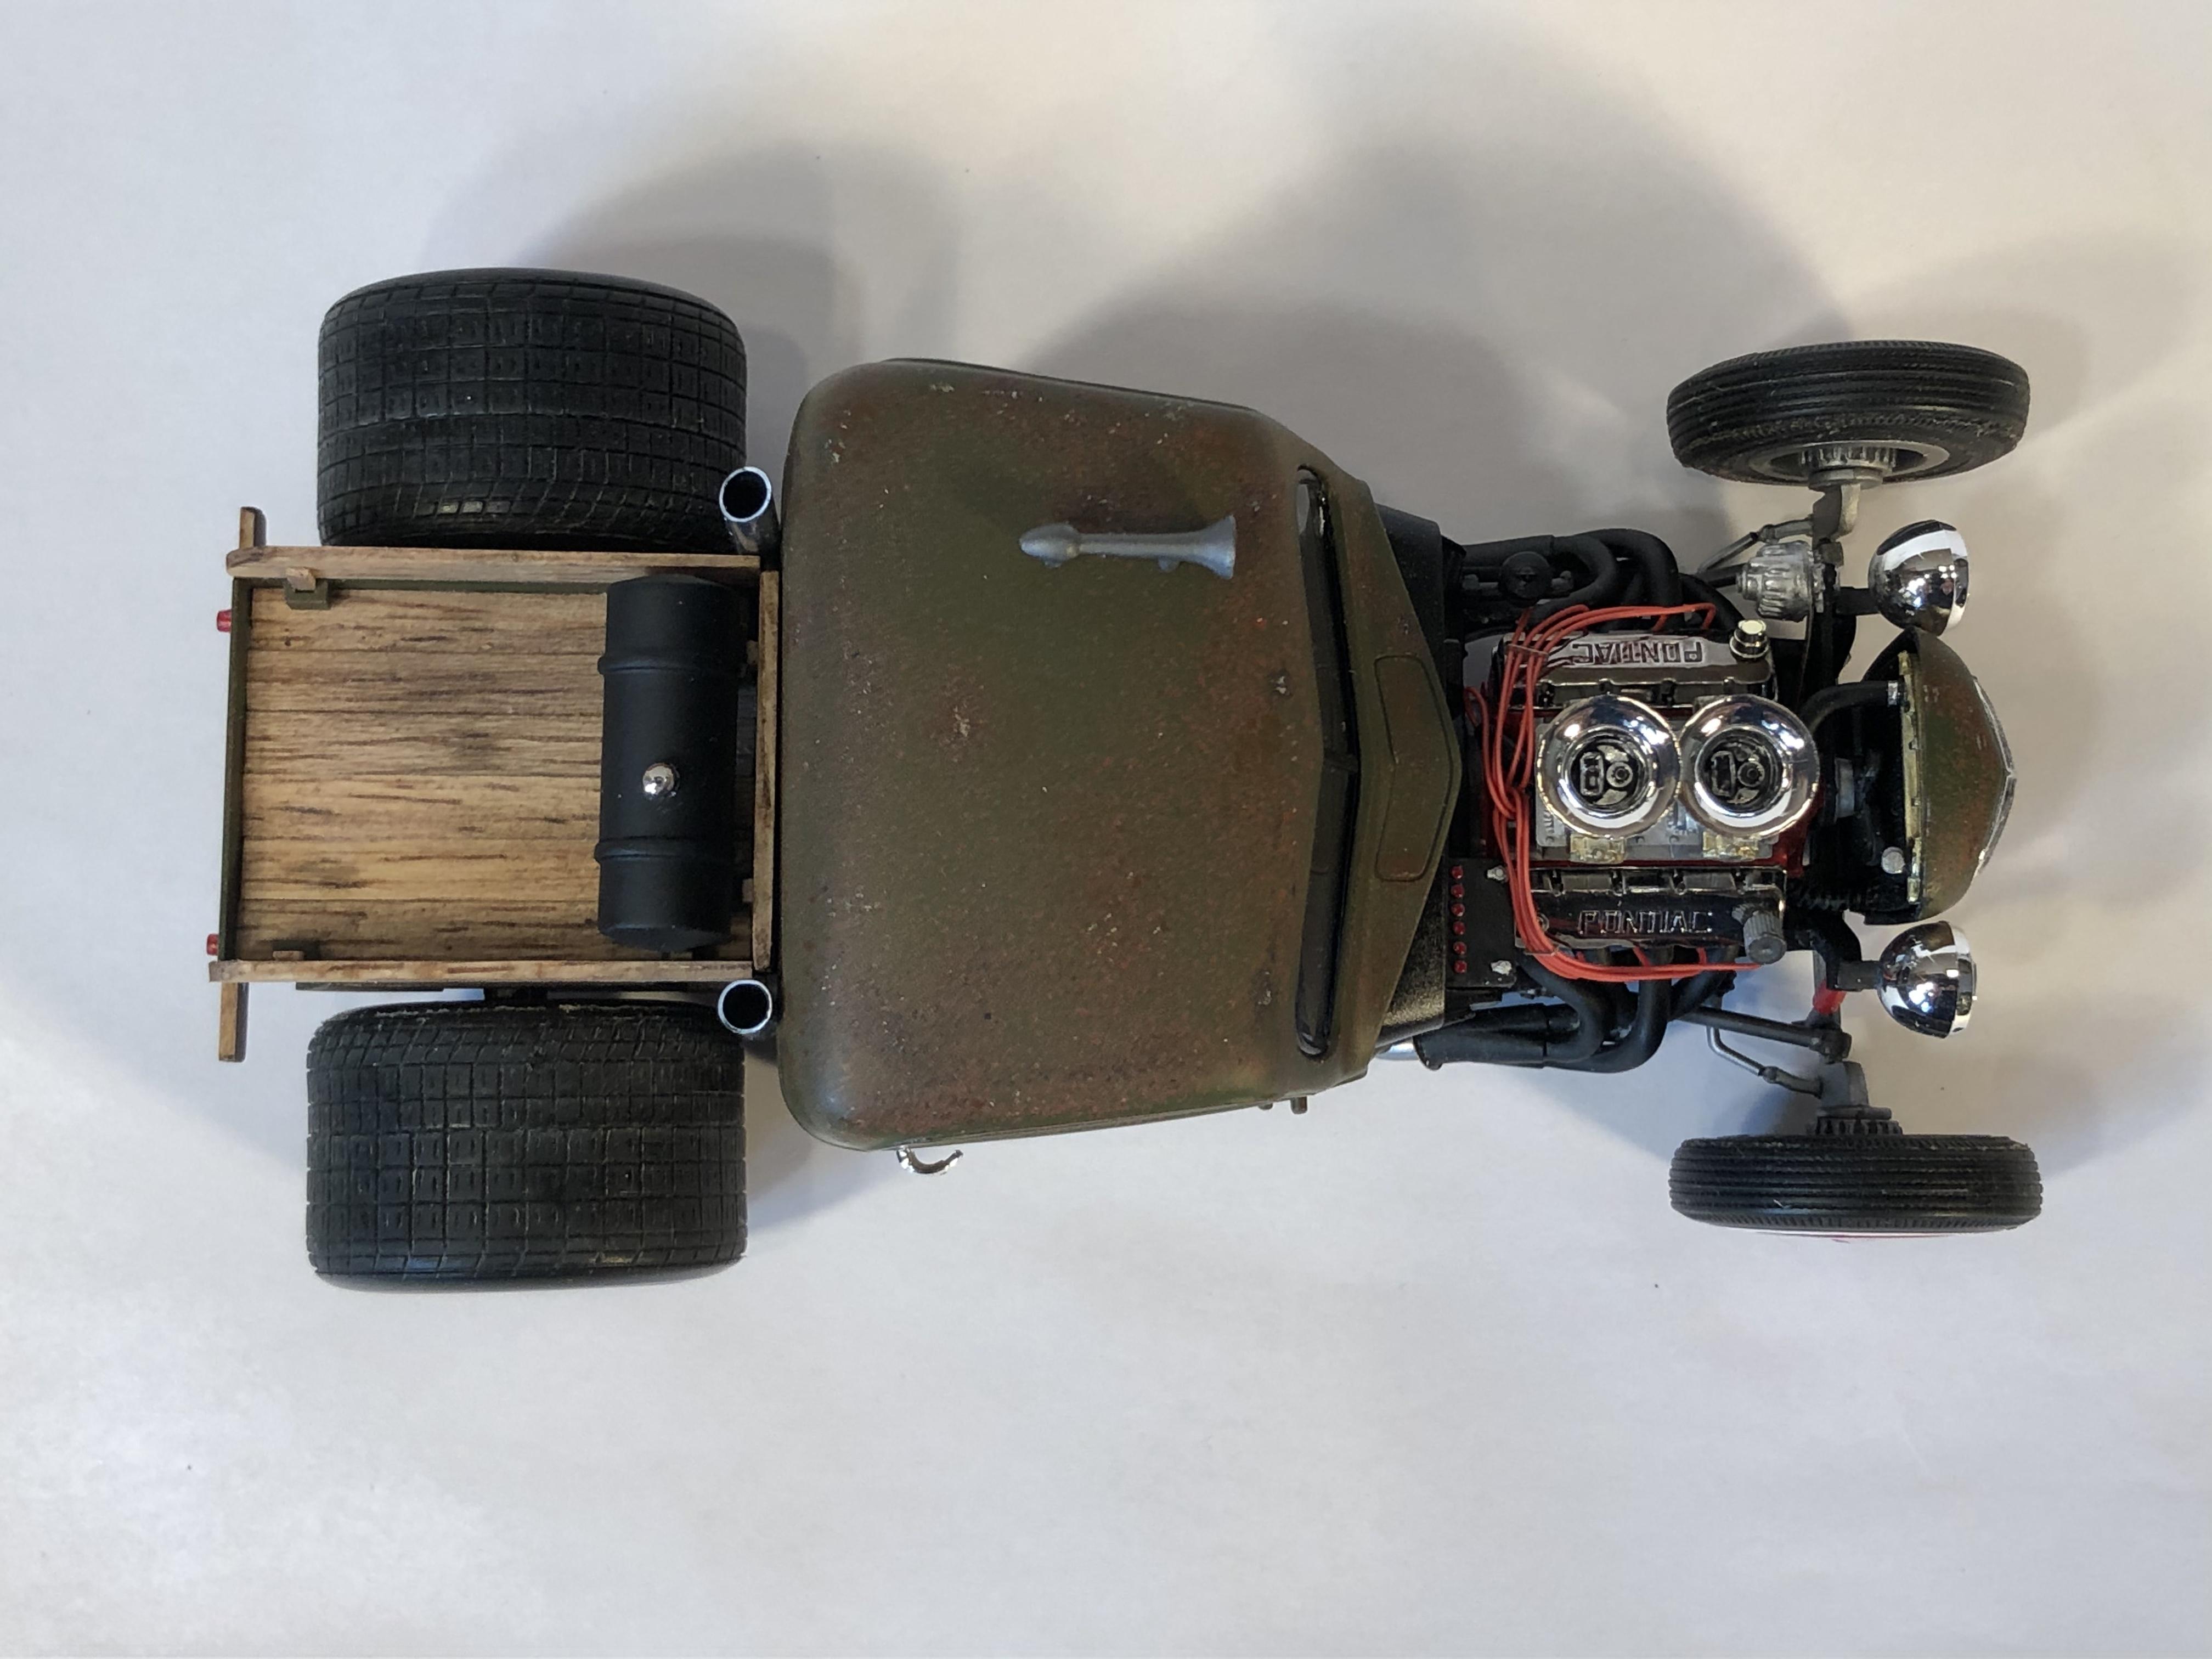
Hi all, This project was inspired by the awesome Modelhaus resin rear tires. I would describe it as a parts box raid, and a very fun build. Started with the “checkers” ‘37 Ford. Body channeled over frame, frame Z’d. Bass wood bed, rails and bumper. Exhaust is solder with aluminum tubing for stacks. Engine is from the pro street Firebird kit with various parts box stuff and ignition wires. Grille was shortened to align with the cowl, top chopped about 3 1/2 scale inches. Decals are home made. Paint is: red primer, rust, silver, flat black and tan, all topped with Tamiya olive drab. Careful sanding to create patina. Hope you like it, comments welcome. Cheers, Steve

-
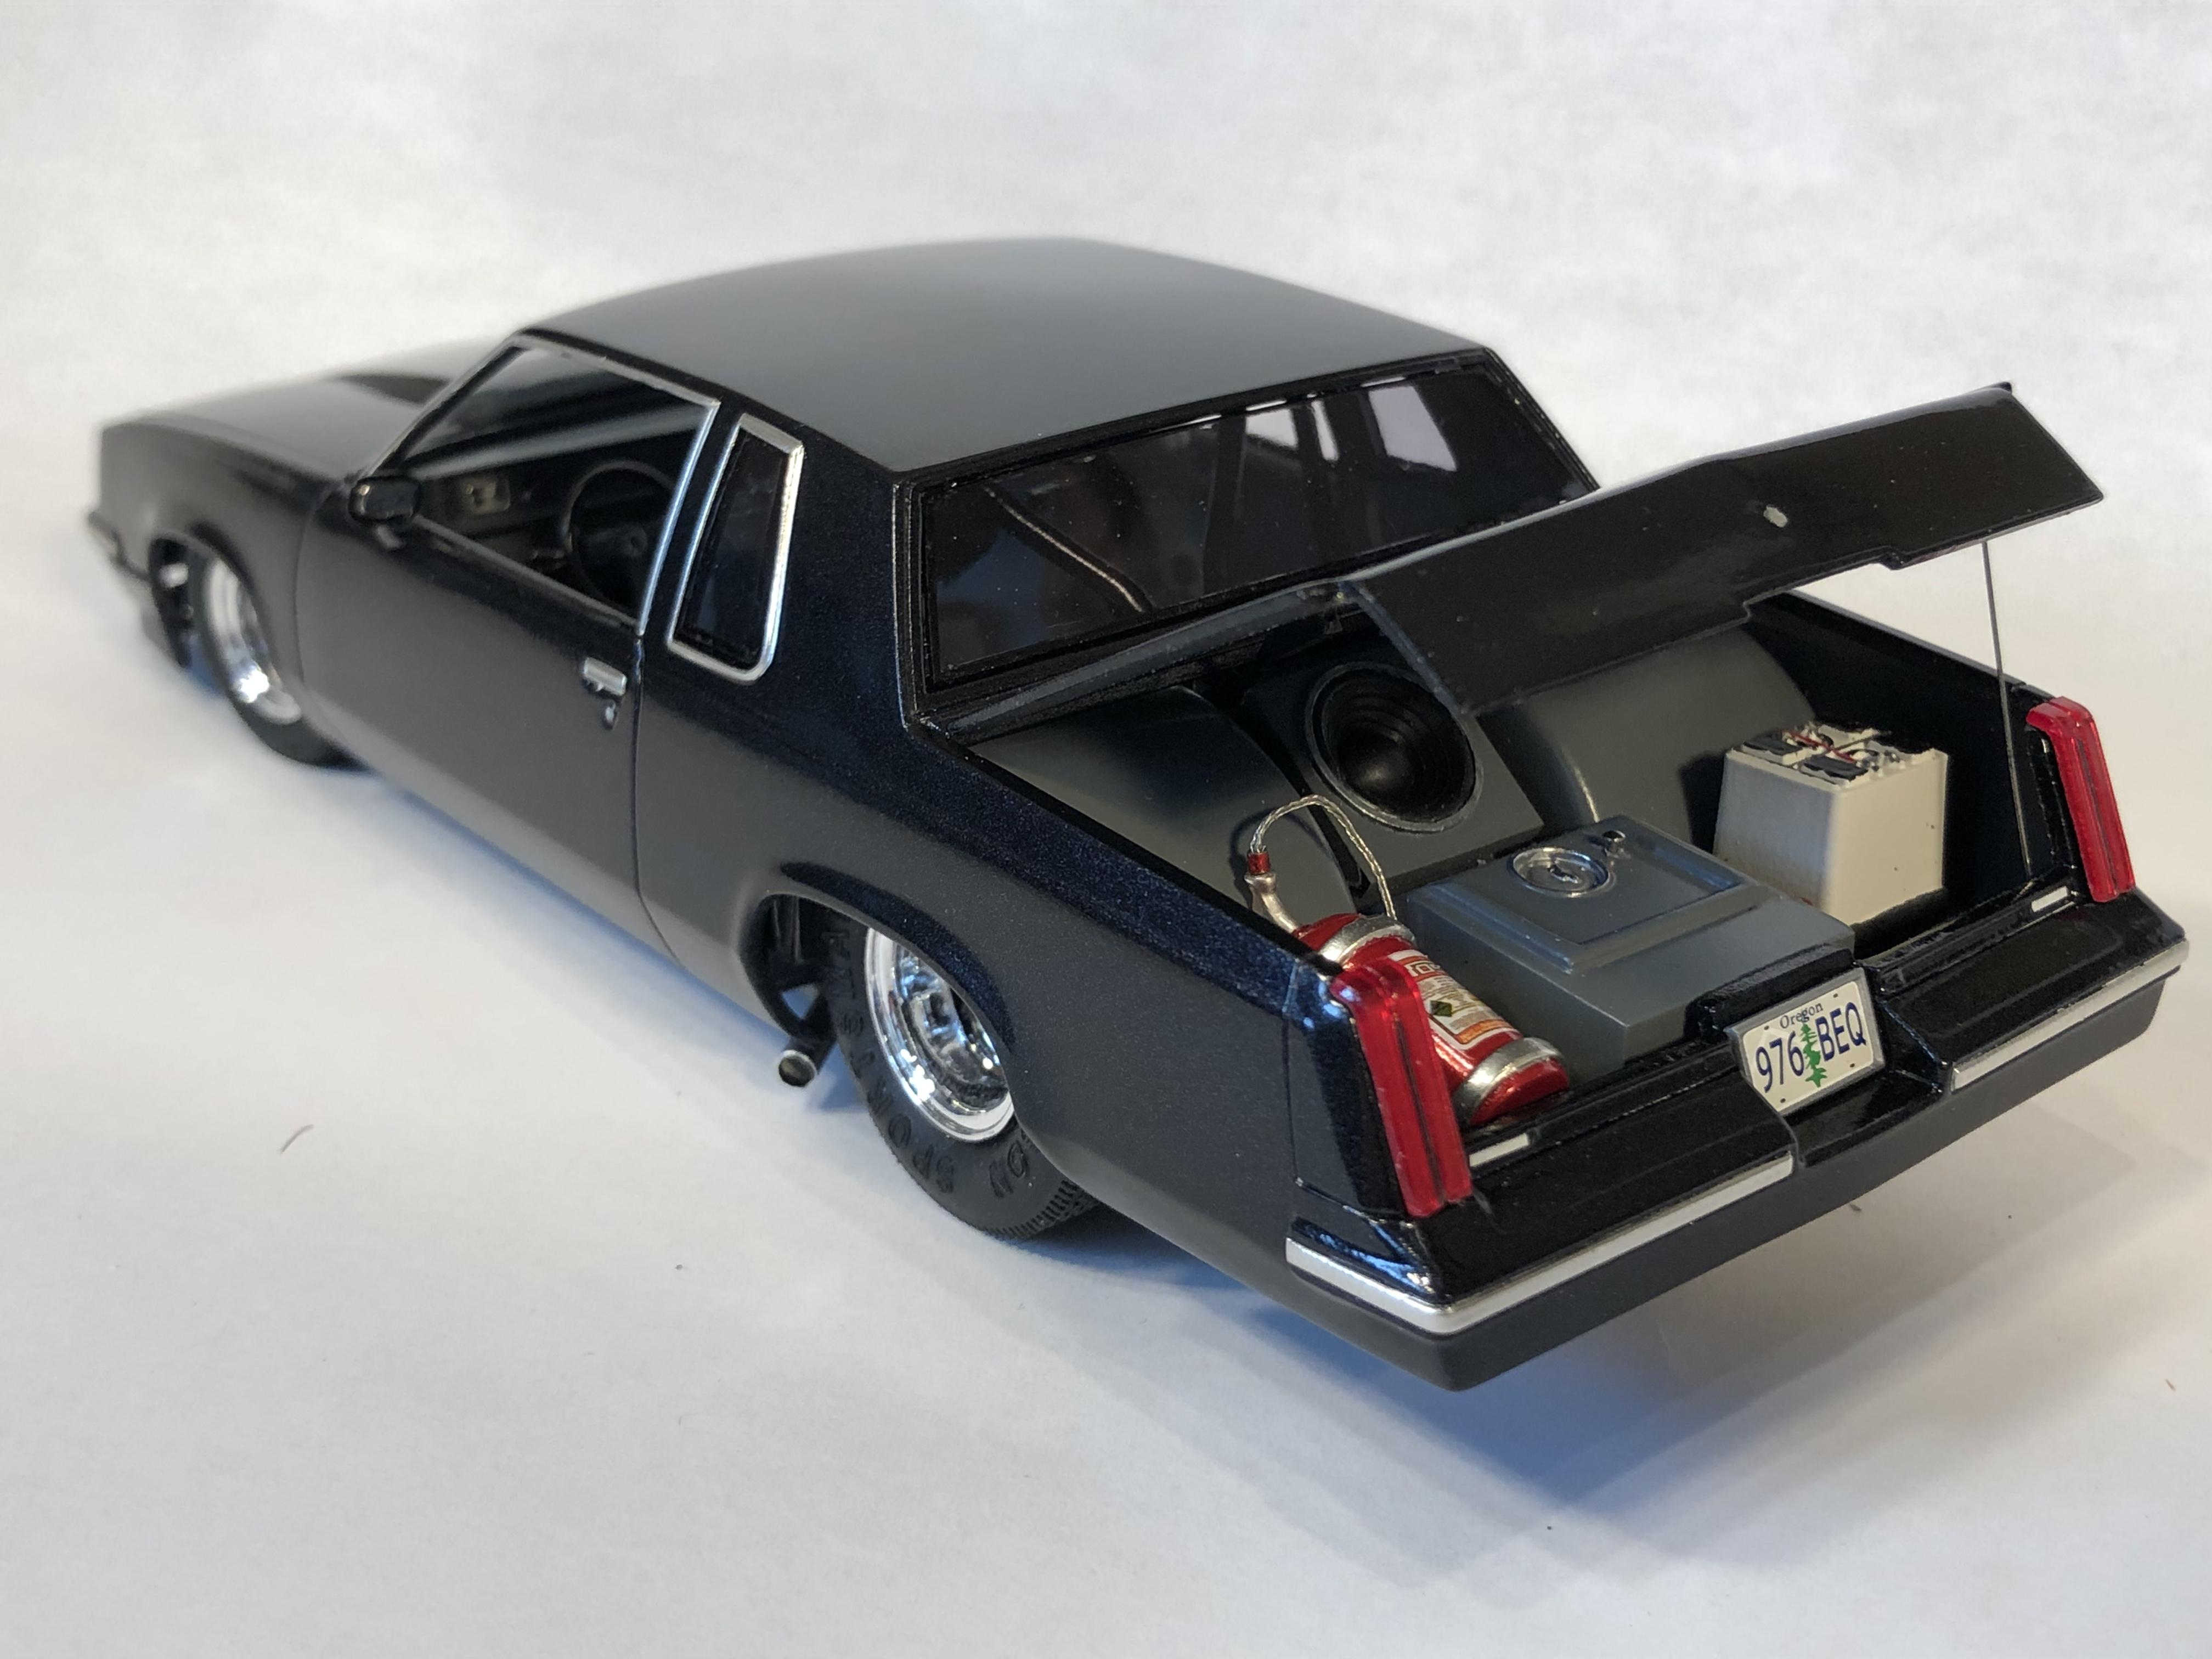
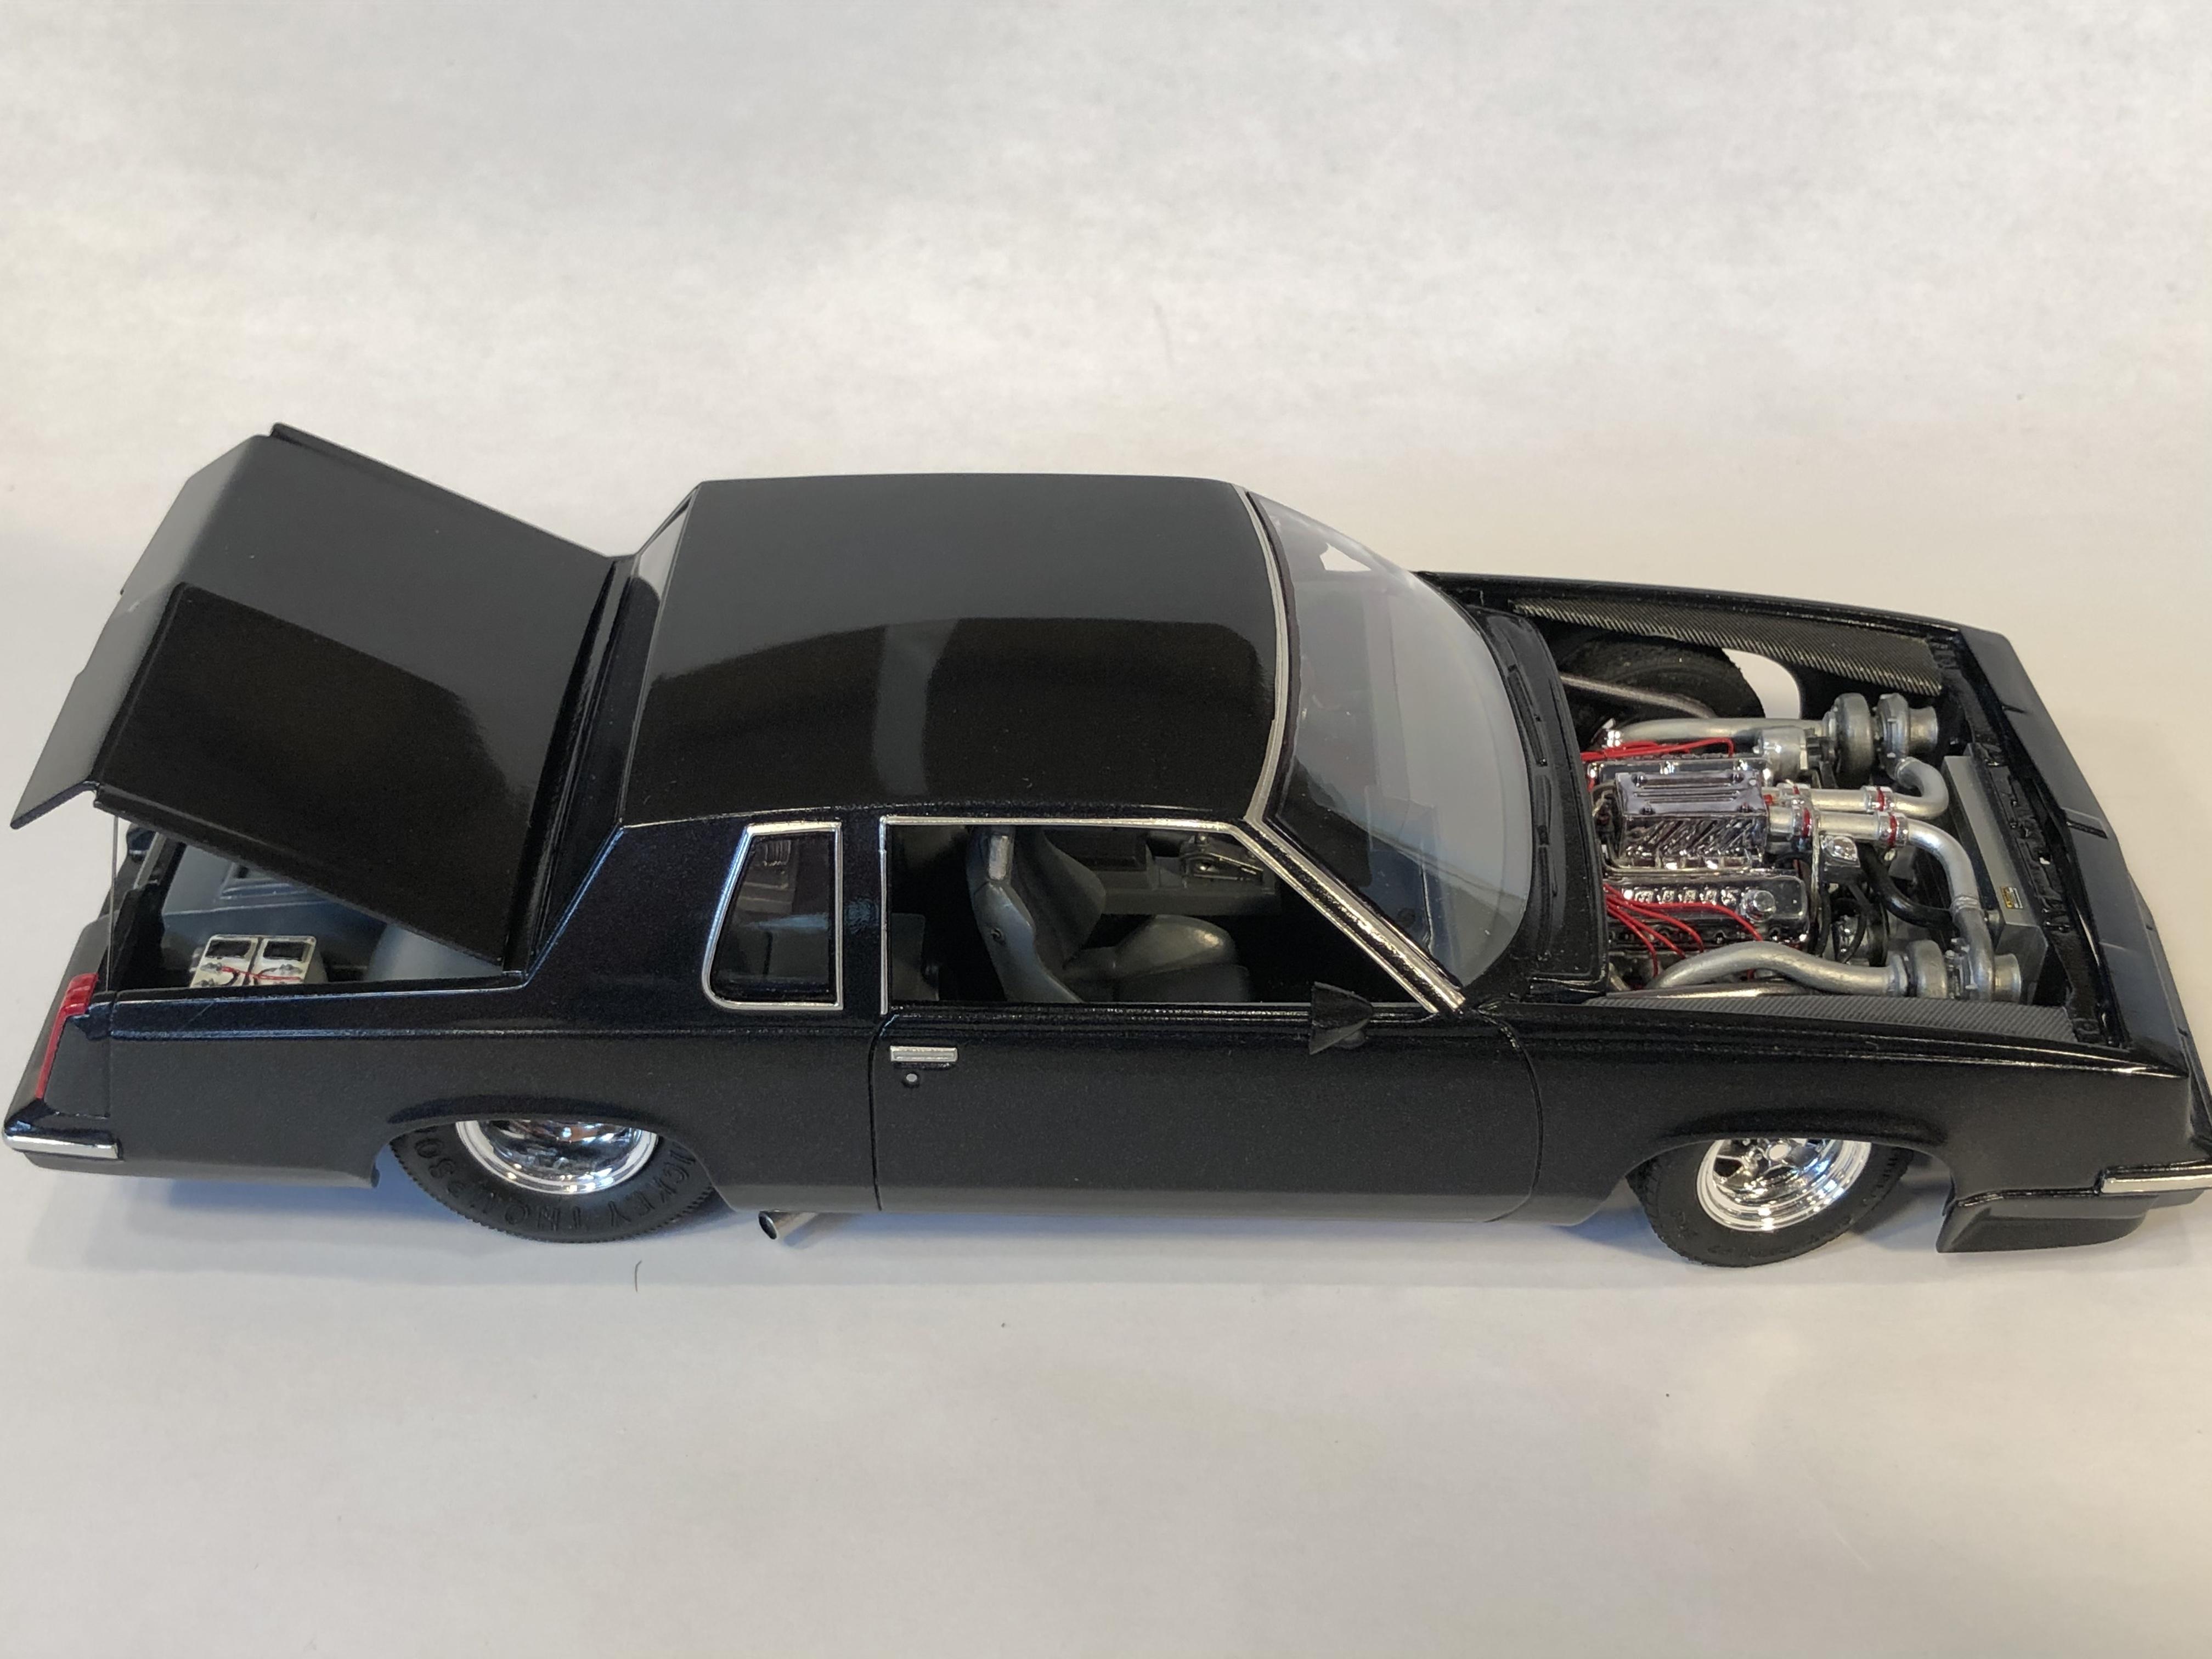
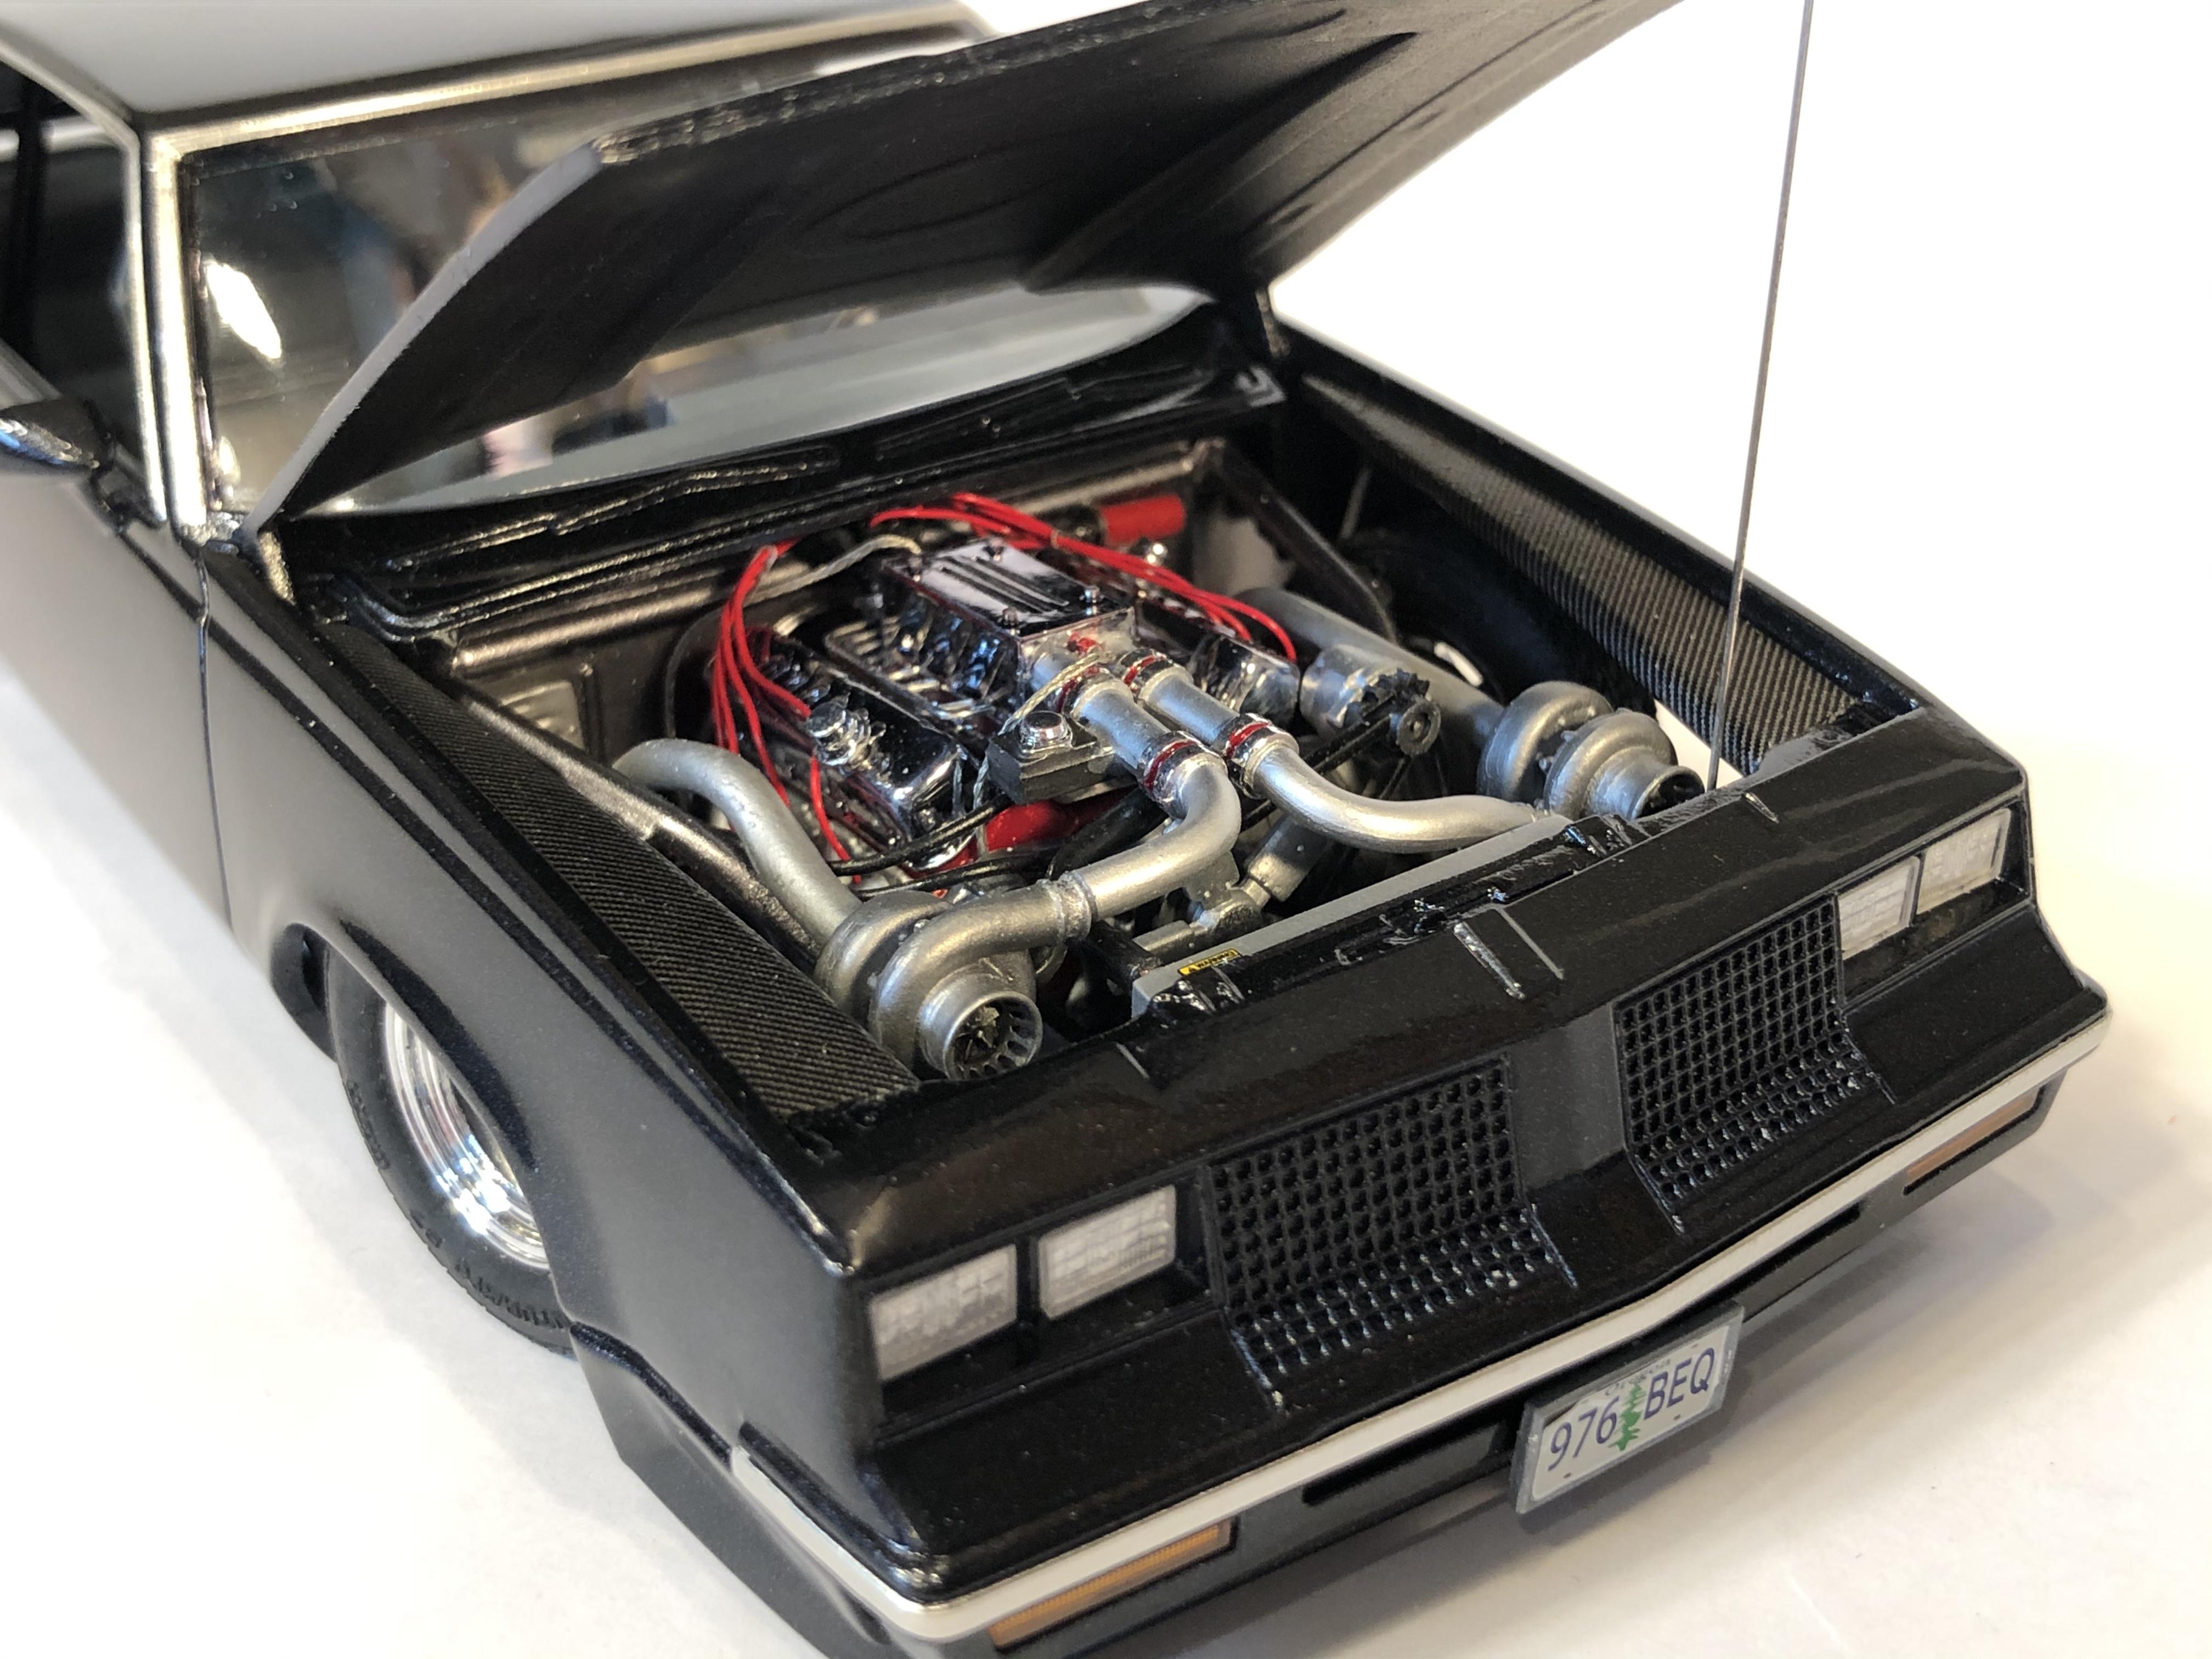
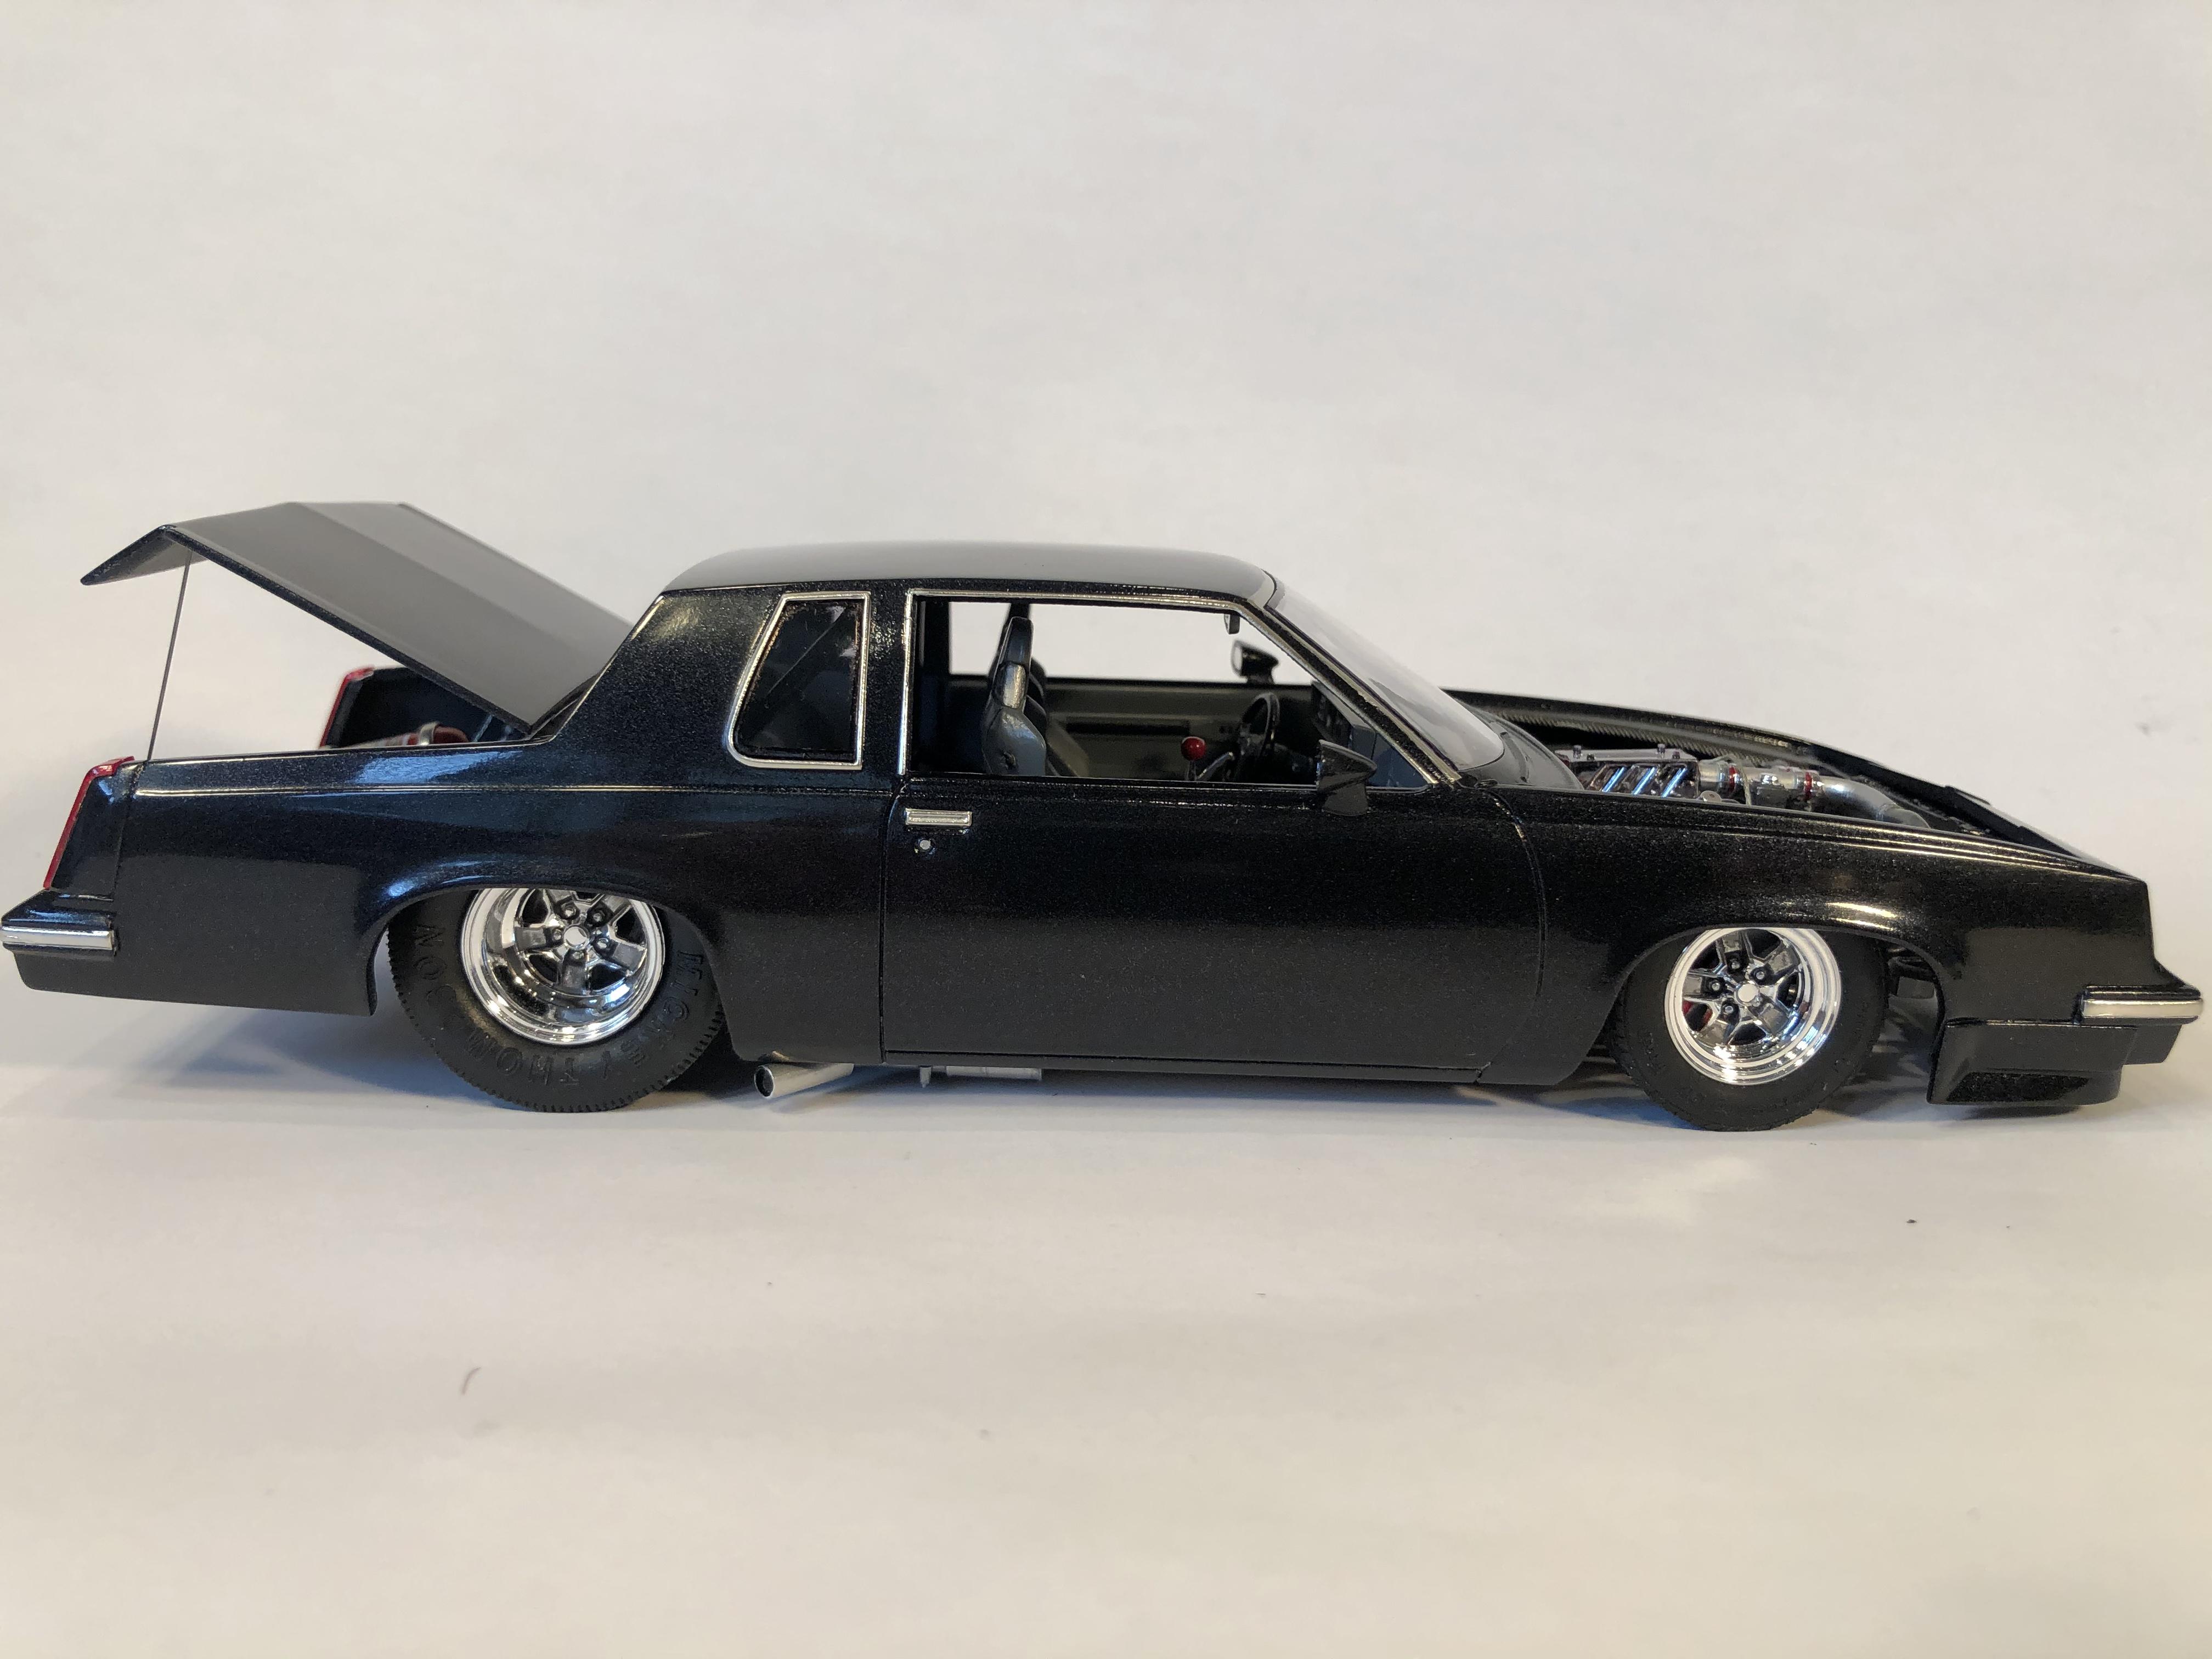
Hi all, I always liked the mid eighties Cutlass, Monte Carlos and Regals. This is a kit-bash of the 83 Olds, Hay’s pro street T-bird, and ‘67 Chevelle pro street. I grafted the tubs from the 67 Chevelle chassis to the front of the Hay’s T-bird. The Chevelle also supplied the base 396 motor. The intake is from the T- bird with resin twin turbos feeding it. Engine is fully wired and plumbed including NOS injection. Carbon fibre inner fenders. The wheels are modified rallye wheels from the Olds kit. The Olds interior parts were modified to fit, seats are resin Recaro units. The trunk is opened and hinged. Aluminum tubing for exhaust tips. oh ya... it’s lowered, I like em low. Hope you like it, comments welcome
- 54 replies
-
- 11
-

-
Beautiful job on both Craig. I particularly like the Camaro. My next project is likely to be a pro touring 70 1/2 Camaro. Well done, and the garage diorama is awesome too! Cheers, Steve
-
Well... as a guy who likes cars low... I love this build !!!! It's bad a$$. Personally, I would stuff a monster DOHC hemi in it. Regardless of the motor choice, it will be cool. Steve
-
41 Chev P/U street rod
Steve H replied to Steve H's topic in Model Trucks: Pickups, Vans, SUVs, Light Commercial
Hi Jeremy, not sure if this will help or not. It was fairly easy to lower. This build is a few years old now but, as I recall, I channeled the body over the frame by about3-4 scale inches. That required some cutting of the interior tub etc. The axles and leaf springs are parts box items. Some builds fight you, and Some fall together. This one fell together without any major issues. Hope that helps a bit. Cheers, Steve
-
41 Chev P/U street rod
Steve H replied to Steve H's topic in Model Trucks: Pickups, Vans, SUVs, Light Commercial
Thanks for all the kind words guys, much appreciated. It was a fun build -
41 Chev P/U street rod
Steve H replied to Steve H's topic in Model Trucks: Pickups, Vans, SUVs, Light Commercial
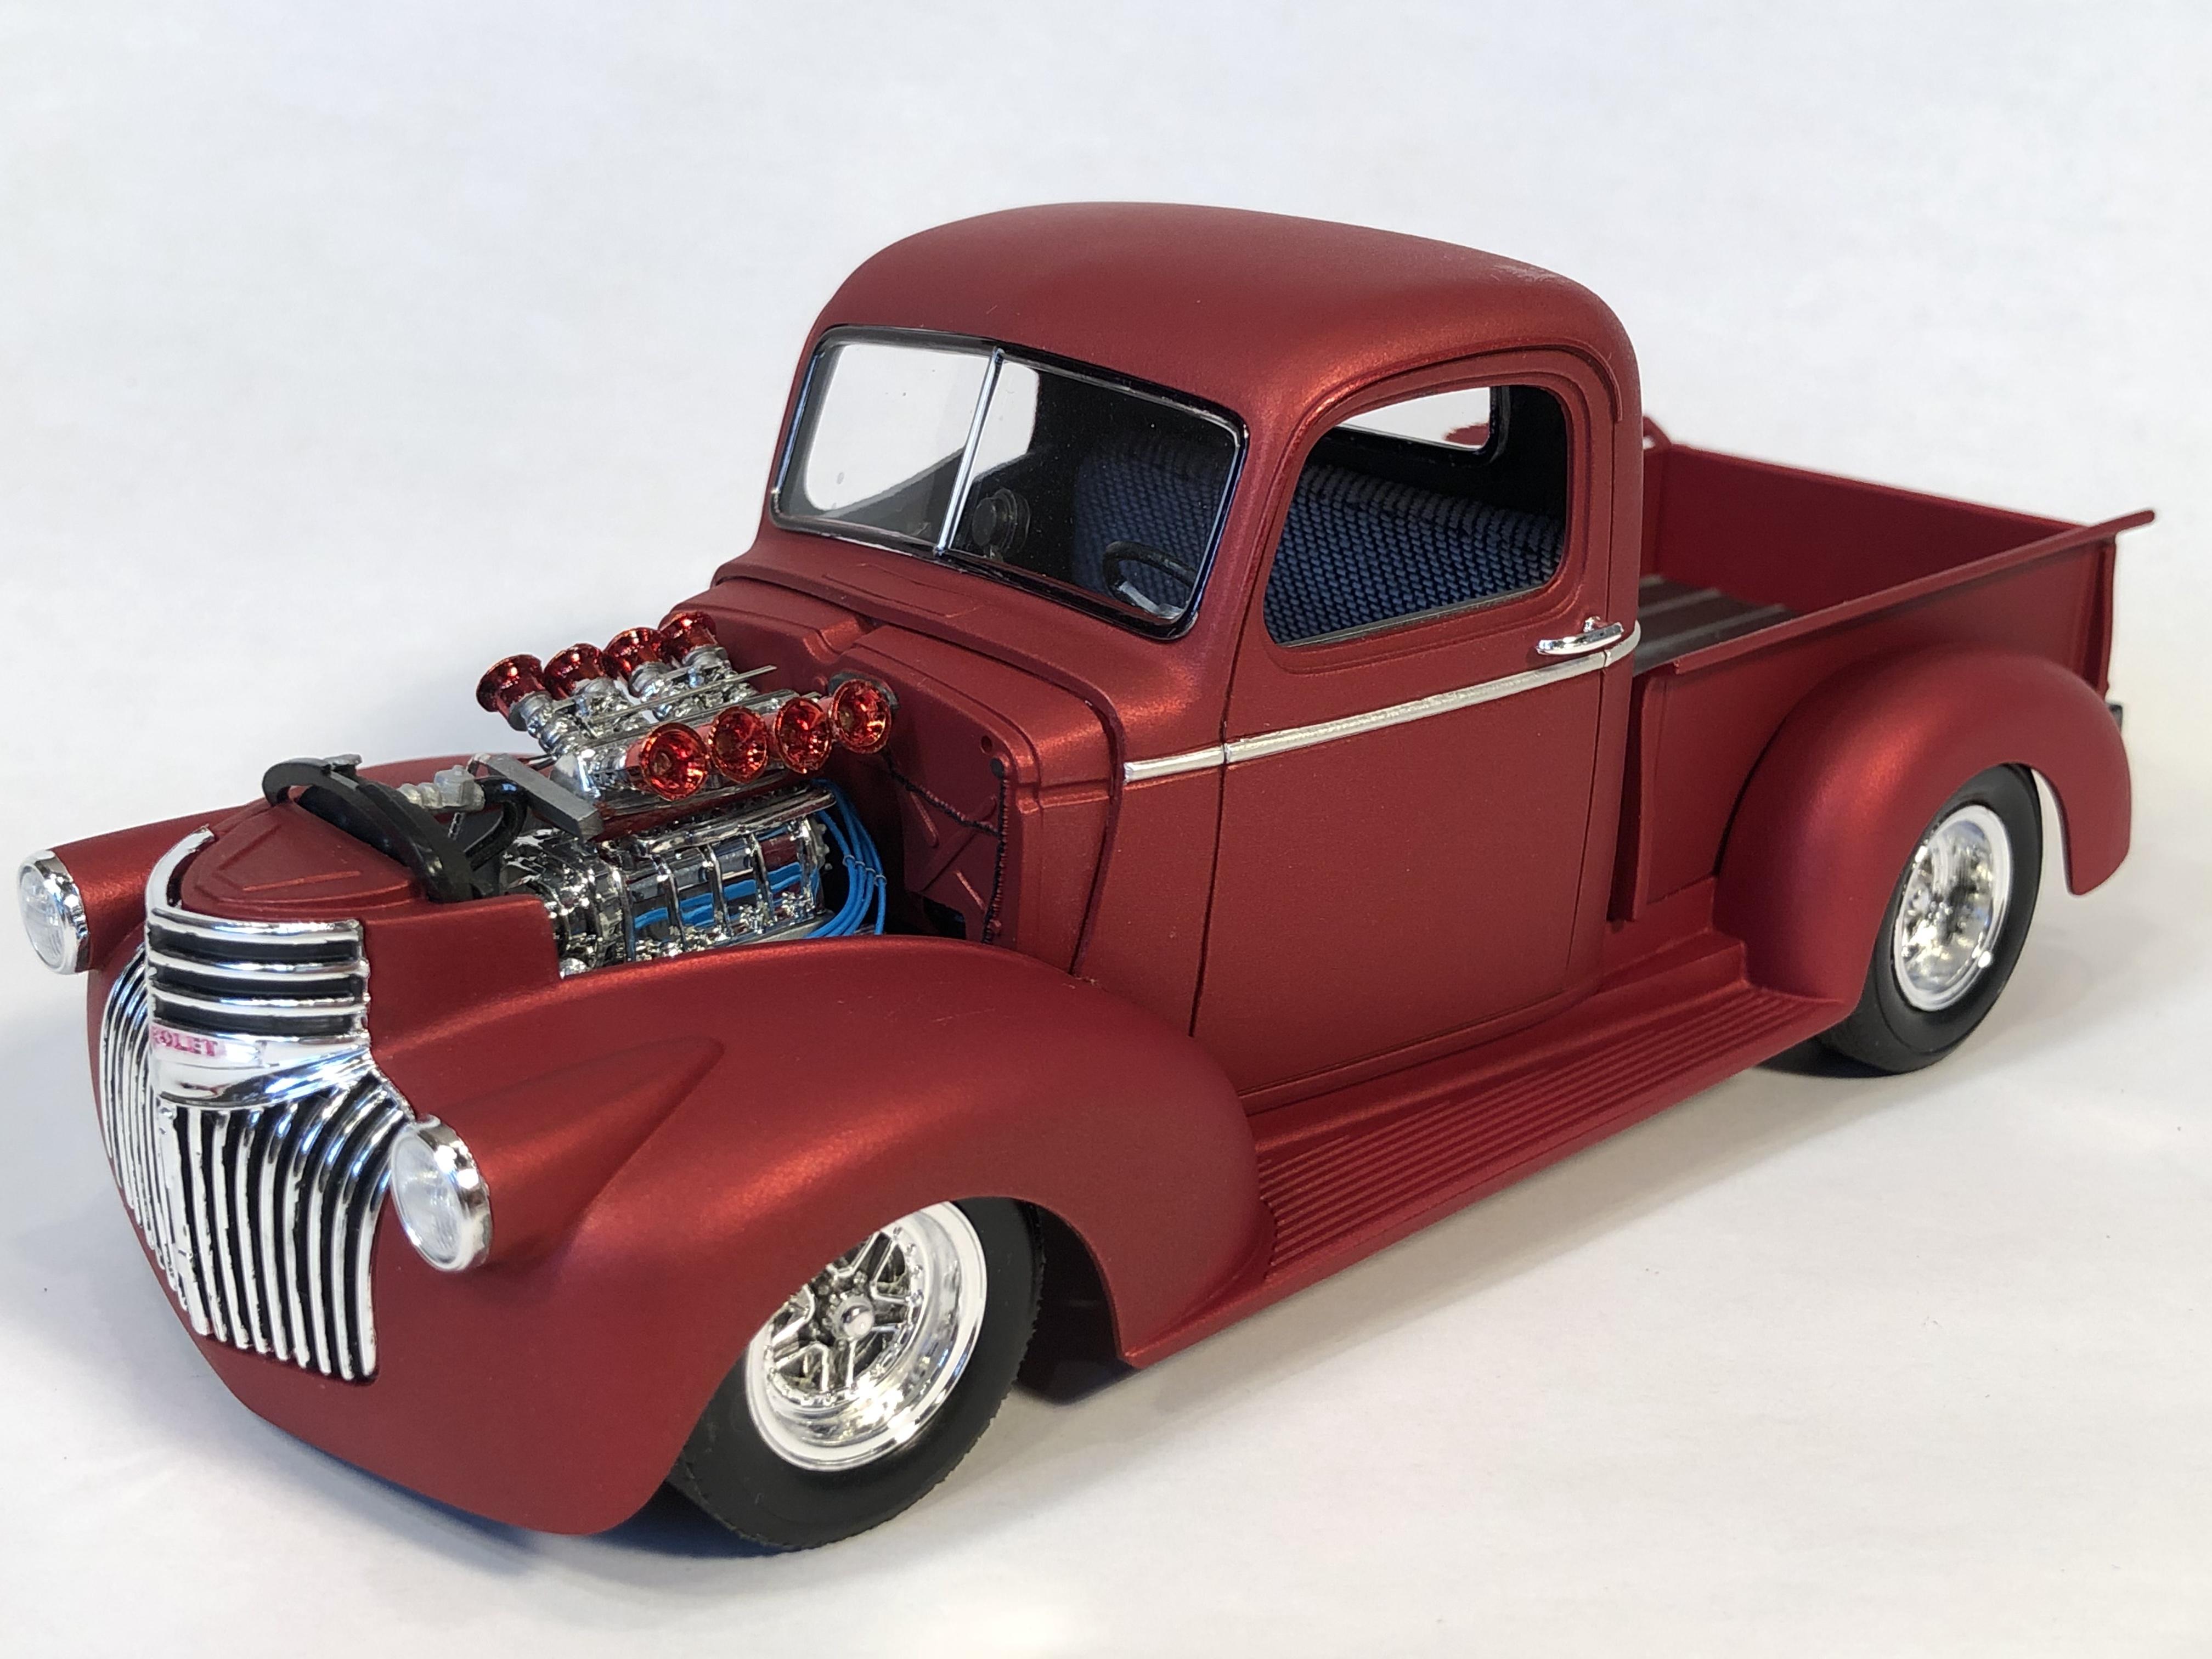
Thanks for the kind words guys. David the wheel base was shortened by about 5 scale inches. The shortened bed seemed to make it look more "round" which I liked. Francis, thanks for the compliments, I'm a big fan of your builds. The metallic red was by Dupli colour, sorry forget which exact colour it was. I always use silver or gold under metallics, in this case it was silver. Not sure if it makes a difference or not, but I think it makes the metallic "pop" a bit? Then testors flat clear. I had done a colour test on a scrap body, but it was still hard to spray flat over a beautiful shiny metallic red. It does get compliments on the colour a fair bit, just something a bit different... -
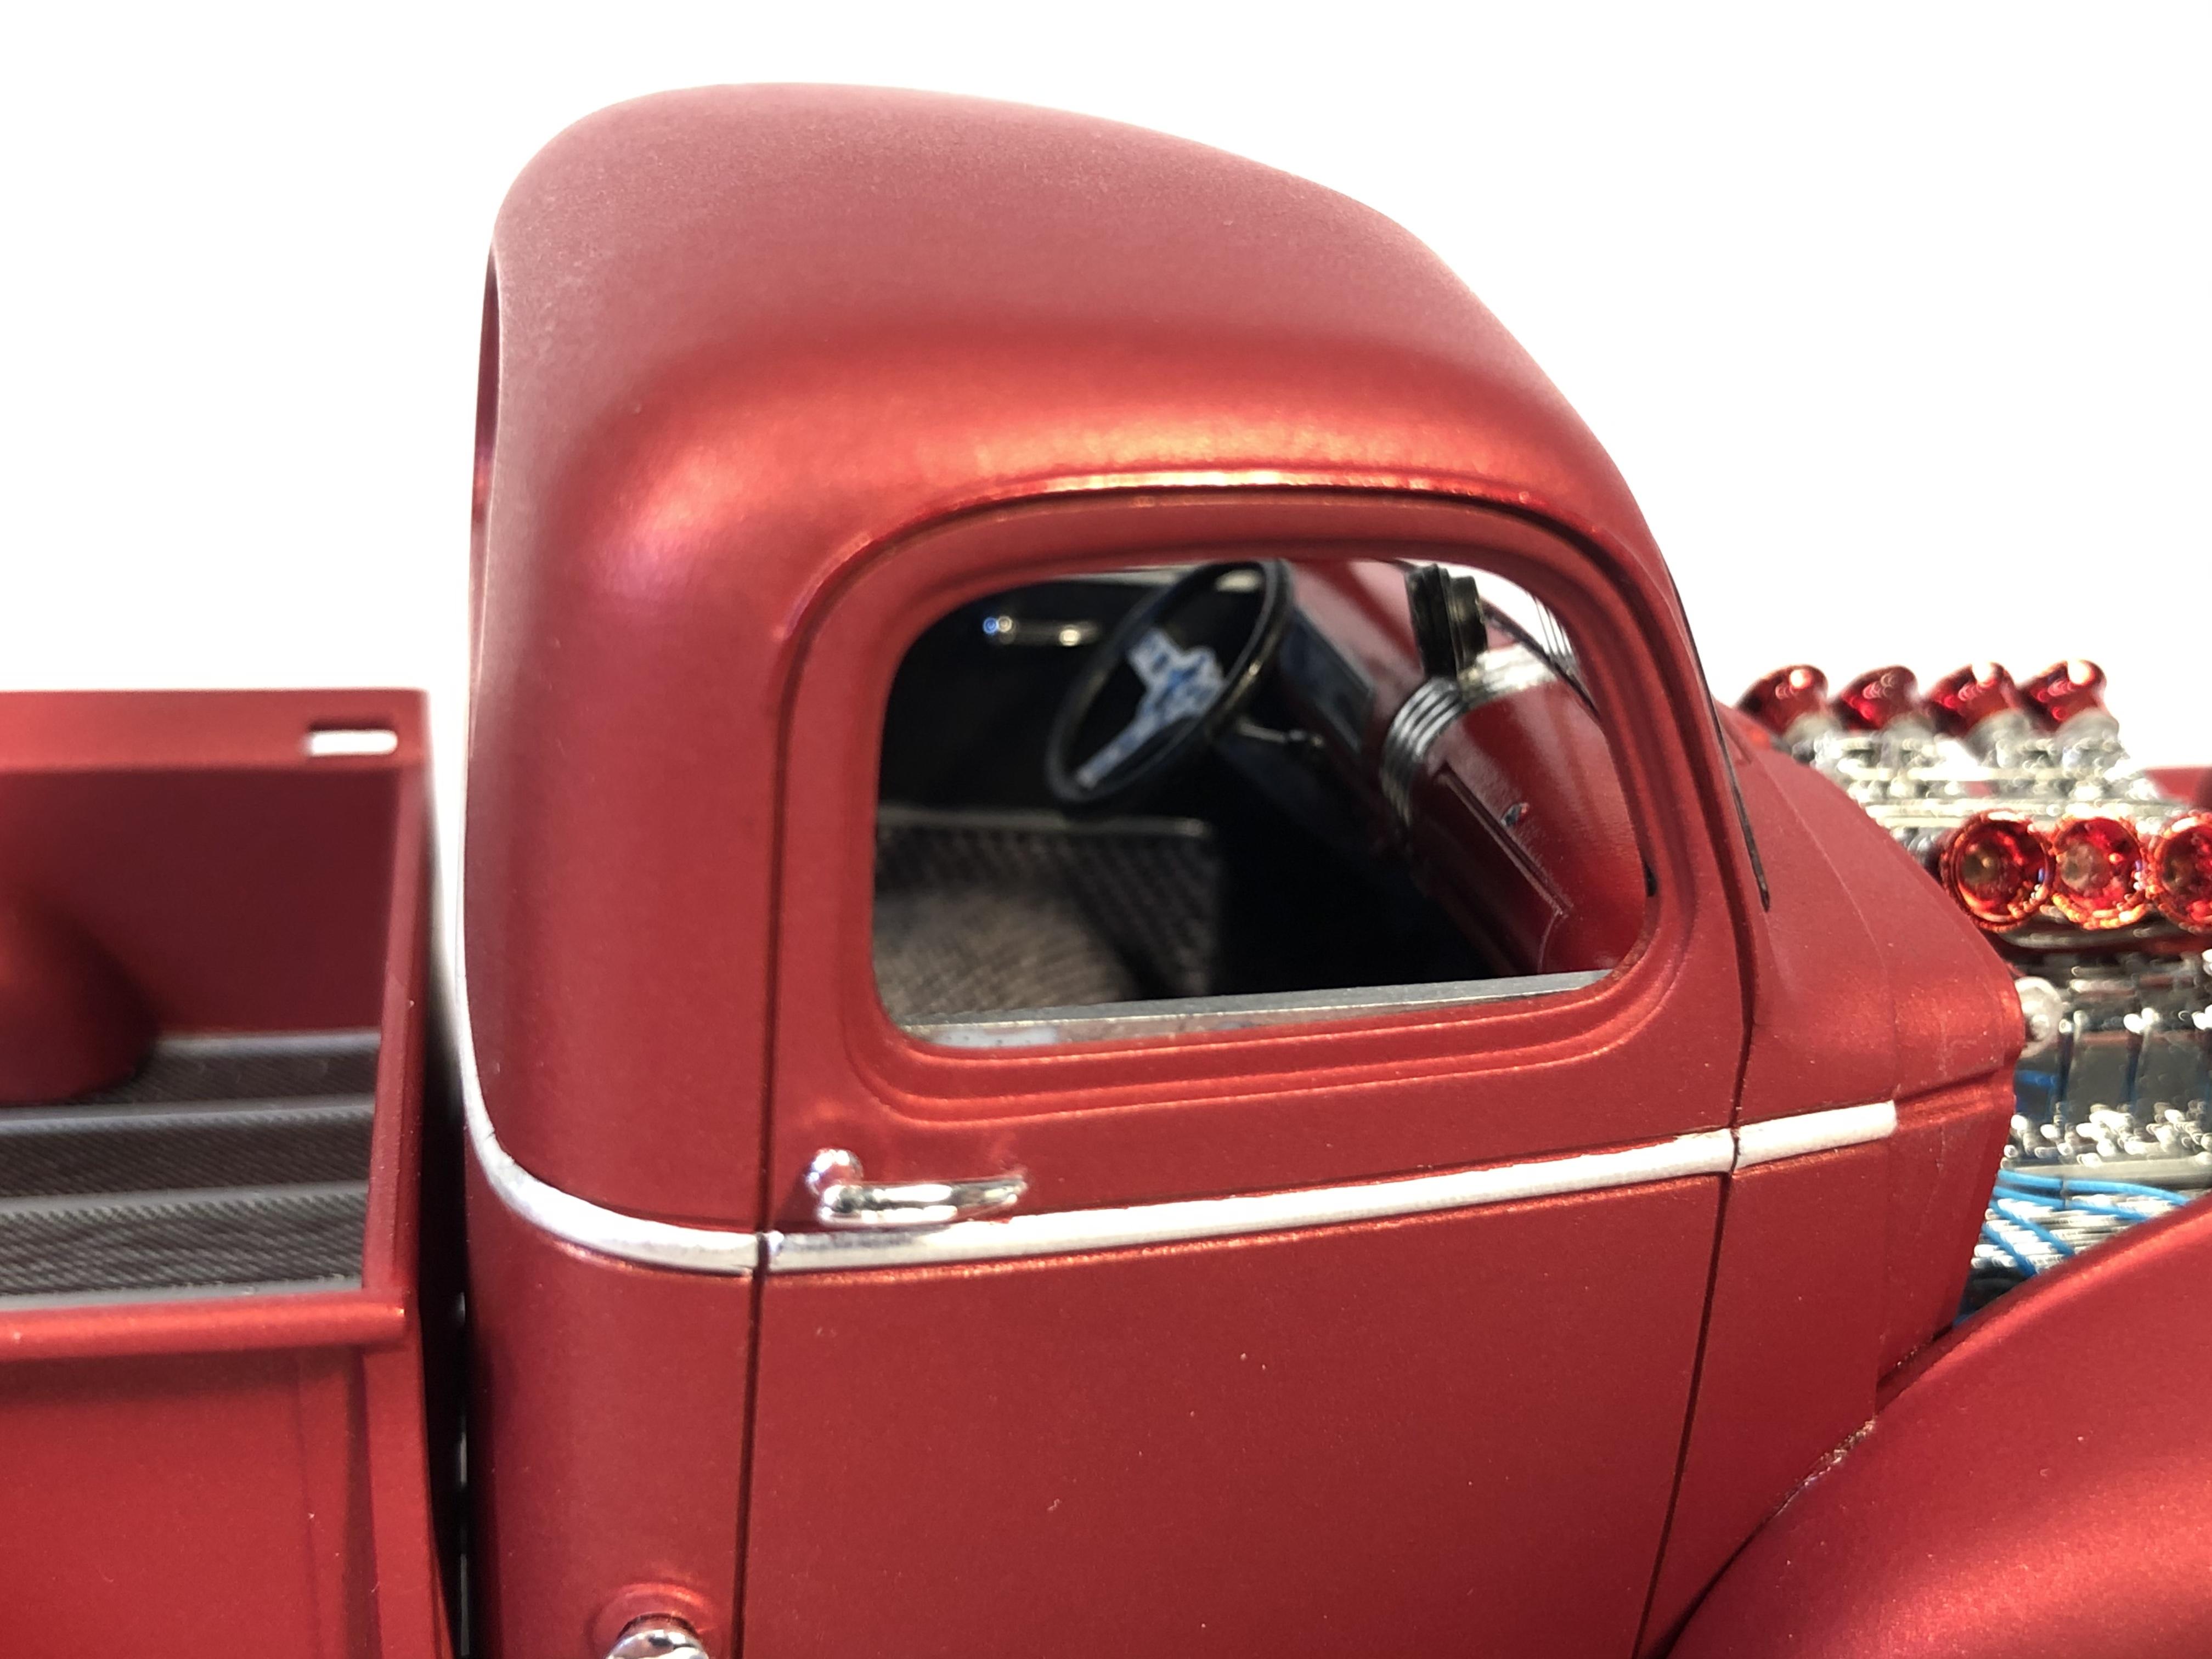
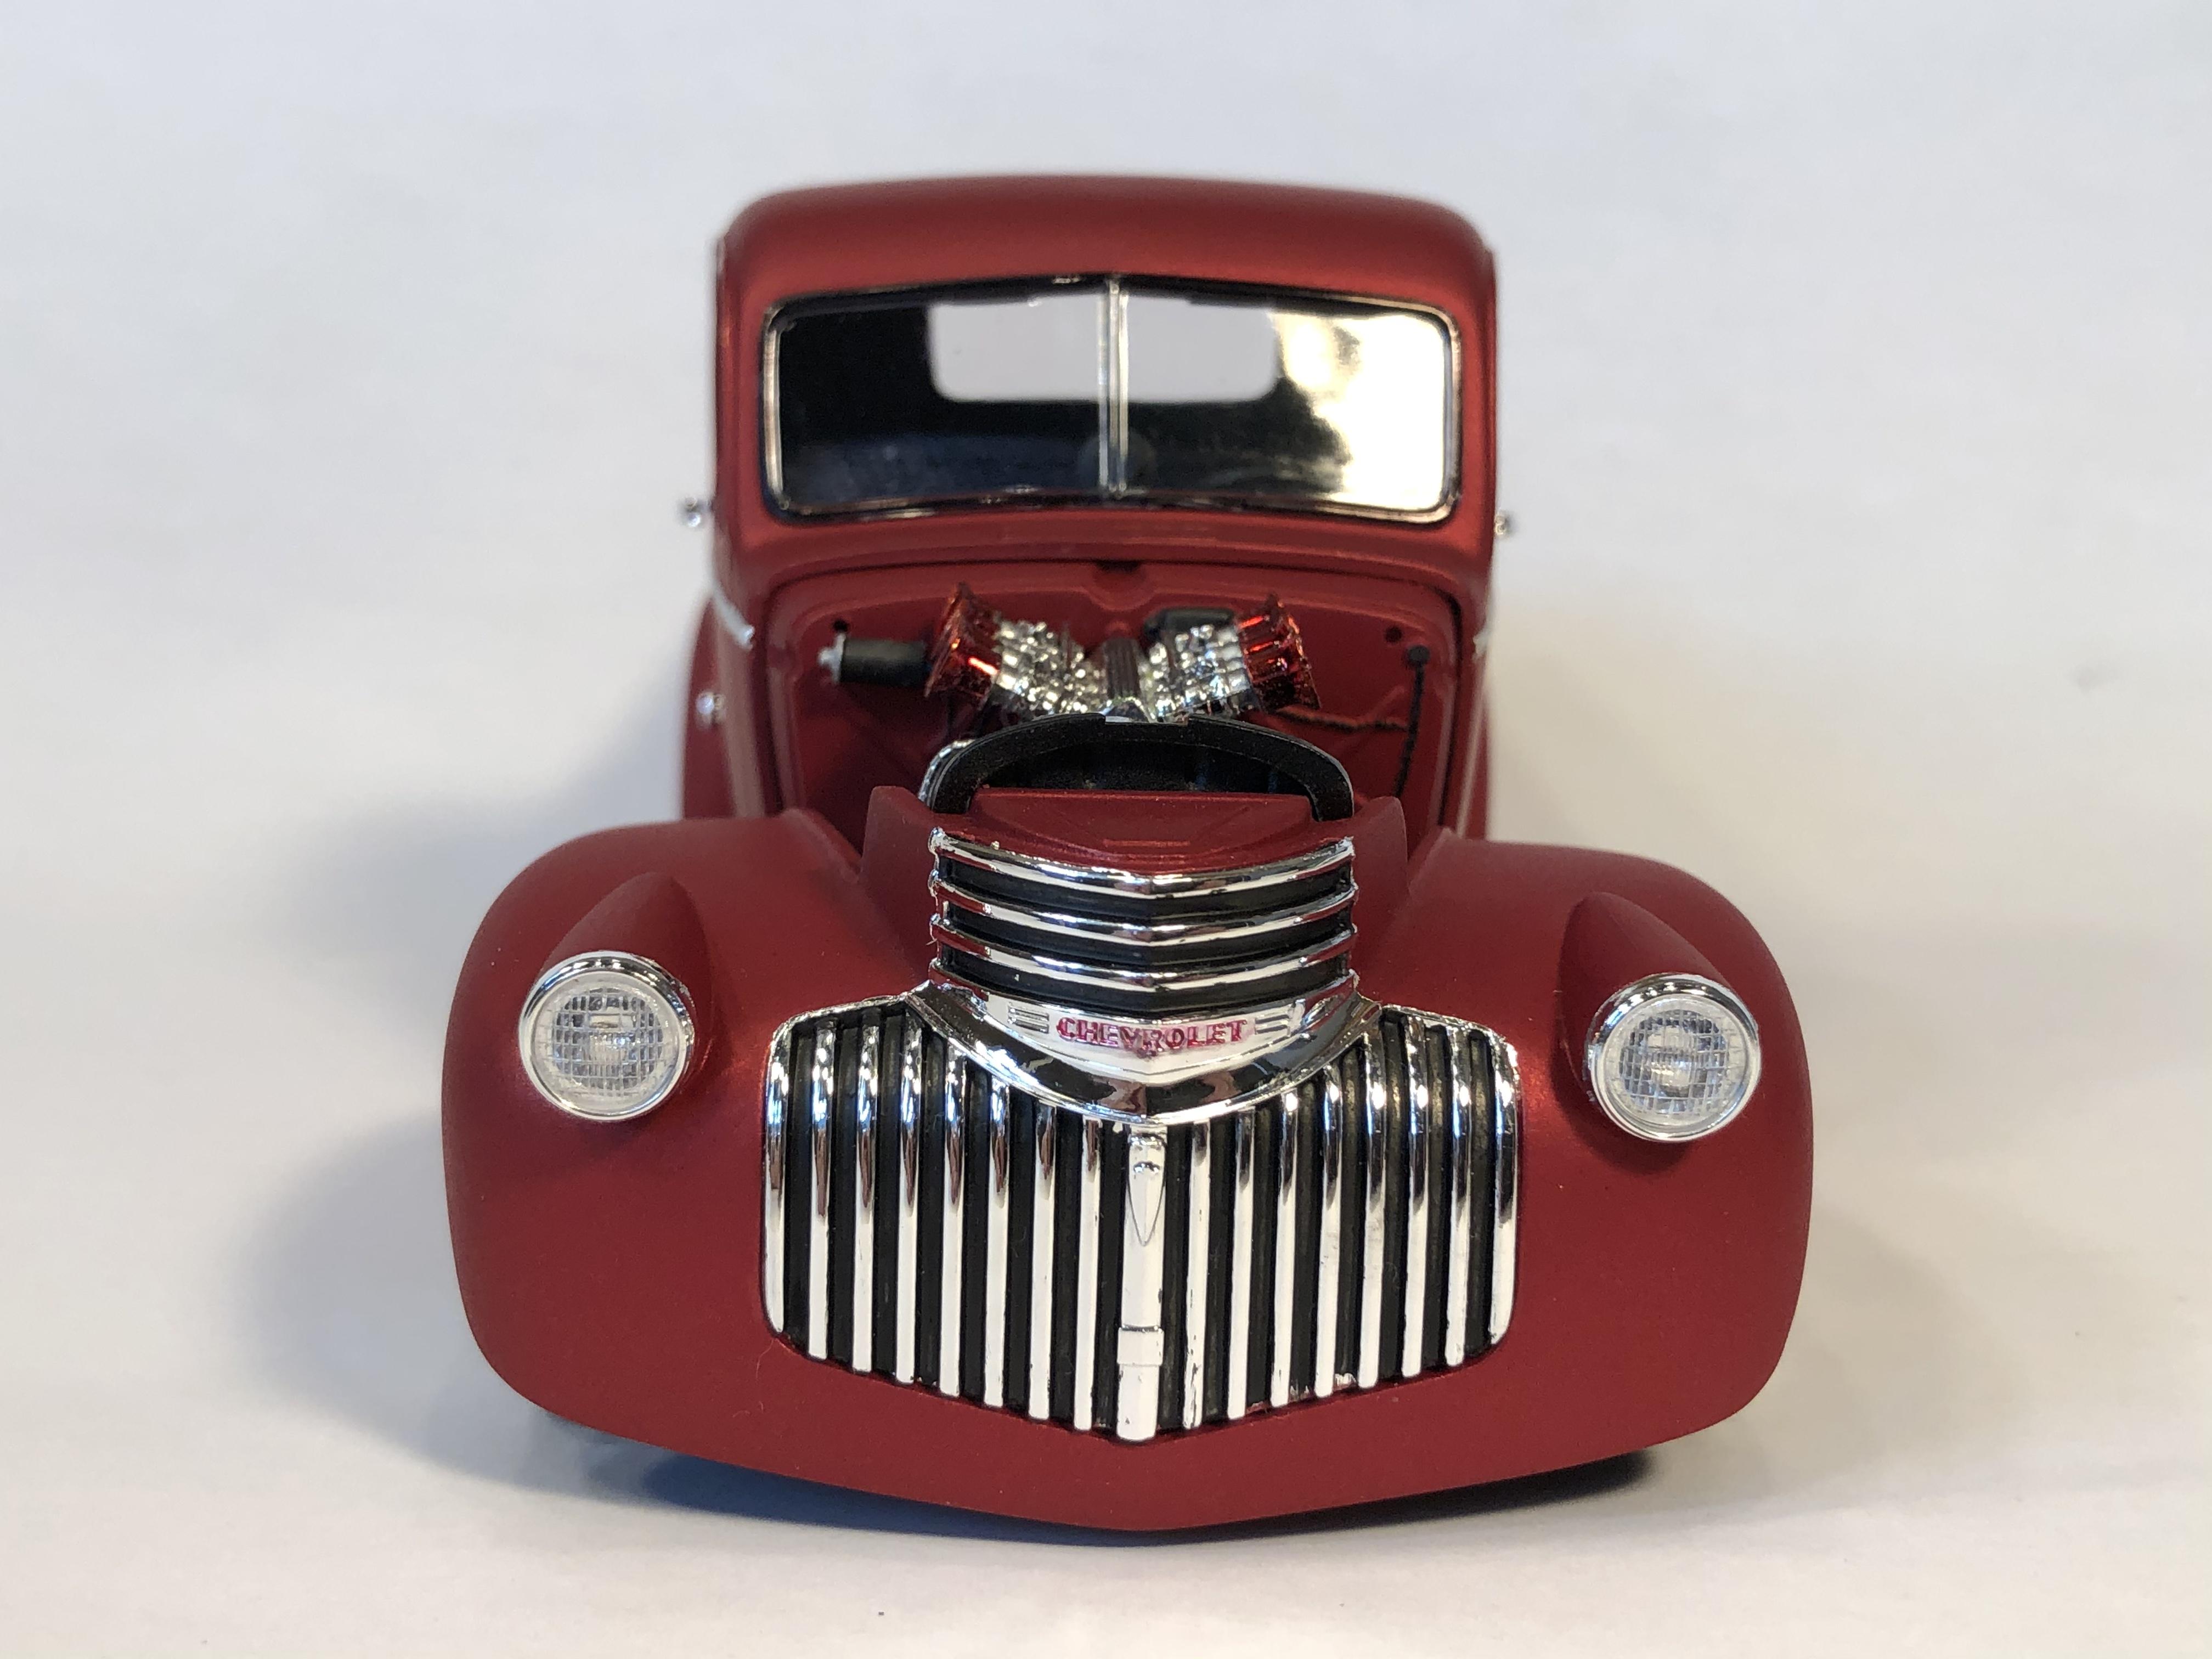
41 Chev P/U street rod
Steve H posted a topic in Model Trucks: Pickups, Vans, SUVs, Light Commercial
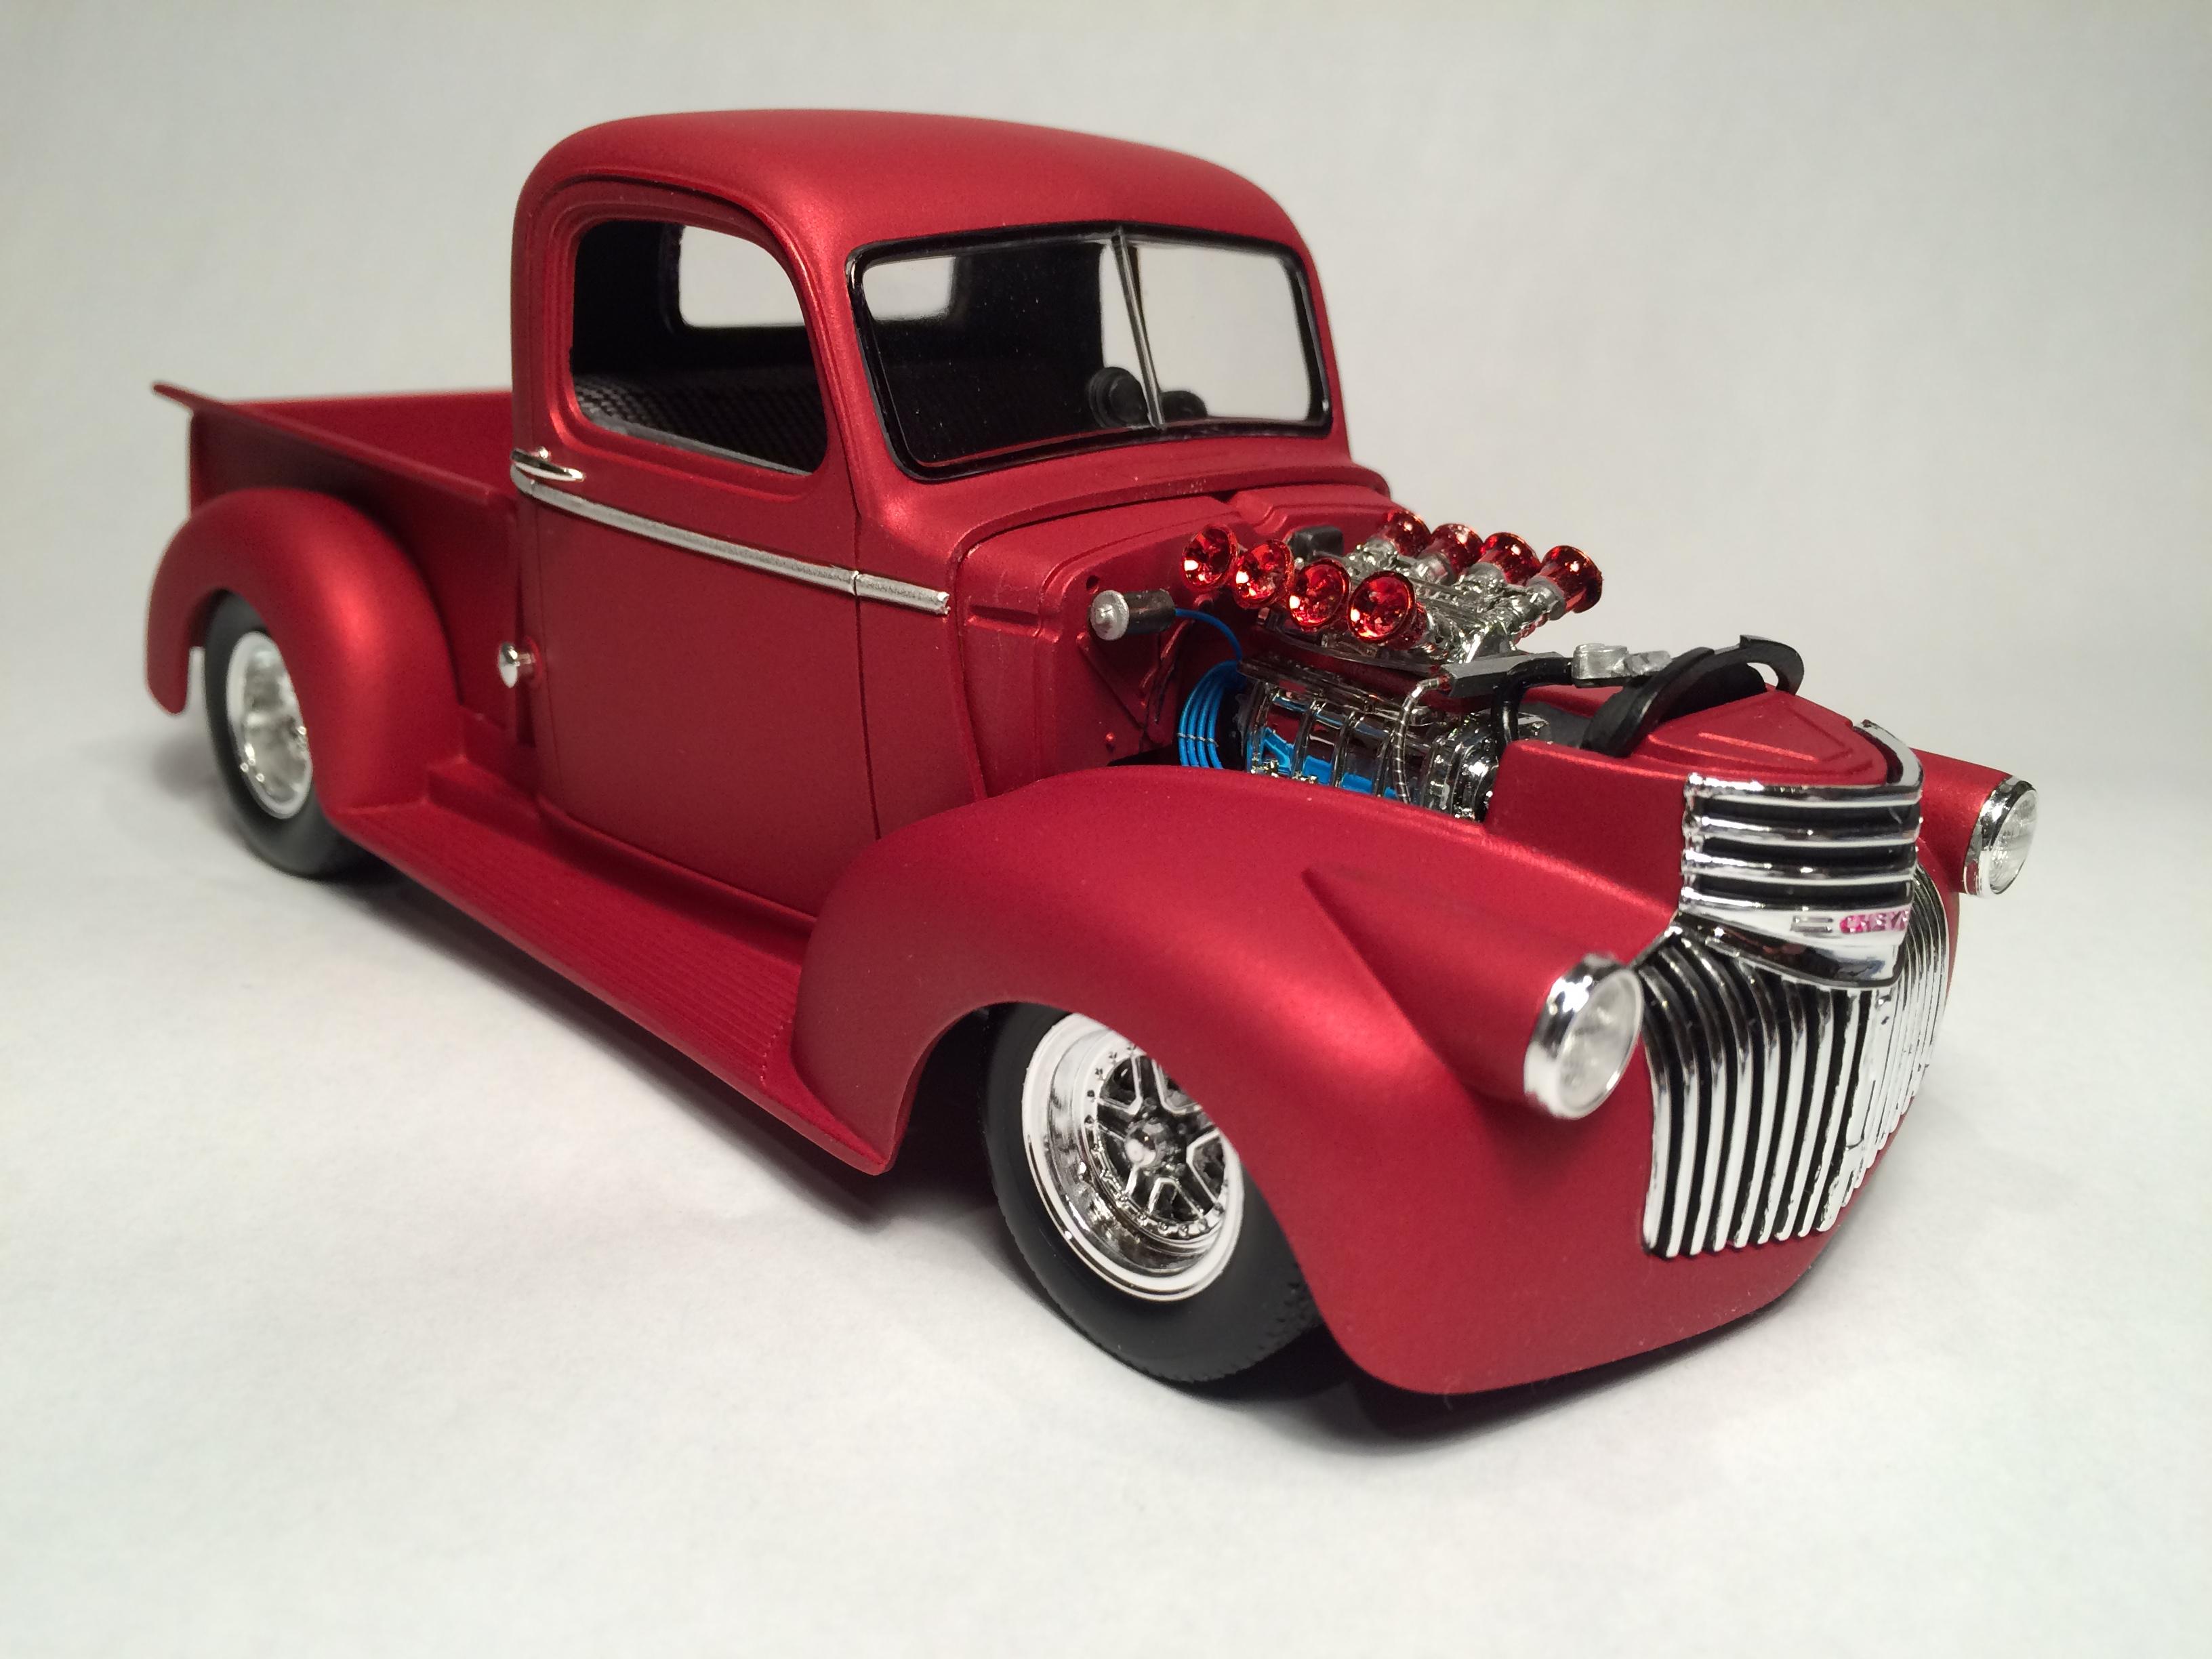
I love these trucks. The grill is one of my favourites on any vehicle. The box is shortened by 11 scale inches, about 4 1/2 in front of rear wheels, 6 1/2 at back of box. Added parts box wheels and tires, used carbon fibre decals for bed, and made a carbon fibre rear bumper. Lowered stance (as always), and aluminium tubing for exhaust tips. The straight six was replaced with a blown 409 with scratch built intake and side drafts. Also added ignition wires and fuel lines. The interior has a fabric seat. Paint is metallic red with flat clear. Hope you like it, comments welcome Steve
-
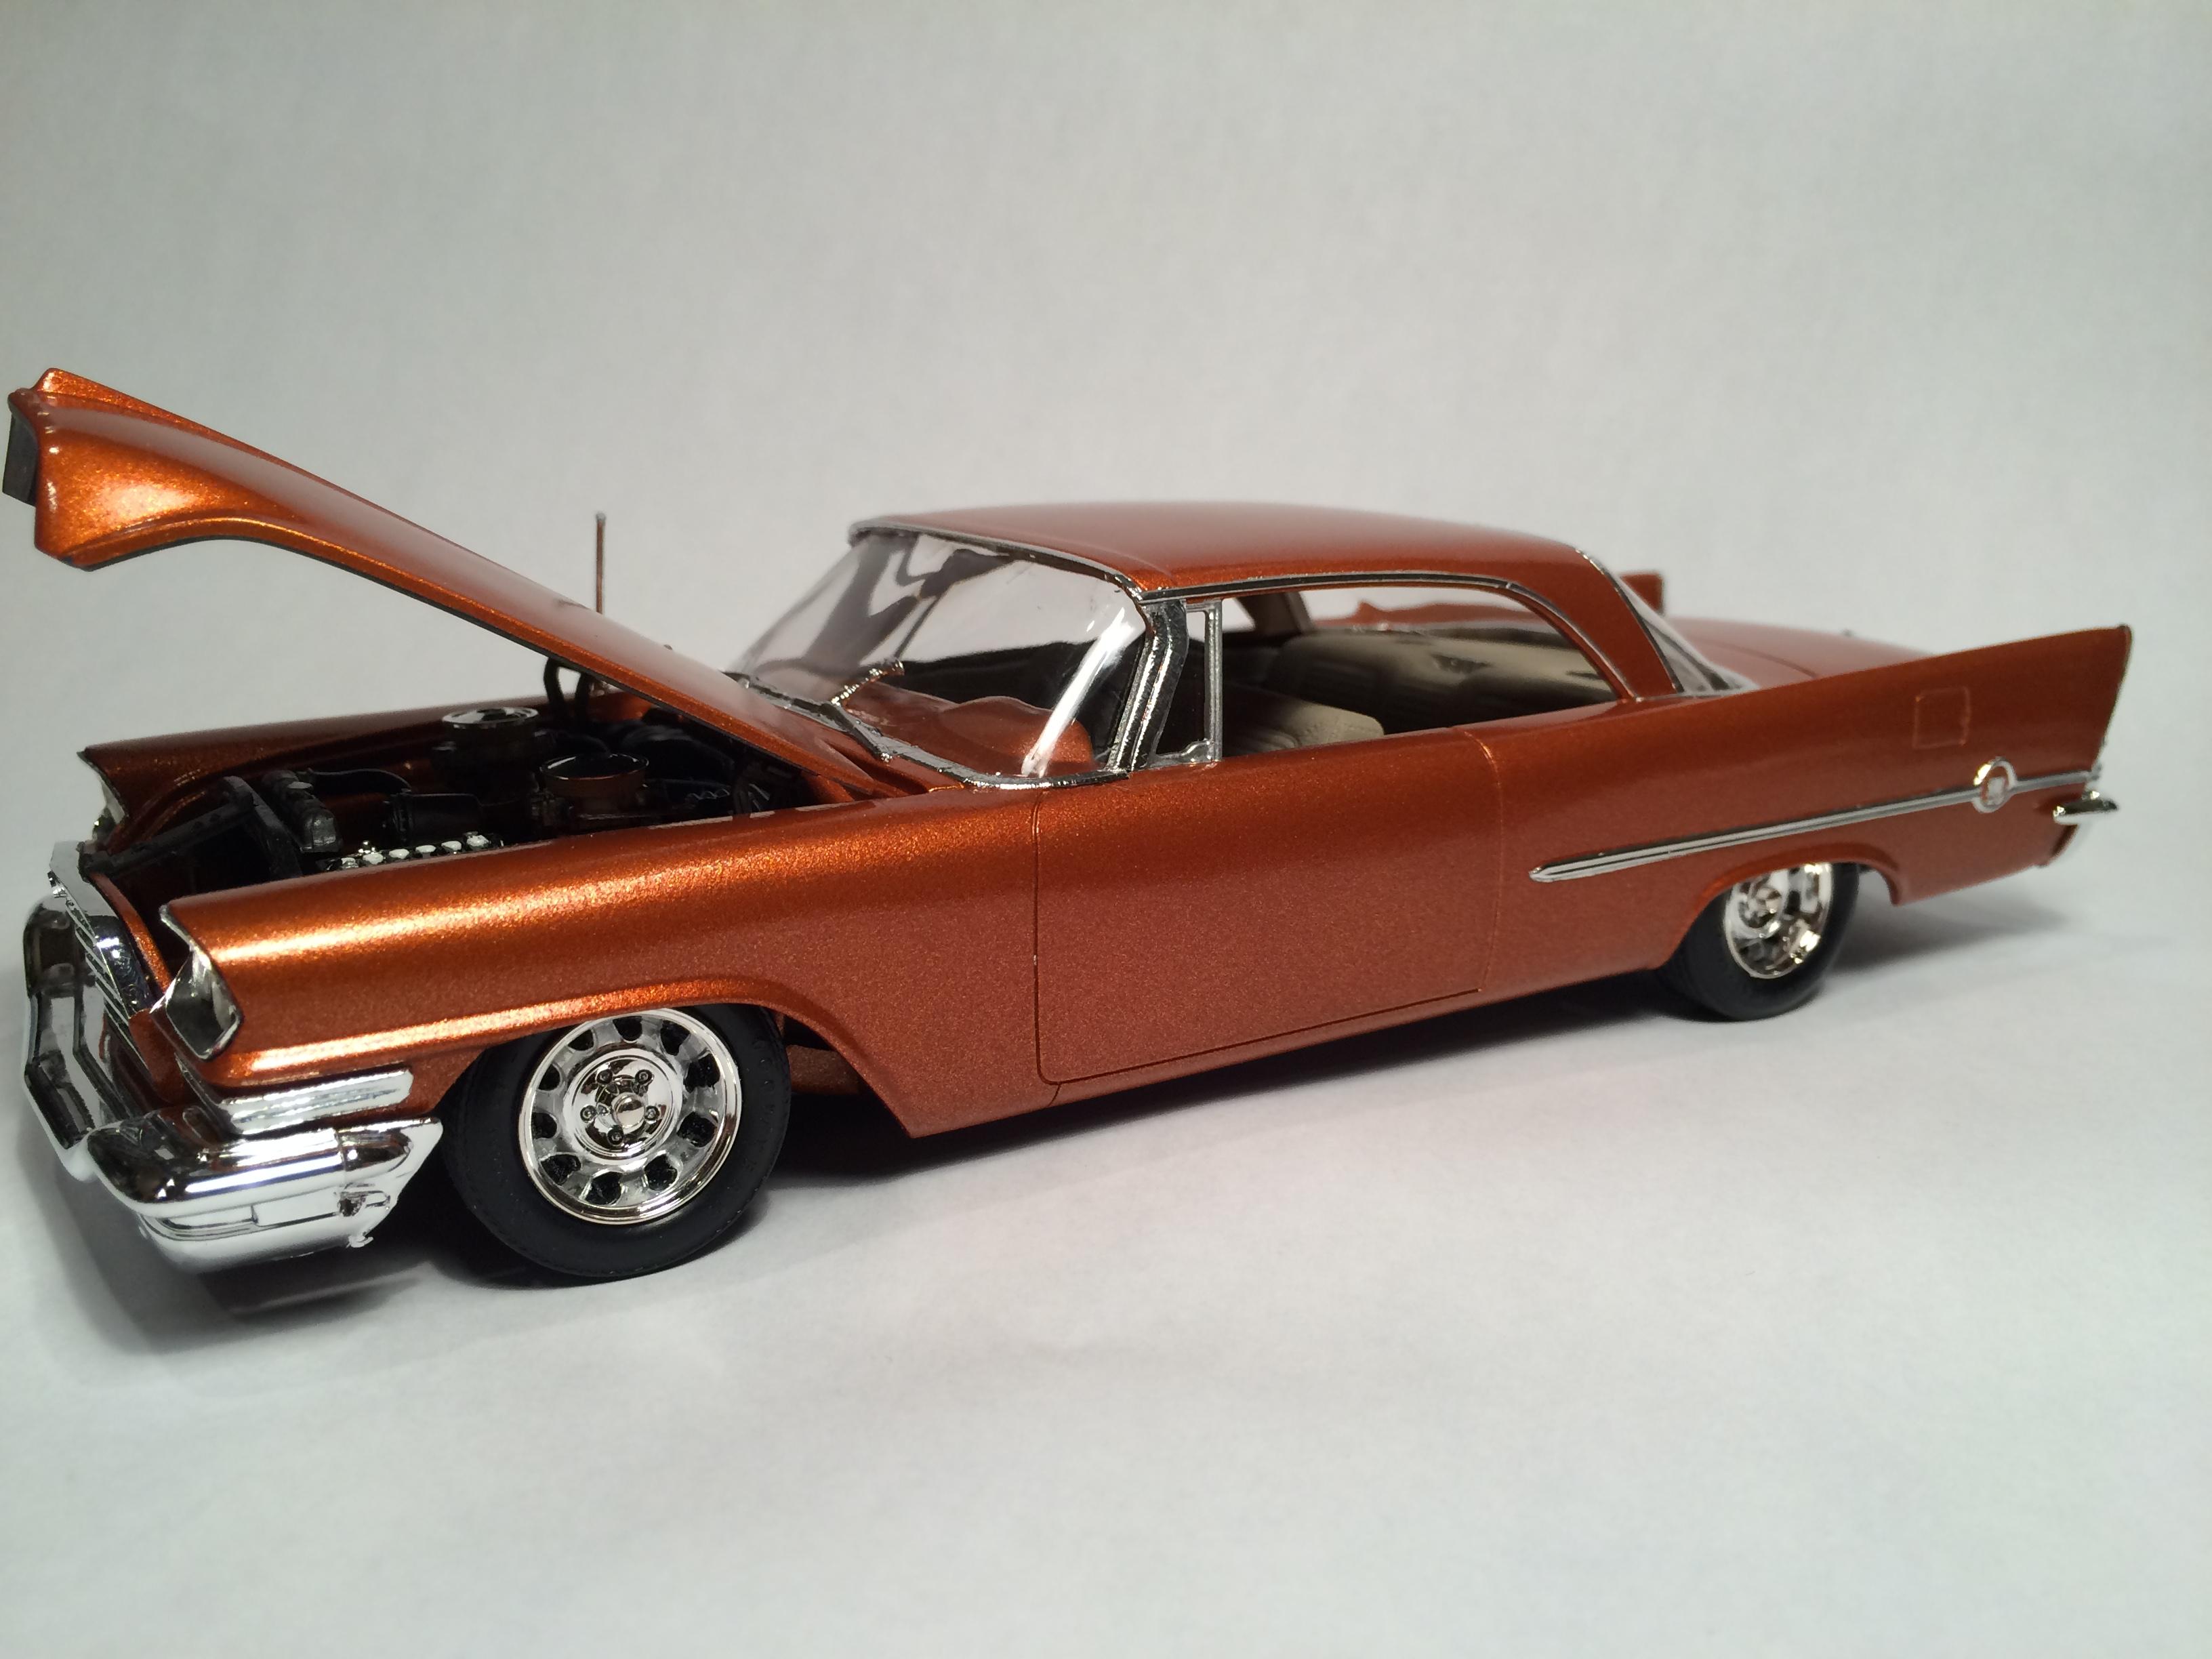
Cool build. What colour are you thinking? I did a lowered 300 in a metallic burnt orange and thought it looked good. Keep it low! Love the Camino conversion.
-
Steve, your work is VERY inspiring. The attention to detail is simply incredible. I wish I had your eyes... Thanks for sharing all your experiments, tricks and tips, they are much appreciated. Cheers, Steve
-
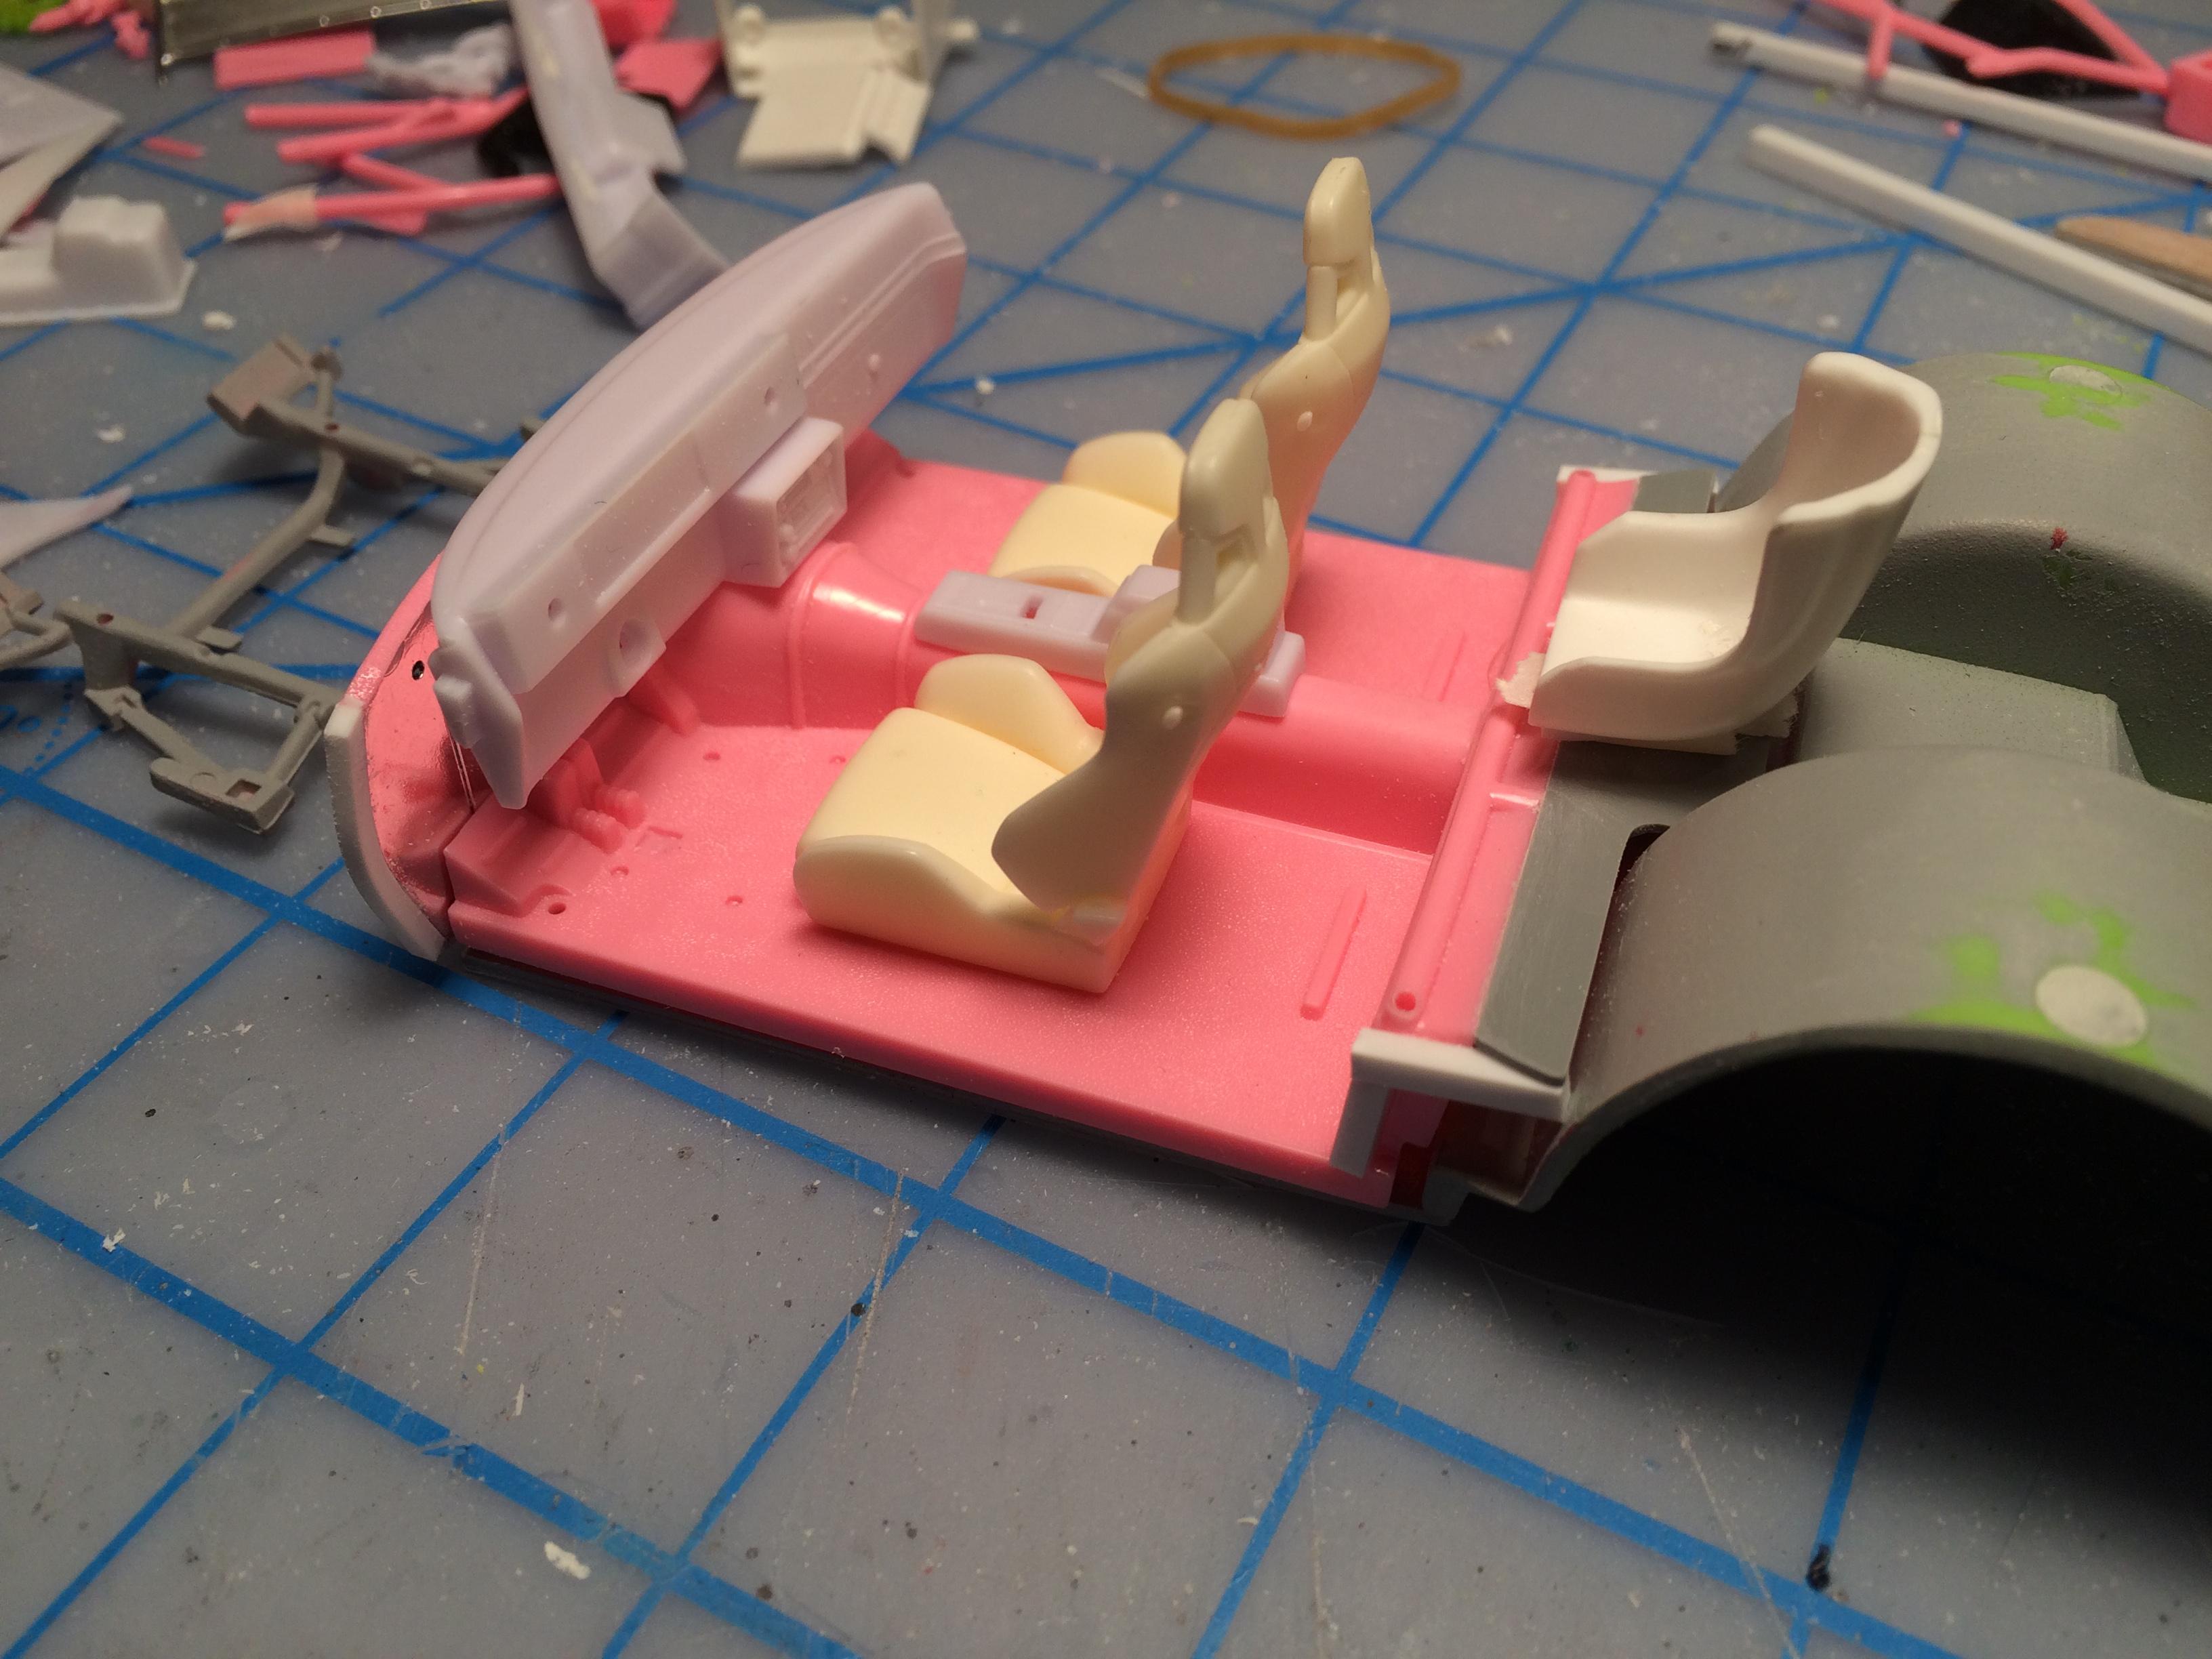
Hi guys, as expected, not much time at the hobby desk this week. I did make some progress on the hinges though. I bent up a couple of hinges and will attach them with “u” channel. Not very realistic I know, but functional. For a first effort at door hinges, I am pleased so far. Hoping to have time to tackle the door side of hinges this coming week. There is not a lot of width to work with on these door panels, and adding width will likely cause conflict with seats. I already found the narrowest seats I could and they barely squeeze in. It will work out, just be a bit a of fiddlin. Allen, I made a pair of blocks to hinge trunk door from body, rather than chassis. I think they will work fine and won’t really be visible once assembly is complete. Dash is almost complete now. Air cleaner is ready to attach to blower intake, steering column close to completion. I use pins with a small piece of wire insulation for turn signals and tilt. I will tackle the body work on the doors and finish the door hinge work next. Then start assembling chassis, interior and paint body.... sounds easy. Thanks for your interest, comments welcome. Cheers, Steve
-
Love it, I plan on doing some sort of, "old meets new" version of a Corvette soon. I like your version. Very well done. Cheers, Steve
-
Chevy Nova Race Car
Steve H replied to zakdoggi's topic in WIP: Other Racing: Road Racing, Land Speed Racers
Hi Geoff, beautiful work. I have done a fair bit of cutting/filling etc. but never braves enough to do a sedan conversion. Very well done! Steve -
Gerald, might be too late, but I think Jimmy Flinstone makes skull shifters. Love the build, it looks awesome!!
-
Thanks for the comments guys. No bench time yet this week, still hoping to hinge those doors by end of weekend. Leslie, where in Scotland are you? My parents are both from Glasgow. This is fun having the United Kingdom gang watching. I will try for an update within the week. Cheers, Steve
-
SPOTTED! Experimental 58 Plymouth Cuda concept car...
Steve H replied to Claude Thibodeau's topic in Model Cars
Hi Claude, totally cool mash-up. Colour is perfect for the car. And yes, this supposed to be fun, most of the time it is! Cheers, Steve -
Forgot I had these shots of chassis during construction. Yikes, what a mess. Also missed the spell check on my last post. It of course is a “Whipple” blower, not a “whipper”