The Creative Explorer
-
Posts
1,990 -
Joined
-
Last visited
Content Type
Profiles
Forums
Events
Gallery
Everything posted by The Creative Explorer
-

Ghost Kits - Shown But Never Released
The Creative Explorer replied to Casey's topic in Car Kit News & Reviews
Bob Downie mentioned it here: http://www.modelcarsmag.com/forums/index.php?showtopic=2538 I wished that would've happened, too bad. -
I just heard about a mysterious Pocher Prototype, of only one in existince and never went into production. Appearantly it was showed at the '91 and '92 Nuernburg toyfair, but due to barely interest, it never became a production model. From what I have understood, it would've been a Lamborghini, but can't say for sure, I enquired for more information and hope to share it soon.
-
1/9 Volkswagen Kübel 'Kubelrod'
The Creative Explorer replied to The Creative Explorer's topic in WIP: Model Cars
I added chromed valvecovers Replaced the molded in throttle bars and added throttle return springs And finally some preview pictures, needless to say that it sits too high as it is. -
1/9 Volkswagen Kübel 'Kubelrod'
The Creative Explorer replied to The Creative Explorer's topic in WIP: Model Cars
Thanks guys! @Richard; no I simply used paper tissues, made them whet, draped them onto the seat and used water thinned acrylics to give it it's rough look. After a week of polishing, 2 hours per evening, I finally got the body in a decent way. So, that means that it is on to final assembly and detailling at last. I started with giving the doors a nice look to it with flocking. What you didn't knew, was a suprise inside the doors. before adding the doorpanels, I airbrushed the inside of the doors with some more skulls, but tucked away And work on the engine continued; -
With a tiny bit googleing; It seems you would be good to go with this kit.
-
Type of plastic affecting color?
The Creative Explorer replied to Dandydan's topic in Model Building Questions and Answers
This is not meant as a bash or feeling god-like, but I never have the issue that a color bleeds through the primer. And I do have painted all kinds of kits and all kinds of colored plastics. Since I use the airbrush (about 2009), I use Alclad grey primer as my main starting point. If I need a lighter color, I use Alclad white primer on top of the grey one. Primarily because there are barely any modelkits molded in grey and gives me a better look to the body while sanding. But I never had any color bleeding through the primer. Again, it isn't meant for bragging, just trying to help. -
I have one not the Turbo, but a GTTurbo. Same engine, different set-up, but almost as fun to drive as the Turbo. Unfortunately mine is already sitting for 6 years now. One day.... @Ajay, Like the wheels, they look a bit like Gotti's.
-
1/9 Volkswagen Kübel 'Kubelrod'
The Creative Explorer replied to The Creative Explorer's topic in WIP: Model Cars
I clearcoated the floorpan, so I could also work on the suspension I really like how this skull came to live with the frontsuspension on his head The back suspension is a very weak link of this kit, very fragile and with a lot of tolerances, I seriously hope it will hold the car on it's feet when ready. The finished backseat in the body, I really like the look of it. It almost looks like some sort of Alcantara. And two early mock-up pictures of how the car sits at the moment, it starts to look promising and it really comes together now. -
1/9 Volkswagen Kübel 'Kubelrod'
The Creative Explorer replied to The Creative Explorer's topic in WIP: Model Cars
Thanks guys! The body has now been clearcoated twice and needs to be polished. I hope to get that done next week, nice little job to do, glad it isn't huge body (<---Sarcasm) I think it came out ok, it is not the finish I wanted, but I think it is not irrepairable and will be decent after polishing. In the meanhwile, I got most parts finished and painted, so I could start working on assembly a bit more. I tried to create a cloth-like upholstery for the seats, instead of giving it brand new seats, I kept it with the original seats and with upholstery, rather than the stated rubbery-like material from the kit. The engine got some more parts, I wired the sparks and added the fanbelt. I need to Alclad a couple of parts, and then heading for a final assembly and wiring of the engine. -
Bill Rutan Special - Hill Climbing VW/Porsche
The Creative Explorer replied to curt raitz's topic in WIP: Model Cars
Really nice Curt, I like the cleanlyness of the build -
1/9 Volkswagen Kübel 'Kubelrod'
The Creative Explorer replied to The Creative Explorer's topic in WIP: Model Cars
Thanks Richard! But unfortunately, the course was set and it was heading for a showrod I don't like military or rat-rod colors so much. -
How do I make acrylic paint crack?
The Creative Explorer replied to Bastardo's topic in Model Building Questions and Answers
I got that stuff finally over here in The Netherlands and used it for the Rommel's Rod and it works really wel and easy, the thicker the coat, the bigger the crackles. No need for complex misbehaviour of regular paints. -
1/9 Volkswagen Kübel 'Kubelrod'
The Creative Explorer replied to The Creative Explorer's topic in WIP: Model Cars
Thanks Rich! Neither could I, it is always a suprise how somethings work out, it shouldn't be but it is to me haha. Today was the make or break day, I had to take the last steps towards the paintjob and it involved the trueflames artwork, that is always tricky and I think it came out ok. This is the scariest moment; the tape comes of...Will I take paint with the tape, will the paint look ok, how did it work out? I think it worked out ok, it does blend and it could've been better, but I like it for this build; nice and wild. -
1/9 Volkswagen Kübel 'Kubelrod'
The Creative Explorer replied to The Creative Explorer's topic in WIP: Model Cars
OK, so long time errr..... not a lot done, But I bring you a new update, I have been able to do some work on the body and finally got it good enough for the paintjob, which will be a huge turnkey in this build. First, I got the wheels done: And the body in it's second painting stage; after primer it is now Desert Sand Yellow For the contrast, in this picture it is shown how different the Kubelrod is from the Kübelwagen Step 3: Adding some brown skidmarks Step 4: Adding some green ones The sparewheel finished, I painted the letters blueish white, just like a brandnew tire Step 5: putting on some masking tape Step 6: Going back to black Step 7: Adding some skulls More steps to follow in upcoming days, I hope you enjoyed! -
Doyusha 1/12 Porsche 911 V8 TwinTurbo
The Creative Explorer replied to The Creative Explorer's topic in WIP: Model Cars
I disagree Even the name 'work in progress' already stated the nature of the topic, otherwise you could name it 'the build before completion'-topic... Other than the name, I like to keep the WIP thread as a diary, I add when I make progress and sometimes there are gaps in my posts, don't we have that all? I know for sure, that if I had to post a topic of the build AFTER completion, I would not make any. Making small contributions each time, works better than a whole book at once. The Porsche is still here and will be worked on in a while, in the meantime: Don't hold your breath! -
Thanks guys, I am so thrilled with it. I don't need to buy any of that stuff for a while now Evergreen is kinda spendy compared to what you get, but quite essential for scratchbuilding. Now I can do whatever I want and not be held back by budget problems
-
I know I've been absent for a while, but still manage to build from time to time. Not much as I hoped, but I get around. I am still working on the Kubelrod and hope to present a update soon. In the meantime, I am trying to get my business up and going. One of the things I do is participate in bankruptcy-auctions and do some buying and selling. A couple weeks ago, I got notified of a toystore auction, while there was not much modelling related items in the auction, it did had some interesting lots. Luckily, it was a very quiet auction and there were hardly any biddingwars, therefore I got lucky and with 2 or 3 lots, I actually hit the motherload. Those 3 lots combined are worth retail more than €2300,00 or $3075,00. I got those for less than 10% of what is worth! Let me share some pictures of what i got: A nice display box (metal), meant for storefronts, I think it belonged to Siku cars. It will be a nice showcase for shows. A Castle, not my forte, but I am thinking of building it for fun, doing something else than my cars The ISS, came with the castle, will be sold again A Mini Countryman, came together with the Rolls and London taxi. Not sure what I am going to do with it. I already have 2 of these Rolls Royces, maybe a nice custom? And the well-known reissued London cab, part of me wants to keep it, part of me wants to part with it Up to the more interesting lots, A miscelleanous box, got it for €16,00 has weathering sticks from Tamiya, glue, modelling wax, tools, primer and it came with.... ...These fences, A lot of them, might be nice for displays and diorama's. And then I managed to get a hold of a complete store display full of KS metals, here we go scratchbuilding! But, the best for last. I also managed to get the store supply of Evergreen, more than 140 of those small bags and more than 60 of those larger plates, I can't possbily have any excuse to mess up my scratchbuilding now! hahaha, I am very happy with the last 2 lots, those are worth so much and I got them for so little, it will last such a long time too.
-
Try to google first a bit, Heller made 2 1/16 DS kits, one of them IS a convertible/cabriolet.
-
It is unbelievable to believe it before you see it, it is hughes. There is even a blackbird under its wings. I'm just lucky that my friend took me to Evergreen and I will never forget it. It is just mindboggling.
-
Whatever you want or think is best, it is YOUR model, it shouldn't be limited to other people's opinions.
-
1/24-25 hotrod garage diorama
The Creative Explorer replied to crazyrichard's topic in WIP: Dioramas
Nice one Richard, so much details added and the weathering looks awesome. I need to see this in real life one day. -
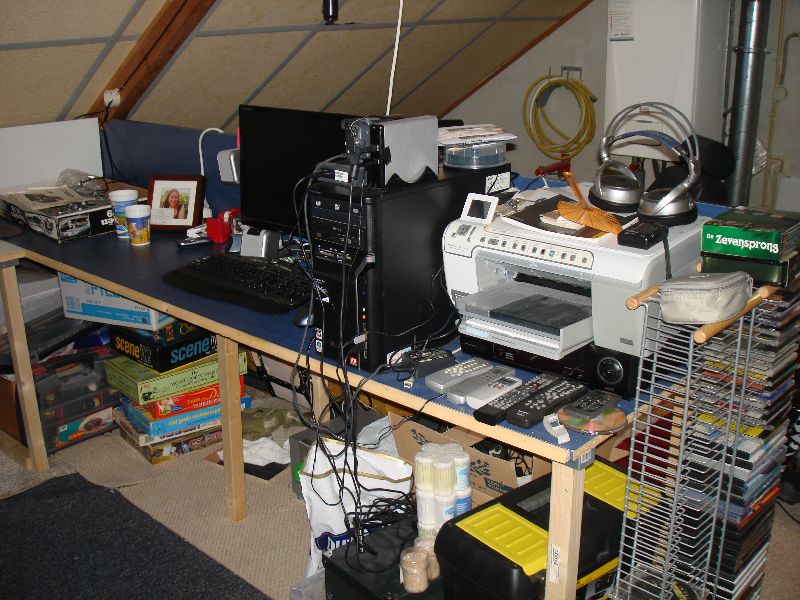
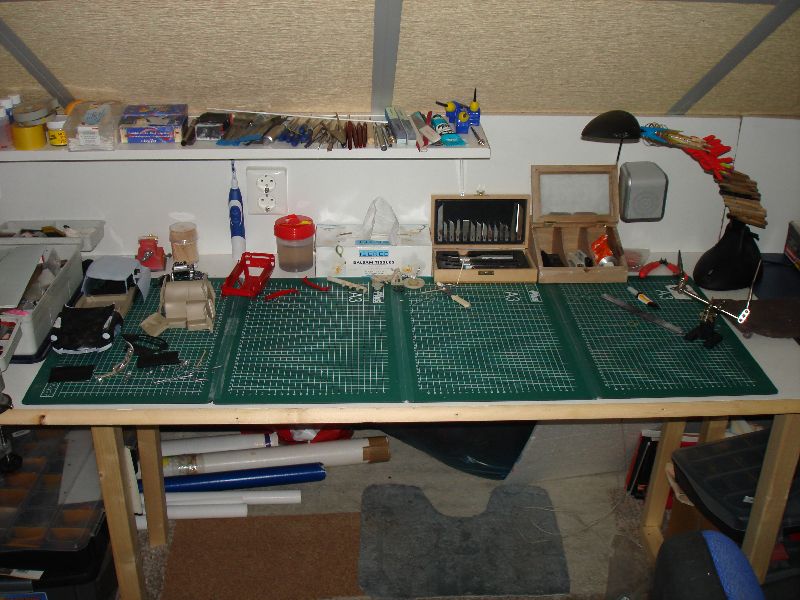
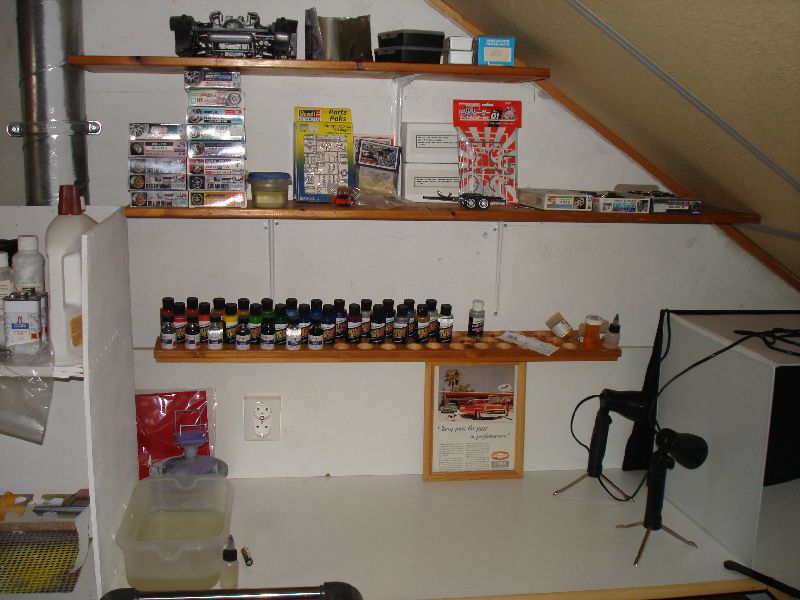
How big is your work table ?
The Creative Explorer replied to Fender's topic in General Automotive Talk (Trucks and Cars)
These are pictures from when we went into the house 3 years ago and the layout is still the same, the computer is gone and that area is my sanding area. But like everybody else, I end up with 1 square inch of room on all 18feet of desk
-
1/9 Volkswagen Kübel 'Kubelrod'
The Creative Explorer replied to The Creative Explorer's topic in WIP: Model Cars
Yeah, it is done with some stencils I got, I will use a variety throughout the build. -
HobbylinkJapan?
The Creative Explorer replied to Shelby 427 1965's topic in Model Building Questions and Answers
Sometimes it just takes a bit, nothing to worry about. They need to figure out shipping and when they have the actual shipping costs, they sent you an invoice and a request to sent the money to their Paypal account. -
1/9 Volkswagen Kübel 'Kubelrod'
The Creative Explorer replied to The Creative Explorer's topic in WIP: Model Cars
Thanks Richard and I agree, I will keep them attached while painting the car, so they will be painted in the right way. Because I had glued some parts that needed serious drying time in order to put strain on them, I started with the paintjob on the floorpan. Be aware; this is a sneakpeak! the paintjob on the body will be different, but hint on this. The paintjob on this project will be very comprehensive, it will not be limited to just the outside of the body, but will go way further than that. Since most area's are visible, the paintjob will continue throughout the whole car.