Pierre Rivard
-
Posts
2,579 -
Joined
-
Last visited
Content Type
Profiles
Forums
Events
Gallery
Everything posted by Pierre Rivard
-
Beautiful build Jason. The stance, detailing and finishes are impeccable. I think you raised the rear glass flush to body right? Looks better that way. Polar Light kit is always a lot of "fun" and you mastered it. I'm sure you were sad that you did not have to squeeze a 429 into this one...?
-
Info needed Ford GT40 chassis 1046
Pierre Rivard replied to Pierre Rivard's topic in Model Building Questions and Answers
Thanks Gary. Wheels & tire changes galore...so I guess that leaves me with the options. Black body over dark blue chassis it is. -
I feel like I receive more than what I give on the WIP's I do because I receive help and advice from the more experienced builders, saving me from going the wrong way sometimes. And if I occasionally come up wit a good indie that can help others I am happy about that too. Win - win!
-
You've captured the look well. This should work out just fine sir.
-
Info needed Ford GT40 chassis 1046
Pierre Rivard replied to Pierre Rivard's topic in Model Building Questions and Answers
Ace & Helmut, Thanks, that's a lot of help. I watched all the videos and obviously the restoration is to be trusted. Dark blue chassis, gold wheels and Goodyear. -
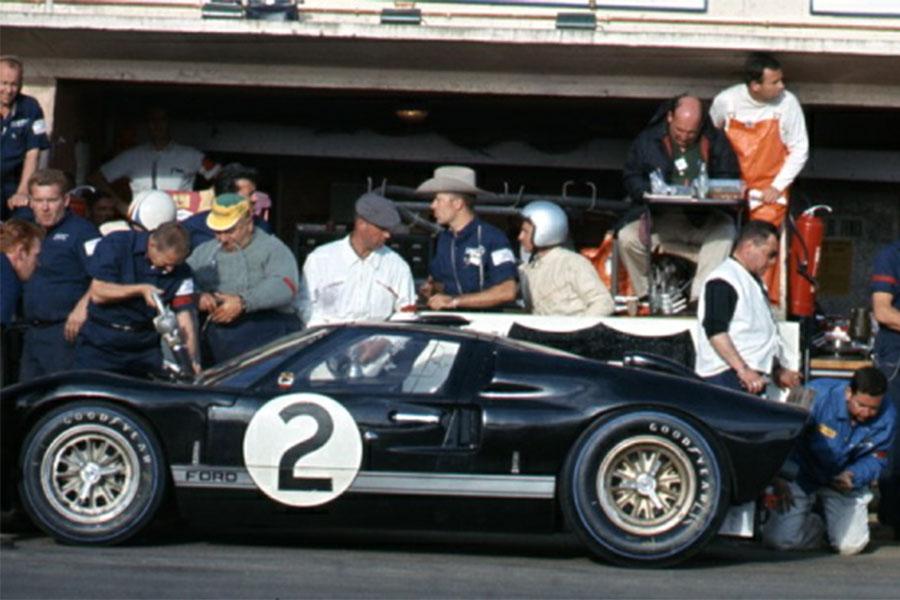
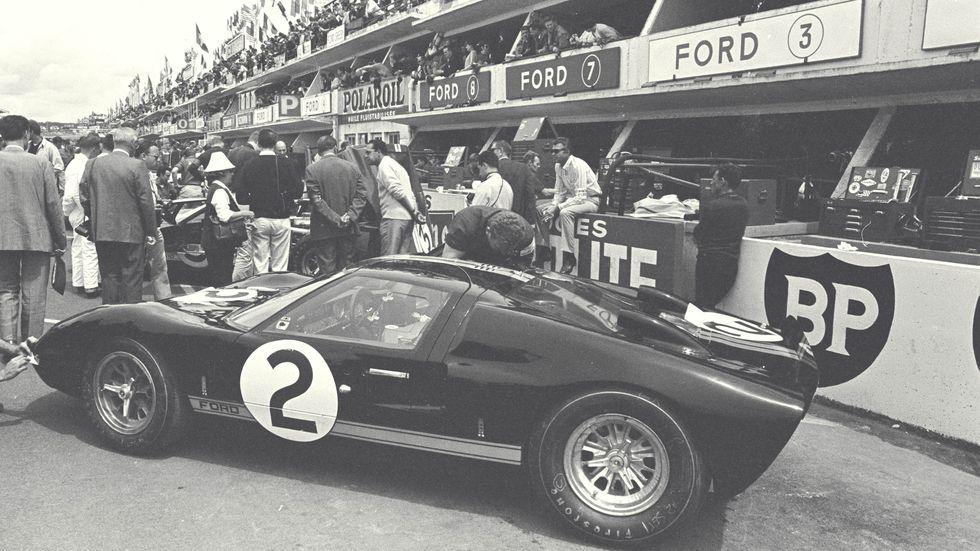
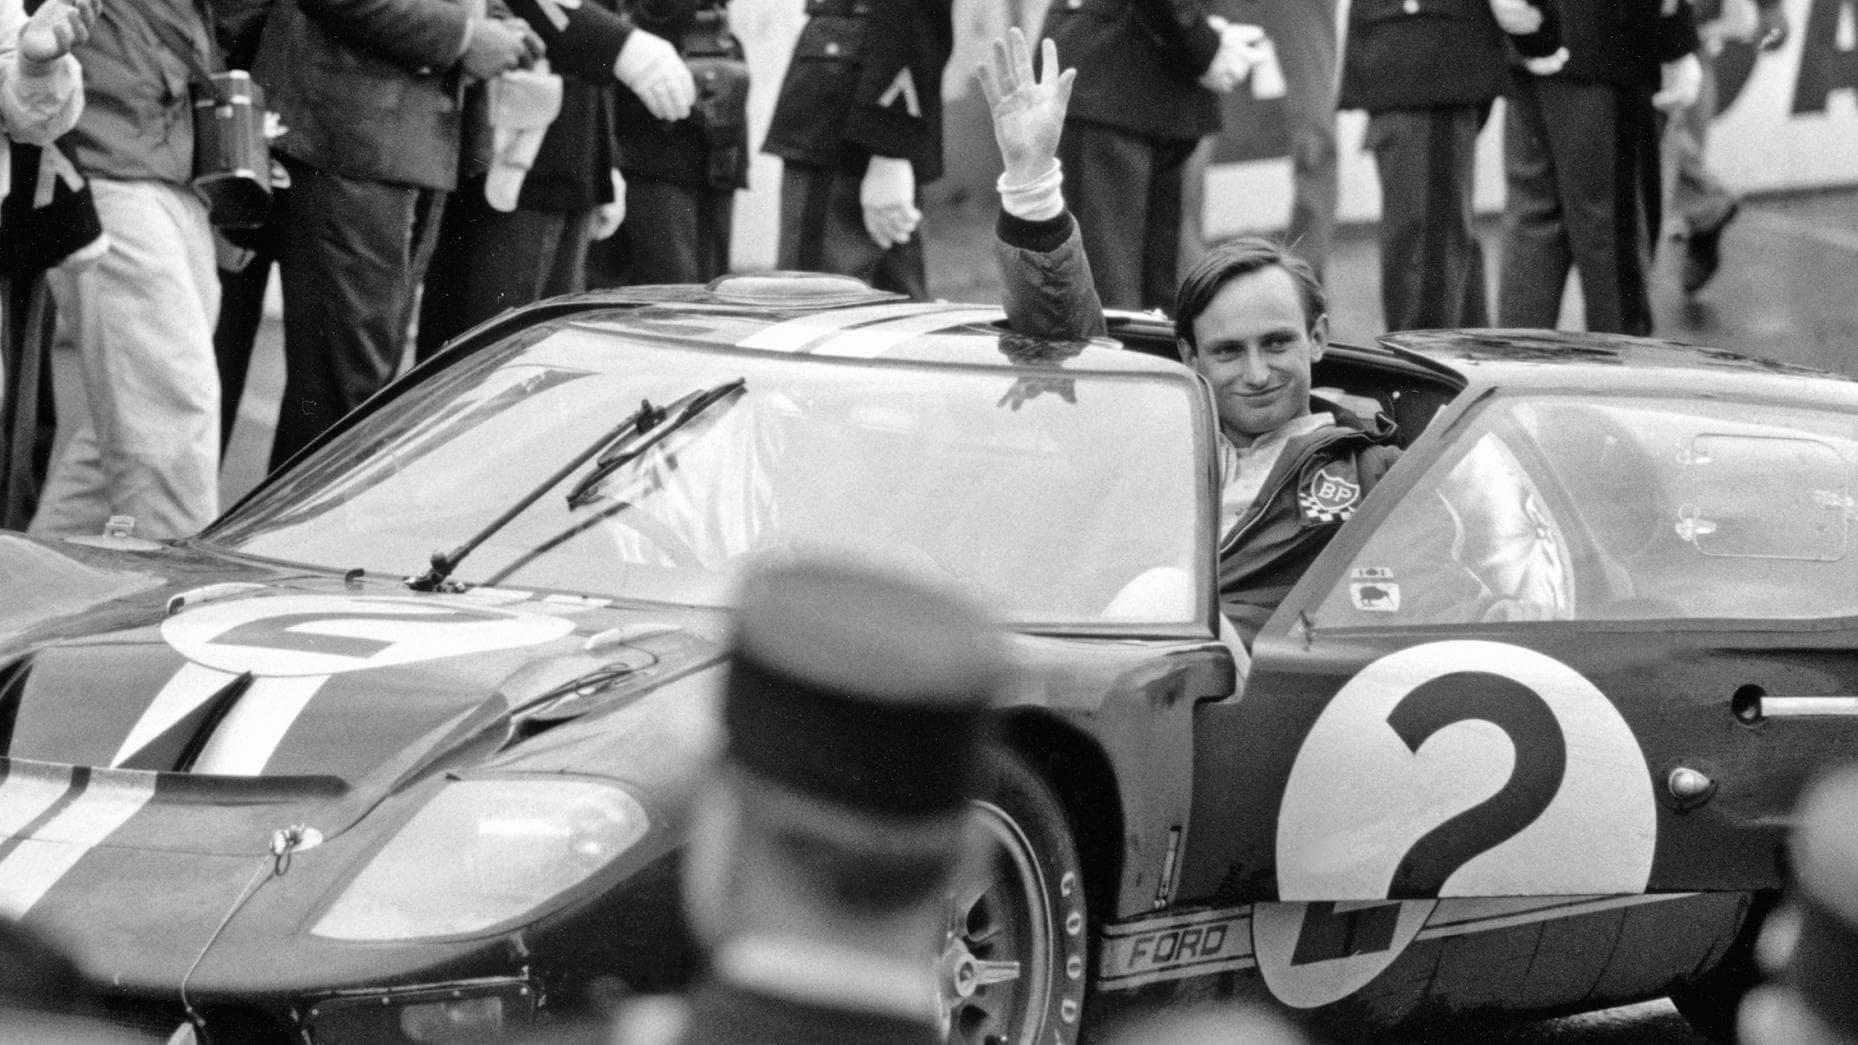
Wondering about Chassis/tub color for the GT40's. I've seen black but also some builds have a dark blue shade. Wondering what it was originally for the 66 Le Mans car #2, chassis#1046. Also curious if any have definitive info about wheels and tires. The restored car has gold wheels with Goodyear tires. The period pictures below are a bit confusing about what wheel color and tires were used either in practice or during the race. Steel, gold, bronze? Goodyear, Firestone?

-
Thank you gentlemen. As simple as the kit was it was easy to make it look like the real car. With some of the inexpensive kits, no matter how much work we put into them it's impossible to shake the "toy" look. Not the case here because the body & glass have been cast very well and I was surprised how the old tooling has held up. So now the new born baby Chaparral holds center stage in my display cabinet, until the next new born displaces it. Enjoy center stage little Chapy, your's for about 2 months.
-
Yeah...don't screw up the screws....
-
Chaparral 2D
Pierre Rivard replied to Pierre Rivard's topic in WIP: Other Racing: Road Racing, Land Speed Racers
Thanks Andy, I always enjoy seeing how you make my stuff look "artsy" More pics to play with in under glass section... -
Chaparral 2D
Pierre Rivard replied to Pierre Rivard's topic in WIP: Other Racing: Road Racing, Land Speed Racers
-
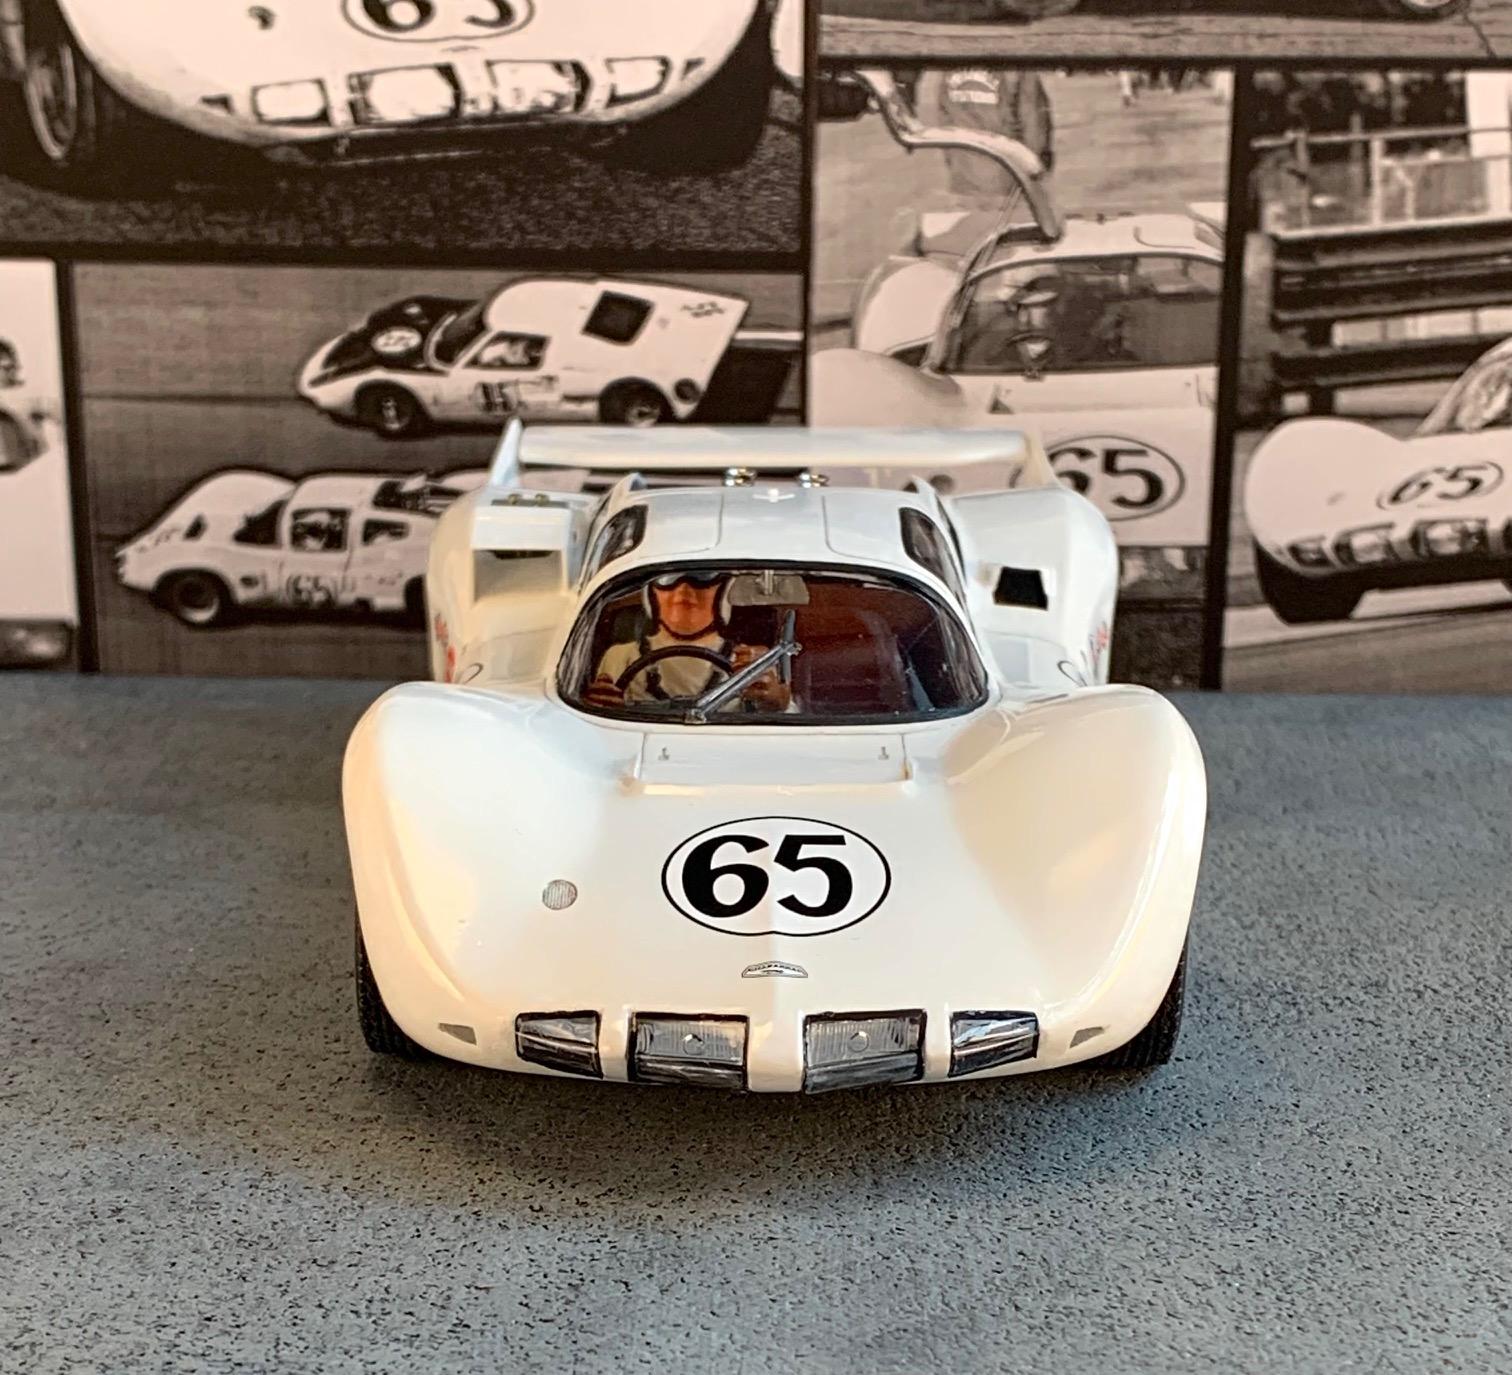
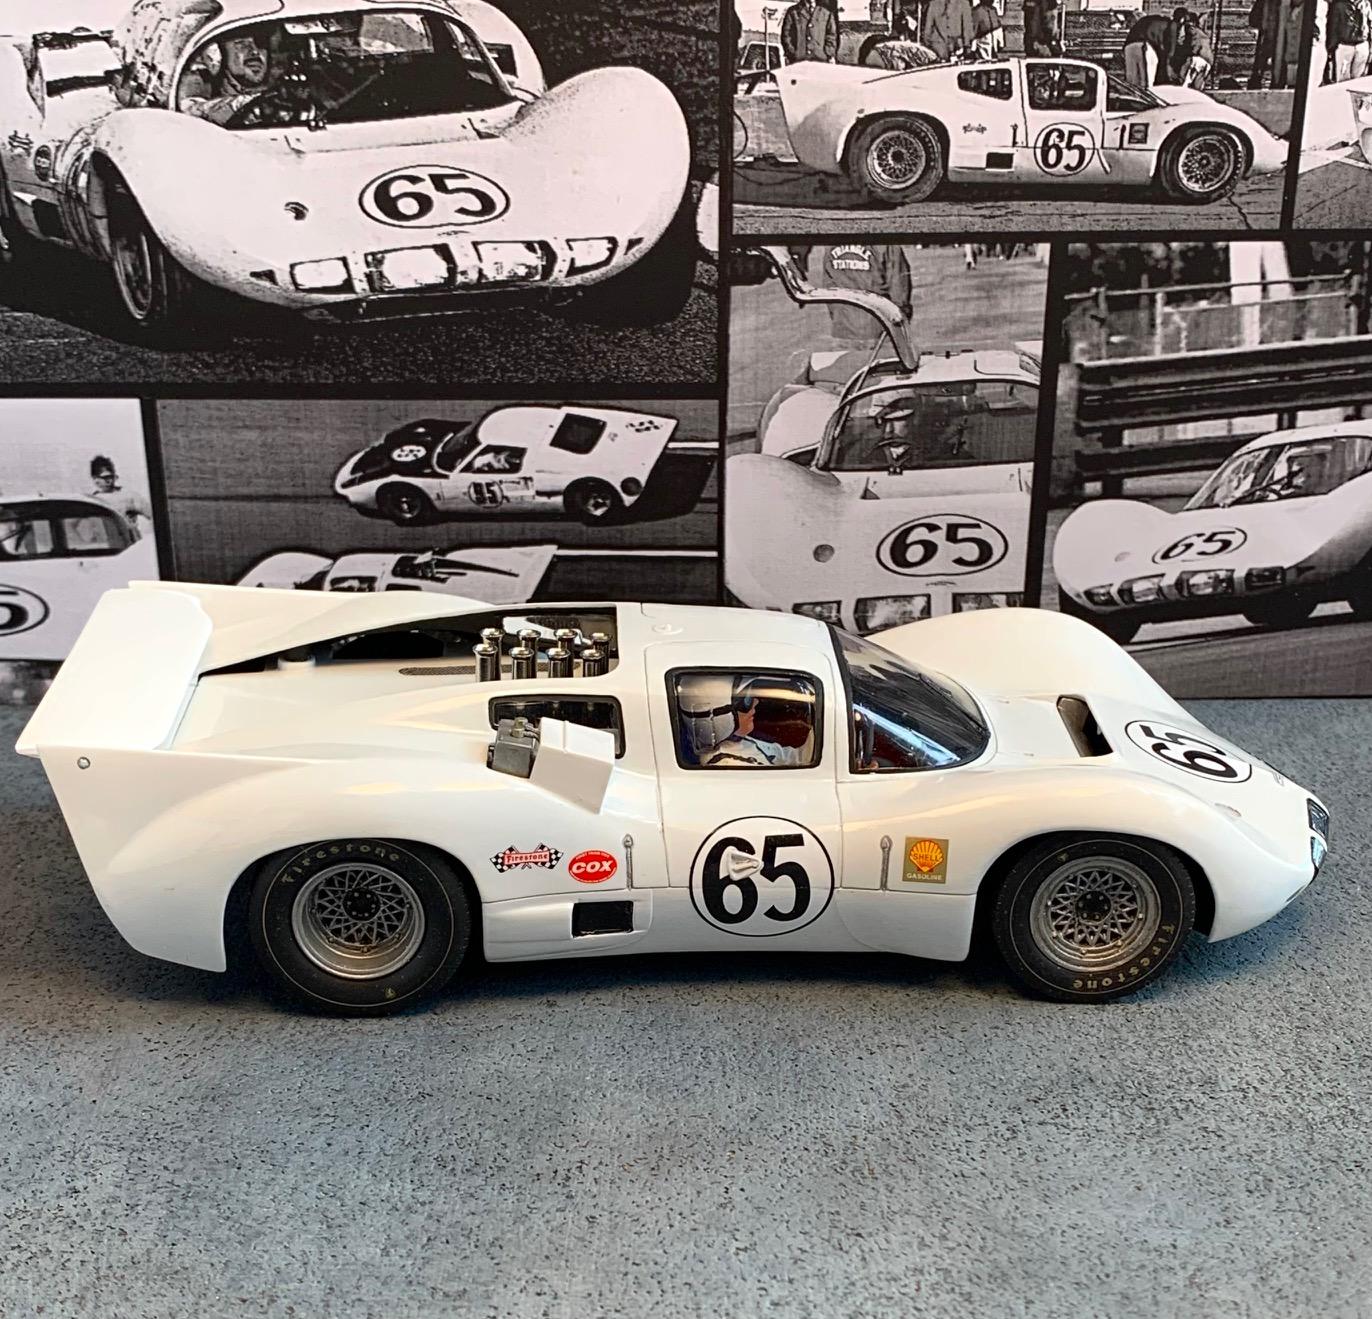
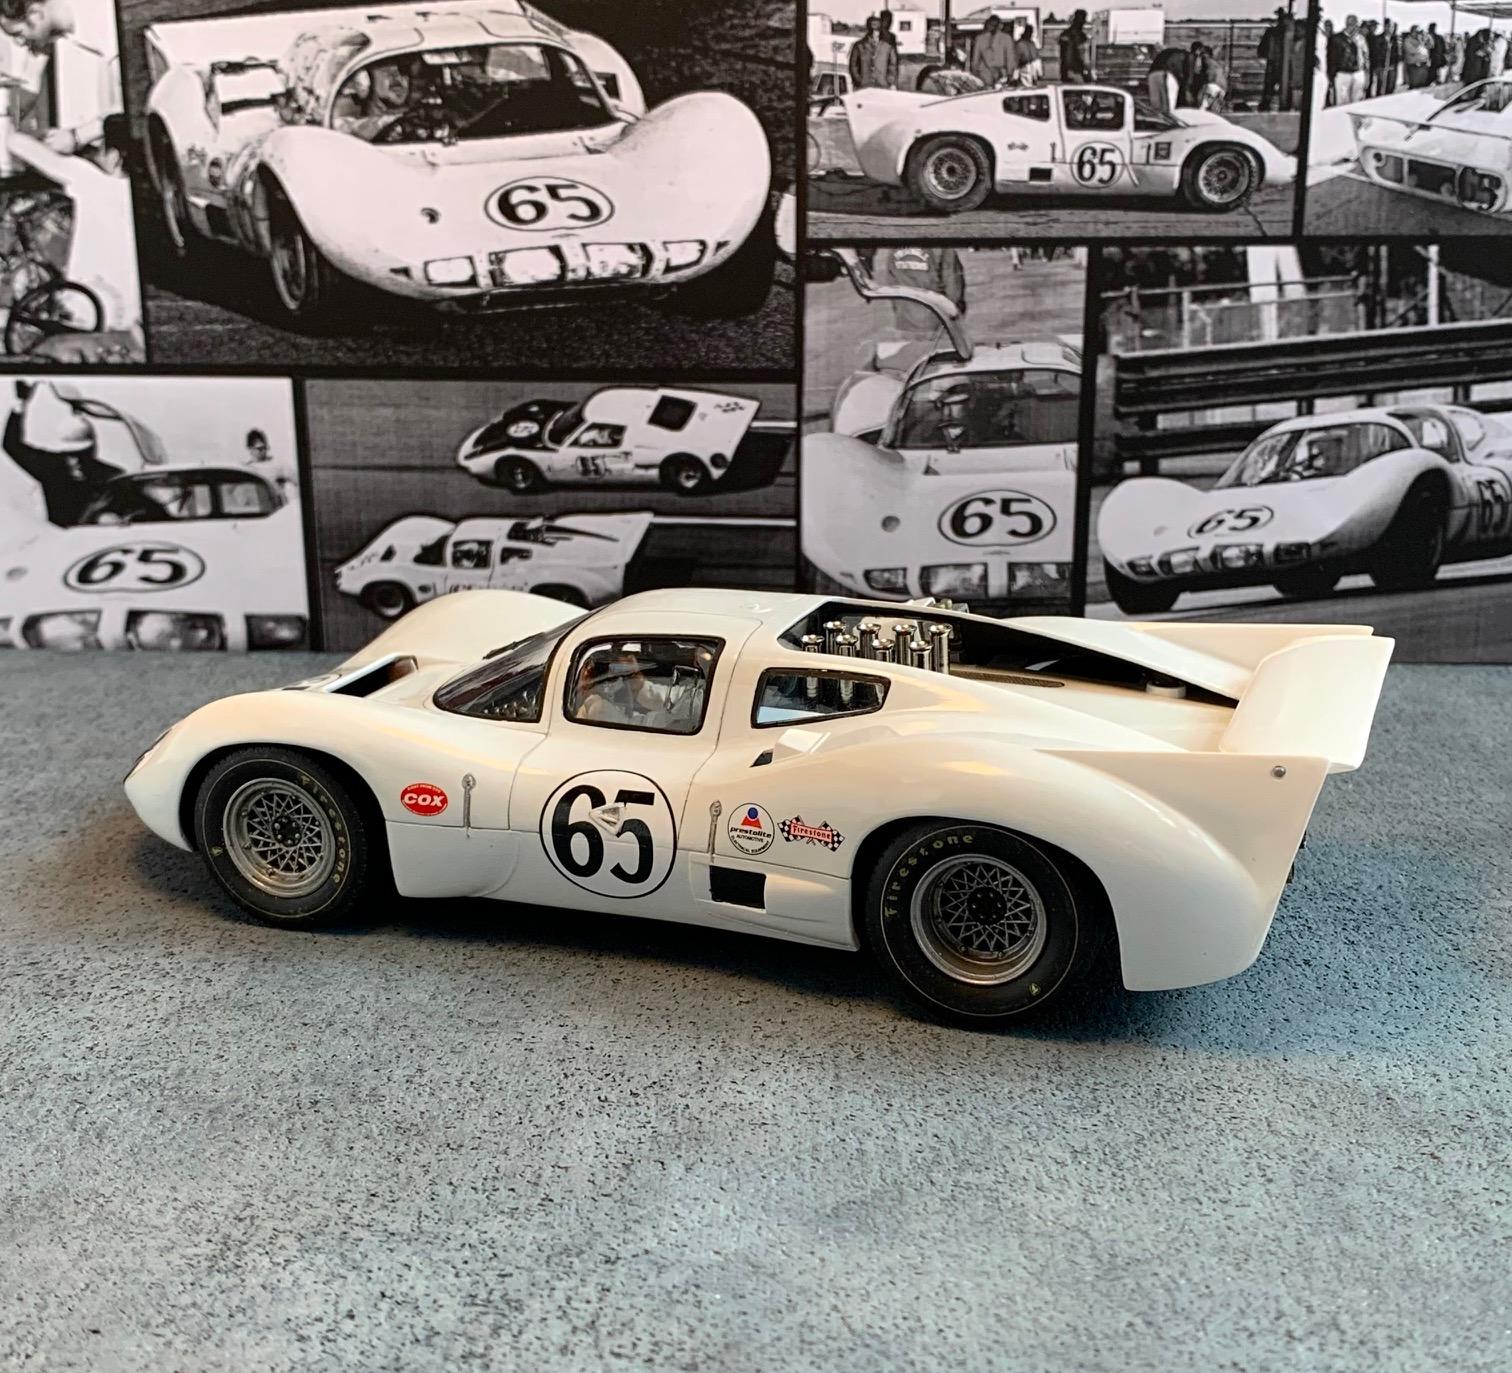
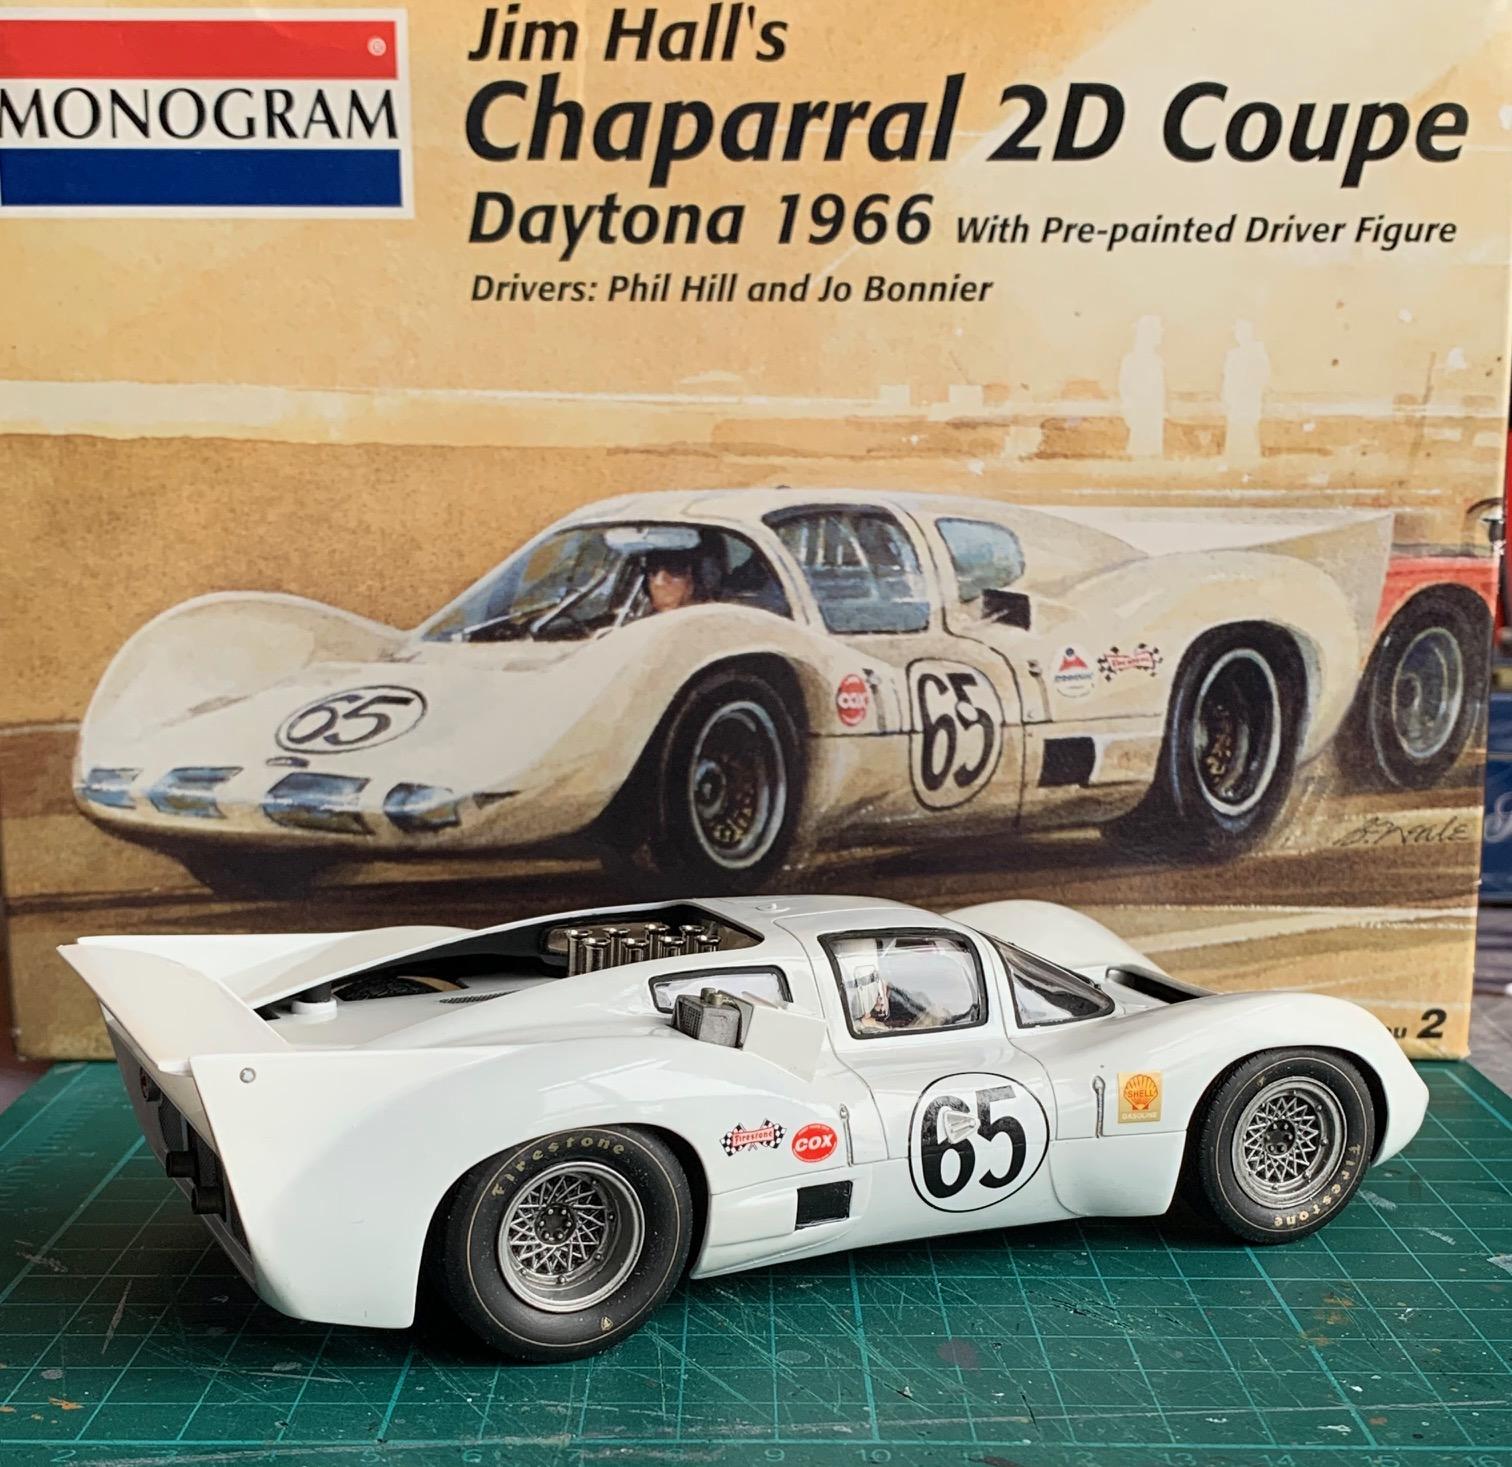
A quick build of 3 weeks (quick for me...) of the surprising Monogram kit with a scary part count of 36! The kit is a very basic curbside i.e. no chassis or engine but the body was cast in a splendid way. I only did a few upgrades, all cooled up from the old spares box: deeper rear wheels, engine plate & intake stacks, oil cooler and dressing up the interior a bit. Vallejo primer and color coat, Tamiya X22 clear and Future seal coat over decals all brush painted. I highly recommend the kit. It's old and very basic but it holds up well in the display cabinet next to the other newly tooled kits. I enjoyed it so much that the Ferrari 275P is on my Ebay watch list
- 45 replies
-
- 12
-

-
Chaparral 2D
Pierre Rivard replied to Pierre Rivard's topic in WIP: Other Racing: Road Racing, Land Speed Racers
Last little bits, decals, Future seal coat. She is done! Will be posting complete set of photos under glass alter today.
-
Best glue for painted parts
Pierre Rivard replied to stevez's topic in Model Building Questions and Answers
Some parts like side mirrors, door handles work best when a pin is added so bonding from the inside of the body, away from the painted surface creates a clean joint. I use 5 min epoxy for this. When that method is not possible I glue the painted, clear or chromed part with Canopy Glue. -
Thanks for sharing this Bob. Wonderful idea.
-
Chaparral 2D
Pierre Rivard replied to Pierre Rivard's topic in WIP: Other Racing: Road Racing, Land Speed Racers
Thanks guys. Following Bob's suggestion, Tamiya weathering added to screens. Not perfect but good enough for a 35 part kit. ?
-
Chaparral 2D
Pierre Rivard replied to Pierre Rivard's topic in WIP: Other Racing: Road Racing, Land Speed Racers
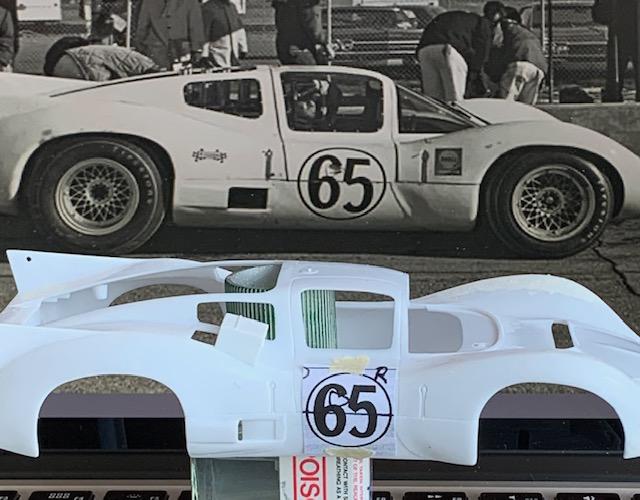
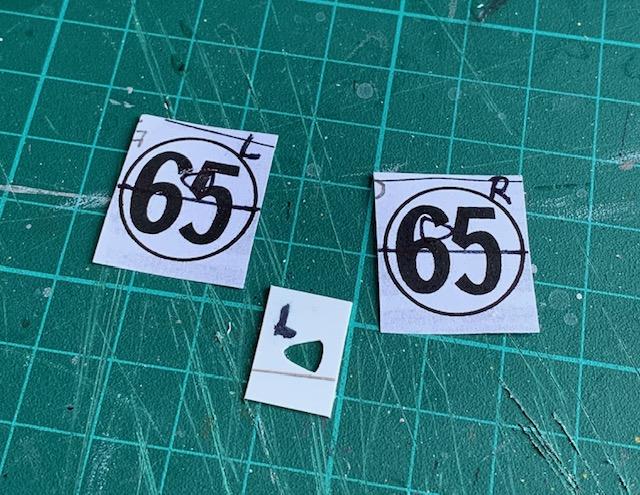
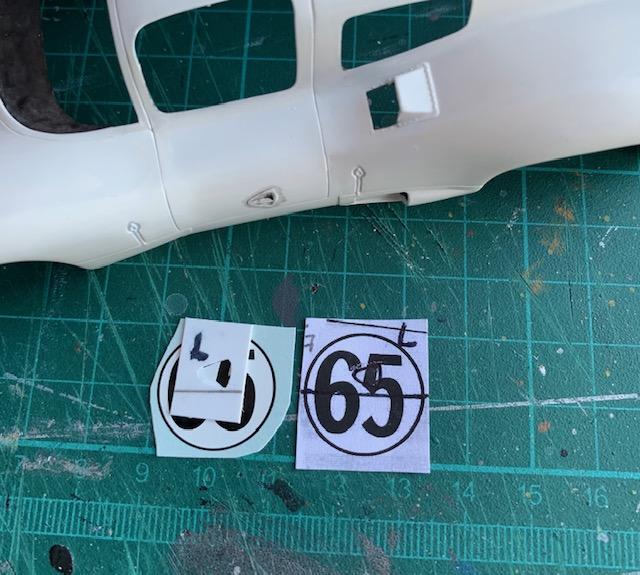
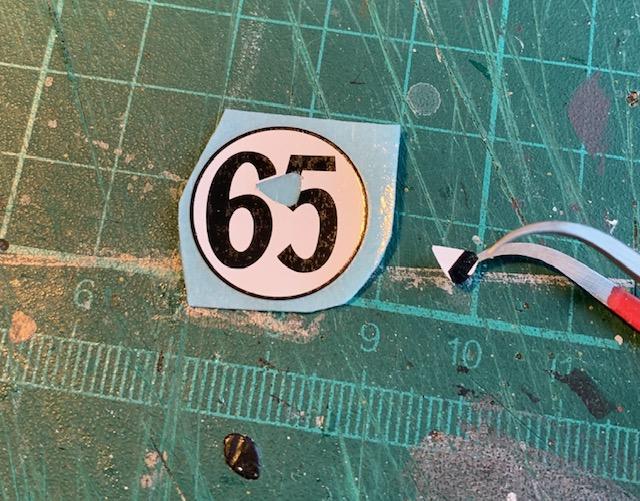
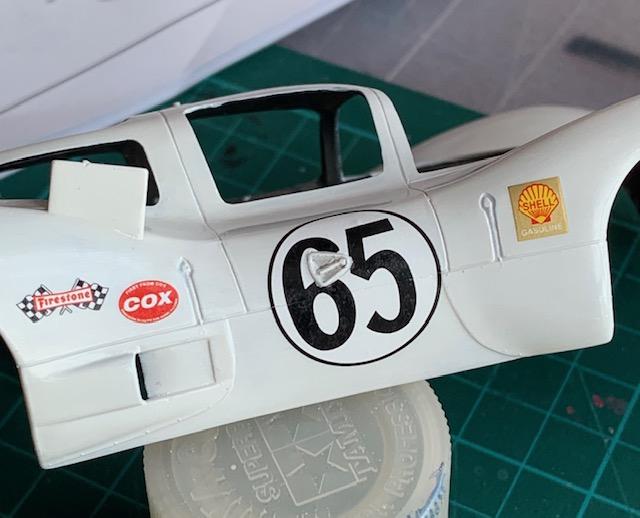
Working decals is something I never cover in a w.i.p. but there is an idea I want to share for those considering building this lit. The car has unique door latch handles molded in the body and the "65" decal covers it. Thinking of the challenge of making the decal conform and look correct I chose to take another path. Not sure it is better but an alternative to consider.
-
The shakes...dremel's best friend. lol. ?
-
Chaparral 2D
Pierre Rivard replied to Pierre Rivard's topic in WIP: Other Racing: Road Racing, Land Speed Racers
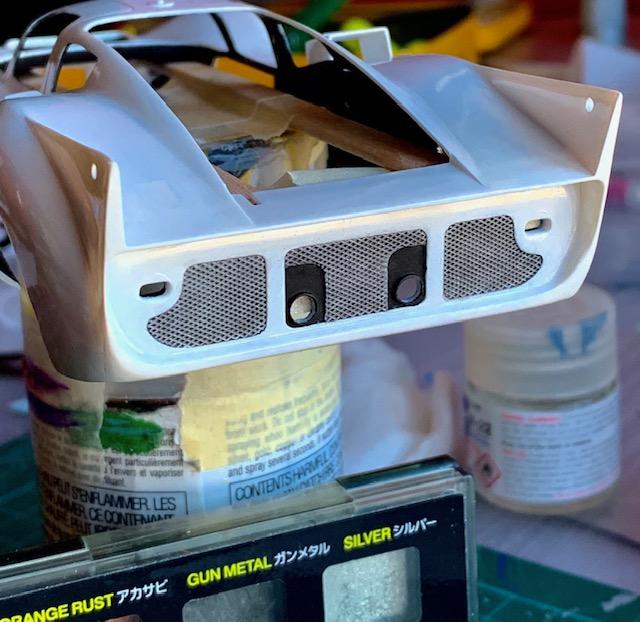
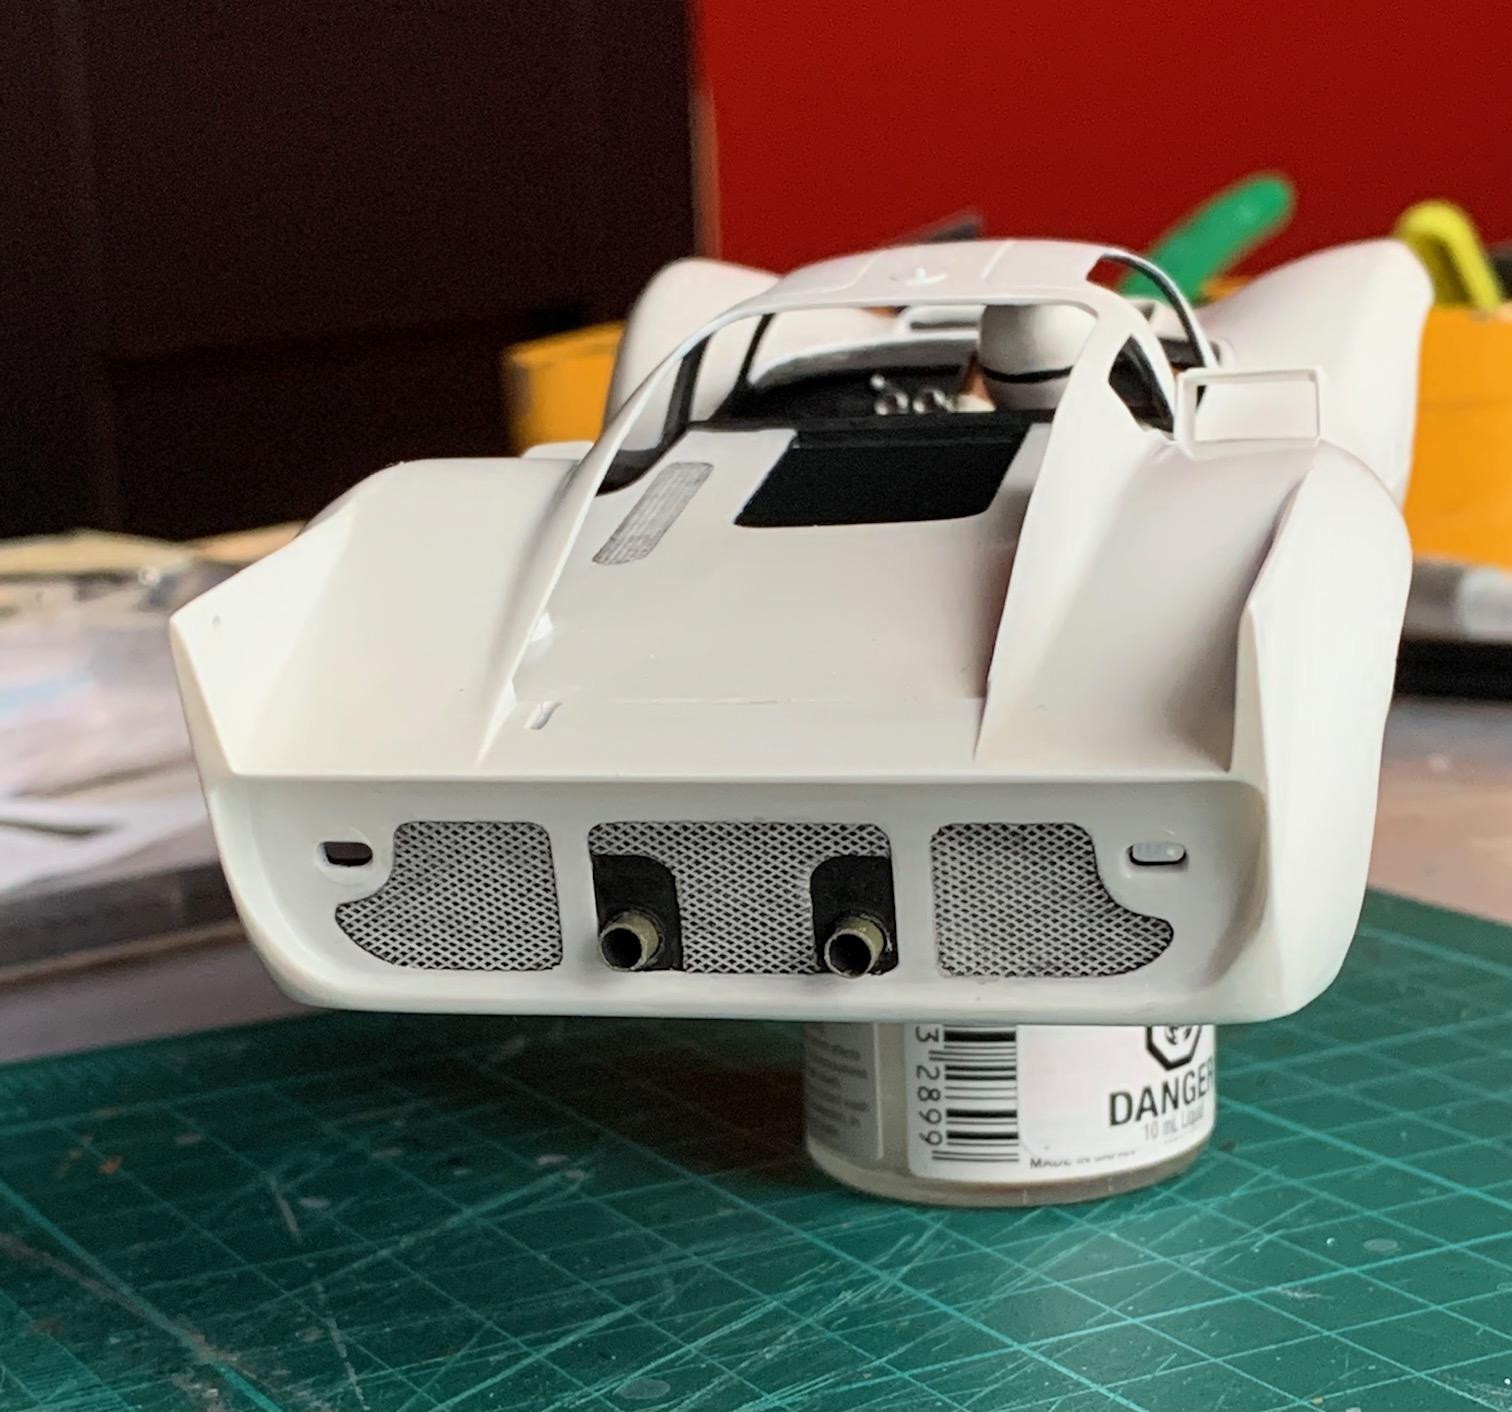
Trying to bring a bit of life to the screened areas using a variety of Vallejo washes. It's still lacking in my opinion. Considering perhaps a delicate rub with Tamiya weathering silver to the screens... I "dunno" advice please?
-
1/20 Tamiya McLaren Honda MP4/4
Pierre Rivard replied to wisco8's topic in Other Racing: Road Racing, Salt Flat Racers
A classic beautifully rendered. Bravo! -
You have extraordinary fabrication skills. This is breathtaking!
-
Looks good Andy. It appears most of the work is done. So what's left to do?
-
Chaparral 2D
Pierre Rivard replied to Pierre Rivard's topic in WIP: Other Racing: Road Racing, Land Speed Racers
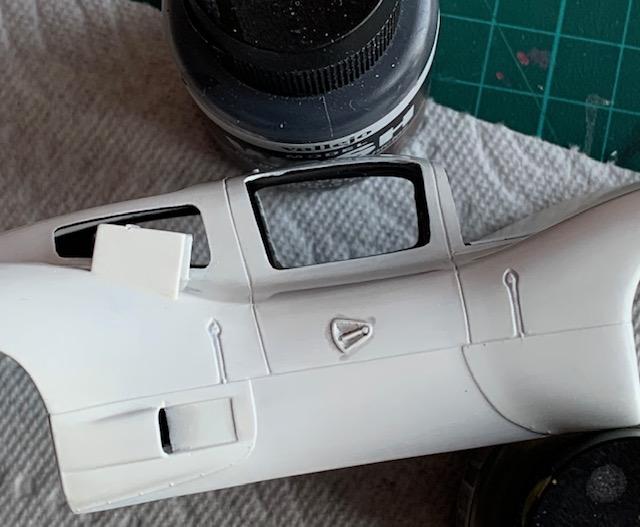
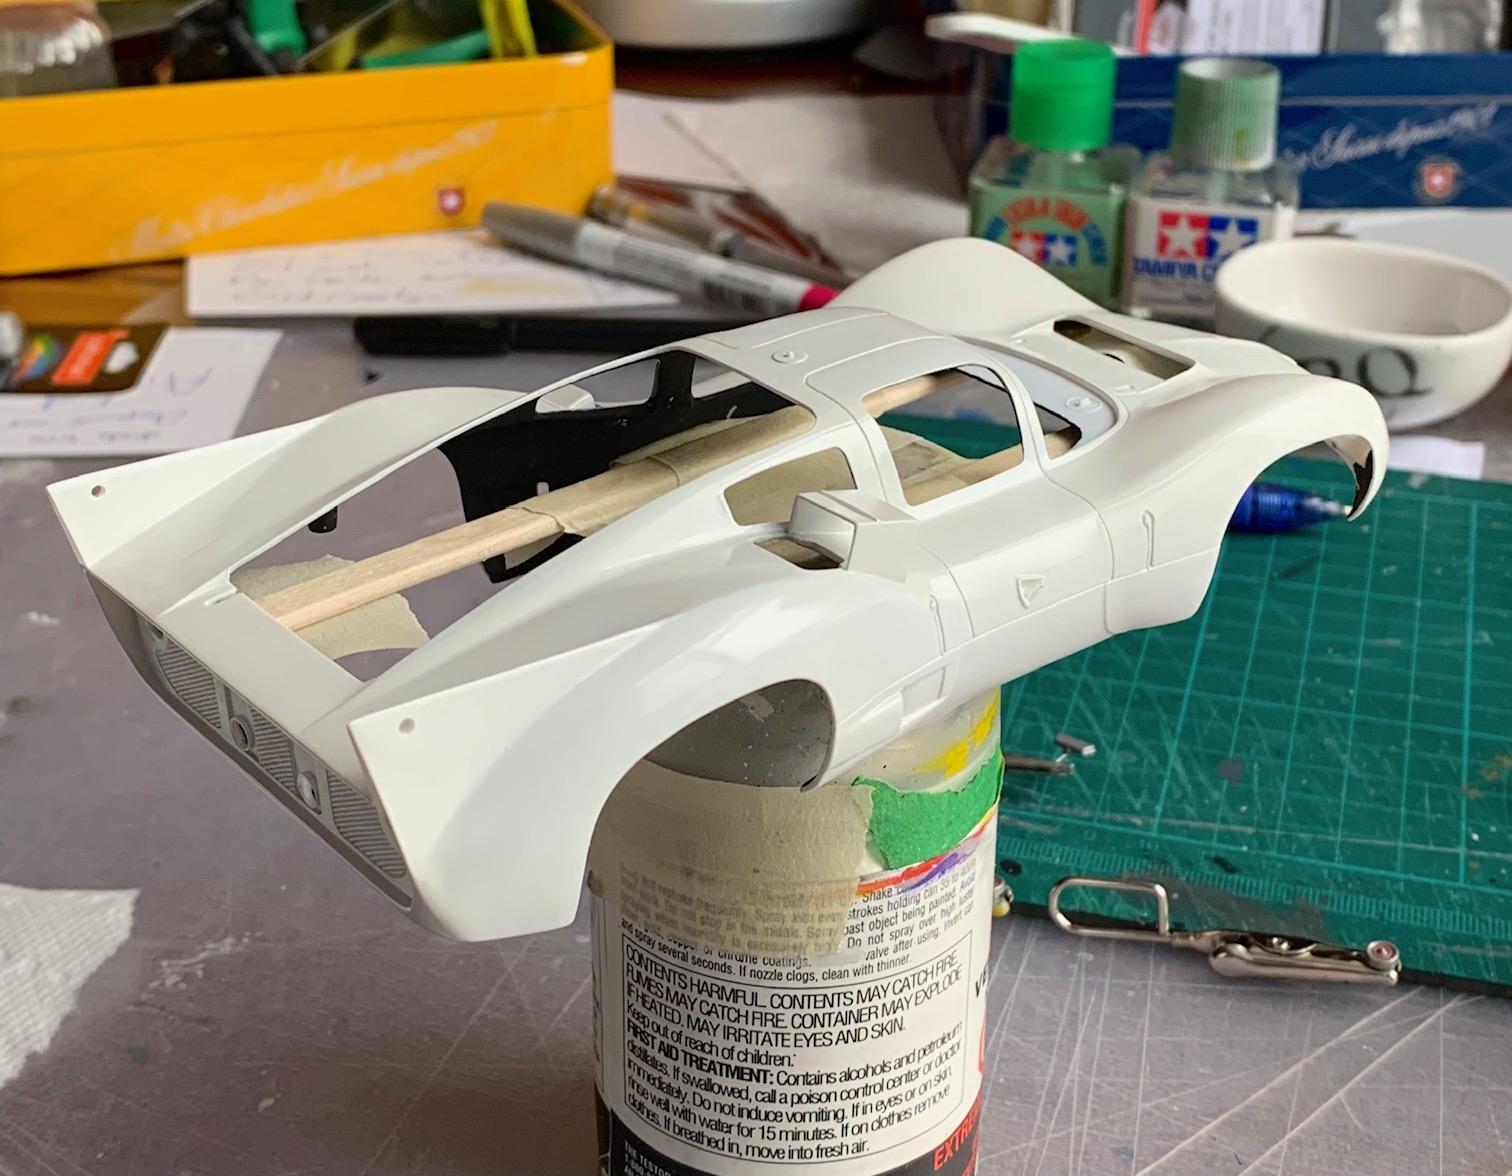
Thanks Bob. It's not possible for me to spray so I have developed ways to brush paint which require extra steps to get a good finish. The picture does not show it but there are very fine brush marks which I will eliminate with a bit of 4000 or 6000 sanding perpendicular to the brush stroke direction, followed by Tamiya fine and finish rubs. -
This is fun stuff guys...and somewhere in the middle of all these exchanges Gary is gonna build a car! ?
-
That detailing is beautiful Bob, Do you make your own oil line fittings? They look very good.
-
Chaparral 2D
Pierre Rivard replied to Pierre Rivard's topic in WIP: Other Racing: Road Racing, Land Speed Racers
Thanks guys. I cleared the body this morning. 2 coats Tamiya acrylic brushed on with one hour gap. This body is a bit complicated for brush painting so I added more thinner and retarder to give me a few extra seconds to lay the paint to all surfaces. In the end it smoothed out good and polishing requirements will be minimal. Next steps are to do the polishing, black detailing and washes for the meshing, decals and a coat of Future.