radiohd10
-
Posts
286 -
Joined
-
Last visited
Content Type
Profiles
Forums
Events
Gallery
Everything posted by radiohd10
-
Thanks guys!! I really had fun with this one. Taking the pictures at the end of a build has become the part i look forward to most!
-
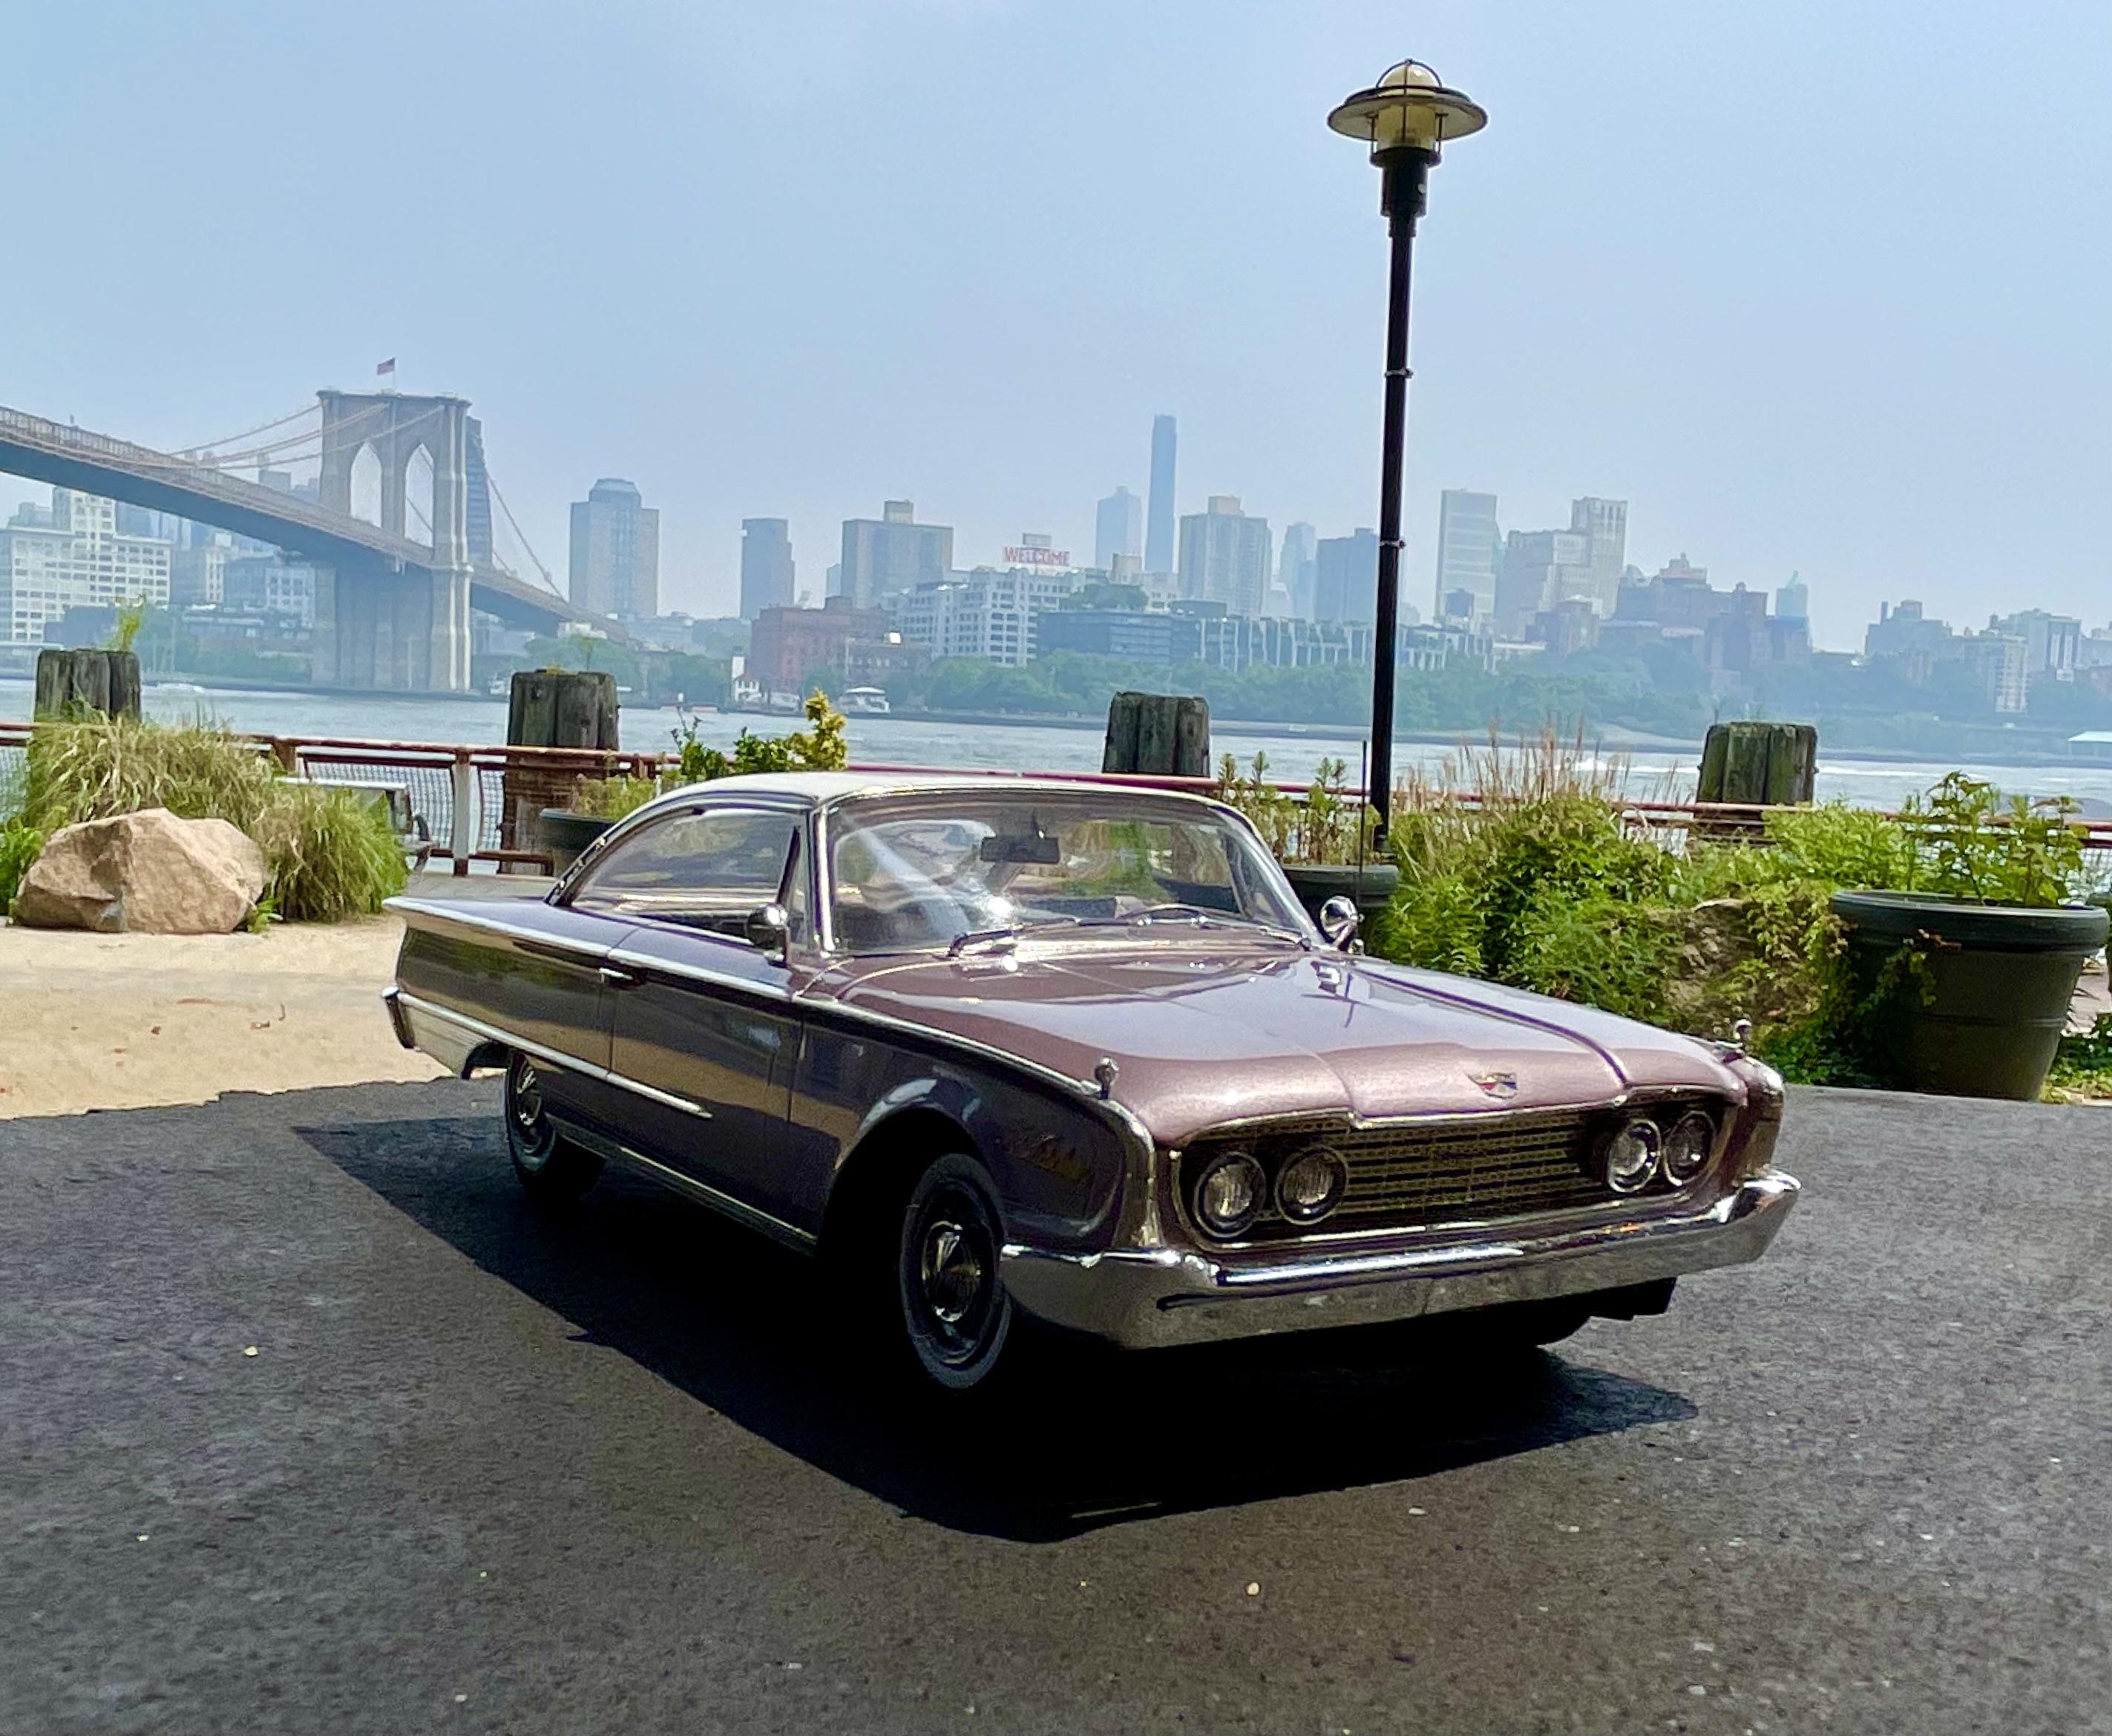
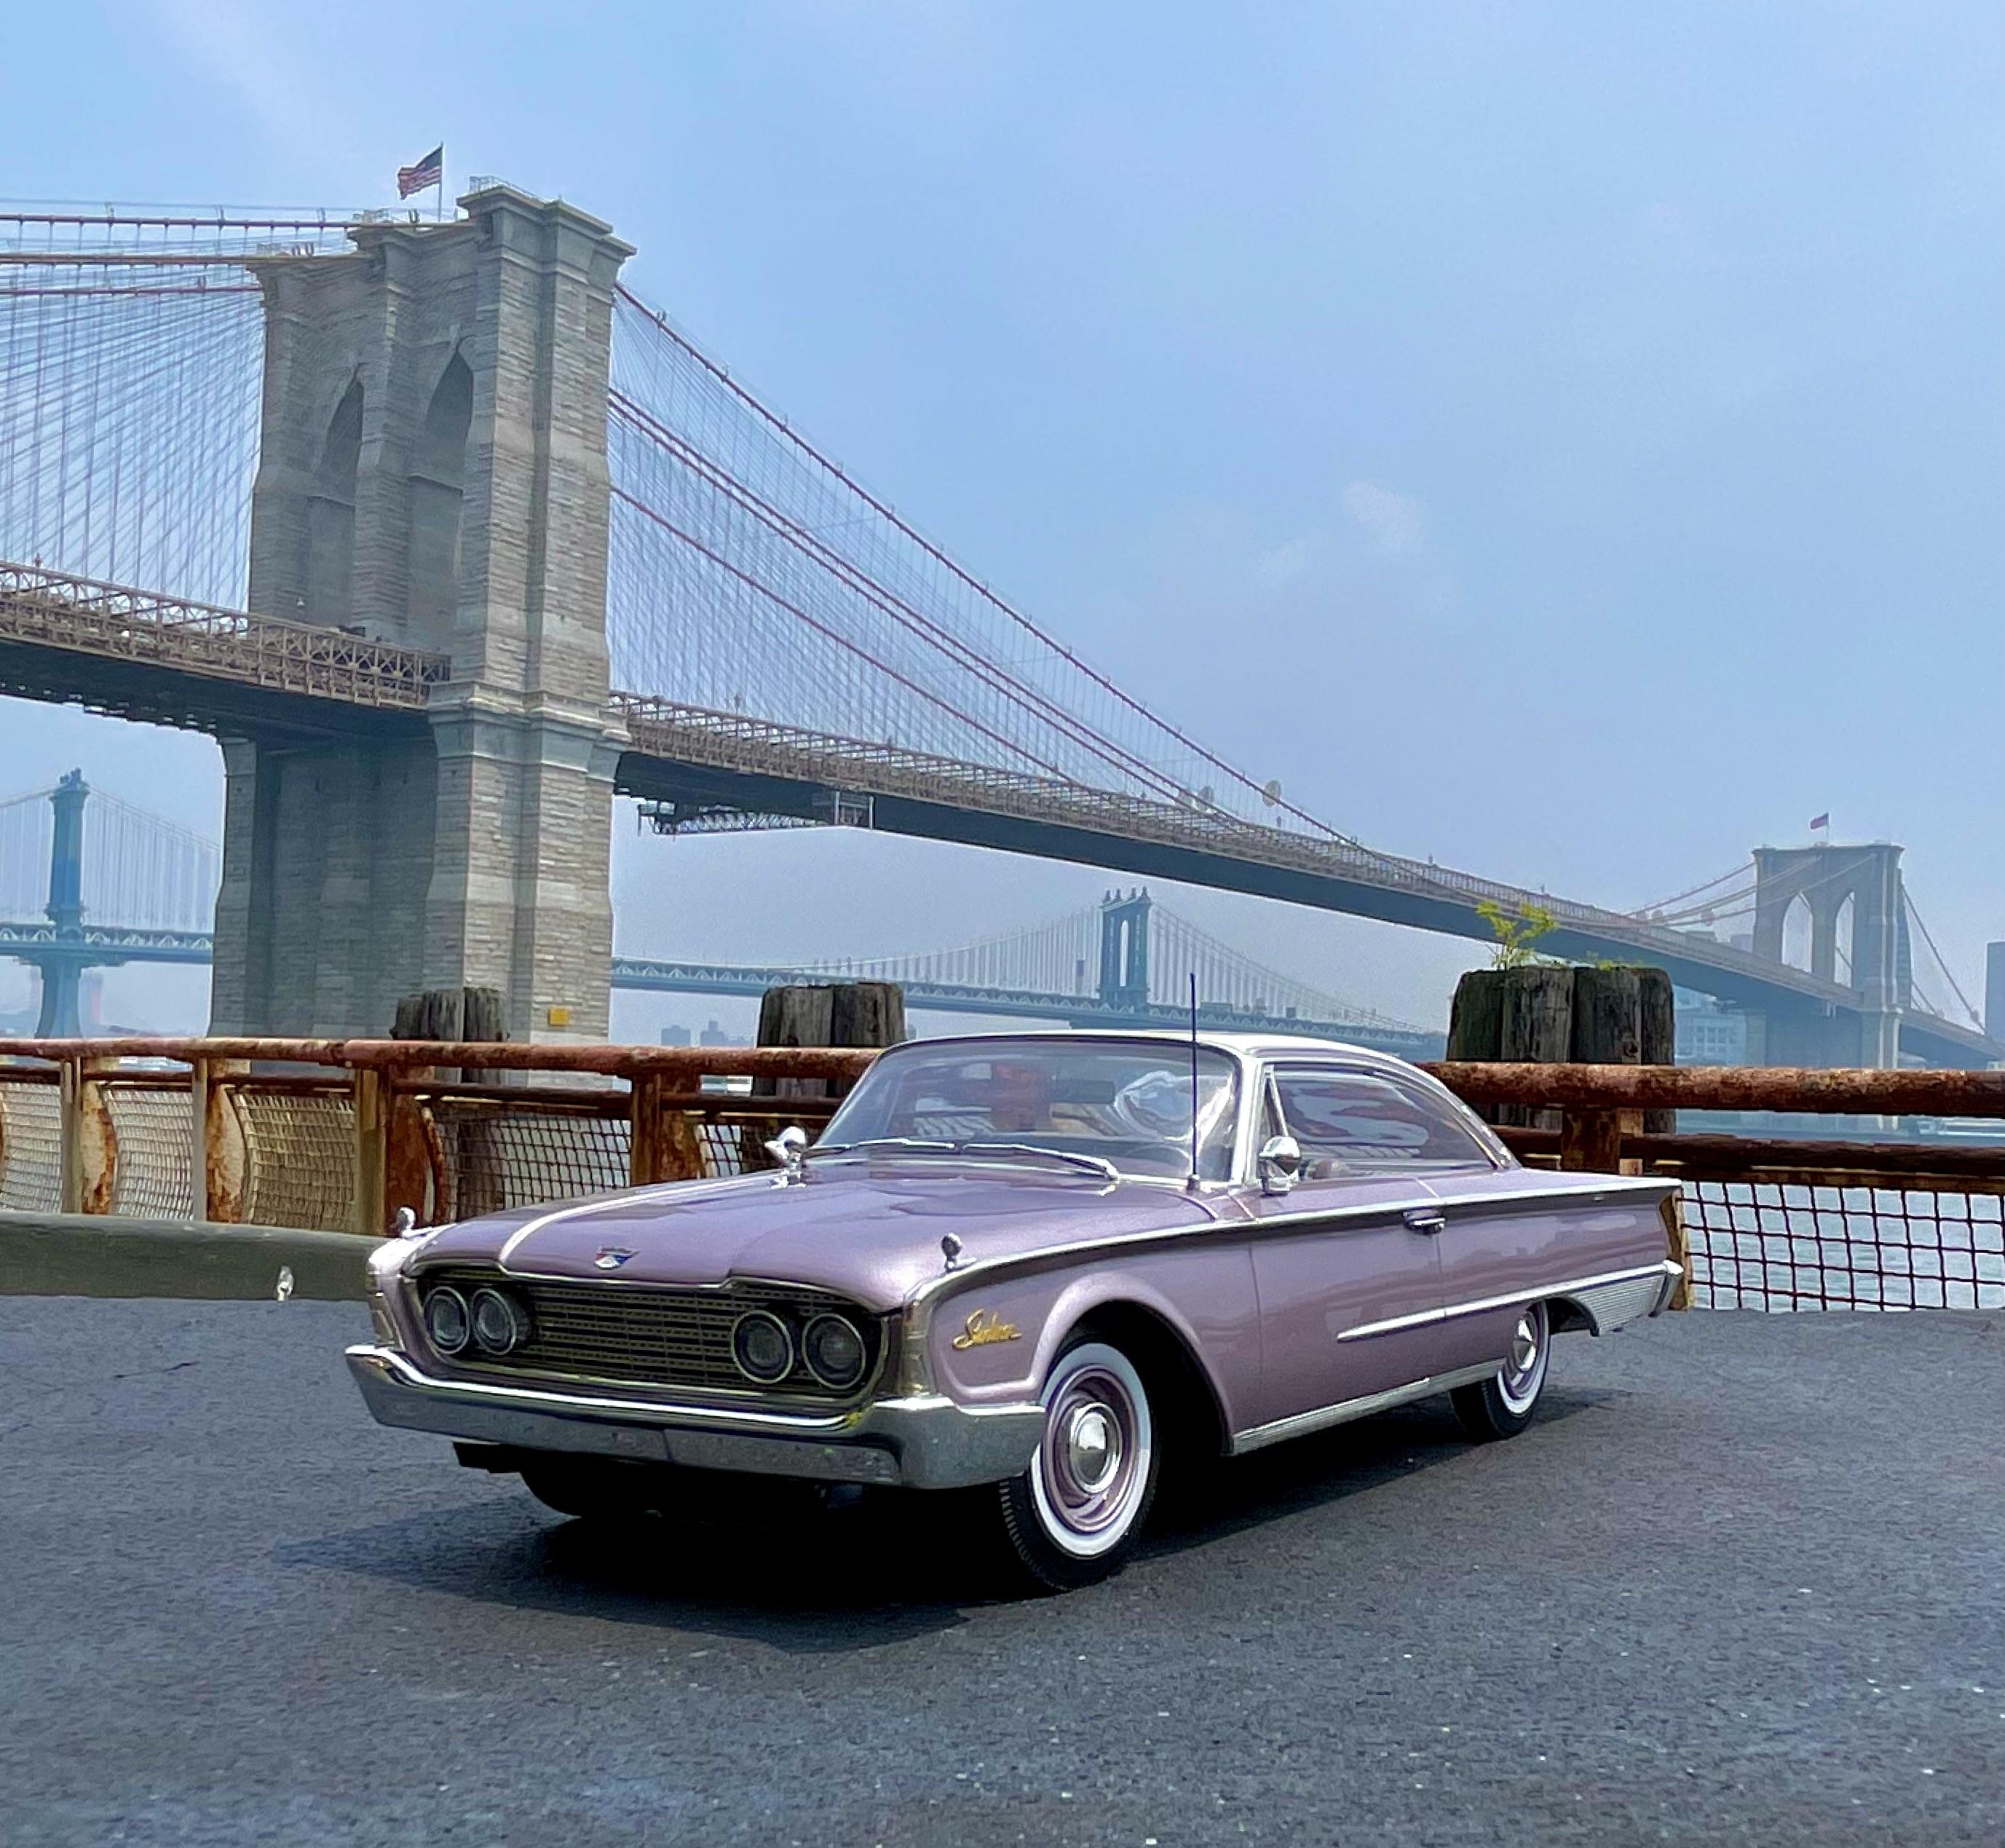
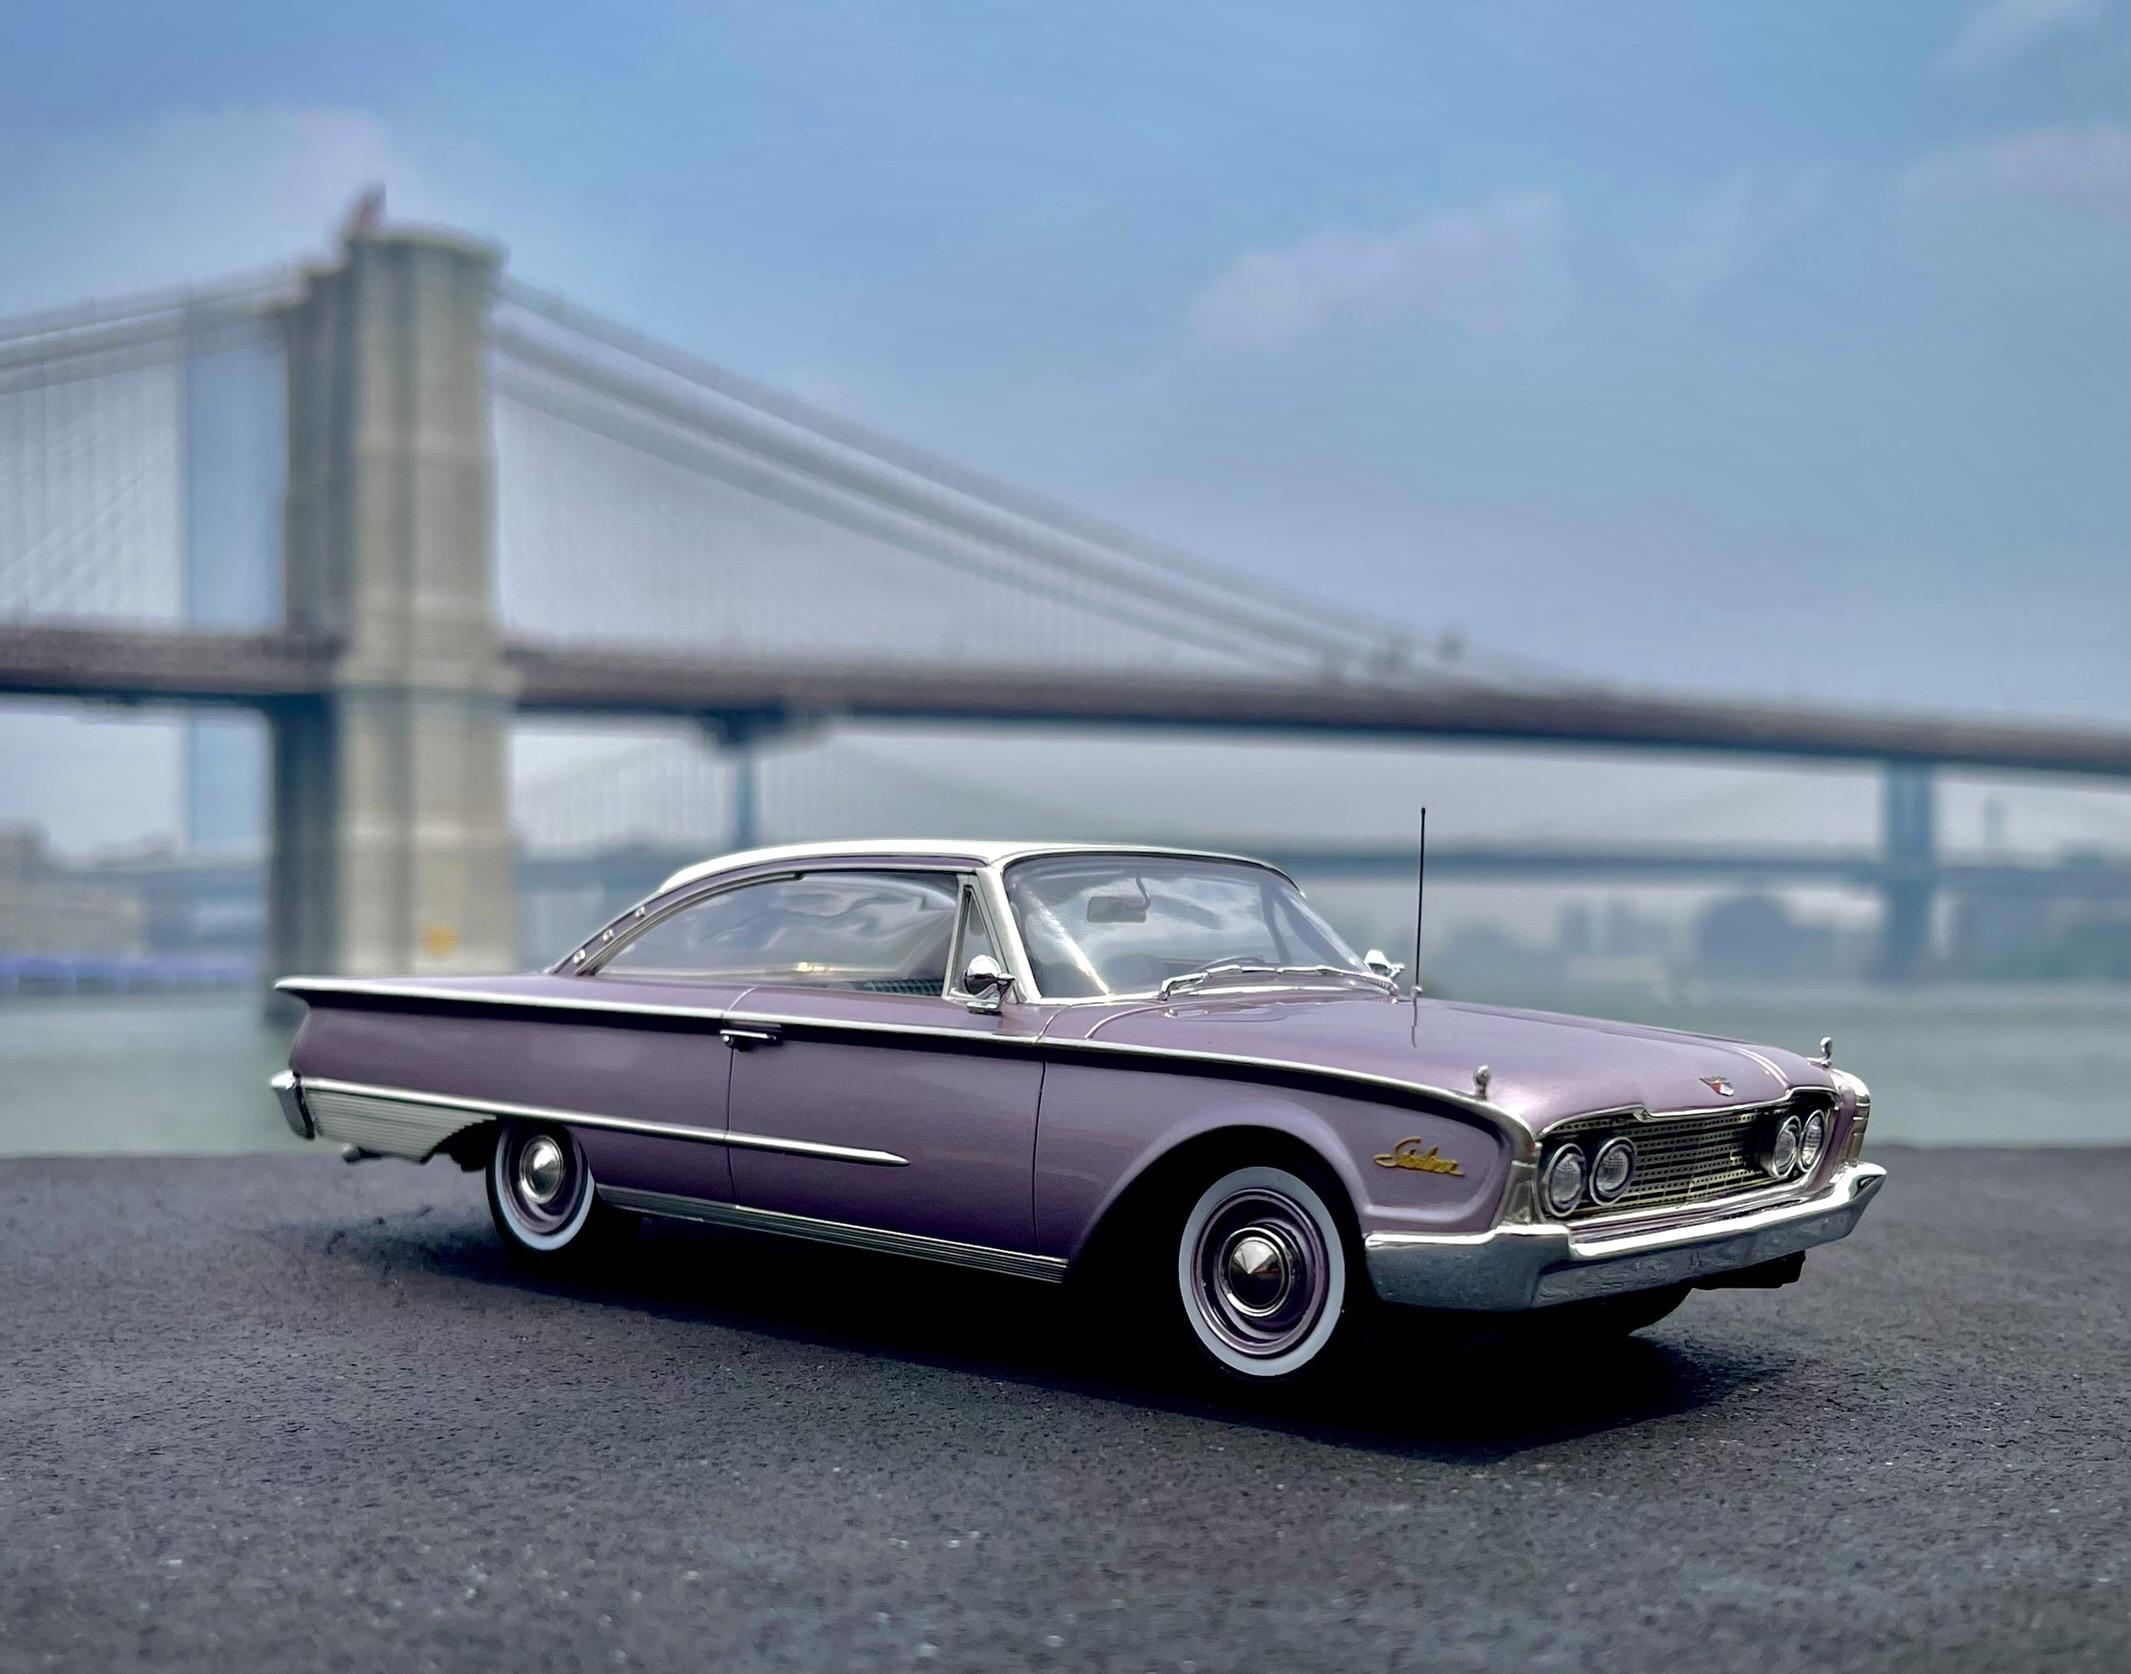
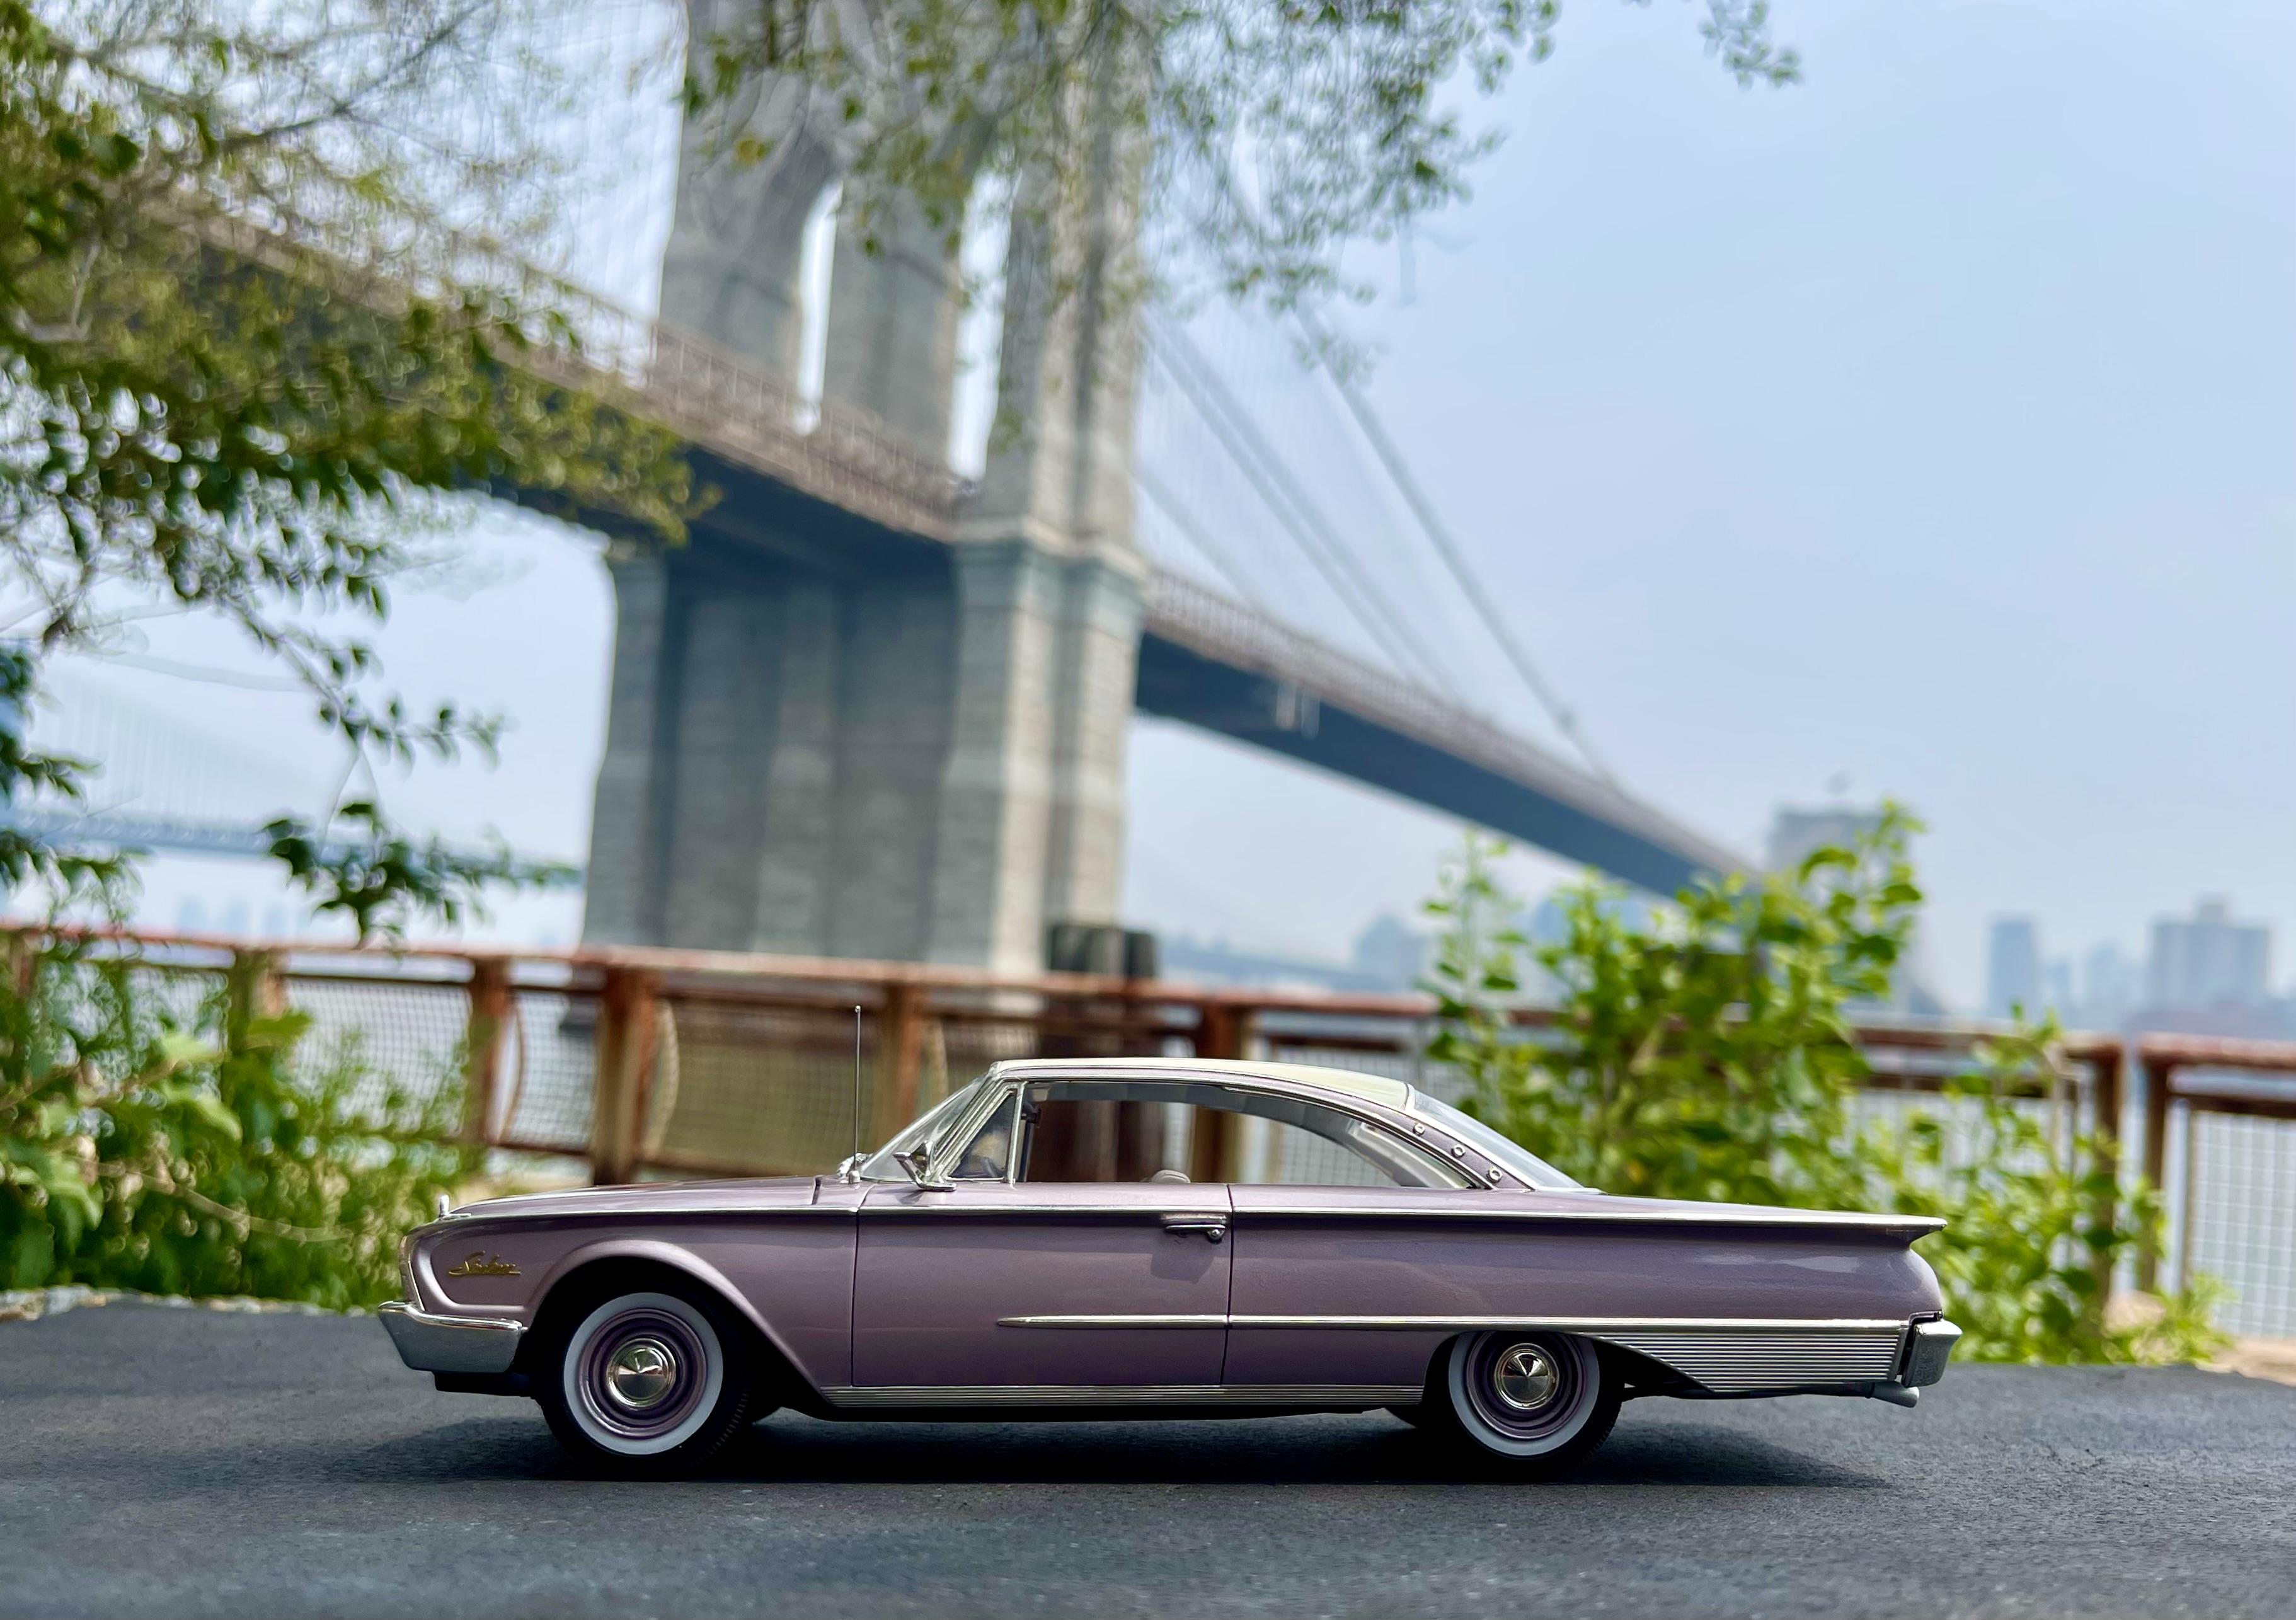
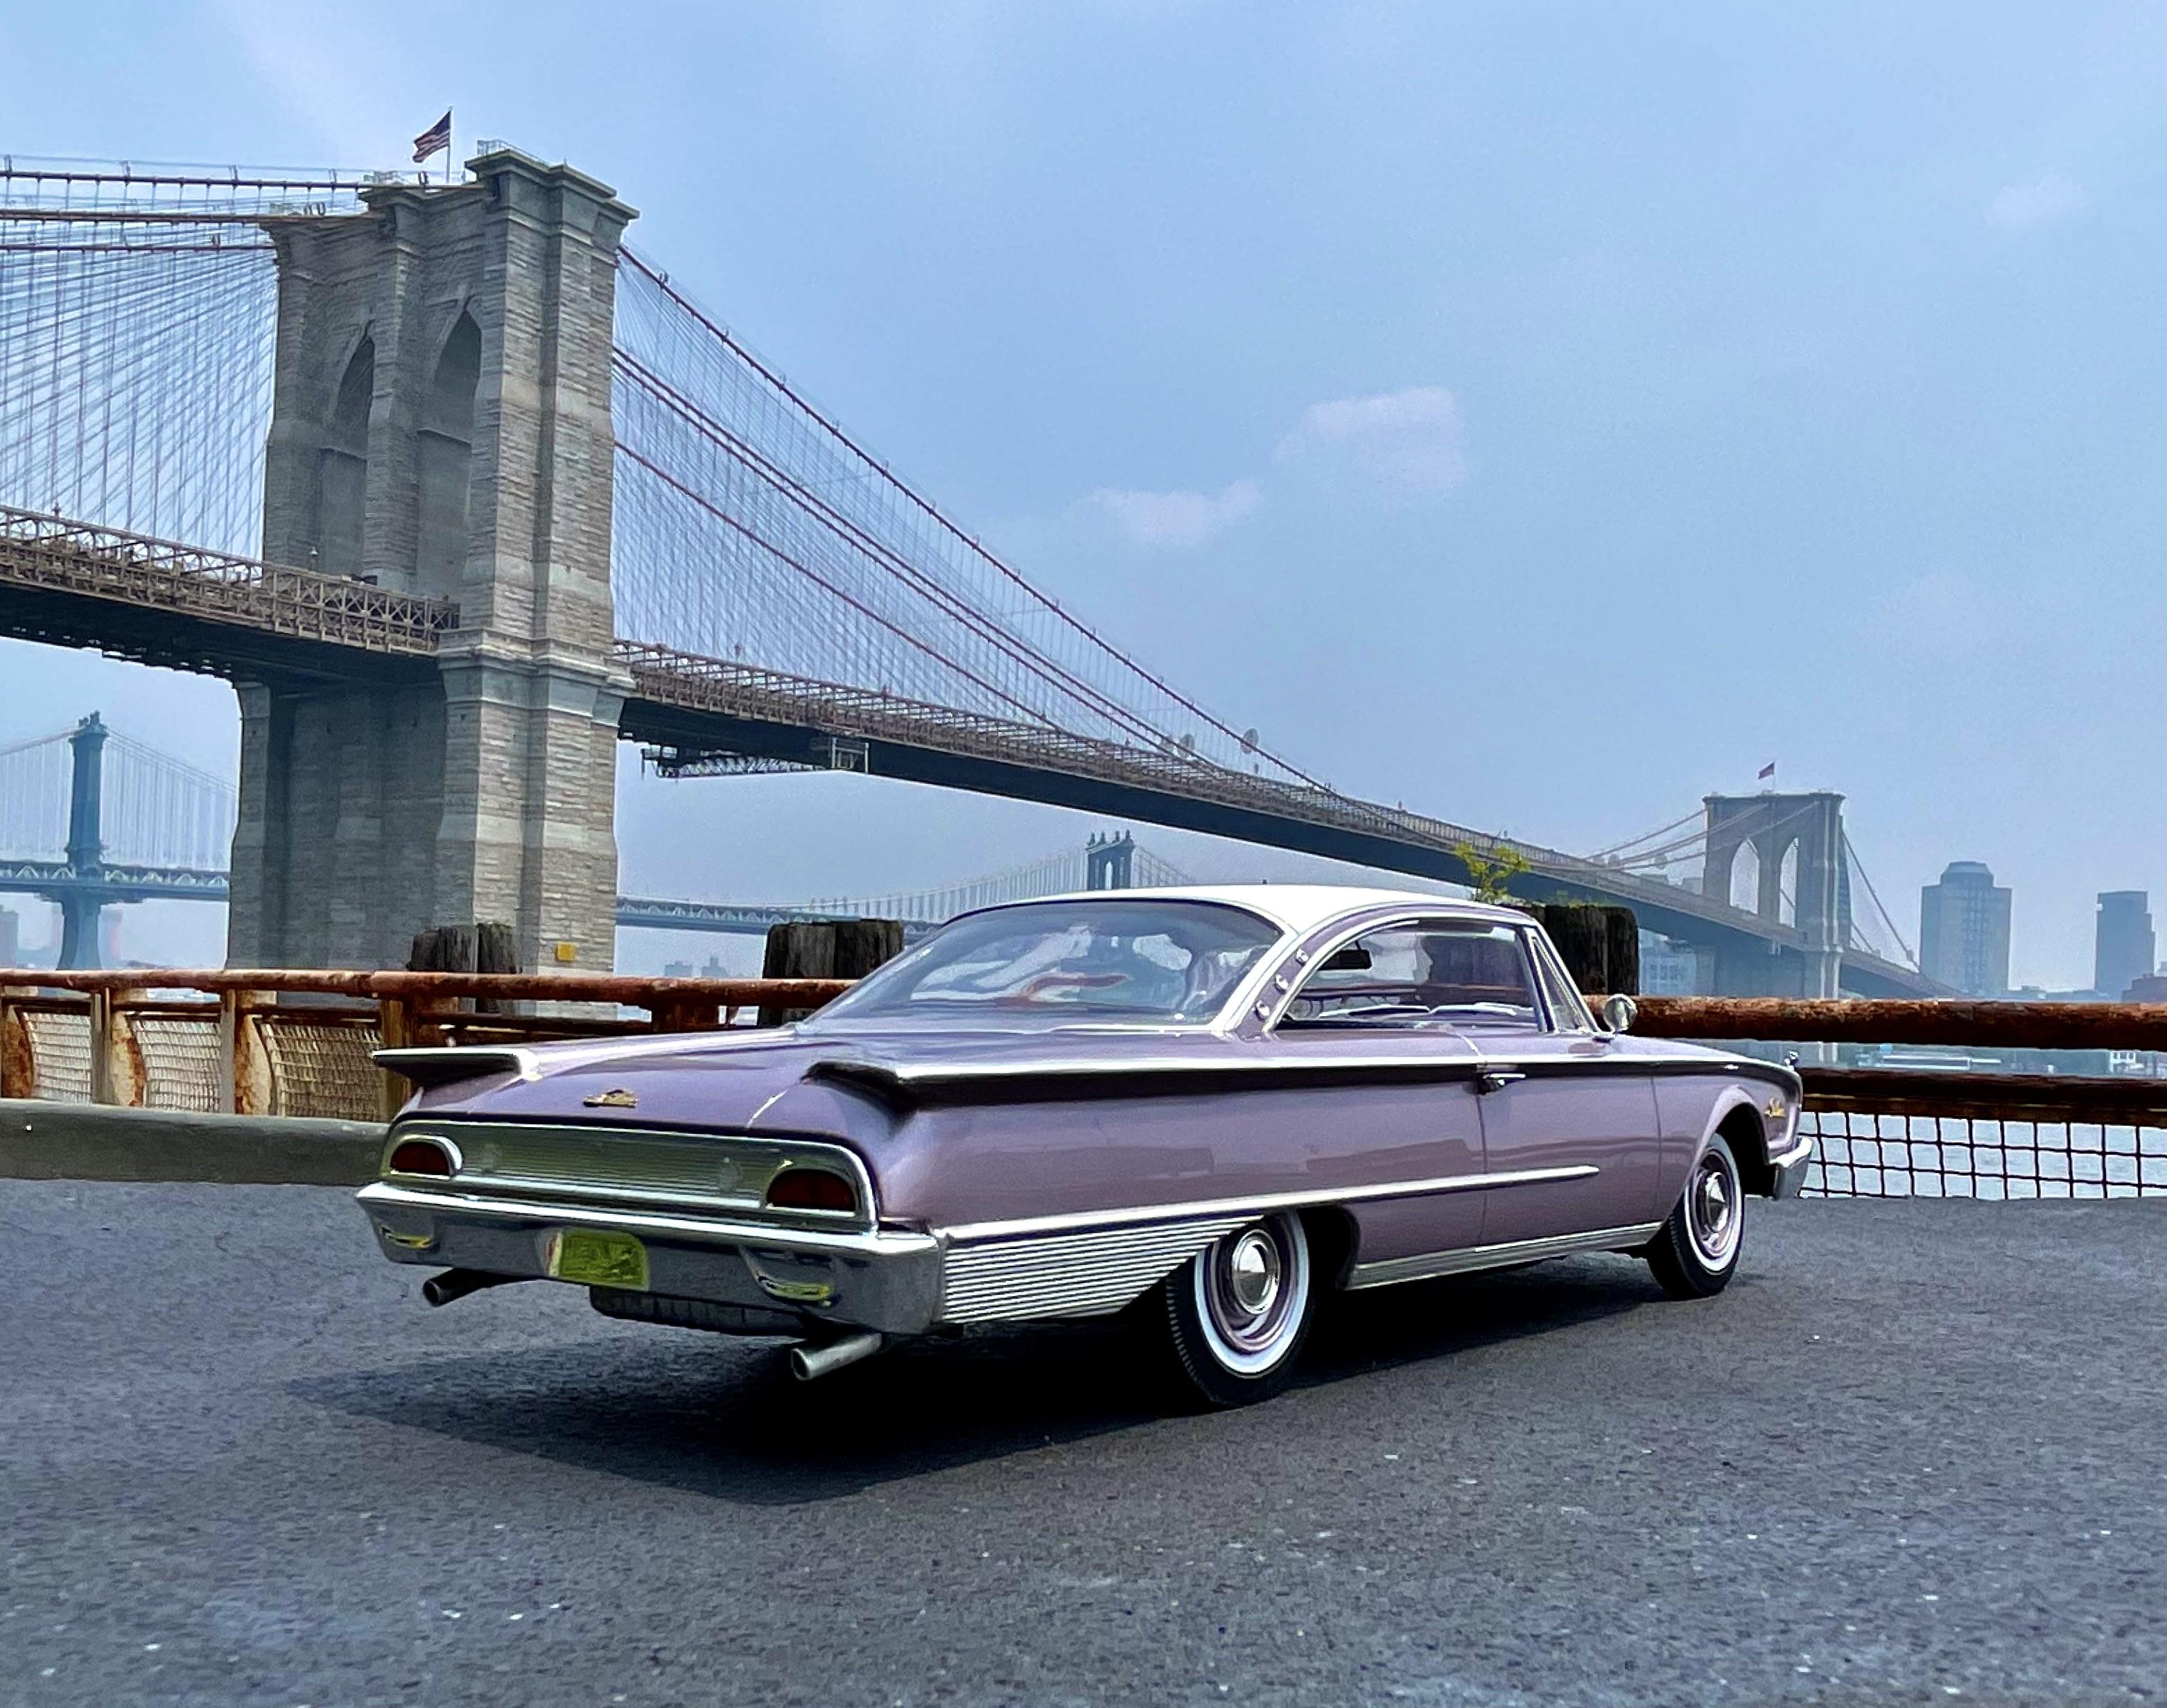
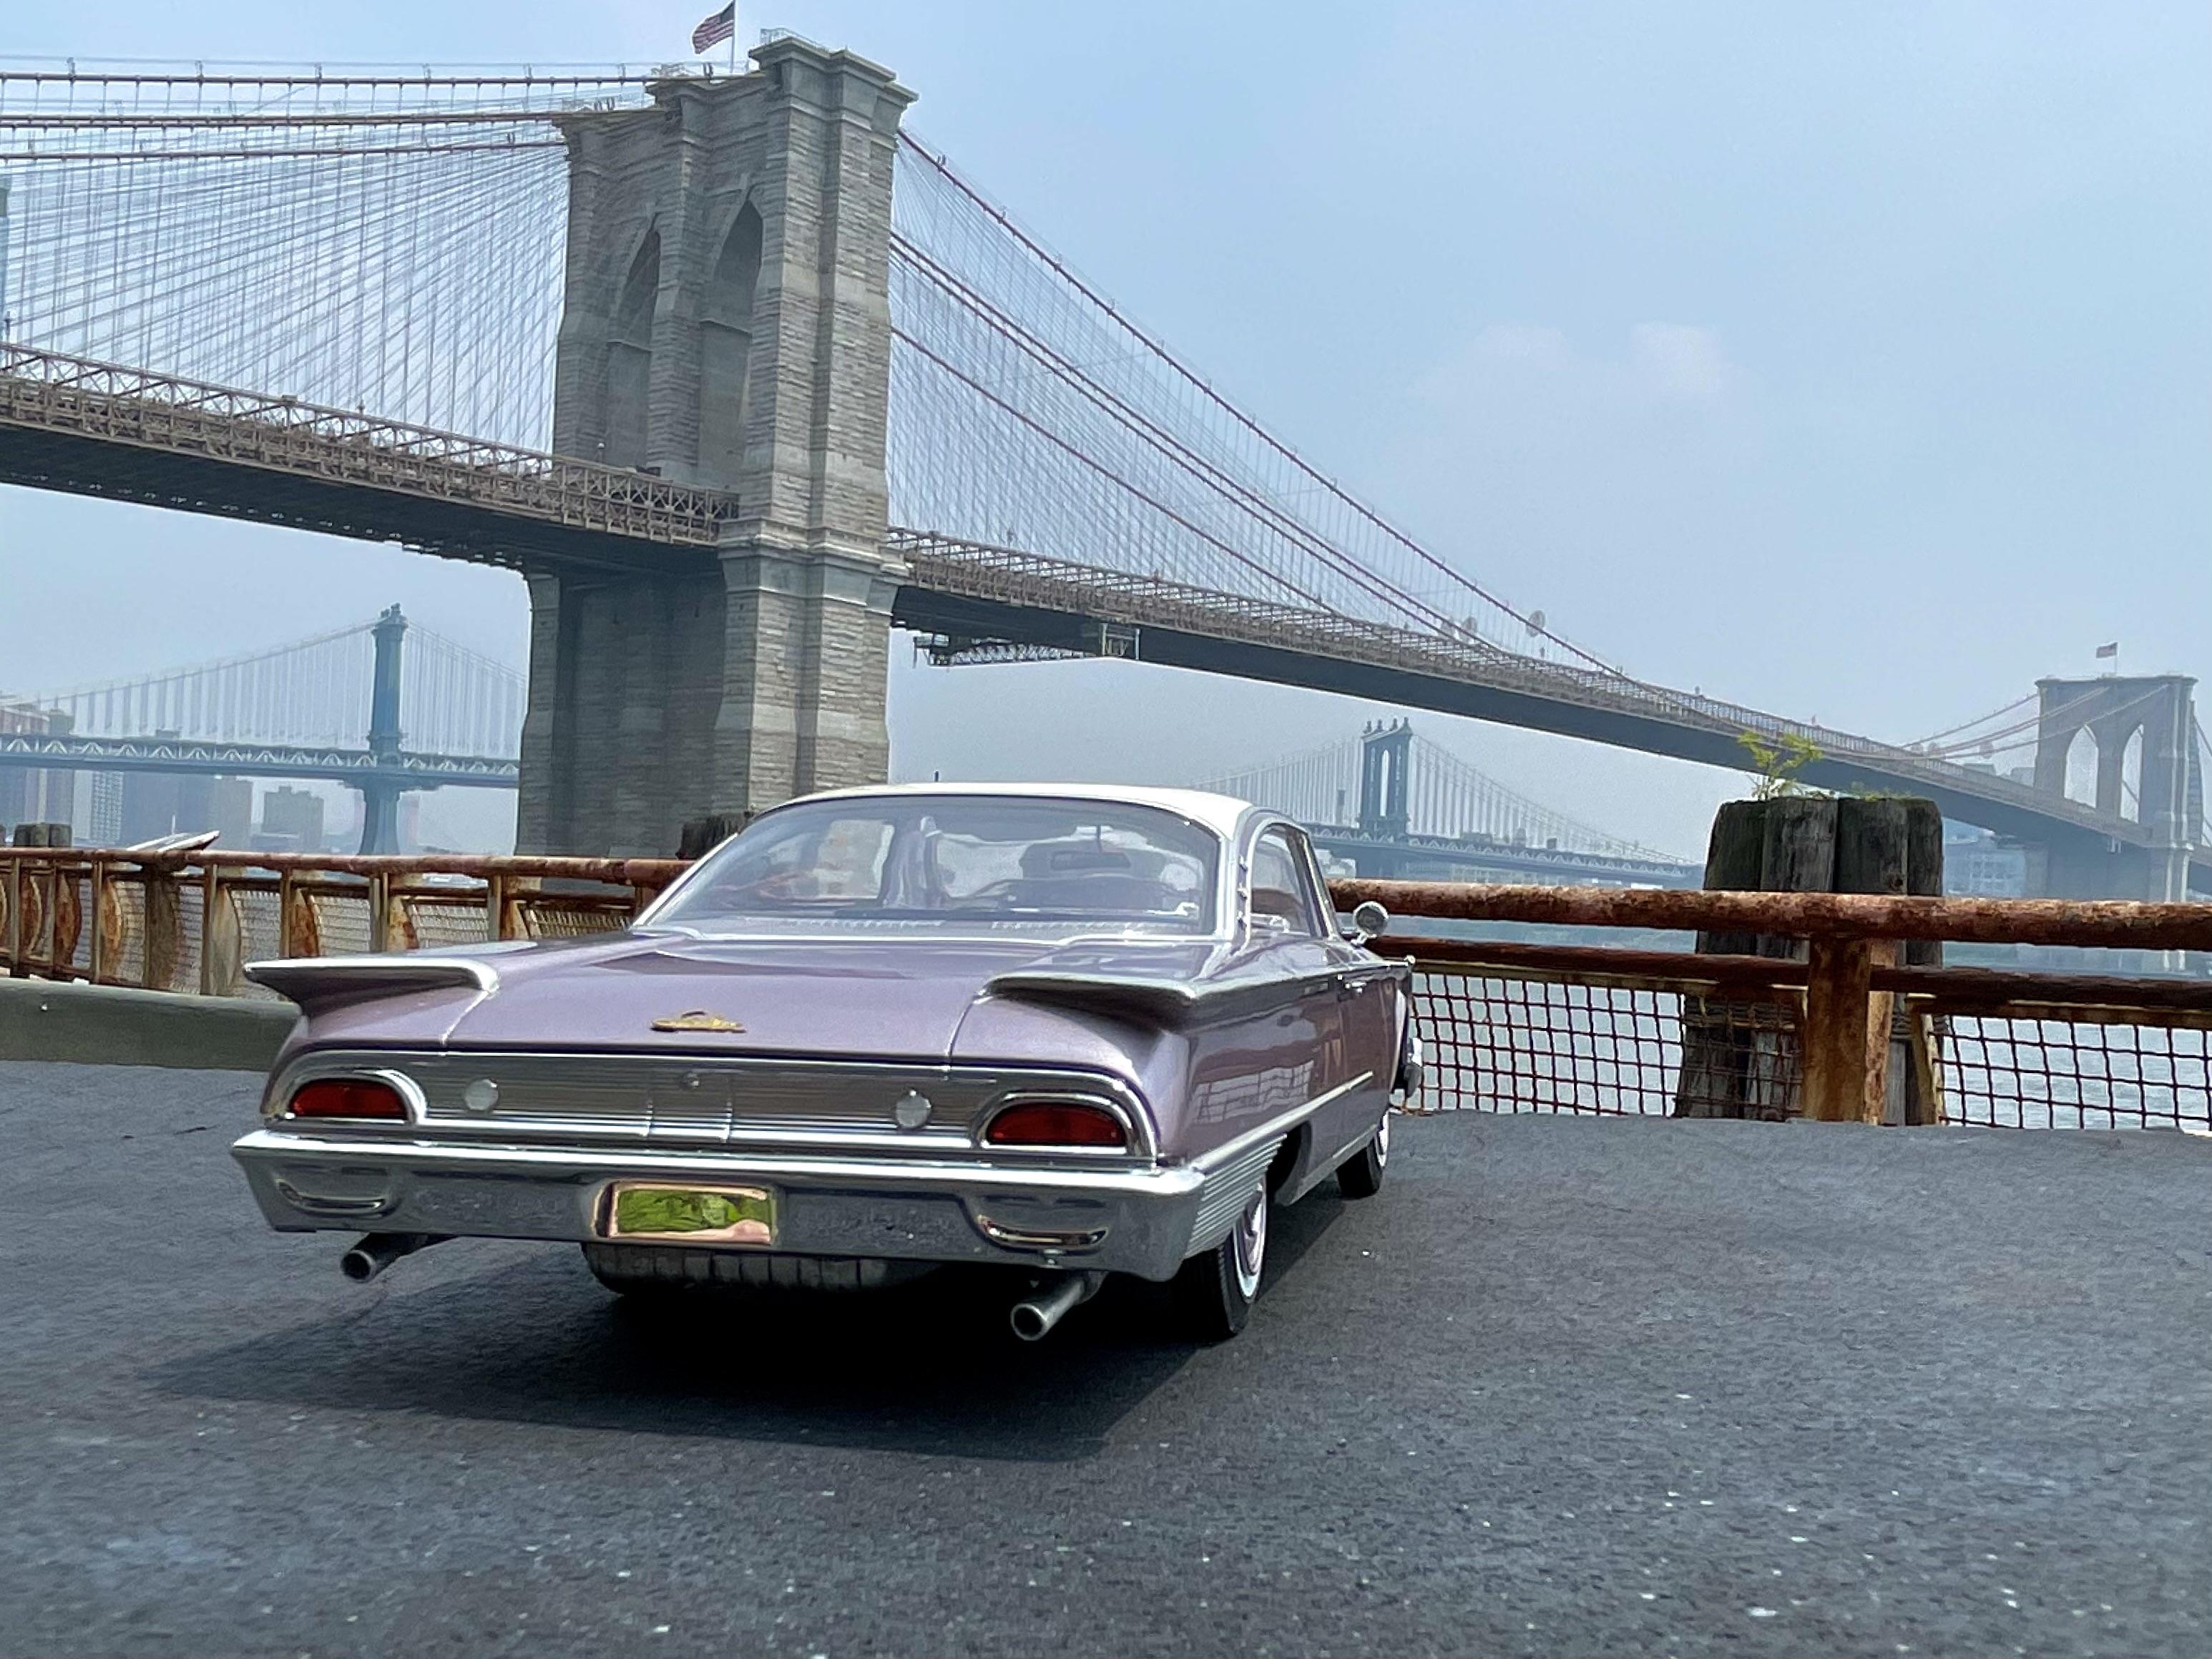
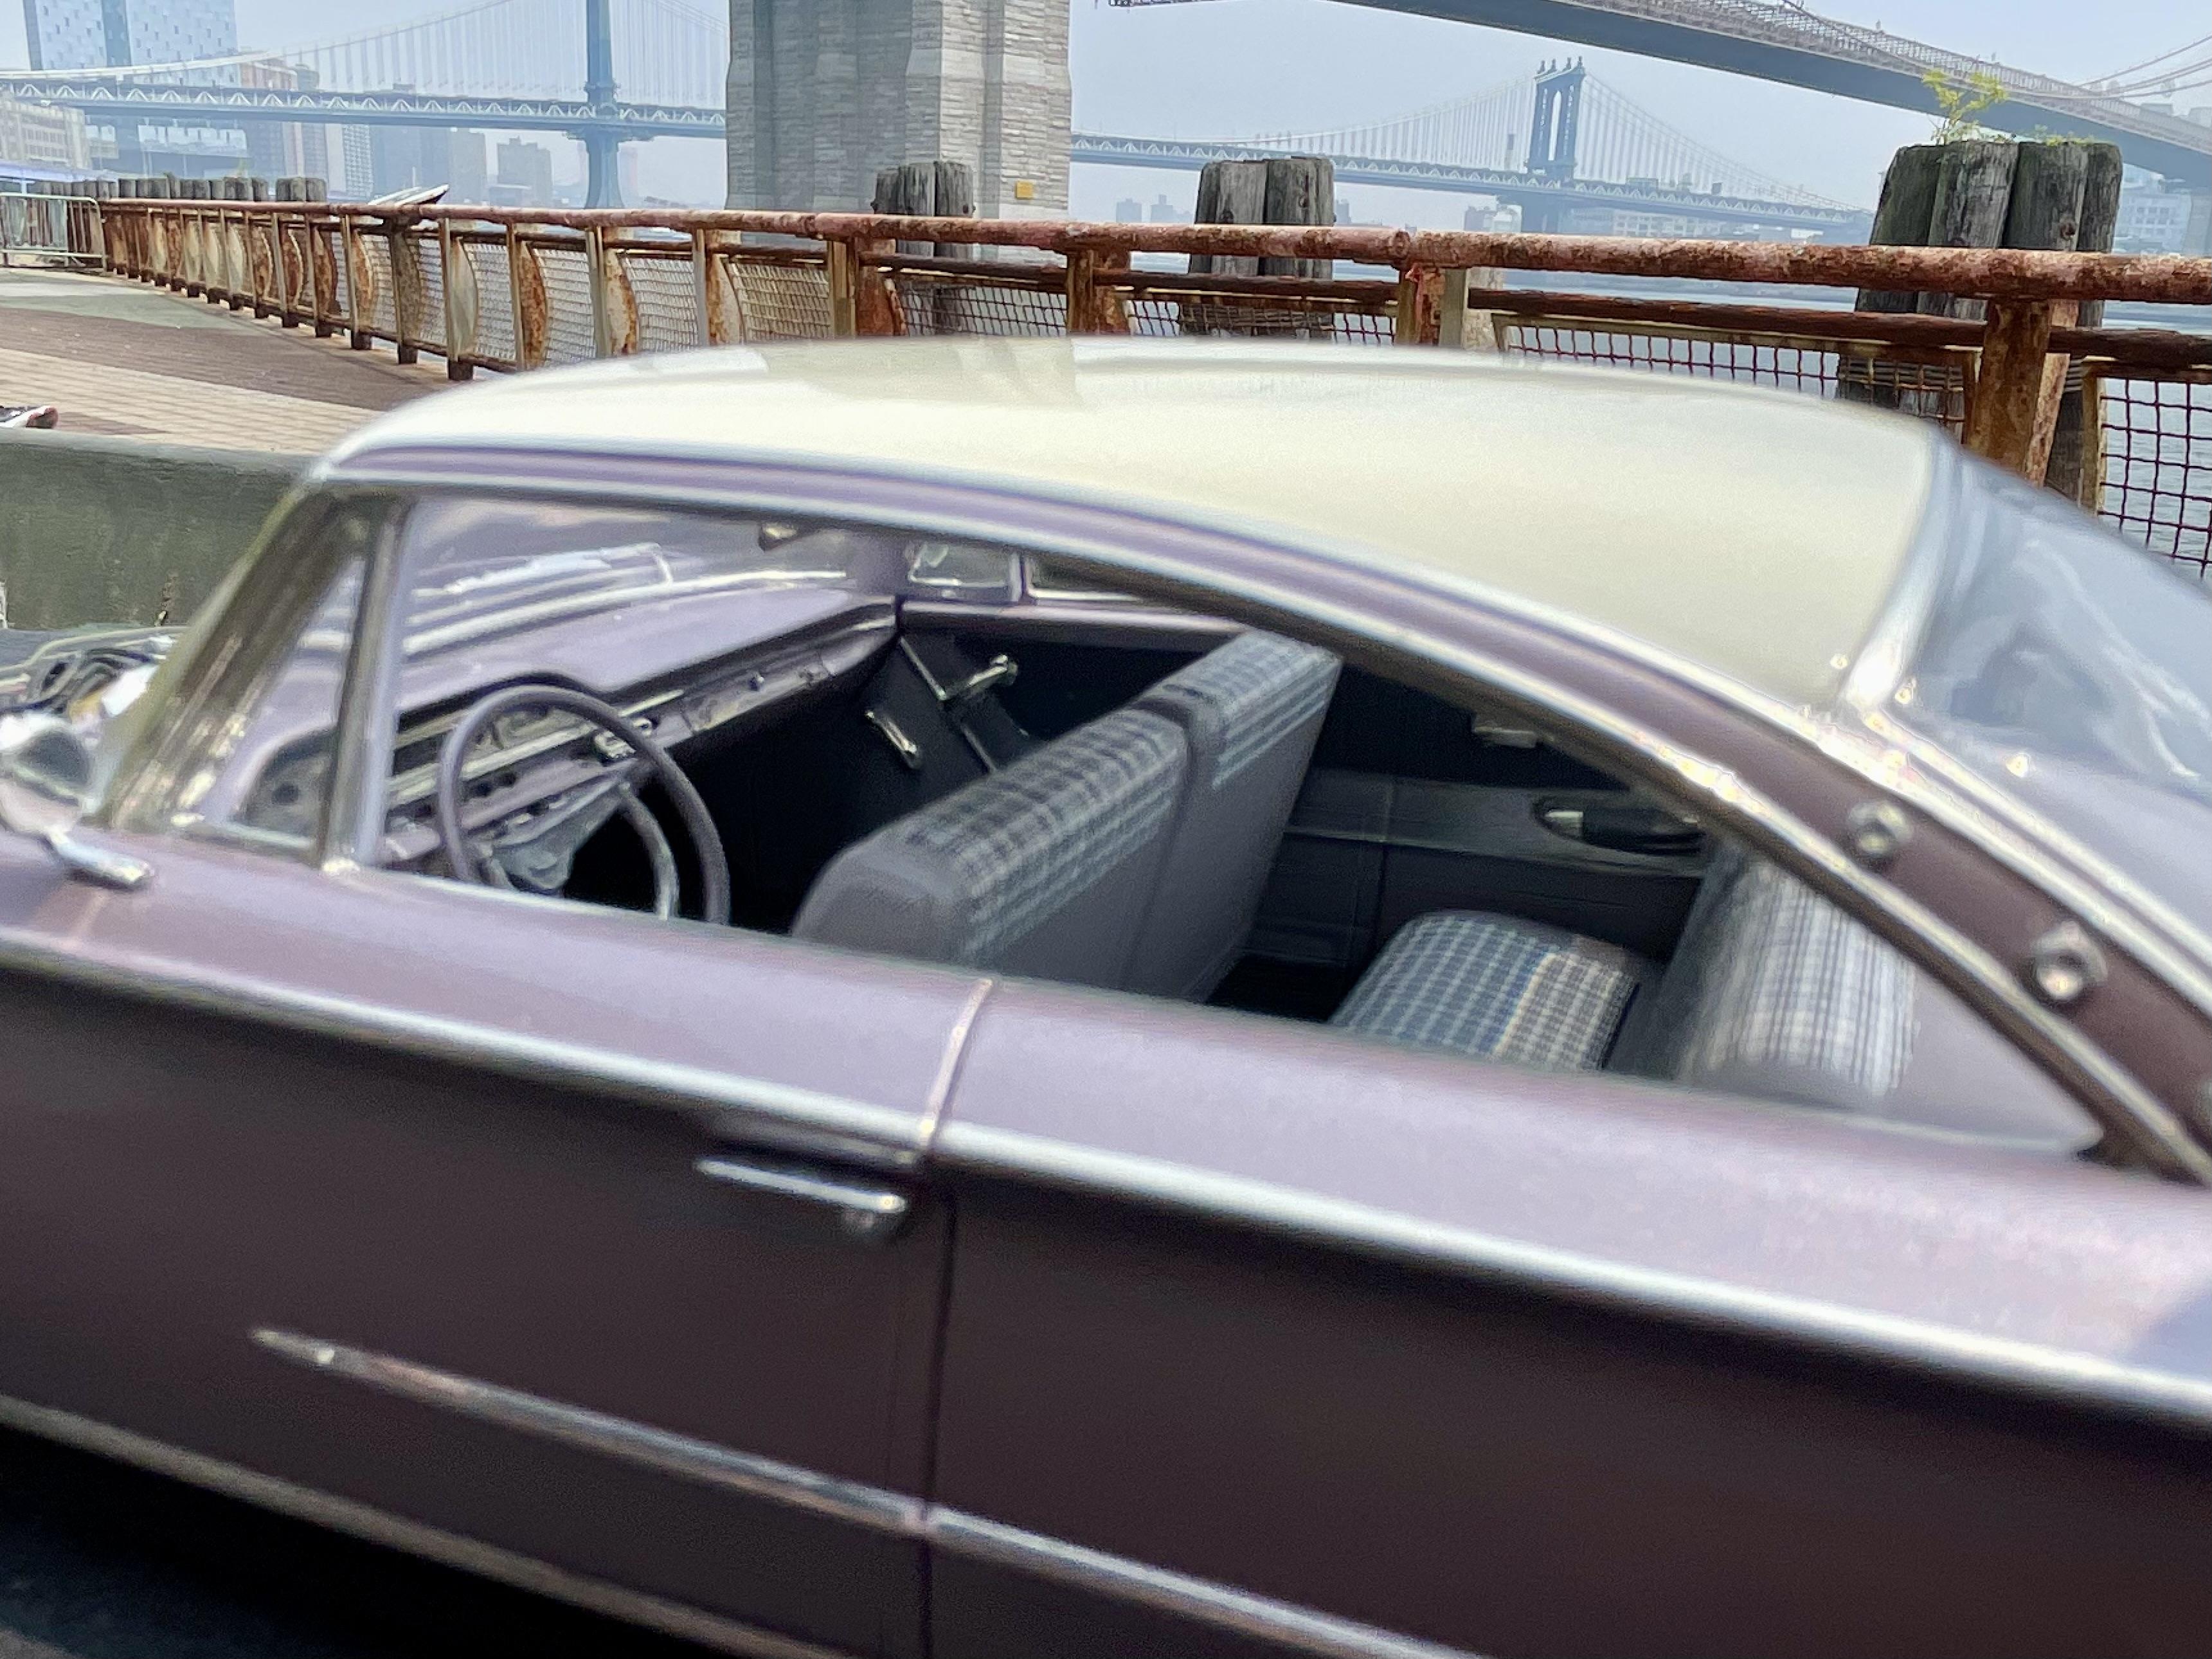
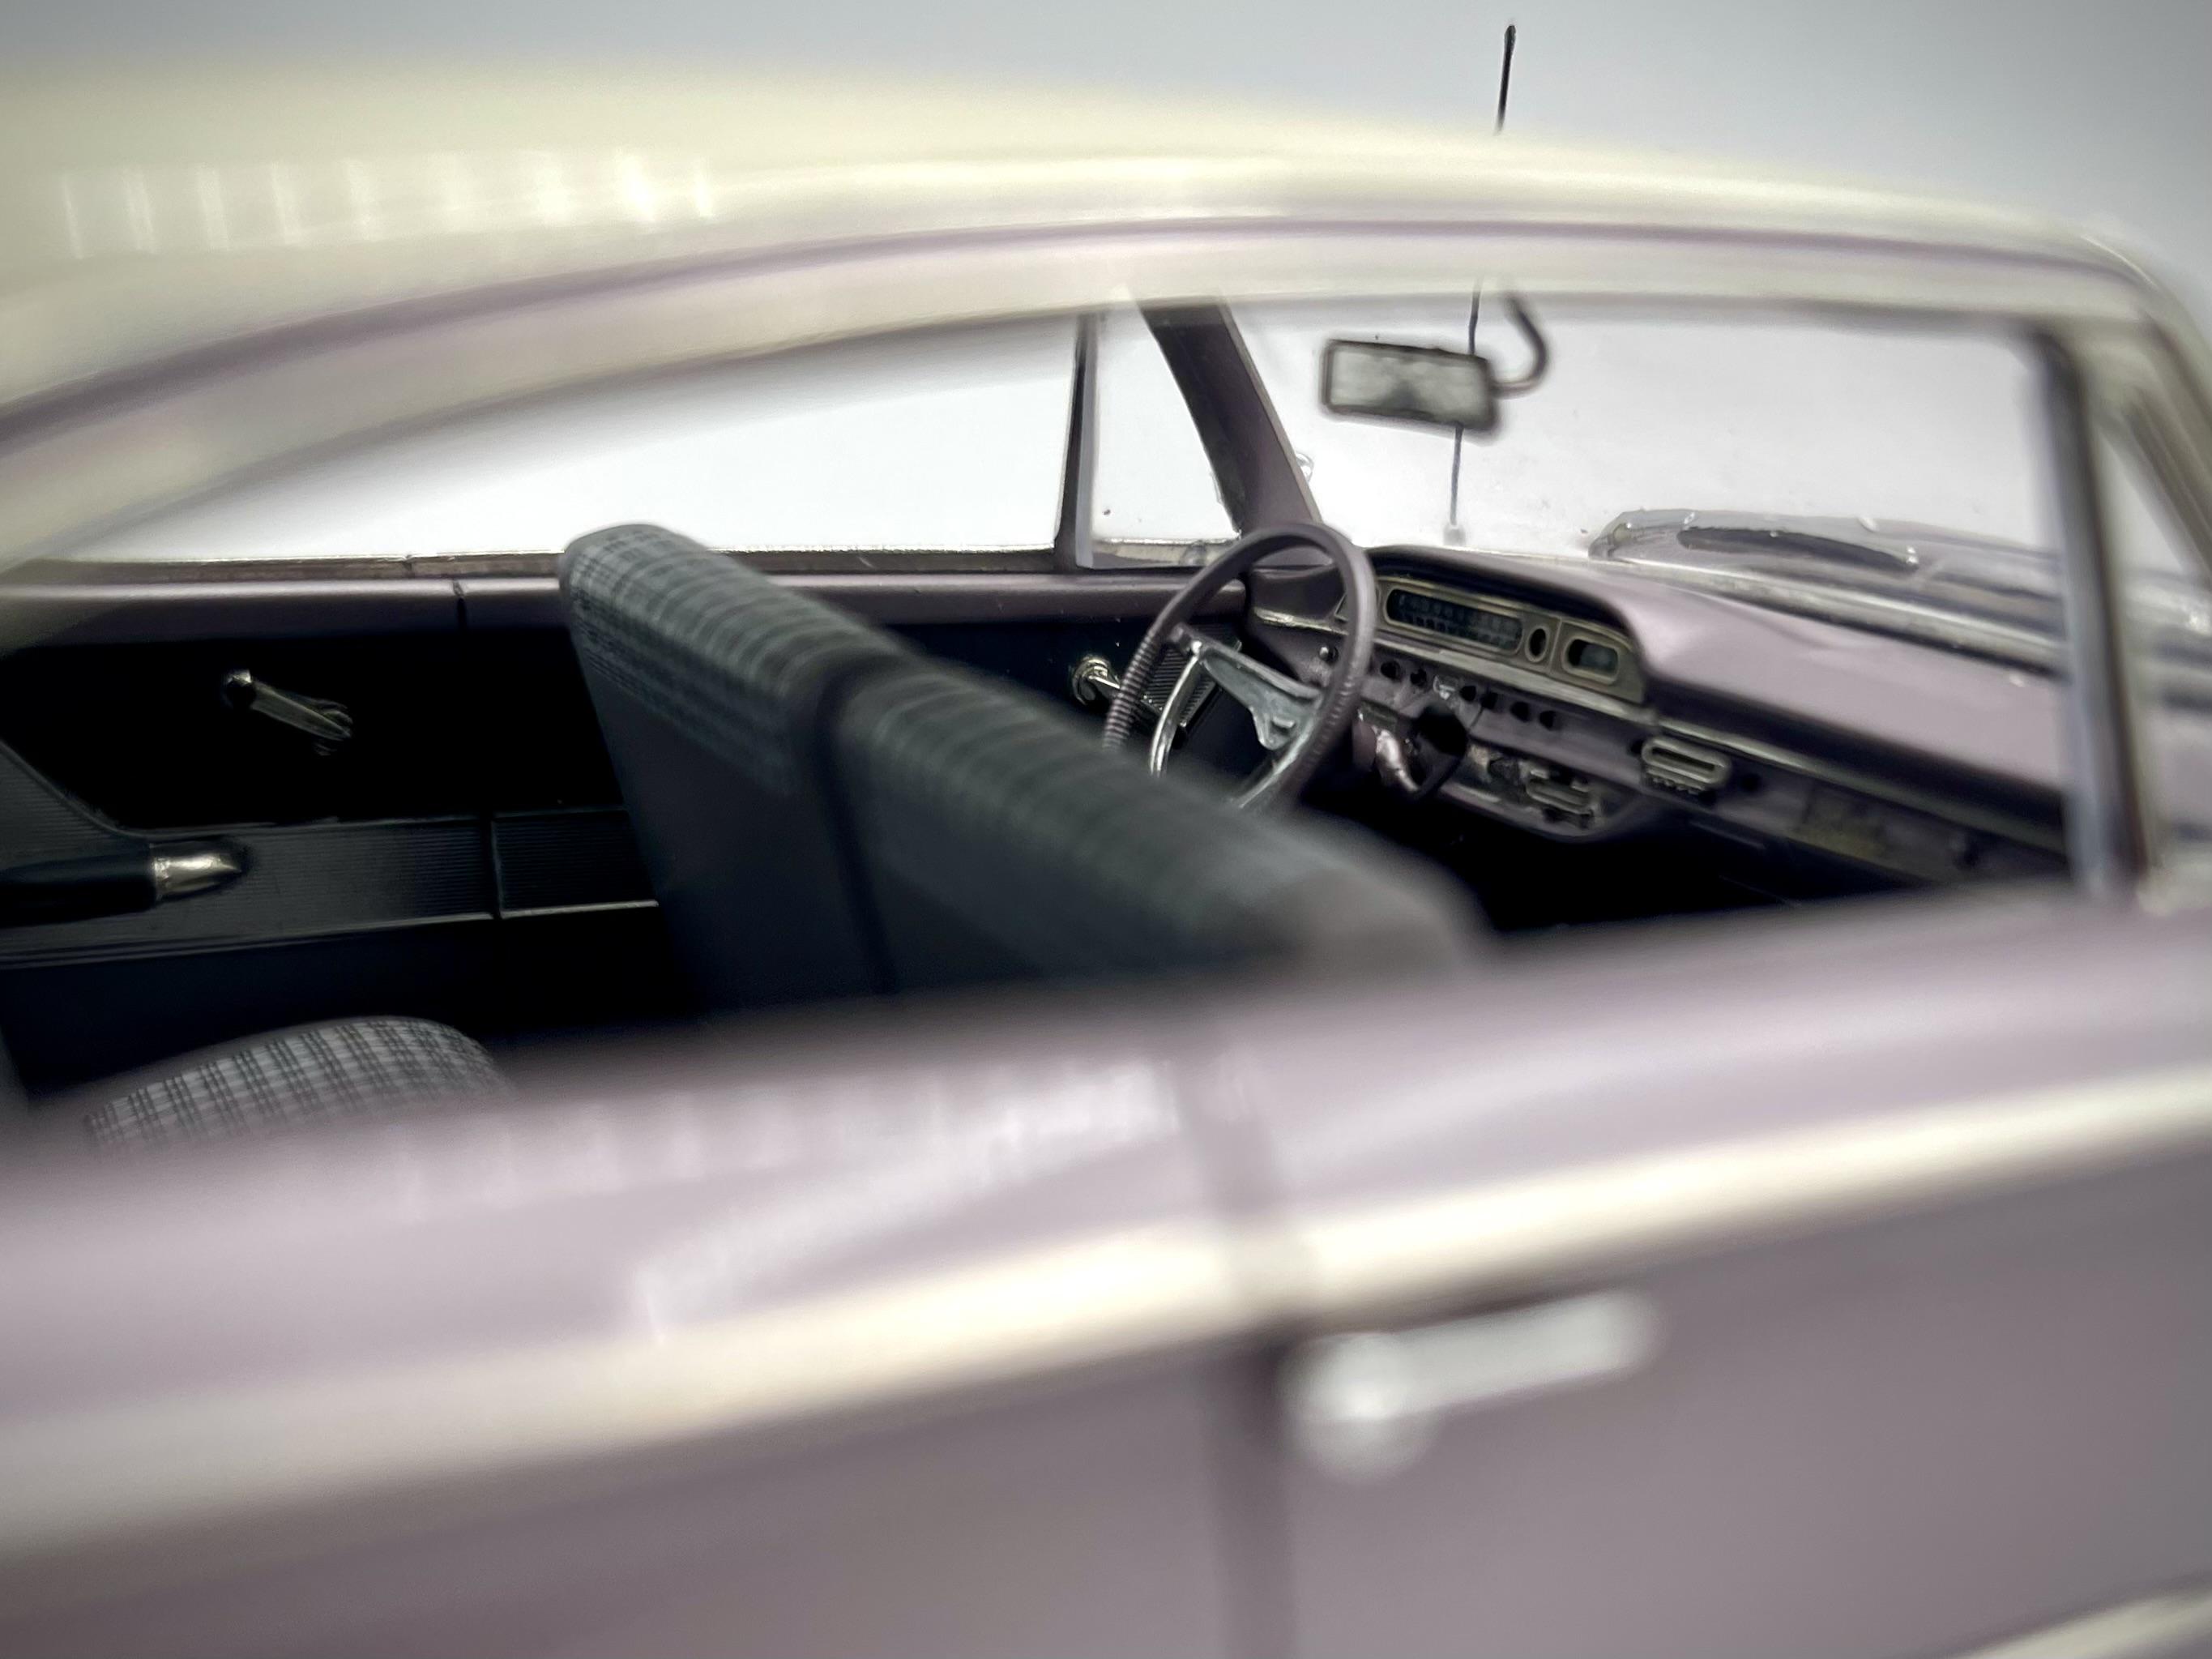
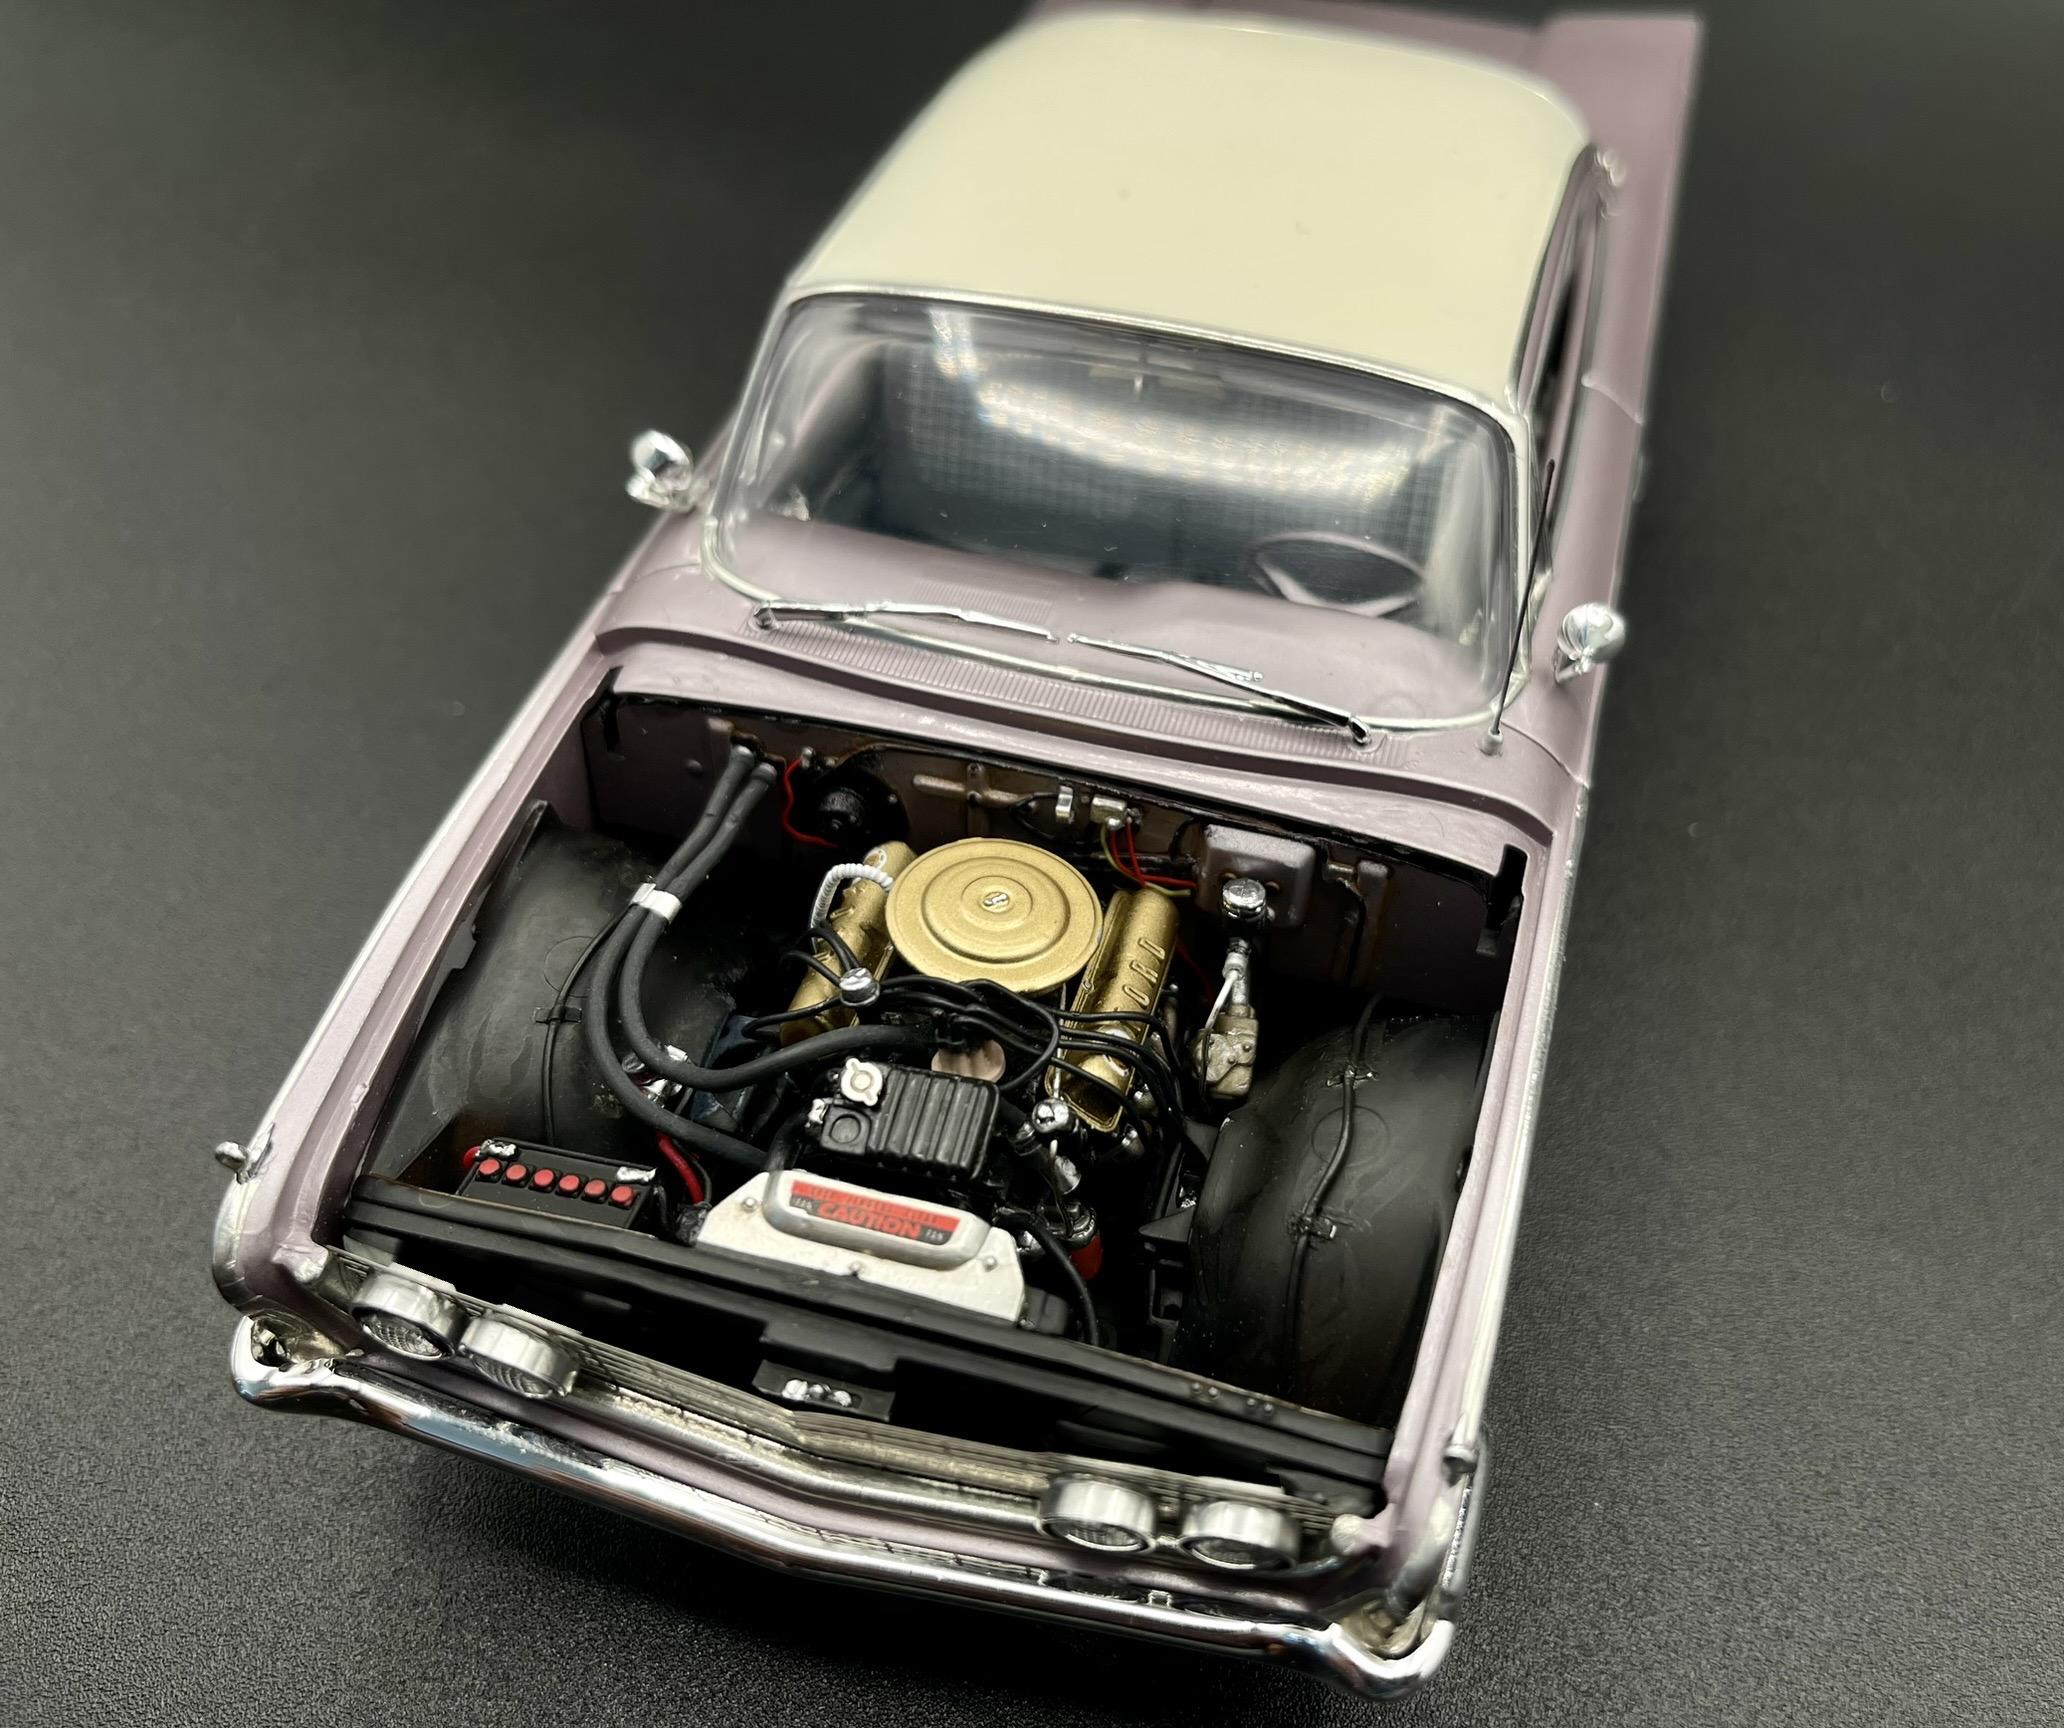
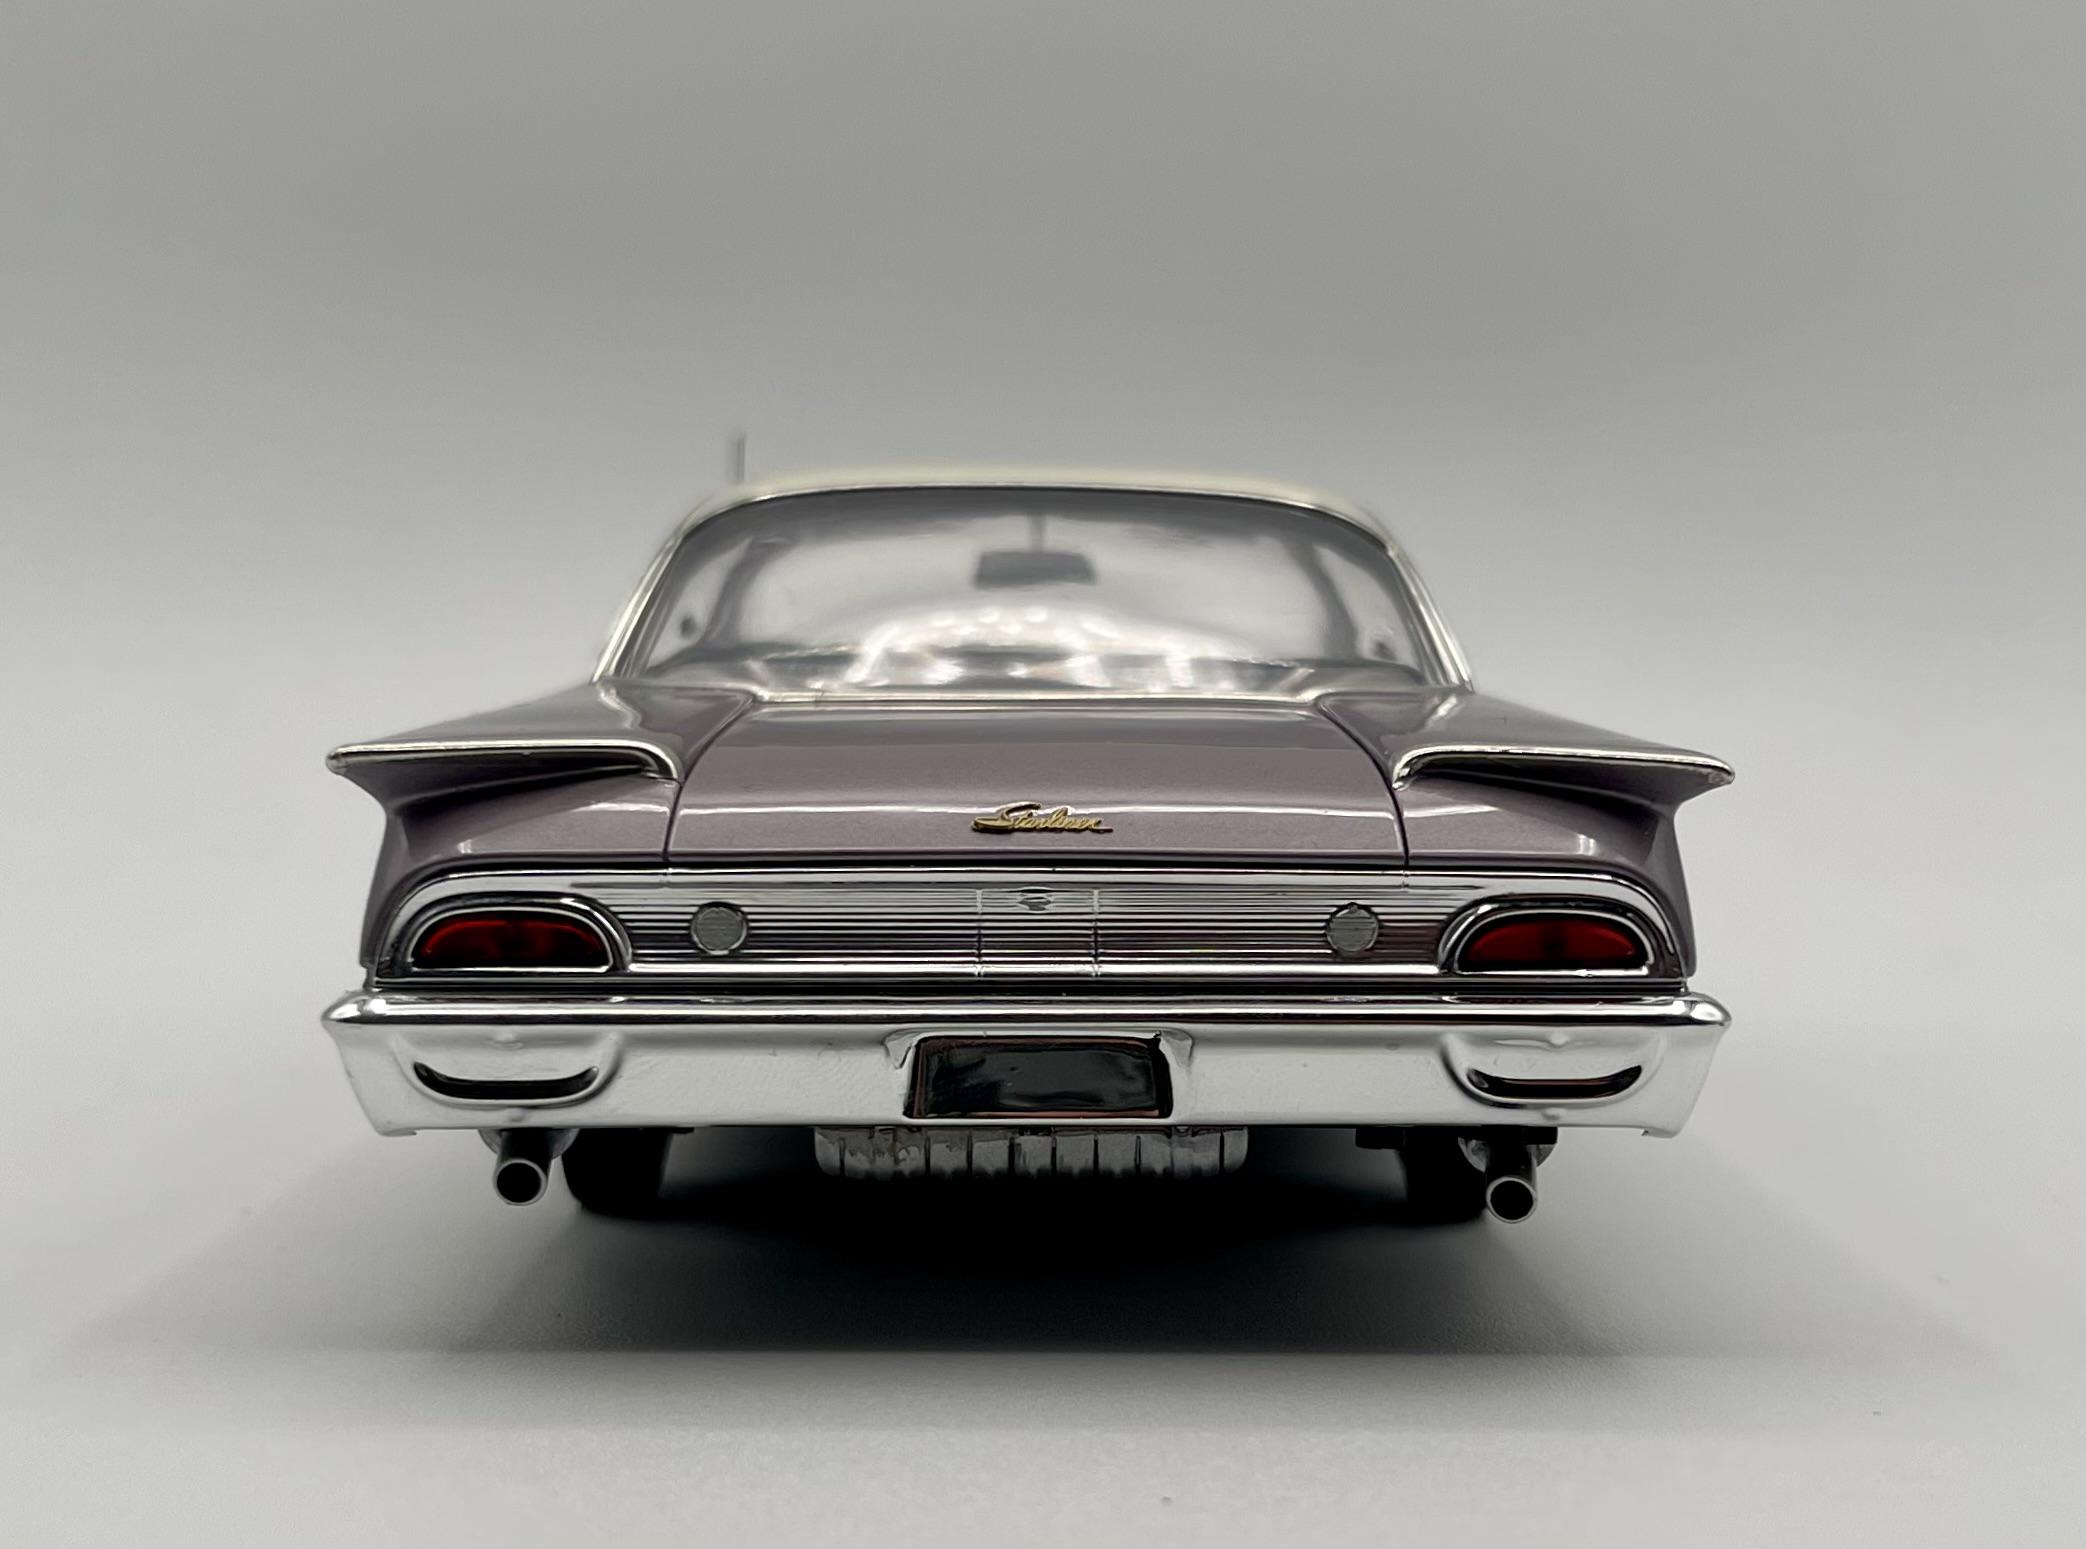
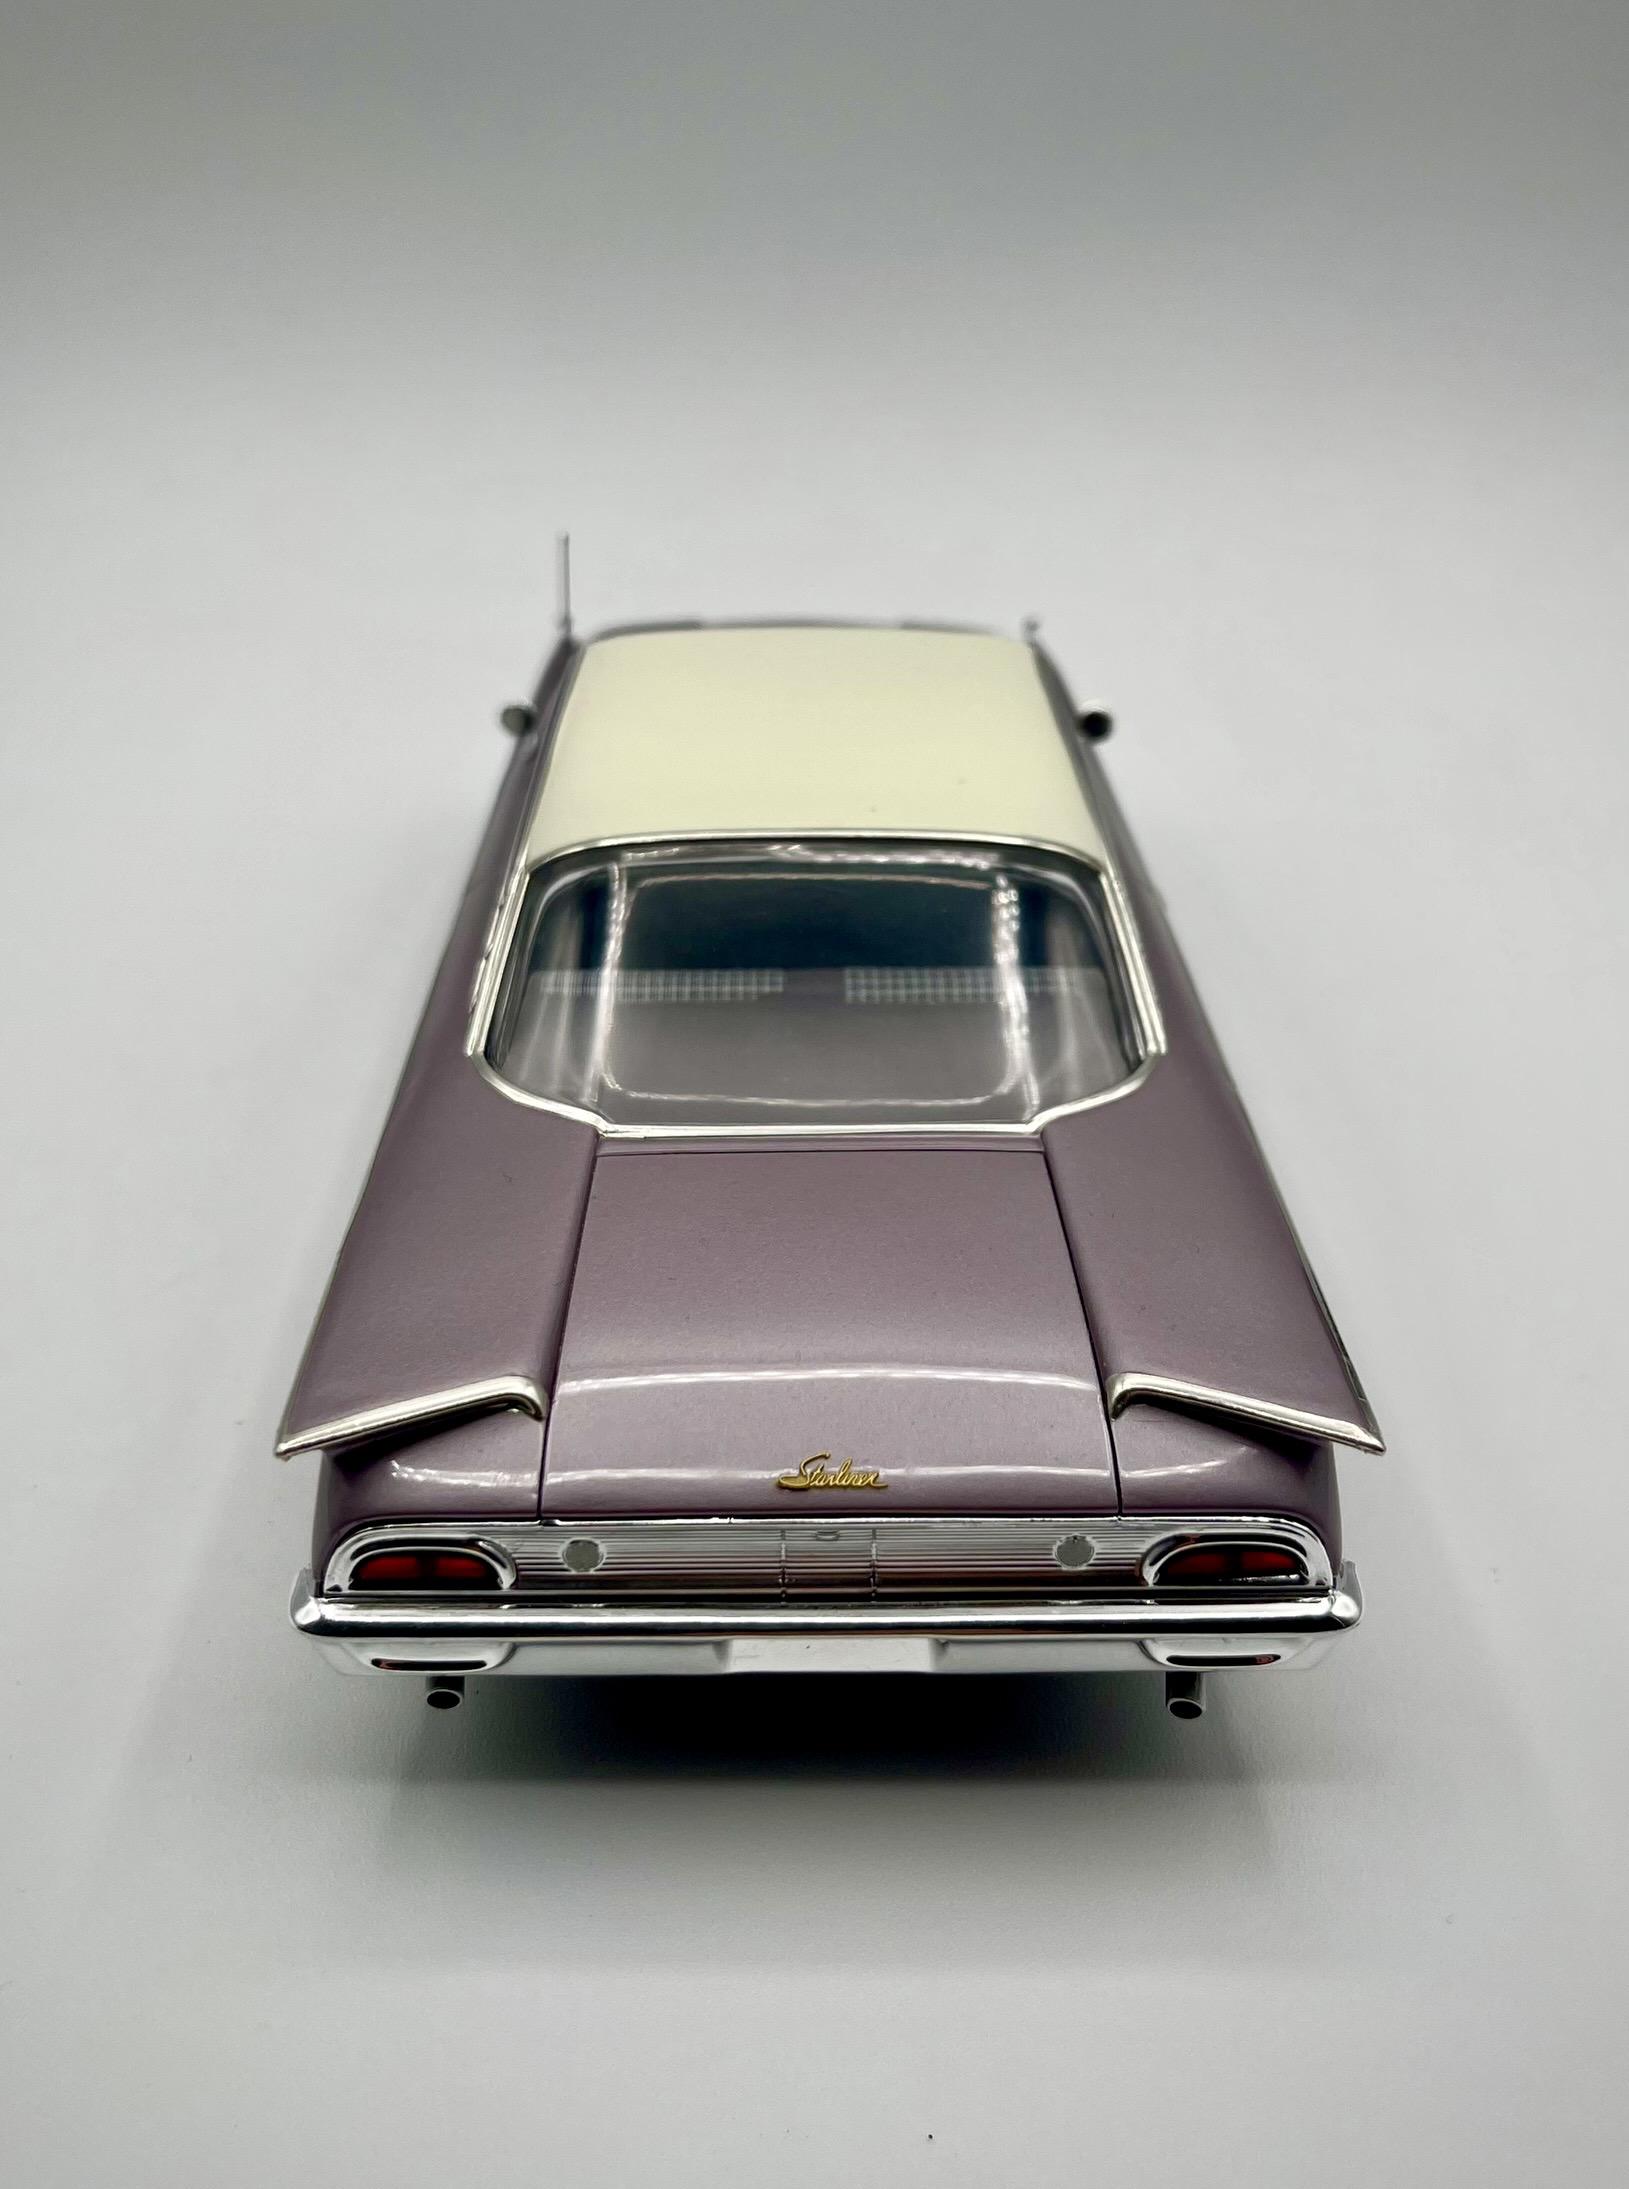
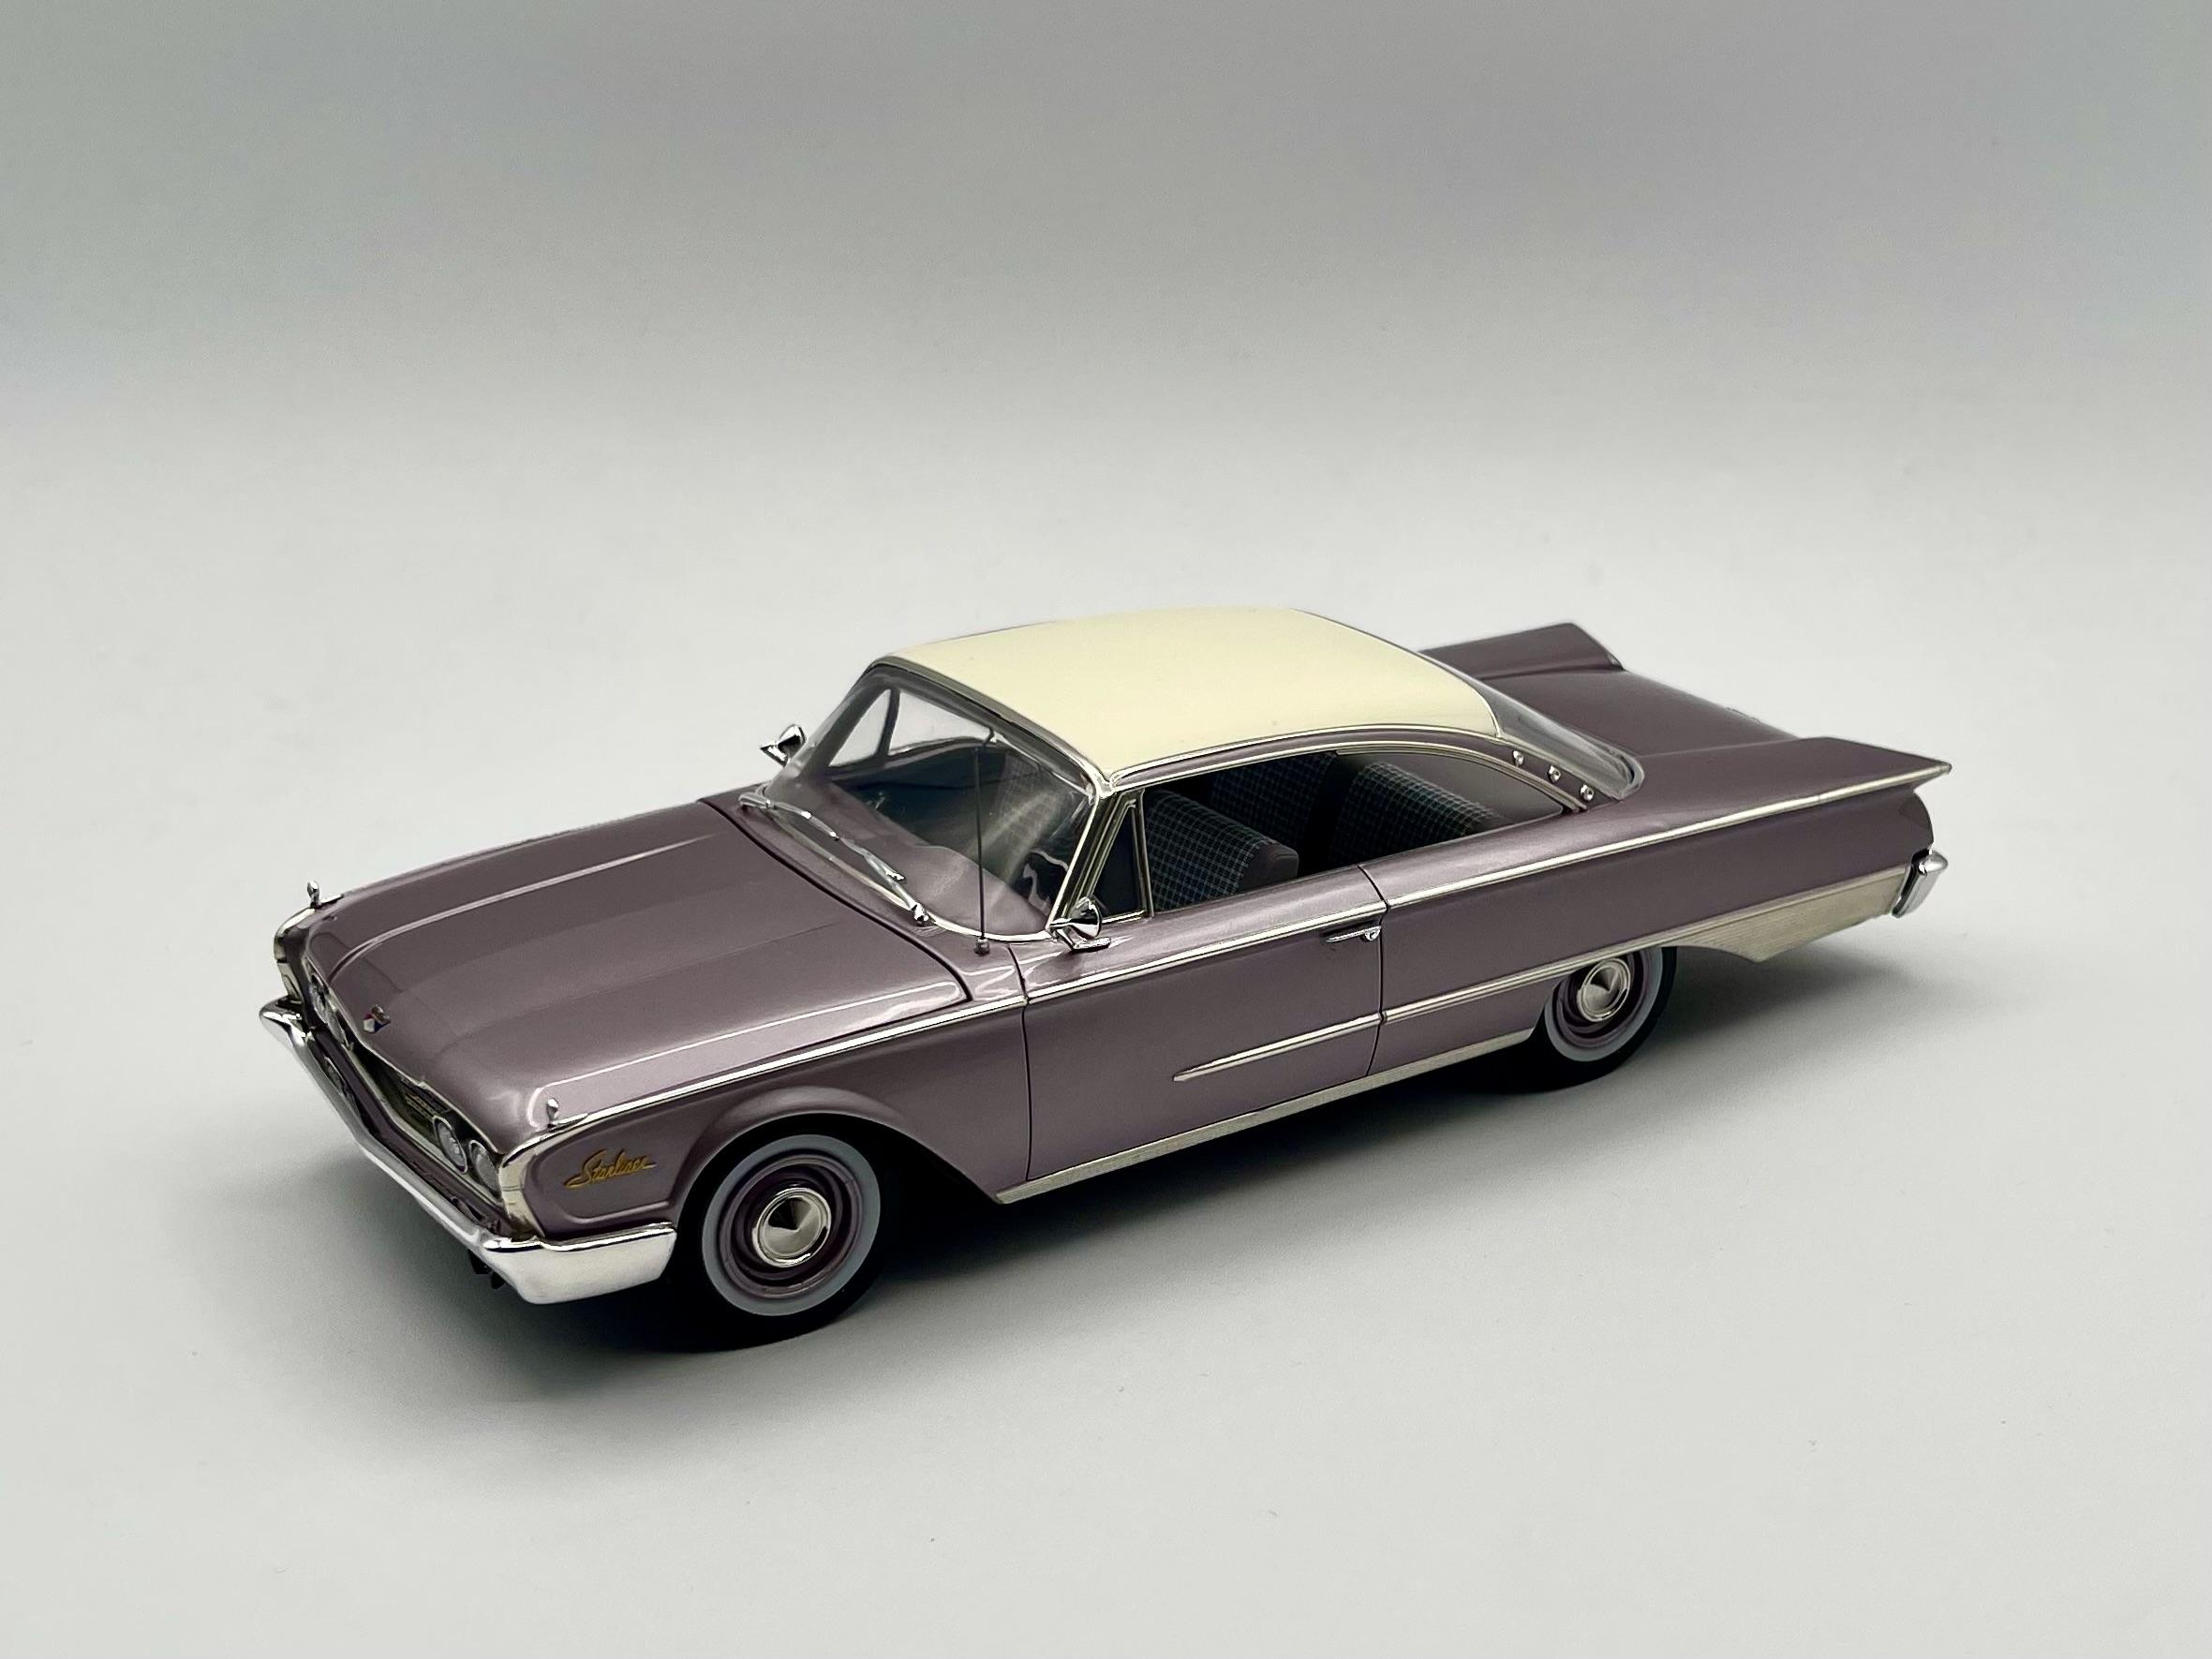
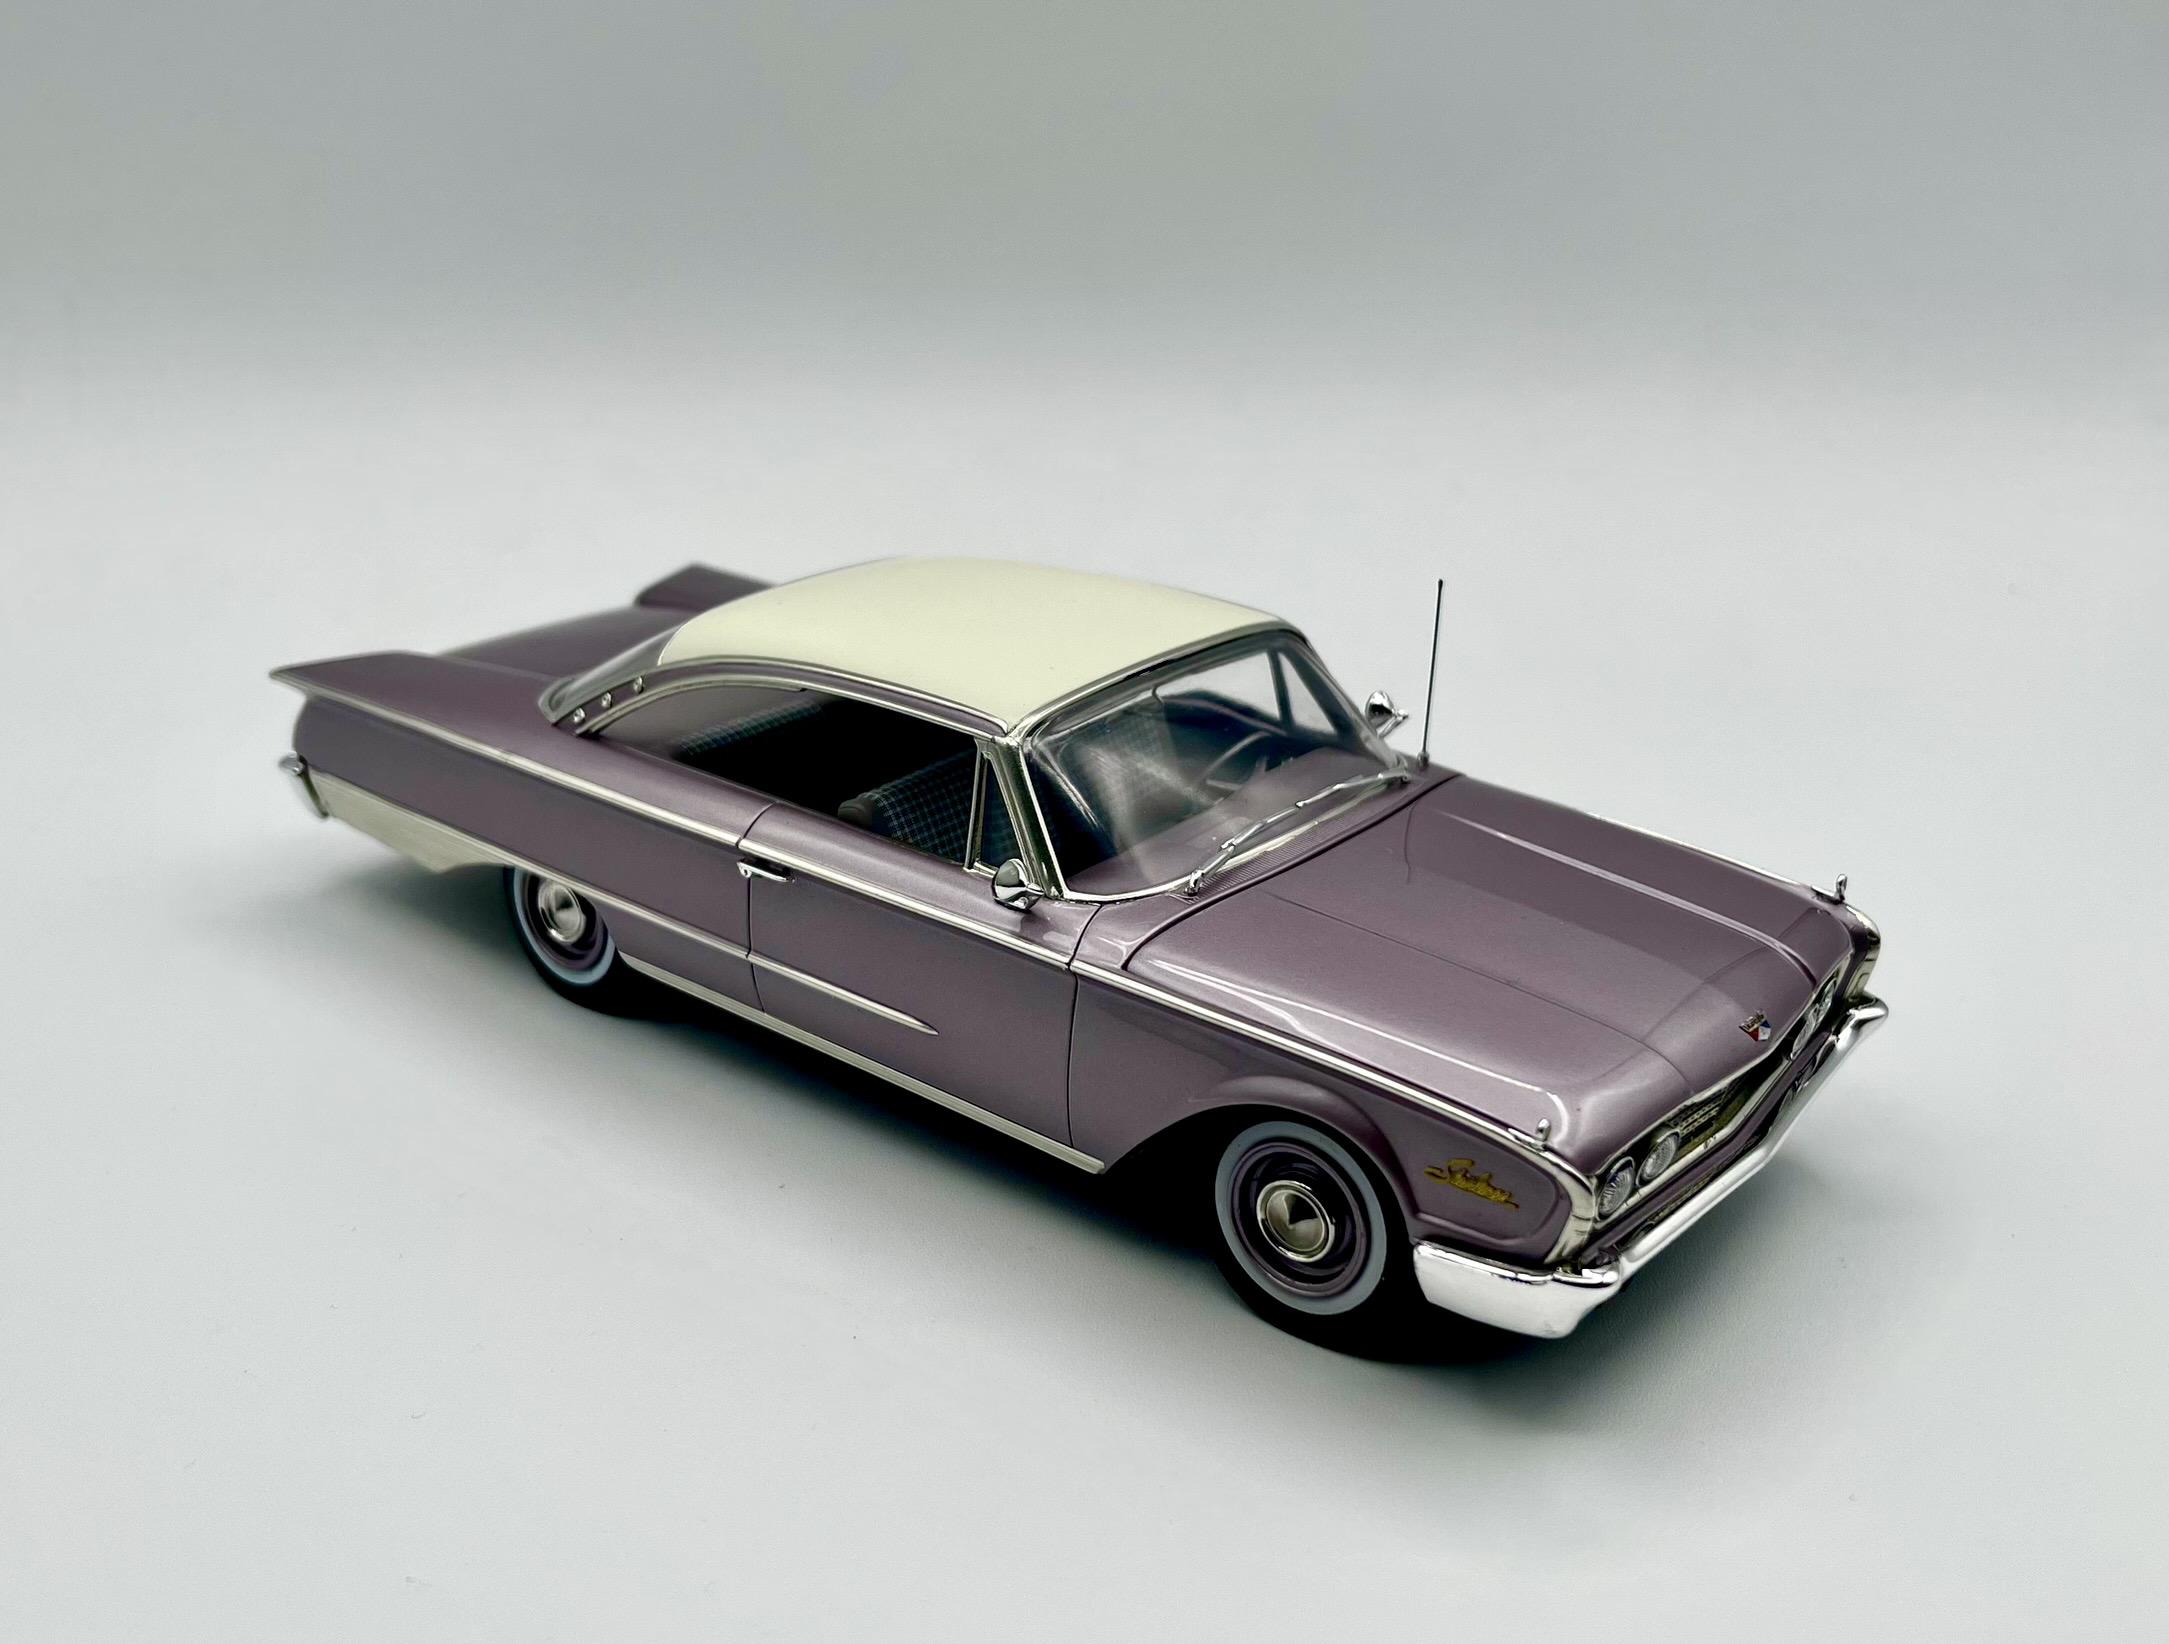
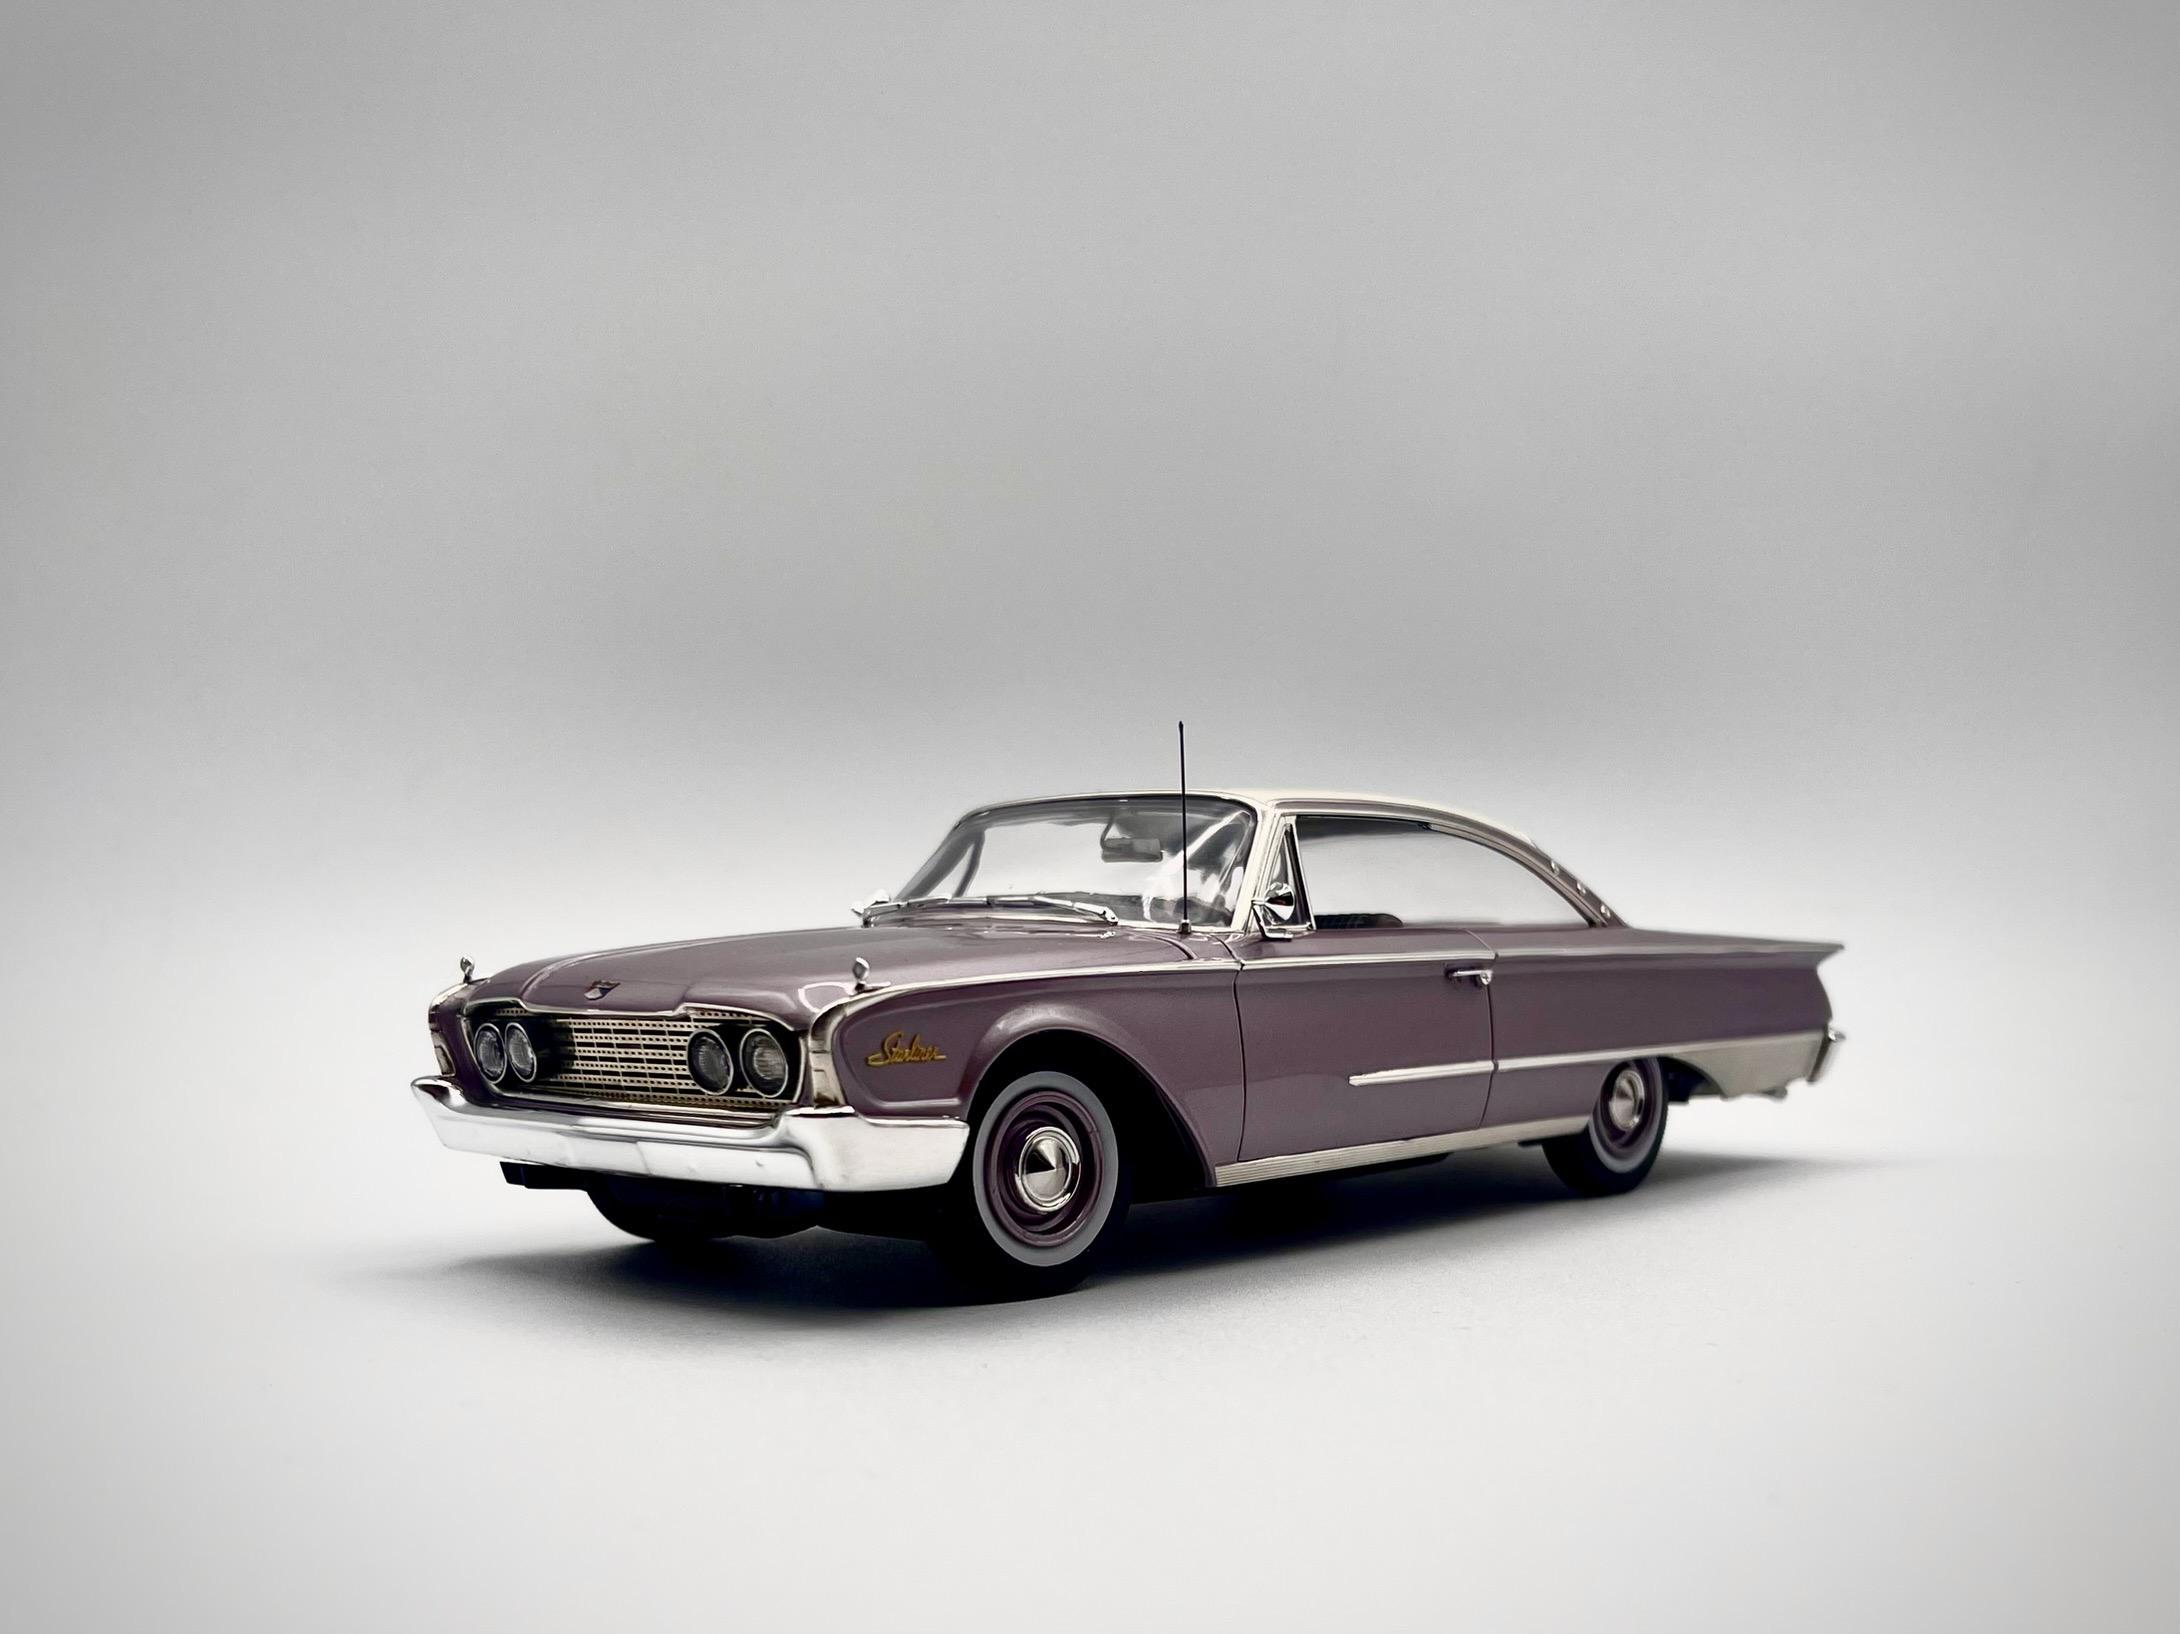
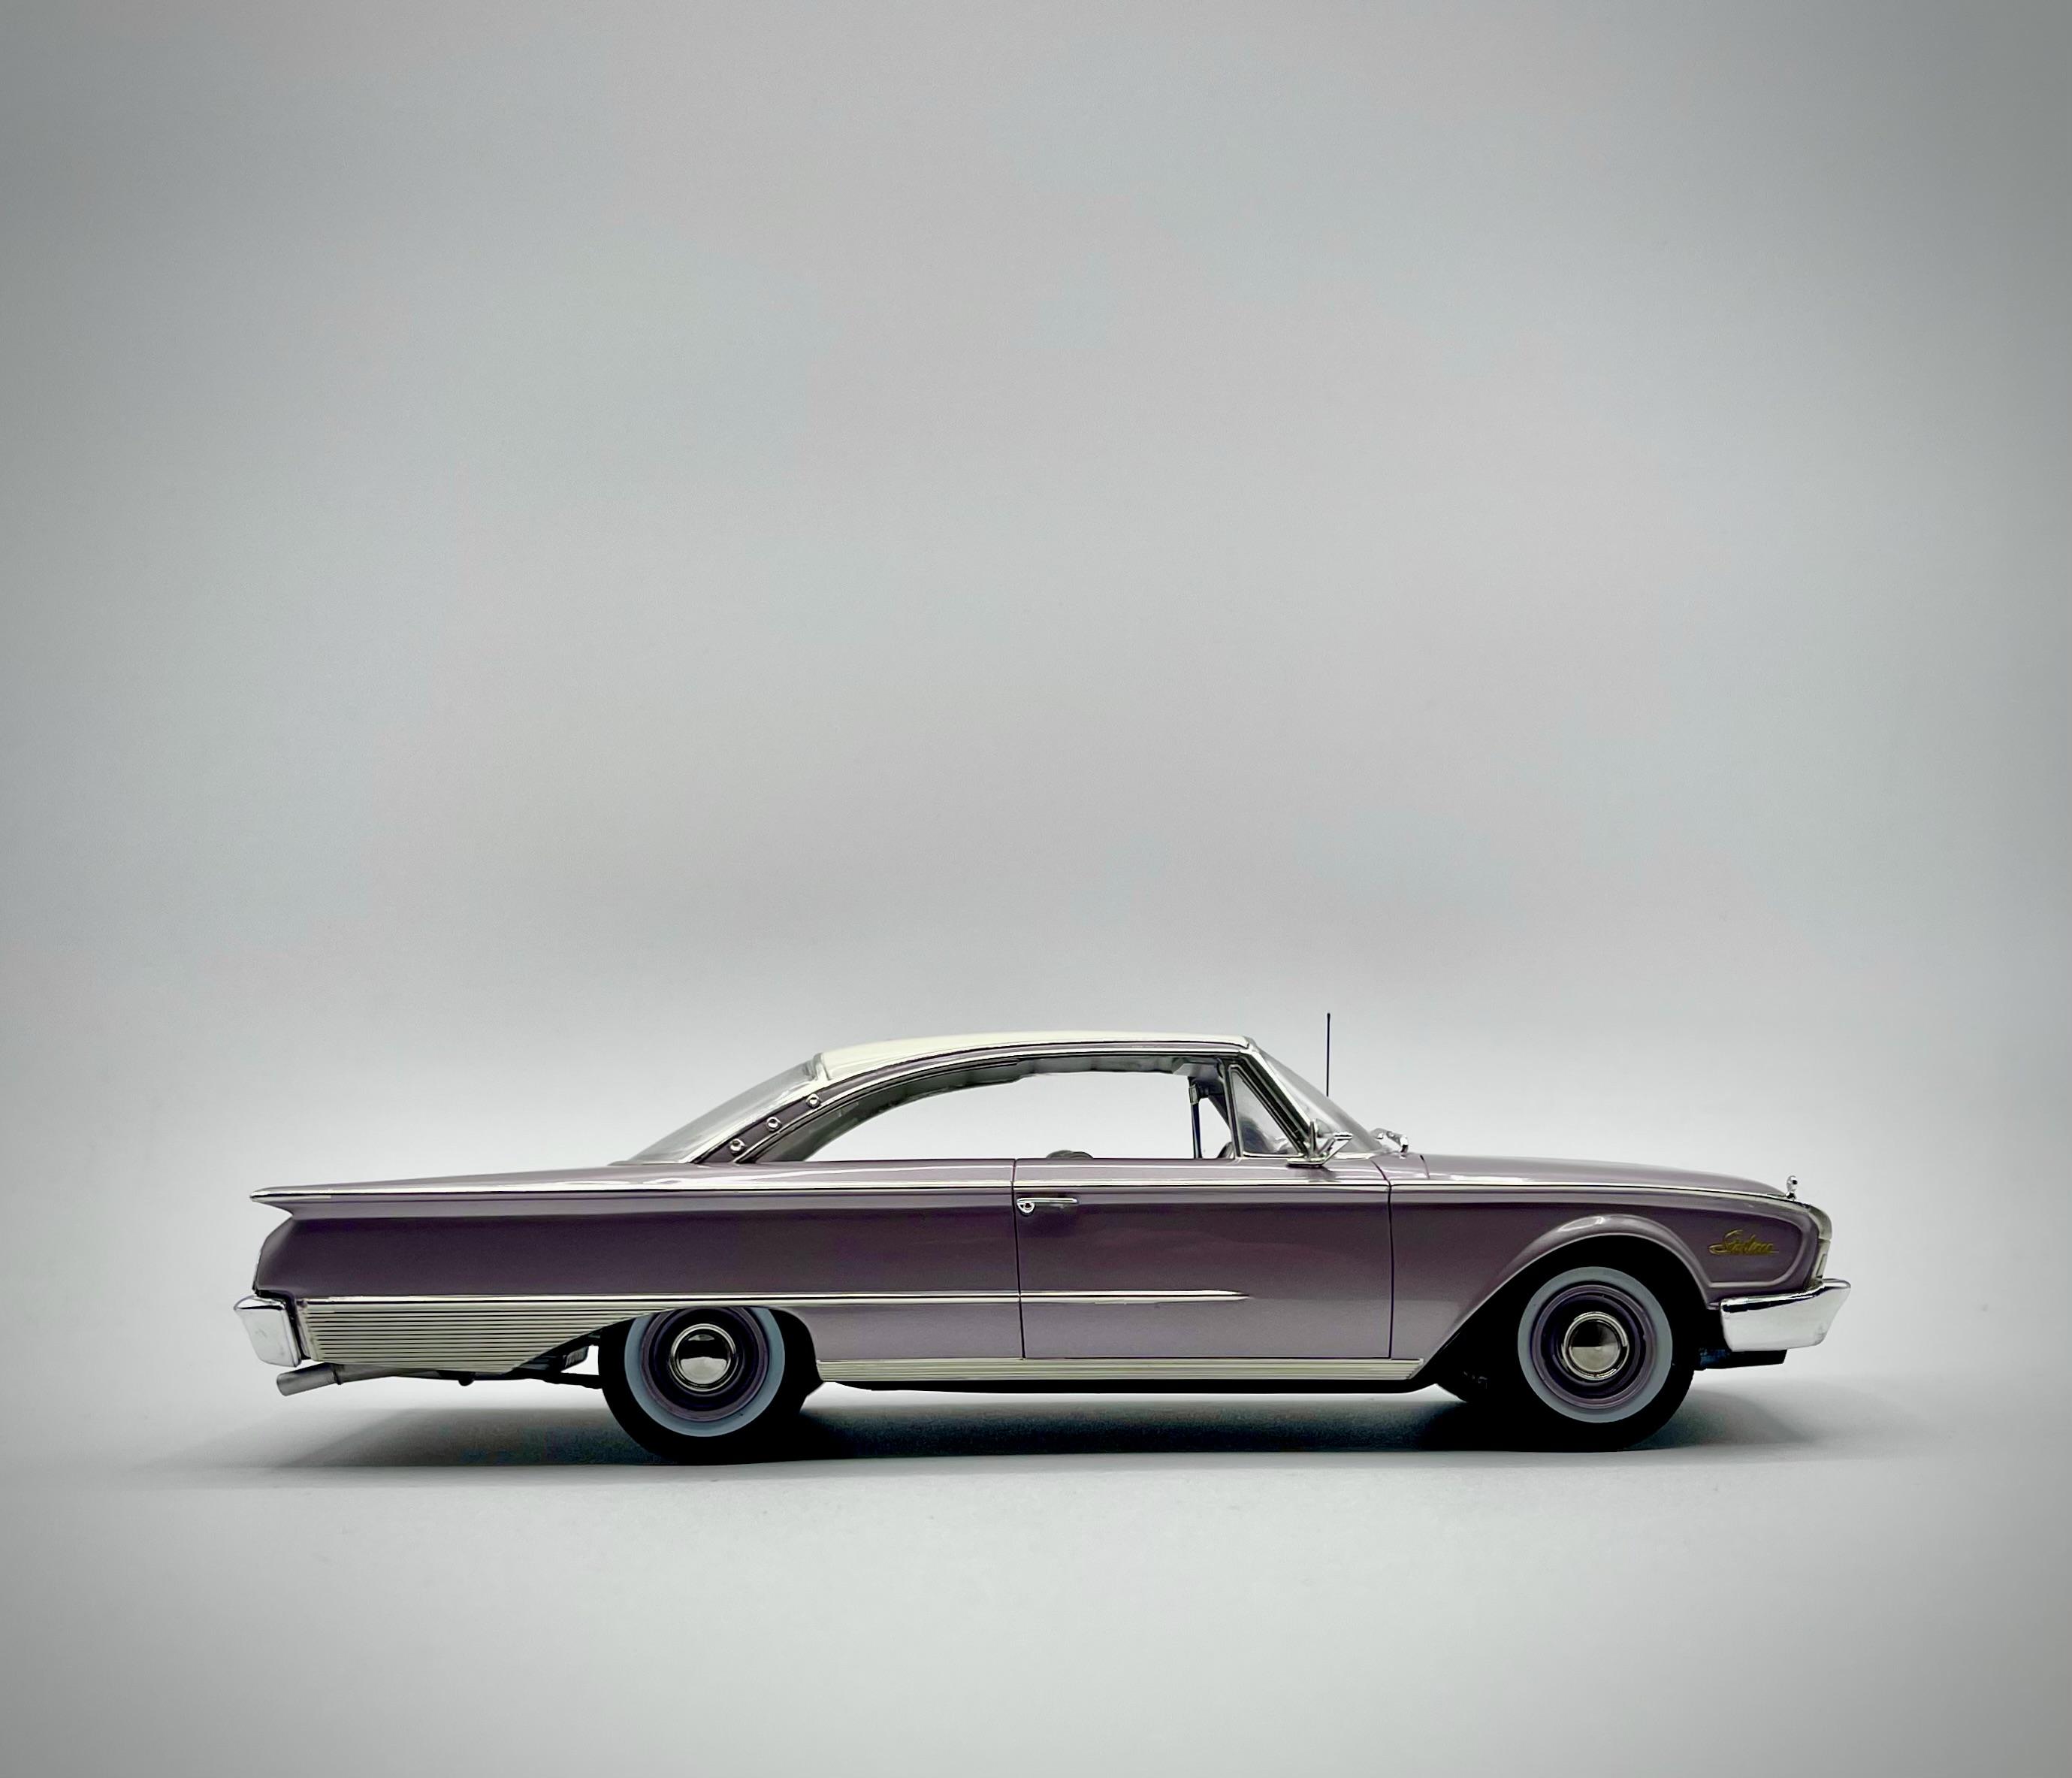
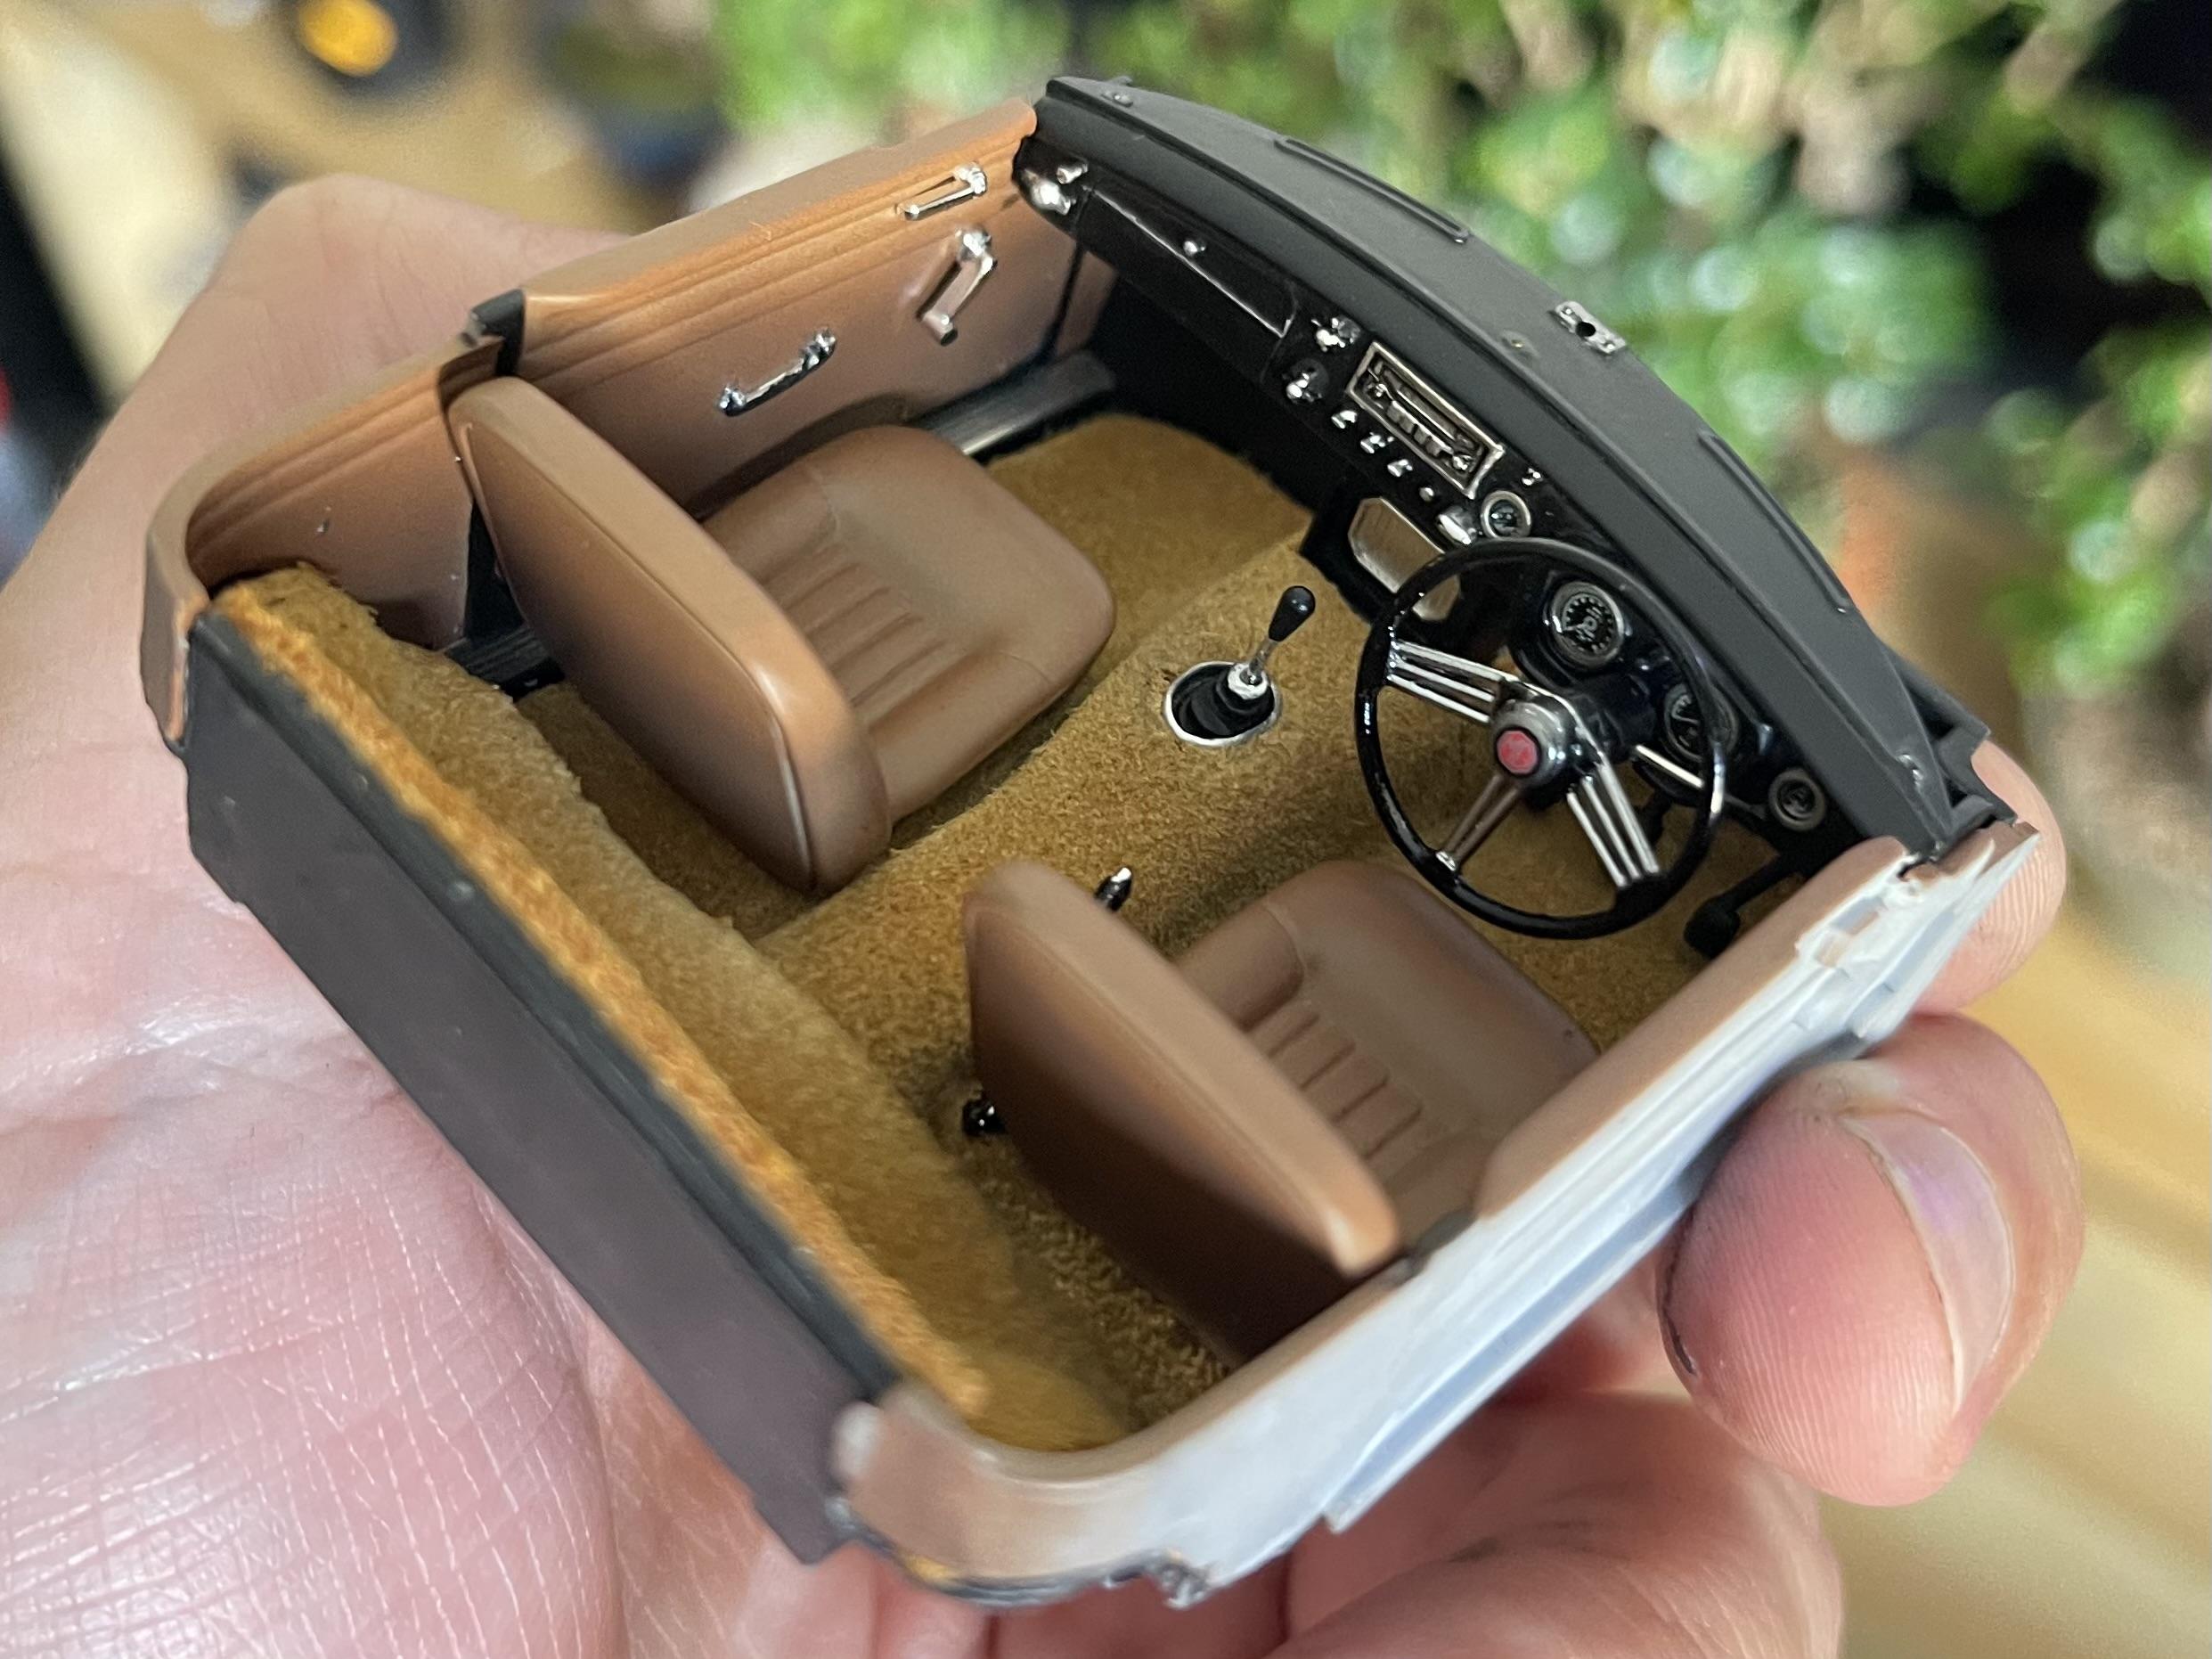
Ok - so, I’ve had this one in the stash for awhile but was hesitant to tackle it because of the intense foiling session I knew it would require. Foiling was hands down my biggest weakness on so many builds and I didn’t want to ruin this beauty of a kit. Then, a few builds ago, I tried some new things with my foil application that has totally changed the game for me. First of all, the new bmf is much easier to use than the Covid-era product. This stuff sticks and burnishes down as it should. Next, I made the switch from using #11 exacto blades to #11 surgical scalpels. This was probably the biggest difference maker. The cut lines are 1000% smoother now, since it takes literally no pressure at all to cut through the foil. Additionally, any cuts you make once the foil is in place will be nearly invisible on the body because the blade is so thin. It also holds an edge phenomenally well - no more slipping or sliding and chipping the body. Also, I now try to cut the foil as close to shape as possible, prior to application. This reduces knife-on-body time and minimizes chances for an errant cut. You just line the foil up as straight as possible along the most visible edge of the part you’re foiling, and burnish it down as you move along. If you need to make additional cuts afterwards, you can just trim along the less visible edge until it looks right. This reduces adhesive residue on the body as well. I can’t tell you how much easier those little changes have made the job for me. I should also note that I used to avoid wet sanding the trim/edges because I didn’t want to burn through the paint…but recently I asked myself, why? If the edge is getting foiled anyway, who cares if it burns through a little bit? Now I just carefully sand them too, and it leaves me with a nice smooth surface that won’t show as much texture under the foil as it used to - sounds like common sense but it only just dawned on me ??♂️ Anyway, if any of you are struggling with foil like I did, give those things a try…it just takes practice and patience Build notes: 1. Lowered the front end by 5-6 mm 2. I used the model car garage photo etch set for the emblems, grill, dash 3. Headlights were built with different sized aluminum tubing, styrene, and the kit lenses 4. Seats were done with scale productions fabric decals and tons of microsol 5. Carpet is adhesive suede 6. Antennae is aluminum tube and music wire. Exhaust pipes are also aluminum tube 7. Rv mirror is a bent tailor pin and some aluminum sheet with hasegawa mirror finish 8. Tires are from an AMT Impala kit (I think) 9. Engine bay had a bunch of stuff added but it honestly would have looked fine without it. Might be the nicest engine I’ve seen in a kit. 10. Ext. paint is Splash Paints evening orchid (body) and tamiya racing white (roof) under mr color clear 11. Int. Paint is a tamiya acrylic grey/red/blue/white mix on the seats, gray/blue/black mix and Alclad silver candy base on the door panels, and evening orchid on the dash and tops of the doors under semigloss clear The body did need quite a bit of sanding and putty but I really can’t complain. Beautiful kit. Here are a couple more pics ?

-
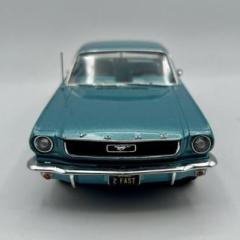
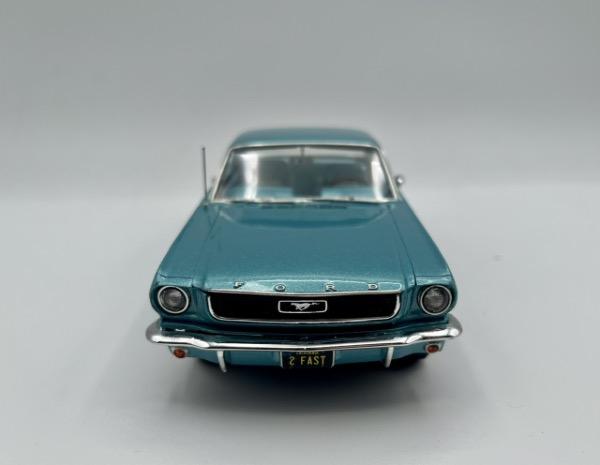
Just wrapped up an AMT ‘60 Ford Starliner. This really was an awesome kit. Can’t wait to build another. Sorry if the pics are a little hazy - there have been some veeery strange skies in NYC lately… I’ll post some build details below ??
- 51 replies
-
- 10
-

-
wow that is awesome! looks like a real car in those pics. great job!
-
really nice job!!
-
thanks guys - i can't recommend this kit enough. i'm itching to build another one but i have a an xj-s and a few e-types i need to tackle first. good luck on yours!
-
100% i shot it over black on a 69 chevelle and it’s my favorite paint job to date ??
-
way to overcome the issues! looks awesome to me. that racing blue is probably my favorite tamiya color.
-
Thanks! It’s the 1/24th scale kit by Aoshima
-
Thanks! haha thanks - i love them too! i just meant it was a nice relaxing box stock/curbside build with very little modification. after the kit bashed mustang i just finished, this was a breeeeze lol
-
thanks guys!
-
thanks - yep they come with the kit. they might be the nicest spoke wheels i've seen in a kit so far. i just hit them with tamiya smoke and some panel washes and they were ready to go. i also glued them on with pva glue in case i want to "borrow" them for another build lol
-
thanks bud
-
very nice! so cool you guys get to build together.
-
looove this
-
thanks! yeah, buy one if you can find it. great little kit and the price is usually pretty low because its a curbside. thanks fellas! the super clear gloss has been a godsend. i was using ts-13 on everything and was worried when i made the switch to the airbrush, but i may like this clear coat even better. goes down so smoothly with a little leveling thinner. the lp paints are awesome too - i even added some of the tamiya acrylic to the mix and it blended right in without issue. thanks dudes i love them too. one of my best buds is trying to talk me into getting one. he said he'd buy one if i do. the prices aren't too bad but it might be tough since i live in nyc! thanks guys!
-
thanks! i just took a look at yours and it's awesome! i'll definitely be adding the seat piping like you did on my next one. amazing job! thanks dudes
-
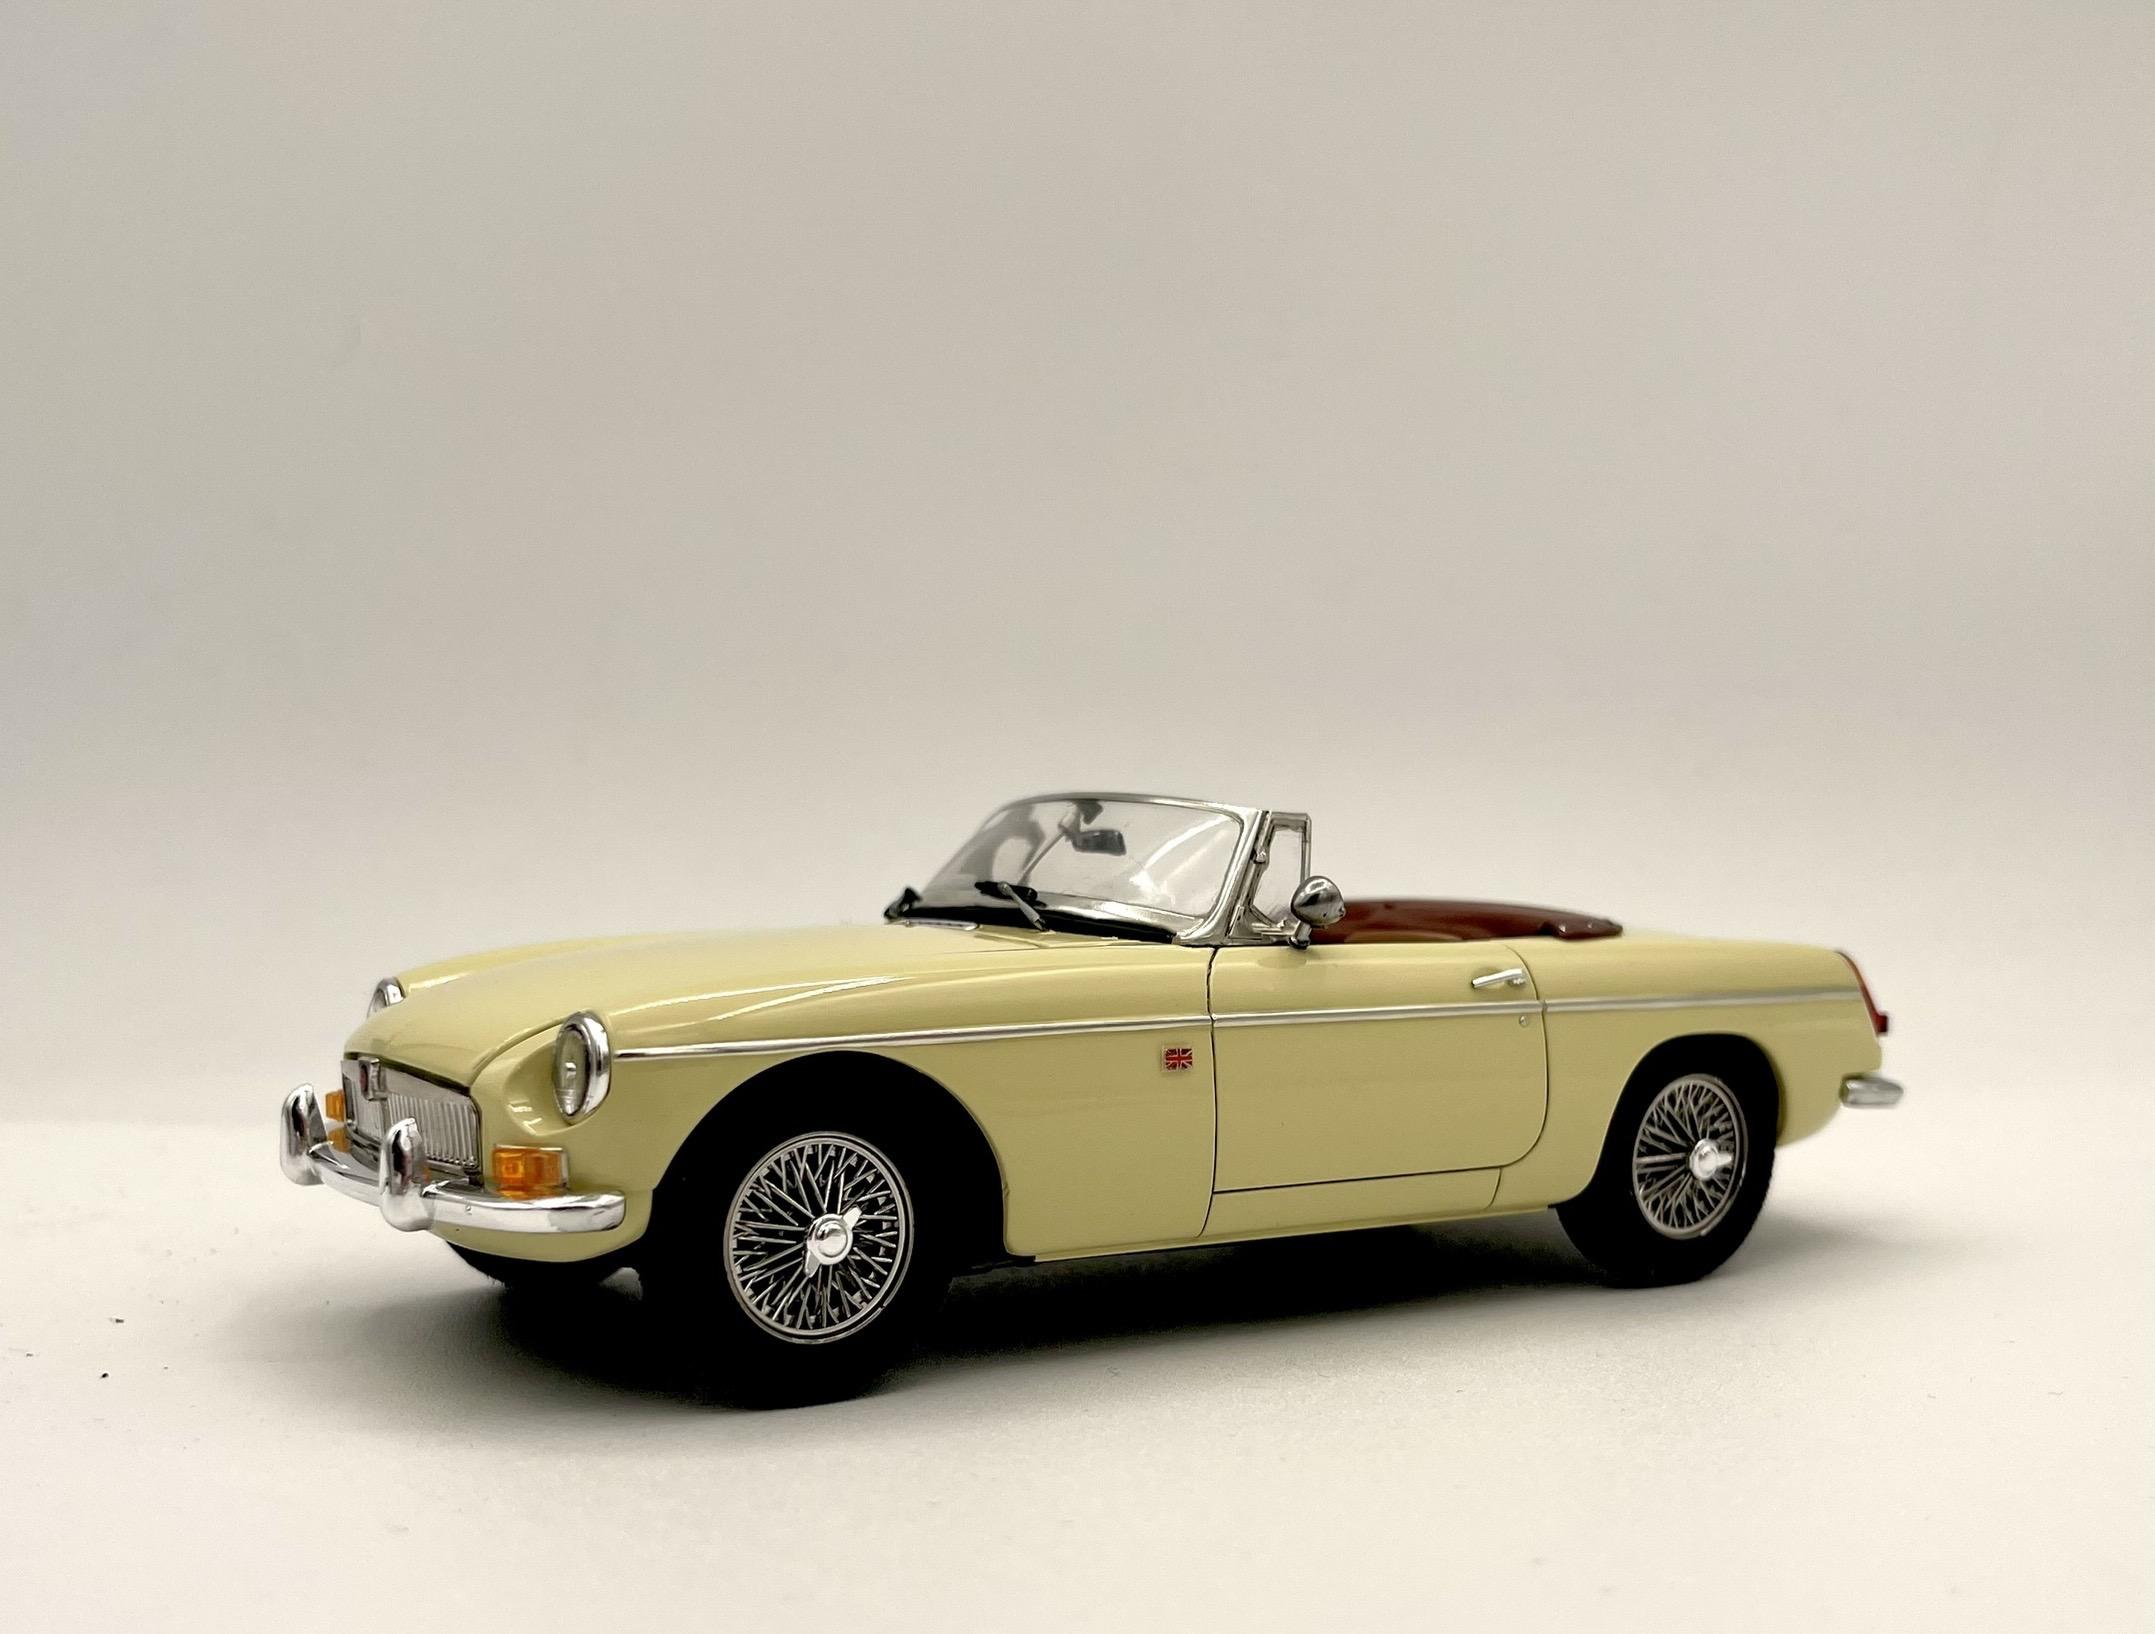
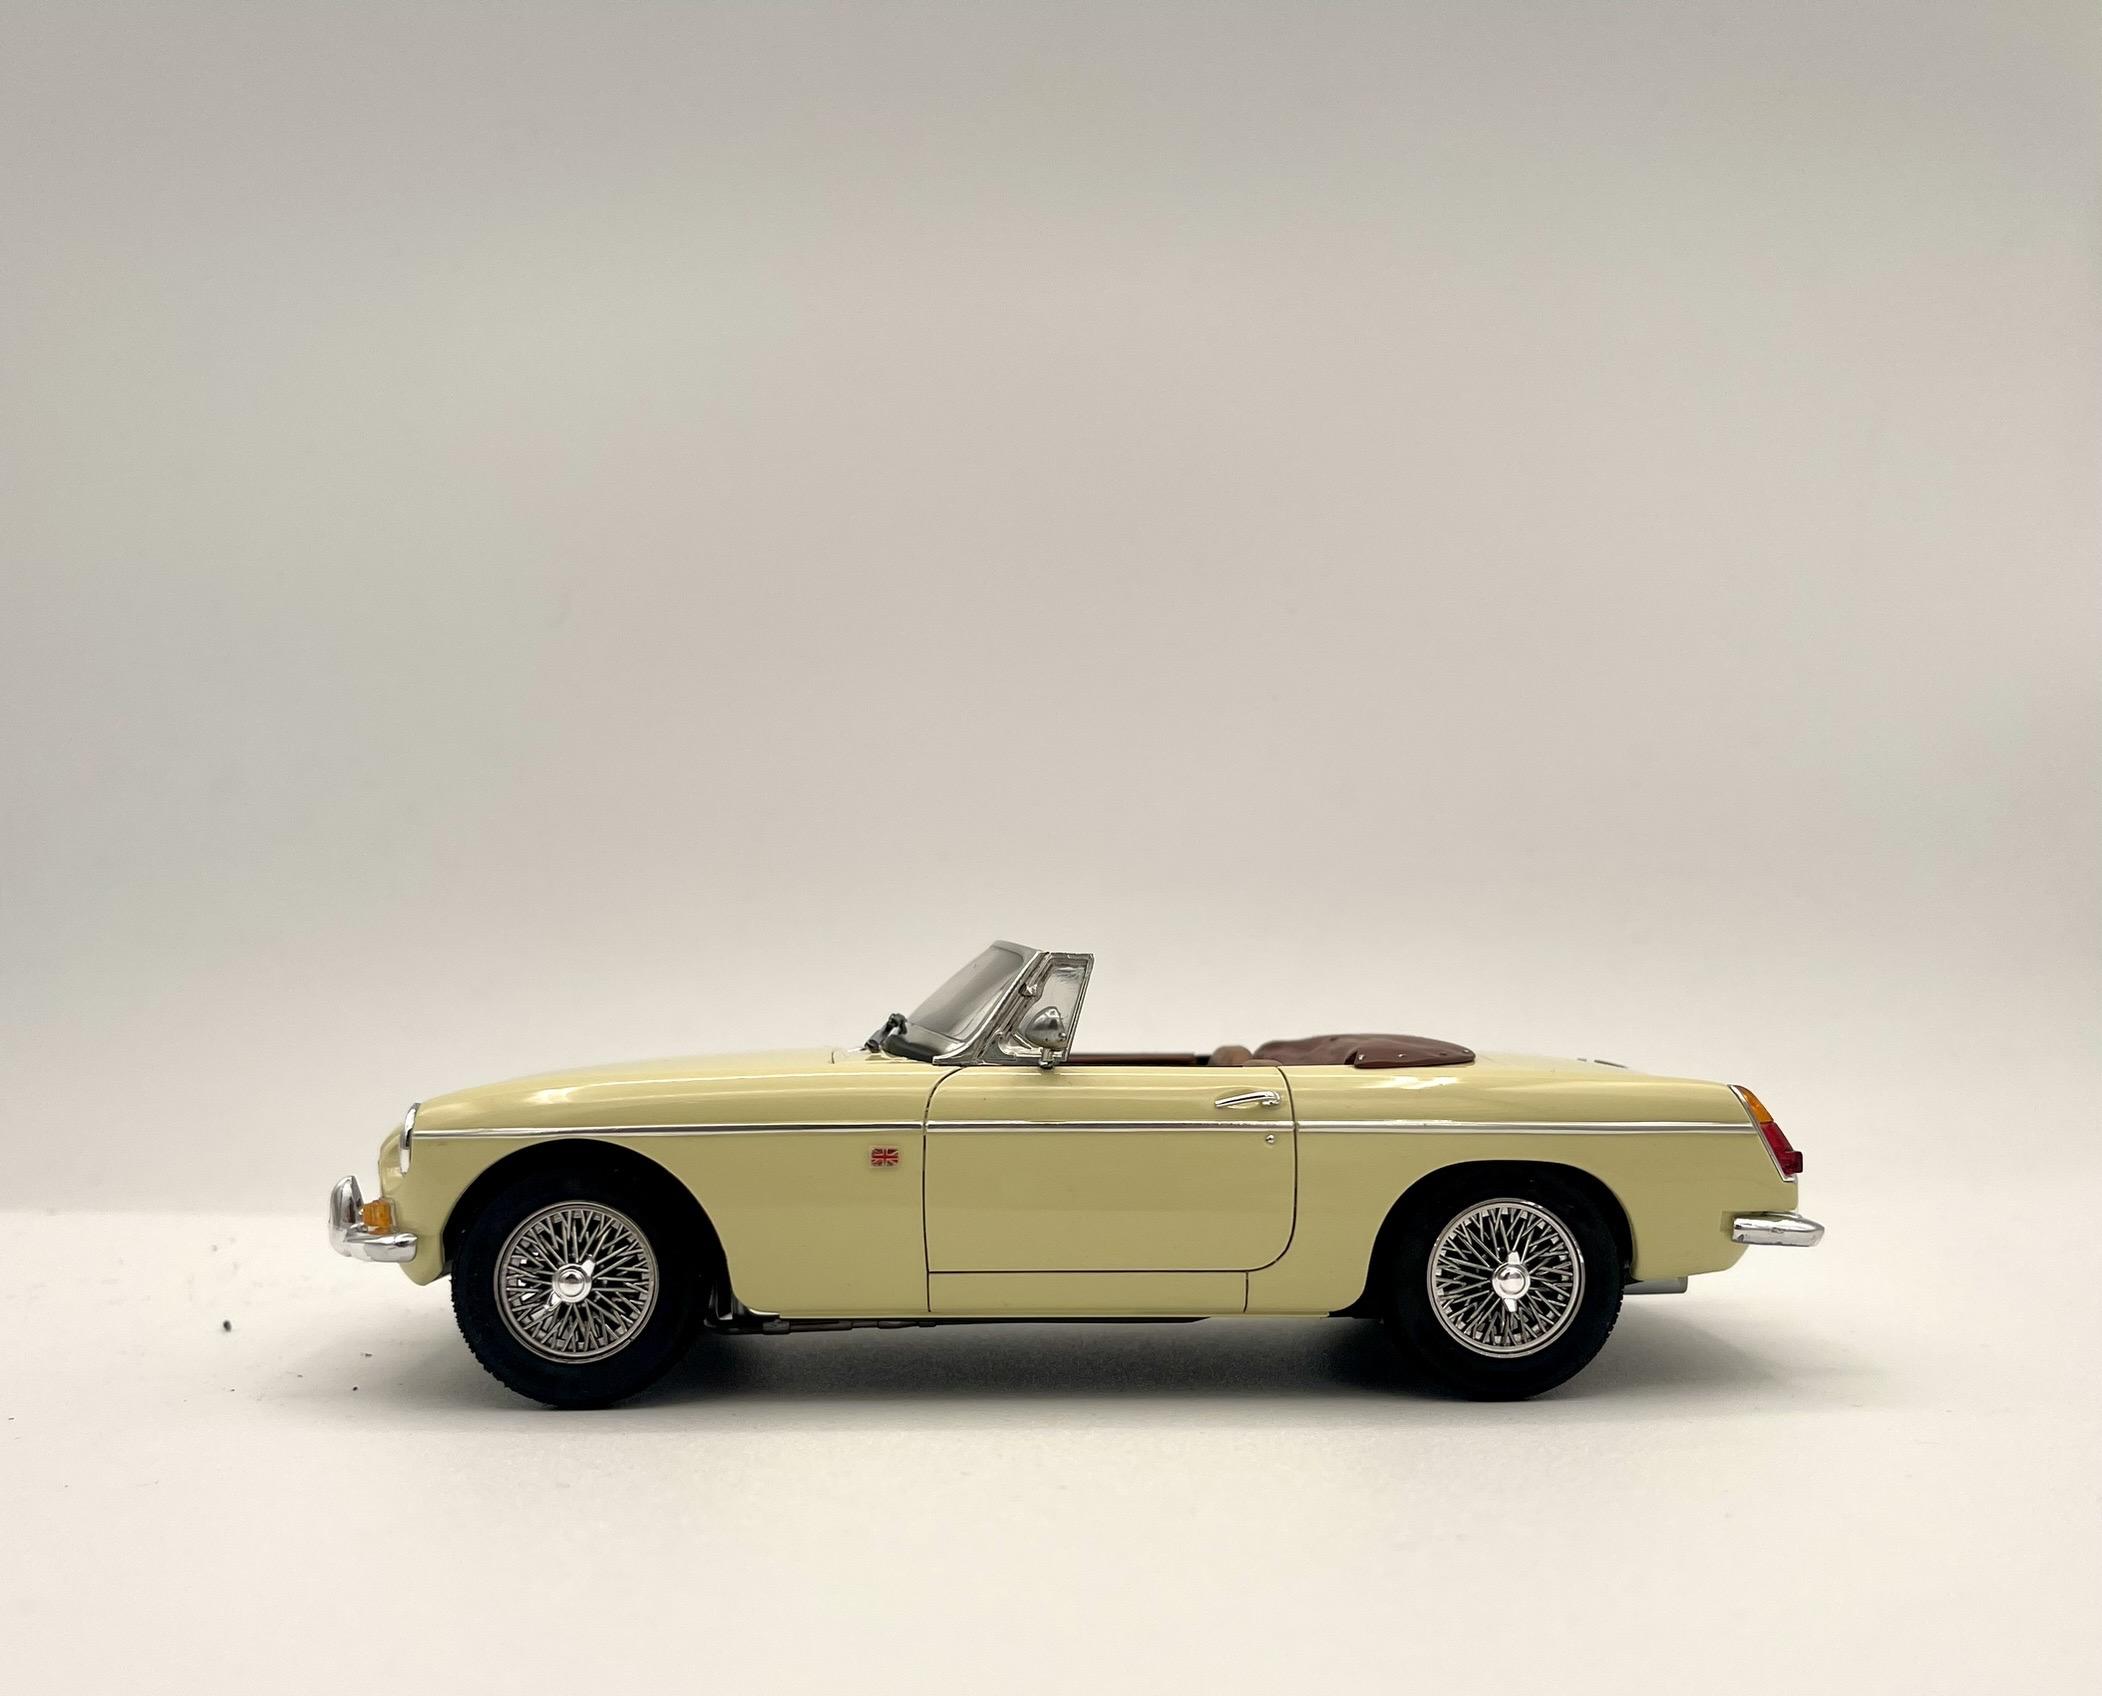
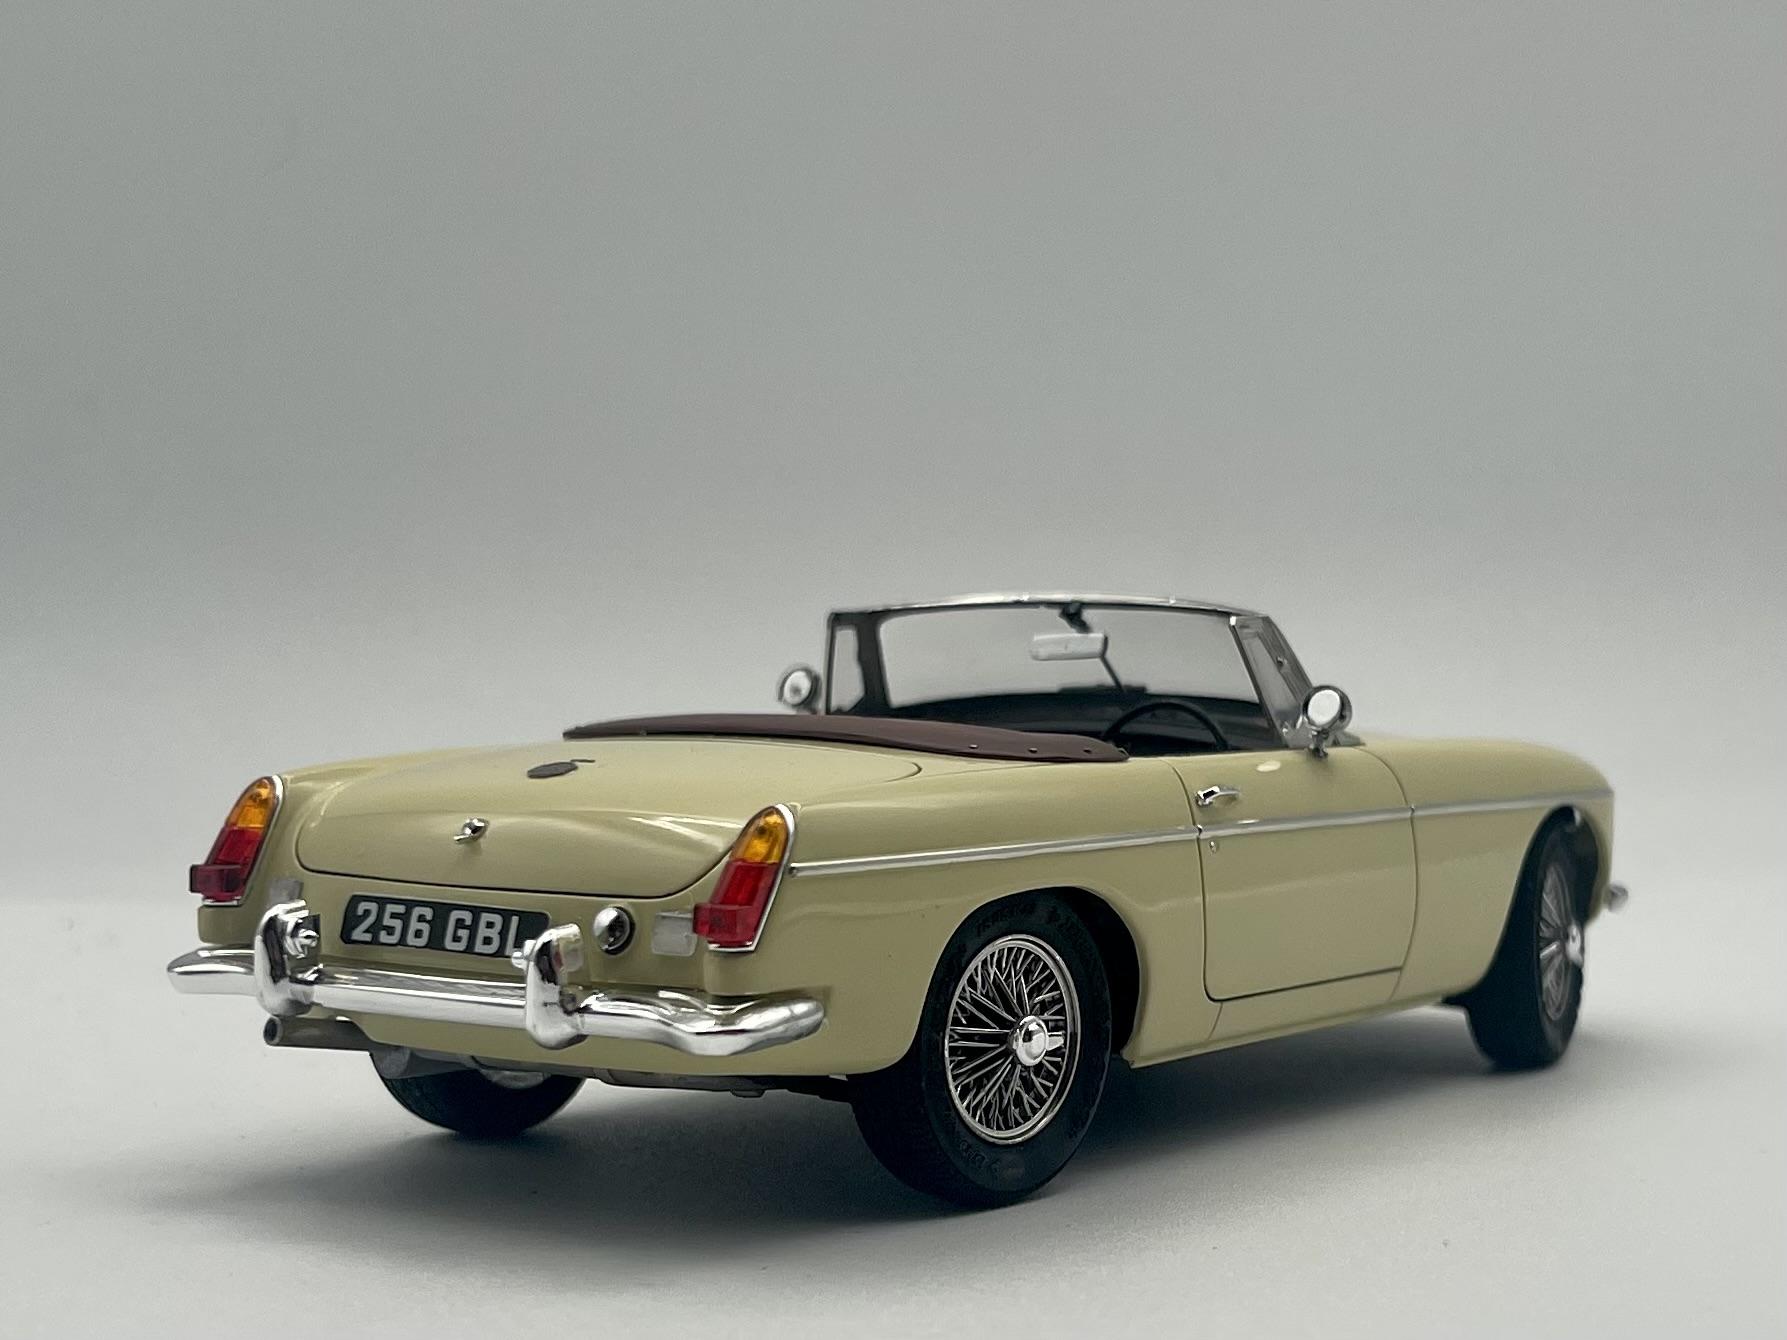
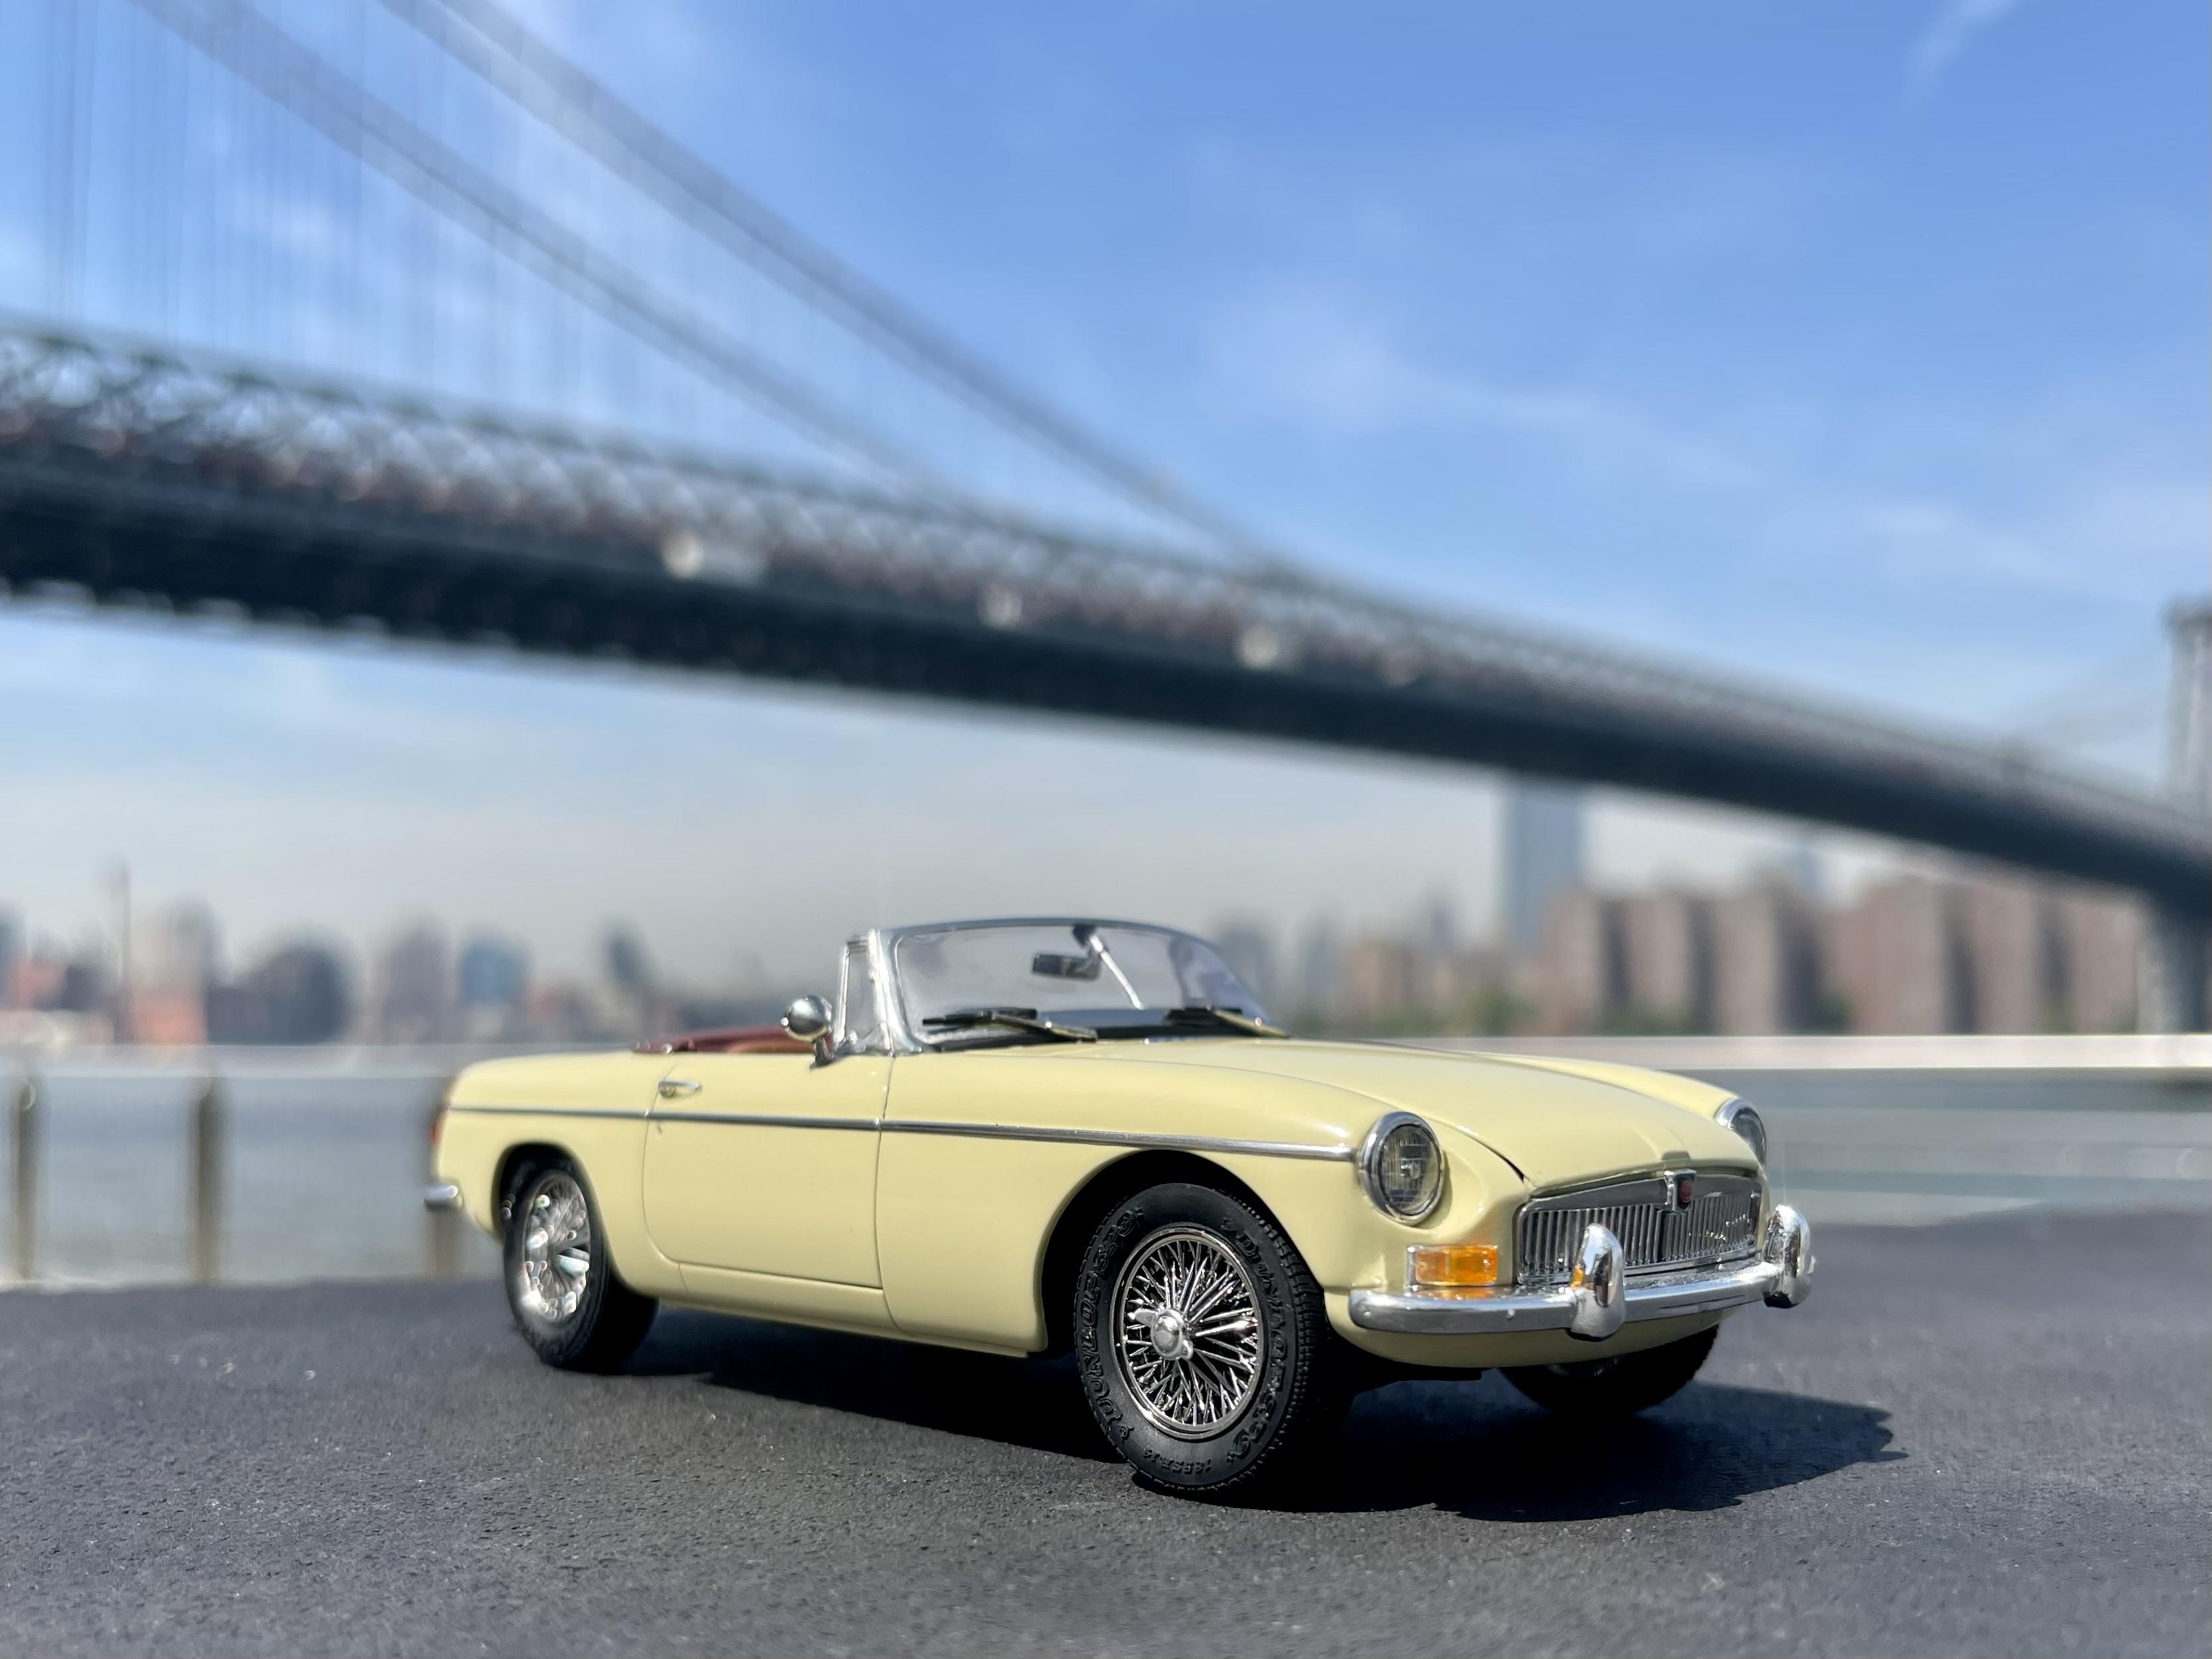
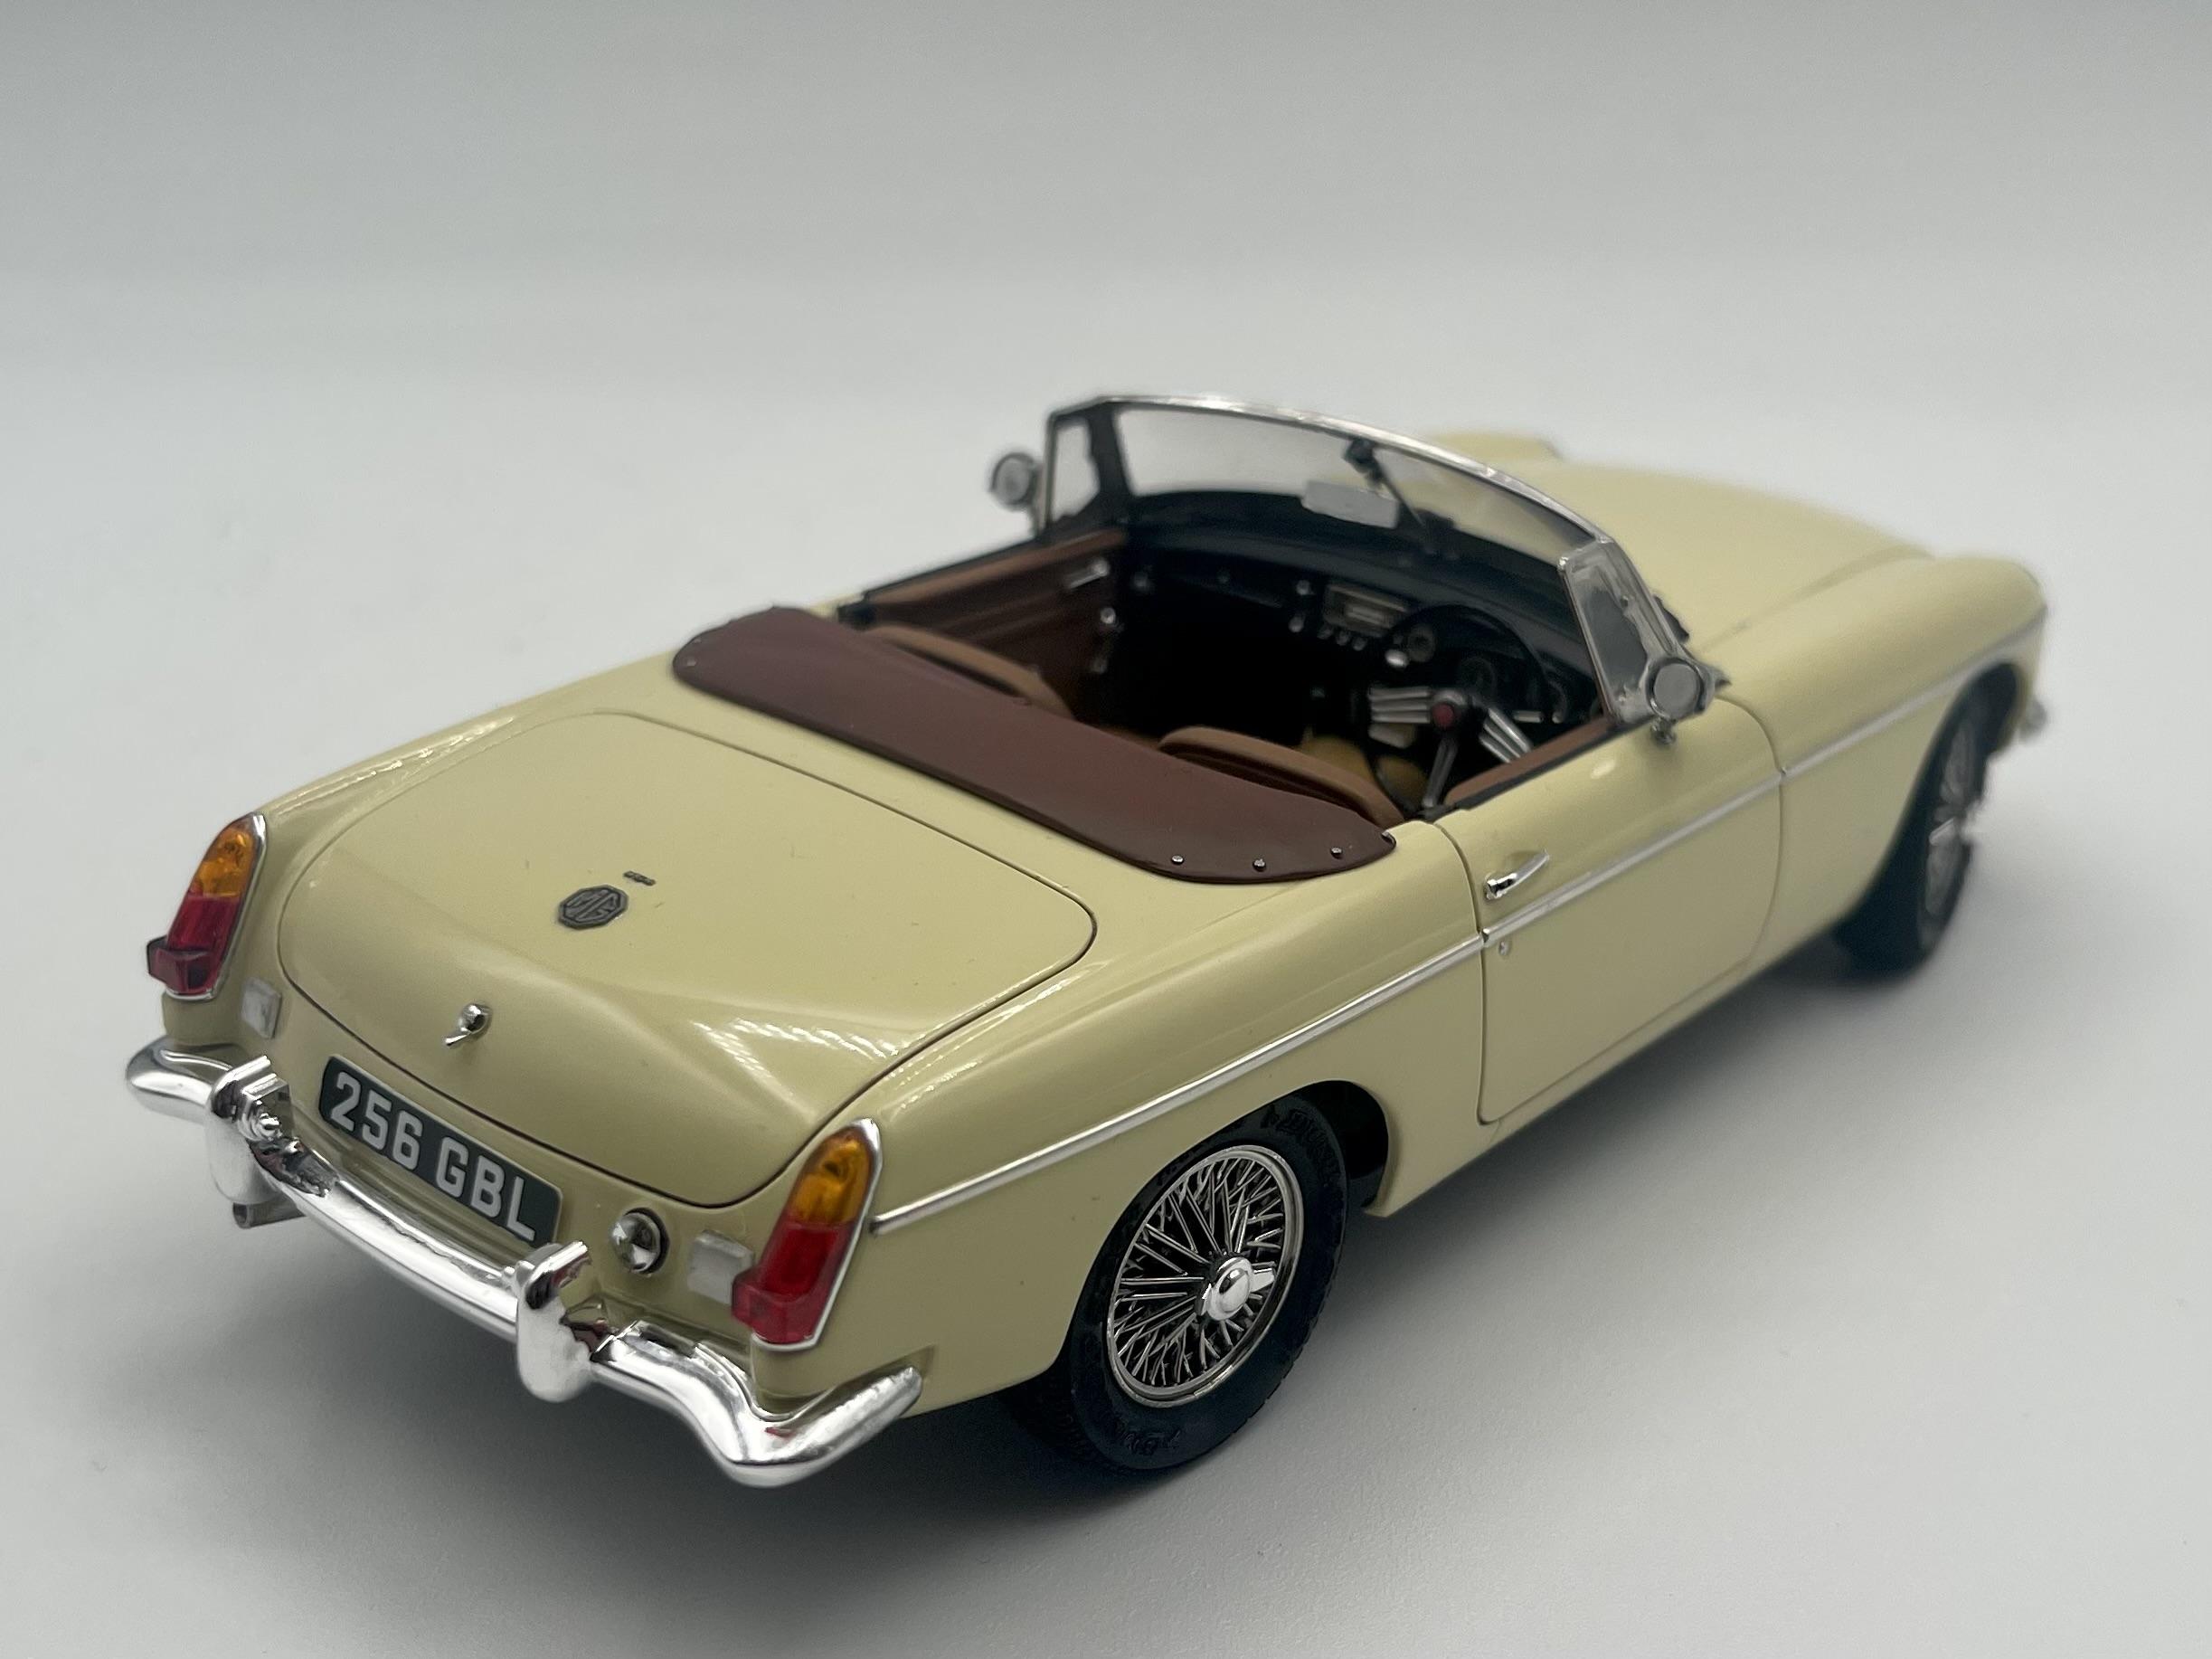
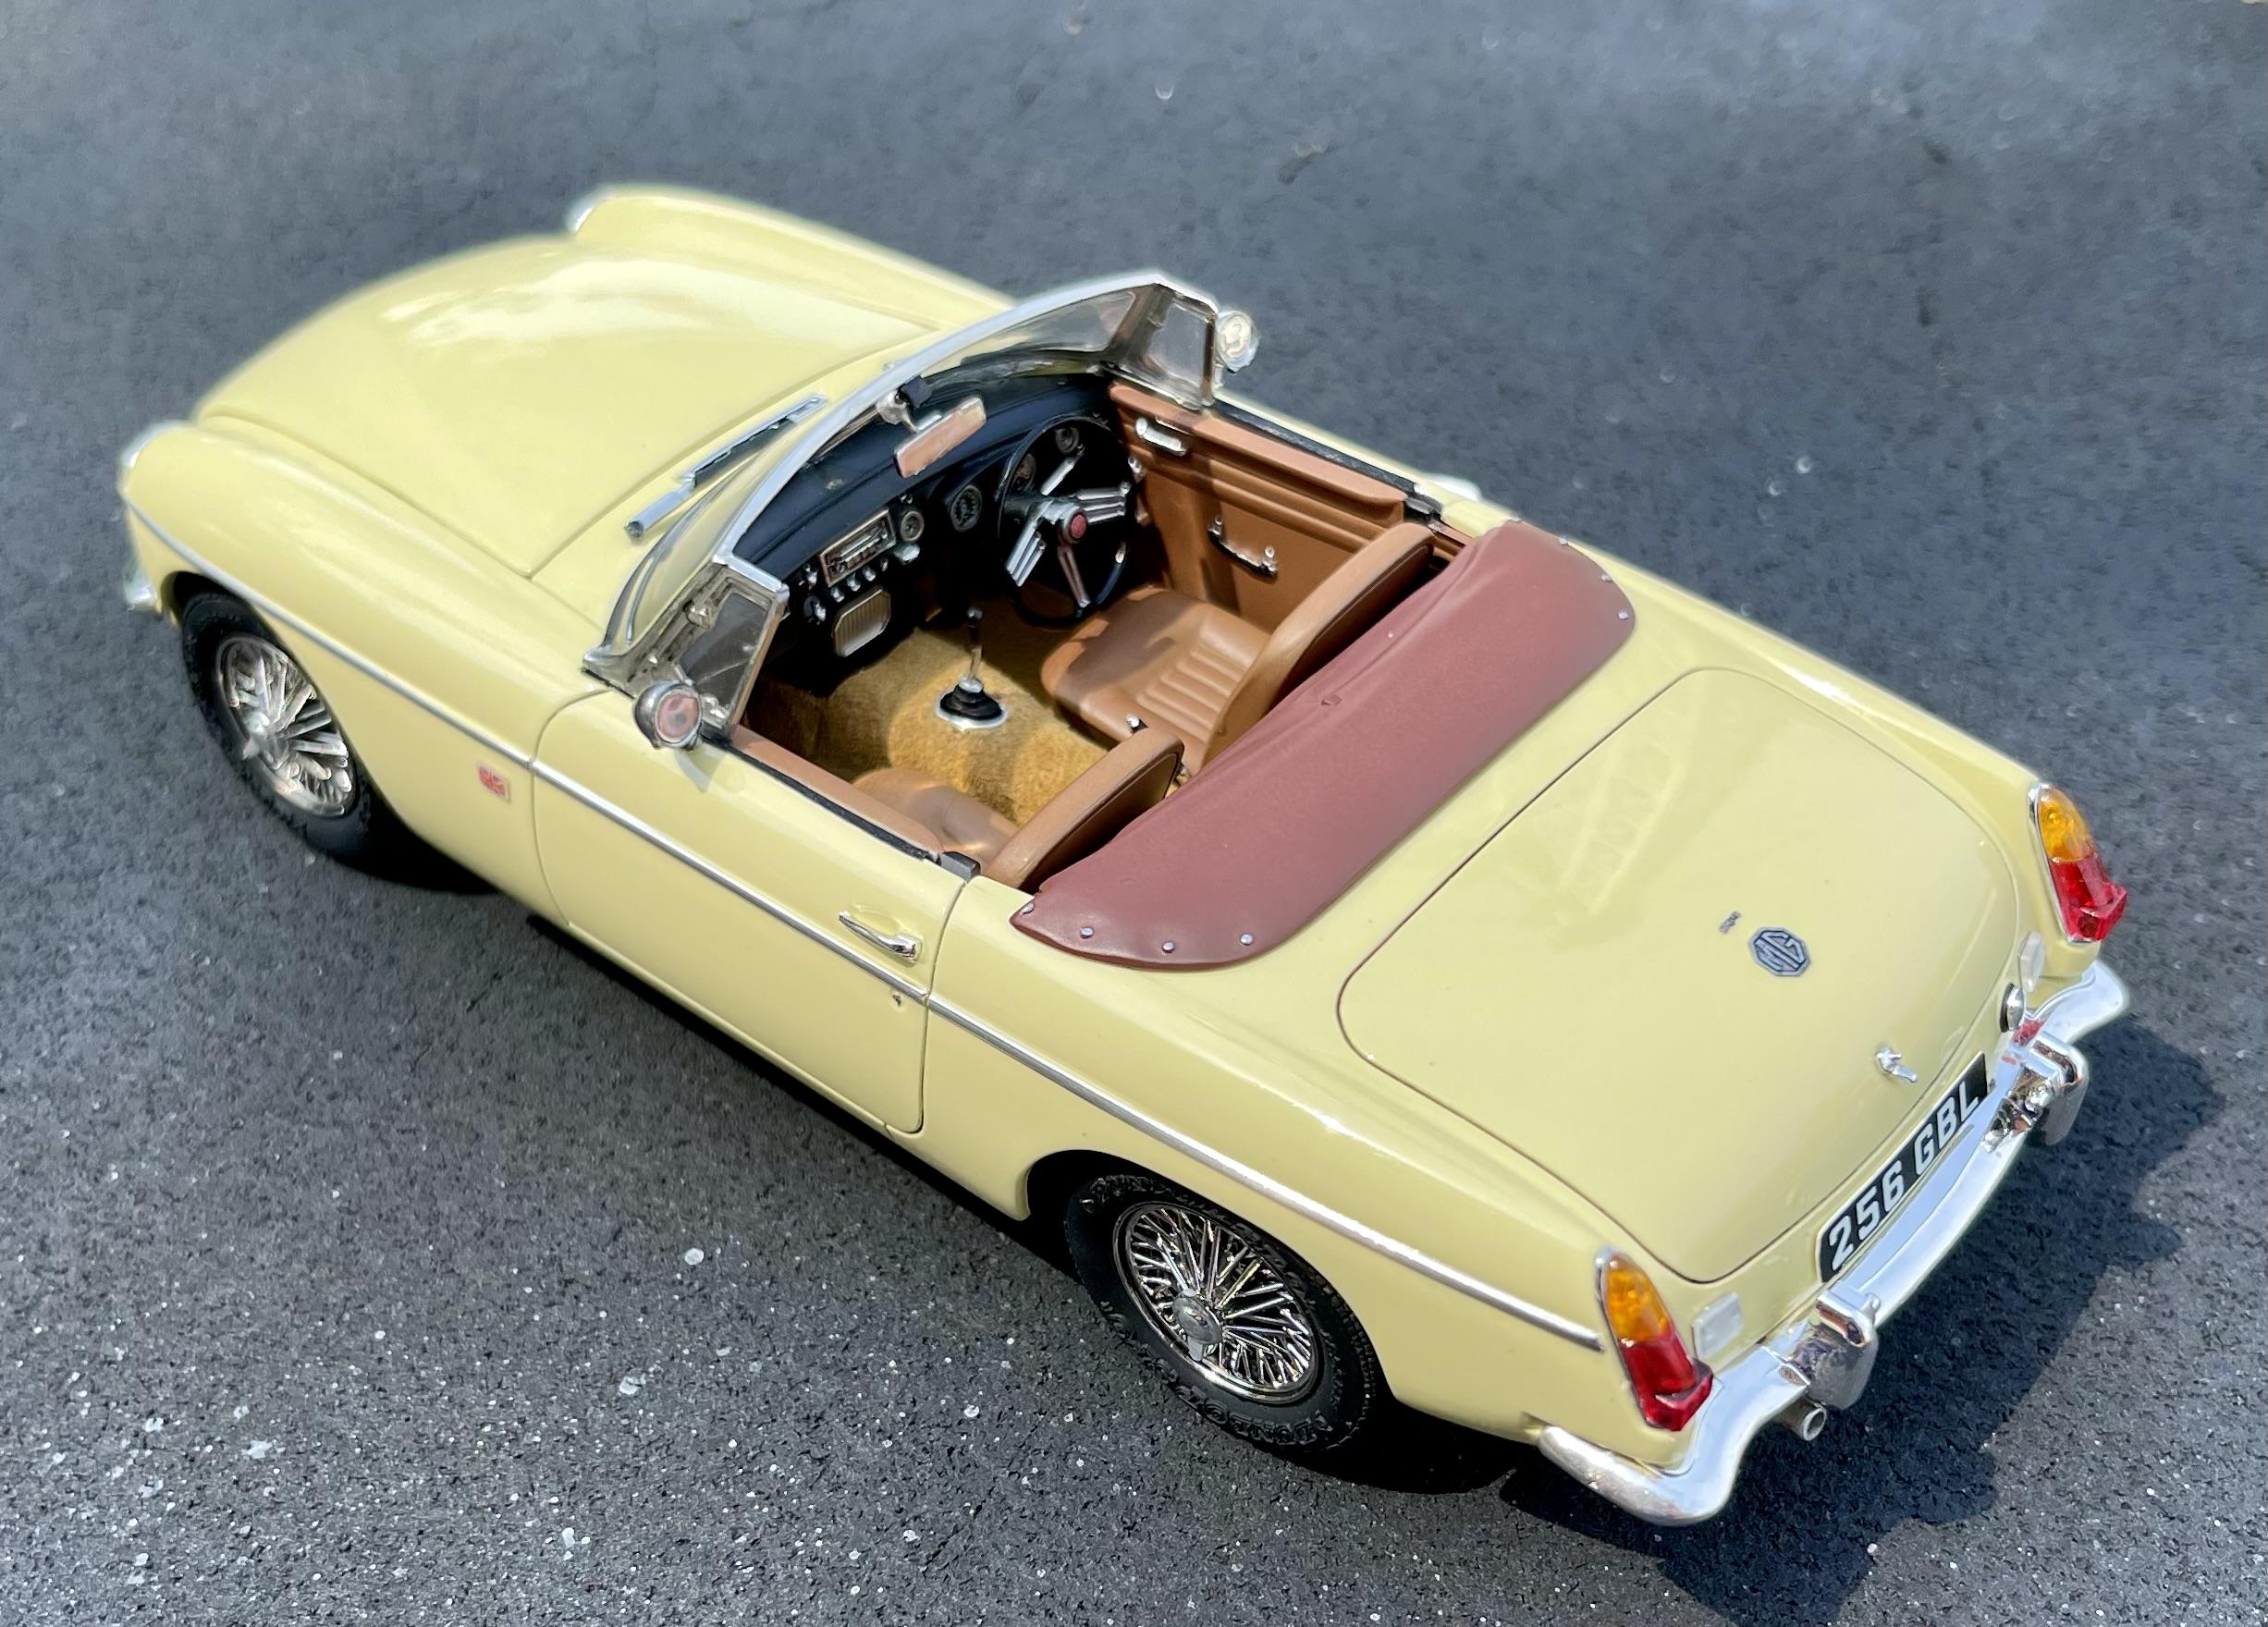
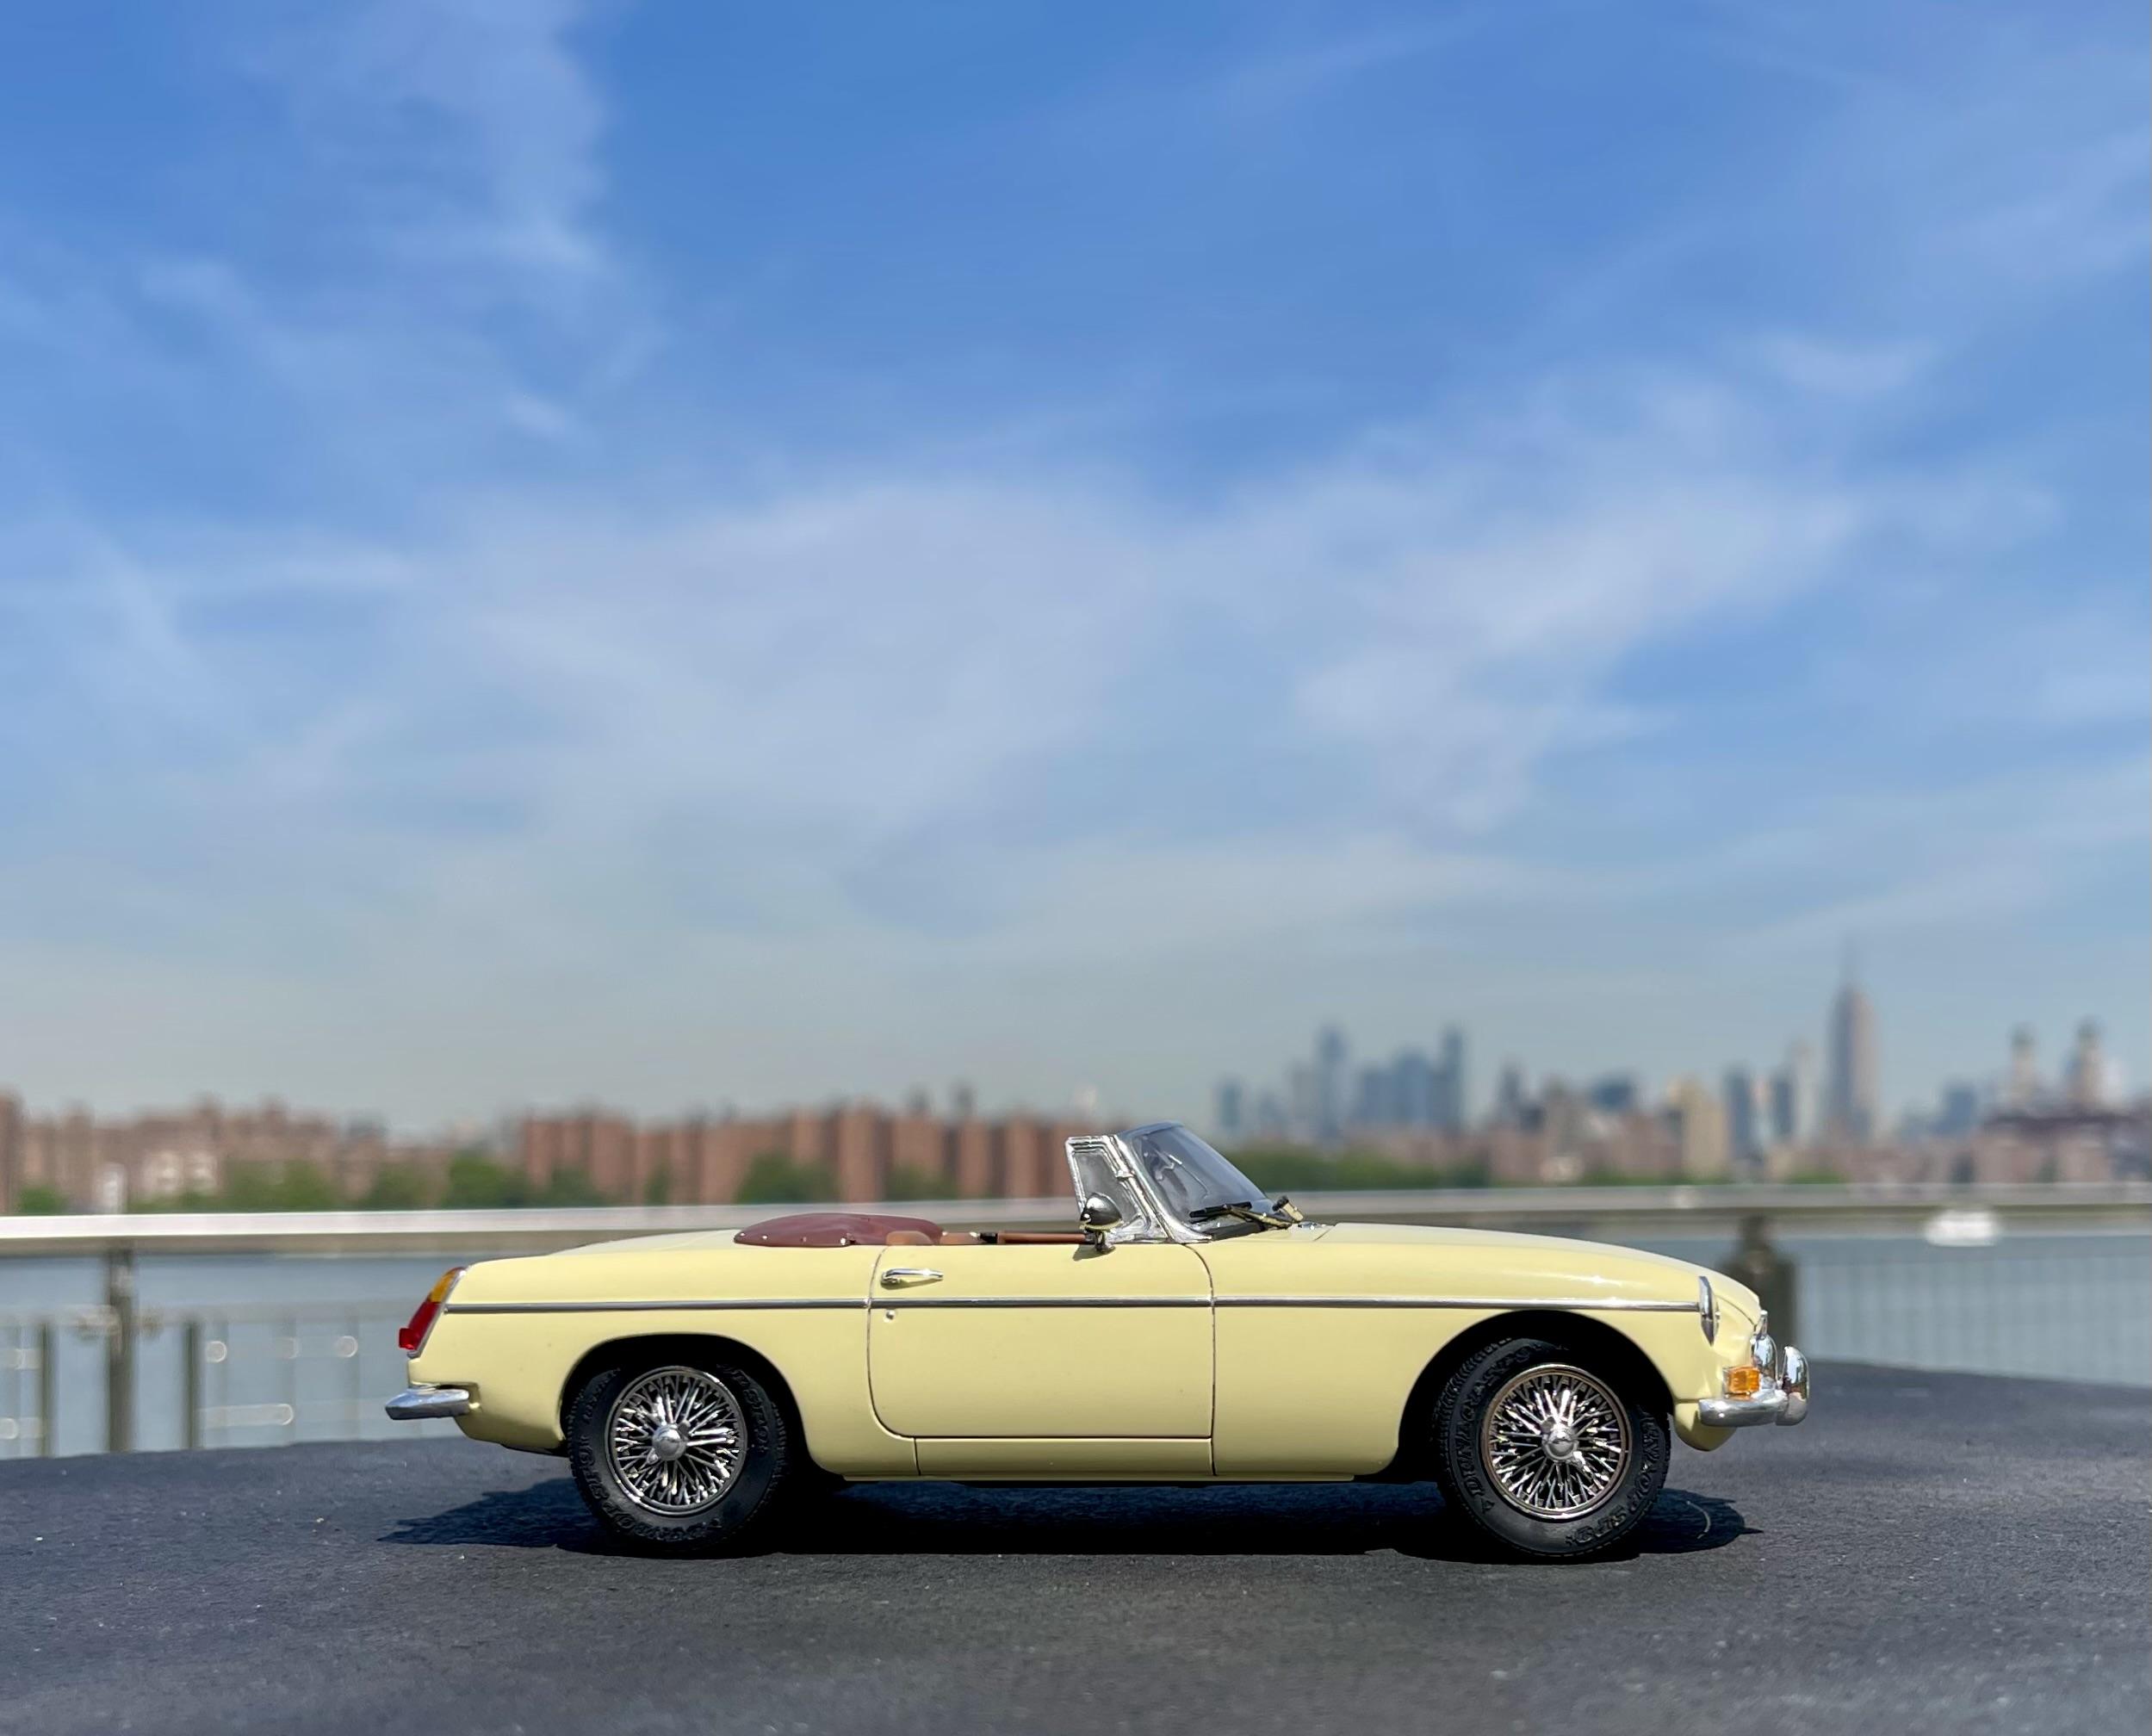
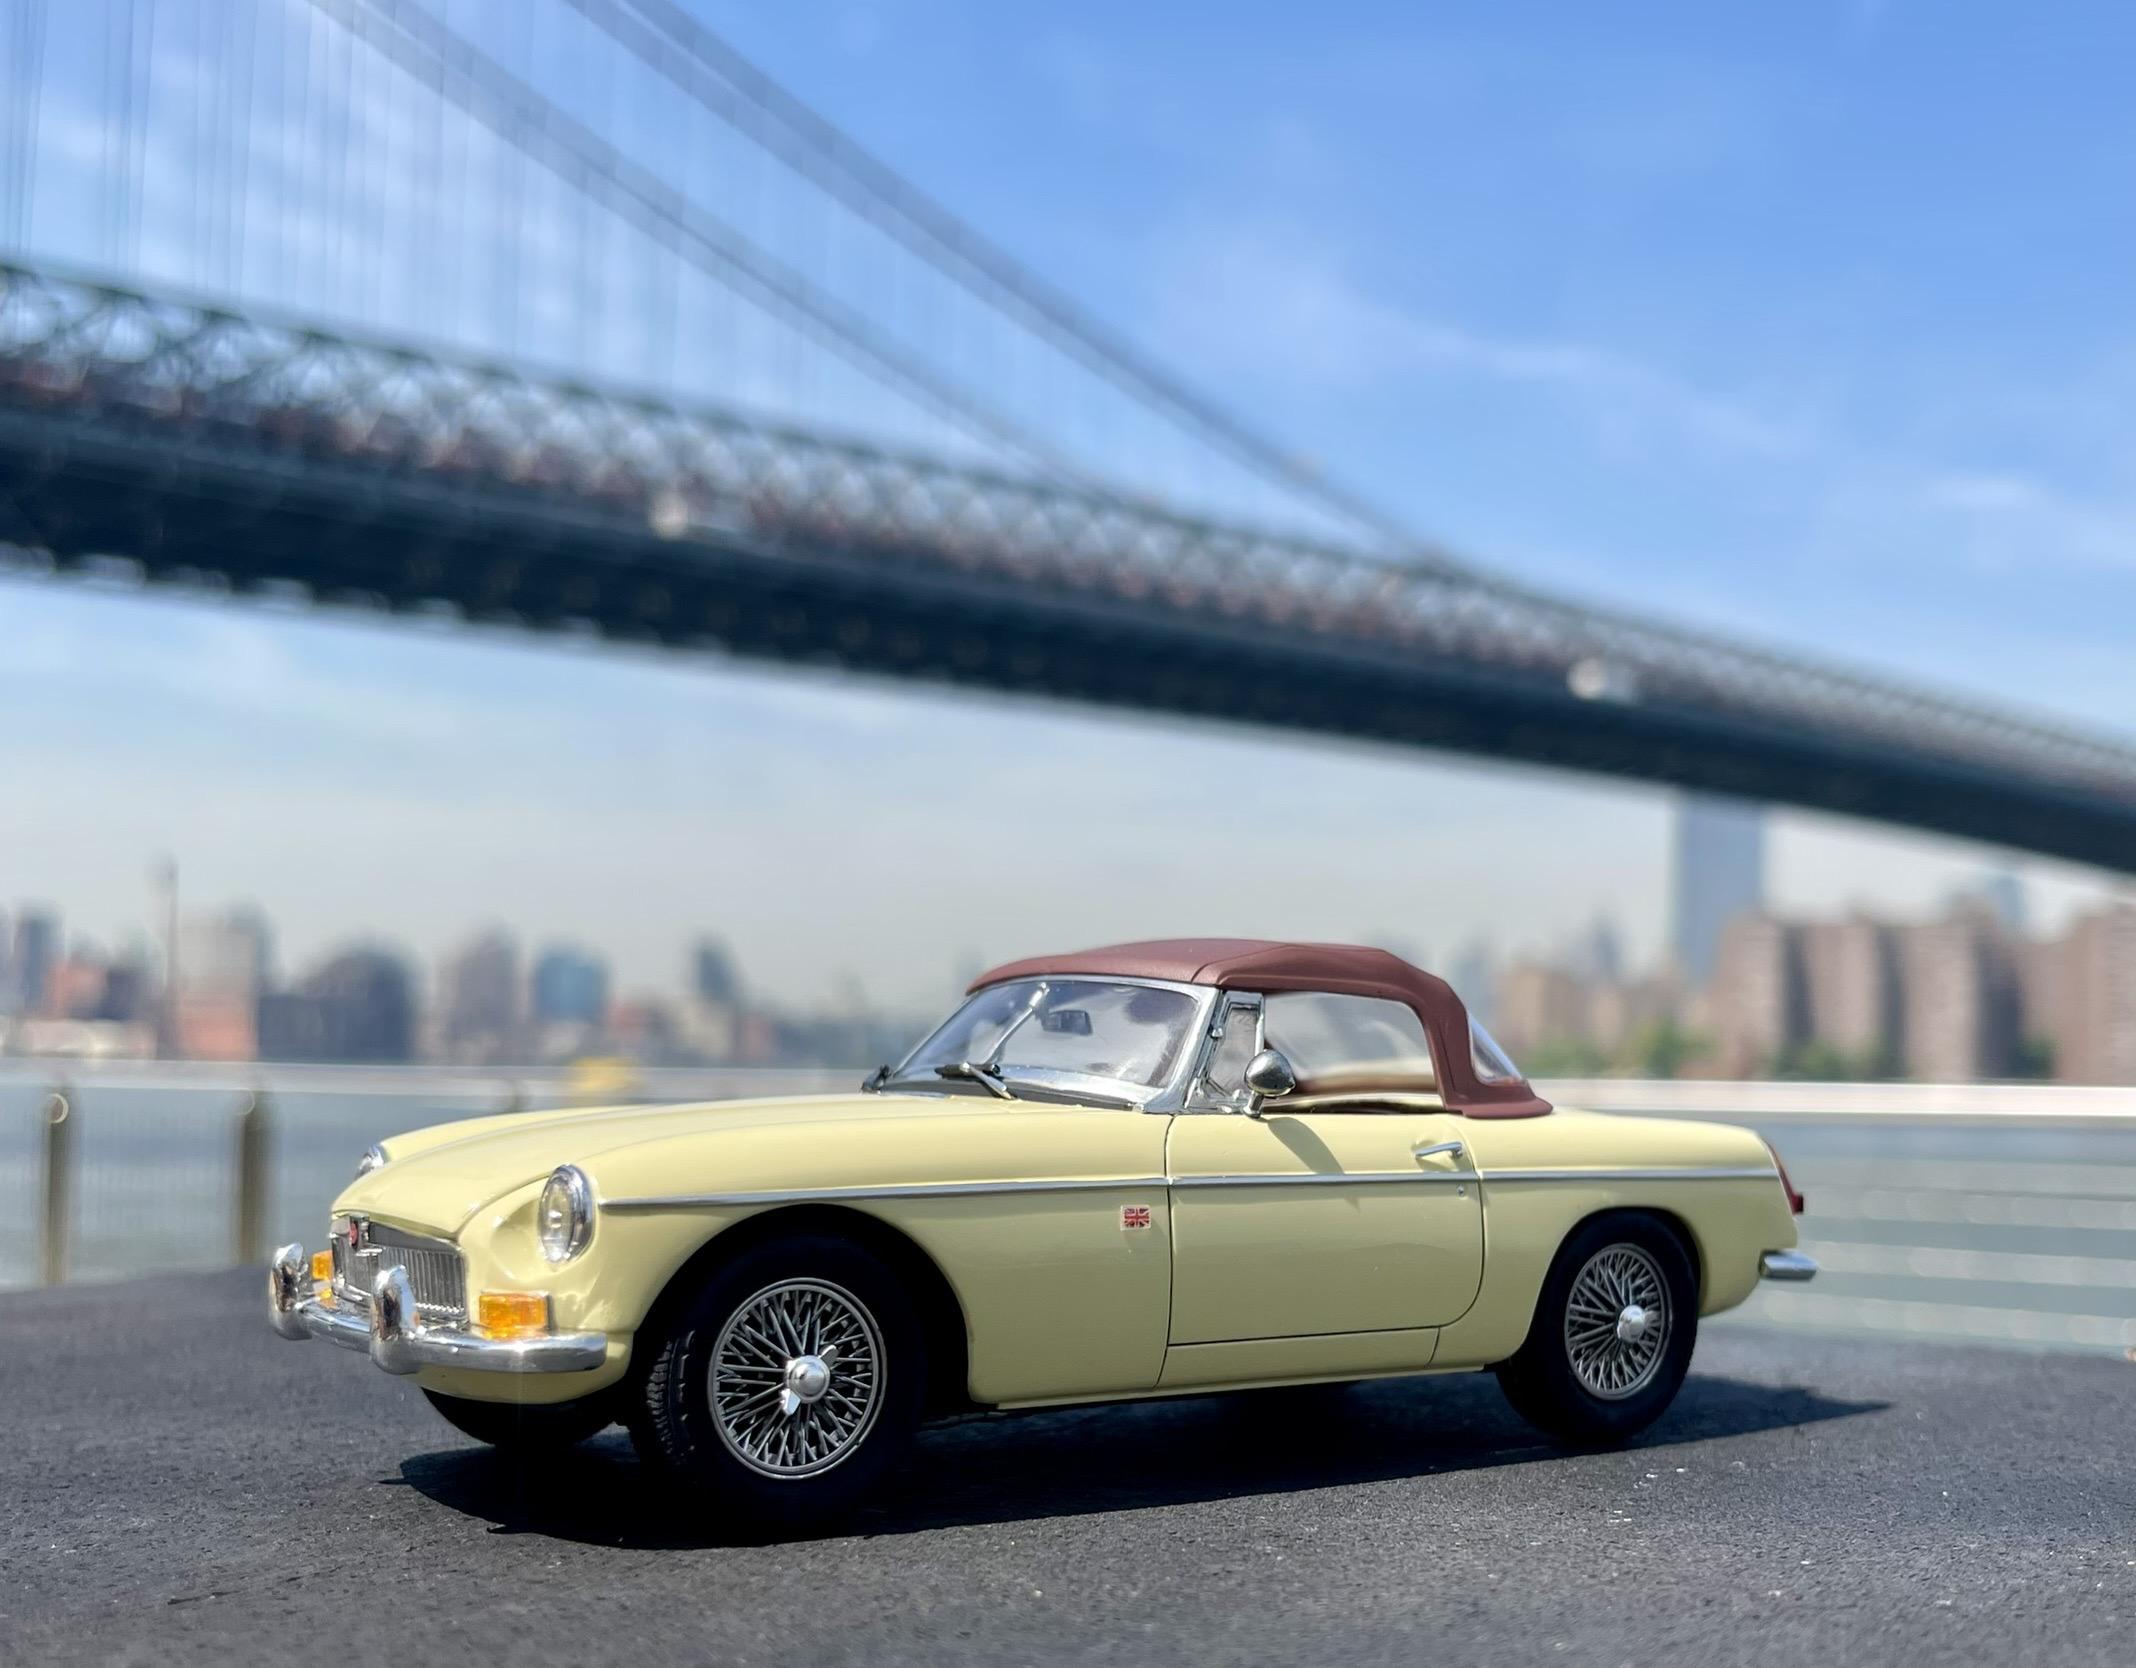
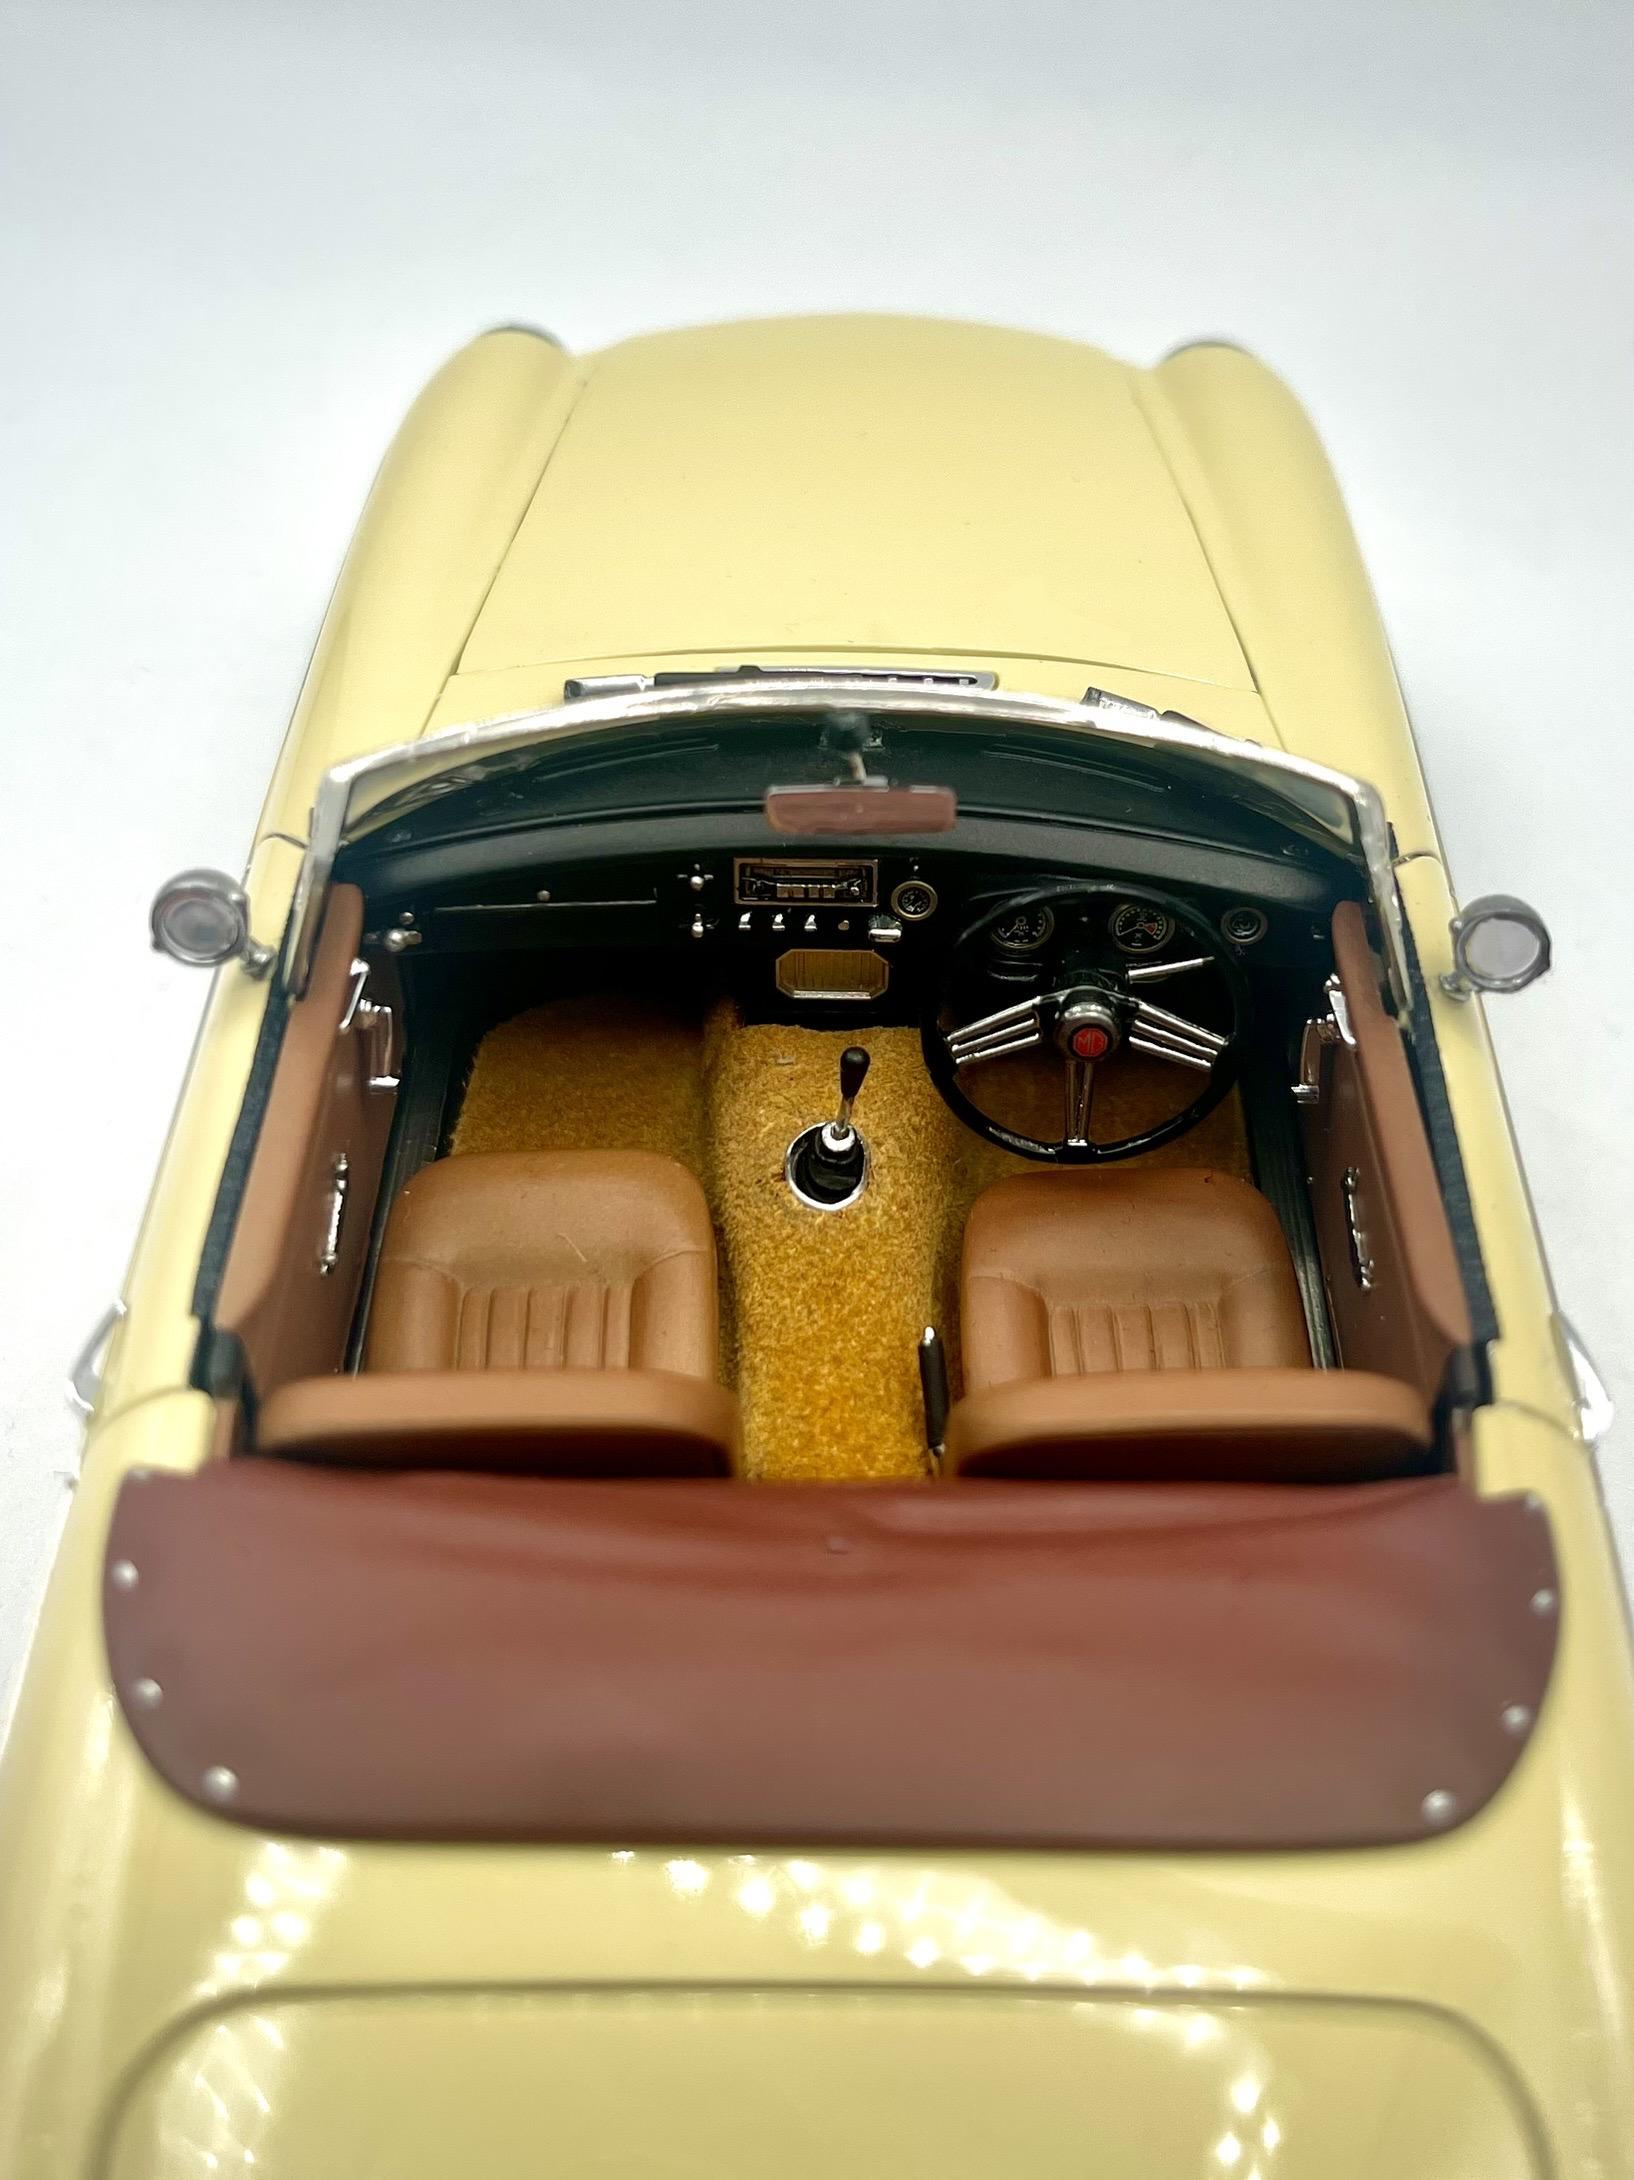
Here’s my latest - the awesome Aoshima MGB. I kept it 95% box stock, but added a couple of details to the interior and cut the hood open in case I want to add an engine at some point down the road. This kit was a great palette cleanser after a string of more stressful builds. The only tricky part was the ride height - it needs to be lowered significantly to look right. In the rear I had to cut away the top of the wheel housing just to get the wheels to fit. In the front, I took it down by 6-7 mm and it still looks a bit high. That said, I really enjoyed this kit and would definitely buy another one. Paint is MCW butternut on the exterior cleared with Mr Super Clear gloss. The interior is a custom mix of Tamiya LP paints for the leather and semi gloss black for the dash. Wheels and bumpers are kit chrome hit with tamiya smoke and panel washes. Trim and windshield are bare metal foil. The rest of the chrome bits are Alclad. I added a little Union Jack badge on the passenger side because the 1:1 I used for inspiration had one. It also had the brown leather interior kit which I thought looked cool with the yellow (and I didn’t feel like making another black interior!). Time for a little breather and then it’s on to the next one ??
- 35 replies
-
- 13
-
-
Very nice. Love this kit
-
Beaut! Love it in blue. Great job
-
thanks duders!!
-
you nailed it. absolutely beautiful
-
looks great!! - i have one in the stash but it seems like a ton of work. any pitfalls to look out for?
-
Pretty sure it was dual but I wanted to get the car done for NNL east and ran out of time. Was literally up until 3 AM the night before getting it finished haha
-
Thanks! thanks! I didn’t go crazy underneath - I was just happy to get it done lol. Here’s a shot