BK9300
-
Posts
2,113 -
Joined
-
Last visited
Content Type
Profiles
Forums
Events
Gallery
Everything posted by BK9300
-
 I'm thinking like Gary - a tag axle would look right at home on this truck. Great progress, Jurgen.
 -
Western Star 4900 FA plow truck
BK9300 replied to BK9300's topic in WIP: Model Trucks: Big Rigs and Heavy Equipment
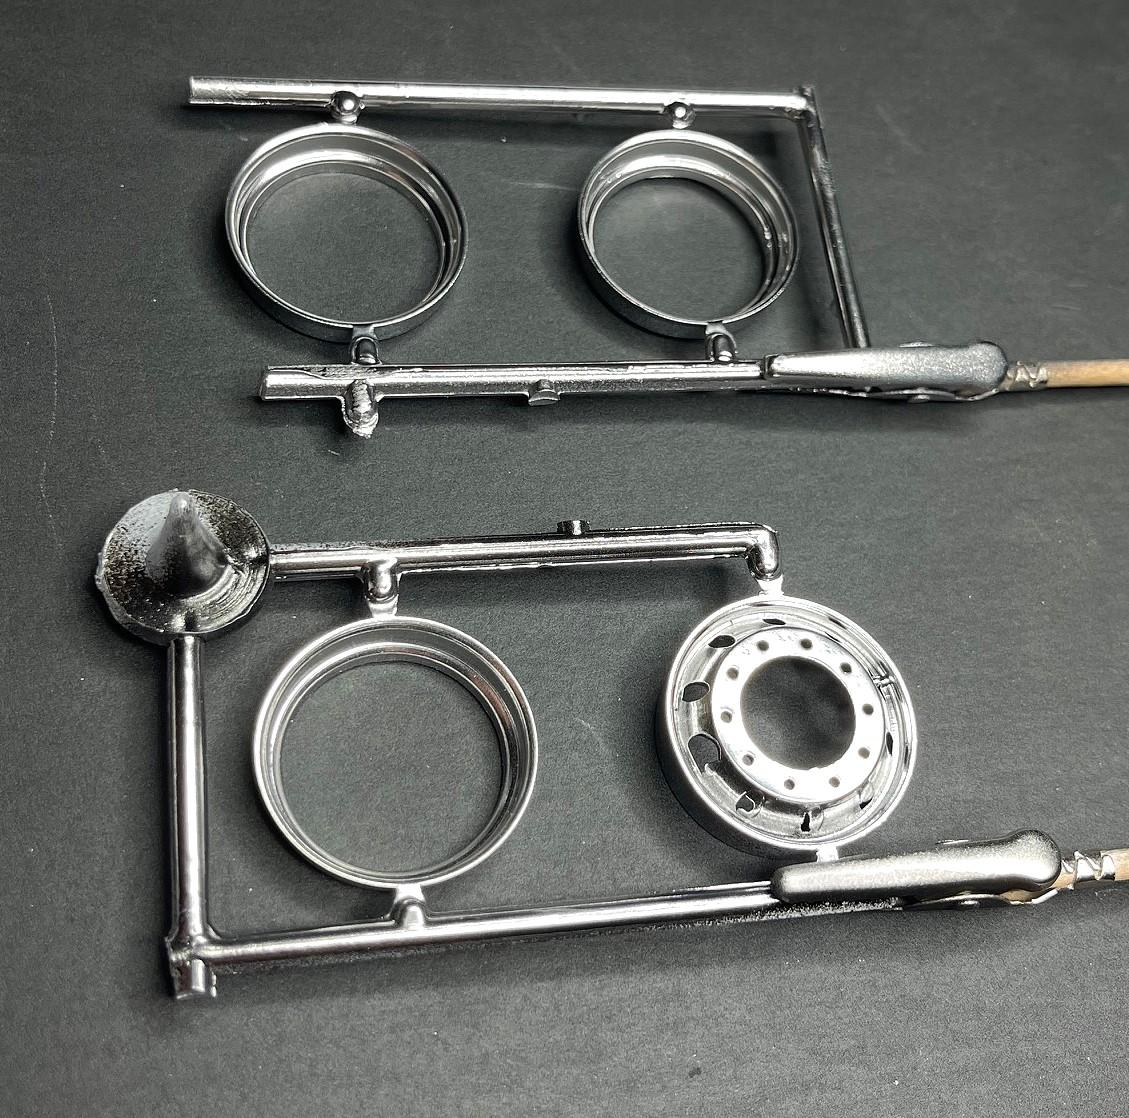
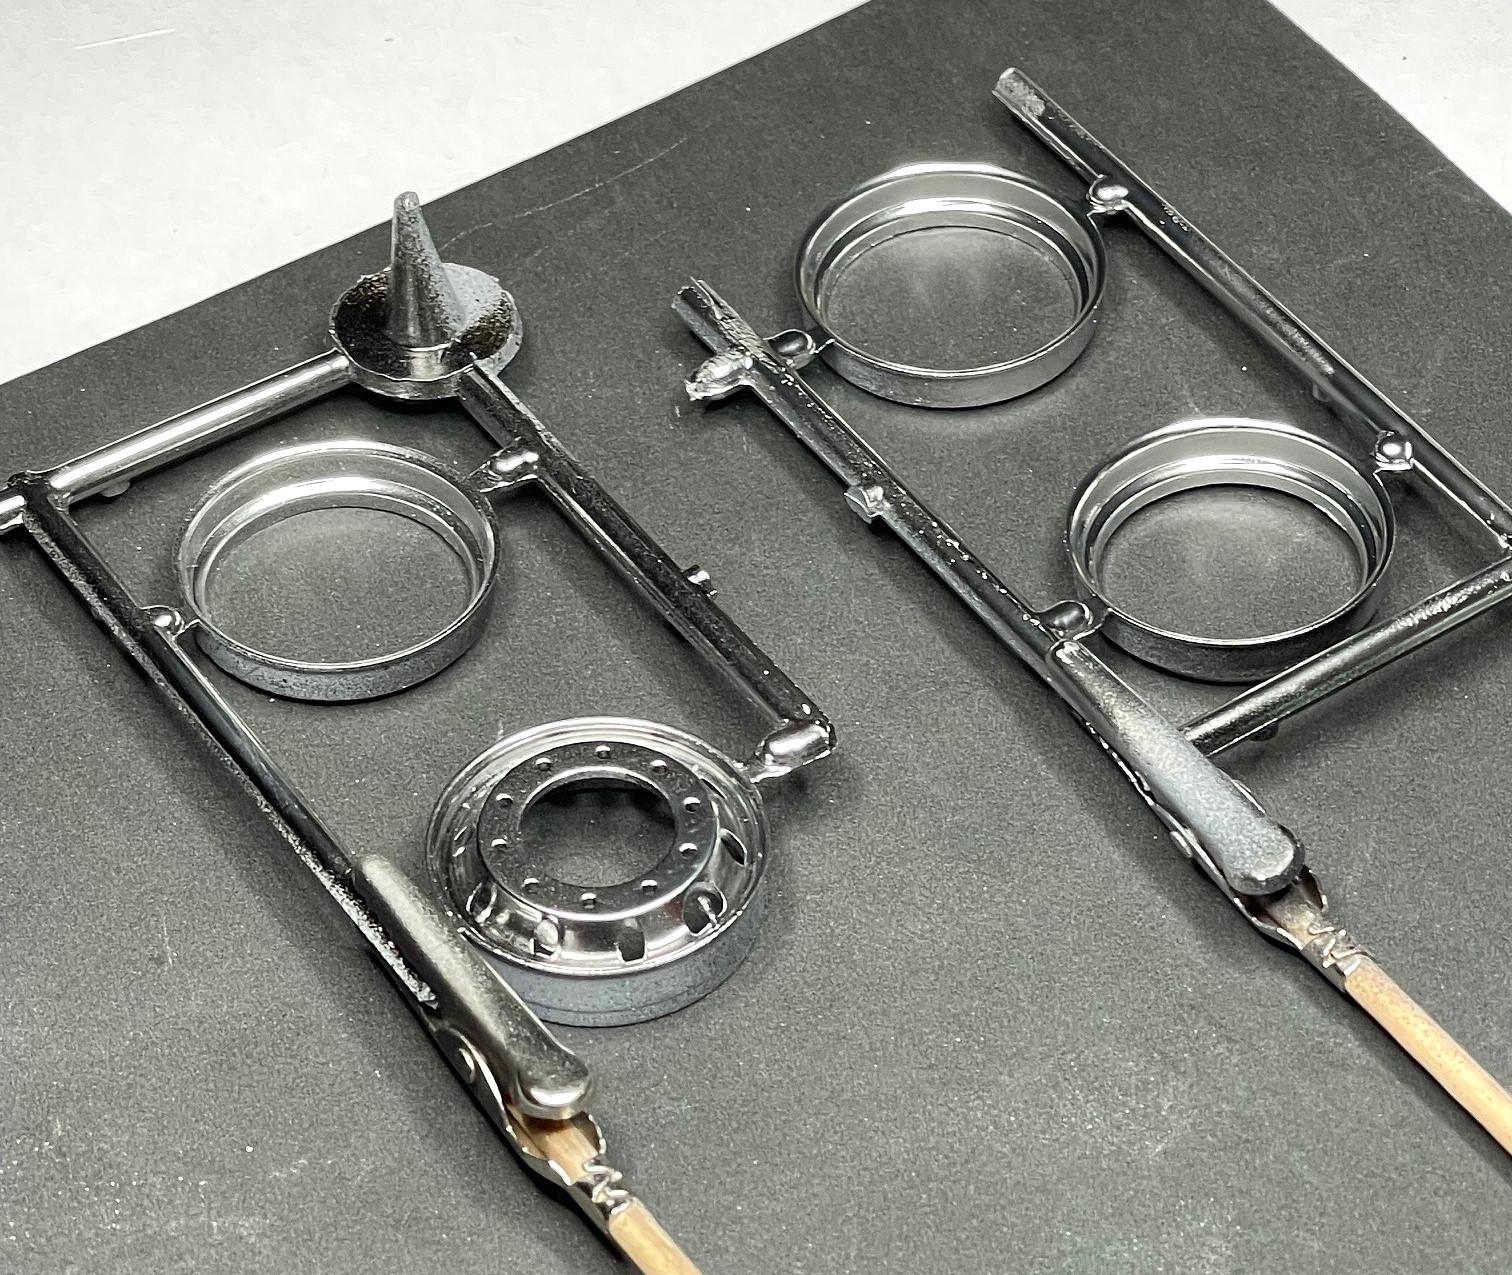
So, after this post, I promise not to do any more dull stuff about what chrome paint I'm going use! Did another test spray of SMS Hyperchrome, Cold Tone, FusionFirm Liquid Chrome and Alclad Chrome. The Liquid Chrome edges out the SMS - but only by a little bit - for brightness and reflectivity. However, it takes quite a long time to set, and even then is a bit susceptible to marking when handled. The SMS chrome is a lacquer, dries very quickly, and is very durable. The Alclad, also lacquer, dried very quickly as well, but was not anywhere near as bright as either of the other two. Still produced a very nice metal look, perhaps for a different use down the road. Hard to get my iPad to take decent pics of the chrome, but both brands look good in the pics (didn't do a pic of the Alclad) - Top row of wheel parts was painted with Liquid Chrome - needs to cure for at least 72 hours; bottom row was painted with SMS Hyperchrome and was dry to the touch an hour after painting - A bit better pic of brightness, from this angle - Liquid Chrome on the right; SMS on the left - If the Liquid Chrome 'touch test' is still iffy after 72 hours, I will just go with the SMS, because it dries hard to the touch, and the parts will need a bit of handling to get them glued into place. In any event, no more babble about chrome paint!
-
Western Star 4900 FA plow truck
BK9300 replied to BK9300's topic in WIP: Model Trucks: Big Rigs and Heavy Equipment
Thanks, Jeff! -
Hey, Jeff! Yes, info can be found lots of ways, and sometimes, like the sales rep and people updating the website, unexpectedly. Always glad for any extra detail info!
-
Western Star 4900 FA plow truck
BK9300 replied to BK9300's topic in WIP: Model Trucks: Big Rigs and Heavy Equipment
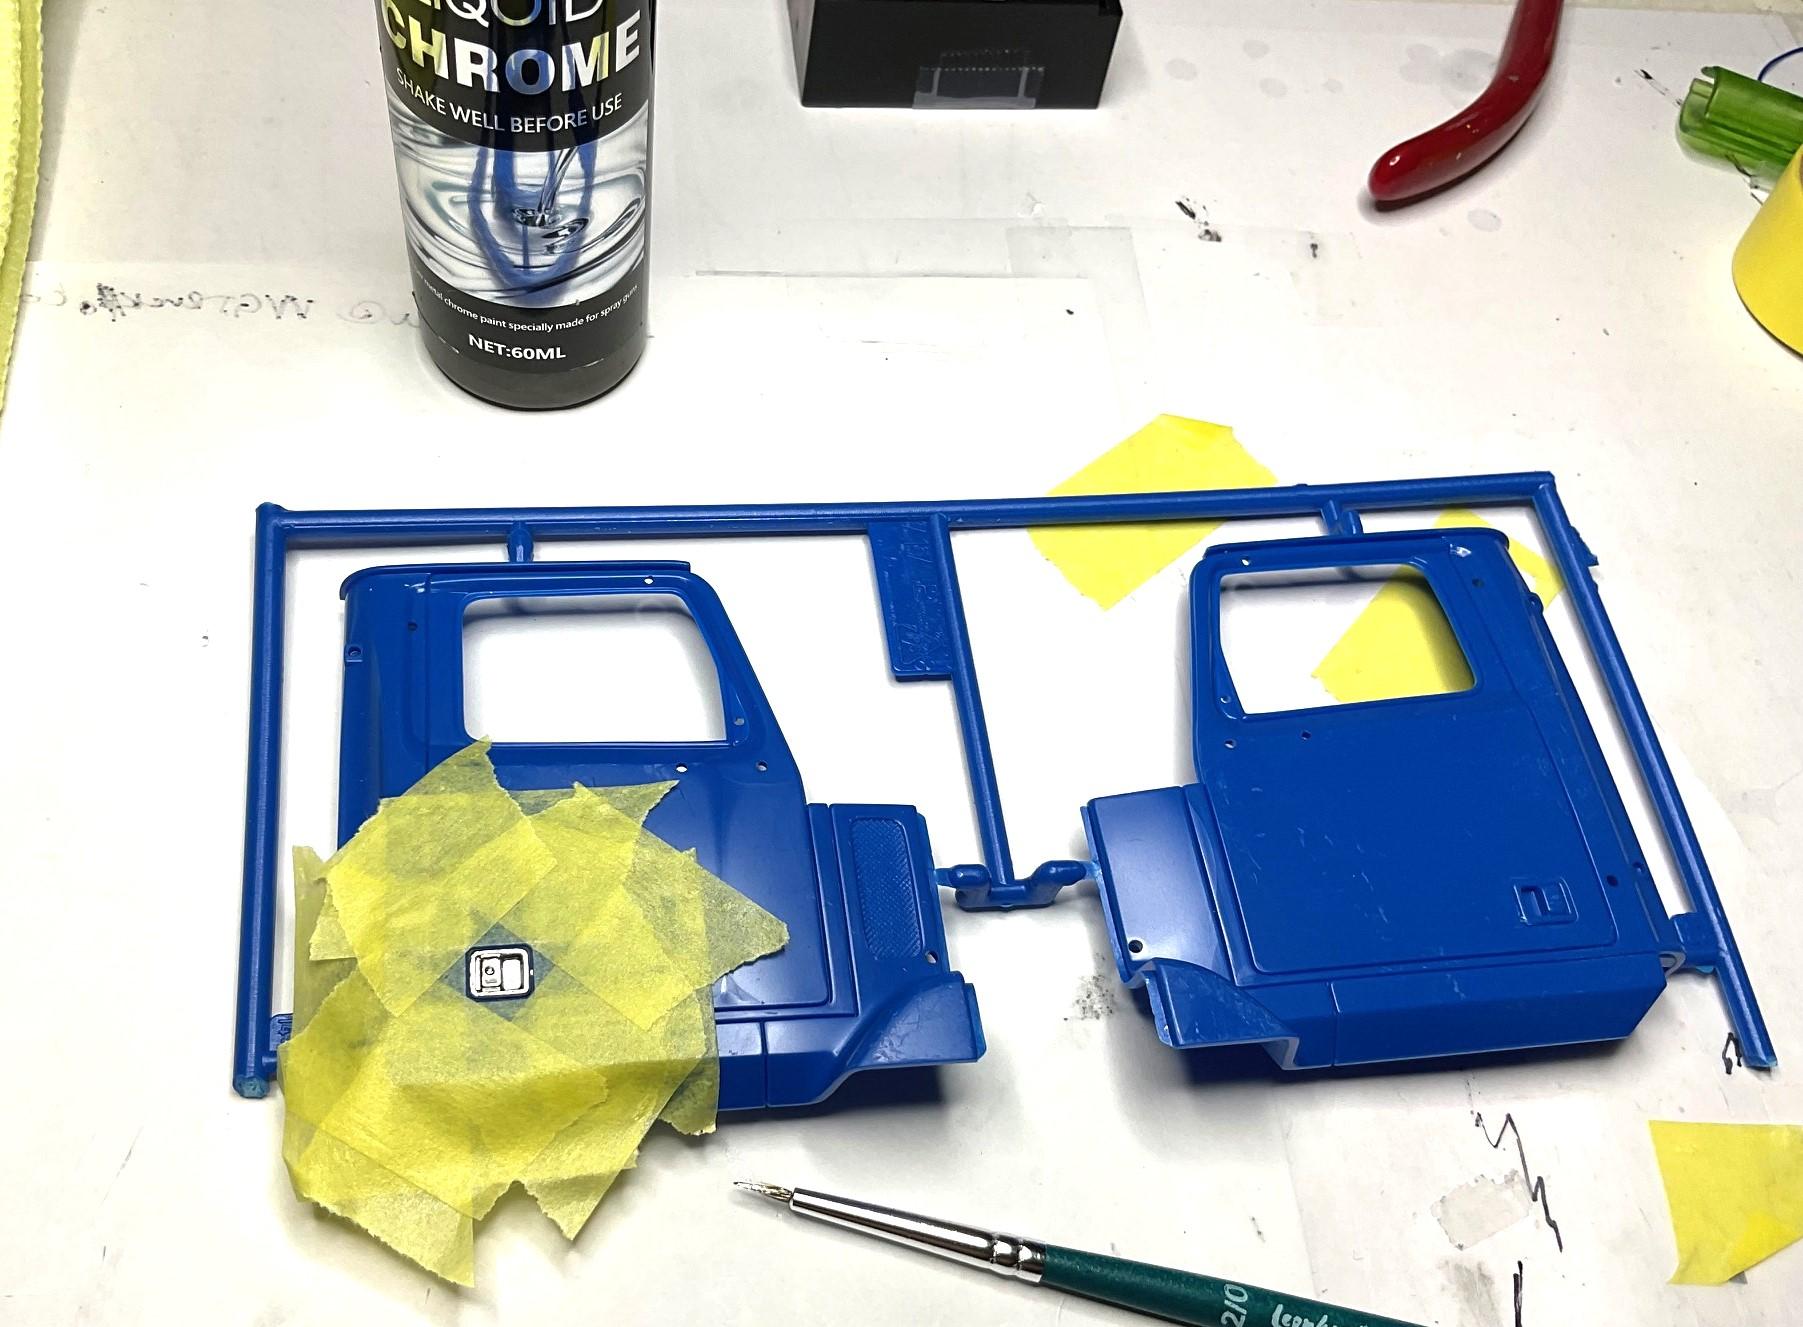
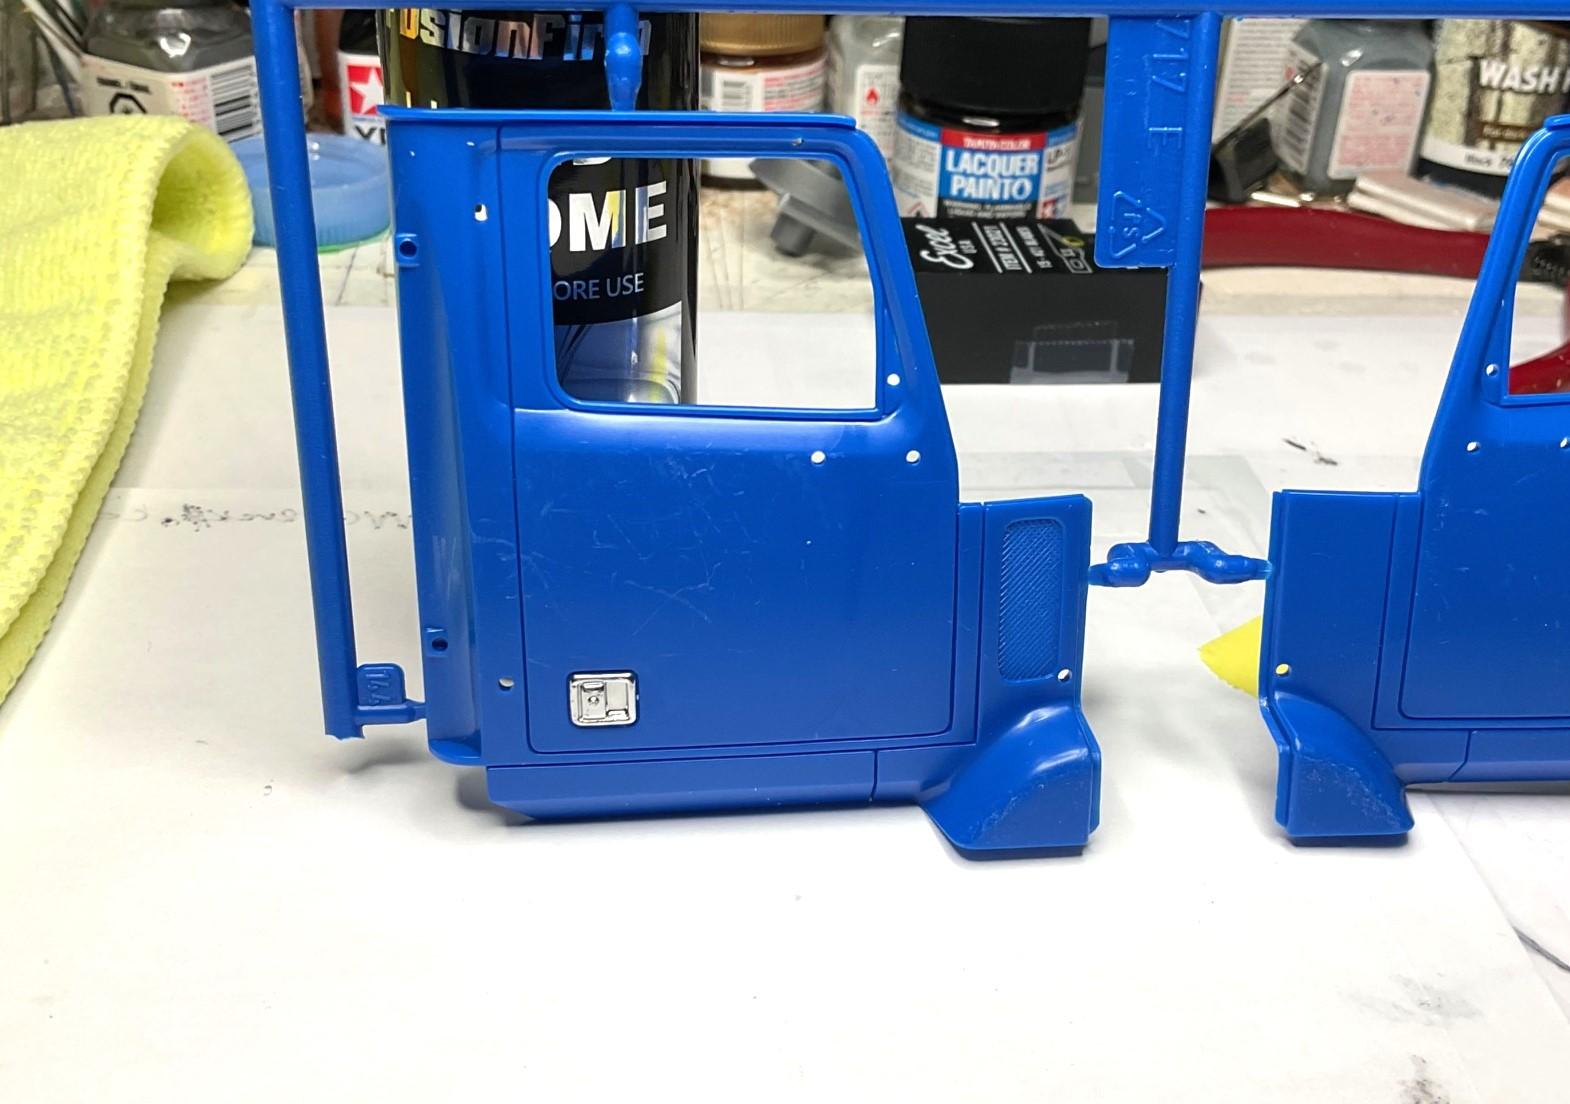
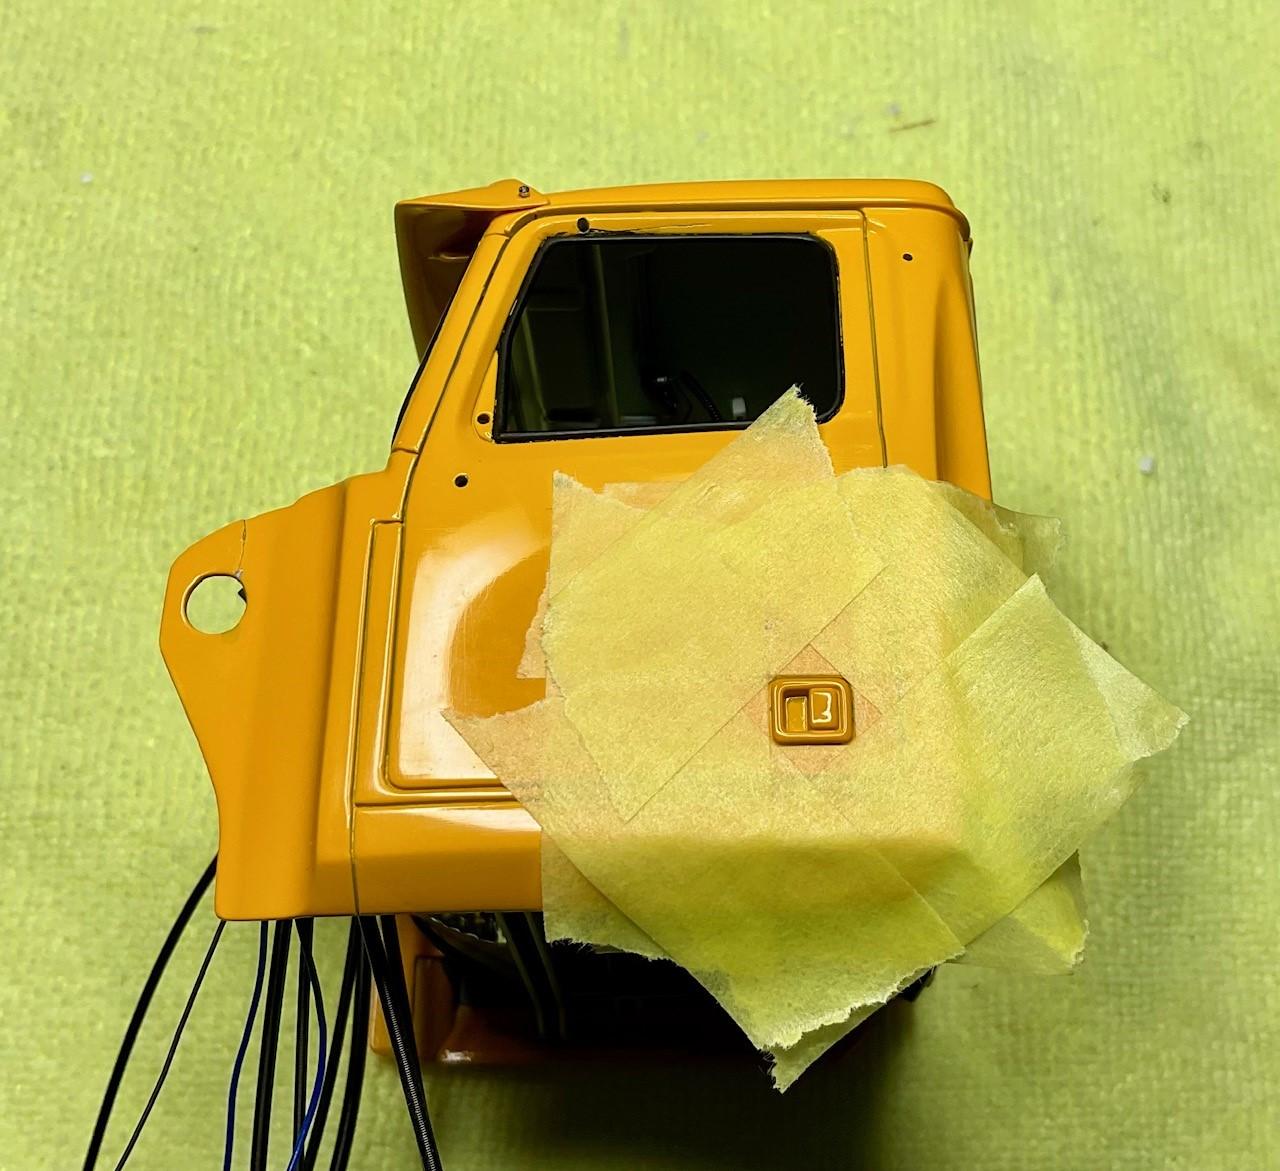
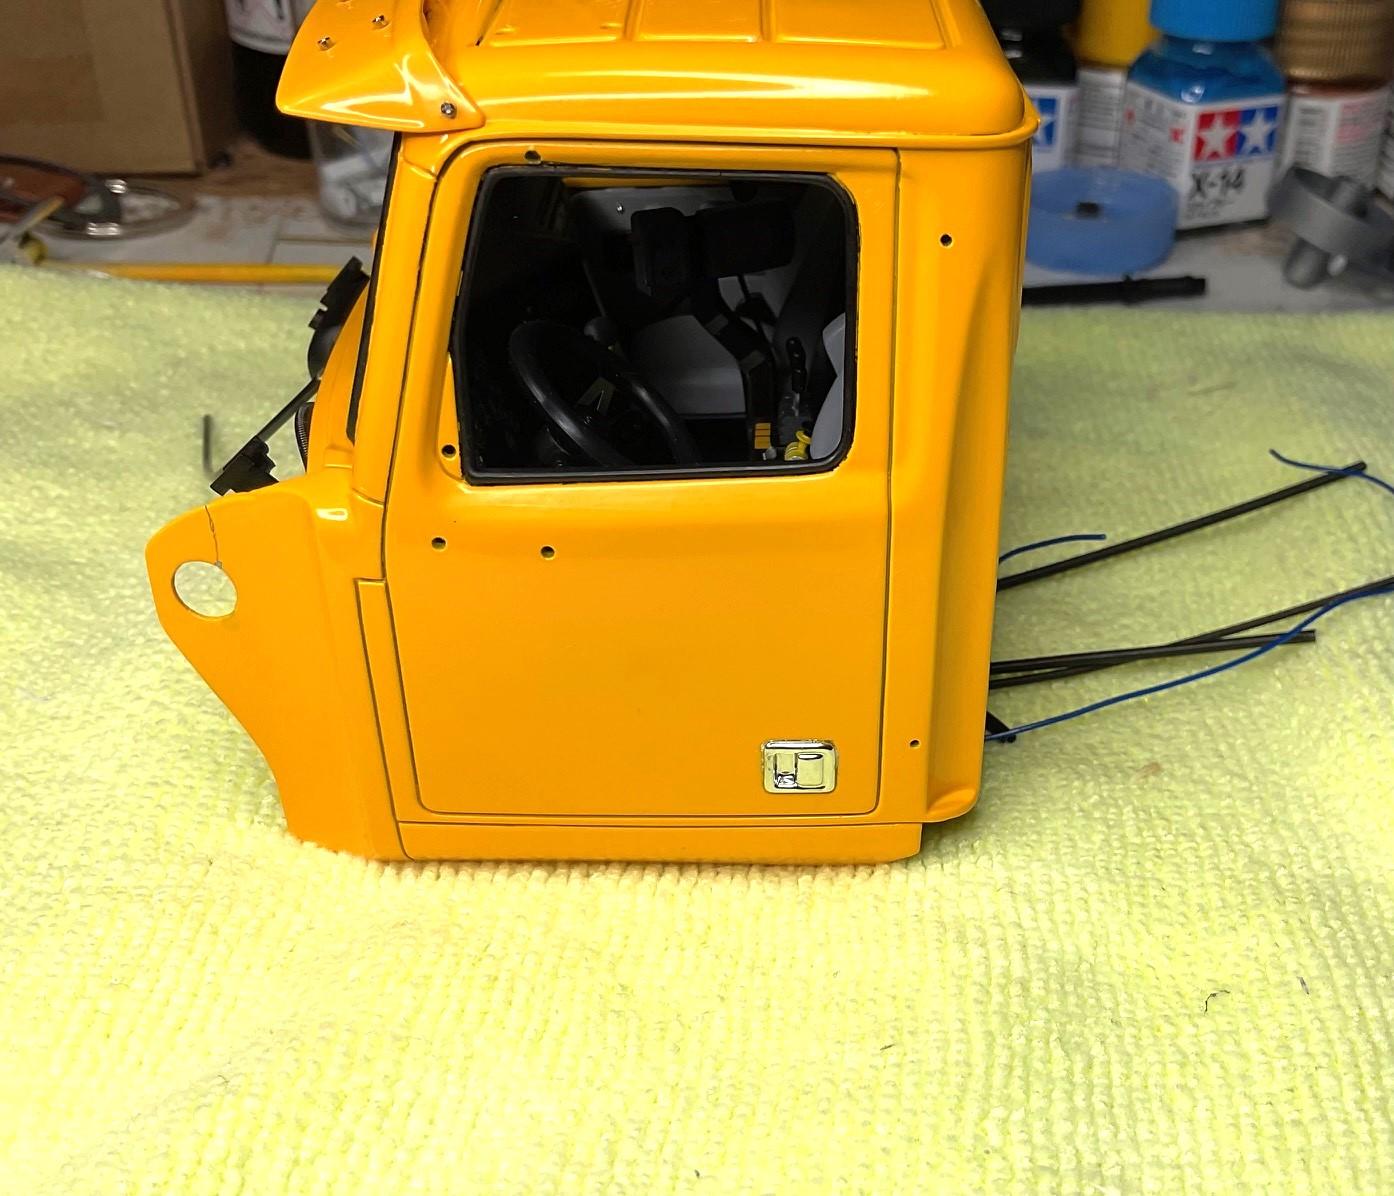
Finally screwed up enough will to paint the door handle on the driver's side of cab. I have mixed feelings about the result, but the 'chroming' has at least started and I hope to get a bunch more stuff painted this week. Did a test mask and paint on another Italeri, WS cab door handle. Goal was to not let paint touch tape and have it wick where I didn't want it! Went with FusionFirm, Liquid Chrome, as it goes on easy with a brush and flows nicely, if you don't work it too much - Was able to remove the masking tape almost right away - Same process on actual cab - Here's where the mixed feelings come about - really like the shine and reflectivity, but, even braced, the bit of tremor in my hands managed to drift the brush tip against the tape in a couple spots and paint flowed into the crevice around the handle. The backup plan for that has always been to use a very fine tip brush, and flow in some enamel or acrylic, black panel wash into the crevice around the handle. I'm hoping I can clean up any stray panel wash way easier than trying to get chrome out of the crevice. Hard to notice when cab just sitting there, and light not shining right on it, but the pictures always tell all! The Liquid Chrome didn't like being sprayed over Tamiya clear on the test panel, but seemed to dry well enough on the test hood, which wasn't cleared and that's why I'm using it on the door handles. I still would like a more durable chrome for the parts I need to handle while gluing them in place, so need to decide which other paint to use, and soon. If the Liquid Chrome on the handle sets up well enough, in a week's time, then I can do the other handle, let it cure and get the cab set in place - that will be a big milestone, for sure!
-
Beautiful truck you owned, Lee - would be cool if you made a trailer for your model, like the one in the pic above!
-
Maxim F model
BK9300 replied to Firebuilder's topic in WIP: Model Trucks: Big Rigs and Heavy Equipment
Really coming along, Dom - interesting to watch the fabrication come together! -
Western Star 4900 FA plow truck
BK9300 replied to BK9300's topic in WIP: Model Trucks: Big Rigs and Heavy Equipment
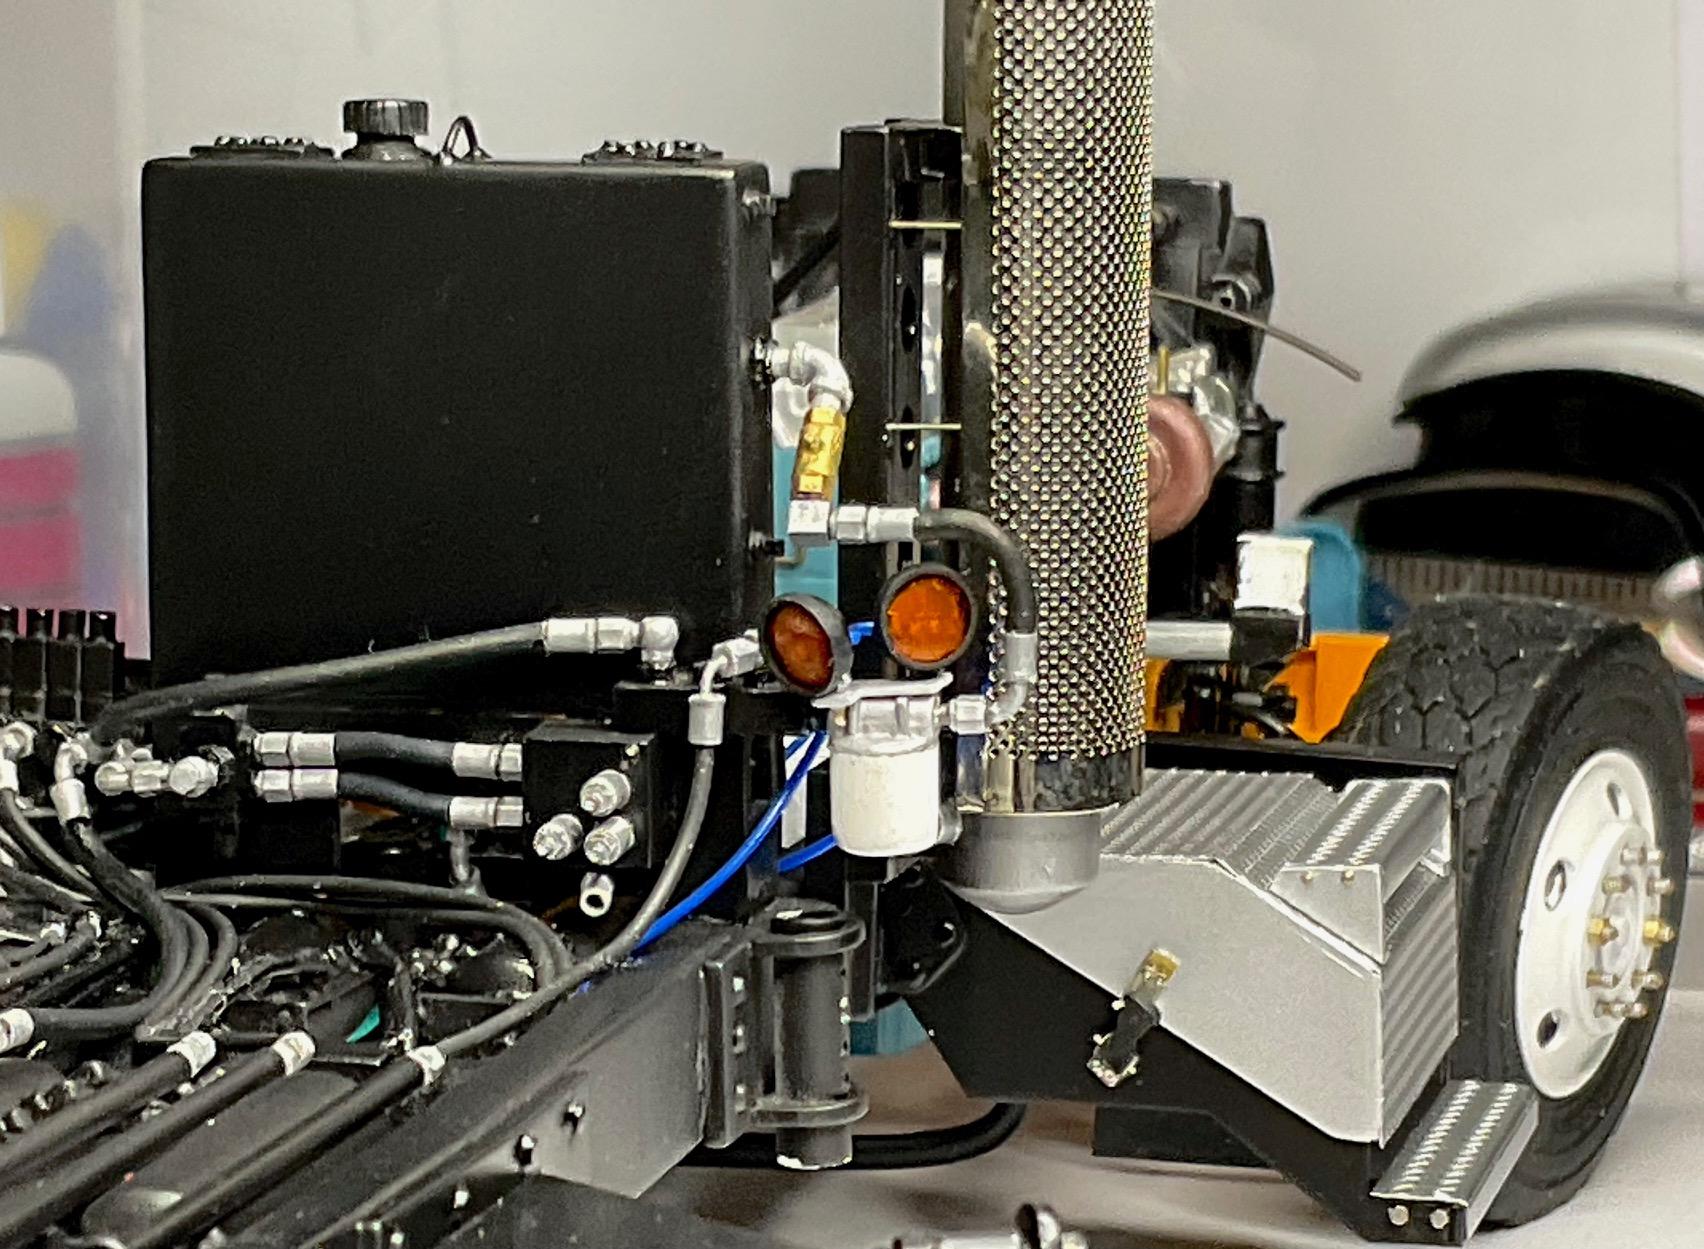
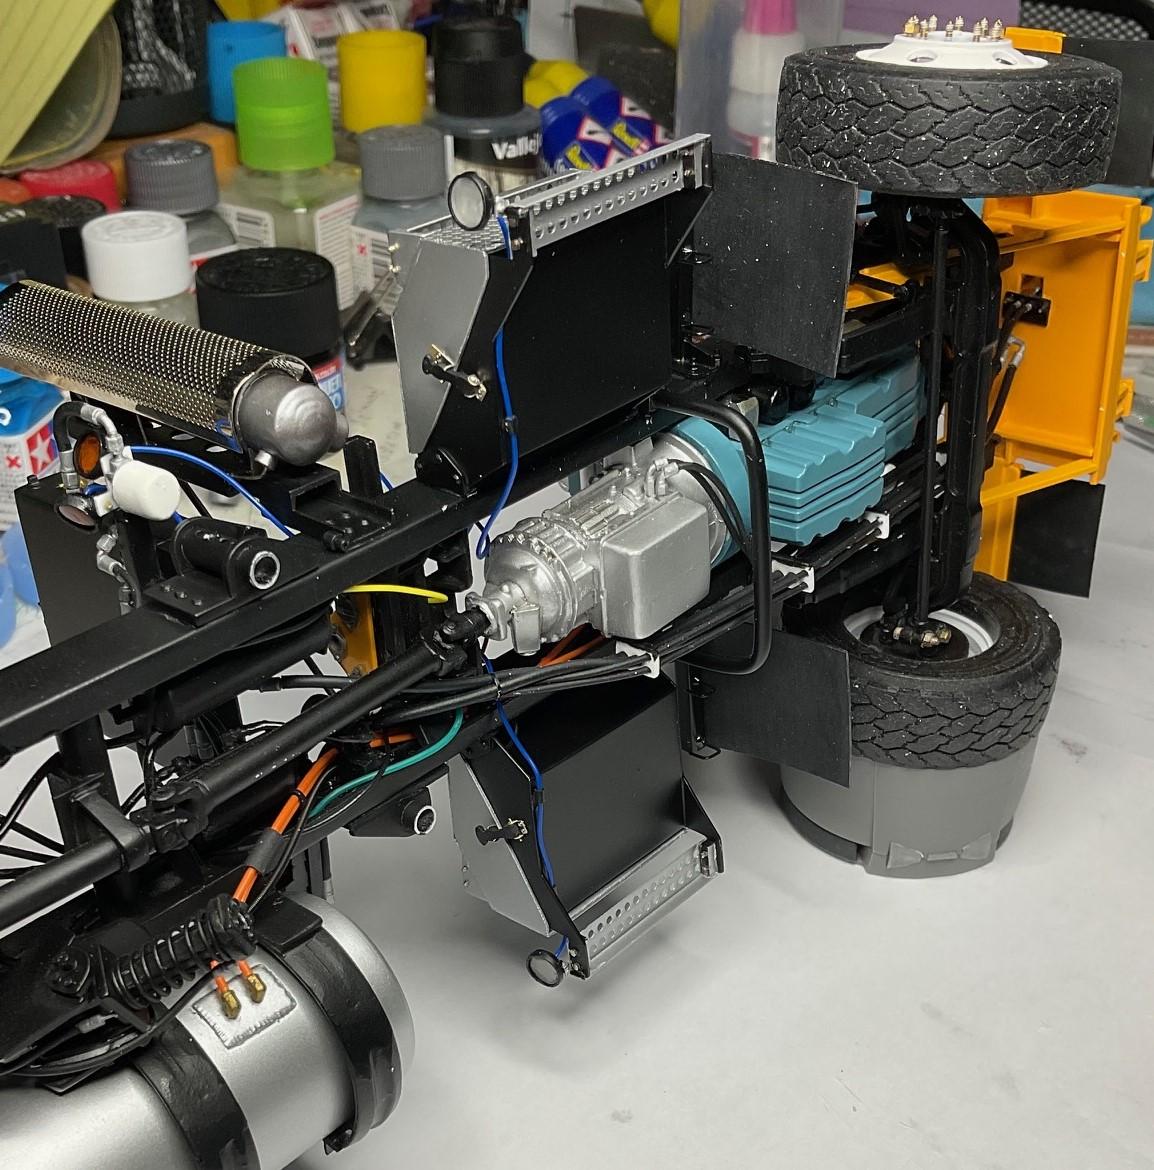
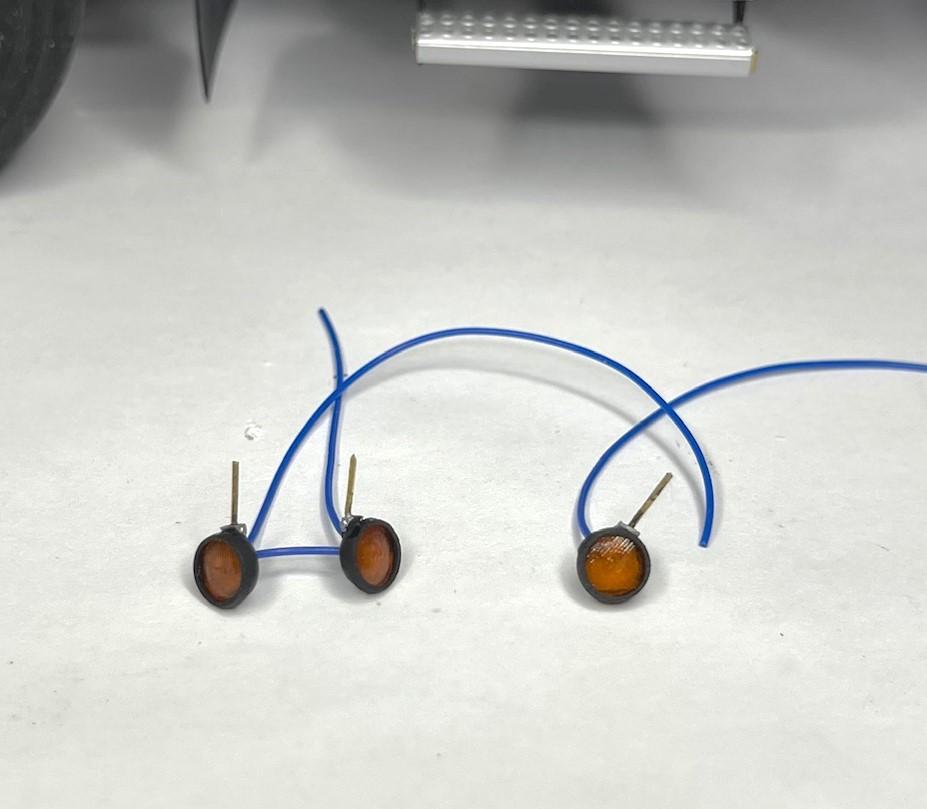
Slow progress, but still making my forward bit by bit. More work done on the work and back up lights and got them finished today! Got the two amber work lights mounted on the hydraulic filter - The two, step mounted back up lights are ready to glue in place. Added a couple grommets to attach the wire runs under the step boxes - Backup lights and grommets glued in place Wasn't till I looked at this pic that I realized I'm likely going to have to pull the wires for the lights back down under, so I can get the cab in place. Then some effort will be needed to see if I can get the wires to feed where they need to go into the bottom of the cab - Also got the charge air piping painted and glued into place - I wanted to do some painting today, but couldn't the temp/humidity right in the shed, even with the heater. Maybe tomorrow!
-
Western Star 4900 FA plow truck
BK9300 replied to BK9300's topic in WIP: Model Trucks: Big Rigs and Heavy Equipment
Good to hear from you again, Steve, and thanks! I keep saying I'm about at the end of the detailing, but more gets added. Hope to have more info about chrome stuff, soon - getting a bit cold to paint now. -
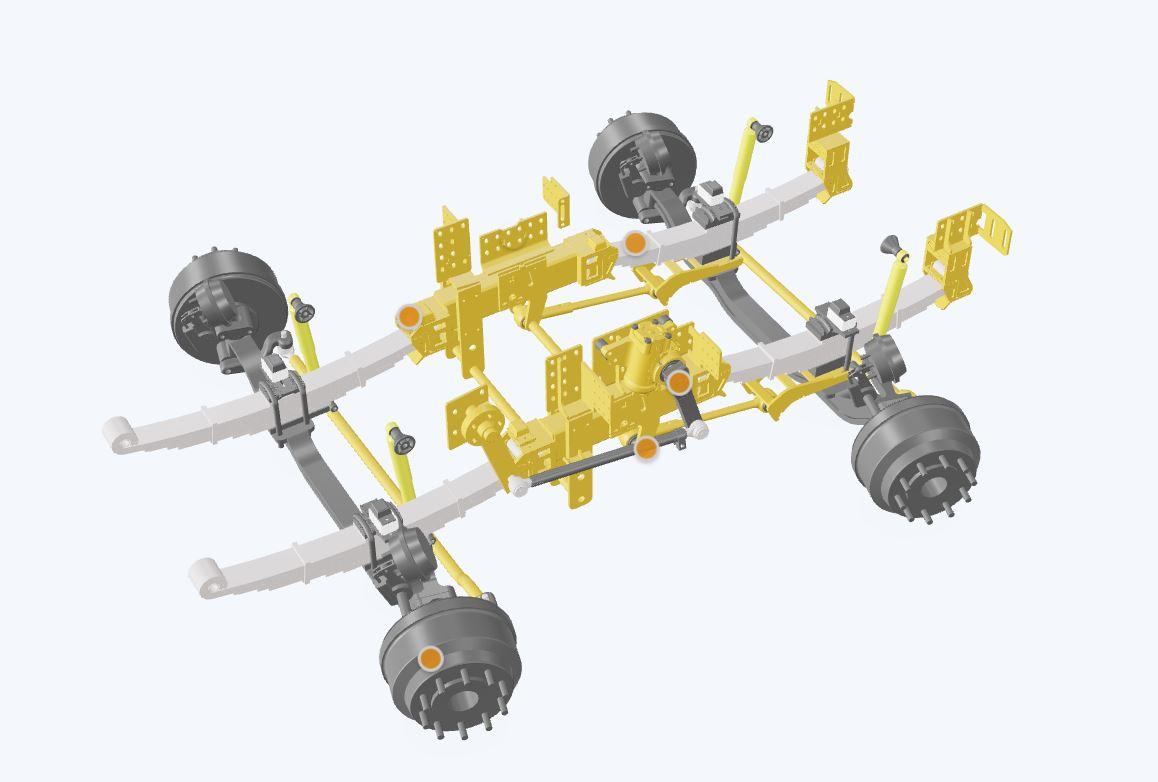
Still doing a little research for this truck, while finishing off the plow truck, and have been focusing on the twin steer set up. Found a couple suppliers of twin, or triple, steer conversions. Simard Suspensions, and Drapeau Corporation, both in Quebec, have offerings for multiple steer options. YRB in Prince George buys Western Stars from Velocity Truck Center and in speaking with a sales rep, I found out that all Western Star twin and triple steer conversions are done by Simard (at least for trucks ordered in PG). Simard's web site shows a 3D viewable rendering of their AMS40T2 twin steer option and I think this is the one I will try and model - There are a few significant pieces missing from the viewable sample, but will have to make do with what I can see here. Bit of a bonus - the sales rep said a customer was coming in tomorrow to pickup a new Western Star mixer truck that had a Simard twin steer set up installed, and he would try to take a few pics for me. Hoping they will fill in some of the gaps in the rendering above!
-
KW925 Something
BK9300 replied to Gary Chastain's topic in WIP: Model Trucks: Big Rigs and Heavy Equipment
Really like the Super Singles! -
So much detail to look at, Jim - quite amazing. And that shifter is a little jewel! Very well done!
-
Seriously well done - amazing work to get all the wiring in place and hidden. Your engine looks fantastic, too!
-
Joining the others - great to see another project on your bench, Steve! Your 1:1 is a fine looking car, too.
-
’72 Dodge Demon Drag Racer 1/25 scale
BK9300 replied to AmericanMuscleFan's topic in WIP: Drag Racing Models
Francis, another update well worth the wait! I think every time you make a new engine, and all the parts that are required, you find a way to make these new iterations better than the previous ones - and they have all been amazing in their own right. A continuing pleasure to watch! -
1975 International 4300 Transtar
BK9300 replied to Pete68's topic in WIP: Model Trucks: Big Rigs and Heavy Equipment
Nice detail painting on your door cards, Lee. Will look great peeking in through a side window! -
Kenworth T680 Next Gen
BK9300 replied to Markitoz's topic in WIP: Model Trucks: Big Rigs and Heavy Equipment
Very nice upgrade on this one - looks really good. -
Ford LS Rescue truck
BK9300 replied to gotnitro?'s topic in WIP: Model Trucks: Big Rigs and Heavy Equipment
Really cool to see this back in rotation, Jeff - great build going on here! -
Kenworth C500
BK9300 replied to Gary Chastain's topic in WIP: Model Trucks: Big Rigs and Heavy Equipment
No 'paint by numbers' here - will be interesting to see how it all comes together! I've got a suspension like yours, too, so will be watching to see how you make out. -
1976 Kenworth Aerodyne COE
BK9300 replied to J.B. Customs's topic in WIP: Model Trucks: Big Rigs and Heavy Equipment
Going to turn into a real nice build. -
Good to see another one underway from your bench, Jürgen!
-
AMT Aero Chief car hauler
BK9300 replied to BIGTRUCK's topic in WIP: Model Trucks: Big Rigs and Heavy Equipment
All the chrome should really pop against that colour - will look great! -
Western Star 4900 FA plow truck
BK9300 replied to BK9300's topic in WIP: Model Trucks: Big Rigs and Heavy Equipment
Thanks, Daniel - yes, lots of detail, and a bit more to come yet! -
Western Star 4900 FA plow truck
BK9300 replied to BK9300's topic in WIP: Model Trucks: Big Rigs and Heavy Equipment
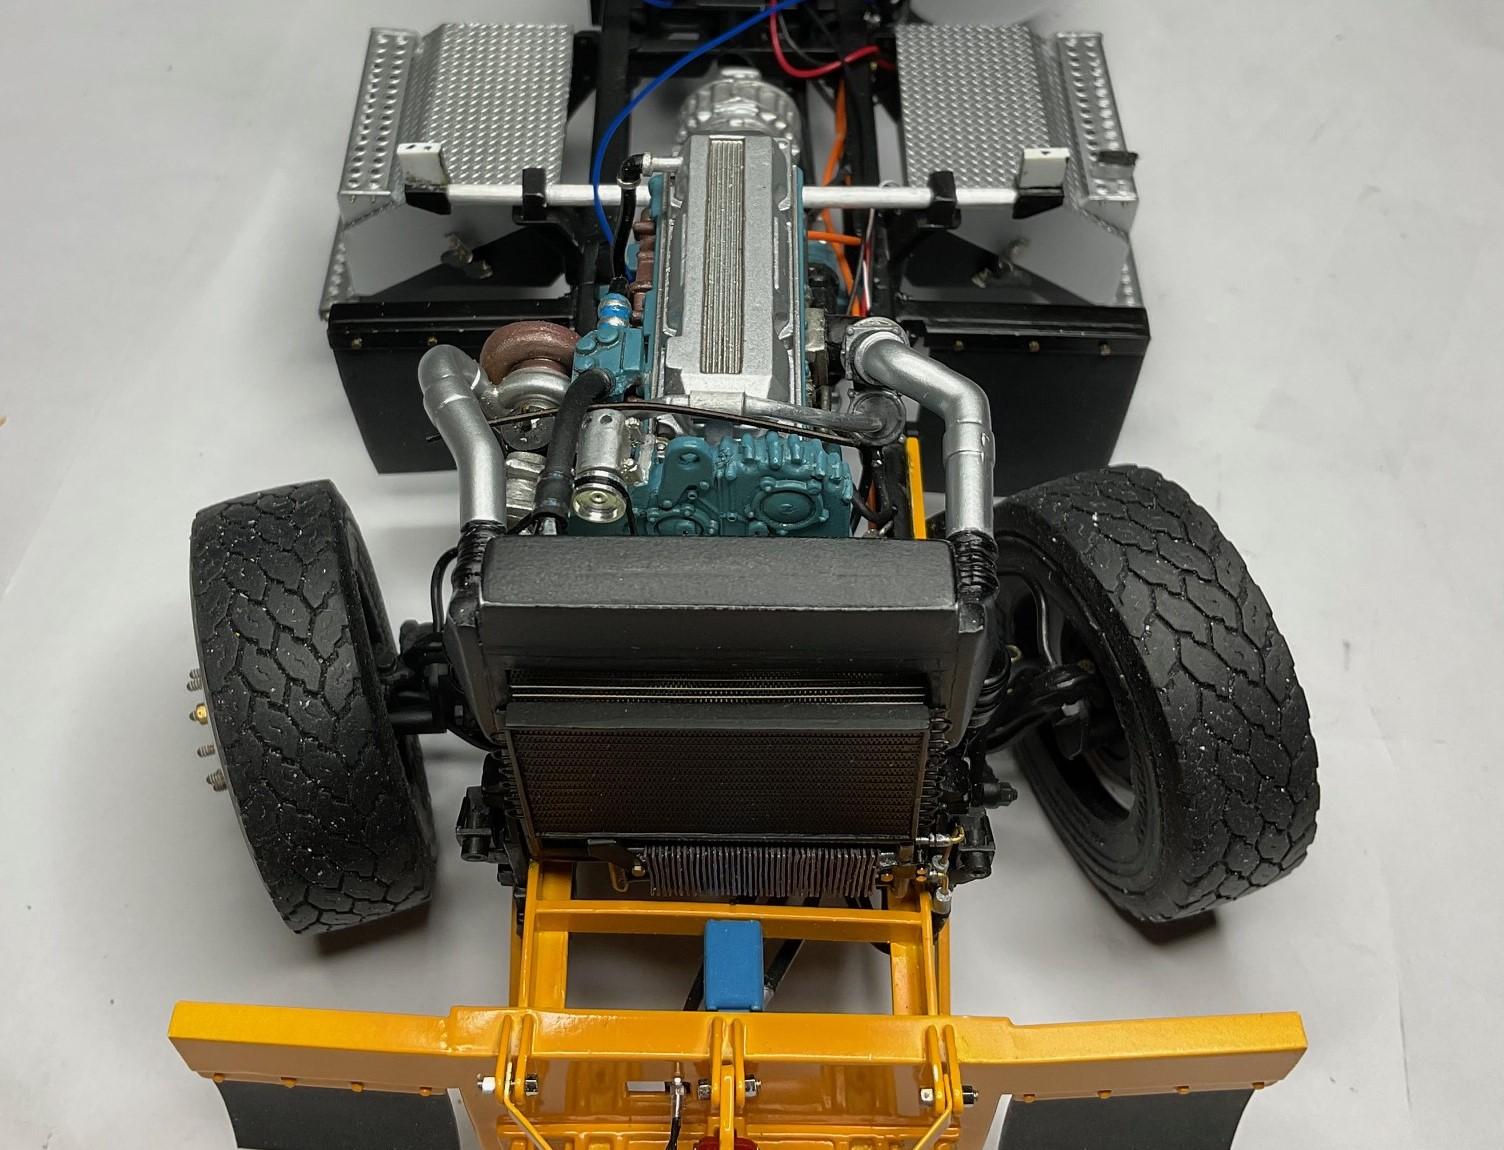
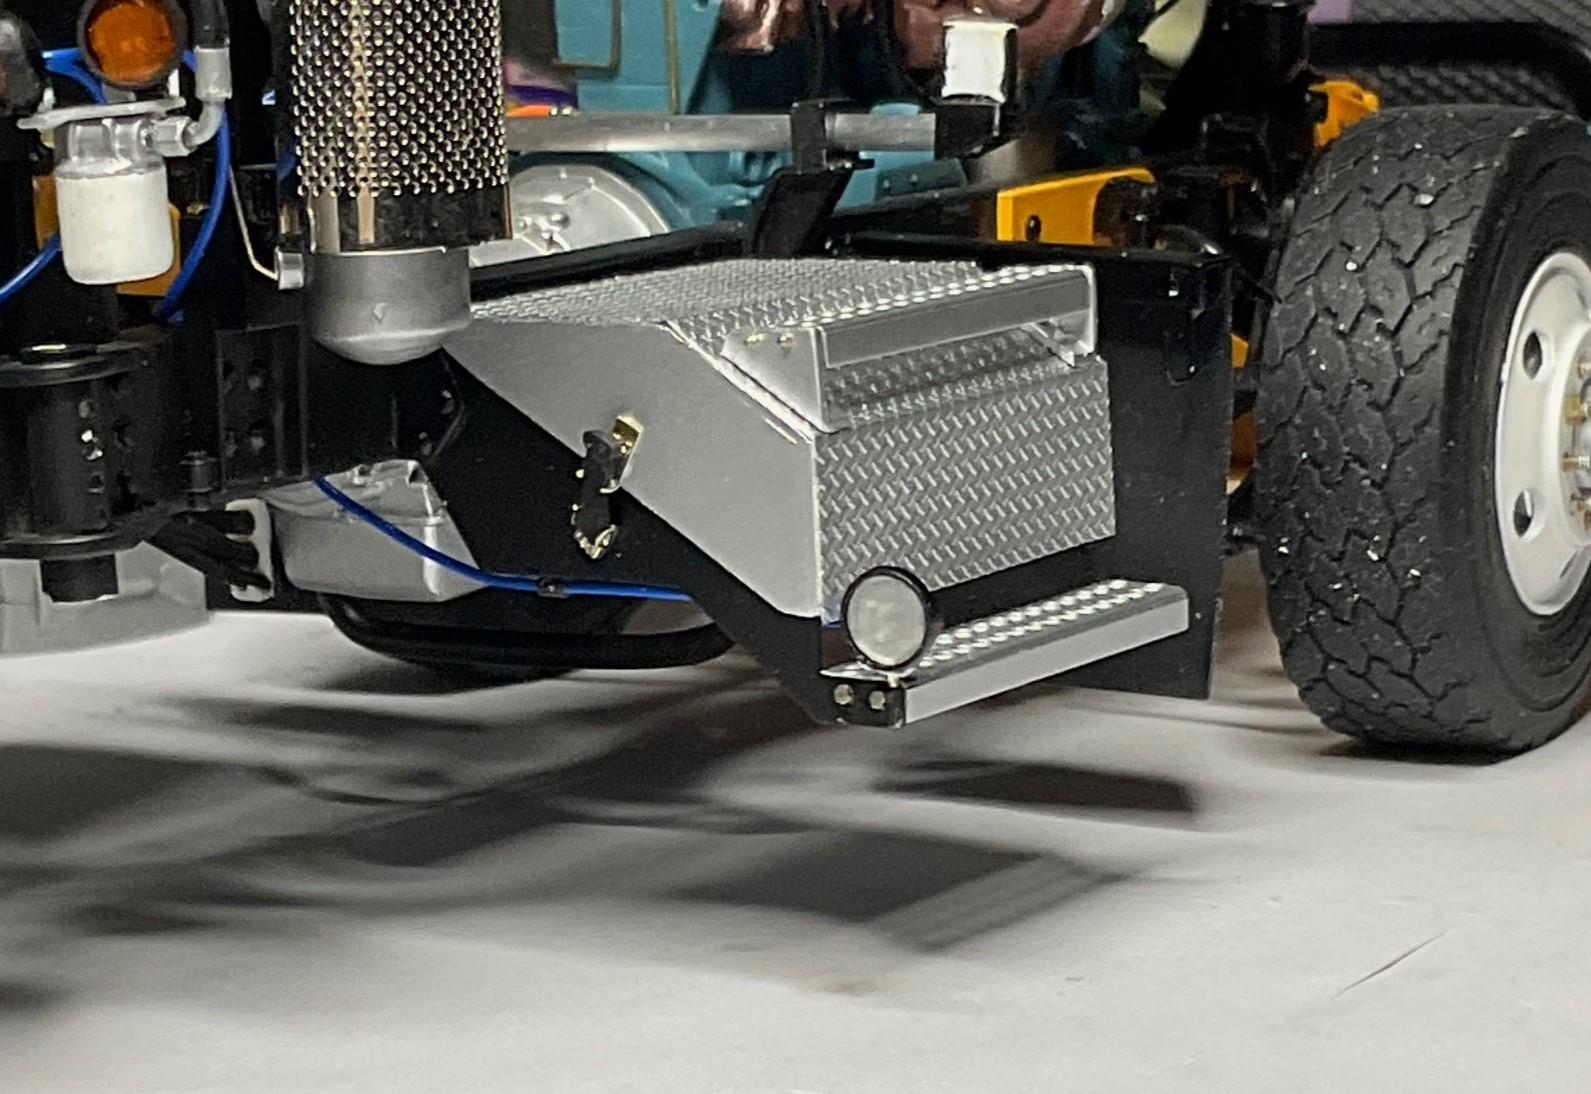
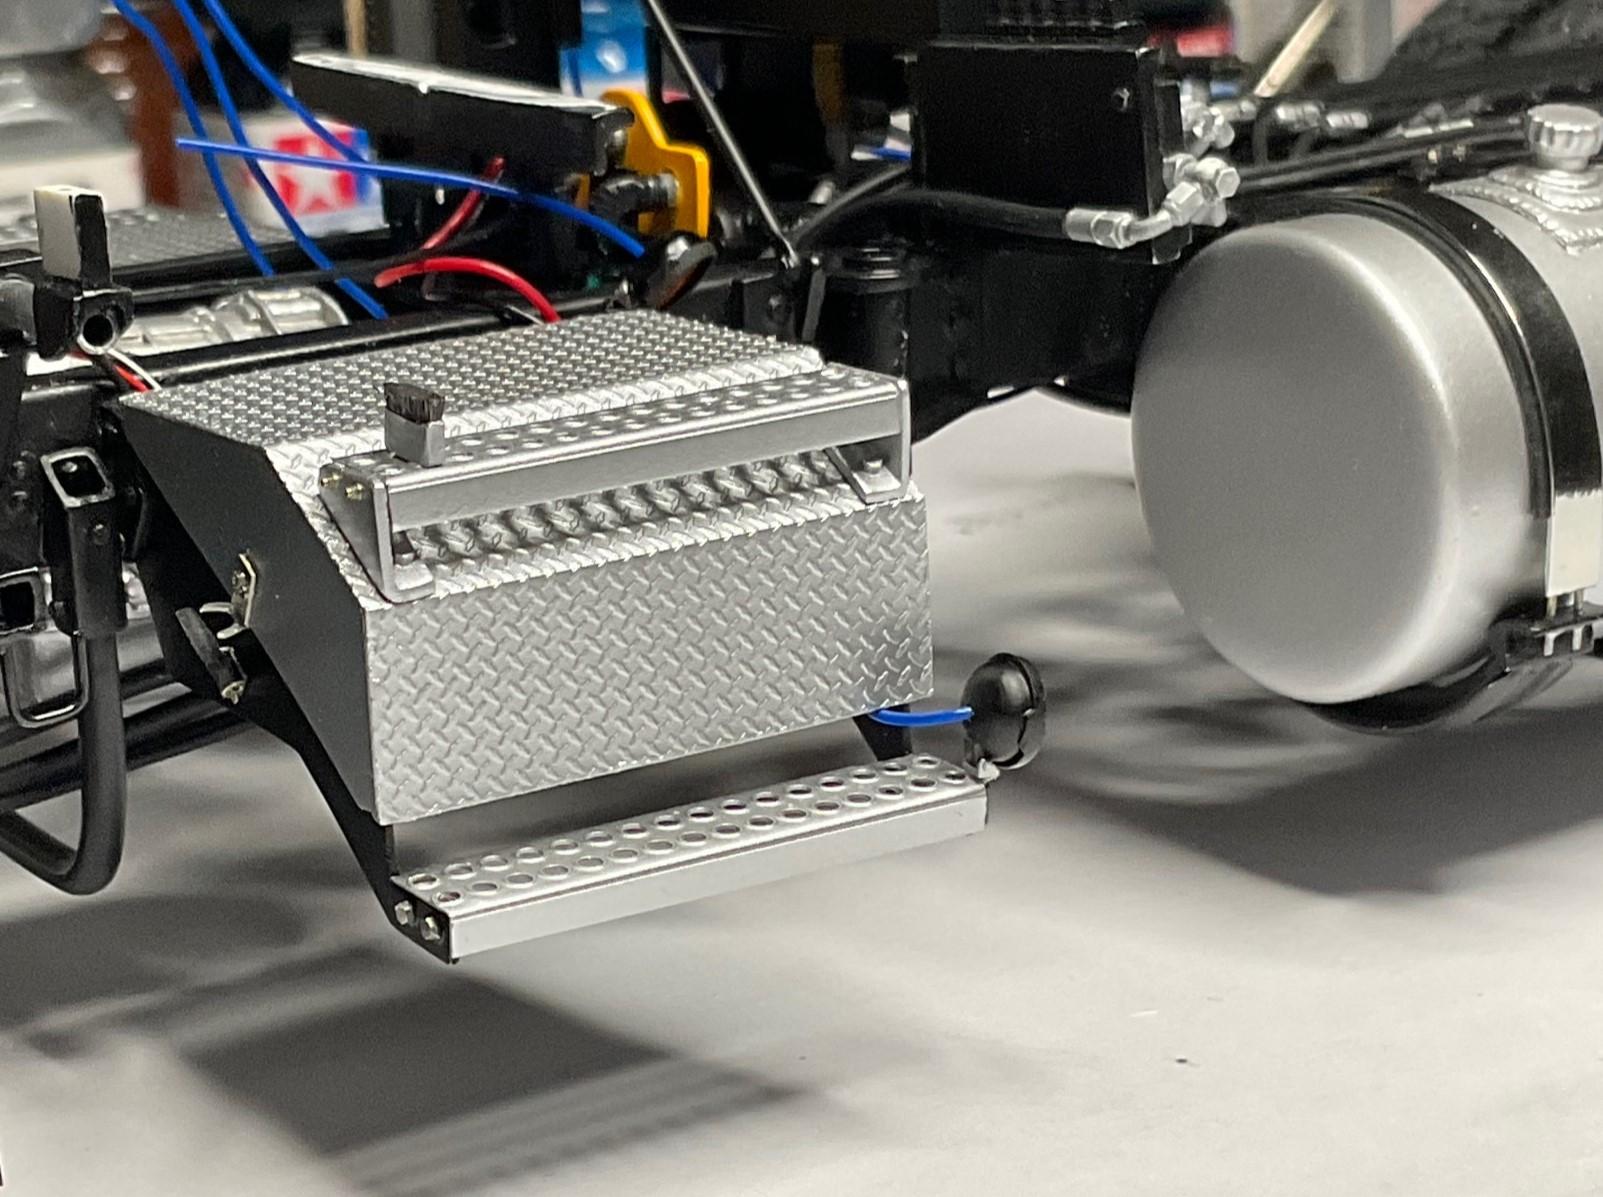
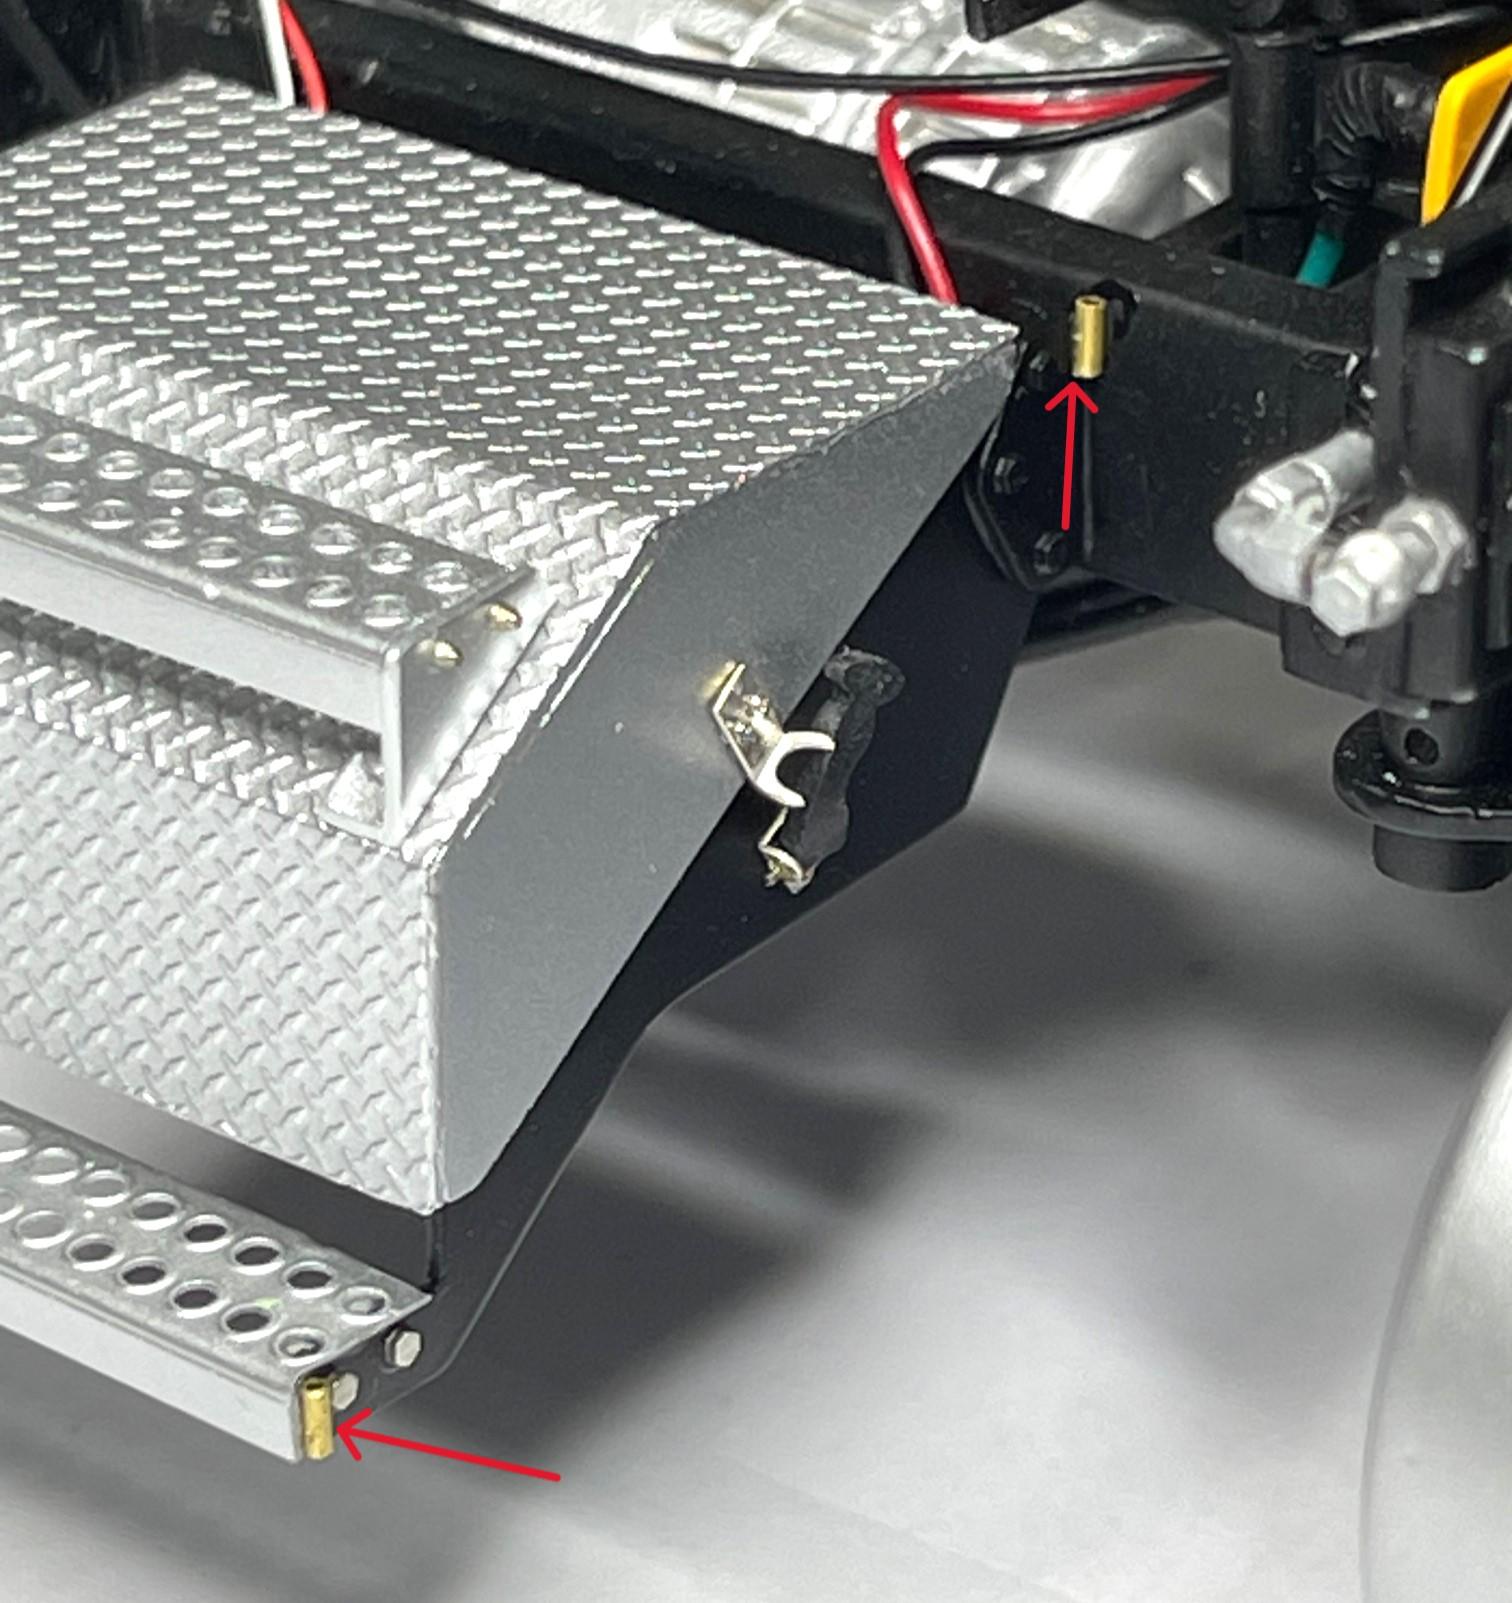
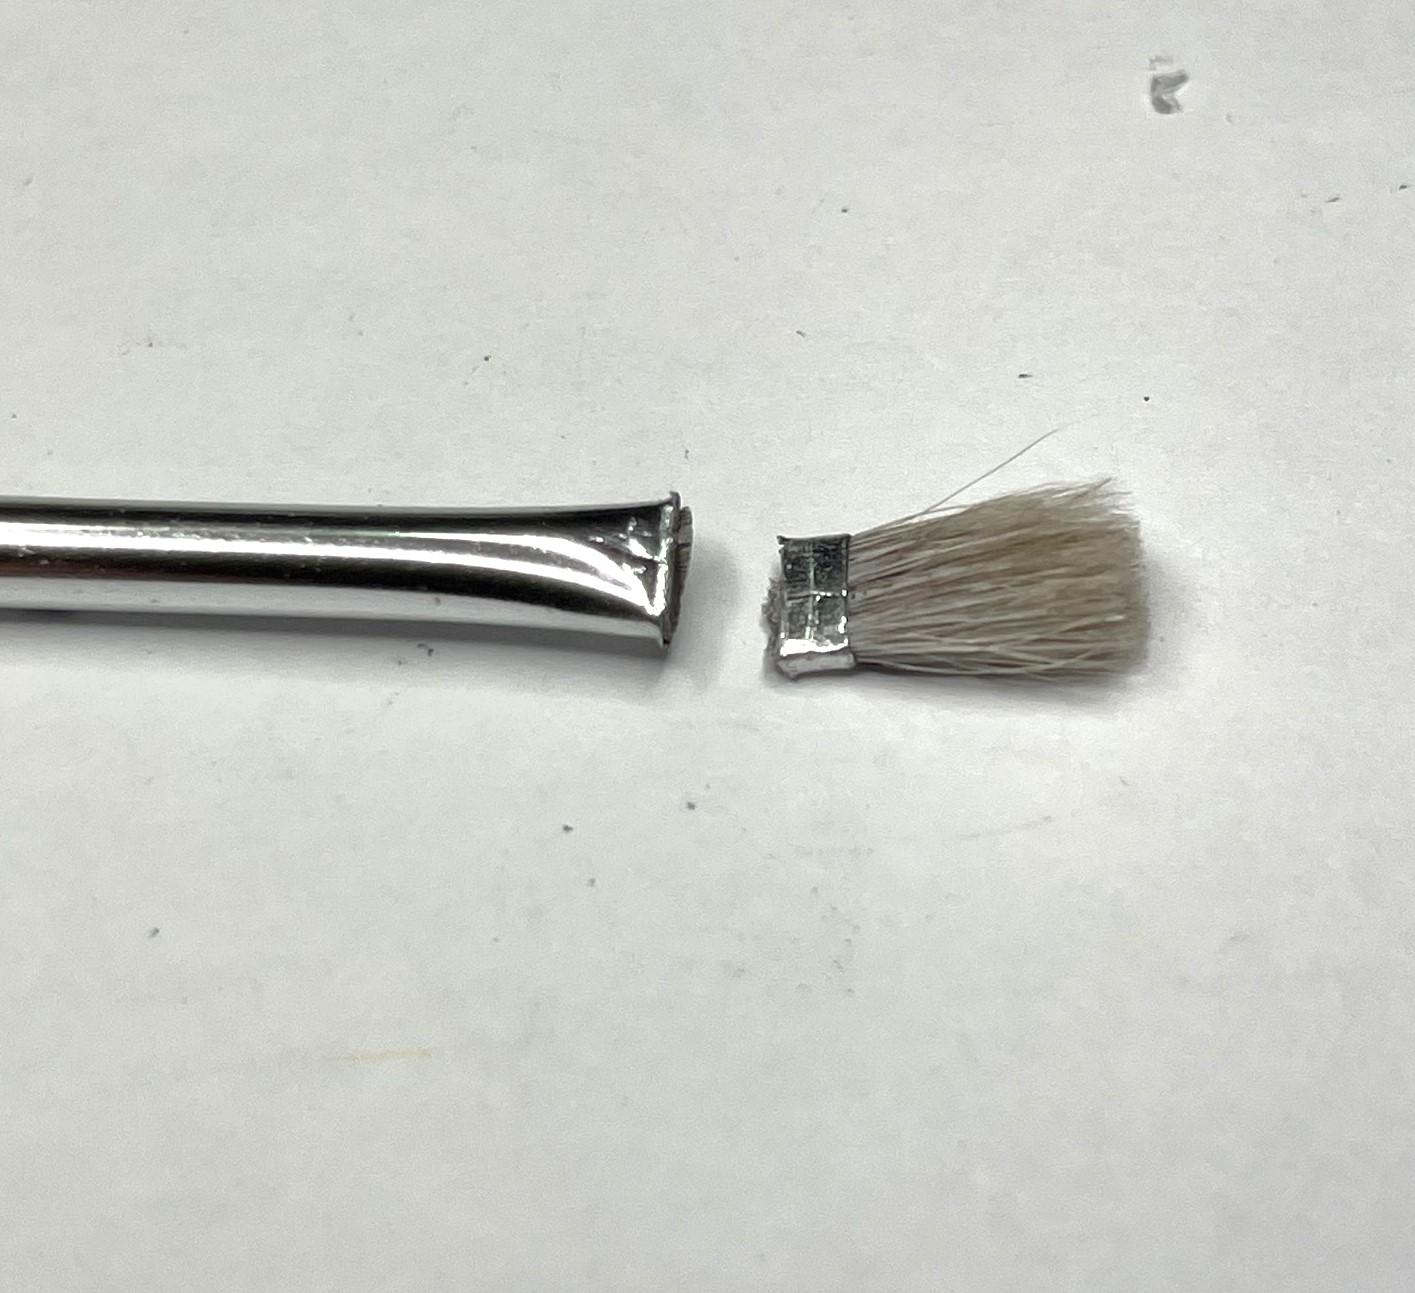
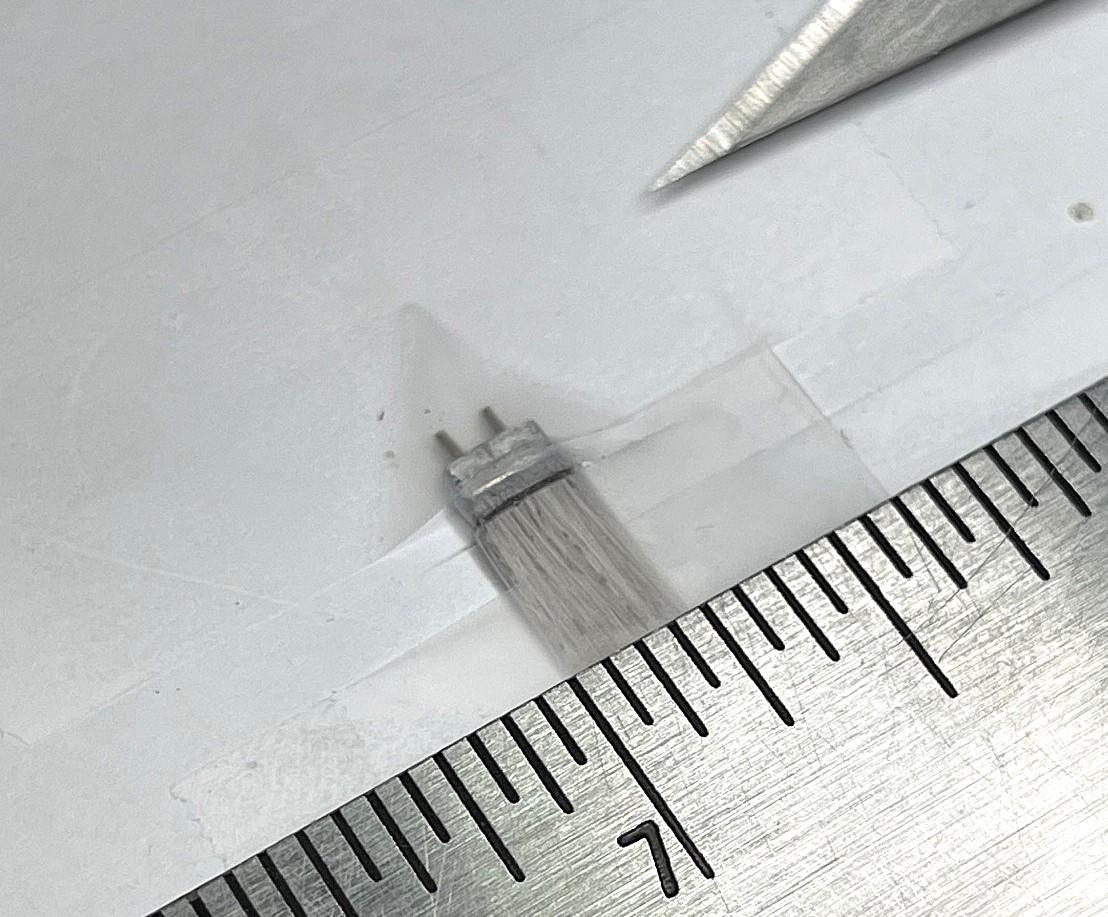
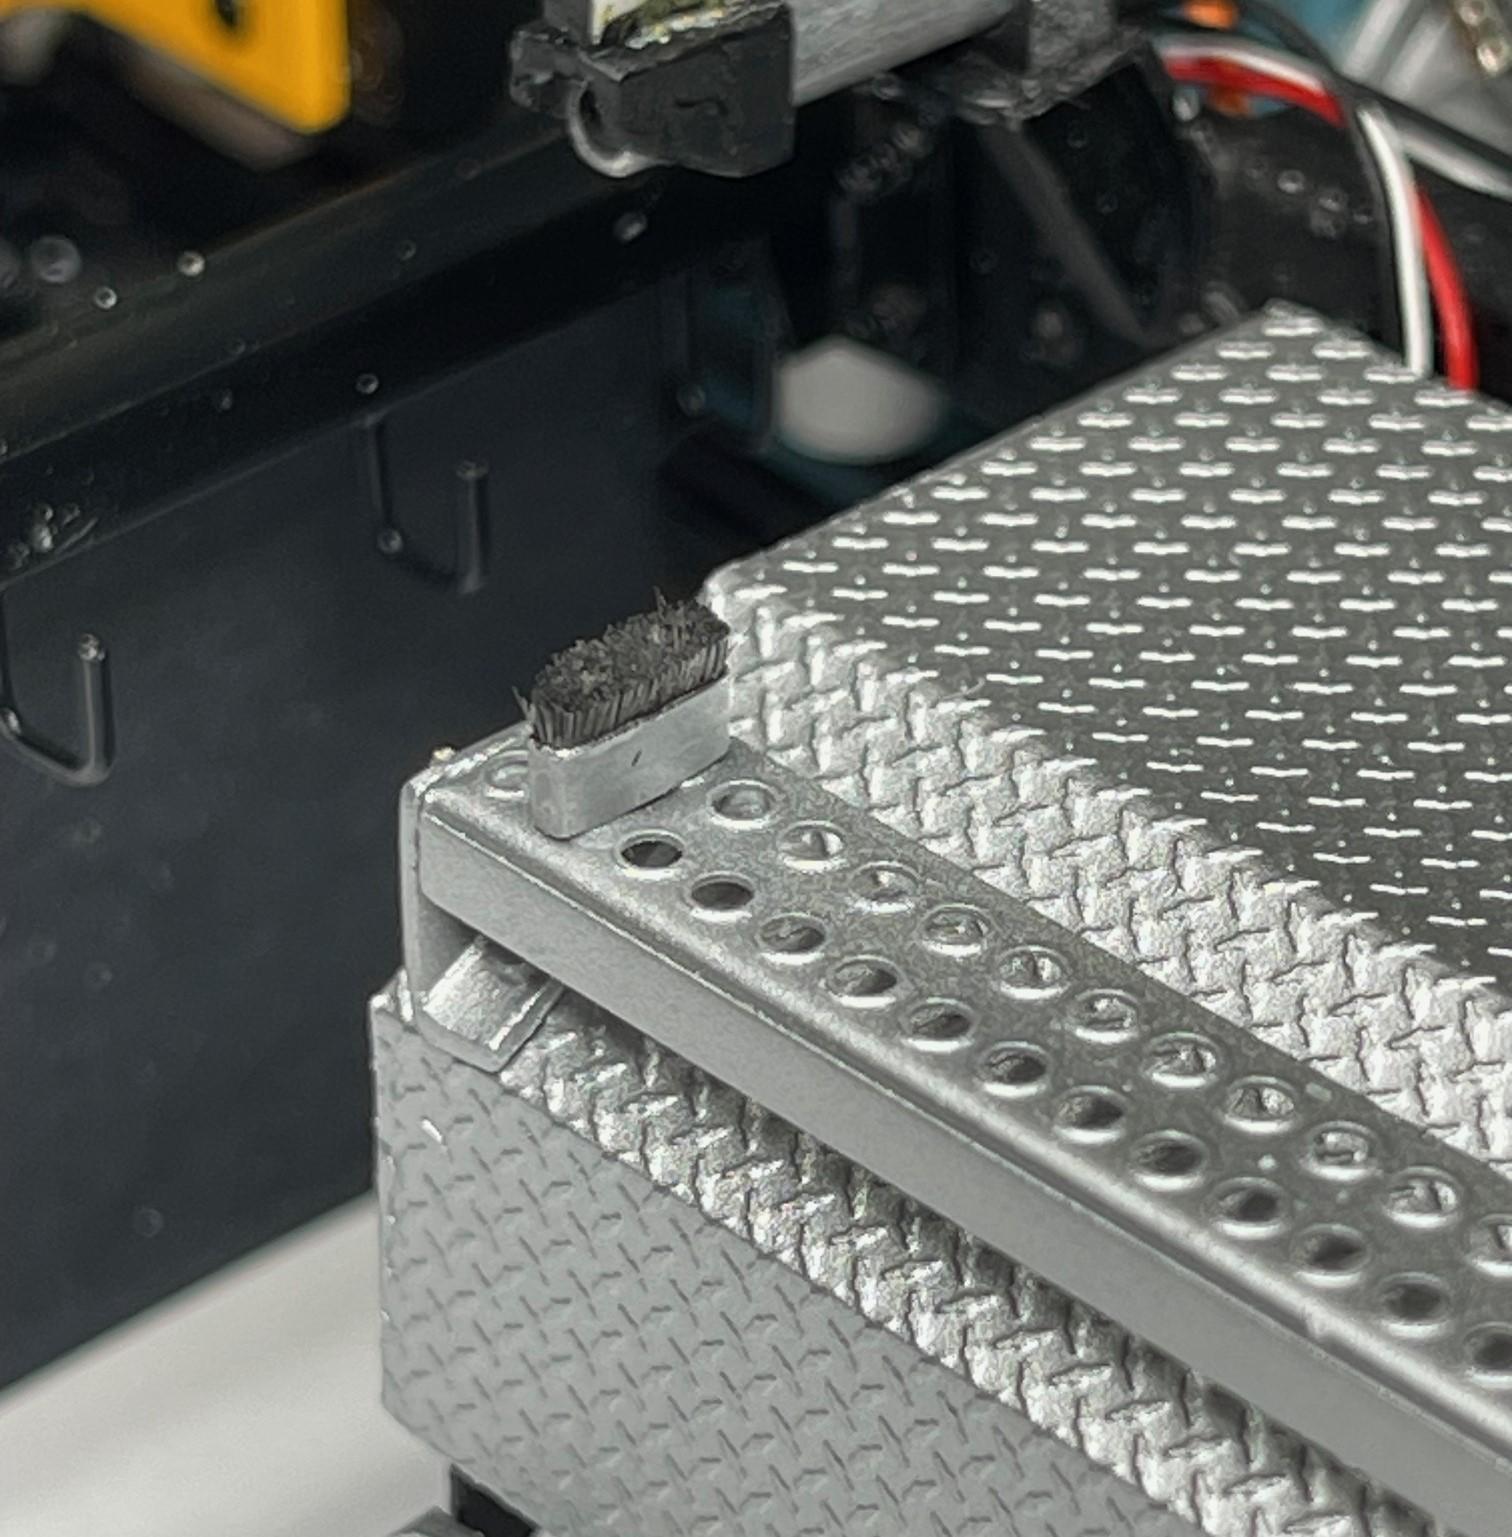
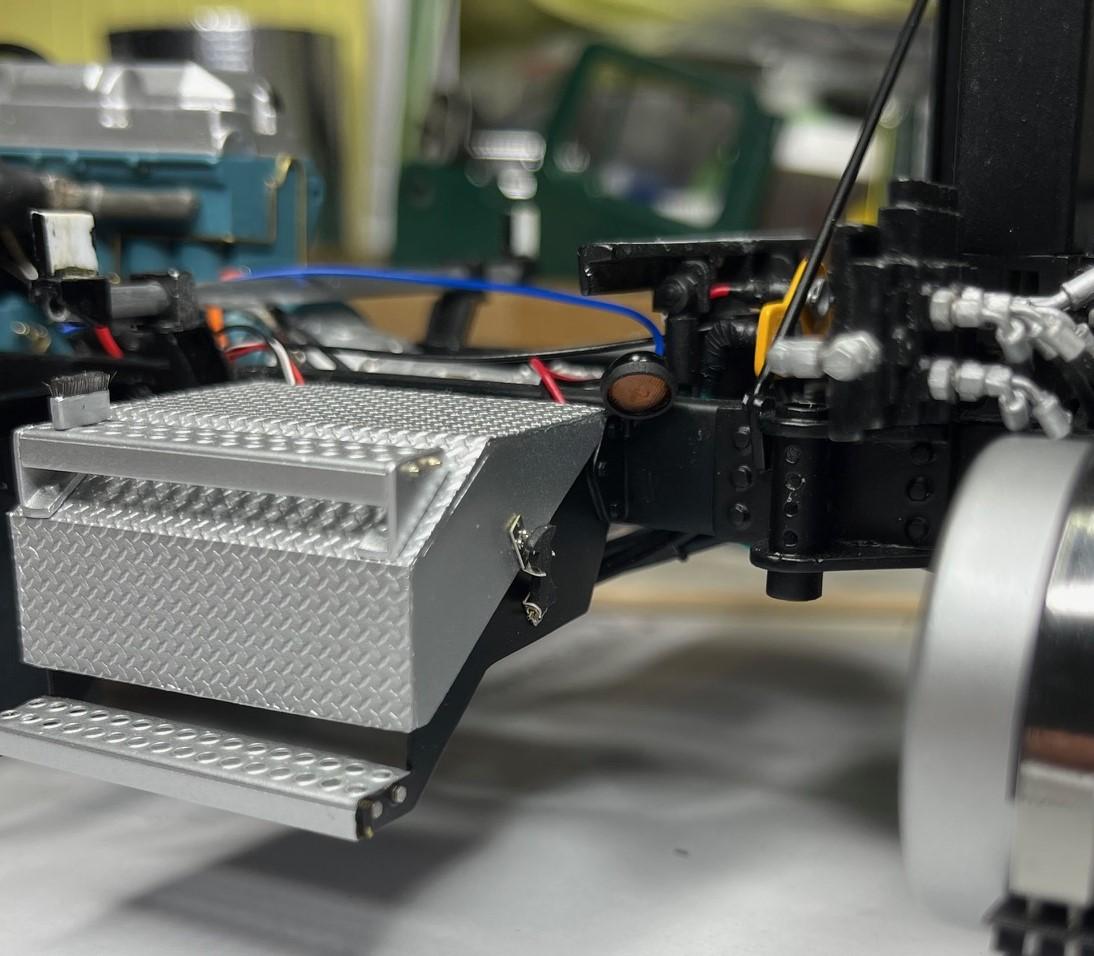
Hit and miss time at the bench, the past few days, but have managed a bit of effort on the remaining work lights. Also got a bunch of little parts set up for some non chrome painting and got inspired to finish one last little item on the driver's side battery box step! I CA glued some .5 mm ID brass in the locations where a few of the work lights need to go - The two lights wired together will go on top of the hydraulic oil filter housing, on a plate that is waiting to be painted; the other light is for the driver's side, shining down on the leading edge of the underbody plow - While I was waiting for a bit of paint to dry on the light housings, I started in on small, boot brush, that is attached to the driver's side top step. Crimped the end of the brush even more than it was, rough trimmed it with an X-acto knife and spread some thin CA glue on the cut edge to set the brush hairs - I added a couple 0.5 mm brass pins, for strength, then taped the brush end down so I could make a clean cut with a new knife blade - Carefully painted the brush hairs - weird, but brush hairs look much darker to my naked eye...- Got the work light that shines on under body intake mounted in place. I'm really hoping I'll have enough room for tweezers to fit in between the drive shaft and the frame, from underneath, to tuck these work light wires into one of the pass through pipes in the bottom of the cab! - Off to do a bit of painting in the shed - should be warm, by now!
-
Kenworth C500
BK9300 replied to Gary Chastain's topic in WIP: Model Trucks: Big Rigs and Heavy Equipment
Always fun, doing 'mechanical' work at this scale! What kit is the axle you are modifying from? It looks more sturdy than many of the I/24 Italeri kit ones.