BK9300
-
Posts
2,113 -
Joined
-
Last visited
Content Type
Profiles
Forums
Events
Gallery
Everything posted by BK9300
-

Ford Louisville
BK9300 replied to Jürgen M.'s topic in WIP: Model Trucks: Big Rigs and Heavy Equipment
This is really coming along nicely, Jürgen! Will you make a 'load' out of your parts box or use other stuff? -
An exceptional build, David - beautiful work!
-
Kenworth W-925 (mild custom)
BK9300 replied to Gary Chastain's topic in WIP: Model Trucks: Big Rigs and Heavy Equipment
Despite the struggles, you turned them all around and what a great looking truck to show for it - wonderful job, Gary! -
I agree - this truck's got a real presence to it. Your mirrors turned out really well, too, and got to love the operating hood! Awesome build, Scott.
-
White Freightliner
BK9300 replied to TopherMcGinnis's topic in WIP: Model Trucks: Big Rigs and Heavy Equipment
Only a guess on my part, but I'm thinking white primer would give you the brightest outcome. Might not matter, depending on how many coats of red you ultimately apply?! -
White Freightliner
BK9300 replied to TopherMcGinnis's topic in WIP: Model Trucks: Big Rigs and Heavy Equipment
Good to know you were a big rig mechanic - maybe it would be ok for me to PM if I need extra ‘how to’ info during a build? Looking forward to your progress! -
Western Star 4900 FA plow truck
BK9300 replied to BK9300's topic in WIP: Model Trucks: Big Rigs and Heavy Equipment
I won't discount that I had some luck on my side with this - thanks, Francis! -
California Special
BK9300 replied to Rockford's topic in WIP: Model Trucks: Big Rigs and Heavy Equipment
I remember way back, making a headache rack for a logging truck and using some door screen for the grating. I'm certain you'll make something work! -
Kenworth W-925 (mild custom)
BK9300 replied to Gary Chastain's topic in WIP: Model Trucks: Big Rigs and Heavy Equipment
Sure looks good, all put together! -
California Special
BK9300 replied to Rockford's topic in WIP: Model Trucks: Big Rigs and Heavy Equipment
Steve, this is looking spot on to your first two, inspiration pics on page 1. Any plans to add the headache rack in those photos as well? Would look awesome! -
Western Star 4900 FA plow truck
BK9300 replied to BK9300's topic in WIP: Model Trucks: Big Rigs and Heavy Equipment
Thanks for the info, Ron - I'll definitely check them out! -
Ford Louisville
BK9300 replied to Jürgen M.'s topic in WIP: Model Trucks: Big Rigs and Heavy Equipment
Moving along well, Jürgen! I’ve been experimenting with some clear topcoats on an old hood. Do you use clear finish on any of your truck builds? -
Western Star 4900 FA plow truck
BK9300 replied to BK9300's topic in WIP: Model Trucks: Big Rigs and Heavy Equipment
Thanks, Ron - I’m liking how it’s turning out. I have a set of finishing sanding pads, up to 10,000 - I’m just leery of leaving any streaks at all in the smooth plastic. Maybe I’ll have to do some fixing if primer shows any flaws - just trying minimize the handling at this point! Yes, I wasn’t getting anywhere fast on the old kit cleaner! Just took awhile to decide to scratch it. I’m my own worst enemy, though - if I don’t know how to do something, I tend to think, then overthink, too much before just doing it. Thanks, Daniel. Thanks, Gary! Bit more to go on it, but most difficult part of it behind me now. Thanks a lot, Jeff! Like I said above, too much time spent thinking about how to do it - this should have been made several pages ago. Thanks, Ron - appreciate you having a look! By accident, I found a few of those screens for sale, tucked away in a box in a second hand store. Maybe you won’t need to buy a whole saver! -
Mark, always a tremendous amount of research and design goes into your decaling - quite a process! With your white inlays, do you ever have movement in them when you’re applying coloured decals over top of them, especially if any decal set solution is needed?
-
Smart Kar(T) HillClimb Screamer
BK9300 replied to Technics's topic in WIP: Other Racing: Road Racing, Land Speed Racers
That's very interesting - how are finding the quality of digital model created from the scan (hard to tell from photos. . .)? -
Western Star 4900 FA plow truck
BK9300 replied to BK9300's topic in WIP: Model Trucks: Big Rigs and Heavy Equipment
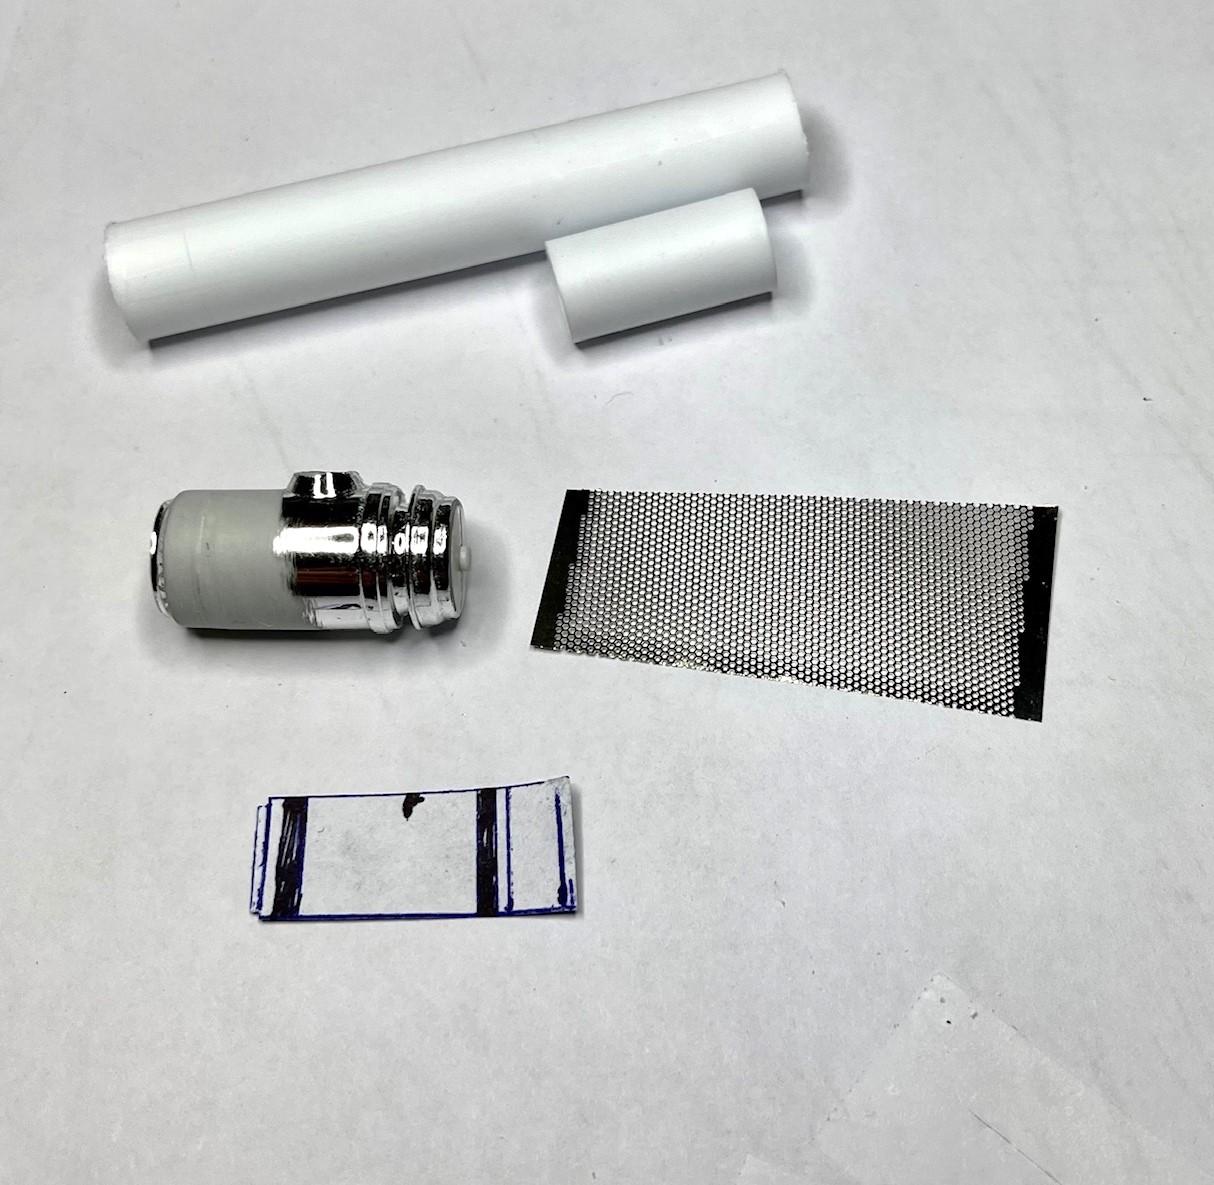
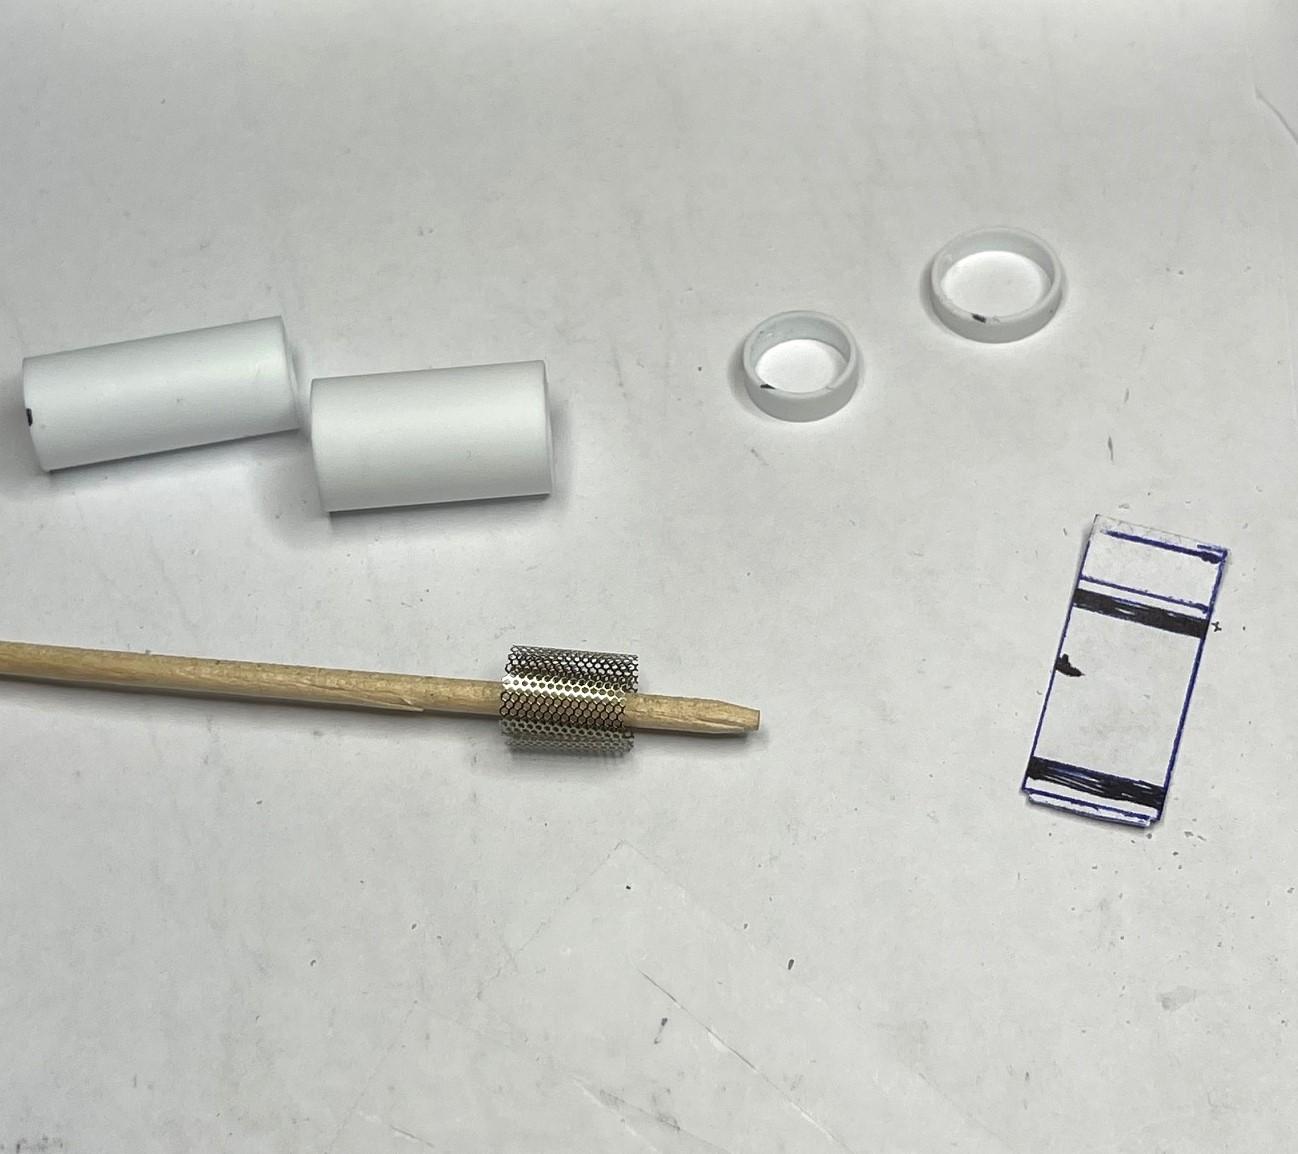
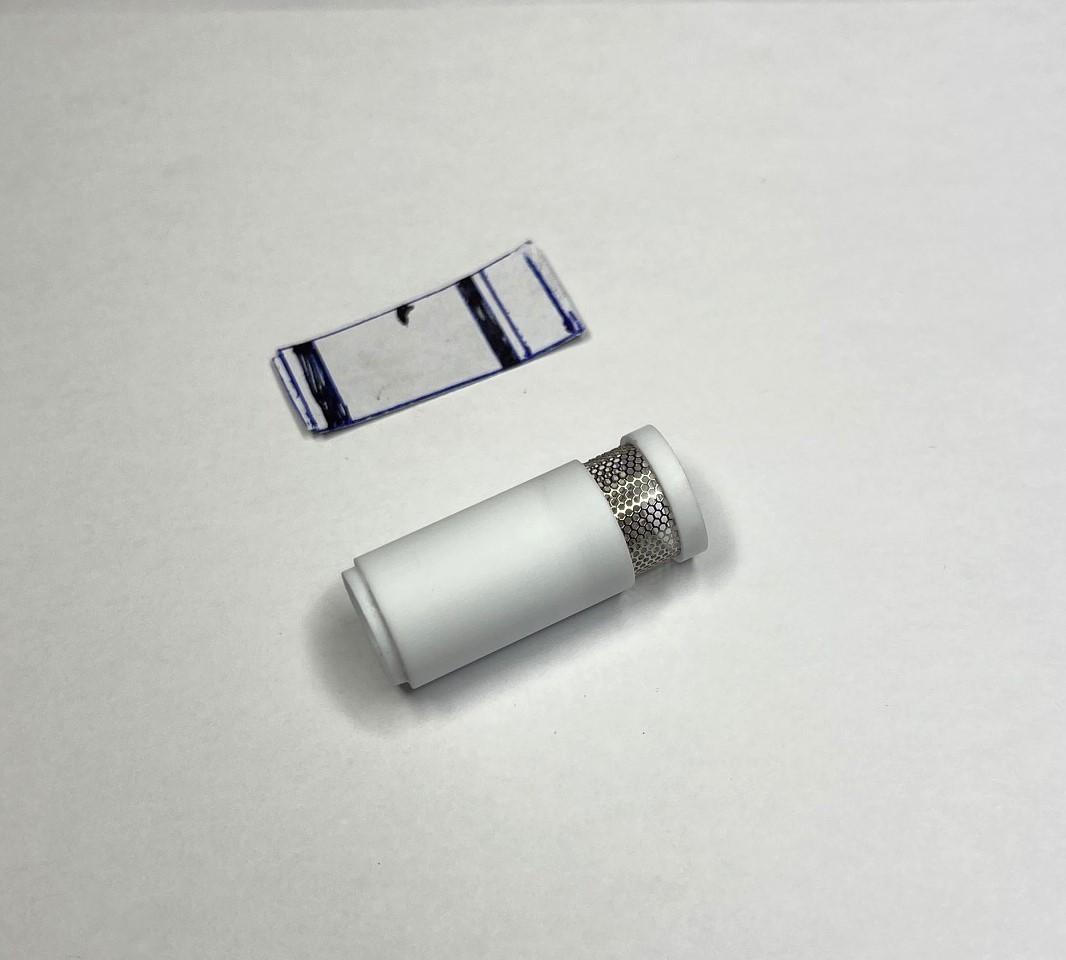
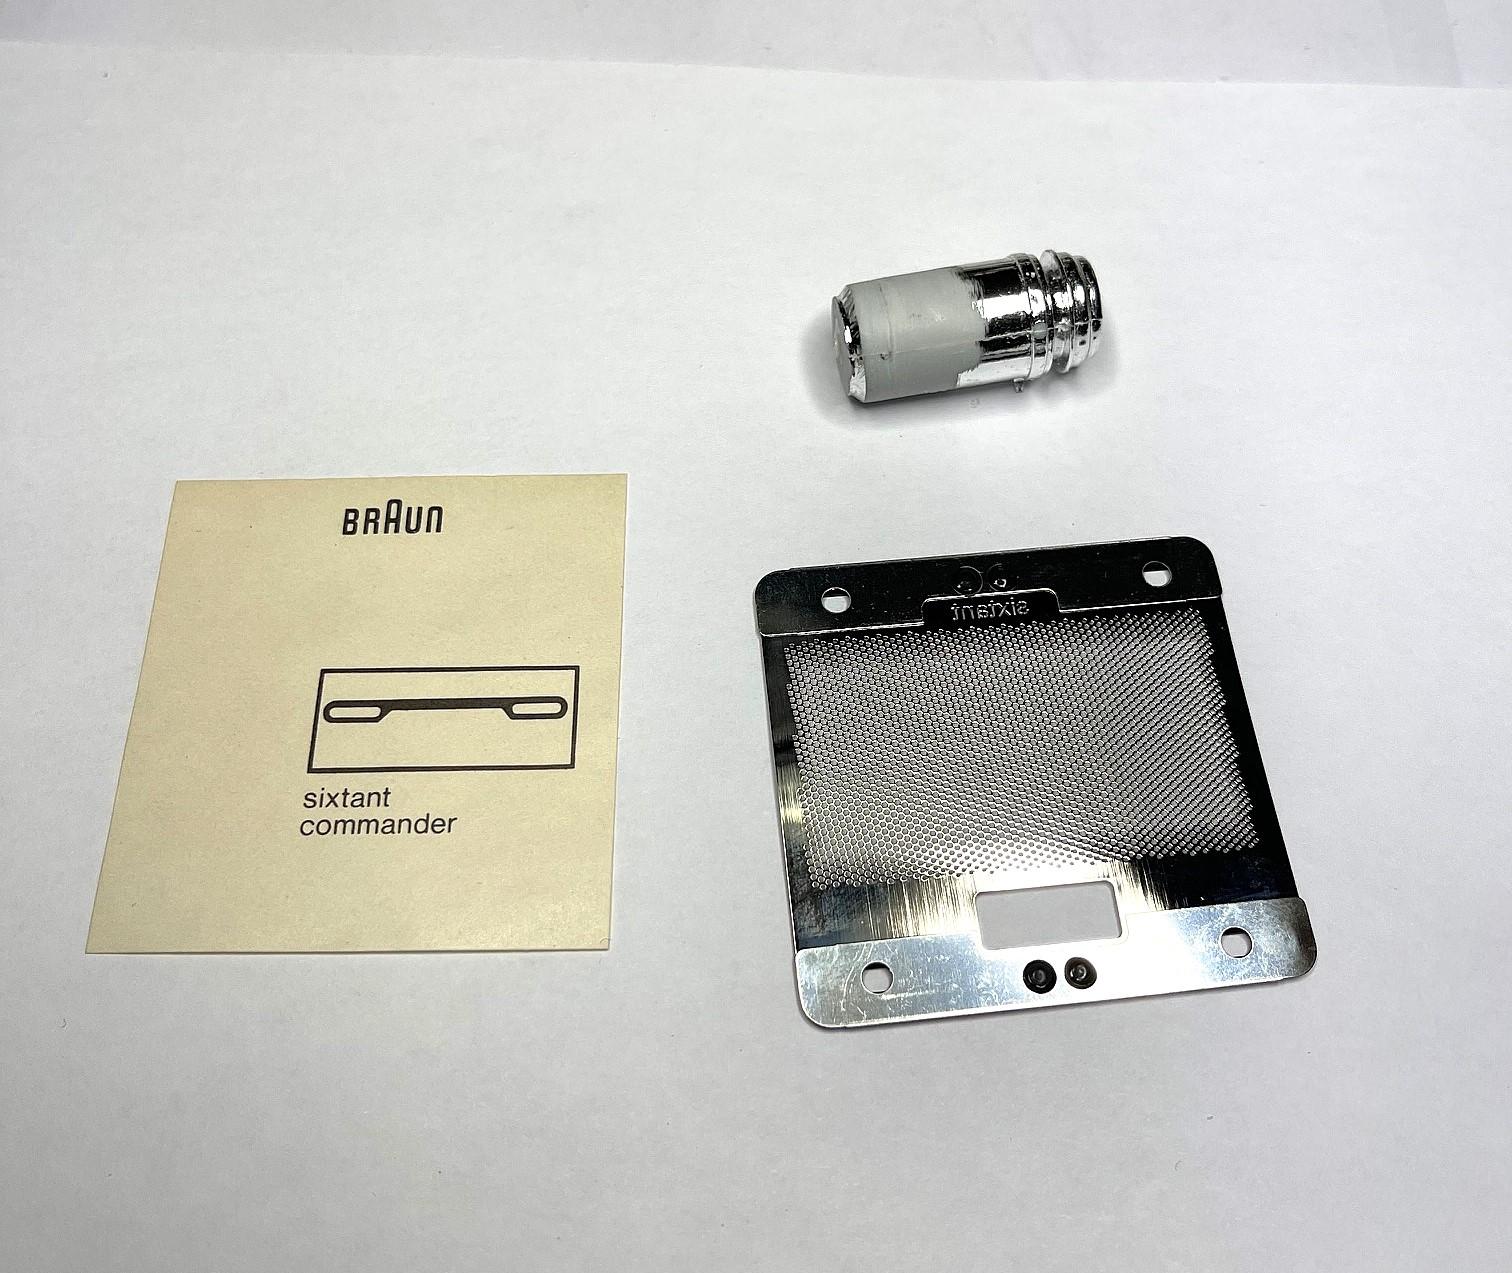
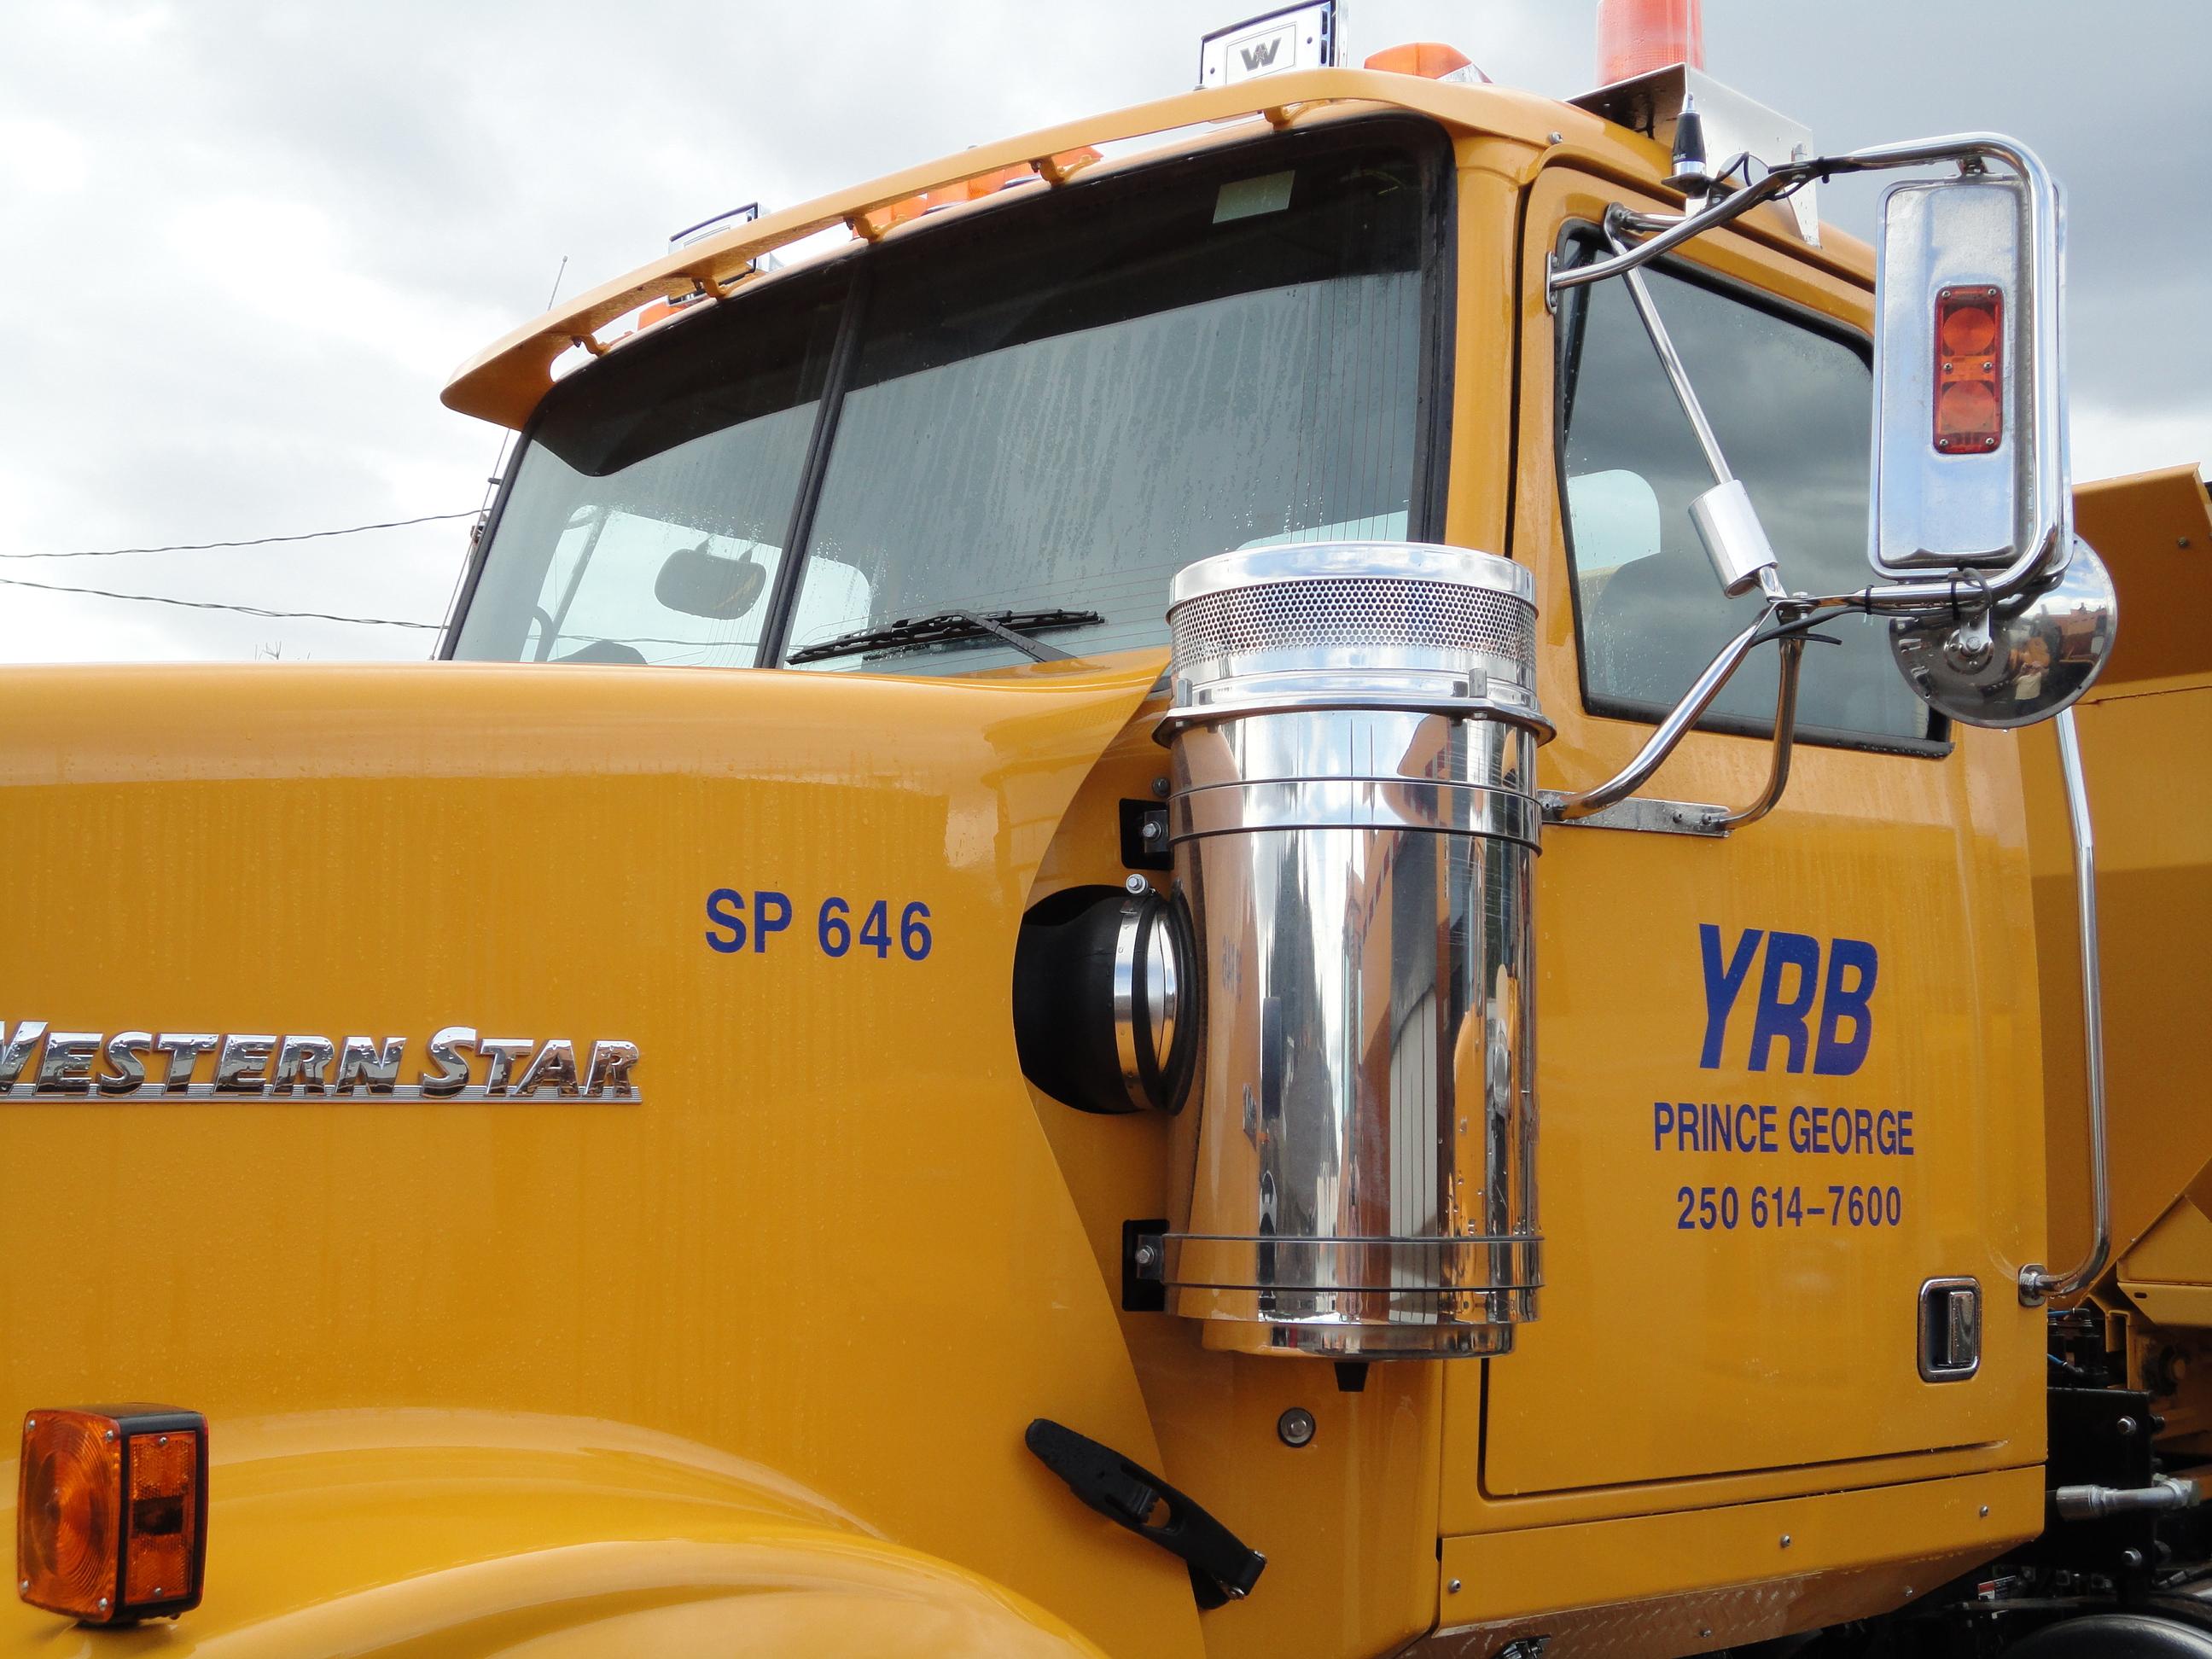
Been raining for several days now, and a bit too humid to paint - even in the heated shed. One of my issues, from way back, was the kit air cleaner cannister being too big - in a mock up, the bottom edge of the driver's side fender was hitting the cannister. A long overdue problem to solve, so I finally made myself tackle it. Gathered a few items to work with and made some progress! The air cleaner in the pic below is from an old kit - thought I could clean it up. But it wasn't close enough to resemble the Donaldson cannister on the real truck and too much work needed to be done for it to look smooth under chrome paint. I had a replacement screen from an old Braun, electric shave I thought I could use, to better look like the Donaldson - This is what I wanted to get closer to - The outer cannister scaled to 1/2" in diameter and I wanted to use the next smaller size, to attach the mesh to and slide that assembly up into a piece of the 1/2" tube - had a small sketch to keep me aware of proportions needed - Pieces cut out and squared up. I cut out a piece of paper to determine the size of the mesh section I needed to cut out of the shaver's screen. Once cut out, I needed to wrap the mesh section around a small dowel, so the mesh would retain a curved bend smaller than the inside tube, allowing it to stay in place until CA glued - I had glued the mesh section to a lower inner portion of tubing and to an upper, 2 mm section. Once glue had set, I was able to slip the 1/2", upper and lower tube sections over the inner tube/mesh, sealing the mesh in - I still need to close off the ends of the cannister and make those end pieces smooth. Plus, will need to make two, simple mounting brackets with straps and add the outlet pipe. I tried to be careful not to scratch the cannister body, so it would still look smooth under the chrome paint. Should be able to get most of this work done tomorrow. I appreciate the continuing patience as I get closer to getting this done - take care!
-
When I look at the body panels you form from brass, I keep wondering if you have a miniature English wheel at your bench. Amazing work, Randy!
-
’72 Dodge Demon Drag Racer 1/25 scale
BK9300 replied to AmericanMuscleFan's topic in WIP: Drag Racing Models
Likewise! -
An exceptional amount of skill was needed to craft this from scratch - and such a bonus for us to be able to see the inside, in all its detail, as well. Just amazing!
-
White Road Boss
BK9300 replied to Gary Chastain's topic in WIP: Model Trucks: Big Rigs and Heavy Equipment
It is a really good looking print - maybe I missed it, but where did you get Alpha-Centari’s file printed? -
Kenworth C500
BK9300 replied to Gary Chastain's topic in WIP: Model Trucks: Big Rigs and Heavy Equipment
I started a couple separate parts boxes for the next build, and am still getting some bits mixed up between the two projects I have. Pretty sure three builds would require part of another room for me - sounds like you’re very organized! -
Kenworth W-925 (mild custom)
BK9300 replied to Gary Chastain's topic in WIP: Model Trucks: Big Rigs and Heavy Equipment
Hate it when the ‘mind chatter’ chases sleep away - on the positive side, your engine is looking great! -
Ford Louisville
BK9300 replied to Jürgen M.'s topic in WIP: Model Trucks: Big Rigs and Heavy Equipment
I like the colour you chose for your frame - looks a bit lighter than semi gloss black, and a bit more steel like. What colour did you use? -
New build for my Pal Jeff in B.C.
BK9300 replied to ShakyCraftsman's topic in WIP: Model Trucks: Big Rigs and Heavy Equipment
Your painted engine looks great, Ron and excellent modifications to your hood. That can be very fussy work! -
Western Star 4900 FA plow truck
BK9300 replied to BK9300's topic in WIP: Model Trucks: Big Rigs and Heavy Equipment
Coming soon…if I stop with the distractions! Terrific to hear your summer hiatus from modeling may soon be over, Francis! As always, very generous comments from you. Hoping to be done soon, but no certainty about where it will ‘live’ when finished - for the moment, I think it would be very hard to part with! Looking forward to coming updates on your Demon!