BK9300
-
Posts
1,986 -
Joined
-
Last visited
Content Type
Profiles
Forums
Events
Gallery
Everything posted by BK9300
-

Western Star 4900 FA plow truck
BK9300 replied to BK9300's topic in WIP: Model Trucks: Big Rigs and Heavy Equipment
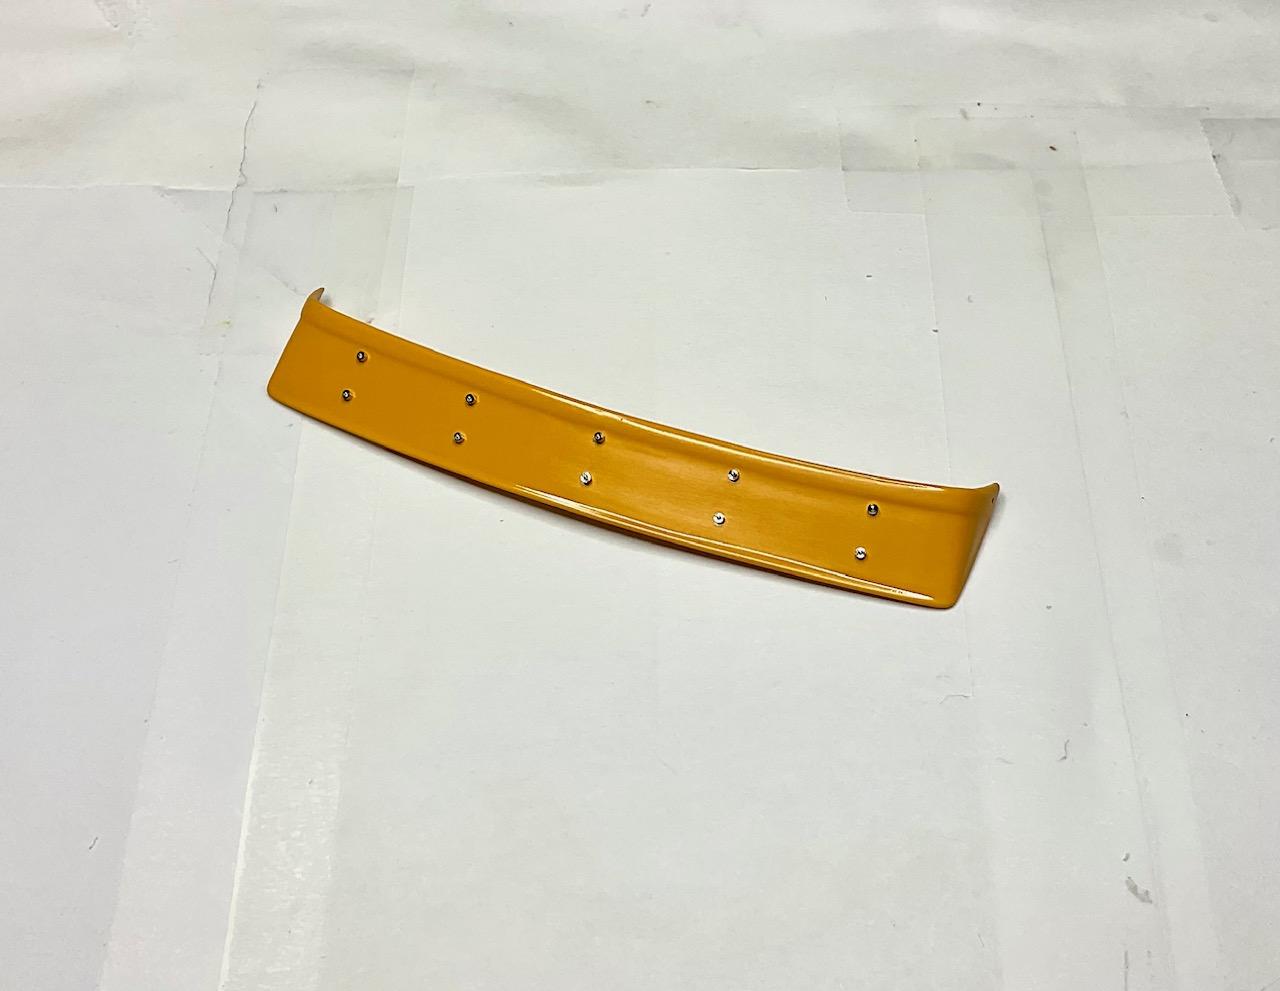
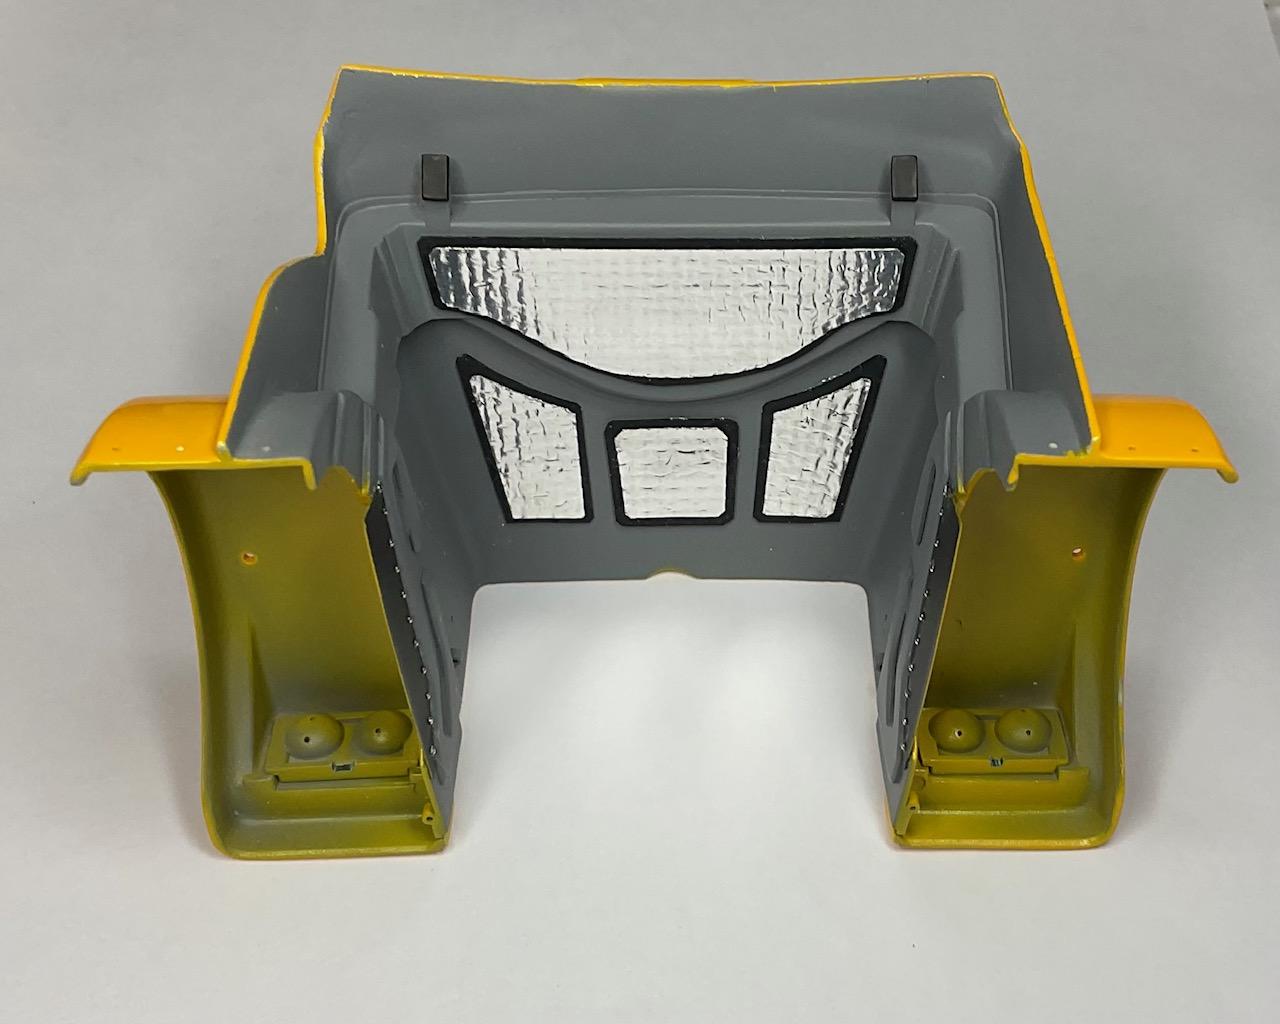
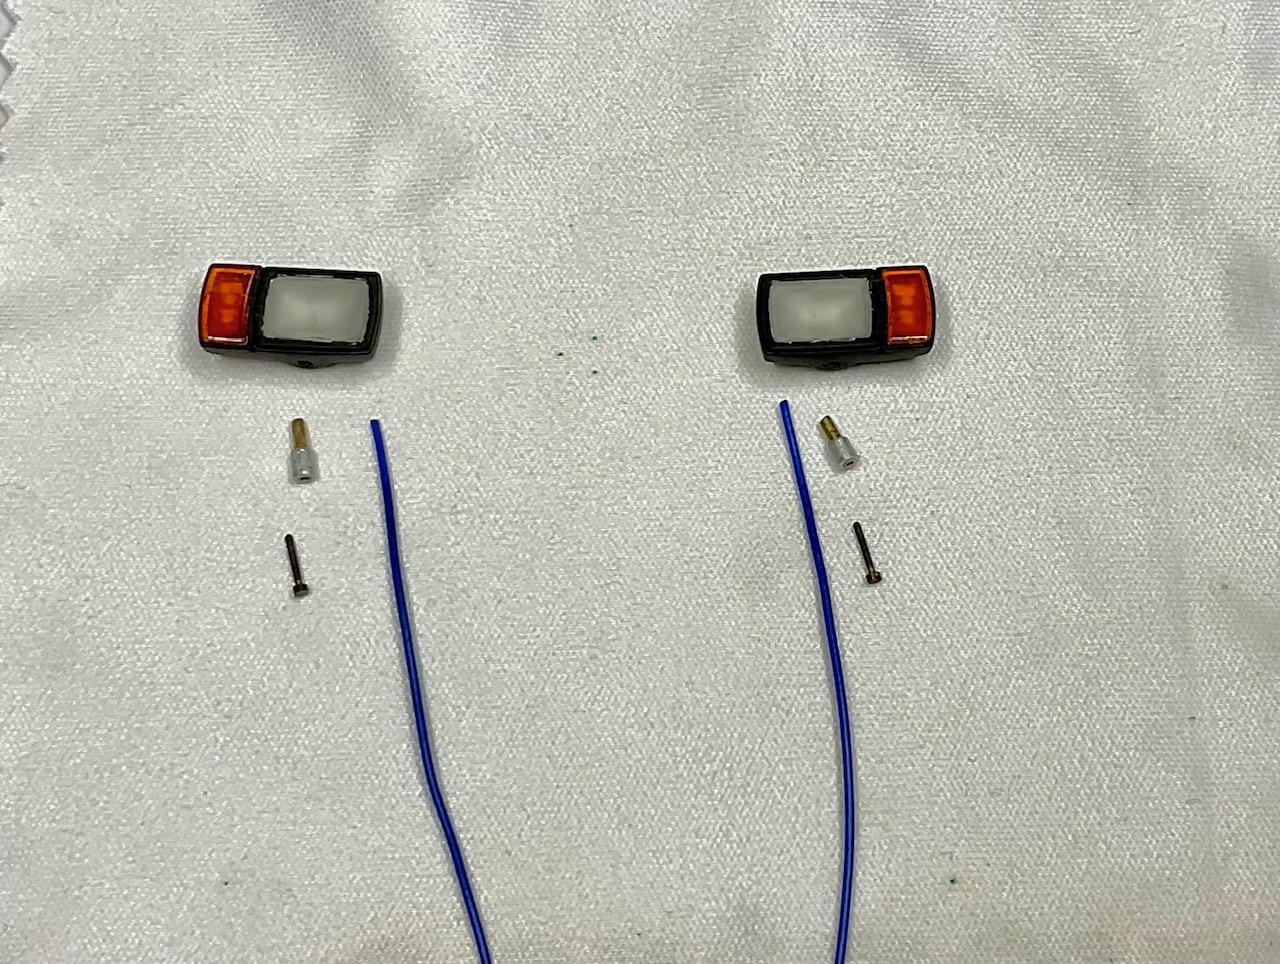
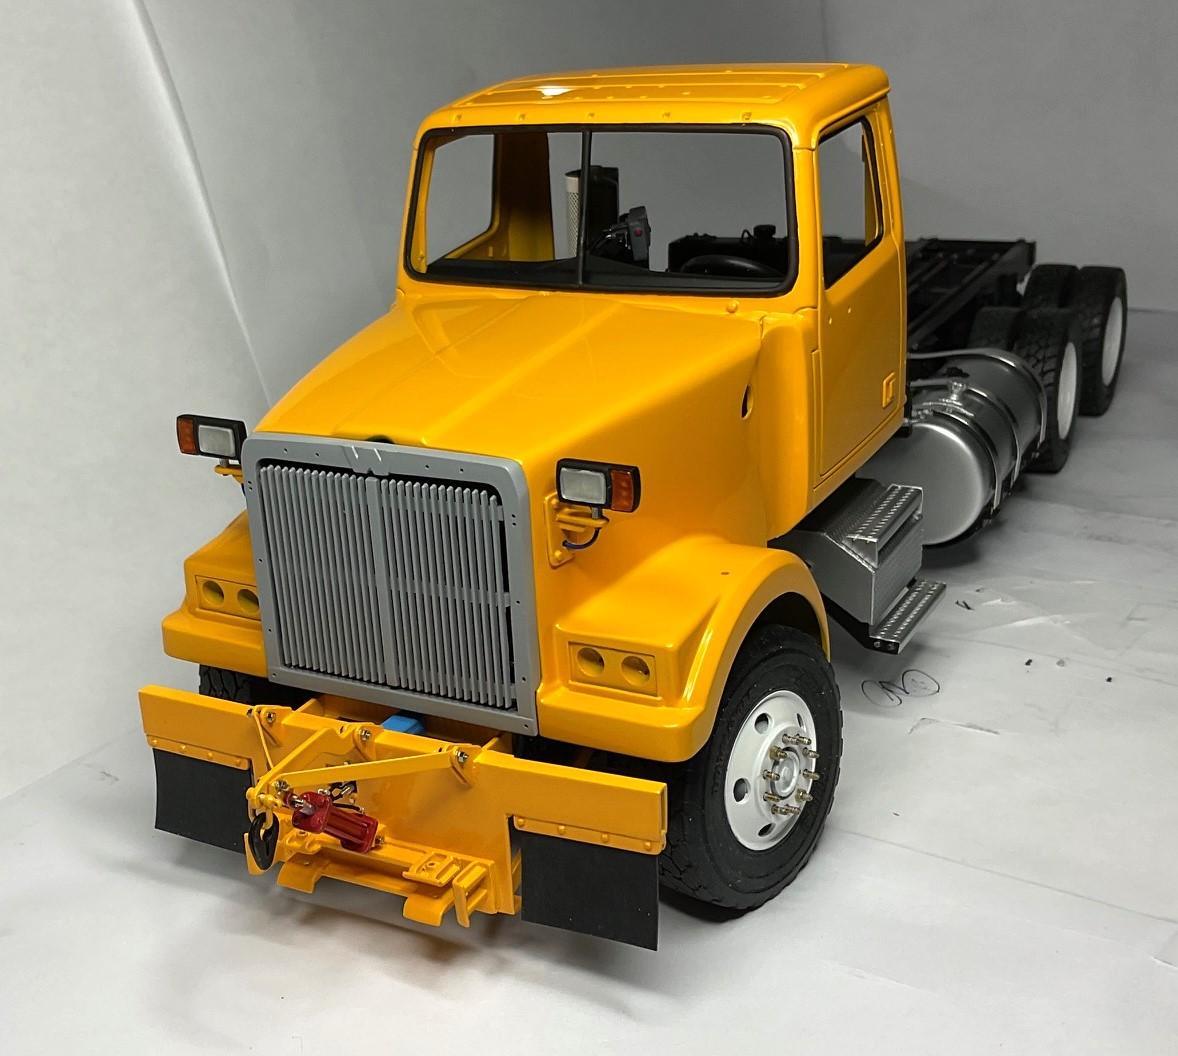
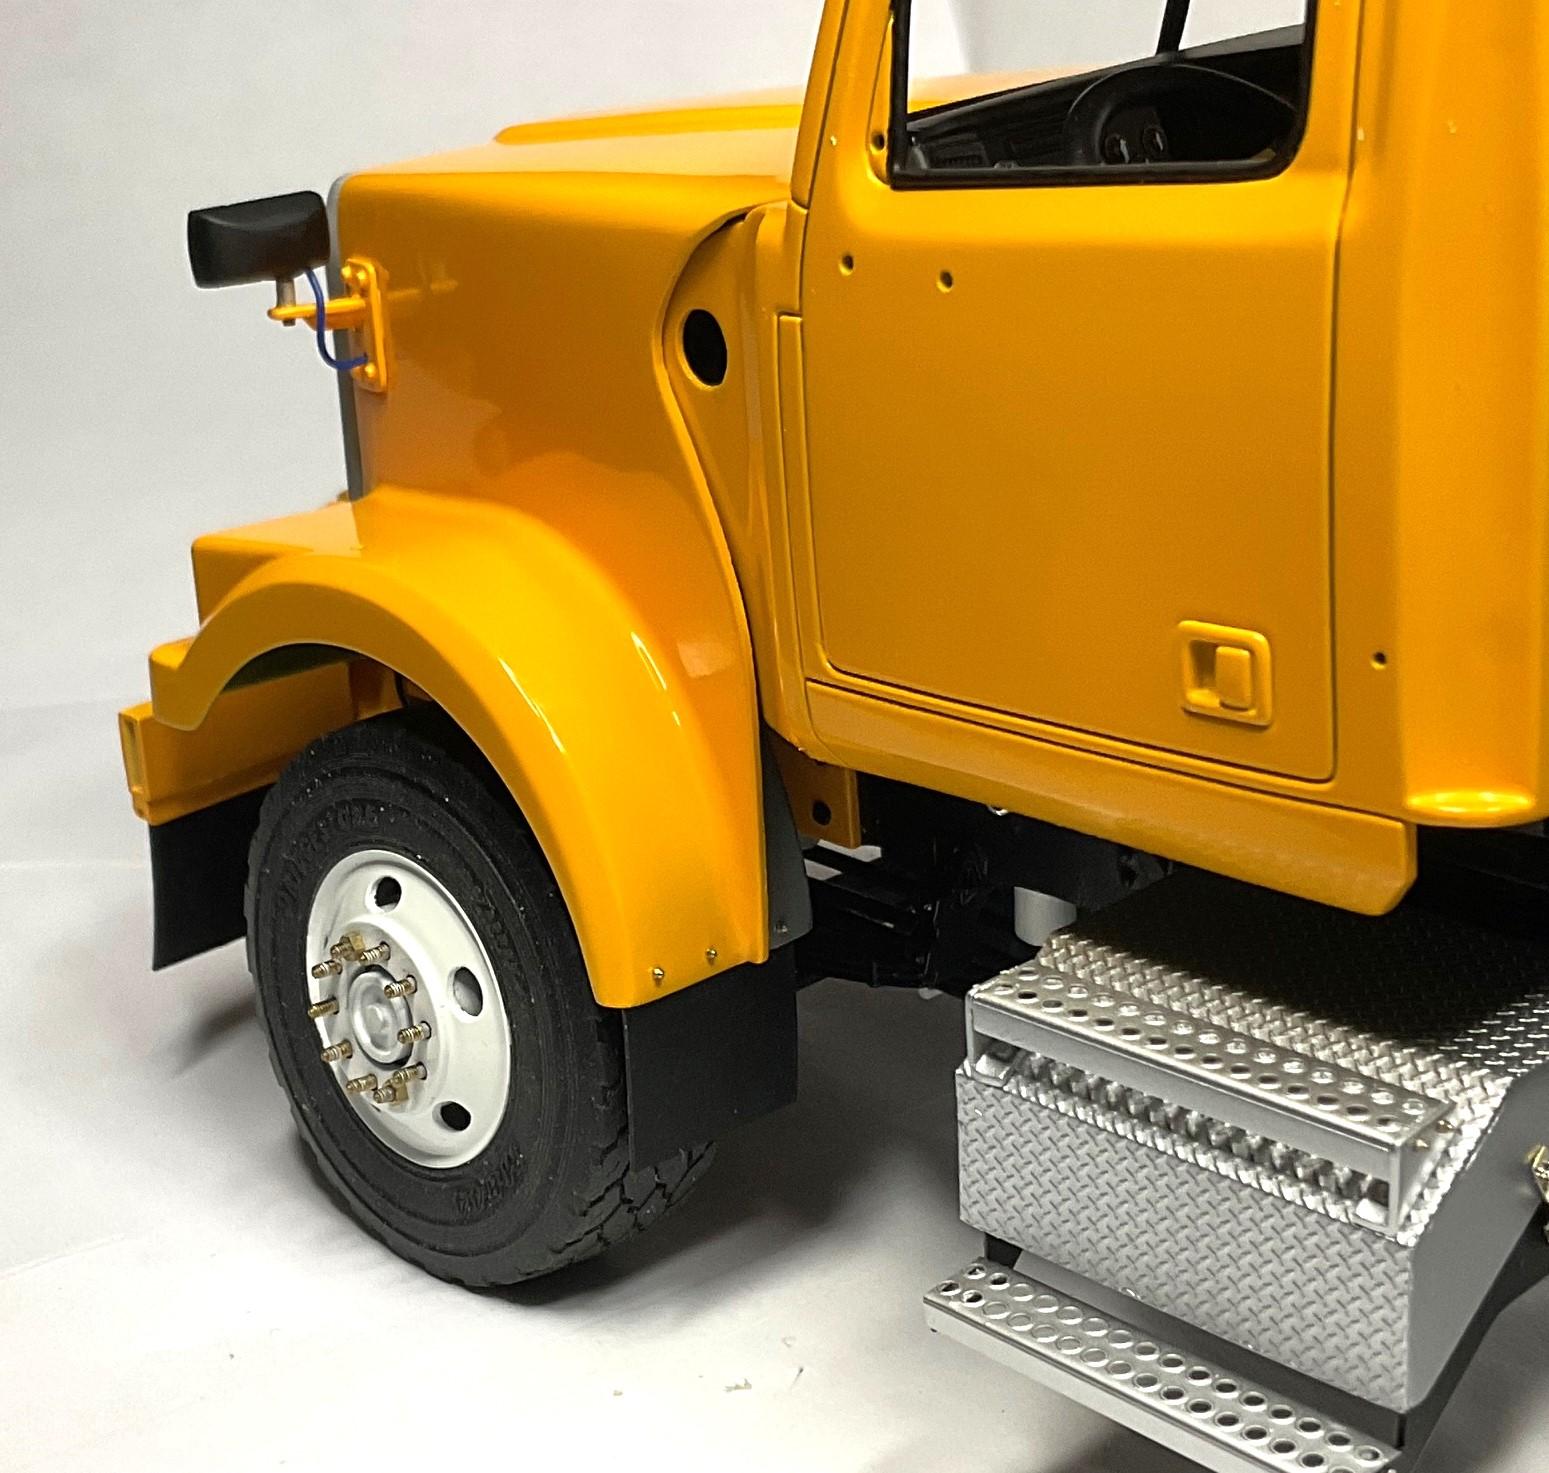
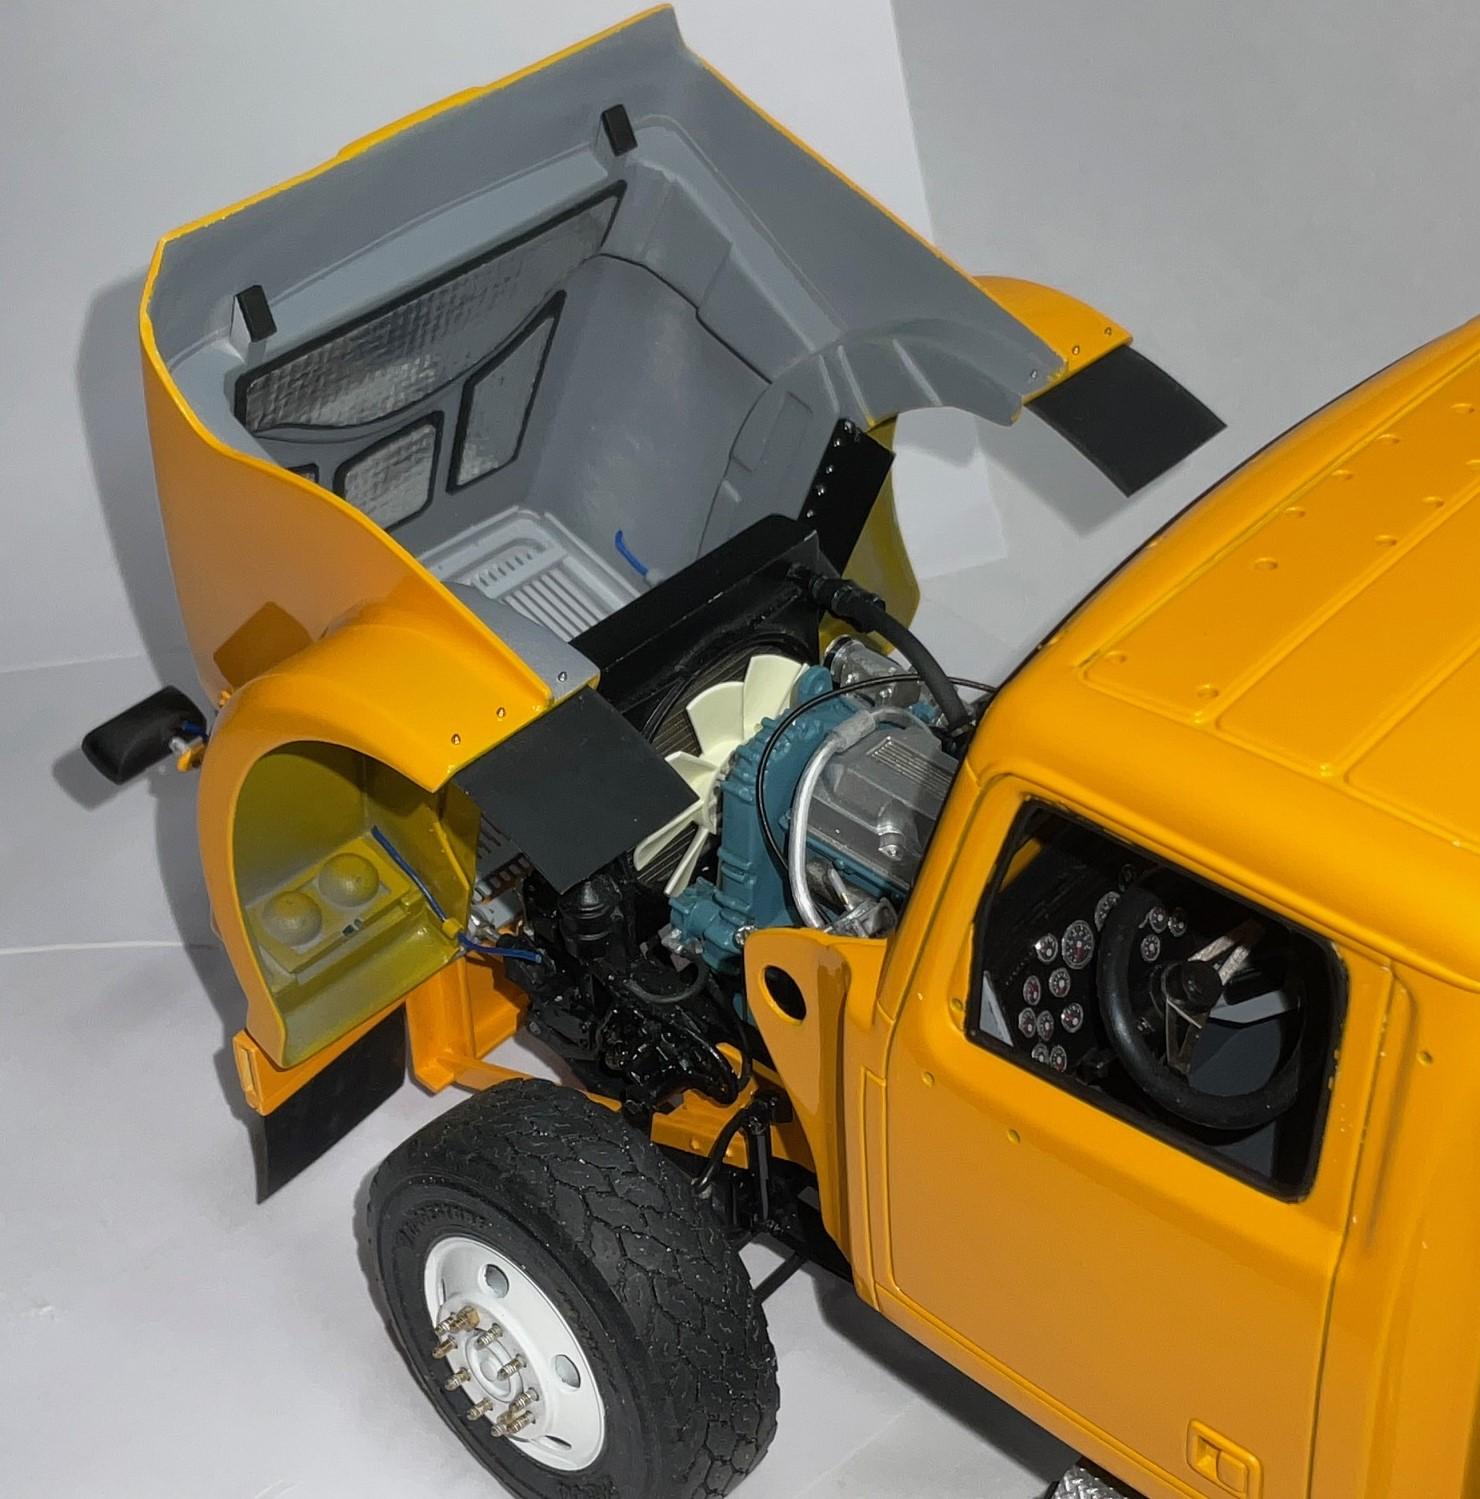
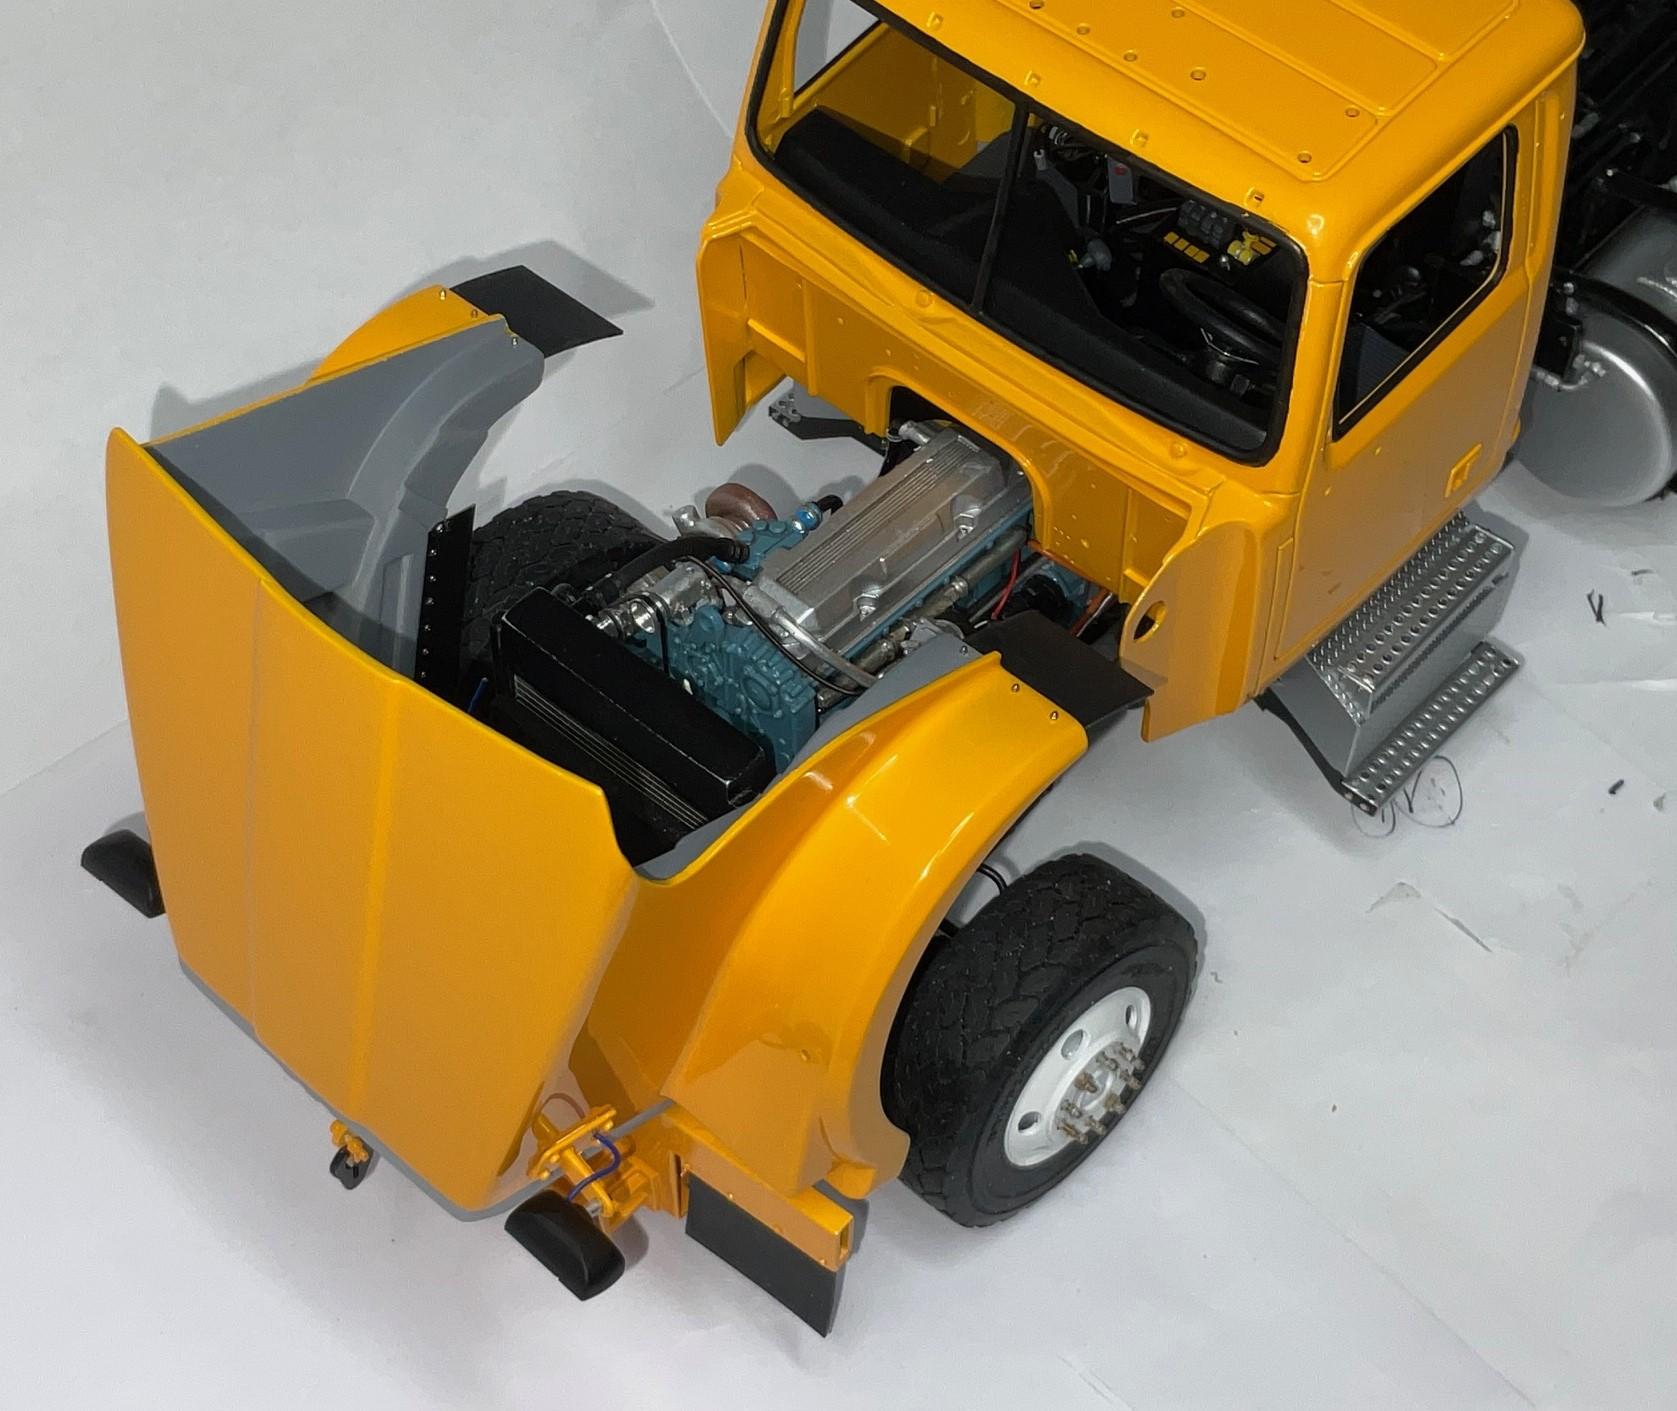
More fussing over the 'details', last couple days - good days, though! Worked on the cab visor, the inside of hood, some mud flaps for the back edge of the front fenders, got the plow lights assembled, attached them to the hood, and their wiring runs threaded back inside the hood. Got a bit of a polish on the visor then glued in the rivets to the mounting brackets - Added some thermal insulation - I took a bit of artistic license with this, because I could only find one blurry picture that showed at least this layout for the insulation. I only managed peek-a-boo pics of the insulation on the real truck - The plow light, turn signal lenses got painted this morning and now good to go with assembling the rest of the bits - One more shout out to @Bren, for printing these plow lights and lenses for me - can't imagine an alternative if he hadn't! Wiring runs going back into hood and through the grommets I had added, way back when . . . Made some mud flaps out of that silicon rubber used for the flaps on the sander and glued and bolted them in place. Another glaring thing needing attention will be to try and chrome paint the door handles (not looking forward to that) - This shot shows all the items worked on the last couple days. I just realized I still need to make the short mud flaps at the front of the inner fender. The blue wiring runs for the plow lights will feed into two looms. Going to have a go at adding some small wiring for the front lights and the fender signal lights - Some more things off the list, for sure, and still, lots to do. After those short mud flaps, air cleaner and chain hangers are made, I'm hoping for very little more fabrication. Some chrome painting and lots of little assemblies to finish this off, and sooner than later would be best!
-
Trucks I’d like to build😎
BK9300 replied to NOBLNG's topic in General Automotive Talk (Trucks and Cars)
Those are awesome pics! Even the second one, which looks like an AI rendered vehicle. -
Love that rumble!
-
Road Boss 2 Project
BK9300 replied to DRIPTROIT 71's topic in WIP: Model Trucks: Big Rigs and Heavy Equipment
Another beautiful build! It's pretty cool to also see (some of) the assortment of your previous builds that show up in your pics. Lots to look at! -
International Transtar CO 4070A
BK9300 replied to Wolf's topic in WIP: Model Trucks: Big Rigs and Heavy Equipment
The photo etch upgrade kit is sure going to look nice in this truck - looking forward to watching your progress. -
Western Star 4900 FA plow truck
BK9300 replied to BK9300's topic in WIP: Model Trucks: Big Rigs and Heavy Equipment
The flat black, acrylic I used really chips easy, at the slightest touch. Will definitely need to try something different, like the Sharpie, or the flat black foil, for next build. Going to need to be careful putting together the rest of the cab - no stress, right?! -
Western Star 4900 FA plow truck
BK9300 replied to BK9300's topic in WIP: Model Trucks: Big Rigs and Heavy Equipment
I realized that part of my last post was kind of stupid - I can’t clear over both the colour coat and the flat black. I’ll just live with needing to touch up the black if needed. Last night I did find some flat black adhesive foil, made by Hasegawa, and ordered some - for future projects, and maybe as a last resort backup for this one, if the acrylic doesn’t holdup.
-
Western Star 4900 FA plow truck
BK9300 replied to BK9300's topic in WIP: Model Trucks: Big Rigs and Heavy Equipment
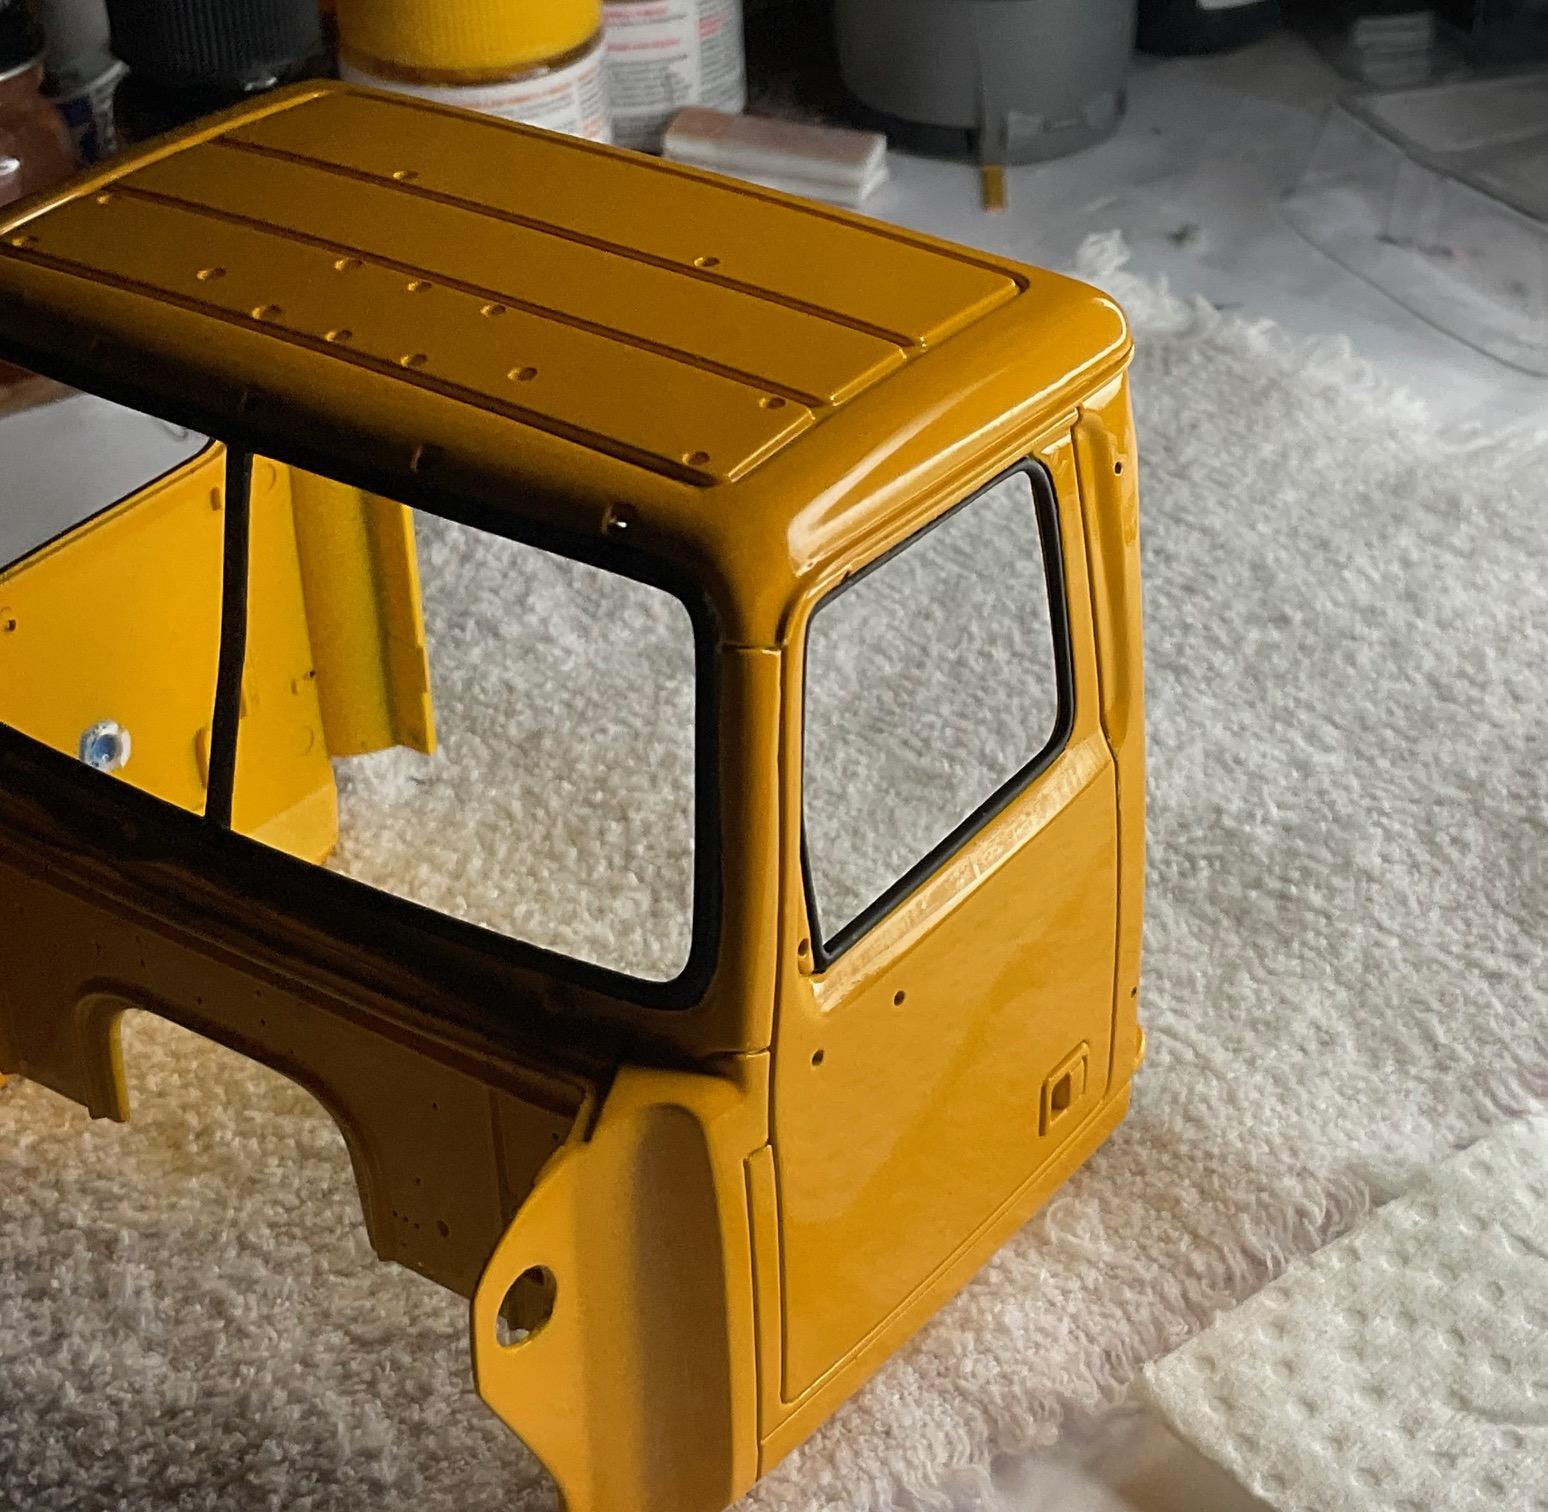
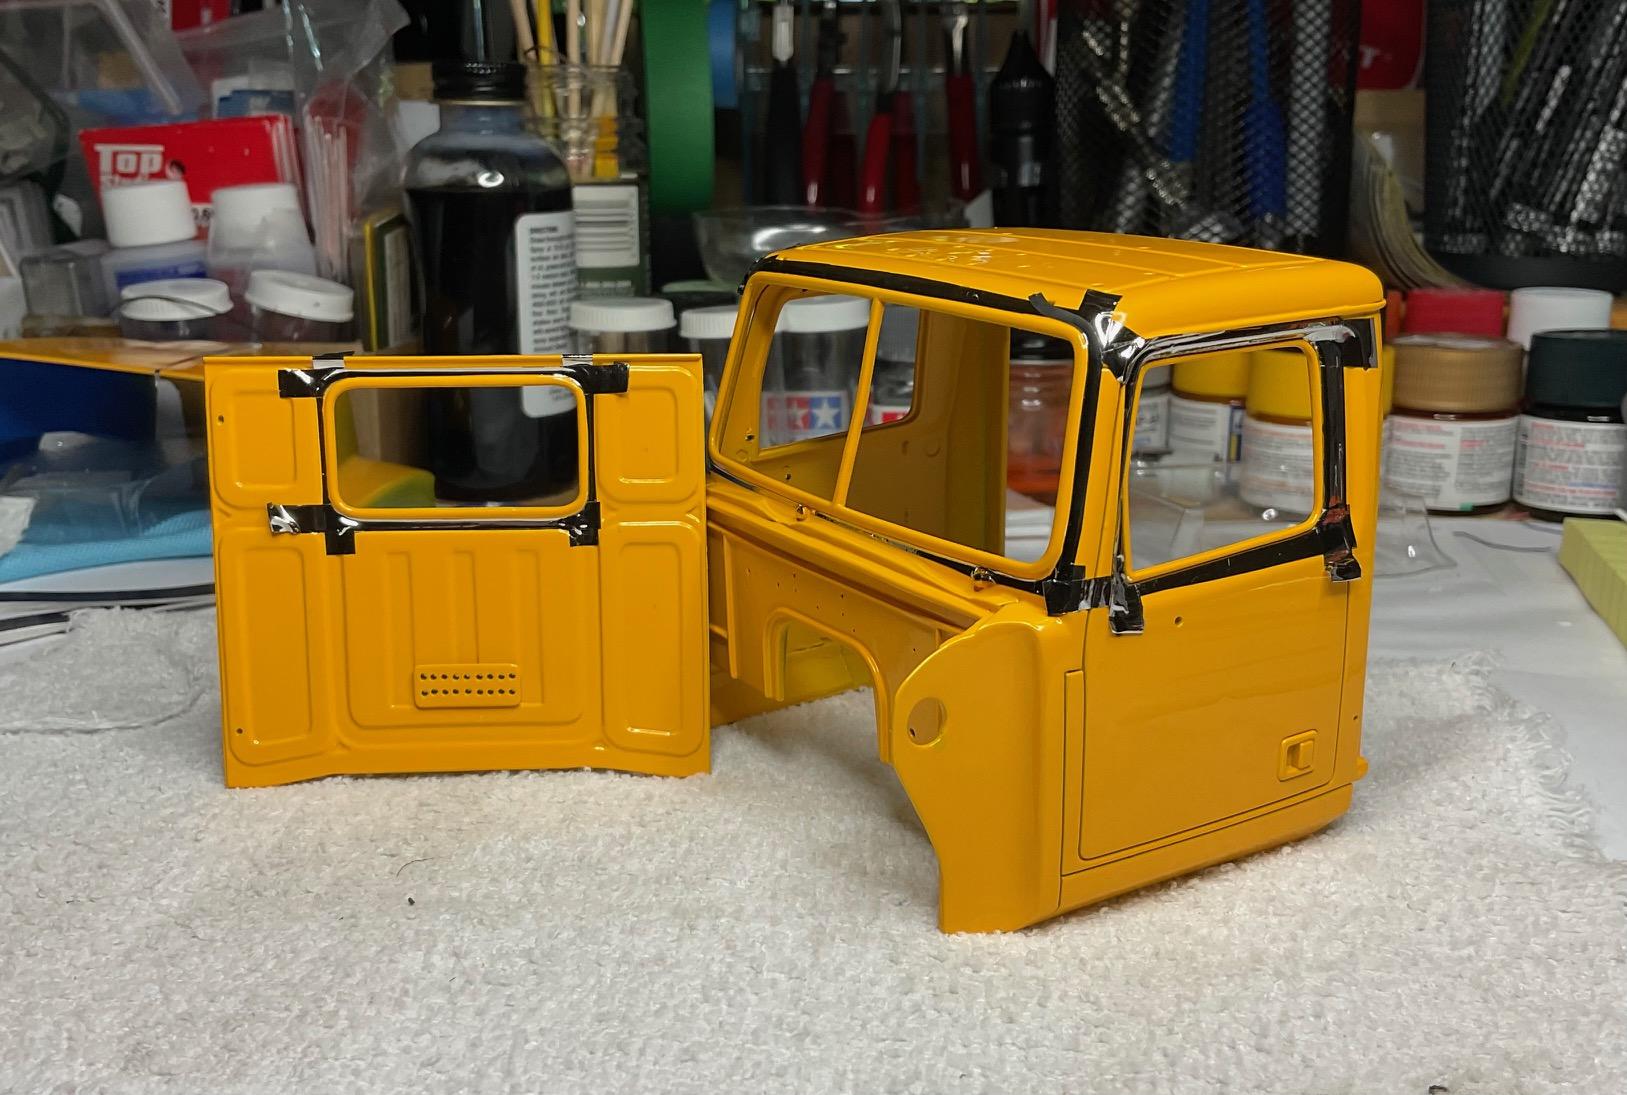
The rubber seals have been painted using that AK Interactive acrylic marker pen - Some touch-up with a fine brush was needed after carefully removing the Tamiya film used as masking - I removed it about 1/2 hour after applying the paint and even then, the paint was cured enough to be brittle along the edges - Maybe the Tamiya film is not the best masking to use either - leaves a very fine edge, but also left a bit of adhesive residue, on the door just below the seal. 'Goo-Gone' won't remove it either, so may need to try and polish it off, carefully - The other problem is how to protect the brittle flat black during the remainder of the build. Not sure I want to clear over the polished paint, or what clear I could use over both the acrylic, flat black and the lacquer body colour (acrylic lacquer?) but maybe will need to do that, after putting the decals on the doors. No end of issues!
-
Western Star 4900 FA plow truck
BK9300 replied to BK9300's topic in WIP: Model Trucks: Big Rigs and Heavy Equipment
Good idea for the future - I did happen across some AK Interactive, acrylic marker pens this afternoon at the hobby store. Picked up a couple flat black ones and going to see how they work. Appreciate the info, Scott! -
Western Star 4900 FA plow truck
BK9300 replied to BK9300's topic in WIP: Model Trucks: Big Rigs and Heavy Equipment
Thanks, Gary - if need be, I can fix it after the seals are painted, or replace the whole vertical piece. Less worried about that, than painting! -
Western Star 4900 FA plow truck
BK9300 replied to BK9300's topic in WIP: Model Trucks: Big Rigs and Heavy Equipment
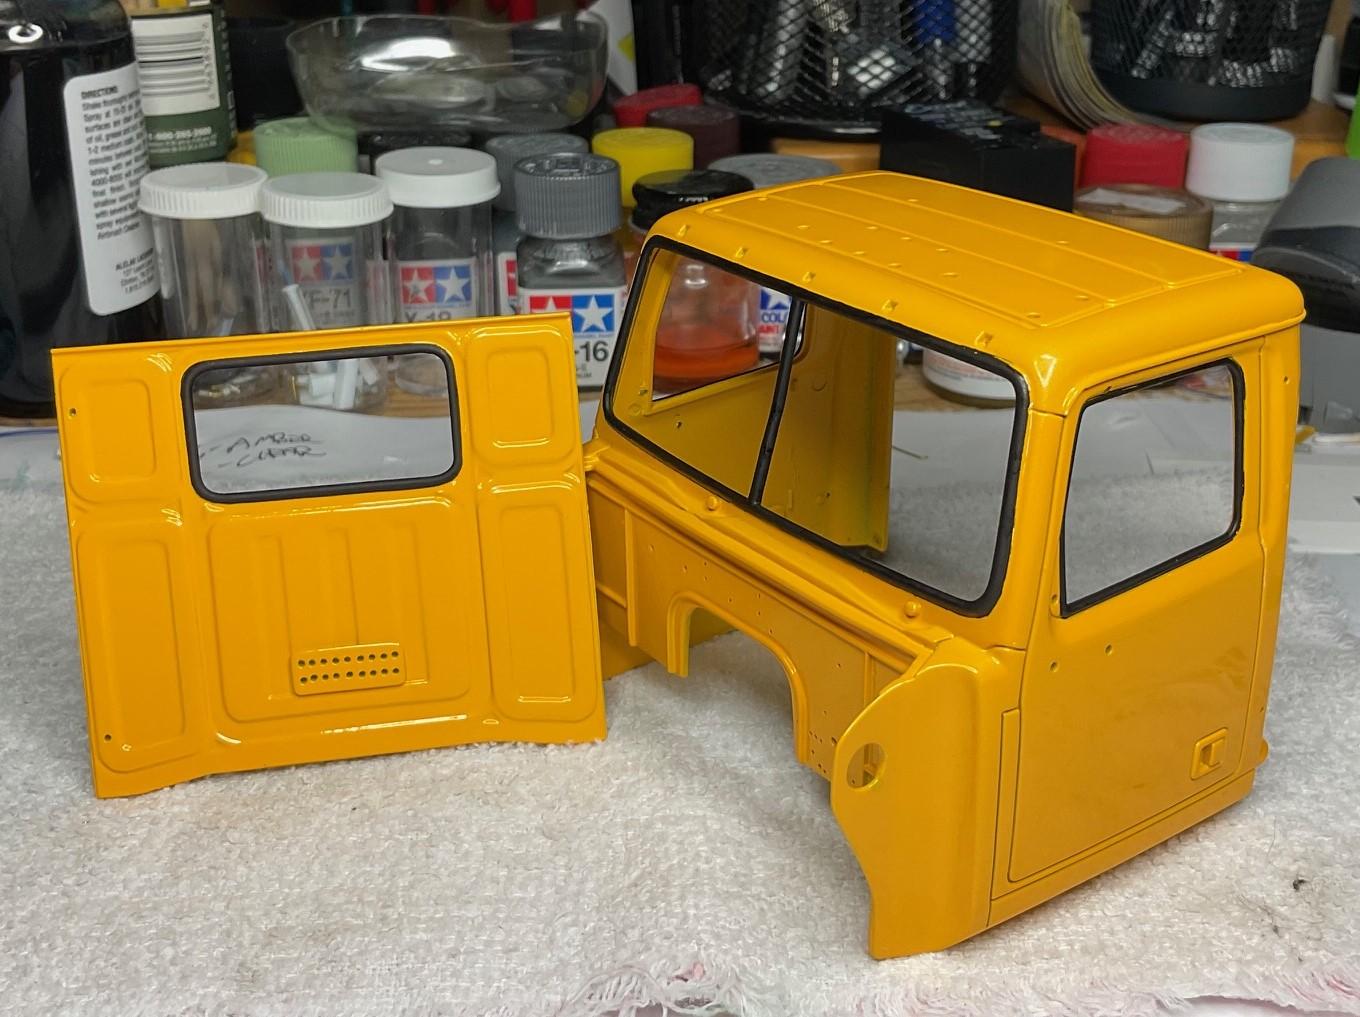
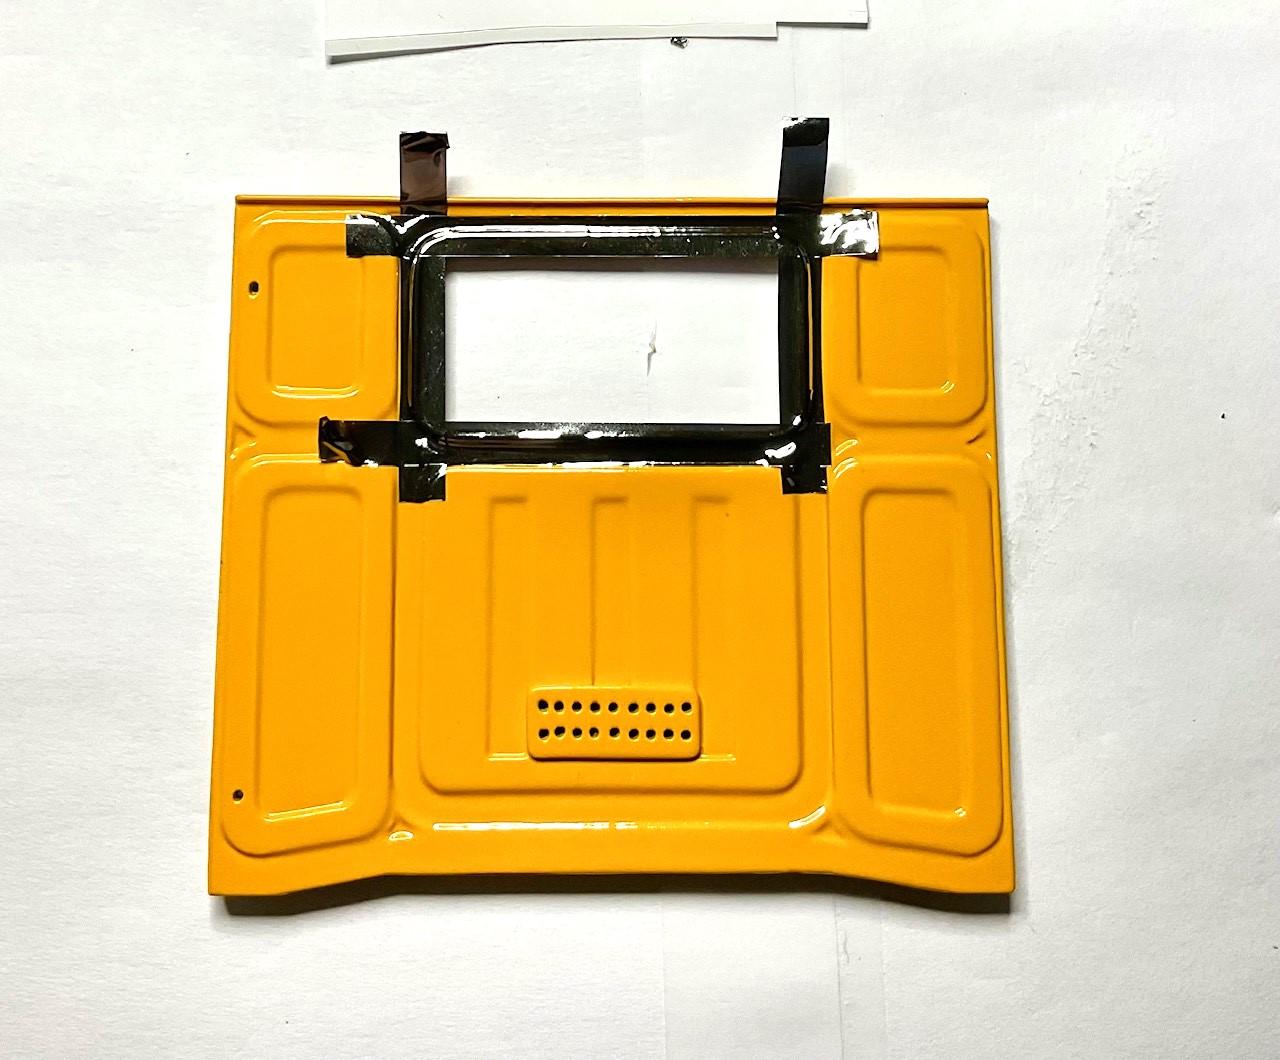
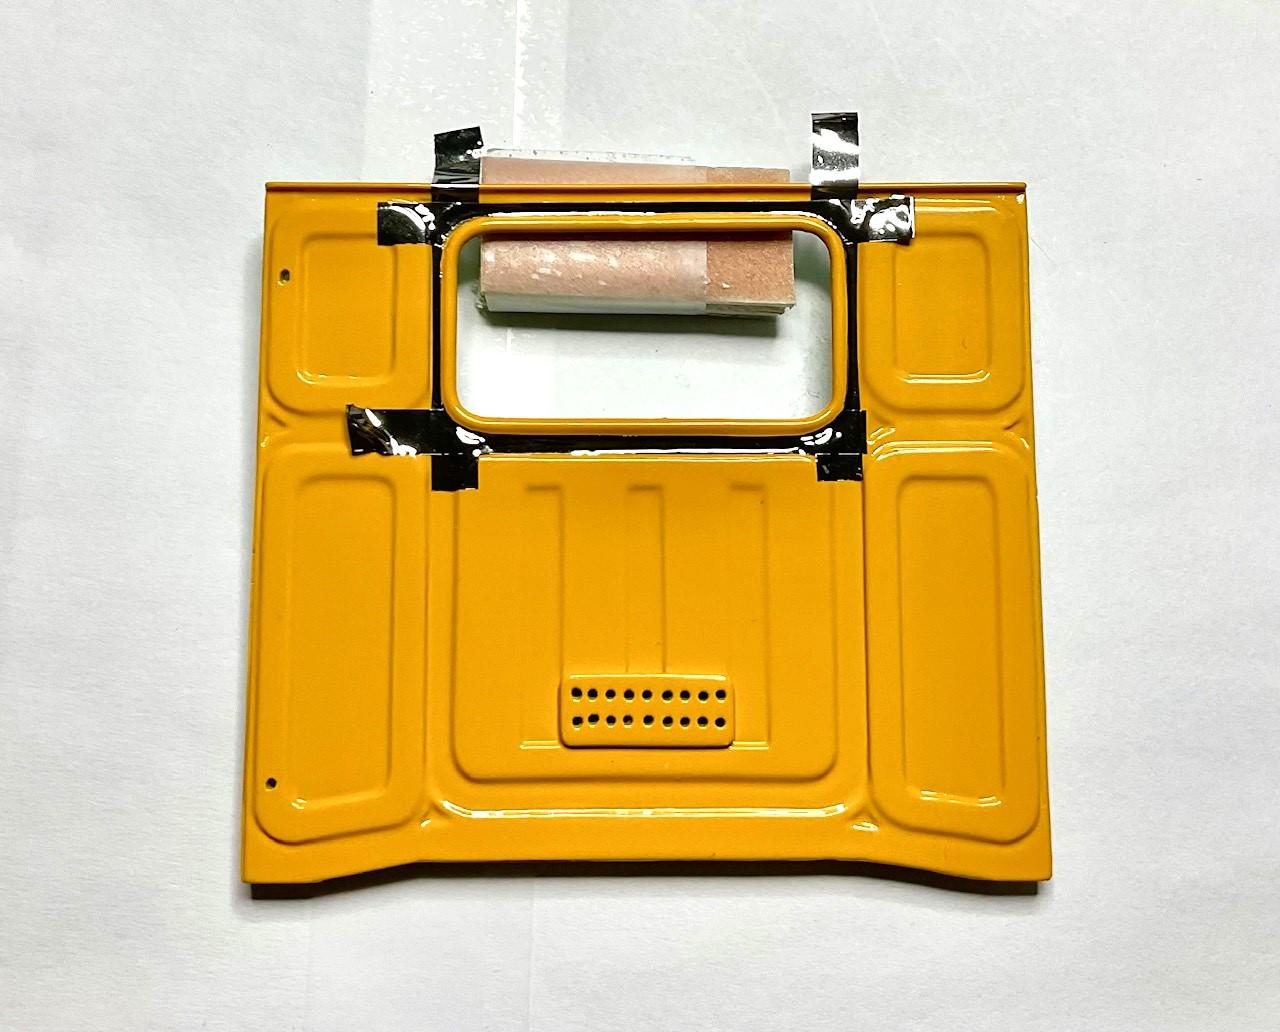
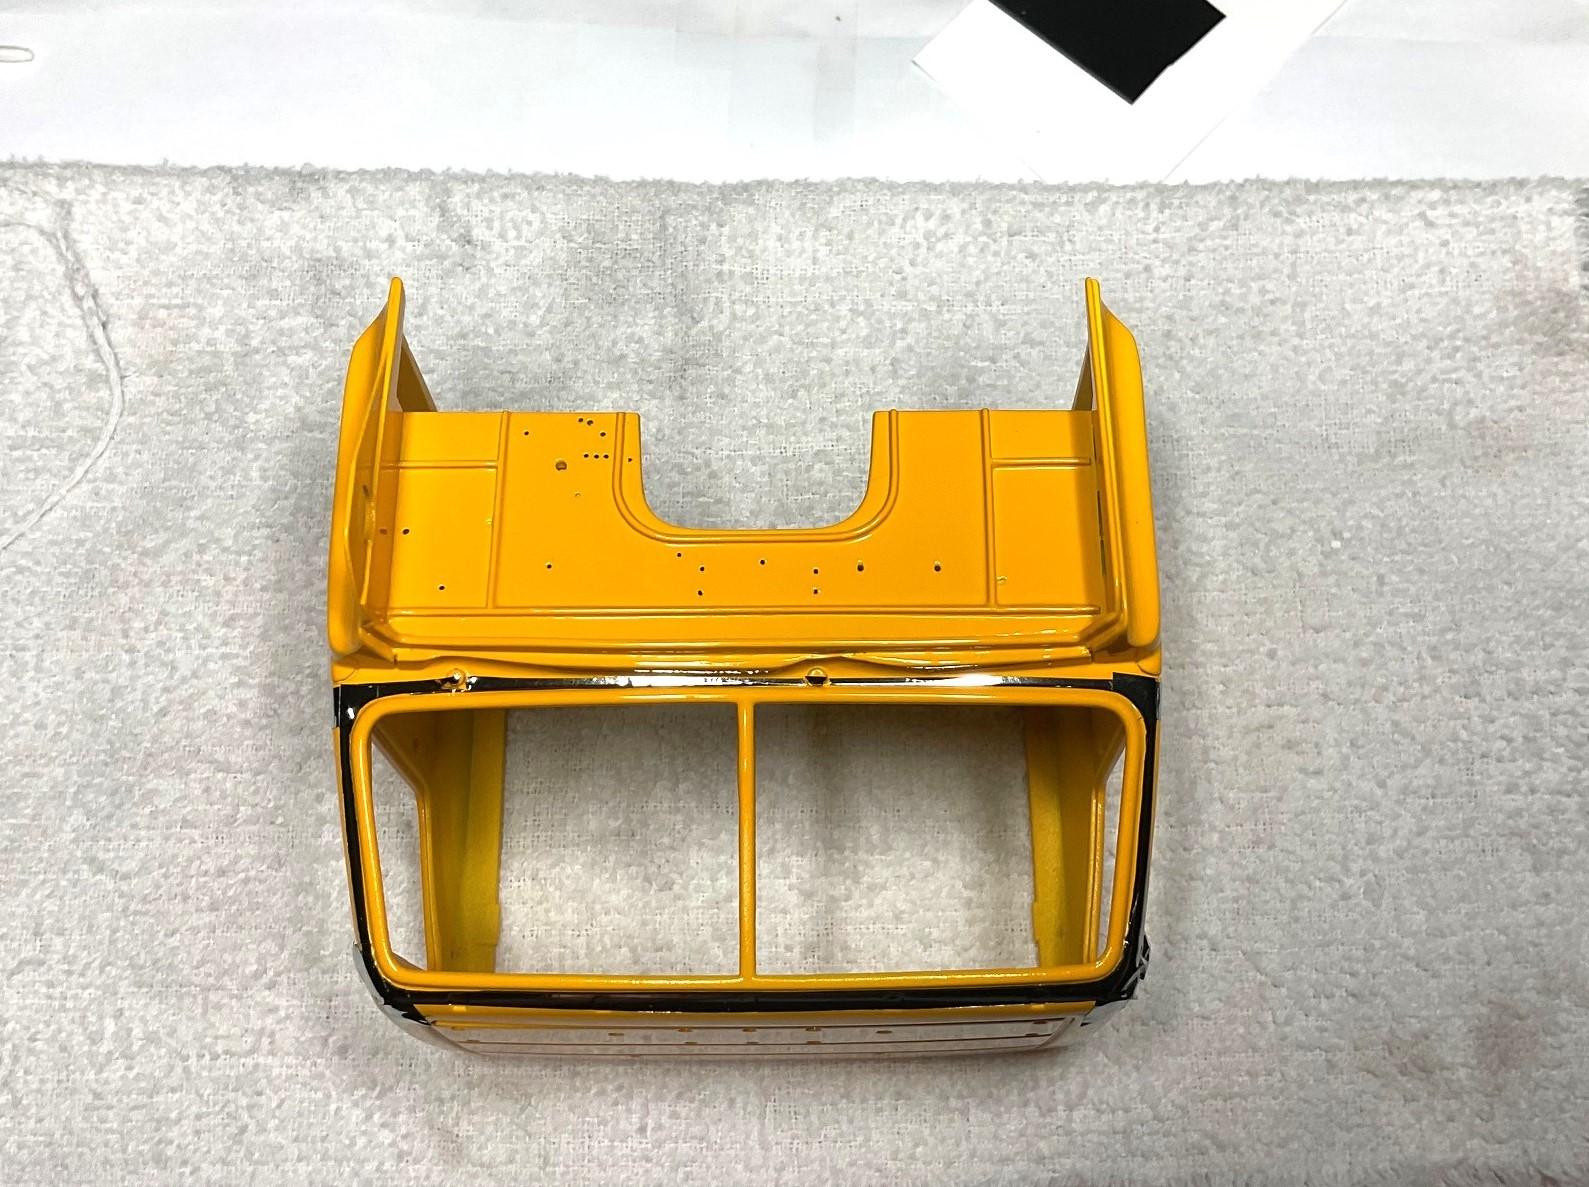
I started in with cab again, this morning, intending to get the window seals painted black. Thought about masking the whole cab, leaving just the seals, and spraying them, and just as quickly talked myself out of it - worried about a screwup on the polished finish! I never got to painting today, but did manage to get the seals isolated by using some stretchy, Tamiya chrome film. Said it before, but I'm finding myself more uncertain doing the fine detailing, than at any time doing the actual building of the the model - go figure! Maybe I'll still brush paint the seals later today. So, the plan was to use strips of the adhesive, stretchy film to cover a small border around the seals, and re-expose the seals by using a new X-acto blade to trim and remove the tape covering the seals - This was the third effort to apply the film and make clean cuts all the way around the rear seal - I've still ended up with a bit of mess in the upper, driver's side corner - Wasn't able to get any overlap at the windshield wiper mounts, so will have to be careful painting those areas - Doing all that, I managed to re-break/crack the center windshield support post at the old break - not visible now, but is when the windshield is pressed up against it - Really hoping this will work out - looking at the pics, I'm sure I can't put too much paint on, or removing the film might chip the paint. Maybe remove the film before the enamel paint has fully set up. It will either work, or could be faced with an unwelcome do-over. I'd rather build another front plow than face that prospect!
-
Western Star 4900 FA plow truck
BK9300 replied to BK9300's topic in WIP: Model Trucks: Big Rigs and Heavy Equipment
Thanks very much, Tom! It was a good feeling to see all the parts in place on the truck. -
Kenworth W-925 (mild custom)
BK9300 replied to Gary Chastain's topic in WIP: Model Trucks: Big Rigs and Heavy Equipment
I really dislike do-overs - I can feel your pain! You'll get it, though. -
Link-Belt HC-218 Truck Crane
BK9300 replied to redneckrigger's topic in WIP: Model Trucks: Big Rigs and Heavy Equipment
Slick work, Tom - interesting to see how it’s all supposed to work. -
Service Truck Kitbash
BK9300 replied to PHPaul's topic in WIP: Model Trucks: Big Rigs and Heavy Equipment
Looks terrific, all assembled, Paul! So, any ideas what the next one will be? -
Freightliner FLC
BK9300 replied to Jürgen M.'s topic in WIP: Model Trucks: Big Rigs and Heavy Equipment
I think it’s quite interesting, Jurgen - have been wanting to do a similar tally myself, but haven’t taken the time to do it. Also, quite curious how you made such clean, tight, radius bends in your exhaust pipes, without crimping the aluminum. Good job! -
WC-54 Ambulance
BK9300 replied to Chariots of Fire's topic in WIP: Model Trucks: Pickups, Vans, SUVs, Light Commercial
Always like checking in, Charles, and seeing new features added, like the functioning rear steps. Also very inventive use of the wall brackets to support / stow the stretchers. Lots to see in your builds! -
Kenworth W-925 (mild custom)
BK9300 replied to Gary Chastain's topic in WIP: Model Trucks: Big Rigs and Heavy Equipment
Perseverance is a definite asset in this hobby, to get things just how you envision them. I don’t think the paint is too dark and it’s a nice contrast to your chromed items, like the battery box/steps, wheels, and soon enough, your bumper. Looks great! -
Link-Belt HC-218 Truck Crane
BK9300 replied to redneckrigger's topic in WIP: Model Trucks: Big Rigs and Heavy Equipment
More amazing fabrication! Real pleasure to follow the progress. -
Turned out really well, and cudos for your weathering and rusting on the frame - looks great!
-
Amt ford snow plow parts numbers
BK9300 replied to kenton44's topic in Model Building Questions and Answers
Been a long time since I looked, but the part 'numbers' in the last set of instructions I had were the order the parts were to be assembled in, so not much help. -
Very cool idea for a build - well done, Ron!
-
AMT 1960 Apache Kustom Kruiser
BK9300 replied to Stt226's topic in Model Trucks: Pickups, Vans, SUVs, Light Commercial
Very clean build - love this vintage of pickups! -
K&R Kustoms+Rods '34 5ive Window Chopped Coupe
BK9300 replied to Kit Karson's topic in WIP: Model Cars
Very smart idea using the magnets to change wheel/tire combos. -
Western Star 4900 FA plow truck
BK9300 replied to BK9300's topic in WIP: Model Trucks: Big Rigs and Heavy Equipment
Thanks a lot, Gary! I appreciate that, Daniel - been a fun go, and just about done! Thanks very much, Jurgen!