BK9300
-
Posts
1,986 -
Joined
-
Last visited
Content Type
Profiles
Forums
Events
Gallery
Everything posted by BK9300
-

Mack DM600/Leach Garbage Truck
BK9300 replied to Scott Eriksen's topic in WIP: Model Trucks: Big Rigs and Heavy Equipment
I caught the reference to Tony - good stuff! -
Western Star 4900 FA plow truck
BK9300 replied to BK9300's topic in WIP: Model Trucks: Big Rigs and Heavy Equipment
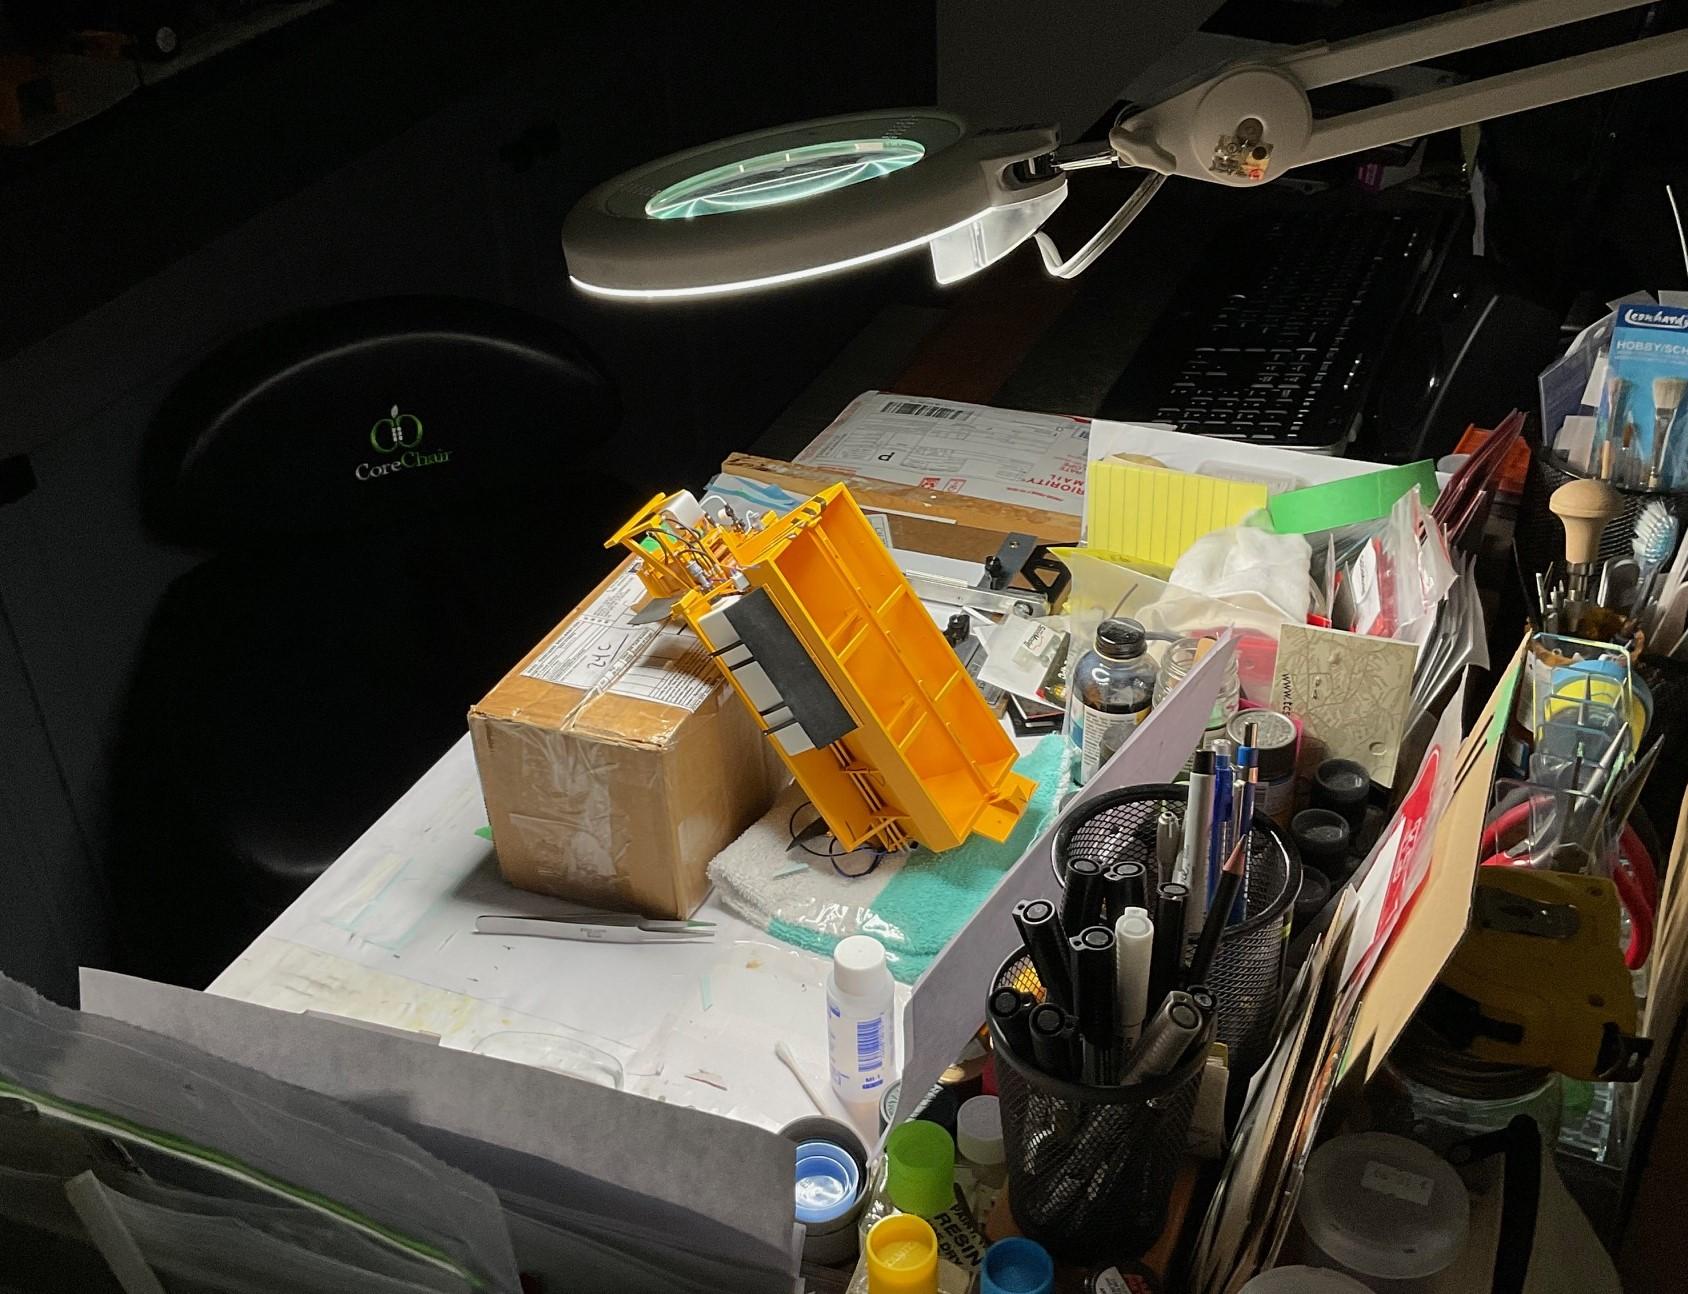
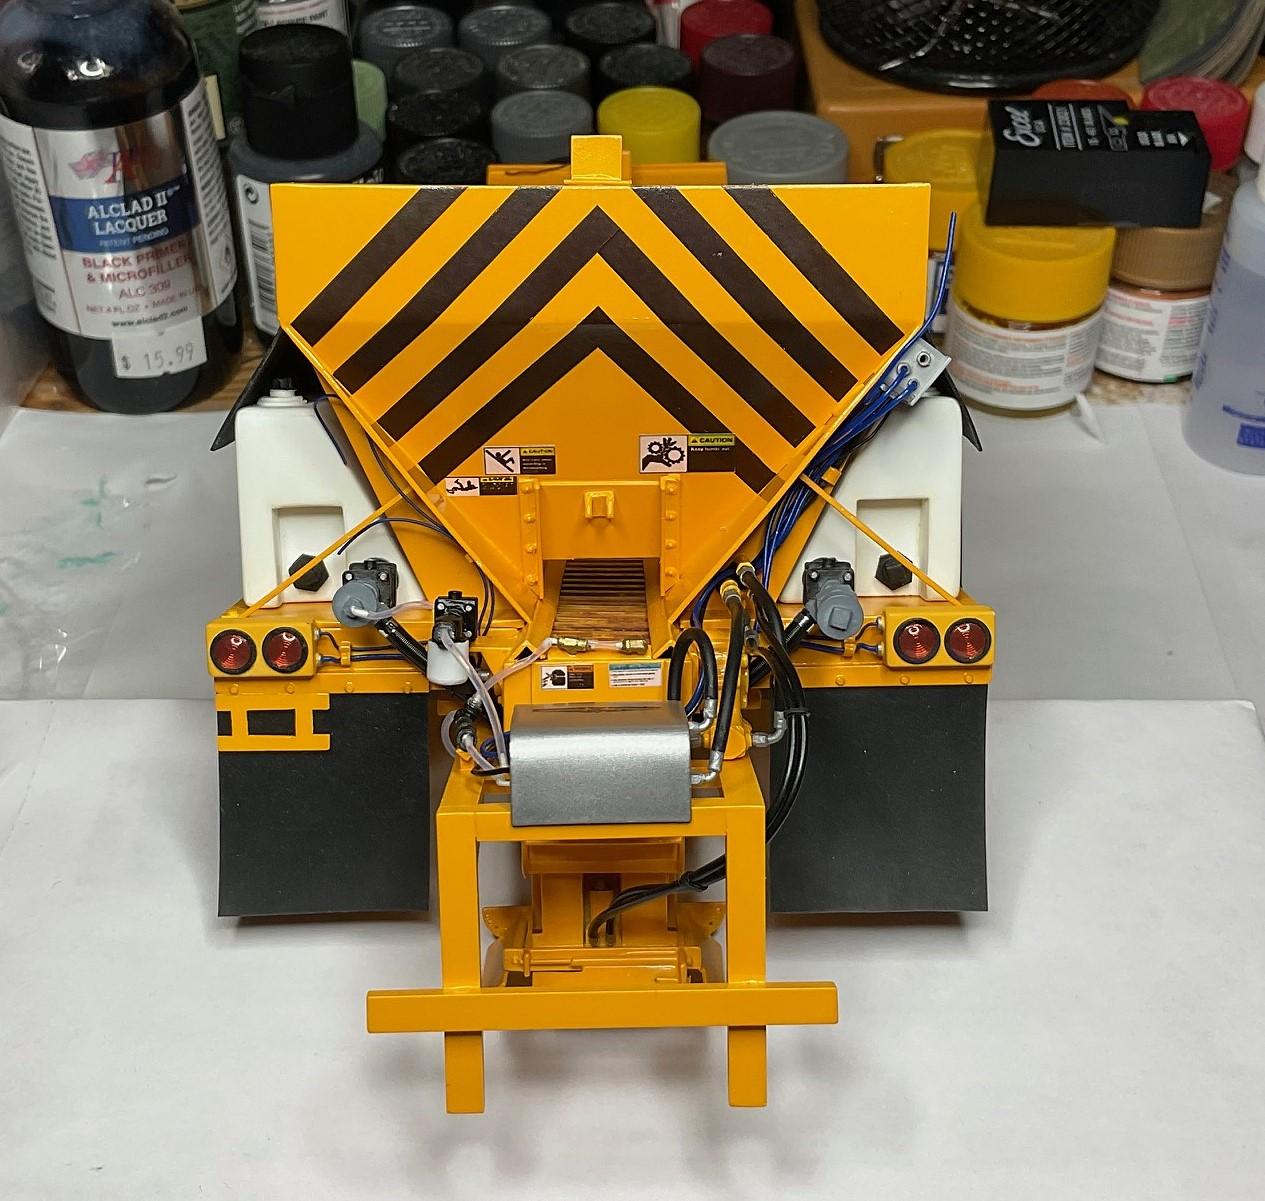
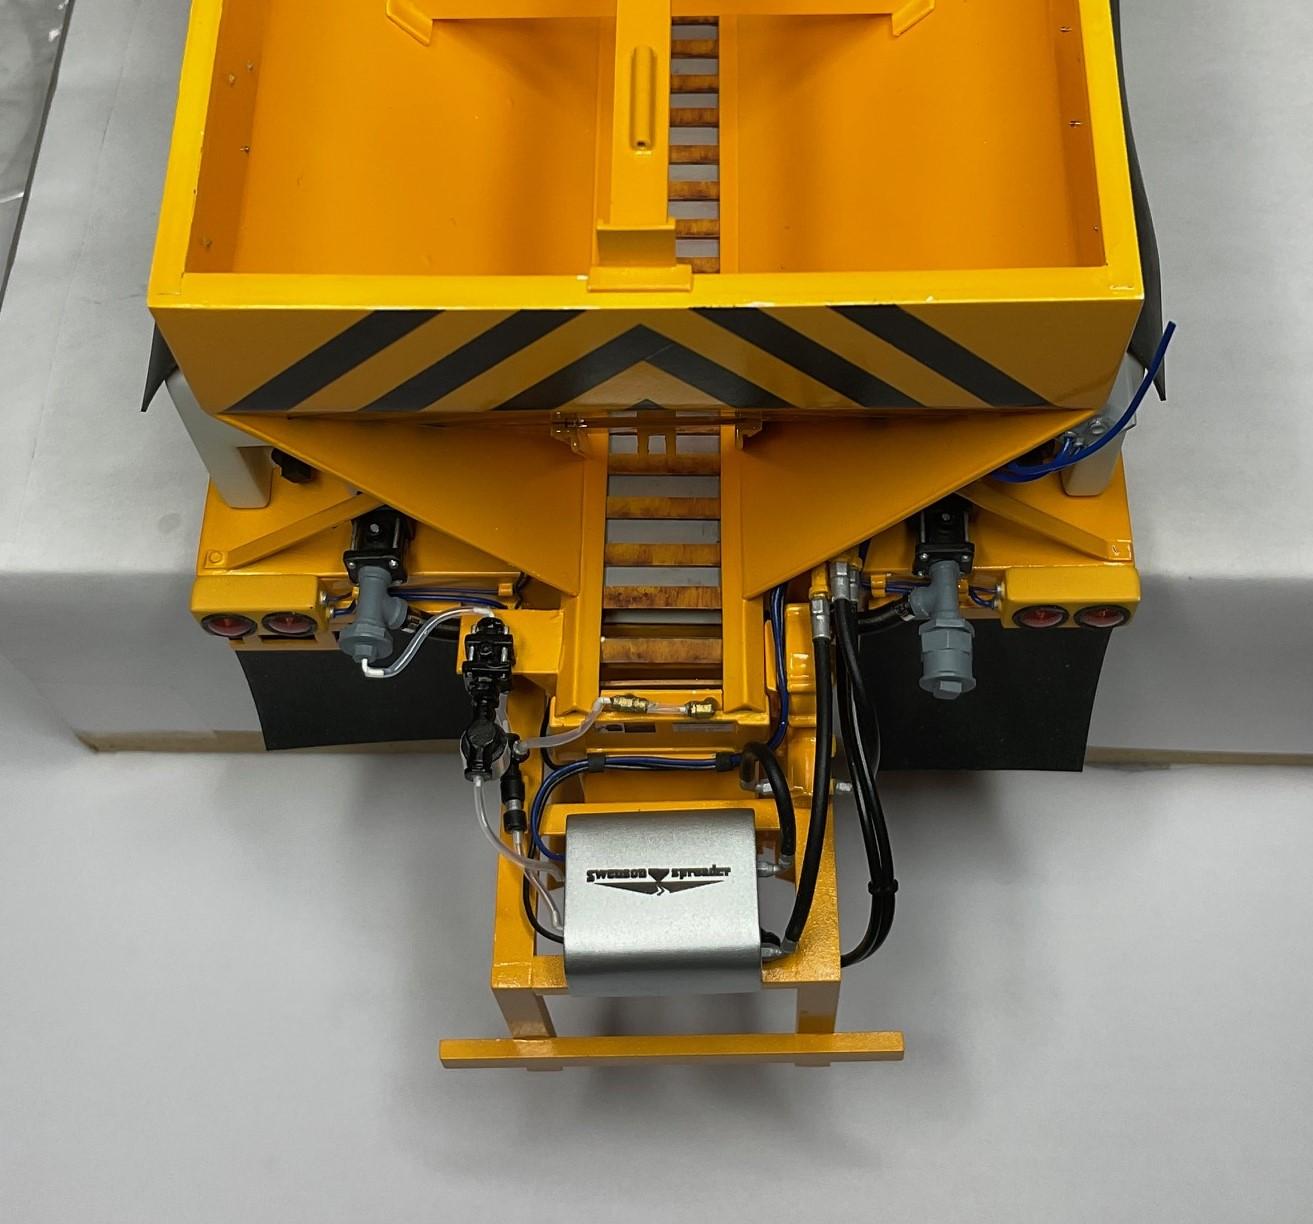
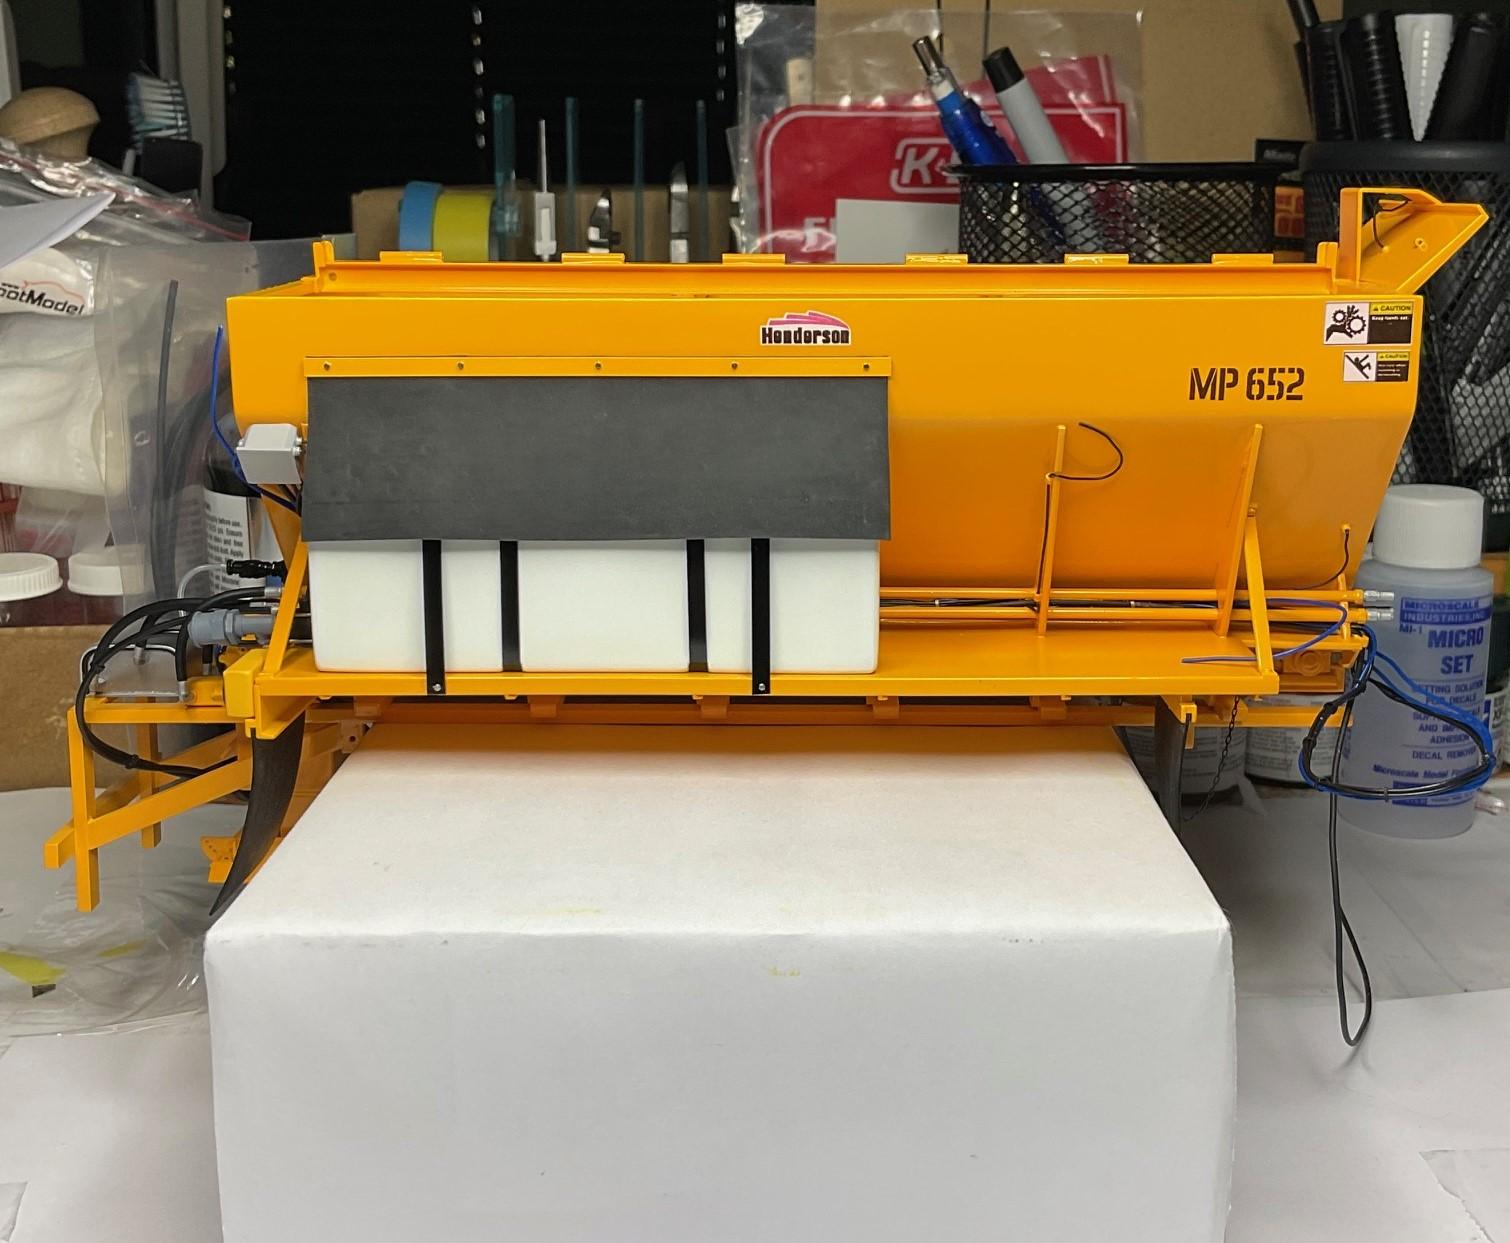
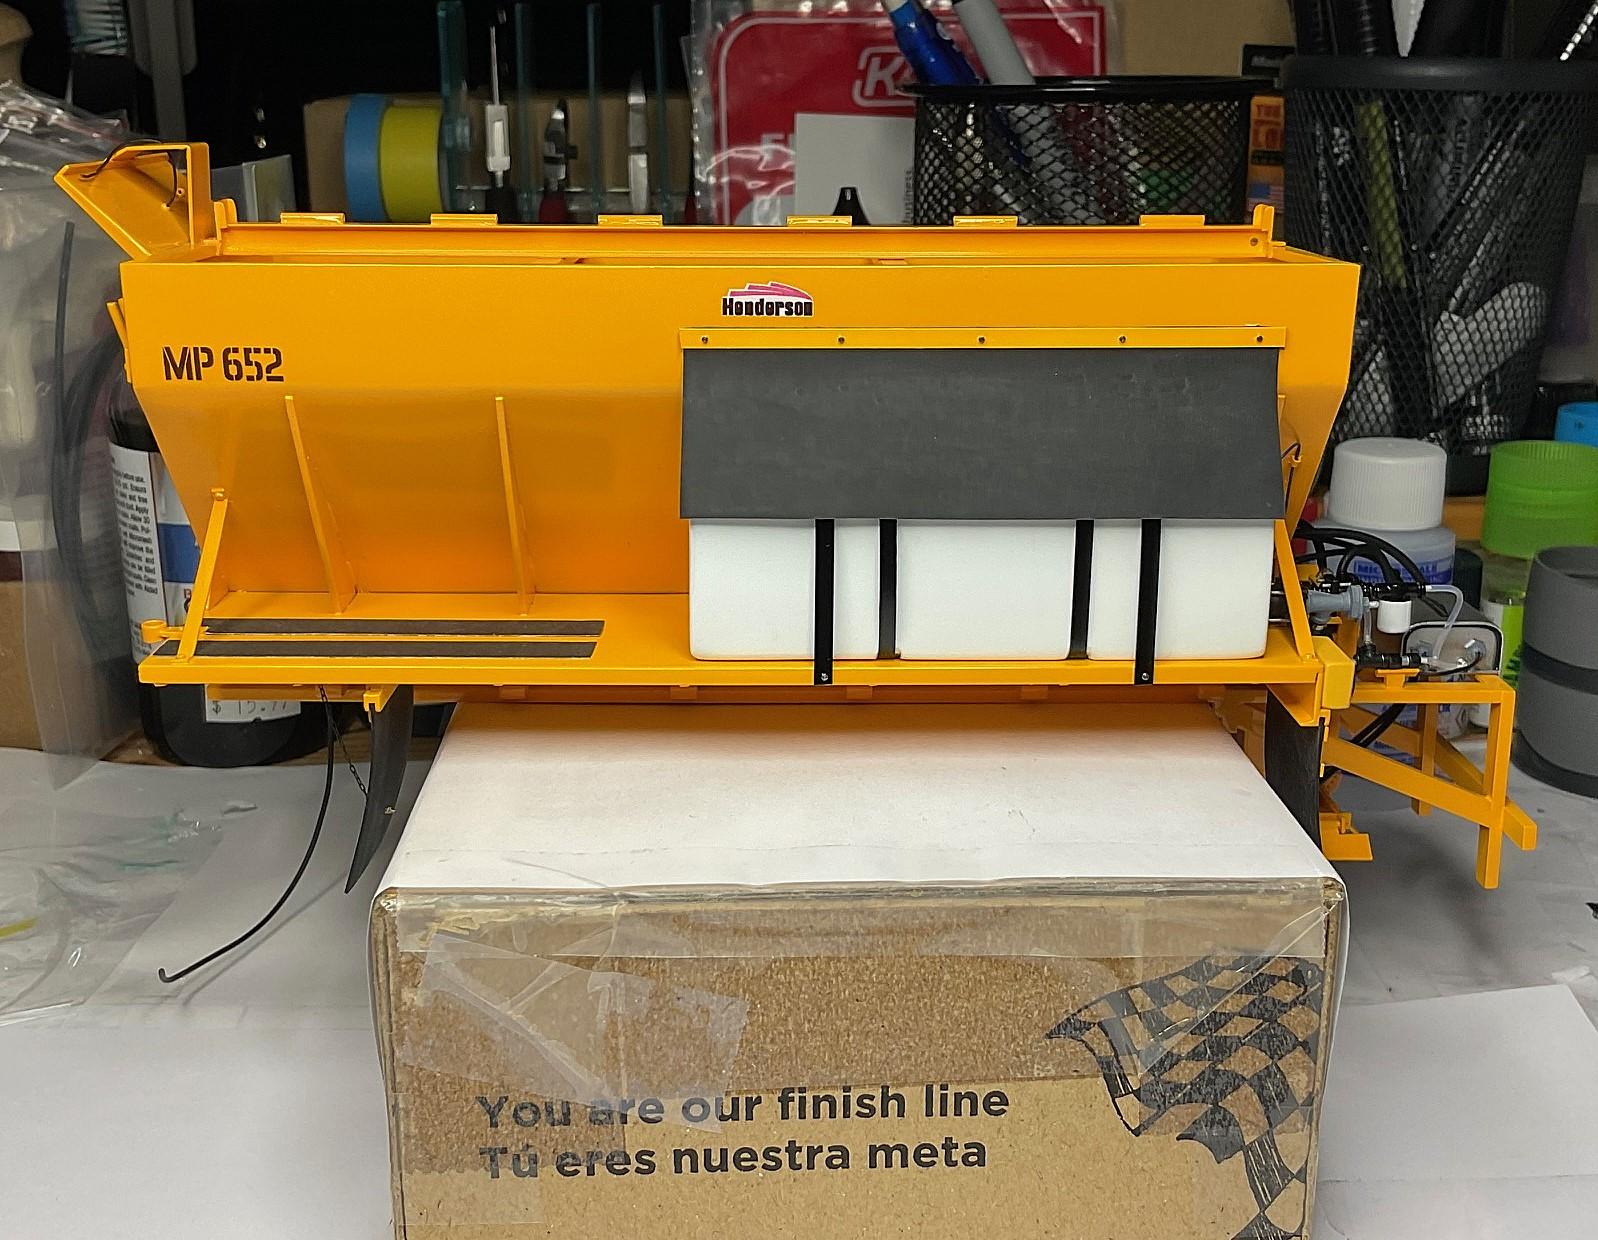
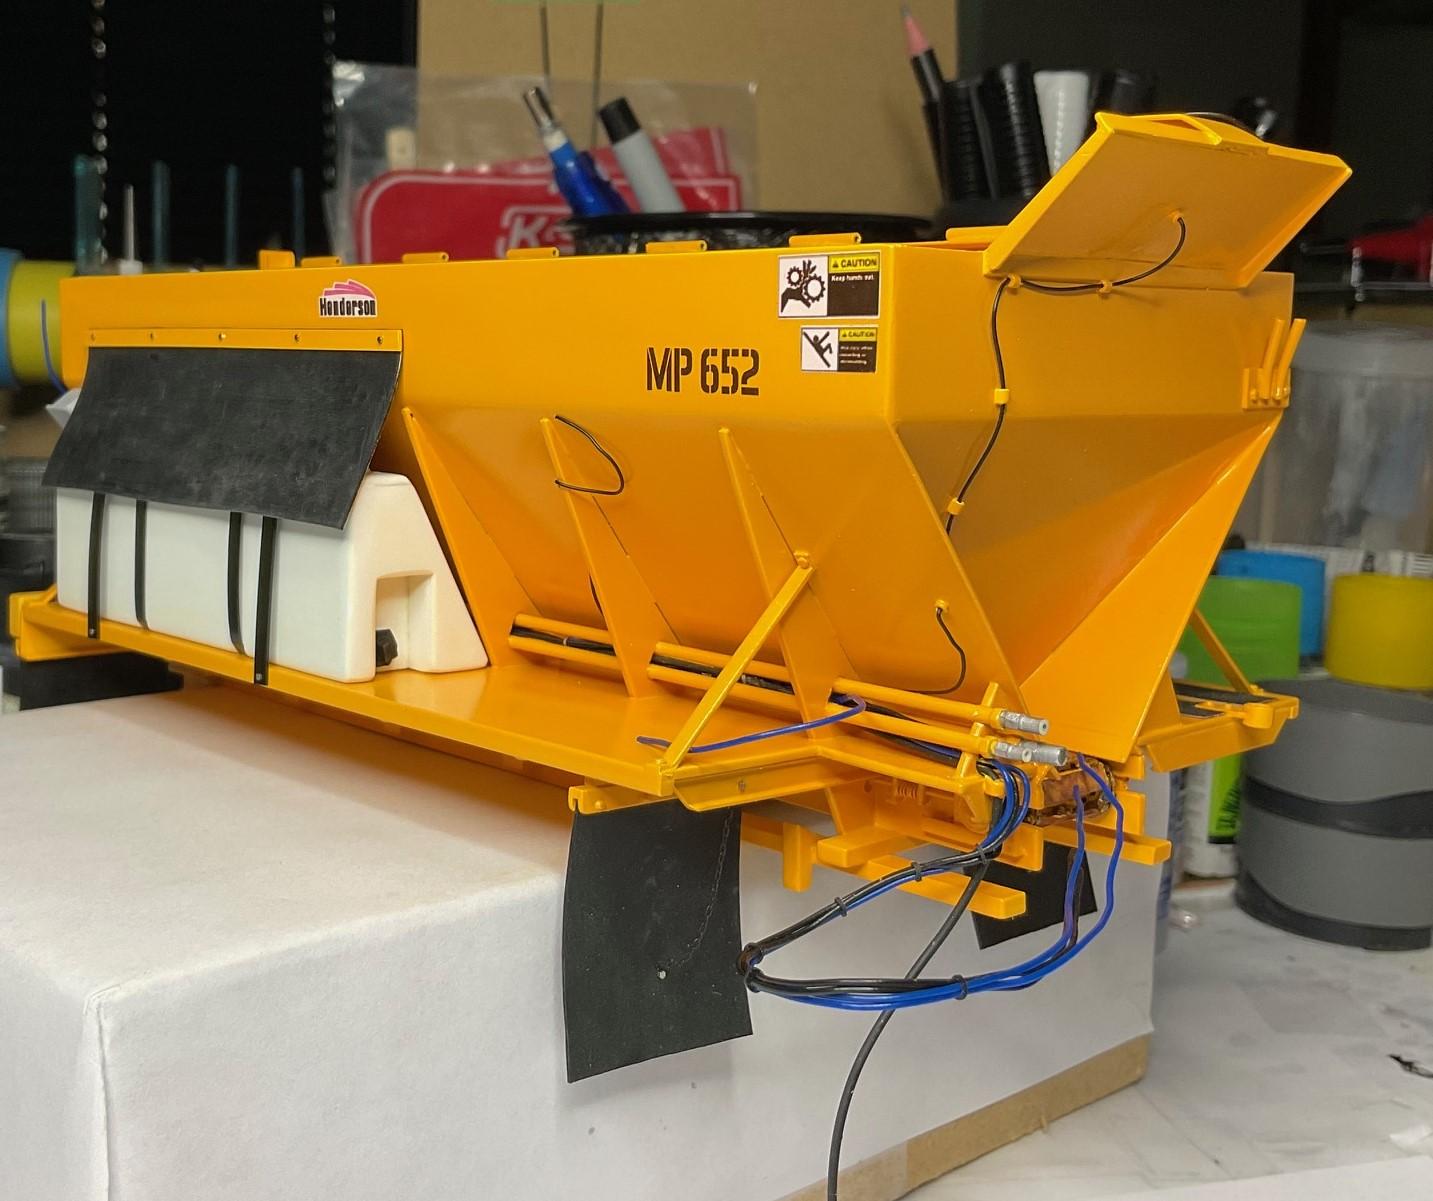
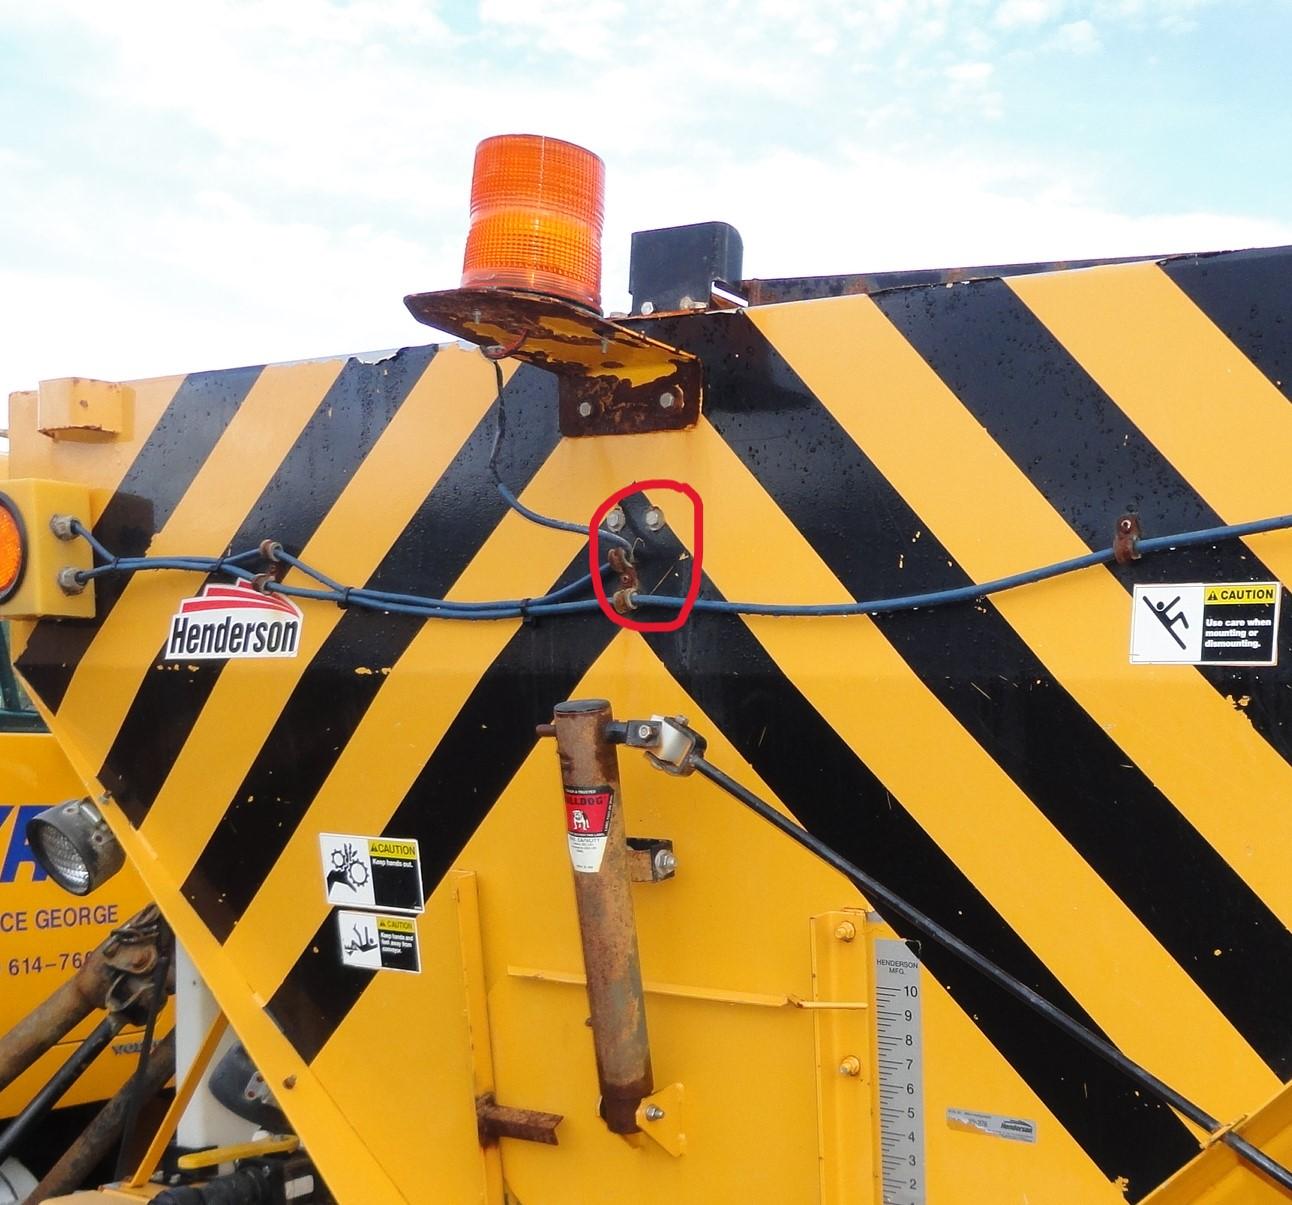
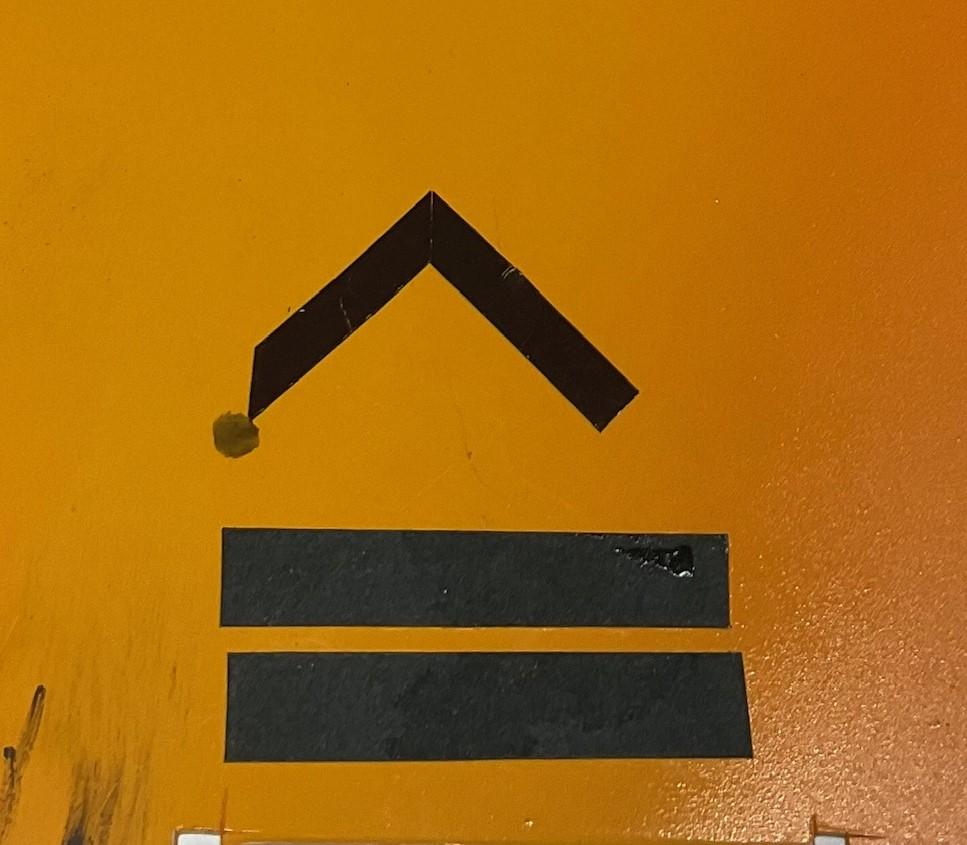
Had a successful morning (and afternoon!) at the bench, working on decaling the sander. Six hours went by pretty quickly! Big shout out to Terry, at STS Decals, for making my artwork into the truck's decals. Used part of earlier drawing to layout a starting point for the hash marks - I've got the front of the sander sitting, carefully, on a towel, with the back end on a parts box - The grid pattern is set! - Not a hundred percent sure why I included this - it did look precarious, though, and made me press on to get the back end finished! - This is a big weight off my shoulders - a couple things not quite the way they could have been, but I had re-done a couple hash marks along the way and wasn't going to do any more! Also got some warning labels added to back end - Overhead shot of decal for the Swenson Spreader, pre-wet pump - Sander's manufacturer decal, a couple more warning labels, and the sander's unit number - Now that this part is behind me, I can get on with finishing some wiring and lights and decide whether or not to attach the sander to the frame yet - may need to leave it off until I get the cab and hood sorted. Things could be easier to handle if the sander not attached just yet. Getting closer!
-
Link-Belt HC-218 Truck Crane
BK9300 replied to redneckrigger's topic in WIP: Model Trucks: Big Rigs and Heavy Equipment
Sounds like a very productive day! Your drawings and schematics should definitely be displayed with the finished model - there is a ton of work in those! -
Mack DM600/Leach Garbage Truck
BK9300 replied to Scott Eriksen's topic in WIP: Model Trucks: Big Rigs and Heavy Equipment
That's looking fabulous, Scott - you know me - love all the hydraulic lines. Terrific update! -
California Special
BK9300 replied to Rockford's topic in WIP: Model Trucks: Big Rigs and Heavy Equipment
I’m late to this reunion, but sure do echo everyone else - great to hear from you, and see another project on your bench! Always an education, and will be great to follow along. -
Western Star 4900 FA plow truck
BK9300 replied to BK9300's topic in WIP: Model Trucks: Big Rigs and Heavy Equipment
Awesome to hear from you, Steve, and a very insightful observation - I’m worrying more about getting paint and decals right, than I did making the hood hinges work! -
Kenworth W-925 (mild custom)
BK9300 replied to Gary Chastain's topic in WIP: Model Trucks: Big Rigs and Heavy Equipment
Good ideas, Gary - got to love those 'problems' - keeps the grey matter active! -
Western Star 4900 FA plow truck
BK9300 replied to BK9300's topic in WIP: Model Trucks: Big Rigs and Heavy Equipment
I think sometimes I make more work for myself than is necessary, but, mostly, have been able to work things through - thanks, Jeff! -
Western Star 4900 FA plow truck
BK9300 replied to BK9300's topic in WIP: Model Trucks: Big Rigs and Heavy Equipment
Early on in building the sander, I wondered about how to do the warning stripes (hash marks) and did think about painting. I was pretty sure I would make a mess of it, in the confined space at the back of the sander, so that's why I settled on the decals. Patience needed for sure, and sometimes I could use more - thanks, Jürgen! -
Link-Belt HC-218 Truck Crane
BK9300 replied to redneckrigger's topic in WIP: Model Trucks: Big Rigs and Heavy Equipment
At 48", the boom sections will be even more impressive, once all assembled! I may have missed you saying earlier, but will you be making the boom foldable? -
Western Star 4900 FA plow truck
BK9300 replied to BK9300's topic in WIP: Model Trucks: Big Rigs and Heavy Equipment
Thanks very much, Tom - I've needed to learn a lot along the way, and can never have too many pics of the real thing! -
Link-Belt HC-218 Truck Crane
BK9300 replied to redneckrigger's topic in WIP: Model Trucks: Big Rigs and Heavy Equipment
I found a few manuals for some of the attachments on the plow truck, but I can't get a manual for the bridge inspection truck, because I apparently need to own one before the company will supply one! -
Western Star 4900 FA plow truck
BK9300 replied to BK9300's topic in WIP: Model Trucks: Big Rigs and Heavy Equipment
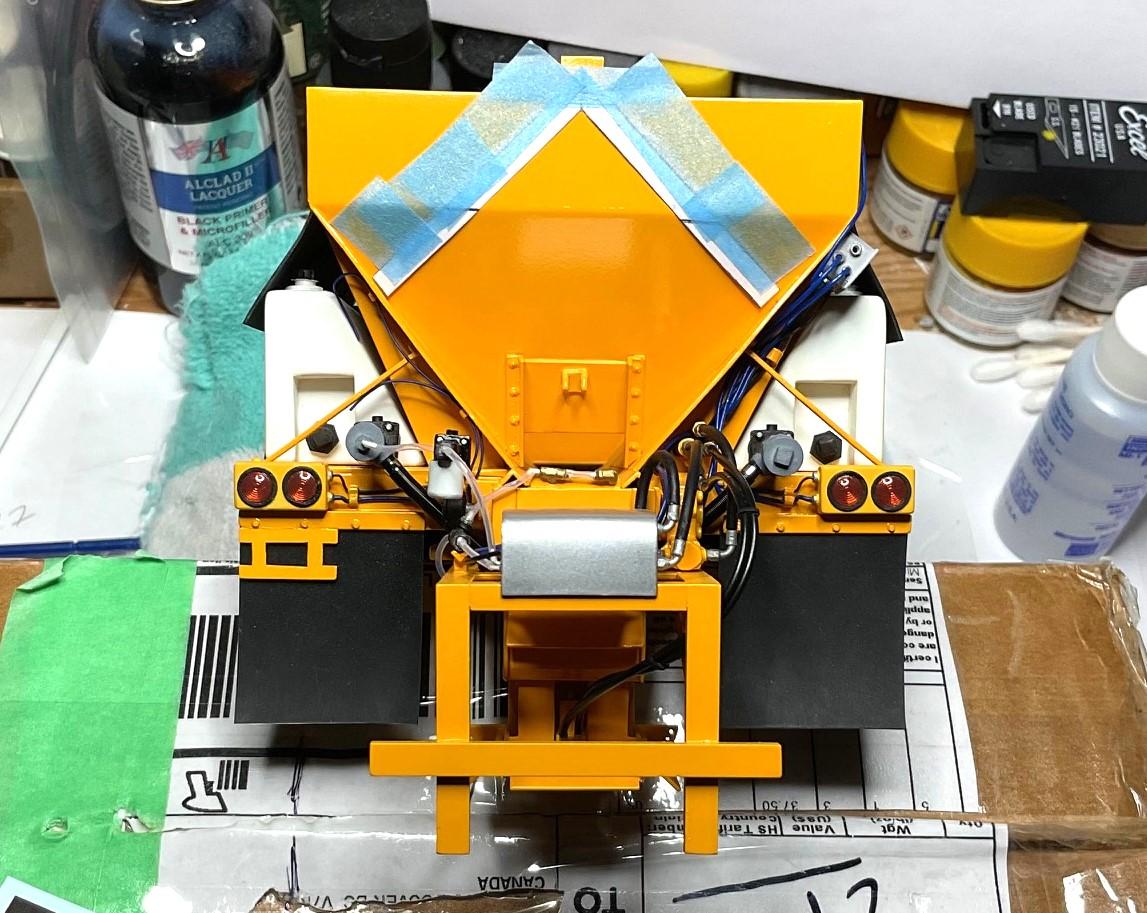
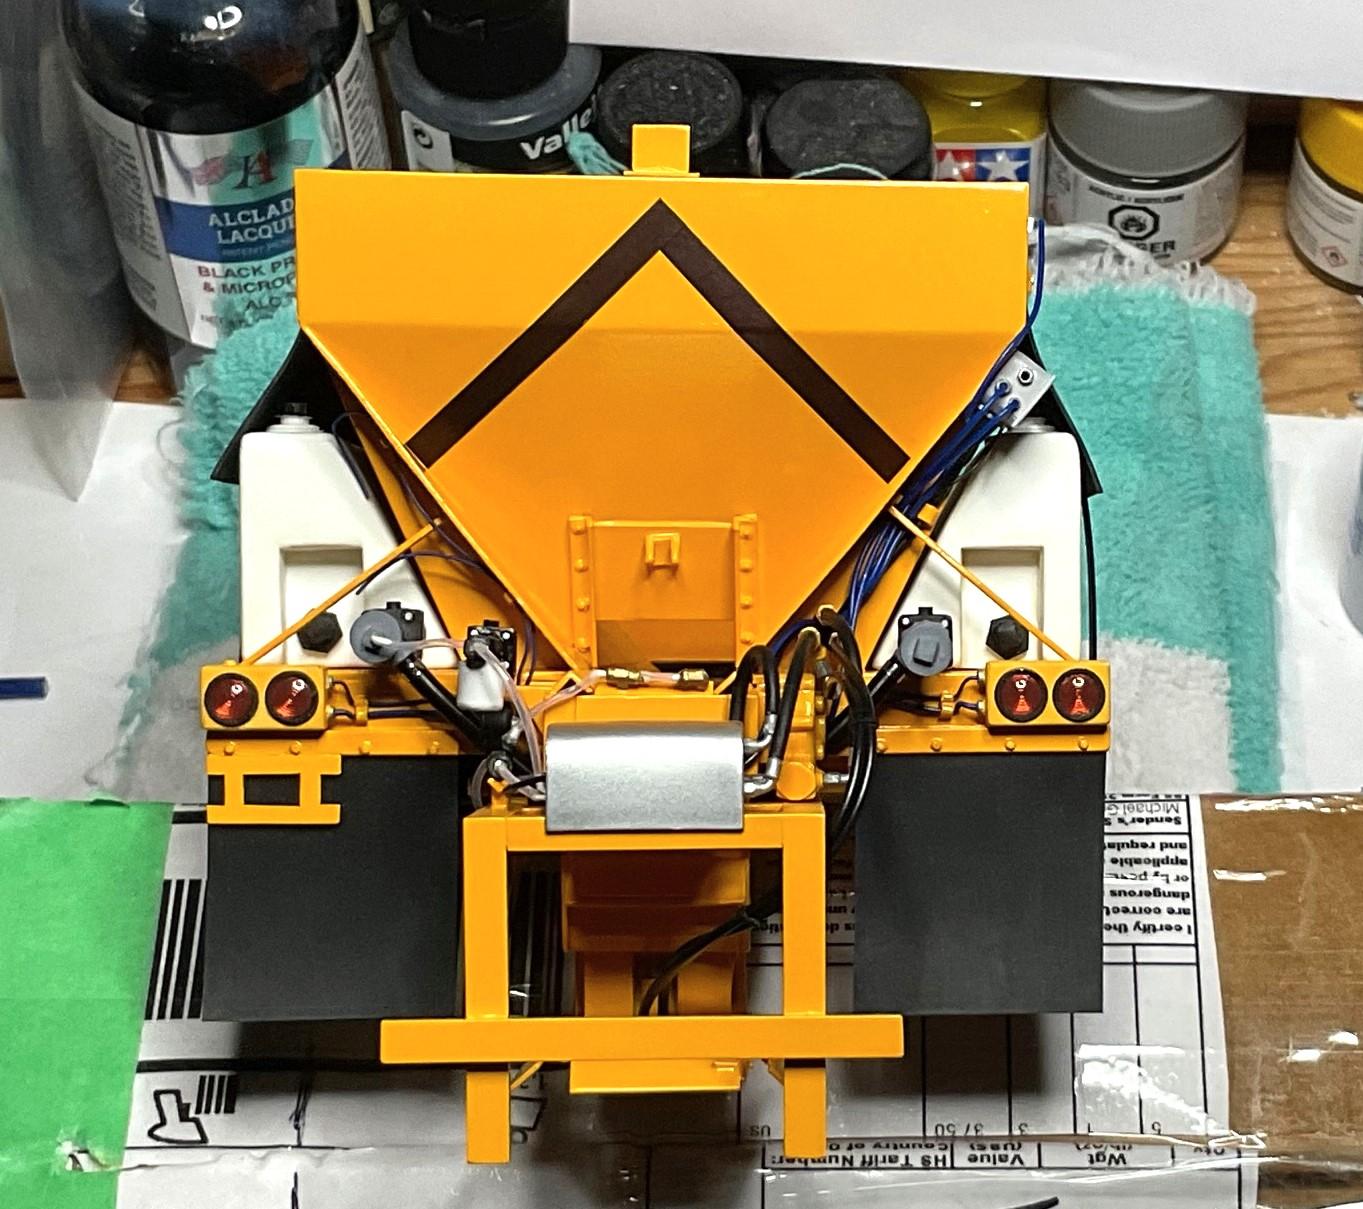
Spent a frustrating afternoon trying to figure out how to line up the warning stripe decals on the back of the sander - go figure. Seems like a small problem, but the closer I get to the end of this build, the more problems I find/create to slow myself down! Didn't get the decals on, but thought I'd share some of my frustrations and my plan for tomorrow. The stripes on the real truck meet at a 90 degree angle, so I started by trimming the ends of two decal test strips at 45 degree angles. Haven't decaled anything in over 30 years, and even using Micro Set, found it difficult to move the stripes into position on a test piece of painted styrene, so they met neatly along the 45'd edges - also discovered that the decals won't take much abuse before coming apart! (the black pieces at the bottom were test patches for the non-slip strips on the sander fender) After thinking about the difficulty of getting the 45'd ends to come together, I went back to pics of the real sander. Again, the mechanics/body shop guys are much smarter than me - I made two 45 cuts for the stripes to come together while they made 'butt' connections using only one cut. Much simpler! Also, the join on the real truck is still not perfect - thin line of paint shows at the joint. Might still have some difficulty moving decals around, but won't need to fuss as much as with the 45's - So, after wasting a couple decal stripes (I had ordered extra just in case), I drew out a layout using the butt joint method and should be able to work out from a Tamiya tape center line and have it work out - hopefully! Tomorrow will tell if this plan works out!
-
Link-Belt HC-218 Truck Crane
BK9300 replied to redneckrigger's topic in WIP: Model Trucks: Big Rigs and Heavy Equipment
Very fine work, Tom. I totally understand about not having 'just the right view' in spite of all the pics you have. No matter how many pics are taken, something will be missing from the pics. -
Looking forward to seeing those added details - should be icing on the cake for this build!
-
Placard holders
BK9300 replied to Steveng's topic in WIP: Model Trucks: Big Rigs and Heavy Equipment
Would this work for you? https://www.ebay.ca/itm/235951721167?chn=ps&mkevt=1&mkcid=28&google_free_listing_action=view_item&srsltid=AfmBOoopHNWhtZezJFxfHBogVwdlg6wW-H13ldEaD0MLB1lod3dxdSfpGSk -
Marvel's Hydra coupe 1/12 scale full scratch build
BK9300 replied to François's topic in WIP: Model Cars
Good luck with your showings. Should do very well! -
PRO BUM : A 2006 STREET CAMARO TRANSFORMED IN AN AGRESSIVE PRO-MOD
BK9300 replied to Claude Thibodeau's topic in Drag Racing
Doesn't matter what type of vehicle build you undertake, they always turn out excellent! -
Thanks, Jürgen - will be relying on the Sketchup model a lot, to guide me along - pretty sure I wouldn't have attempted it just from the pictures I took!
-
Another fine build, Jurgen! You mentioned in your WIP that the cabover couldn't sit next to the conventional on the shelf. Even with the display cabinet you built awhile back, sounds like you might need to make another cabinet, or expand into another room!
-
Beautiful, well executed project, Daniel - great addition to your Raccoon Racers!
-
You've created a gorgeous ride! Beautifully done.
-
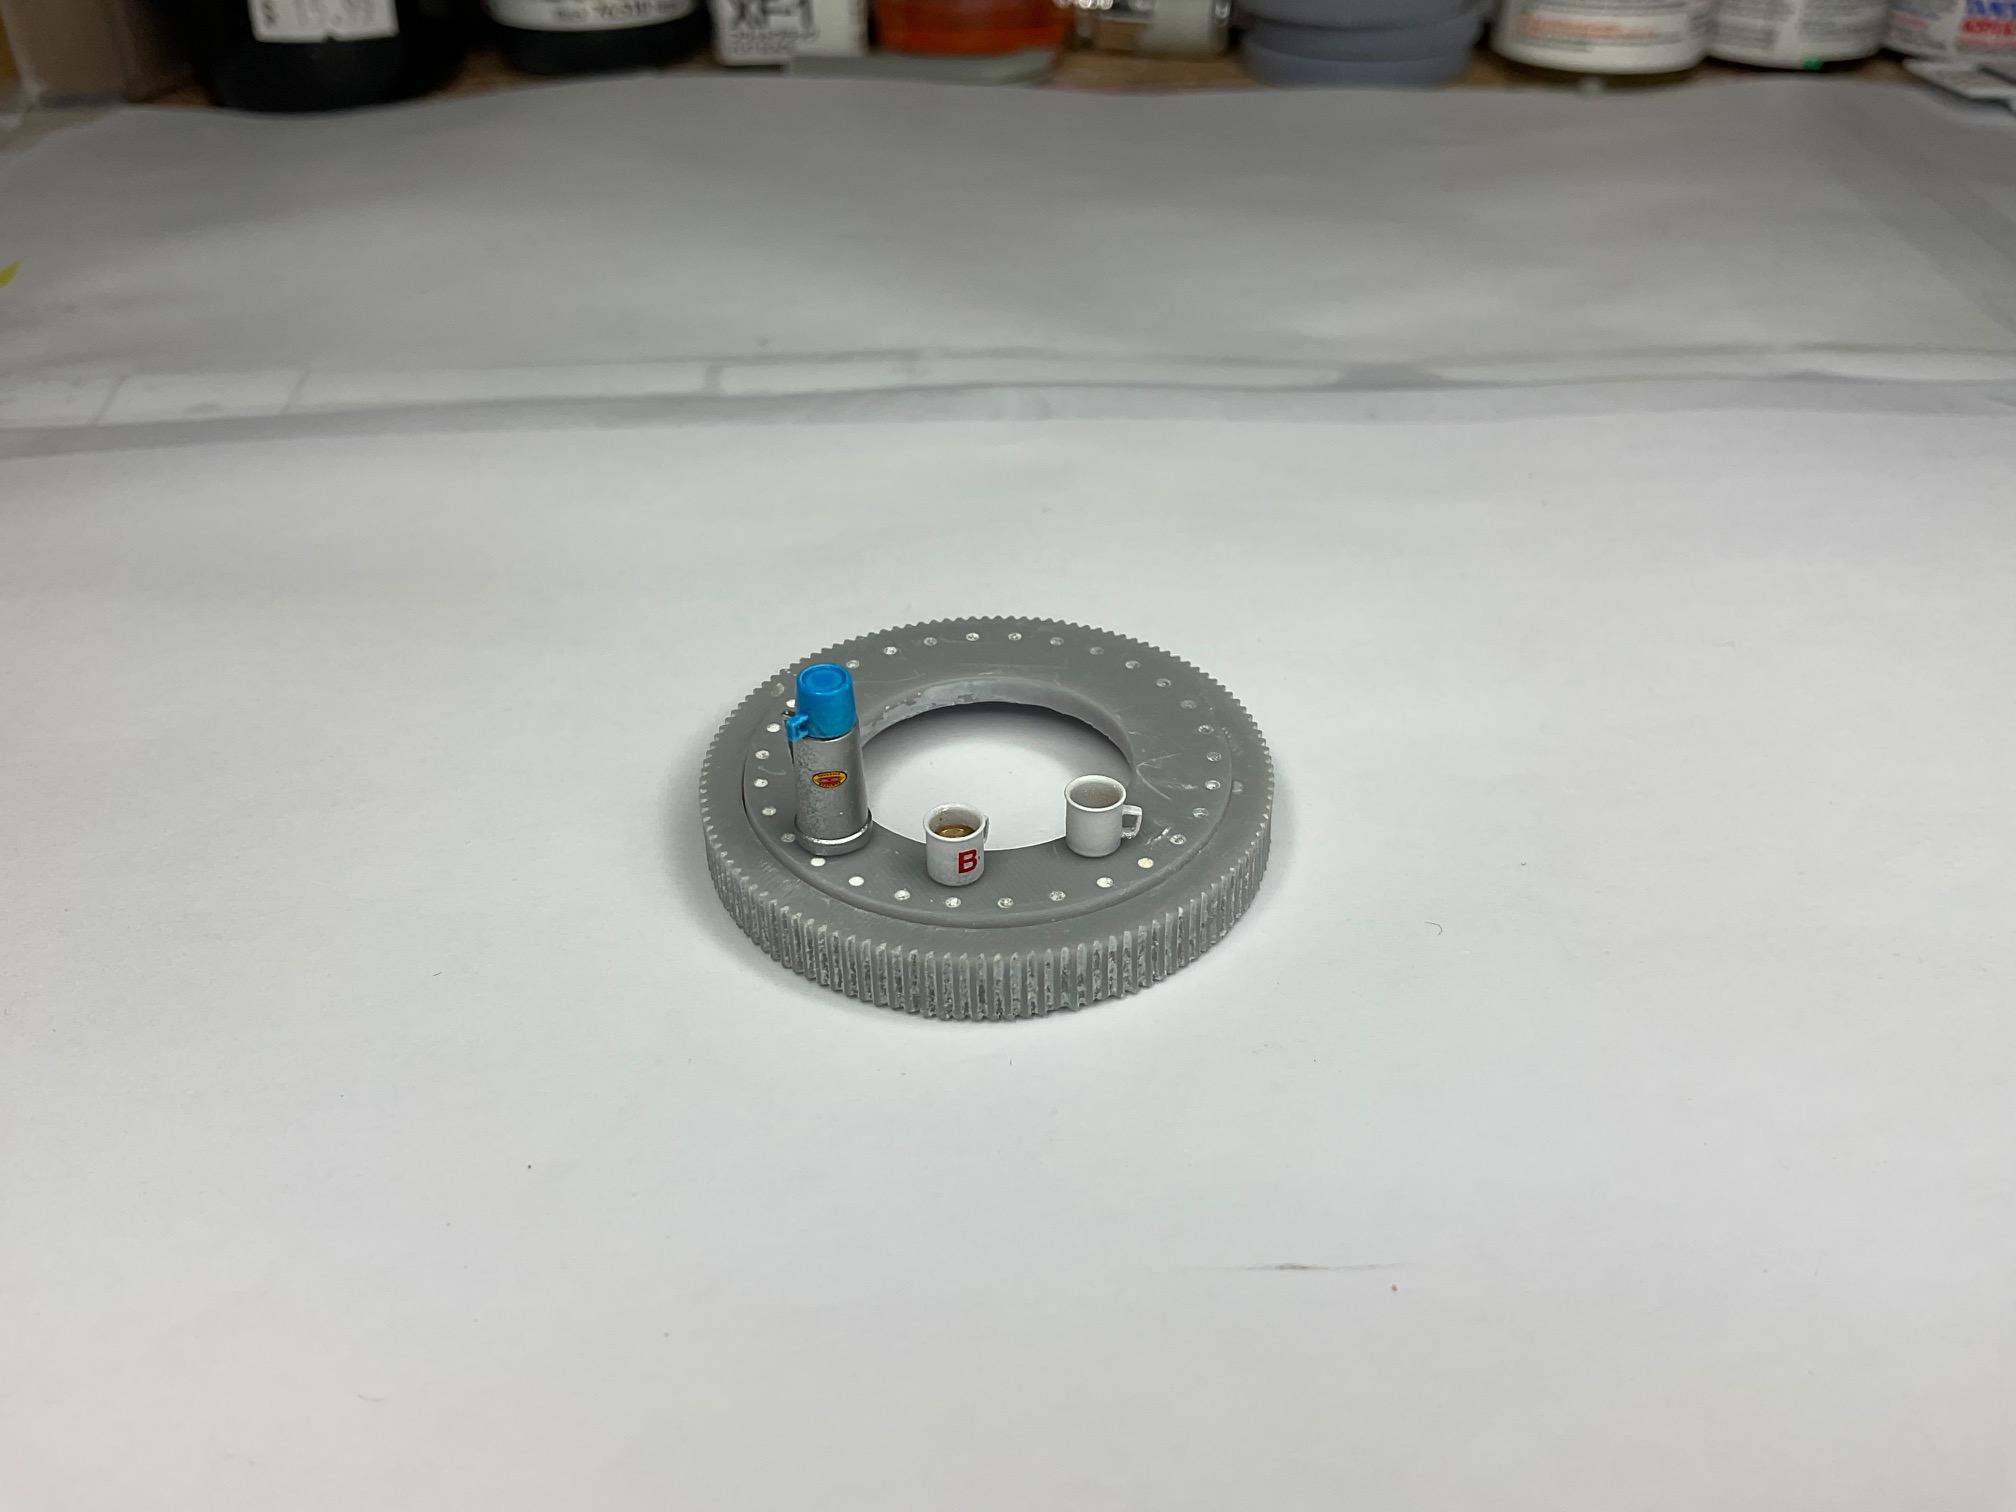
Thanks, Jeff - lots to work out yet! When I actually get started on this, I want to build it a bit more conventionally - frame, suspension, engine, cab, hood and then the deck and the Snooper unit. The rotating towers were the biggest concern and might be on my way to having them solved, so, that’s a big relief! And those little thermos/coffee cups sets are pretty special - need a scale shop bench to set them on!
-
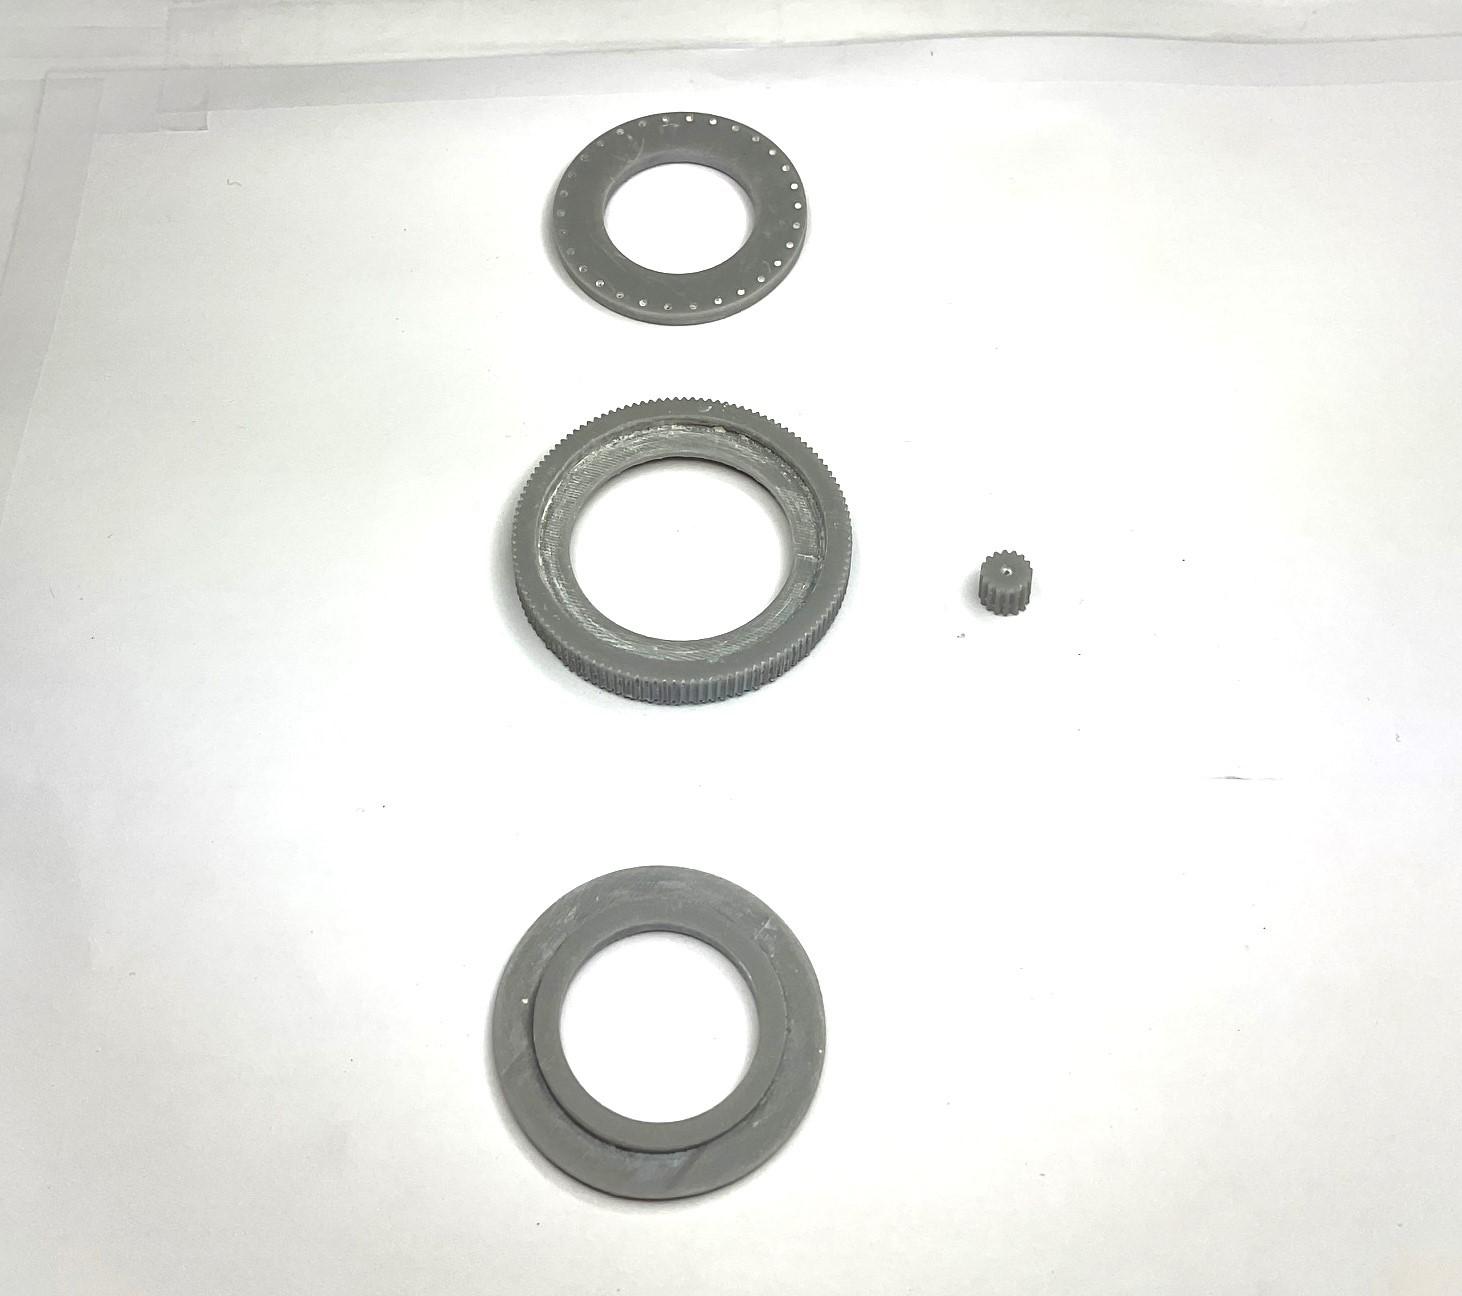
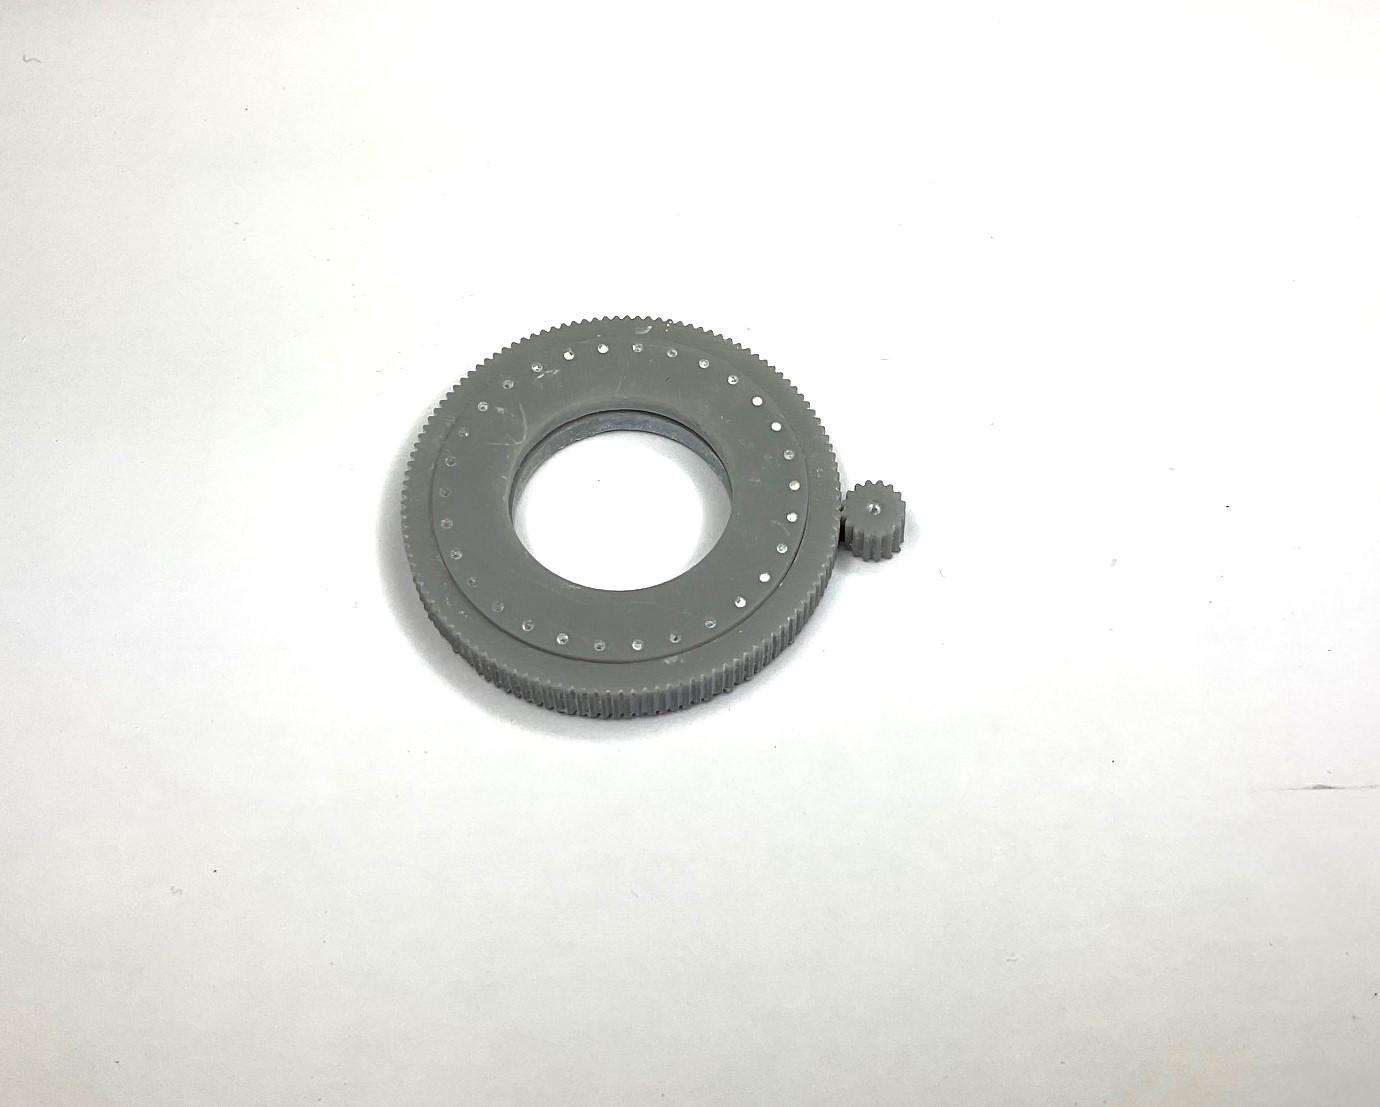
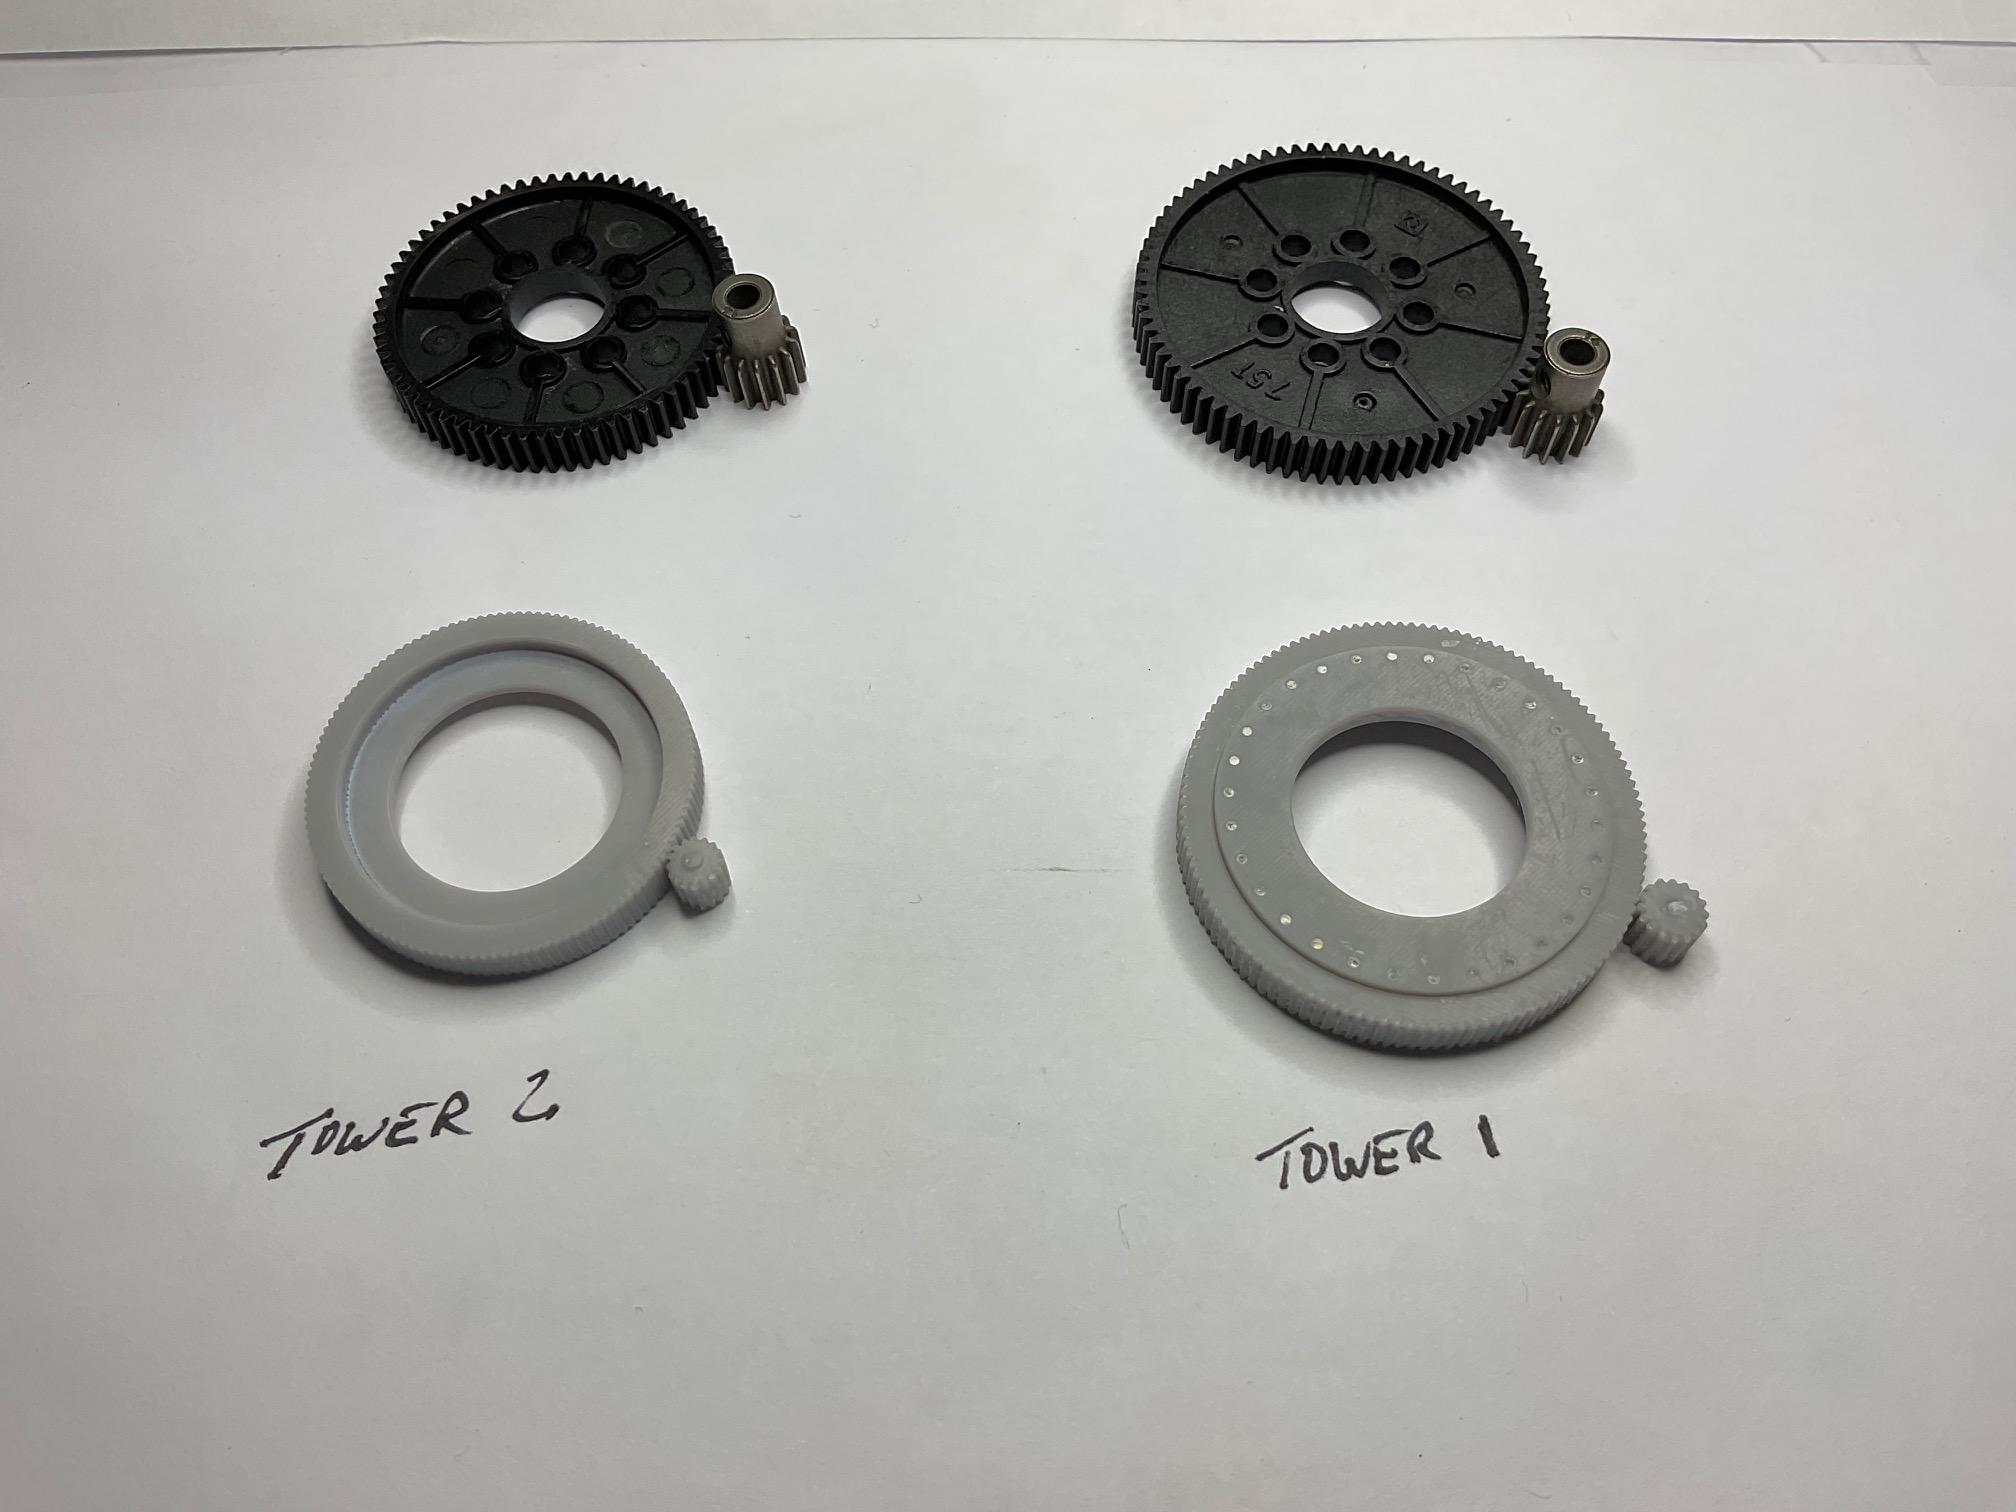
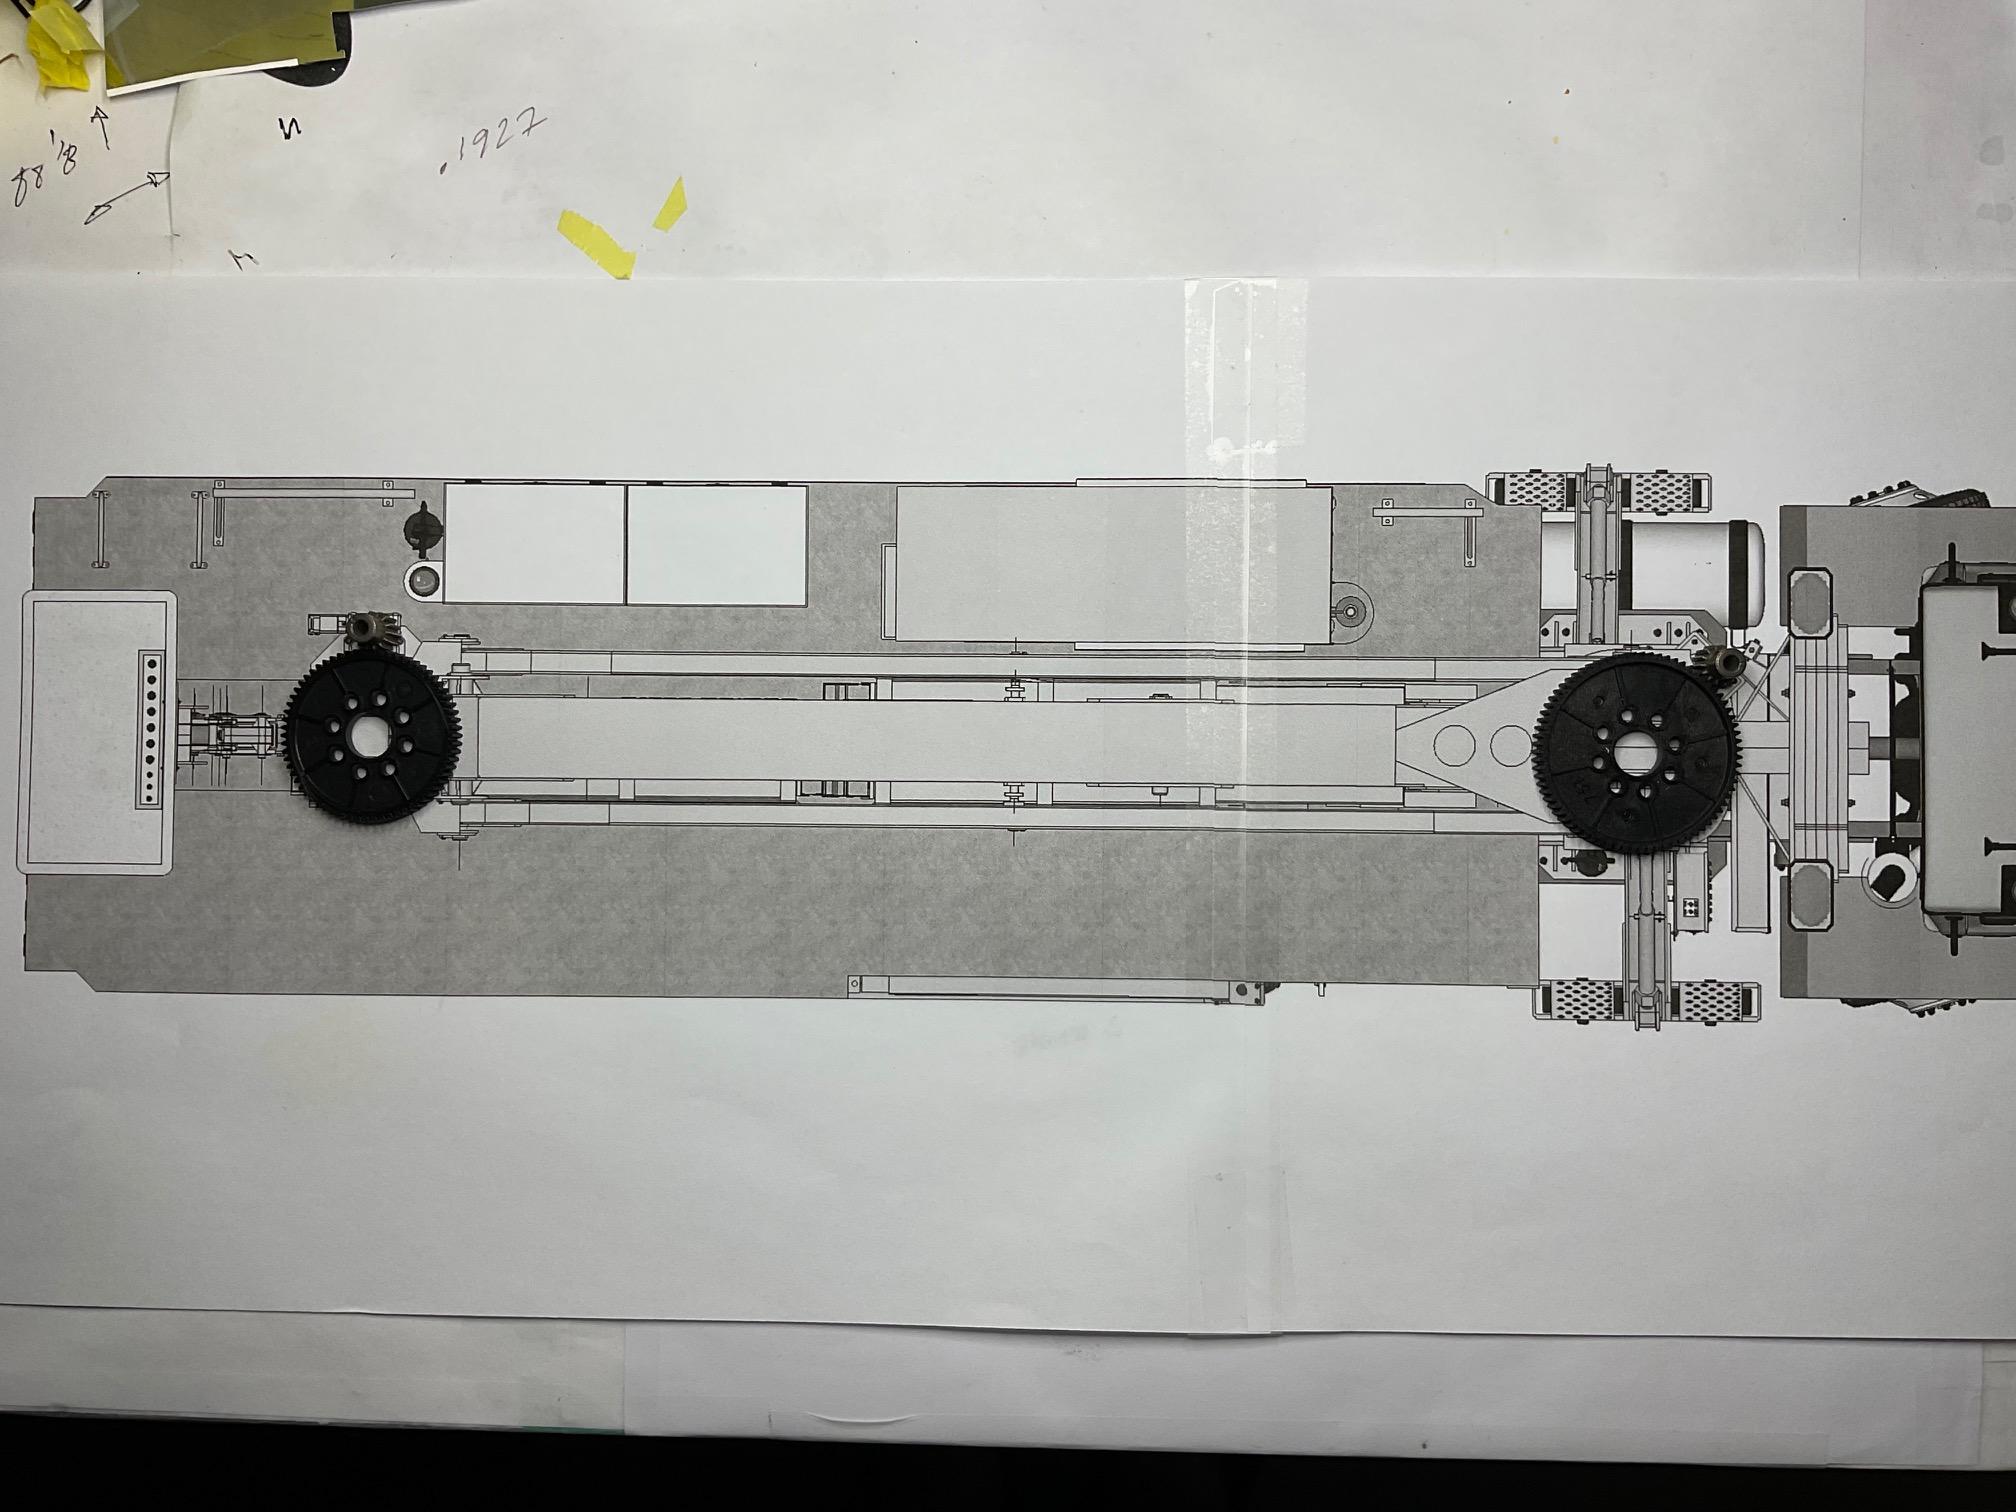
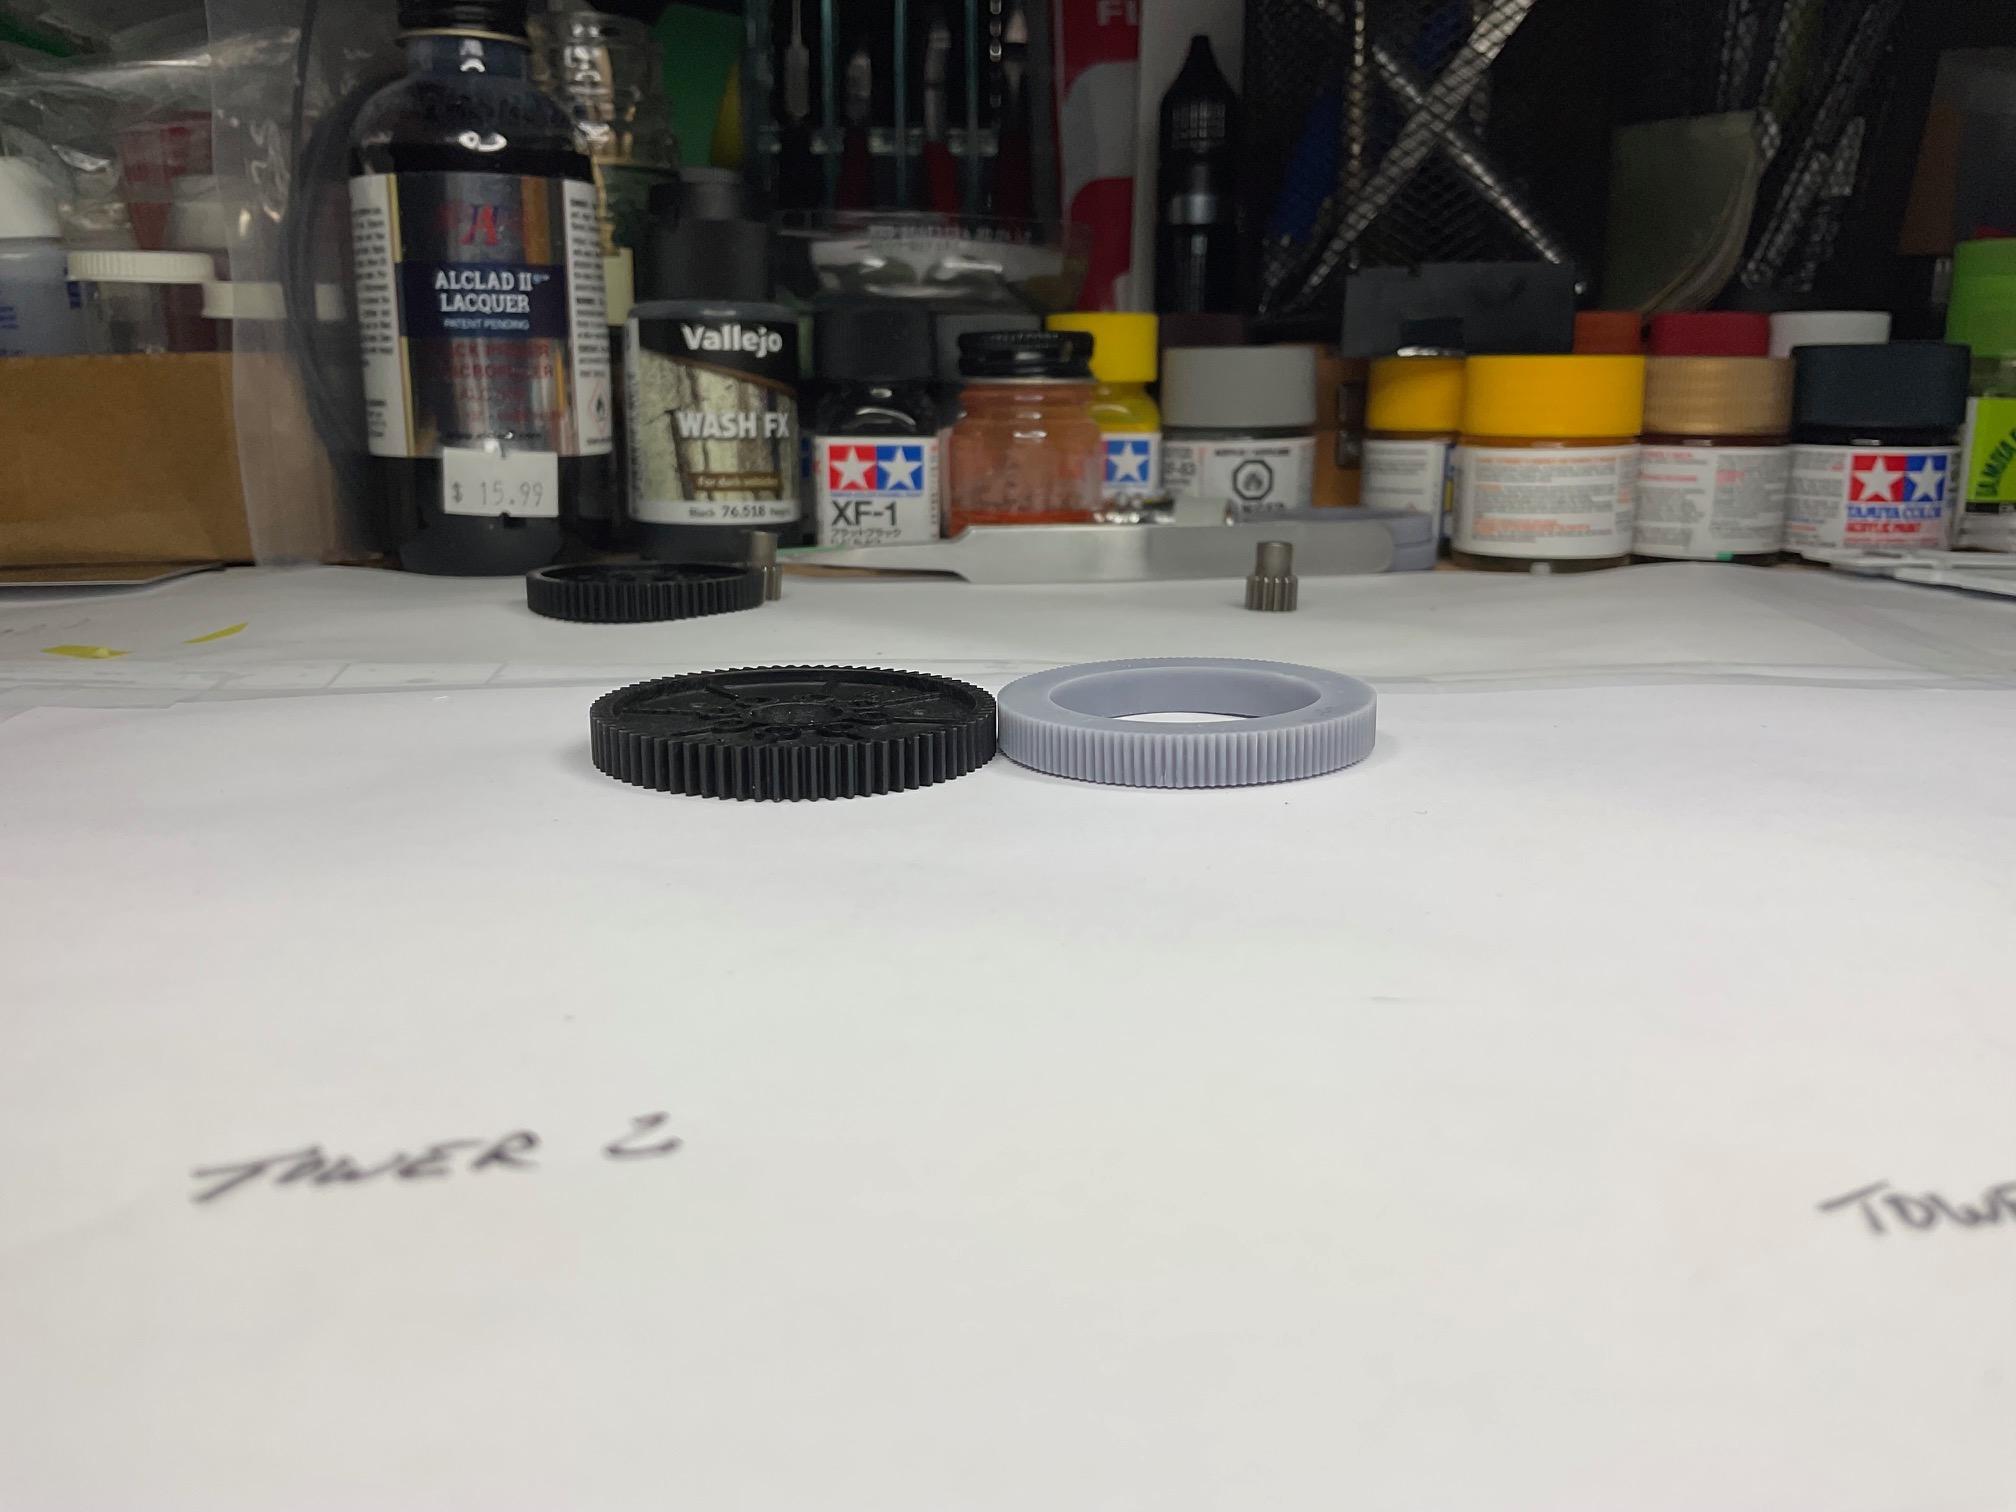
Earlier, I made some changes to the slew drive assembly design, and asked @Bren for another round of test prints. I received the latest version yesterday! I am satisfied with the external ring gear portion, and still plan to make the inner portion from styrene. Because I want to be able to pose the boom sections, I started having some worries about the strength of the resin ring gears, given I need to drill numerous bolt holes around the circumference of the gears. So, I started looking for alternatives or backups, just in case some testing down the road breaks a gear (or both). Latest test print - external ring gear, drive motor gear (pinion?) and the two, inner ring pieces to sandwich the ring gear between - After a bit of cleanup, and sanding the inner sections to fit inside the ring gear, I found the sections would move over each other, and that confirmed the workability of the design concept. But, in this state of finish, there was considerable resistance to smooth movement. That's partly what I hope to overcome with inner portions being made from styrene - Was at the hobby store today, and came across some spur gears for R/C vehicles and picked up a couple. One was 78 teeth and the other was 68 teeth, and the drive gears each had the same number of teeth. My biggest resin gear has 120 teeth and the smaller one has 100 (maybe). Each of the plastic spur gears are slightly bigger in diameter, with less teeth than their resin counterparts, but would definitely solve the strength concerns I was having - The plastic spur gears and the resin ring gears are the same height - Perhaps all I need to do is make the slightly bigger, phantom version of the PM-260, say, a PM-262, to allow for the slightly bigger spur gear diameters (and change the logo on the main boom!). I laid out the two spur gears on the overhead shot of the inspection unit and I don't think I would need to make too many changes to make the gears fit in - slightly bigger main, and secondary towers, slightly longer boom sections and all would be good. Still going to consider the resin gears, and I'm going to test their durability, but I thankfully have a backup plan - Oh, and Bren also sent along some coffee to the fab shop! - Some things being worked out, so that's a good thing!
-
Beautifully detailed! Are your door pulls and chrome dash pieces kit chrome or did you paint them?