.jpg.3869ec82859c49d19c221cb1e38dc132.jpg)
Tcoat
-
Posts
528 -
Joined
-
Last visited
Content Type
Profiles
Forums
Events
Gallery
Everything posted by Tcoat
-
.thumb.jpg.5fb3080b3082c0b7e11de74dbfff8c69.jpg)
Lindberg Le Fleur
Tcoat replied to Lucius Molchany's topic in All The Rest: Motorcycles, Aviation, Military, Sci-Fi, Figures
I am in Canada. No hobby lobbies here. I will shop around since the shipping is usually more than the kit price so If I can find one up here it cost far less. -
Lindberg Le Fleur
Tcoat replied to Lucius Molchany's topic in All The Rest: Motorcycles, Aviation, Military, Sci-Fi, Figures
I may take you up on that. -
I have one that looks exactly like that sitting on a shelf. A great old kit.
-
Lindberg Le Fleur
Tcoat replied to Lucius Molchany's topic in All The Rest: Motorcycles, Aviation, Military, Sci-Fi, Figures
Beautiful. I must find one of these for my "I will do it when I am retired" stash. I took the liberty of trying to clean the pictures up a bit (my abilities are limited) so I could see the rigging more clearly. Hope that is OK!
-
Quick note on this. I built this for a friend of my son's father who worked on them in WW2 and loved the movie (as fictional as it was). I found out on the weekend that he passed away just before Christmas and since his son does not have room to display it it will be returned to me. Now I have to find shelf space for a 1/48 B-17.
-
Having owned a couple of cars with this engine and worked on a dozen or so more I would think that unless you are doing a factory fresh or recently restored car it needs a bit more grime down low. These thing were one of the best engines ever built but they leaked bad. That vent tube beside the distributer also spewed oily smoke that made a mess on the oil pan and tranny. Just a suggestion from experience. This is my version of a CLEAN stovebolt six.
-
The colour of the Chevy stovebolt 6 engines in the 50s seems almost random up until the Blue Flame made it's appearance. Most pre Blue Flames were grey but the 51 model year were often red. The blue used later on could vary from bright (almost Ford like) blue to a duller bluish grey. The grey eventually became the "standard" colour for the truck engines while blue was the cars. But sometimes you will see grey in a car and blue in a truck. As a modeler it is sort of a blessing because you can paint the engine different shades of blue, grey, red, or even black and someplace there will be a picture to support your choice.
-
I am so, SO glad you did this! Not only is it beautiful it has solved a dilemma I have had for a while. I have had the kit of my current 1/1 scale Toyota 86 languishing in my stash because I could not find the right green pearl paint or just the right colour for the seats. You solved both issues in one fell swoop! Your paint job is perfect.
-
Moebius 1967 F350 Ramp Truck
Tcoat replied to iamsuperdan's topic in Model Trucks: Pickups, Vans, SUVs, Light Commercial
Looks like a dog at a fire hydrant -
AMT '60 Chevy Fleetside Restomod
Tcoat replied to Tcoat's topic in Model Trucks: Pickups, Vans, SUVs, Light Commercial
Well in full disclosure it was all I did all week. Probably a months worth of normal working time just compressed. -
AMT '60 Chevy Fleetside Restomod
Tcoat replied to Tcoat's topic in Model Trucks: Pickups, Vans, SUVs, Light Commercial
Couple of points that I ran into: The frame was badly twisted. I mean really bad! I straightened it as much as I could with hot water but had to clamp the body to get the remaining twist out. This may be just my kit though. The rear cab panel (part 70) assembles from inside the cab. The instructions are not clear and make it look like it is on the outside and it will go on nicely from the outside but there is no way you will ever get the box on as there is just no clearance. Maybe OK with the stock engine but there is not much space between the inner fender liners and you need working space to align the cab body pins so it is much easier to add the engine after the cab is in place. The mounting pins on the box are brutal to try and line up. Since the box fits right against the cab there is zero wiggle room and the box has to come straight, and I mean STRAIGHT down. I fought with it for an hour and finally ended up cutting two pins off to get it in place. If I had to do it again I would open up the holes in the frame a bit so there is a bit of leeway. Other than those it goes together like a breeze. -
AMT '60 Chevy Fleetside Restomod
Tcoat replied to Tcoat's topic in Model Trucks: Pickups, Vans, SUVs, Light Commercial
Yes, yes it is! I started working on a Revell '65 as soon as I finished it so that must have been stuck in my brain. -
which kit is that? The Tamiya or the Aoshima? If Aoshima anything to watch for? I have one to do my 86 but it is down the que a bit. I am thinking of picking up the Tamiya kit and just doing my old FRS as a curbside.
-
AMT '60 Chevy Fleetside Restomod
Tcoat replied to Tcoat's topic in Model Trucks: Pickups, Vans, SUVs, Light Commercial
This was fun since I went into it with zero planning. It was literally "Those buckets need something between them. Oh look there is a custom console in the Impala kit". Realism was thrown away since I really didn't expect to ever show it as it was just a training tool. Being a restomod truck the fact it has an automatic tranny with a clutch pedal and shifter just means the builder kept them for appearance only! -
Two weeks ago I picked up the Revell kit just for the engine to use in my '58 Nomad project I also ordered some Tamiya spray lacquer in candy apple green (TS-52) for the same project. . When I opened the kit I found that the bench seat was perfect for an upcoming project so now I had a truck model I had zero interest in with no seat or engine. Oh well I will build it as a rotting wreck someday. Or so I thought. While looking through my stash for wheels for the Nomad I came across an old '86 Monte Carlo kit that a buddy at work gave me a few years back. It had been started by his kids and was a total glue bomb with many parts missing. What it did have was untouched wheels, a couple of decent bucket seats and a badly glued but savable fuel injected 305. Comparing the paint lid to the Nomad photo my wife declared that it was far to light a tone so I now had a can of Tamiya lacquer with no use for it. It was at this point I realized that I had the parts to fill the gaps in the Fleetside and could use the practice using spray lacquer and clear coat (I have never used these before since most of my work has been military. I also have always struggled with BMF but got enough time in on this that I am now comfortable with it. So Christmas eve I hit the bench (a small desk in my living room so no I was not secluded) and got t work. As this was meant to be a learning venture I didn't take build pictures but the finished work made me very, very happy! The engine bay did not get any wiring but as those fuel injected 305s hid most f it anyway. It will be displayed with the hood up because I like the hood brackets. The interior looks rough in the pictures but all that stuff that looks like dirt turns into shading and highlights once closed up in the cab. Didn't do much underneath since it would obviously be a show truck. Just enough to make it different than the shiny bodywork. There is currently no exhaust past the manifolds while I try to find just the right side pipes for it. All in all this is not a subject that would normally appeal to me at all but I learned a fair bit on this one and it will make my future bright and shiny projects less intimidating to me.
-
I hope the driver got out OK. This is the most convincing model I have ever seen!
-
It is 1/35. The turret came with the kit. It is the old Academy. UH-1C "Heavy Hog" kit. Fr the age of it t is an outstanding kit for anybody interested in helicopters. https://www.scalemates.com/products/img/4/4/3/107443-10000-pristine.jpg
-
Just do like most restomods do and relocate the battery to the trunk. That way all you need to do is run some wires up to the firewall. The MC can just get dropped a bit to clear the intake tubes.
-
My wife had a '76. Just a slightly lighter blue than that but exact same stripes. She of course just had stock wheels. Paid $75 for it in '84 and drove it into the ground.
-
You think that if I sent some exhausts your way he could do exactly that for a couple of junkyard cars for me? I probably could not deliberately make such a good rotted out muffler.
-
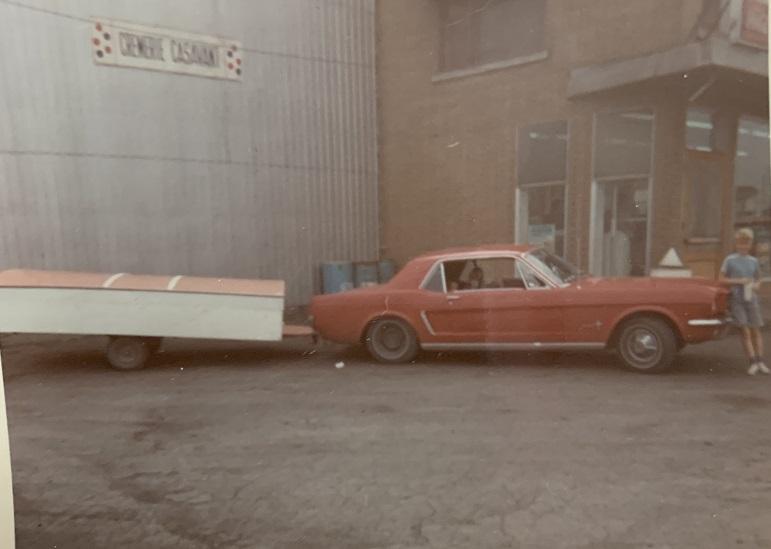
I grew up as Canadian Redneck. There was no brand loyalty in my family. I doubt that my dad ever paid more than $100 for a car or truck right up to 1974 when he bought his first ever new vehicle. Many of them were free "get that junk off my lawn" cars that he would get going for a year or two and then just park out back in the field. I had quite the eclectic group of junker cars as a playground as a kid and would love to have almost any one of them back today. On the plus side I learned such skills as unsticking a seized engine with nothing but two wrenches, a screw driver, a hammer and a piece of 2x4 at a very early age. He wasn't actually kind to them! How about a 64 1/2 mustang, six cylinder, with no floor and not much exhaust for a cross country trip in 1970 or so? If I remember right he got that Mustang by trading for a cord of firewood. My Nomad was 22 years old when I got it. From what I could learn from the guy I bought it from it had been in continuous use that whole time. The odometer read something like 80,000 miles but had spun over at least once by the time I bought it and as my year round daily driver and family car I probably (don't remember) put another 10,000 on it before I had to fix it. I paid the grand sum of $600 for it since it needed floor pan repairs which I did with some sheet tin, a pop riveter and liberal amounts of tar. The tar ensured that the garage doing the "safety" check would not poke around too hard. The outer body had been painted that bright green sometime within the prior two years so it looked great from the outside. The regular maintenance consisted of pouring a quart of oil into it once a month or so. I was not one little bit surprised when I found the condition those valves were in. The fact that it still ran at all with them as bad as they were is actually a testament to the reliability of those sixes not a condemnation.
-
Yep. Resigned myself to that. The resin body will be easier to convert than the promo to fix. The promo doesn't look too bad and is sort of cool unto itself so will just clean it up and put it on the shelf for what it is. Very glad I got he heads up before I spent a pile of time on it!
-
Welcome to the darkside of modeling!
-
It was! I was actually very conservative with the gunk and goo. I had the car when I was still in the Army. After owning it about 6 months I was having issues getting it to start and any trips had to be planned so there were no hills to go up. Did a compression test and the gauge hardly even moved. Time for a valve job. Pulled it all apart and the exhaust valves were not much more than little nubs on the end of a stick. No big deal they made these engines forever so valves should be easy to get. WRONG. I could not find valves for it anyplace (anybody trying to find auto parts before the internet knows what I mean). This was an issue since it was my daily driver not some show piece or garage queen. Then I got to thinking that the old 1950s GM deuce and halfs we were still using at that time had a similar engine. Went to see the Maintenance guys and sure enough the valves were the exact same. Had her up and running like new in no time.
.jpg.de4e1e5fab471ca1ad69135fe8e4b6bf.jpg)
.jpg.6fc878a7314a8e365ff088a773158c45.jpg)
.jpg.a23d2262295ee8d595c5d37fd0d9cd26.jpg)
.jpg.d3792ce64e375ad392b676b23ff4777a.jpg)
.jpg.486c961d9f4ca7a8305f1d97c053b85f.jpg)
.jpg.be1387a41c2c3f9e2173b1090b500c93.jpg)
.jpg.51297bd5d79e1c8e13166a4c9171677e.jpg)
.jpg.af2a95f2322a763f96b901d1853447ce.jpg)


.jpg.d1b43607827e79035b34a75ff1803a10.jpg)

.JPG.6d96635f3aa8c1dc51eb1763d50358b0.JPG)
.JPG.3195fddad3e3c905c6d58bc0a0c70c56.JPG)
.JPG.20244e076d8a66b116087adfe8e84953.JPG)
.JPG.0a51058bdce2beb1fa420fc7e1ce0c99.JPG)
.JPG.f802ae0c4b0f738629046e514f1aefe0.JPG)