Jürgen M.
-
Posts
1,783 -
Joined
-
Last visited
Content Type
Profiles
Forums
Events
Gallery
Everything posted by Jürgen M.
-
 Nice! I like that kit. I used to have the old version. Wasn't called "Cross Country Hauler" back then. I had built it like shown on the cover but unfortunately it didn't survive a move! It got crushed as a heavy chair fell on the moving box. Glad to see it's back on the market. Have fun. I'm sure this will be an awesome build!
 -
Convoy, take 7
Jürgen M. replied to Jürgen M.'s topic in WIP: Model Trucks: Big Rigs and Heavy Equipment
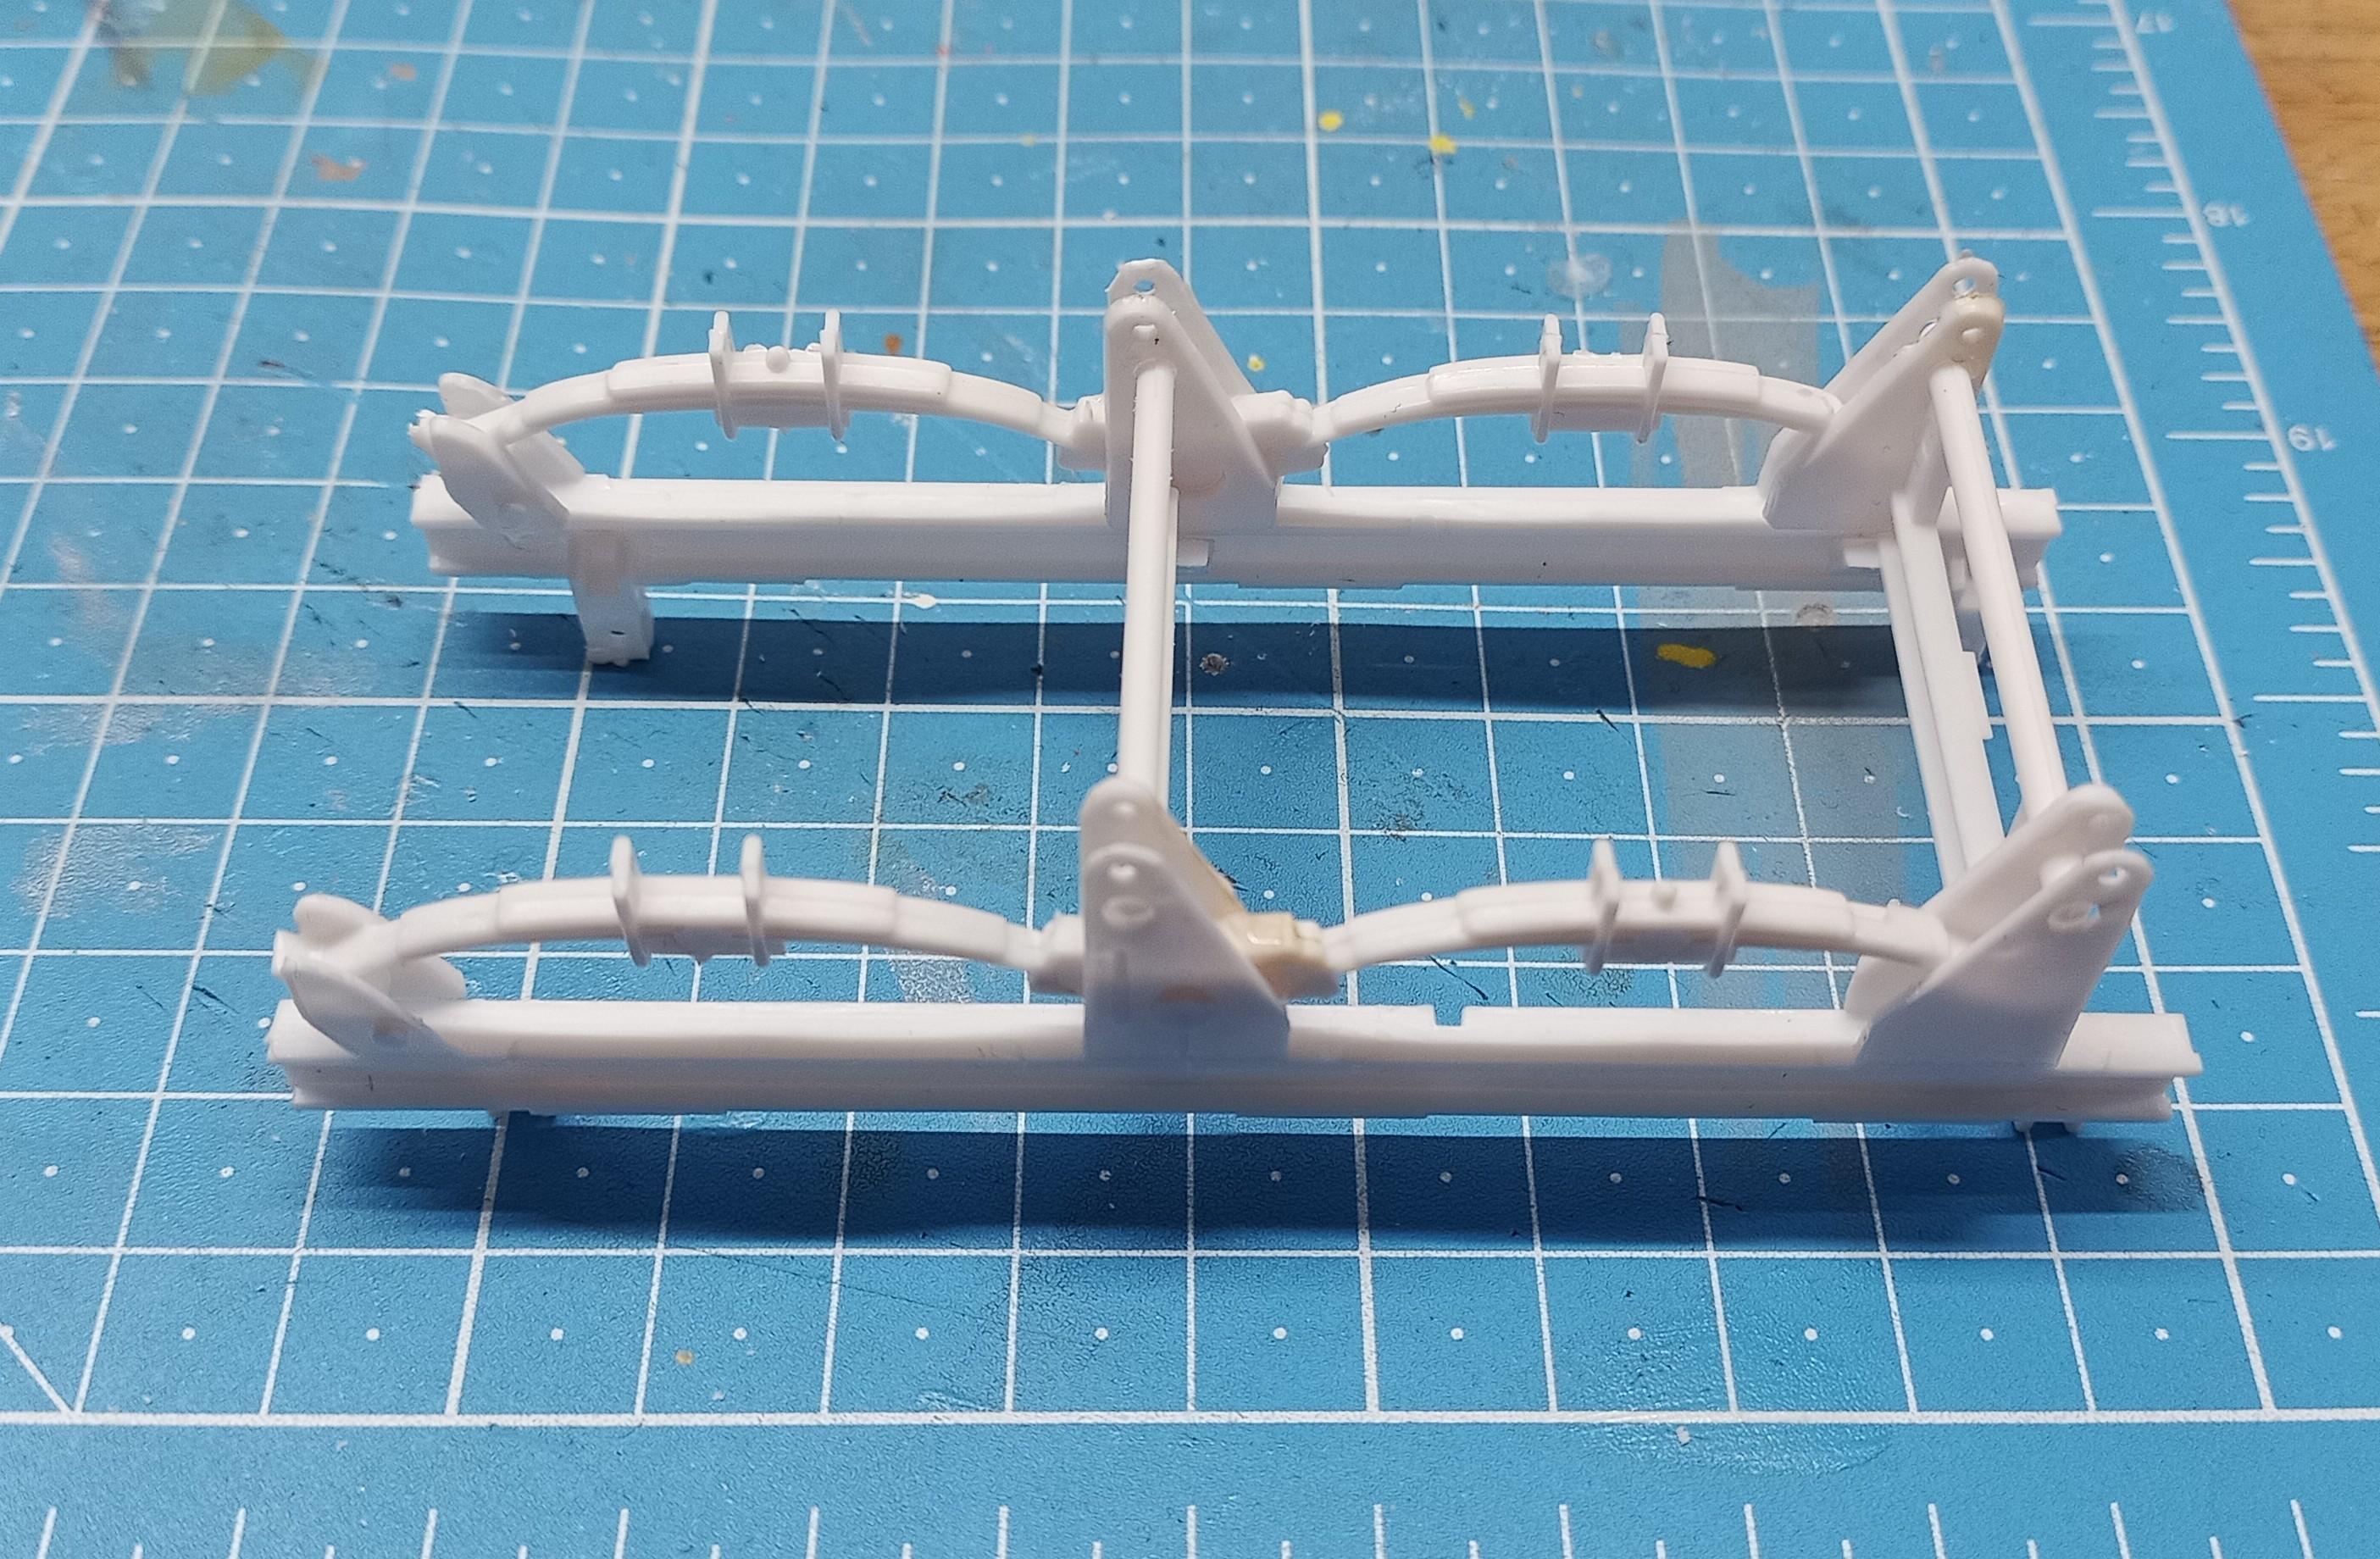
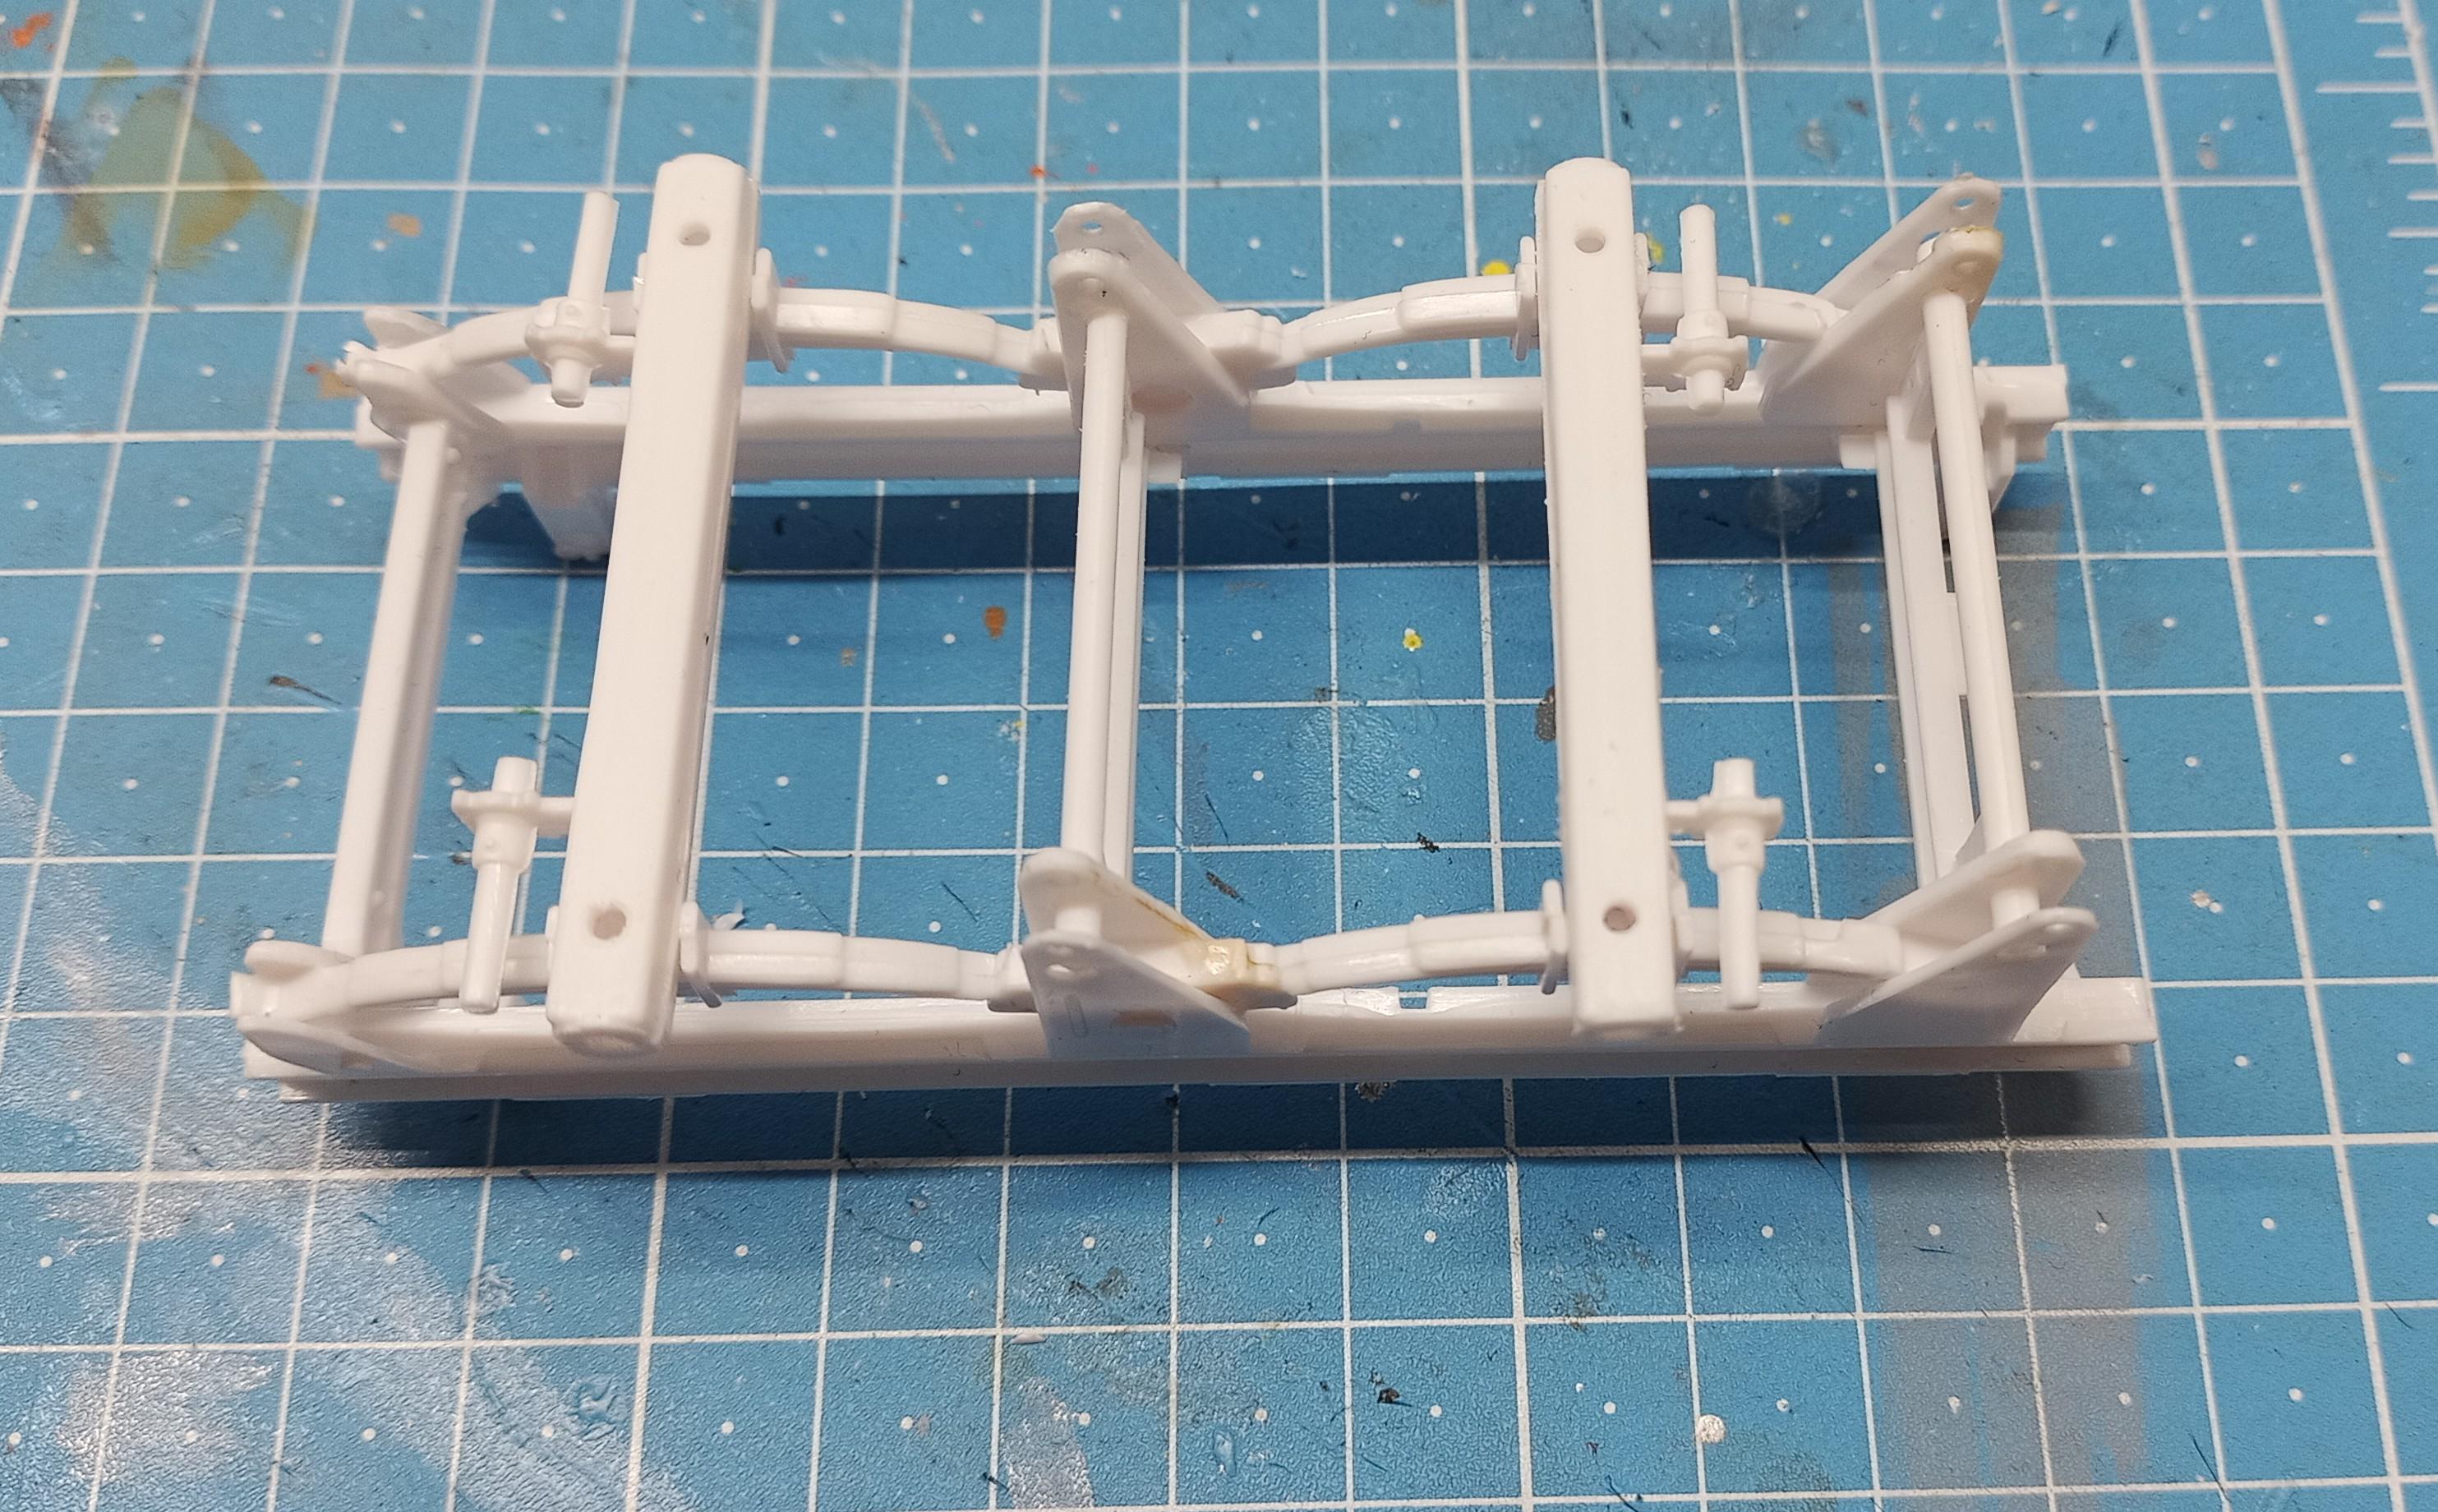
I managed to fix the brake chambers and completed the chassis and under body of the trailer! The sliding of the chassis works pretty well! The brake lines will be attached after painting. The crank cross shaft was already broken in the box so I used a piece of 1mm brass rod! Now the painting can begin!
-
Convoy, take 7
Jürgen M. replied to Jürgen M.'s topic in WIP: Model Trucks: Big Rigs and Heavy Equipment
It's a typical AMT kit! Lots of cutting, sanding, ....! Two of the brake chambers broke. Have to fix them! Why do they make these parts in chrome? For a trailer?? 🙈 That makes it even harder to detach them. I'm tempted to print new ones that are not so fragile! -
Convoy, take 7
Jürgen M. replied to Jürgen M.'s topic in WIP: Model Trucks: Big Rigs and Heavy Equipment
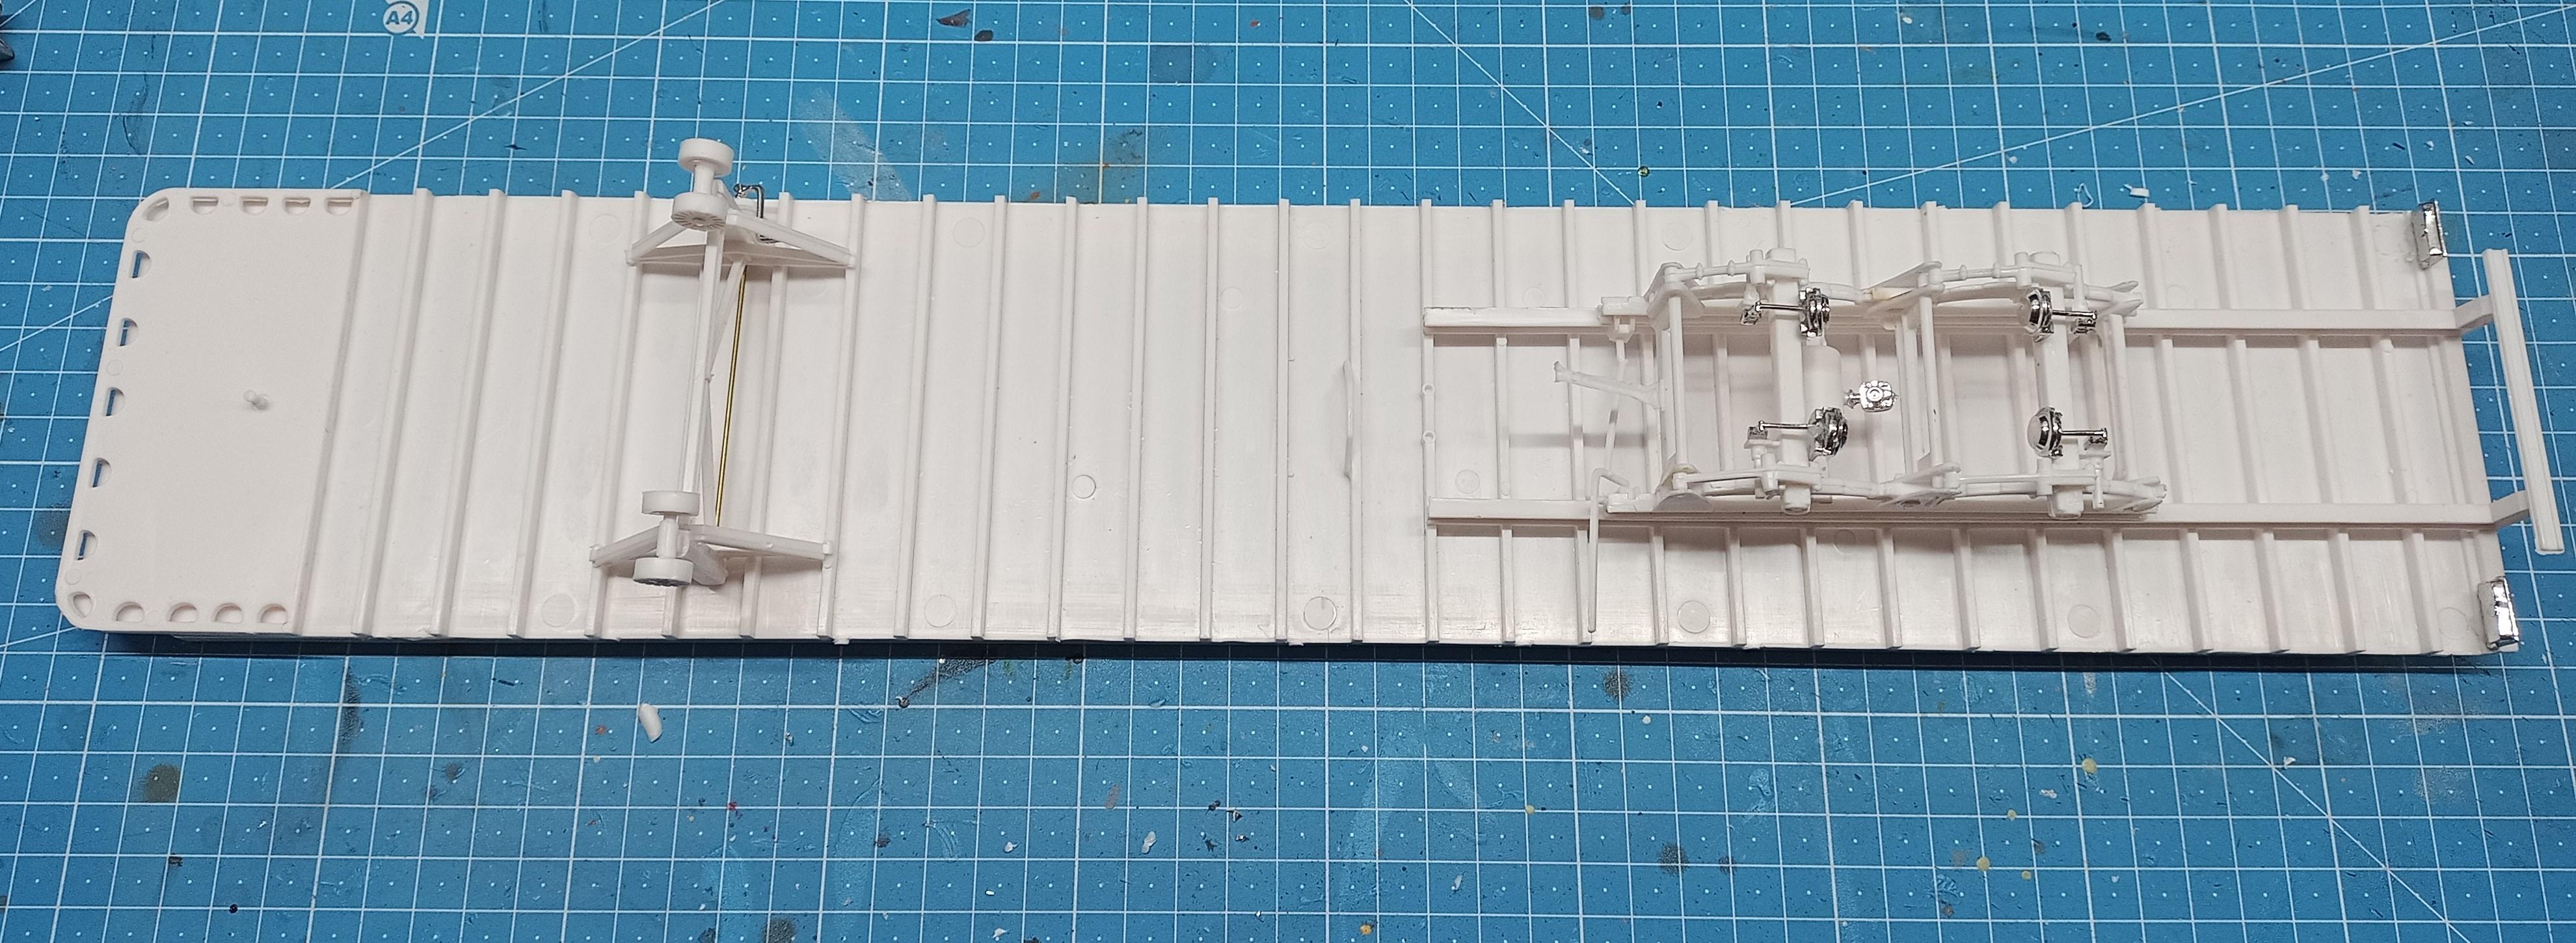
I began assembling the trailer chassis:
-
Convoy, take 7
Jürgen M. replied to Jürgen M.'s topic in WIP: Model Trucks: Big Rigs and Heavy Equipment
Thanks Jeff! I also hope they'll arrive soon! Don't know why it's taking so long! At least now I can do something again! -
Convoy, take 7
Jürgen M. replied to Jürgen M.'s topic in WIP: Model Trucks: Big Rigs and Heavy Equipment
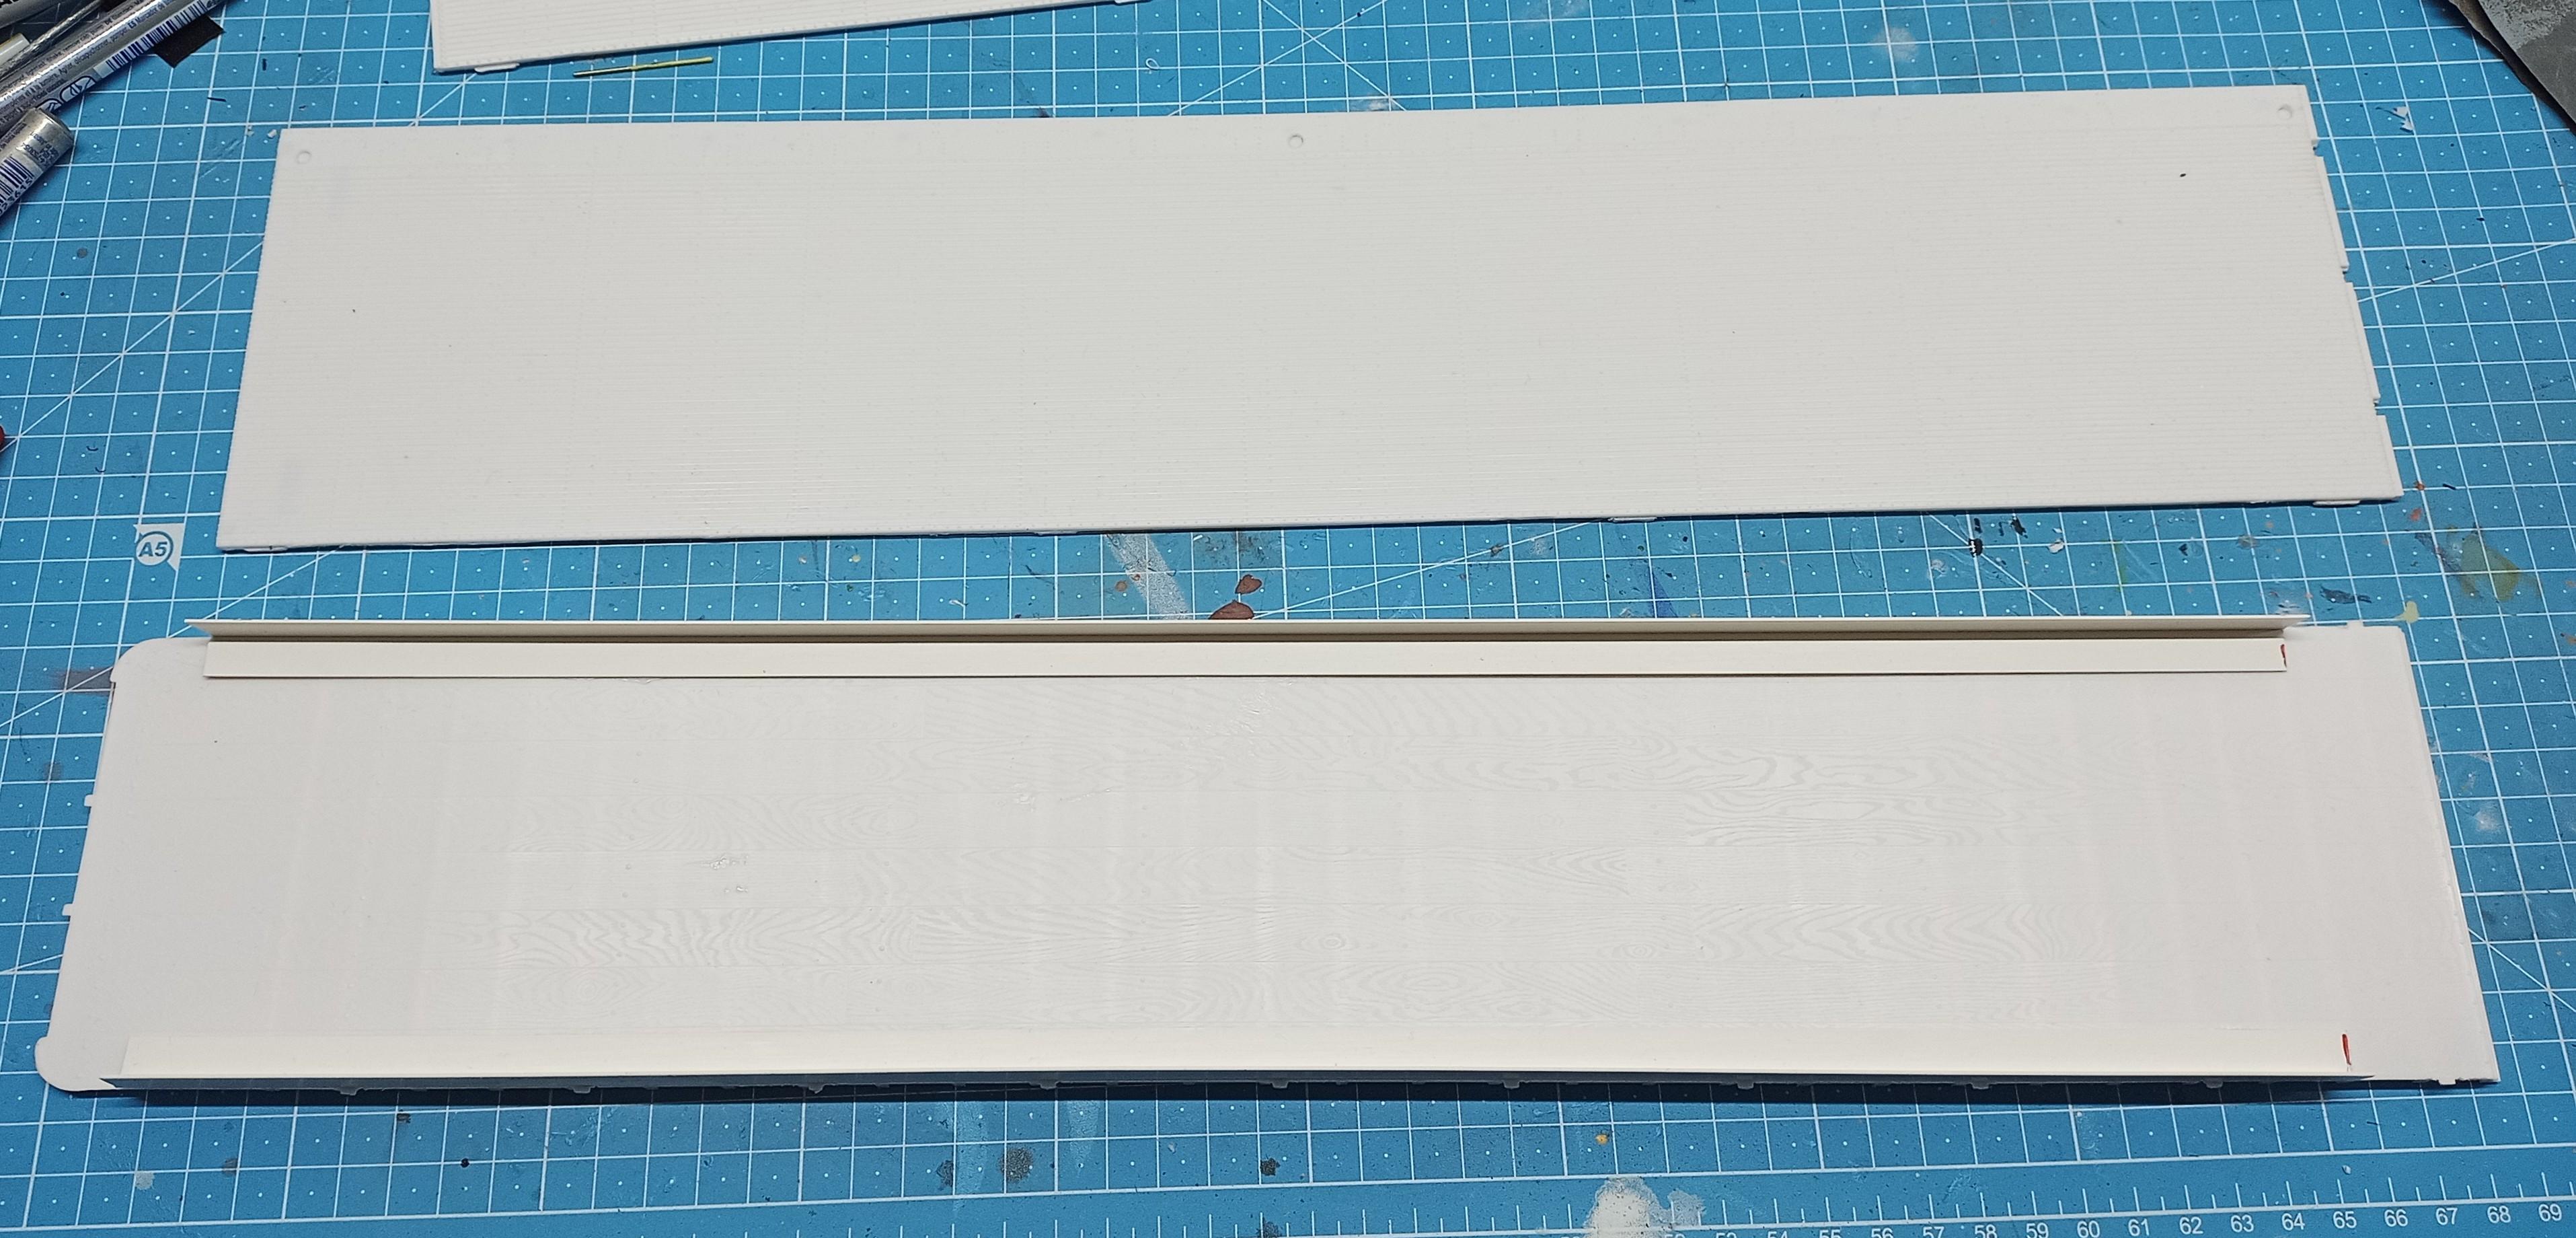
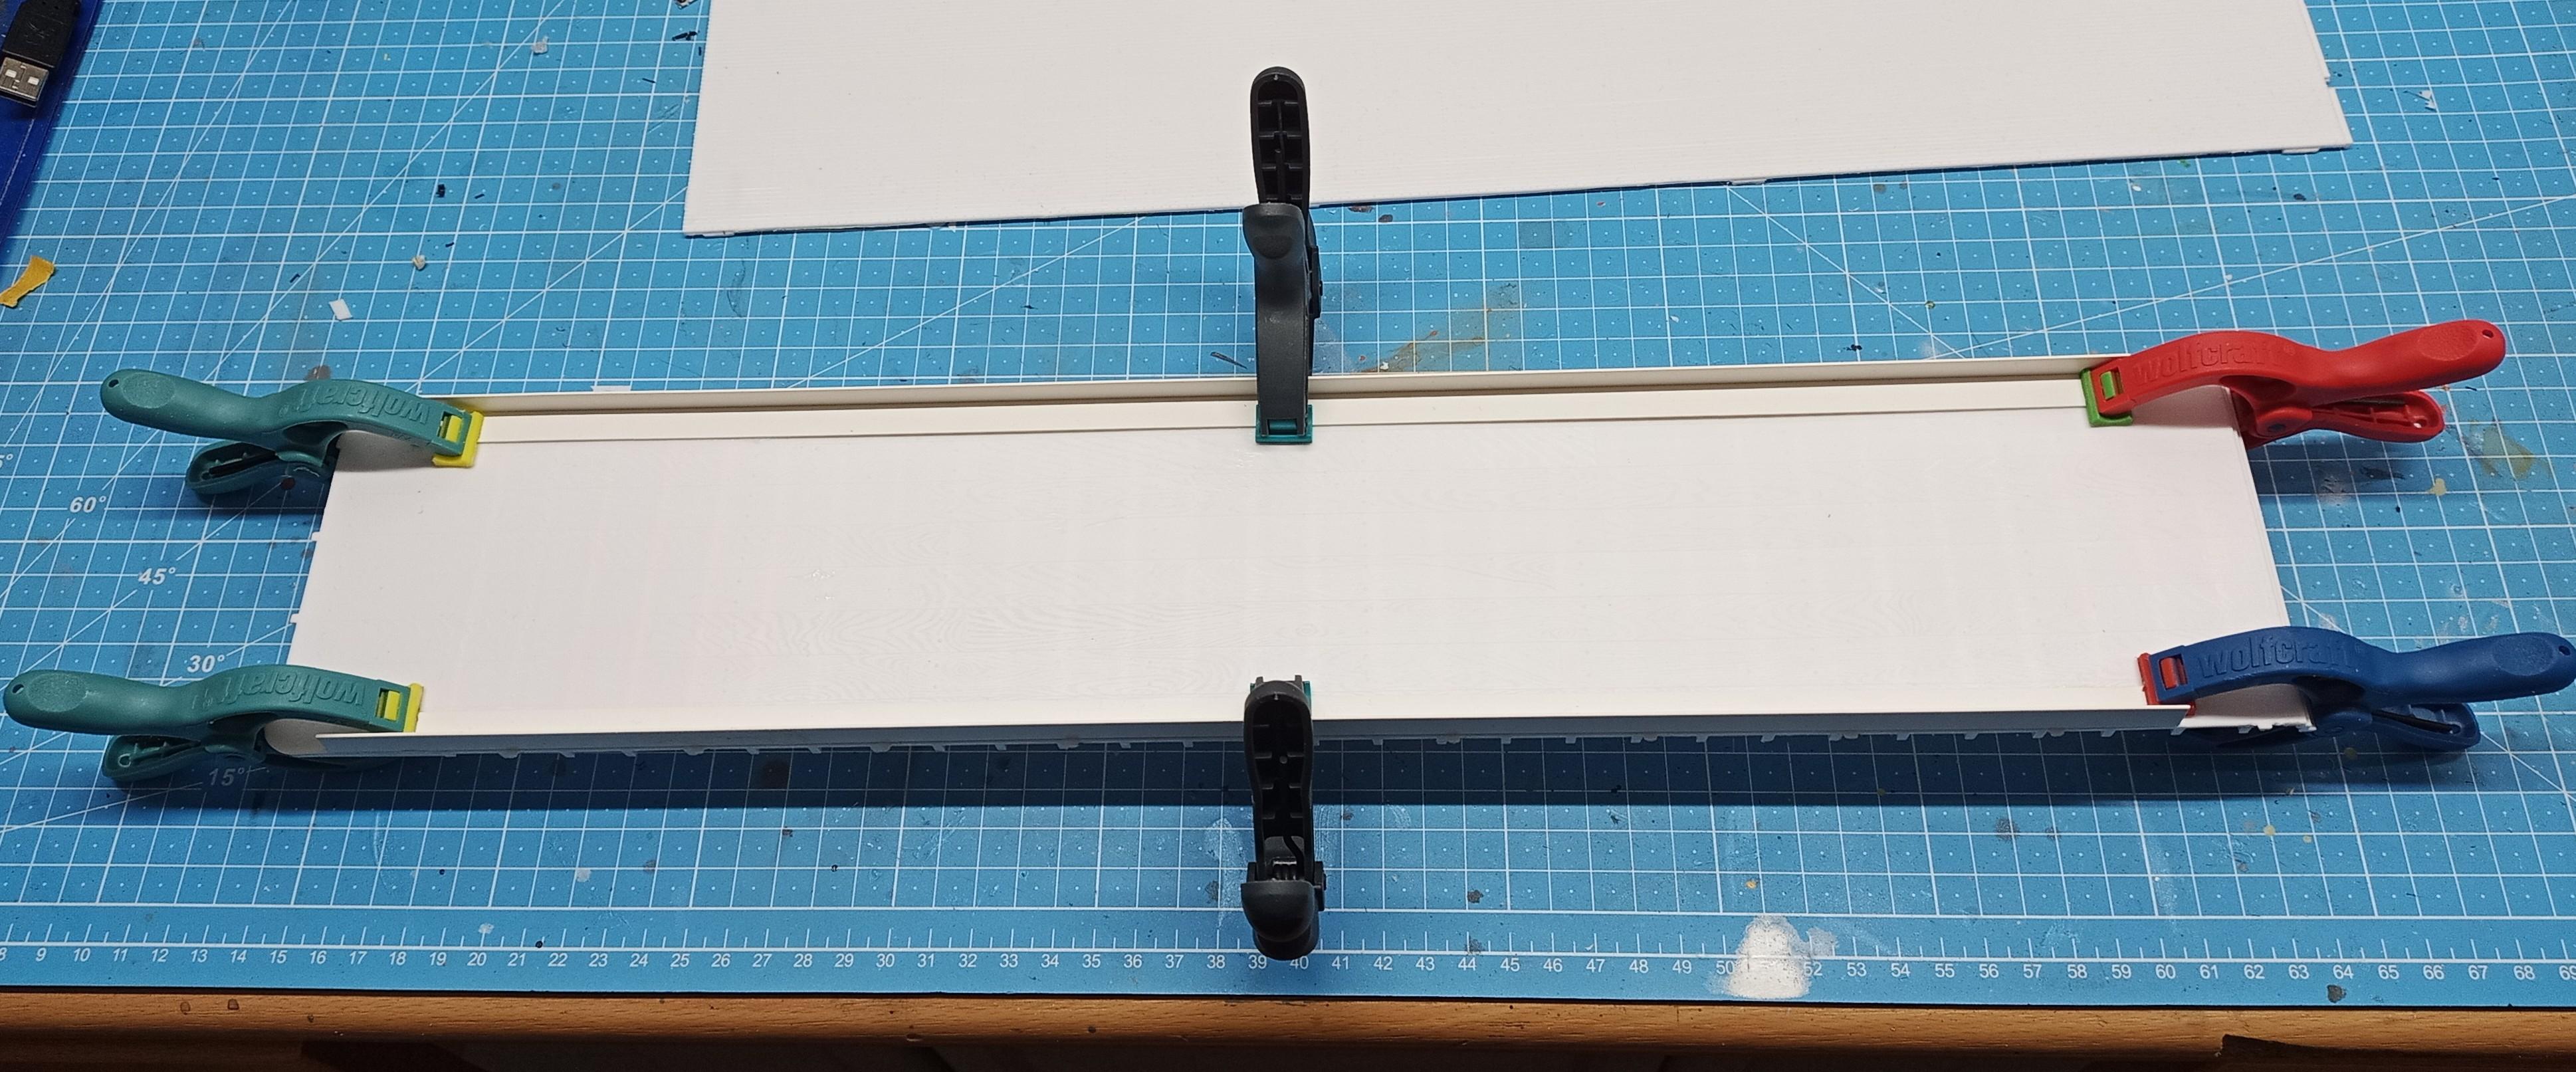
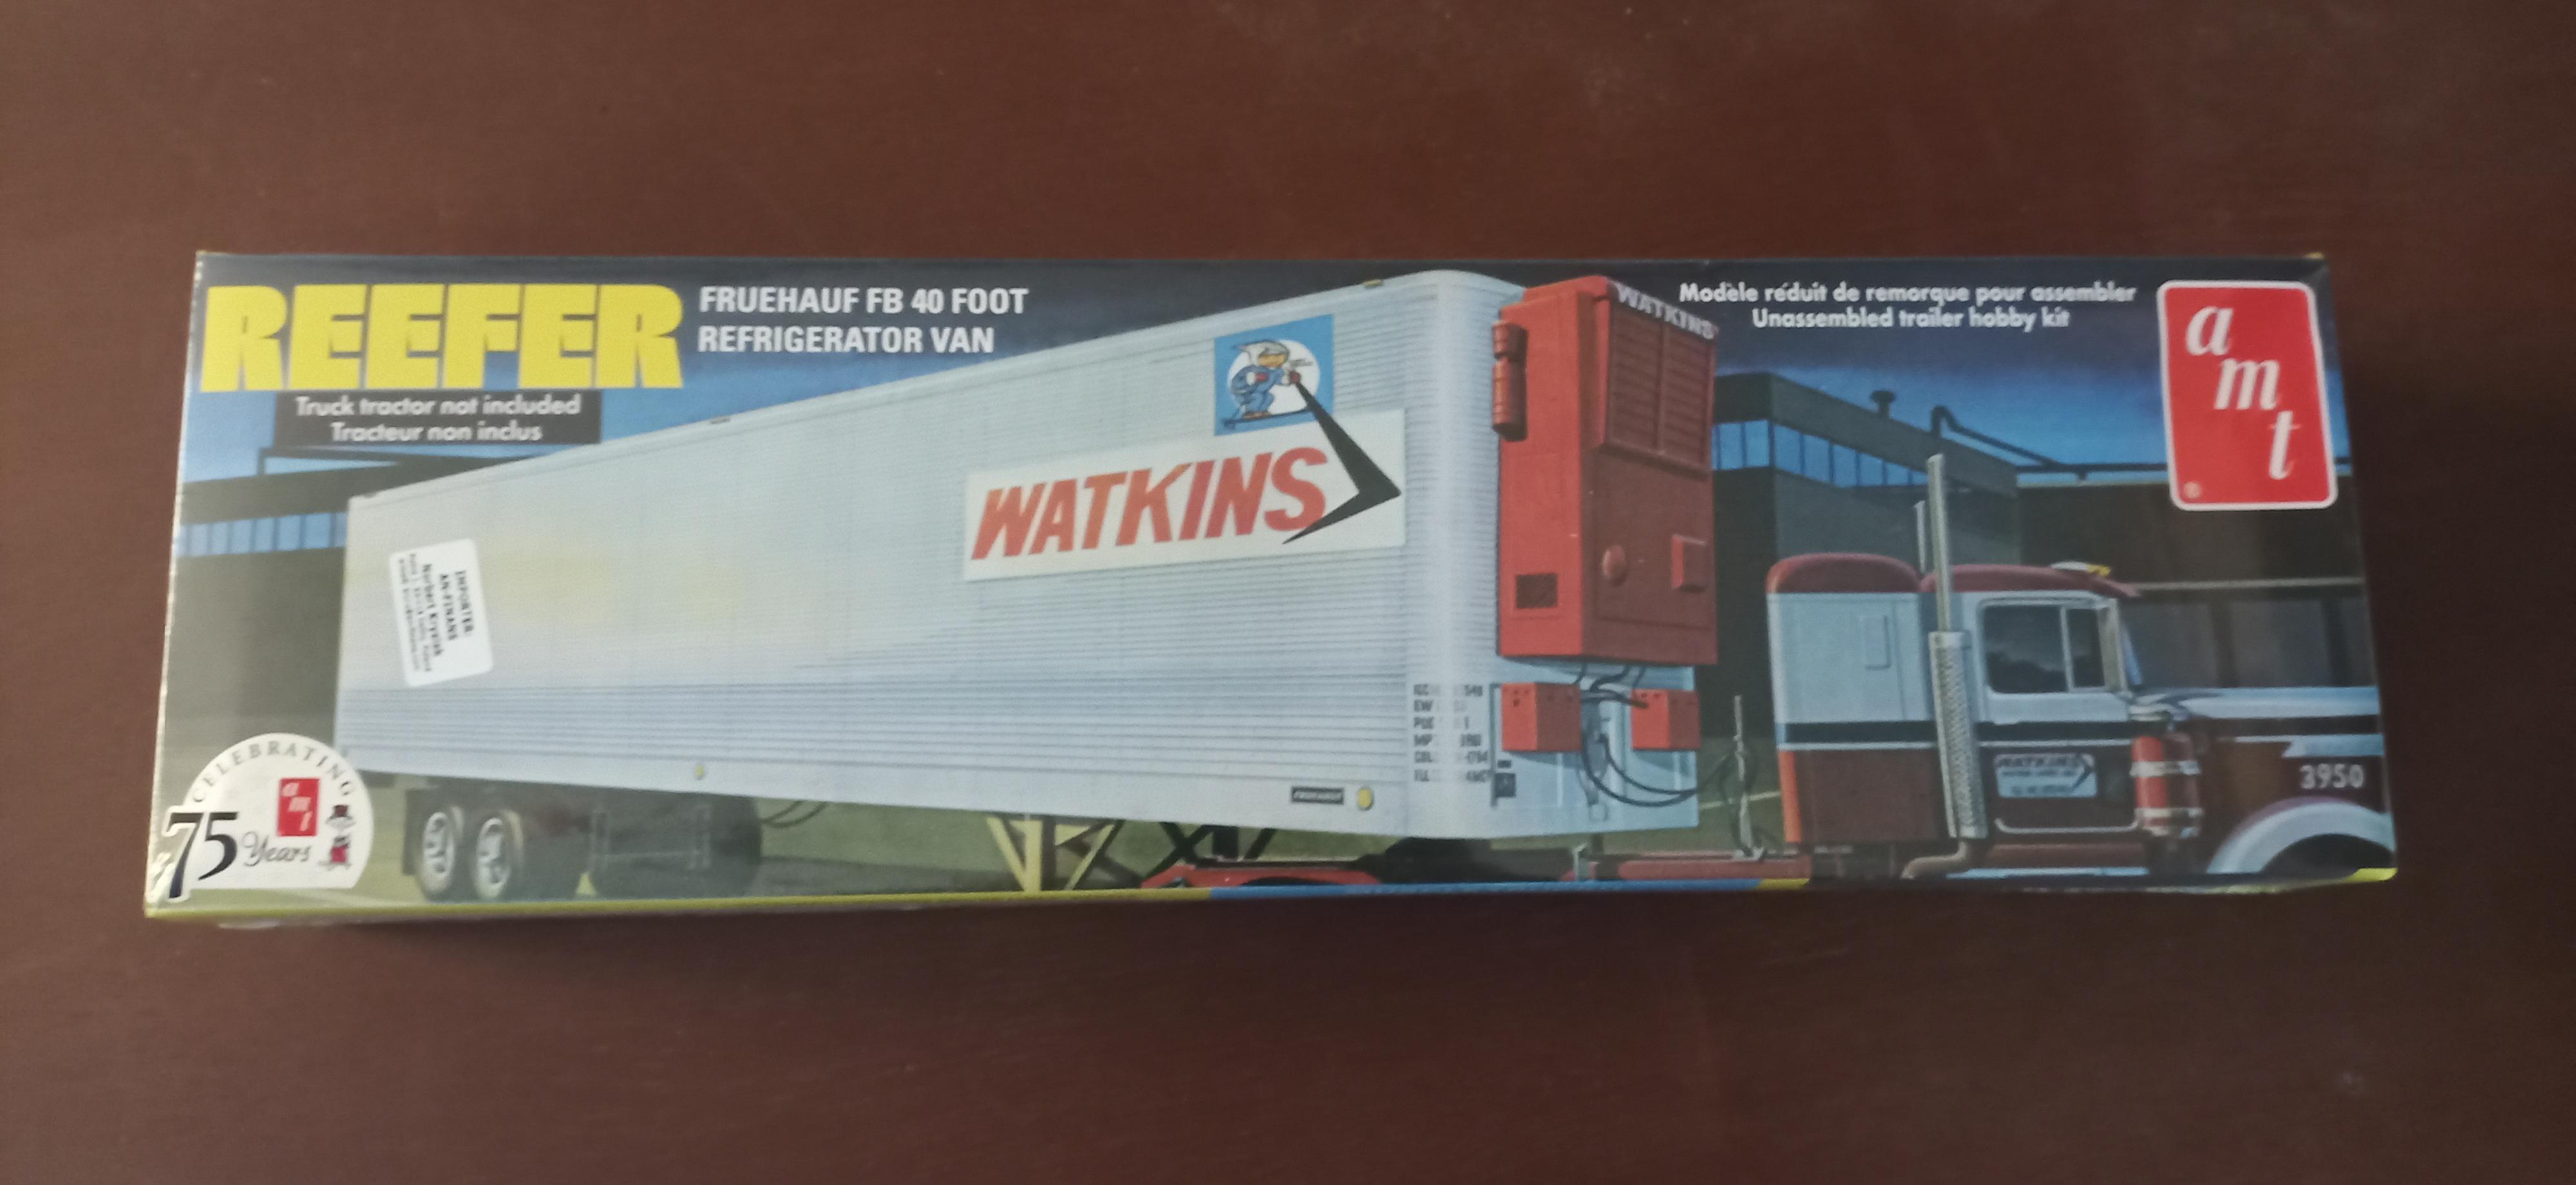
Finally I have something to do on this build again! Not what I hoped because the cabs Bren printed for me haven't arrived yet but the trailer did! I purchased this AMT Watkins reefer not wanting to print the side walls, roof and floor in several pieces. That would be a waste of time and filament! I purchased it on eBay for 40€ plus shipping which was a good deal. Shipping isn't that expensive so it was cheaper than buying a cheaper one from further away. Of course there's quite some pre-work to do. The side wall notches don't really fit the floor pins so I used 90° styrene rails to enable a solid attachment and more stability! The pins will be removed before assembly! I also designed the trailer decals which I will first print on paper to make sure the size is OK. The plate is not the original as in the movie since that is not legible at any point. I just got a short but blurry glance at it and saw that it was white! Of course I'll have to print the side wall decals in two pieces a side but that's not a problem! Next step will be the removing of the floor pins and assembly of the chassis and its attachment to the floor so I can paint it in one piece!
-
1970 Ford C 600
Jürgen M. replied to Biggu's topic in WIP: Model Trucks: Big Rigs and Heavy Equipment
If I may make a comment to the issue 'non drying lines': I have made the experience that glossy and satin paints take much longer to dry on those lines than flat ones! But that's only based on Revell colors. Maybe that helps a bit! -
Convoy, take 7
Jürgen M. replied to Jürgen M.'s topic in WIP: Model Trucks: Big Rigs and Heavy Equipment
Thanks Gary! Hope the cab arrives soon. I can't do anything at the time. The reefer should arrive Wednesday. Then at least I can work on something and create the decals! -
Convoy, take 7
Jürgen M. replied to Jürgen M.'s topic in WIP: Model Trucks: Big Rigs and Heavy Equipment
Thanks very much Bren! You're absolutely right. It's a great time to be a modeller. Next to printing also scratch building has increased in possibilities by improved materials. Combining both you can really get the best out of modelling! Some of you guys have scratch building skills I can only dream of so I try to substitute that by designing and printing. And with your skills in resin printing I am now again able to put another nice truck on my shelf! I too enjoy challenges! This IH cab was one! I'd be happy to accept a challenge of yours! 😊 Hope the cabs arrived soon. Can't wait to work on this build again. By the way, the reefer will be a kit. It would mean a great deal of time to print it. Took me 5 days to print the pups when I built the "Big Nasty" Mack! I already purchased the Watkins reefer on eBay! The decals will of course be self made again. -
Western Star 4900 FA plow truck
Jürgen M. replied to BK9300's topic in WIP: Model Trucks: Big Rigs and Heavy Equipment
And the original "Western Star" key chain! 😉 Great job! Can't imagine this getting better! Impossible! -
Convoy, take 7
Jürgen M. replied to Jürgen M.'s topic in WIP: Model Trucks: Big Rigs and Heavy Equipment
Killing time with minor mock-ups! A little ashtray, grille, lights, ... The fit ist not perfect on this dummy cab but good enough to get the idea! Bren has put the cab on its way! Should arrive by end of the week!
-
Convoy, take 7
Jürgen M. replied to Jürgen M.'s topic in WIP: Model Trucks: Big Rigs and Heavy Equipment
Yes, that's quite nice! I really appreciate Bren's efforts seeing how terrible my cab came out! But it's good enough for adjusting decals and positioning parts like the lower grille. I'll have to mix the Paint for the cab. It looks like an off white. I'll just put some yellow in the plain white. Should work! -
Convoy, take 7
Jürgen M. replied to Jürgen M.'s topic in WIP: Model Trucks: Big Rigs and Heavy Equipment
The new dash: Looks a bit better than the old one. Still not perfect but good enough!
-
Convoy, take 7
Jürgen M. replied to Jürgen M.'s topic in WIP: Model Trucks: Big Rigs and Heavy Equipment
Thanks pal! I hope it'll look as good as I expect it to when it's finished! 🤞 -
Convoy, take 7
Jürgen M. replied to Jürgen M.'s topic in WIP: Model Trucks: Big Rigs and Heavy Equipment
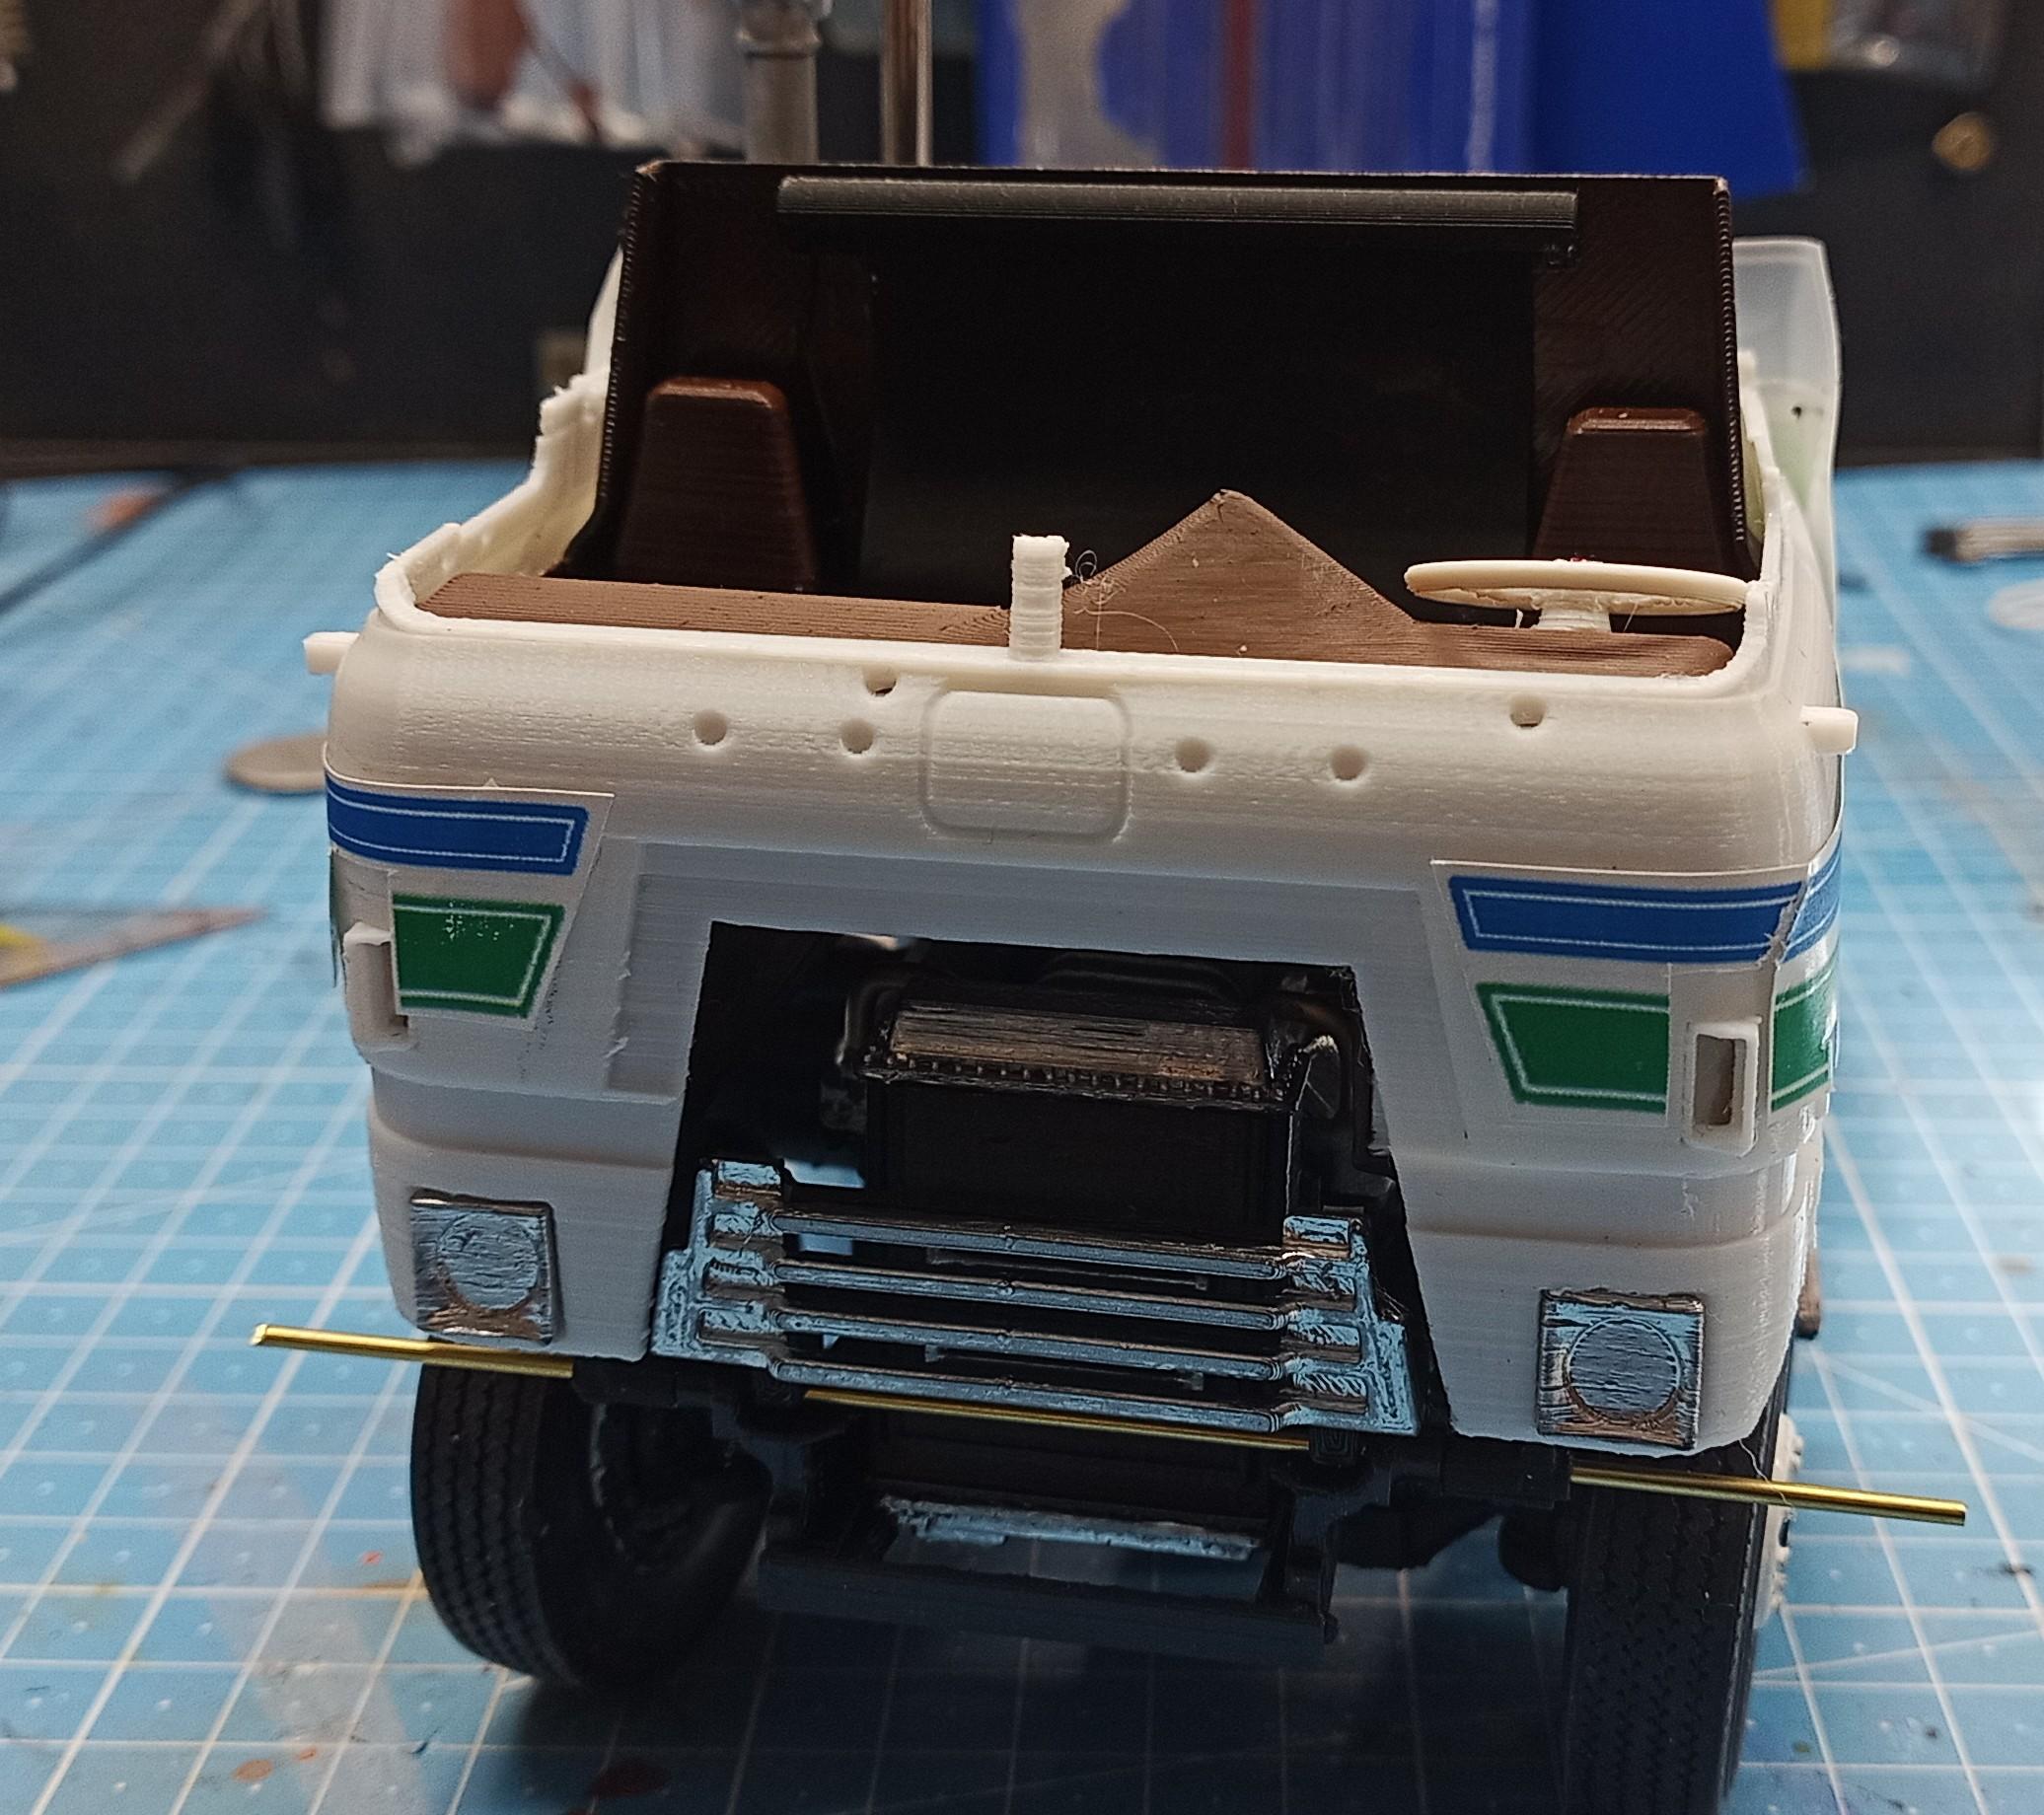
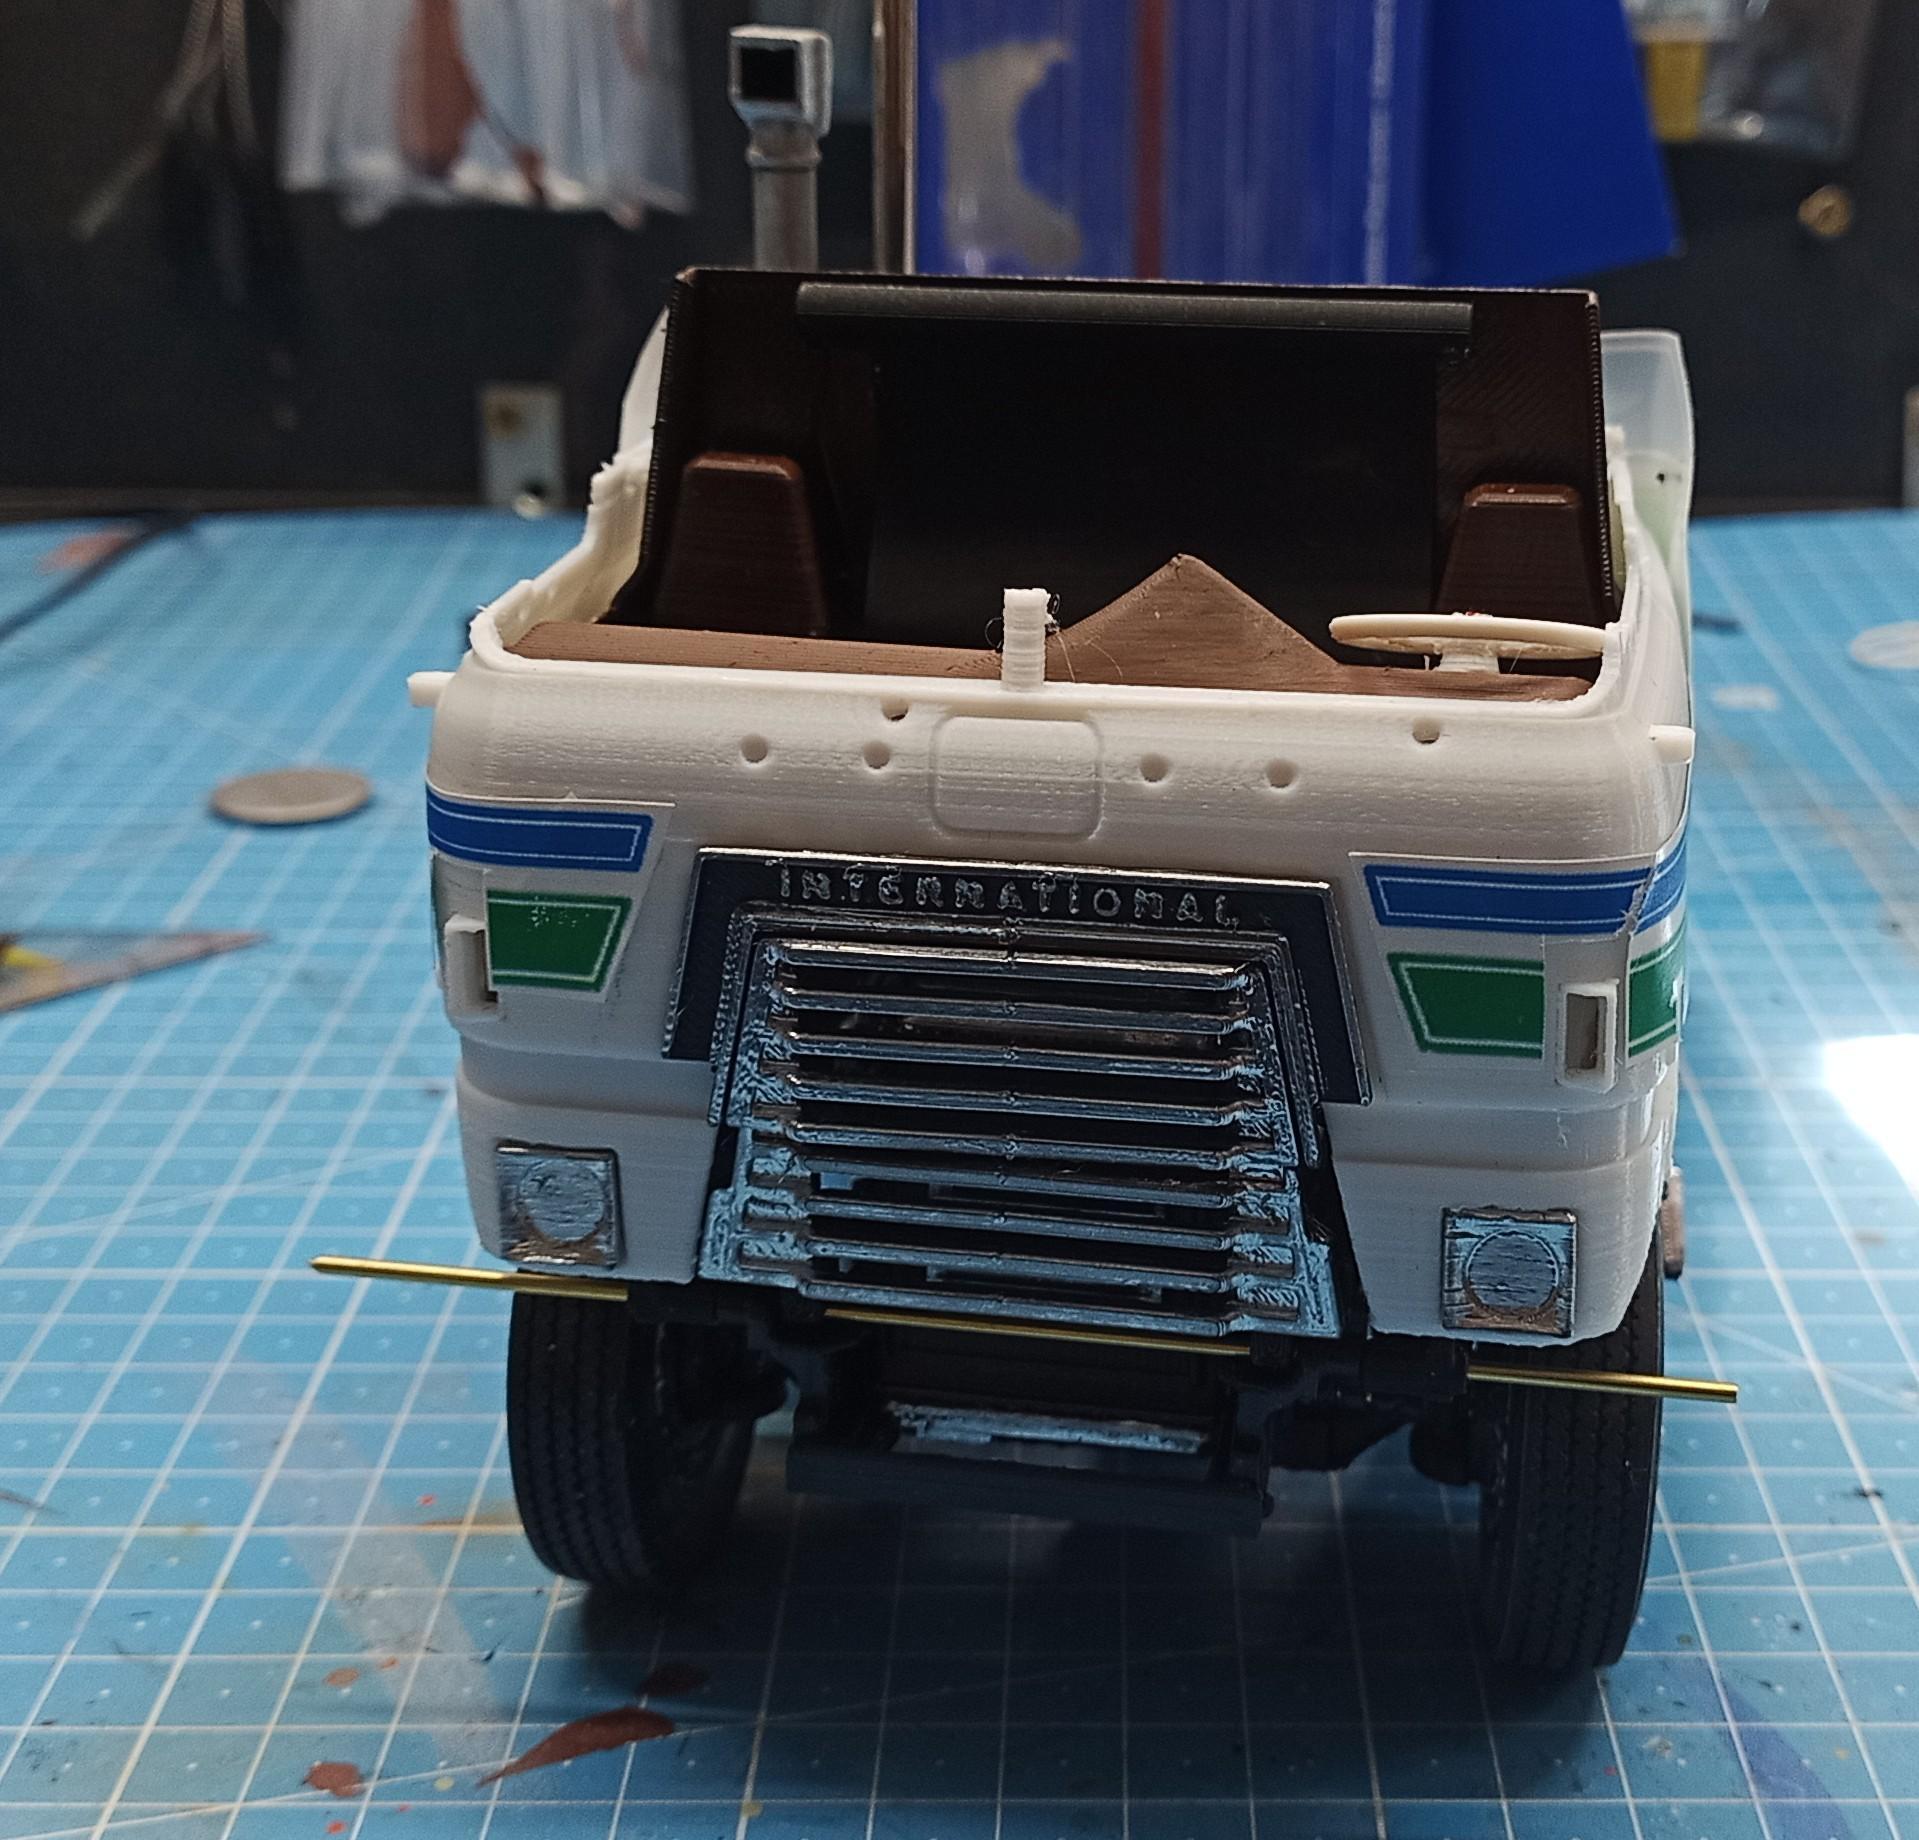
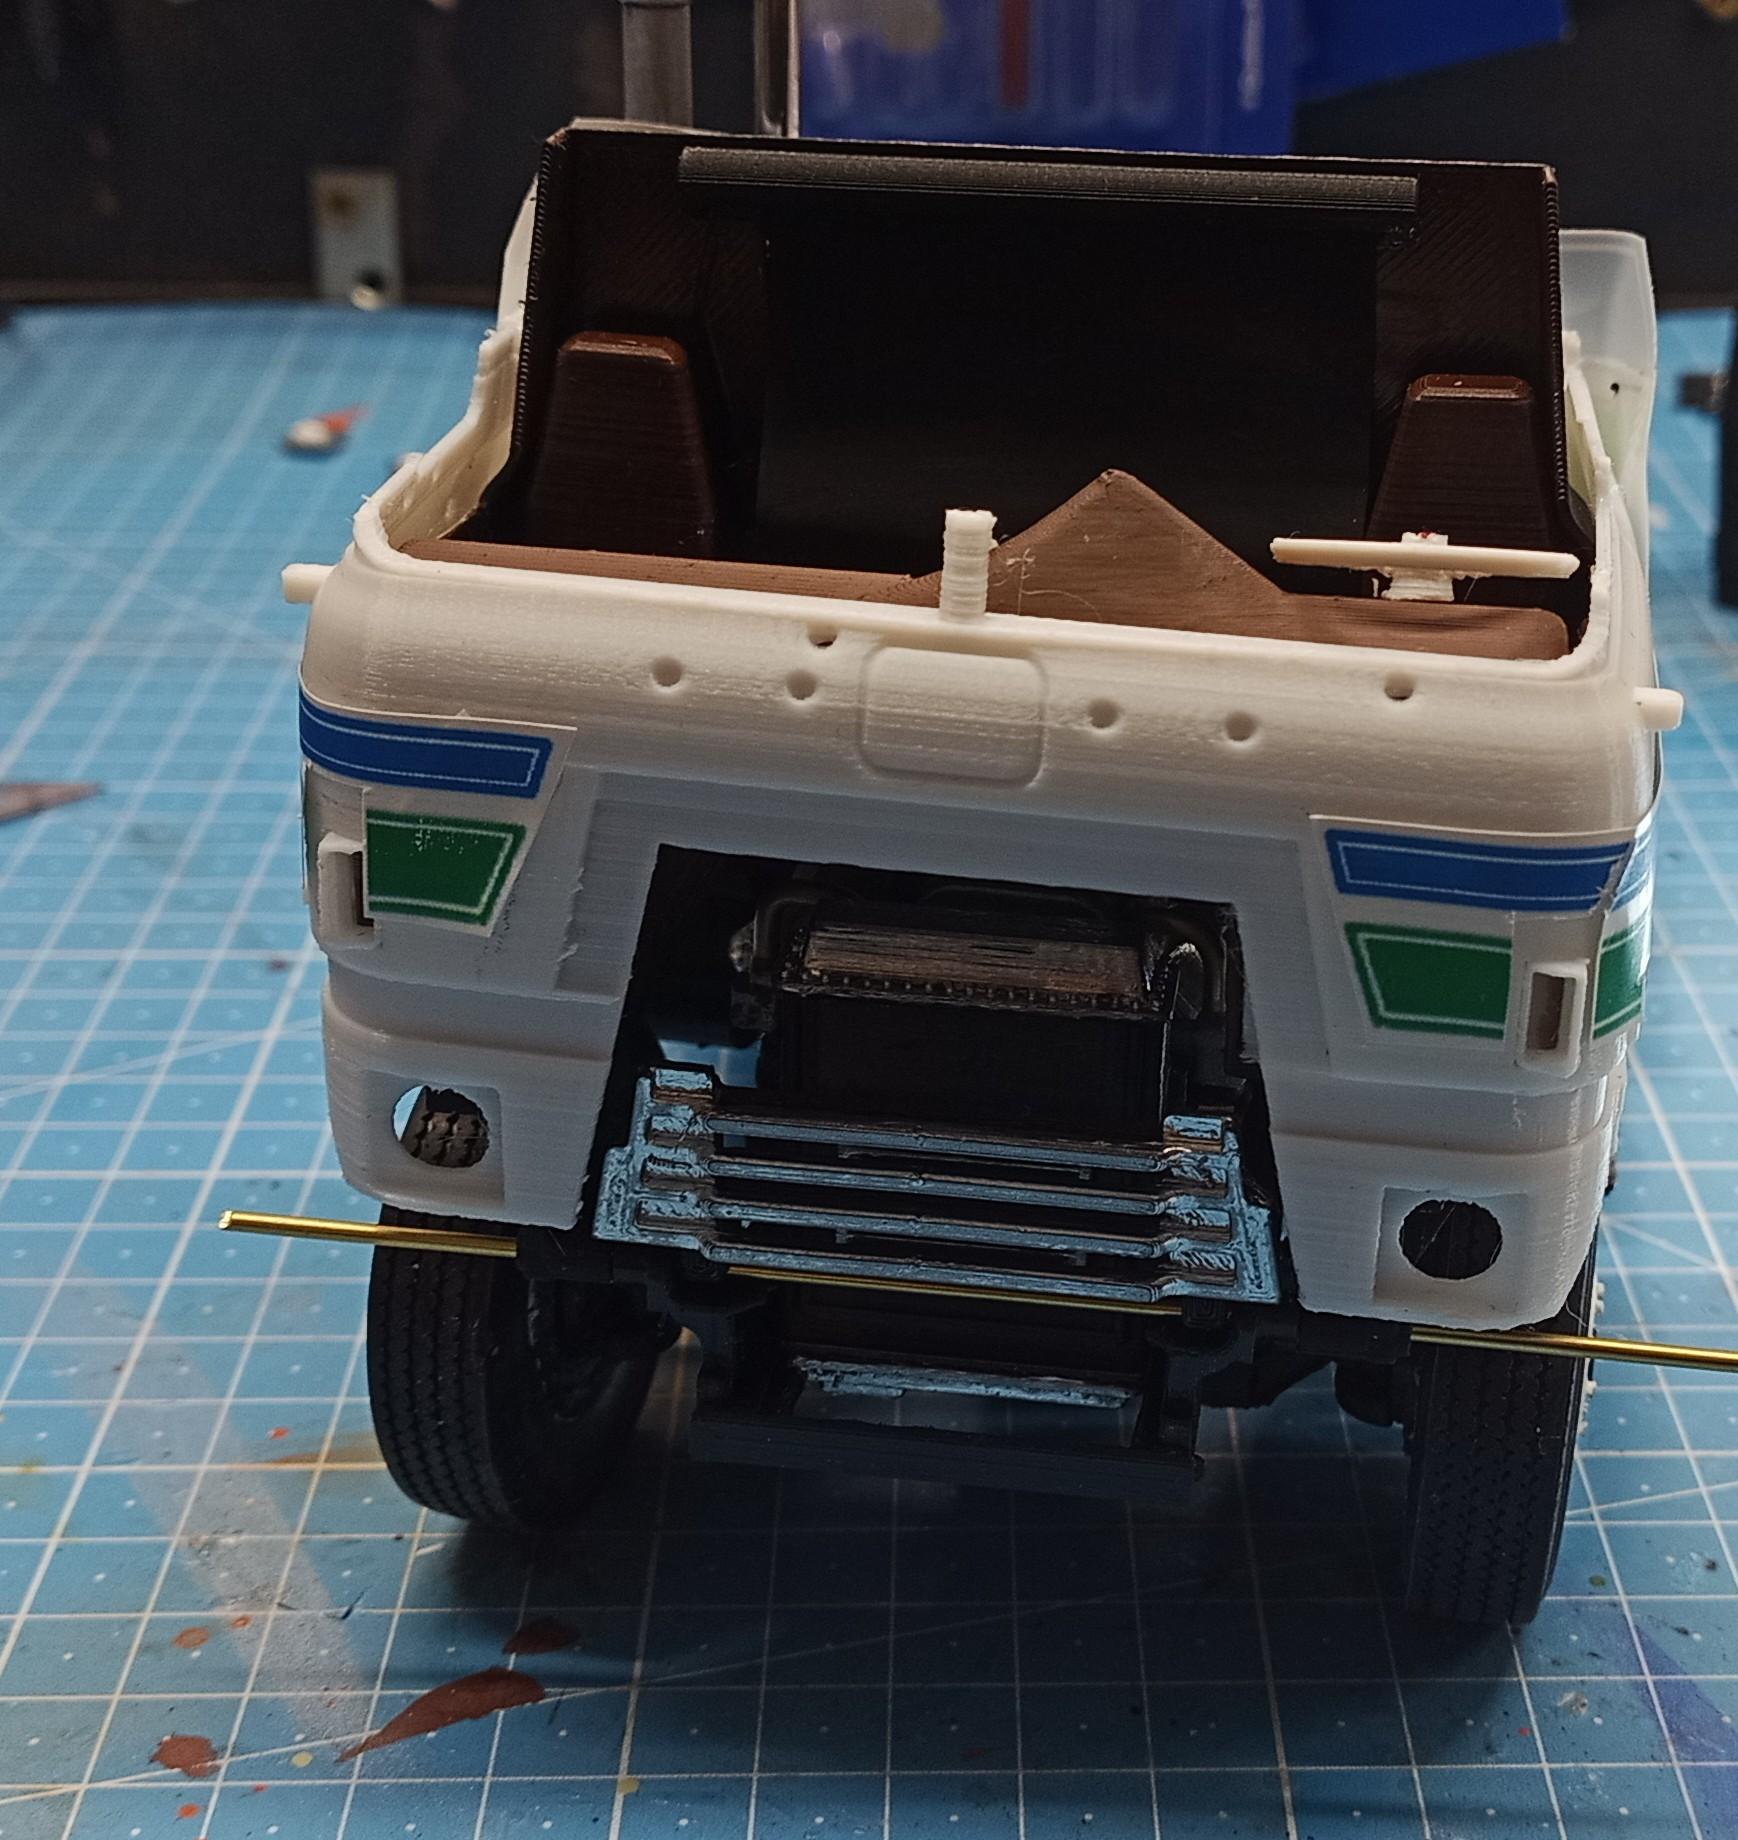
Not having done anything the last few days I decided to print a dummy-cab from a faulty file. It came up to the window line looking quite OK, then started to show more cavities than material so I stopped the print. It's cause is to adapt the decals and to see if it fits together with the tub in assembly. It fits perfectly! Still some work to do on the location of the cab sided hinges but the cab tilts and fits over the shifter. I then designed the decals and printed a first shot which looks quite satisfying. I attached them with little pieces of double sided carpet tape. Still need some attention though. I also added the side steps to the cab below the "Transtar" plates. (Of course I only attached one temporarily to see how it looks). Now the cab has the correct height and so will the bumper! It's also (more or less) adapted to the Transtar II design that way! In consequence I also decided to make a new dash according to the Transtar II. It's not perfect, it should have stretched a bit more to the center of the dog house but I'll leave it that way! The wall to the sleeper will be closed. Therefore I will not bother making a bed or any panel work. And now, the best news: Bren actually made it! After I was able to simplify the file of the cab a bit he managed to print a very nice looking cab. Thanks again very very much, Bren! I more than appreciate the time, patience and effort you put into this! Saved me again! 😉 Hope it's OK that I posted a few of your cab pics? Can't wait to get them in my hands and start integrating one into my build!
-
That's a real beauty Ron. Awesome combination. I like the color scheme too. Very nice build! Just like I know them from you! 😉
-
Caboverdose
Jürgen M. replied to Rockford's topic in WIP: Model Trucks: Big Rigs and Heavy Equipment
Hey Steve, good to see you back! Remarkable work you're doing. I always enjoy following your builds. I told Jeff (Biggu) a while ago that I was thinking about a tribute 1/32 rebuild of my Rubber Duck Mack with trailer. I was planning on making a diorama of the introduction scene of Convoy in 1/32 with the XKE. That might be my next project after I hopefully finish the 4070b. The printing of the cab has brought up some problems but I'm very confident that Bren will succeed! -
Convoy, take 7
Jürgen M. replied to Jürgen M.'s topic in WIP: Model Trucks: Big Rigs and Heavy Equipment
Are you referring to the original version of the Convoy song? Otherwise I don't know what you mean! 🤔 -
Convoy, take 7
Jürgen M. replied to Jürgen M.'s topic in WIP: Model Trucks: Big Rigs and Heavy Equipment
A few small things more: filler necks and a bit of touch up here and there! The chassis is therefore completed! Now I'll begin to paint the interior so everything is ready when the cab arrives! I know, it's from the "a" but as I said, it won't be visible up on the shelf!
-
Convoy, take 7
Jürgen M. replied to Jürgen M.'s topic in WIP: Model Trucks: Big Rigs and Heavy Equipment
Thanks Brian! Don't know yet when the cab will be finished! For the others, Bren has generously declared that he will print the cab for me! Thanks again Bren! 😊👍 -
Convoy, take 7
Jürgen M. replied to Jürgen M.'s topic in WIP: Model Trucks: Big Rigs and Heavy Equipment
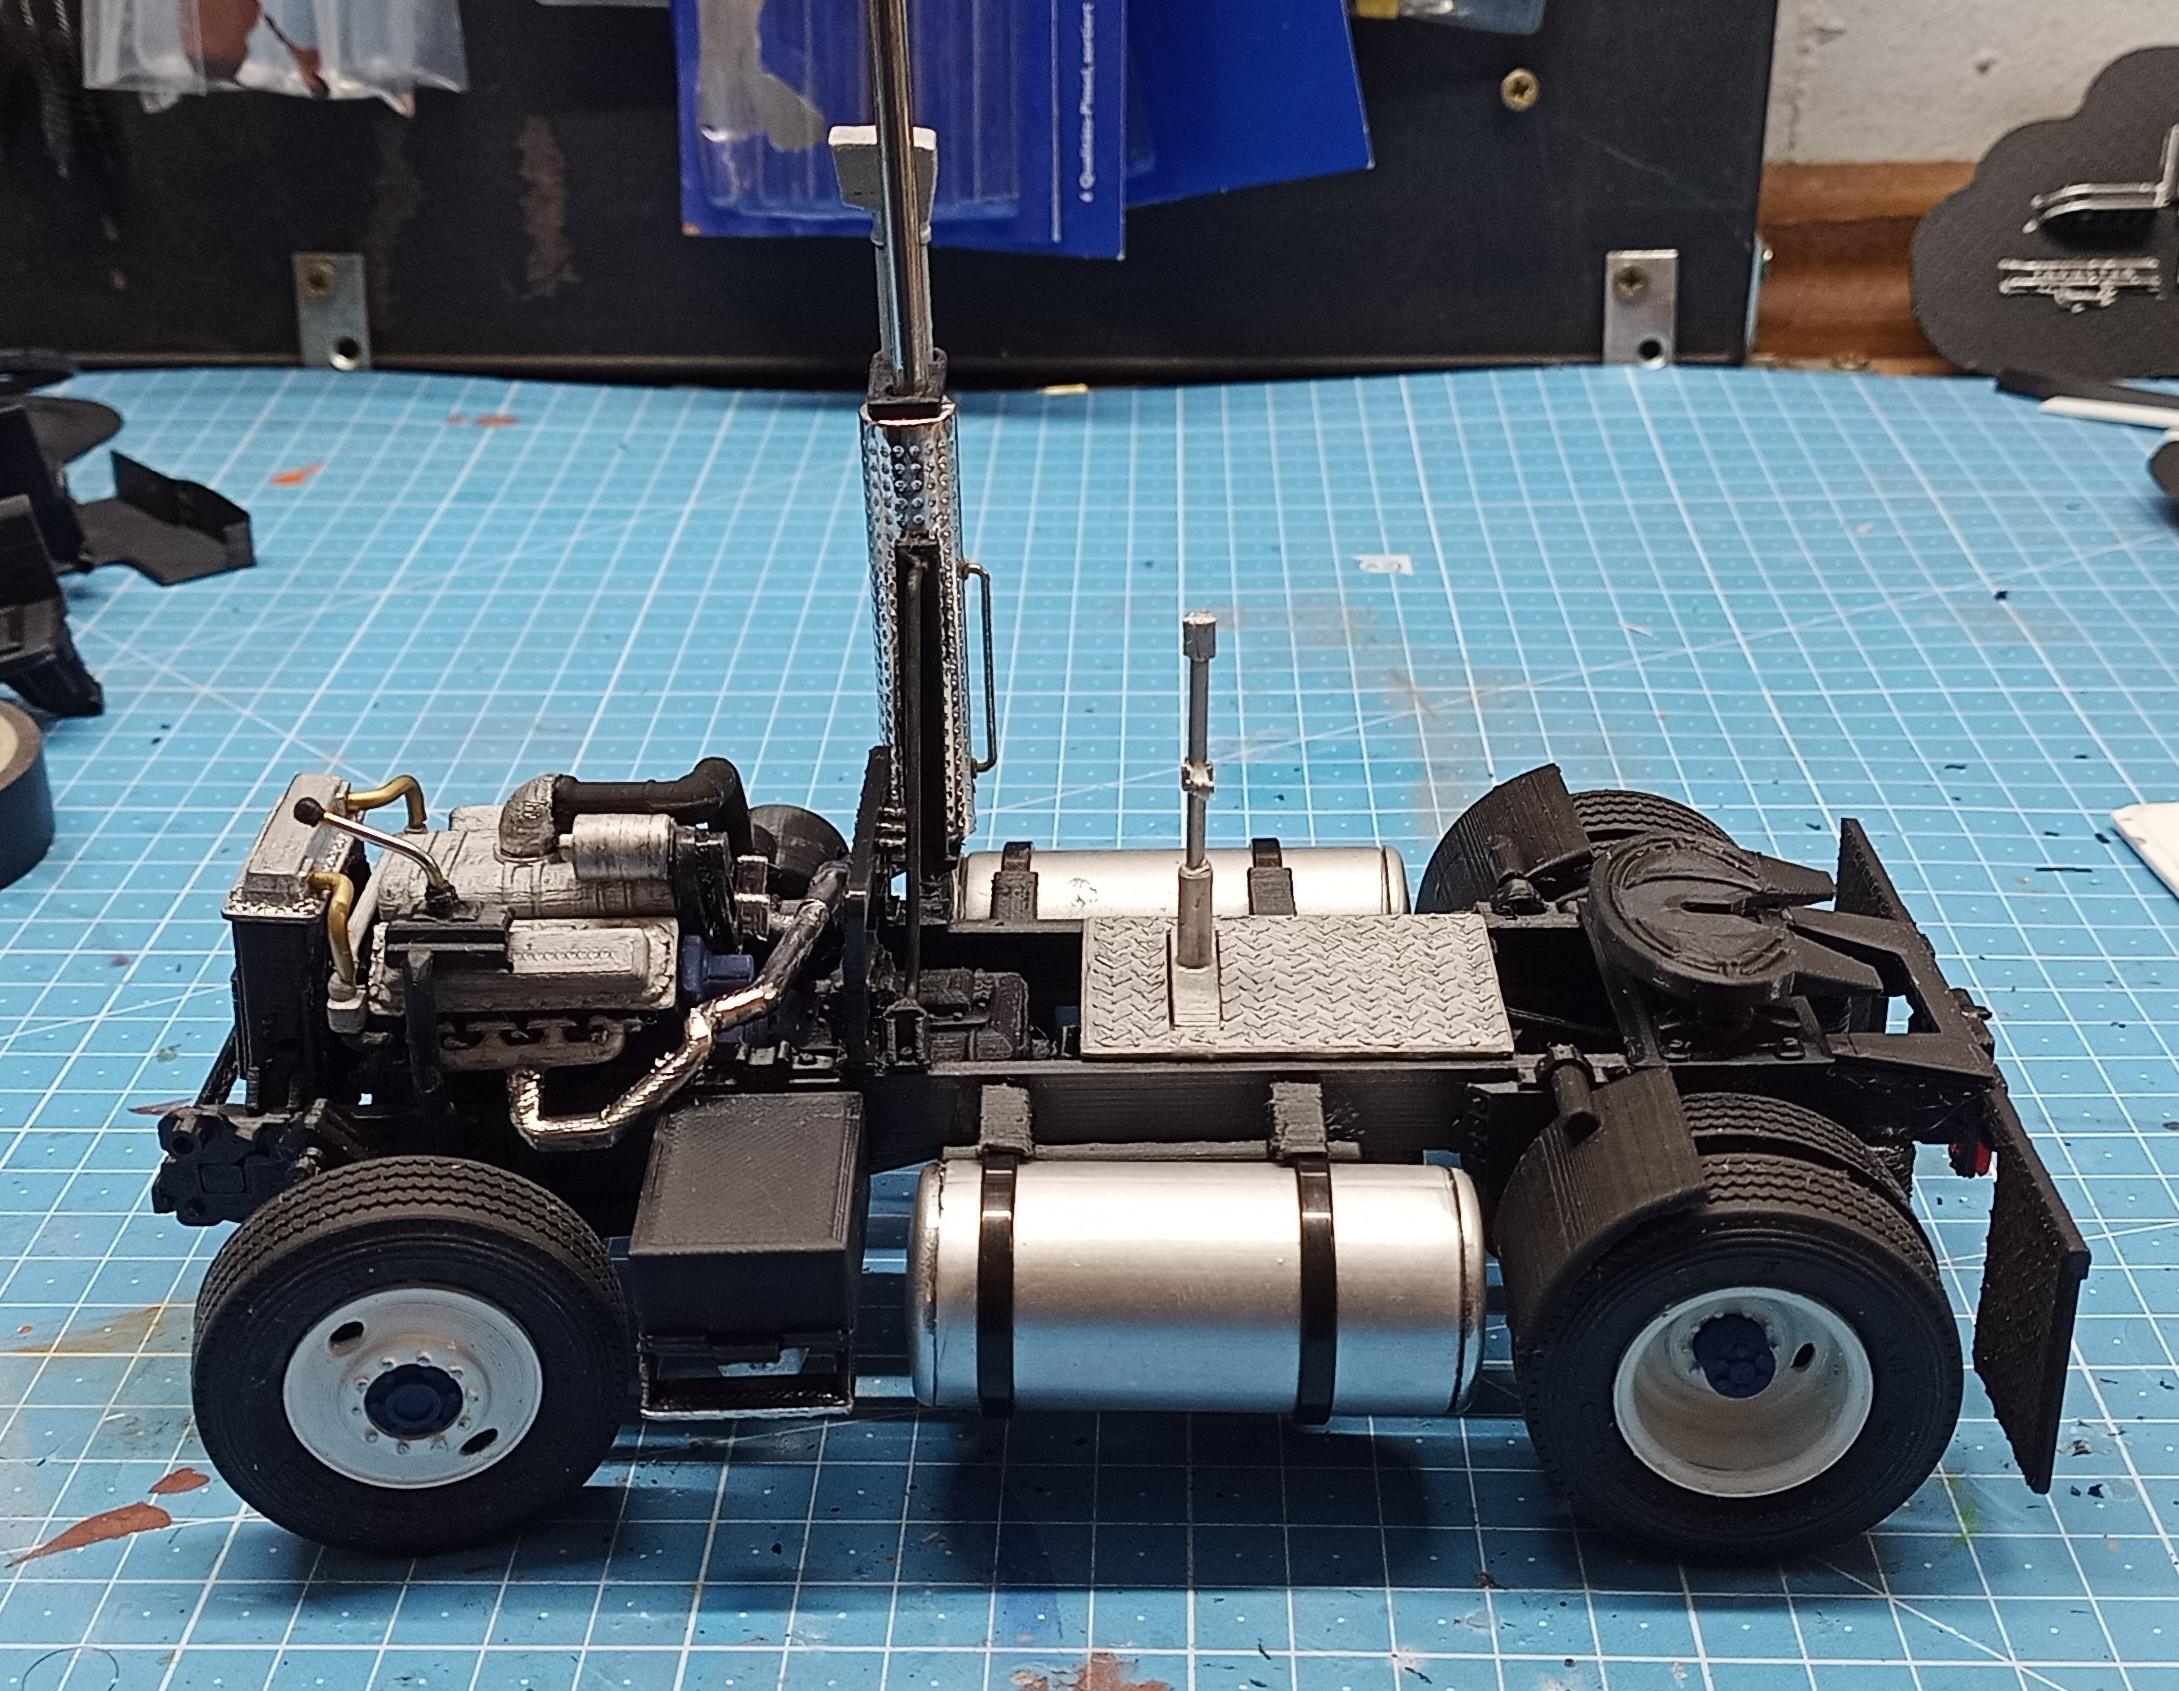
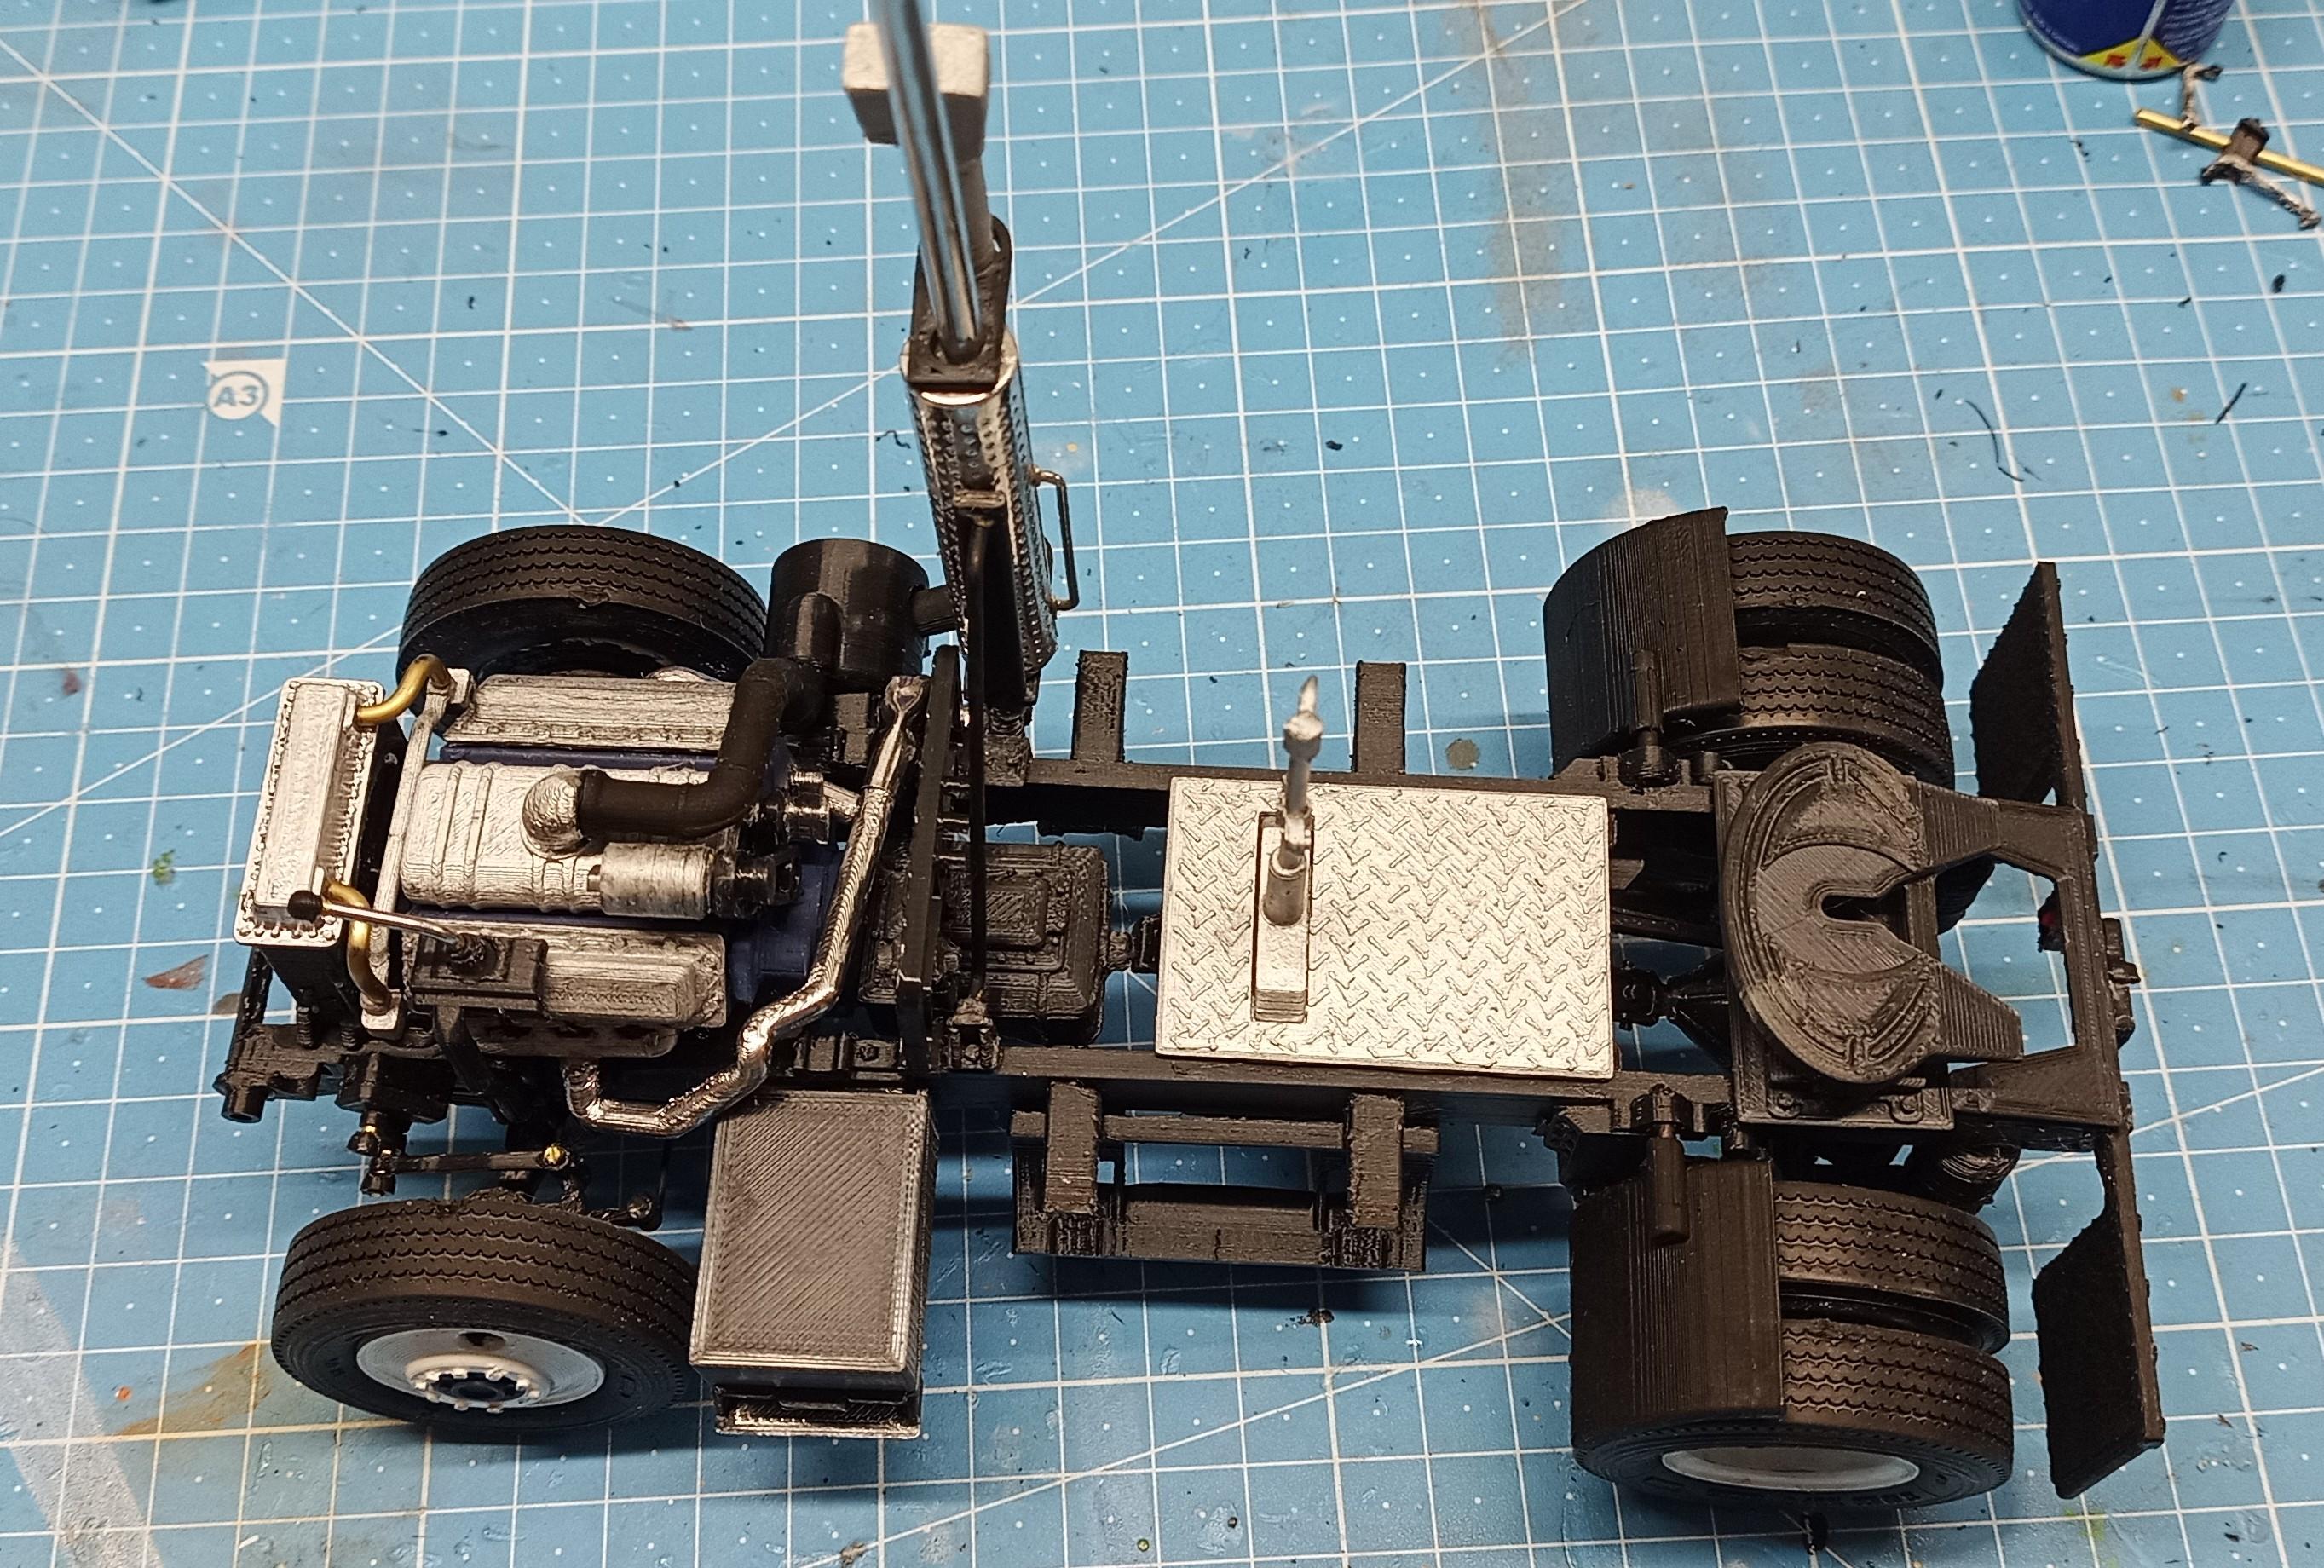
The tanks are painted and ready to mount: I used a no name chrome spray that actually has a nice dull effect. Looks more like aluminium than any model paint I know! Mounted they look pretty nice too! The tanks are pieces of 25mm aluminium pipe and the ends are slatted plugs. Works great. I did the same on my Superliner! Now I need the filler necks. They'll be printed!
-
Convoy, take 7
Jürgen M. replied to Jürgen M.'s topic in WIP: Model Trucks: Big Rigs and Heavy Equipment
There is a guy here in Germany who has a replica of the R.D. Mack. He bought it from someone in the US and brought it over here. It's not totally authentic though. Sleeper is different, no original plates, ... but he once showed it to Kris Kristofferson before a concert. Kris was impressed about the Remake quality but didn't seem to be that happy to see the truck since he didn't have such good memories about making the movie. I don't know if all of the actors in the movie would have thought that way? No way to find out anymore since they've almost all passed away. Only Franklyn Ajaye is still alive. And Ali MacGraw. No matter what they would have thought, I love the movie and the trucks in it and I'll try to keep it alive as long as possible! -
Convoy, take 7
Jürgen M. replied to Jürgen M.'s topic in WIP: Model Trucks: Big Rigs and Heavy Equipment
Thanks Jeff! As far as I know there are hardly any trucks of that movie left. I therefore have no idea if this truck still exists! -
Convoy, take 7
Jürgen M. replied to Jürgen M.'s topic in WIP: Model Trucks: Big Rigs and Heavy Equipment
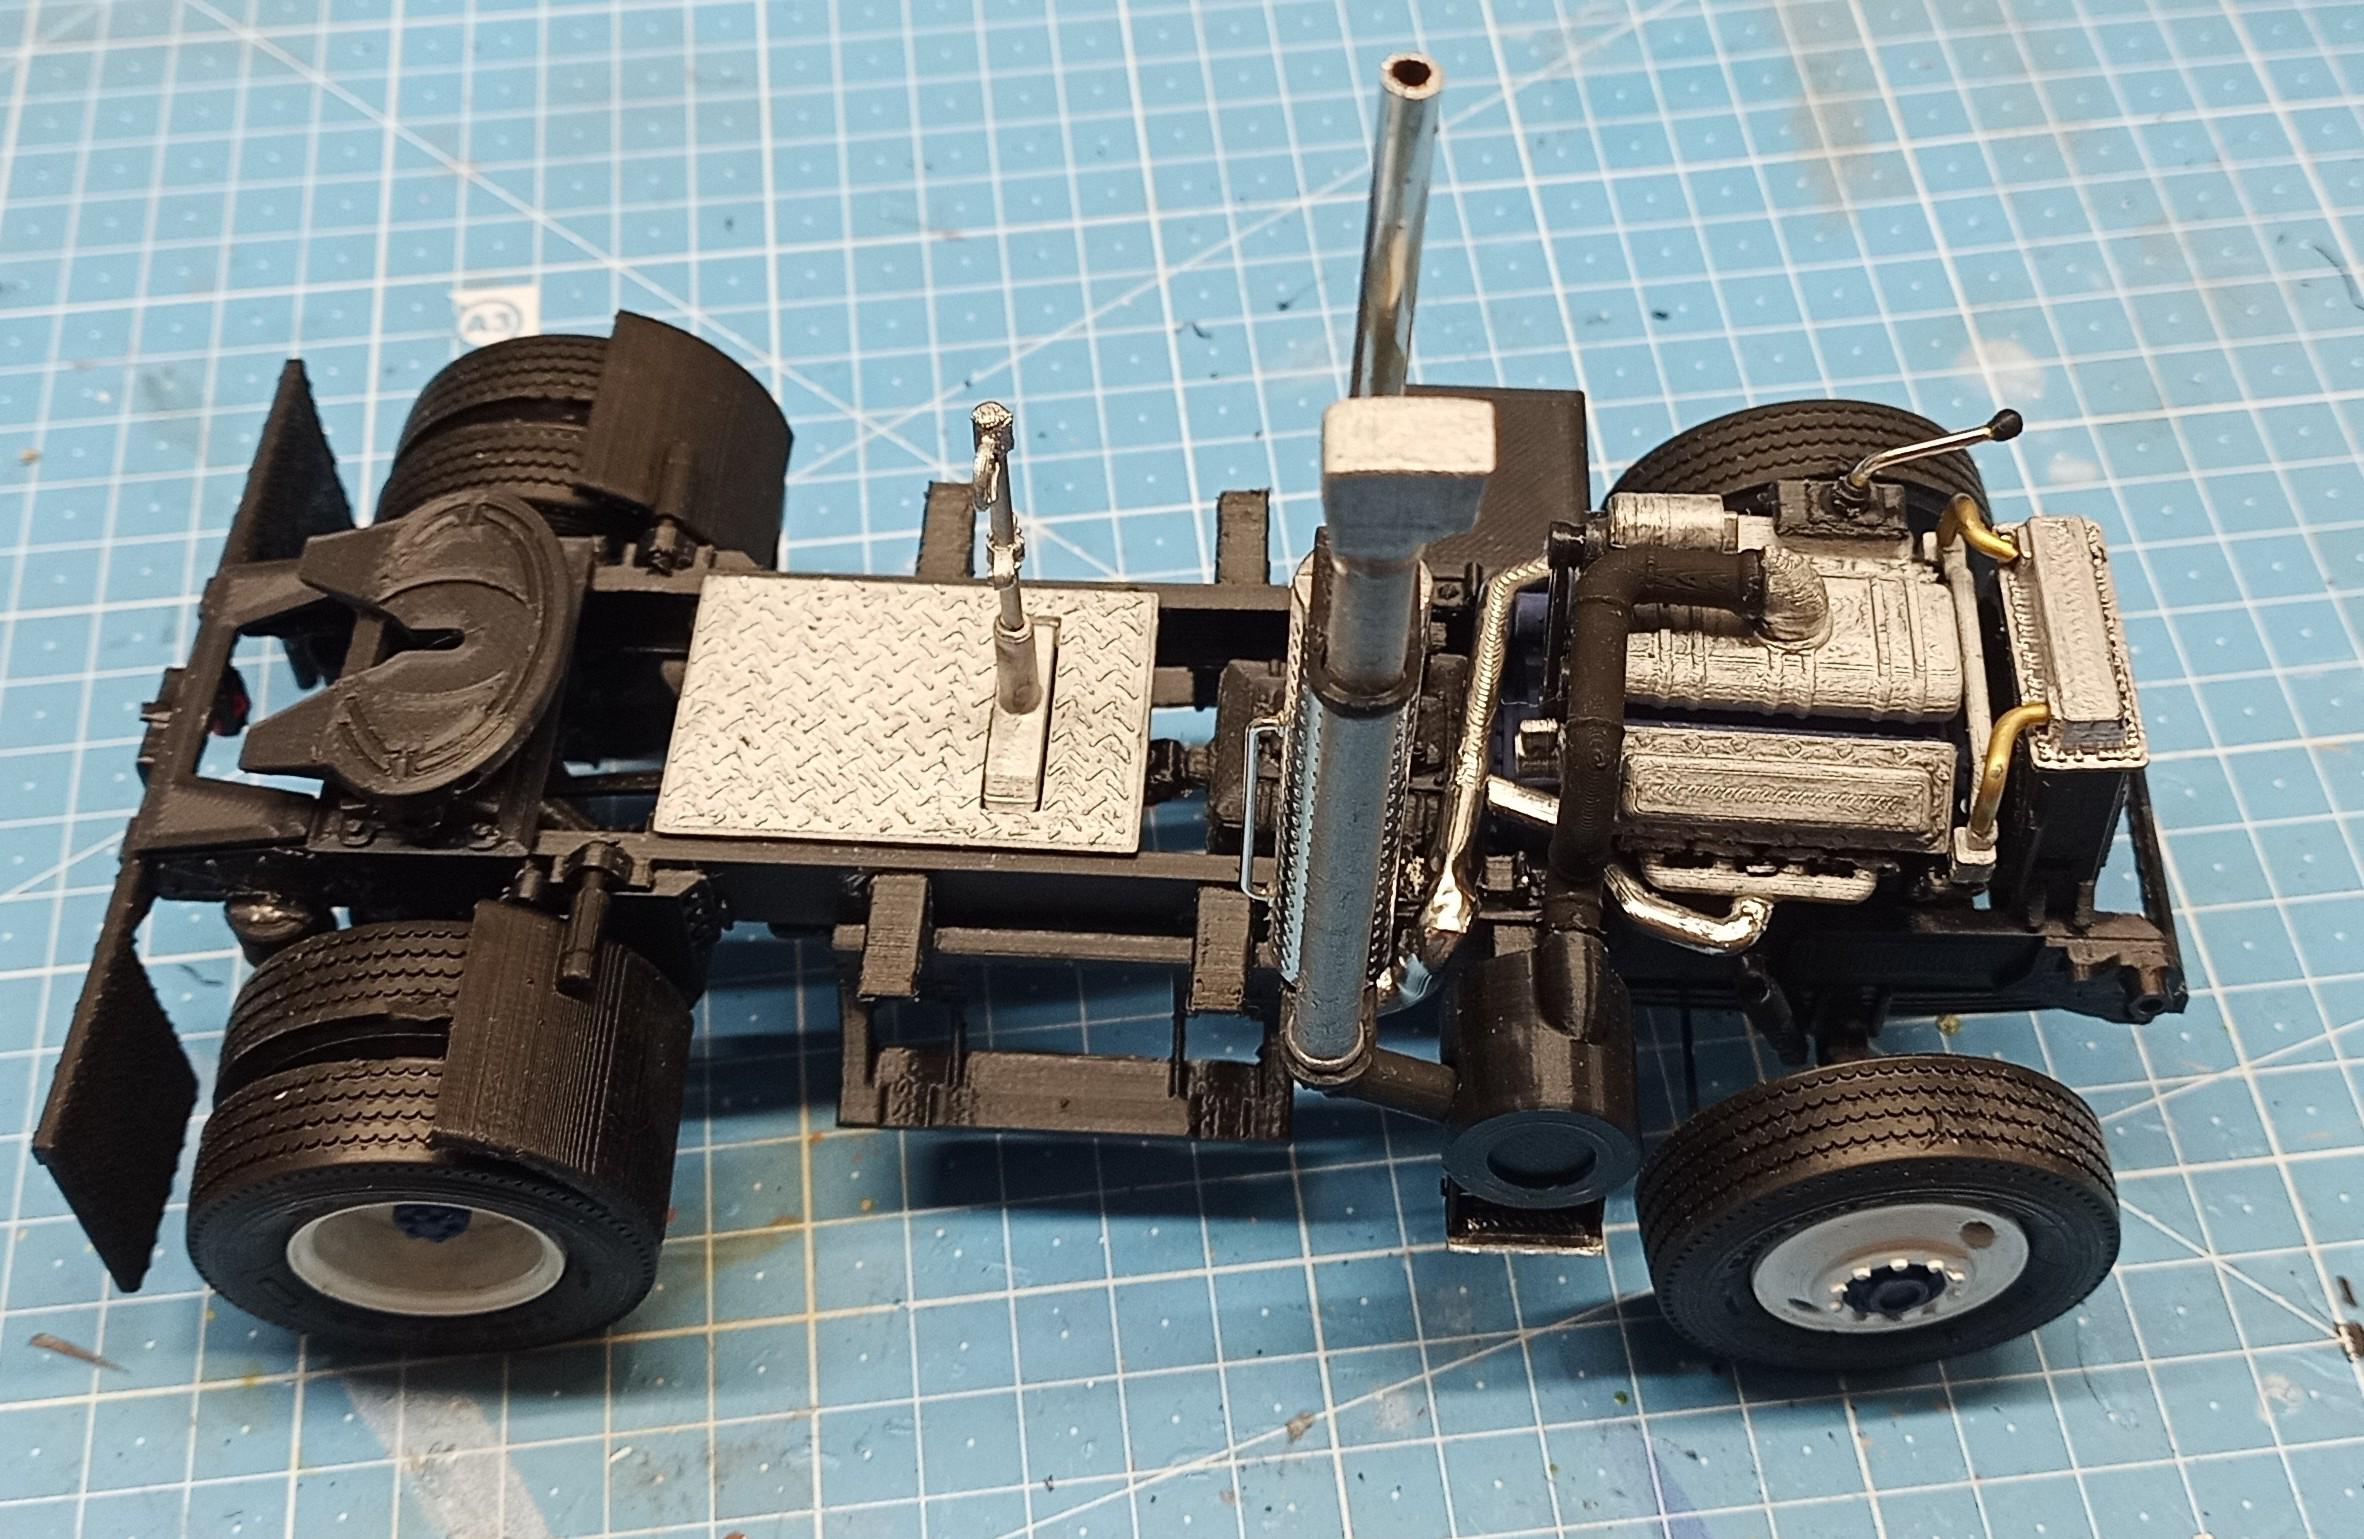
I worked out the exhaust system. Not as smooth as I had hoped but good enough for this build! The fuel tanks are primered. Hope to get the chrome in tomorrow!
-
Convoy, take 7
Jürgen M. replied to Jürgen M.'s topic in WIP: Model Trucks: Big Rigs and Heavy Equipment
Thanks guys! I actually used the same steering as in all my models. The only thing new is the steering gear and the connectors to the wheel. I am quite proud to see it work though! Just like the fitting of the cab in the engine. There were so many places it could have collided. The clearance between the tub and the valve covers is less than 1mm.