François
-
Posts
489 -
Joined
-
Last visited
Content Type
Profiles
Forums
Events
Gallery
Everything posted by François
-
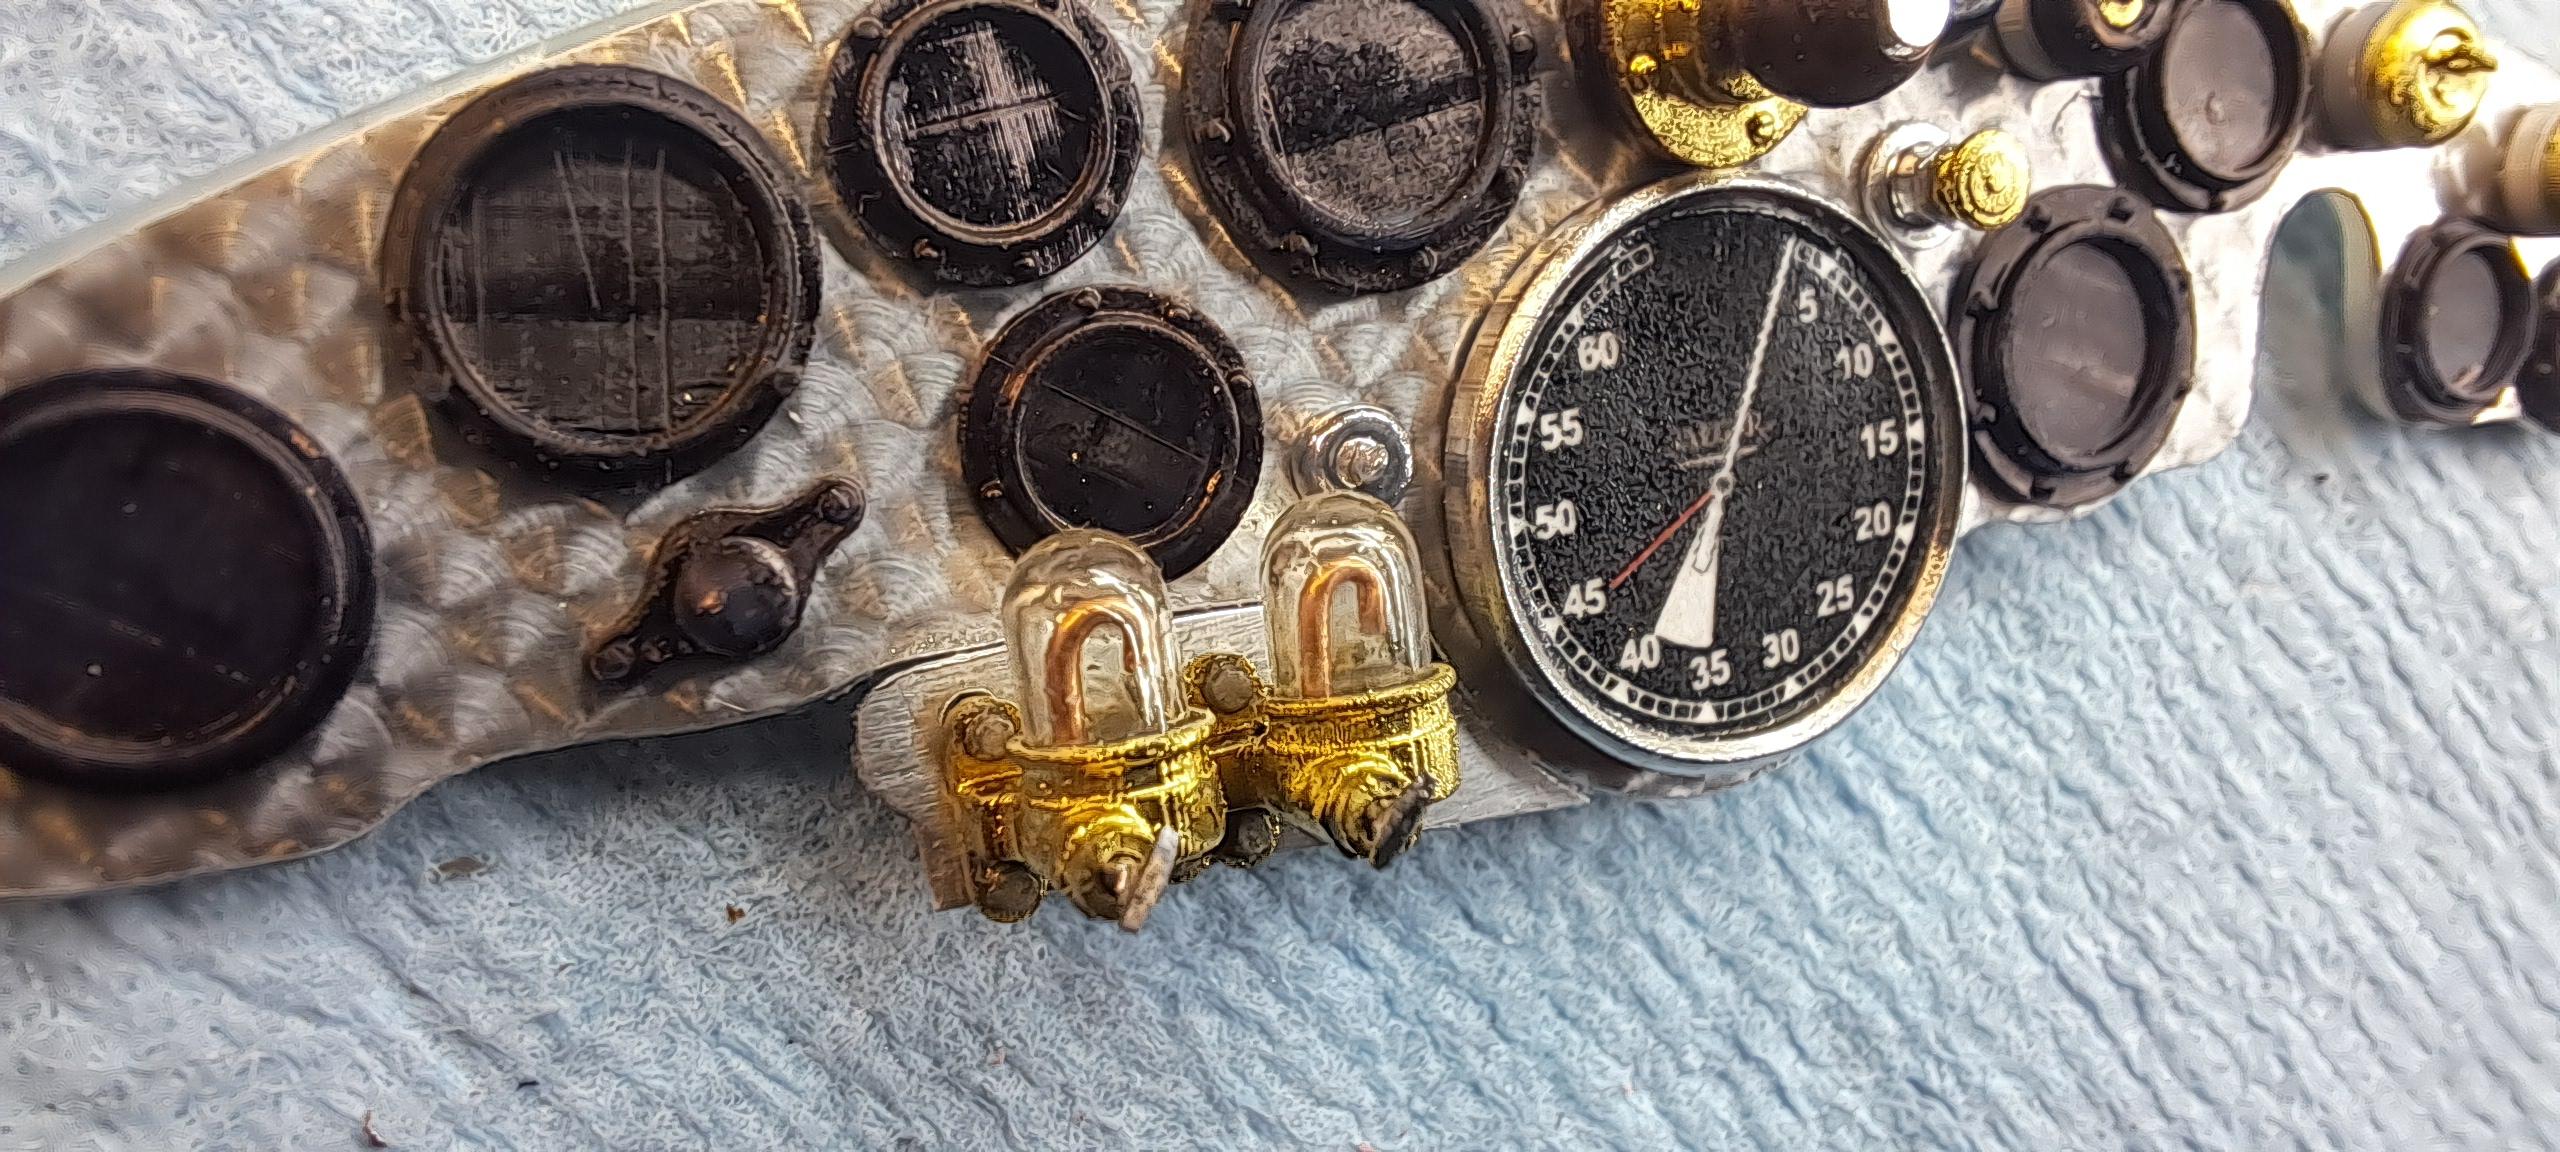
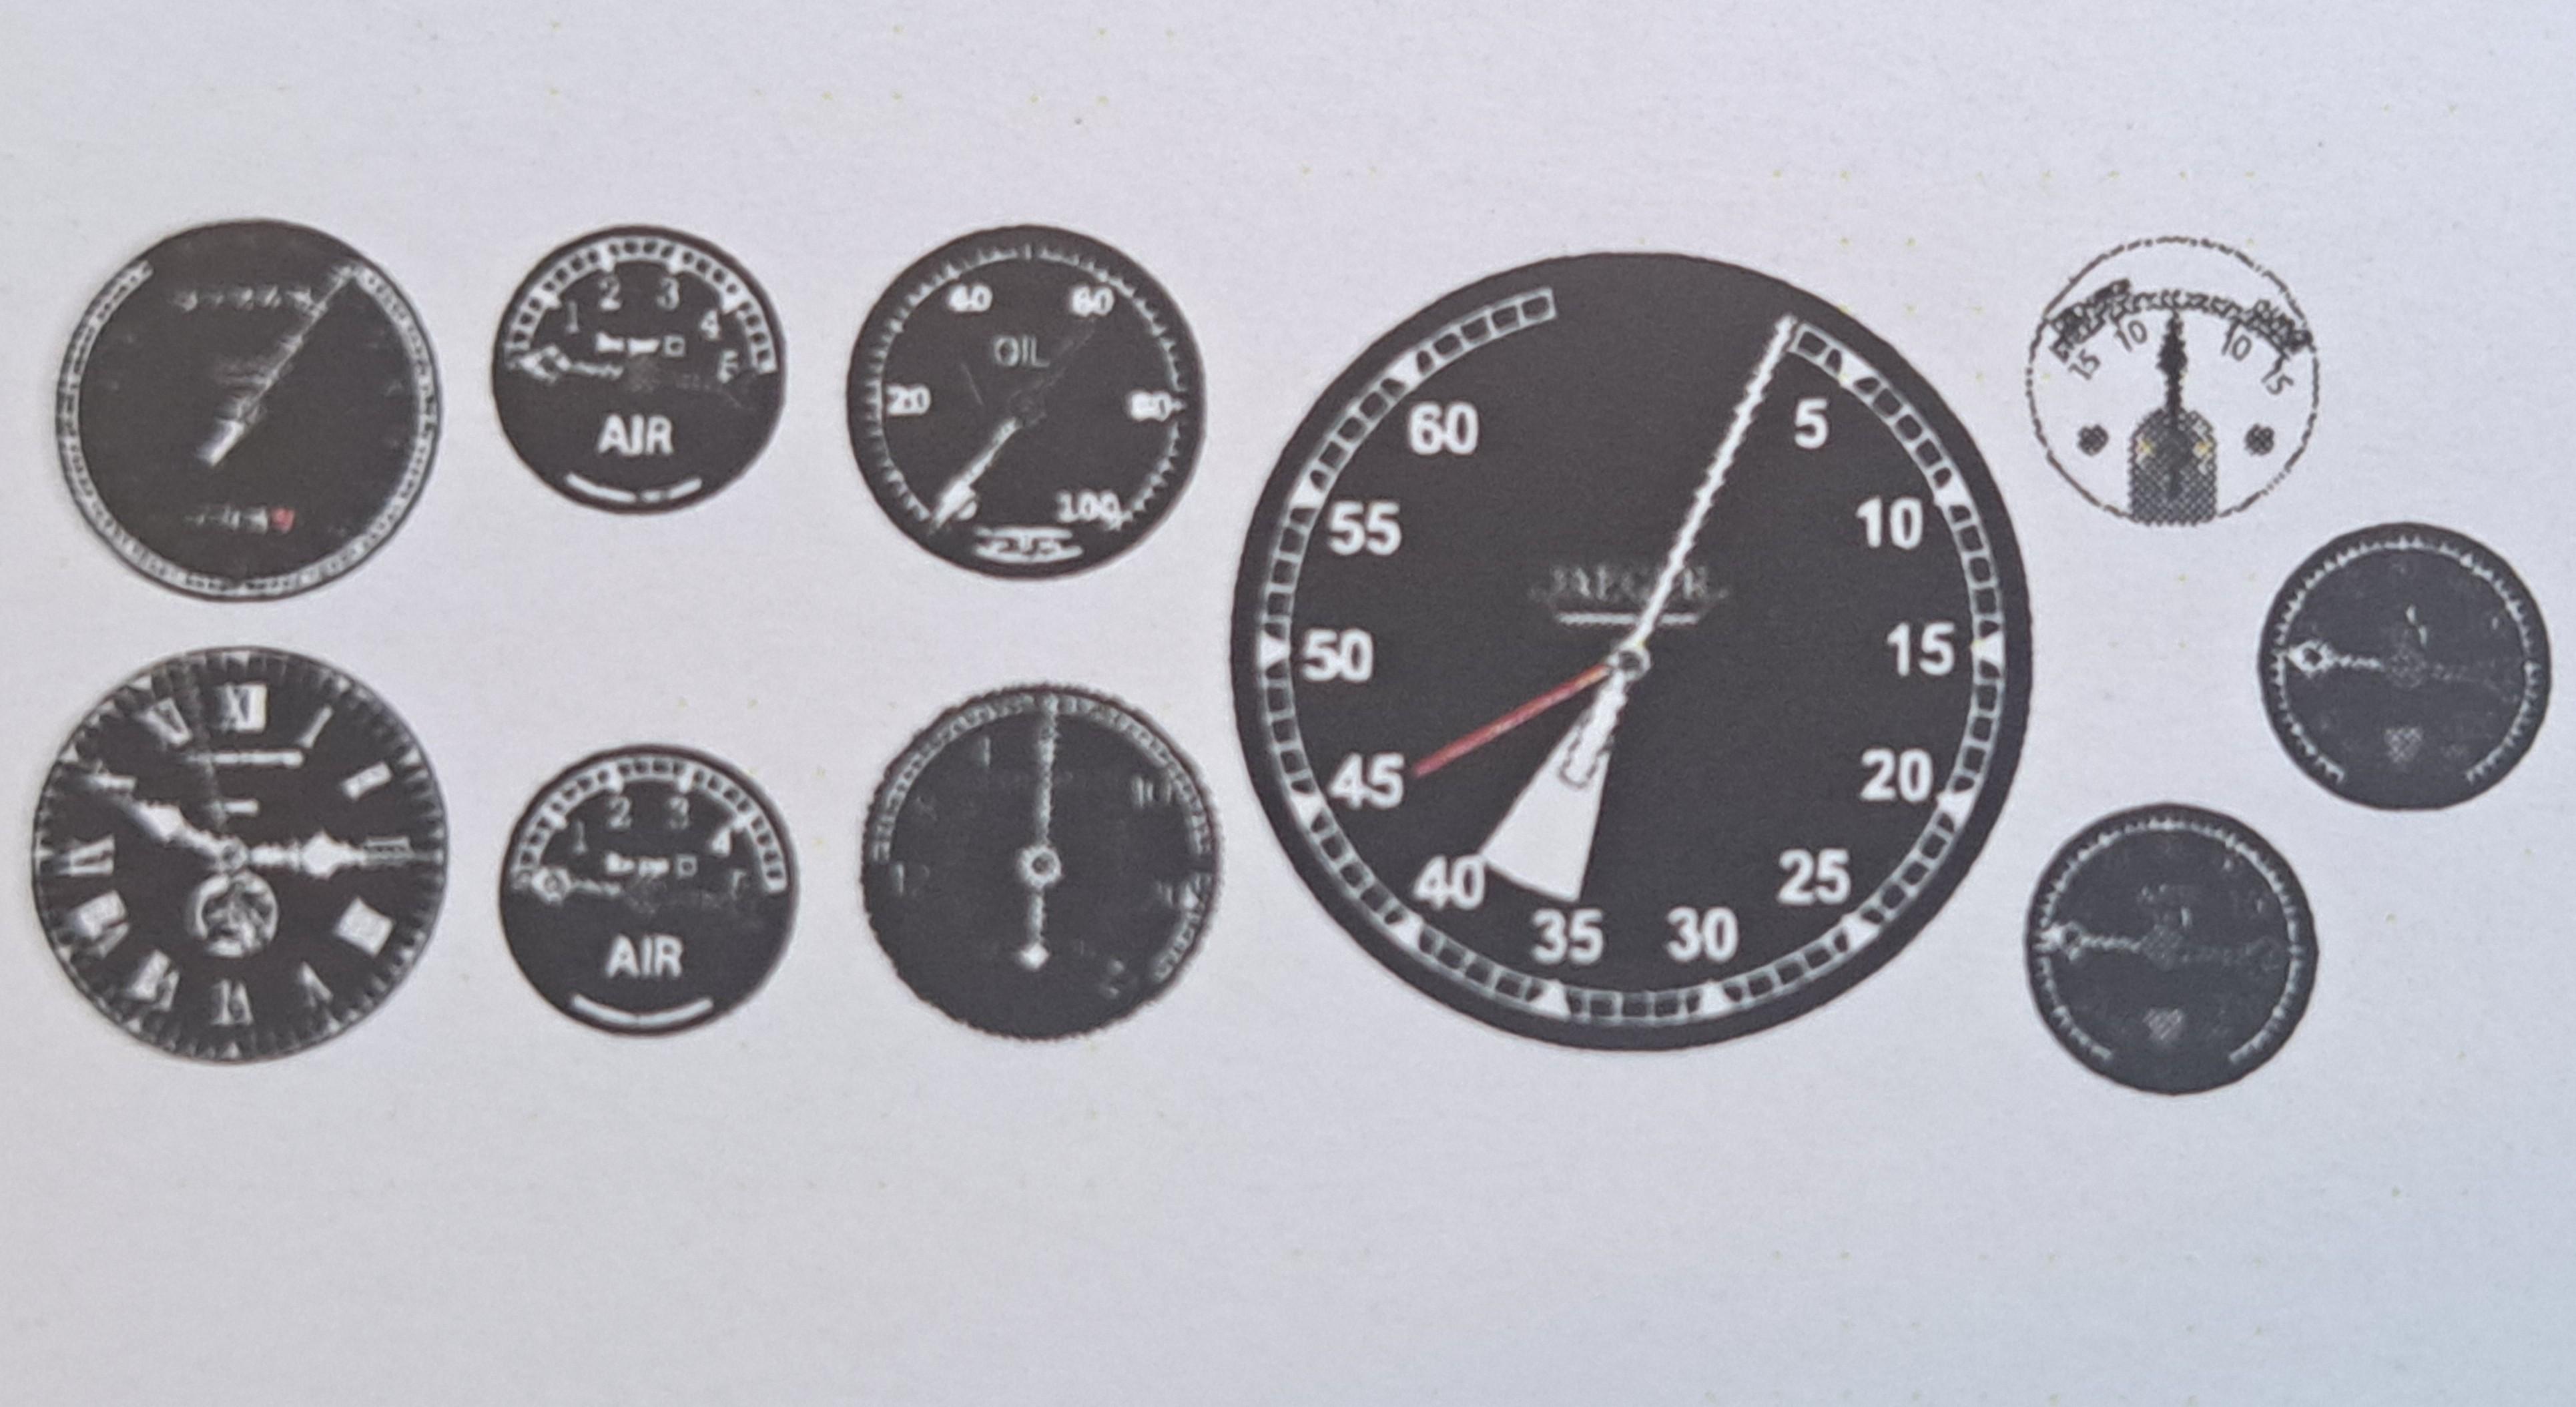
All the dashboard parts are printed and painted. All that is left to do is to cut the gage facia, install them and to glue all the components in place. Here's a few pictures. The gage facia artwork ready to be cut (again, thanks to Nick from Britmodeller) and a few shots of the dashboard assembly ( not glued up yet) And the real thing

-
Kensar, I bought it on Amazon 2 years ago. A bit cheap but it works for me. It's 78mm from under base to top of Table. TEXALAN Multifunction Worktable Milling Working Cross Table Compound Drilling Slide Table for Bench Drill Adjustment X-Y 310X90MM
-
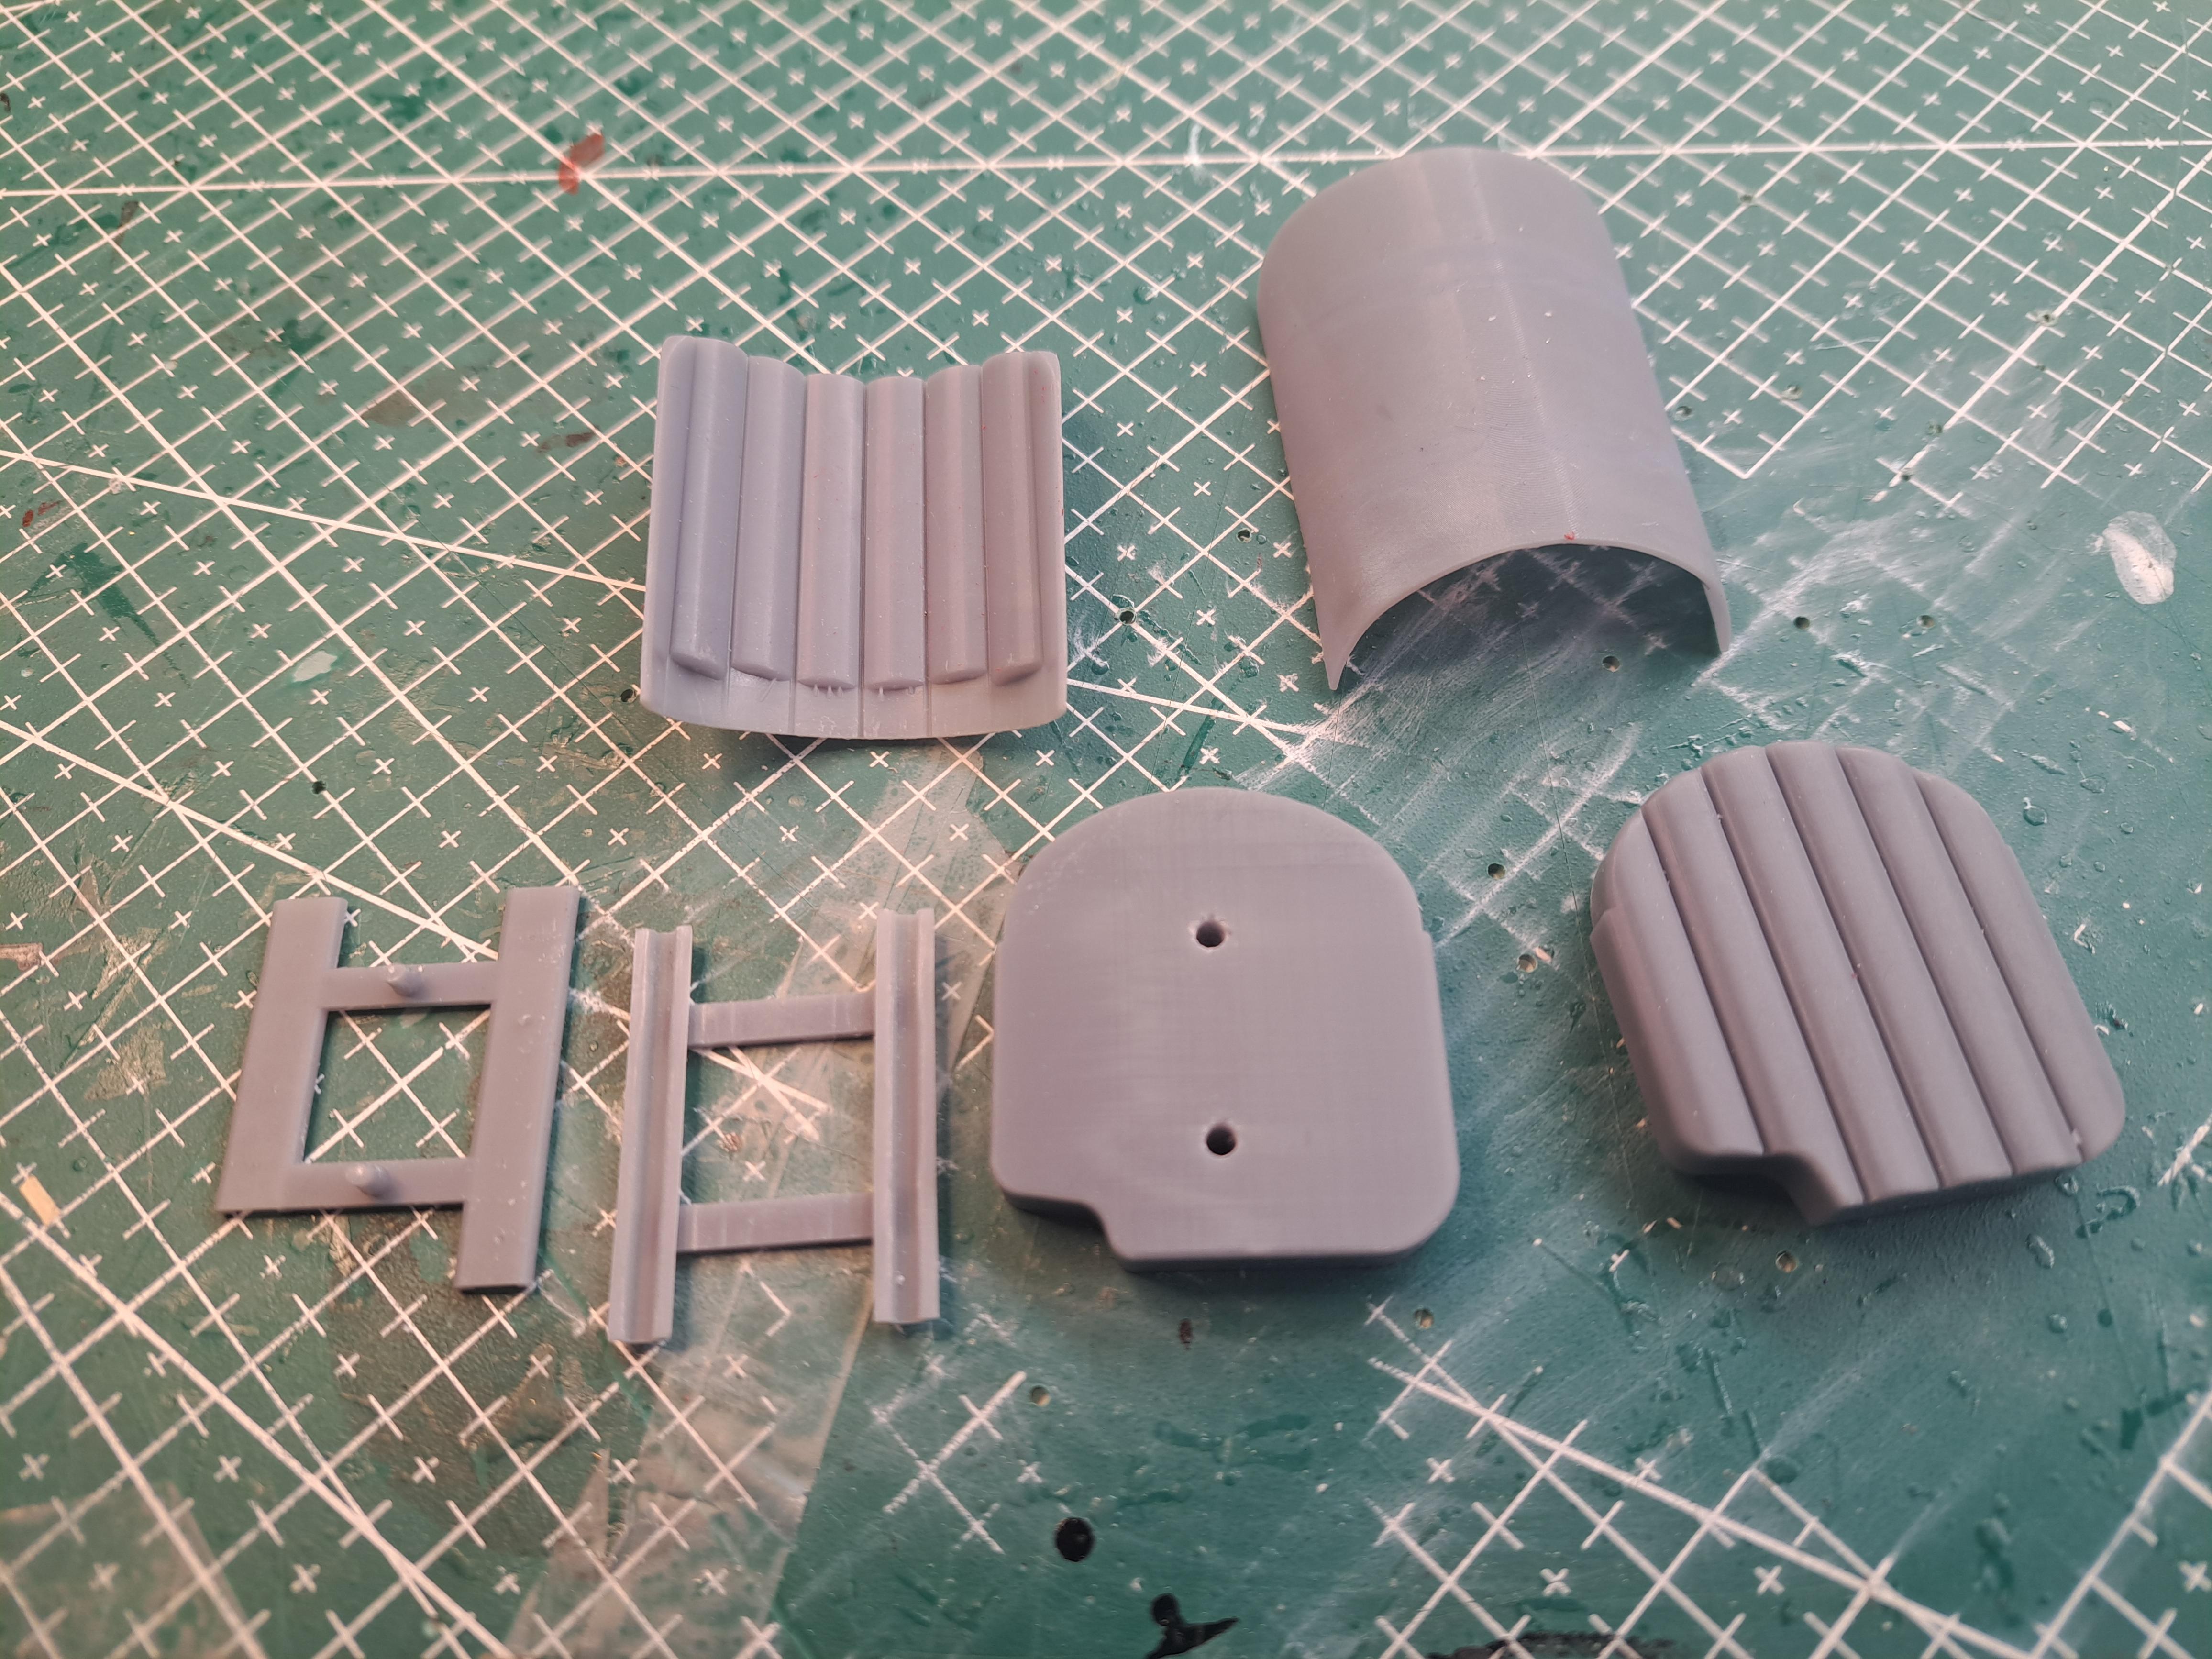
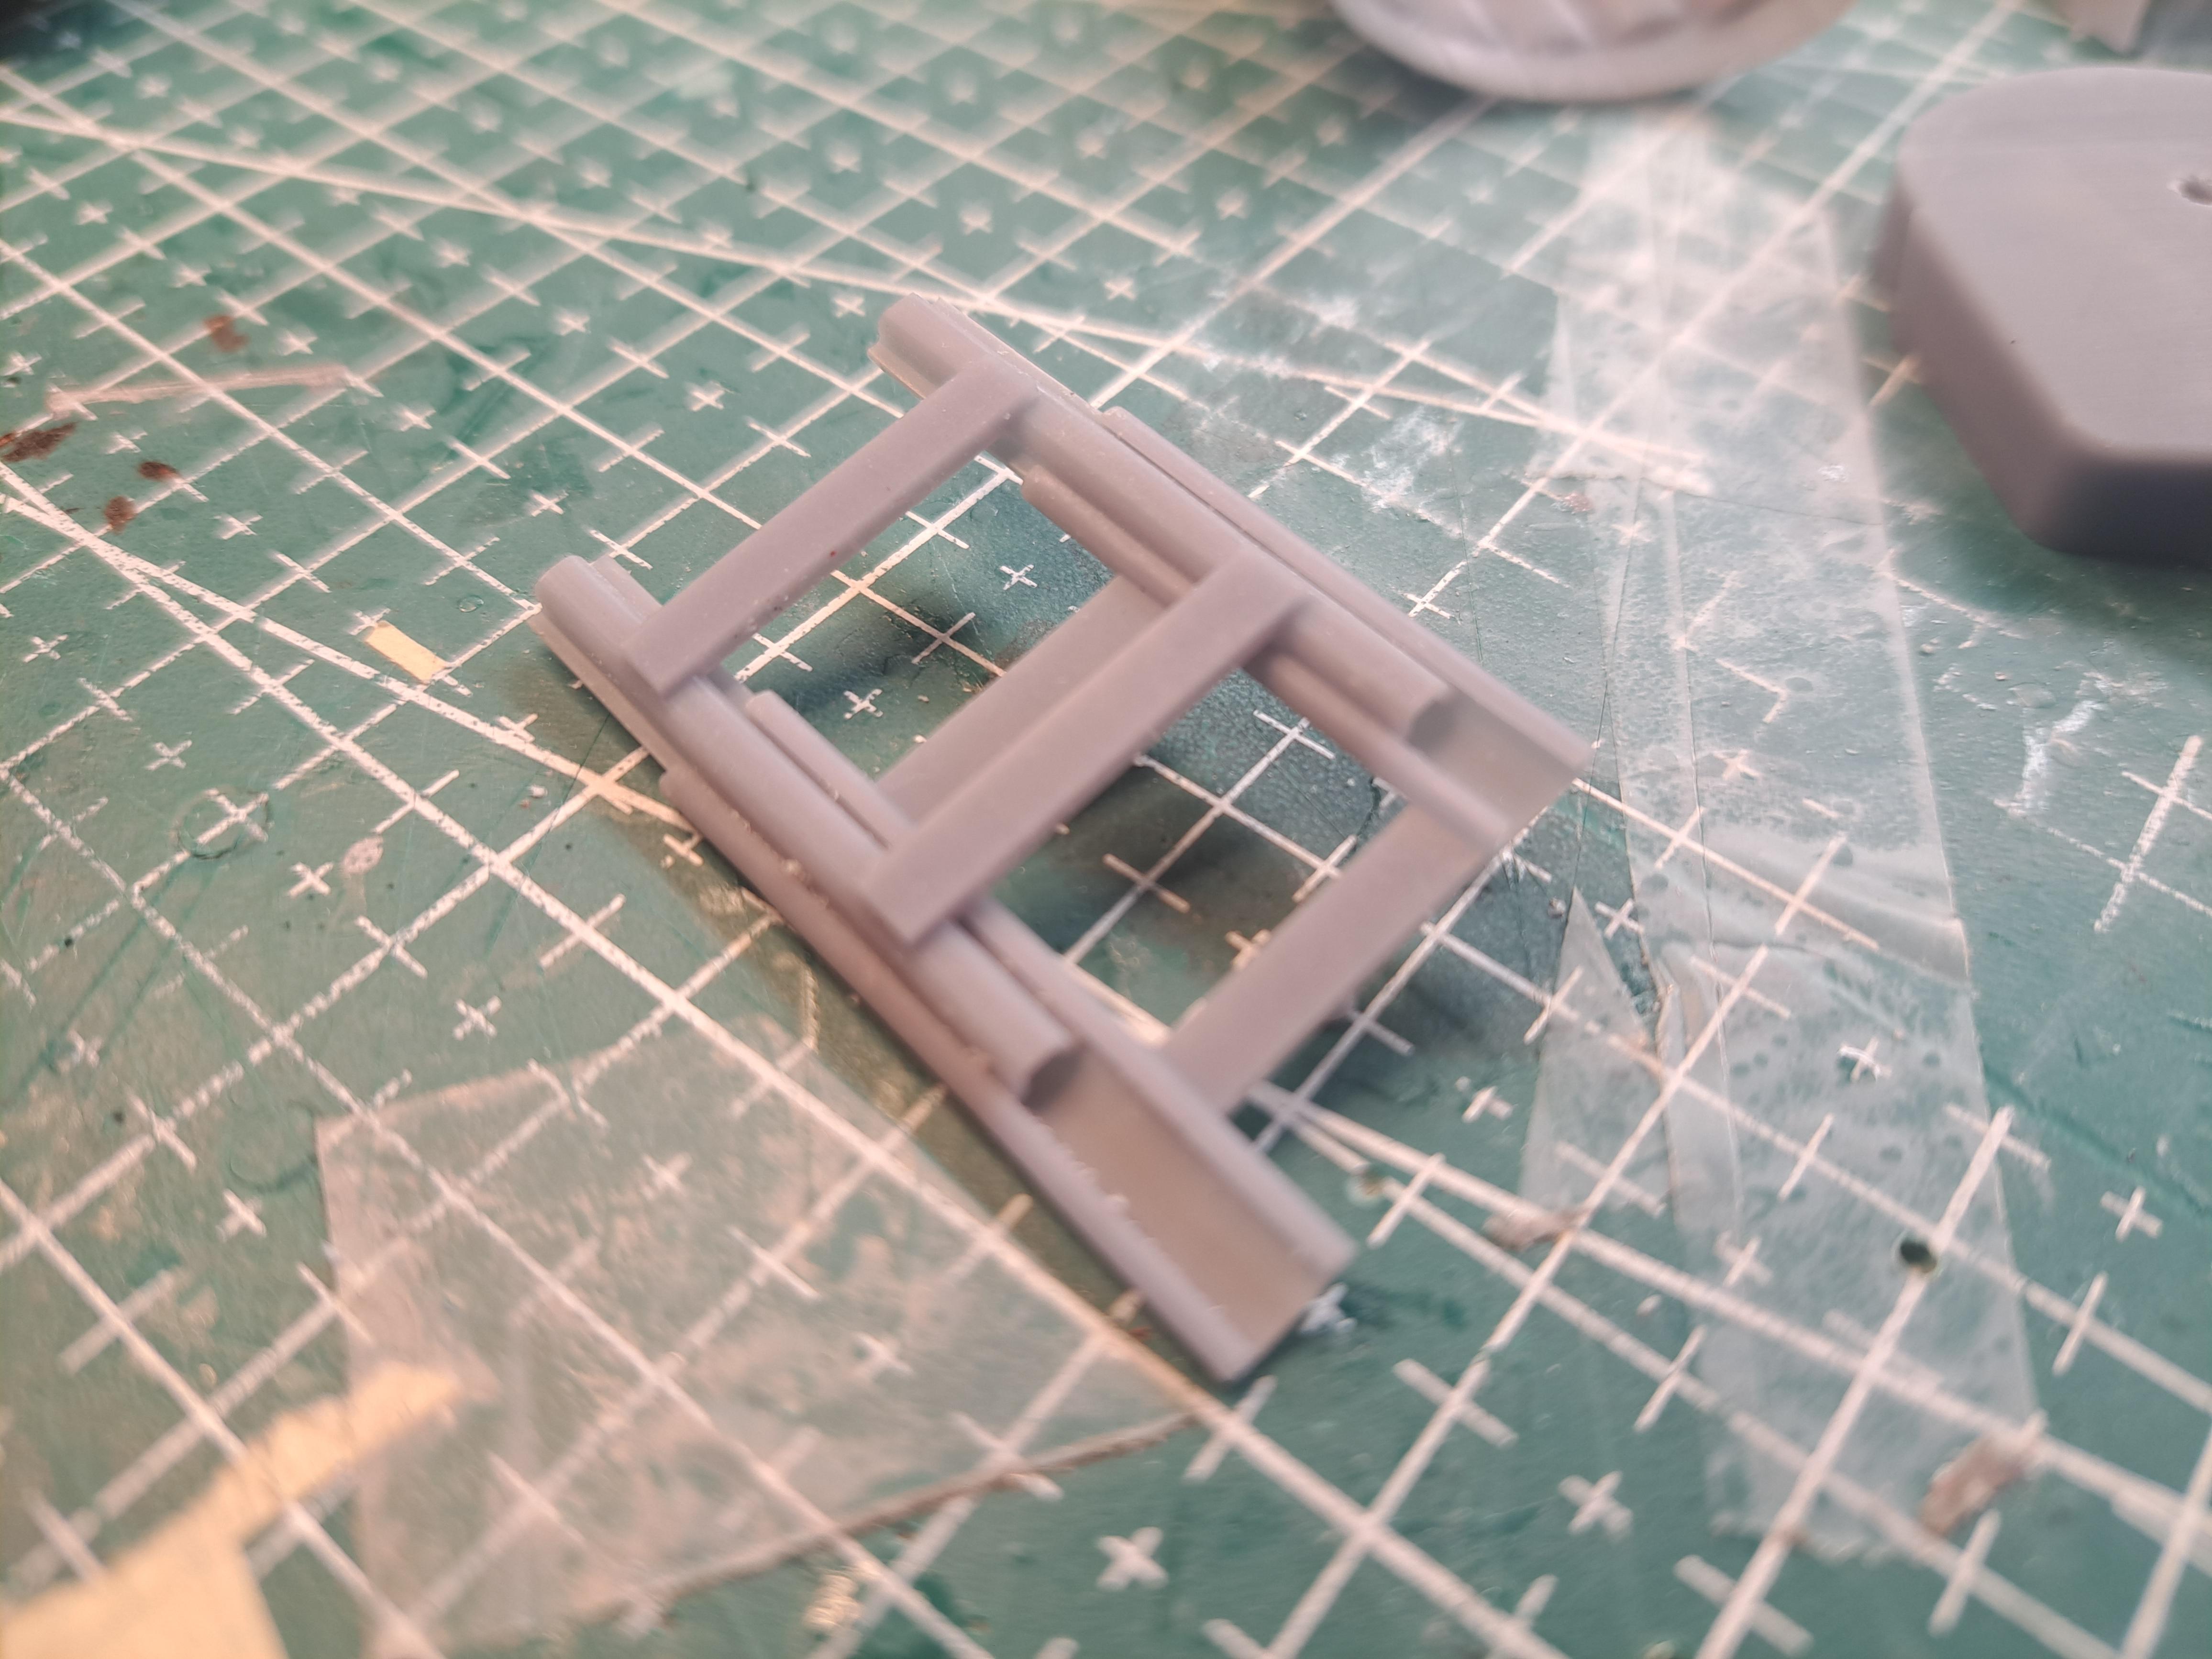
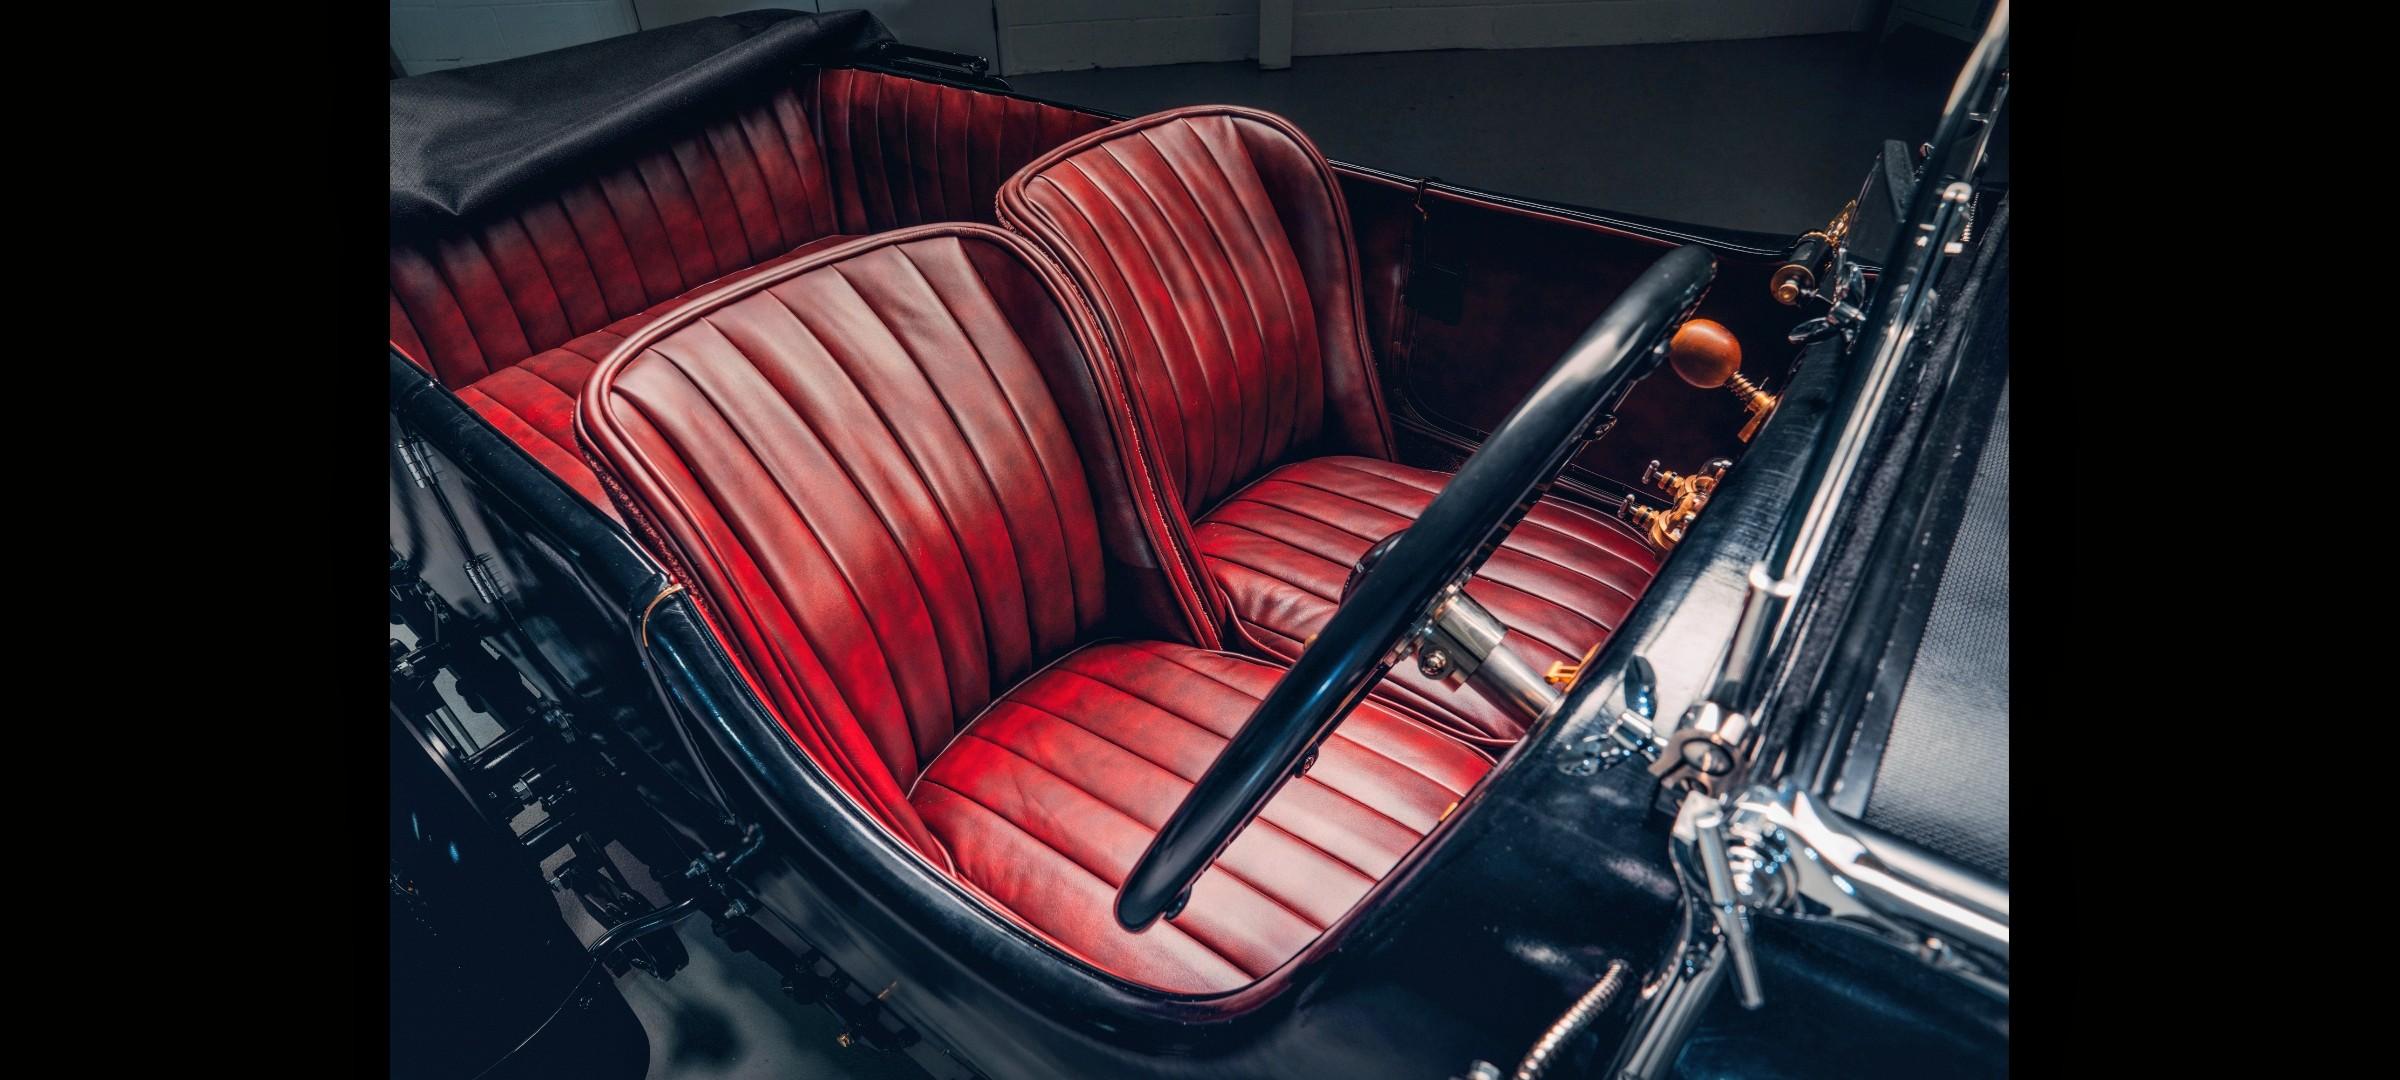
Ok, dashboard update time. I've read alot about engine turning and one thing I've learned is that at this scale, it's call jewelling or 'perlage' in french and is a finish found on high end watches. Engine turning for much larger applications. Both methods are identical except jewelling will requier a very small tool. Here's what jewelling looks like. My idea of a multi stage jig didn't work, it was too complicated. The idea was to have a plate that held an aluminium sheet in place while also locating the different drilling jig, 4 in all (thus the multi stage). Each drill jig had a different hole pattern that guided the jewelling tool. Once all 4 jig used, I would have the jewelling pattern. The main problem was that the holes could only receive a certain diameter tool. A change in diameter meant 4 new jig to reprint. It was also difficult to see what I was doing. Here's the jig Instead, I designed a simple 2 part tooling. A lower plate that has .09" dia pins spaced at .72" (8×.09) intervals and a upper plate that has a .09" diameter notch every .09". A total of 33 notchs. Why a .09" pitch? I wanted a pattern that would look good at 1/12 scale so I opted for .09". The tooling is mounted on my small xy table. So by moving the upper plate from notch to notch, I create a line of jewelling exactly spaced by .09". Once a row is done, I move the 'X' and 'Y' axis by half a pitch (.045") and start another row. With this method, the tool diameter is less important since it doesn't have to fit in a hole. Here's the fixture. (It's printed in clear resin) I made several jewelling tool test. I tried a fine grit sand paper glued to the end of a steel dowel but it was very difficult to get the right pressure. I tried a wooden dowel, same difficulty. I then tried a very old and dried up pencil eraser and that seemed to work. But it was too big. After a bit of research, I found a eraser pencil. It's a pencil that has an eraser core instead of a lead core. It can be easily sharpen to get the point diameter I want. Here's the eraser pencil( the gray is the eraser) and here's the setup in action 20240610_151820~2.mp4 And the final result I then applied a paper template on it to drill all the gage mounting holes and to pre trim. I printed a profiling jig to get the final shape by following the outside of the jig. and after profiling The the final result So this is how I made a jewelled (engine turned) dashboard plate without sophisticated machinery.
-
Ok, break's over, time to finish this thing. I completed the 3d model of the dashboard. Nick, from Britmodeler, gave me his gauge facia art work. I'll send him some 3d files of a few parts I'm pretty sure he did not model yet in exchange. So that's one problem solved. The next hurdle is the dash aluminium face plate. It has an engine turning pattern on it. I came up with a (possible) solution to create the pattern without the aid of sophisticated equipement such as a milling machine or cnc. I designed a multi stage jig that should help me do the pattern manually. More on that later on. Here is the completed 3d model of the dashboard. A real dashboard I also made the last of the 3 filler spouts.
-

Bentley Blower 4.5 litre 1930 Les Mans Airfix 1/12 scale
François replied to louis Carabott's topic in Model Cars
Hello, I stumpled on the build while searching who else is doing a Bentley. Very nice job and many added details. You did an excellent modrl. I've been working on my own version of the Blower for over 1 year and am very close to completion. If anyone is interested, here is my build log. https://www.modelcarsmag.com/forums/topic/181907-airfix-112-bentley-blower/ -
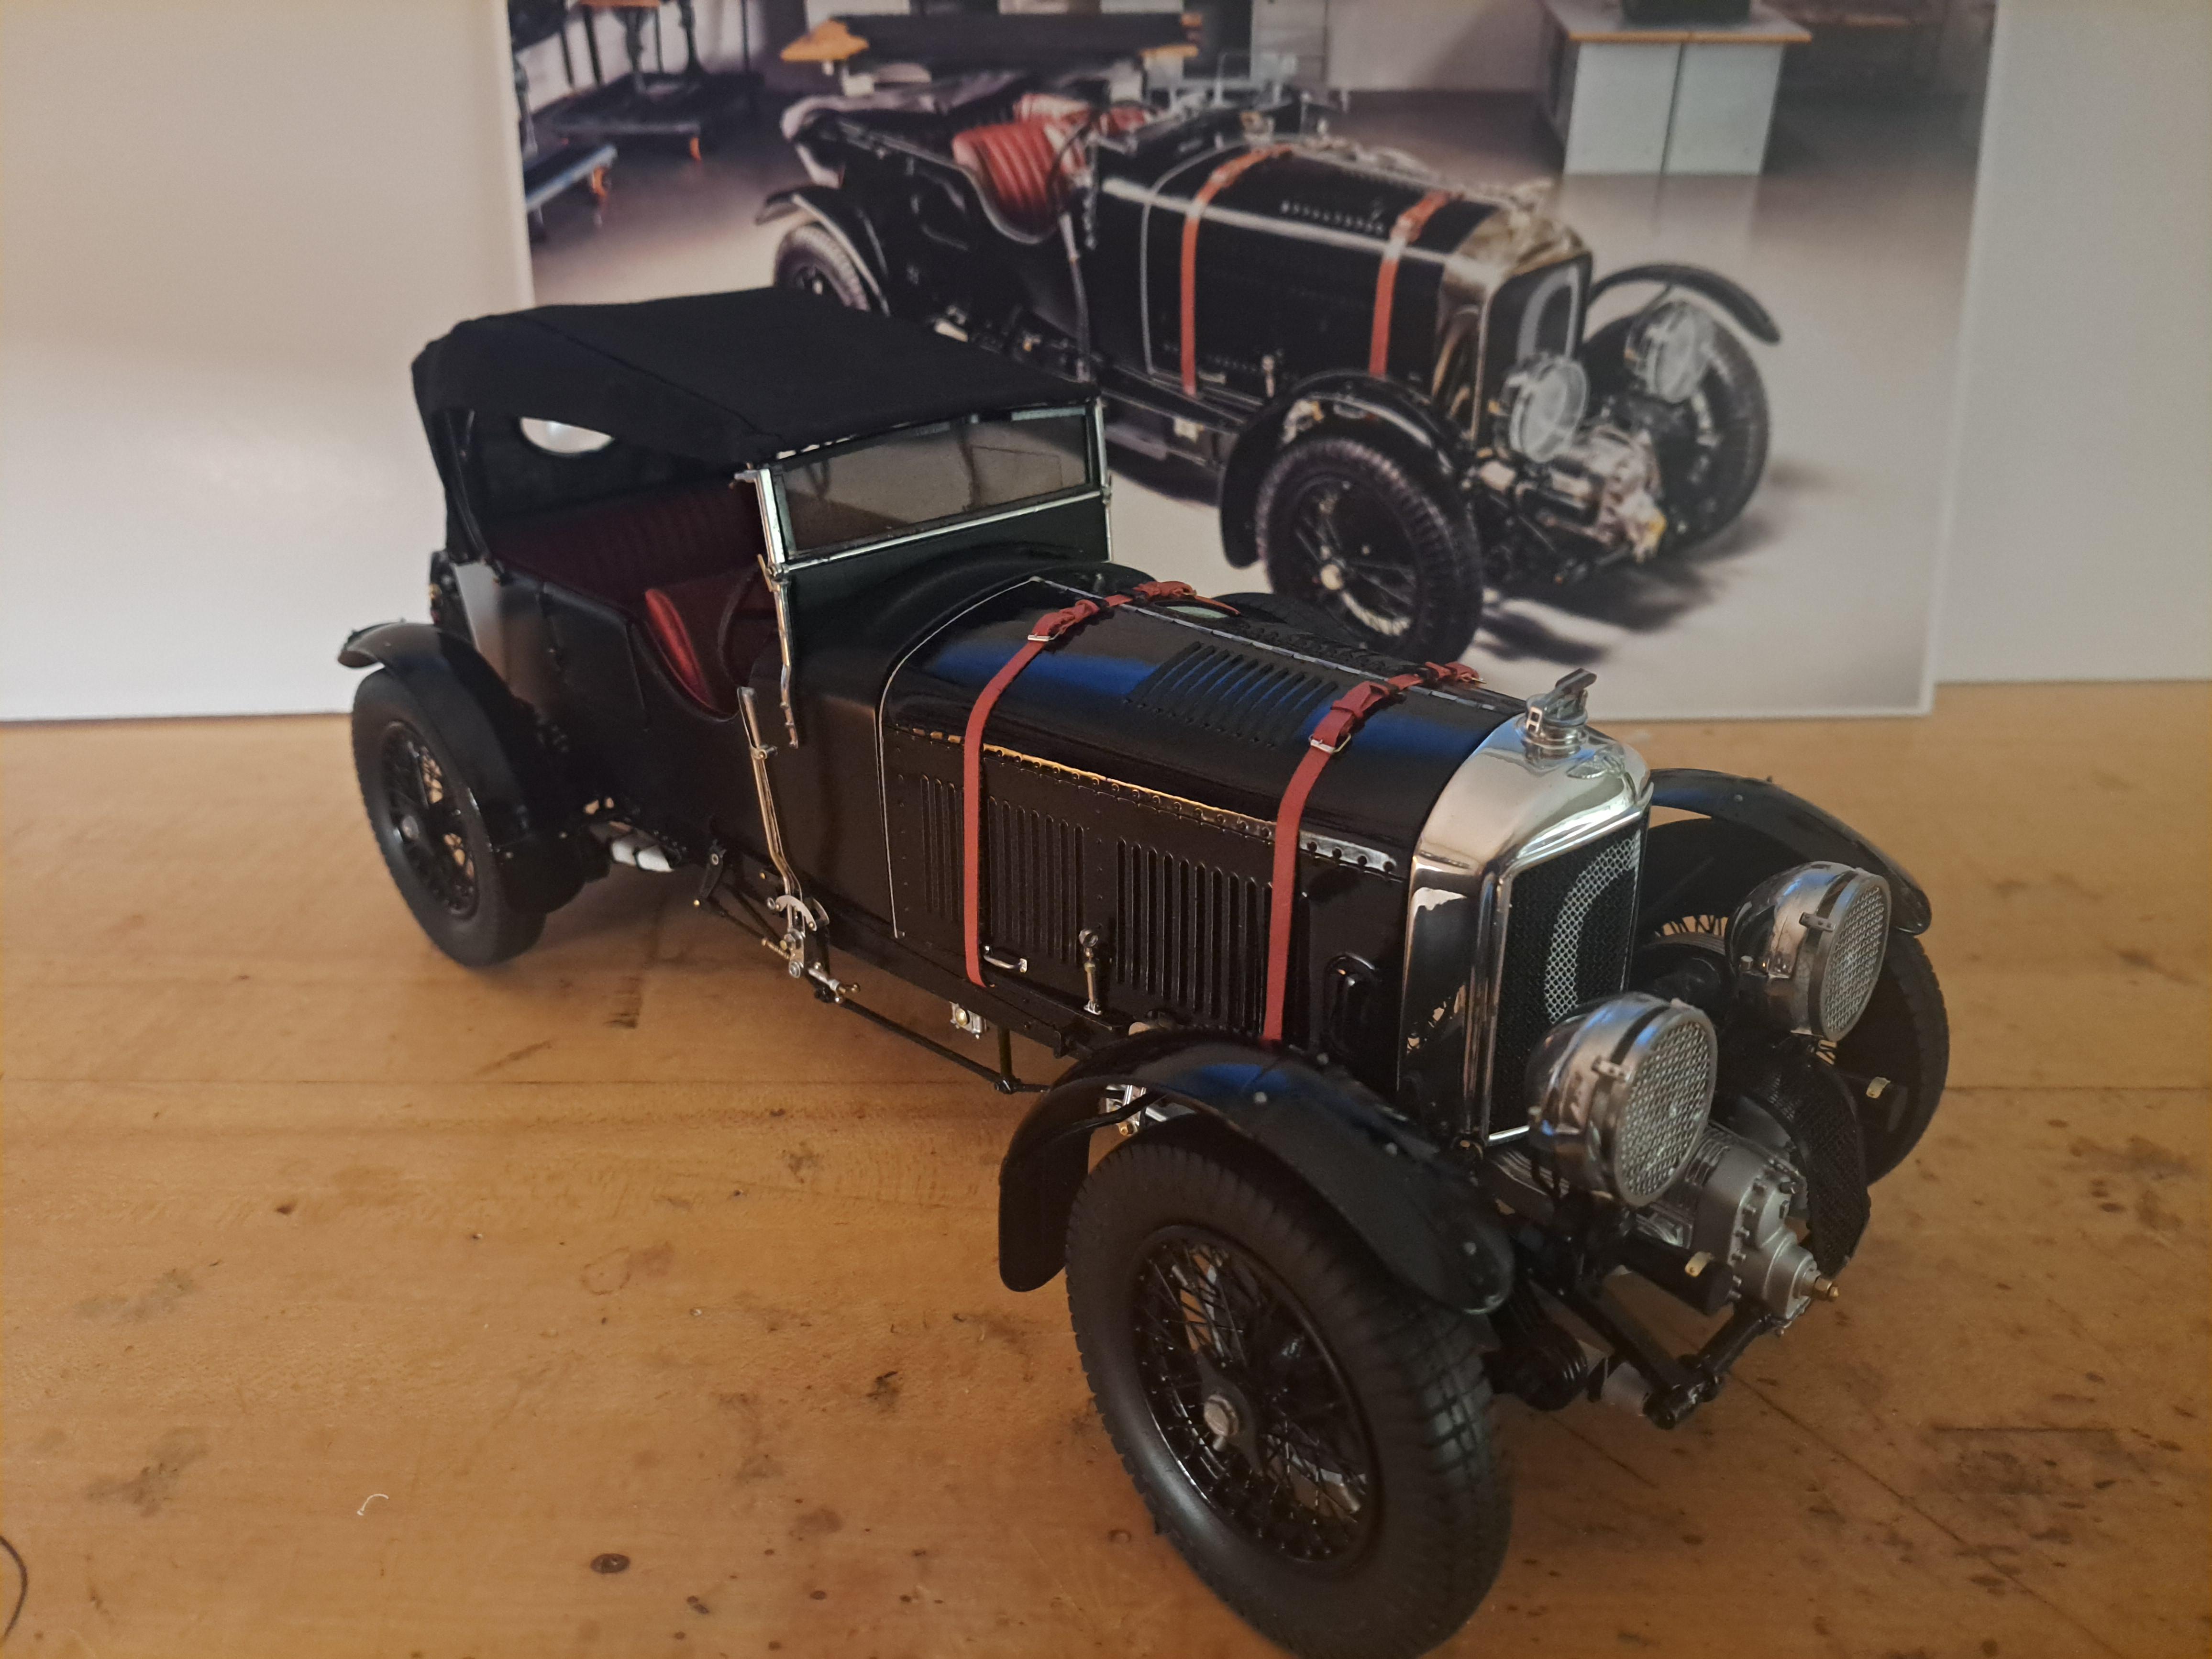
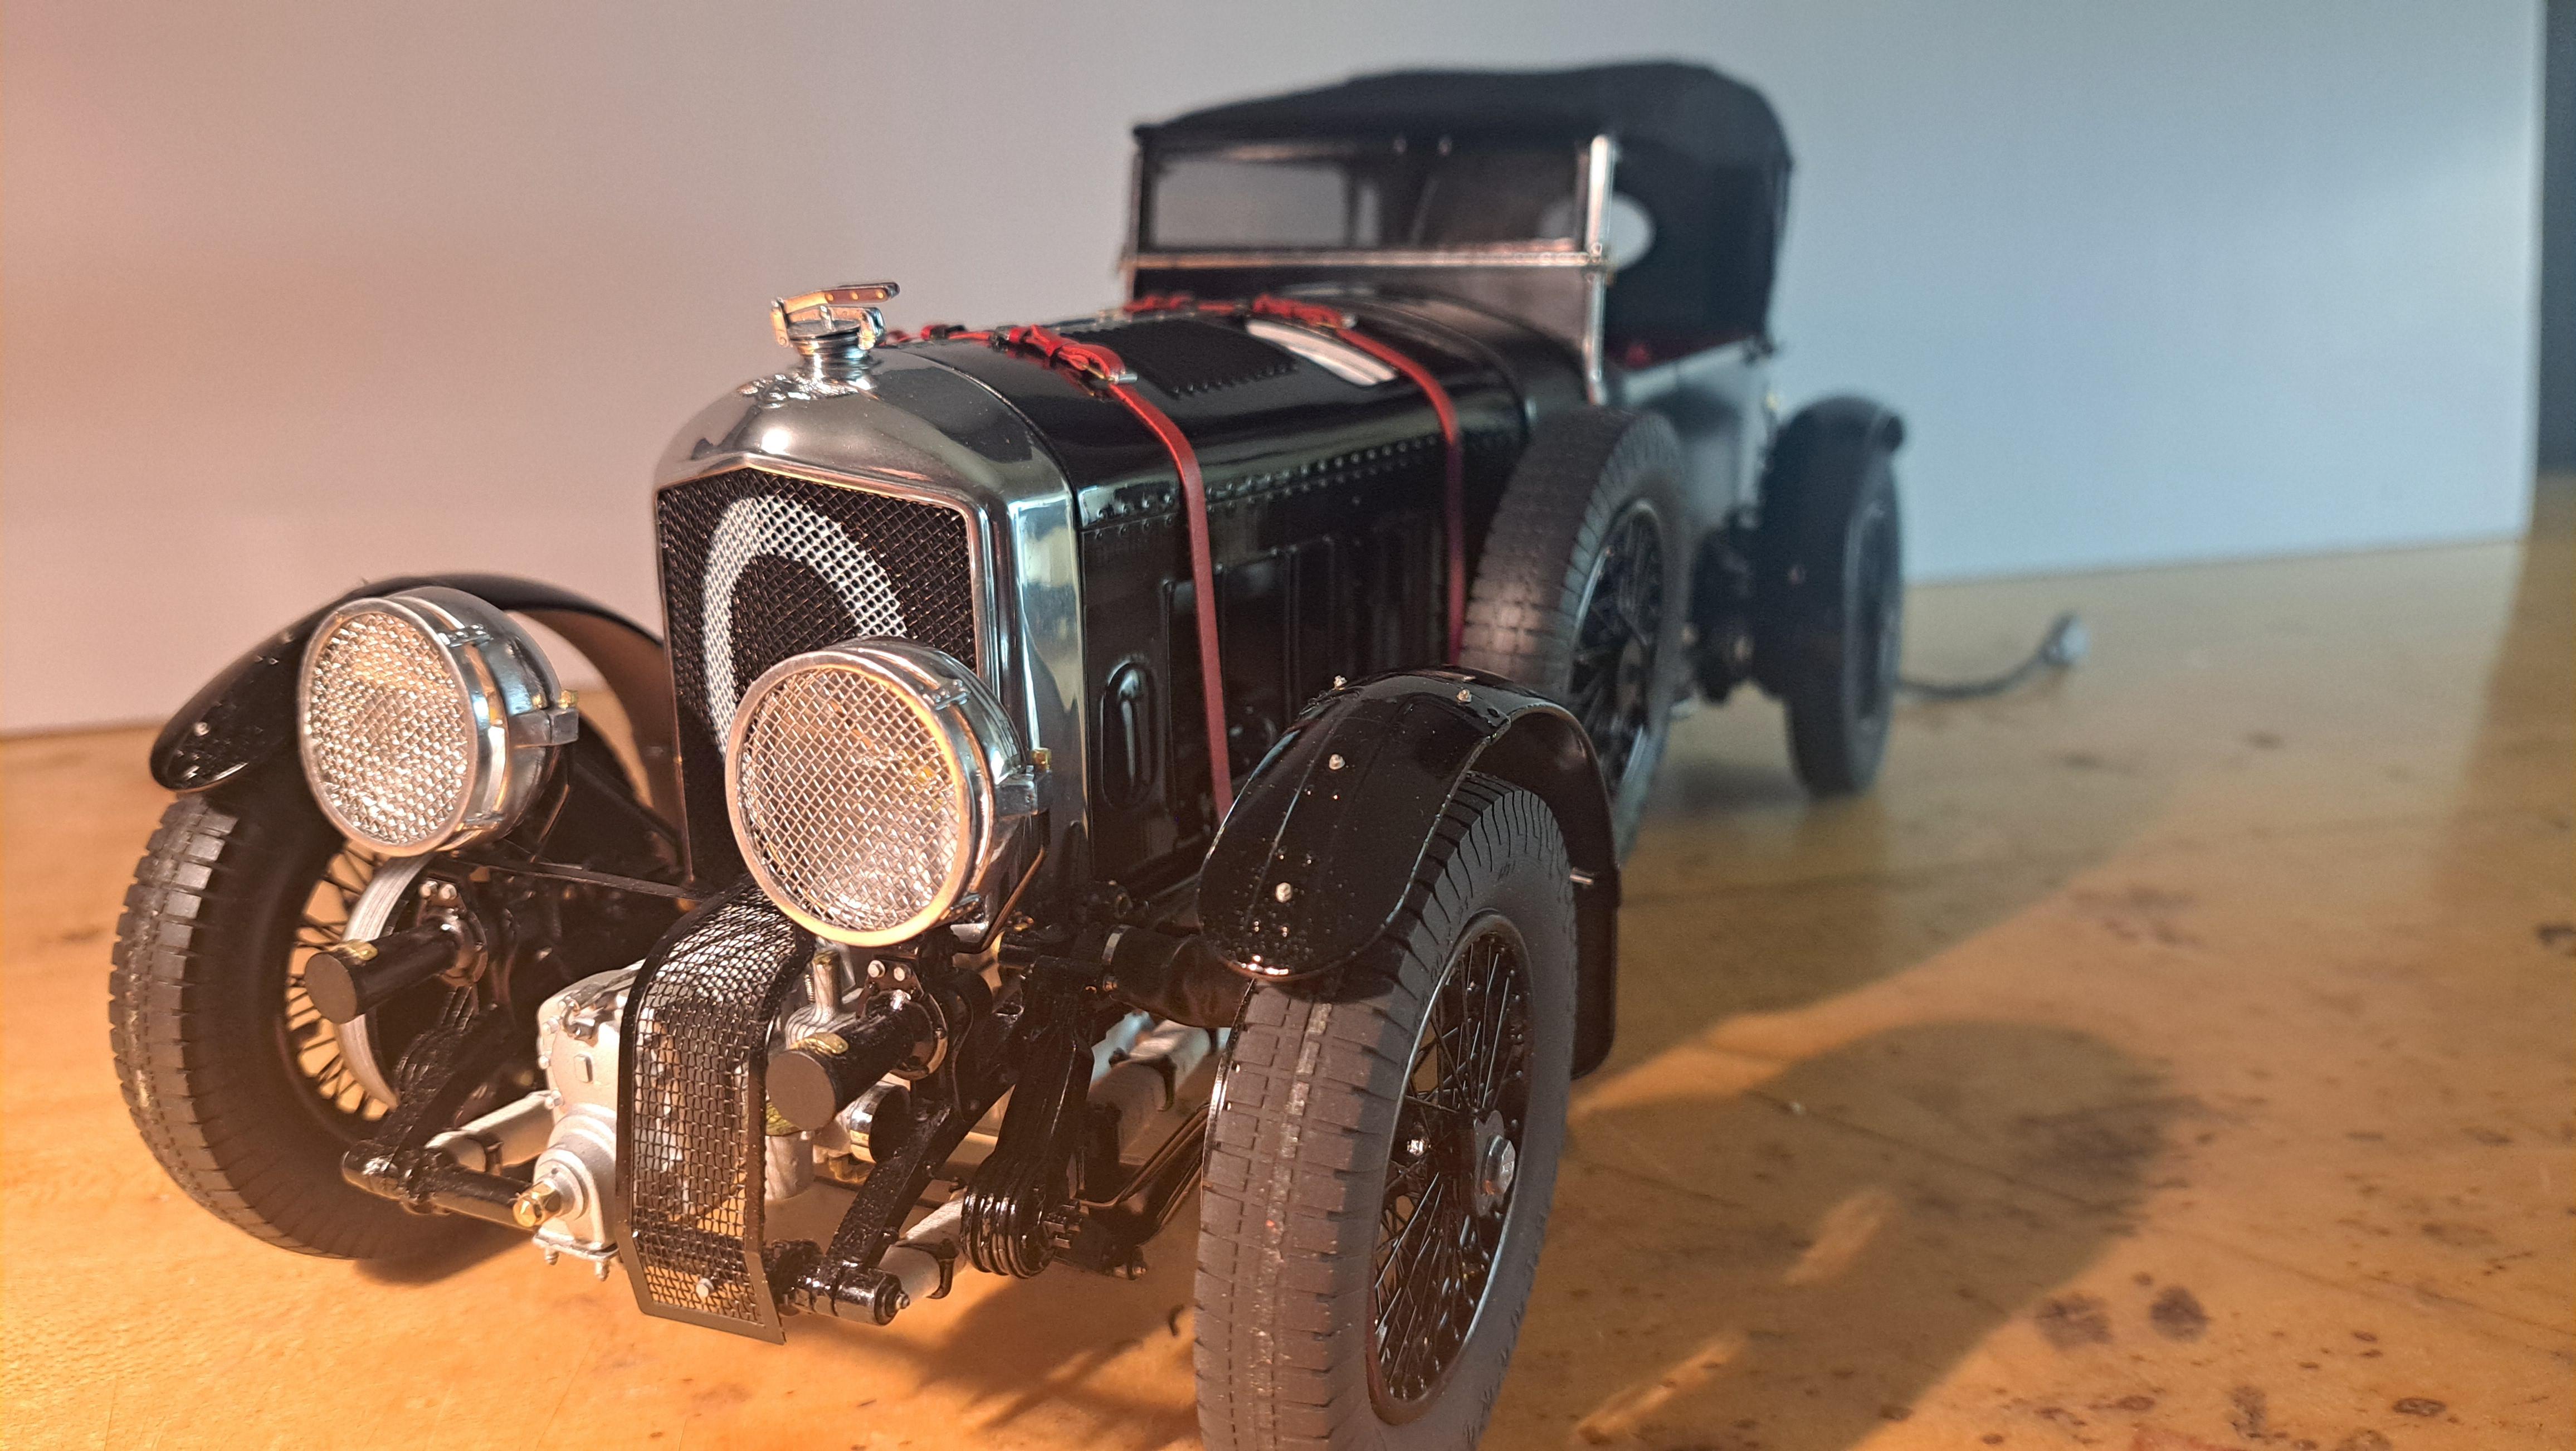
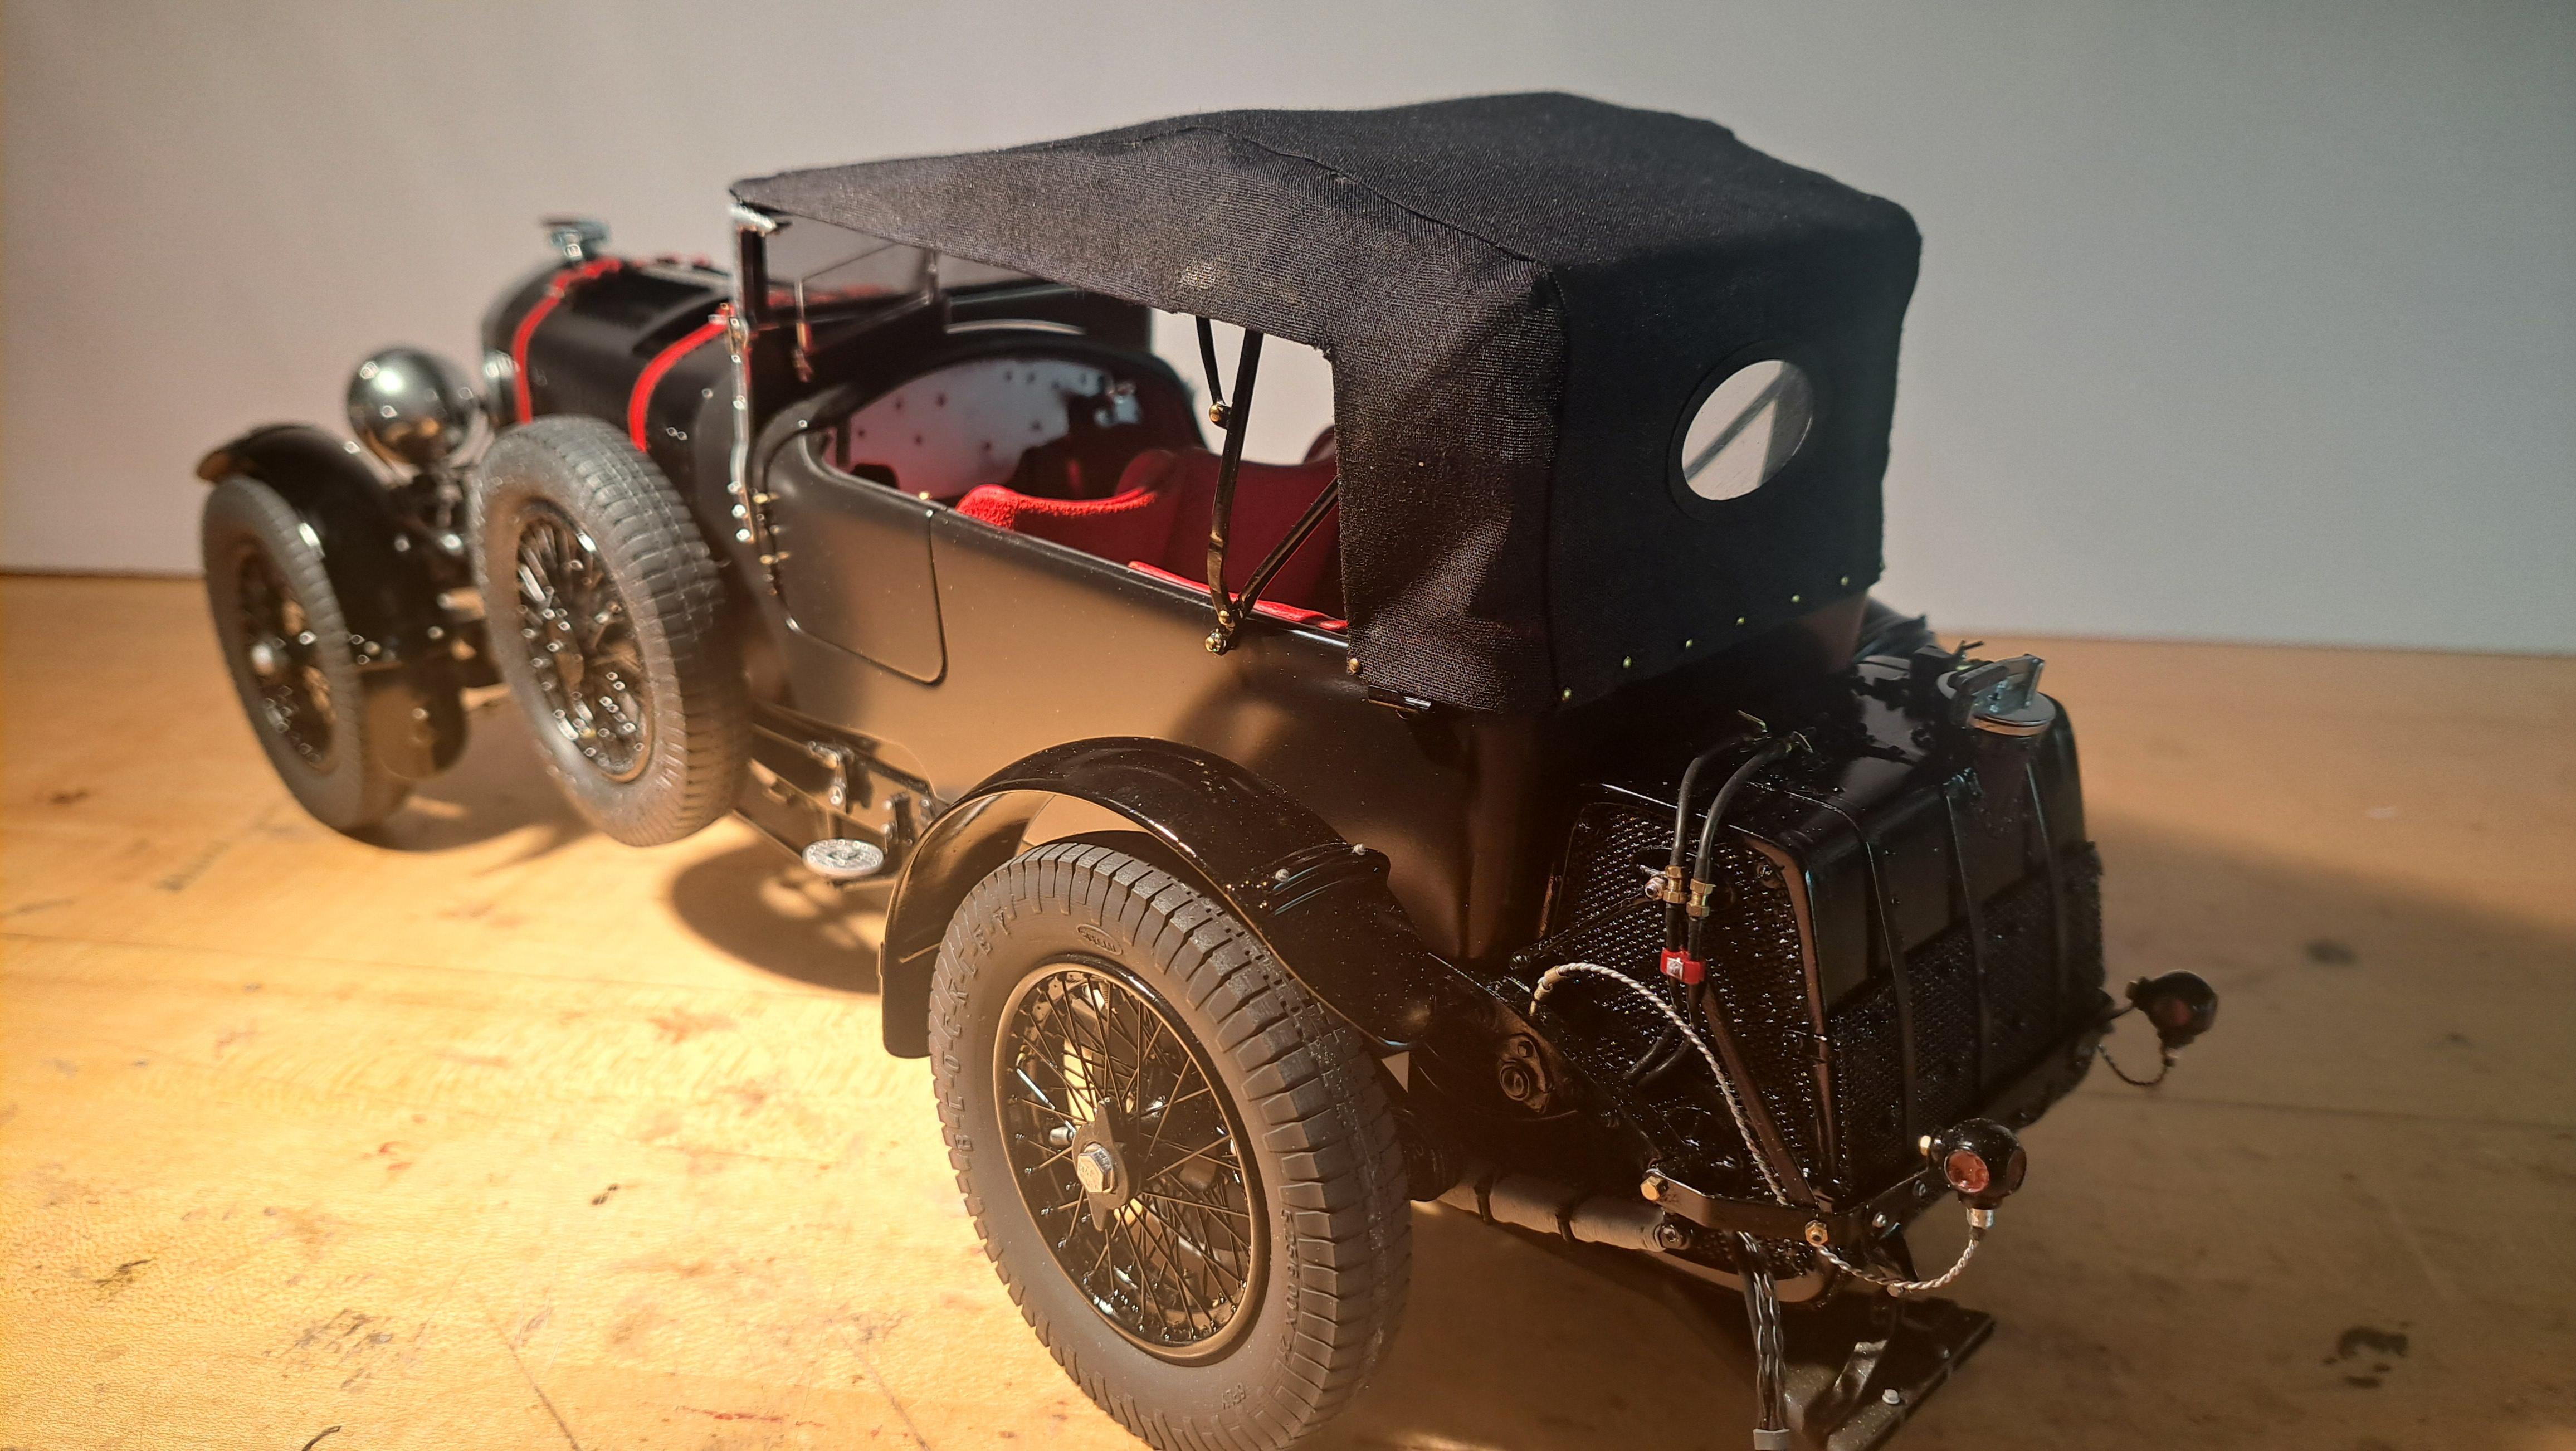
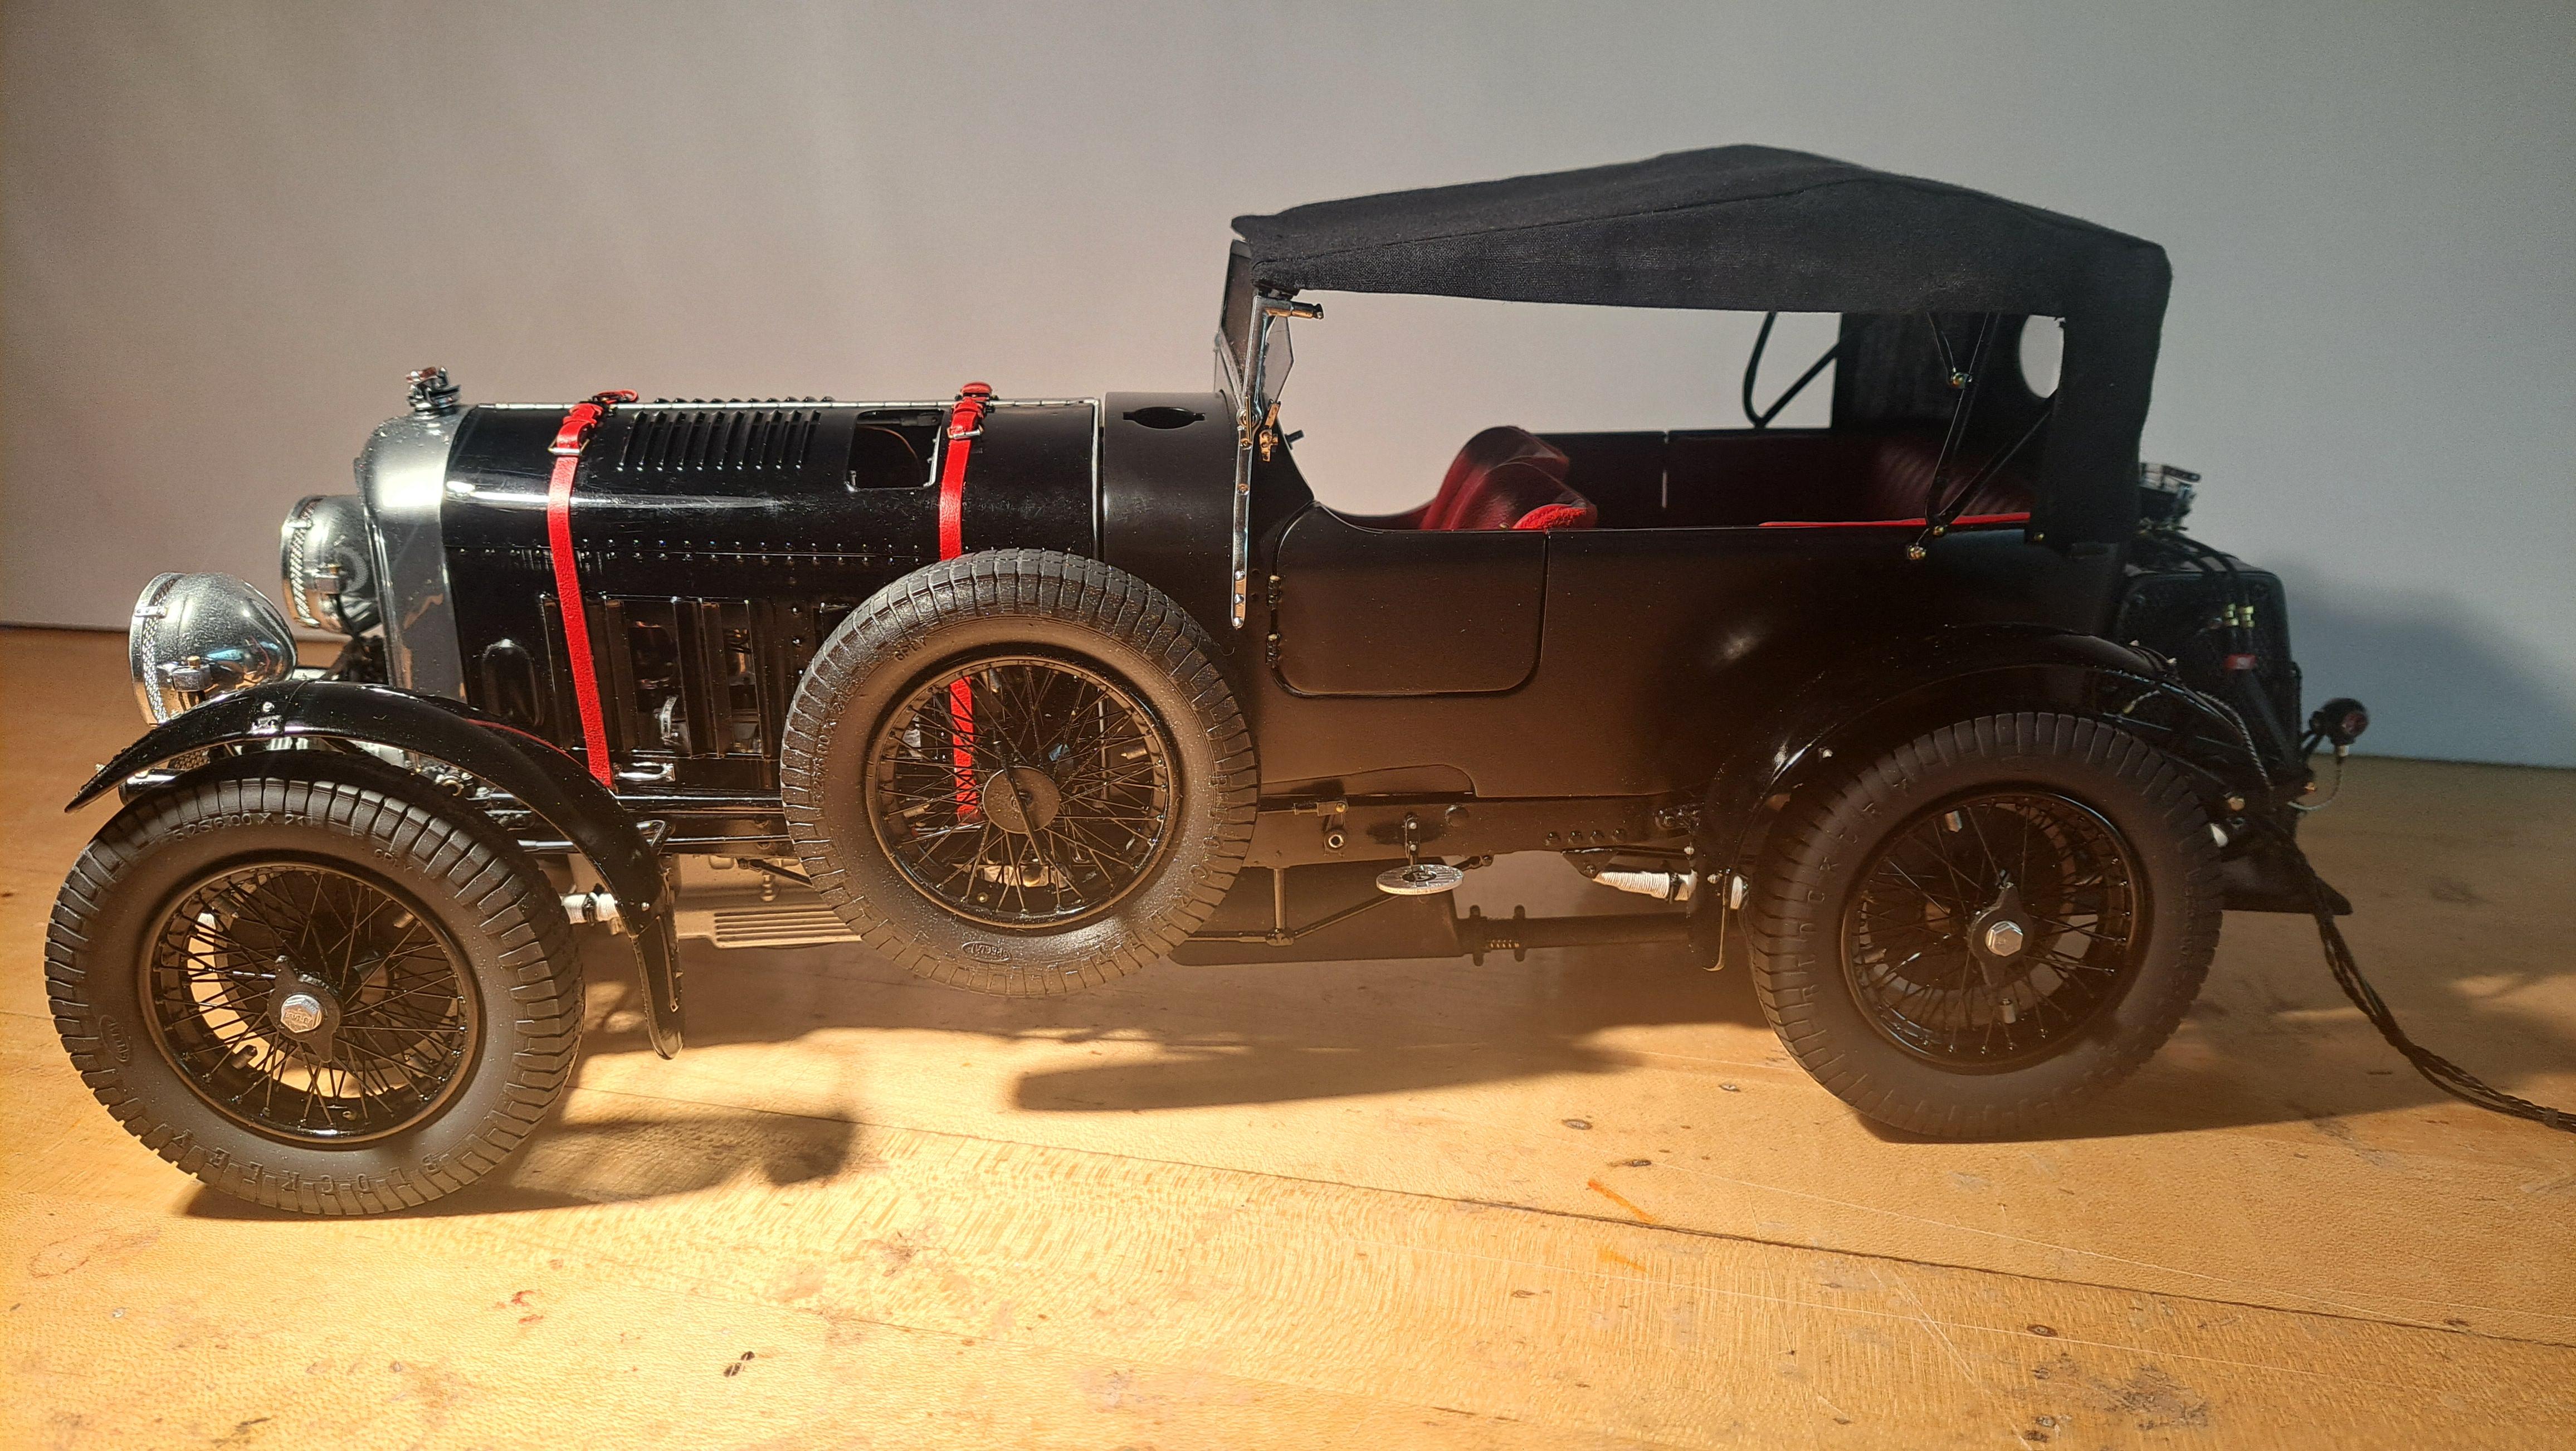
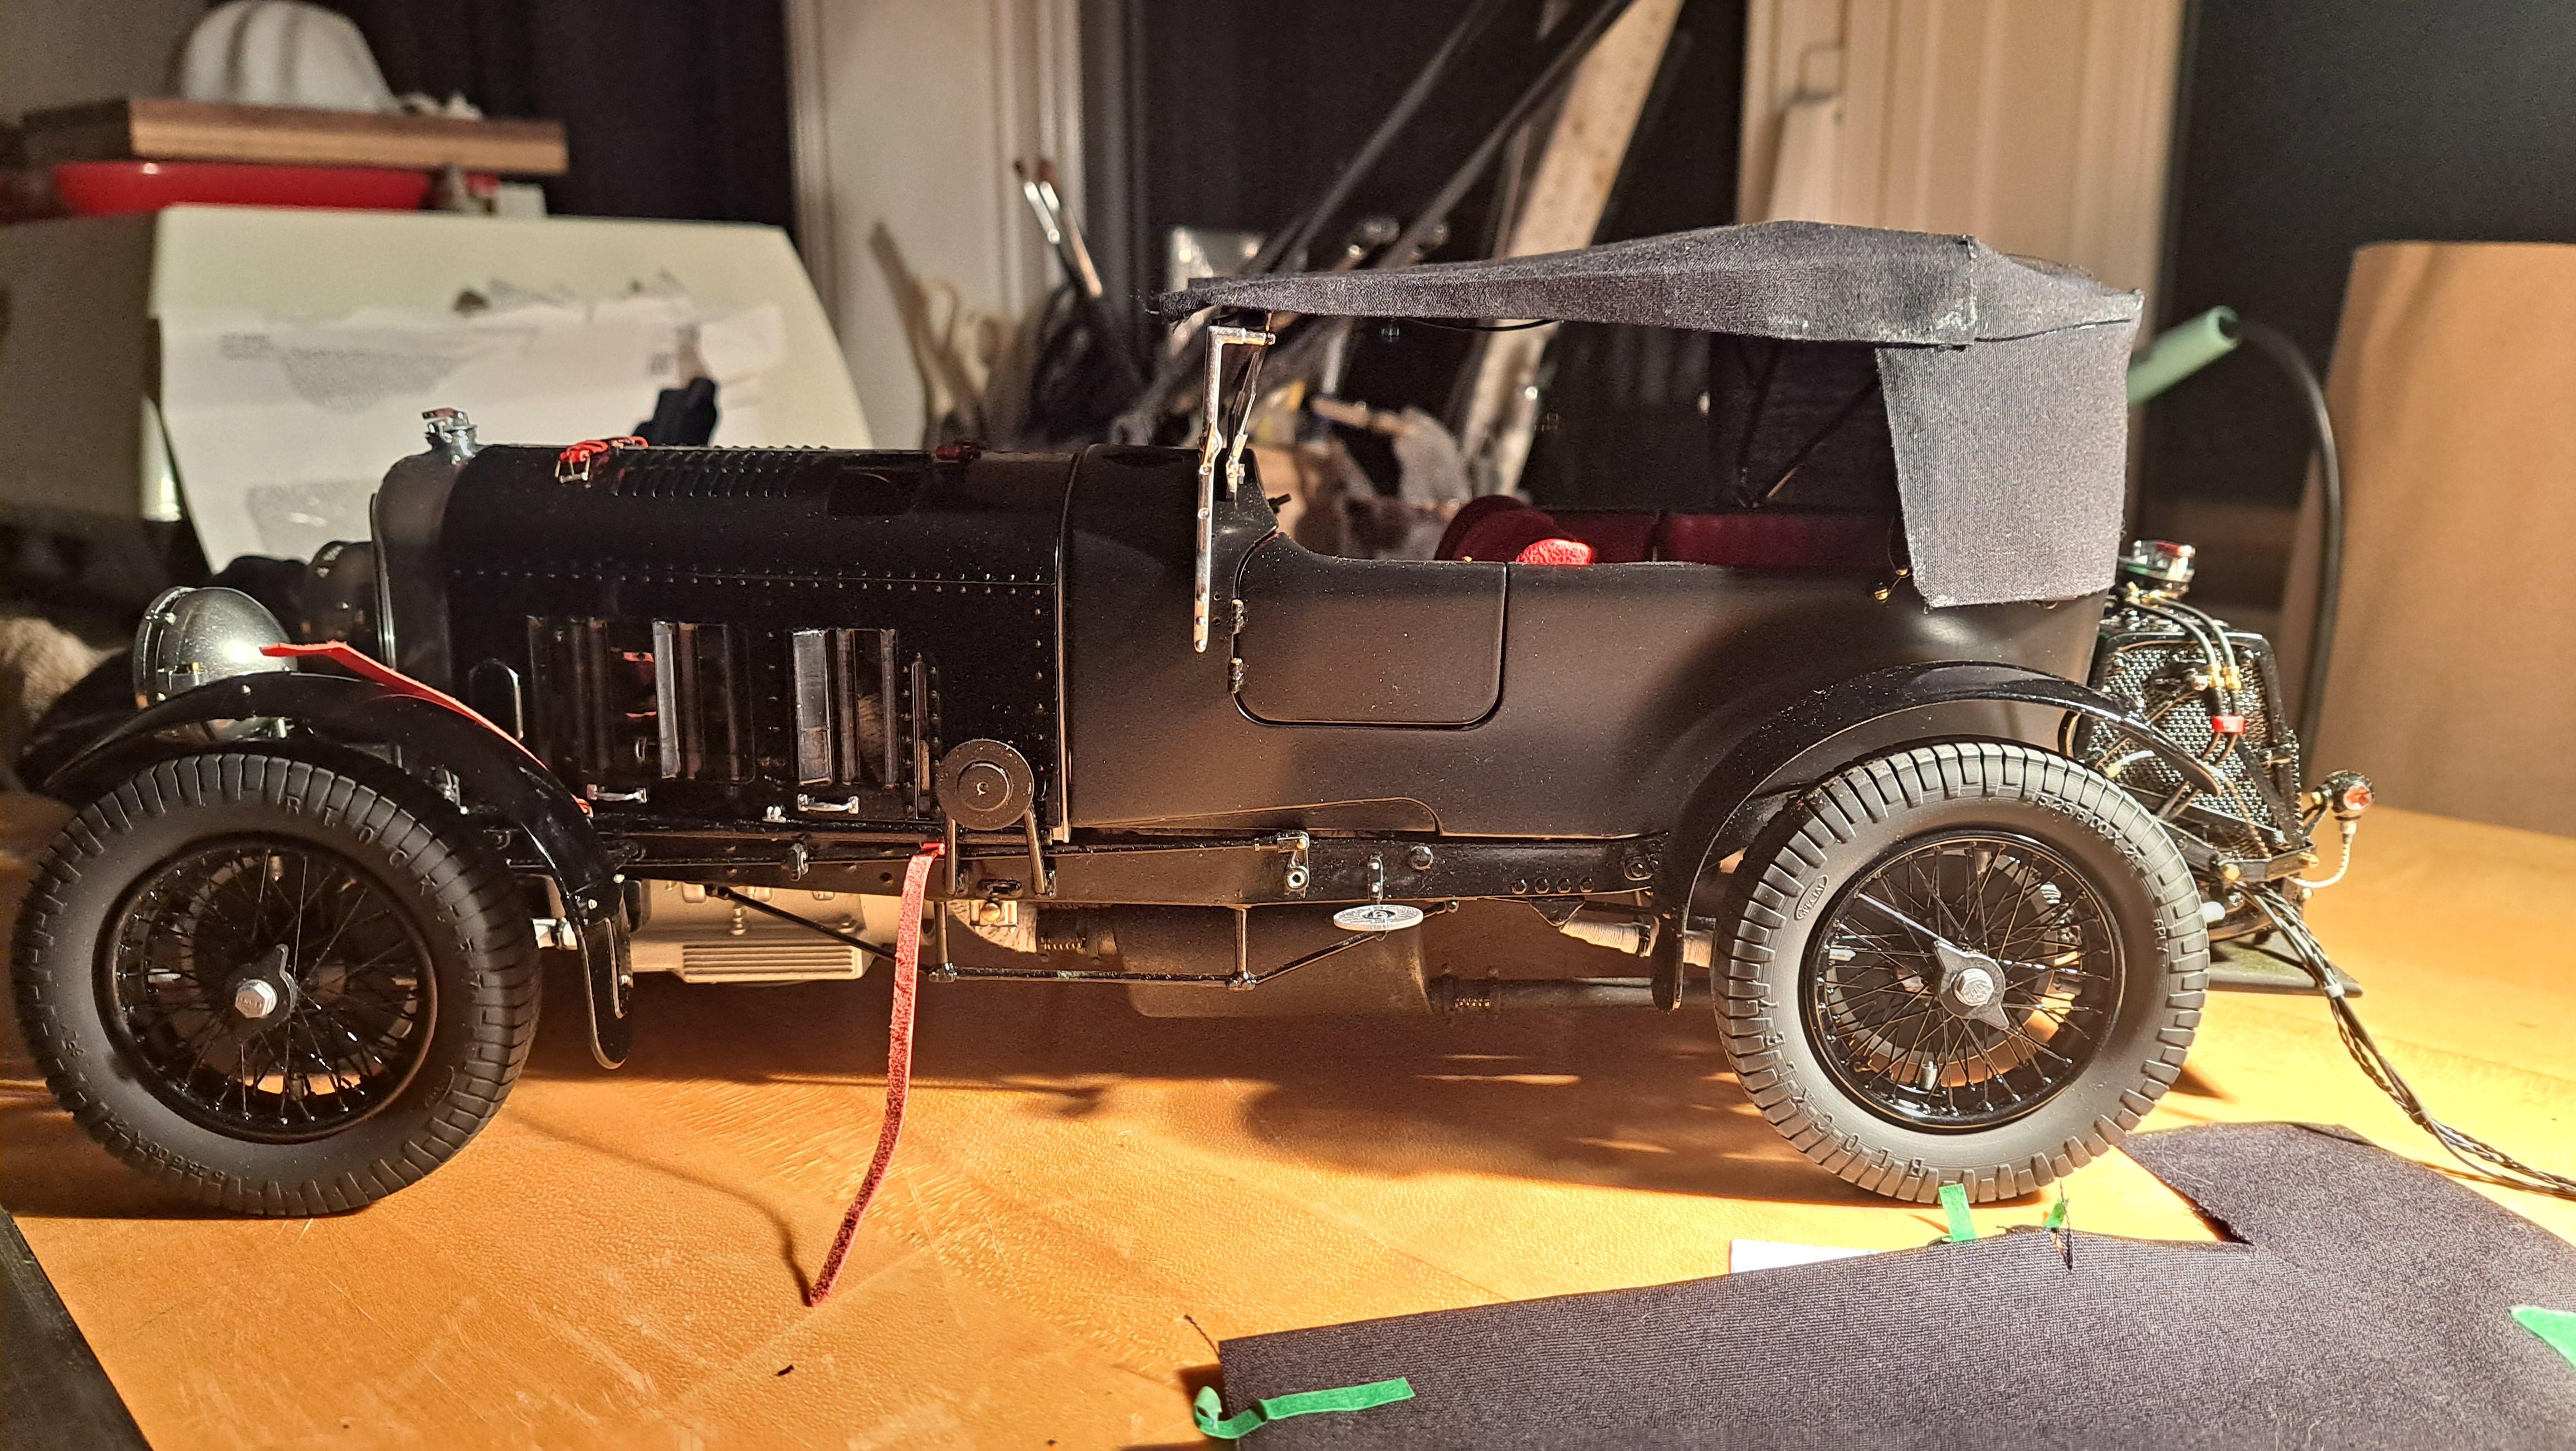
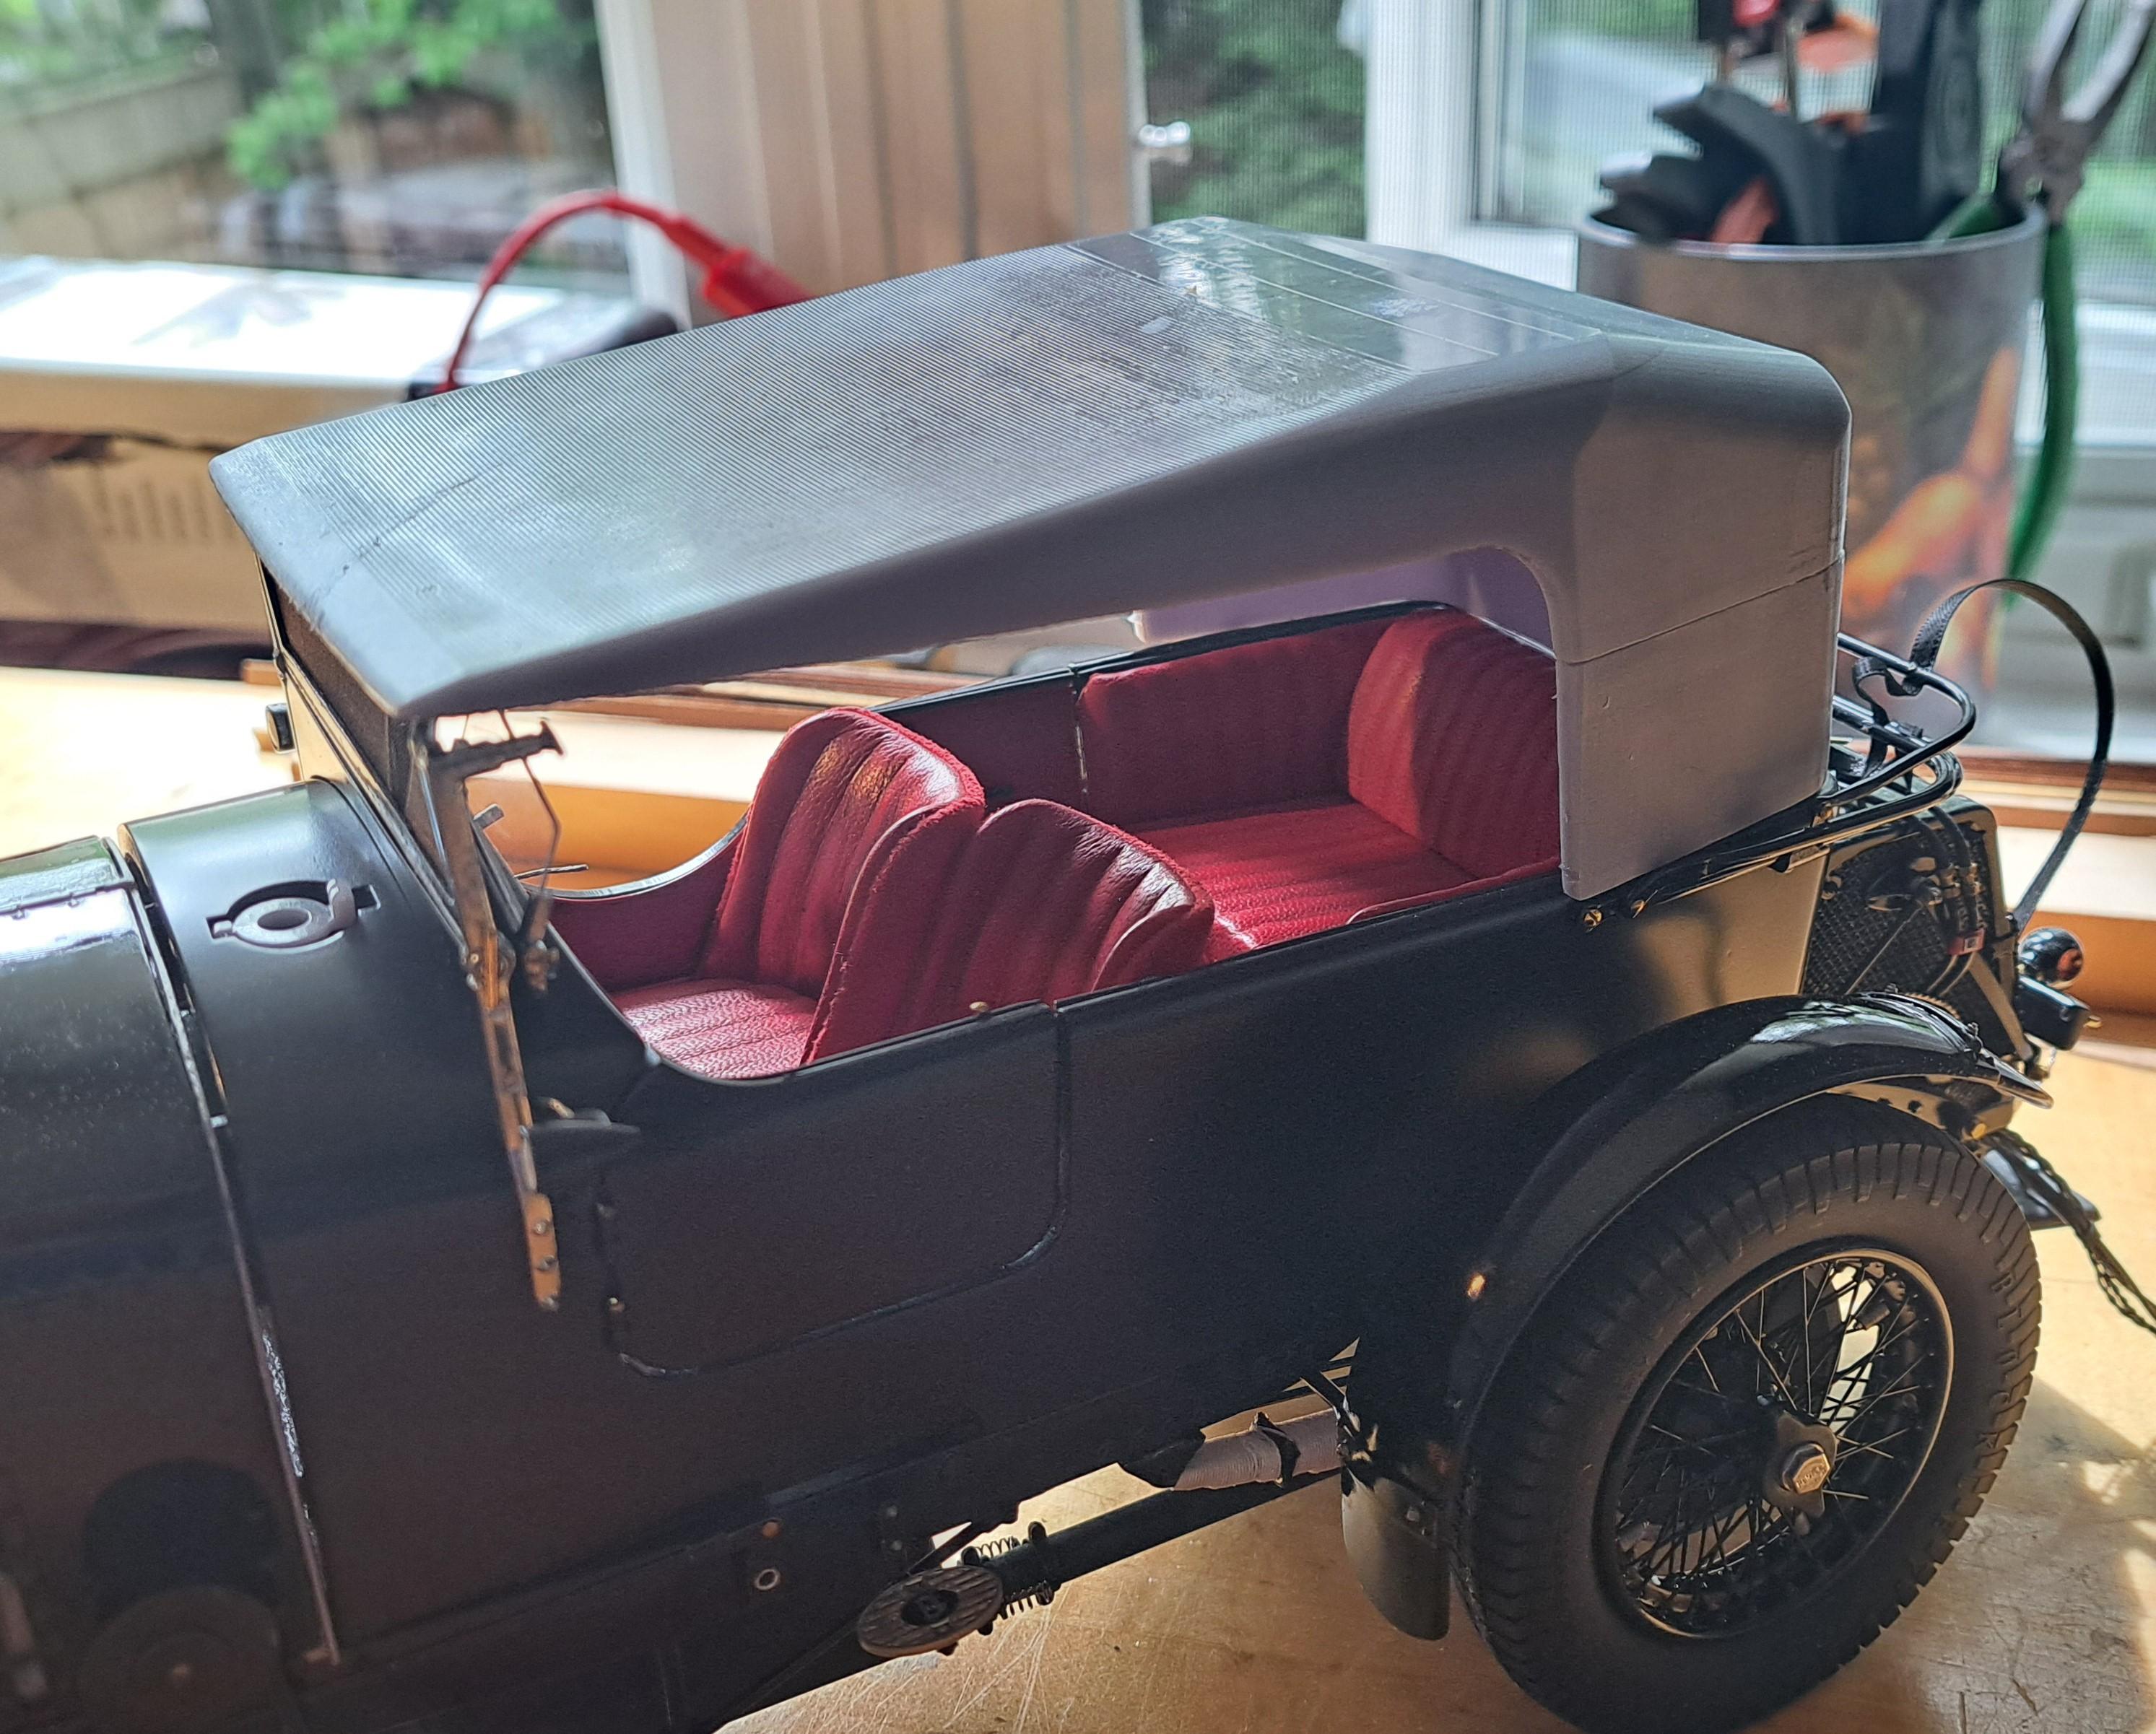
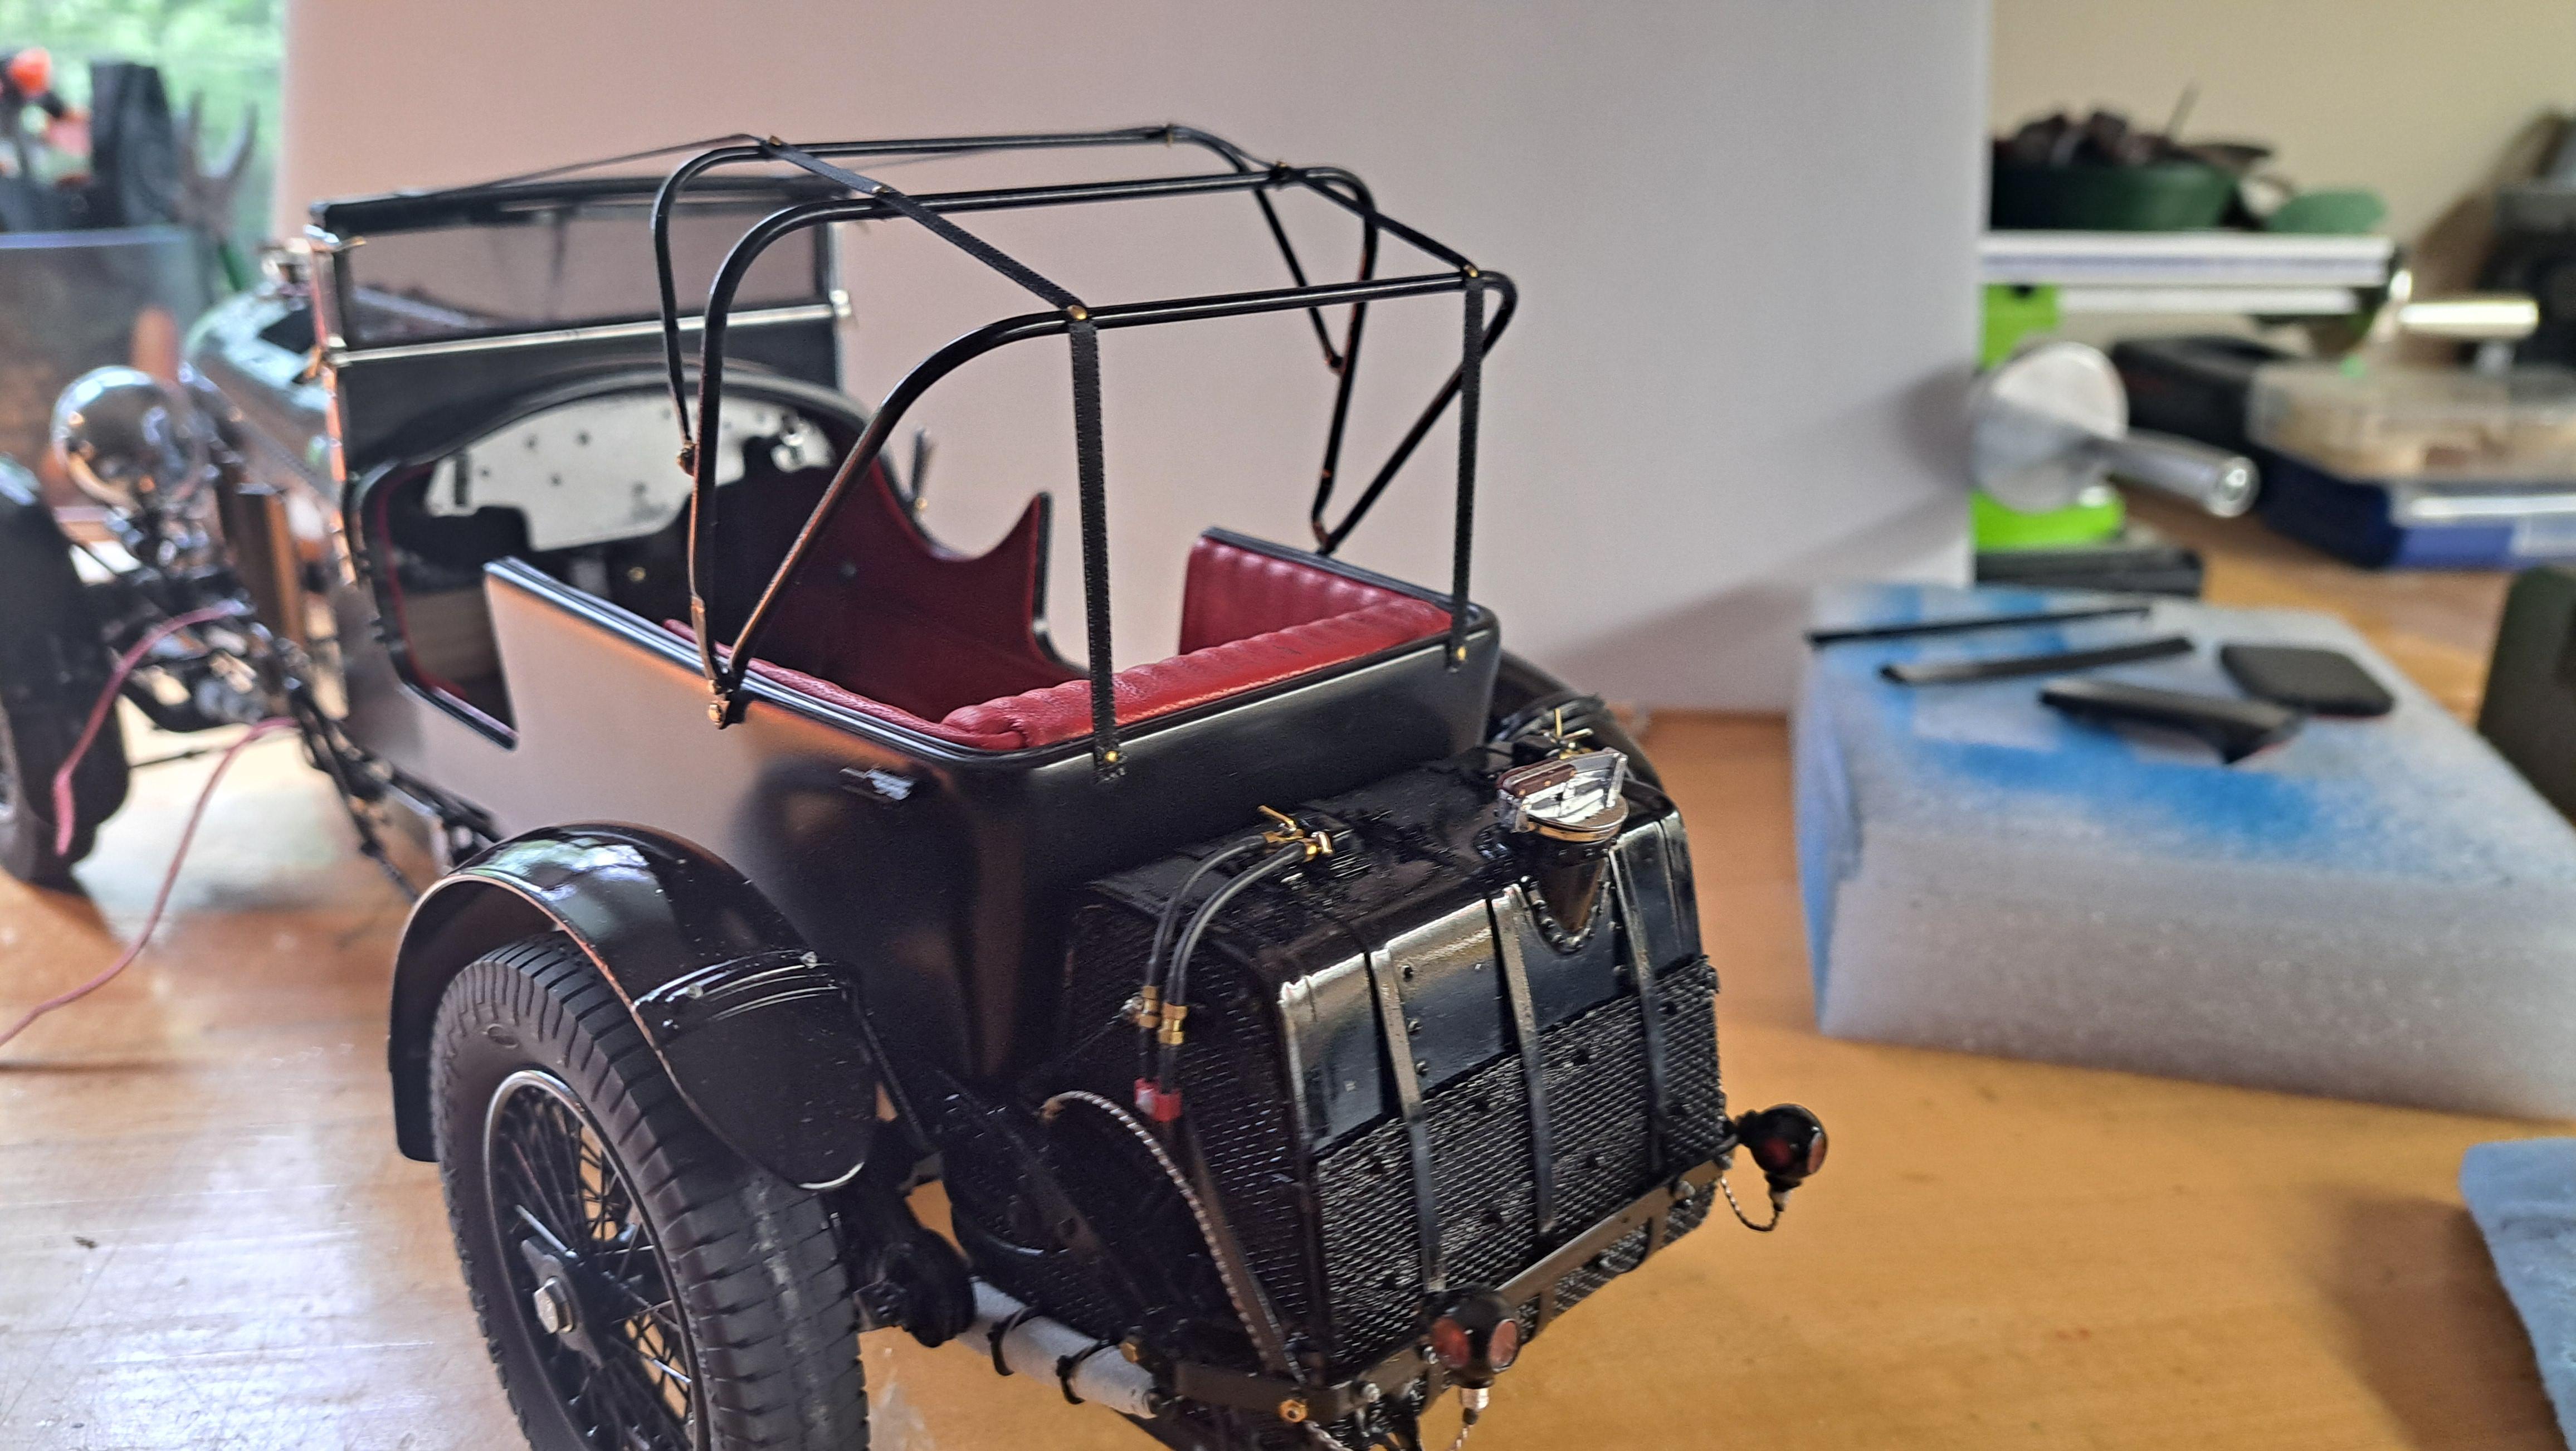
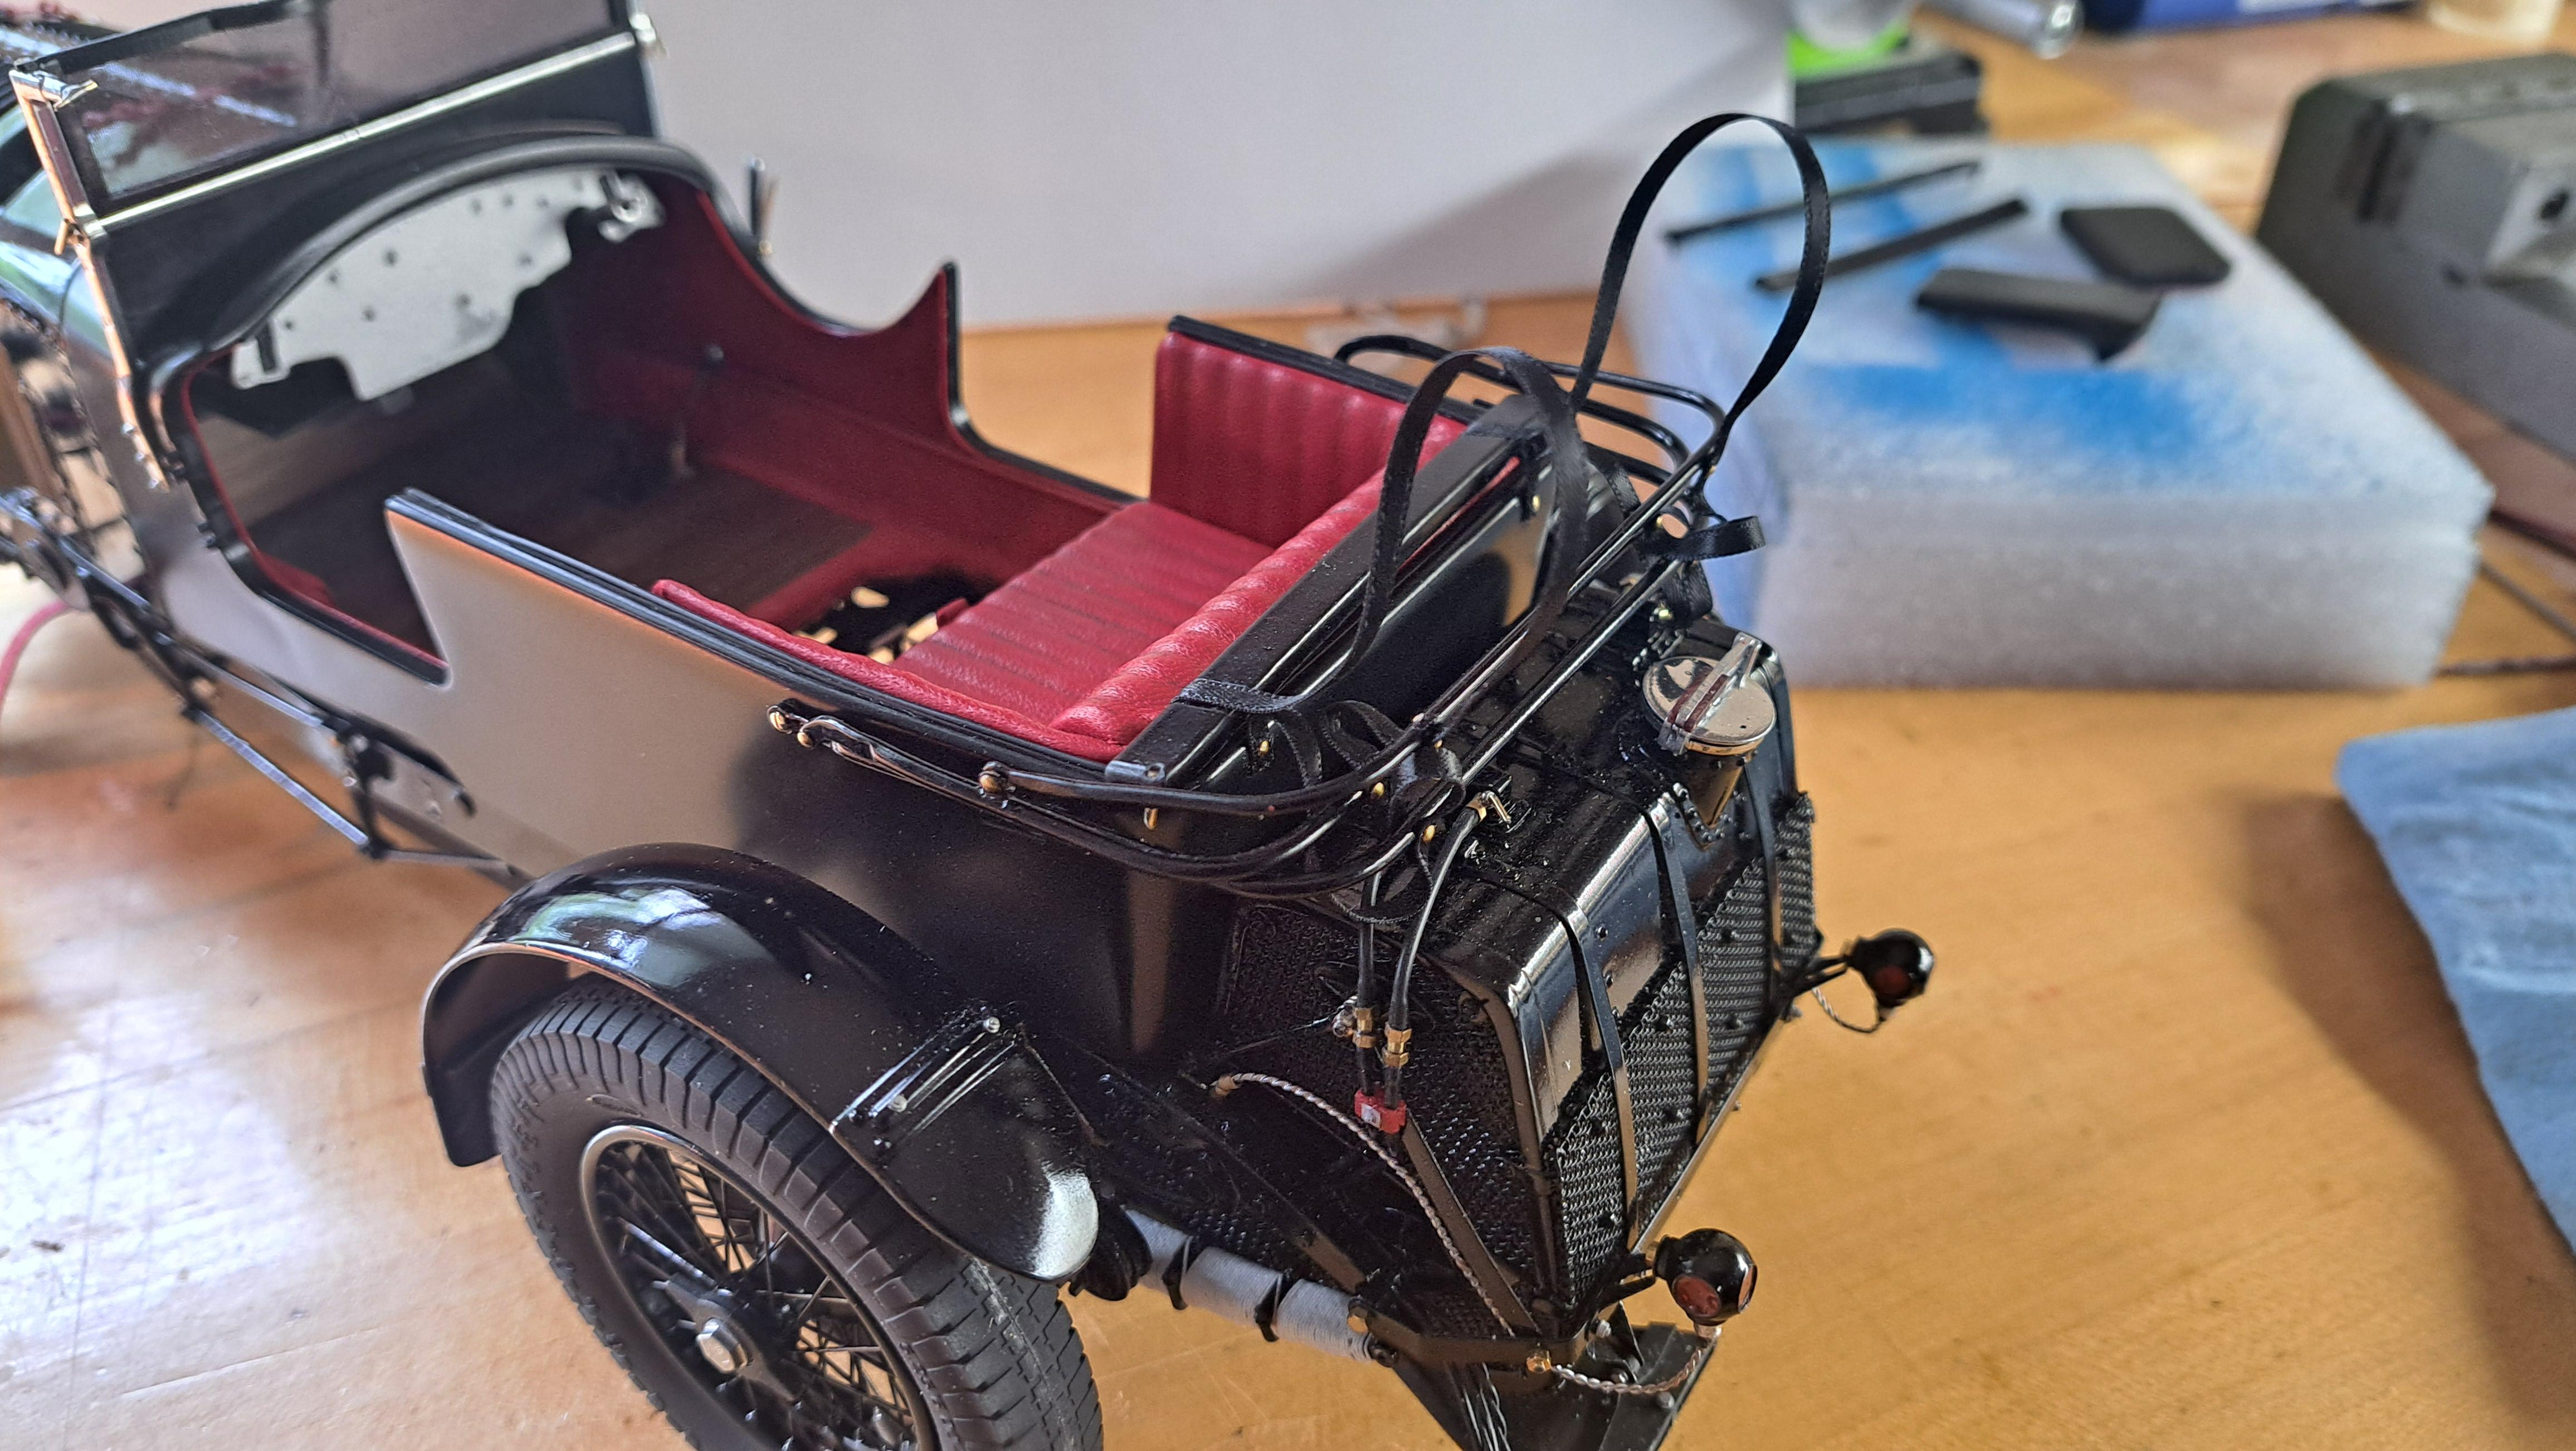
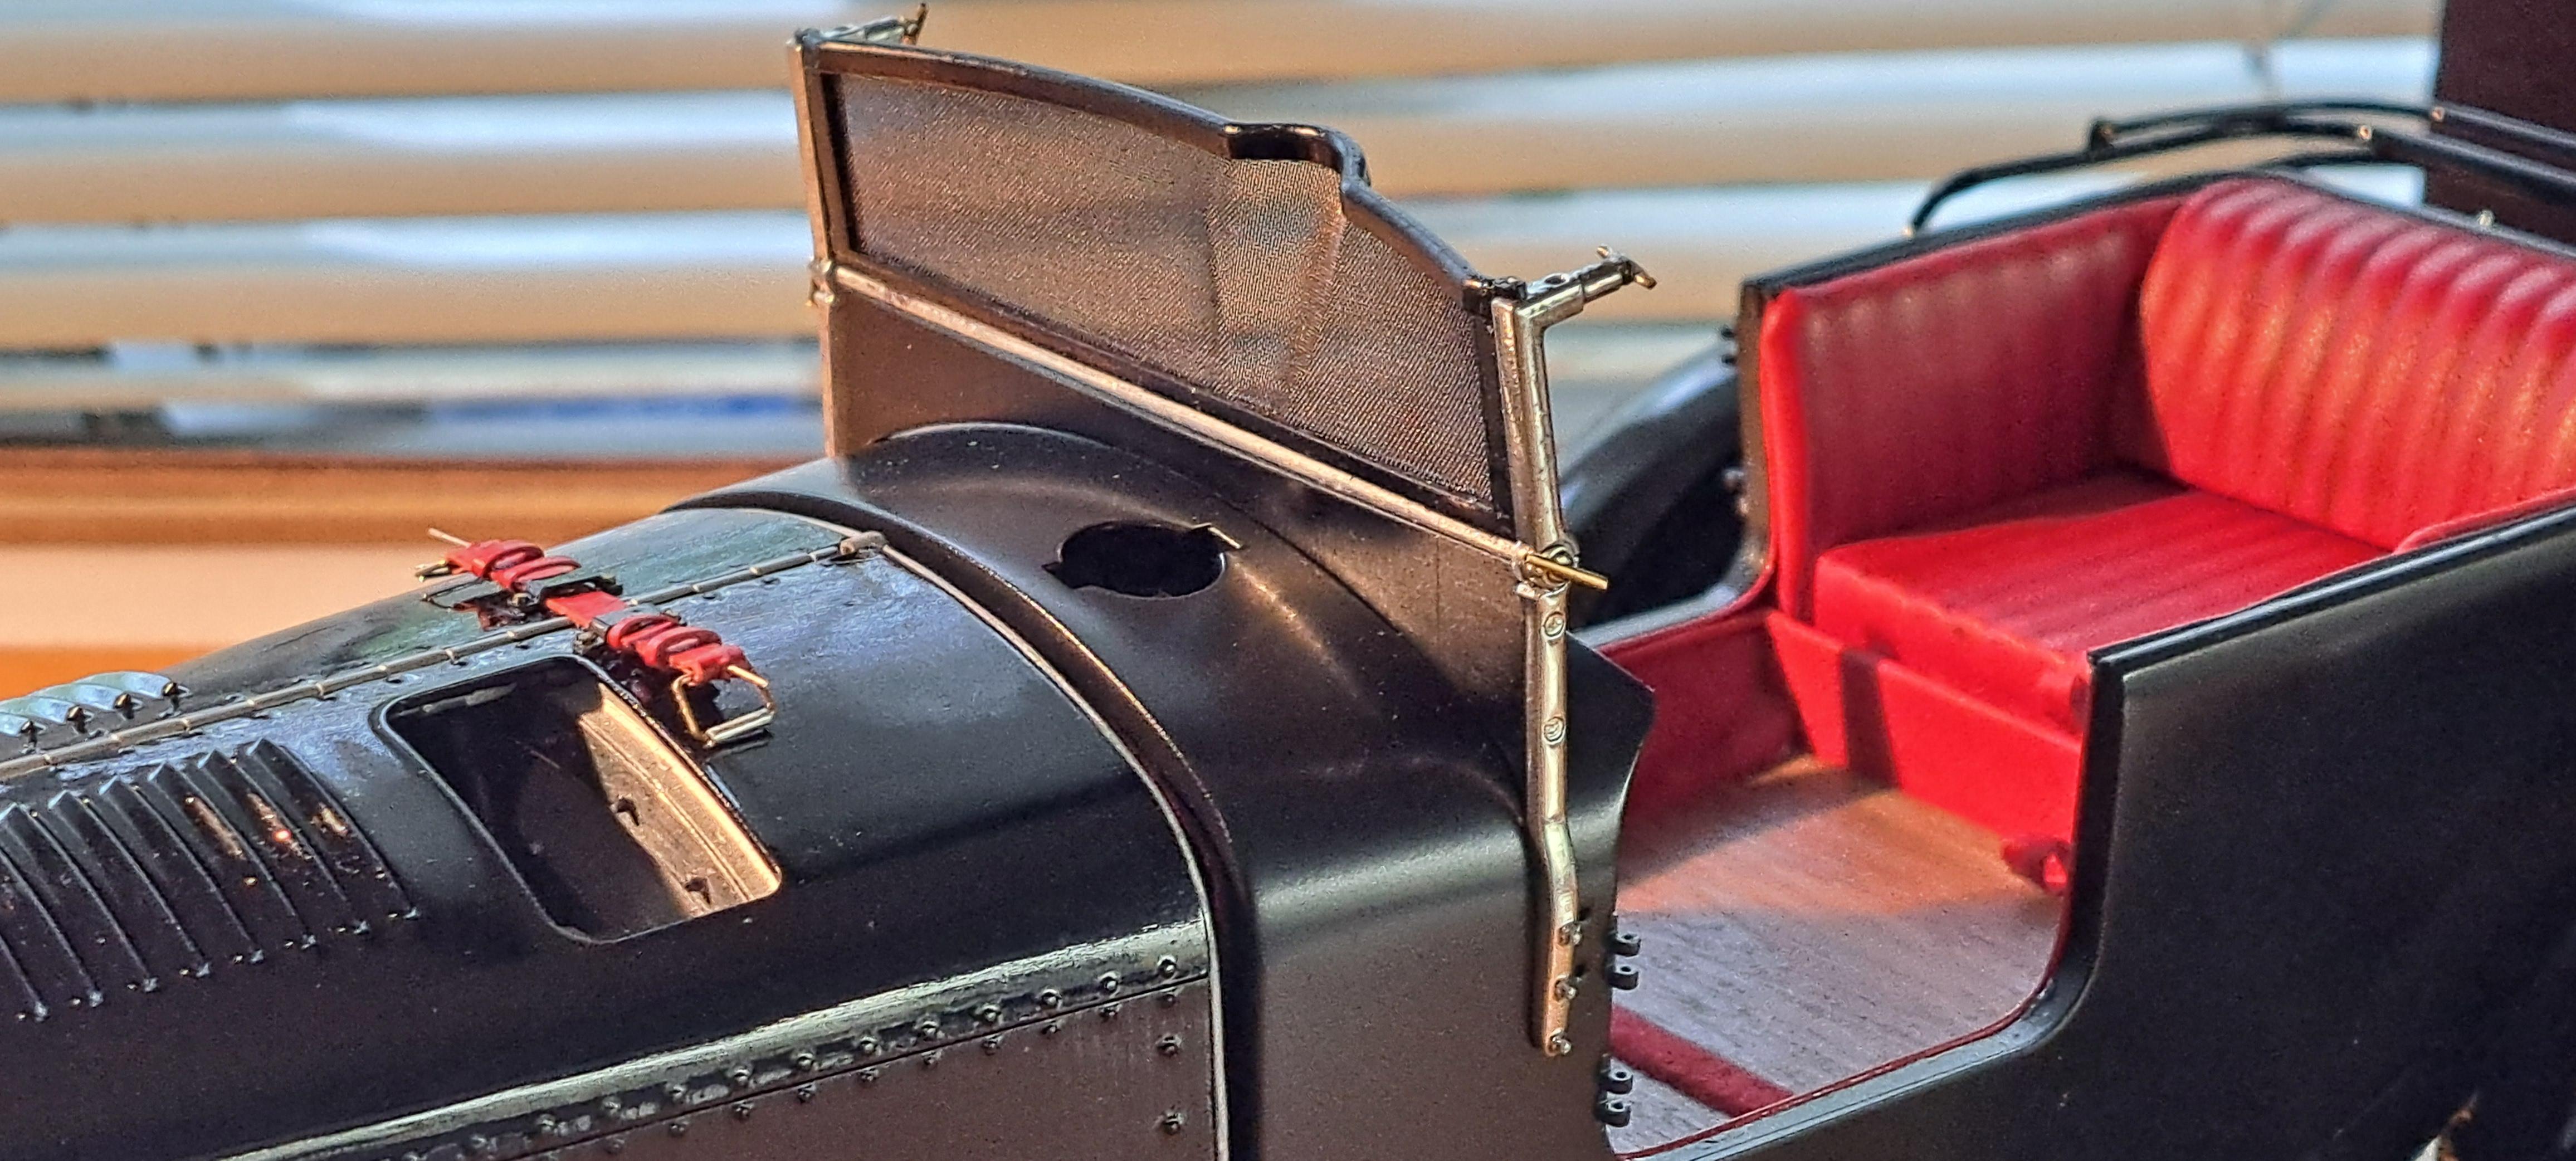
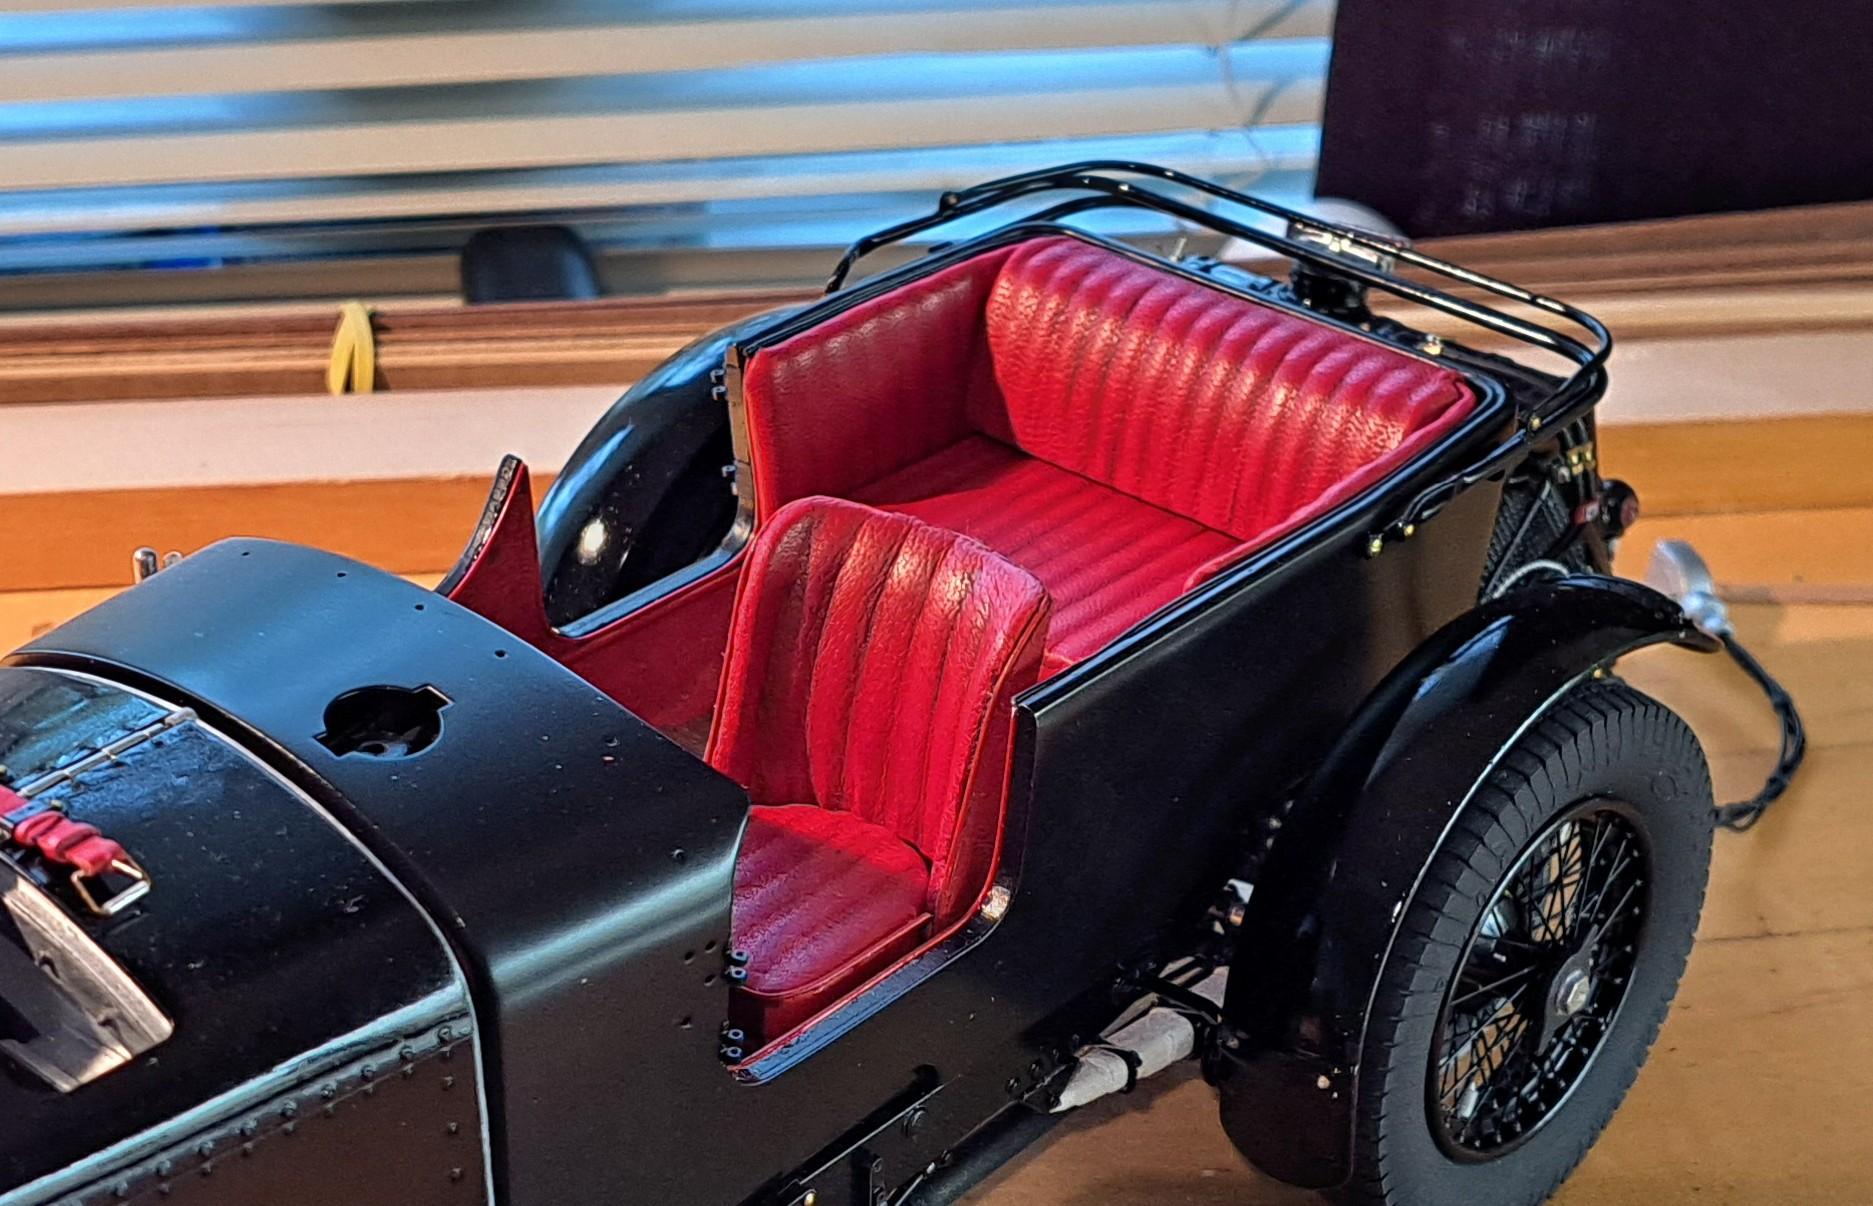
The soft top is finished. I'll eventually make a cover for it when it is down. The final step will be the dashboard but I might take a little break before. In the meantime, here are some pictures of the car so far.
-
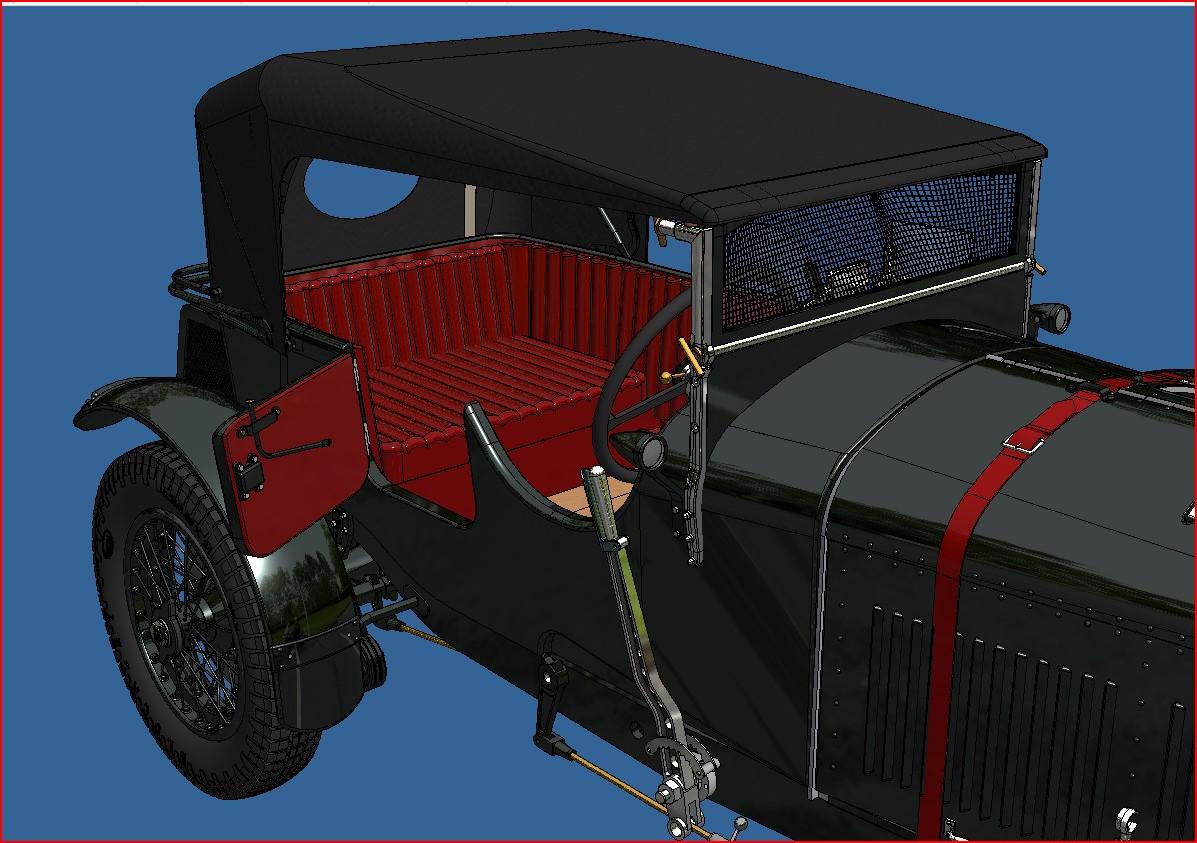
I found a drawing of à bentley with the top up and it's a bit different from what I made. Since I couldn't find any pictures showing my ref car with the top up, I decided to modify my top to look a bit more like the drawing. As a bonus, it will better show the foldable top frame.
-
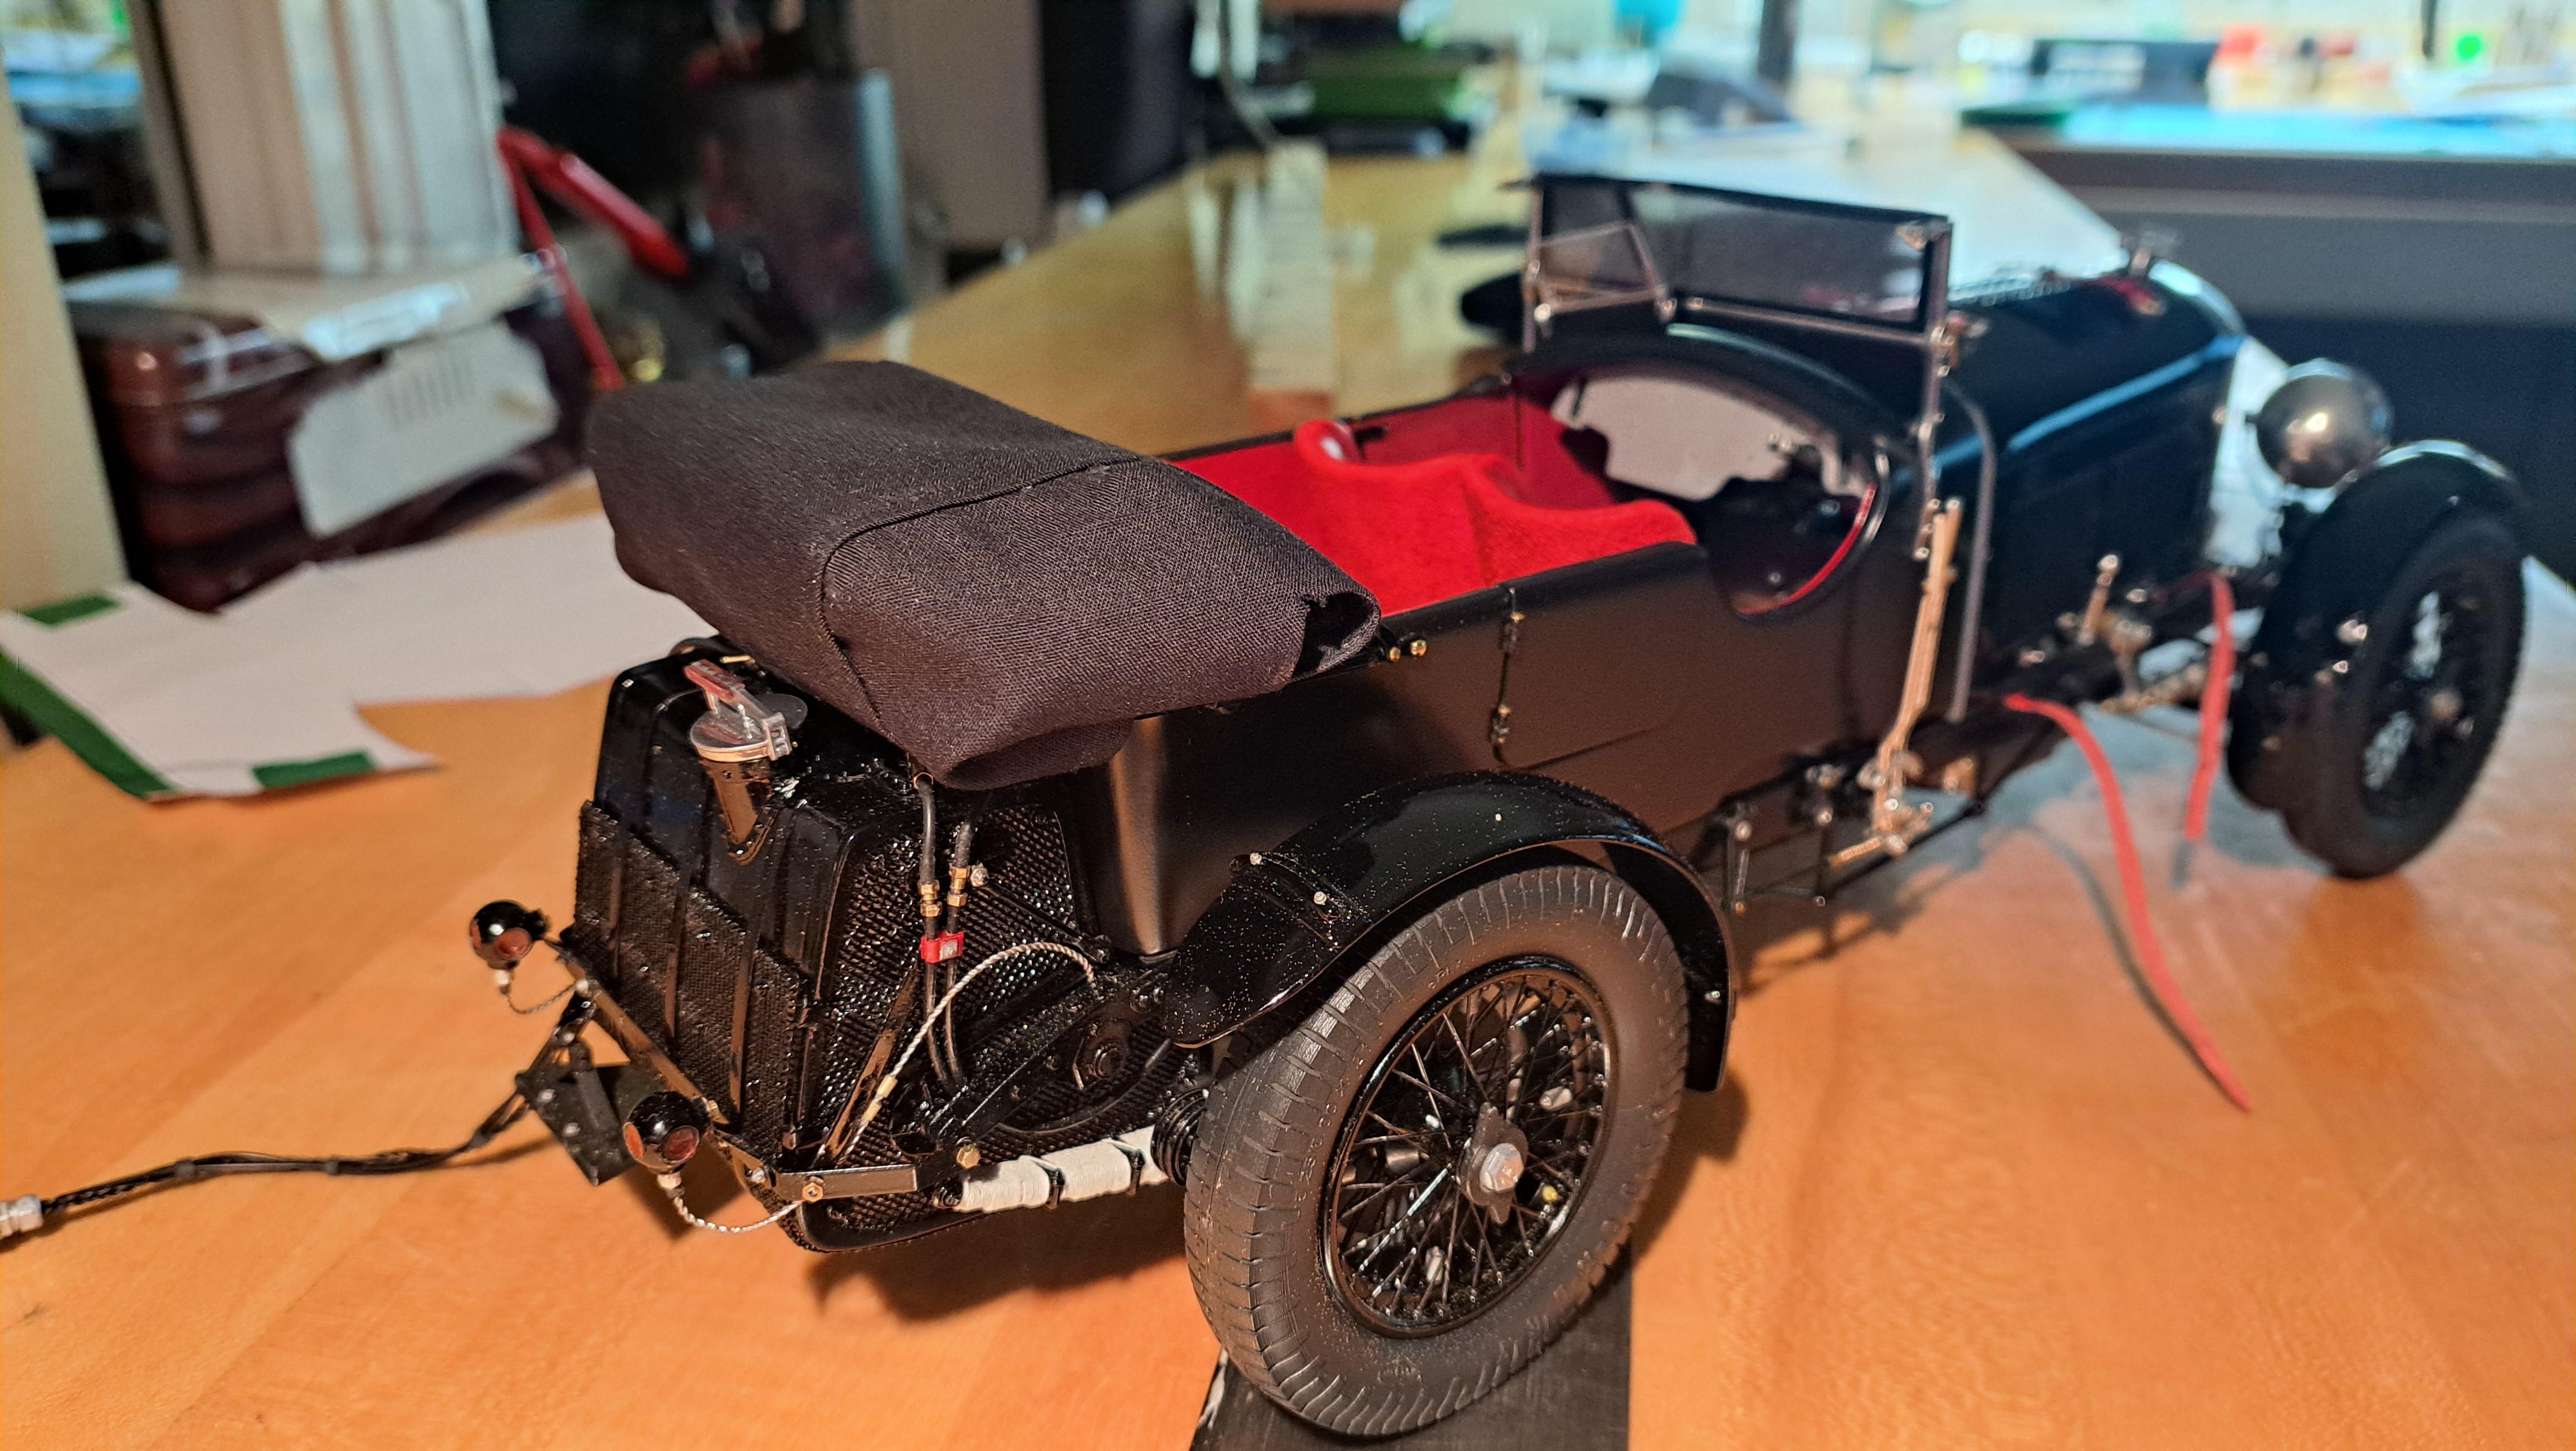
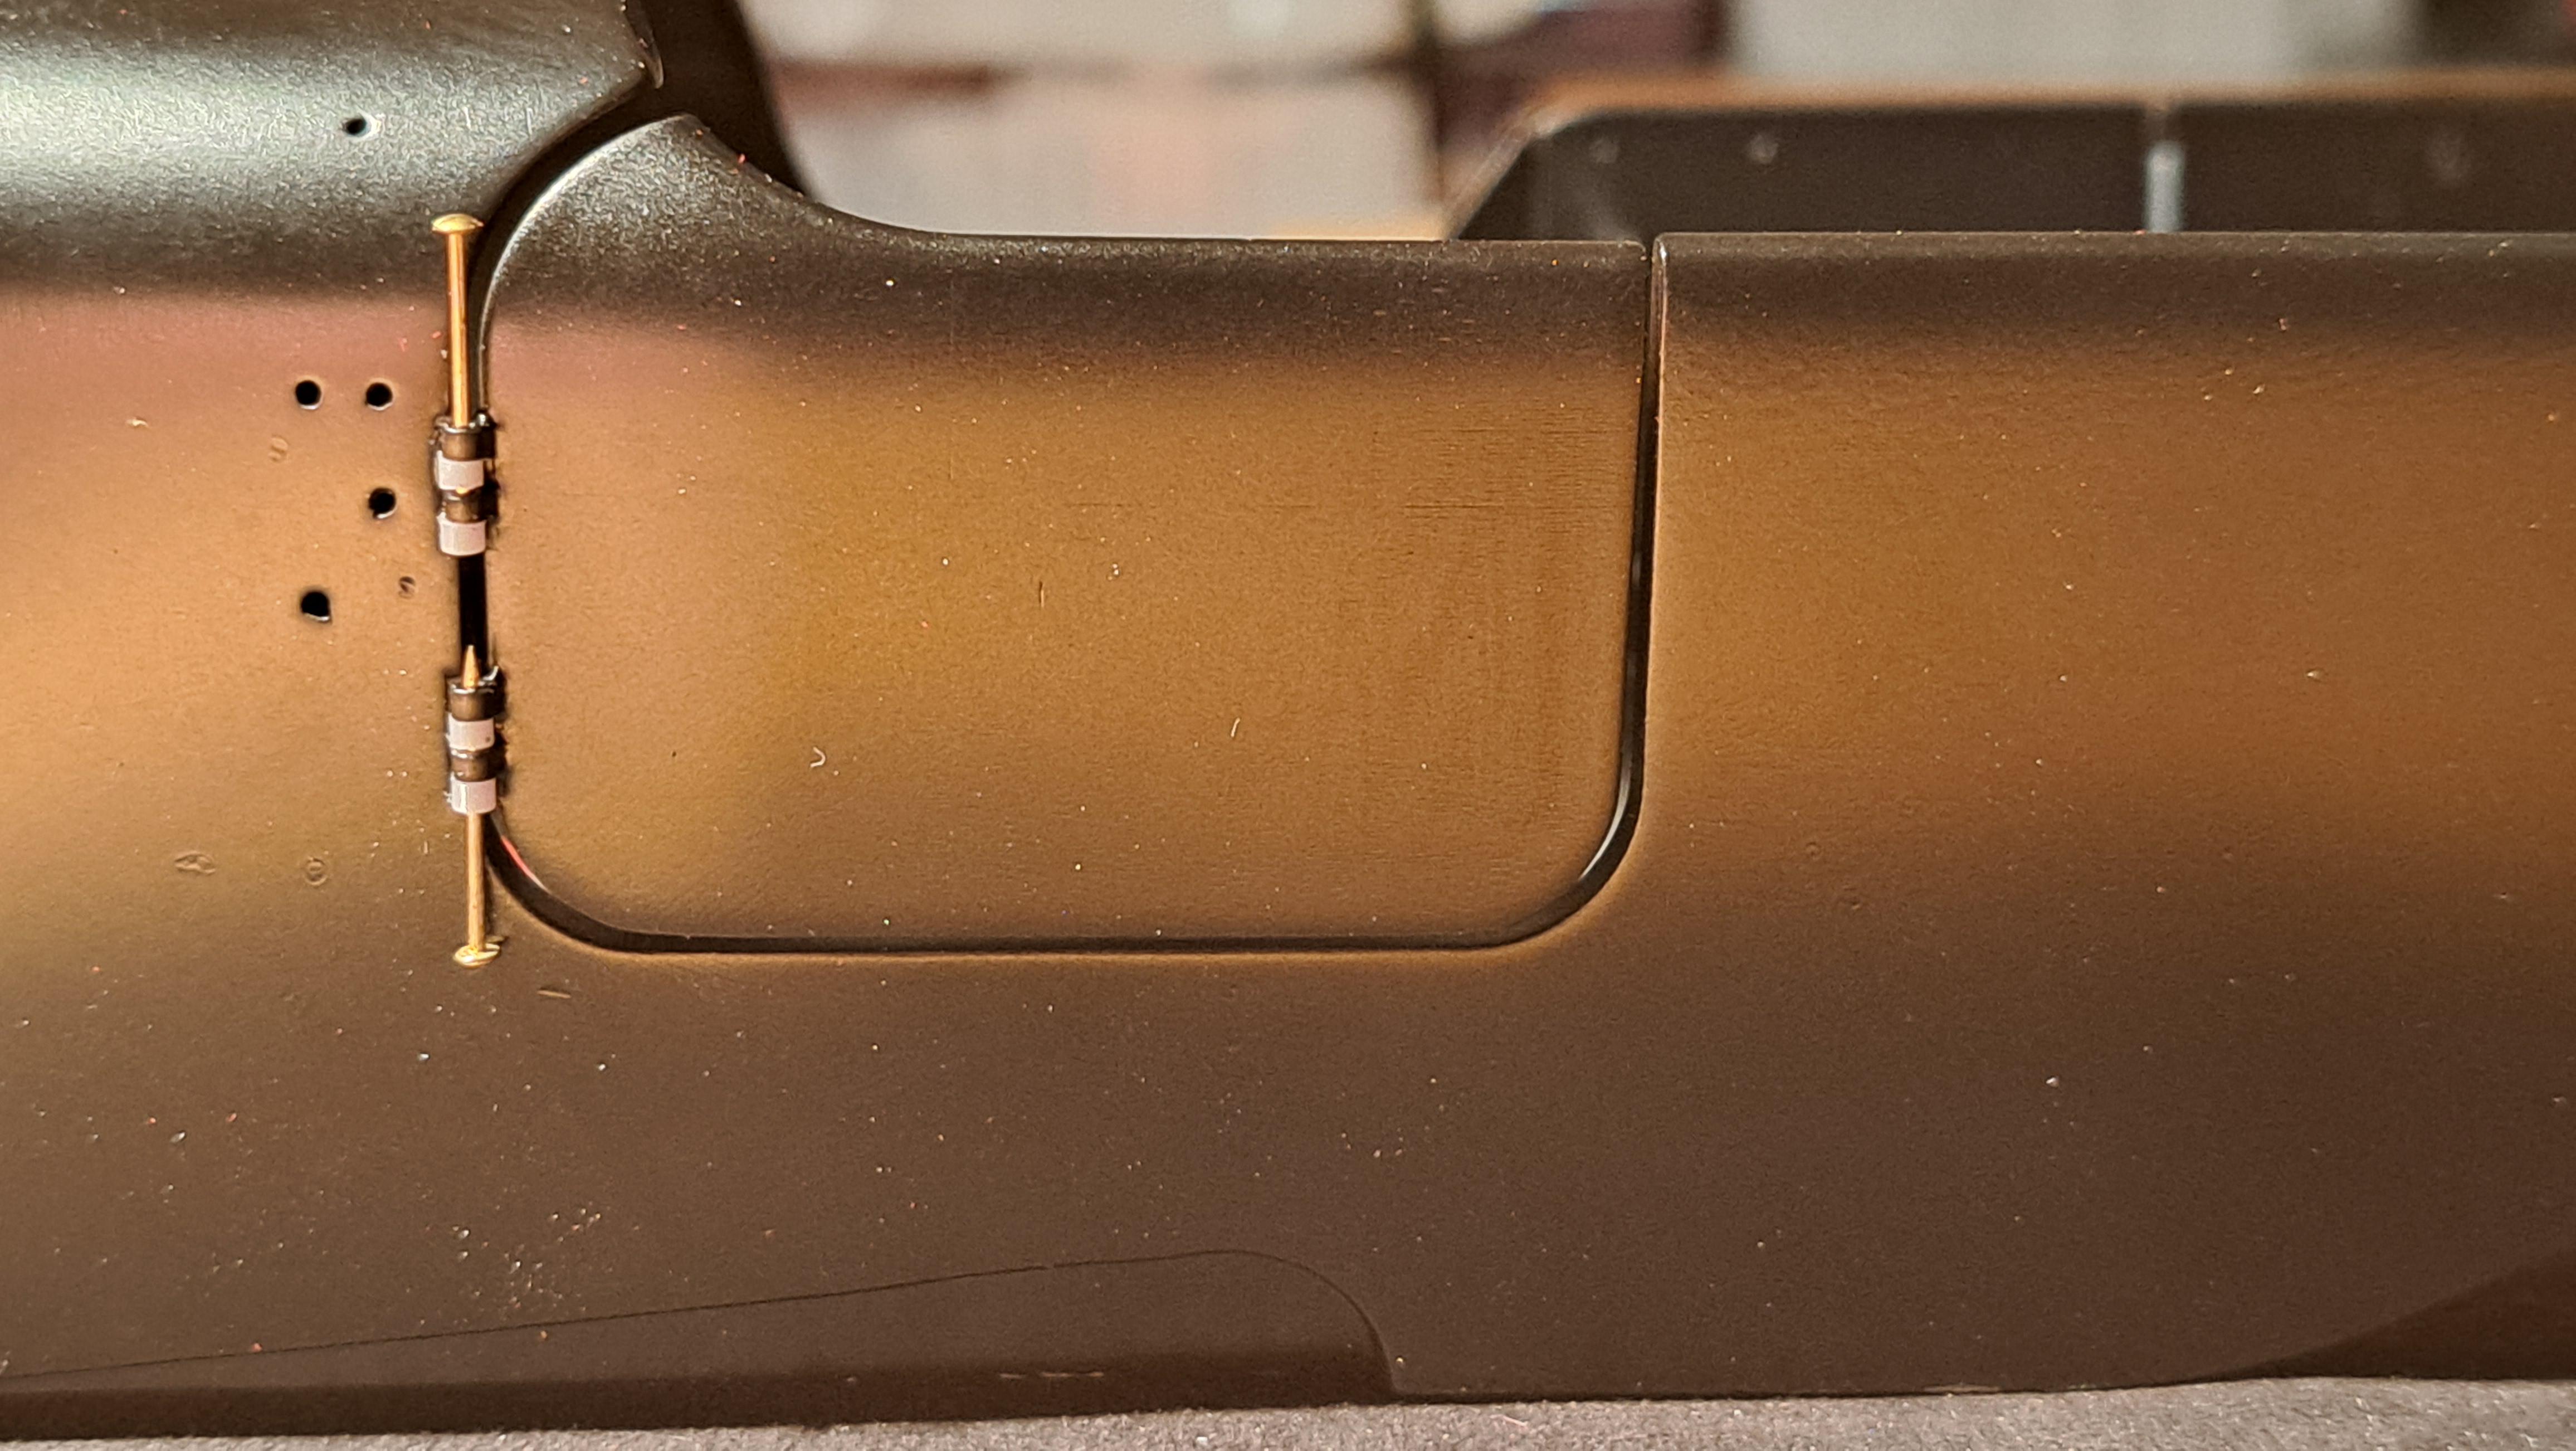
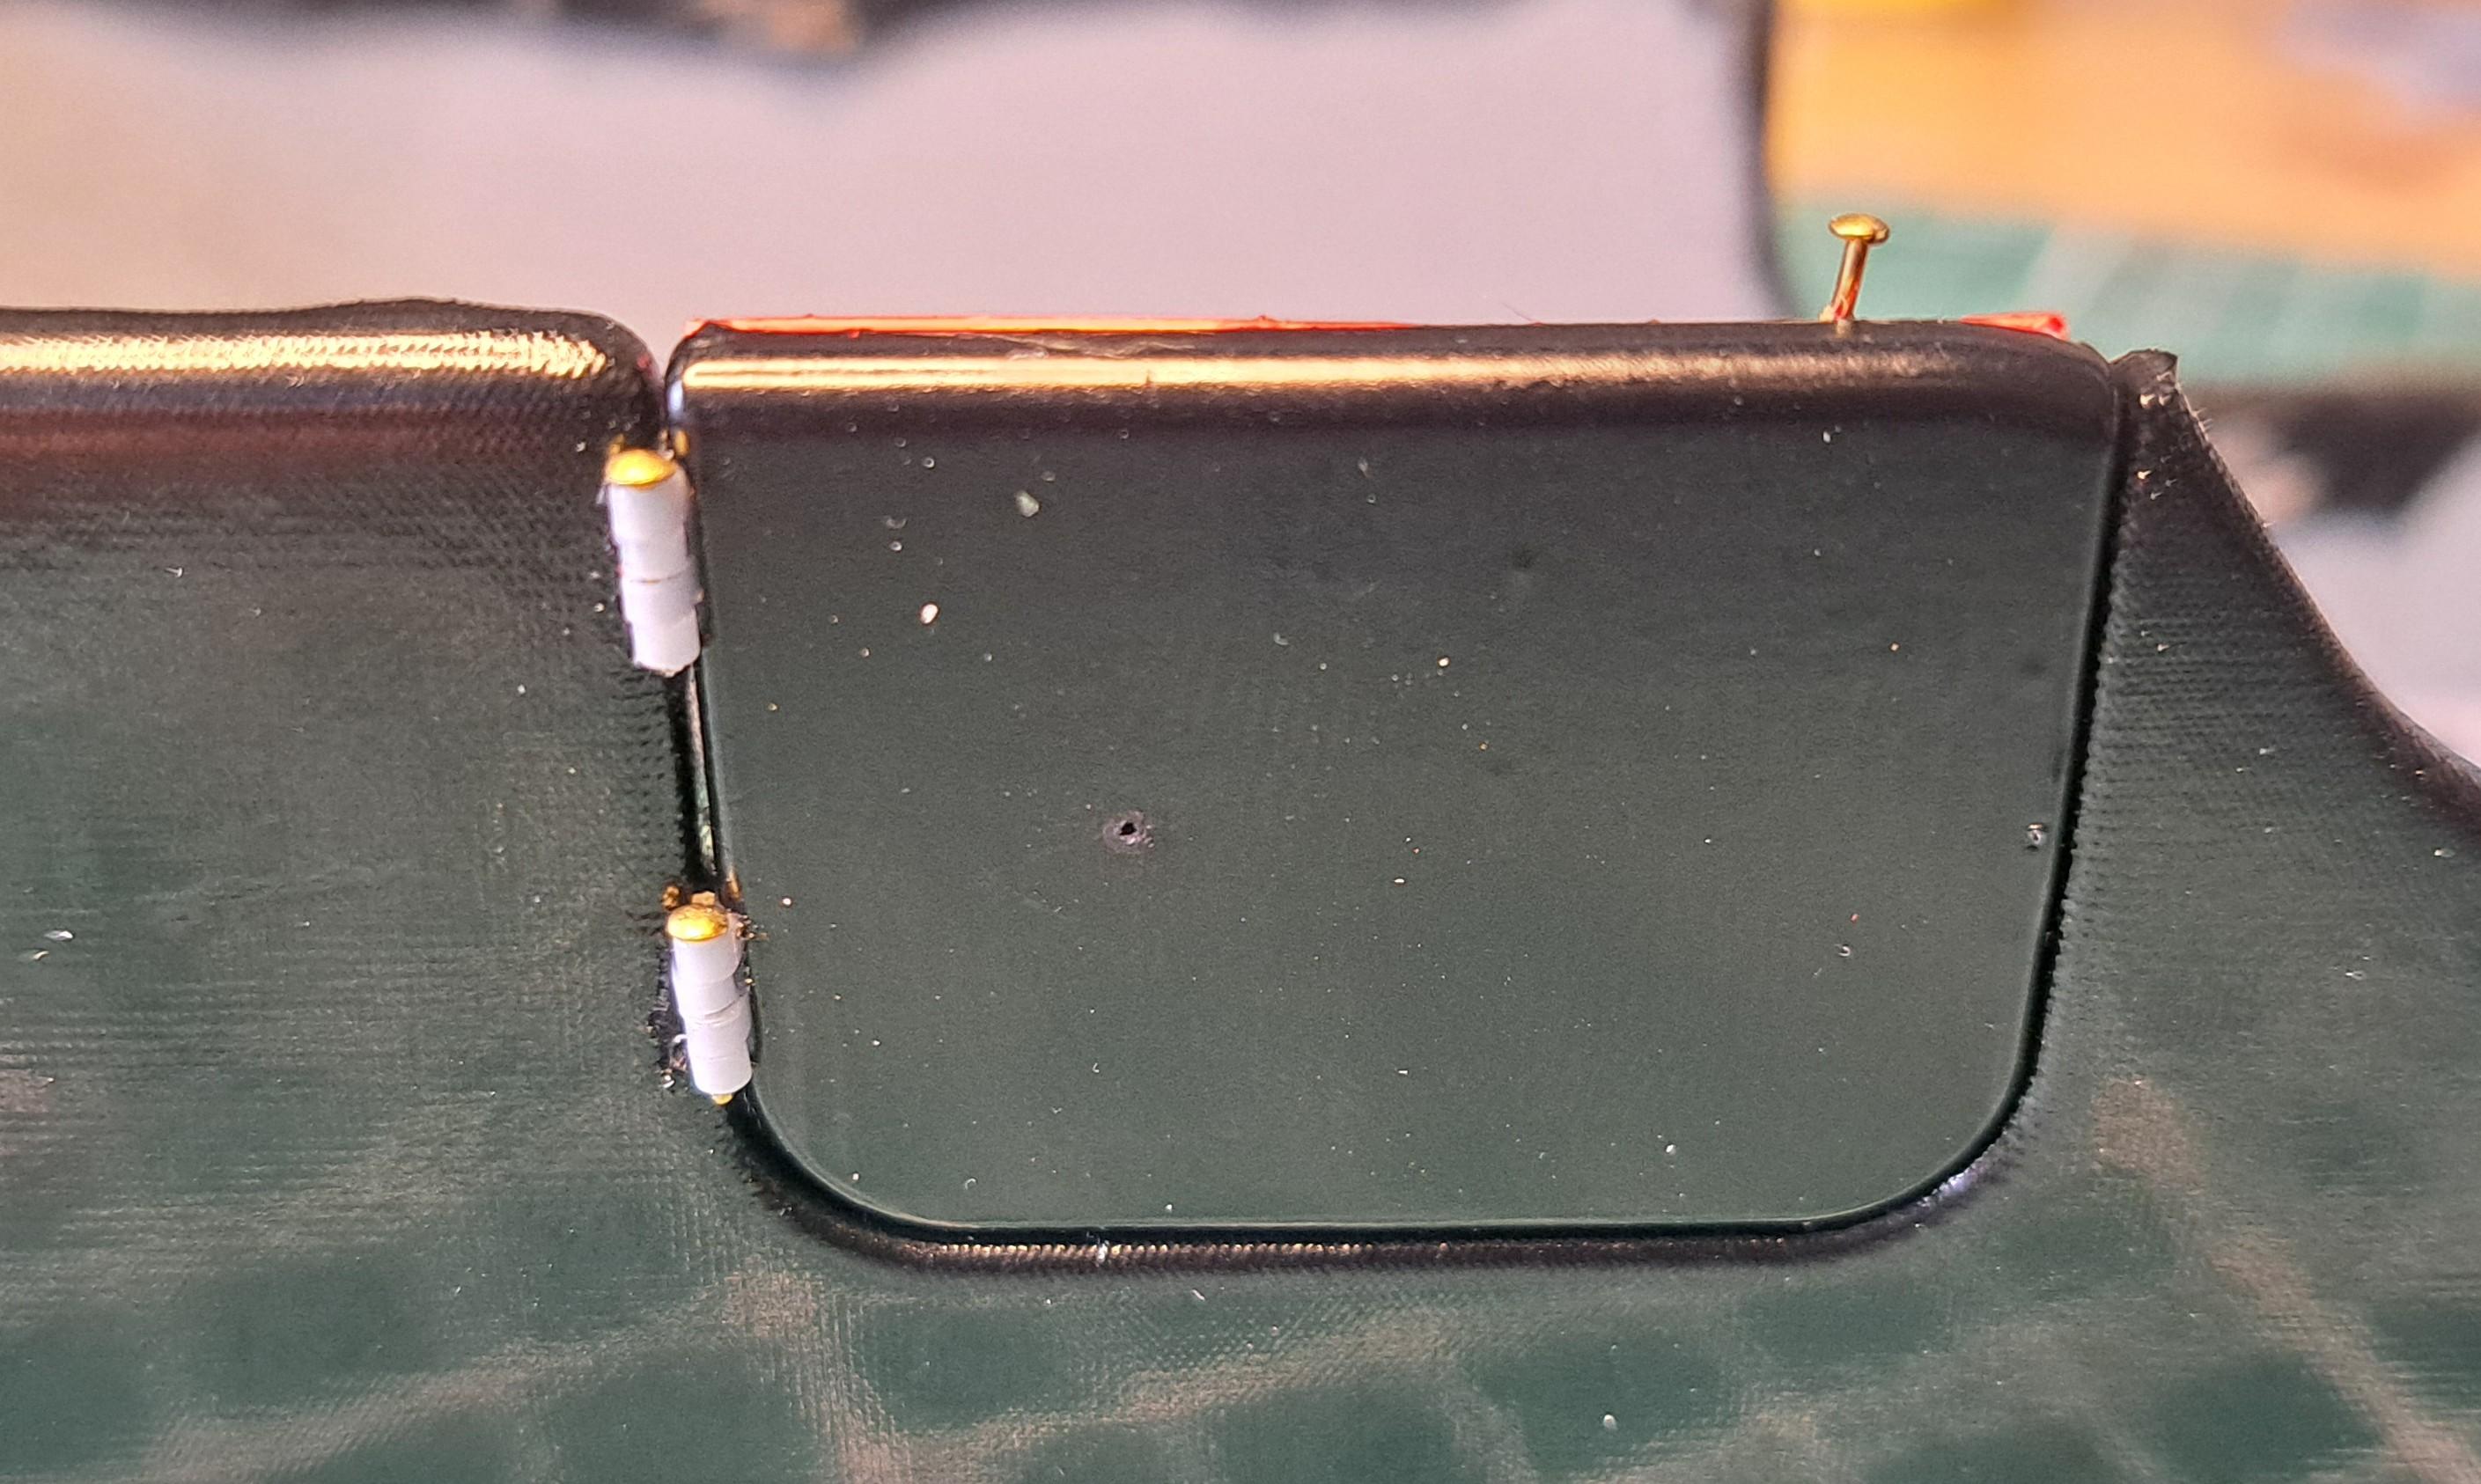
I made the rear window for the top. I printed a window surround and also cut a plastic window. Then I drilled a 0.6mm dia hole in the center of the foldable frame pivot screws and inserted a small brass nail to simulate a snap to hold down the sides of the soft top. And finally I drilled small holes on the end of the tub and inserted brass nails thru the soft top to hold it in place. Now all that is left to do is to glue the front of the top to the header bar.
-
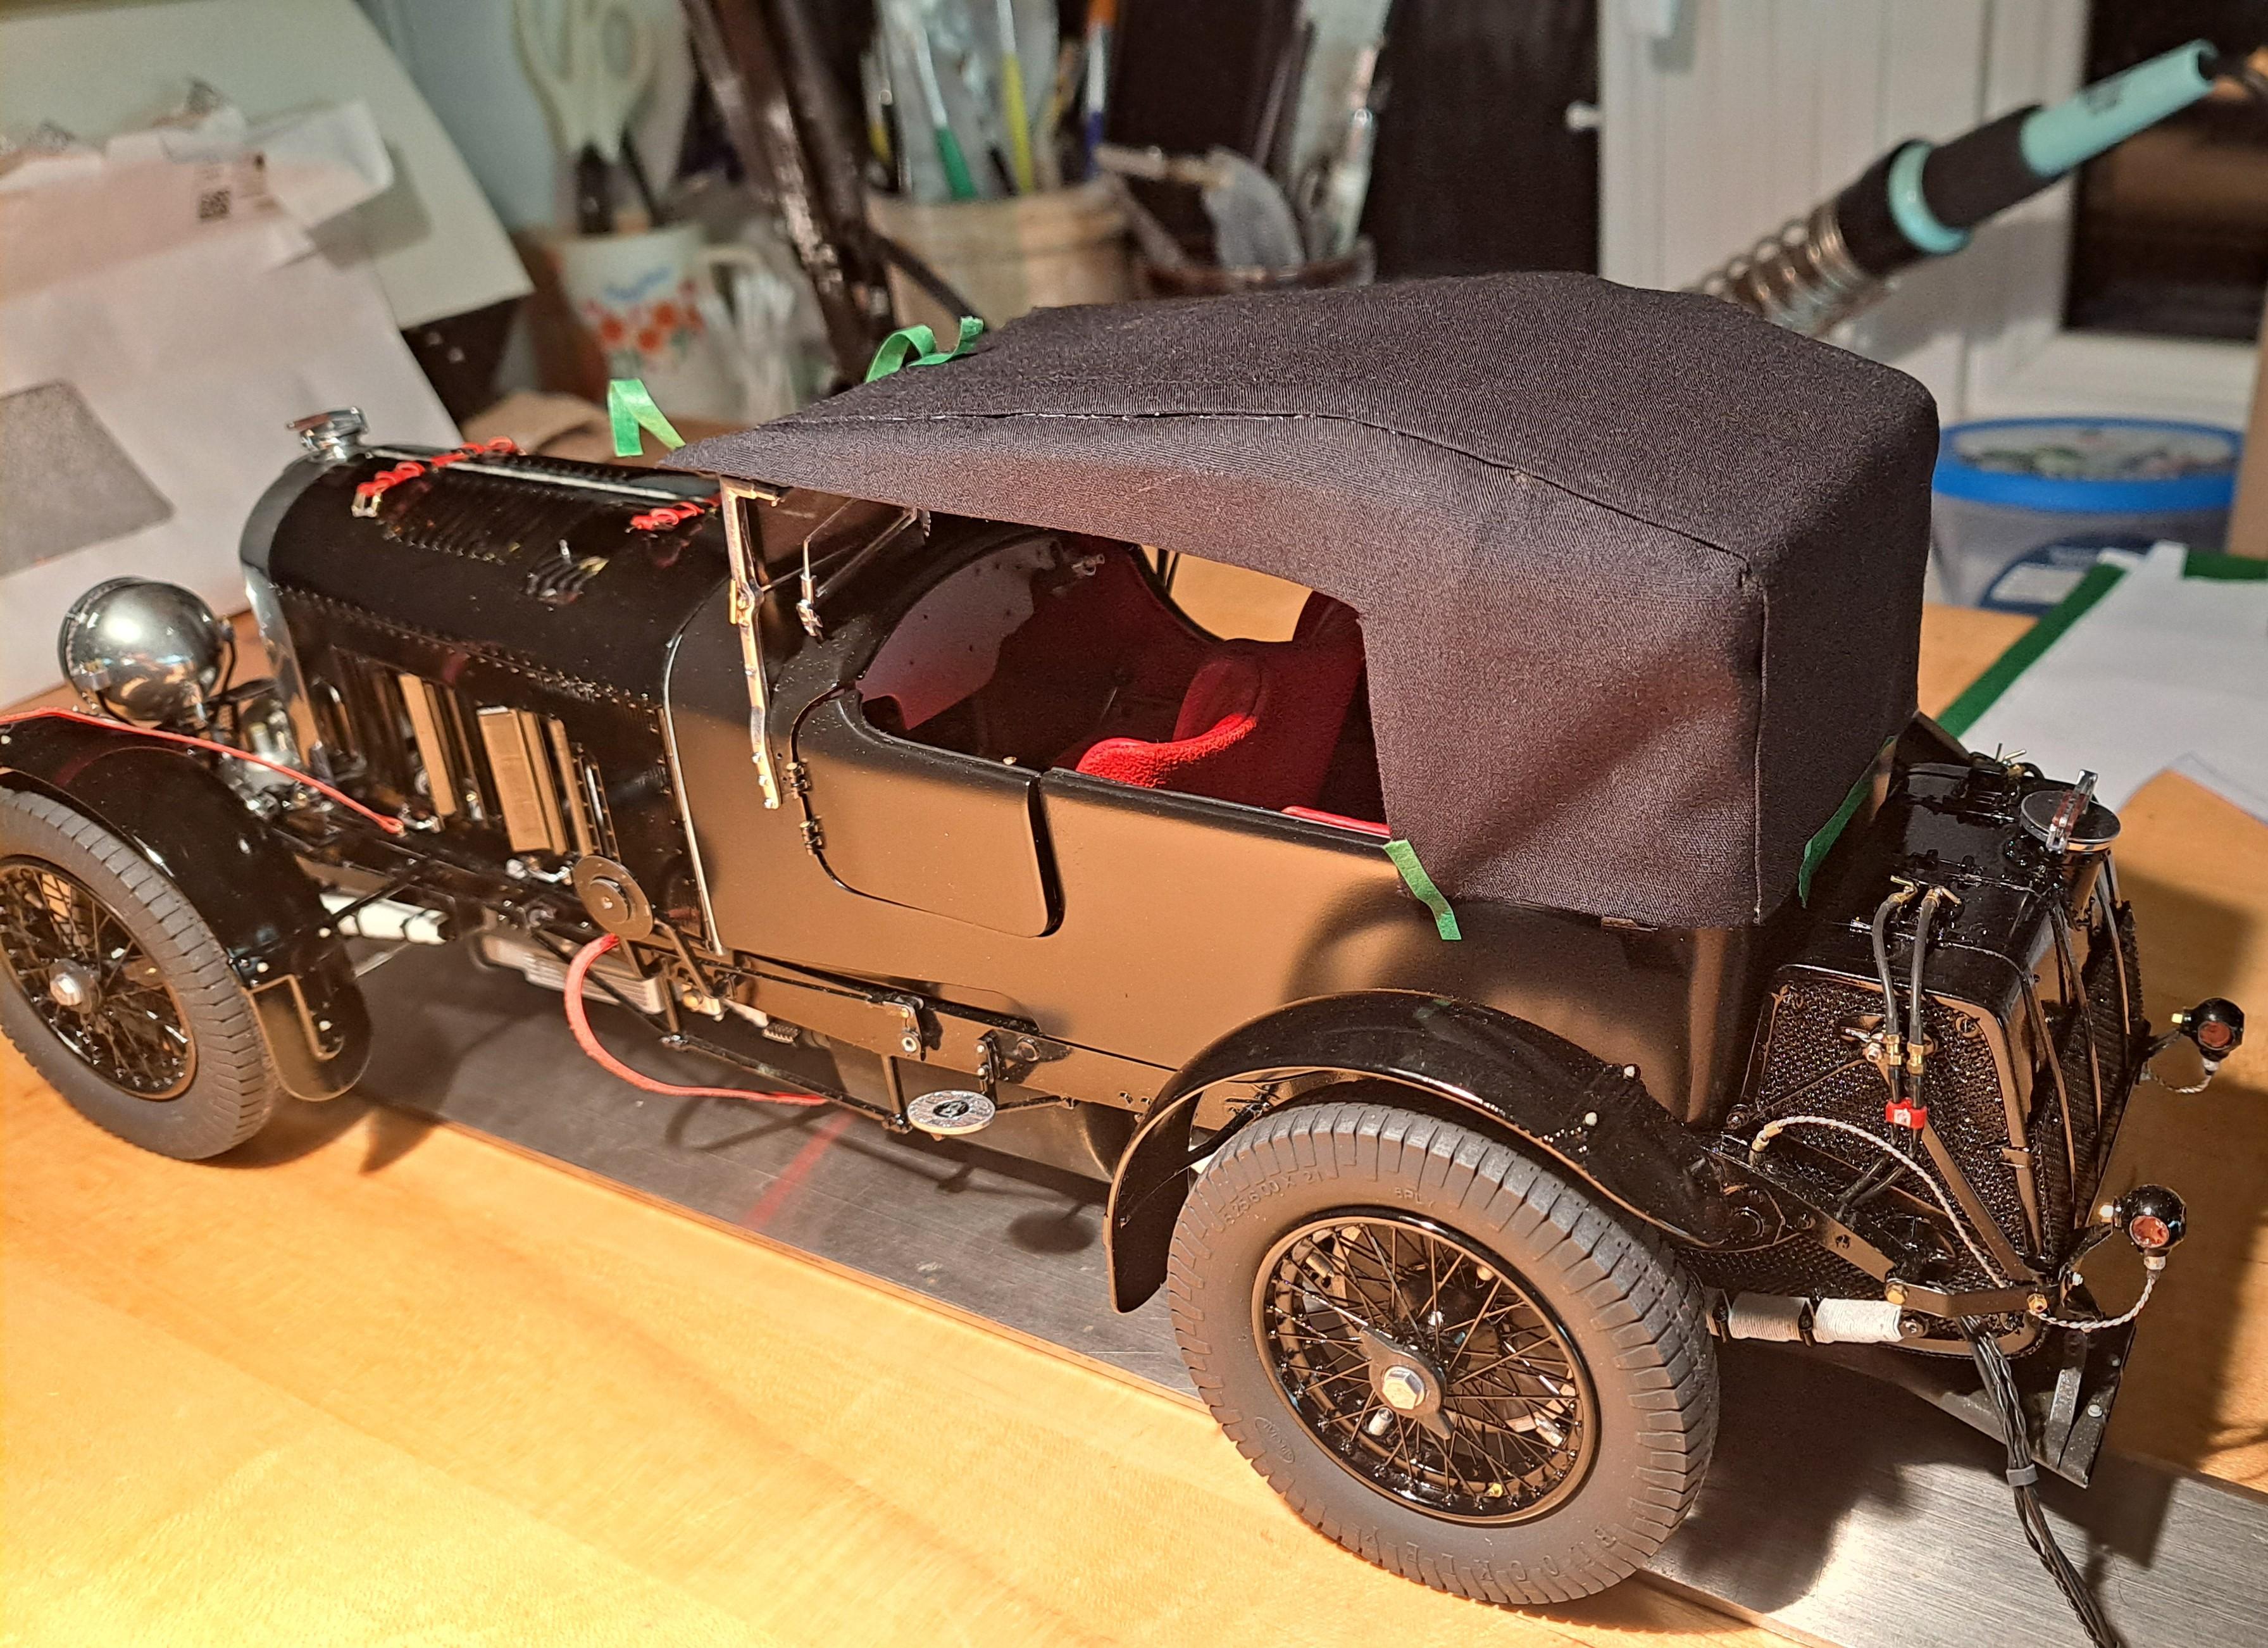
Here is the third soft top test. I think I got the shape and the assembly method. Instead of making it out of one piece like the previous tops, I made this one out of 3. One center piece front to back and 2 side pieces. I think it give the top a cleaner line and the joint are more like the real top. I'm still not 100% satisfied with the glue up. I'm using a glue called Speed-sew, it really works well but any overspills are just about none removable. So I might redo it one last time being more careful of the glue application. I still need to figure out how l will attach it to the front bar and to the rear. Top up And down
-
I made a few more soft top test and with each try, I'm getting closer to something I like. It's a game of compromise, I want a material that looks good but it also needs to be thin and soft enough to fold down. This first test was made using a black coton canvas that looks really good but is a bit stiff. The second test I made with a thinner and softer black polyester and coton blend. It fits better but is a bit sheer. The toughest part is to figure out the shape and where to make the seams.
-
John, not sure on both but I don't think the lobe profile is all that important for this. If I can get movement of the valve I'll consider it a victory even if they don't open or close at the correct time during the stroke. As for the sequence, John Haddock seems to have a good sequence description in his doc. I didn't take the time to verify it yet but I'm confident it is ok.
-
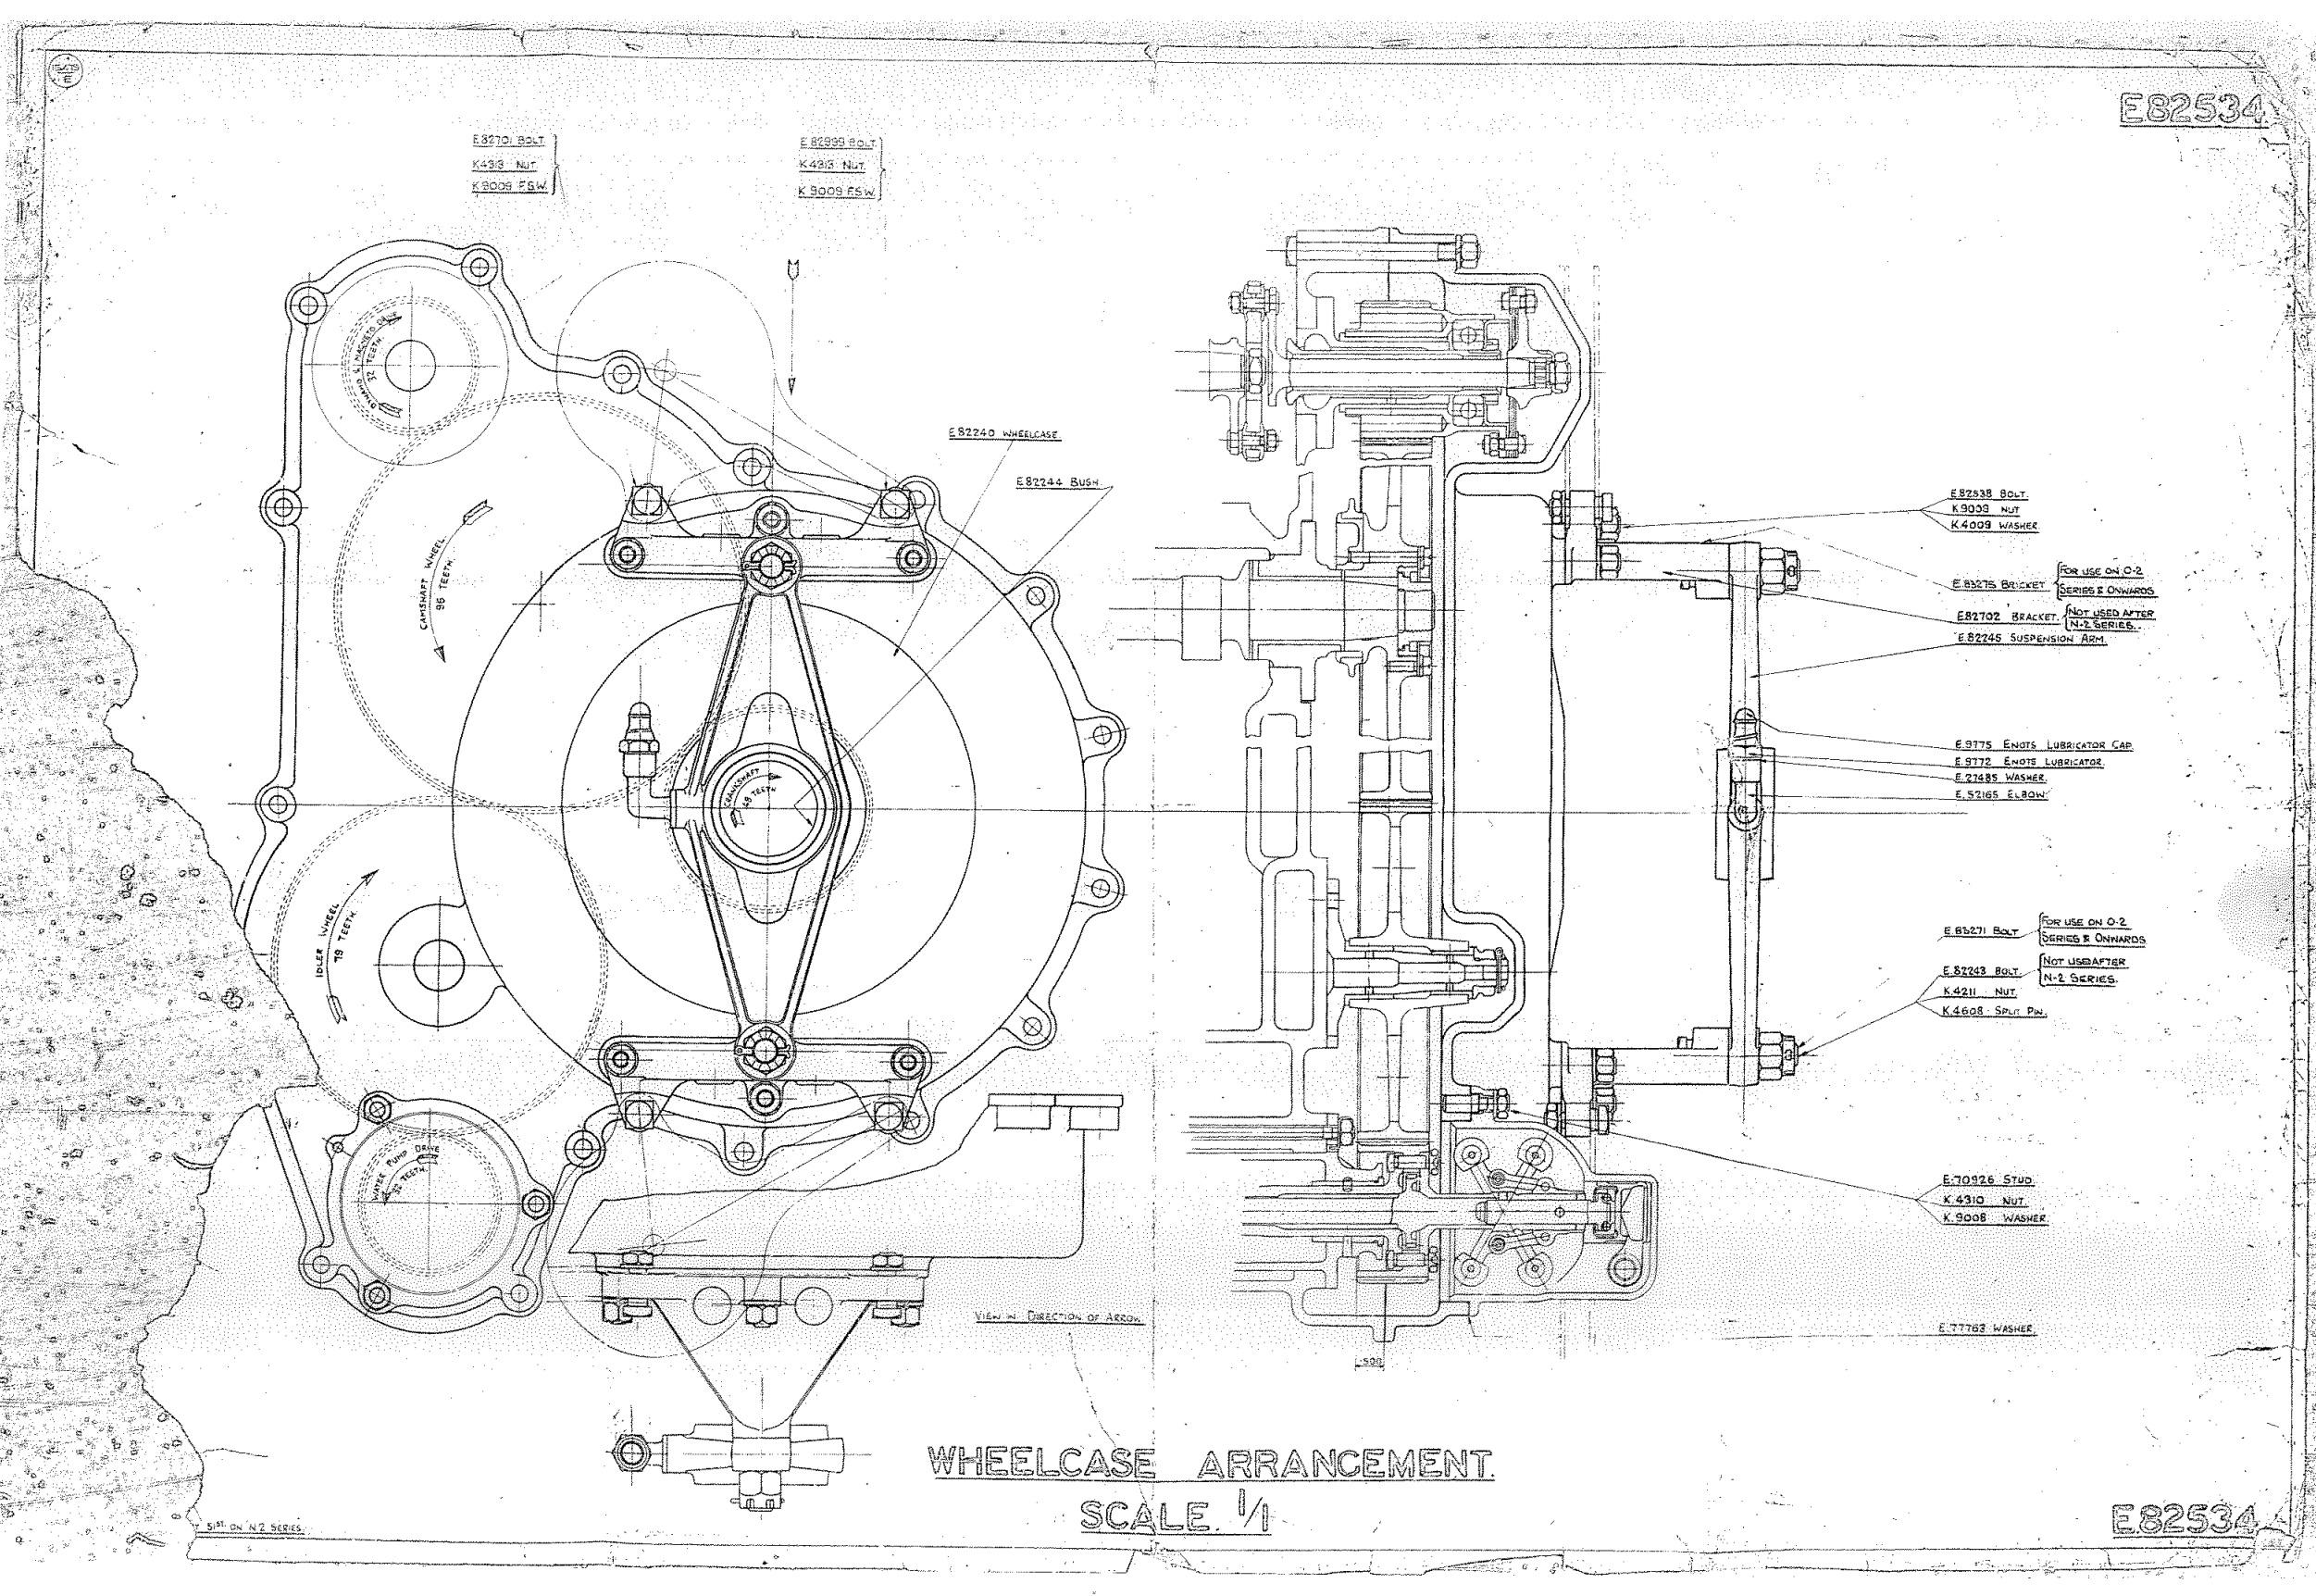
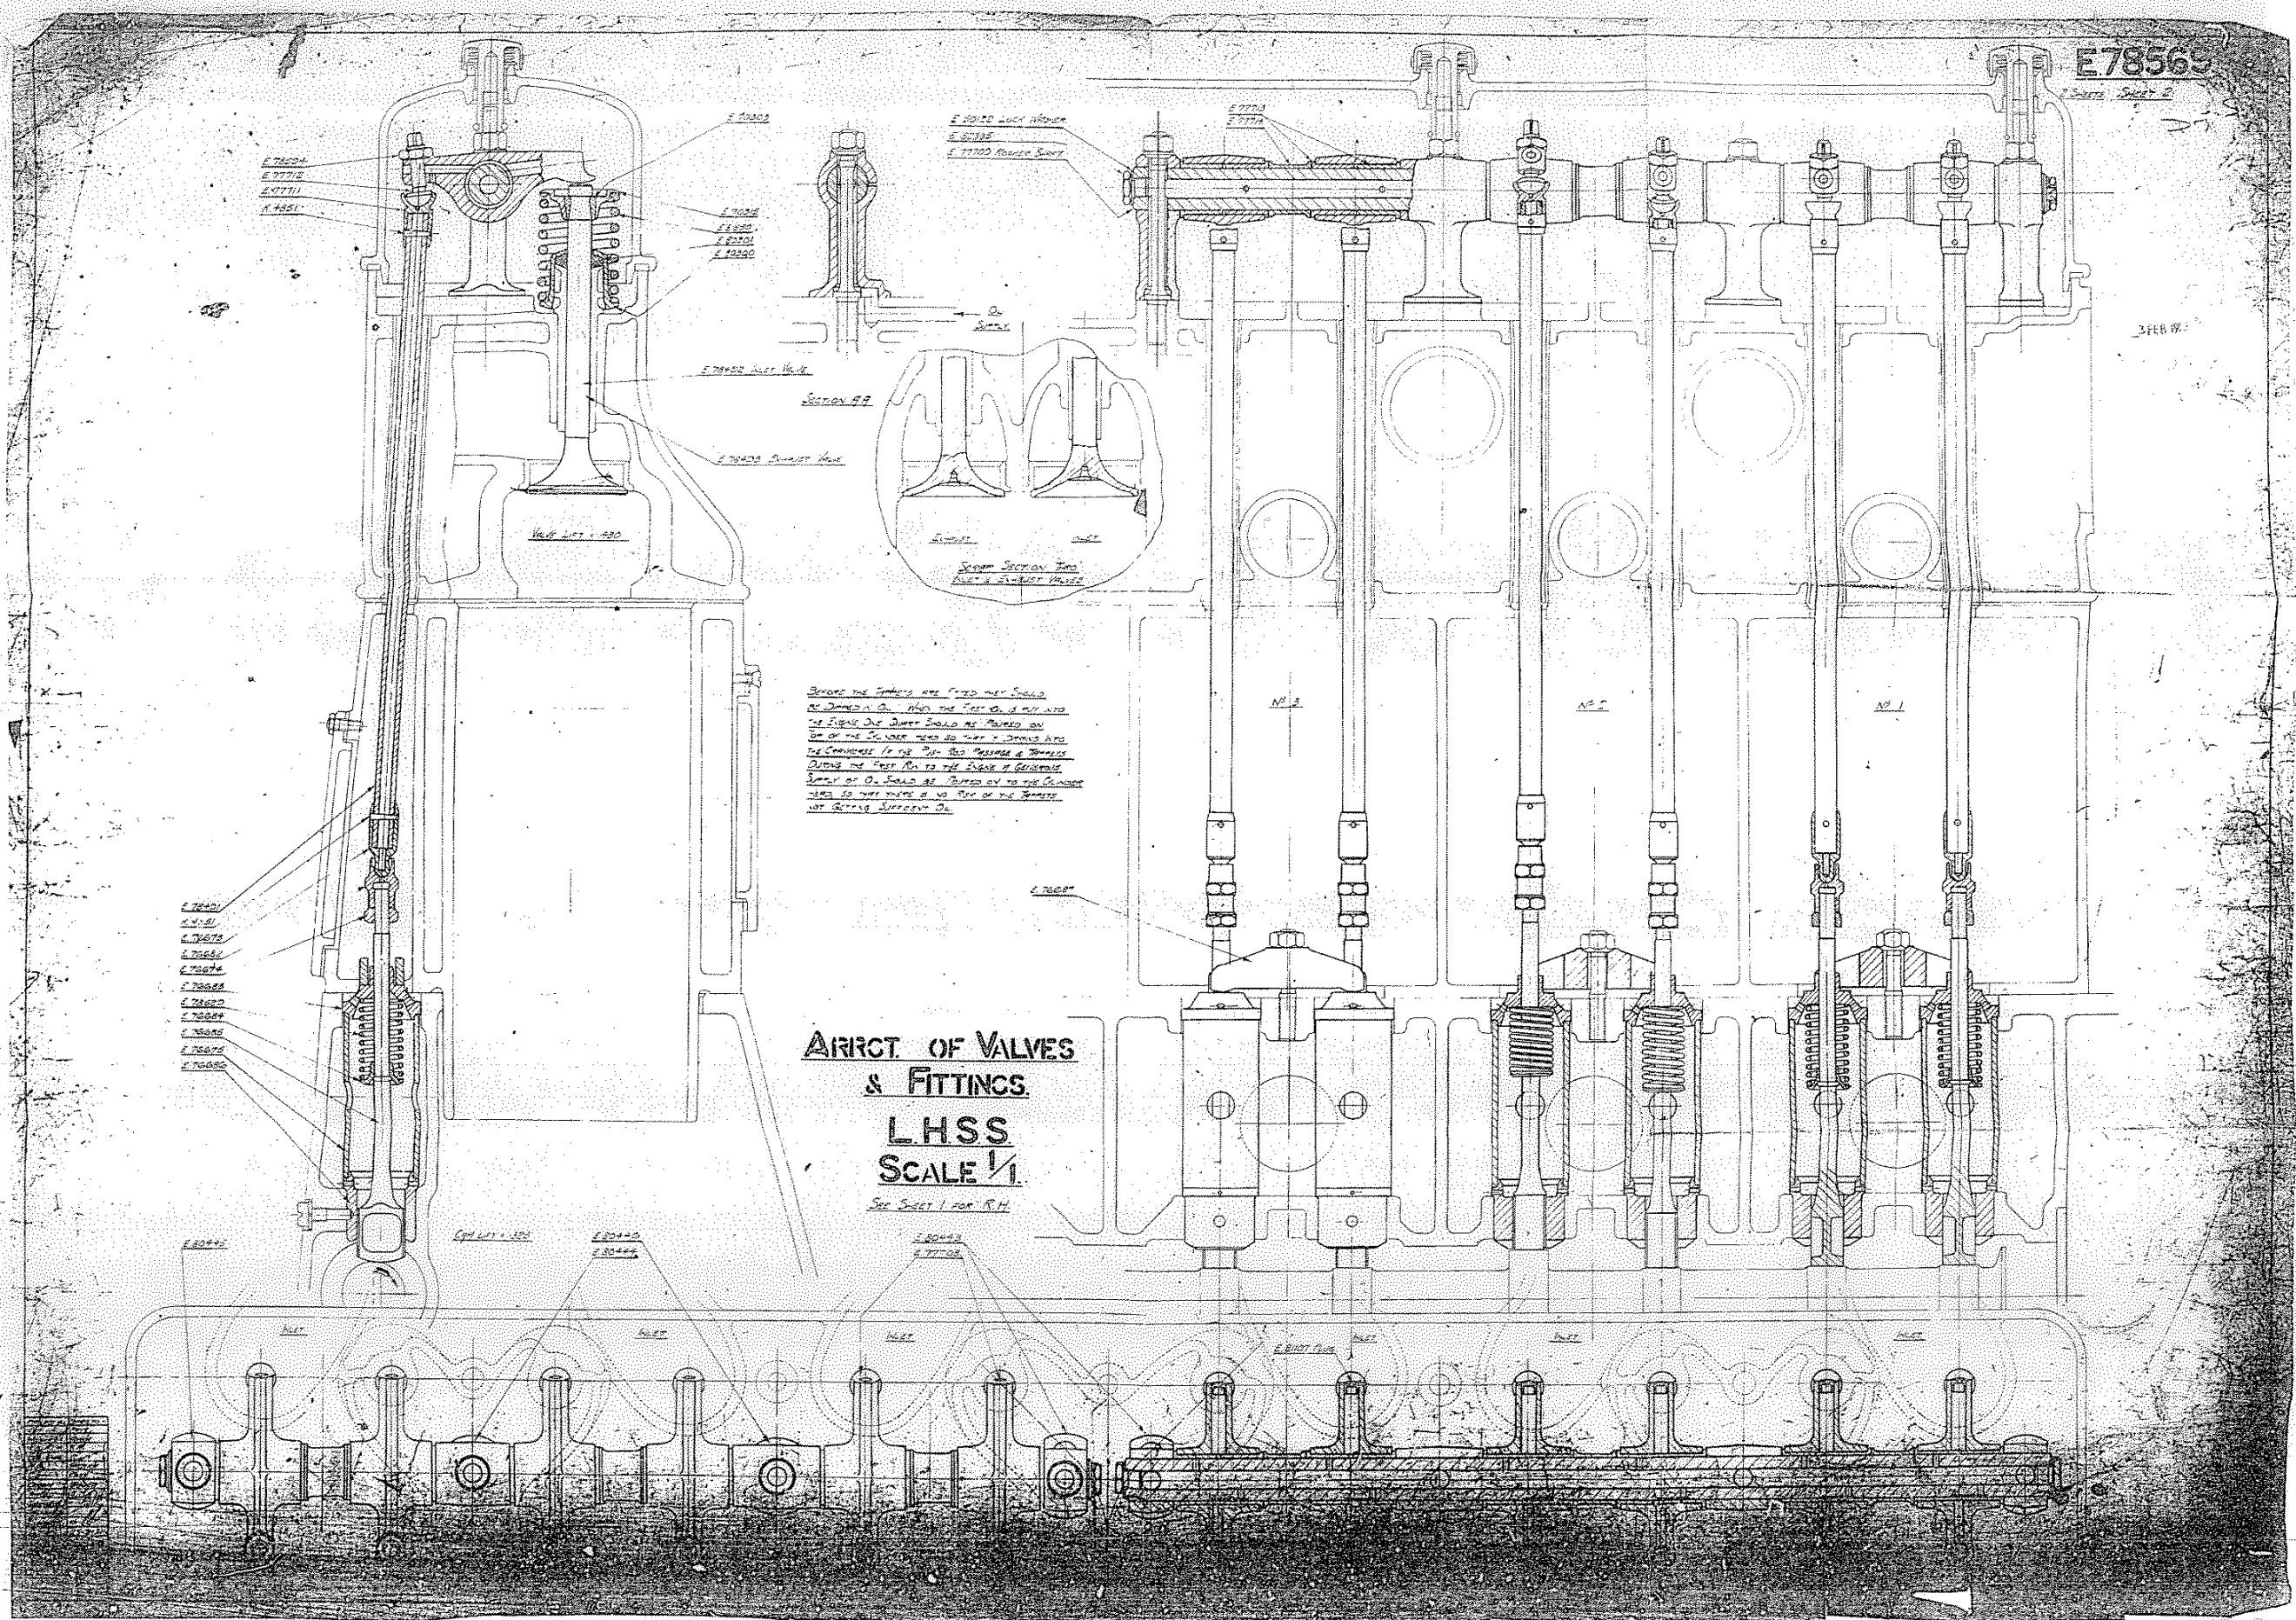
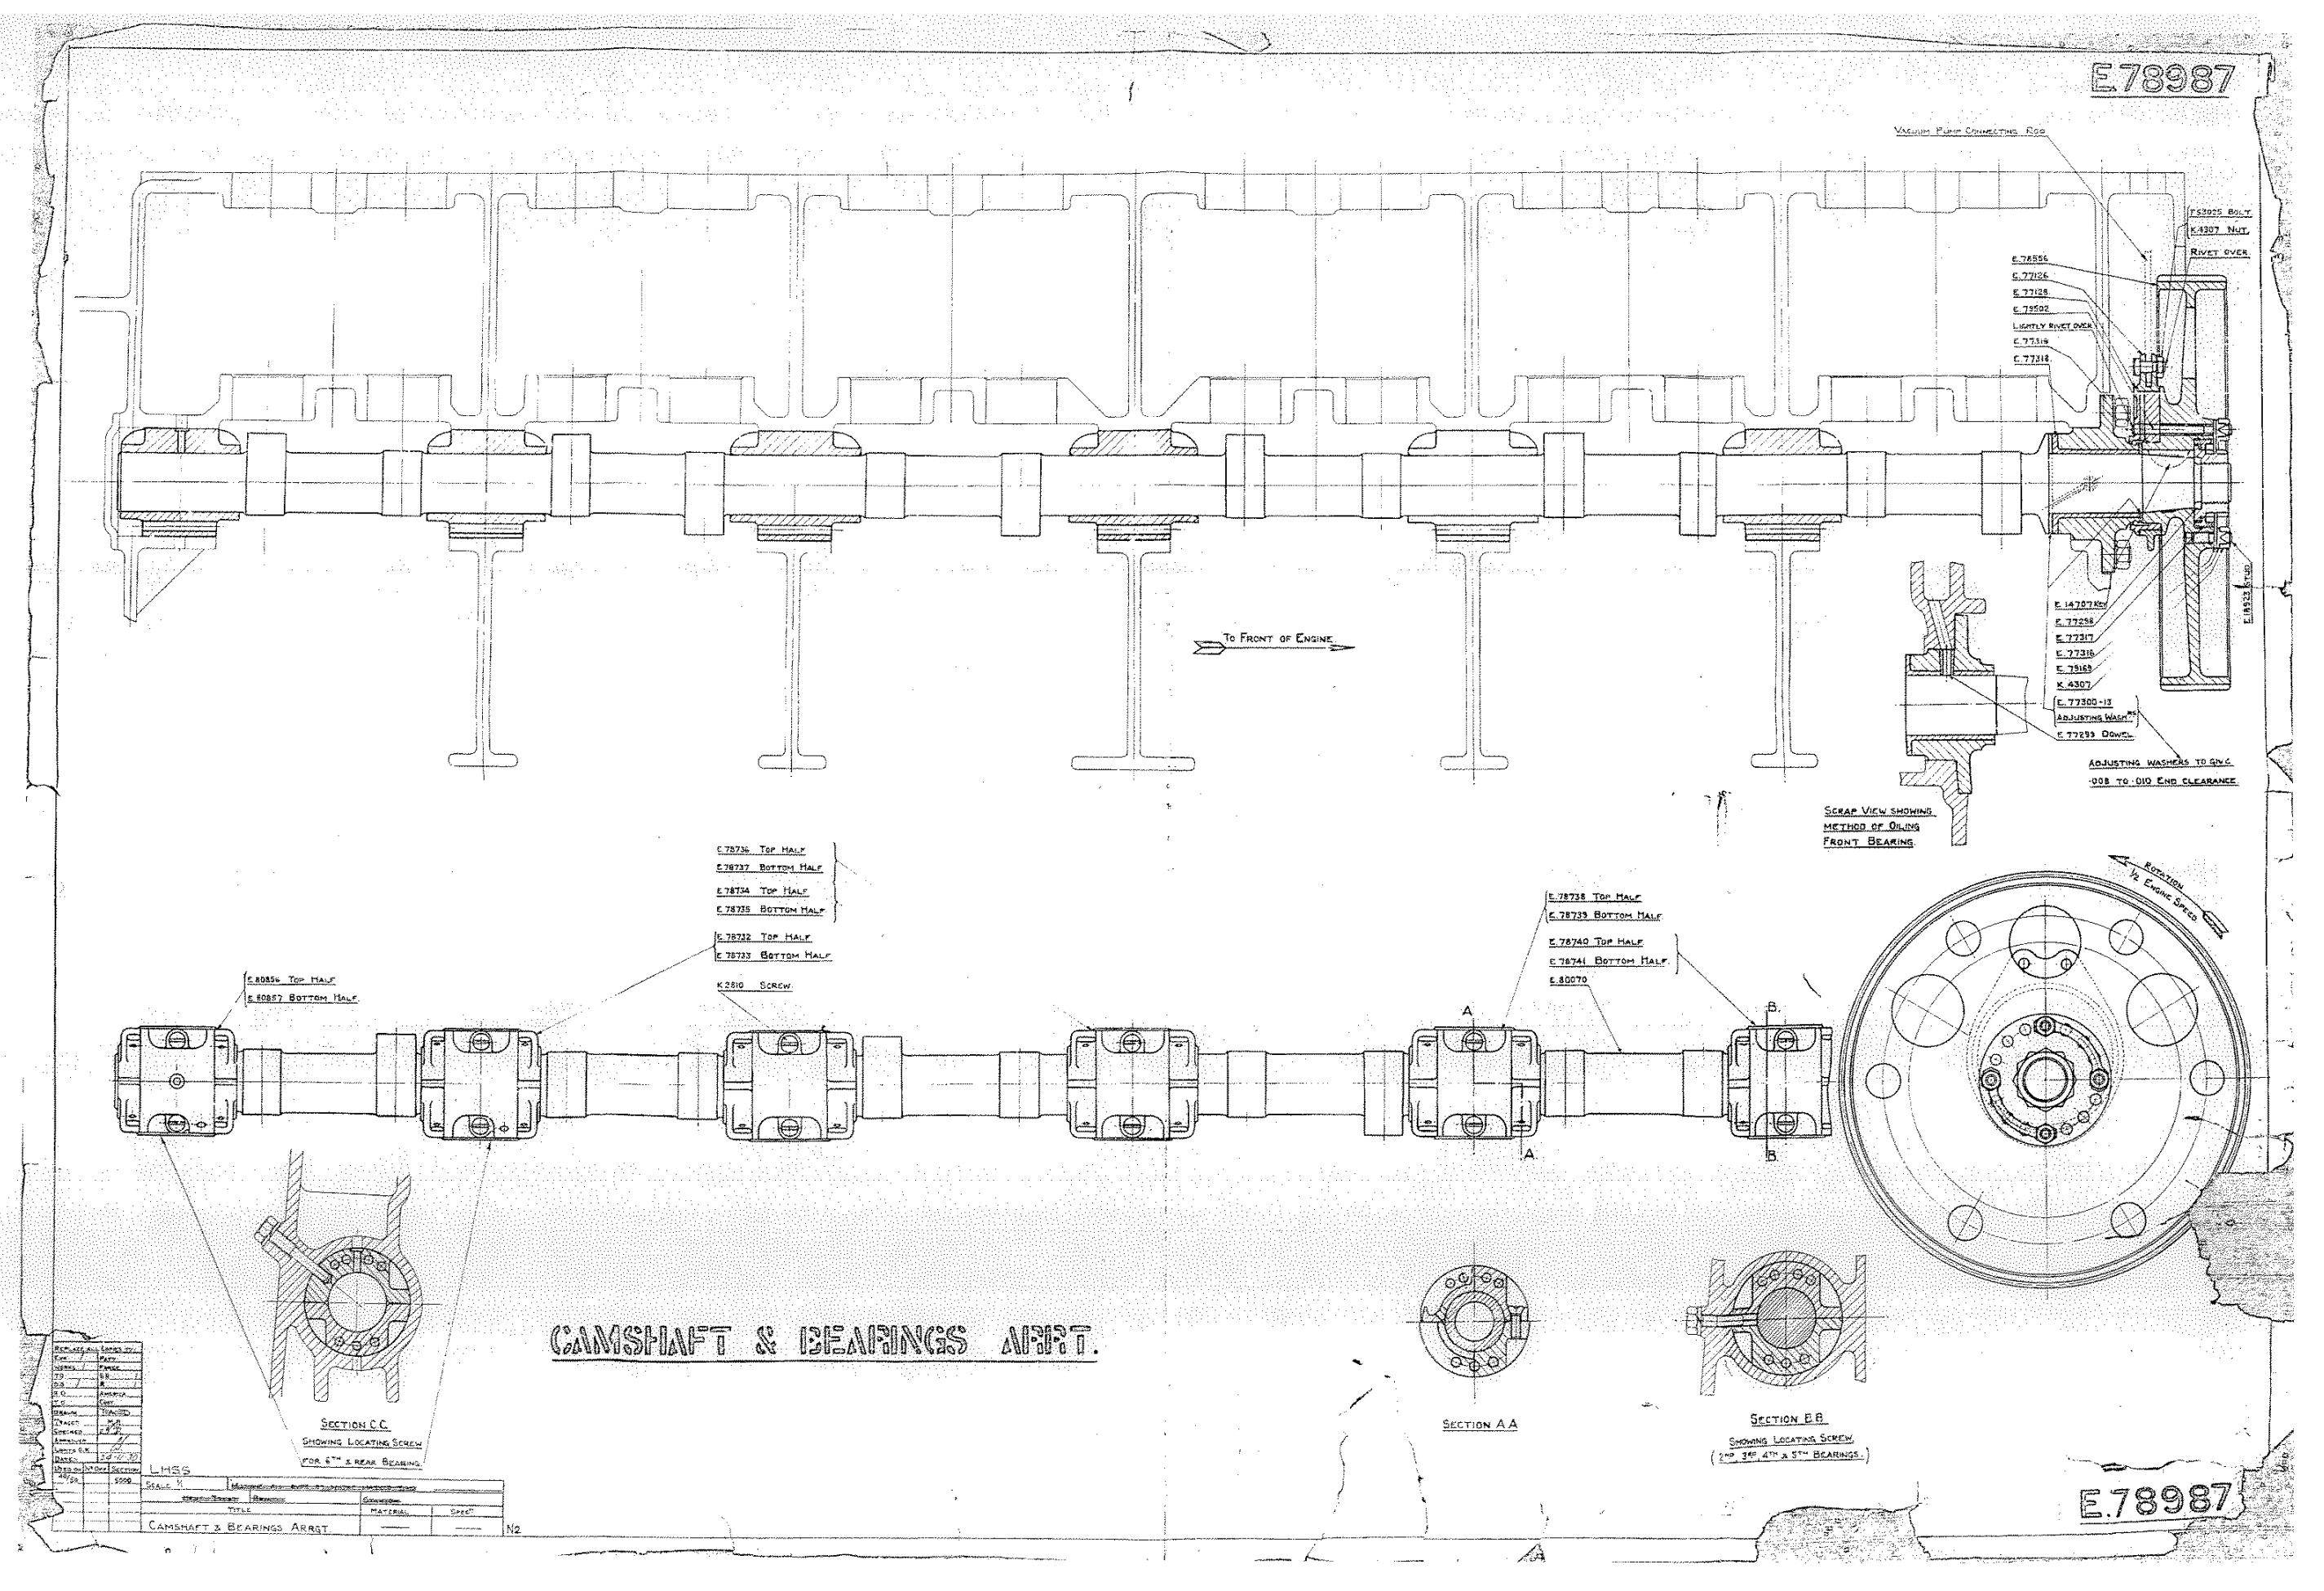
Thank you for the tip Bugatti fan, I contacted John Haddock and he gave me some very nice original drawings of the Phantom engine. I now have all I need to make a working valve train... eventually. I just need to finish the bentley first.
-
I added a few more details, the front side markers, both windshields and both doors. Side marker Windshield and passanger's side door driver's side door now this leaves me with 2 final things to do. The dashboard, which is a project in it's self and that I will do last. And the soft top. Which I will do next. As the name implies, the soft top is soft, so made out of a fabric. To be able to conform to the top frame, It will be made of several pieces clued together. I did a first test with a center piece going from front to back and quickly realised that I wont be able to figure out the shapes of the different pieces directly on the model because it will involve too many manipulations and trials and this portion of the model is too fragile. So I took the 3d model of the soft top I did, scaled it to 98% to compensate for the material thickness and 3d printed it. This gives me a "form" on which I can try as many different shapes as I want without fear of breaking anything. Here is the test I did And here is the printed top that will serve as a form
-
I'm not sure but I do believe that this is a first for the 1/12 scale bentley blower. 20240515_124155.mp4
-
The fronts seats are done and i'm very happy with the result. I've also installed the windscreen. My seats next to the kit's In the car Windscreen up And down
-
I upholstered the rear seat complete with a bunch of springs underneath. I have no idea if this is how a 1930's seat would have been made and have used a lot of 'modelers leeway' but it was still fun to do. I also modified the rear seat back cushion by making it thicker, my first try was too thin. next I upholstered the front passanger seat. I'm very pleased with lower seat, with the ajustement rail and ajustement lever. Not so pleased with the seat's back. It's ok but I think I could do better. I've reprinted thinner back parts and will retry.
-
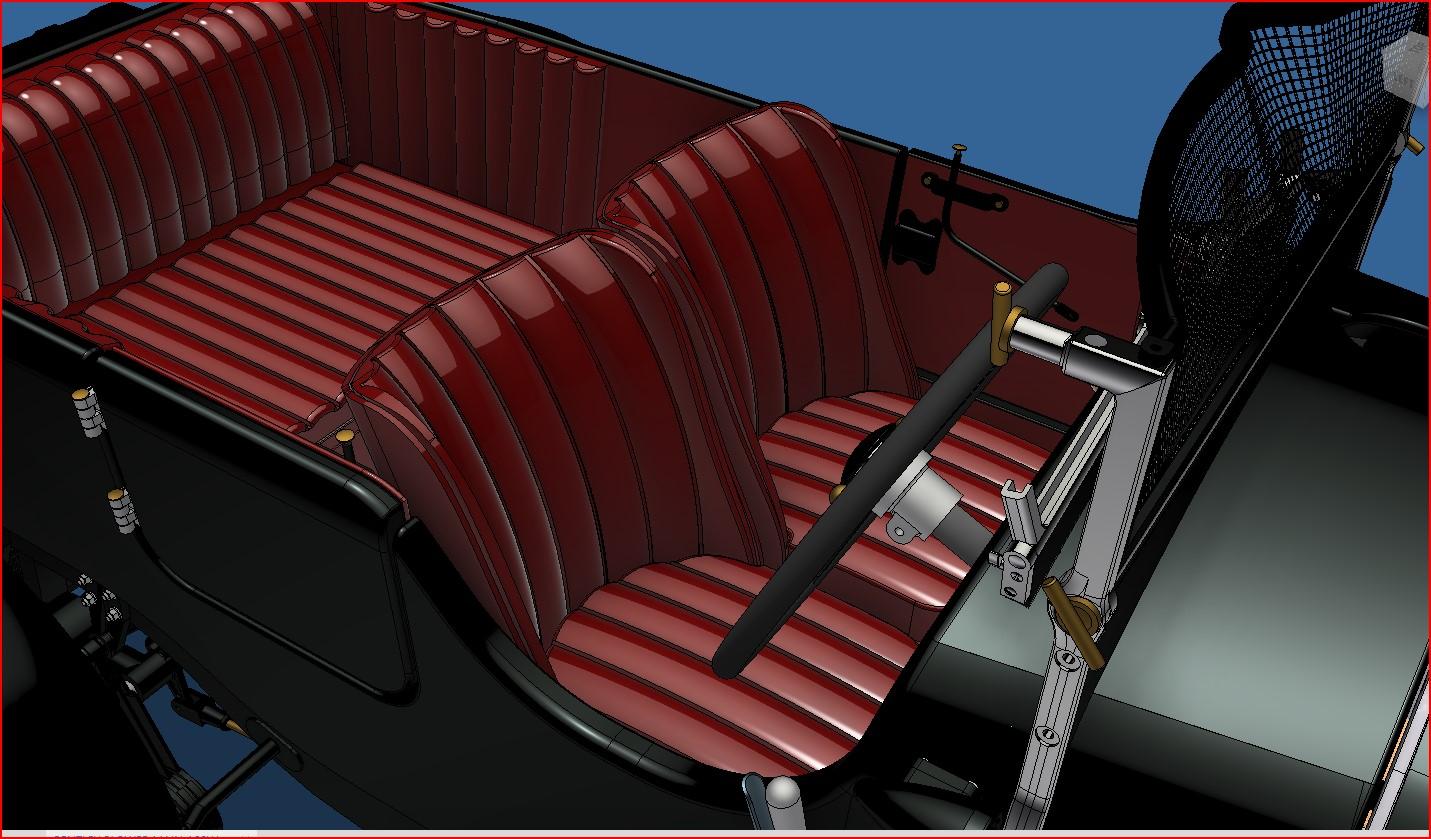
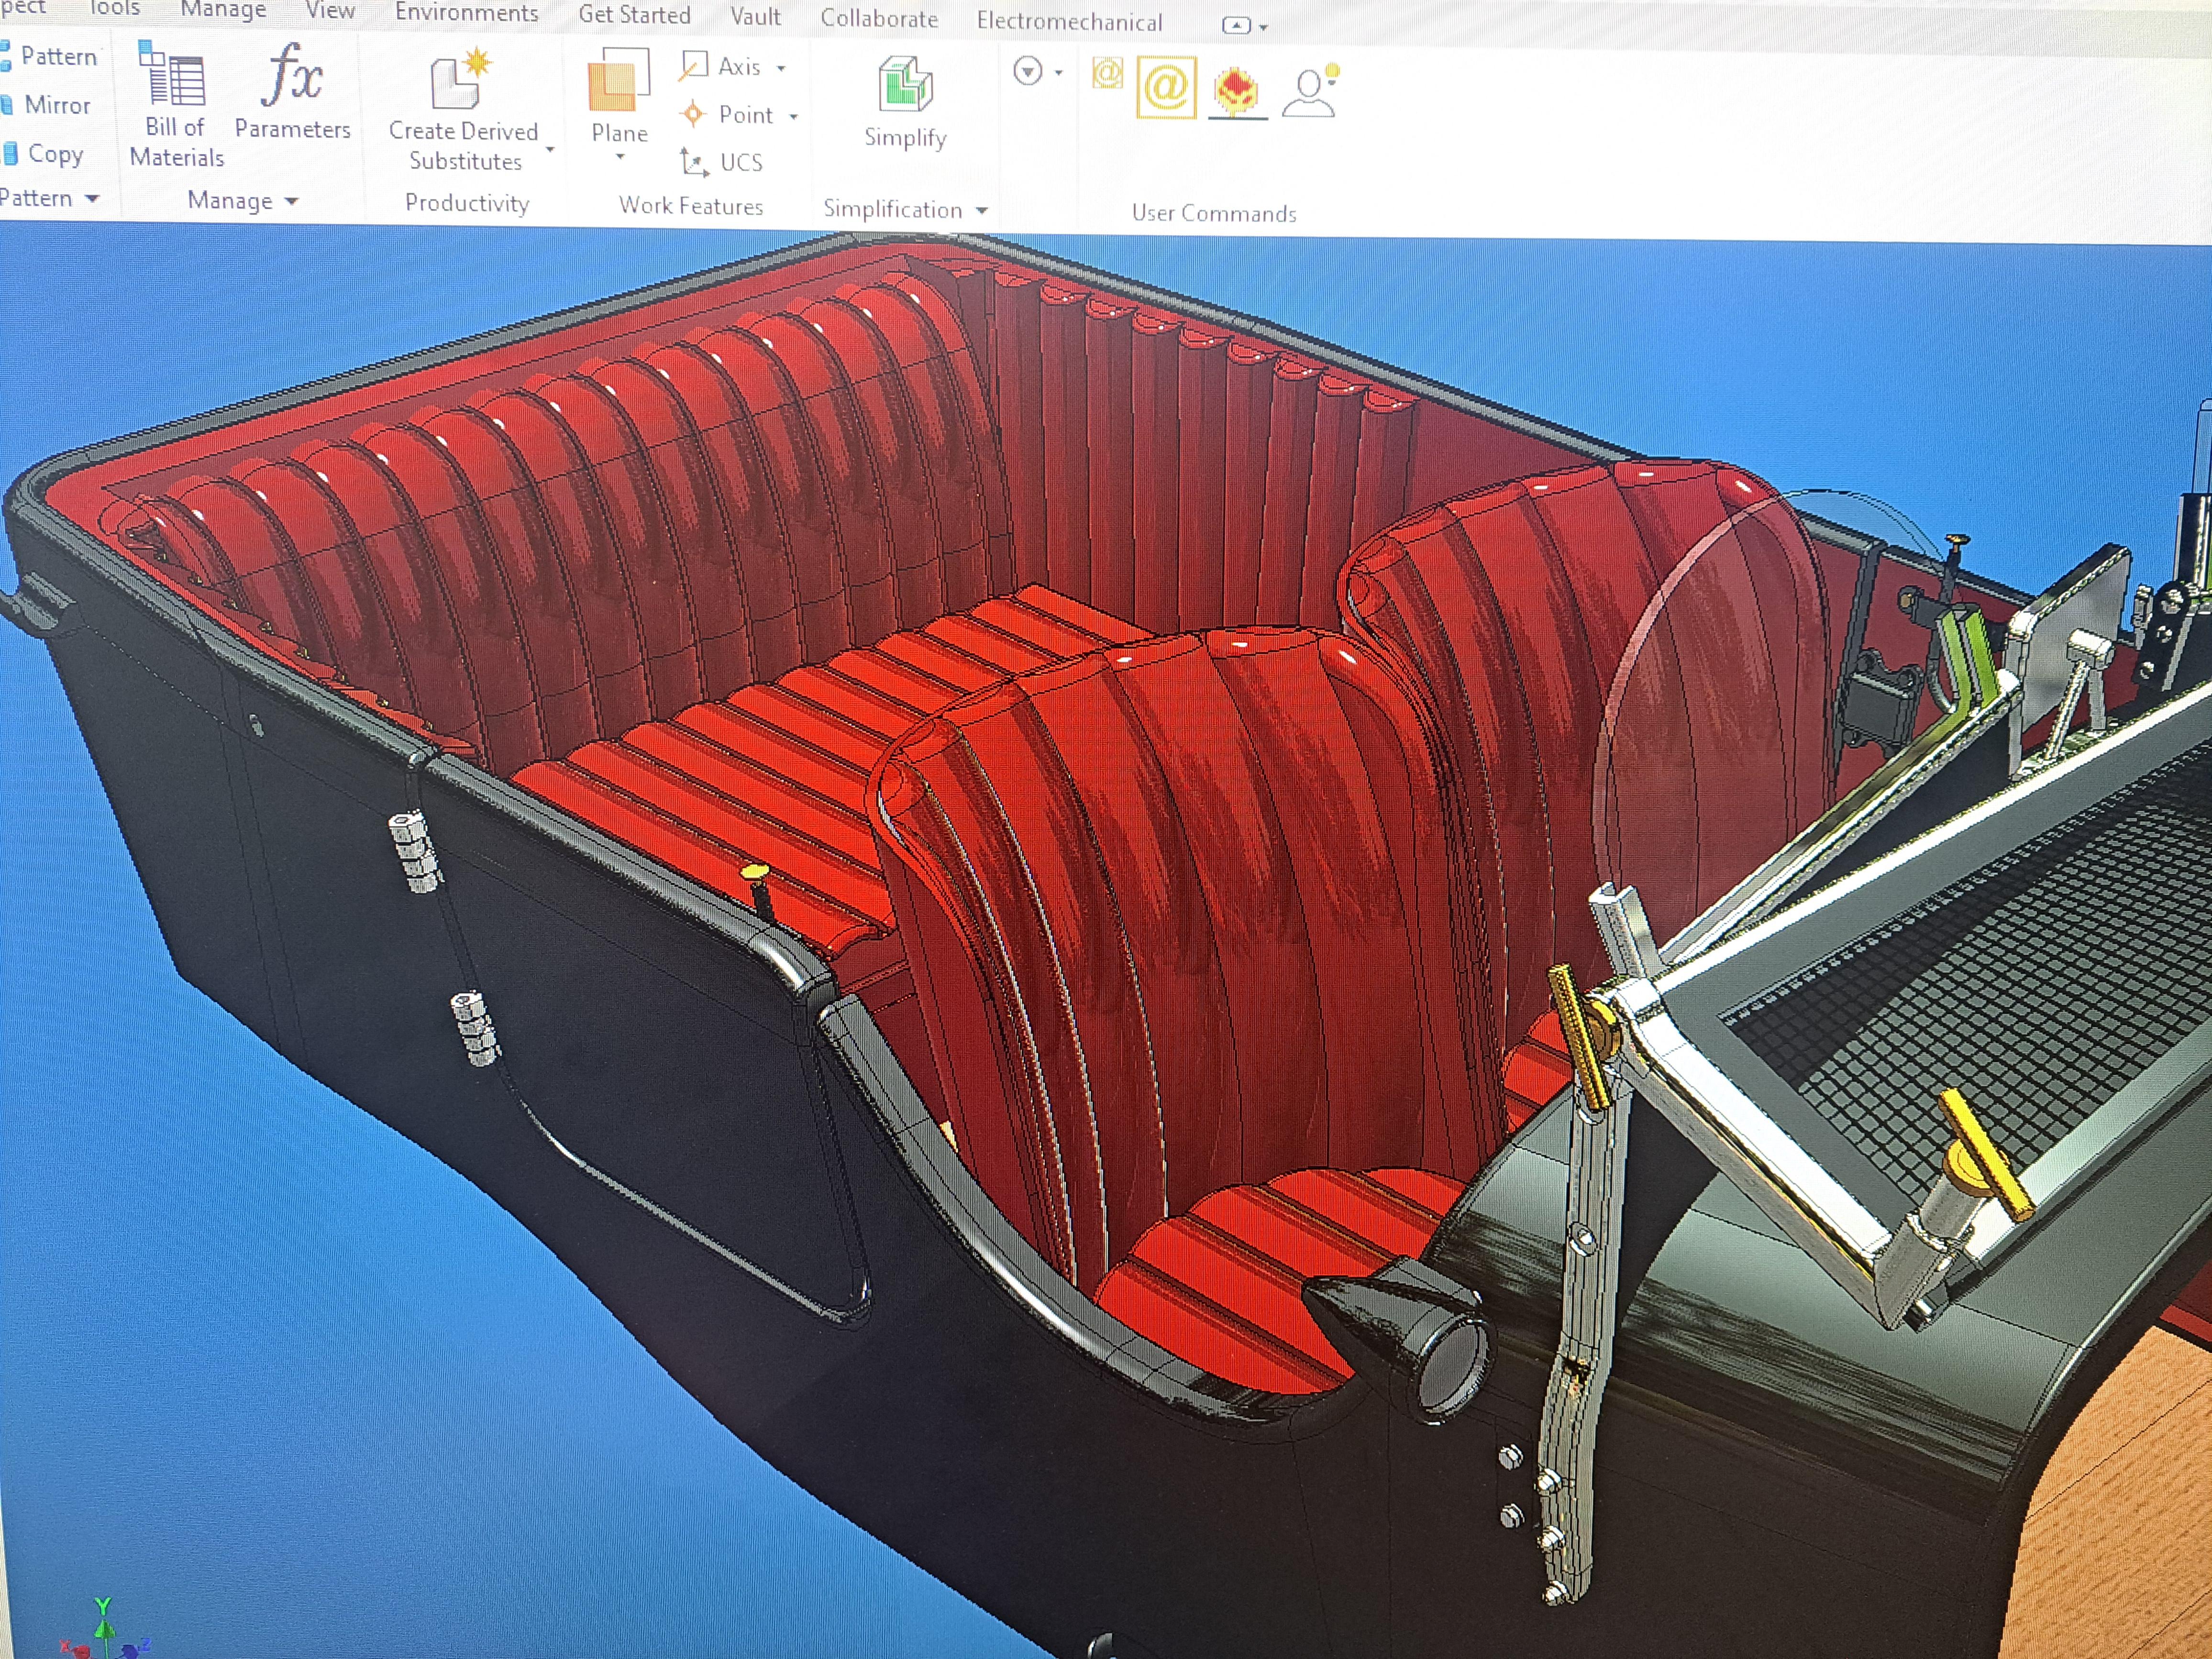
I have... again... modified the shape and curvature of the front seats. The 3d model doesn't show the leather texture nor the piping but I think that once coverded with the leather and piped, they will look pretty close to the real ones. The 3d model The ref car
-
Althought I hâte to admit it oldrevellfan, you're right. This should be better.
-
I started the front seats. The kit's seats, aside from being different from the ones on the the car, are too big so they don't fit. The kit's body was moulded with thin walls compared to the real body so airfix made the seats to fill the space, ense they don't fit in mine. So I designed and printed new seats that I will cover in leather. I printed them with an upholstered pattern more like that of the ref car. I also designed and printed the seat rails so the seats can be adjusted. My only problem is that, althought I took in account the thickness of the leather and made the seats smaller, it seems like I didn't make them small enough. They fit now but once upholstered, they won't. So I'll have the reprint smaller using a scale factor, something like 5% smaller should do. I also printed the rear seat cushion but it too is à bit oversized. Lastly, l installed the top foldable frame. Here are some pictures. The kit's seats Kit's seats In my body The different components of my seat The seat rail My seat (right) next to the kit's (The the cut-out on the front left corner is to clear the shifter, only on the driver side) And in the car i The real seats the top frame real top frame
-
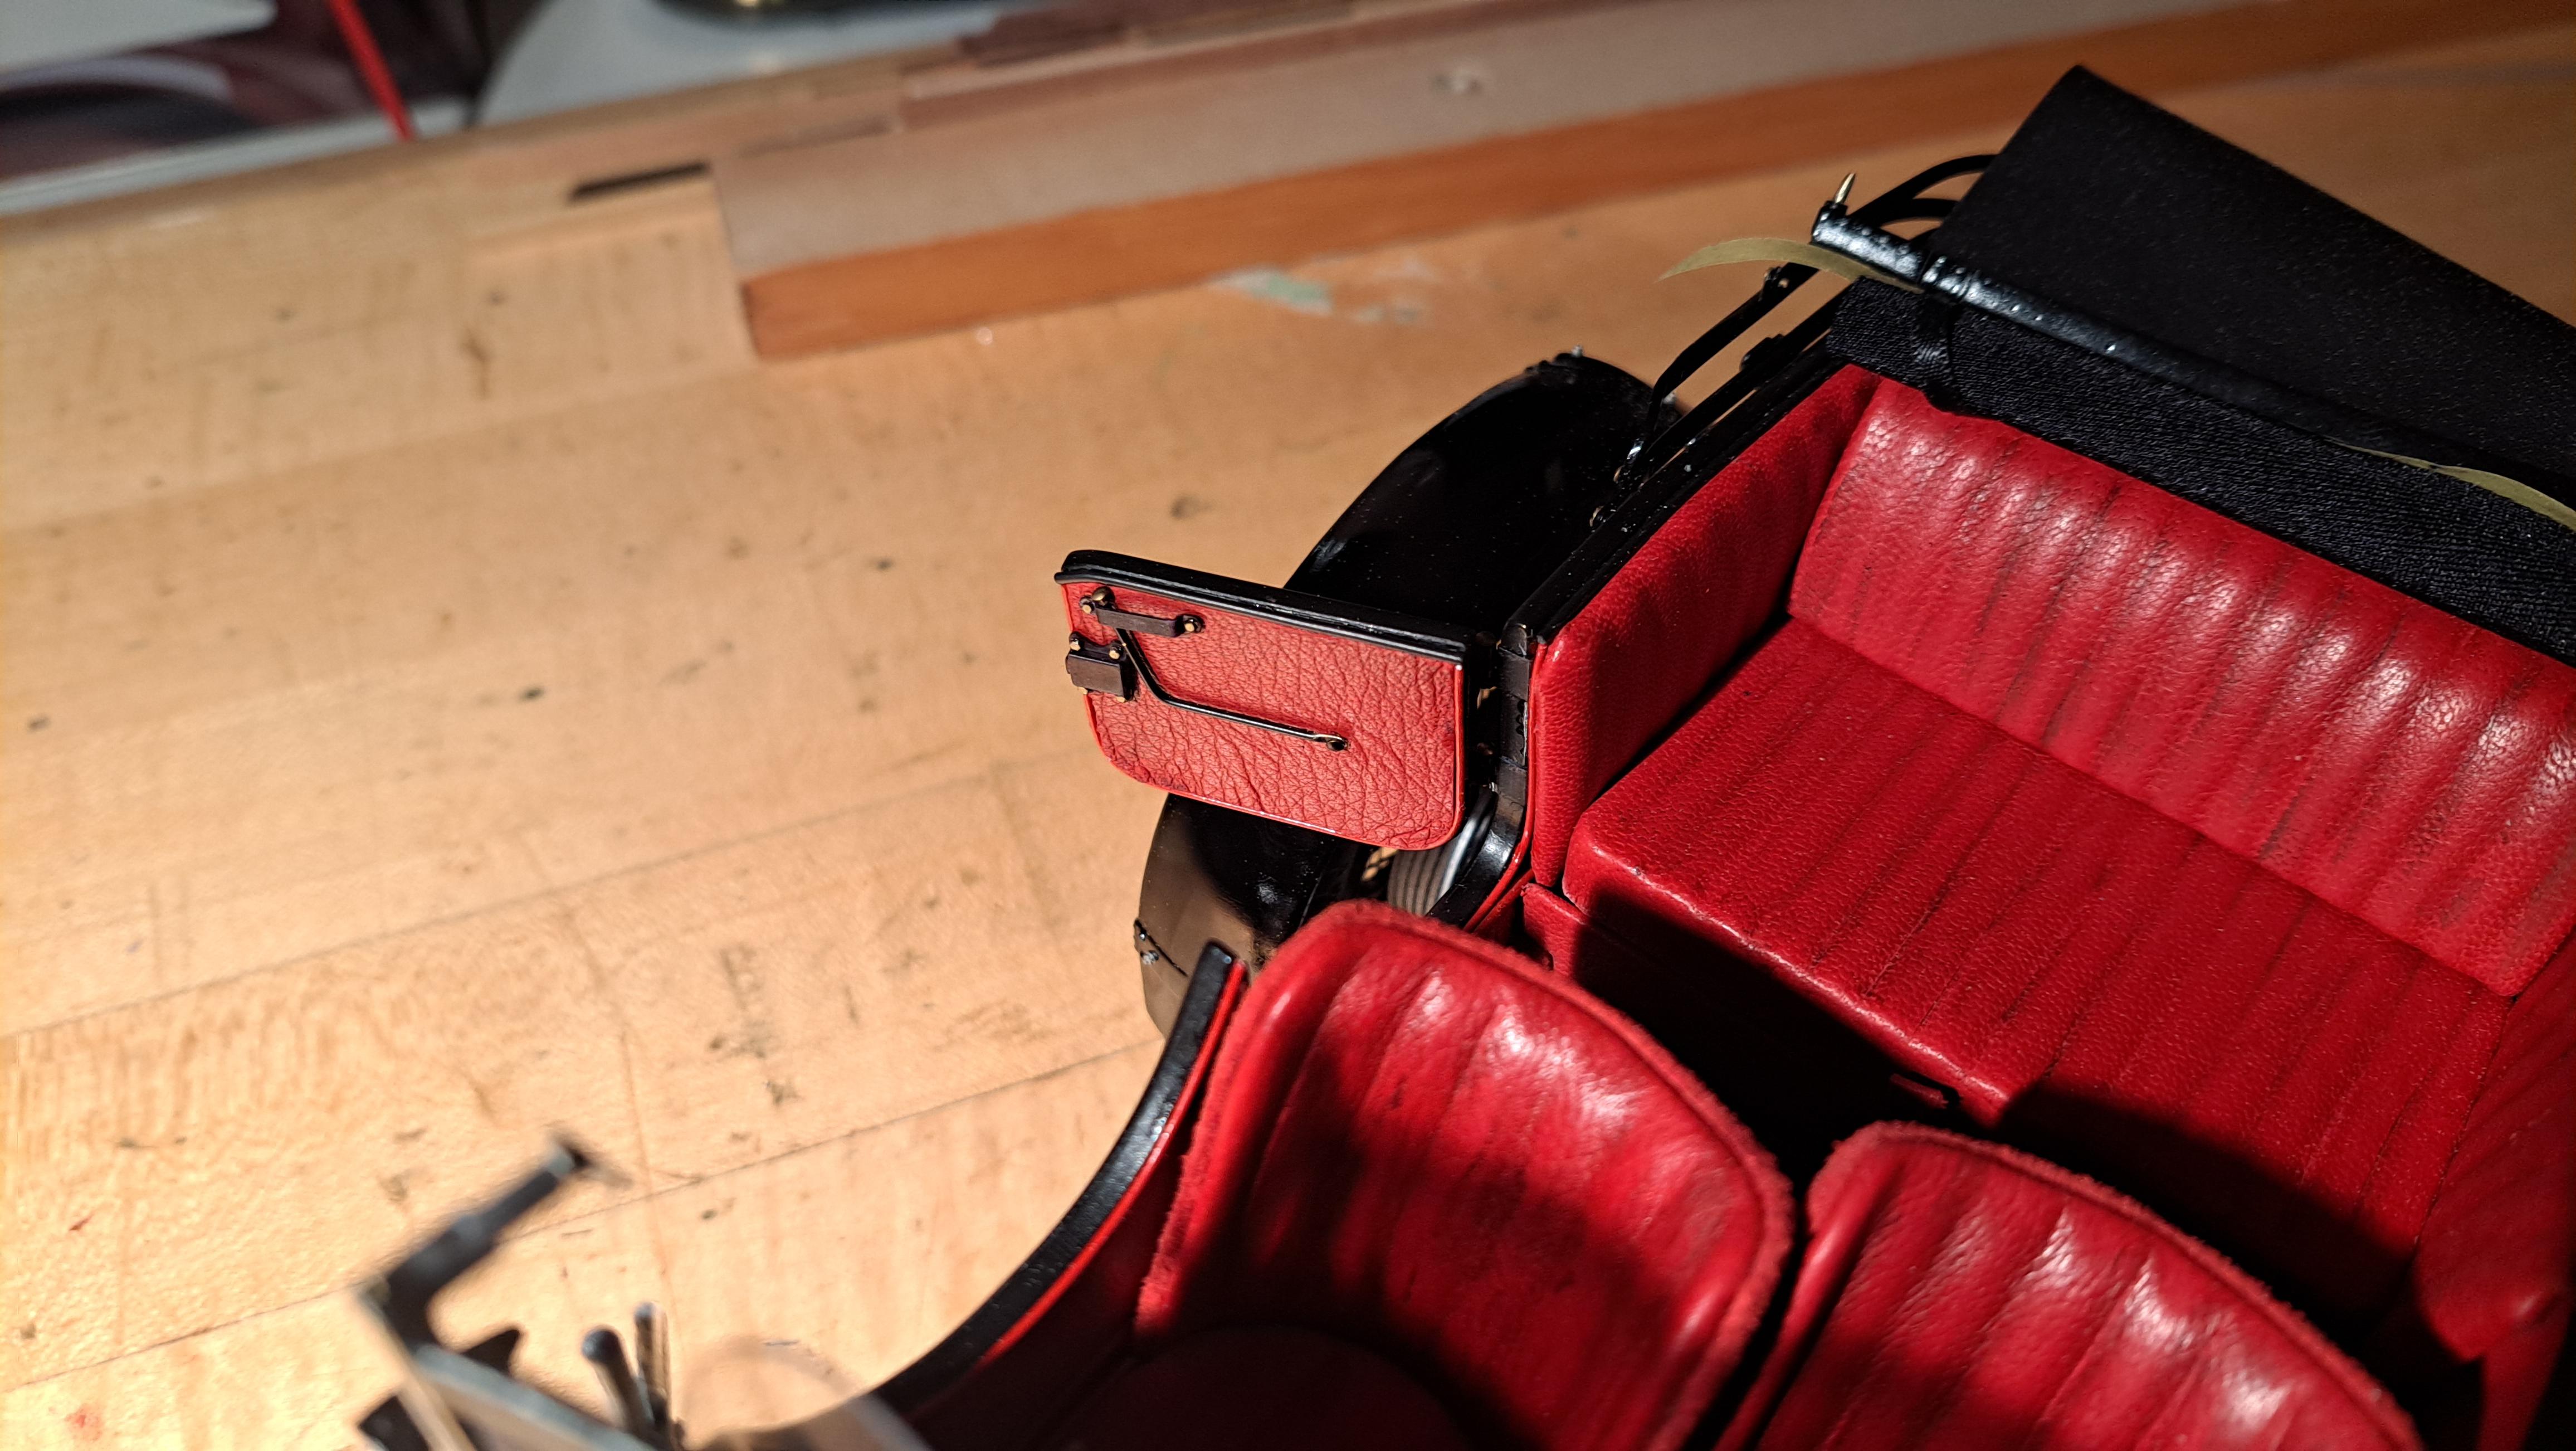
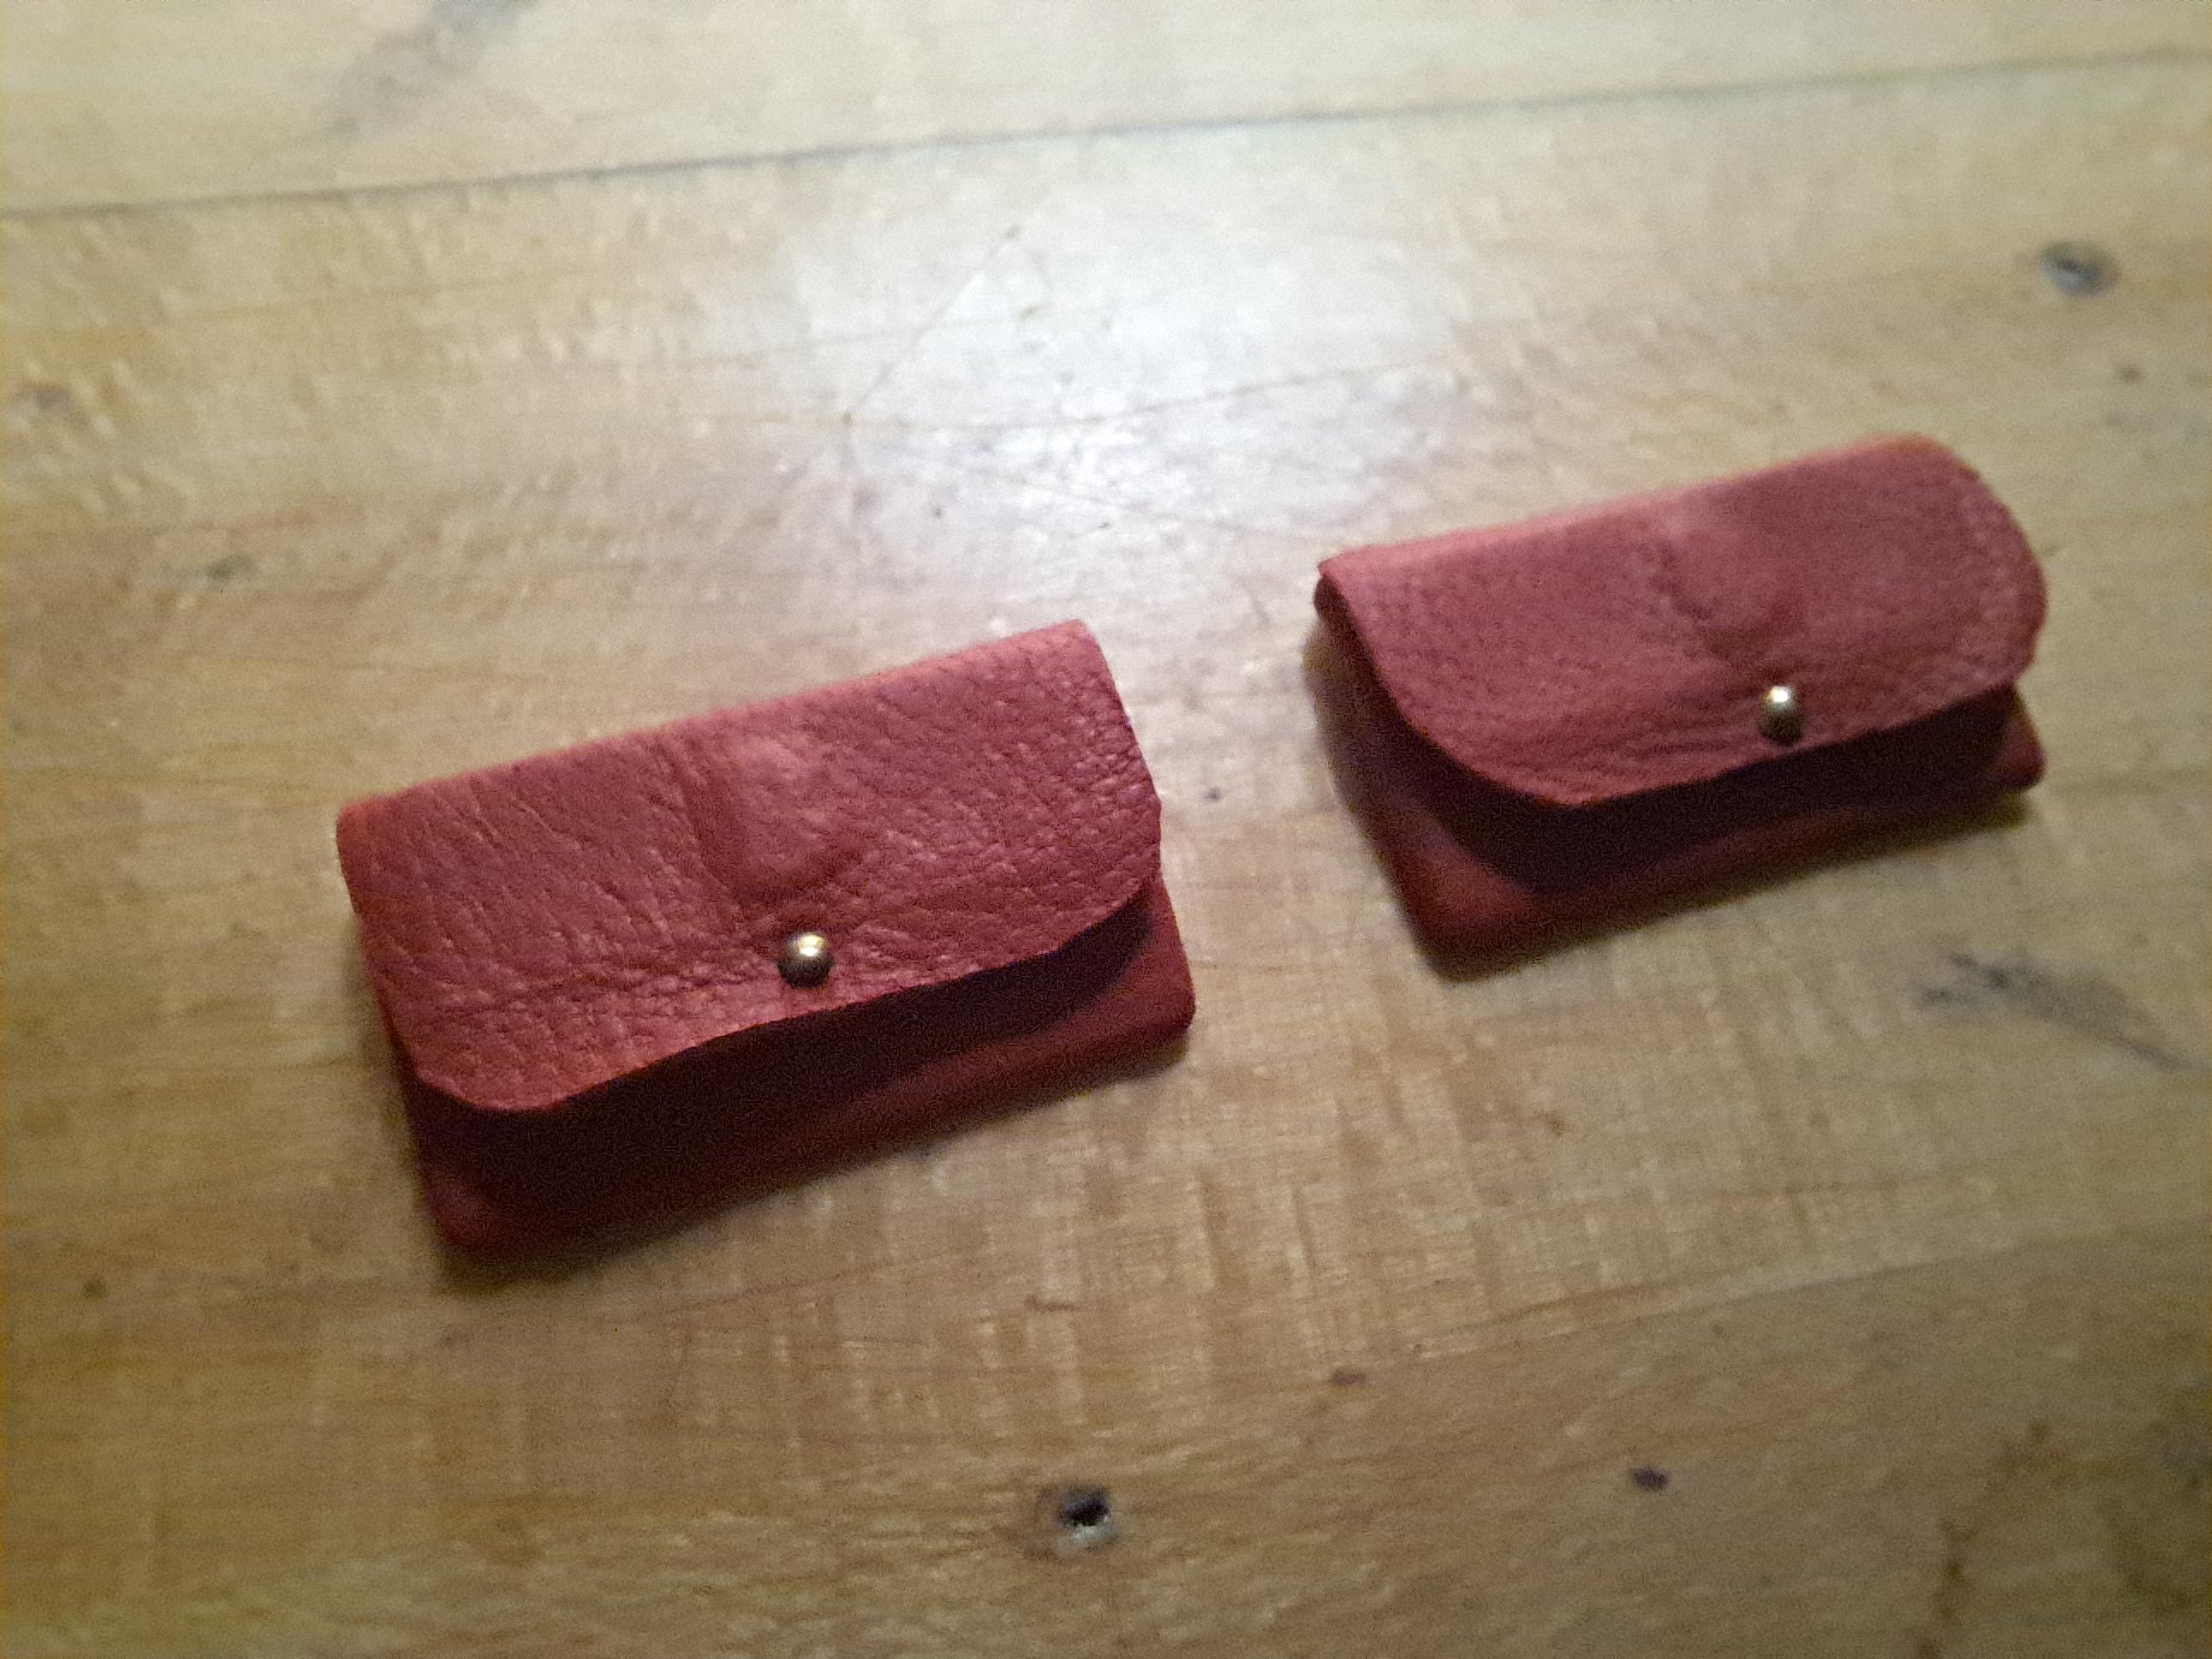
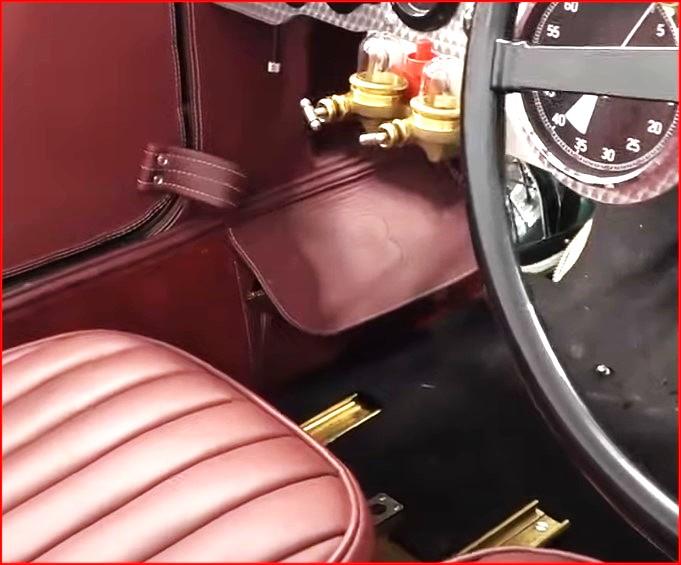
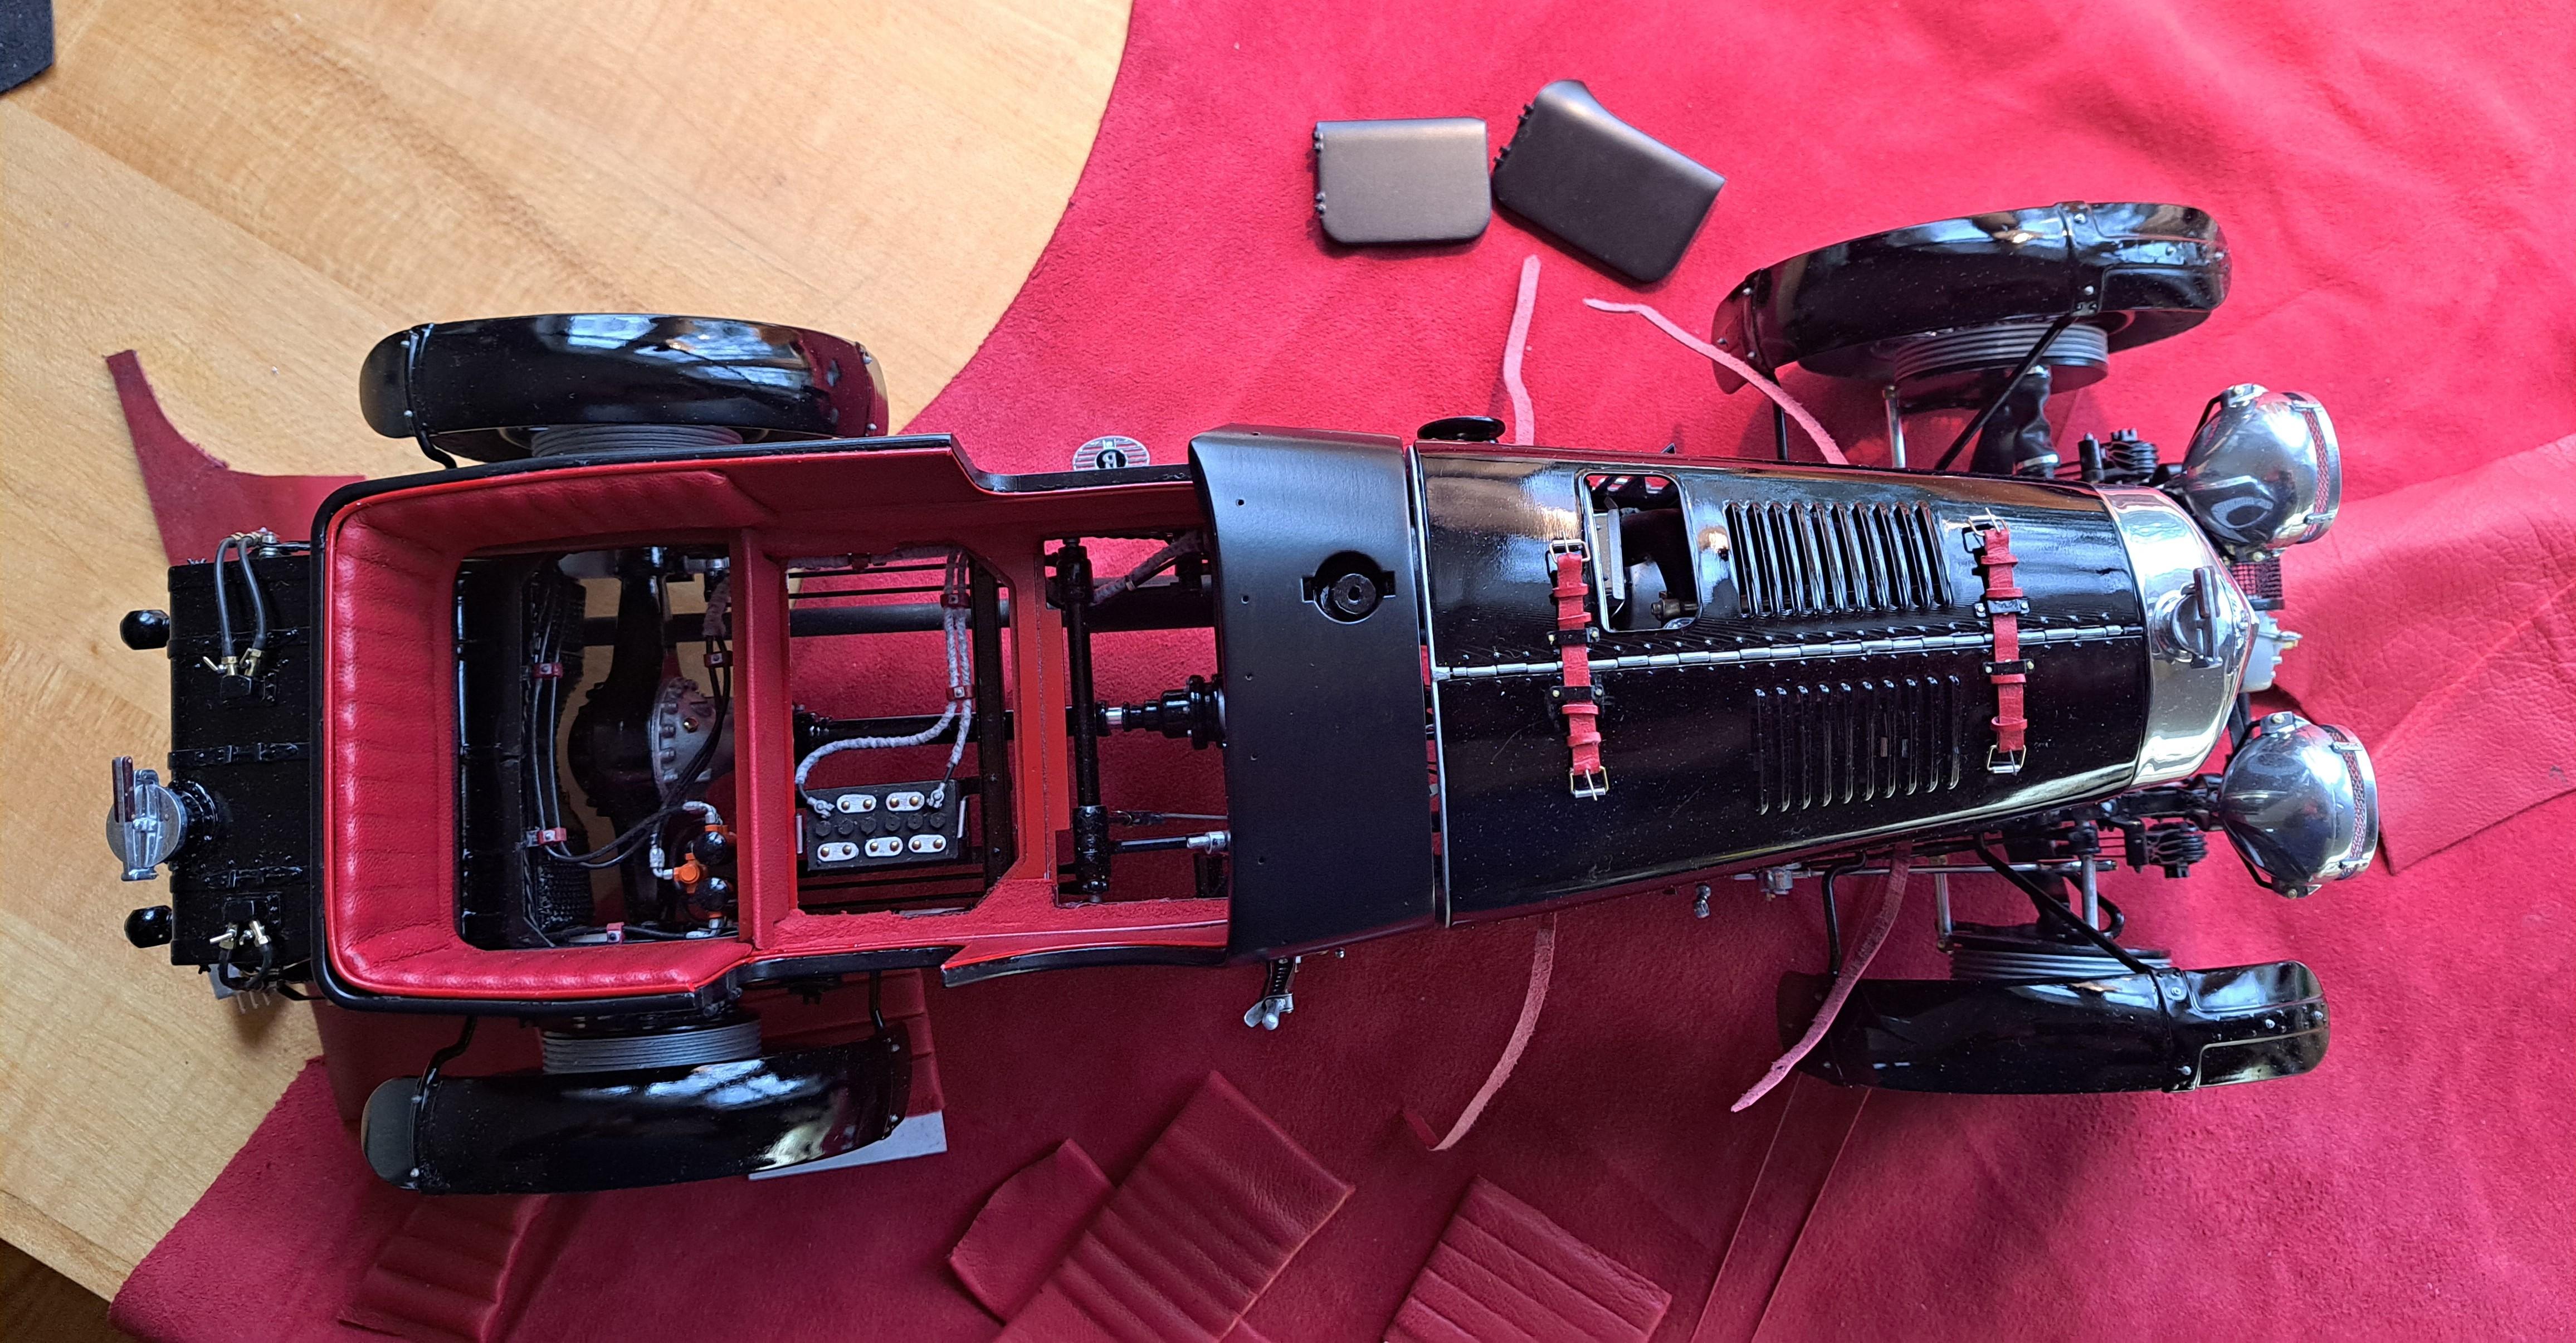
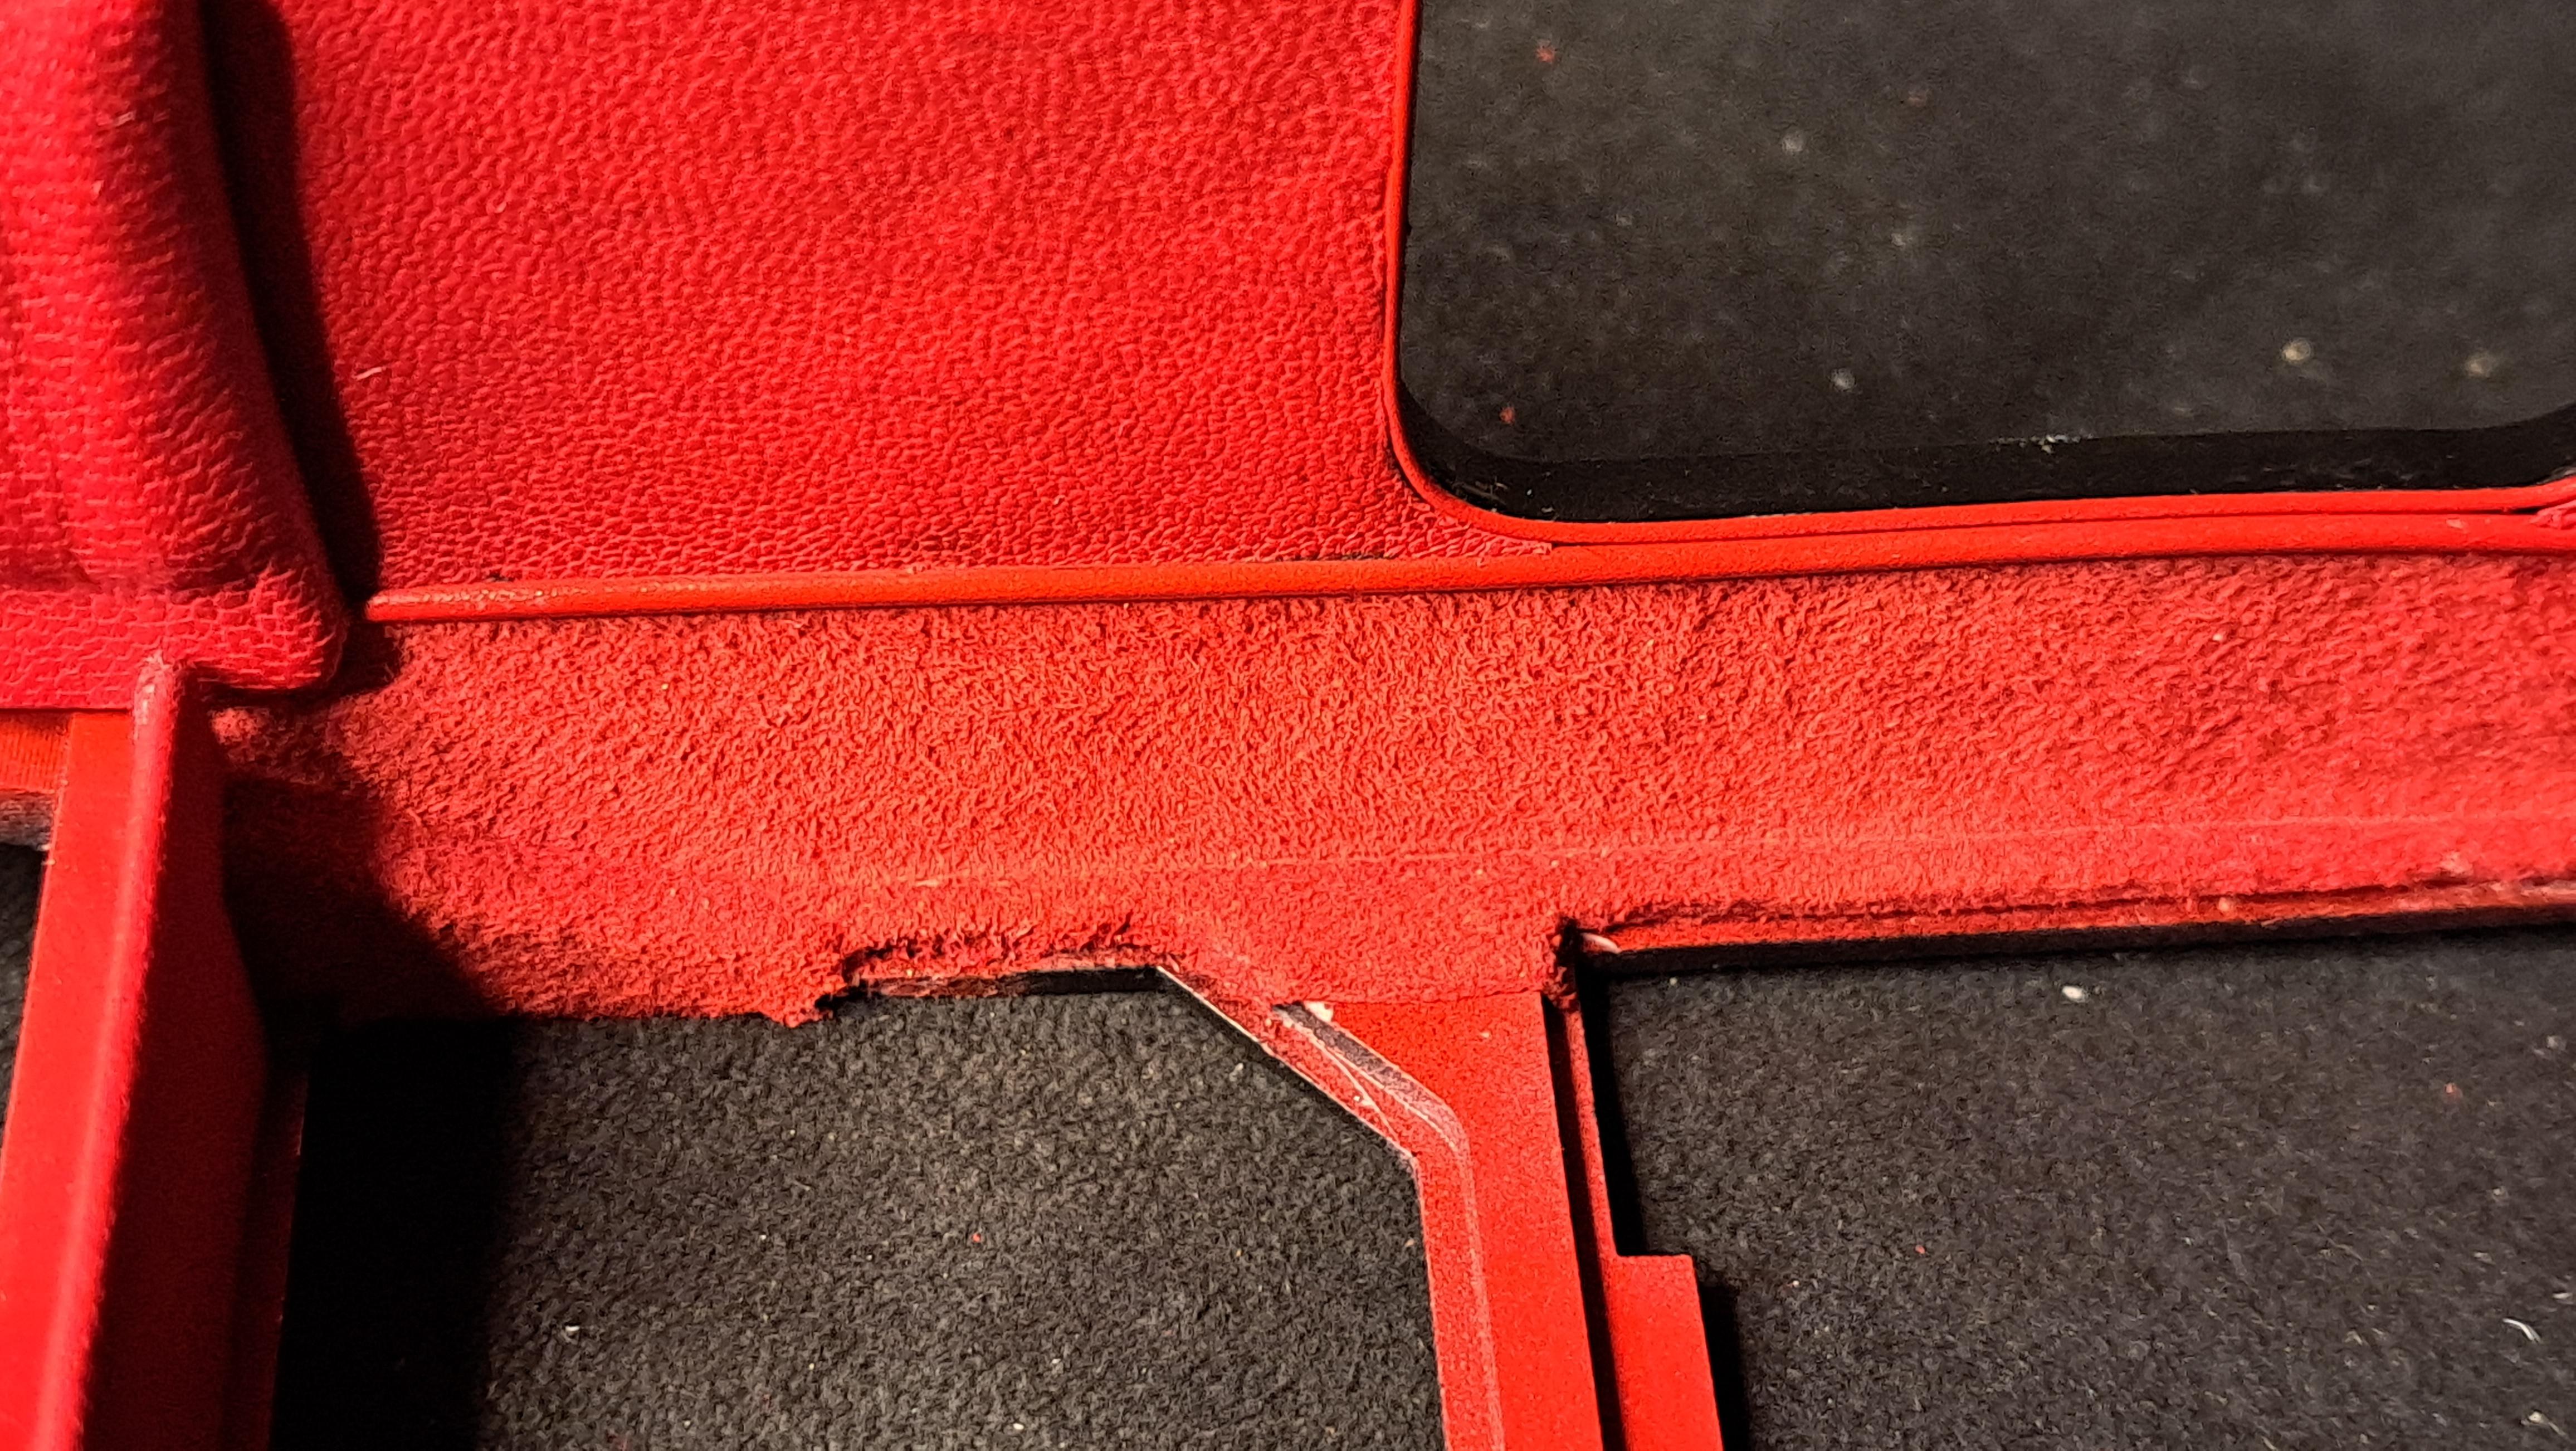
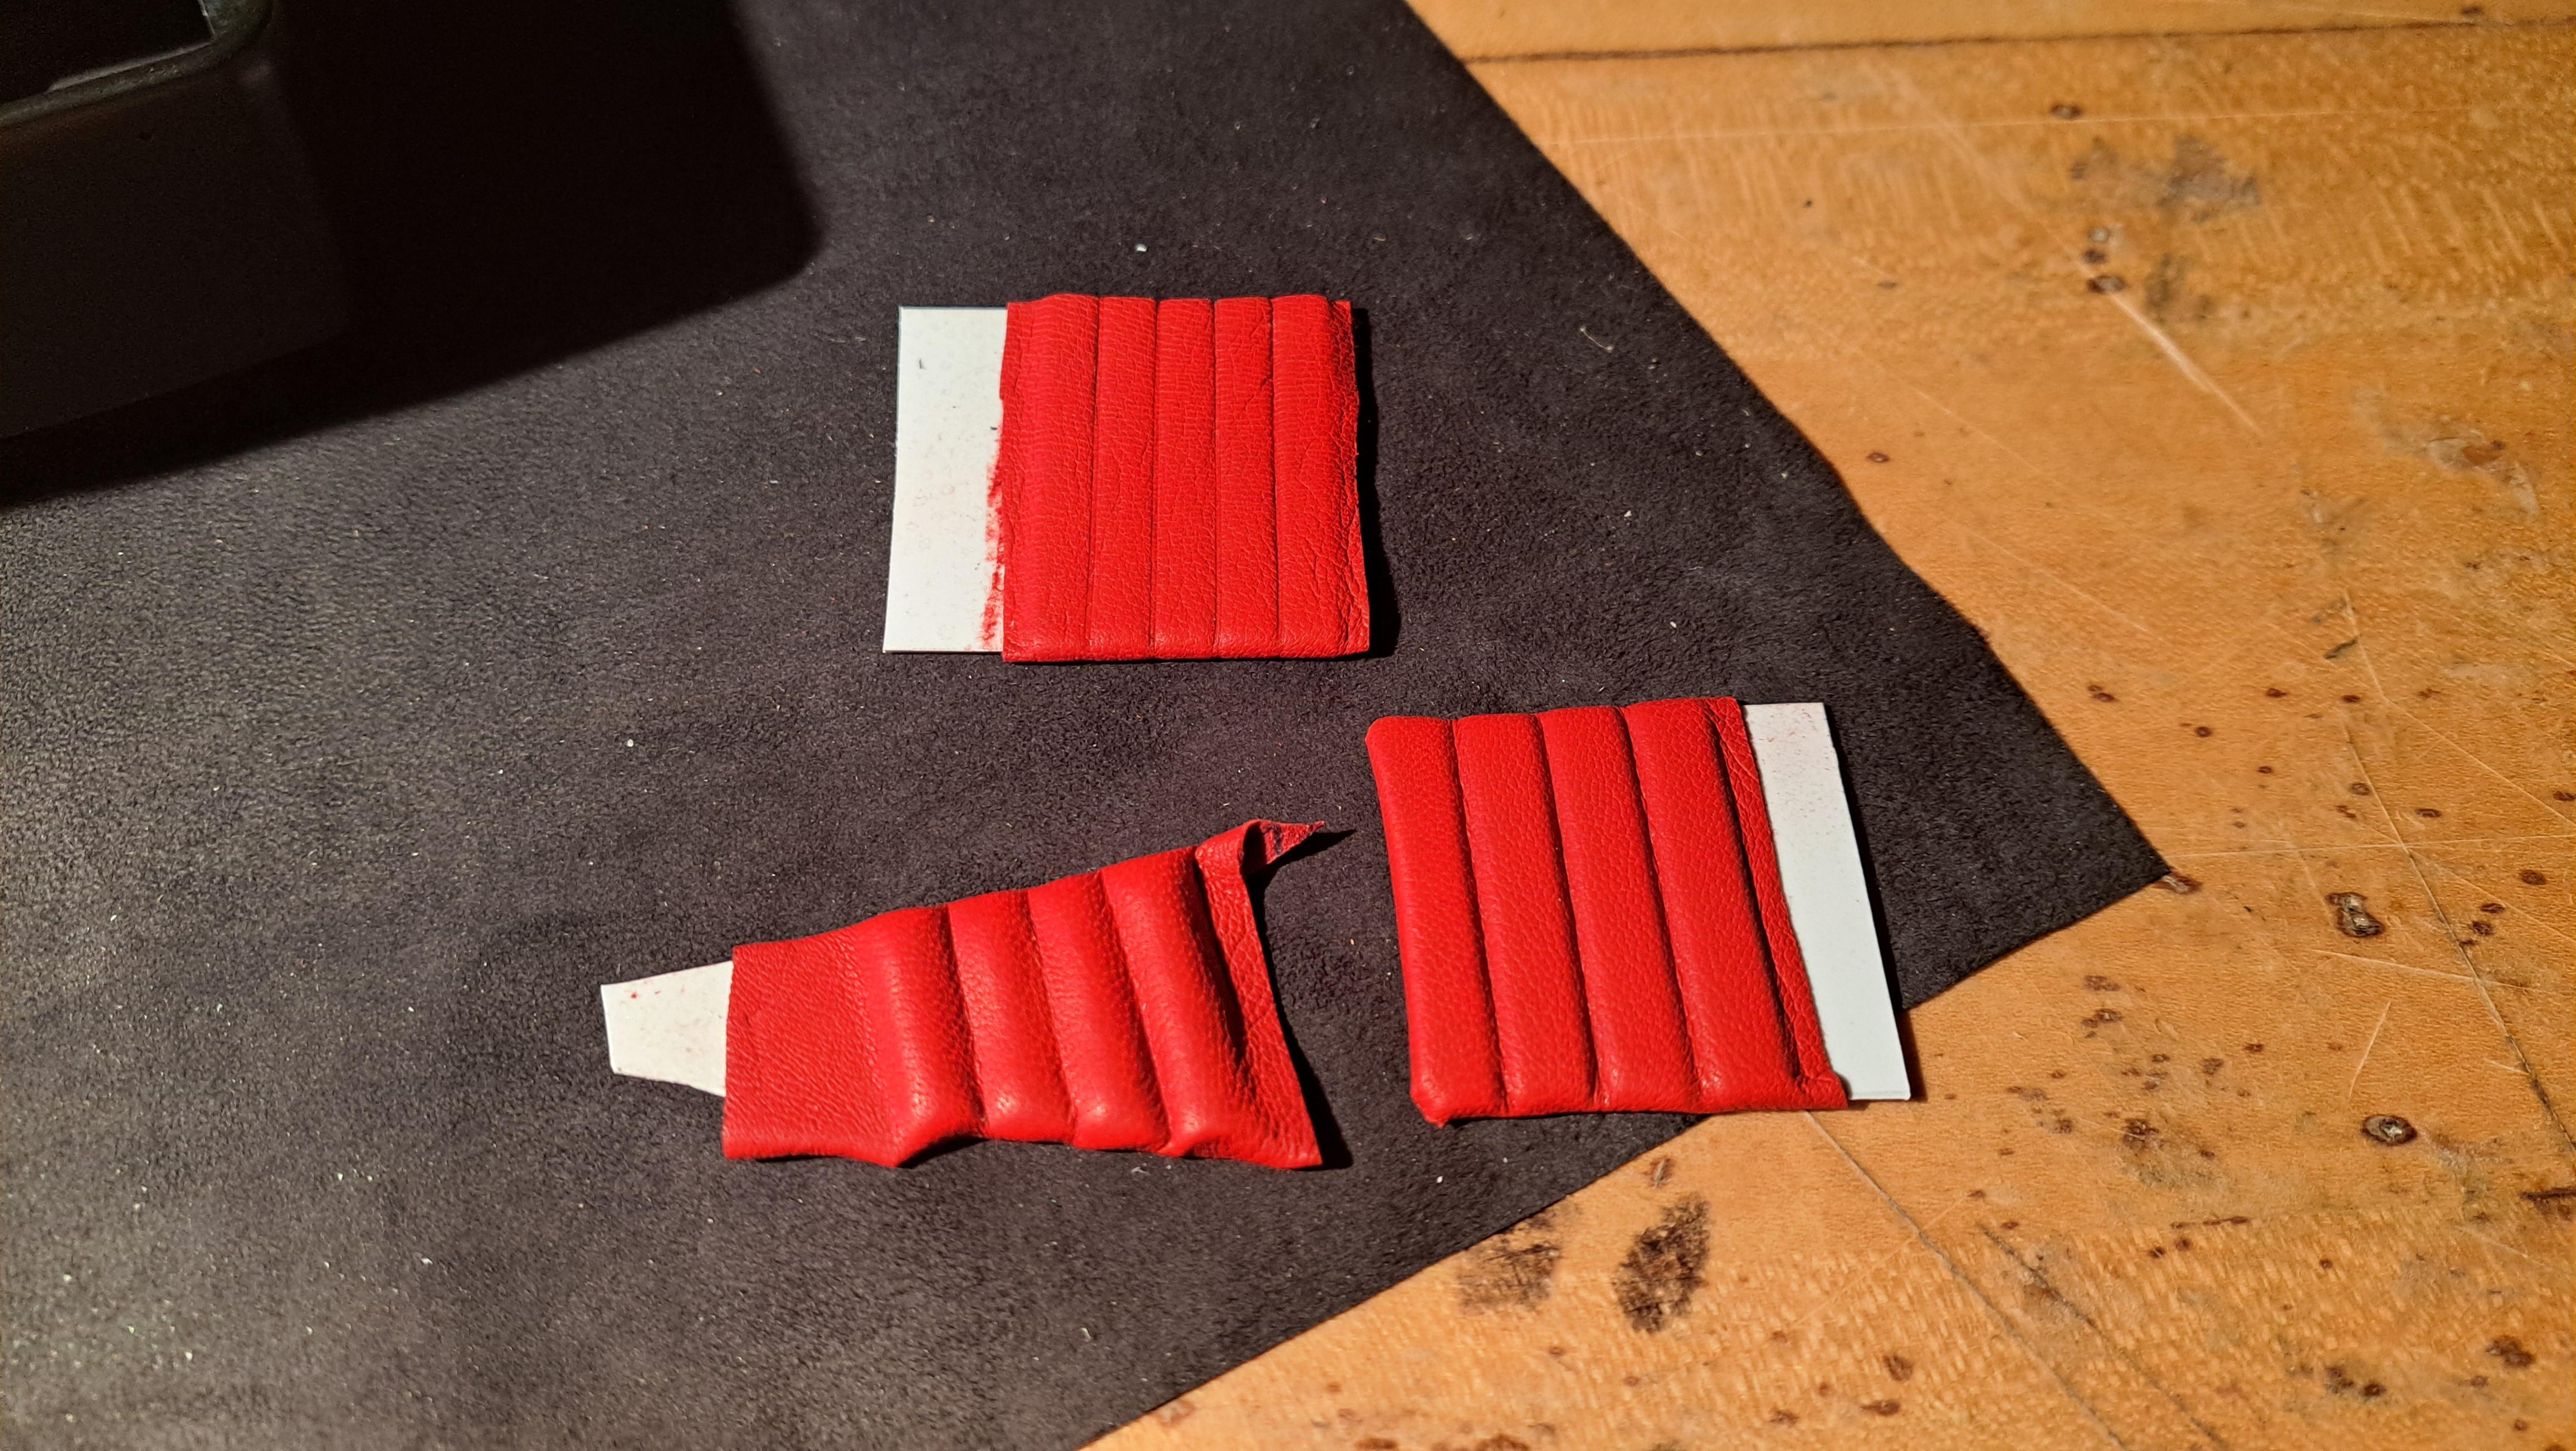
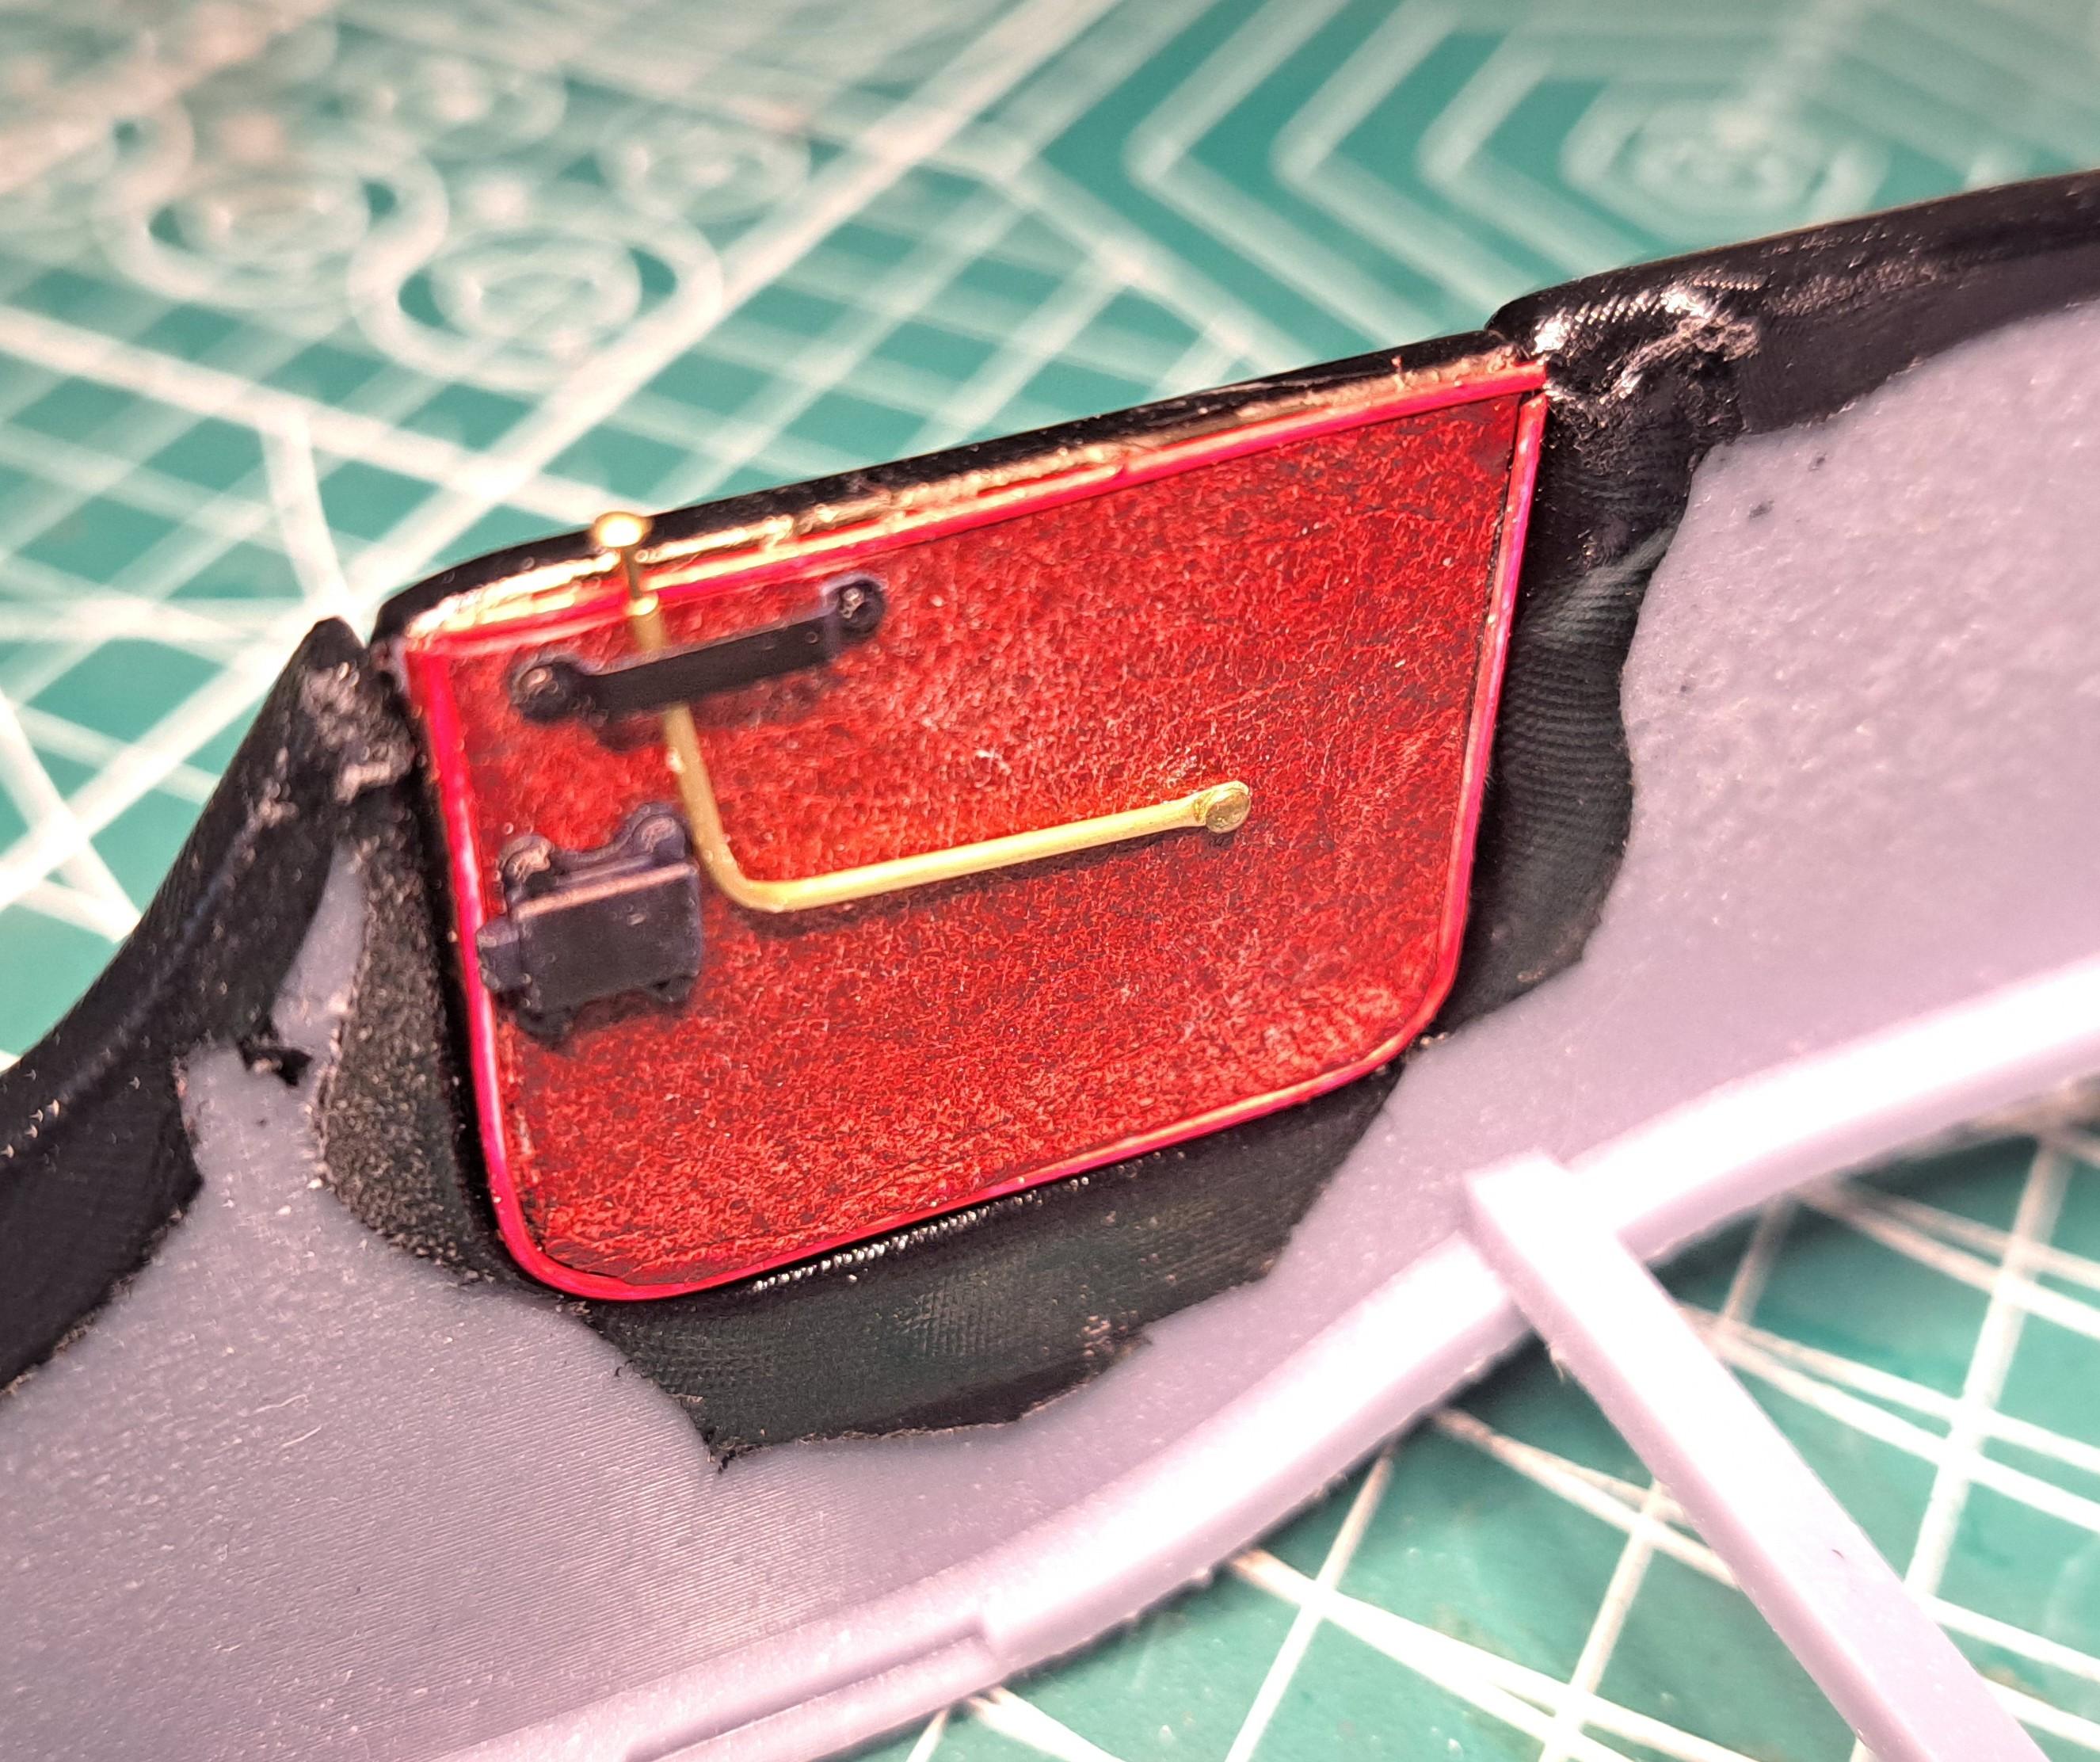
Worked on the wooden floor today. The rear floor is finished, complete with lifting strap to access the battery. The front floor is glued up but I still need to make the brake adjuster and shifter cut-outs. I also made 2 storage pockets as found on the real car. Rear floor Real storage pocket( you can just see a hint of the B embossed on tge flap) my storage pockets
-
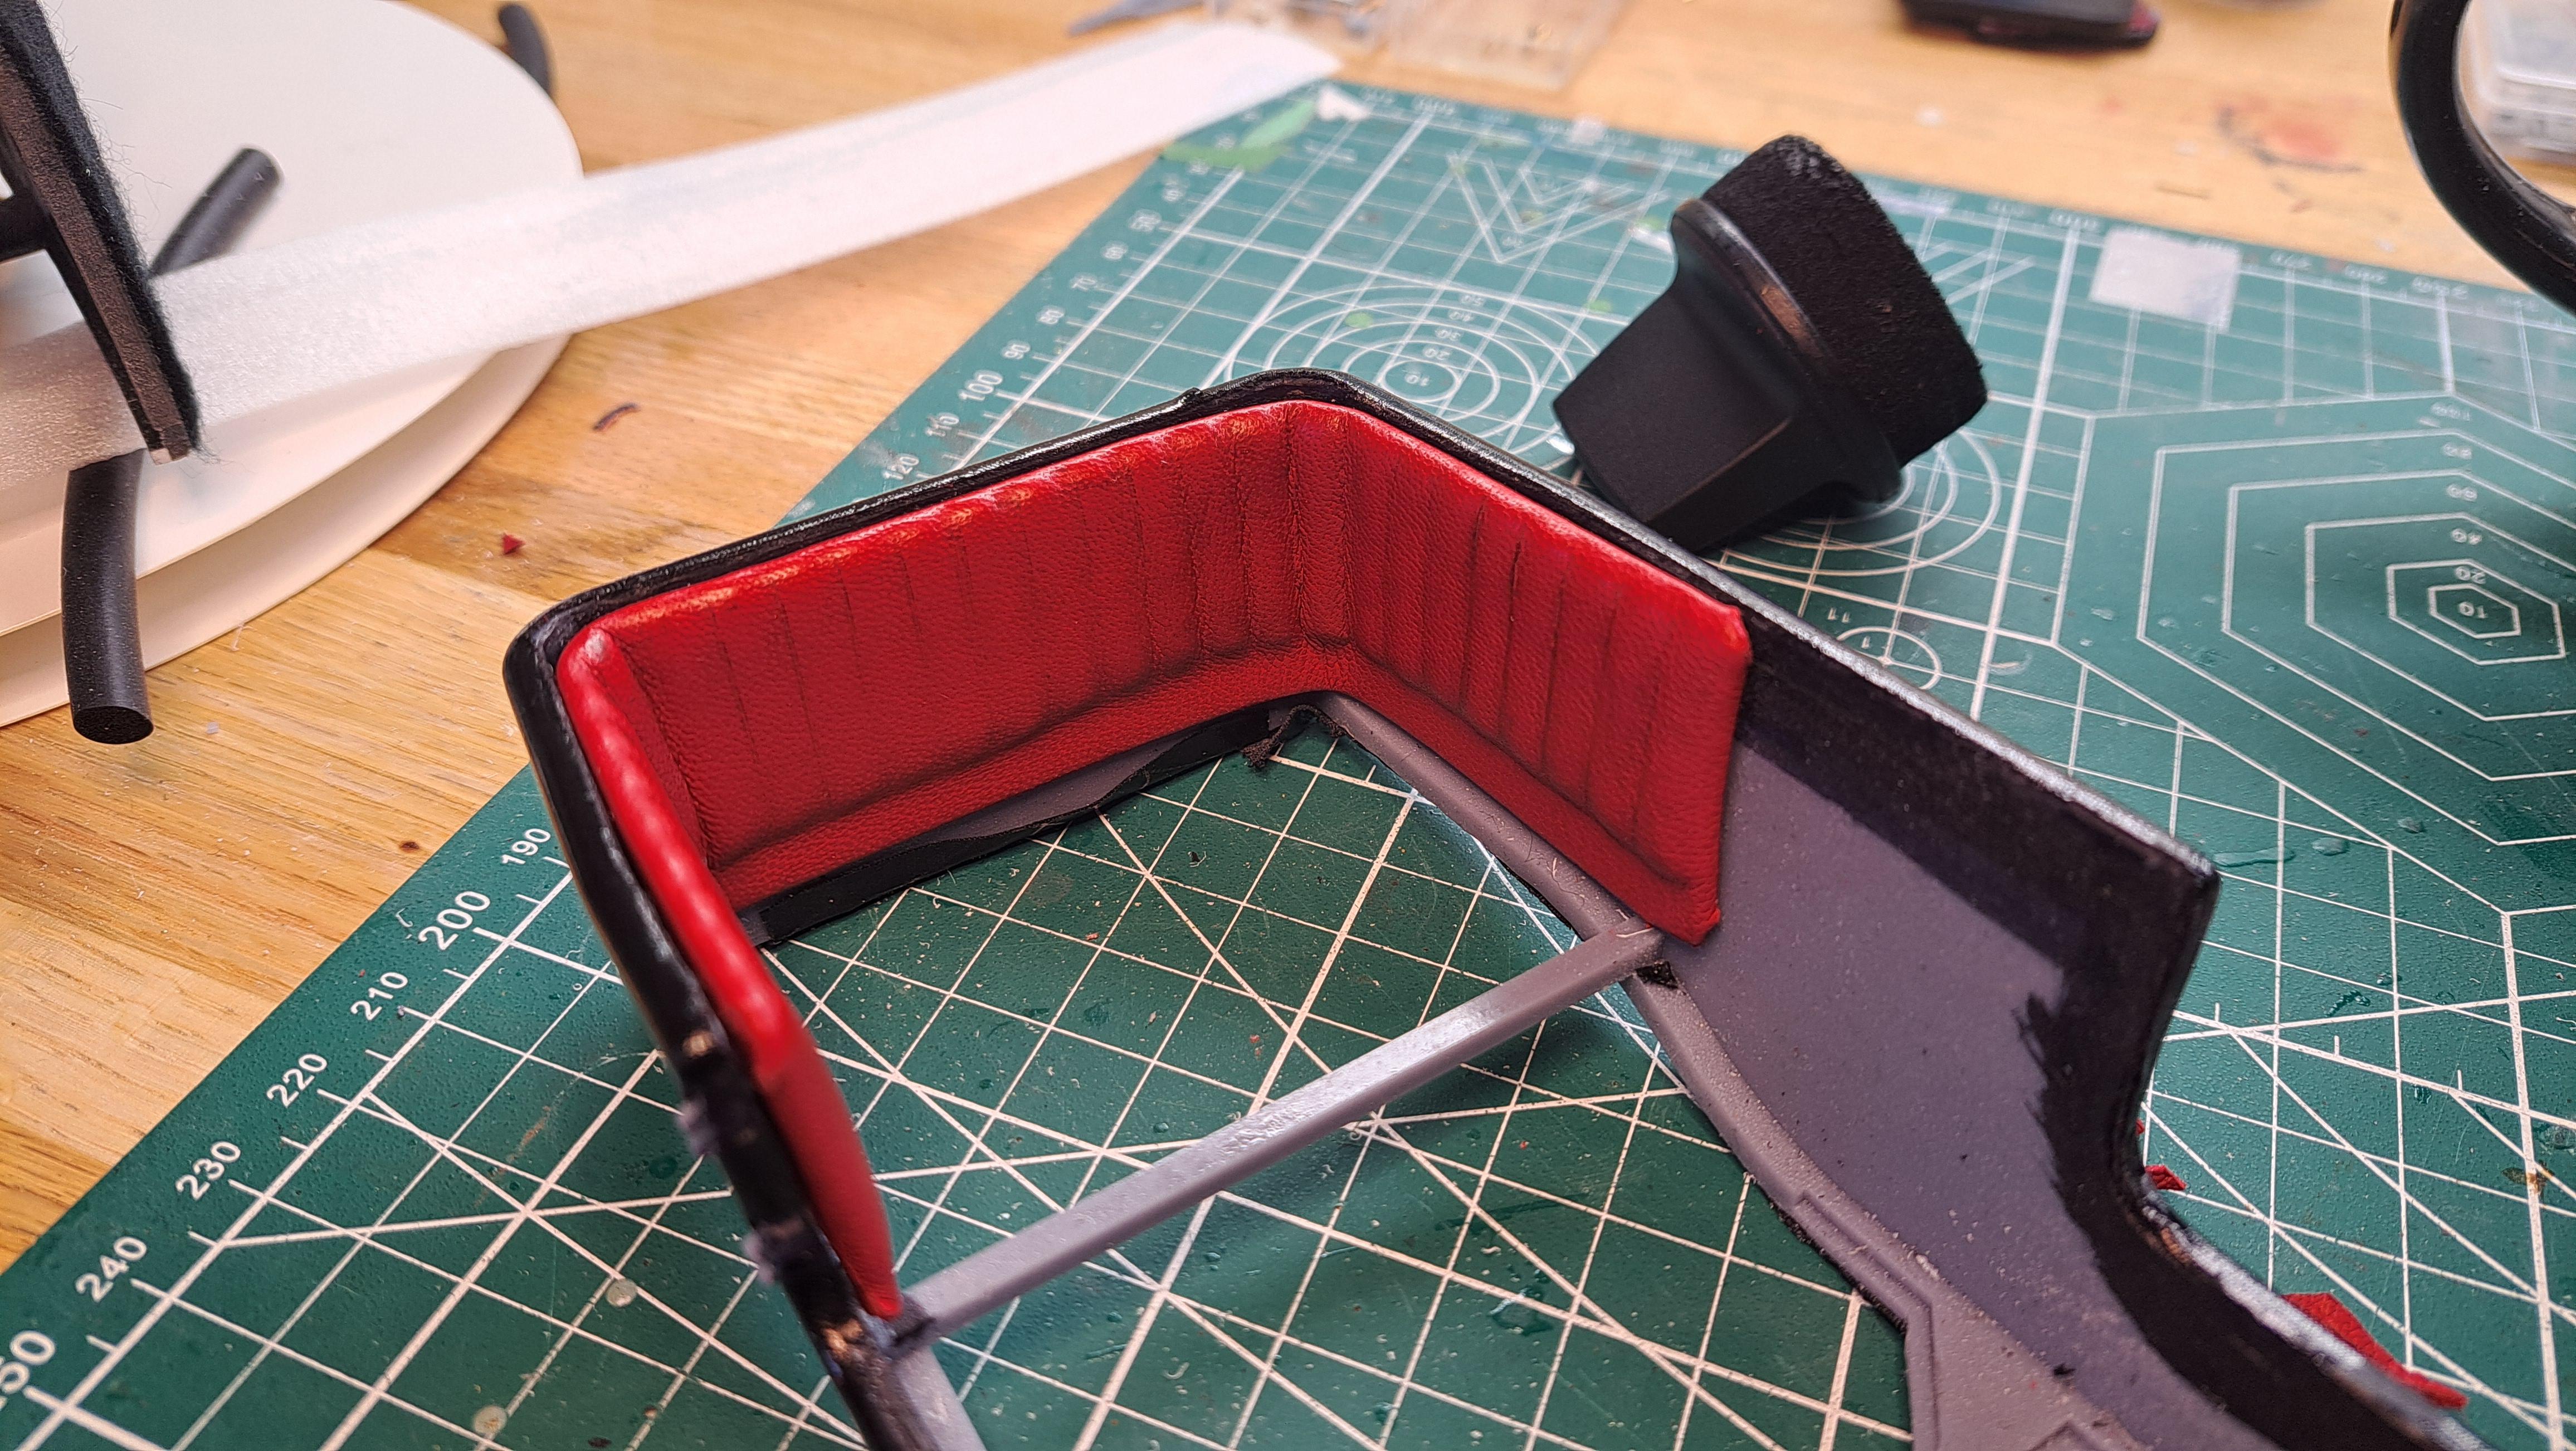
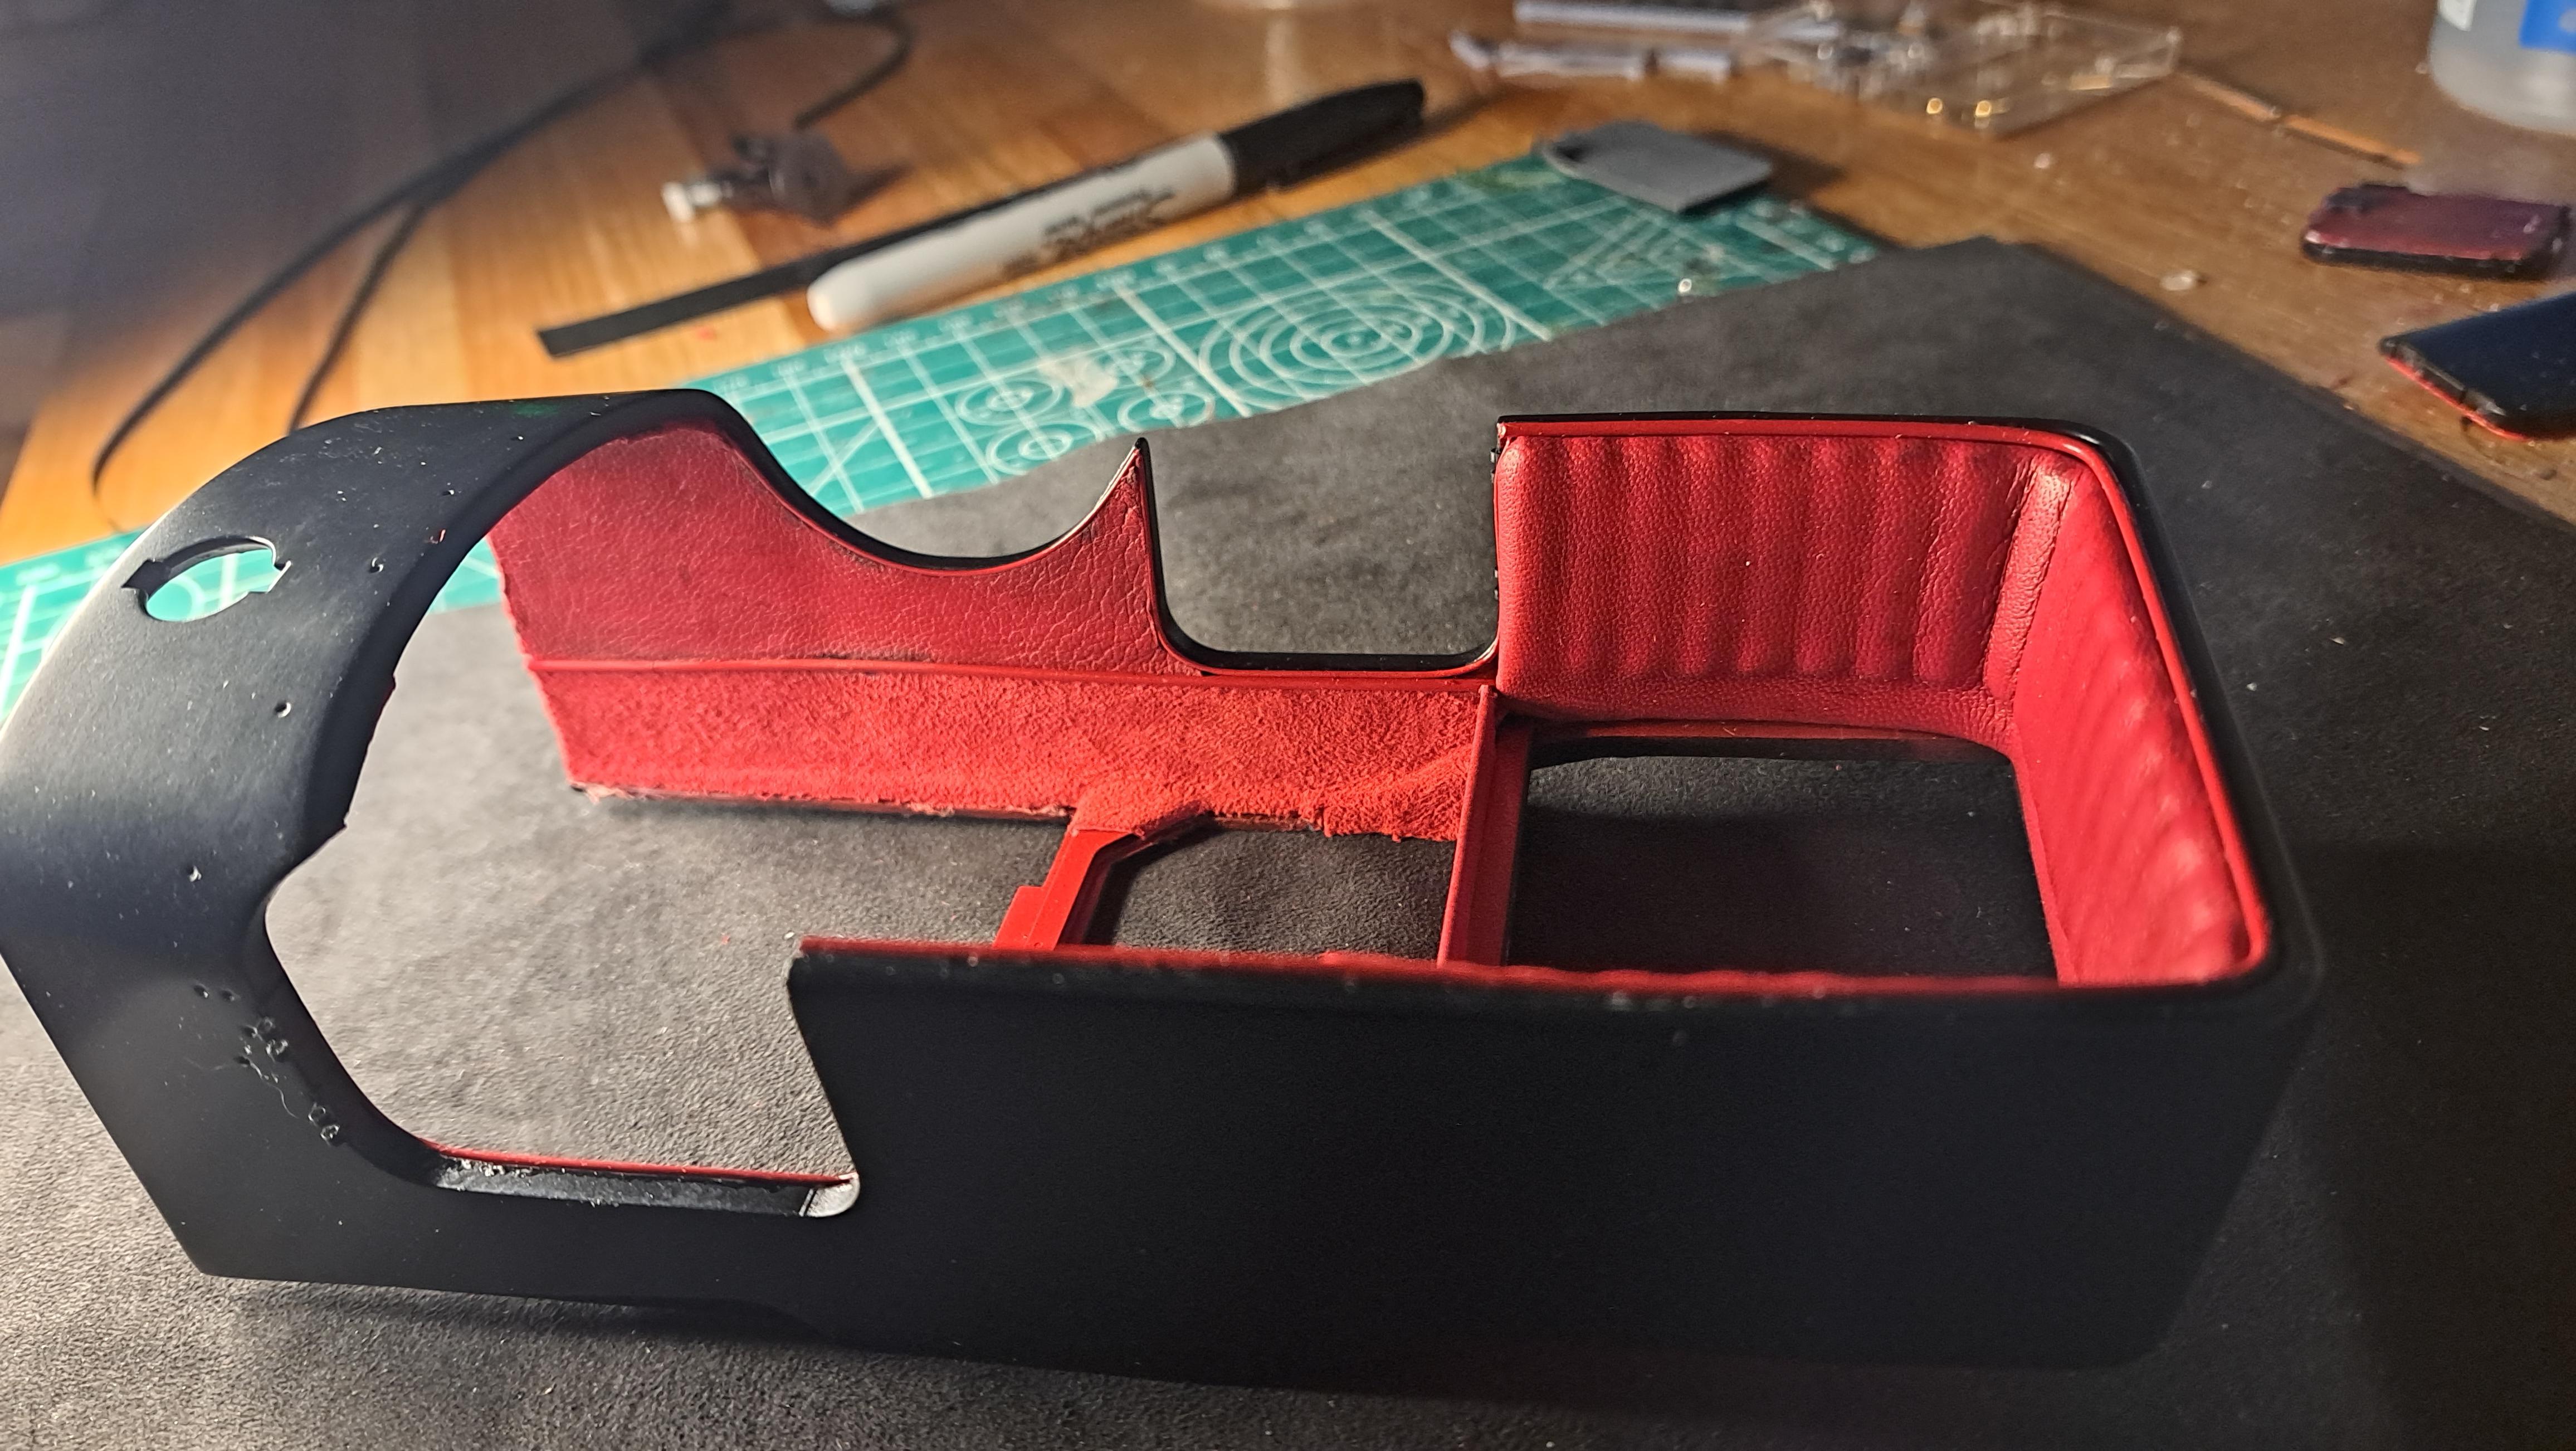
Today, contrary to what I thought would be, turned out to be a very productive day. I did alot of upholstering. The rear seat back cushion, both walls and piping are done. On rhe real car, the bottom half of the walls are carpeted while the upper half is covered in leather. I used the back side of my lambskin to simulate the carpet and the result is quite nice. I'll do the same for the back sideof the front seats. I used two different piping size, a small .6mm dia styrene rod to do all curved edges and a larger 1mm dia rod to do the straighter edges and also where the gap is too big for the .6mm rod. Not to toot my own horn but I really did not think it would have turned out this good. Believe me when I say that pictures do not do it justice. The rear seat back cushion fab Styrene ribs glued to styrene back wall Ribs coverded with a thin felt liner And covered with red leather Walls upholstering Bottom of side walls carpeted and upper portion leathered Body mounted on frame I still have a small piece of carpet to install over the center rib after which I'll do the wooden floor planks.
-
Thanks absmiami, I used Revell's satin black straight out of the can. Aside from the revell chrome, it's the first time I use their canned paint. It applied well but the can is ridiculously small for the price.
-
Well, after many tries, I've trown the towel on the boby wrapping. Althougt the results were relatively good, it just didn't look like it should at 1/12 scale. So I decided to paint the body instead. I pretty happy with the result and most pleased with the door gaps. I also started working on the interior upholstery. I did a few test on the rear seat back cushion.
-
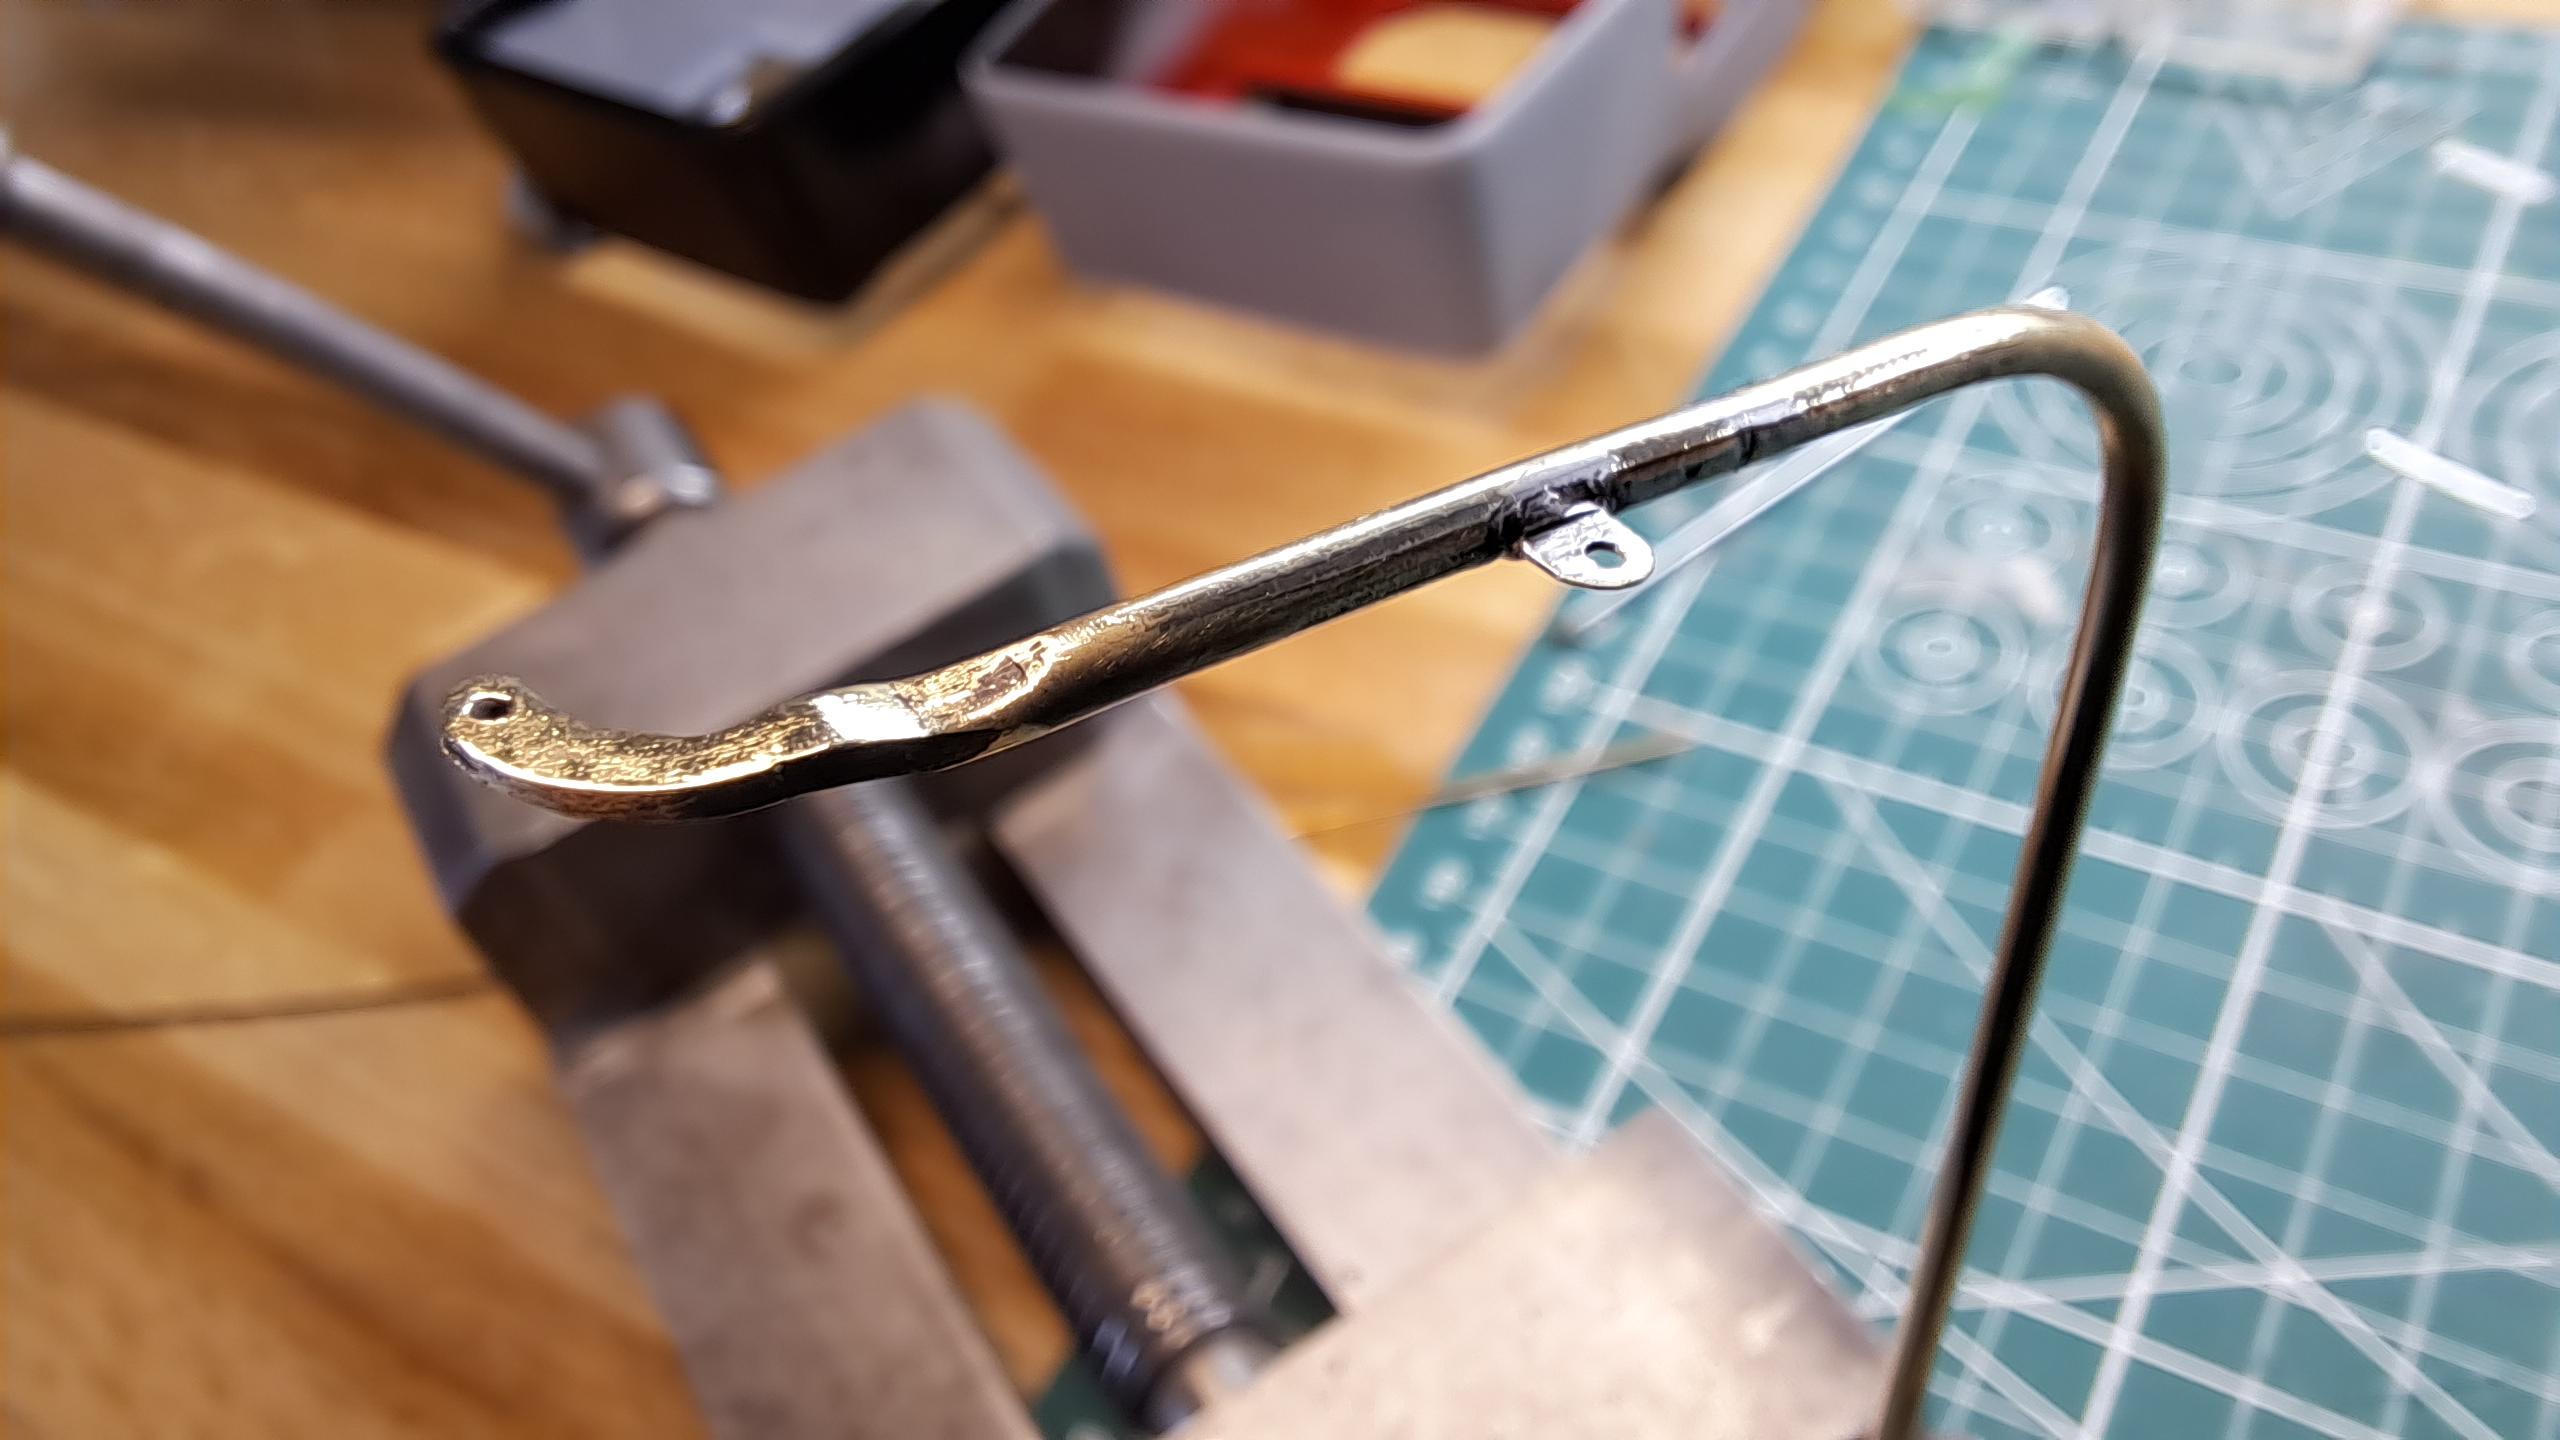
Today, I fabricated the foldable top frame out of brass. I was a bit nervous about making it, it's not an easy part to make. It has to be fairly precise and as close to symmetrical as possible. It turned out pretty good. 20240429_141253.mp4 I finaly found a good piece of red lampskin. I got a complete skin for 10$. At .015in thick it's pretty much as thin as I can get without needing to skive and being lamb, it's very supple and stretchy. It will do nicely for the seats, and I can use the back side to simulate the carpet as certain areas like the back of the front seats seem to have carpet instead of leather.
-
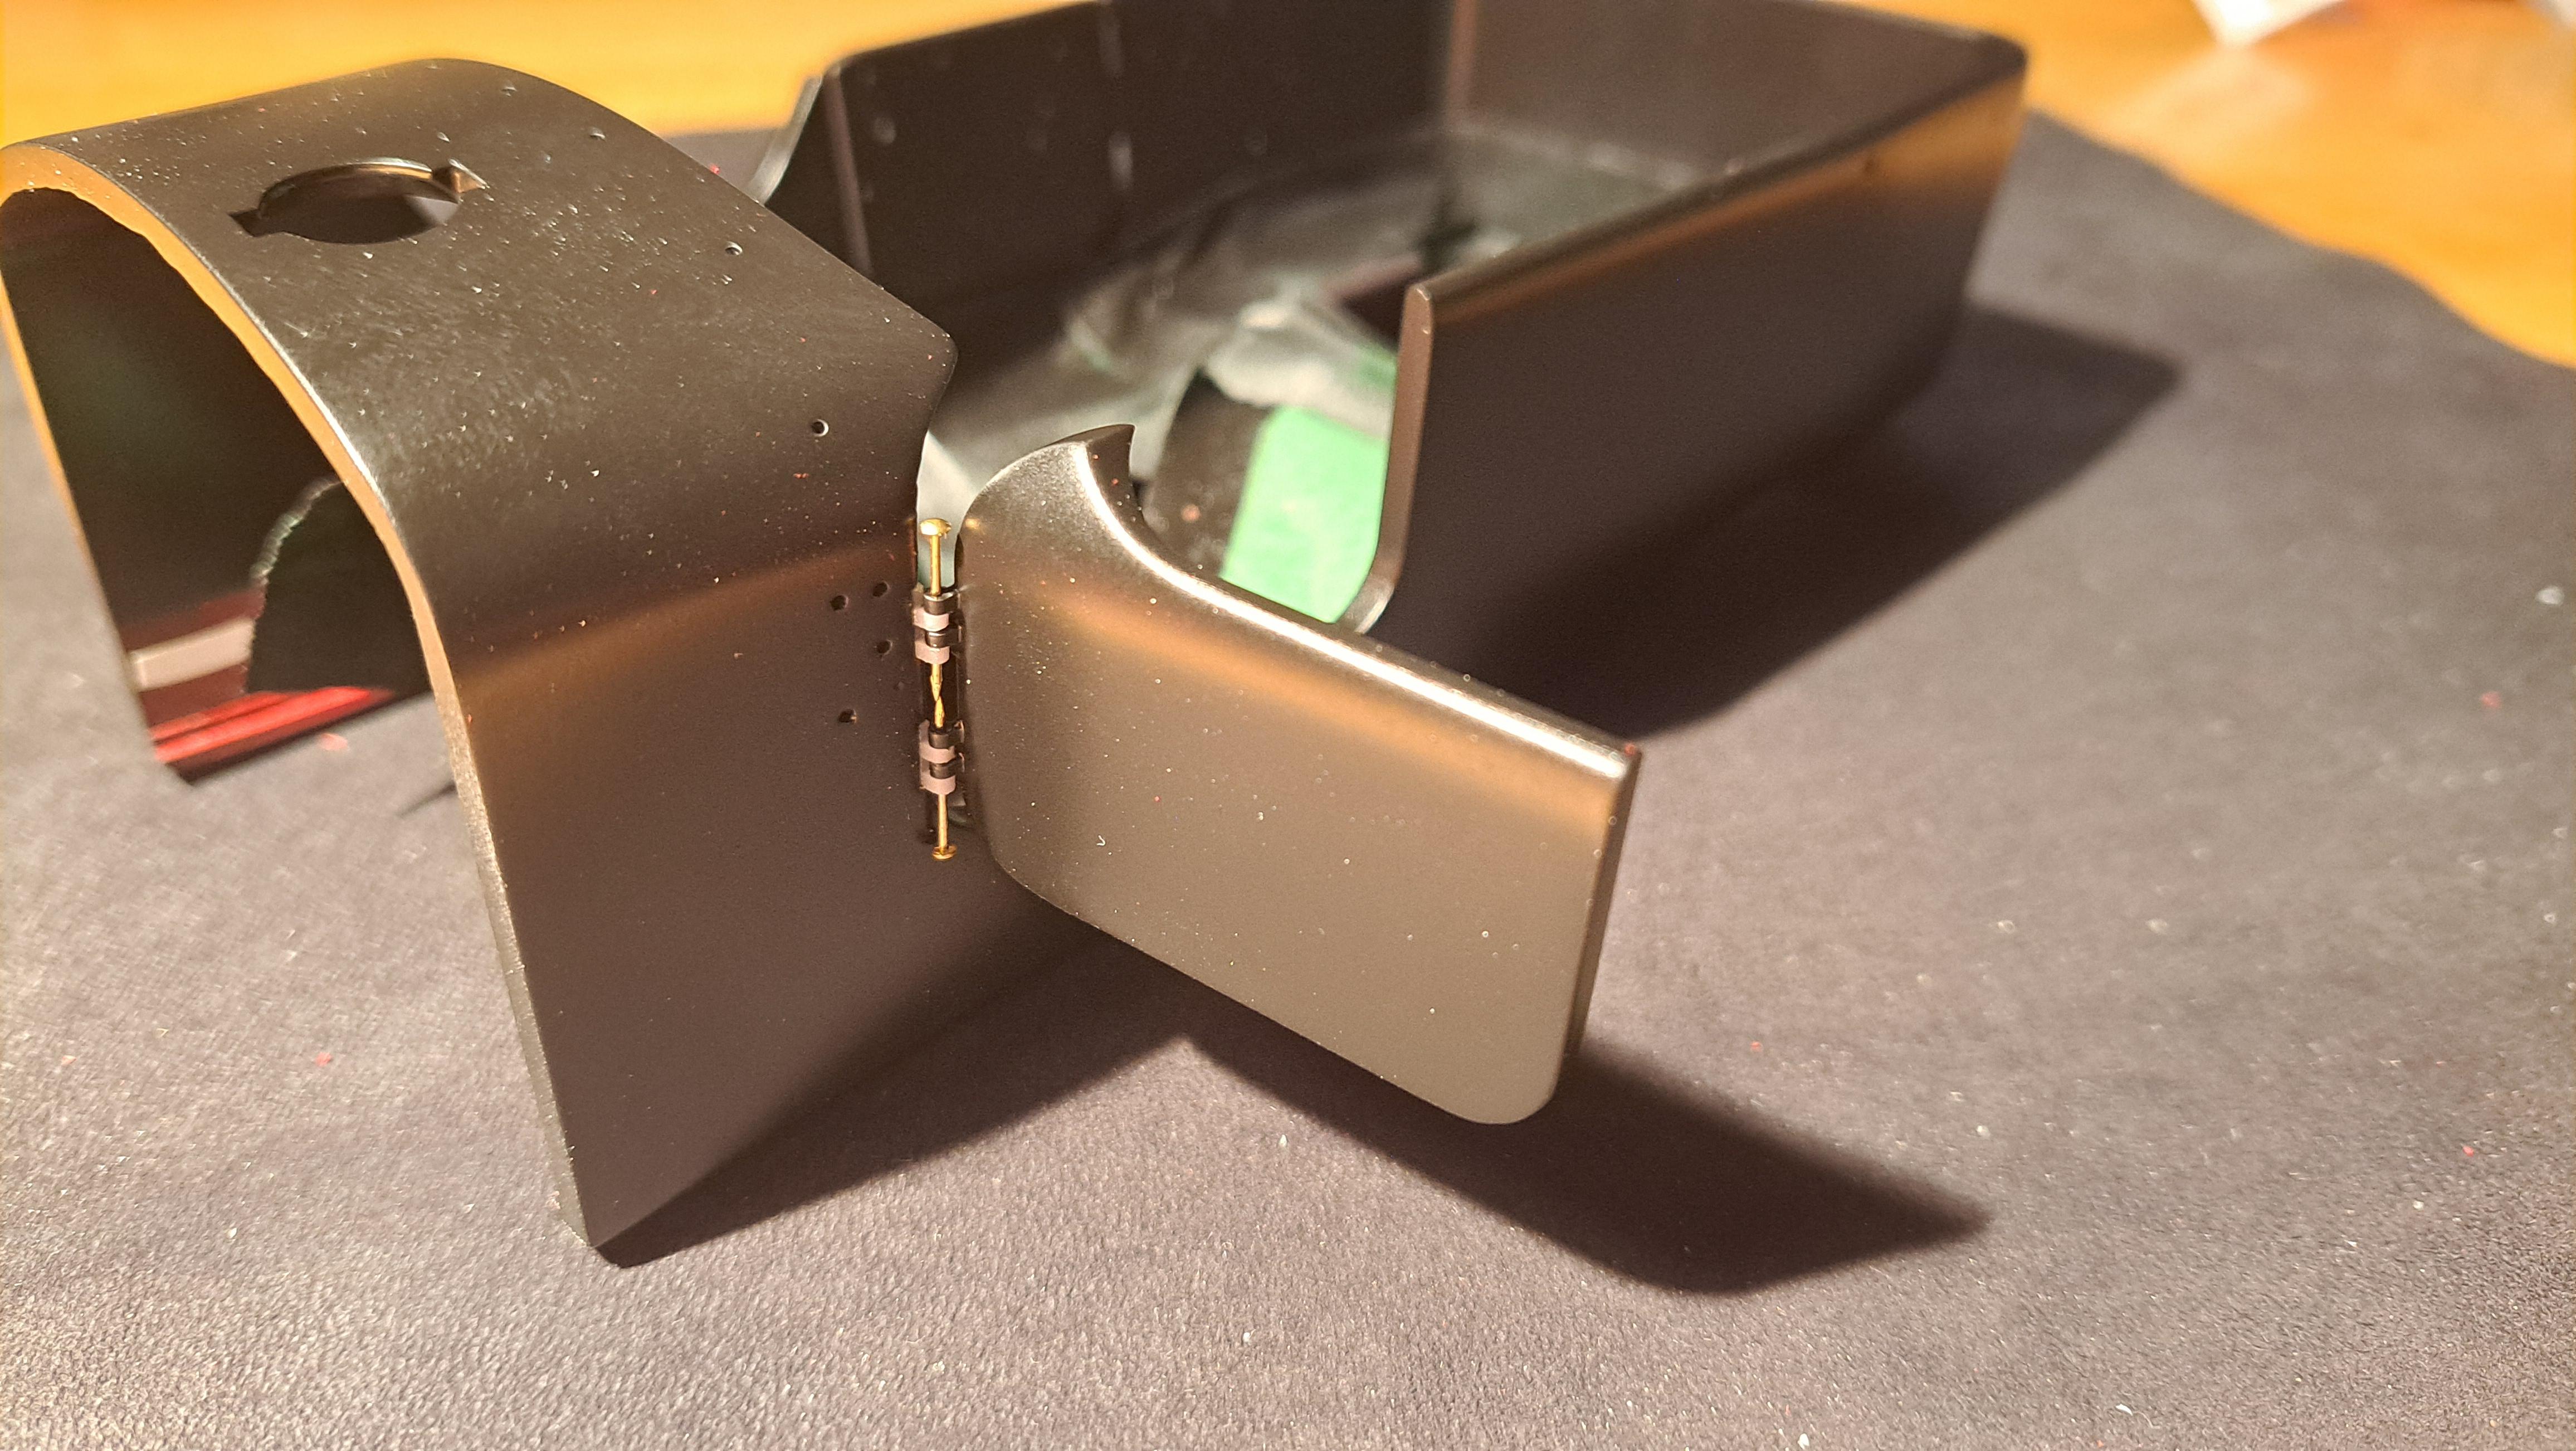
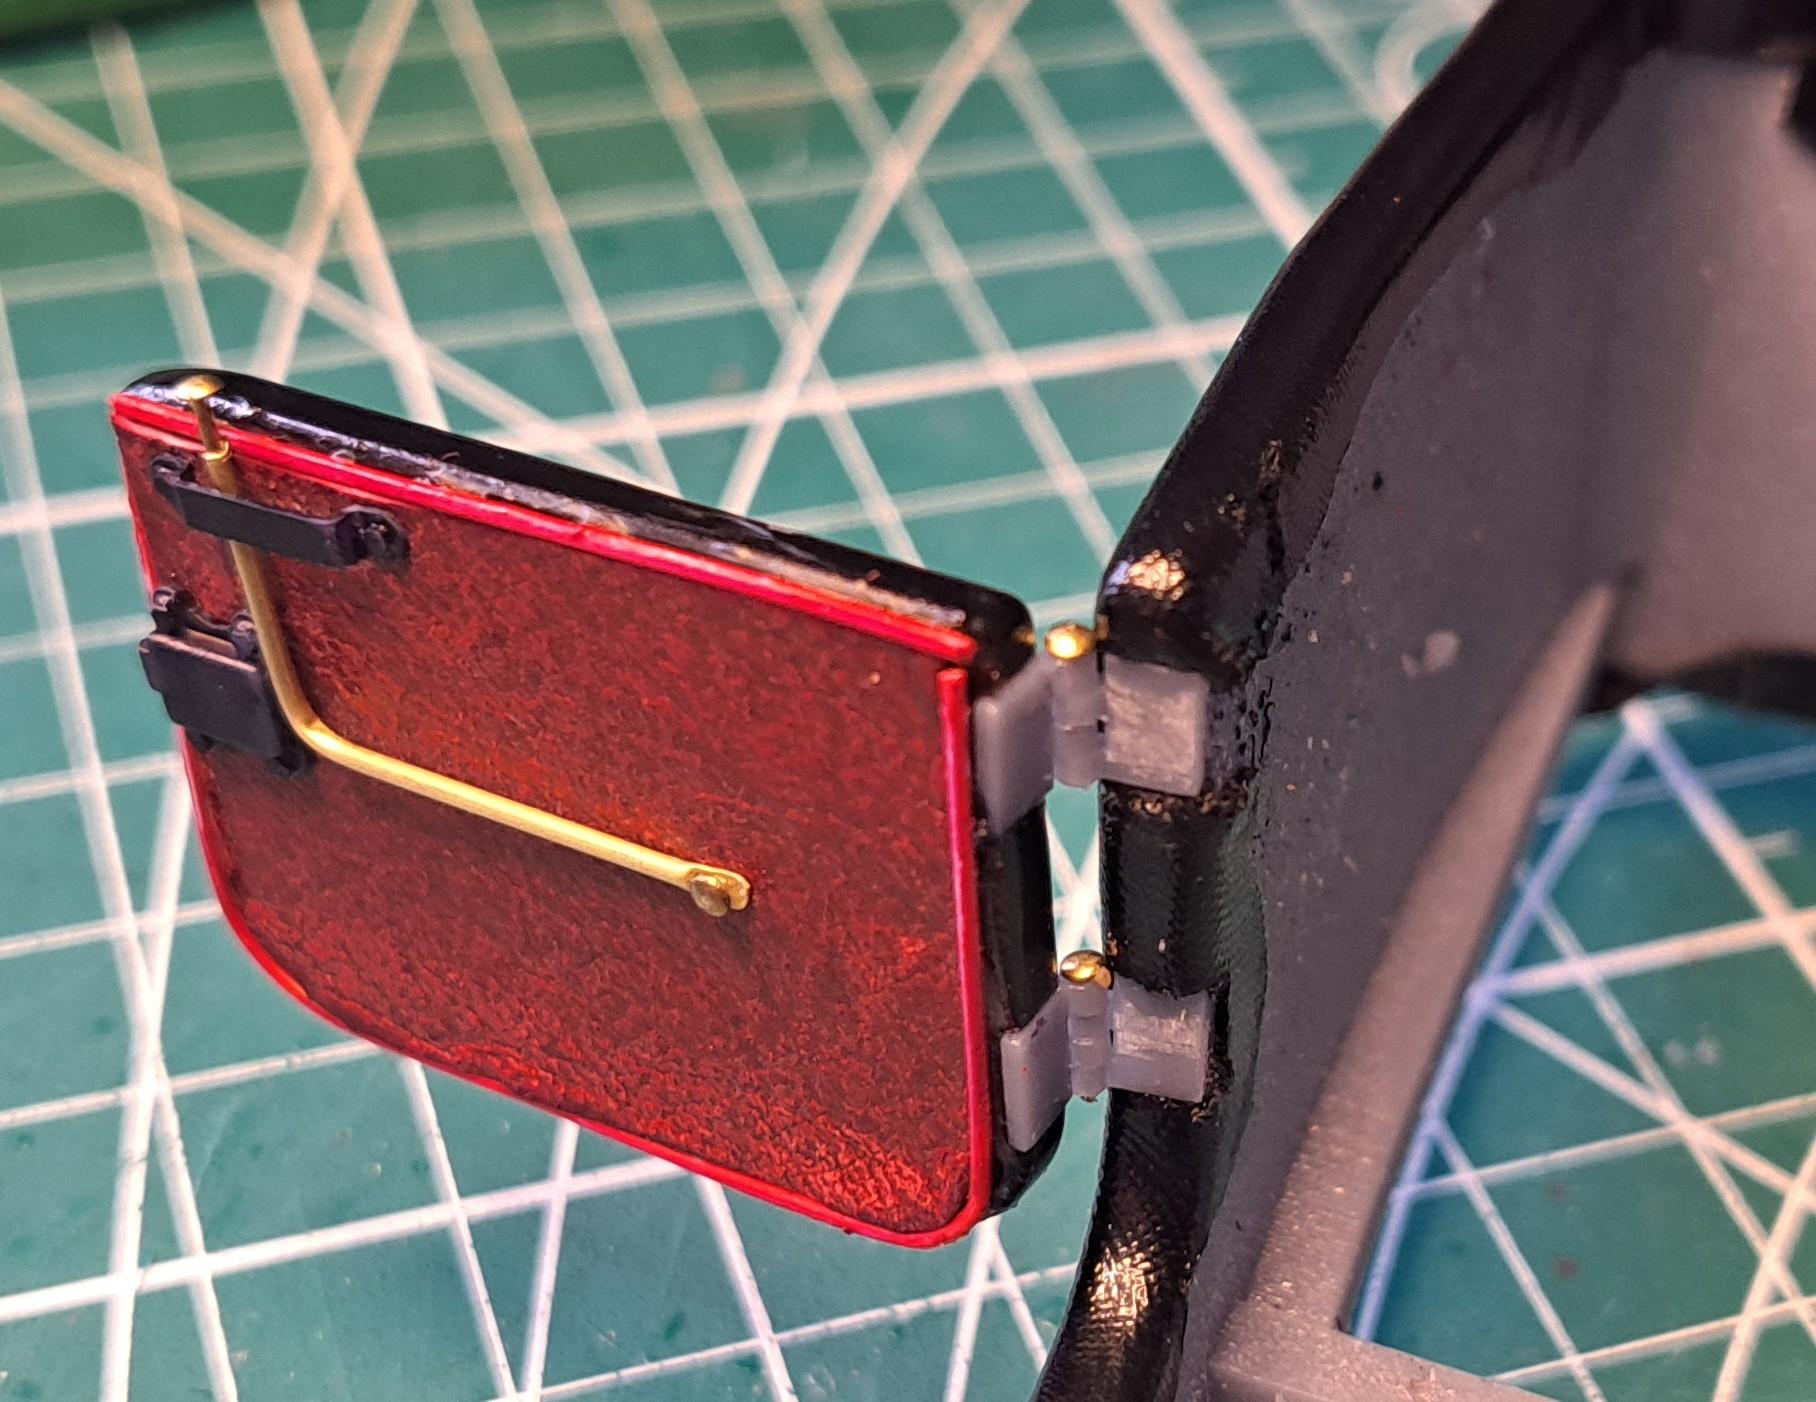
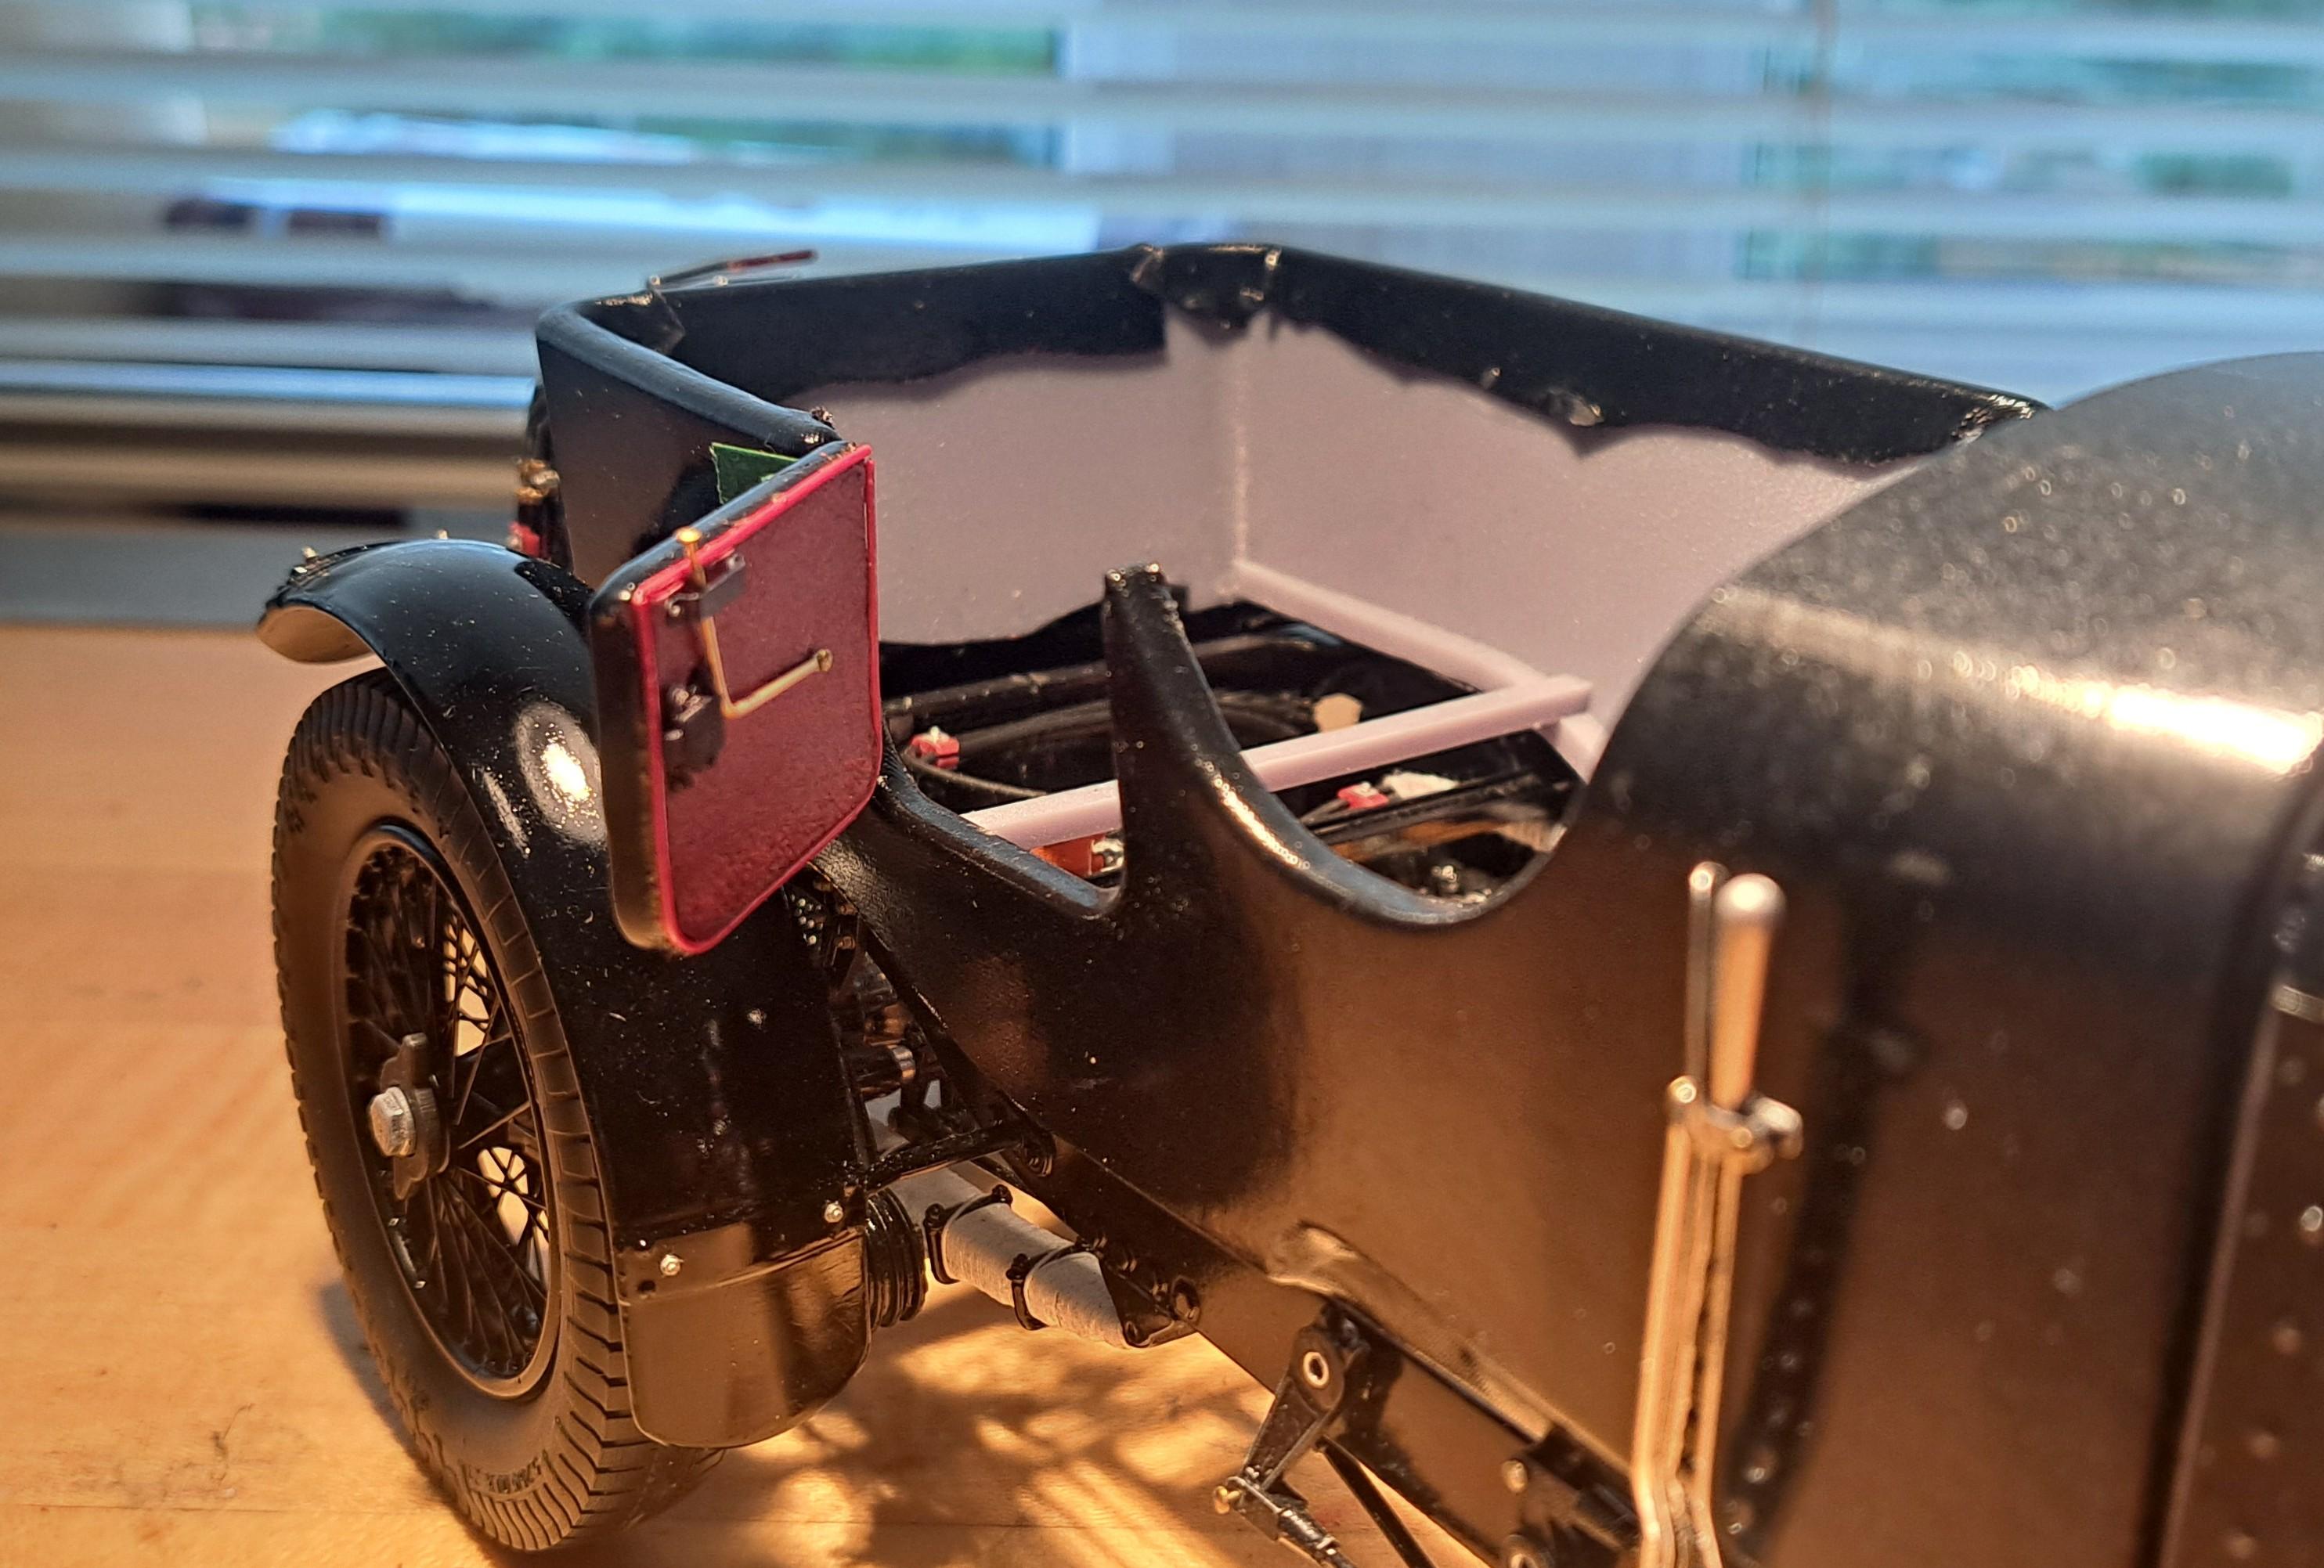
Tried my hand at lining the interior of a door with leather. It's not perfect but it's only a test so overall not too bad. Also tried the hinges and they work ok. This door is too tight in the body opening but the newly printed doors and body should provide more clearance. Here's a list of things still to do - vinyl wrap body and doors - line interior of body and doors with leather, do piping, make storage pockets - make wood floor - make rear seat (perhaps with removable seat cushions for storage - make front seats with seat rails - make foldable top frame - make fabric top -install windscreen and windshields - make oil tank filler cap - make dash with gages - install lights in display case - install plexi sheets on display case - grab a beer to celabrate end of build...