François
-
Posts
489 -
Joined
-
Last visited
Content Type
Profiles
Forums
Events
Gallery
Everything posted by François
-

Marvel's Hydra coupe 1/12 scale full scratch build
François replied to François's topic in WIP: Model Cars
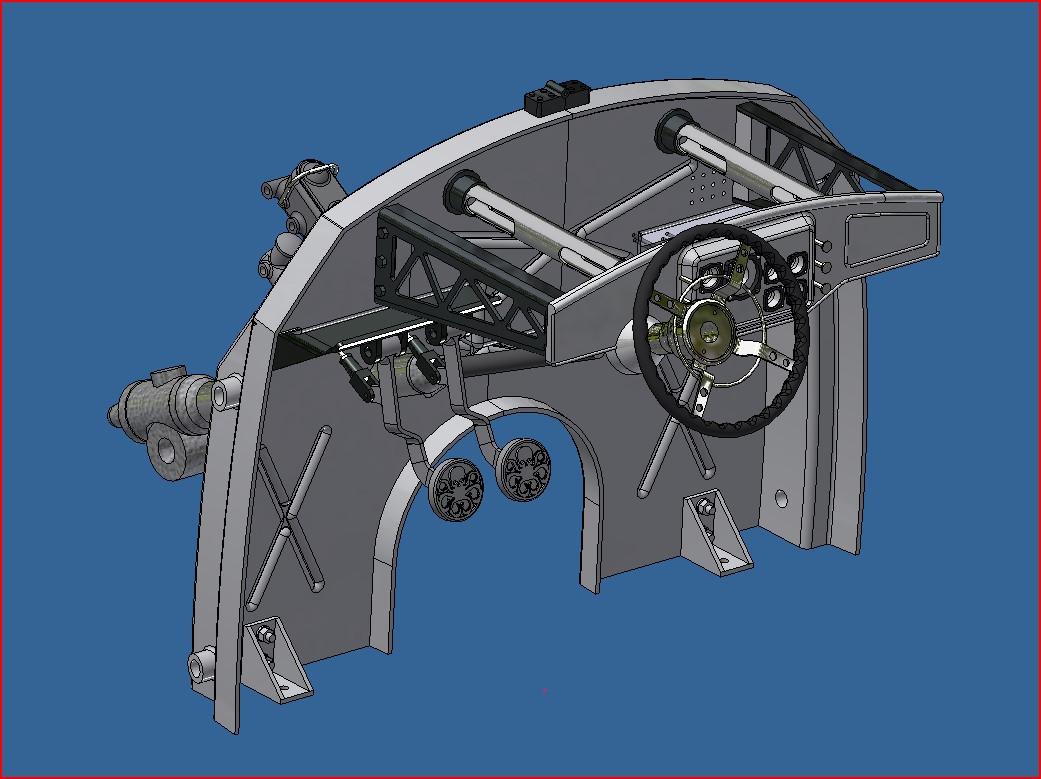
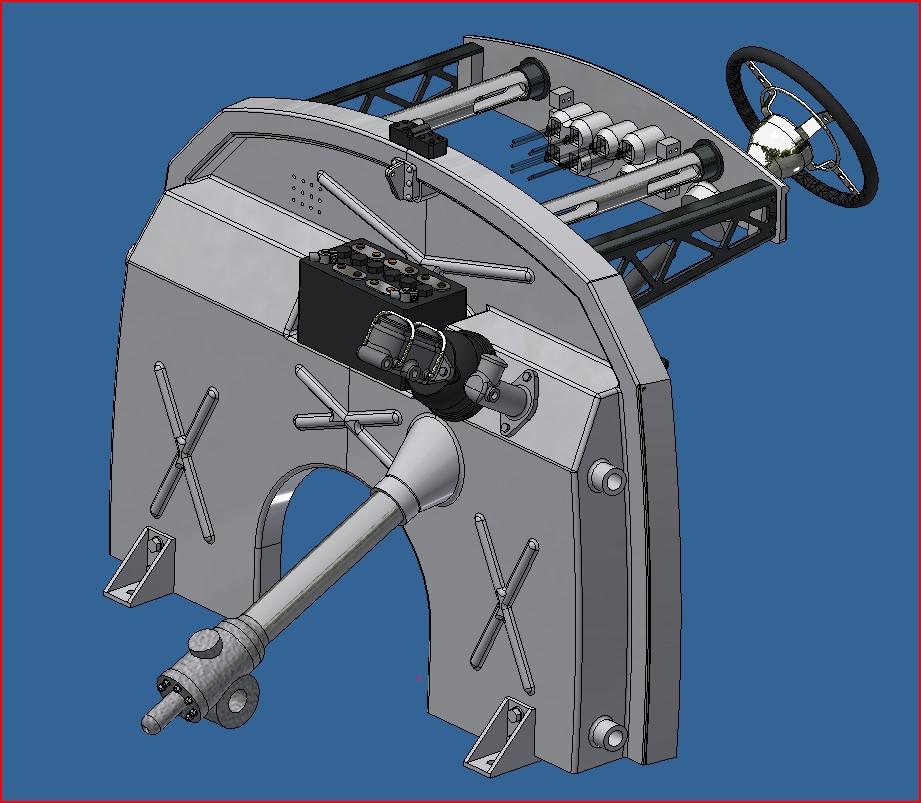
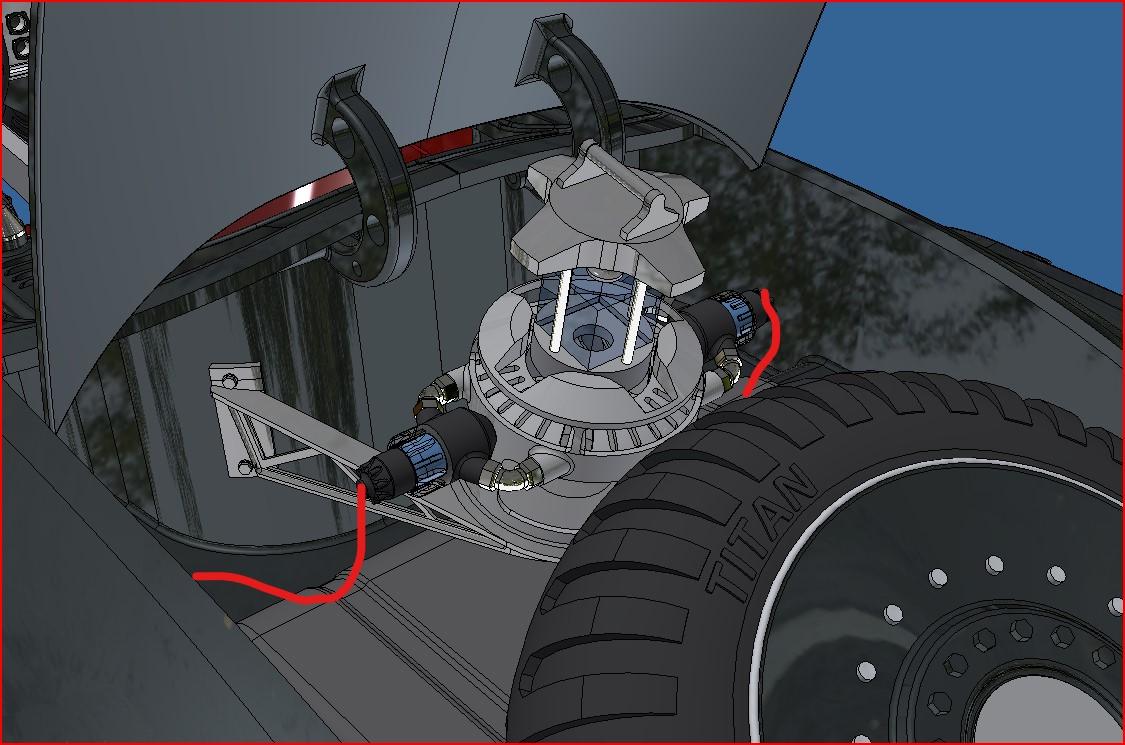
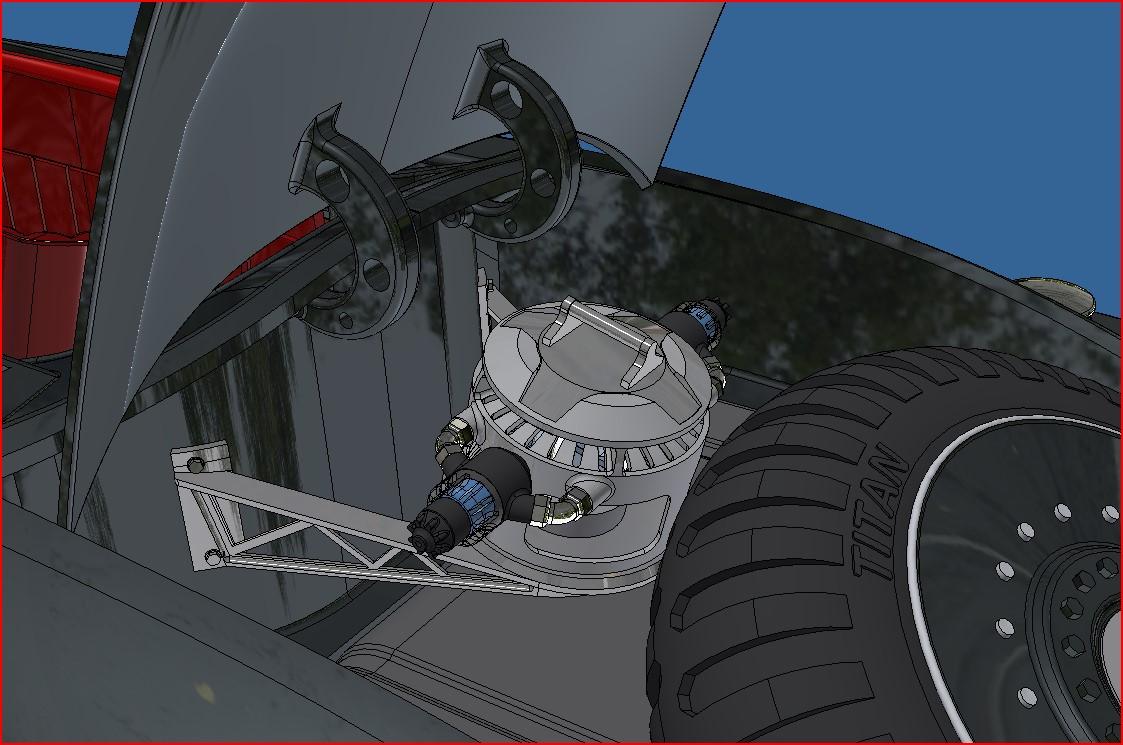
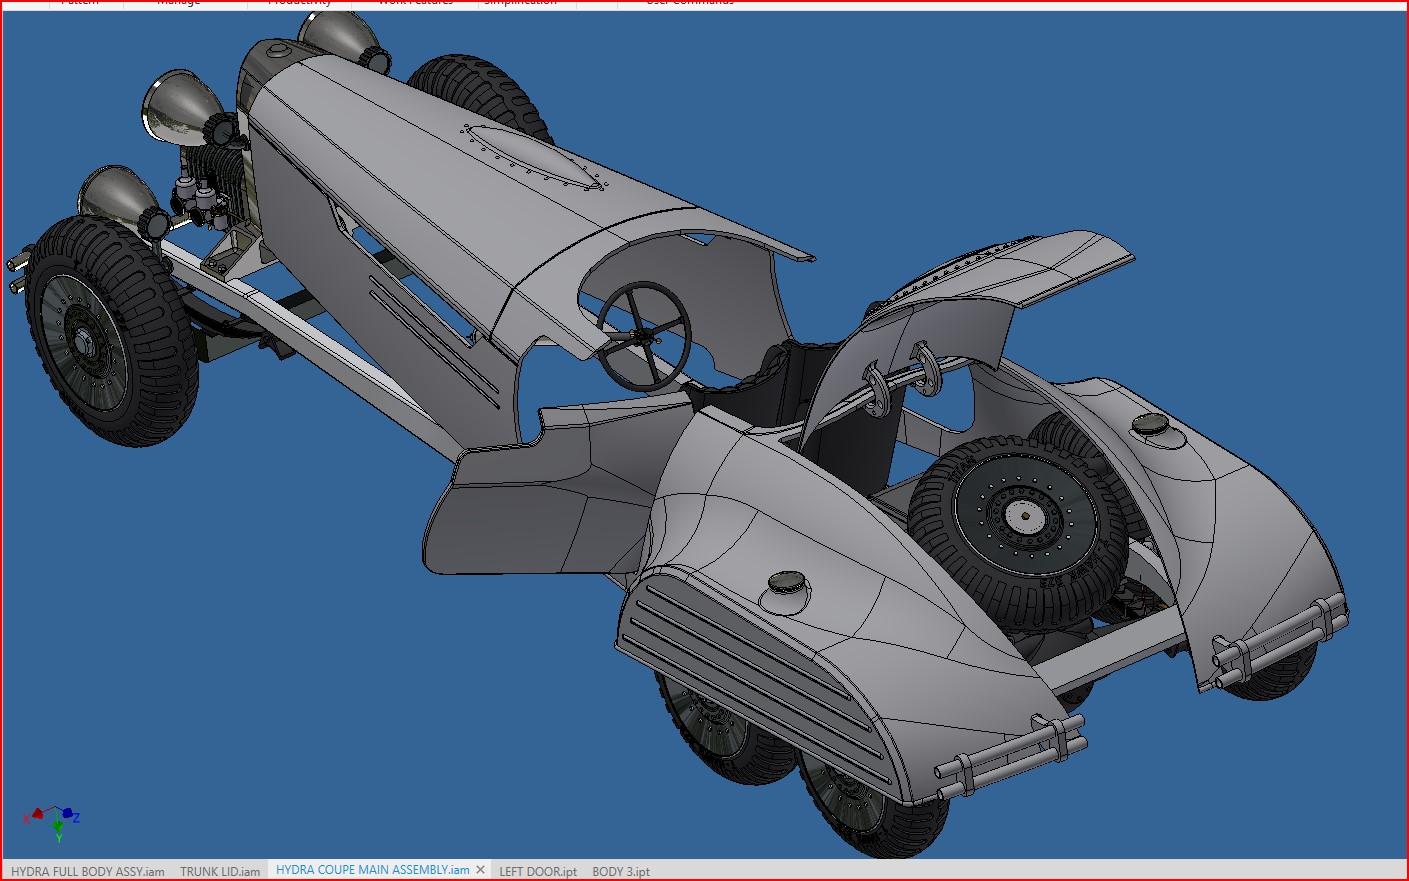
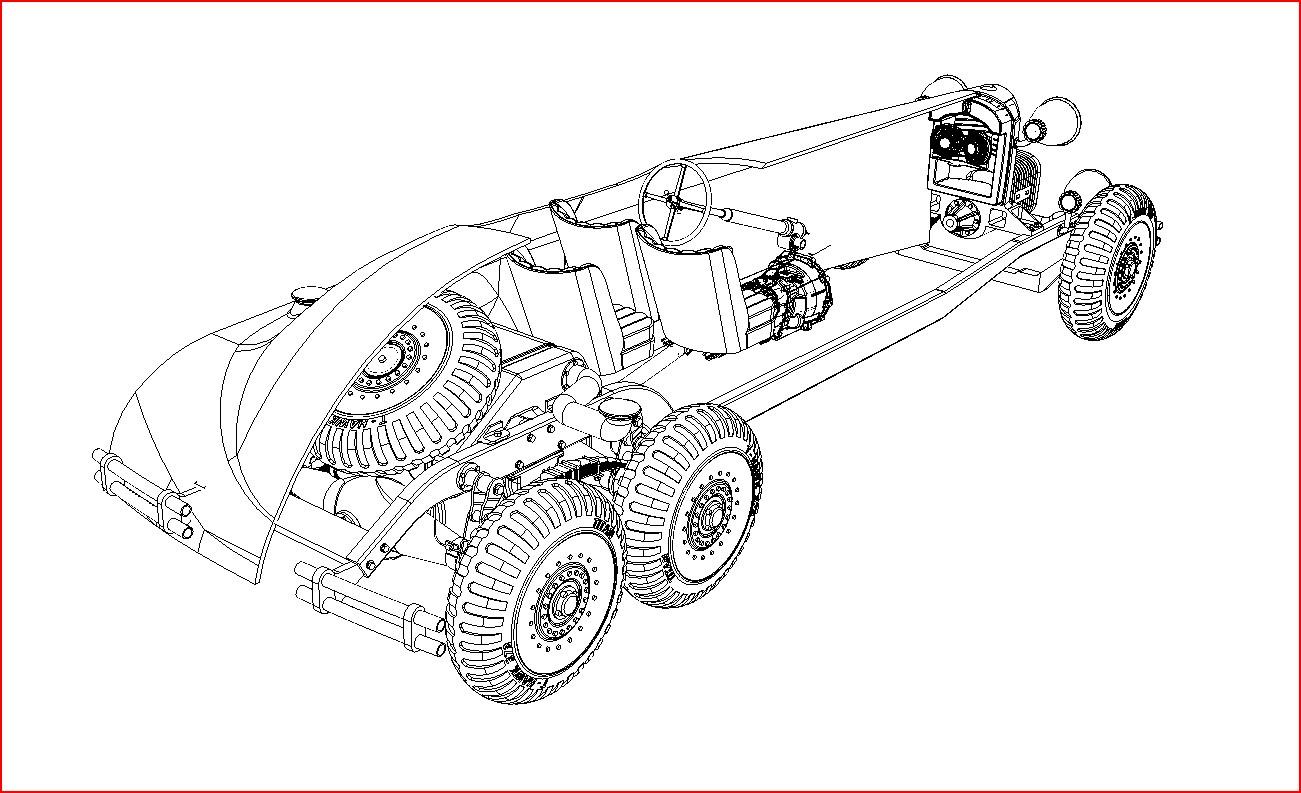
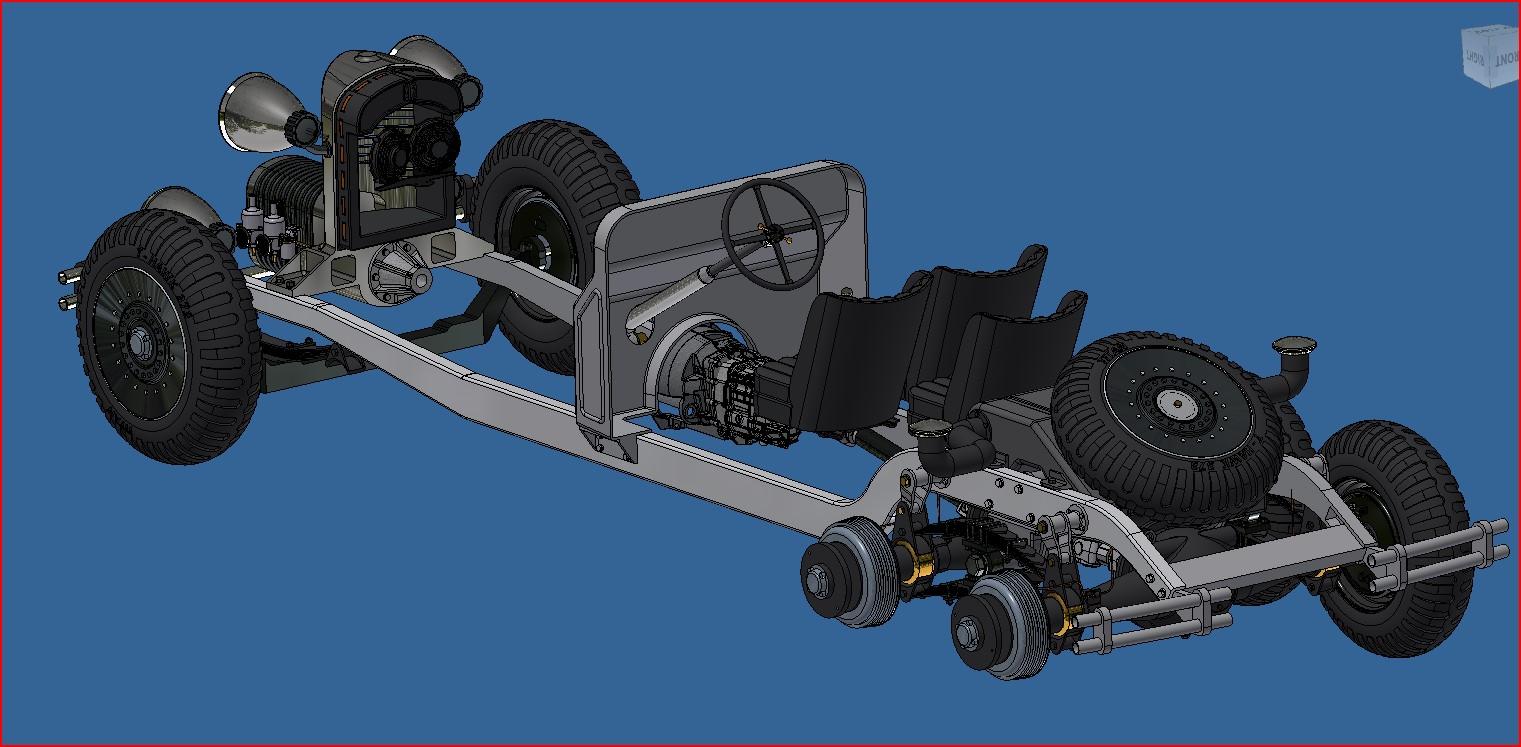
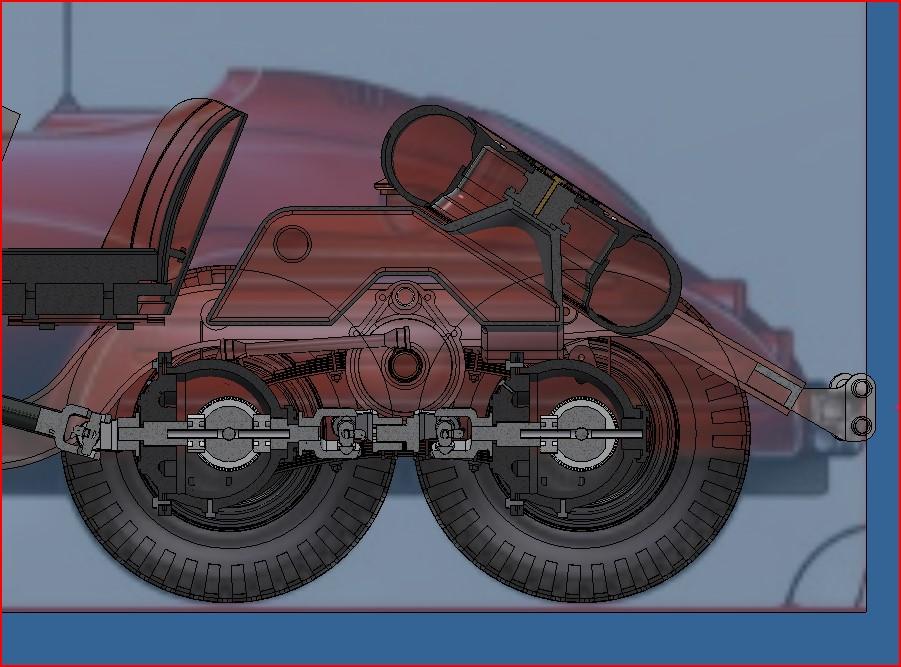
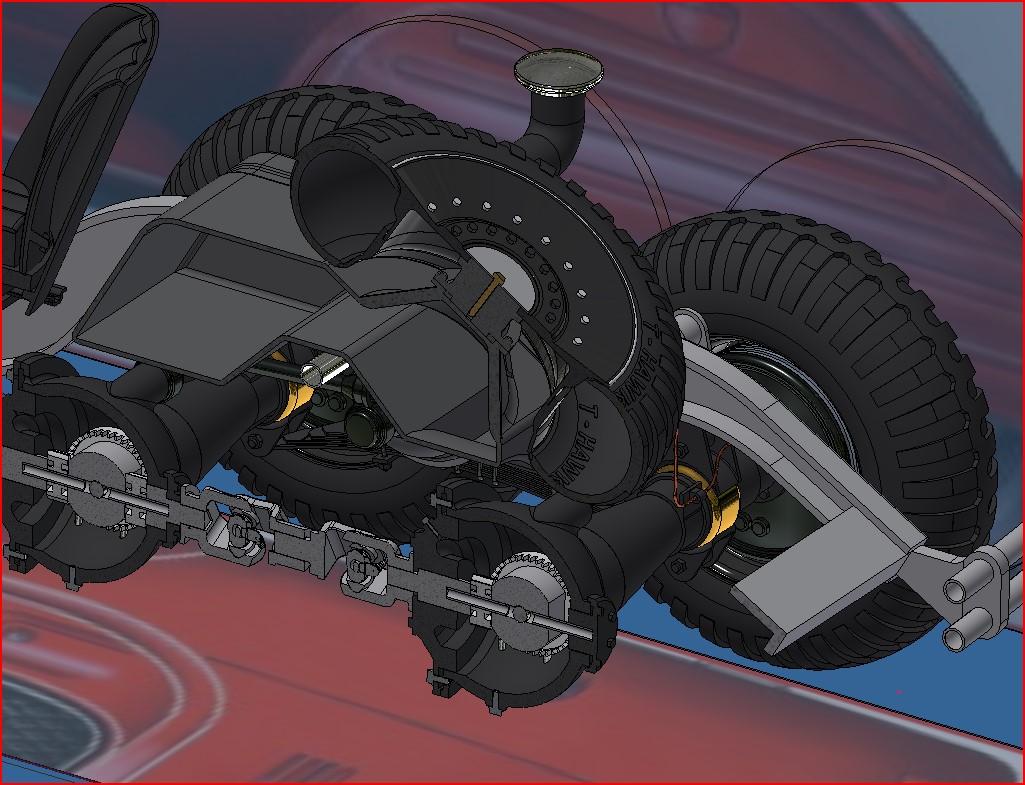
Made some good progress on the front suspension and steering mecanism. The front leafsprings are done, just need to add some dampeners. Not sure what type yet. As for the steering, it's been close to 40 years since I designed a steering mecanism. They are many rules to follow to get a proper steering geometrie but, this being a model, I'm keeping it simple. I did try to get the ackermann close ( that's when the inside wheel pivots more than the outside wheel since the 2 radii are different). I also designed the steering column, I went with a worm gear setup a bit like the one on the Bentley. it's quite difficult to get the different pivot points in the righ places but l'm getting close to something that works. Hopefully, the steering box won't be too much in the way of the yet to be determined engine block. 20240925_193953.mp4
-
Marvel's Hydra coupe 1/12 scale full scratch build
François replied to François's topic in WIP: Model Cars
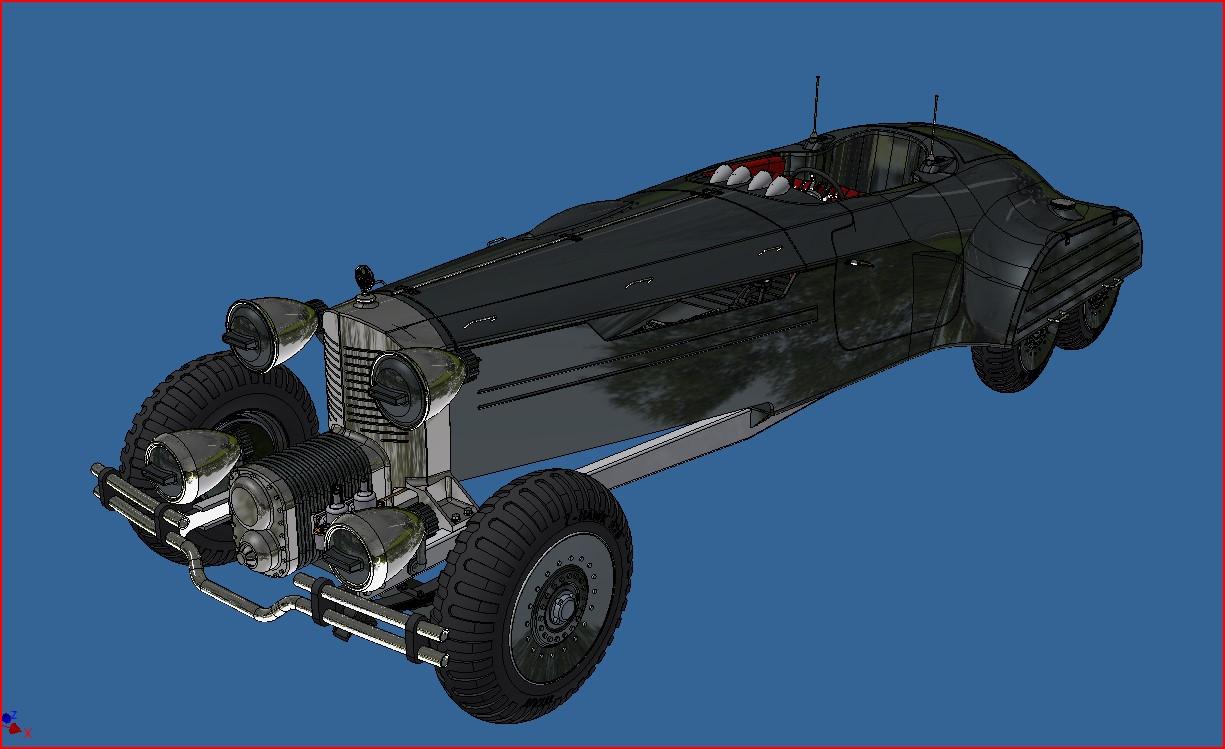
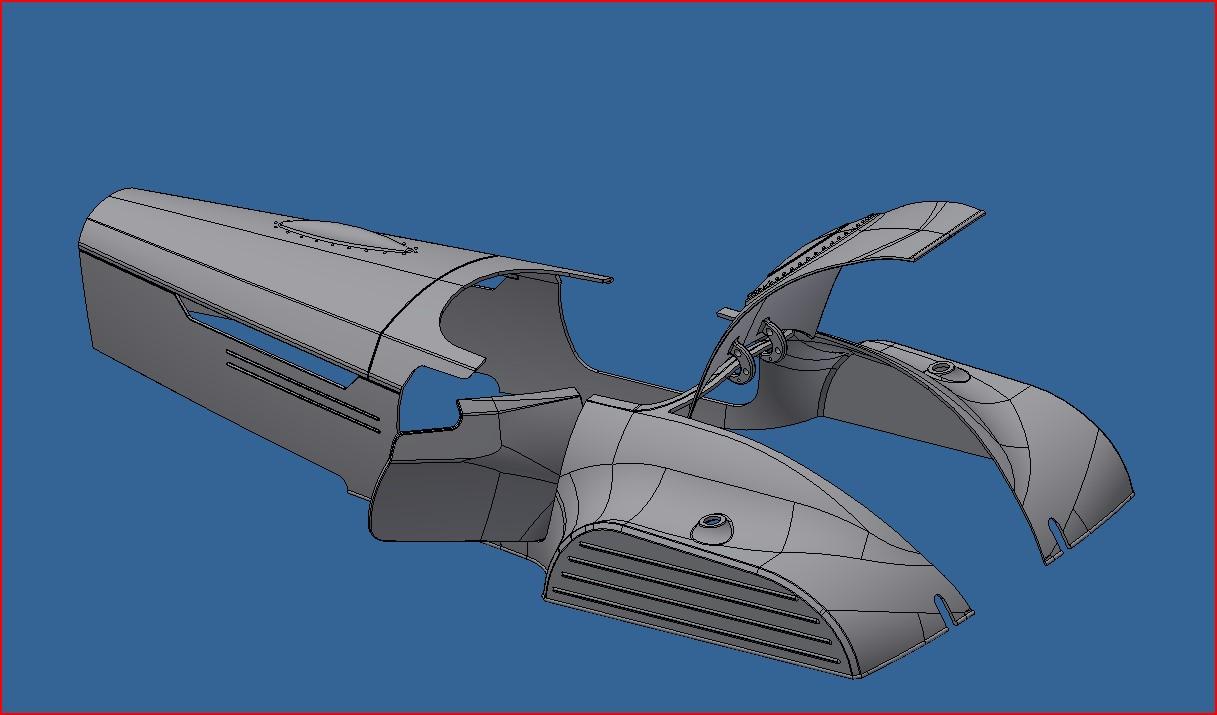
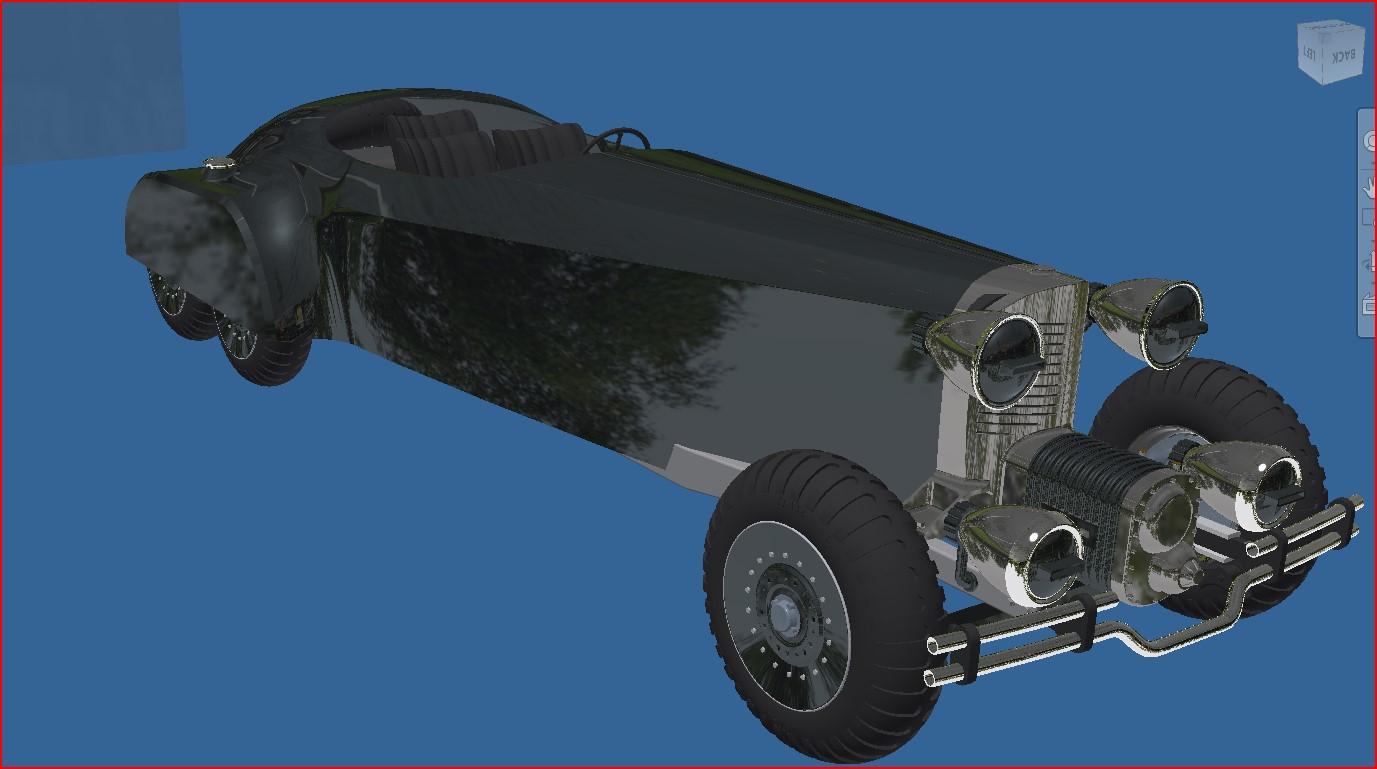
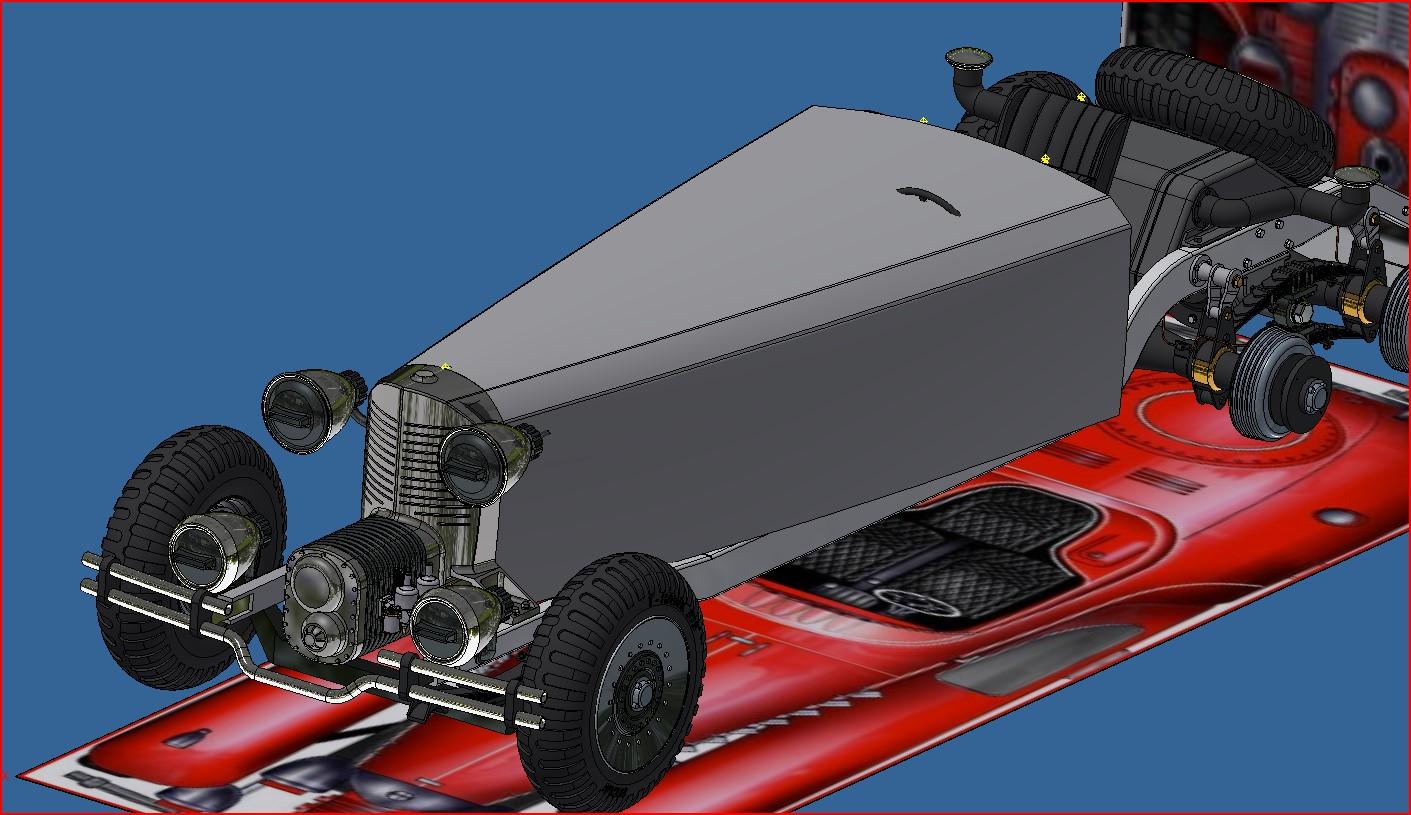
I reworked the fenders and I think they are better. So with this done, the body is pretty close to being finished. It is now composed of six parts so it can be printed. I also made a few cross members for the frame. Here is the completed boby with revised fenders. The 6 body parts The frame with new cross members And the car as of today Next up, the front suspension and steering.
-
Marvel's Hydra coupe 1/12 scale full scratch build
François replied to François's topic in WIP: Model Cars
Finaly got around to model the fenders. Of all the parts modeled so far on this car, these were the hardest to do. I'm not 100% satisfied and I might play around with them a bit but I think it a case of 'leave well enough alone'. I also started the under fender storage boxes. They will have two hinges so they can be opened. Not sure what will be stored in them yet. I made the gas pedal which will eventually be linked to the carburators via a cable. Compared to the movie prop The windscreen frame And the gas pedal
-
Marvel's Hydra coupe 1/12 scale full scratch build
François replied to François's topic in WIP: Model Cars
Did some more cad work on the firewall assembly. I've included a period master brake cylinder (comes from a 1940 ford) and clutch cylinder. They both have working spring loaded pedals. I've also figured out a way to mount the dashboard on the firewall so that the body can be removed without removing the dash and steering column, a bit like I did on the bentley. Ans lastly, I added a properly scaled human so I could position the pedals correctly.
-
Marvel's Hydra coupe 1/12 scale full scratch build
François replied to François's topic in WIP: Model Cars
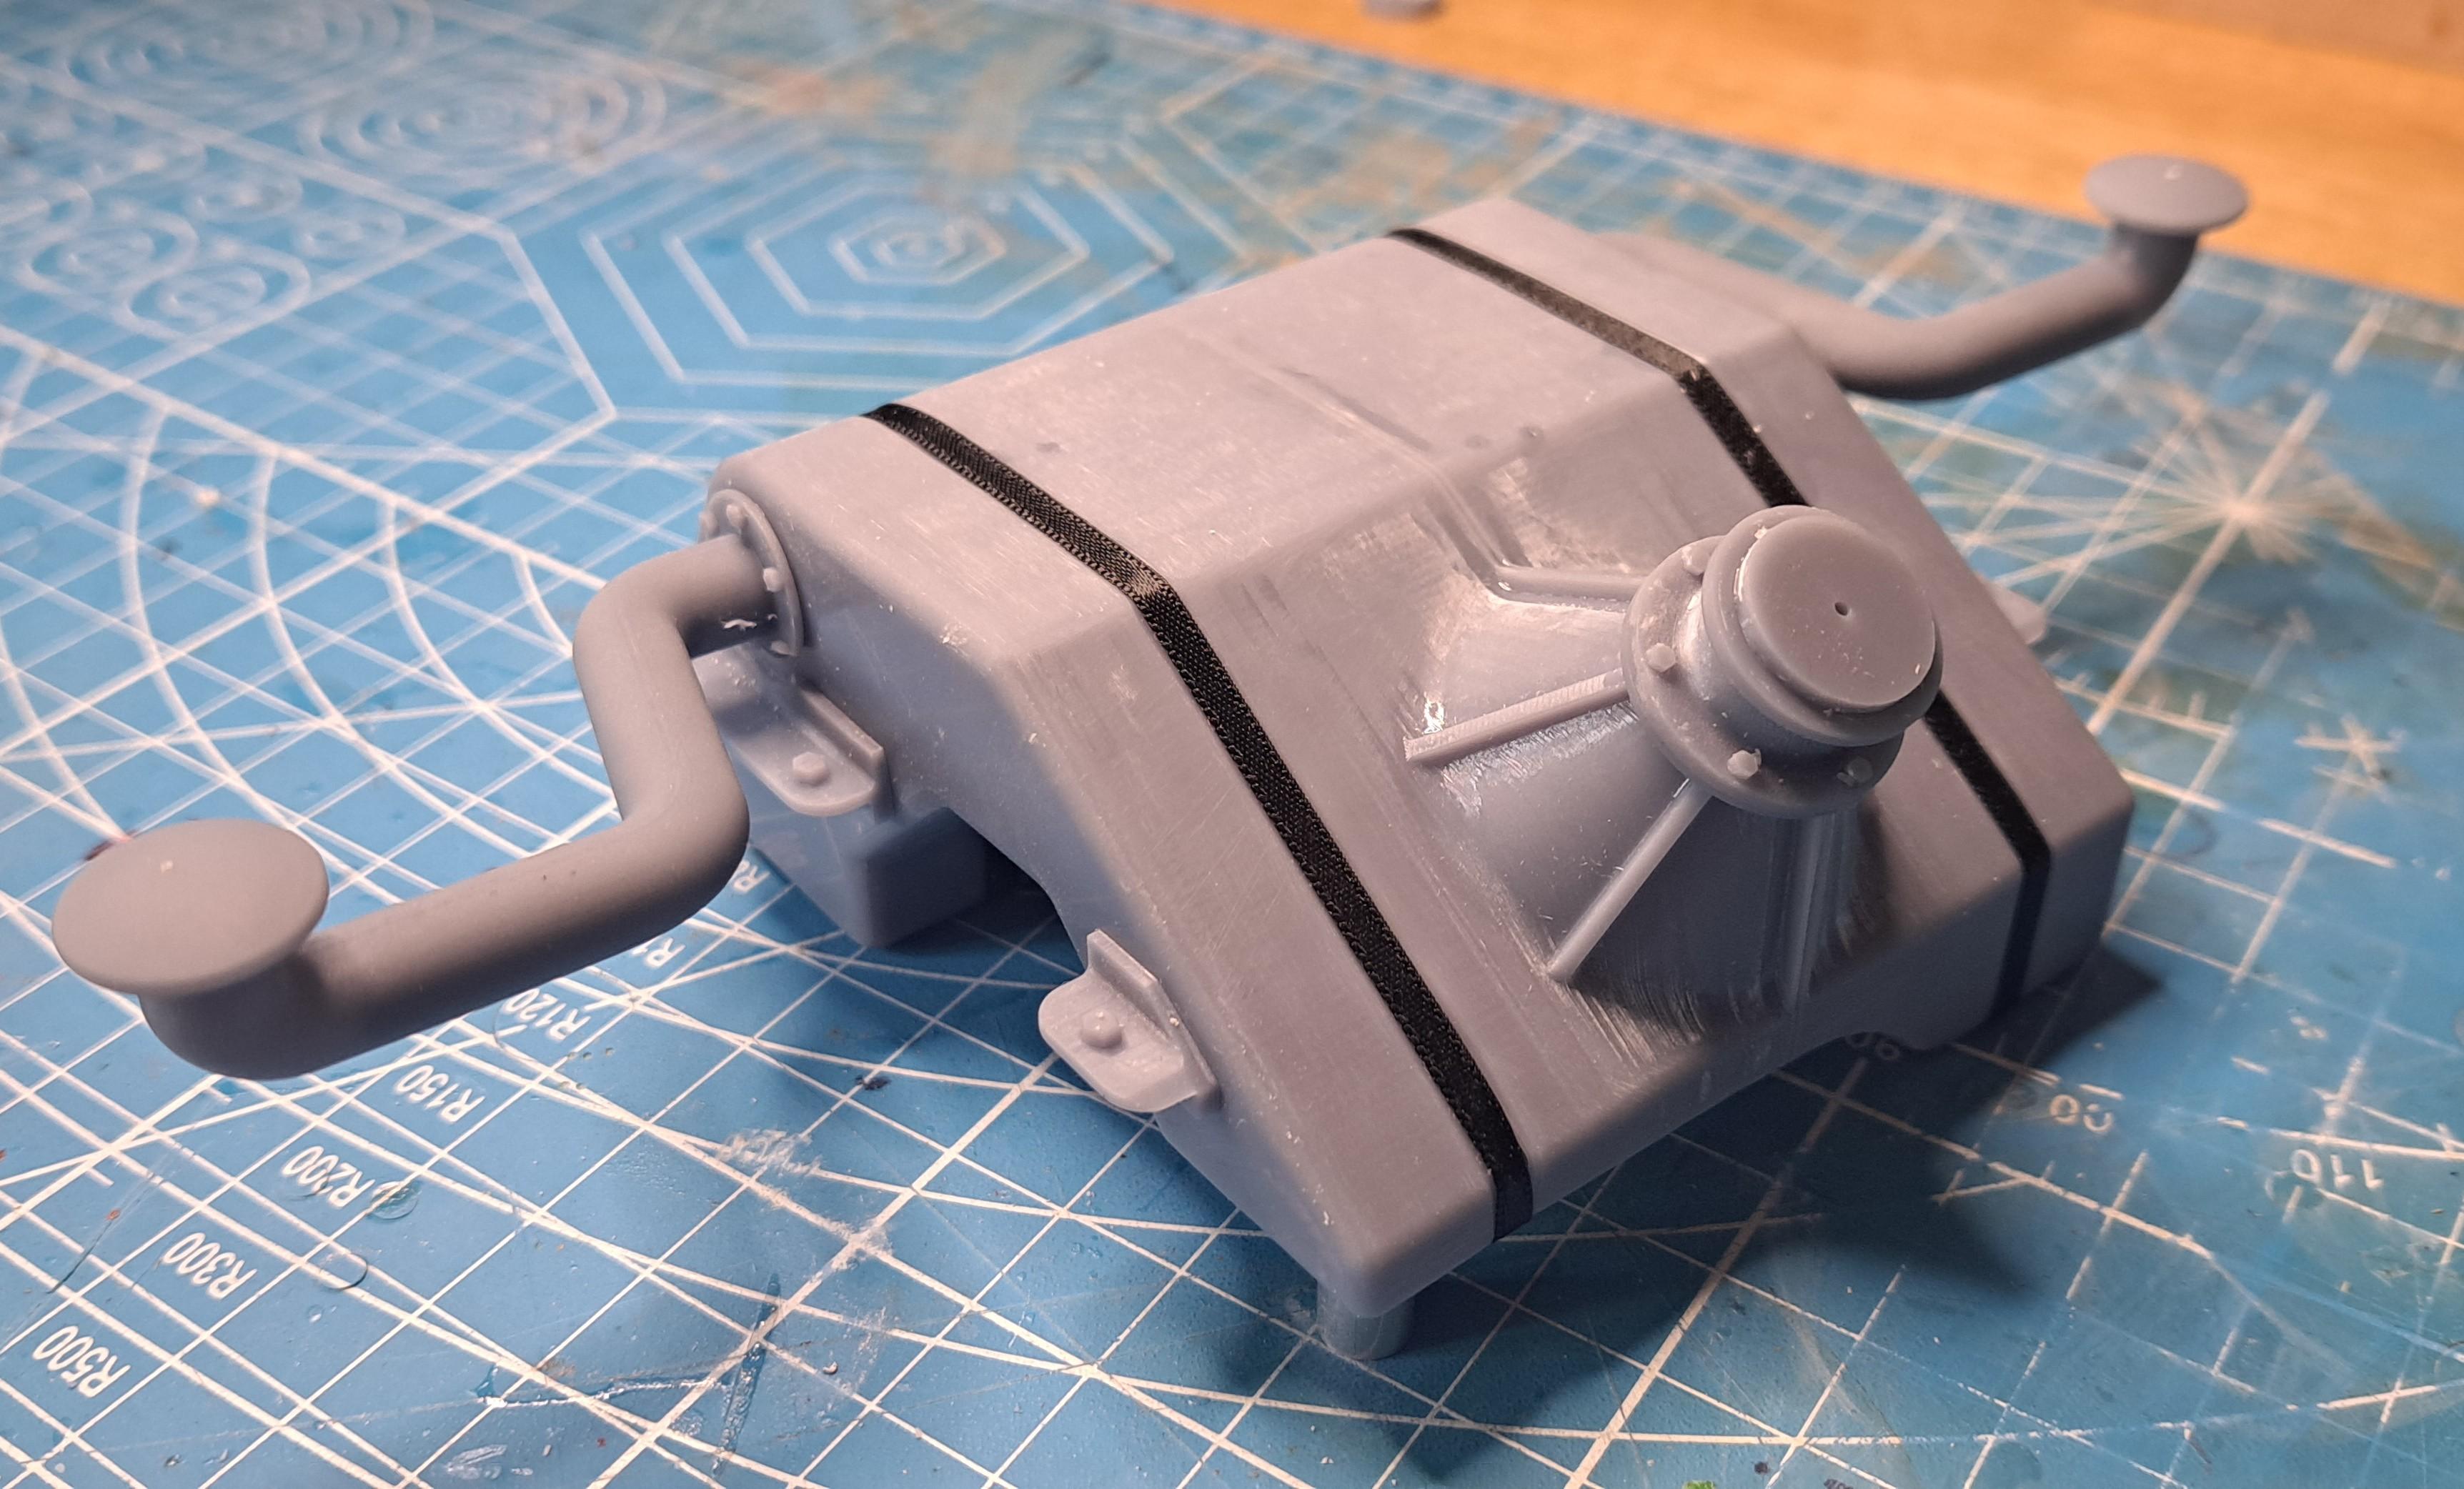
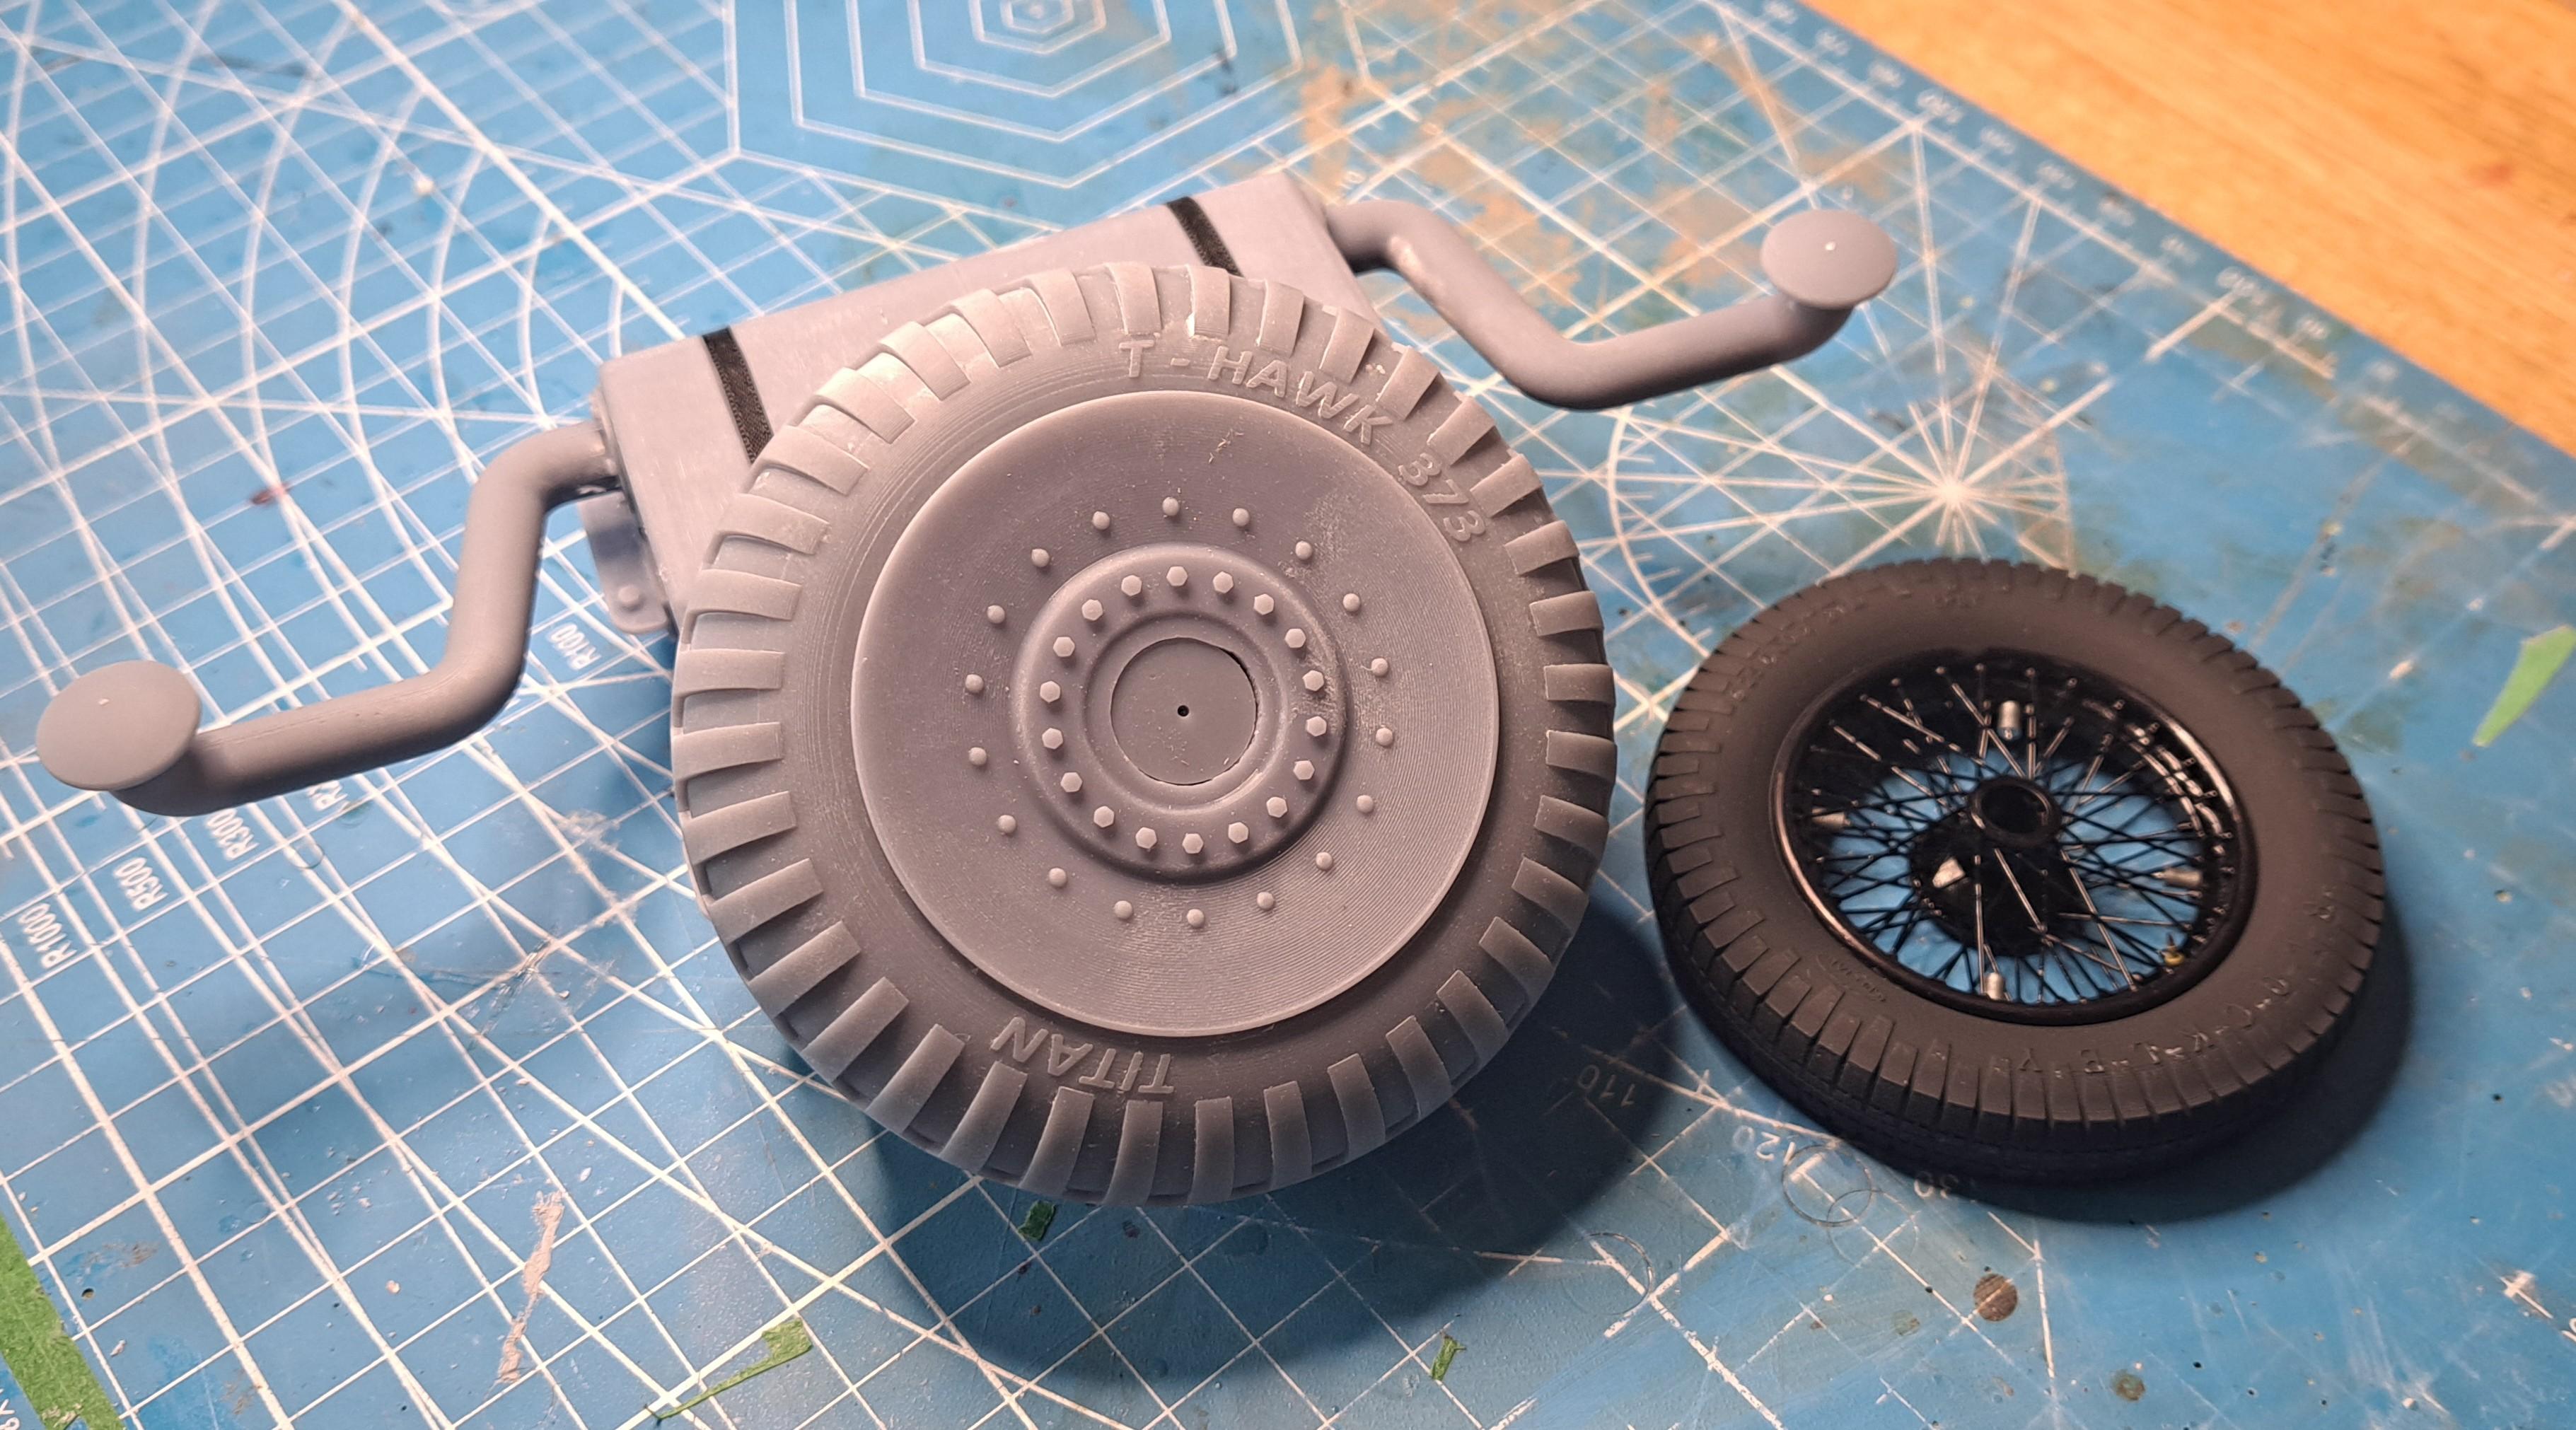
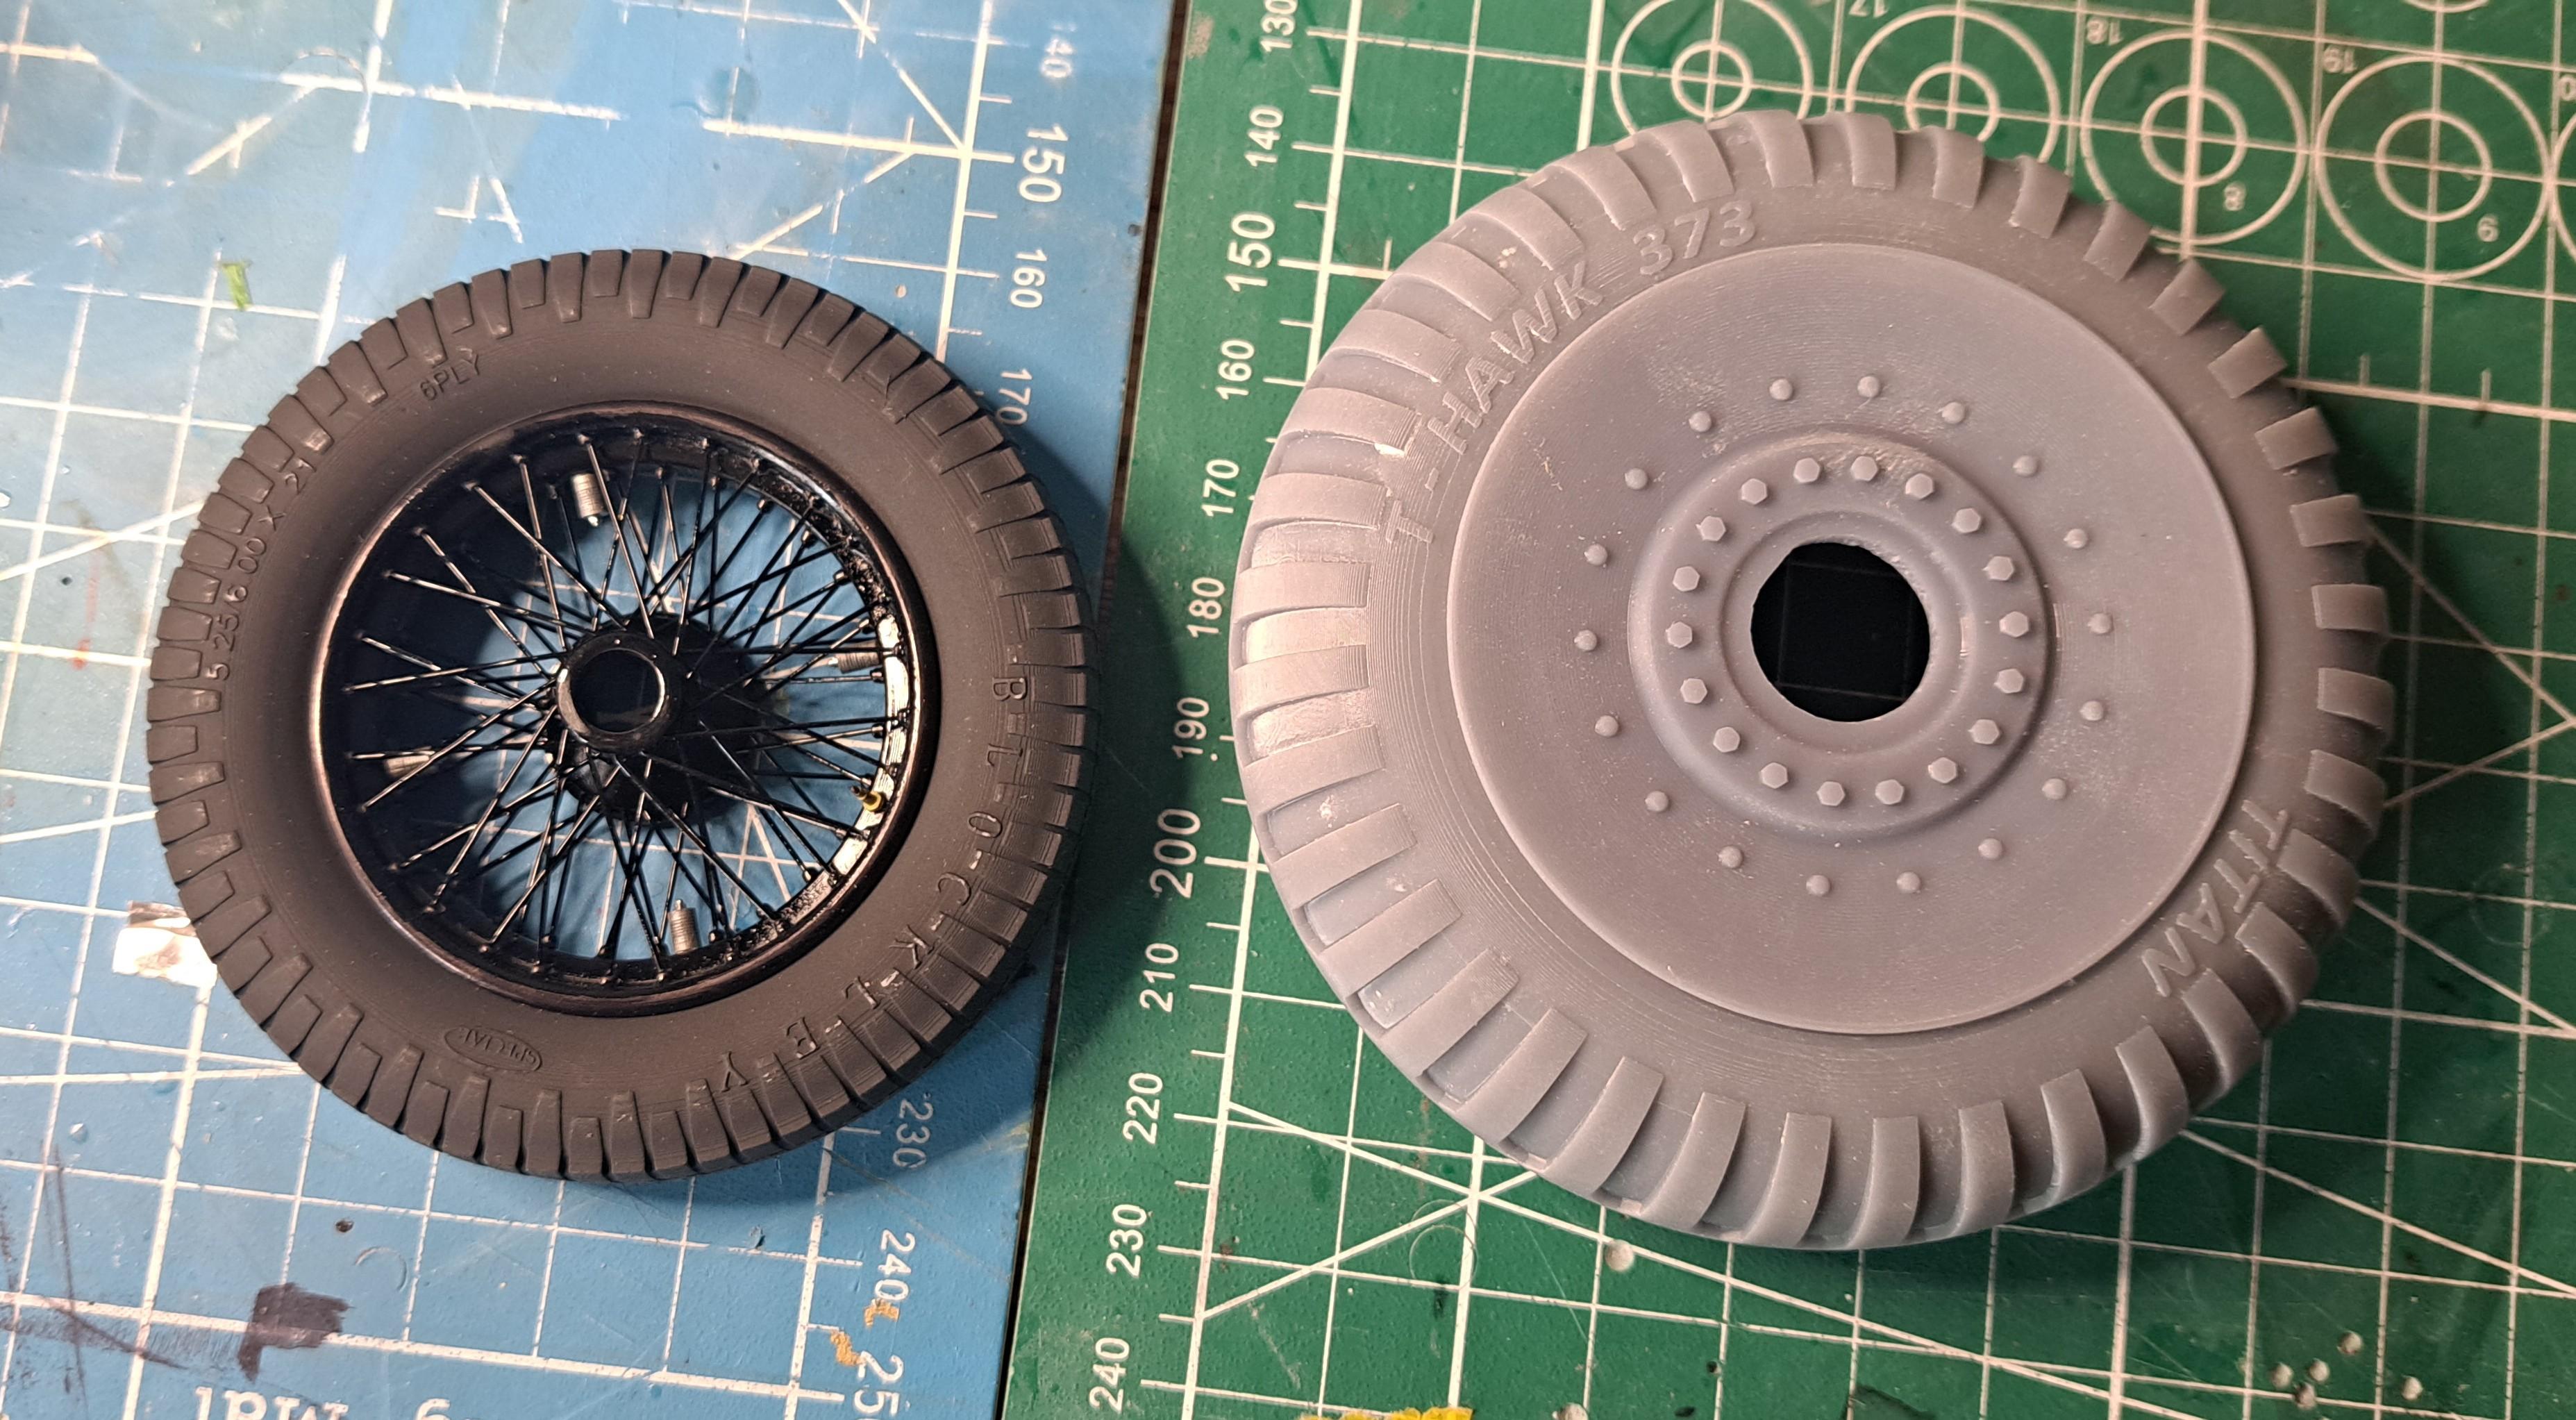
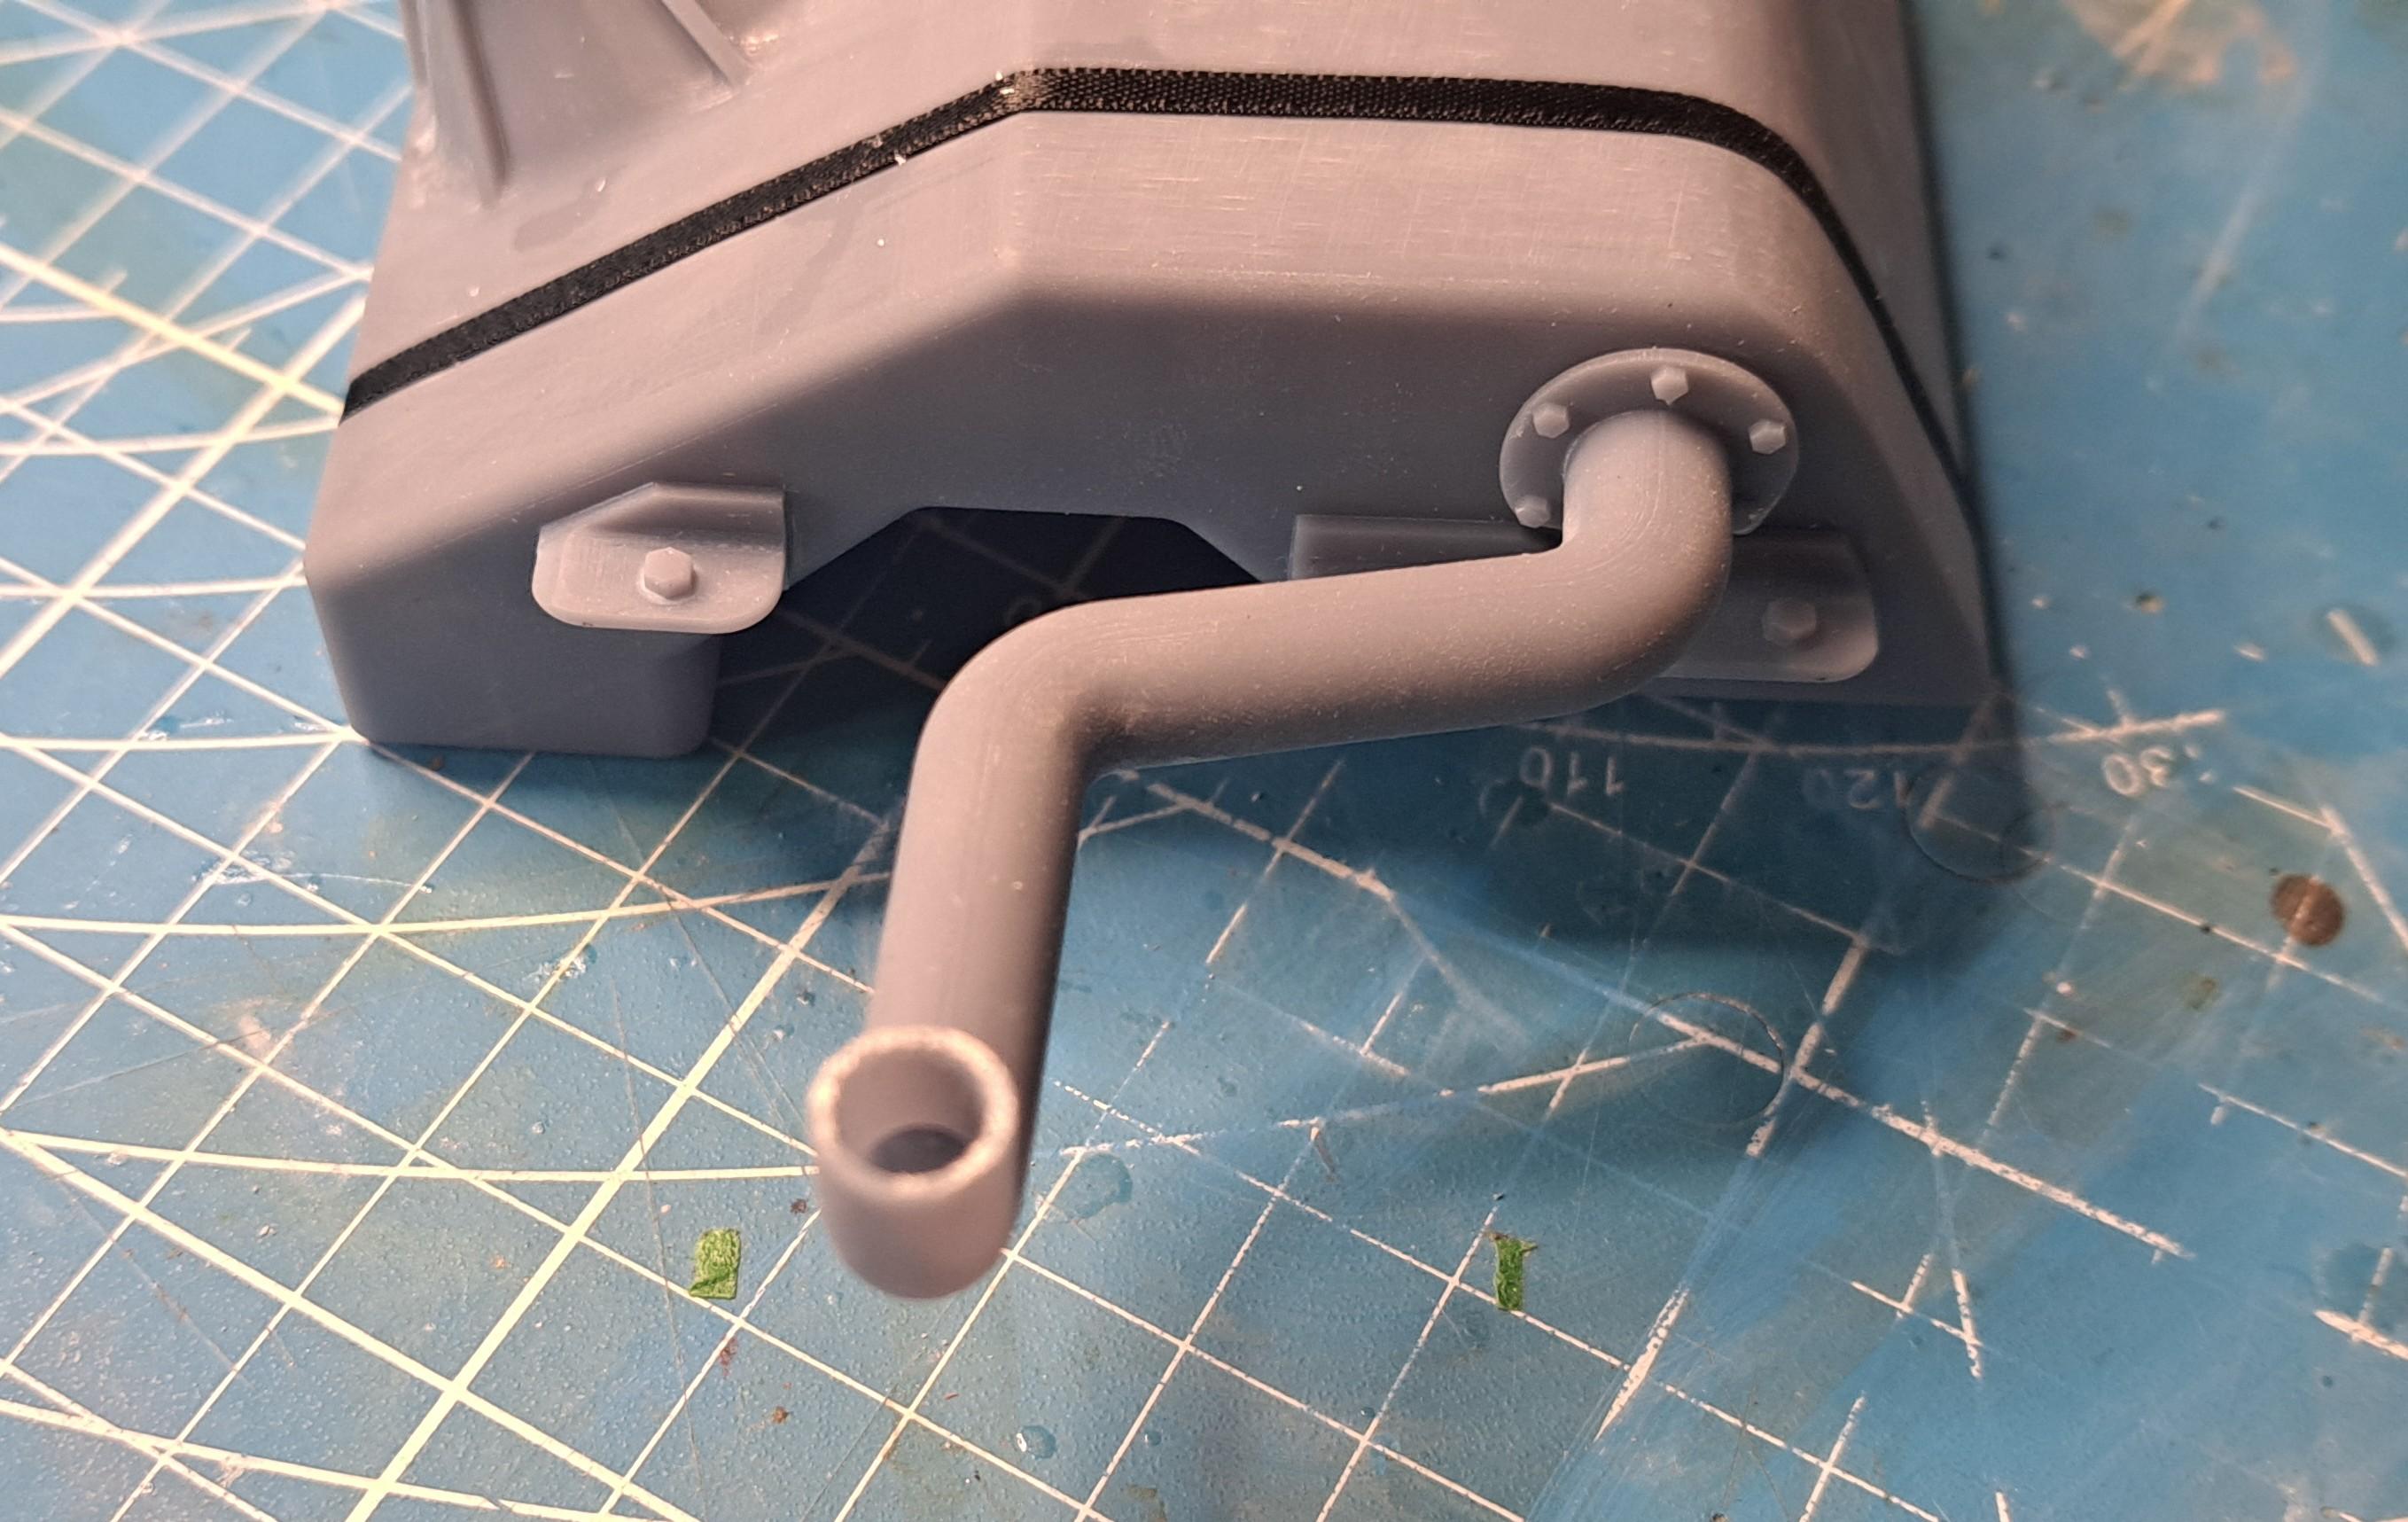
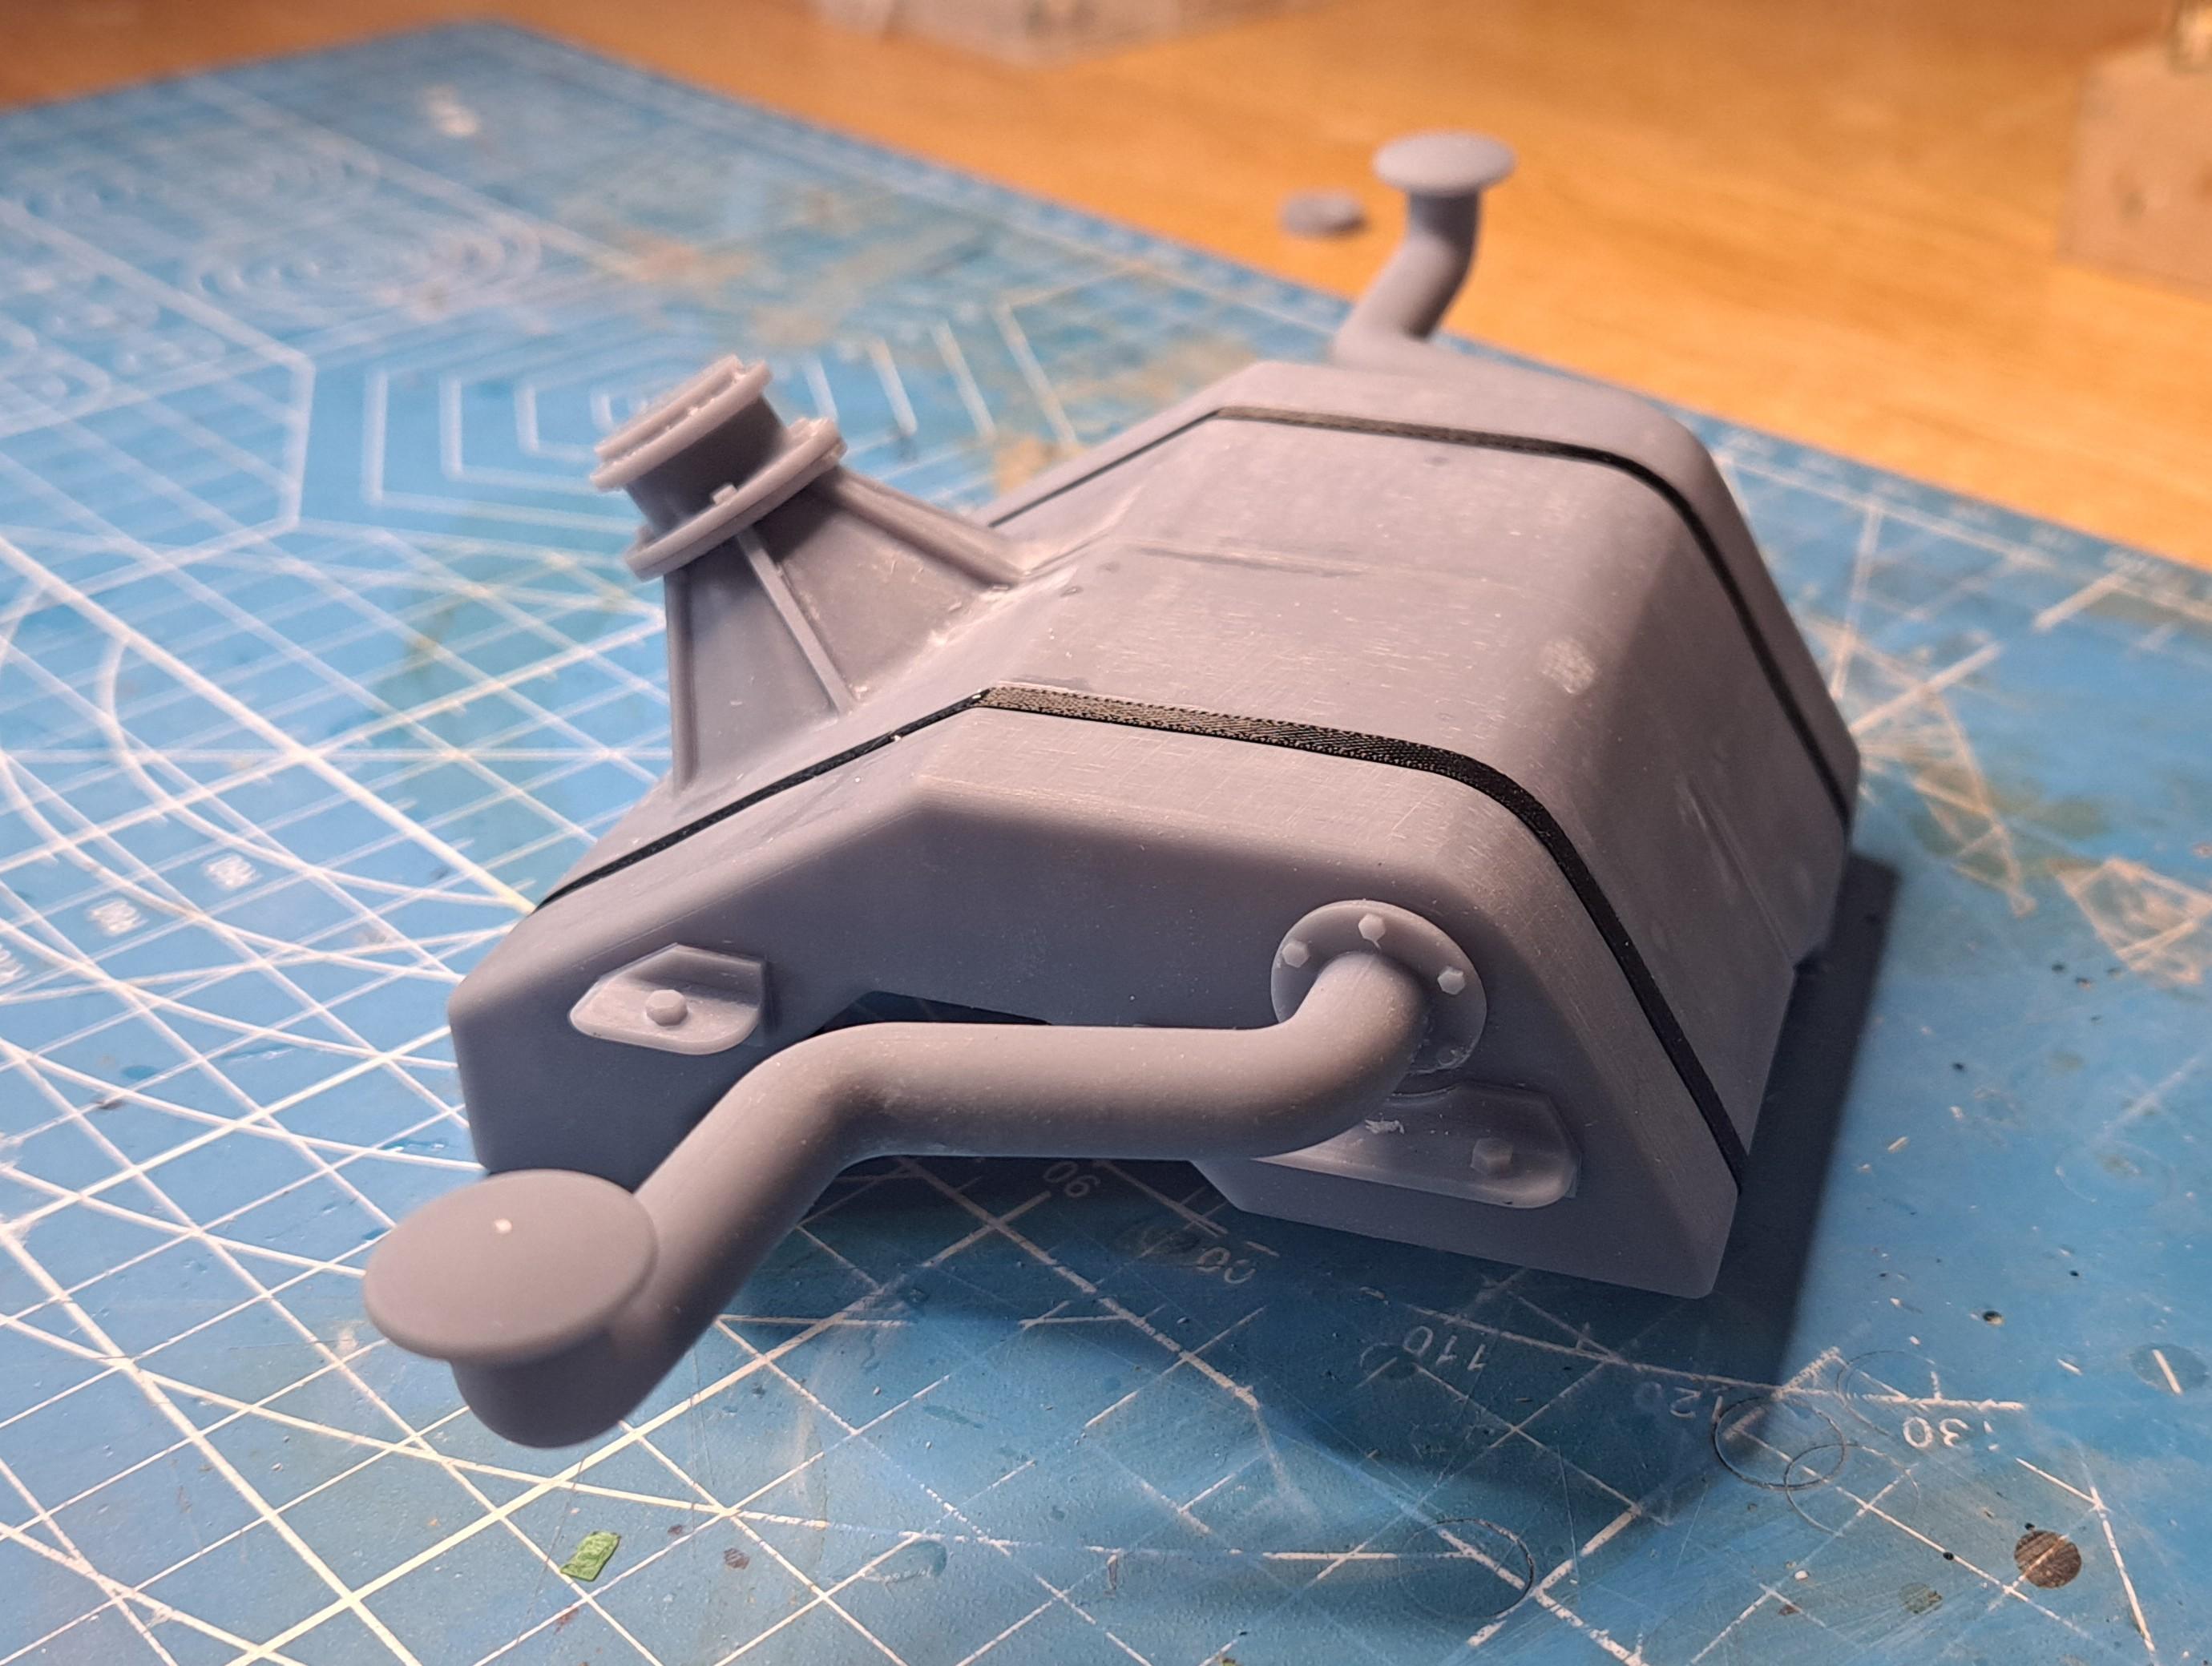
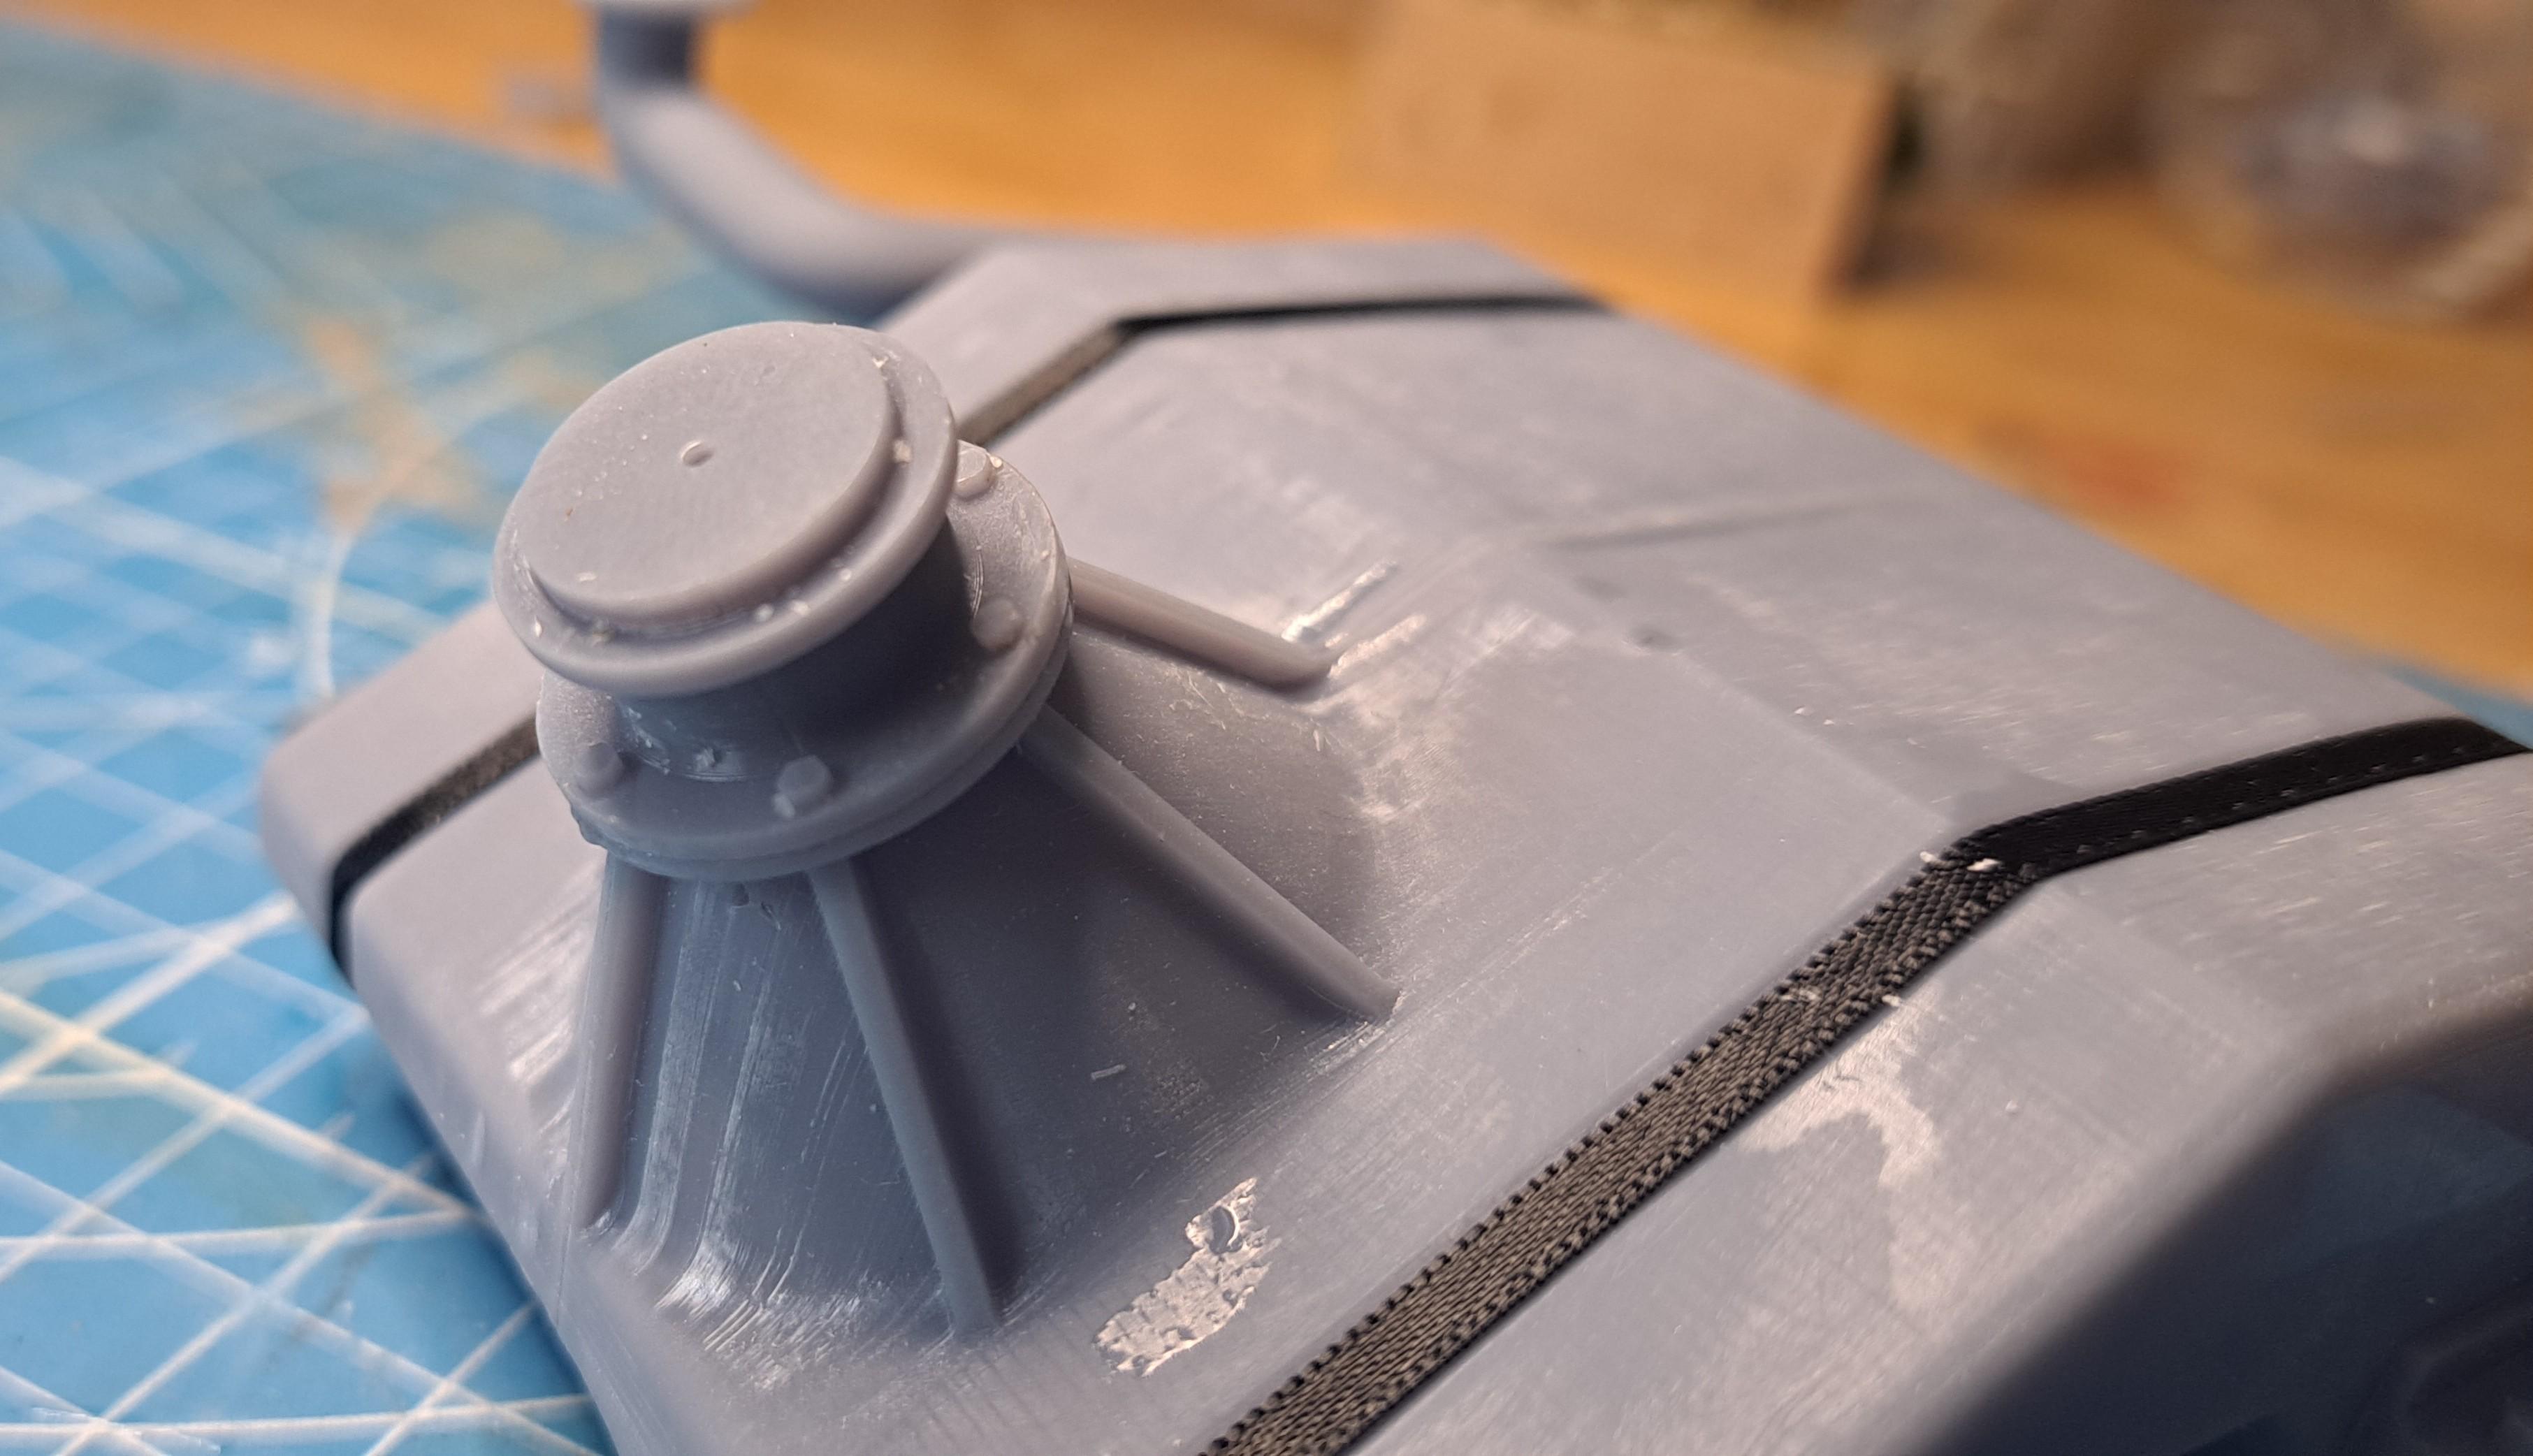
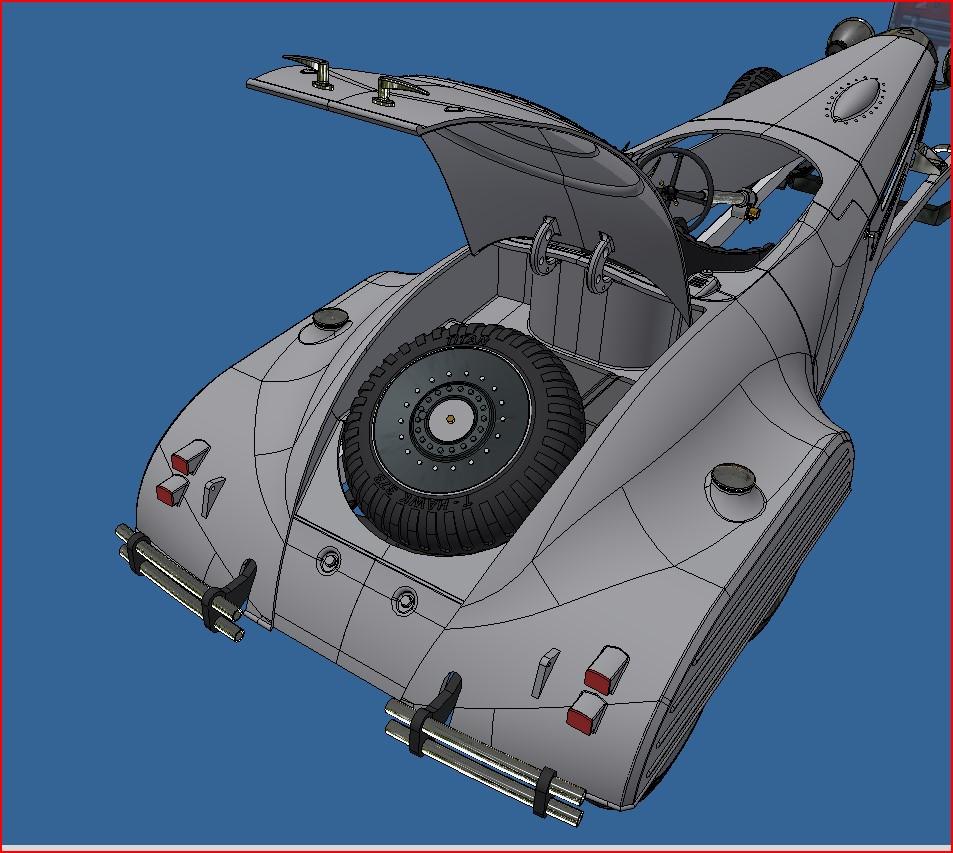
I worked a bit on the tank and it's not half bad, but the walls are too thin which caused some printing errors so I'll reprint it. I also printed both filler tubes with the gas caps. So I have a fully assembled gas tank to play with. I also test printed a tire and it came out pretty close to perfect. I would really like to print them with a soft resin but this type of material is quite expensive. I took a picture of the tank next to the Bentley's gas tank, it give a good idea of the enormous size this model will be. Like I said before, they are both 1/12 scale. The spare tire mount Tank with spare tire The hydra wheel next to the Bentley's The hydra tank next to the Bentley's
-
Marvel's Hydra coupe 1/12 scale full scratch build
François replied to François's topic in WIP: Model Cars
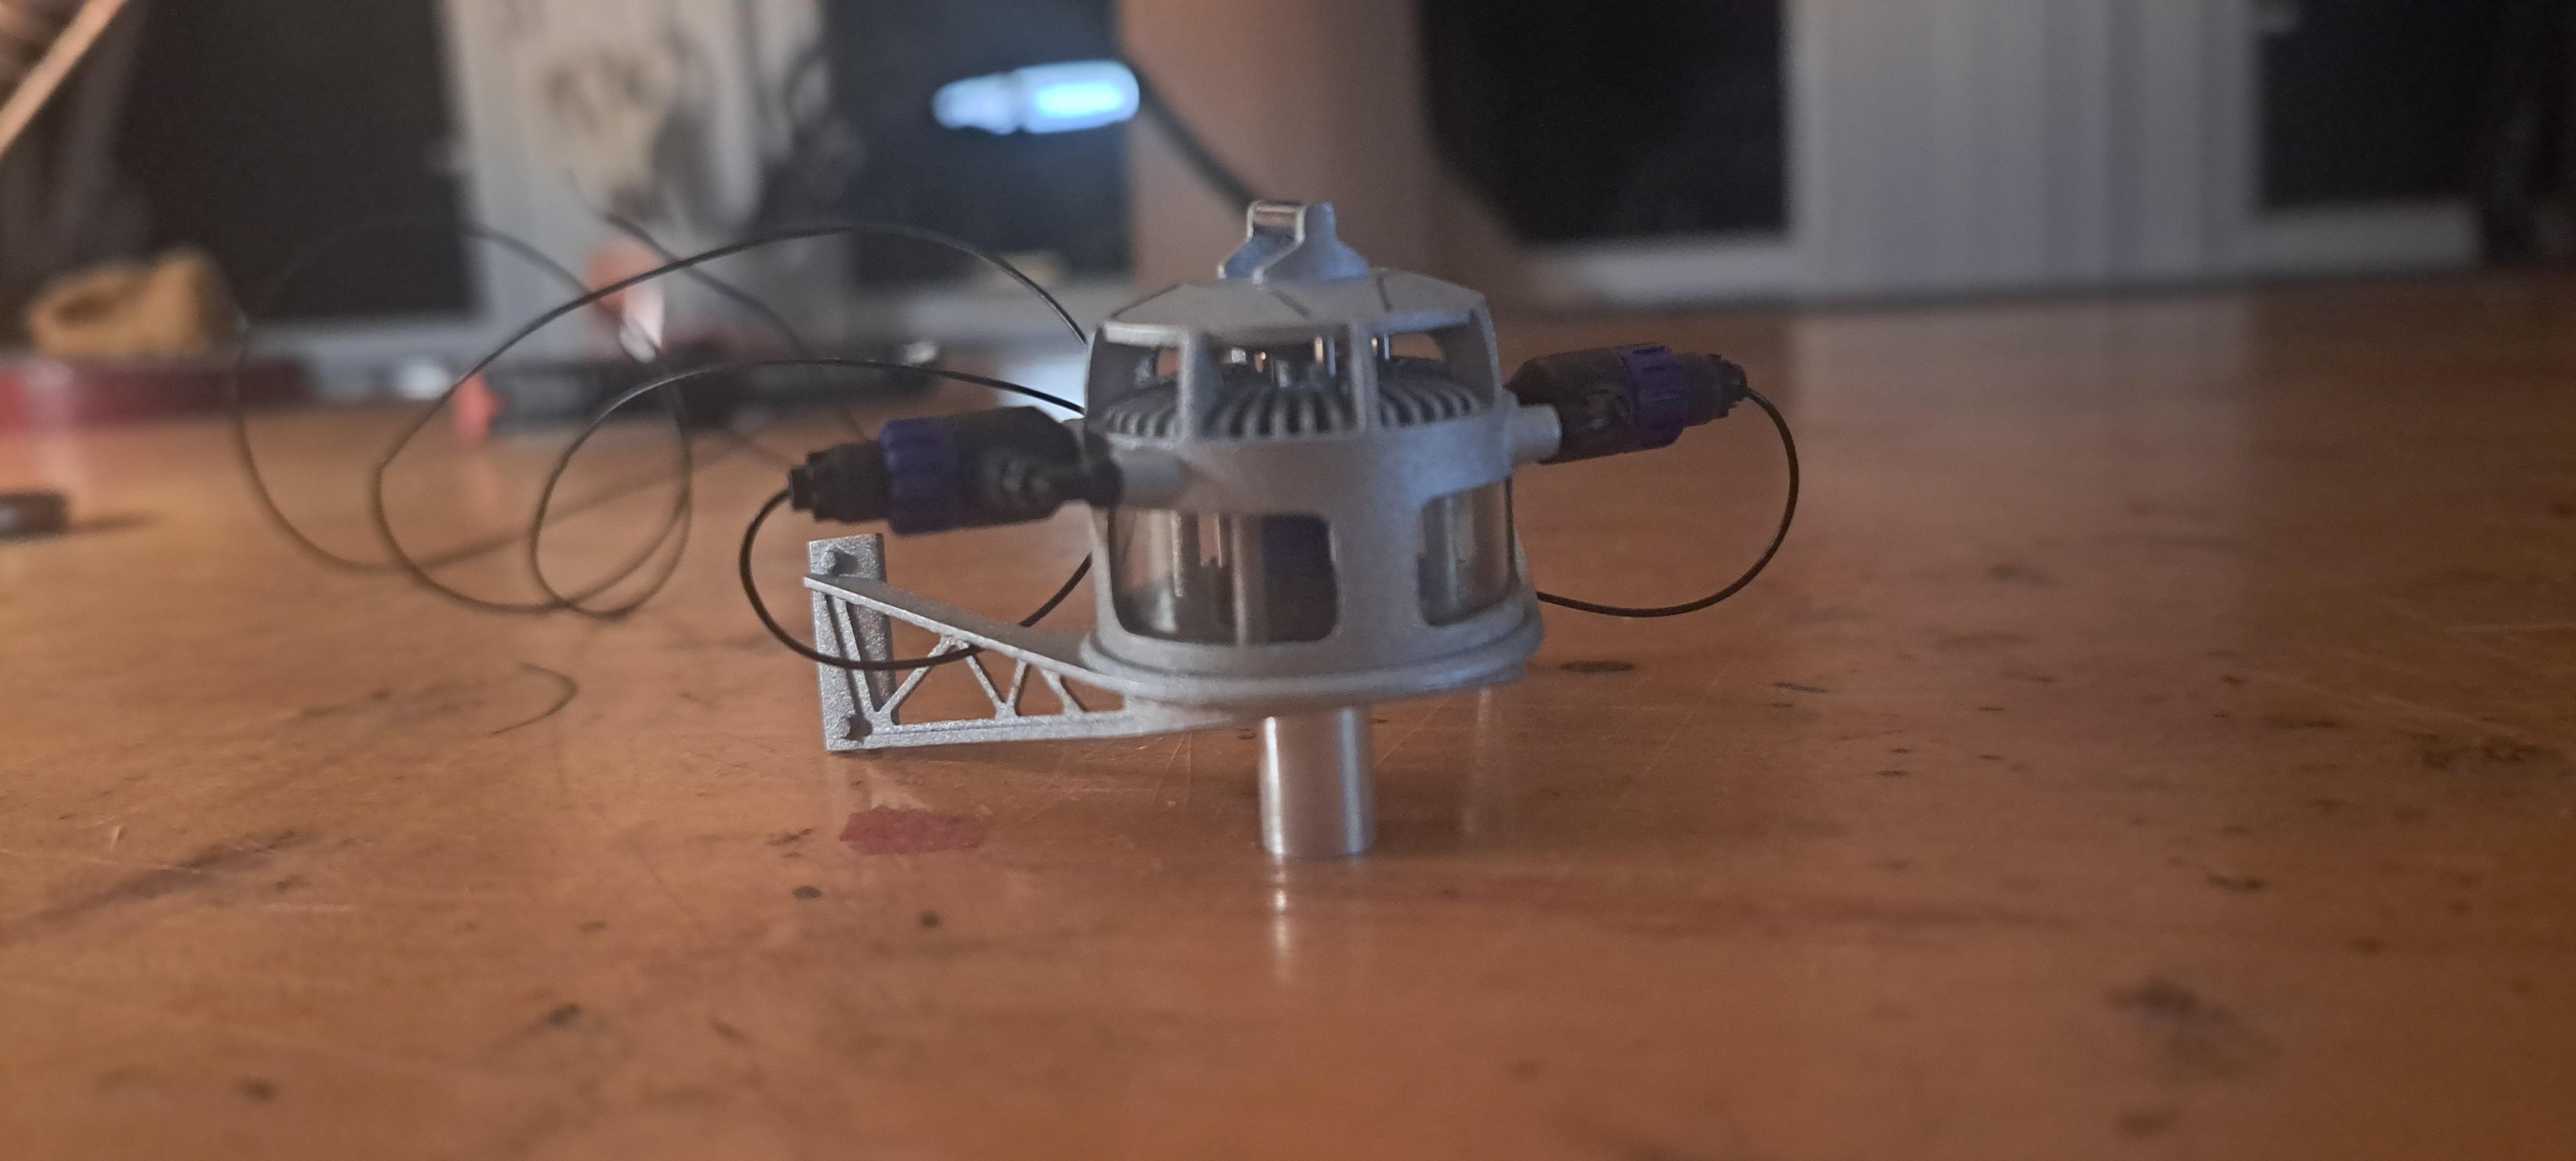
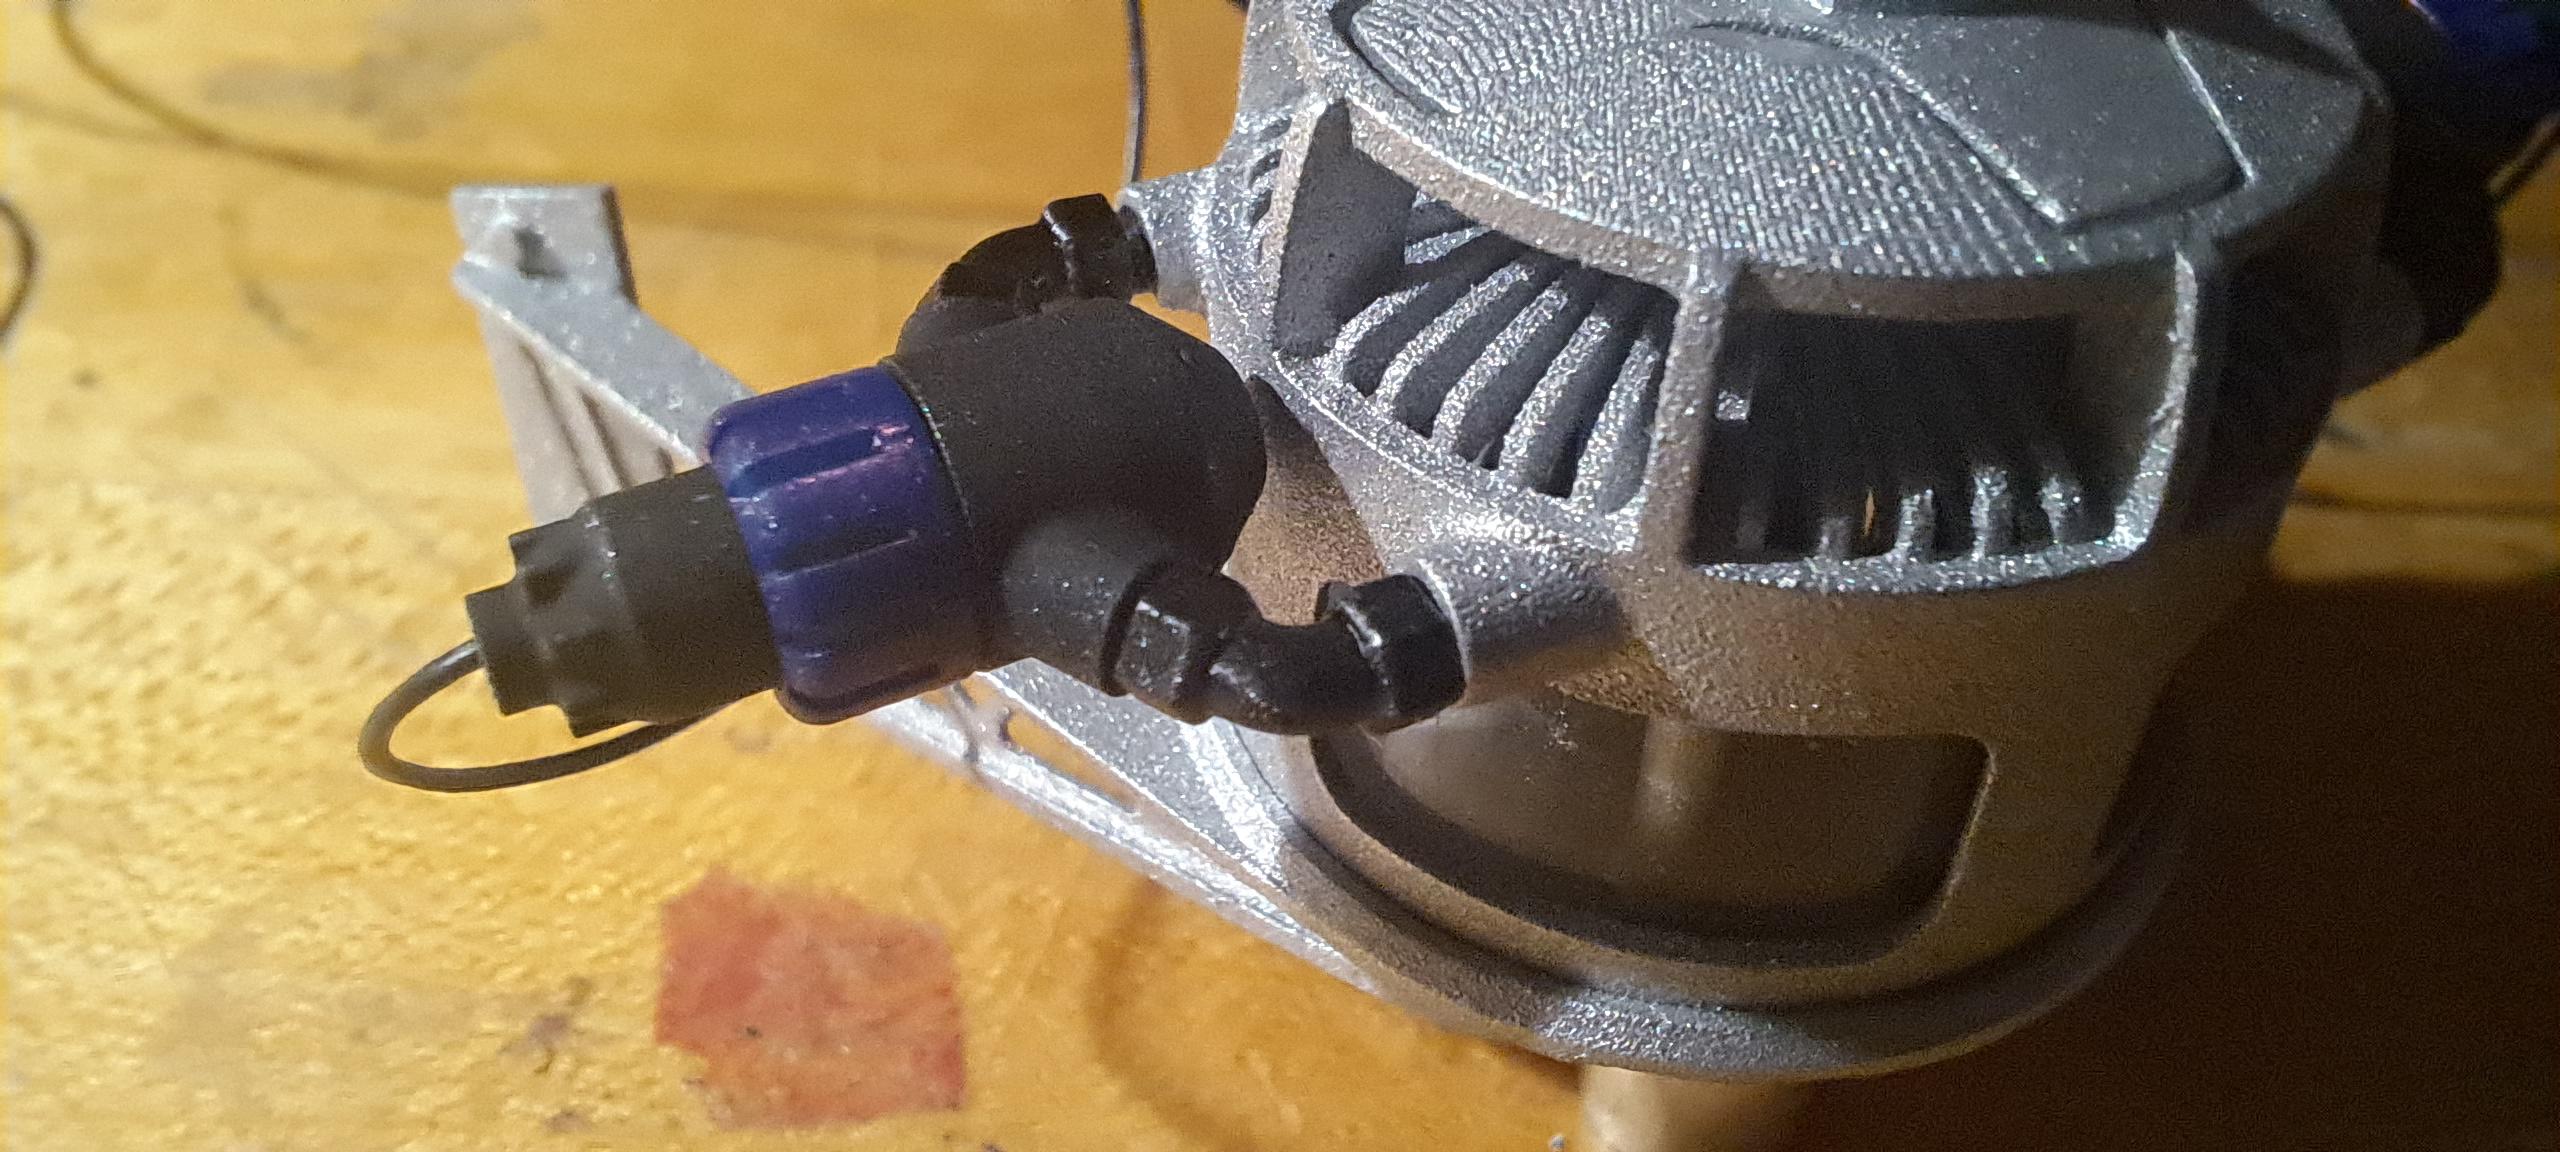
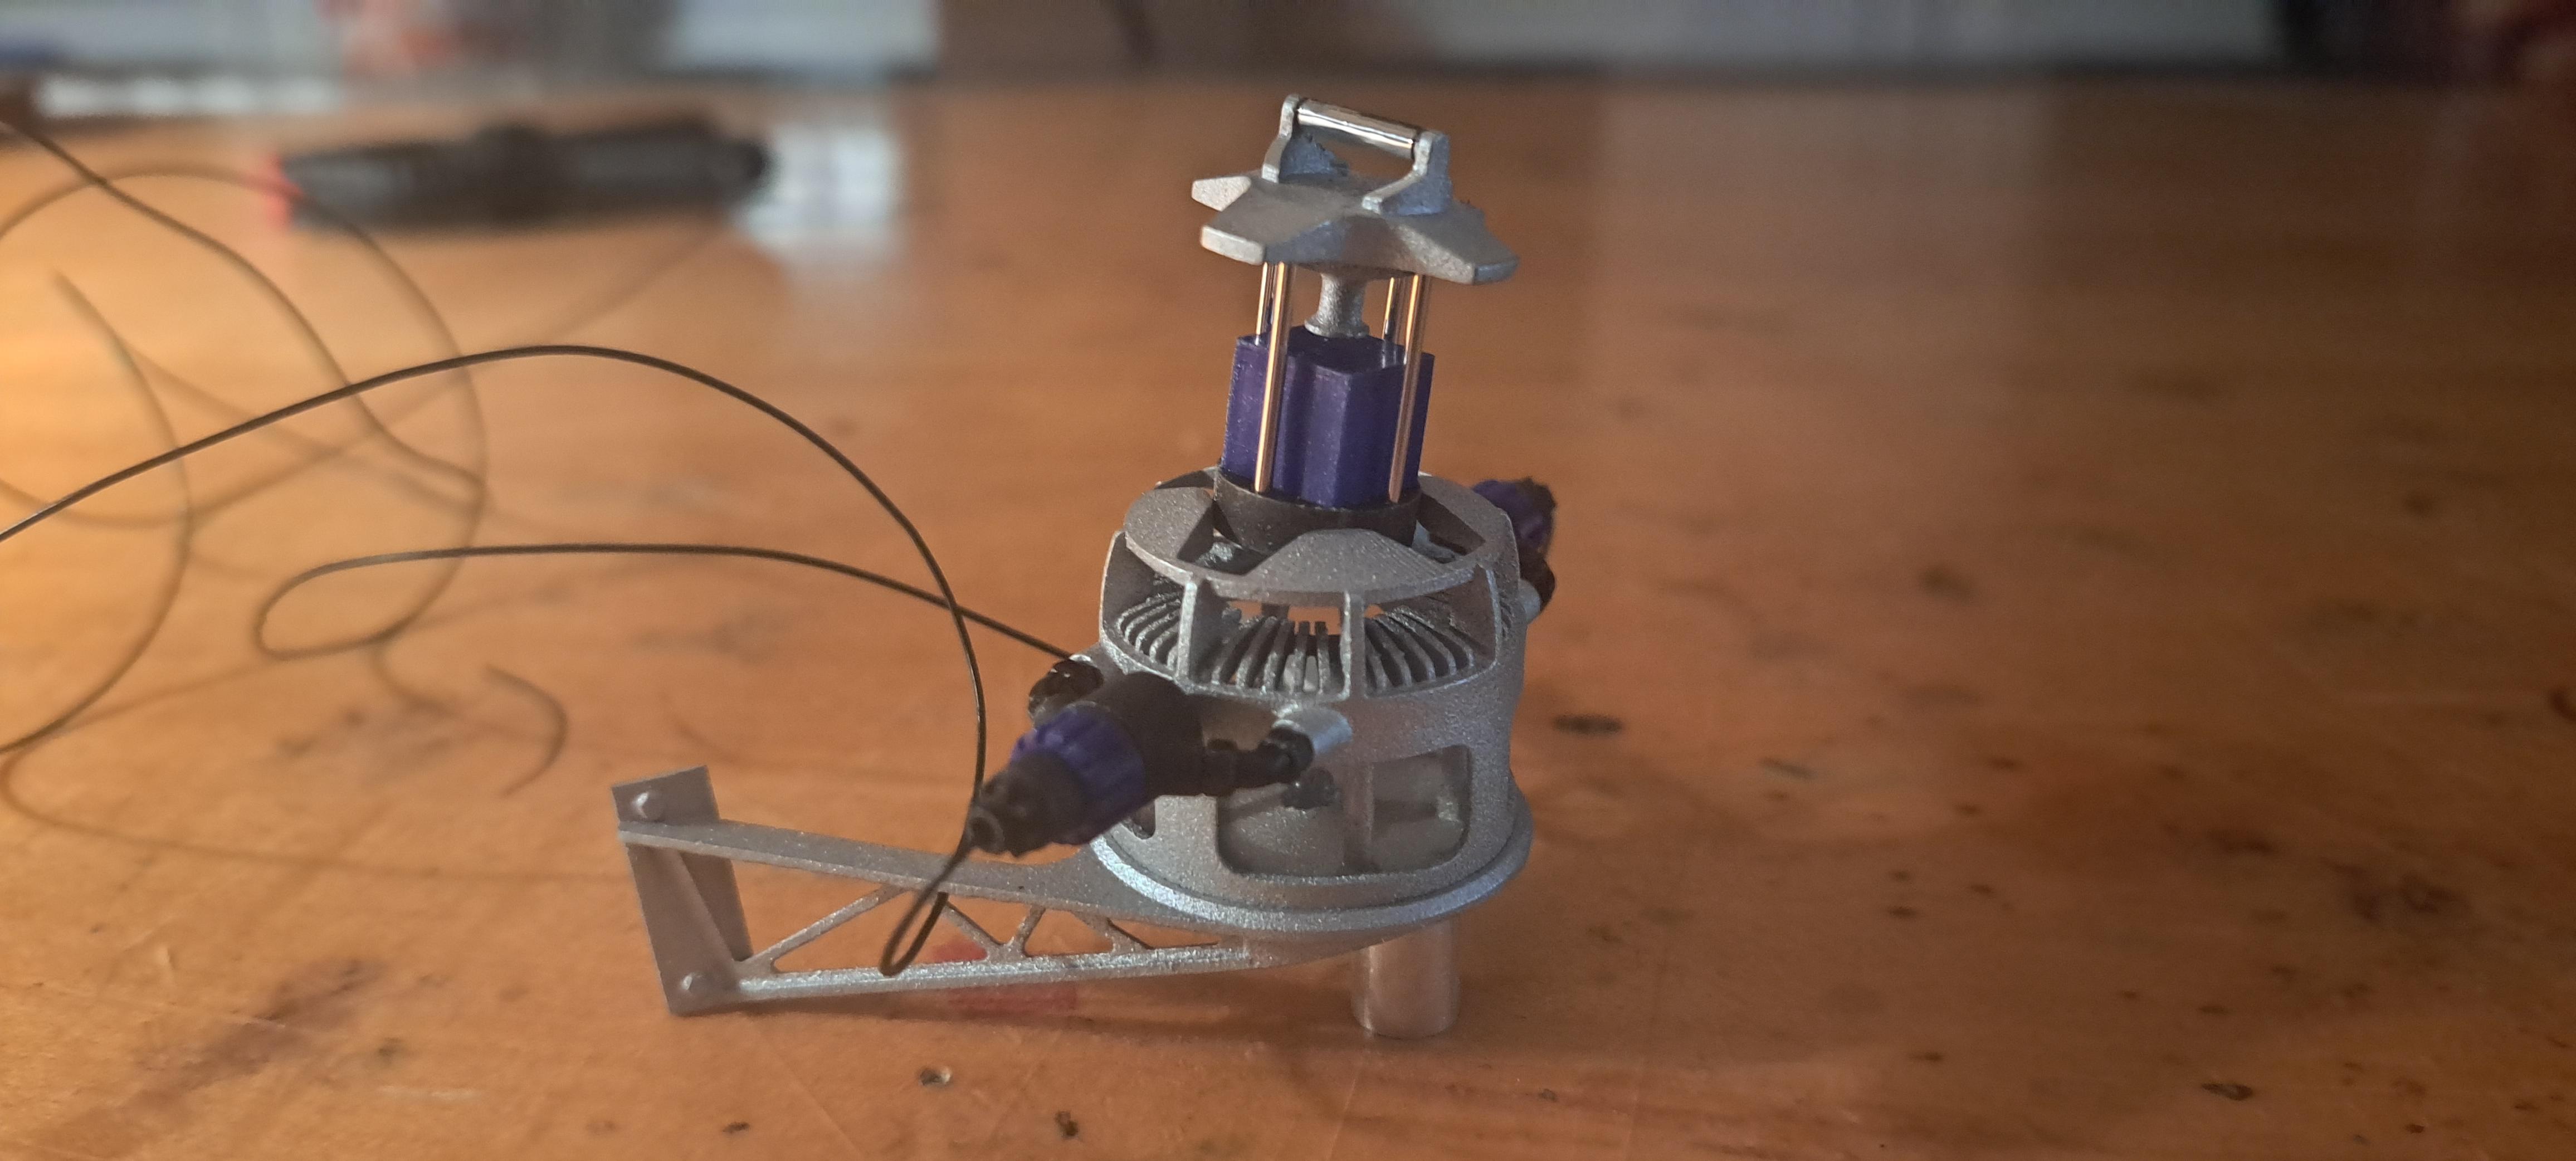
Thanks gtx6970 I made the cube holder/ flux capacitor/ quantum hyper drive thingy. It came out pretty good. I installed a blue led inside to light up the cube which will eventualy be reprinted out of clear resin. I'll also install some micro leds, one per side to illuminate the 2 blue rings. They too will be reprinted in clear resin. Here are the parts before assembly And assembled And lighted up And again, the reference I also test printed a wheel and the gas tank. The wheel came out great but the tank not so good. I could fix it and once installed with the spare tire on top it would probably be ok.
-
Marvel's Hydra coupe 1/12 scale full scratch build
François replied to François's topic in WIP: Model Cars
Oh, ok!! Flux capacitor, right... I was thinking it could maybe replace the battery, but flux capacitor works. I'll still but in the v16... but just for show. -
Marvel's Hydra coupe 1/12 scale full scratch build
François replied to François's topic in WIP: Model Cars
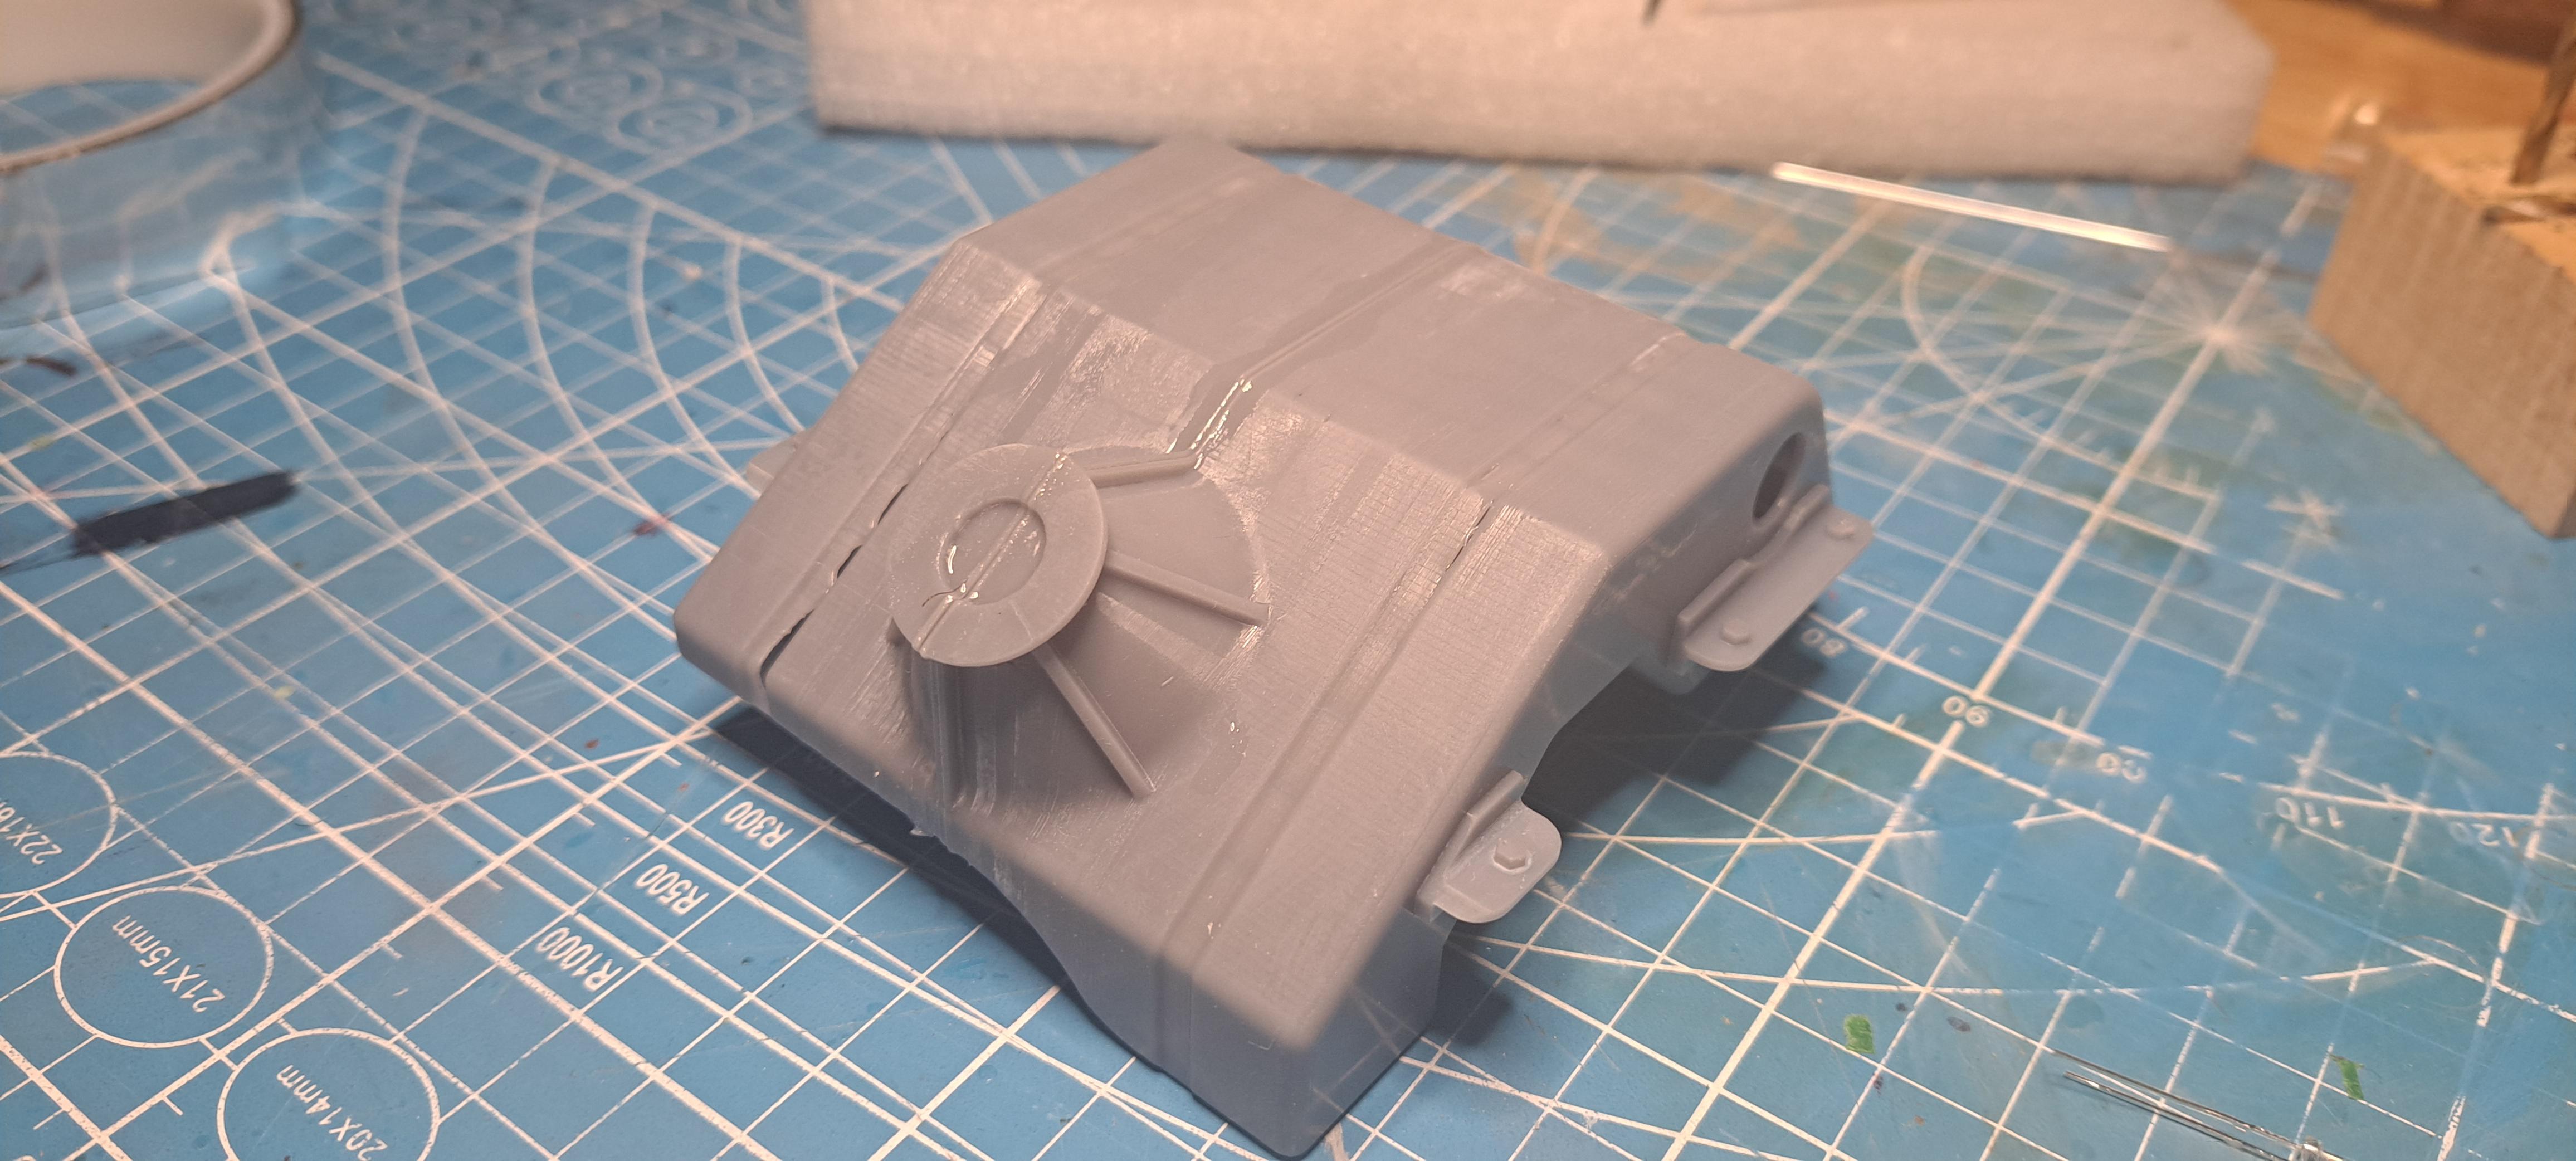
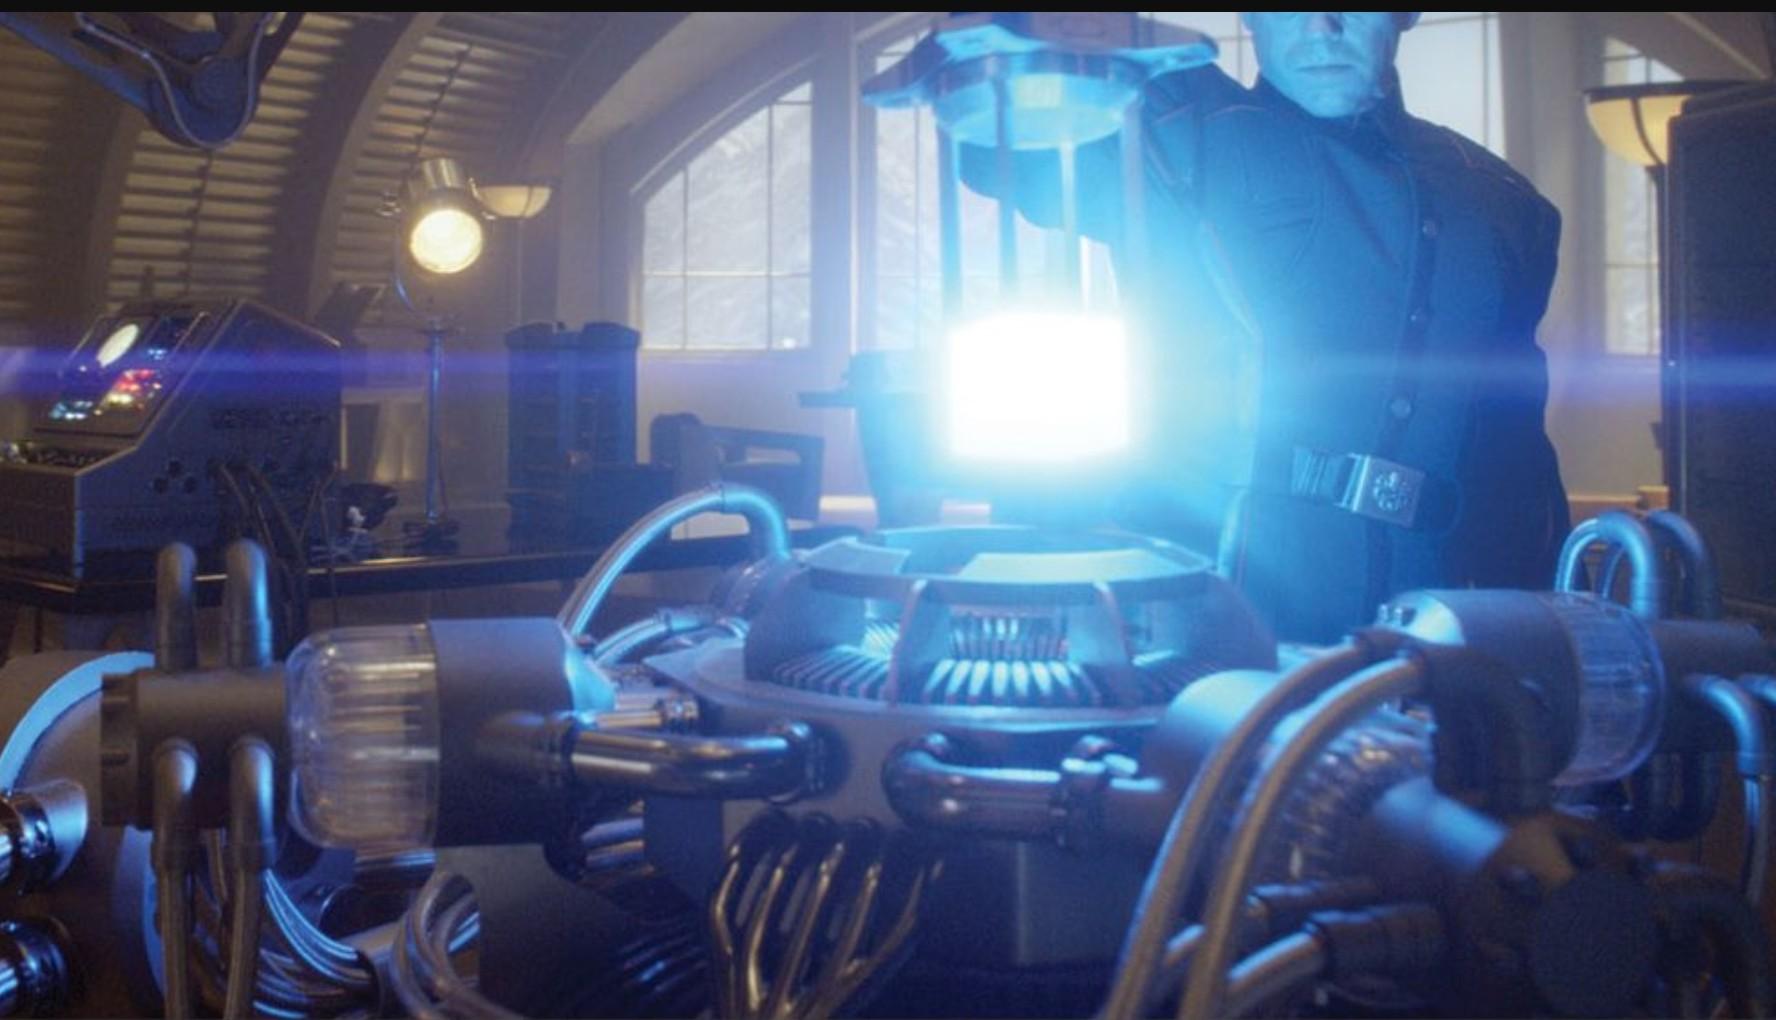
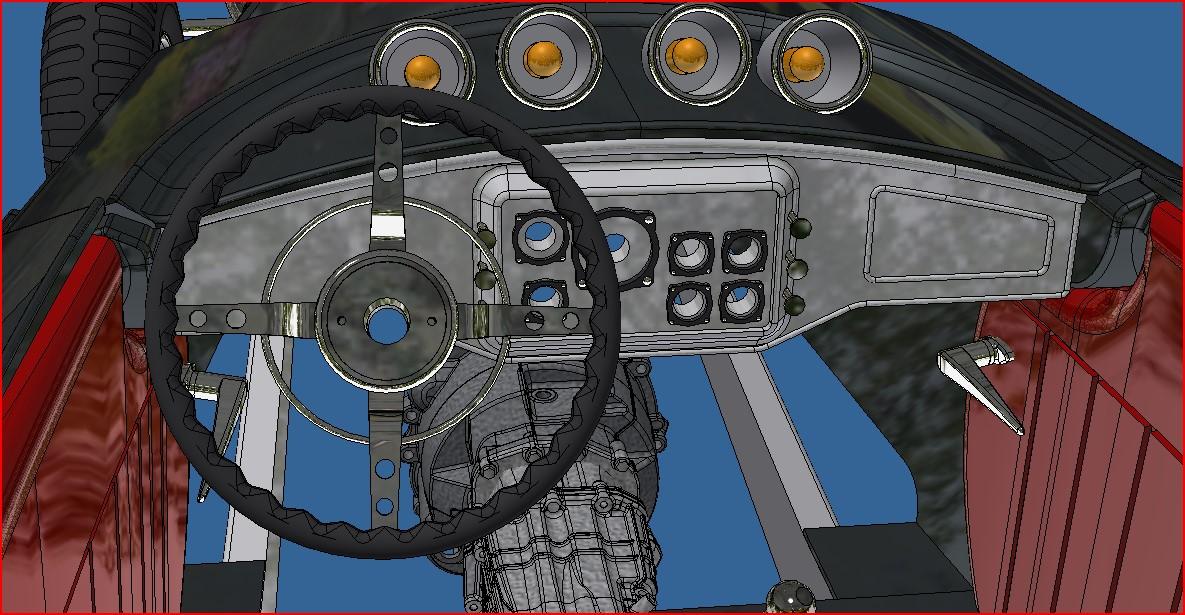
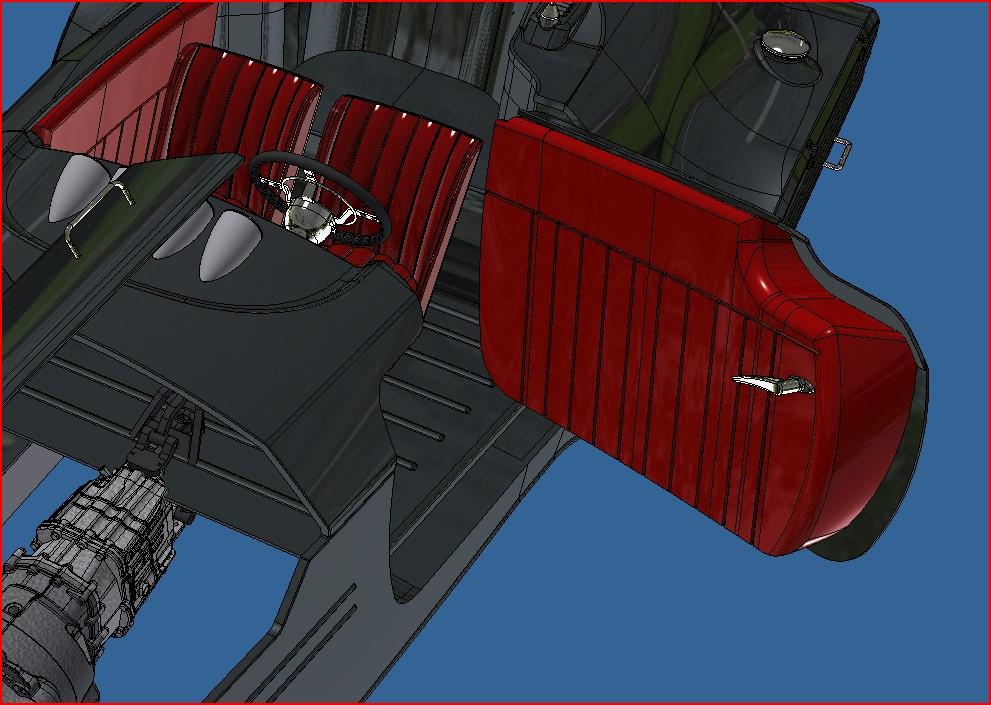
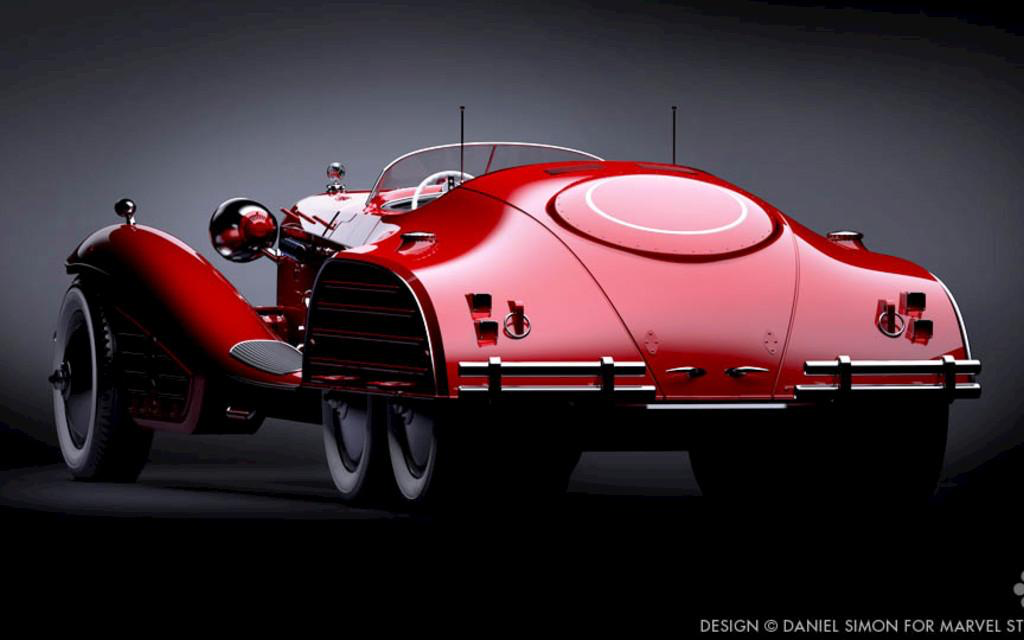
You might have noticed by now that I'm a science fiction movie geek. Especially when it comes to most Marvel films, they have some really cool stuff in them. In the very first one, they introduced a thing called a 'Tesseract', it's a blue glowy cube which is supposed to be a limitless power source. At one point, the cube is inserted in a cool looking devise. So I decided to add this devise in the car. It has no pratical use whatsoever, it's just looks cool! Here's the movie prop And here is my version I'll run some wires (red lines) from the gadget to the engine bay. I might even put a blue led inside to illuminate the cube. I also did the dashboard and steering wheel (a lot simpler than the Bentley's) And the door panels
-
Marvel's Hydra coupe 1/12 scale full scratch build
François replied to François's topic in WIP: Model Cars
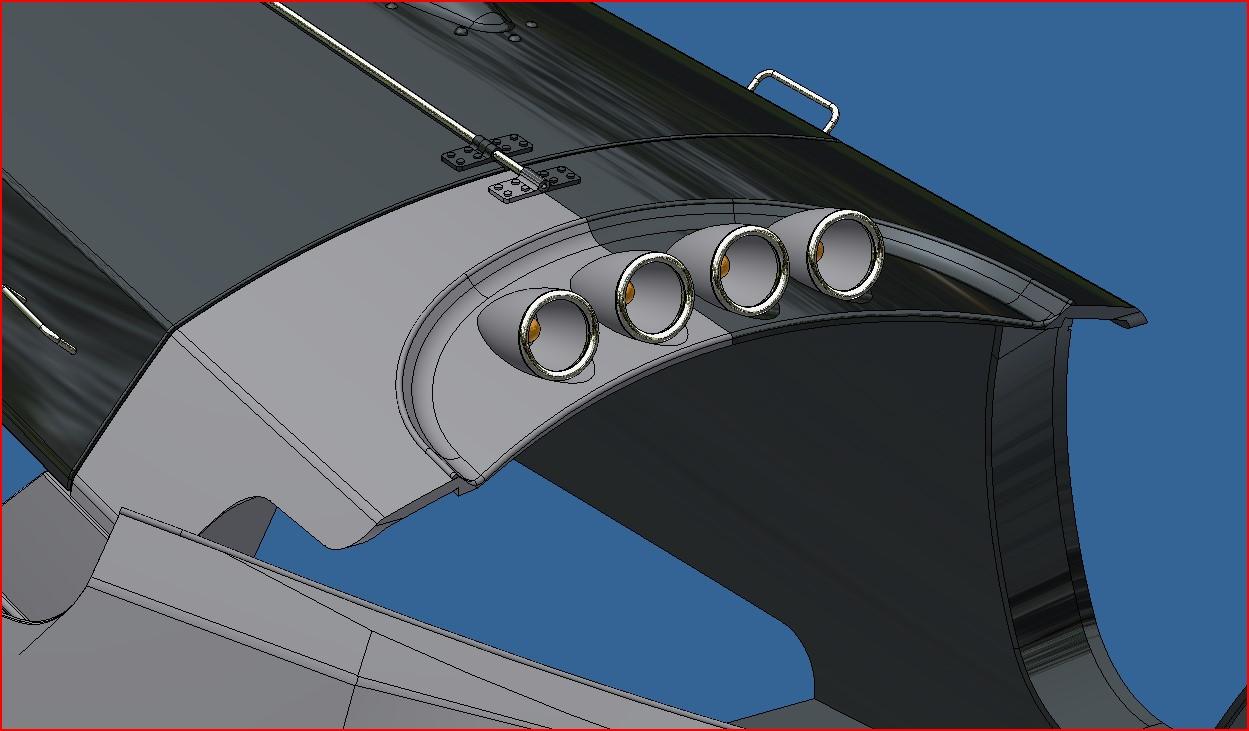
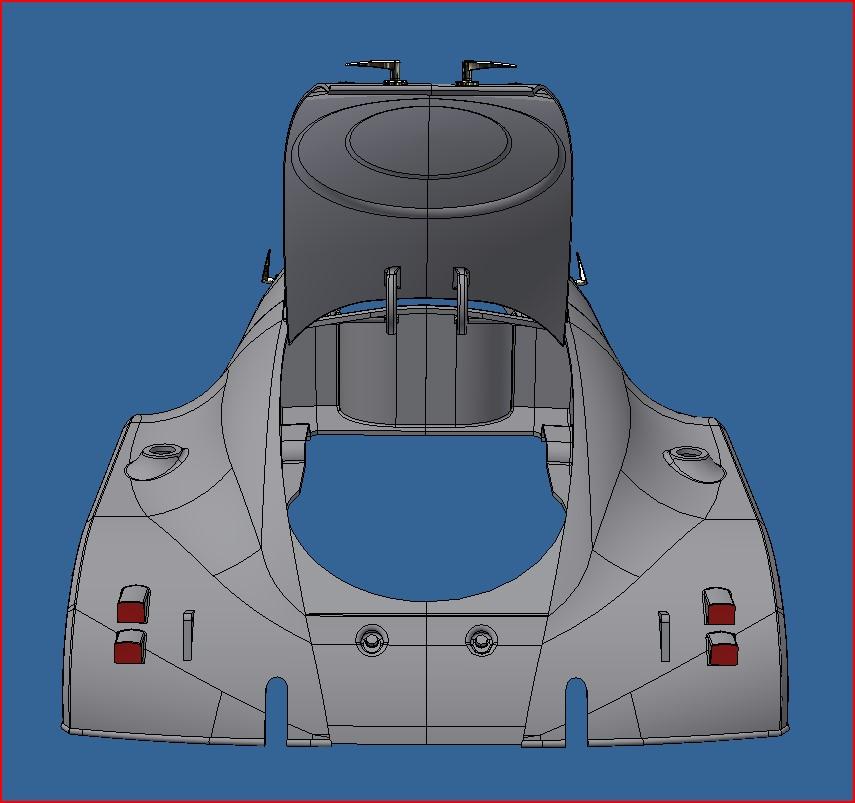
I added a few more details to the body. Left and right hood now open, did the interior shape(it will all be upholstered in red leather), added the dashboard top with 4 gage bodies and did the Captain America's shield on the inside of the trunk lid. Still a lot more body to do.
-
Marvel's Hydra coupe 1/12 scale full scratch build
François replied to François's topic in WIP: Model Cars
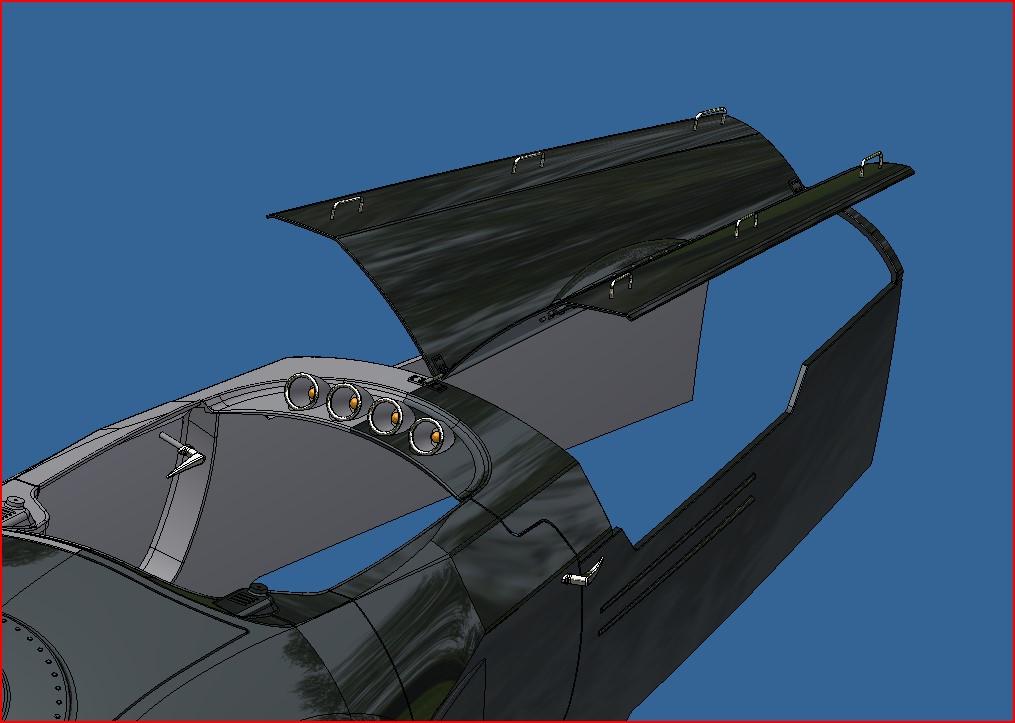
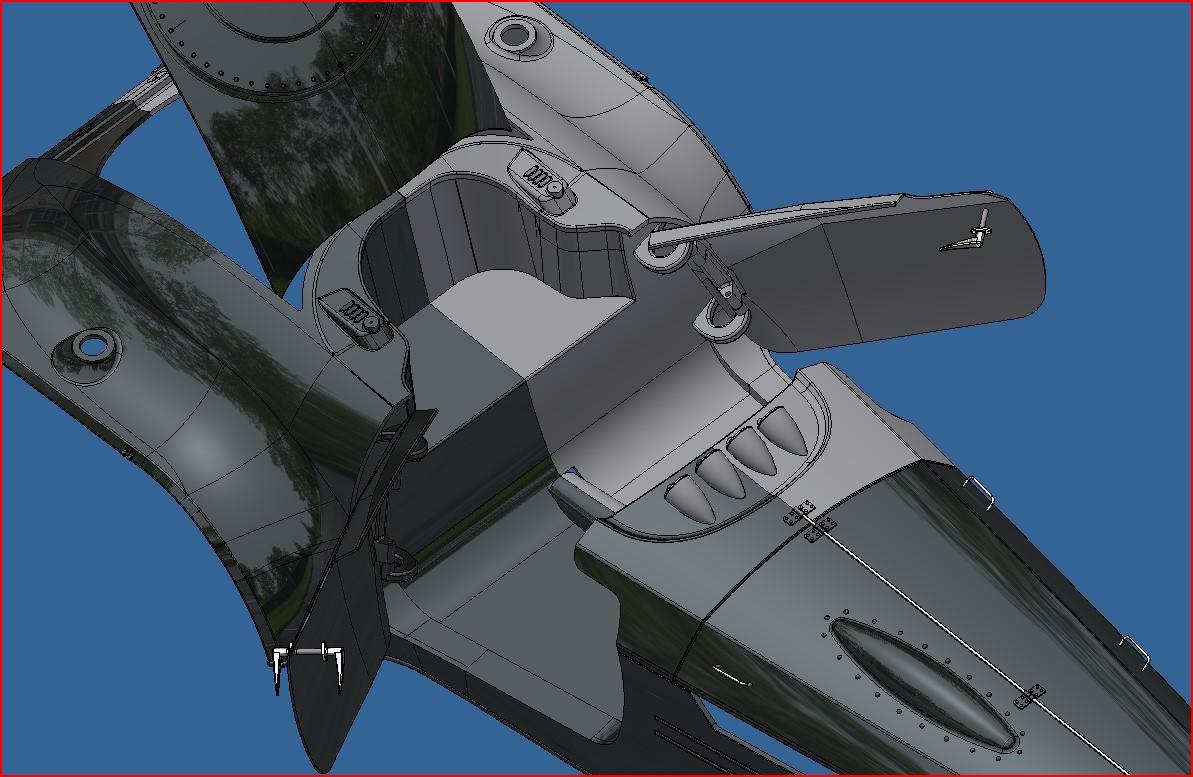
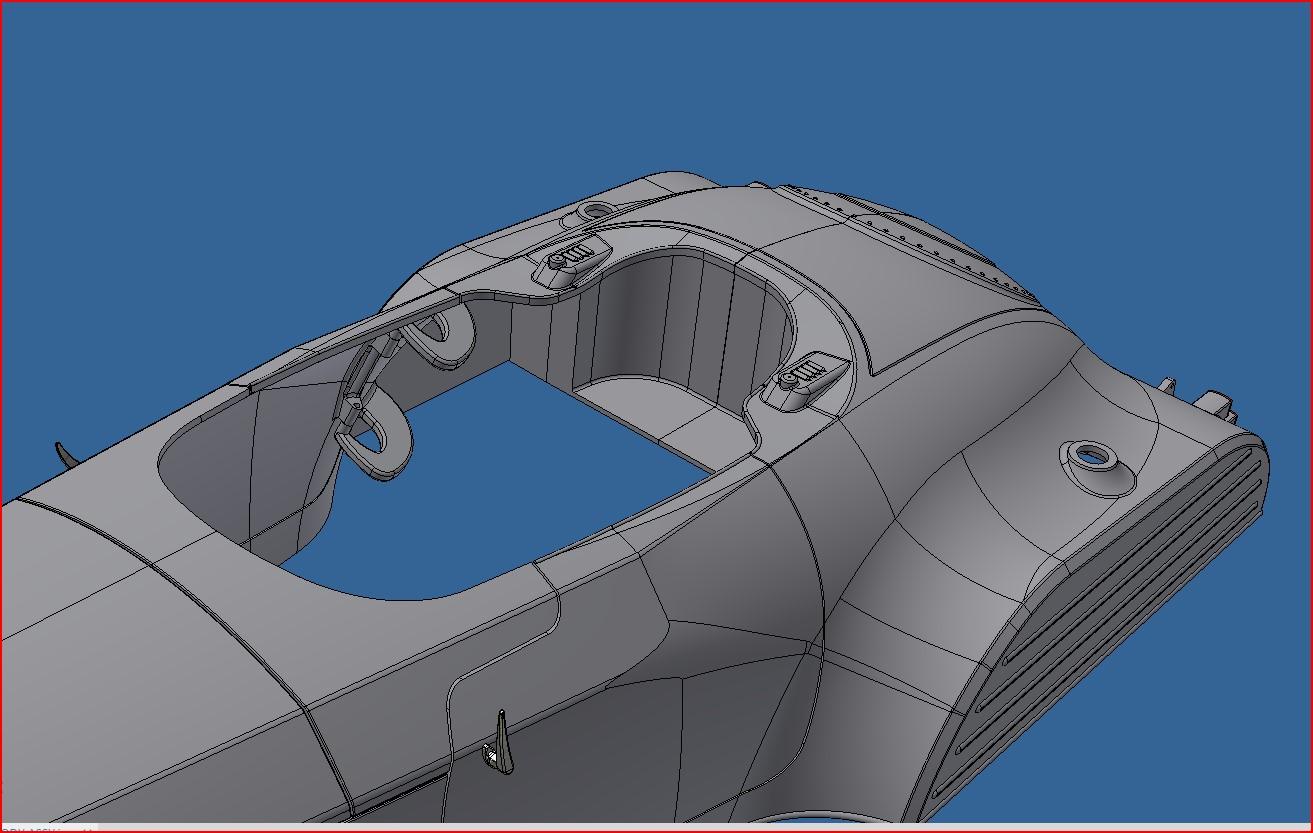
Many more body details added today, tail lights ( I still have to figure out the wire routing and battery location), hook anchors, antenna holder and rear cockpit surround. I also did the interior of the trunk space which is 100% hypothetical since I have no pictures of it. The prop car probably didn't even have an opening lid. I imagine that the round bump on the trunk lid is to clear the massive spare tire but again, 100% blind on this also. About that bump on the lid, it stangely ressembles Captain America's shield. Maybe I'll paint the interior of the bump the same colors as the shield, make it a cameo of some sort.
-
Marvel's Hydra coupe 1/12 scale full scratch build
François replied to François's topic in WIP: Model Cars
I modeled the trunk lid hinges today, it wasn't easy to find the right pivot spot but I think I got it. Same goes for the suicide doors, those pivot points were even harder to find. So far, it looks all nice and feasable on the screen. But the fun will start when I actually start building the freakin thing!!
-
Marvel's Hydra coupe 1/12 scale full scratch build
François replied to François's topic in WIP: Model Cars
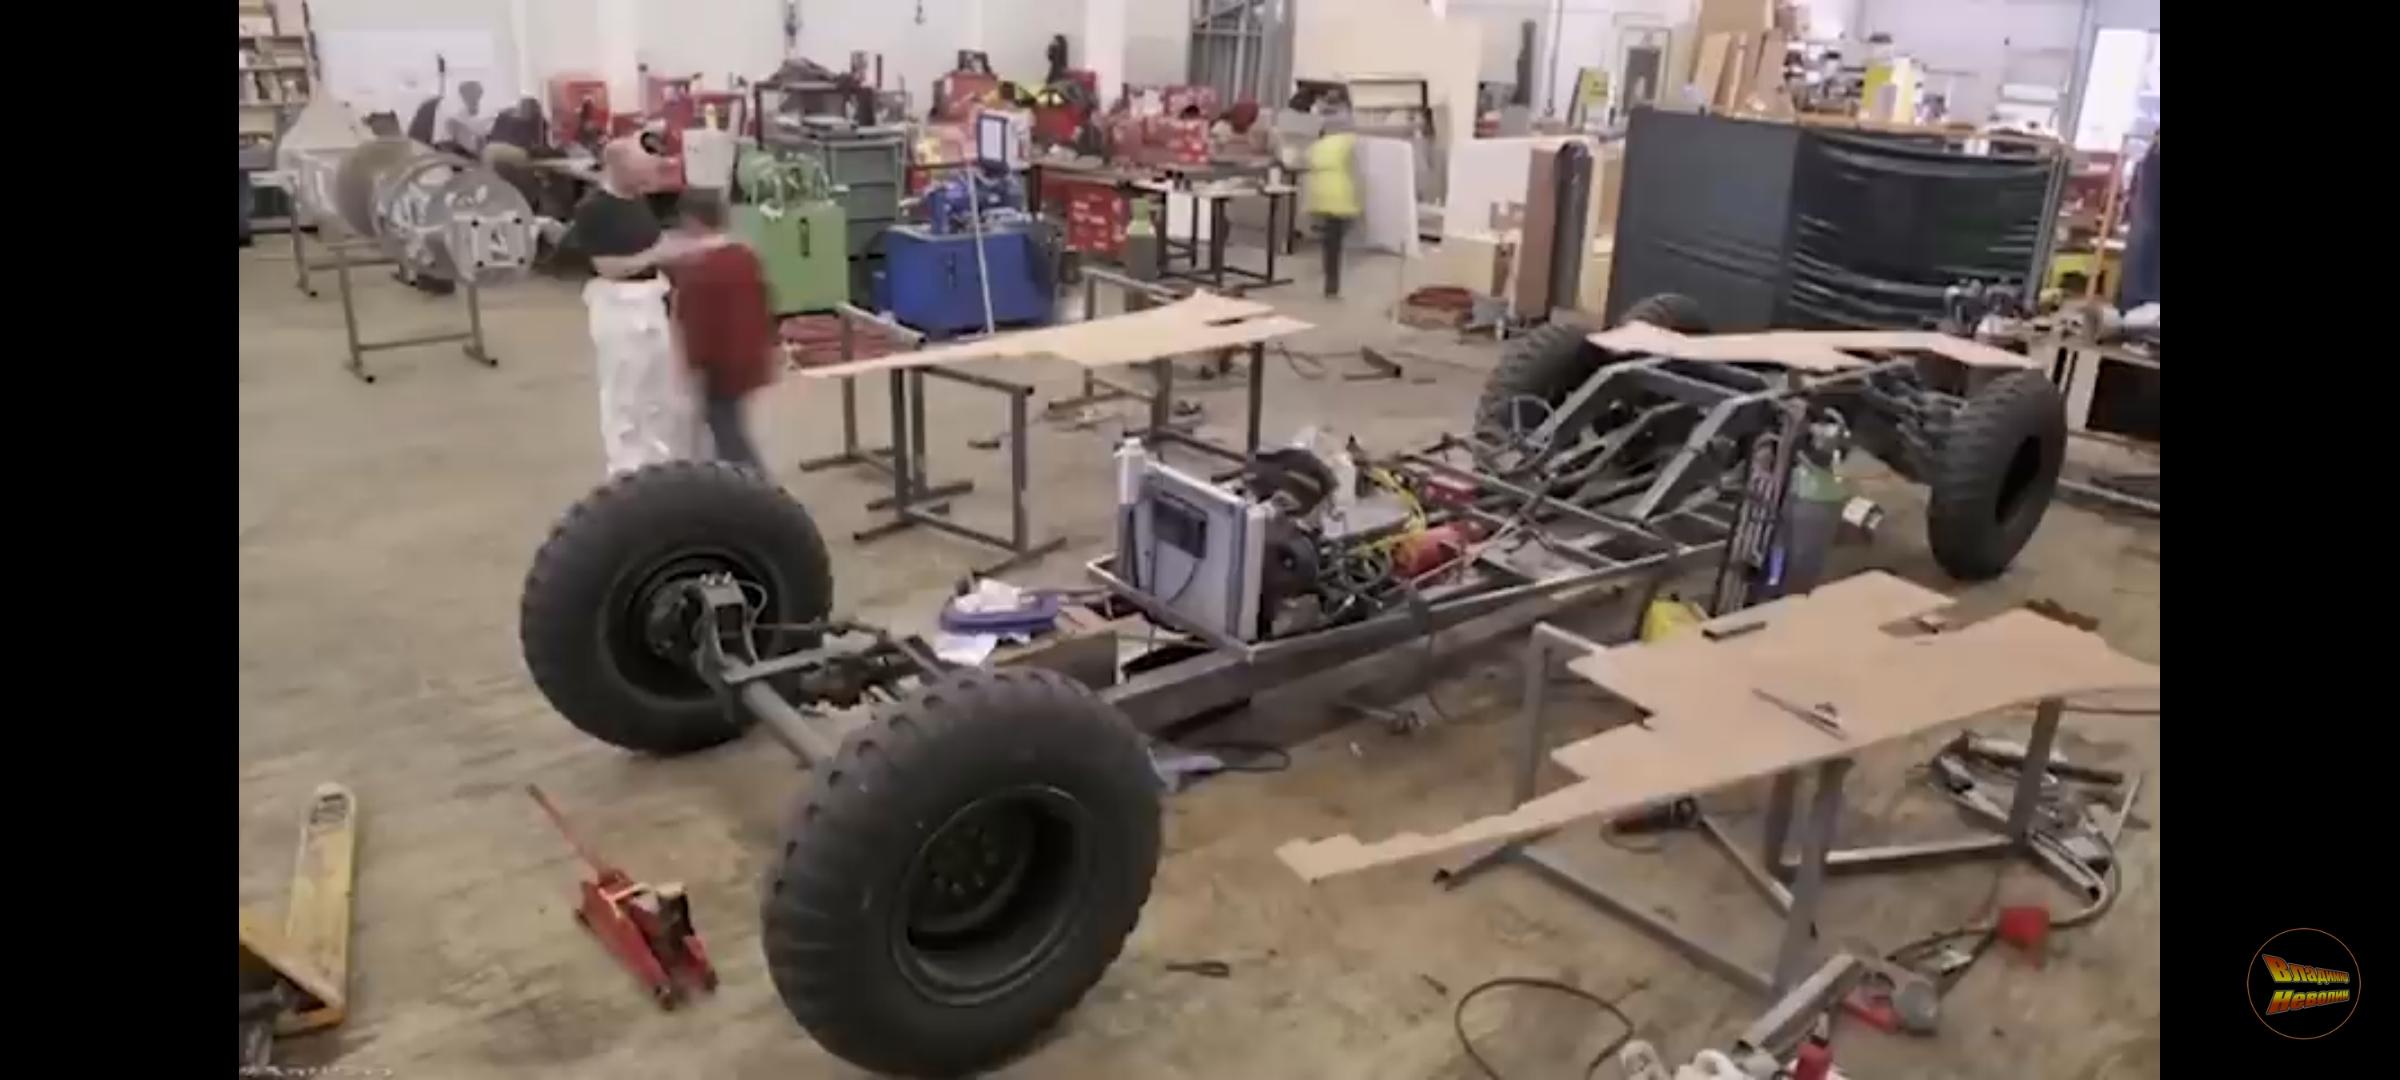
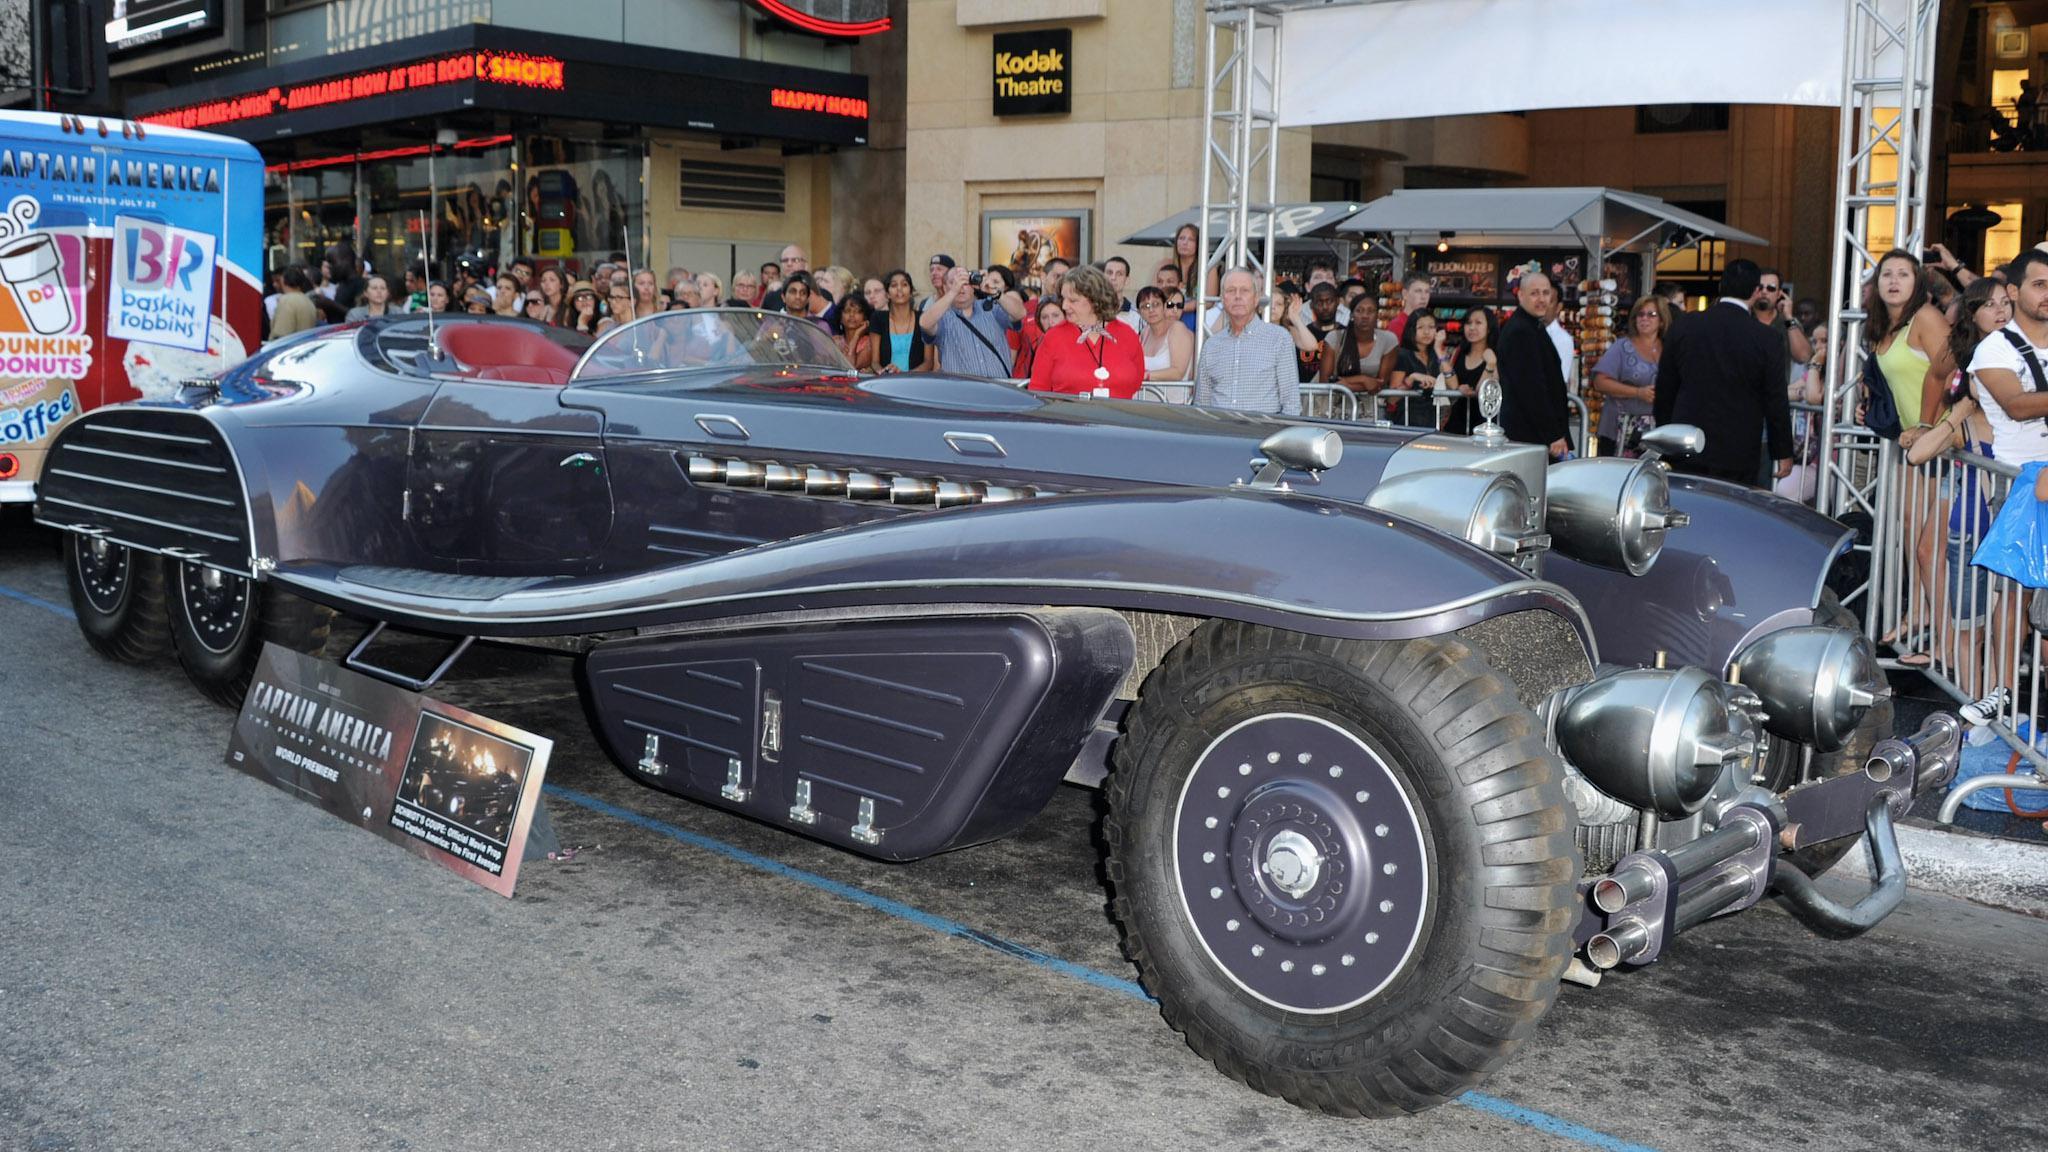
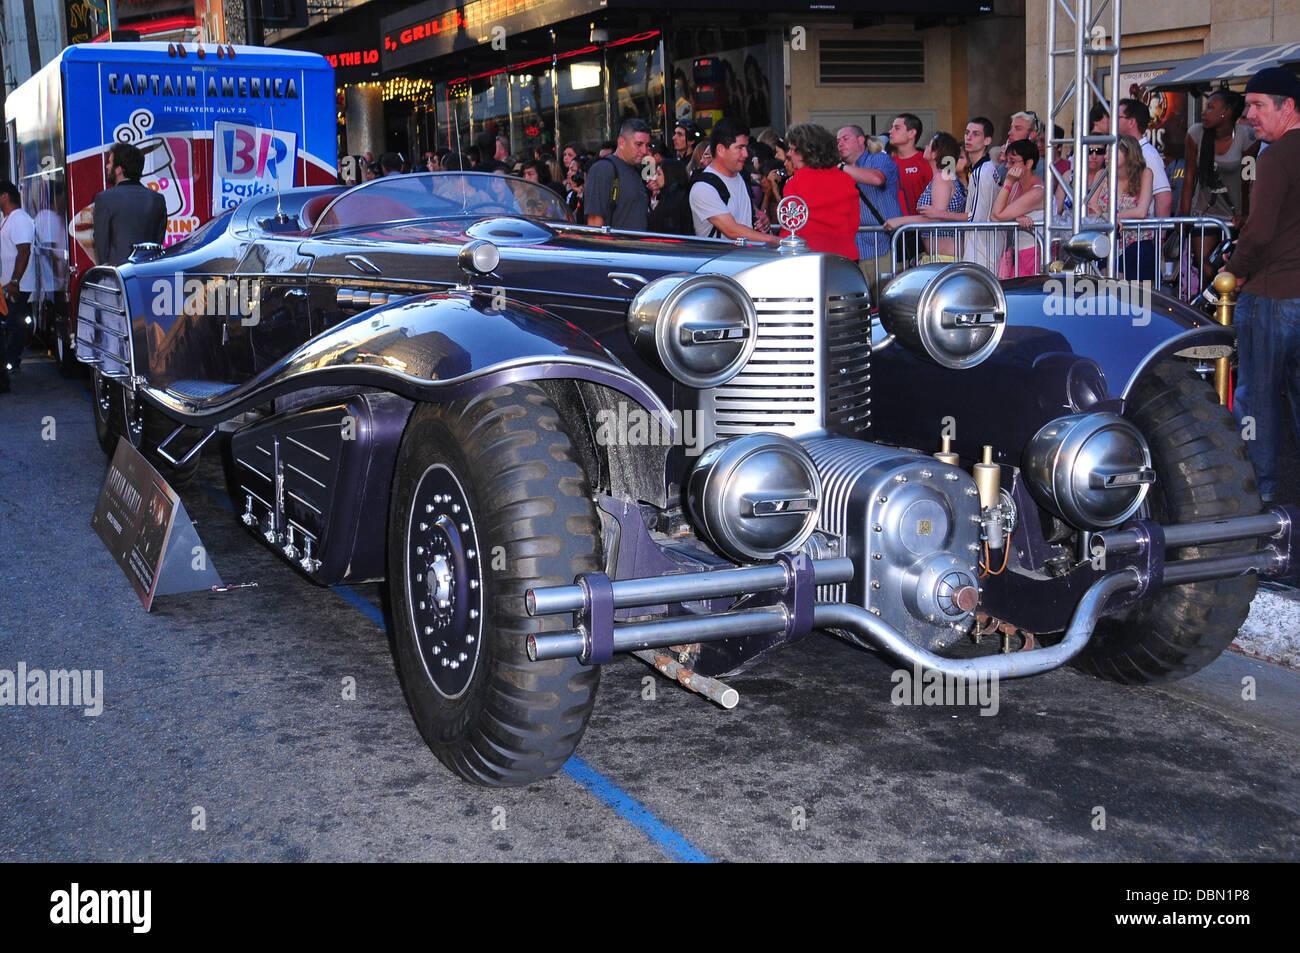
Not sure about the fire truck frame, the info I found states that the body was installed on a commercial truck frame. I guess a fire truck is a commercial vehicule. Whichever frame was used, I based my frame on the Mercedes G4. the prop car under construction
-
Marvel's Hydra coupe 1/12 scale full scratch build
François replied to François's topic in WIP: Model Cars
Bugatti Fan, from what I've read and seen, the prop car was drivable. There is a youtube of it being driven on a flatbed platform. It had a v8 engine of some sort, nothing like the v16 powerplant the designer envisionned. -
Marvel's Hydra coupe 1/12 scale full scratch build
François replied to François's topic in WIP: Model Cars
Almost there!
-
Marvel's Hydra coupe 1/12 scale full scratch build
François replied to François's topic in WIP: Model Cars
More work done on the body today. I had my doughts on how easy it would be to do the body with Inventor but I must say it's turning out pretty good. I still need to tweak the form here and there and to add many details such as the hood scoop, the spare tire bump, the exhaust ports... Once I'm satisfied with the shape, I'll create the seams for the hood panels, doors and trunk lid. These will all be separate parts since they will all be openable. I will definatly need to separate the body in multiple pieces to be able to print it.
-
Marvel's Hydra coupe 1/12 scale full scratch build
François replied to François's topic in WIP: Model Cars
Thanks big John ! I started the bodywork, it will definatly be a hard one to do as the cad system I'm using is not exactly the right tool for this type of form. But, being very patient and stubborn, I should be able to eventually get it right.
-
Marvel's Hydra coupe 1/12 scale full scratch build
François replied to François's topic in WIP: Model Cars
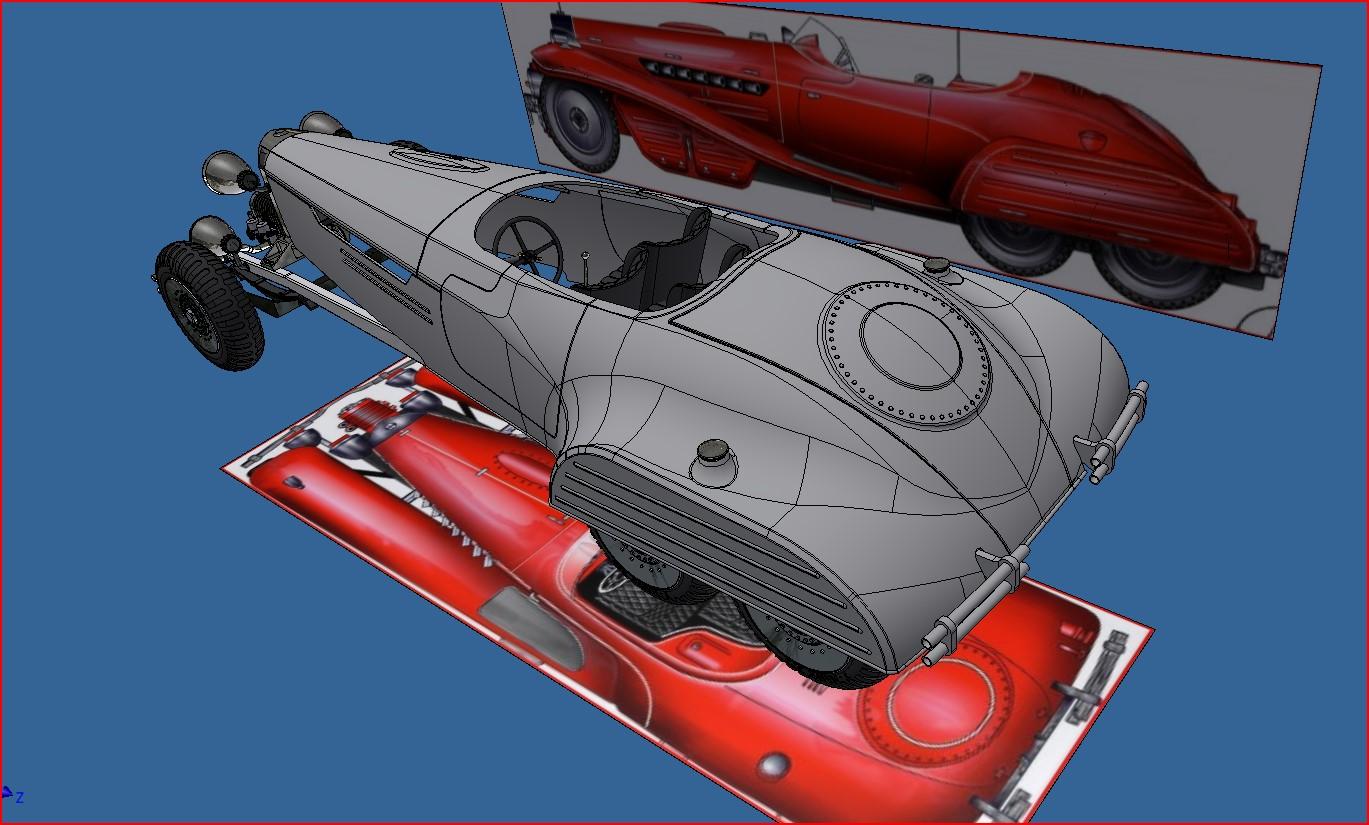
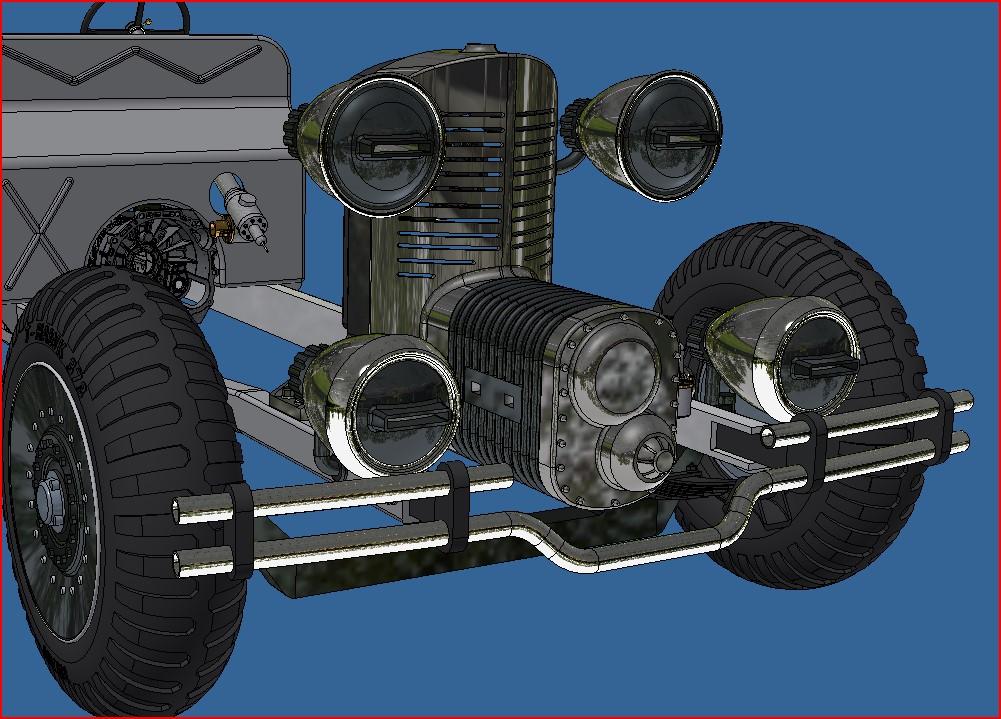
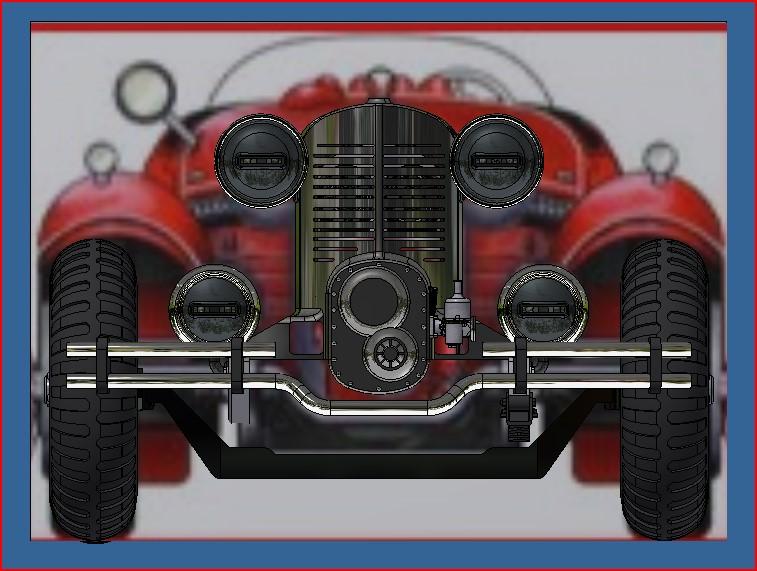
I've been busy with the mouse and key board the last 2 days. I'm a long ways from being done, especially since I need to design a complete 16 cylinder engine. But before I start on that, I decided to work on the enveloppe first, to better know what volume I have to fill with mecanical stuff. So I started with the front end working my way towards the back. I first 3d modeled the radiator with the 4 head lights being careful to draw printable parts and adding as many features as possible such as lightbulb housing for the head lights and wire routing. I base the design of certain parts on similar bentley blower parts such as the radiator core. I'm very satisfied with the result so far. I also started the firewall. Once it's done, I'll be able to do the hood. I'll then have a very good idea of the engine bay volume. Here are some progress pictures.
-
Marvel's Hydra coupe 1/12 scale full scratch build
François replied to François's topic in WIP: Model Cars
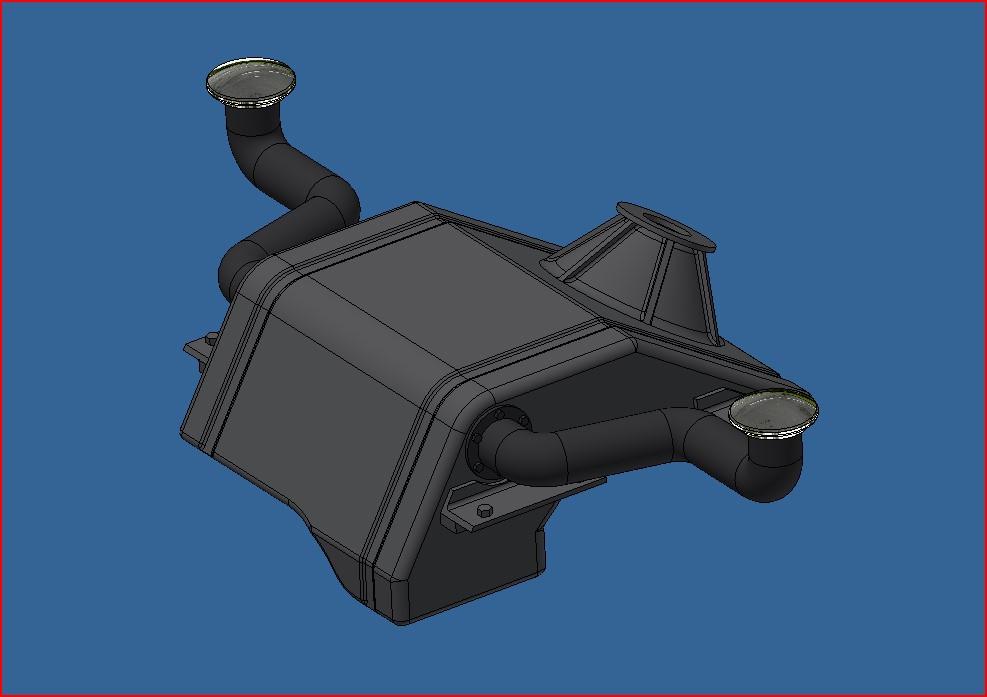
The fun thing about this build is that I know what the enveloppe will look like and it's limitations in space (height, width, lenght and curves). Everything else is speculations and up to my spur of the moment whim. So today I decided to create the fuel tank based on the only known parameter for the tank, I know where the fuel filler caps are (yes, they are 2). Then it was just a question of giving the tank a somewhat plausible shape that would fit in the general area dictated by the caps. The location in just dehind the rear seat and above the 2 differentiels, just under the trunk lid, a pretty standard spot. But the area is quite small since the spare tire seems to be located just under the trunk lid. I'm using the tank as a spare tire holder, this gave the tank a rather nice shape. But it will be a small tank so this v16 will definatly not be winning any mileage contest.
-
Marvel's Hydra coupe 1/12 scale full scratch build
François replied to François's topic in WIP: Model Cars
I found a partiel transmission housing already modeled. I added the shifter mecanism, really not sure how it will print. I guess I'll find out eventually.
-
Marvel's Hydra coupe 1/12 scale full scratch build
François replied to François's topic in WIP: Model Cars
Big John, thanks for the engine suggestions. I've read somewhere that the car's designer envisionned it with a v16 airplane engine. I might investigate that a bit. I do like the Auto Union engine. Which ever engine I choose, a big decision factor will be how much info I can find on it (existing dowloadable cad files, dimensions...) Absmiami, Thought one: glad you can get something out of my crazy obtention Thought two: I'll certainly look it up, I don't know that one Thought three: it's already in the plan, each frame rail will be printed in 3 sections and I plan to incorporate a brass or steel rod from front to back. And probably some aluminium tubing for cross members. Thought four: ha ha! Definitely not in the city! All the parking spaces are taken by construction cones! Good thing I rarely go there... in one of the text I read on the car, it say that the movie car had a 38 foot turning radius and wasn't very fun to drive. -
Marvel's Hydra coupe 1/12 scale full scratch build
François replied to François's topic in WIP: Model Cars
I started the ground work on the cockpit. I inserted 3 bentley seats ( I'll eventually model new ones with the correct shape and upholstery pattern) and the Bentley's steering column. The idea is to position these items correctly so I can continue with the transmission, firewall and eventually the engine. After a few minutes of web search, I found a 16 cylinder motor but it's too modern and the proportions are wrong. I need a very long v16, I'll probably end up modeling it myself. I might use some parts from the v16 I found such as pistons, con rods, crank... it's extremely detailed.
-
Marvel's Hydra coupe 1/12 scale full scratch build
François replied to François's topic in WIP: Model Cars
Here is a second version of the drive shaft. It now has an 8 spline shaft so orientation is no longer an issue.
-
Marvel's Hydra coupe 1/12 scale full scratch build
François replied to François's topic in WIP: Model Cars
Nobling, you are absolutely correct on both counts, the drive shaft is a prototype and the phasing is off by 90deg. I made this same mistake on one of the very first machine I designed back in 87, shame on me for doing it again.Thanks for noticing this! -
Marvel's Hydra coupe 1/12 scale full scratch build
François replied to François's topic in WIP: Model Cars
The printer is an Anicubic photon M5. And the ujoint parts were printed separatly. I would't know how to print as 1 working unit. -
Marvel's Hydra coupe 1/12 scale full scratch build
François replied to François's topic in WIP: Model Cars
It's more the printer's high resolution. At 12k, the print quality is pretty good right off the bat. Small or big, the quality is there. I did no sanding on this. I printed the ujoint and they came out looking great. End they work !