Duddly01
-
Posts
1,048 -
Joined
-
Last visited
Content Type
Profiles
Forums
Events
Gallery
Everything posted by Duddly01
-
Thank you! The Kelsey Hayes wire wheels were not available I believe until 1962 on the Thunderbird, but many restores add them to baby birds these days, including Amos Minter who is well known for Baby bird restorations. They did have wire wheel hub caps available, but they are not as nice looking of course.
-
I do prefer the clean looks of the 55 but I like the 56 better functionally. 12v vs 6v and the continental kit was a temp fix for no room in trunk complaints. I have never seen a 1955 kit? The 57 kit is really not a good kit. Only good point is the body proportions are good. The top is garbage so I got a couple resin tops from drag city customs that are quite nice to use for 57 builds. This lot so far seems nice.
-
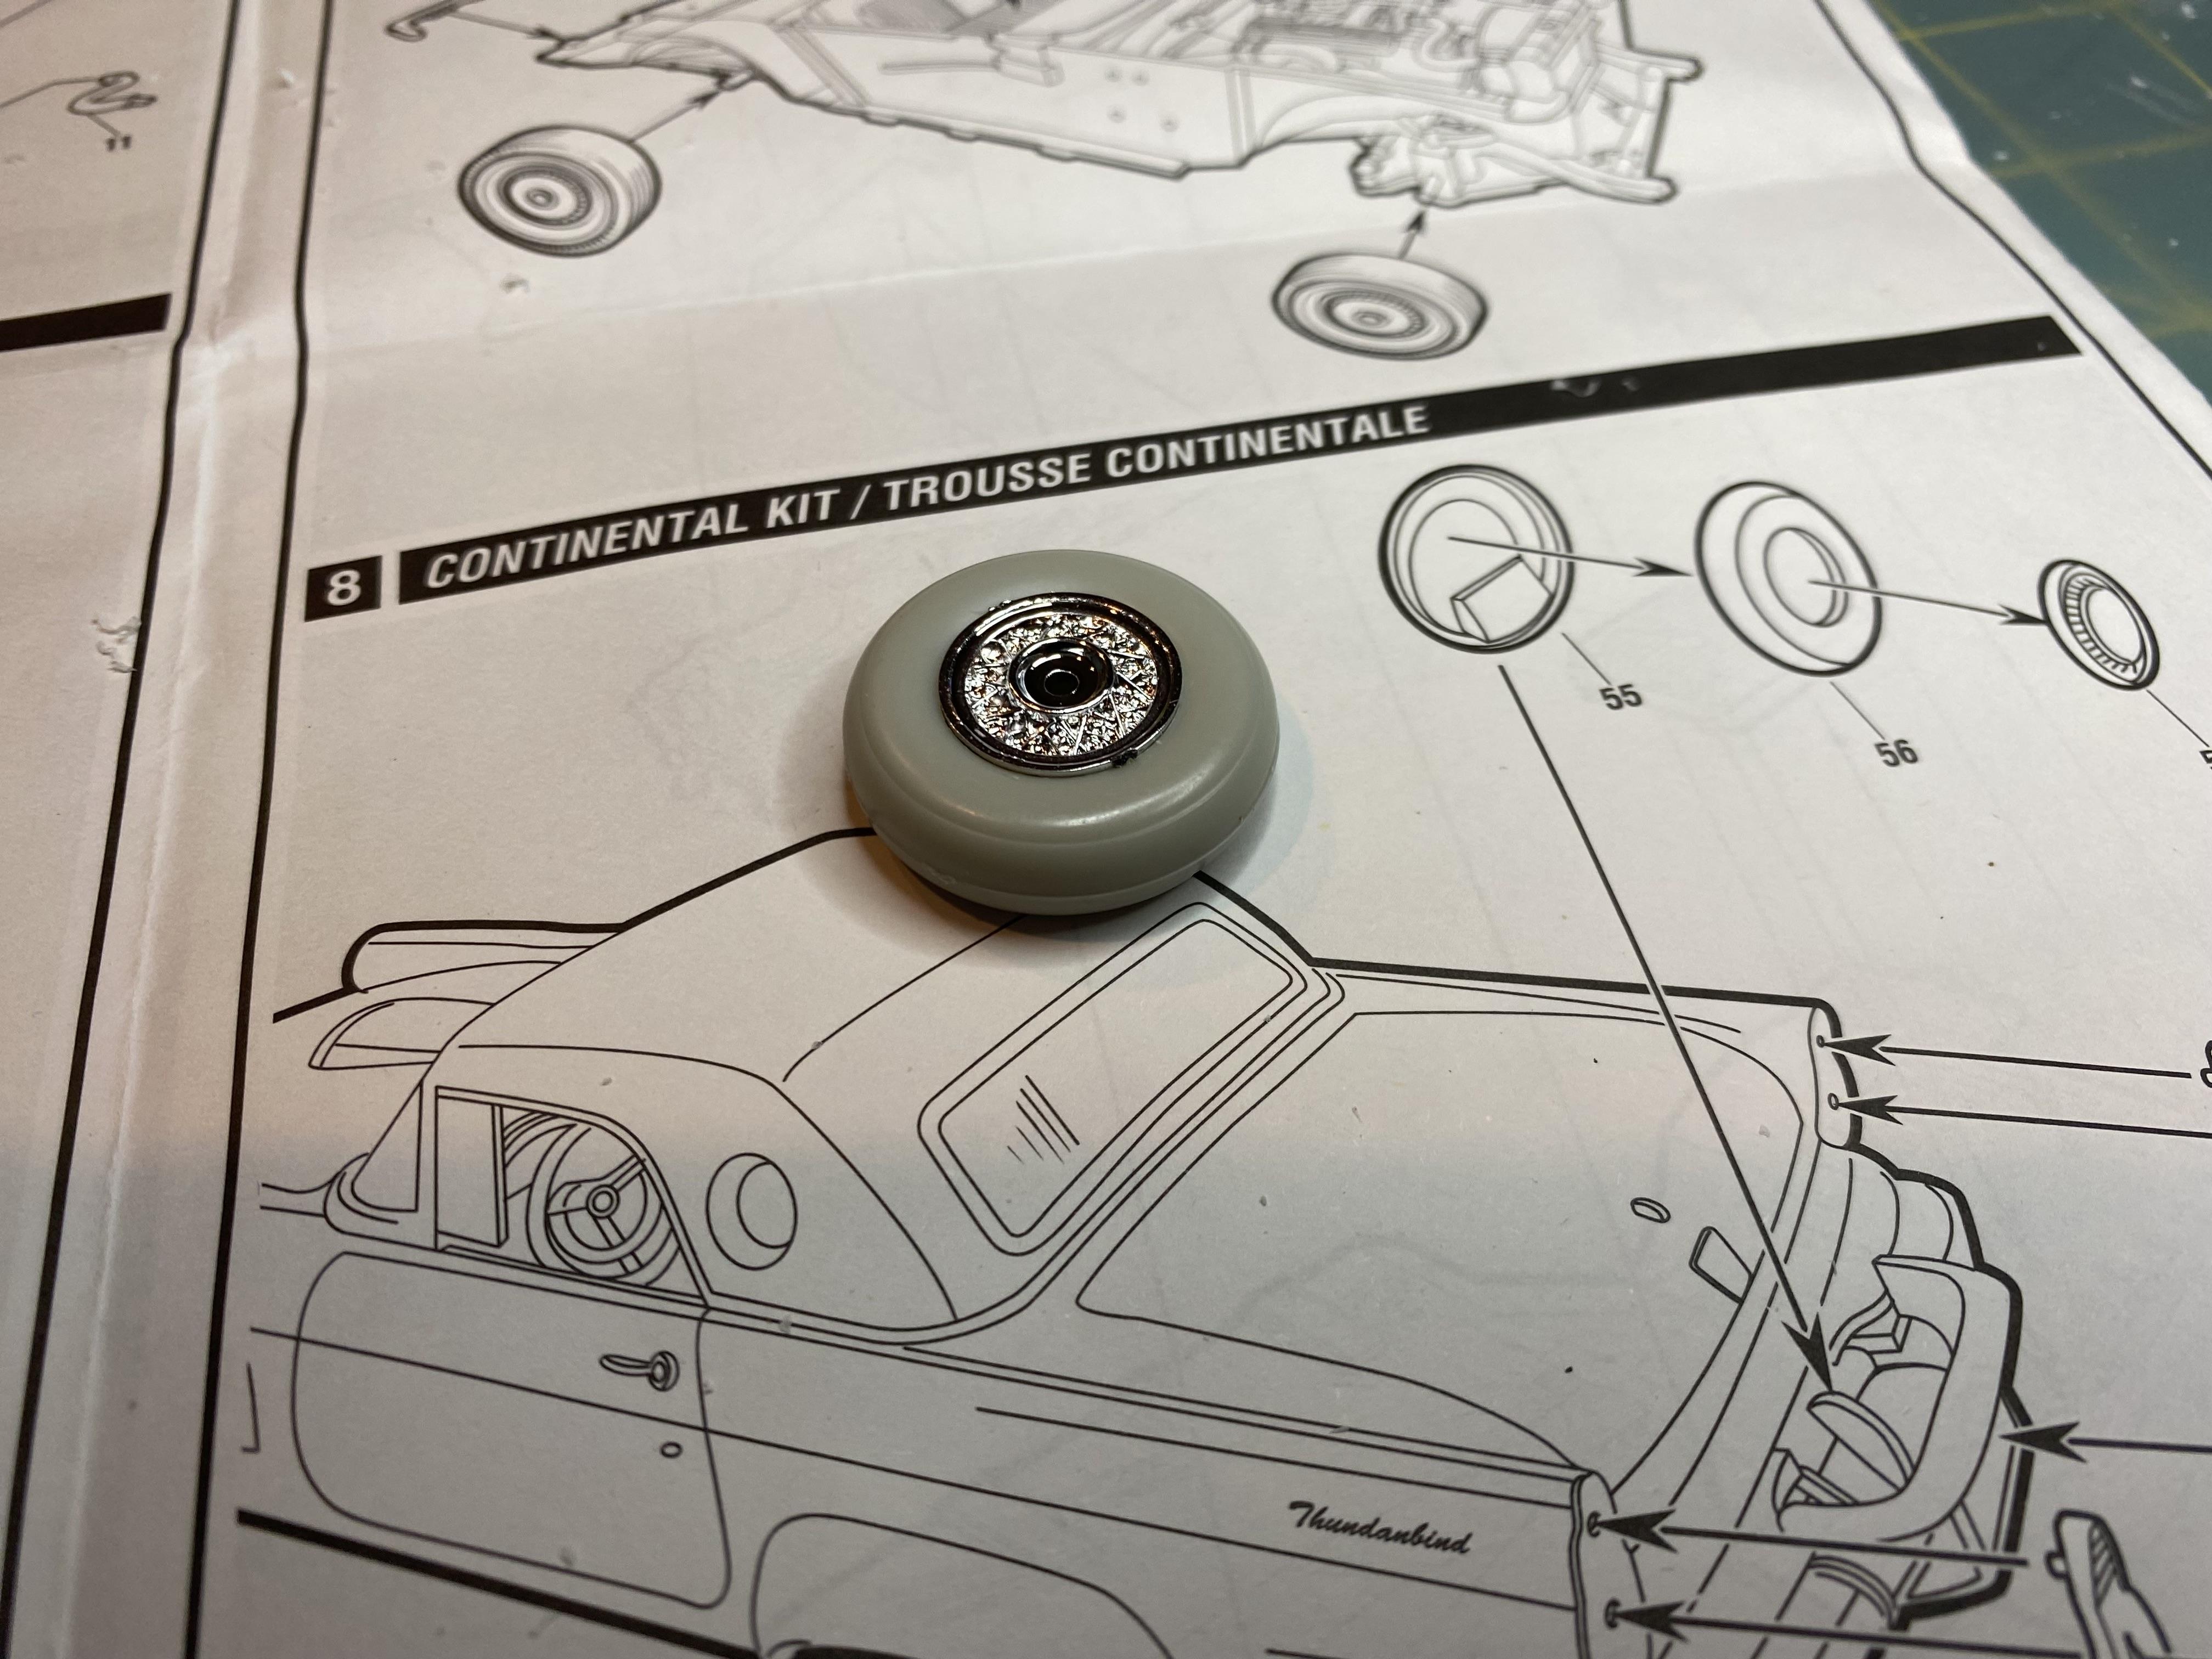
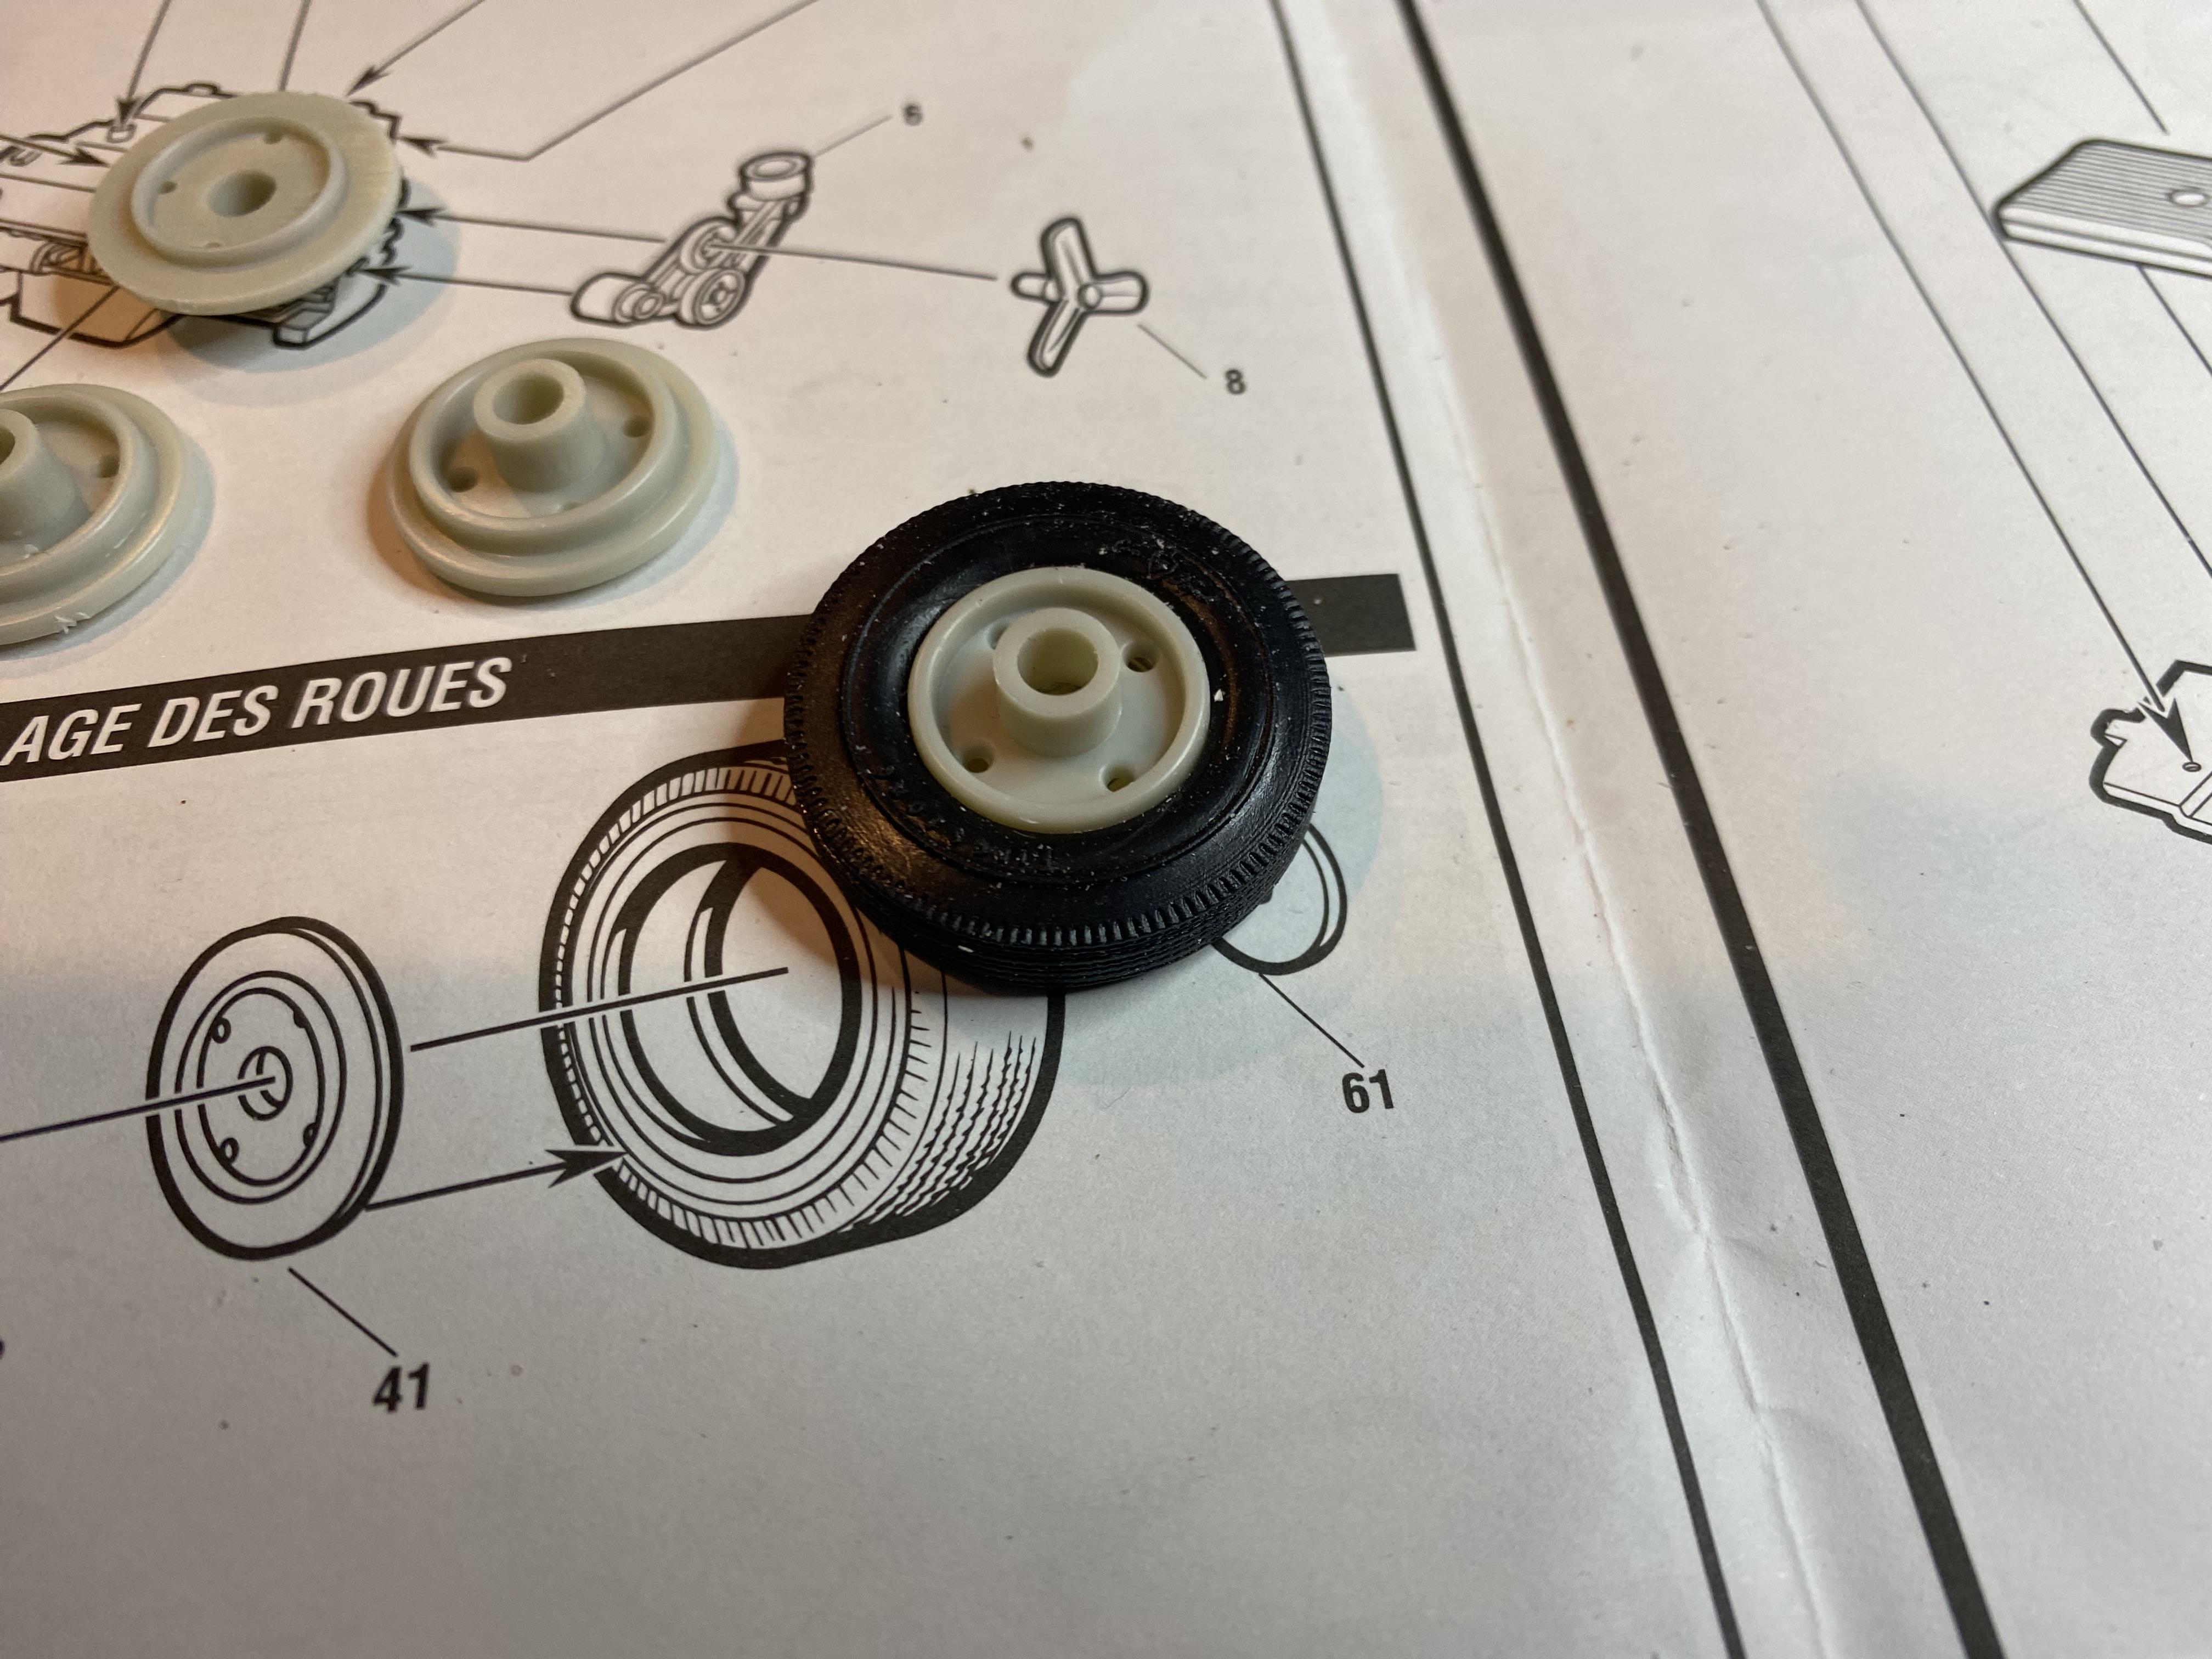
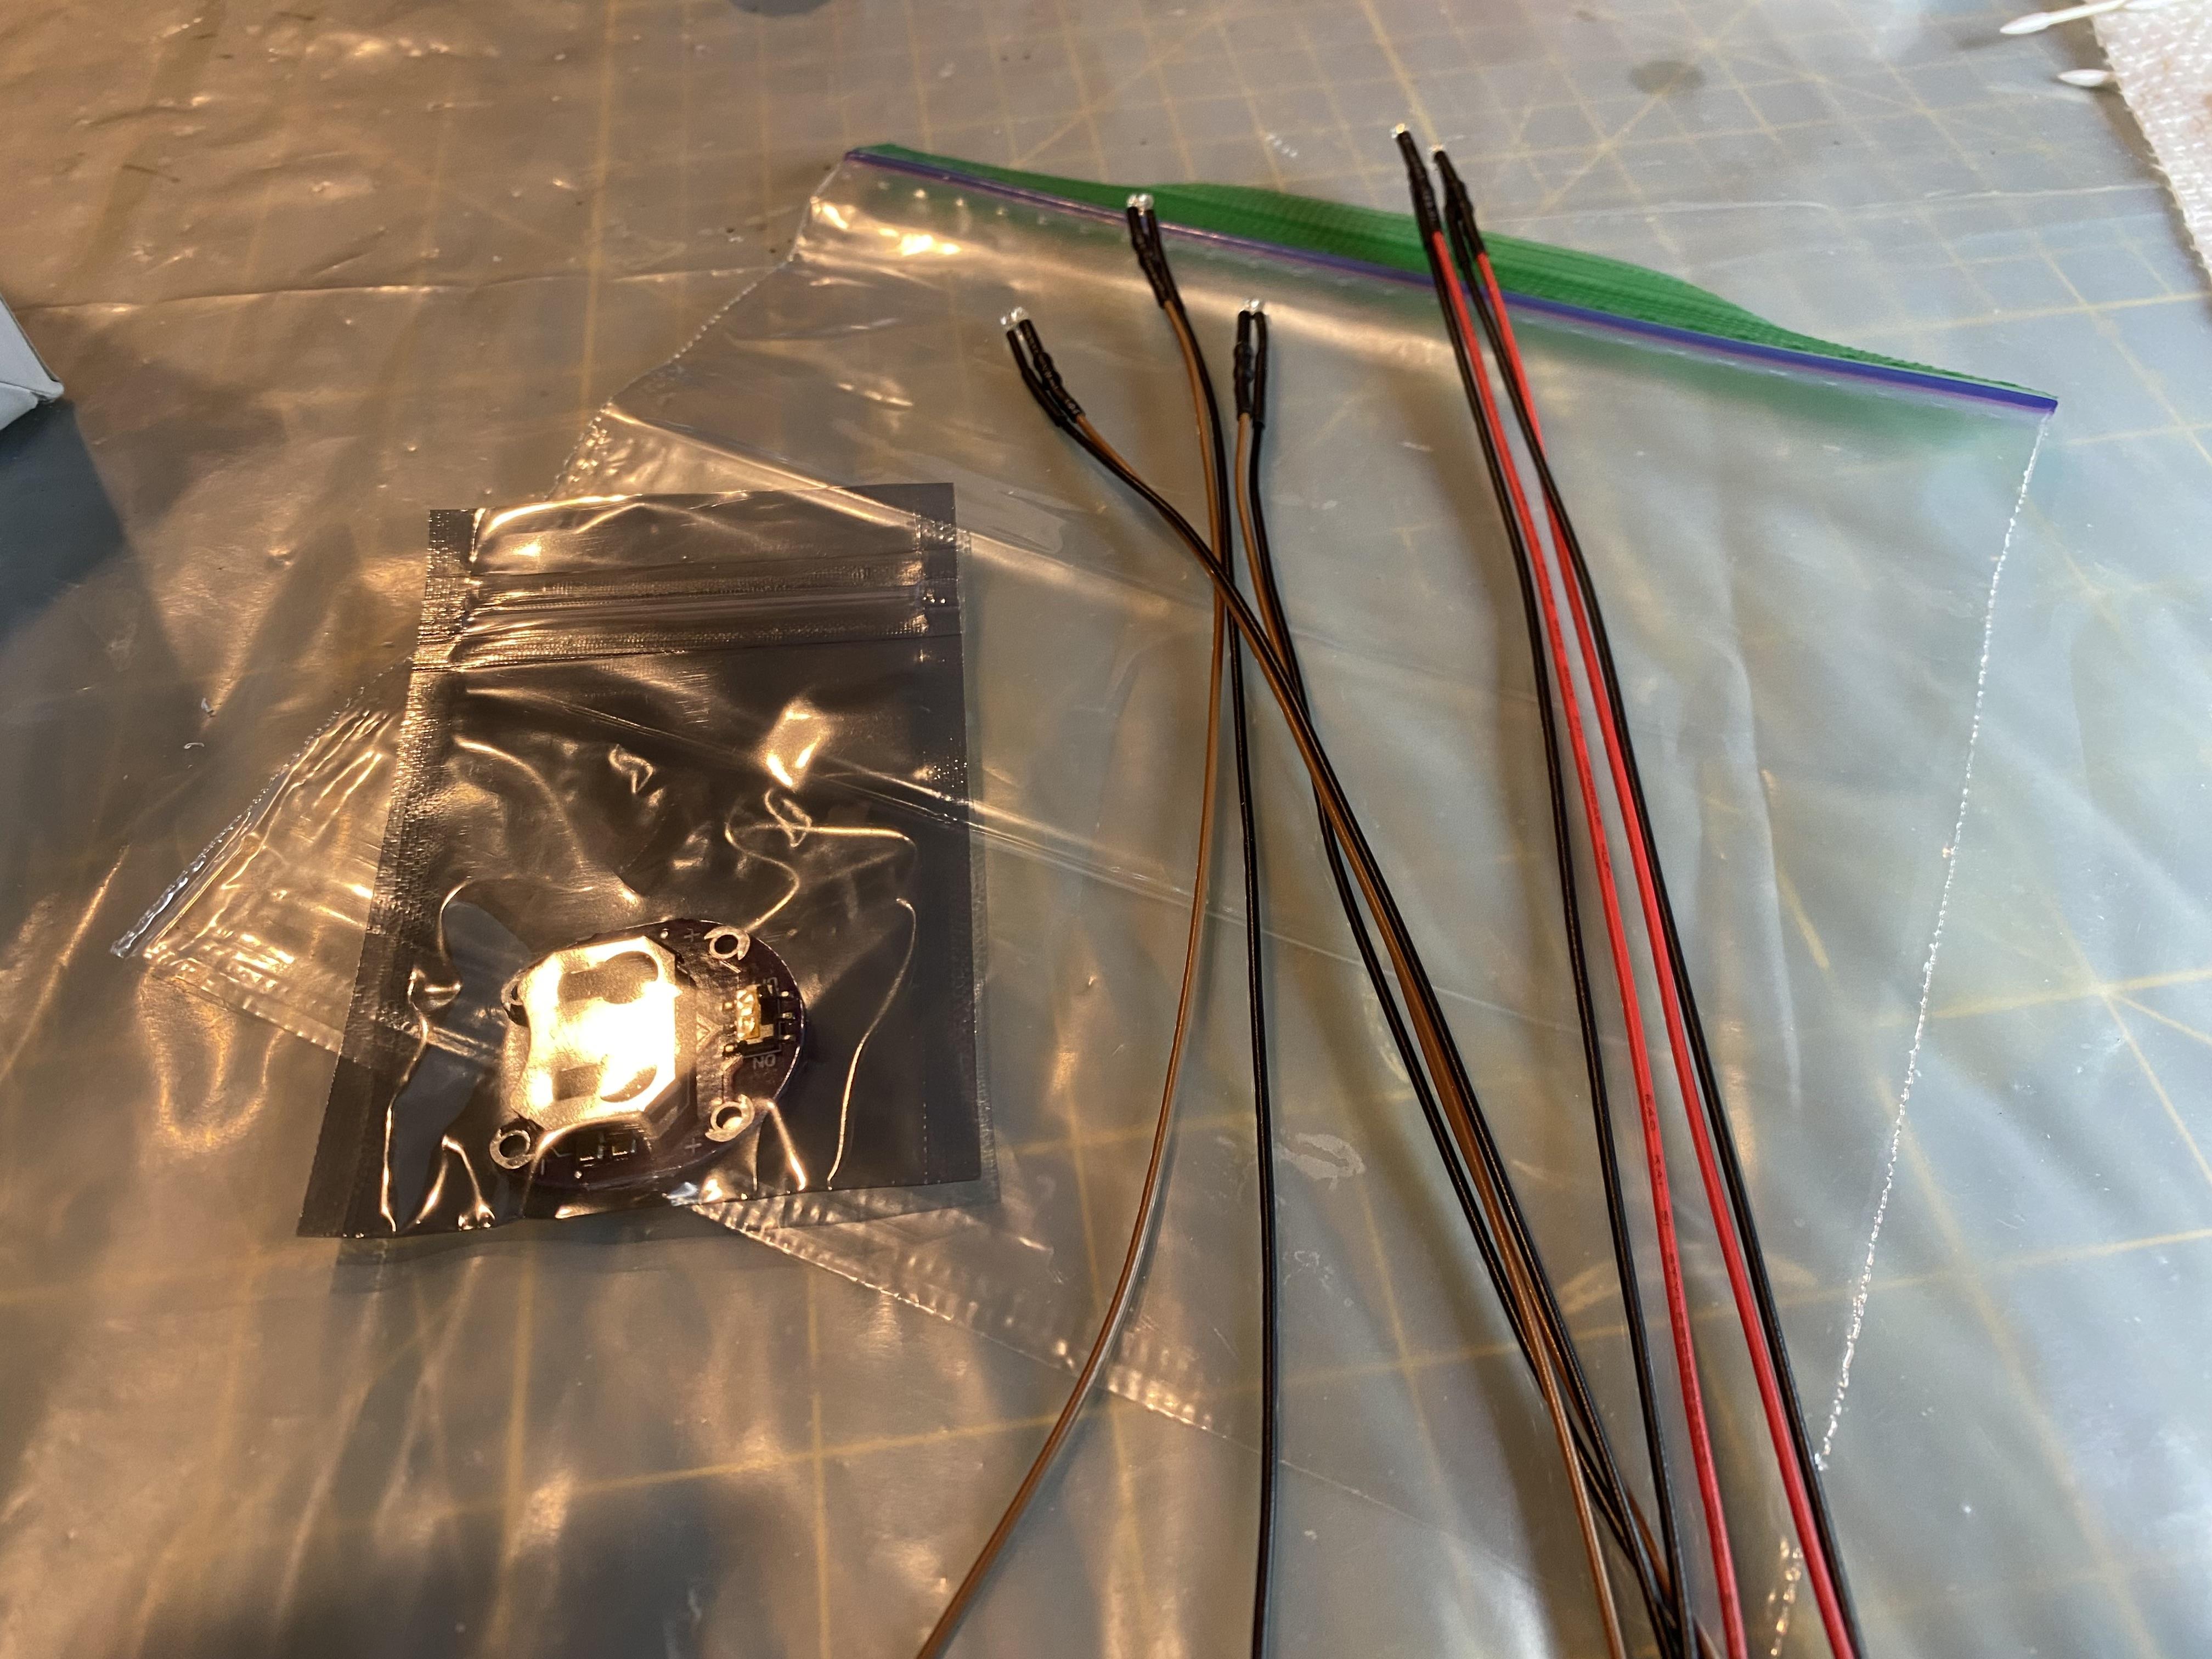
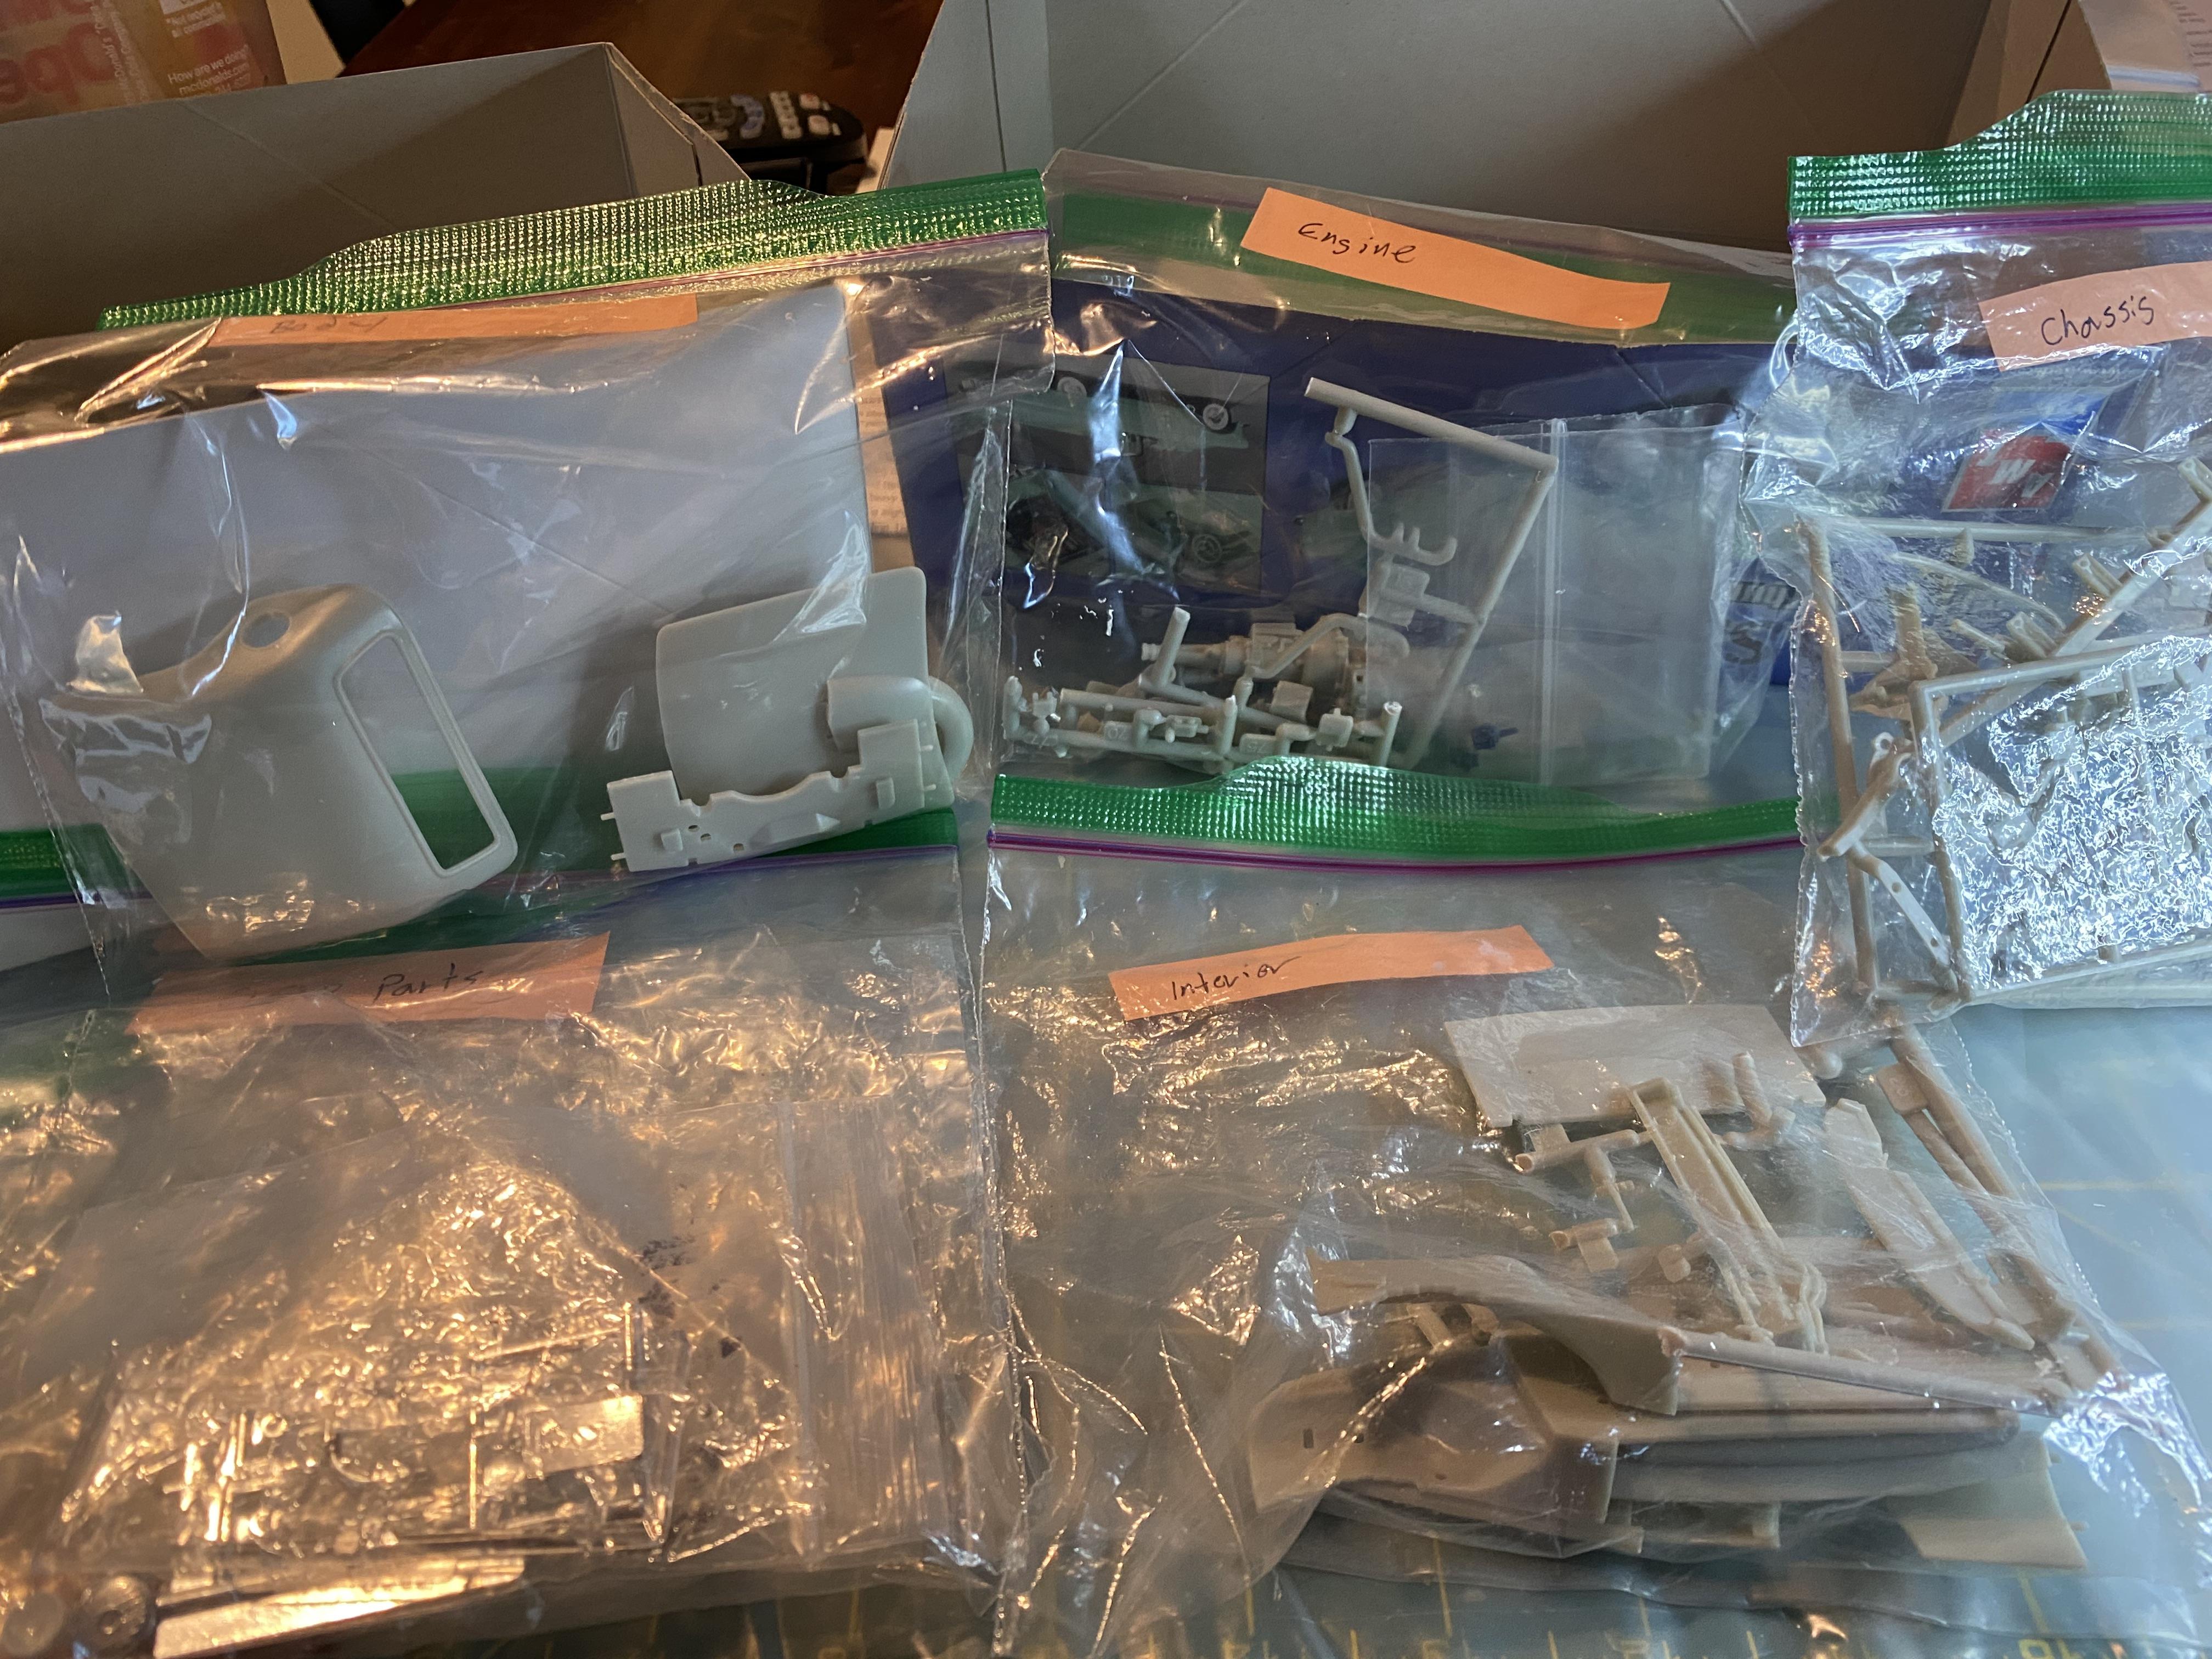
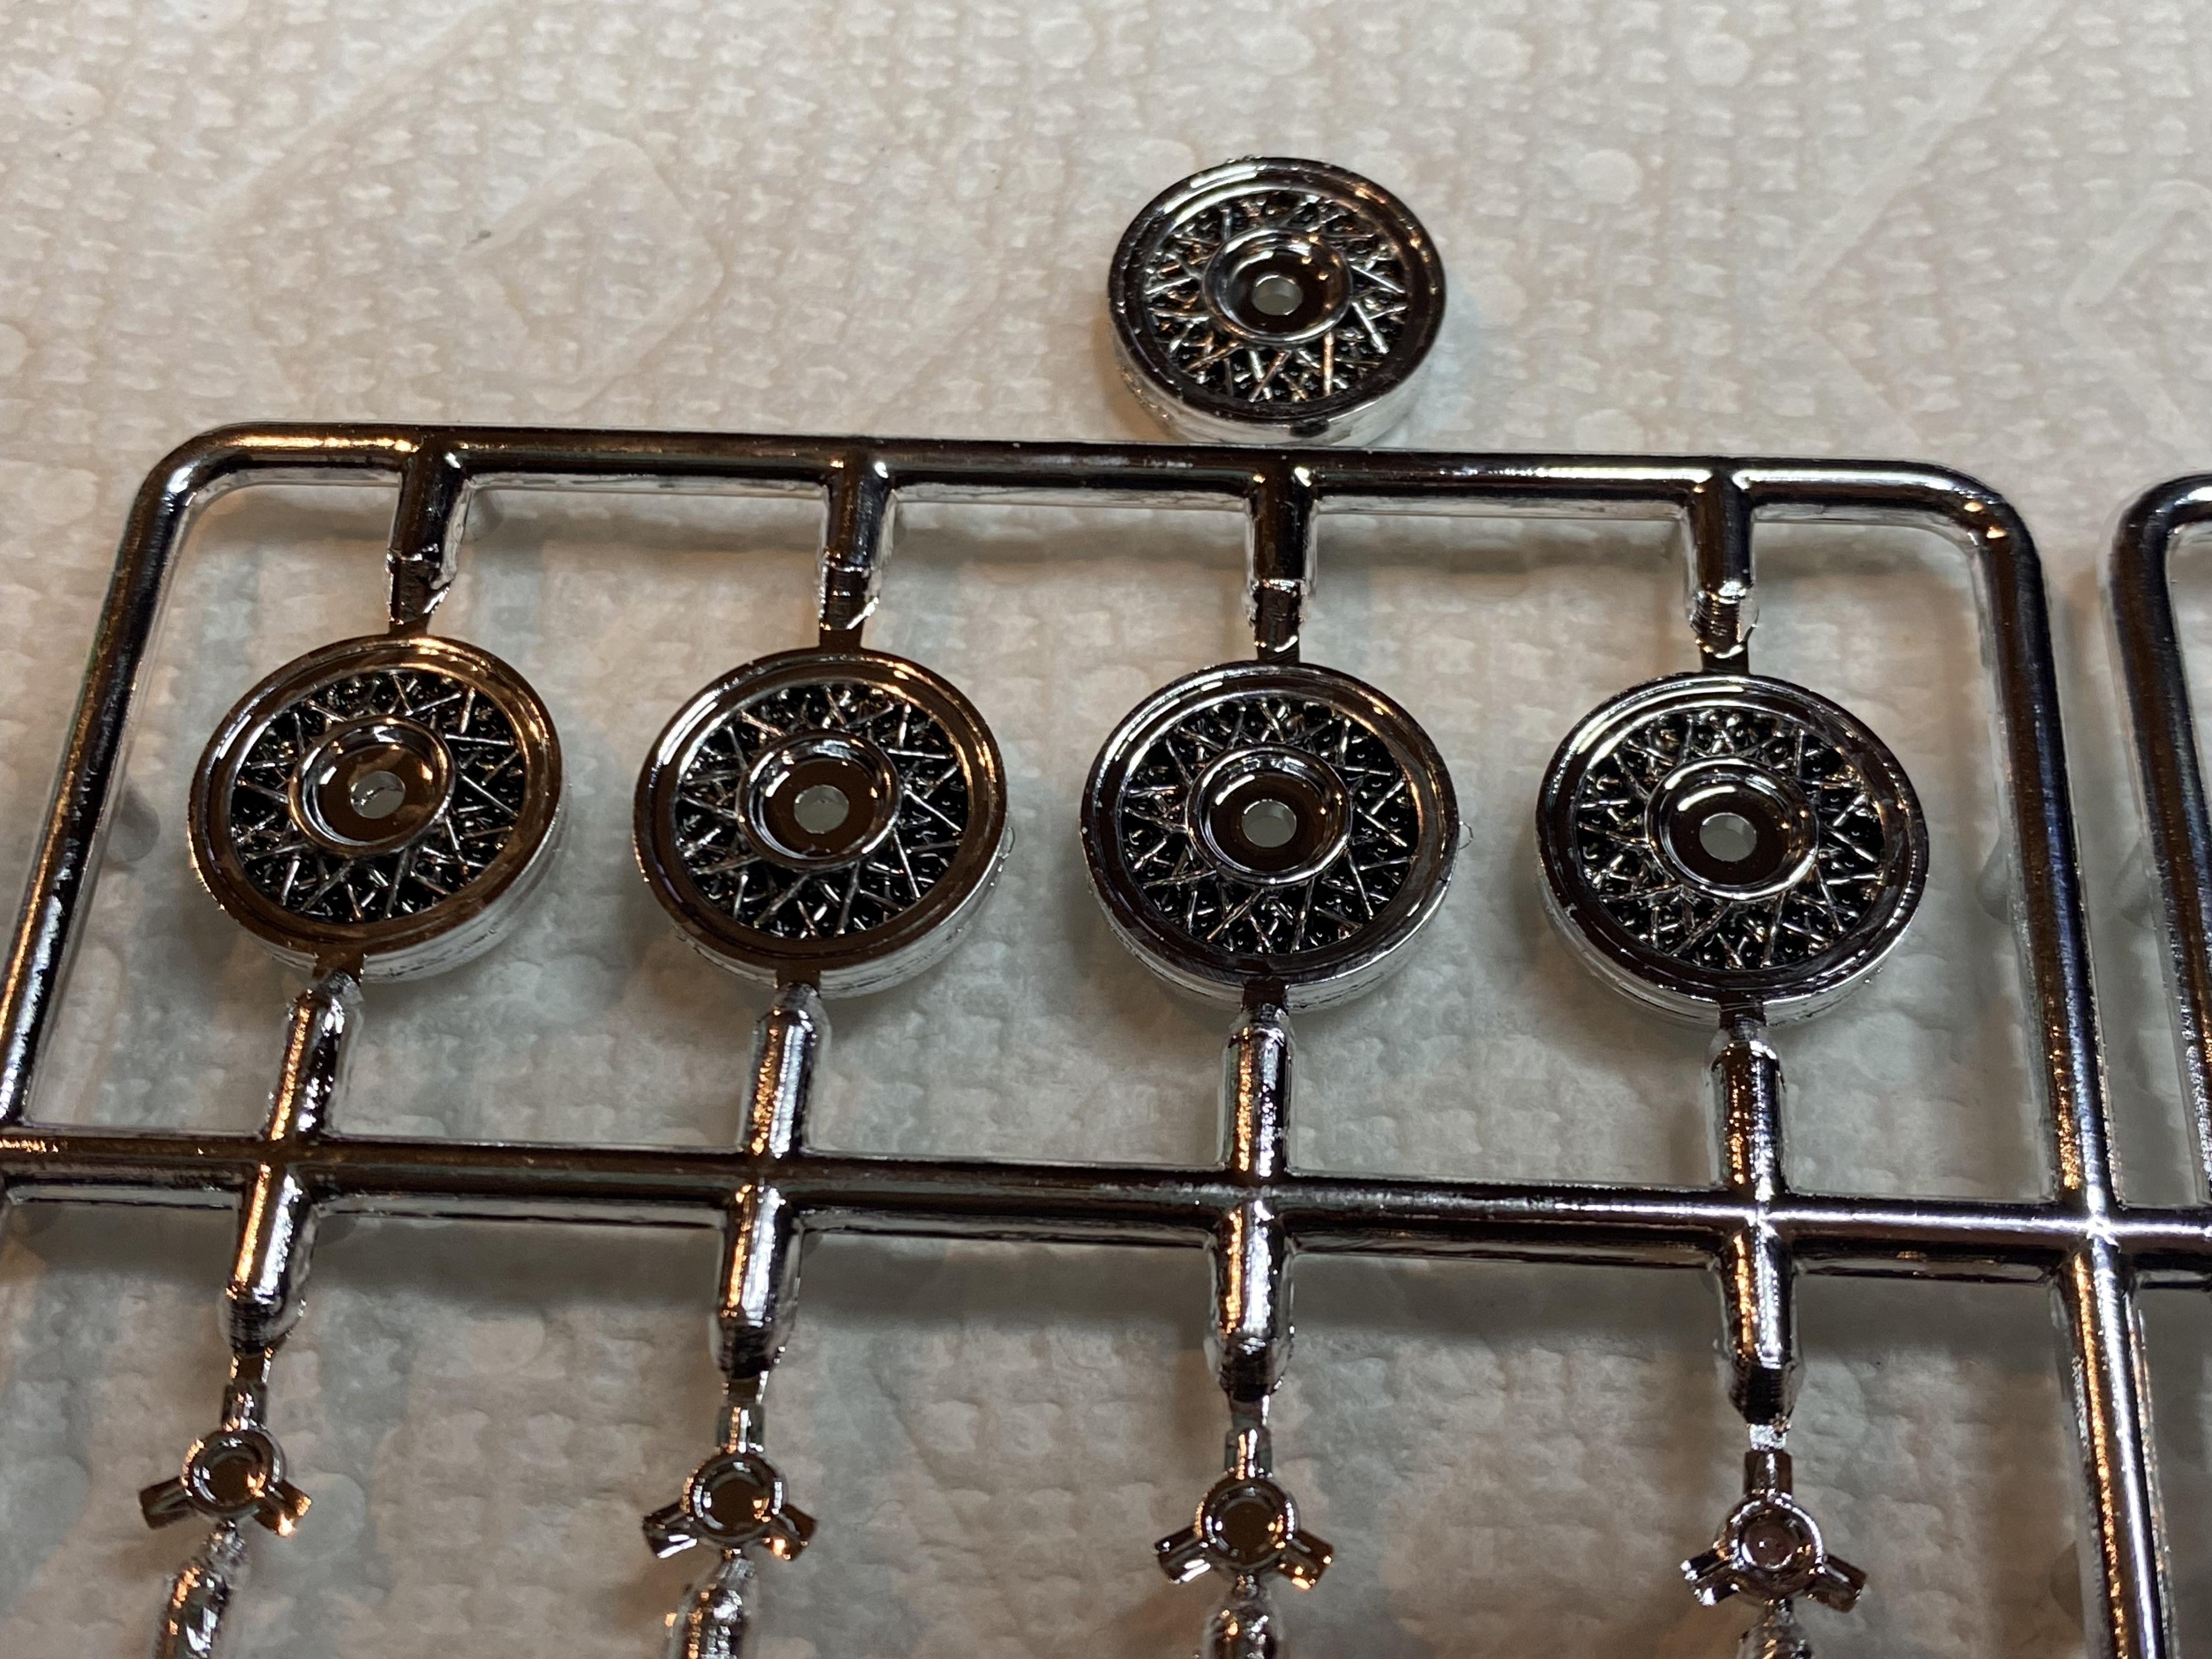
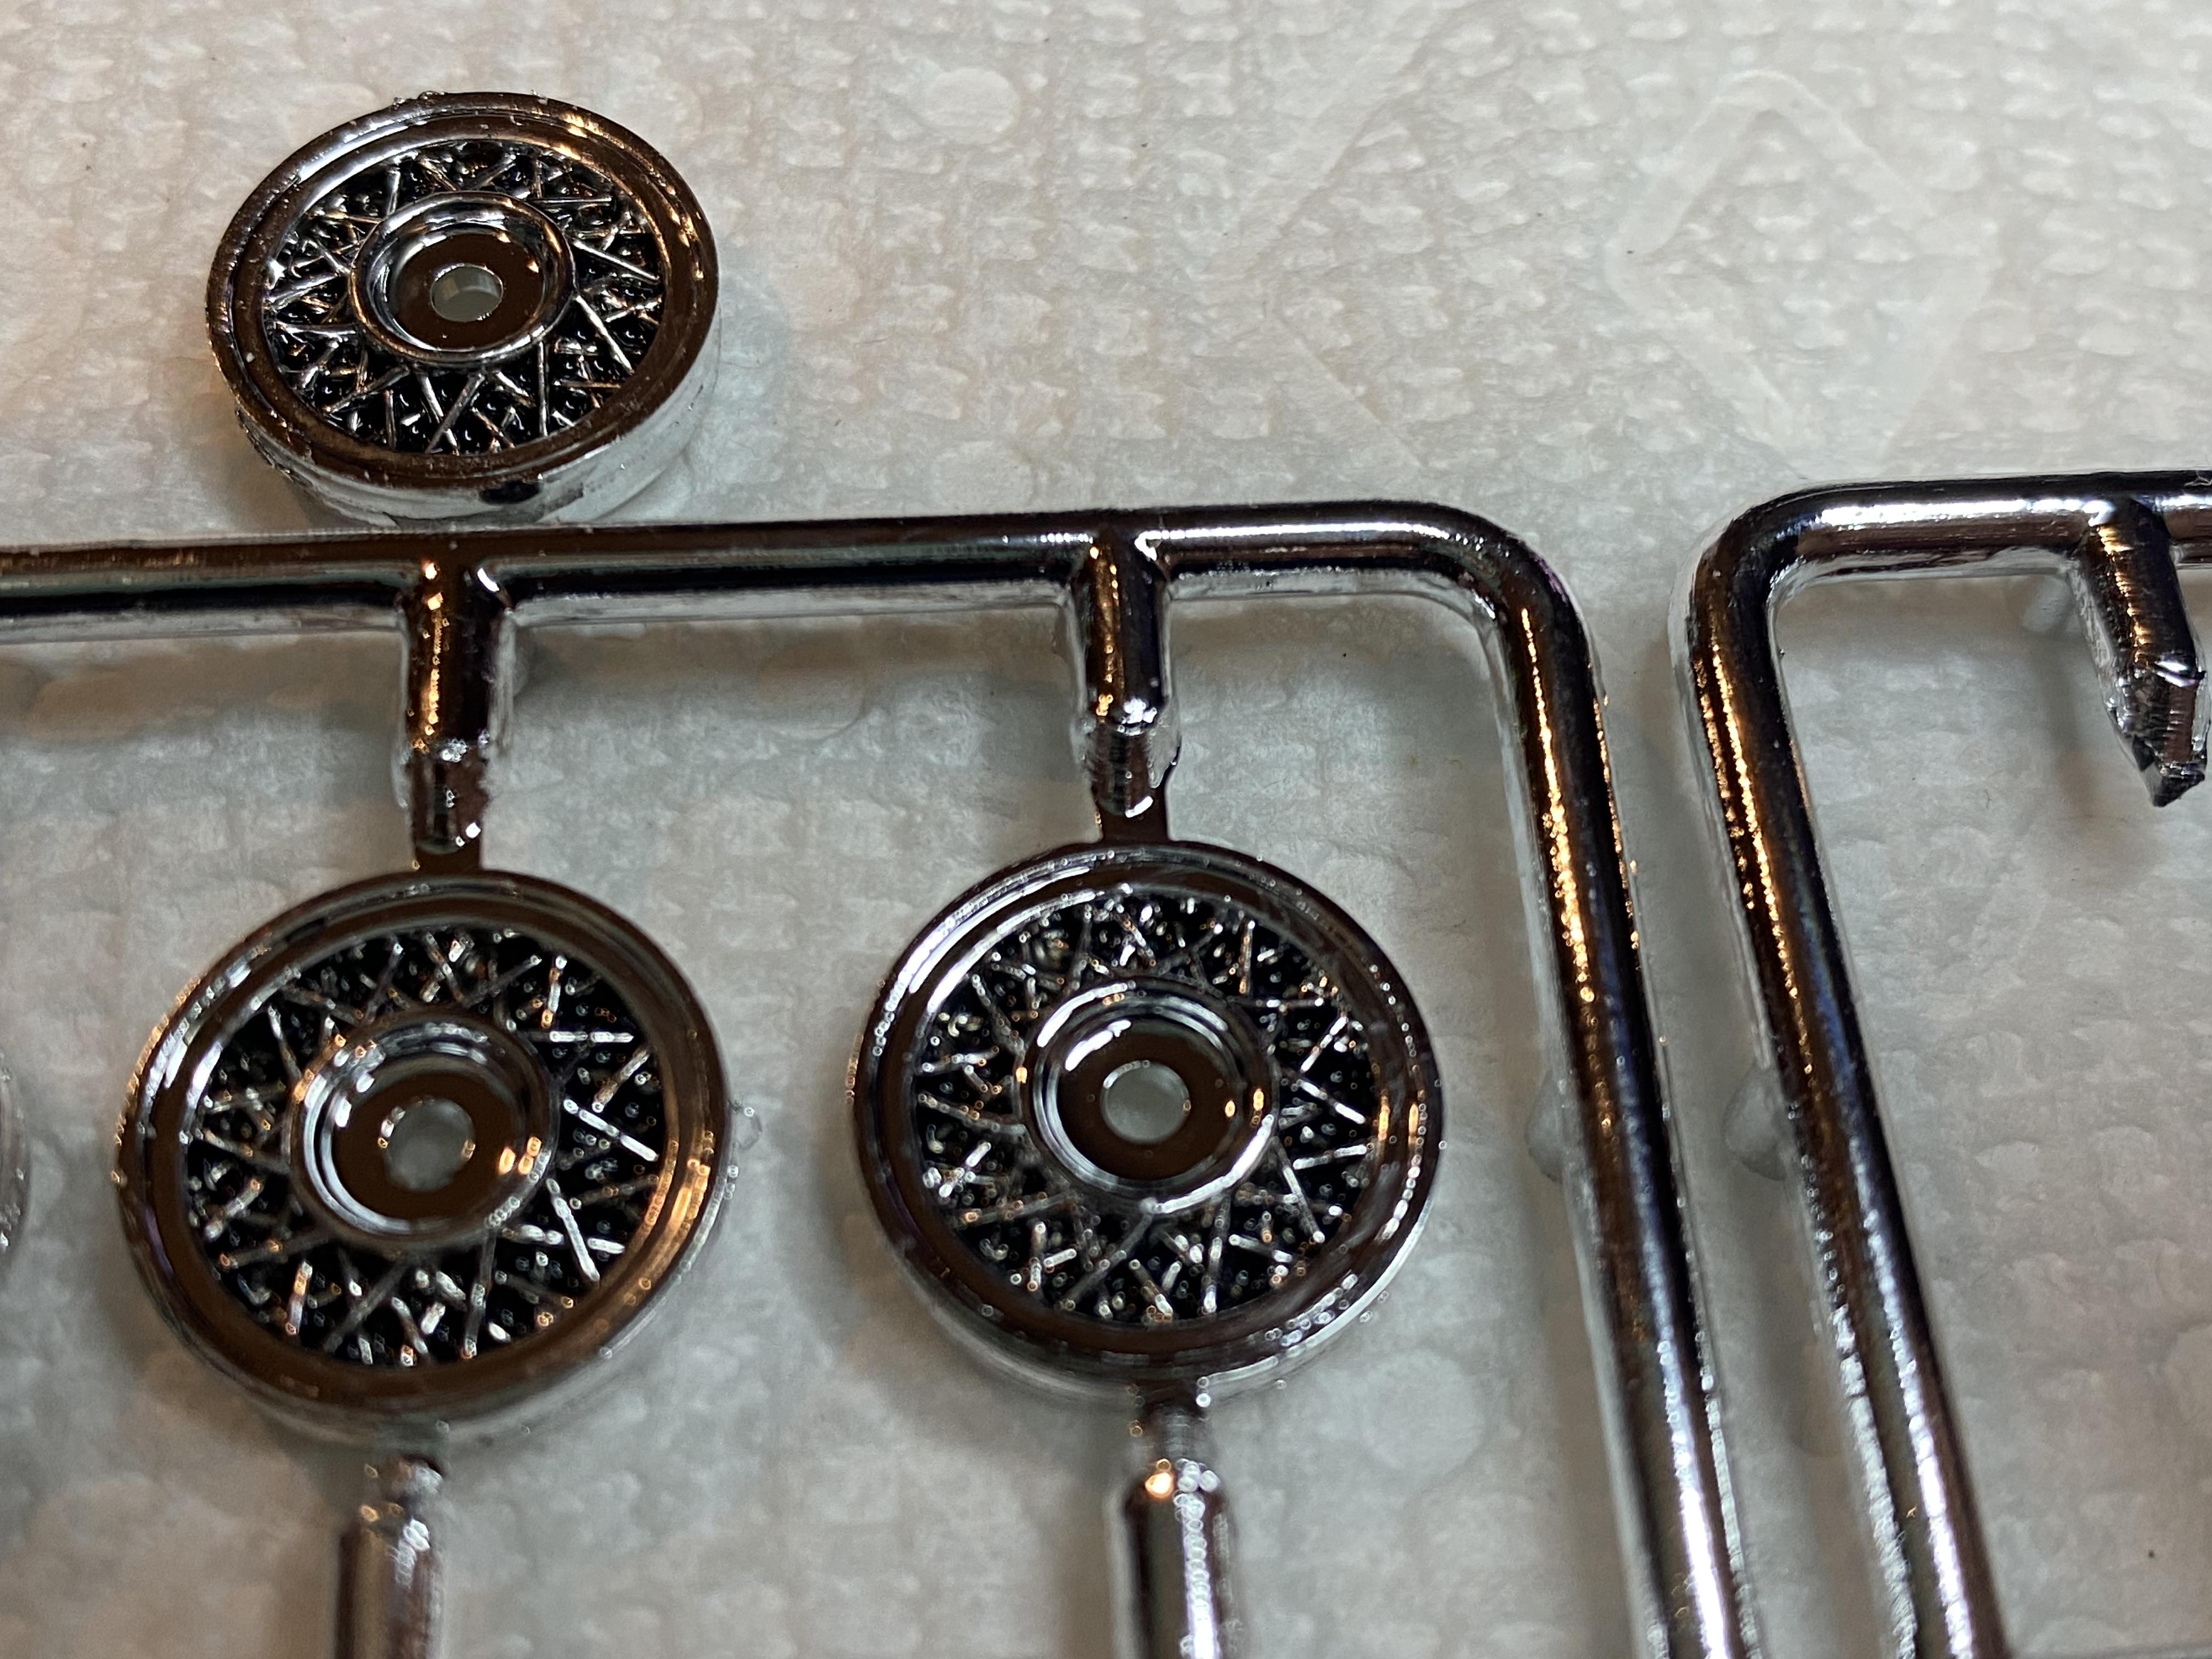
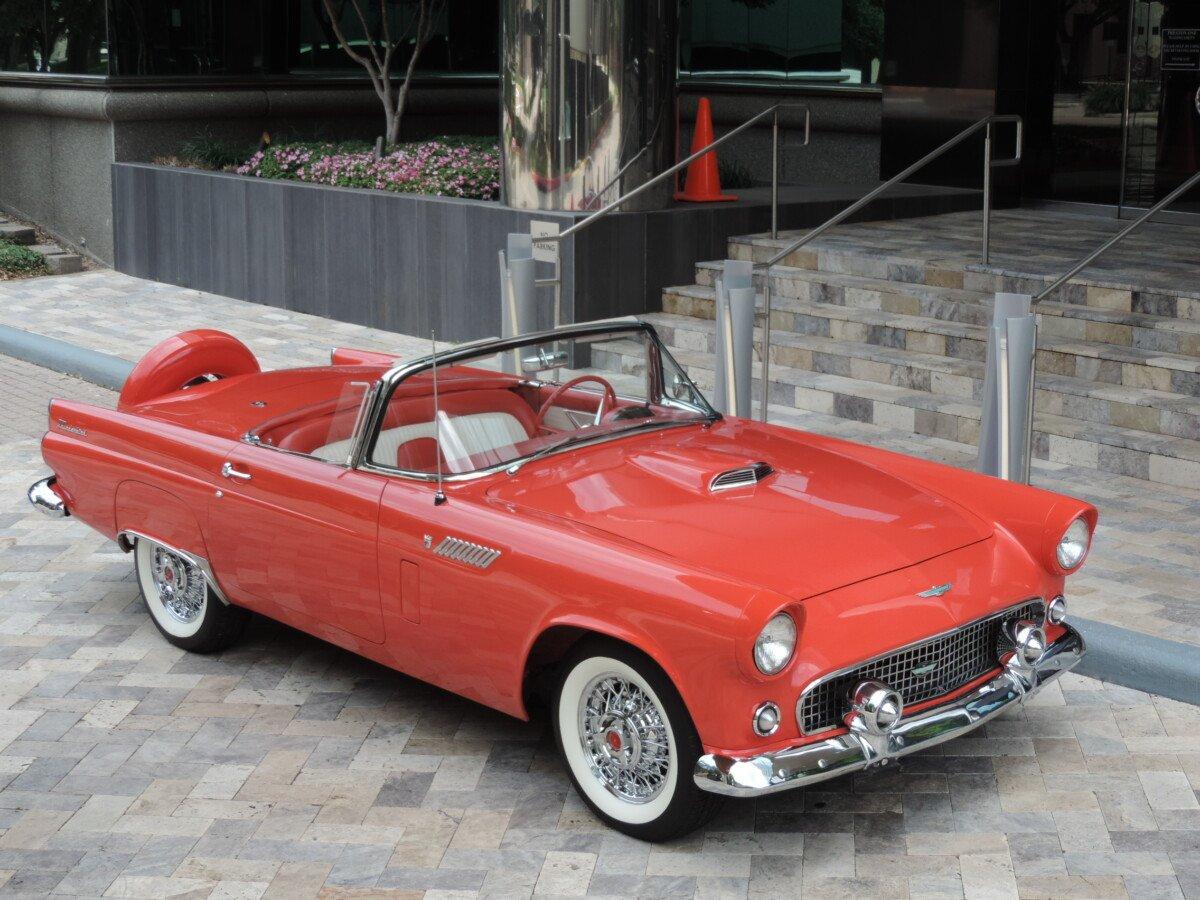
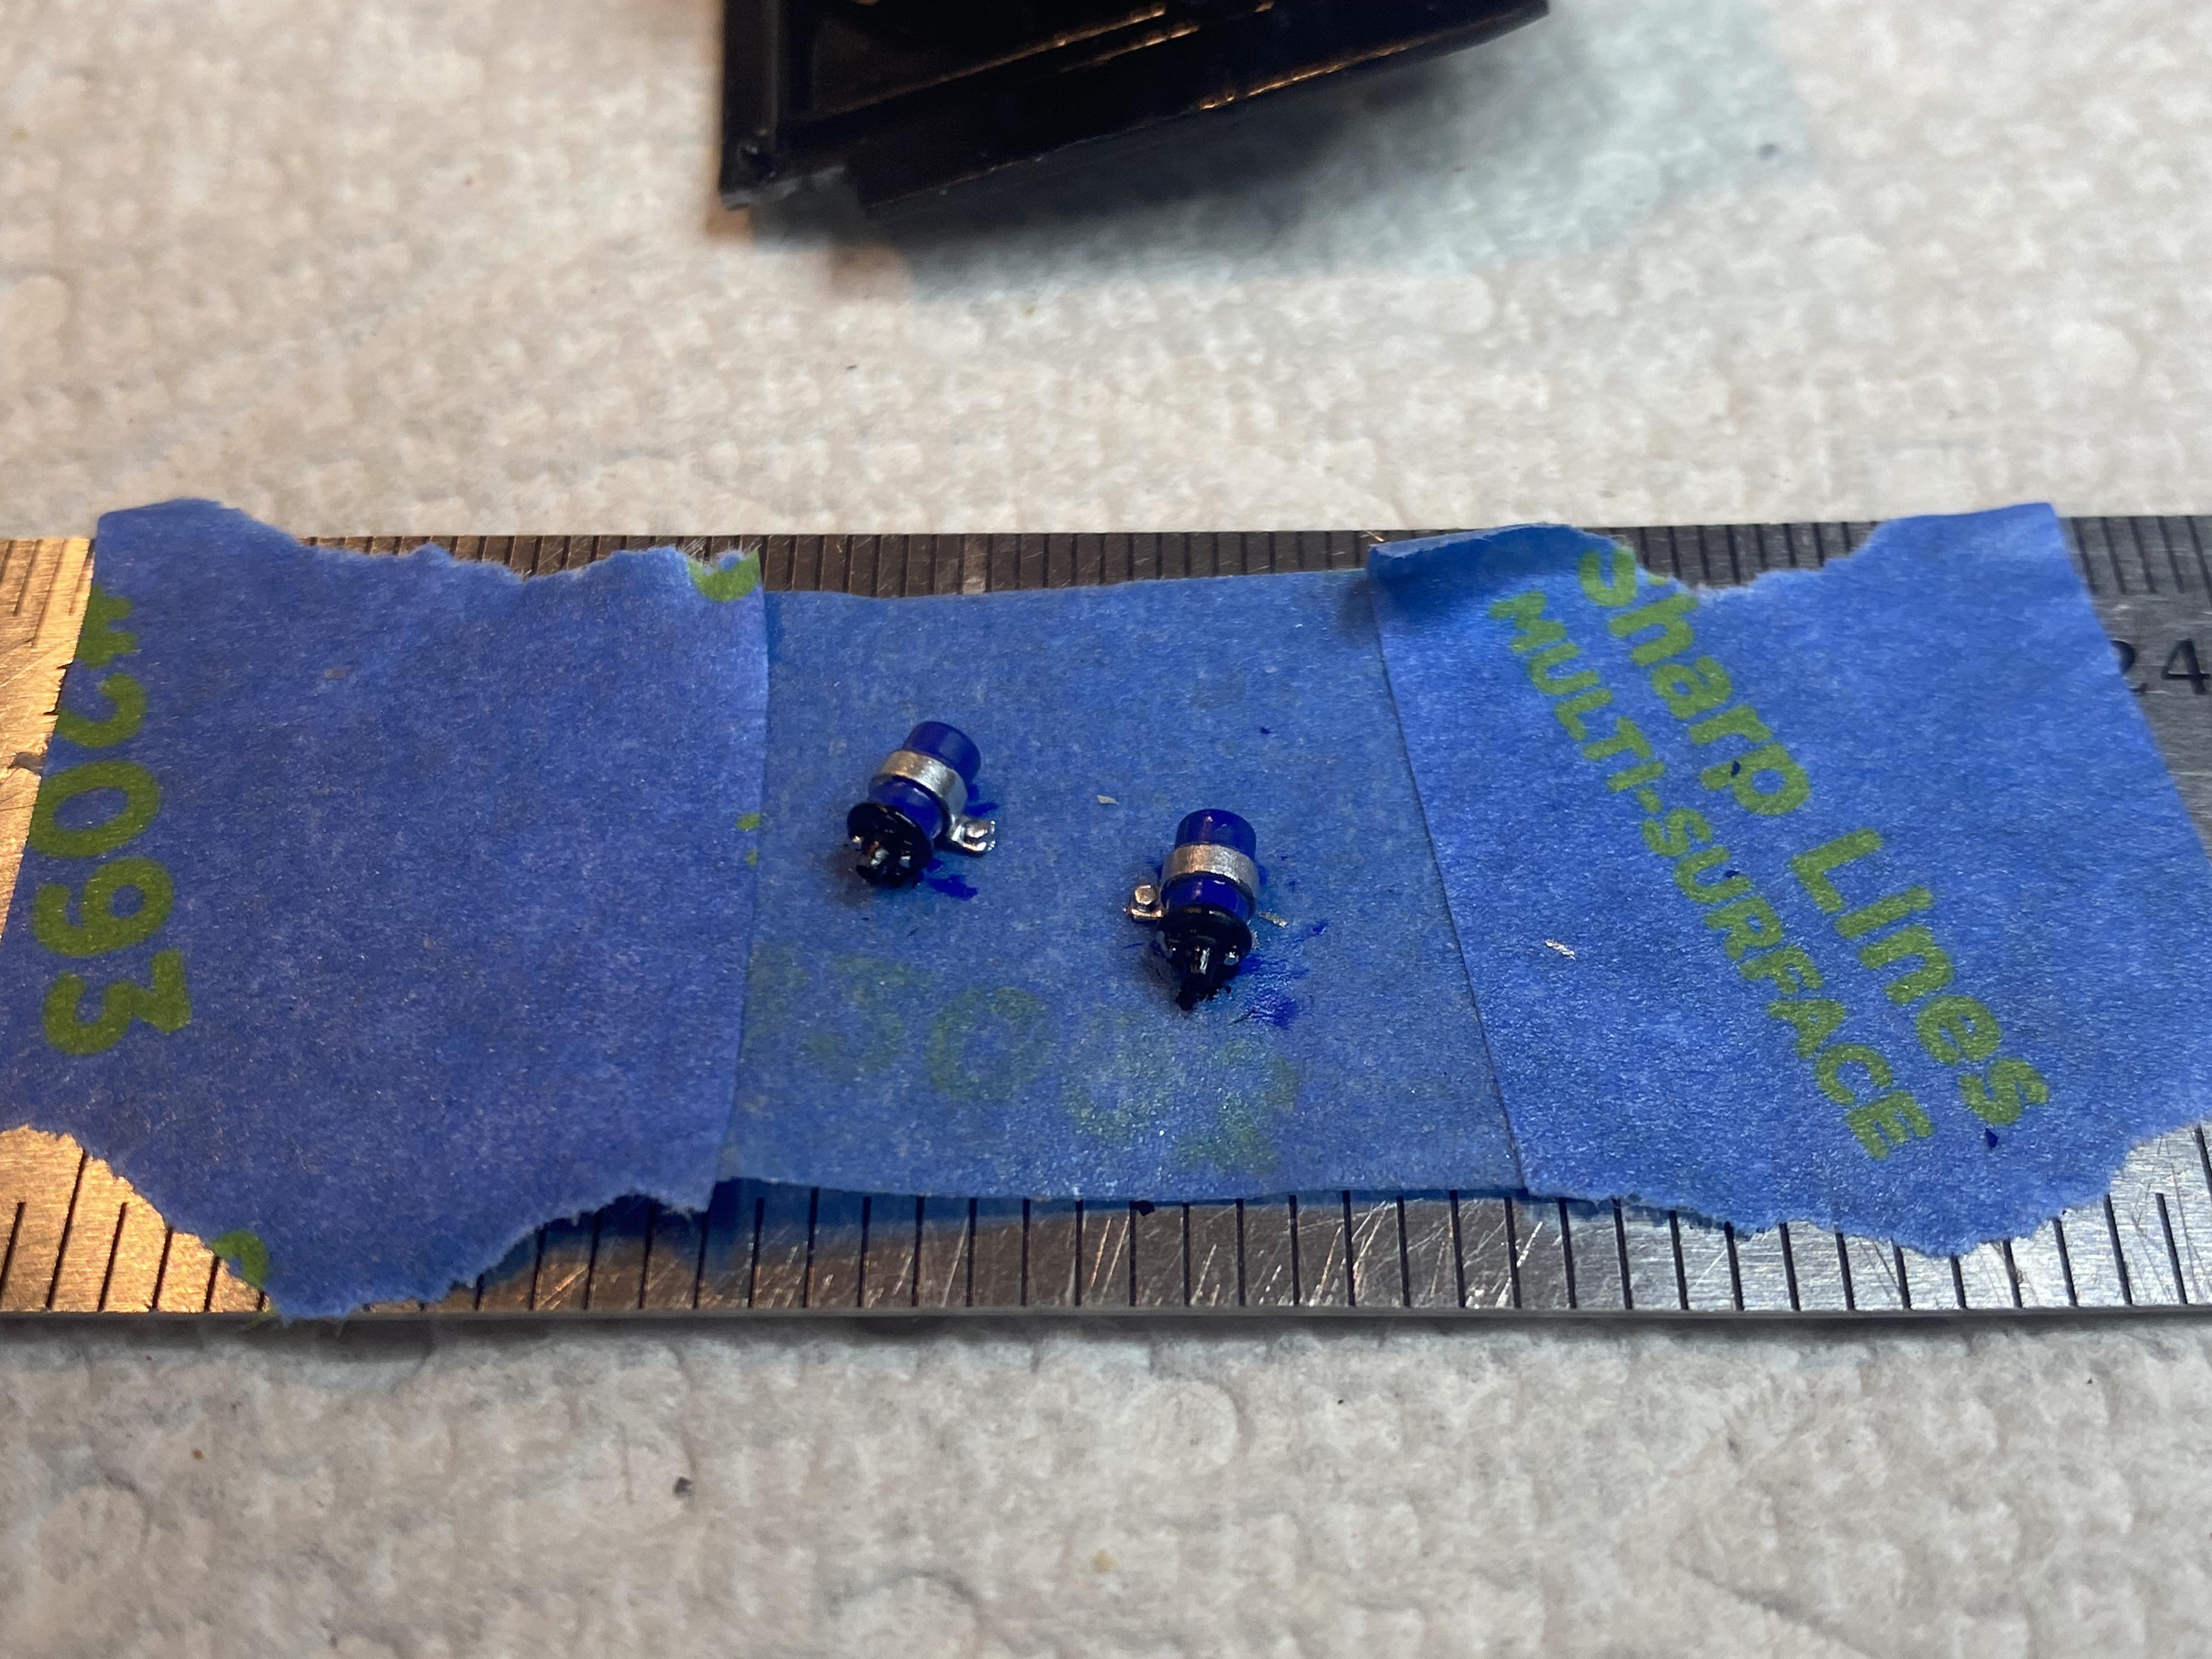
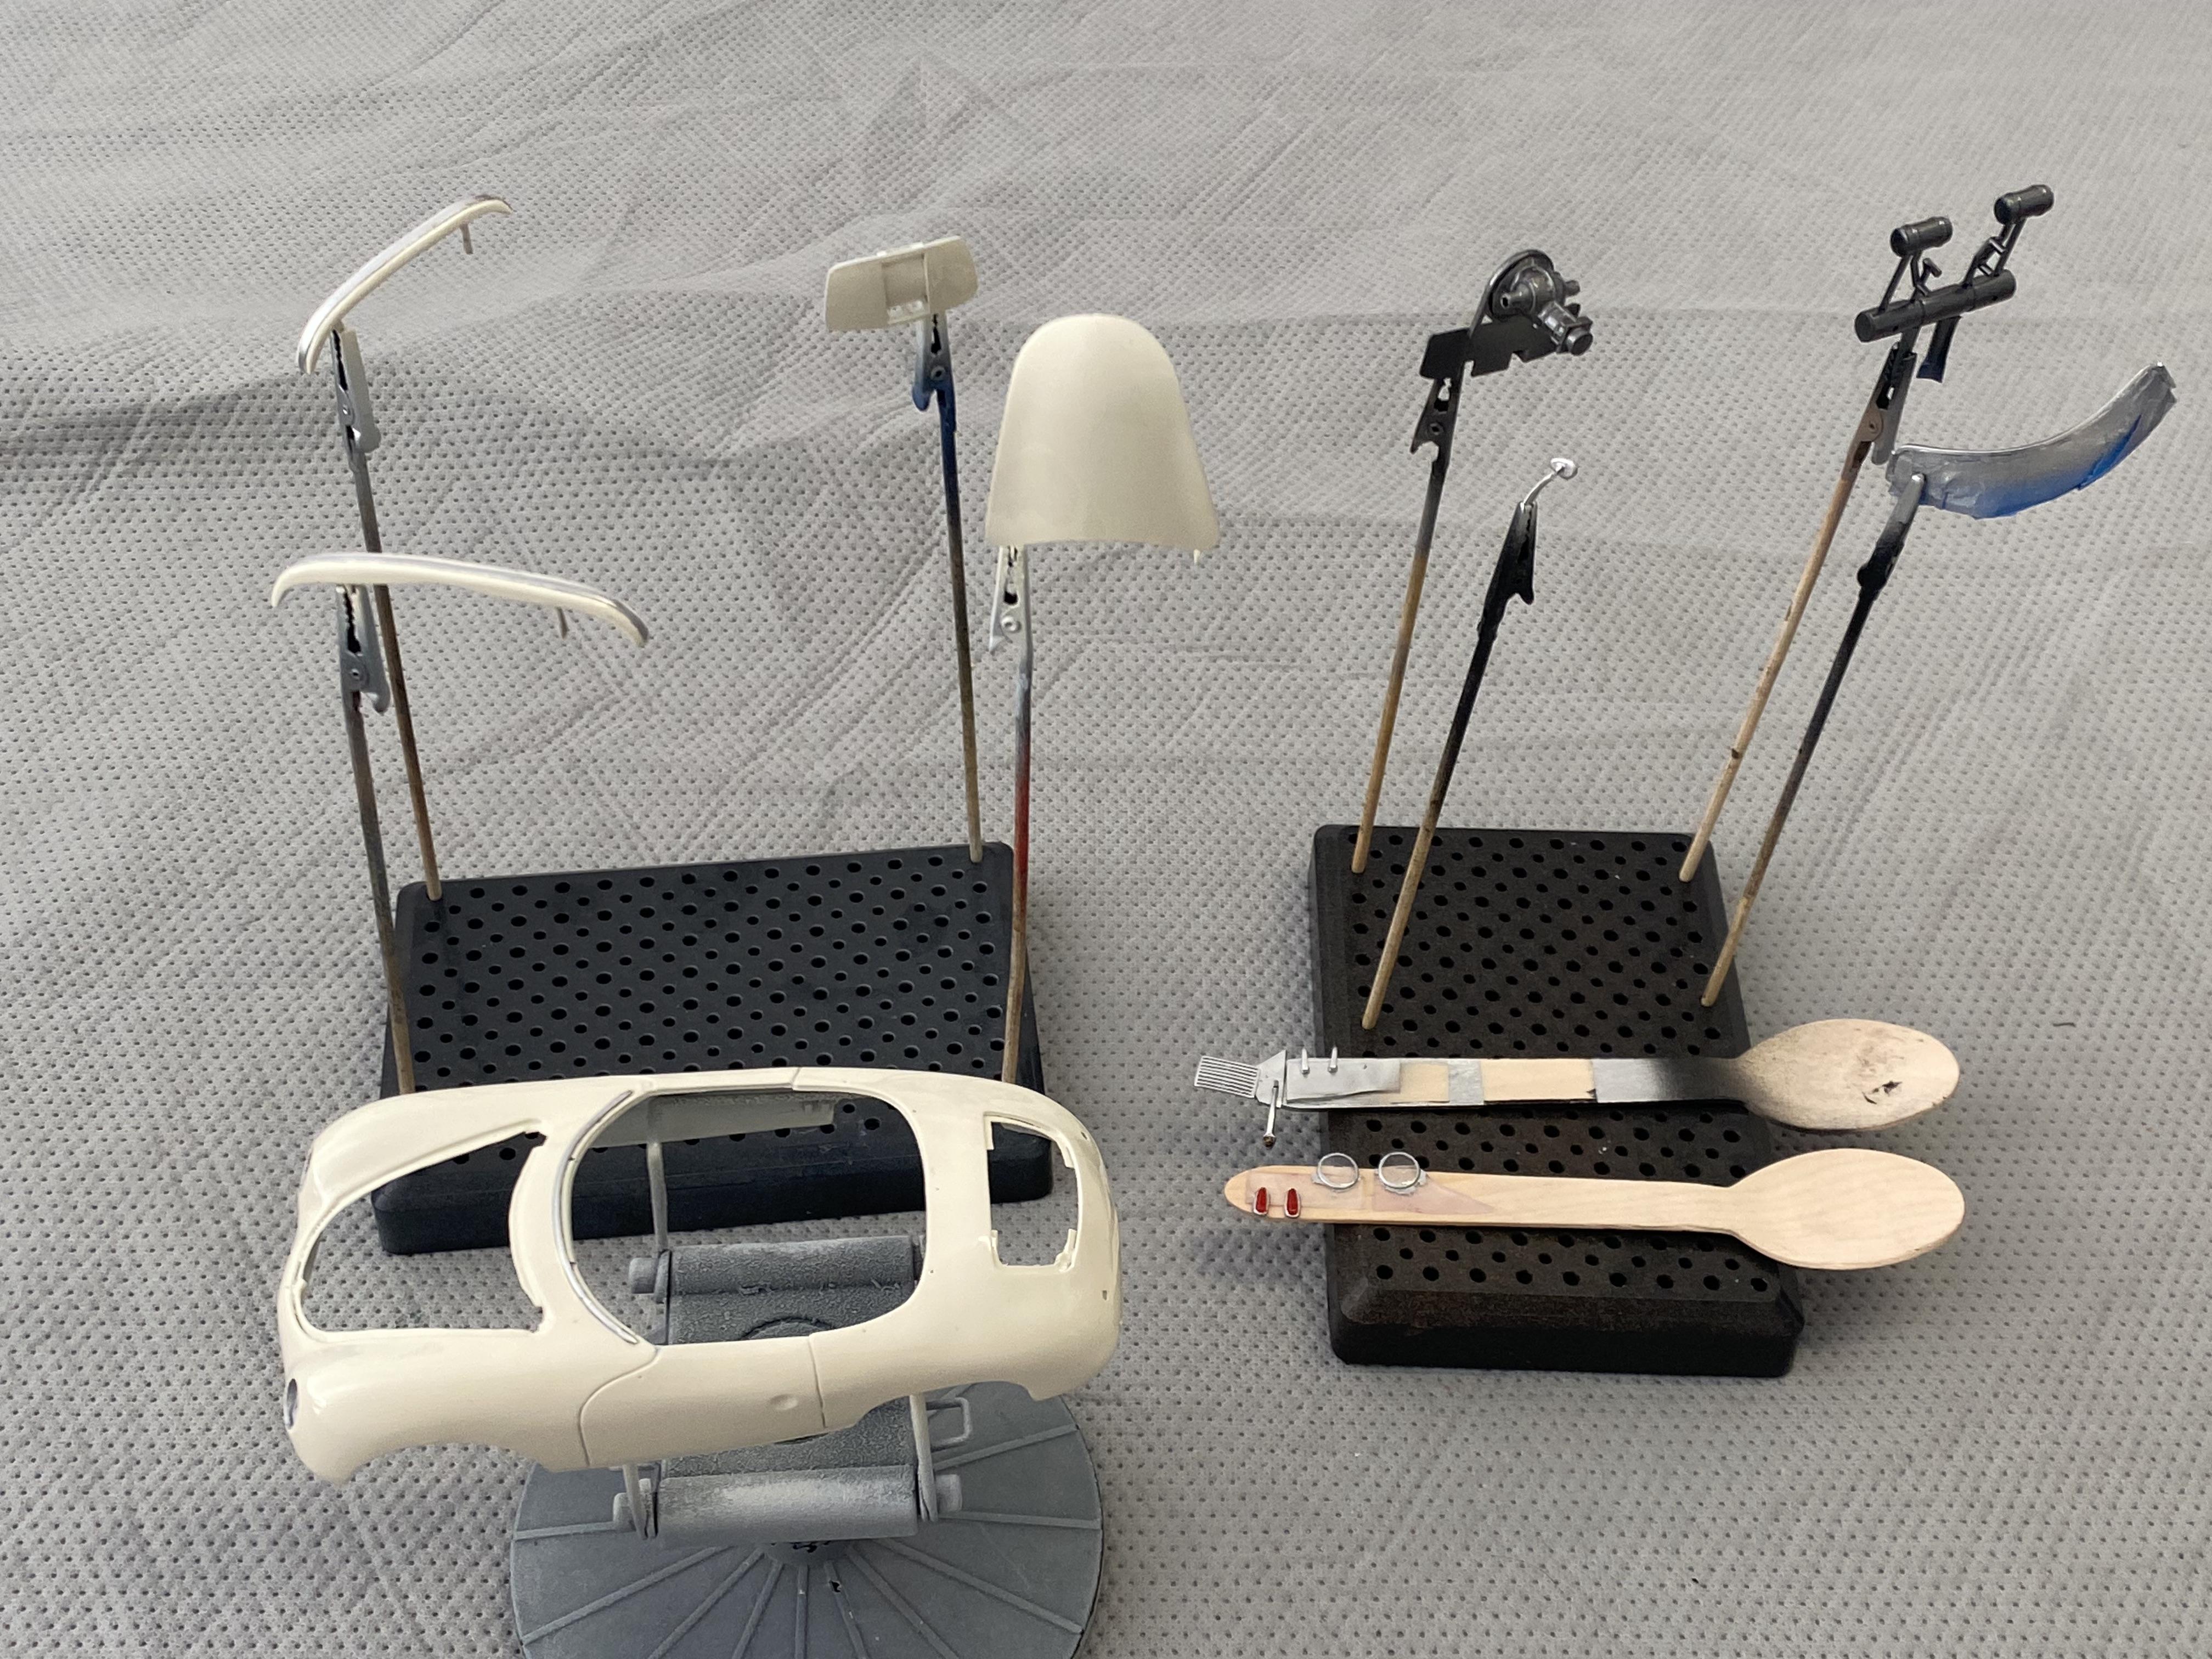
I am starting on my next build. An older AMT 1956 Thunderbird kit I picked up from a vendor at the SoCal Open Model car show last year. Should have it ready for the show this year. Now that they have re-released the AMT 1956 Thunderbird kit I may have to get another one to make a 1955 Thunderbird if this one goes well. I have gotten a few supplies but will need to order more. Fiesta Red paint from Scale Finishes. I had the colonial white from MCW finishes left over from my 1957 Thunderbird build. A photo-etch detail kit and Kelsey Hayes Wire wheels with Wide White pad printed tires from AMT. This appears to be so much better a kit then the AMT 1957 Thunderbird that I had to make so many modifications and scratch build parts to make look decent. Started putting together the components that will get painted the same color. For the engine I dug out a nice pre-drilled 3d printed distributor and coil. I cut open the spare so it would accept a Kelsey Hayes wheels. Modified the wheel back so they would work with the wire wheels and pad printed tires as well. Then used panel liners on the wire wheels to see how they will look. I bagged up the parts in bags per area to avoid loosing anything. then dug out some LEDs to created the wiring for this build. This is an Amos Minter restoration of a Fiesta Red 1956 Thunderbird with the look I am going for.

-
Thank you!
-
Thank you!
-
Thank you! Have you looked at my WIP thread? There is a lot of work that goes into making the body look right.
-
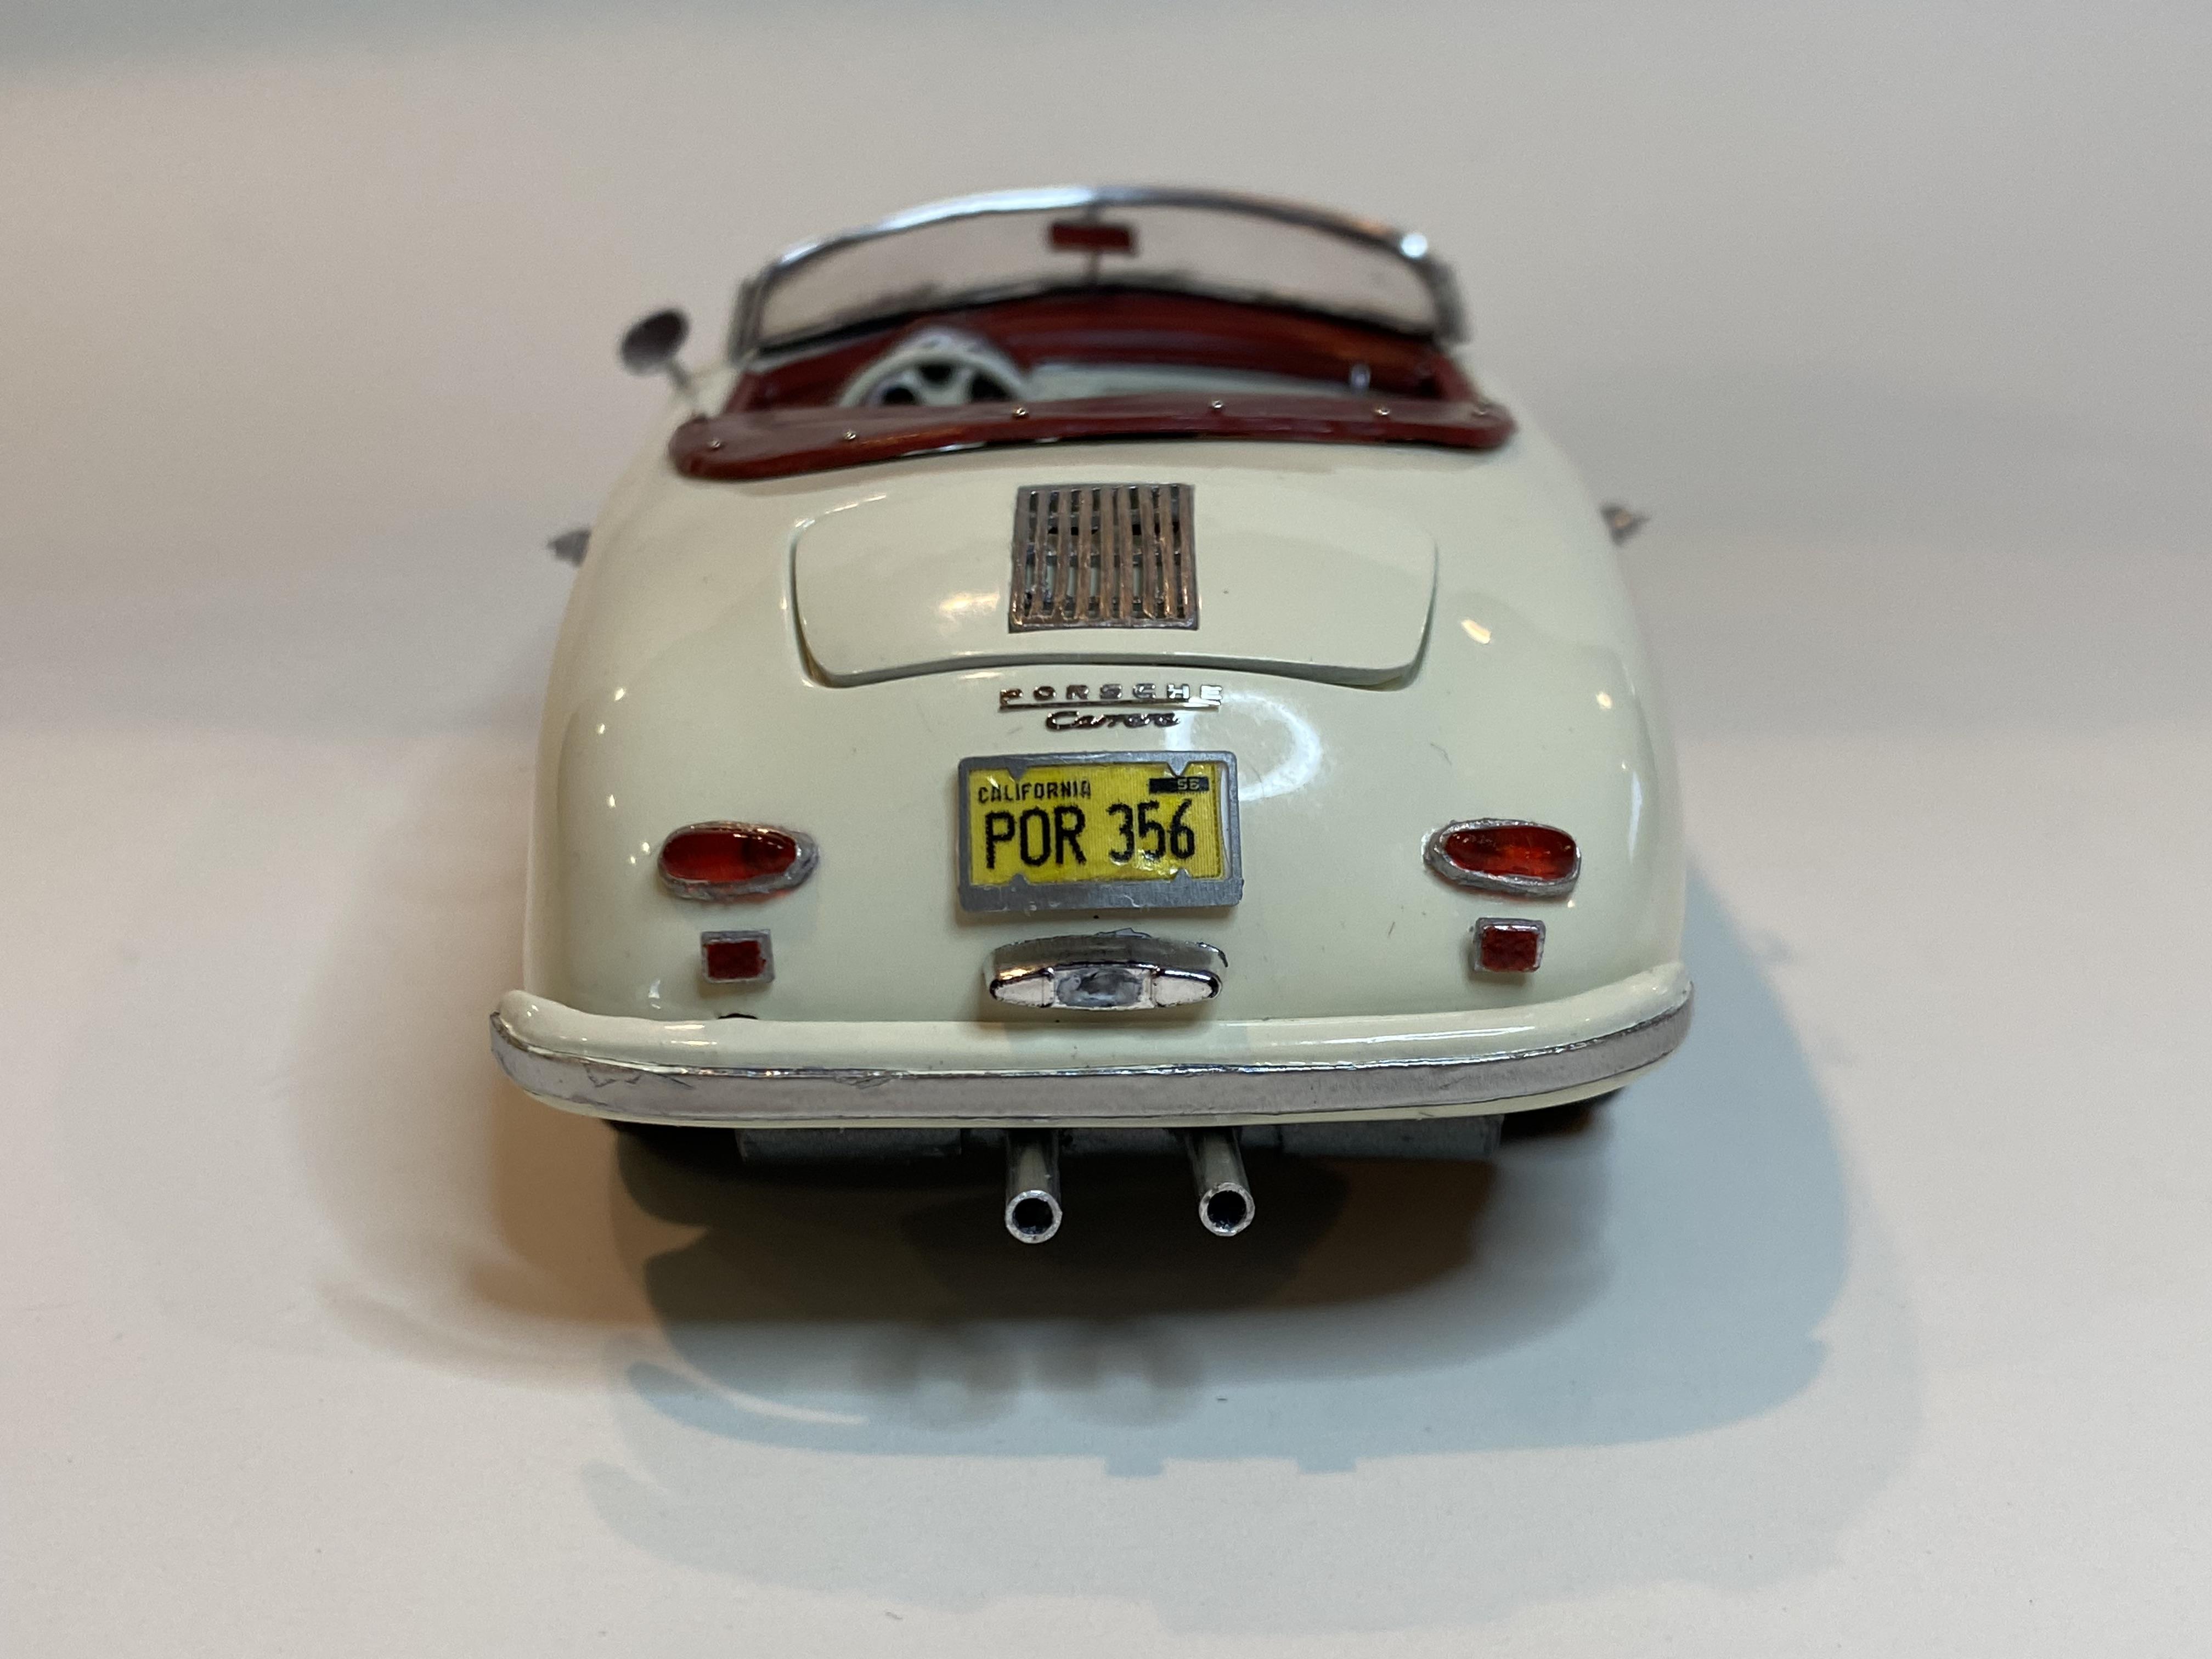
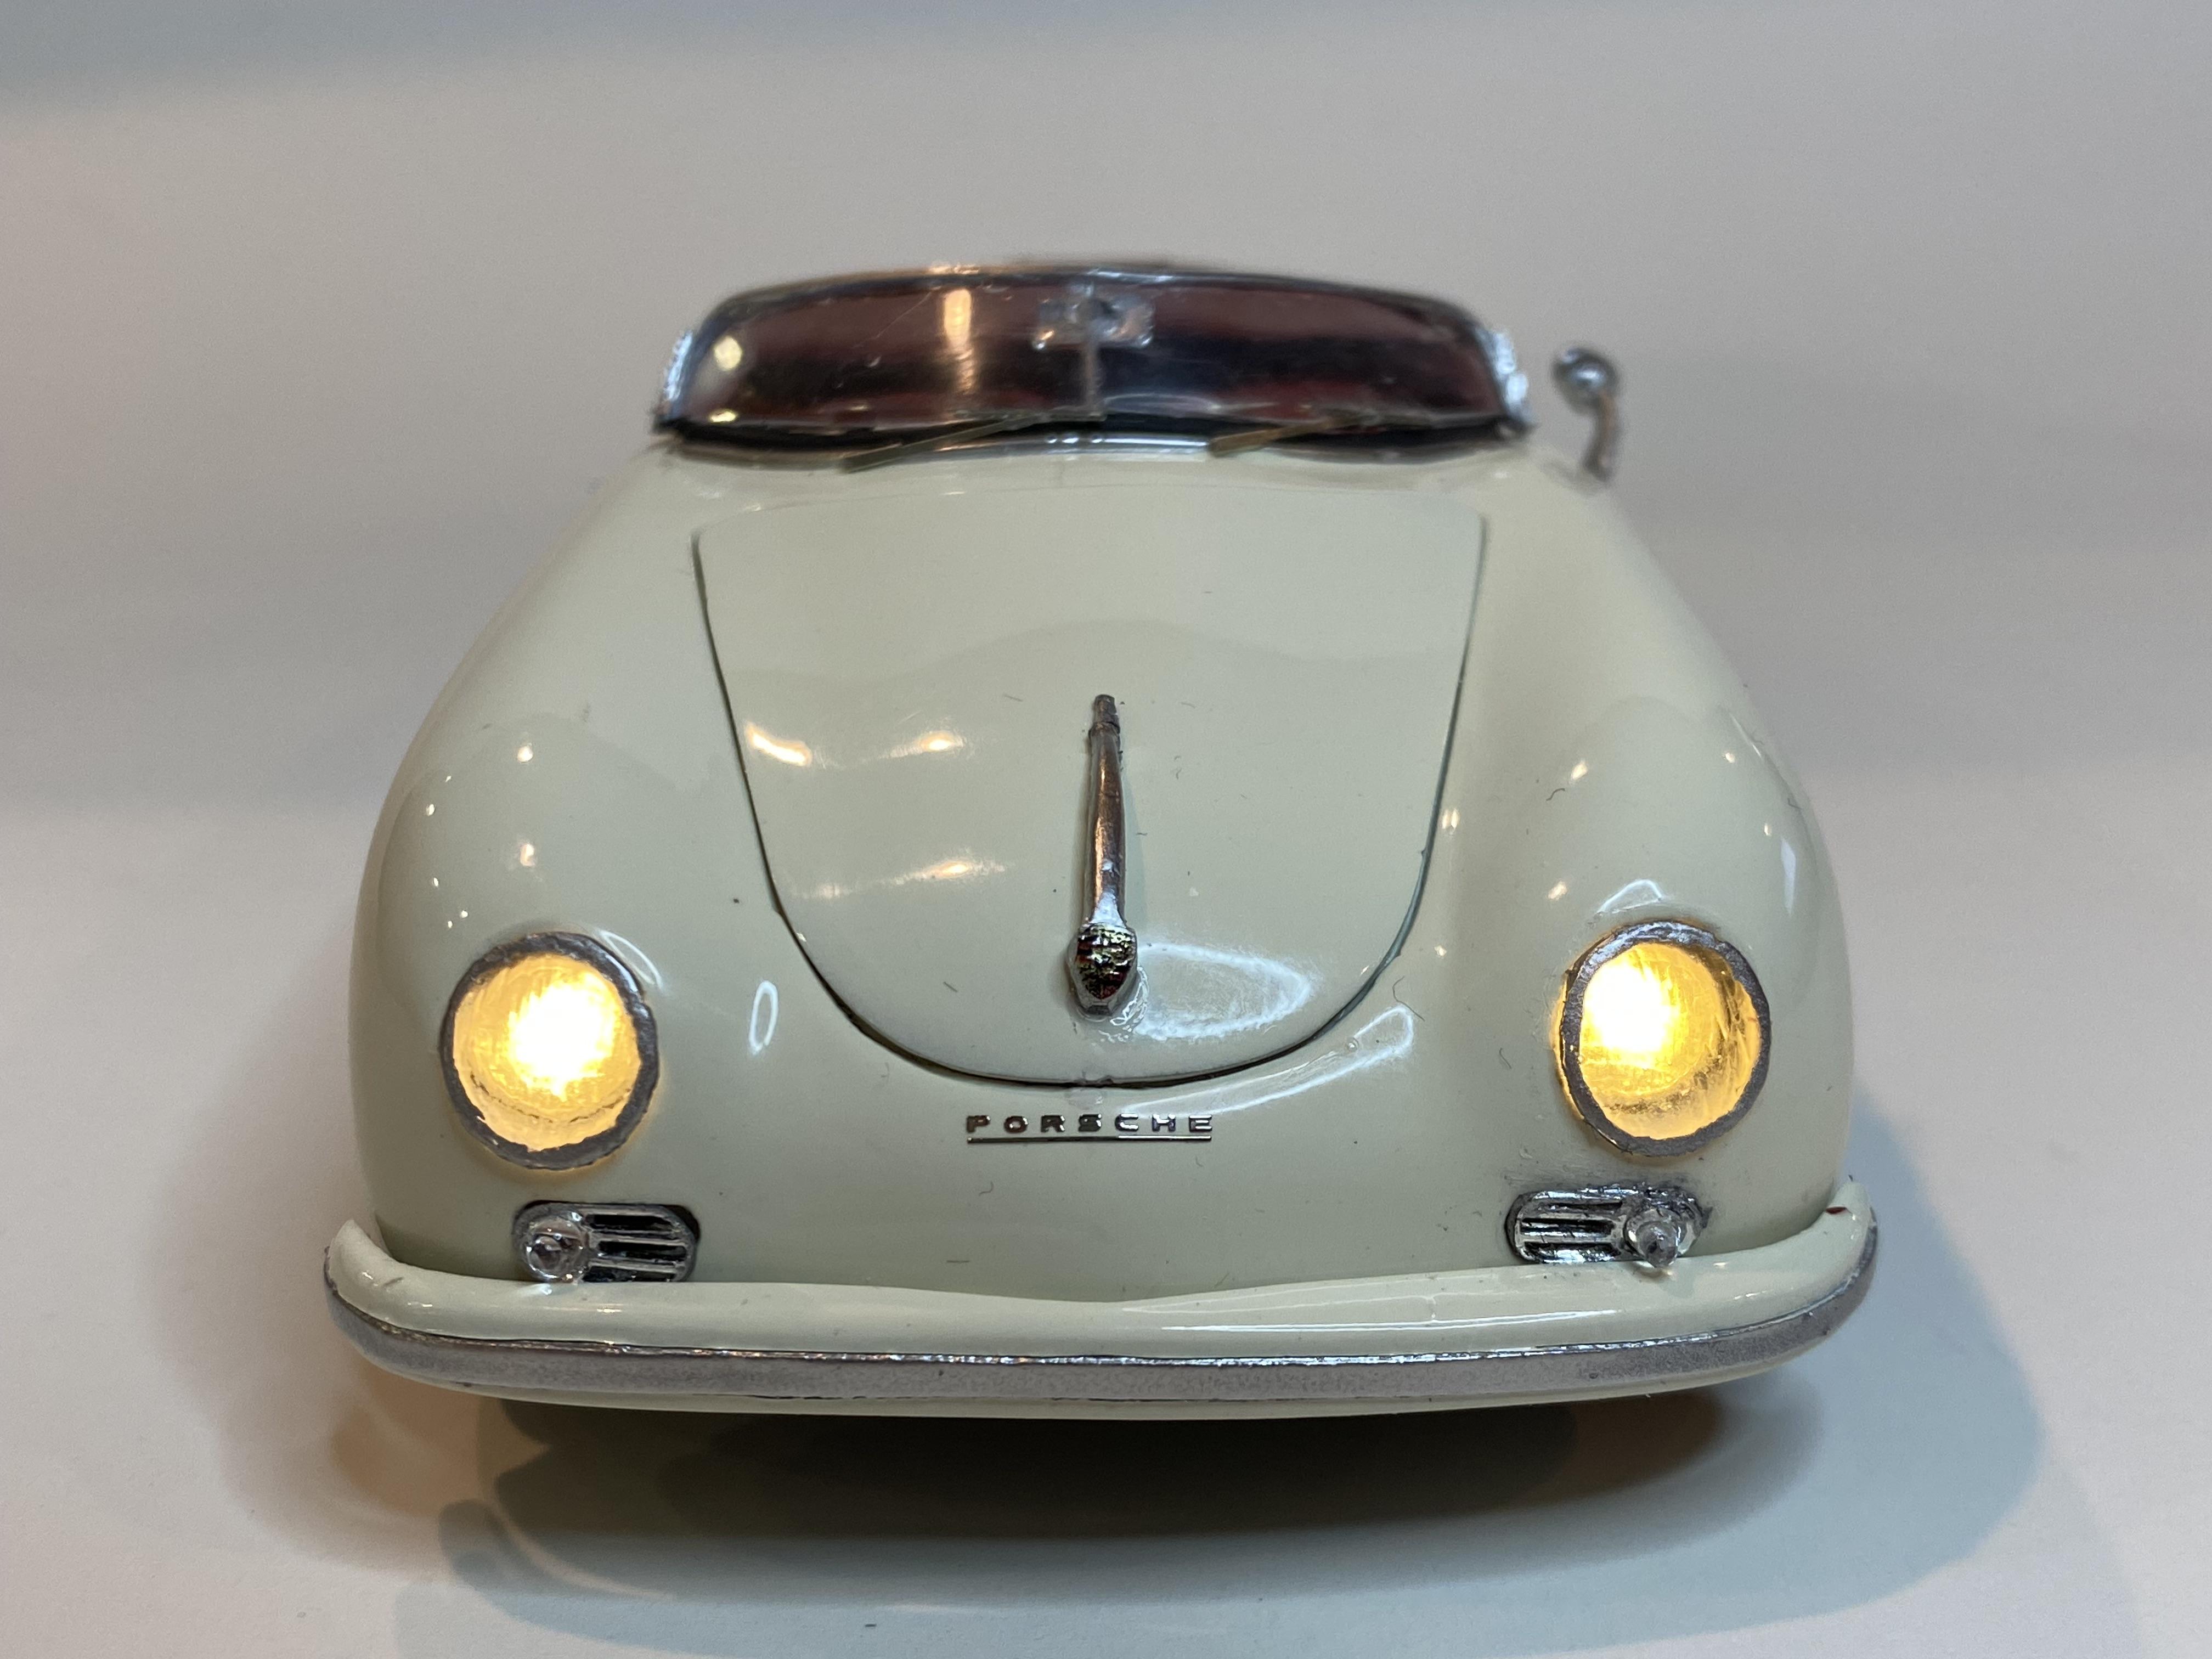
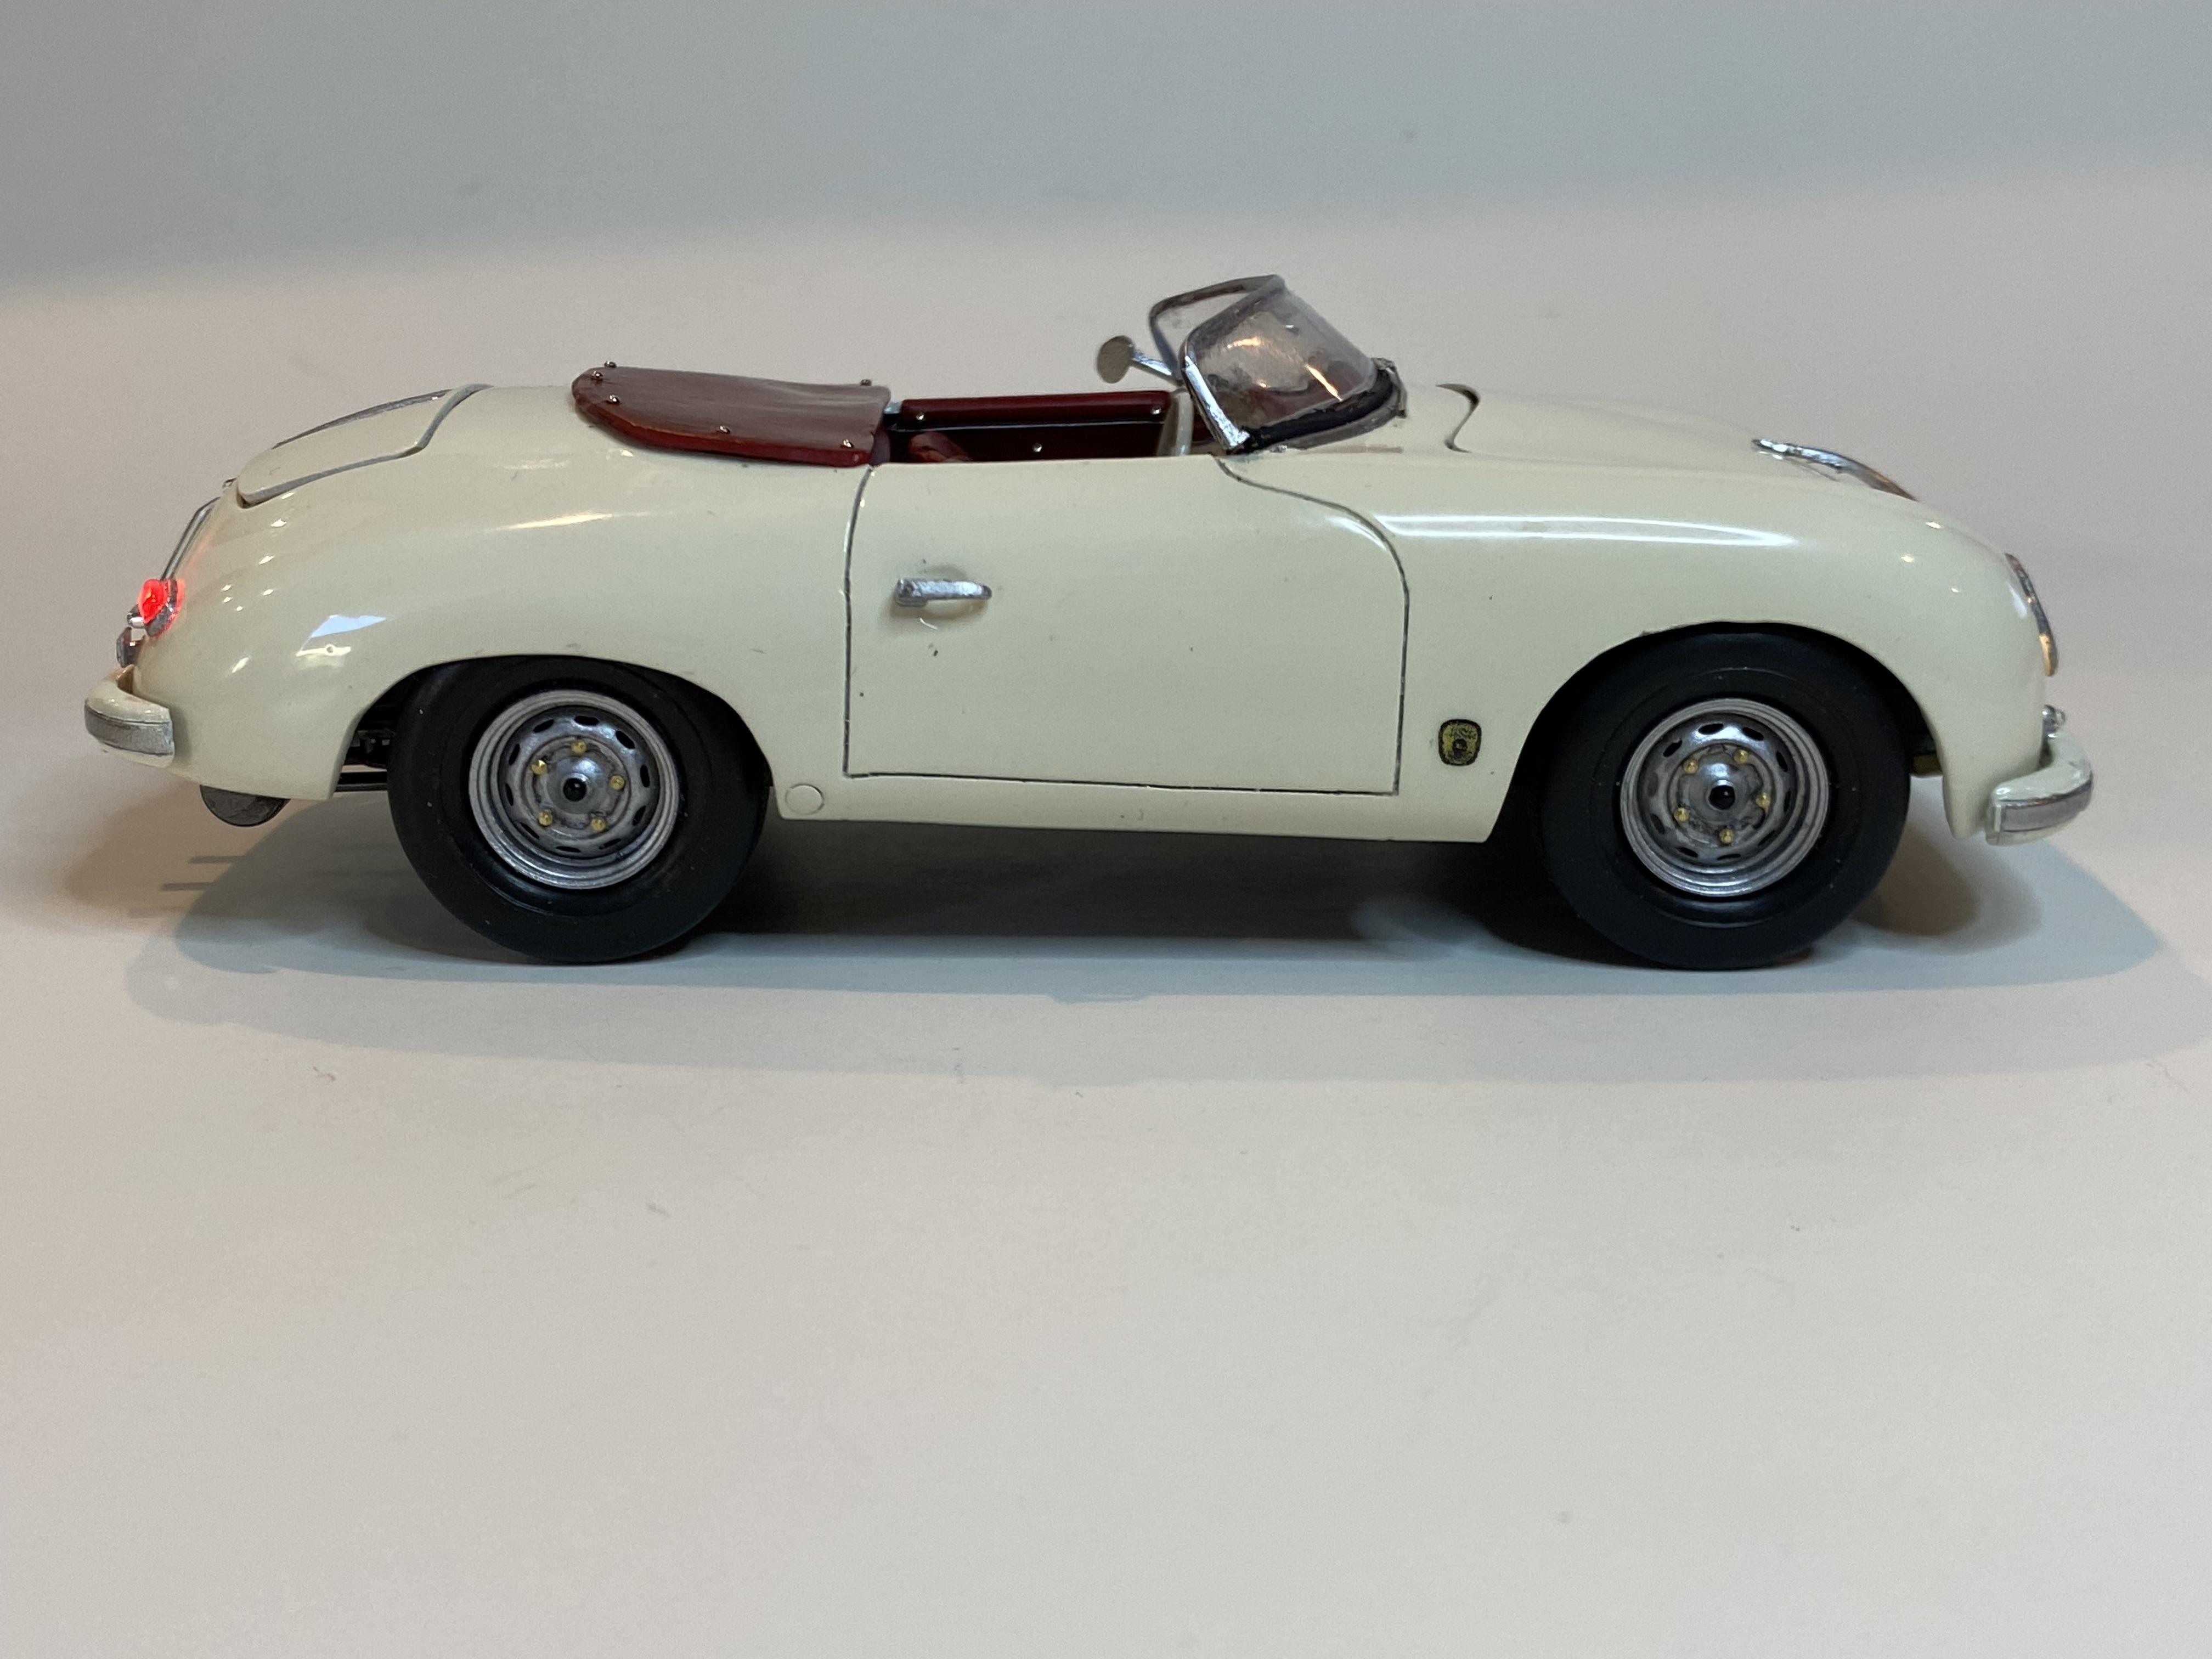
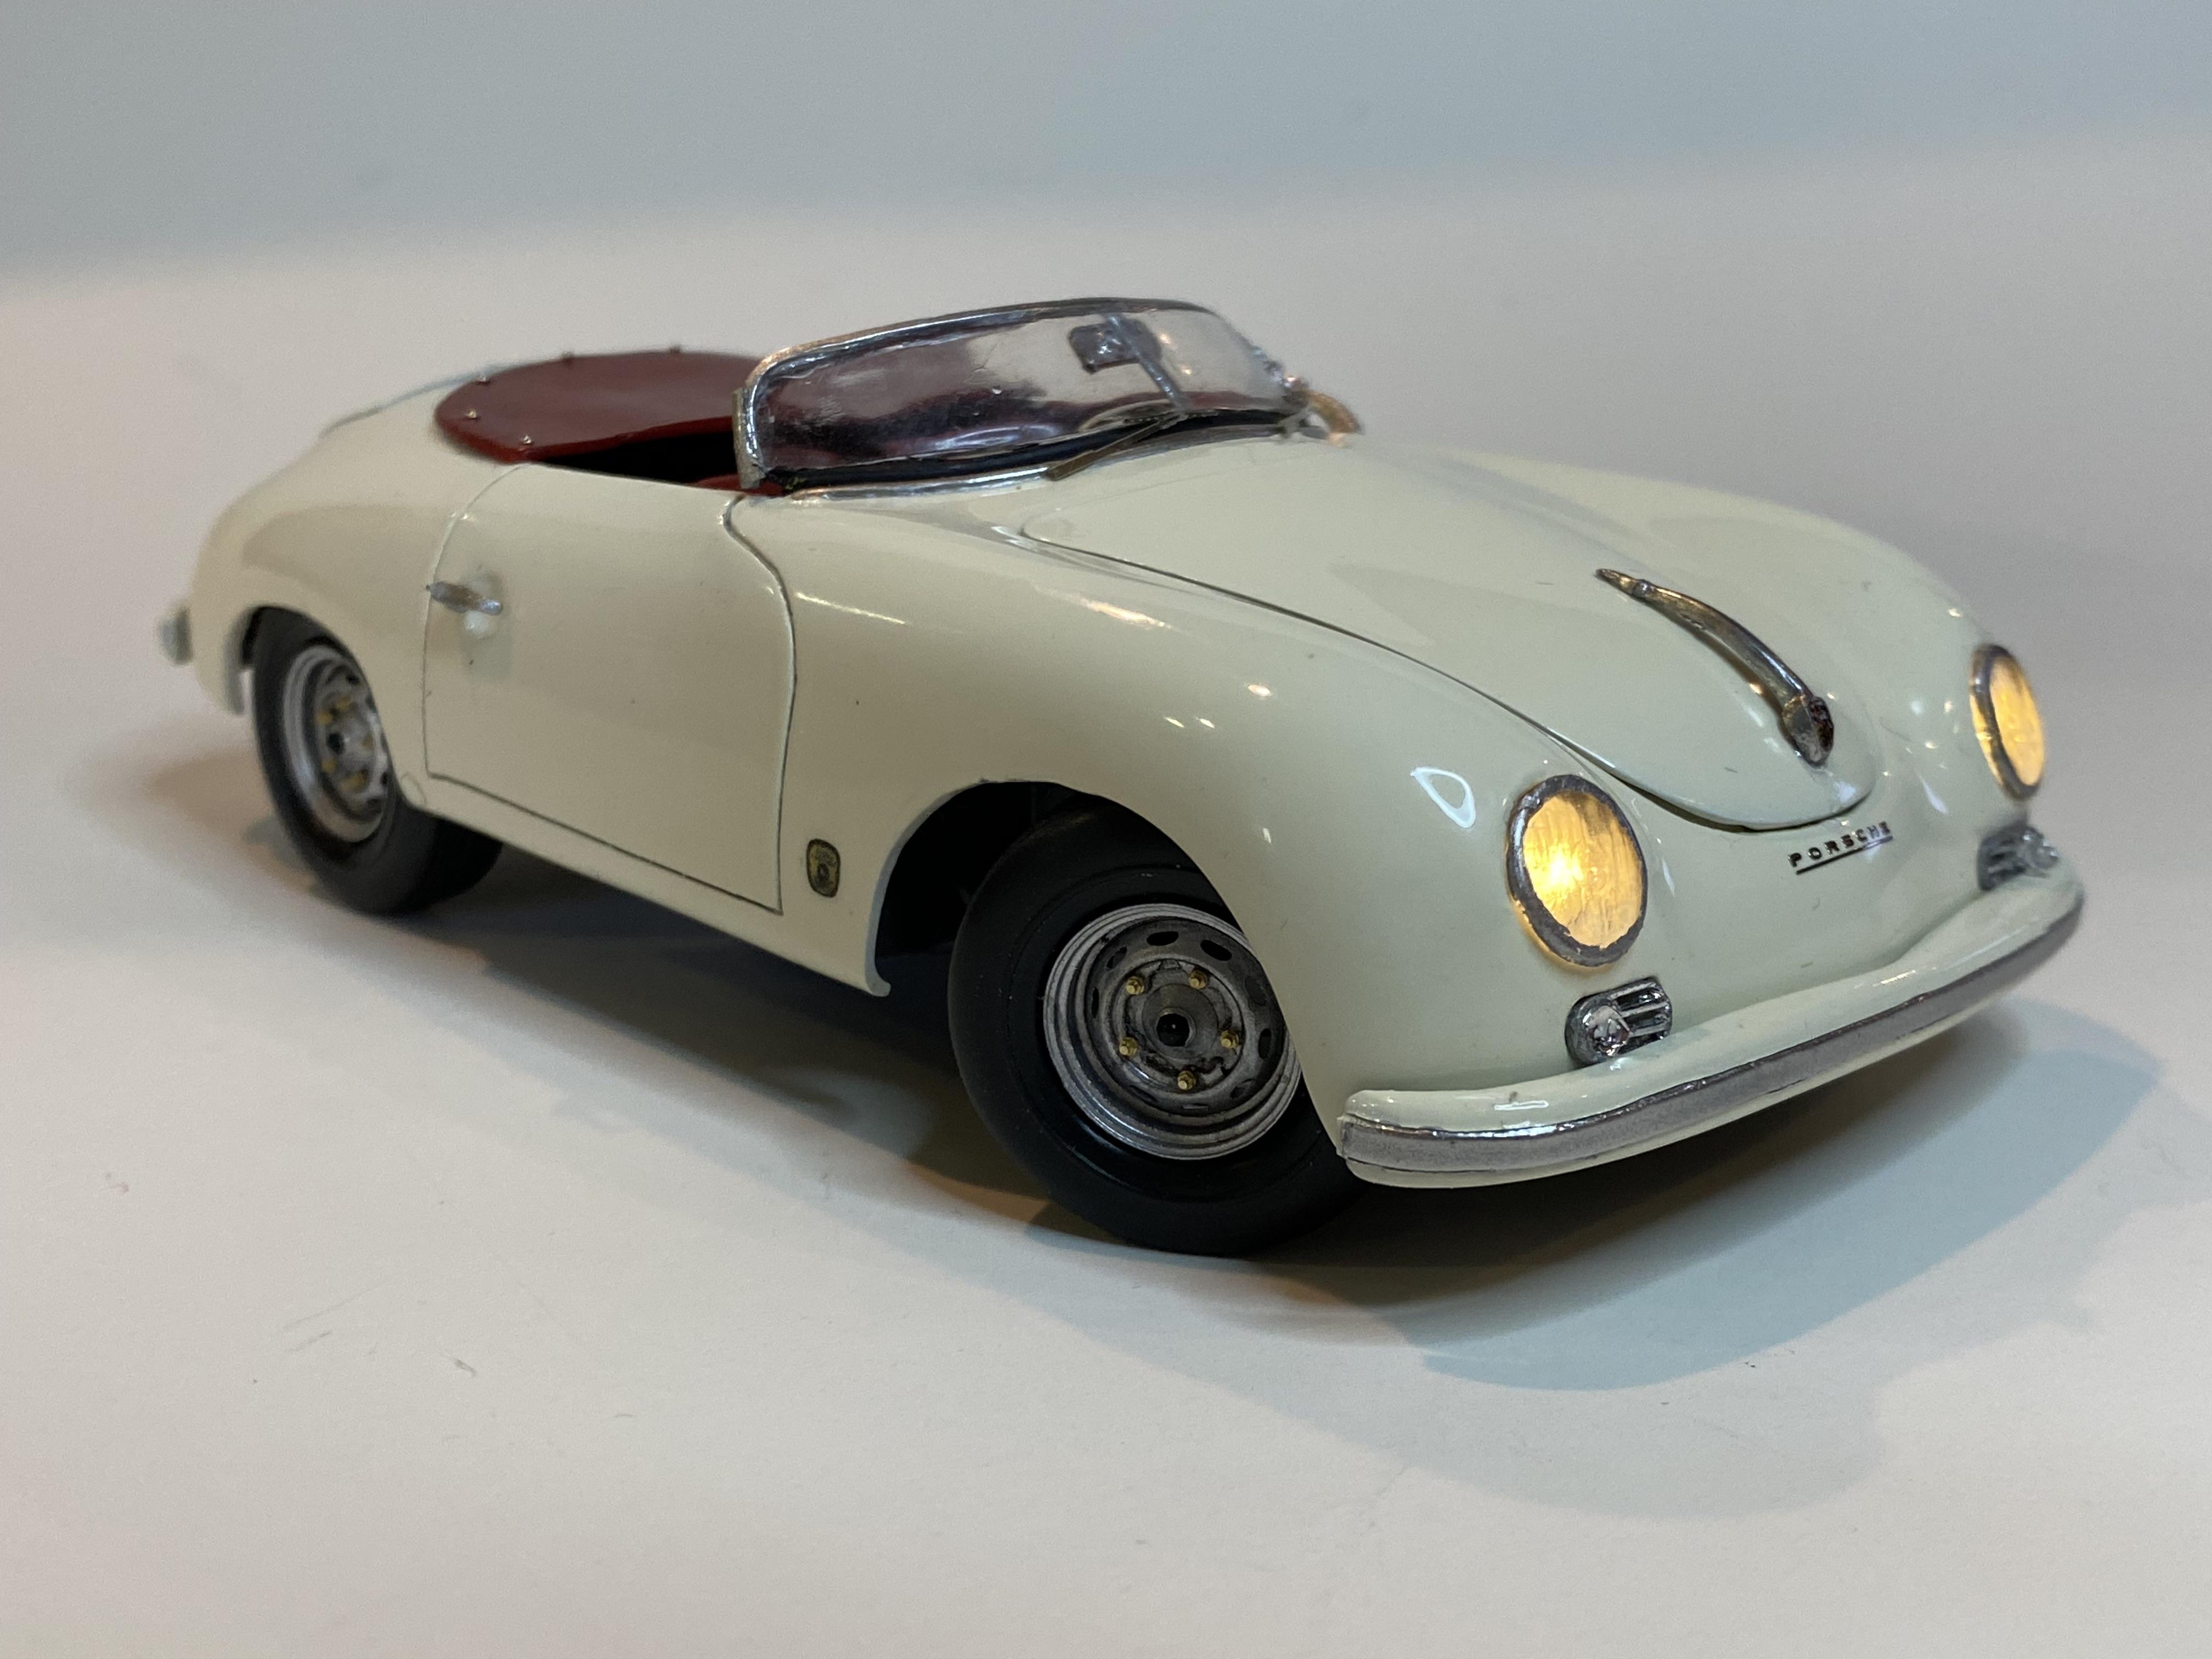
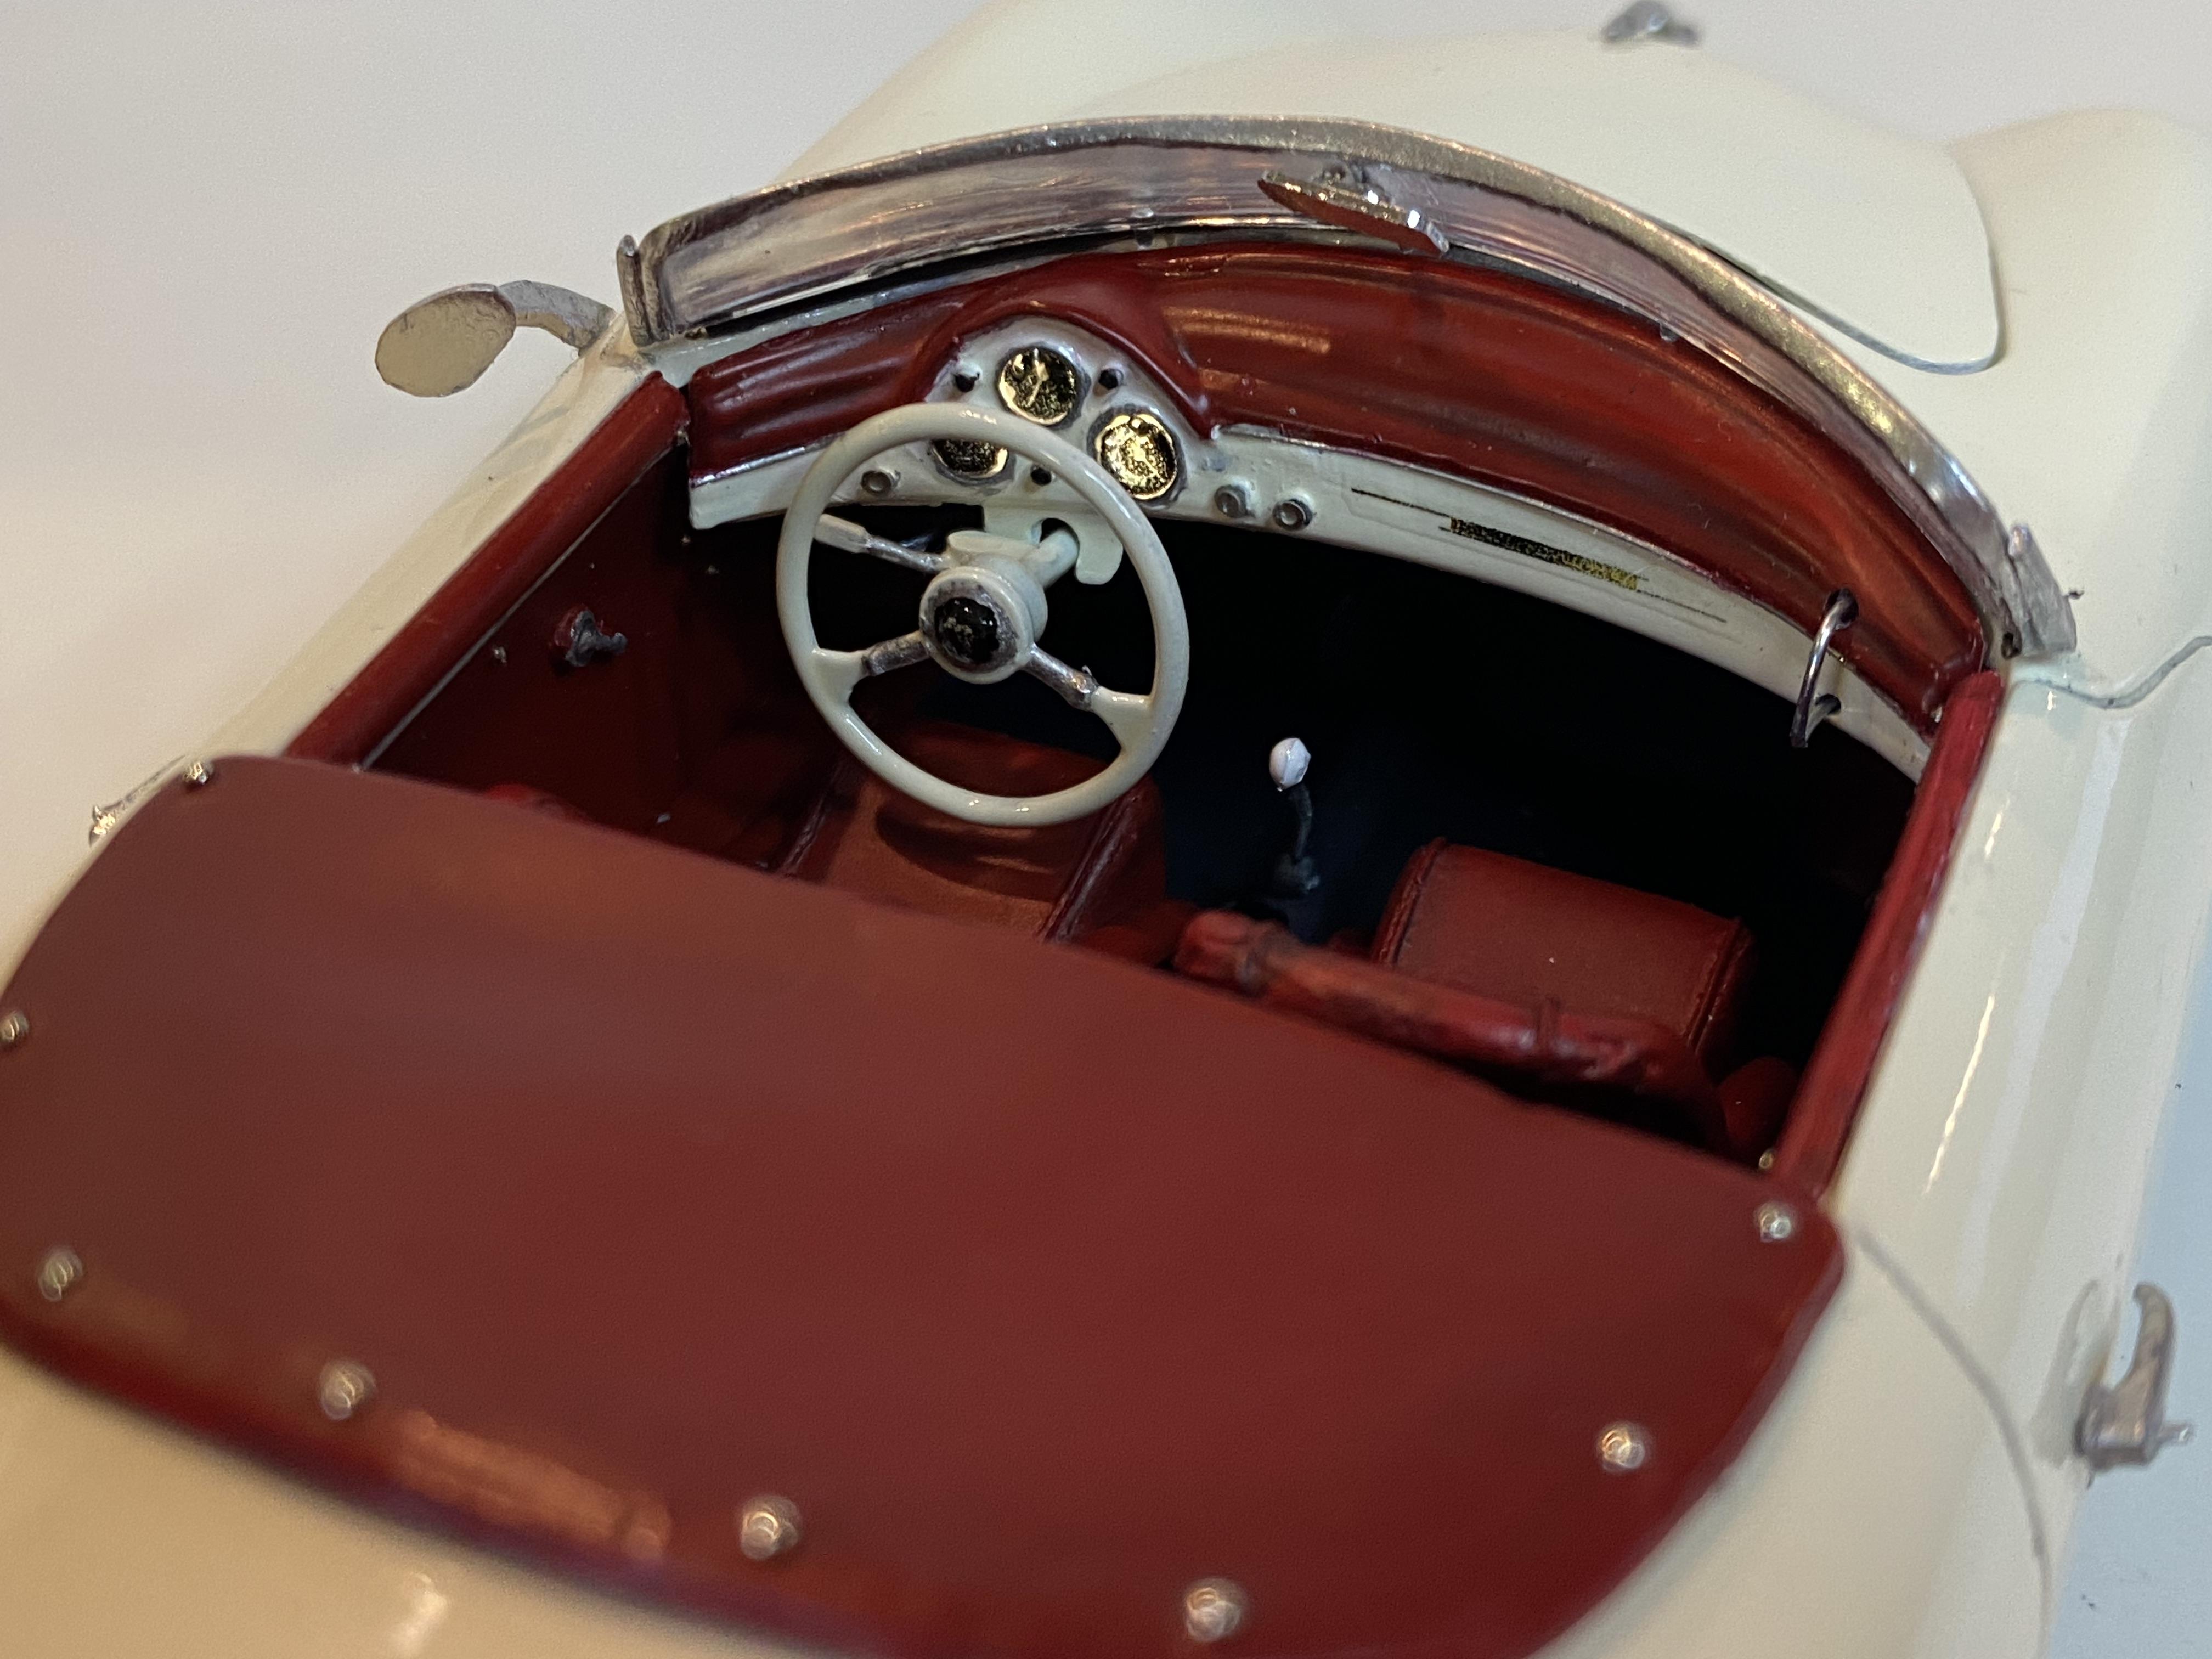
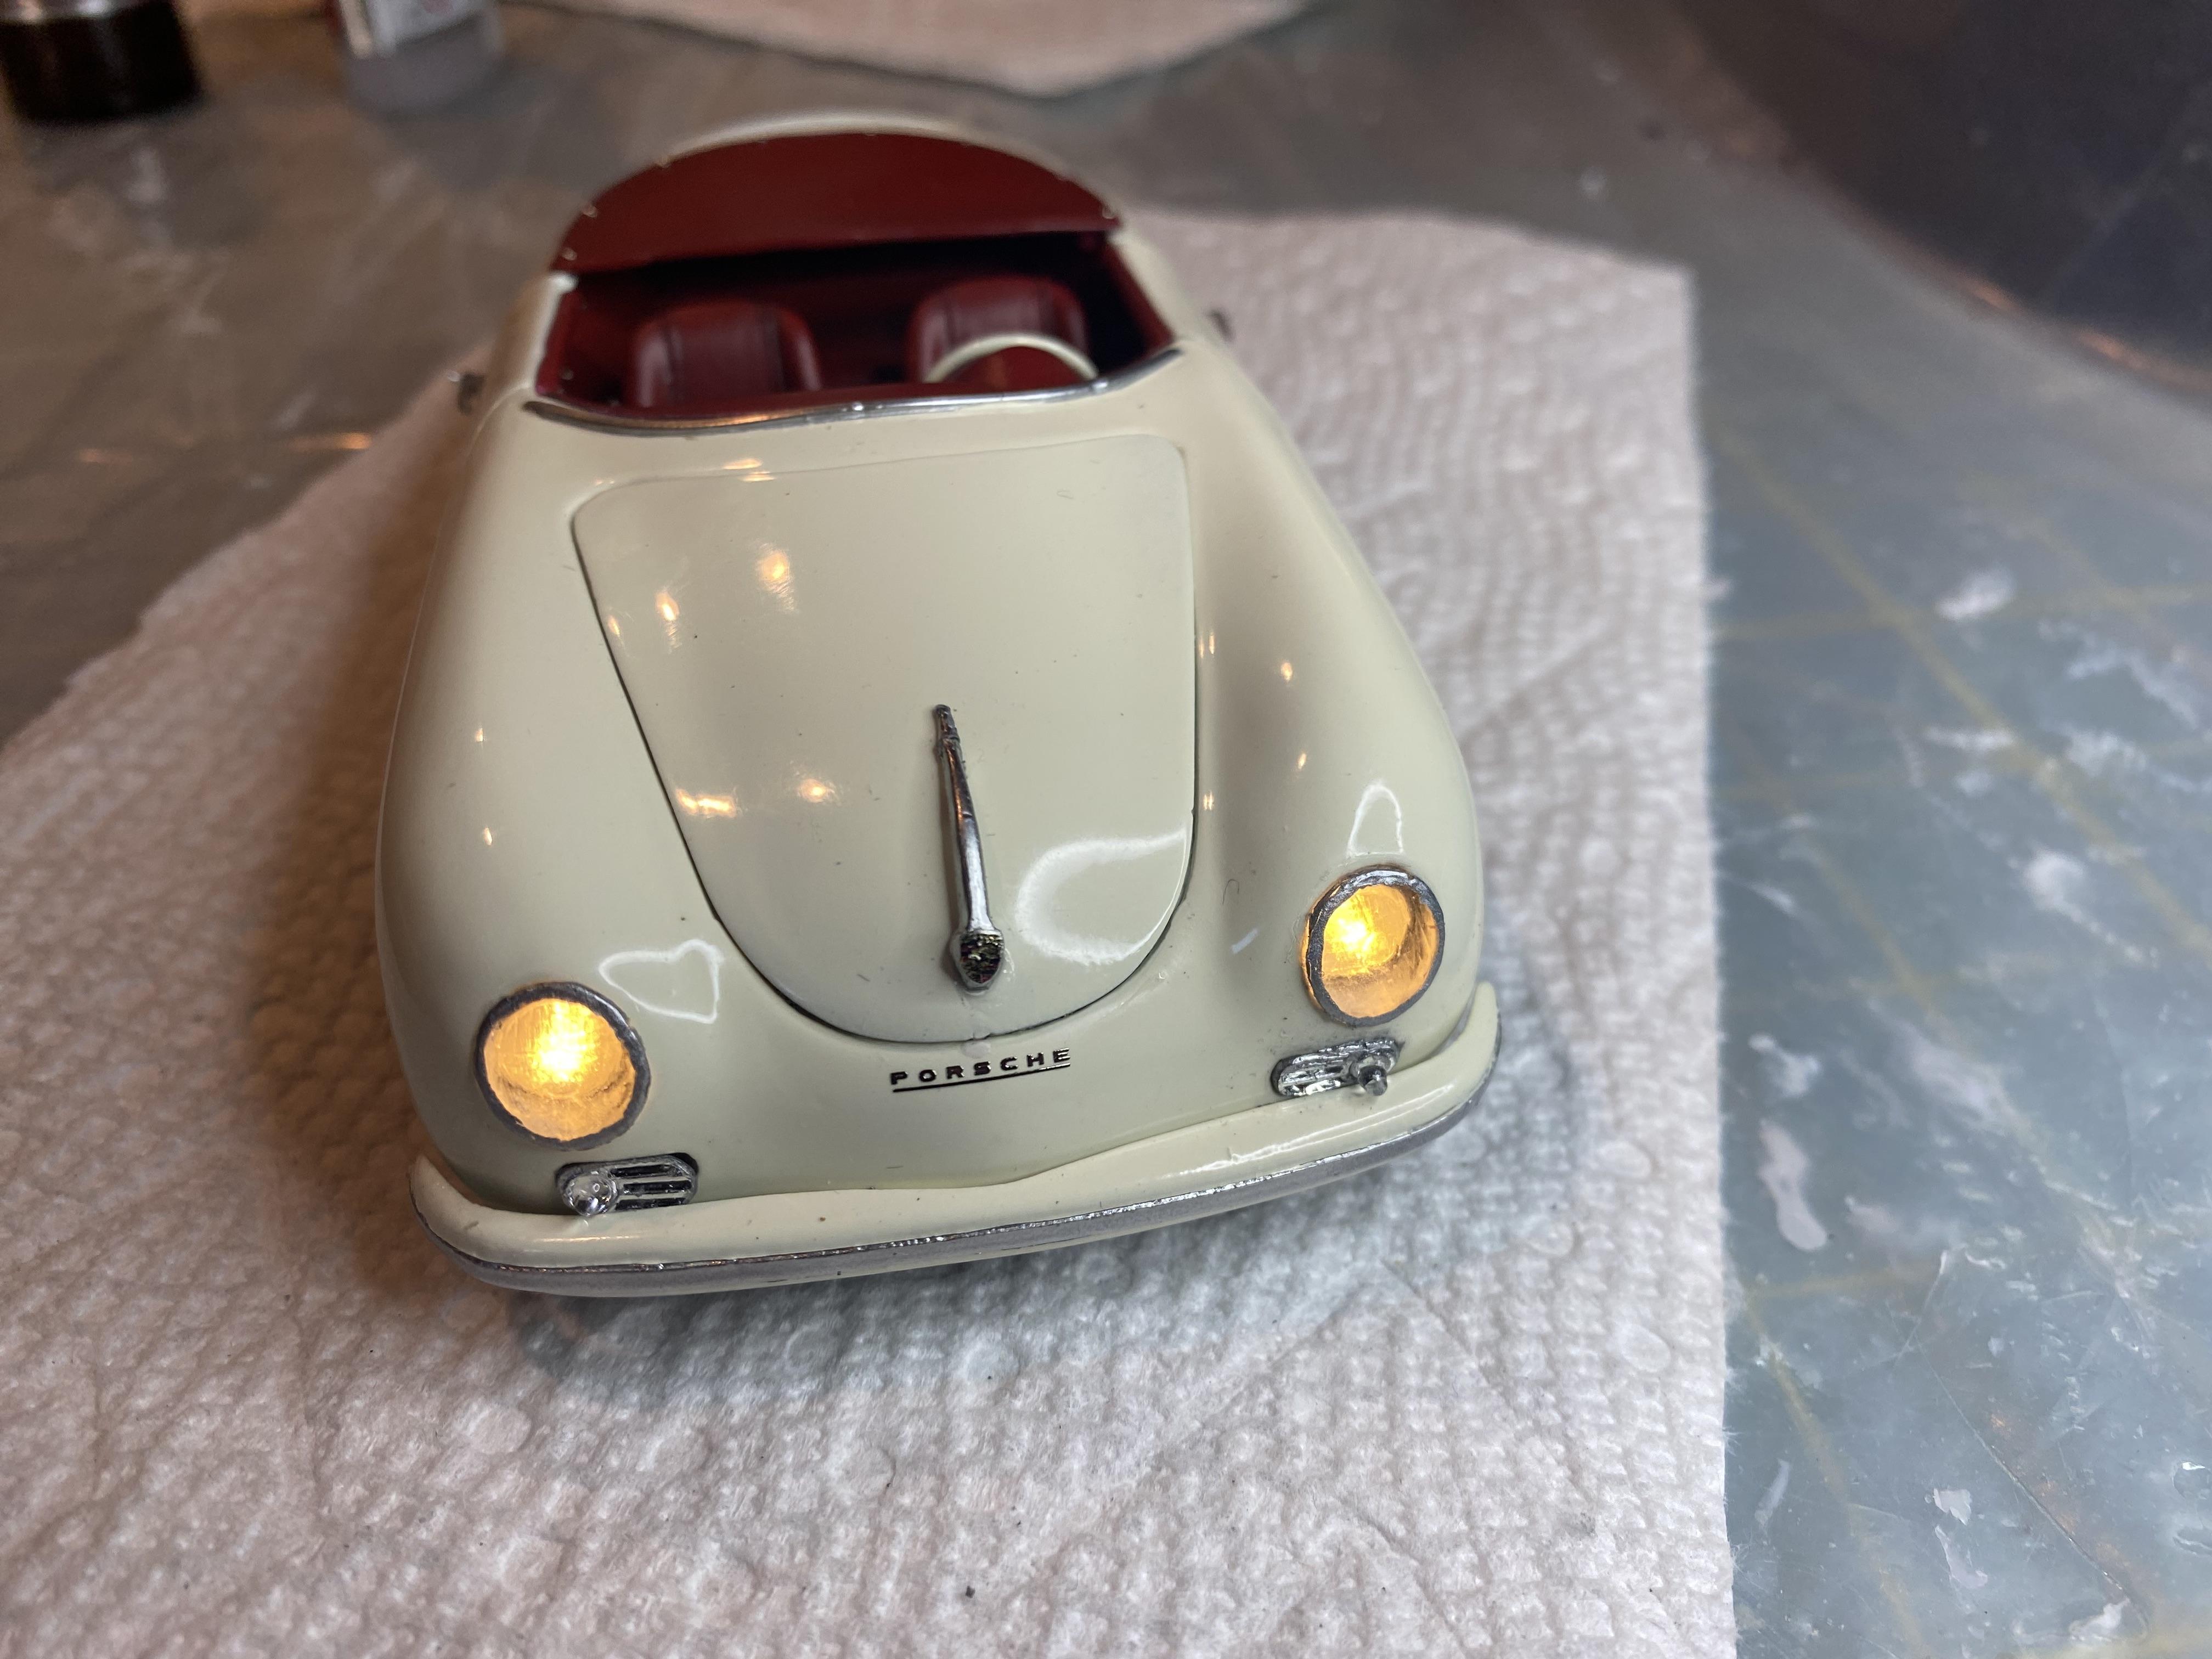
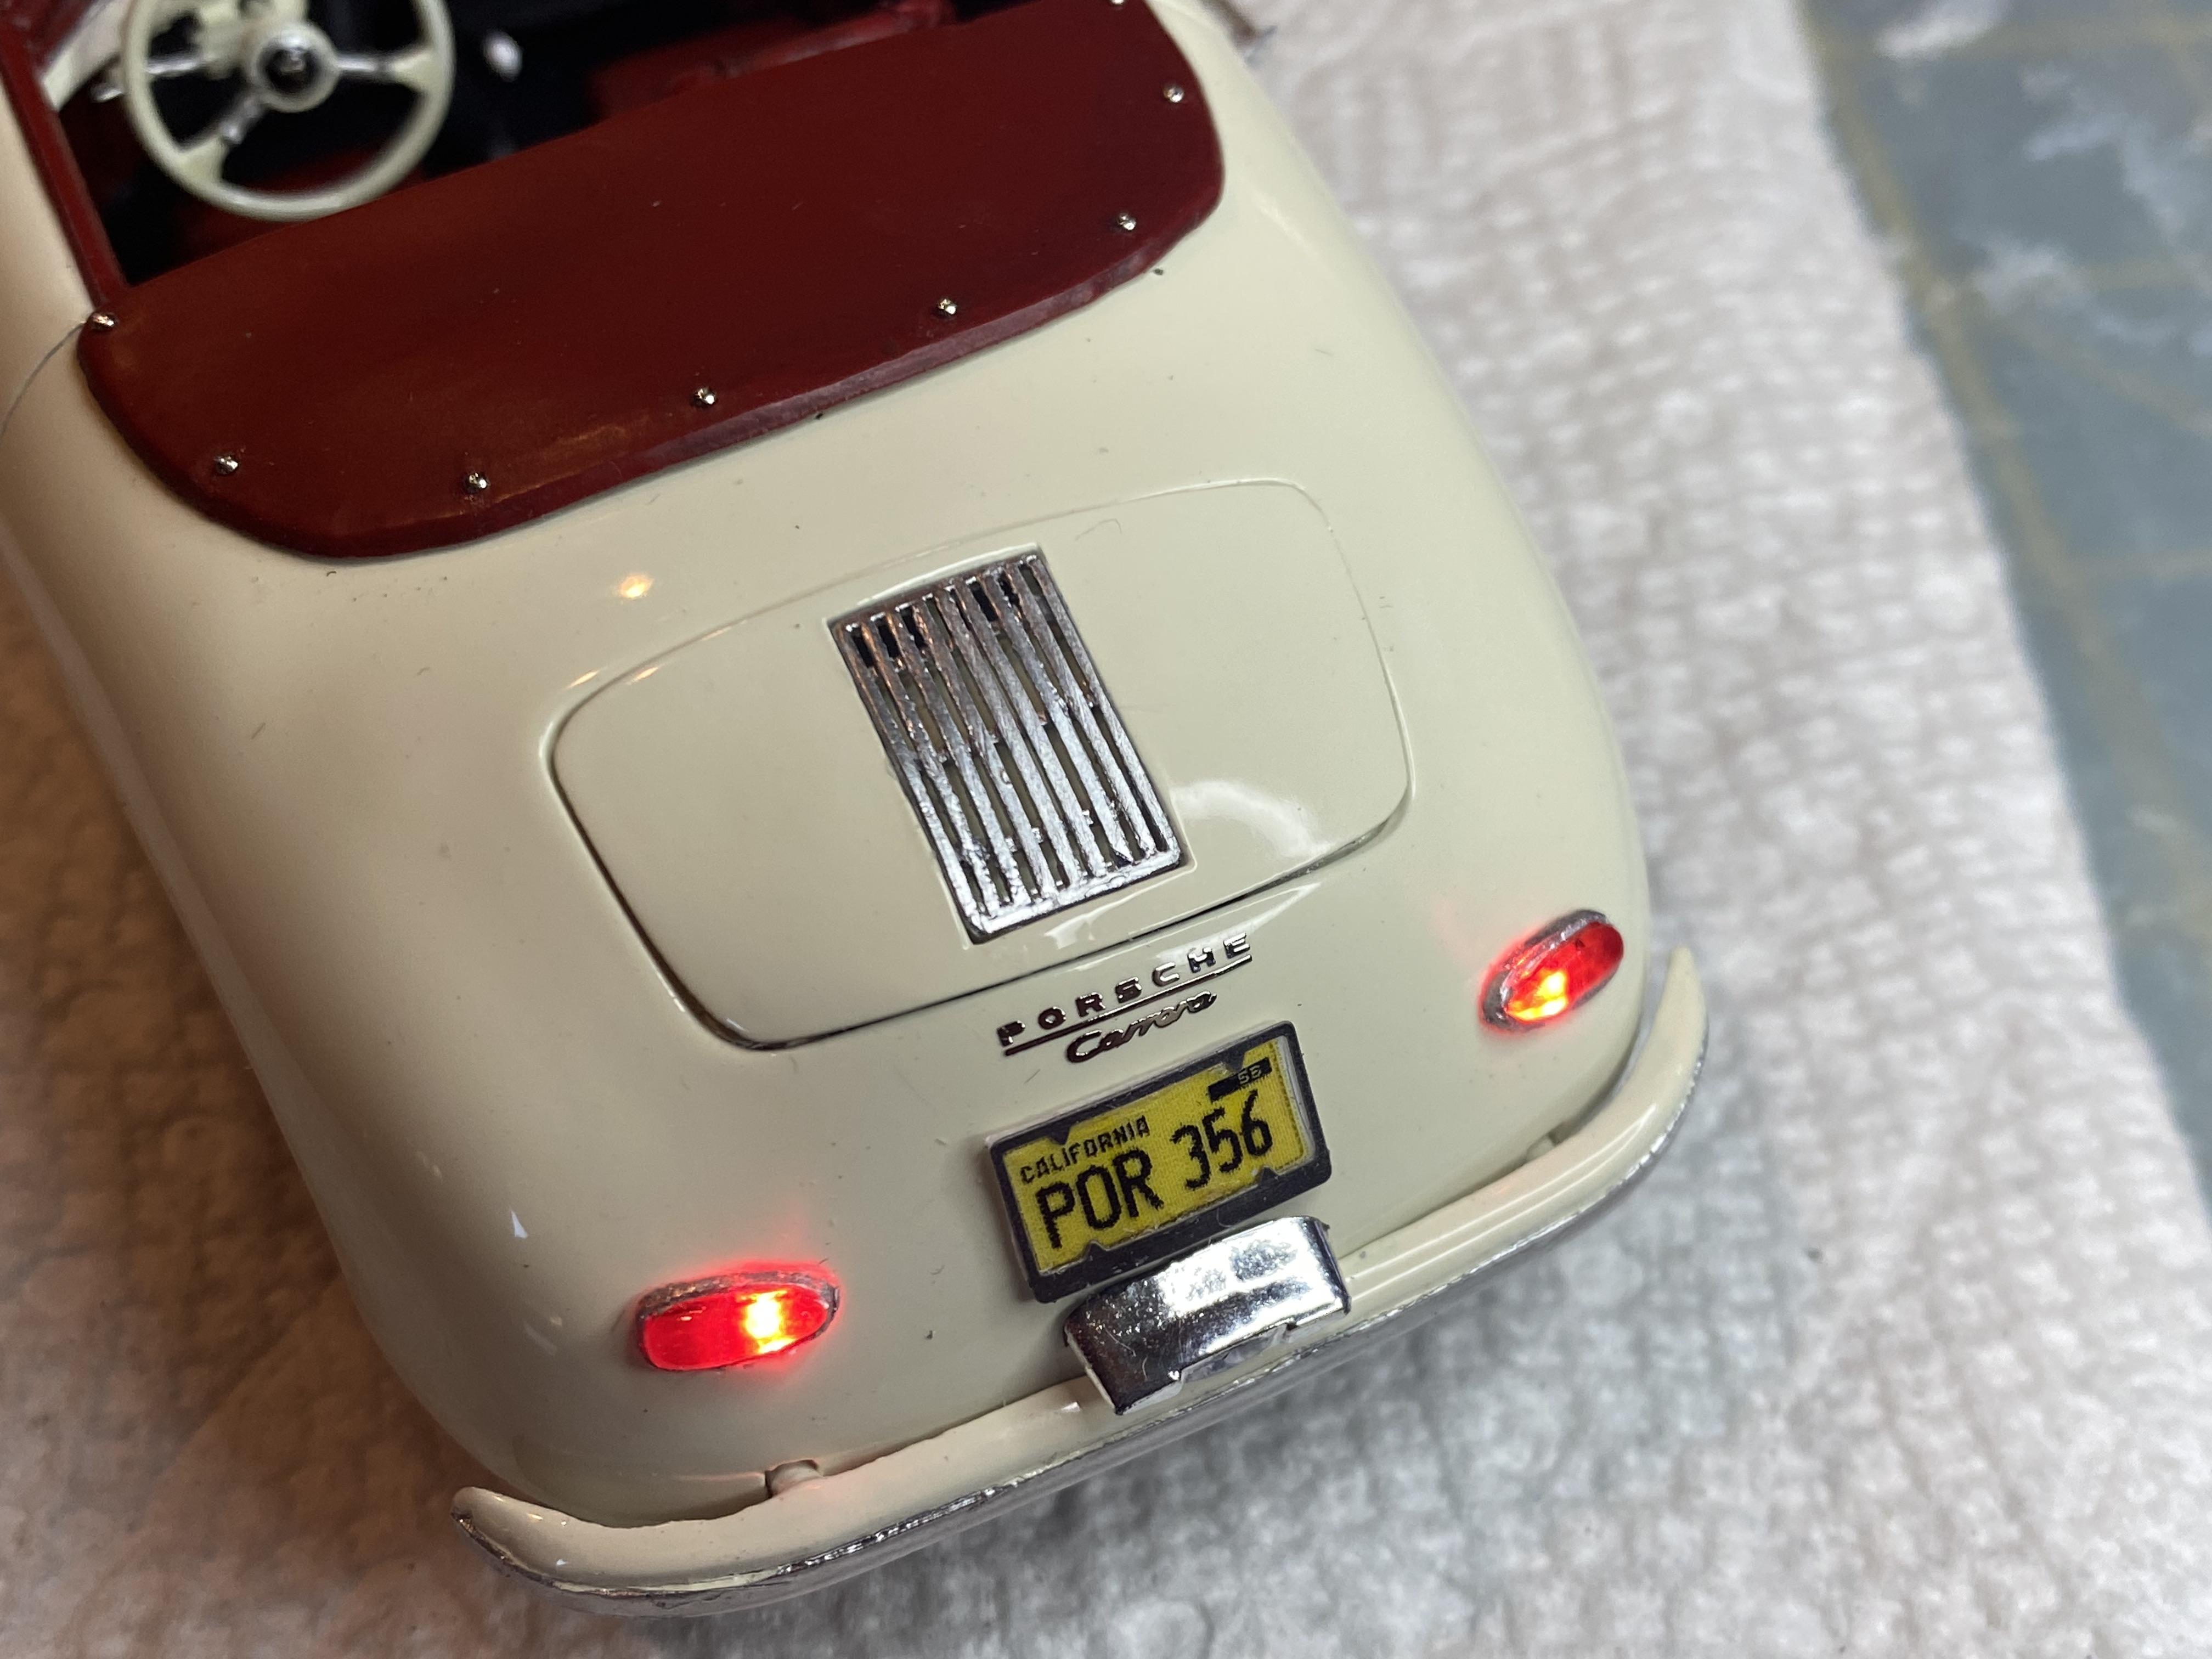
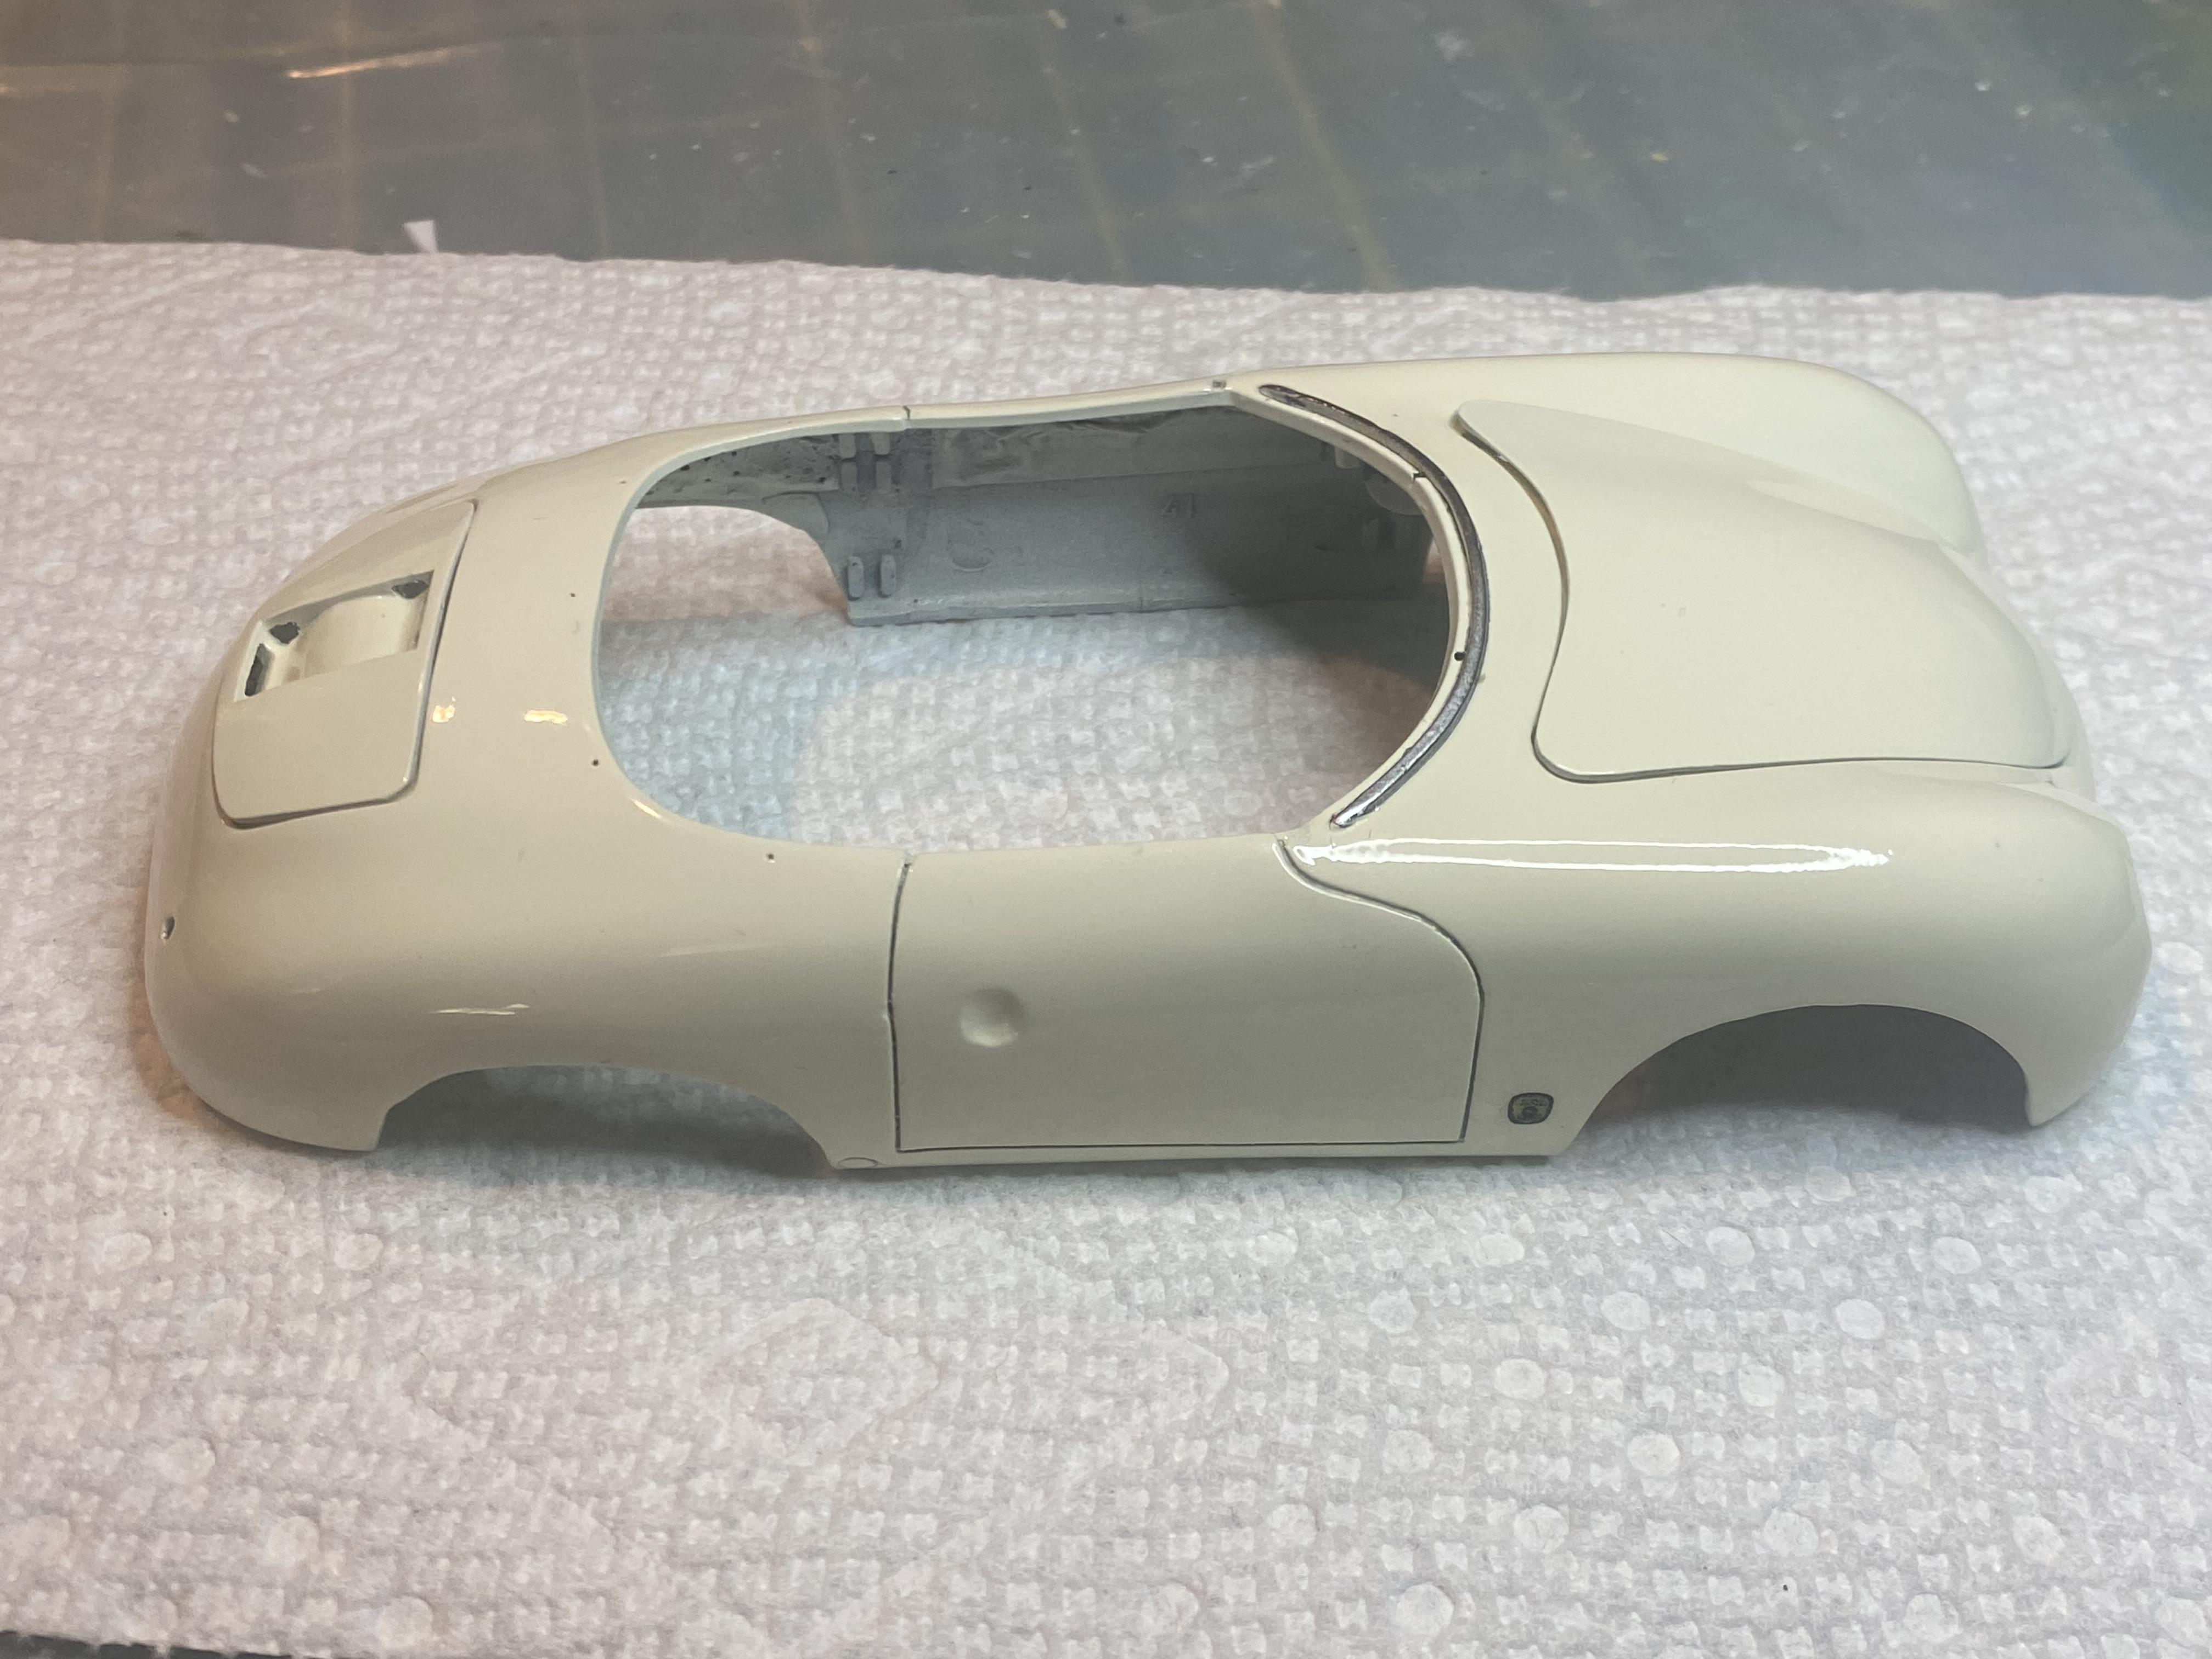
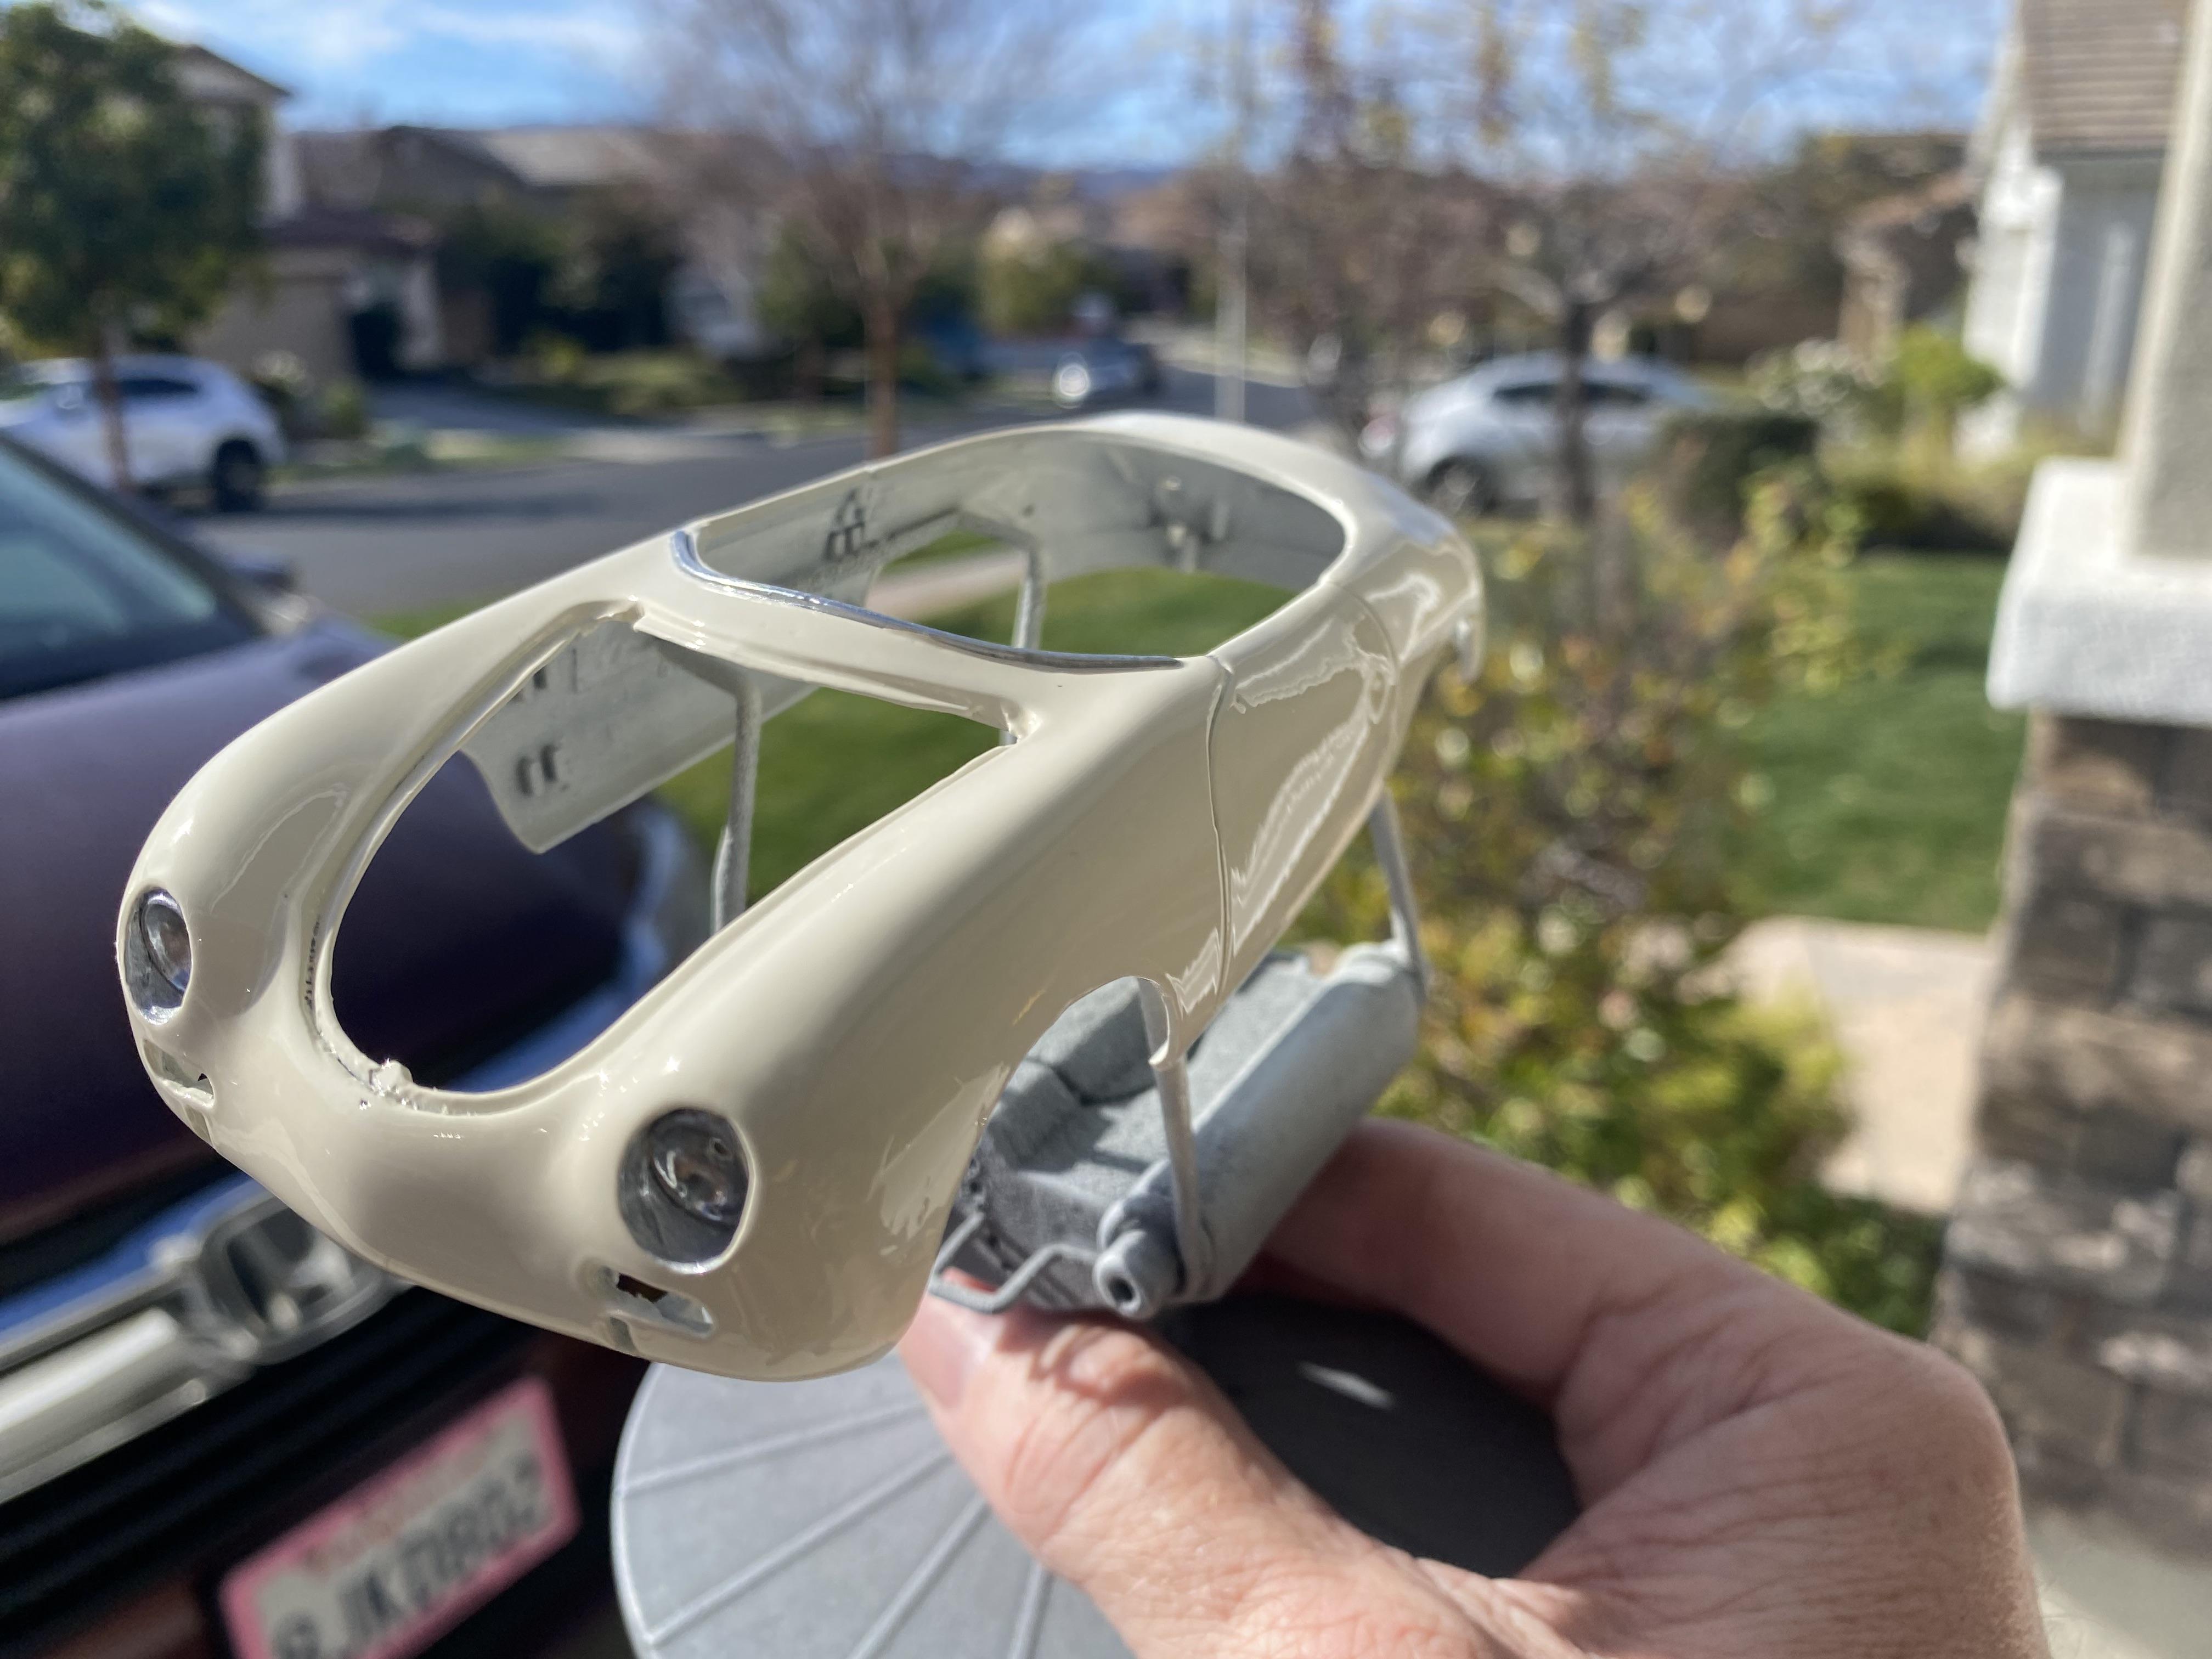
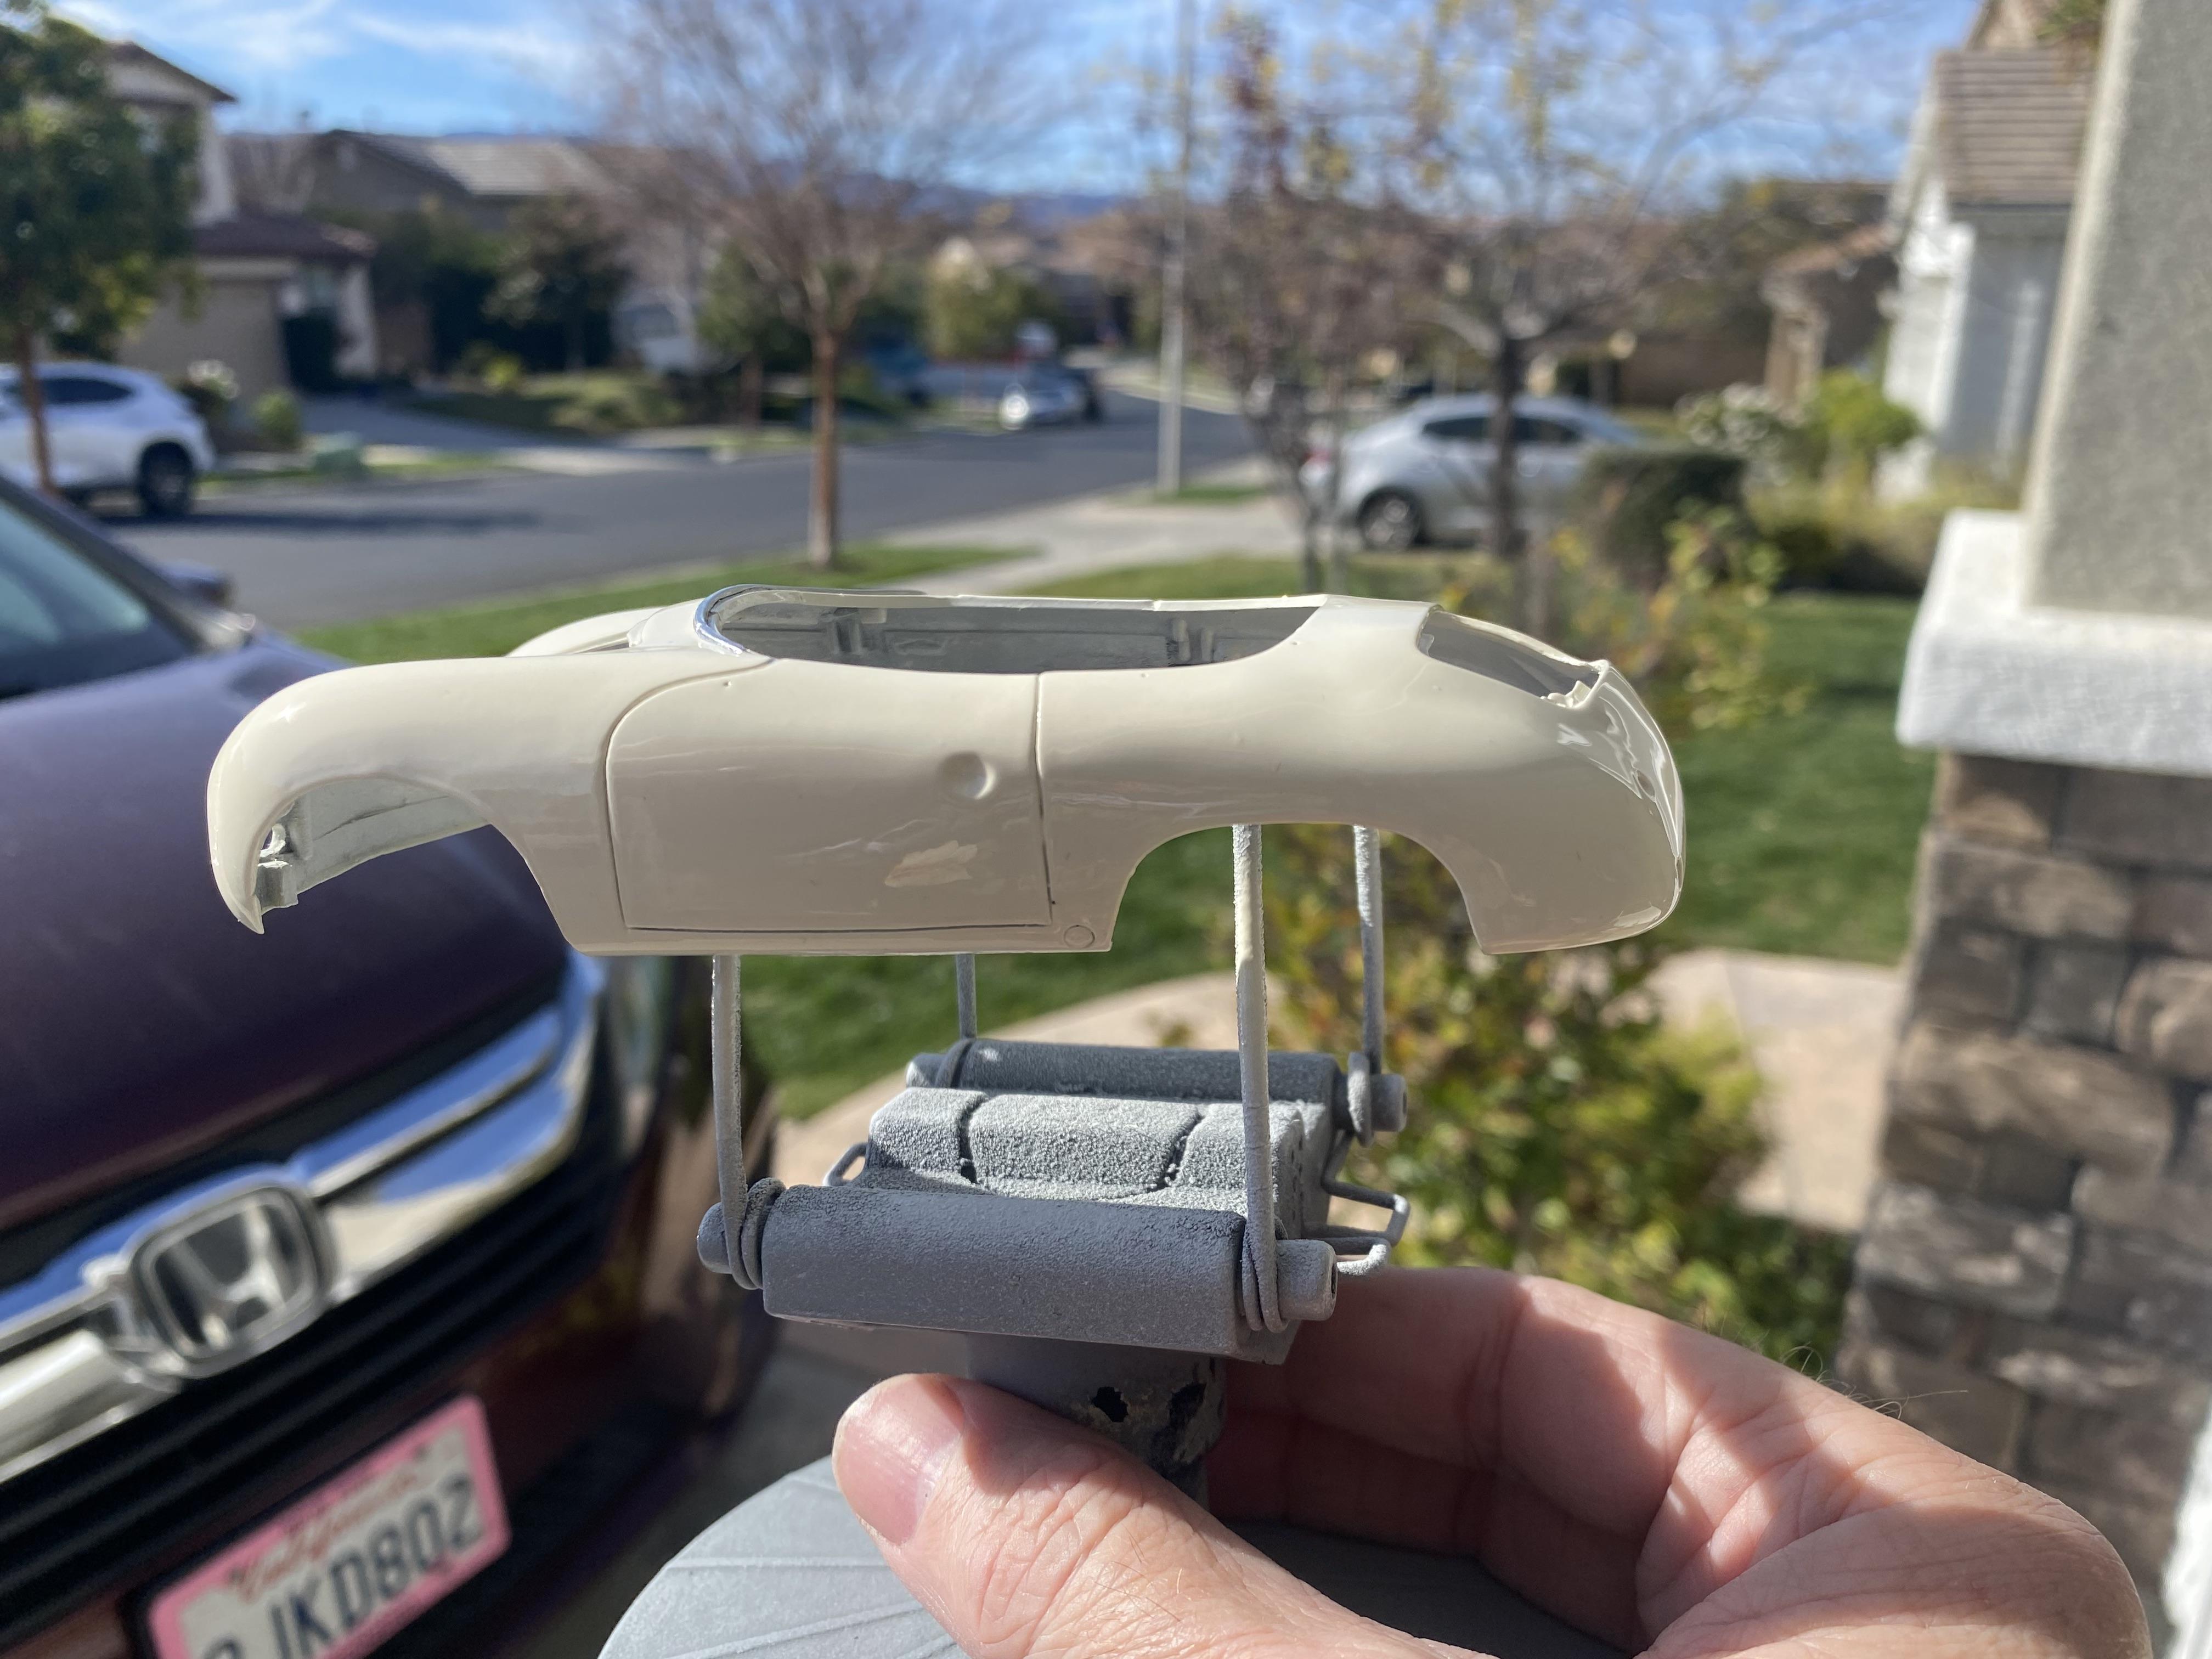
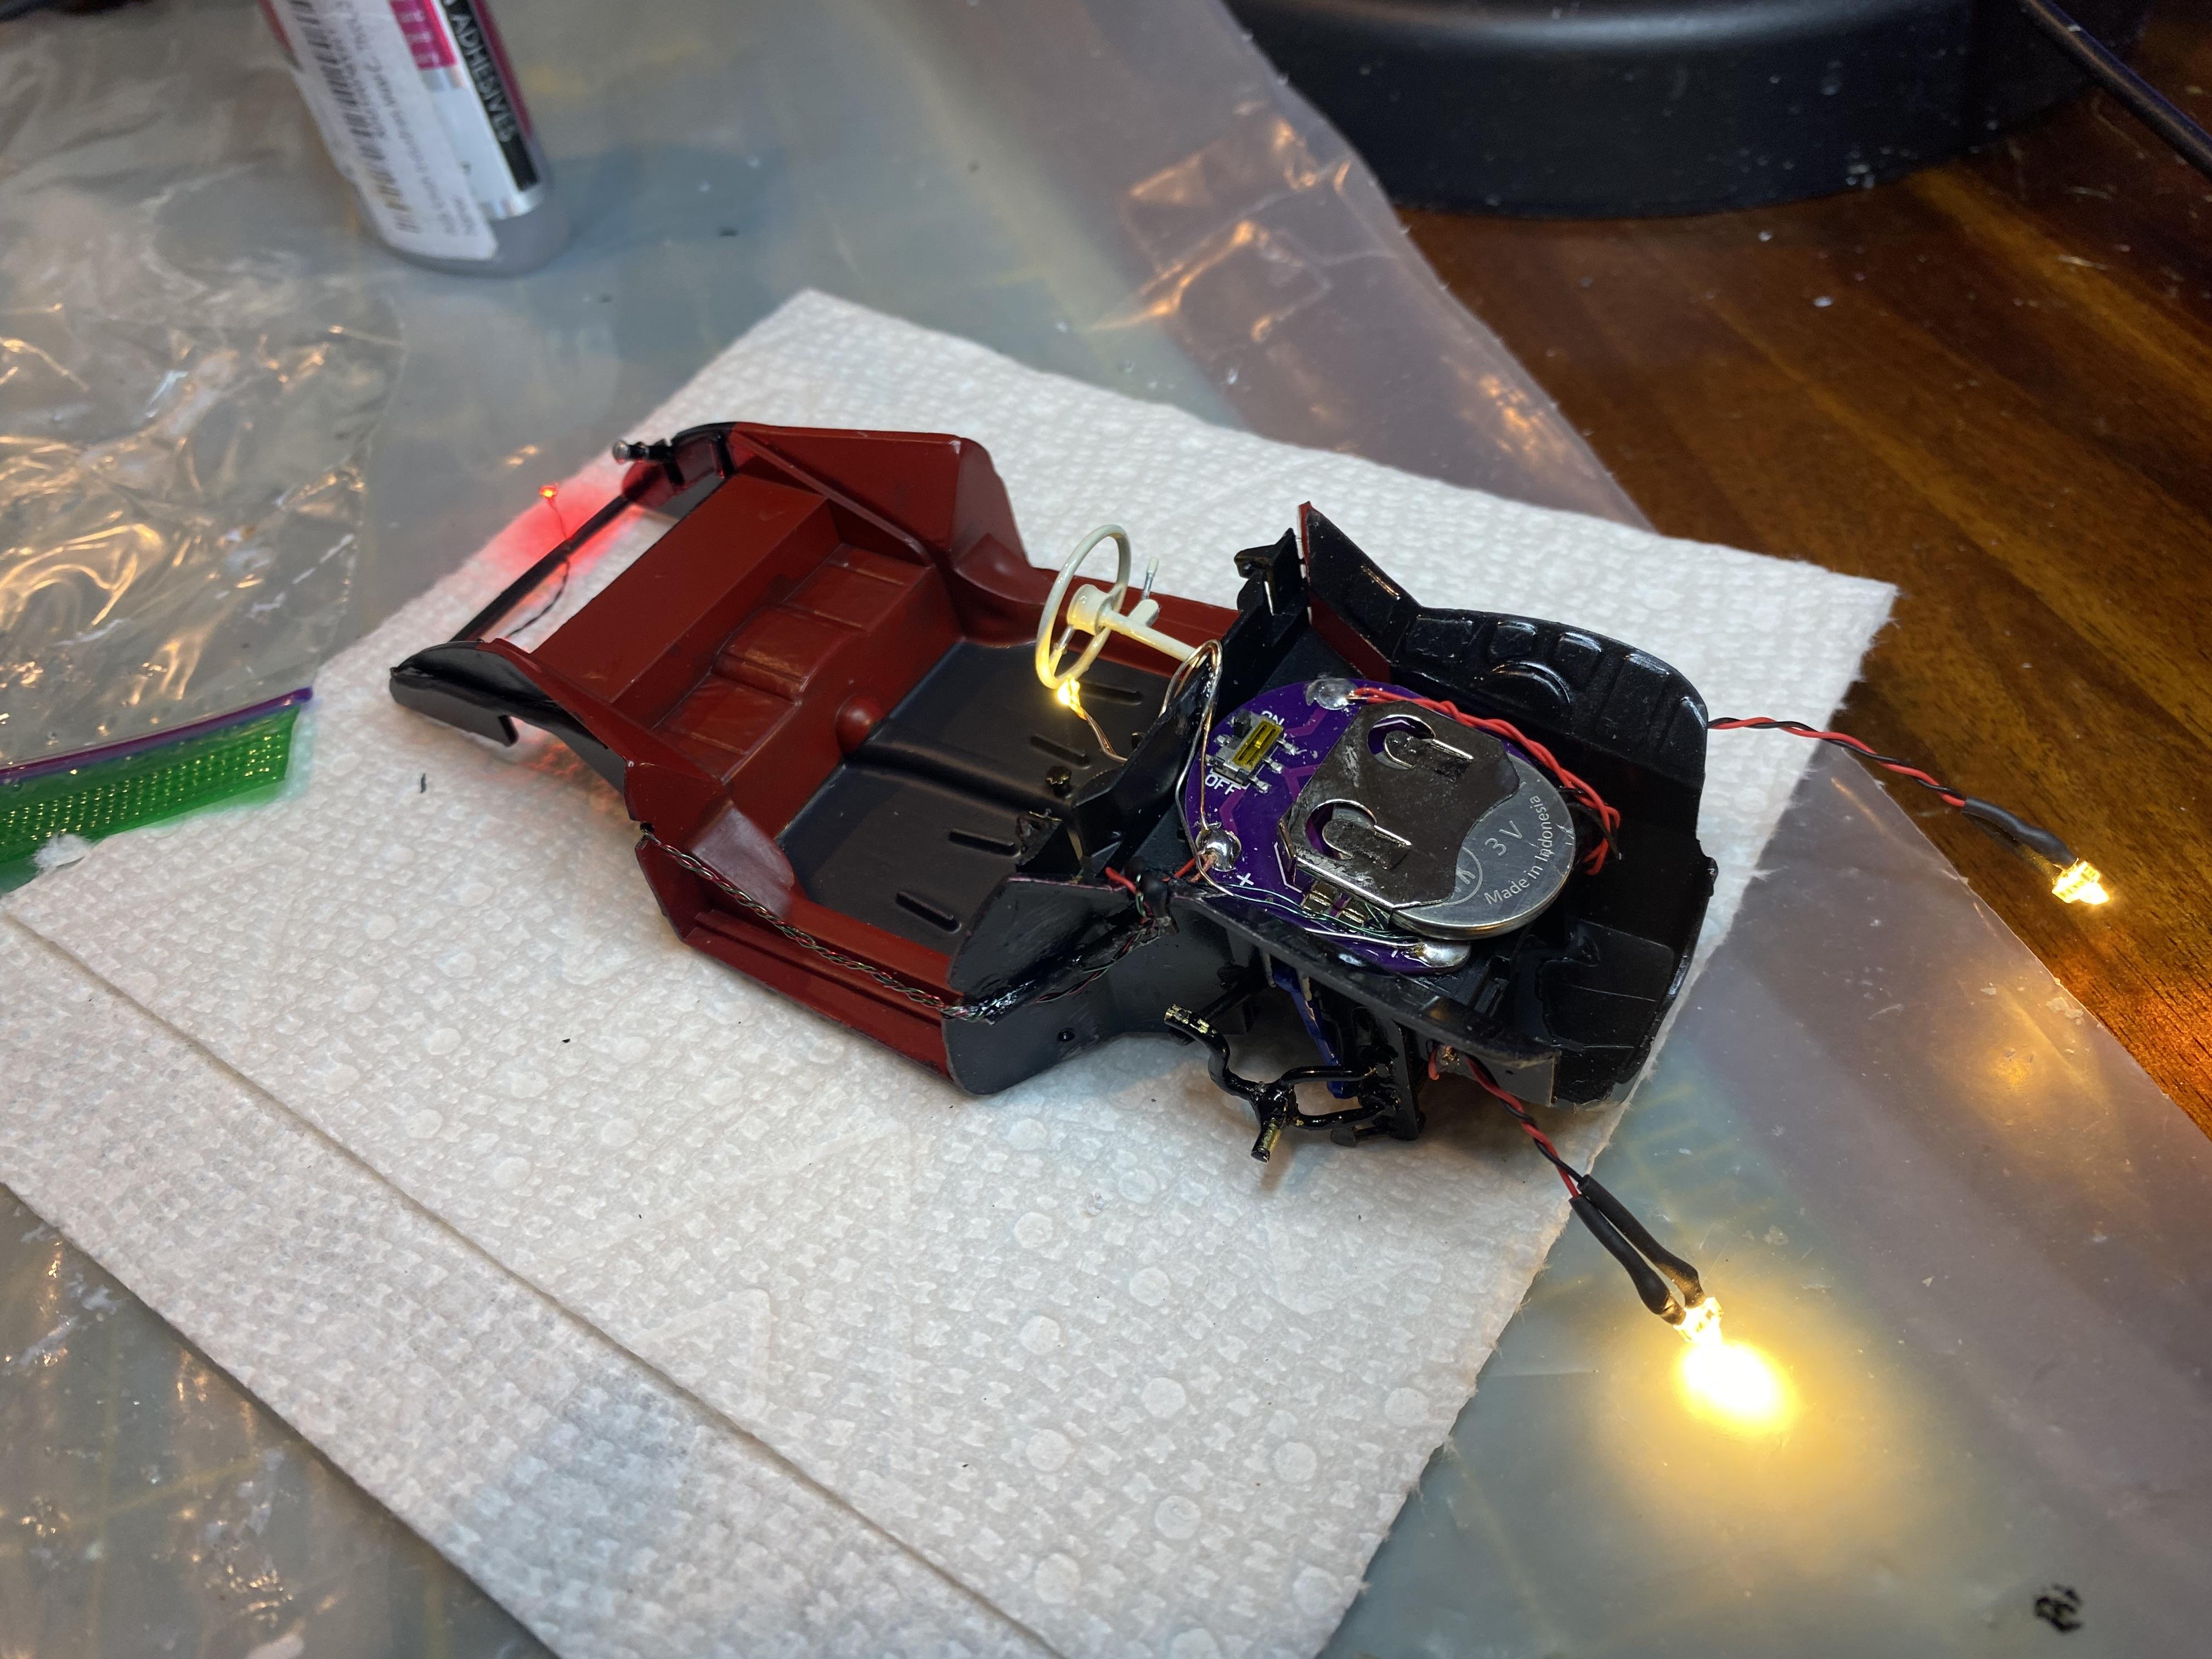
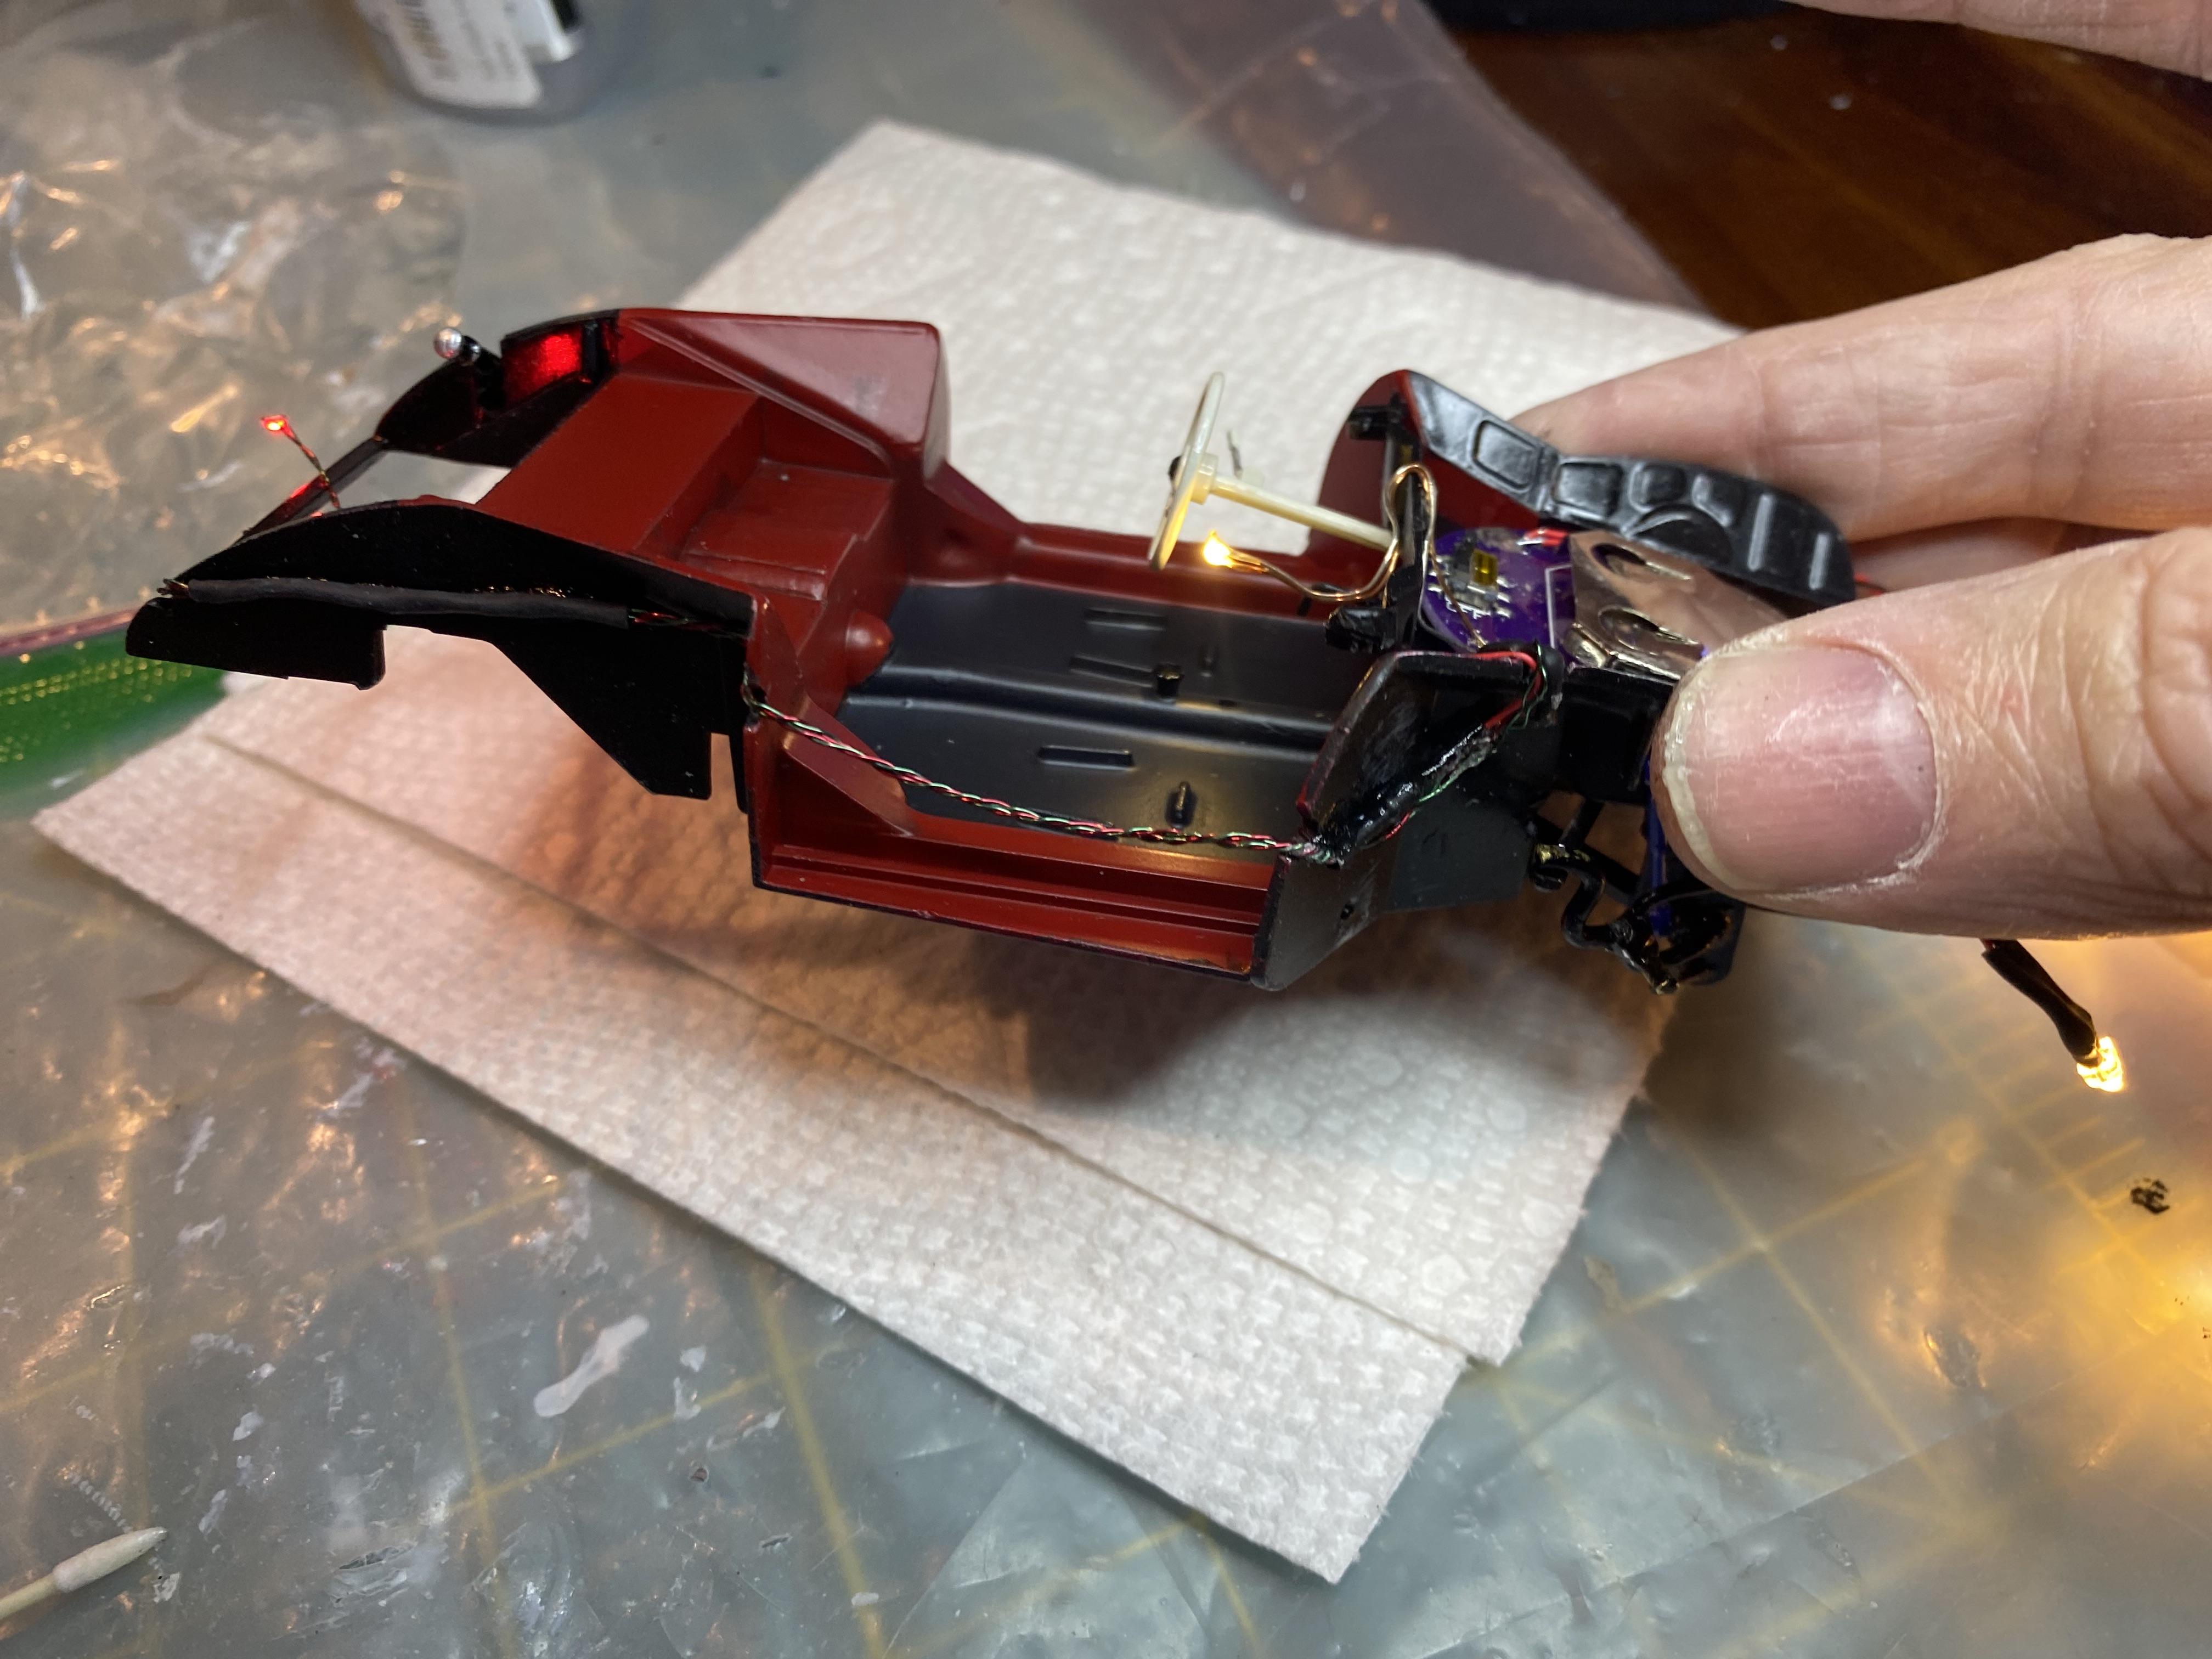
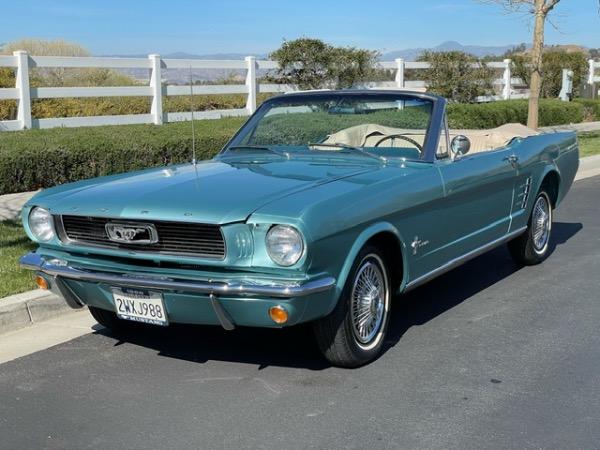
Thank you! A whole lot of modifying and scratch building. My love for the Porsche 356 is the only reason this one got done. First time I ever boiled a body to get it looking even close to correct. I have been adding LED lighting systems since I got back into modeling, not much over a year ago. I just started deciding to add poseable steering since my 1967 Mustang Convertible build. I did a 1974 Corvette Convertible, but it came with poseable steering out of the box. Now my family has said Lighting and steering are a requirement for all future builds.
-
Thank you! Thank You!
-
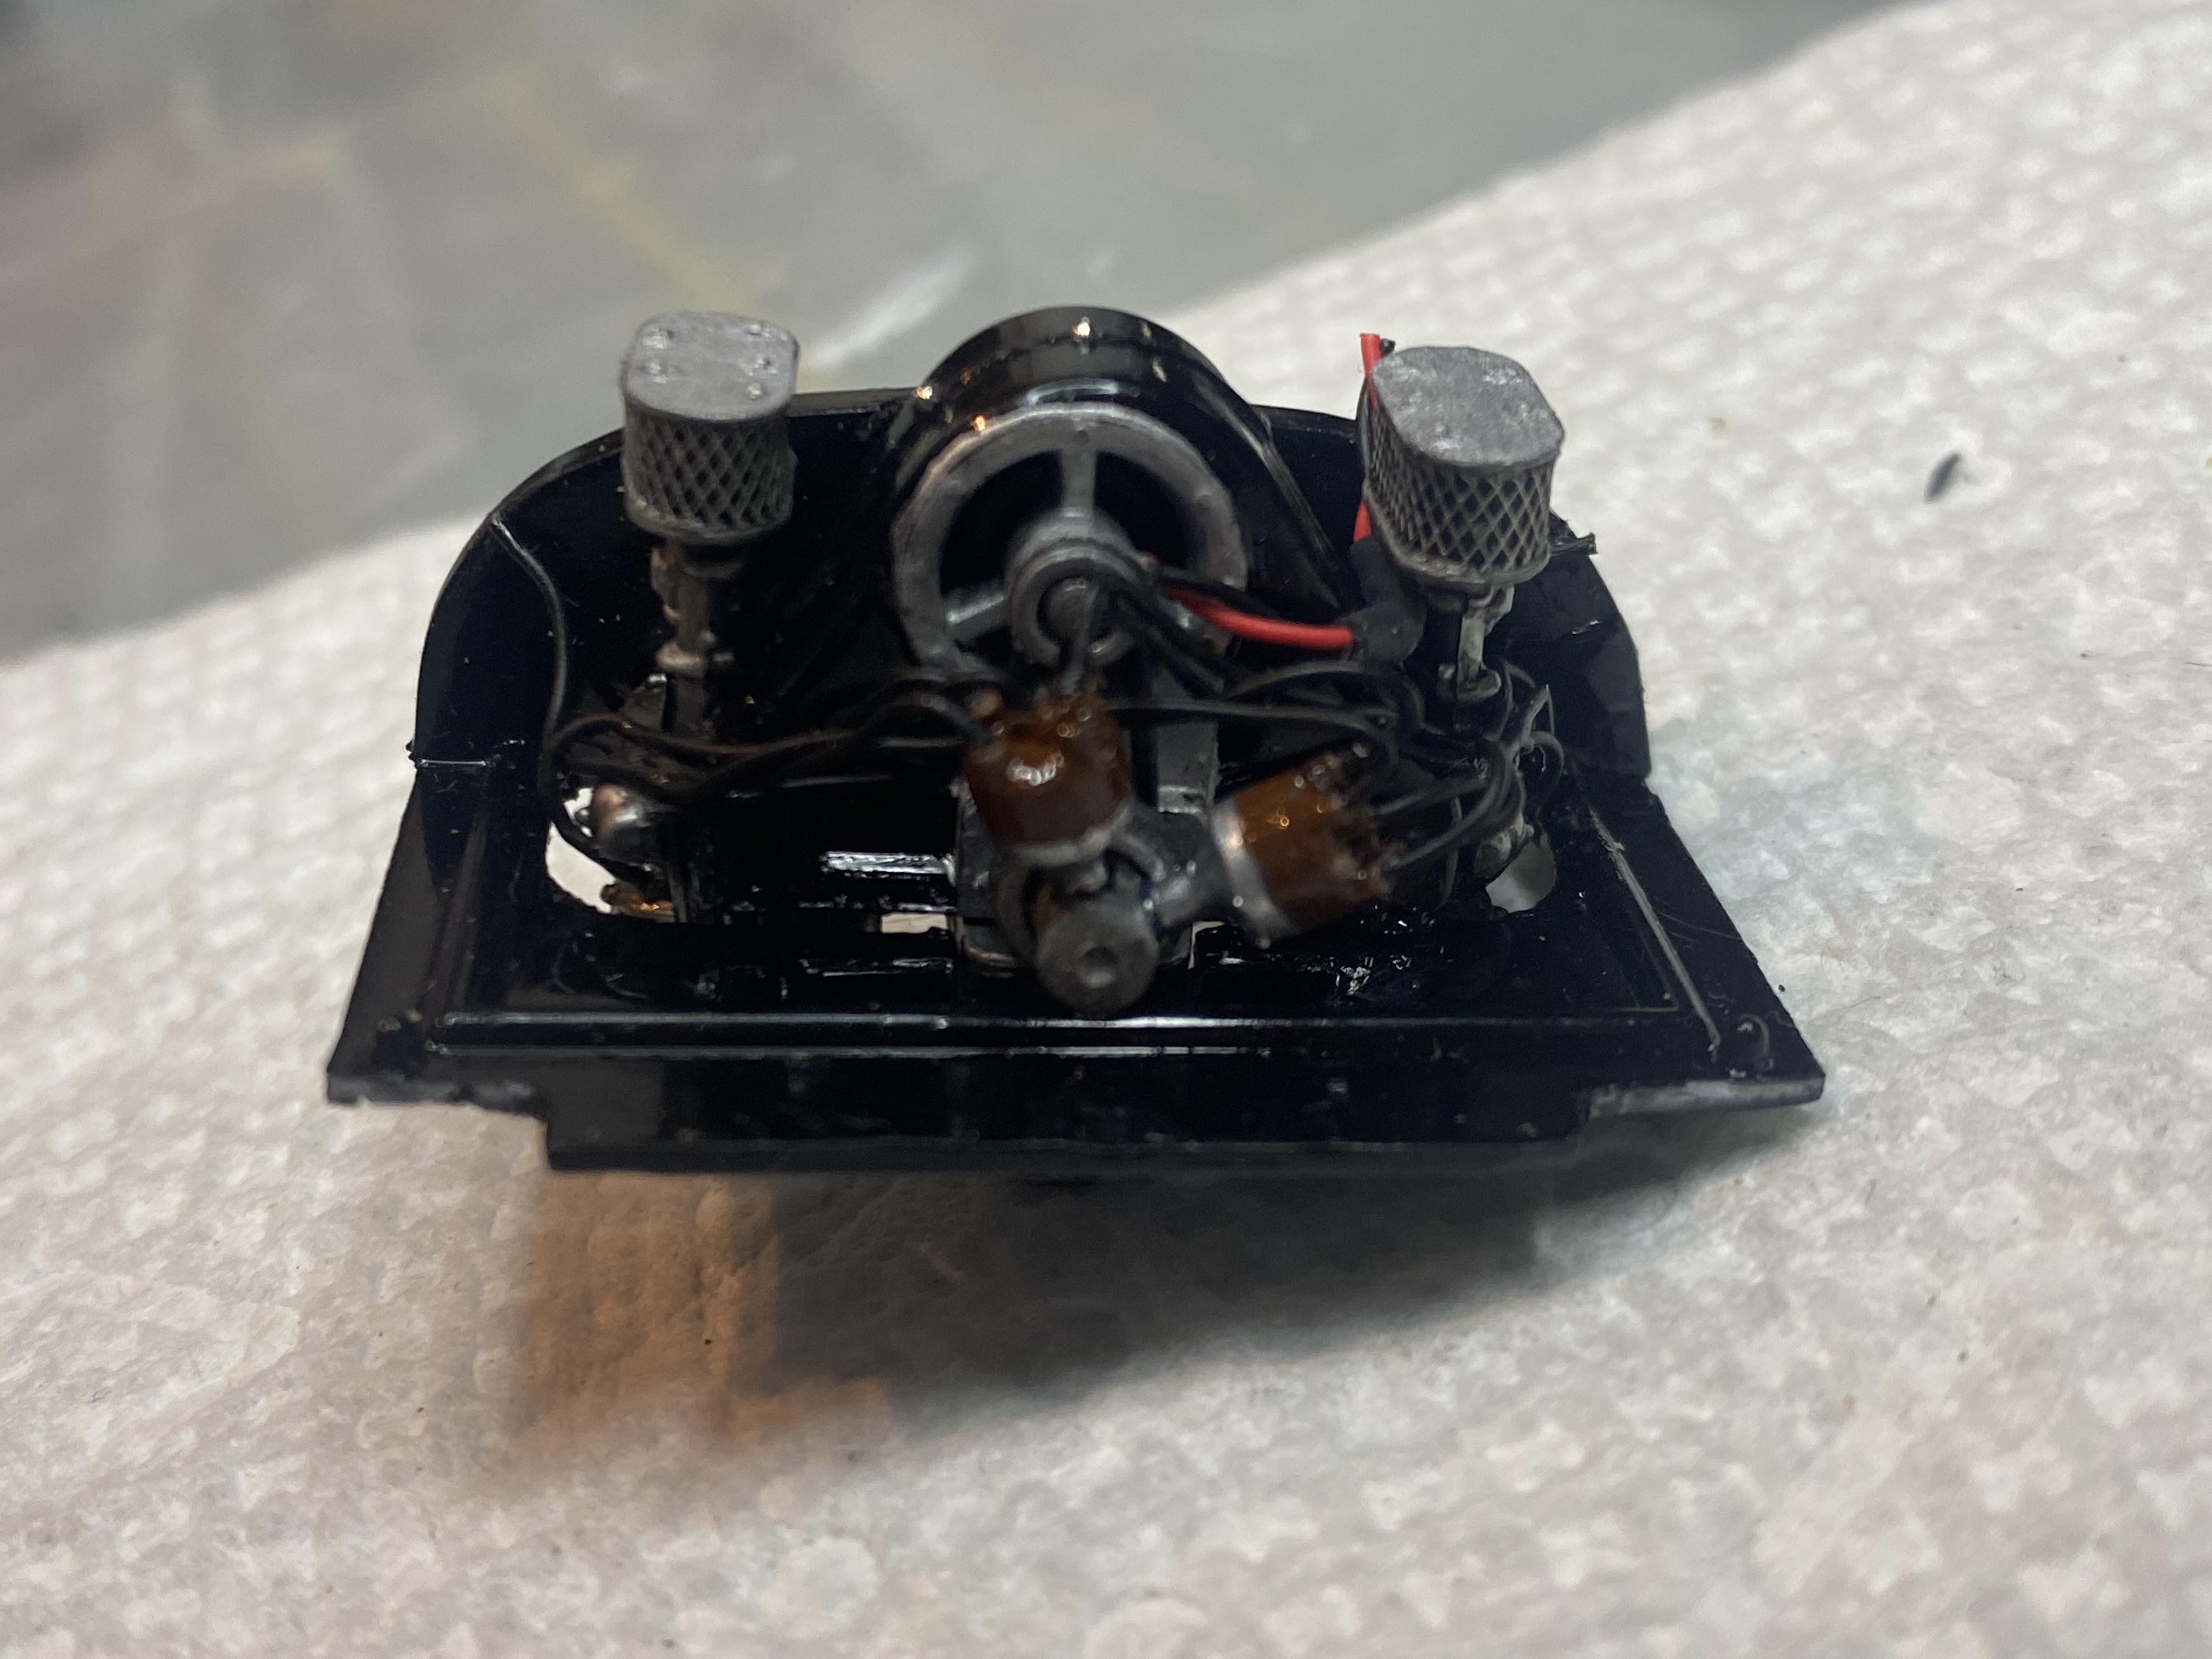
Iceman Collections and Texas 3D Customs both carry a very nice 1/24 resin printed VW flat 4 air cooled engine.
- 1 reply
-
- 1
-

-
Wow, I just finally looked at the images on a 32" monitor. I didn't realize how much dust and debris got on the model before I took pictures. 😬 It was post-race... yeah... that's why. 😉
-
Thank You! It took a lot of work but I am happy with how it turned out in the end.
-
Thank You! Thank You! It really is not a good kit but I was determined to make it into something presentable.
-
Thank You! I am sure anyone could do it, just takes some patience and persistence. You are right though, there wasn’t a single part of the body that was accurate.
-
Thank you! Thank you! Thank You!
-
Thank You! I was off work for the holidays so got a lot of time to build. Thank You!
-
Thank You! I would most certainly recommend starting with a Fujimi Porsche 356 kit. The Revell kit is not good at all. Much of this is scratch built or heavily modified to the point I literally boiled the back section of the body to get it into shape. Thank you! My family won’t let me do a build without the lighting.
-
Posted pictures to underglass can be seen here:
-
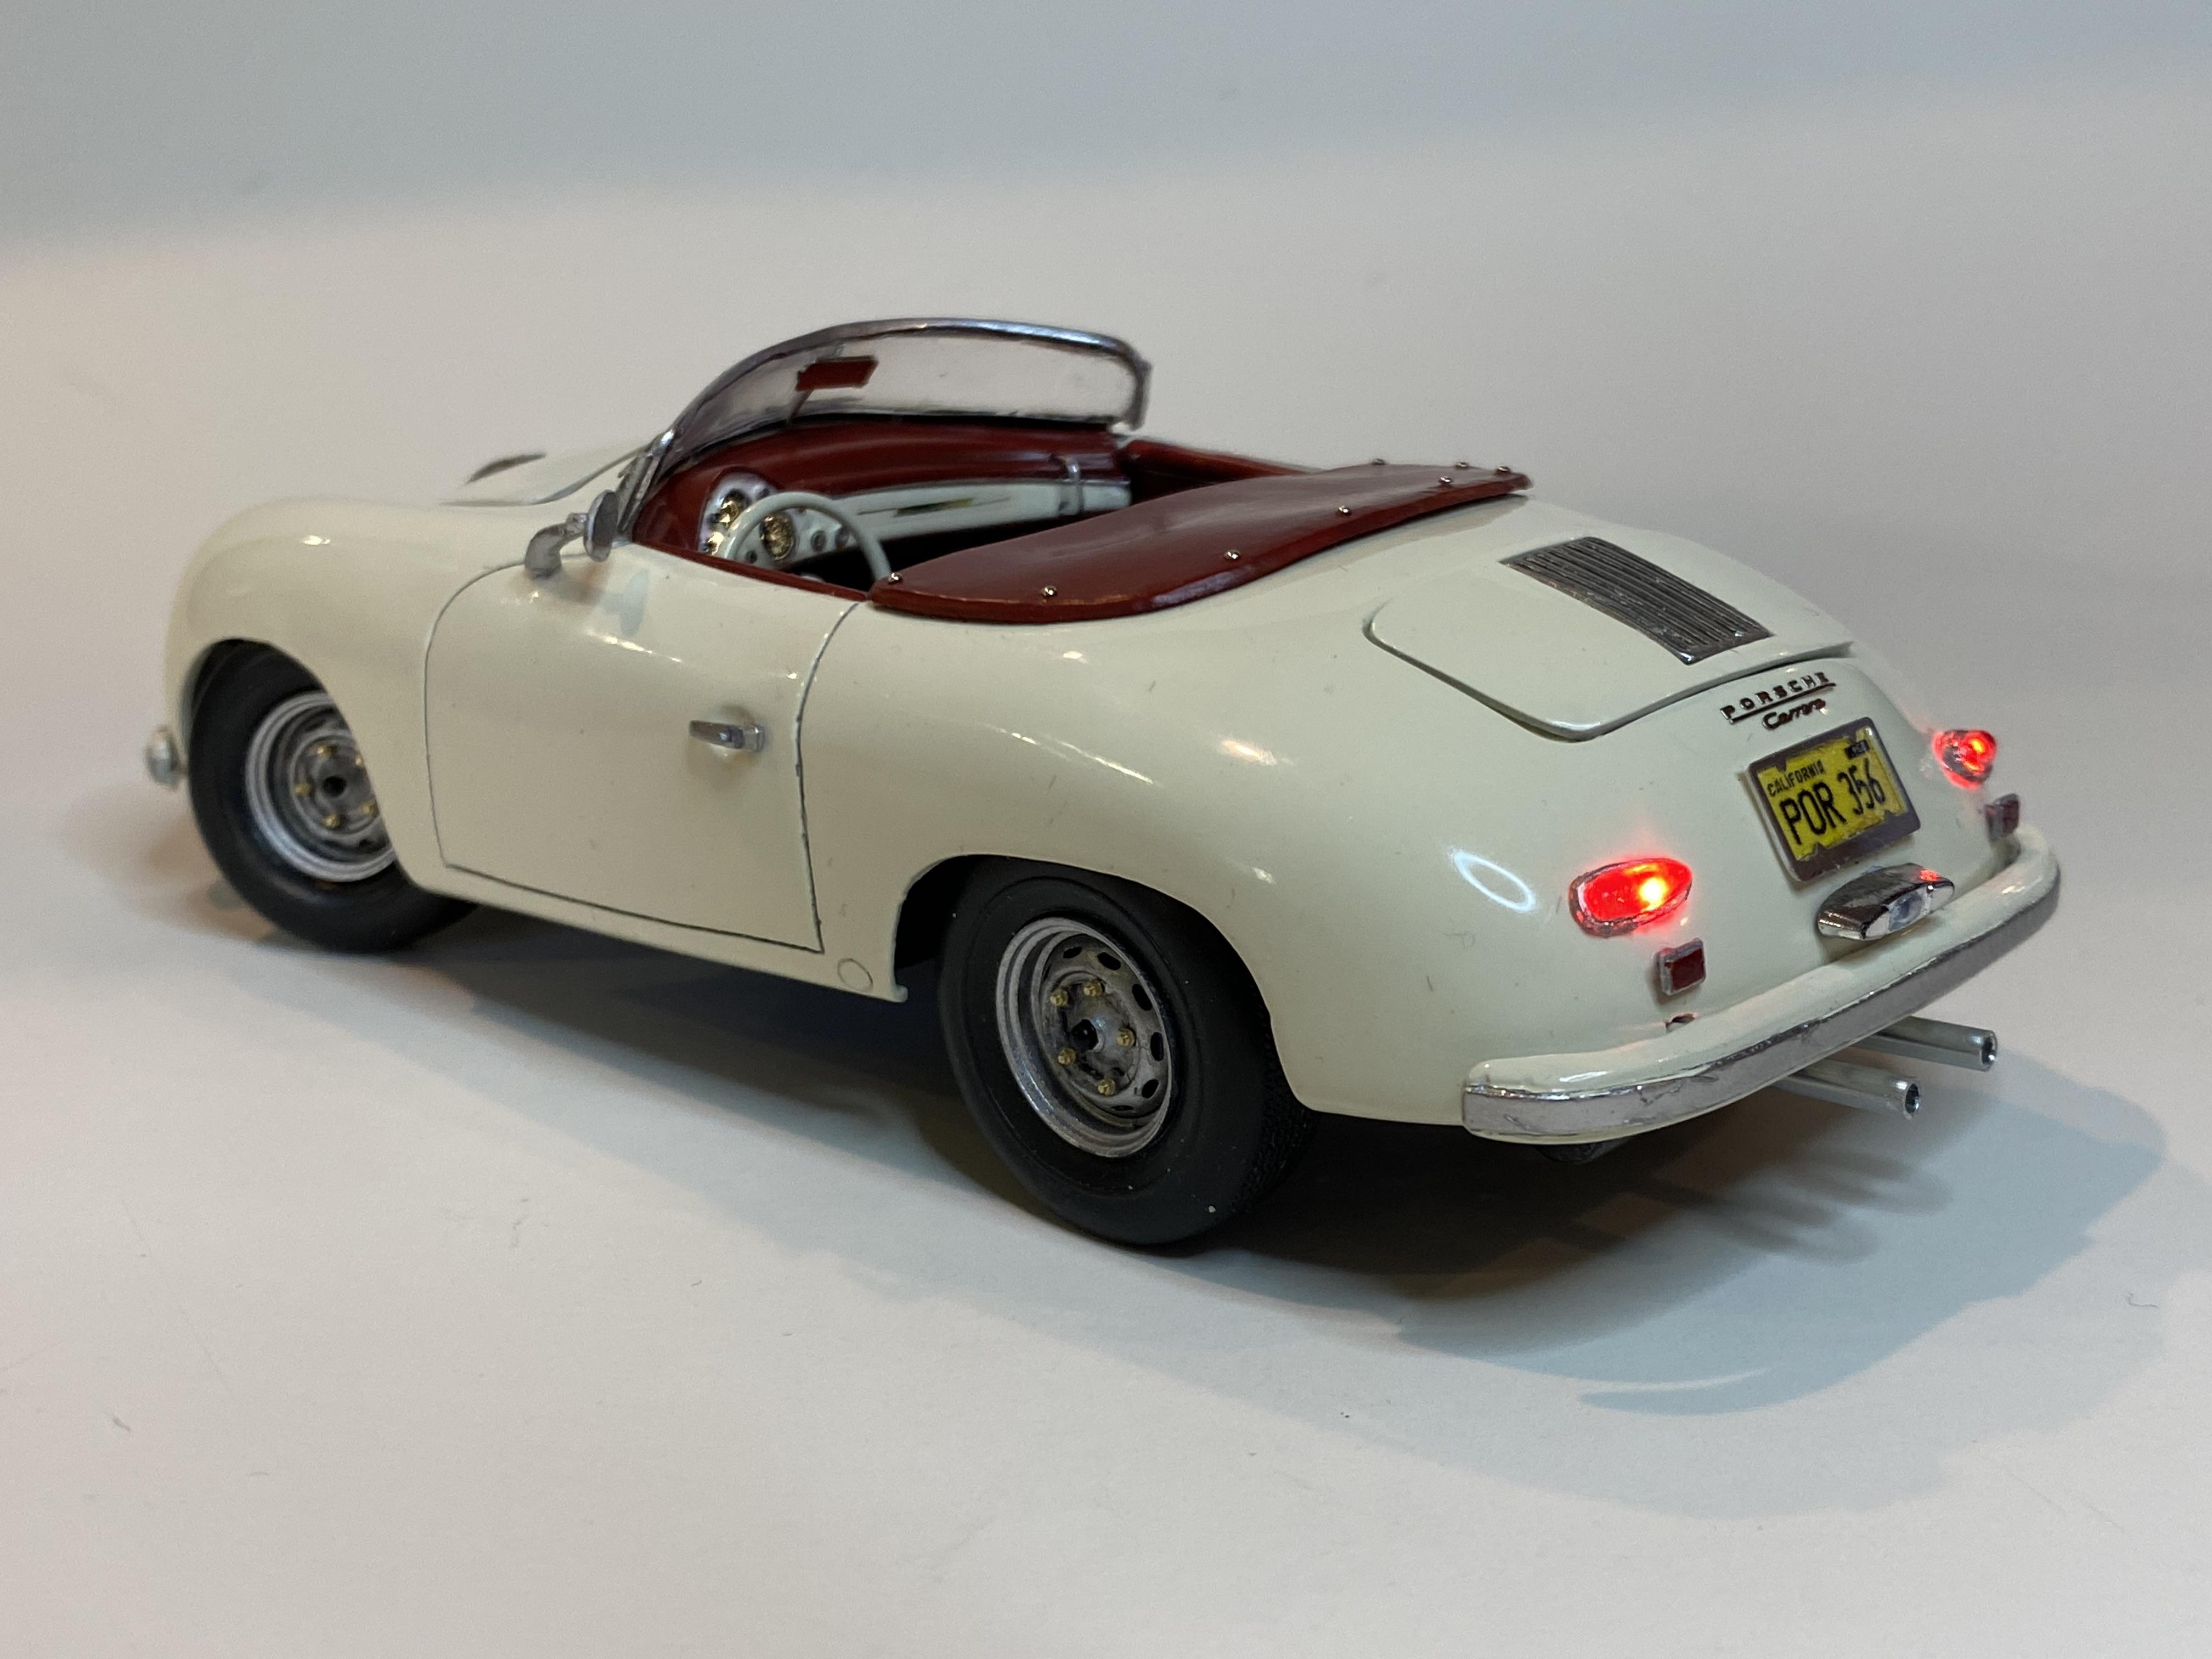
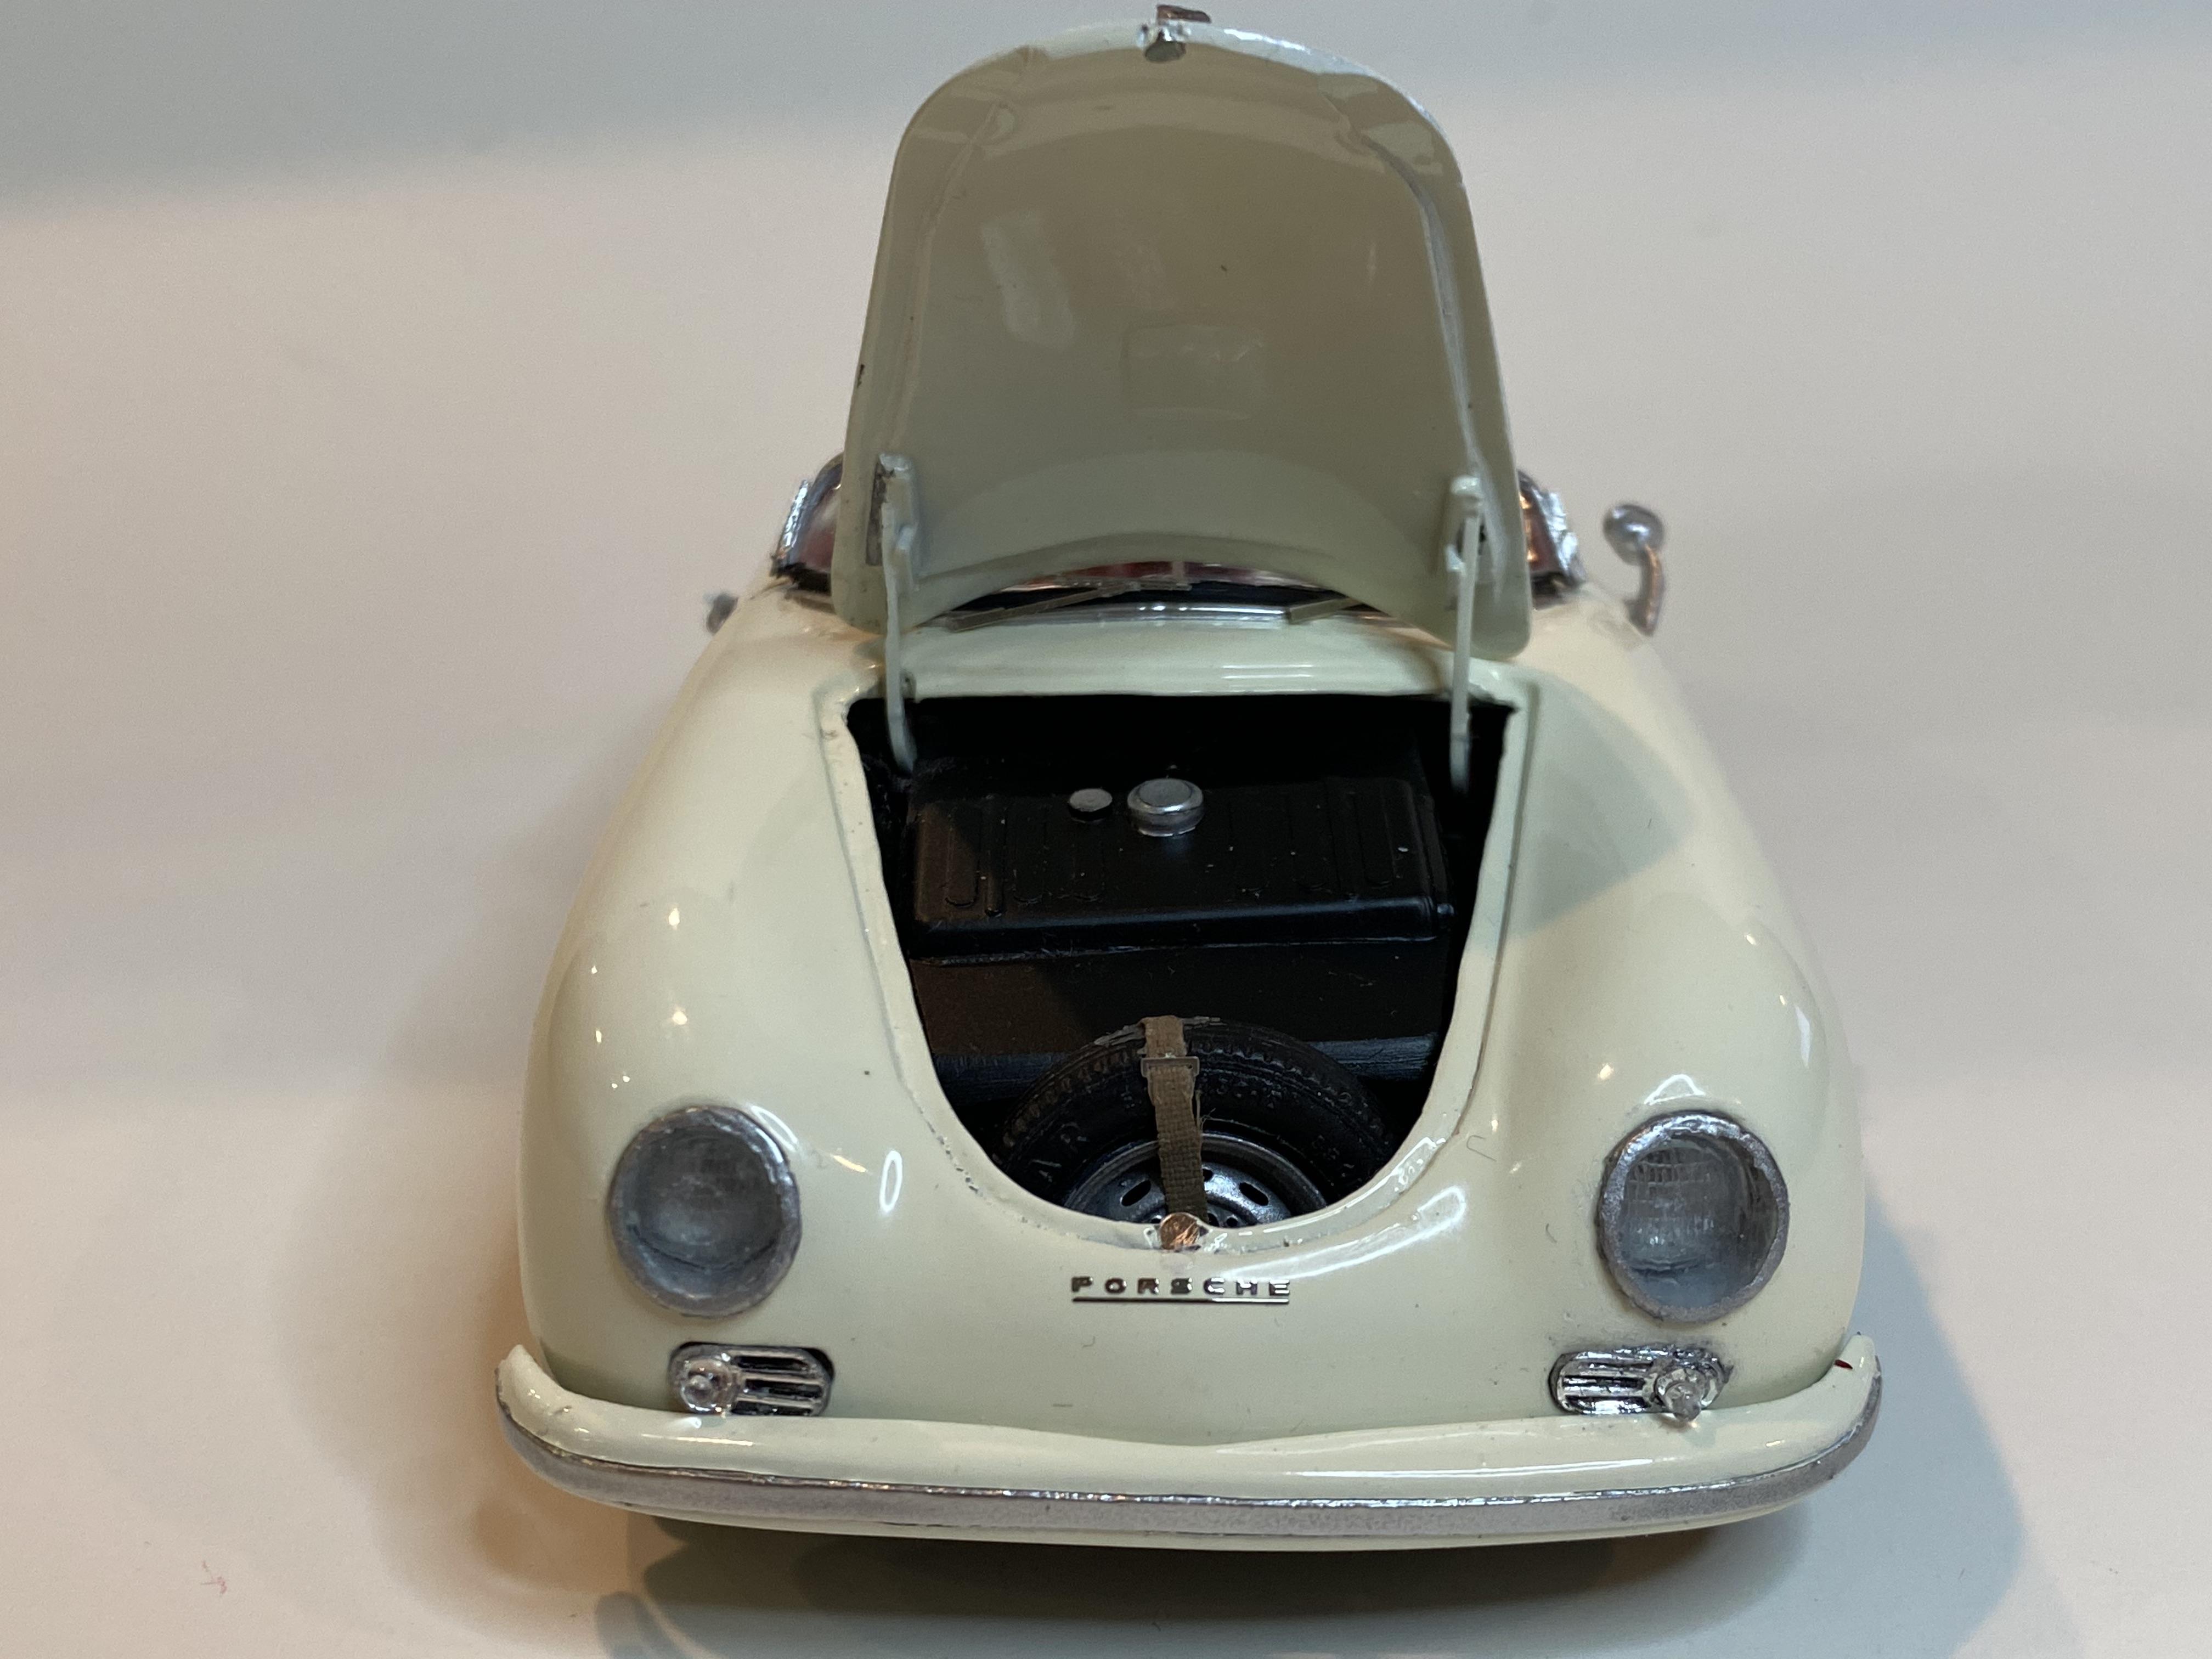
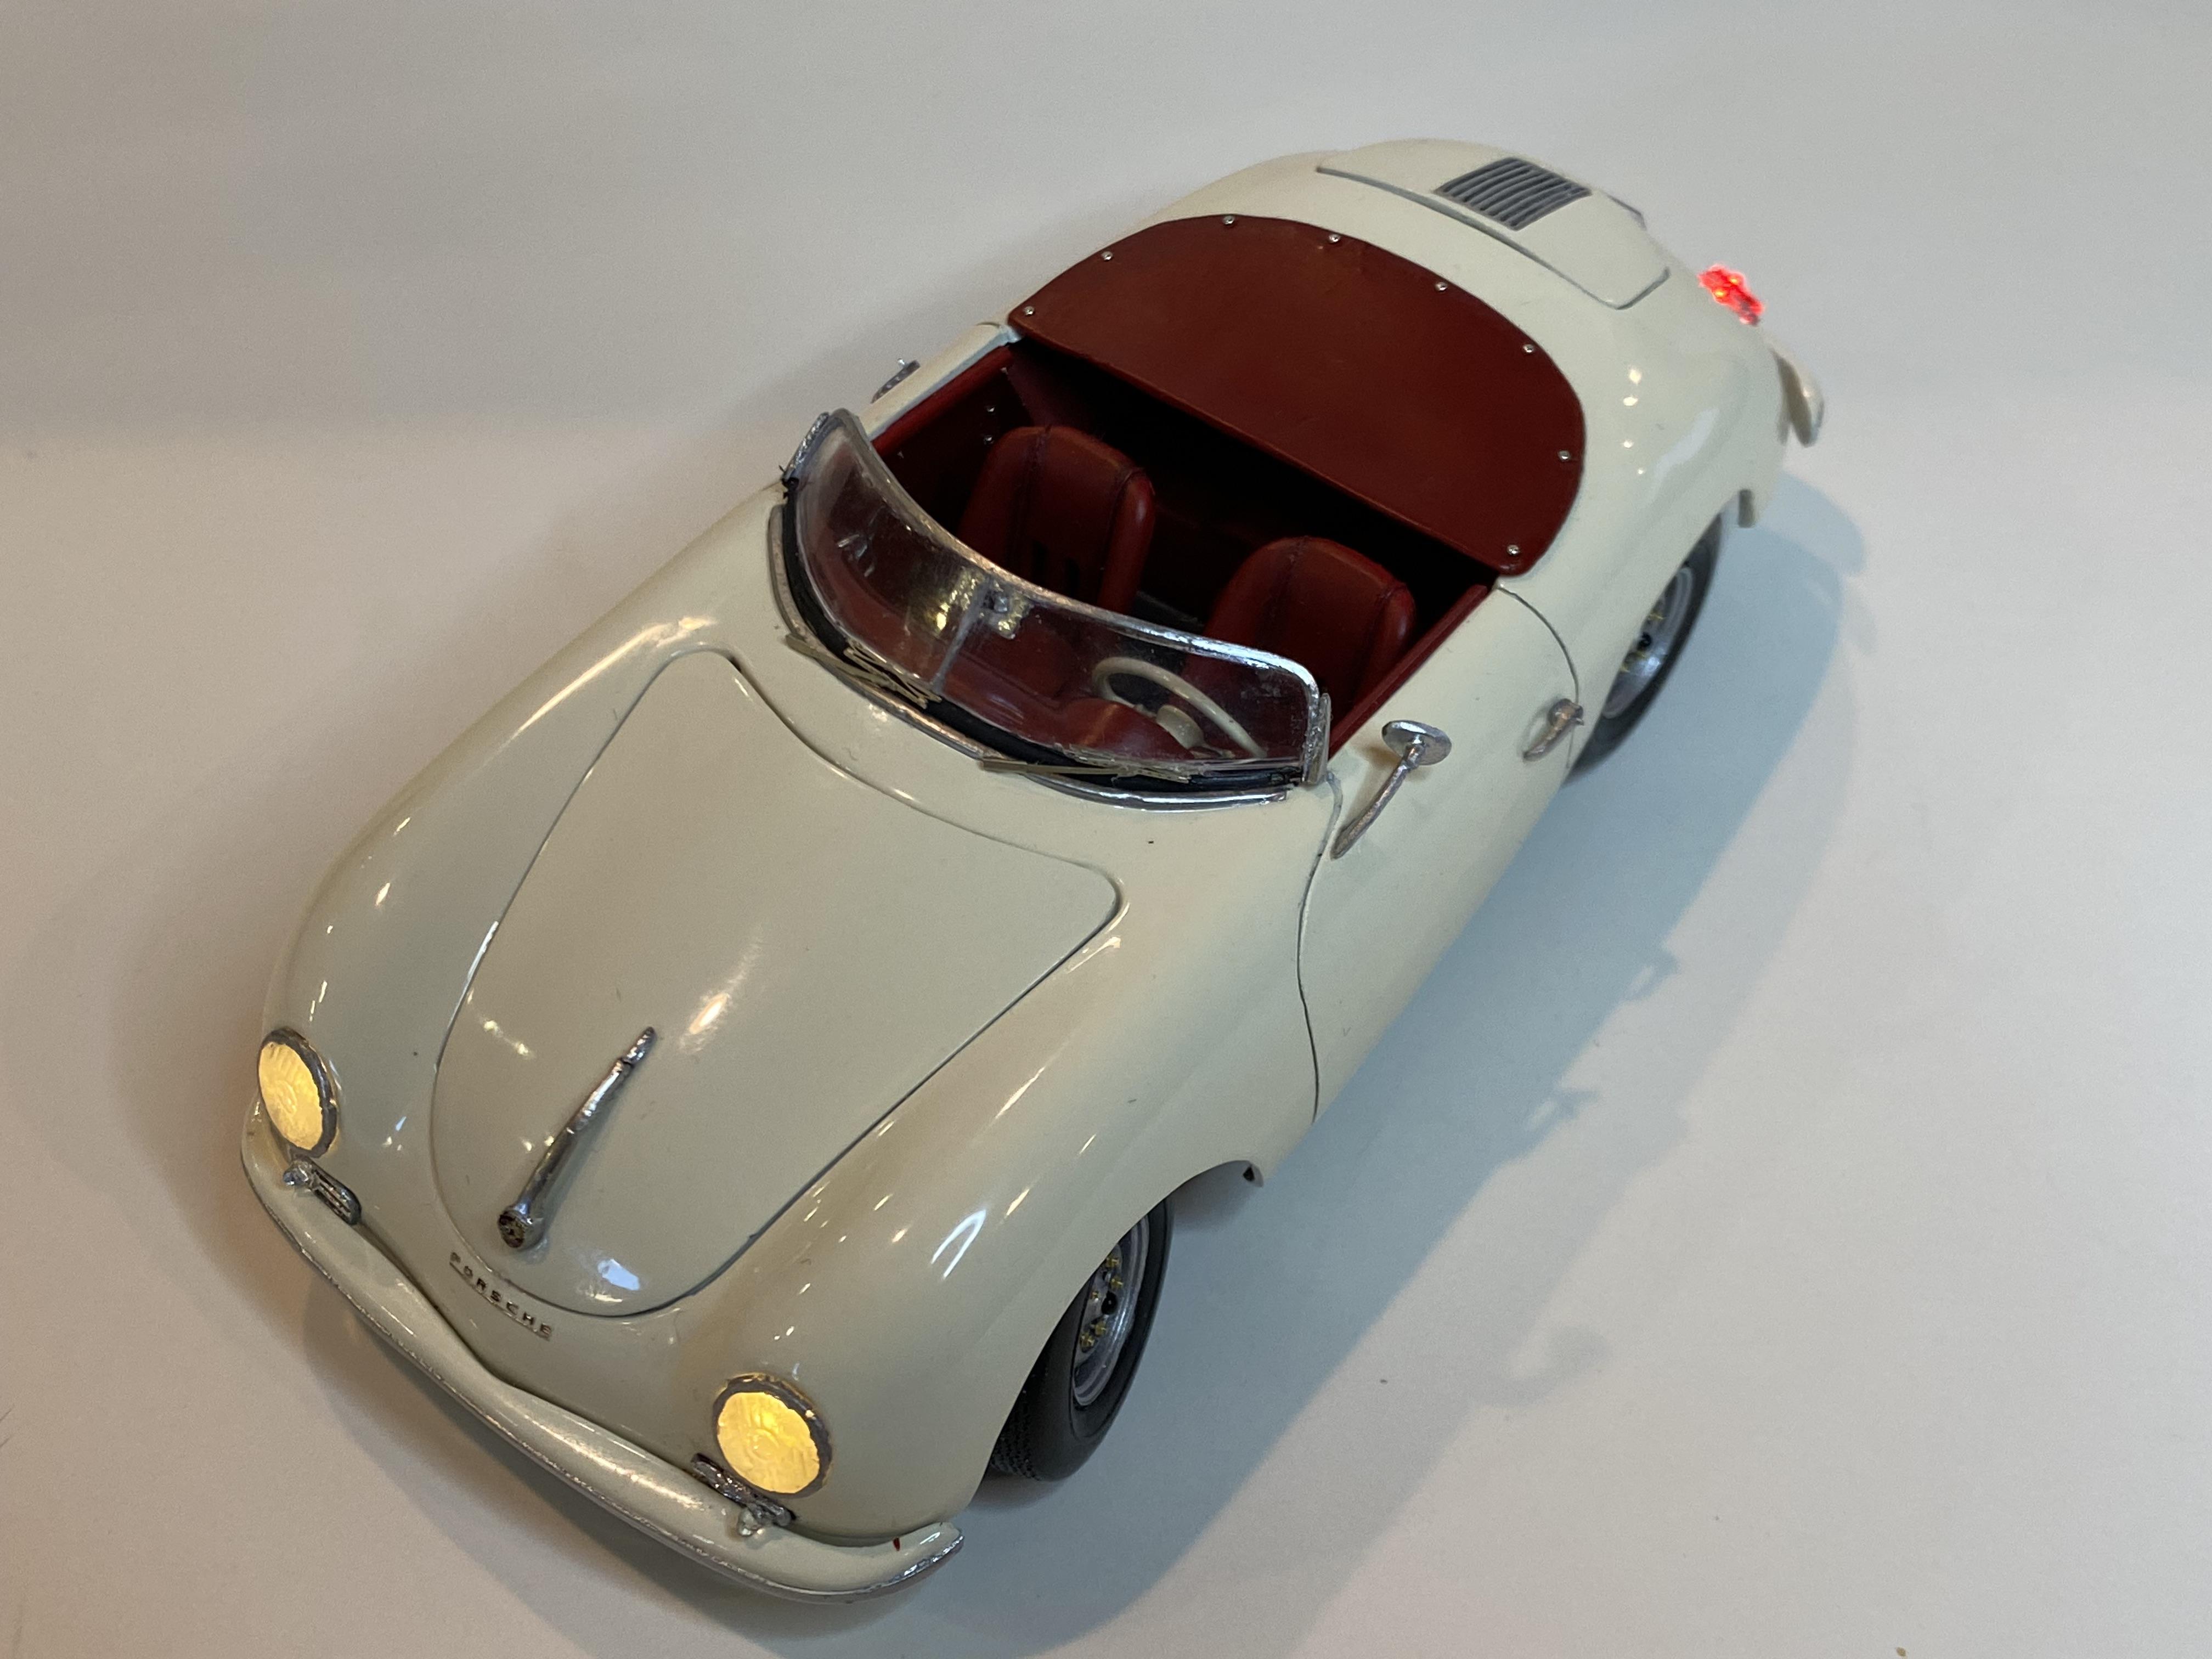
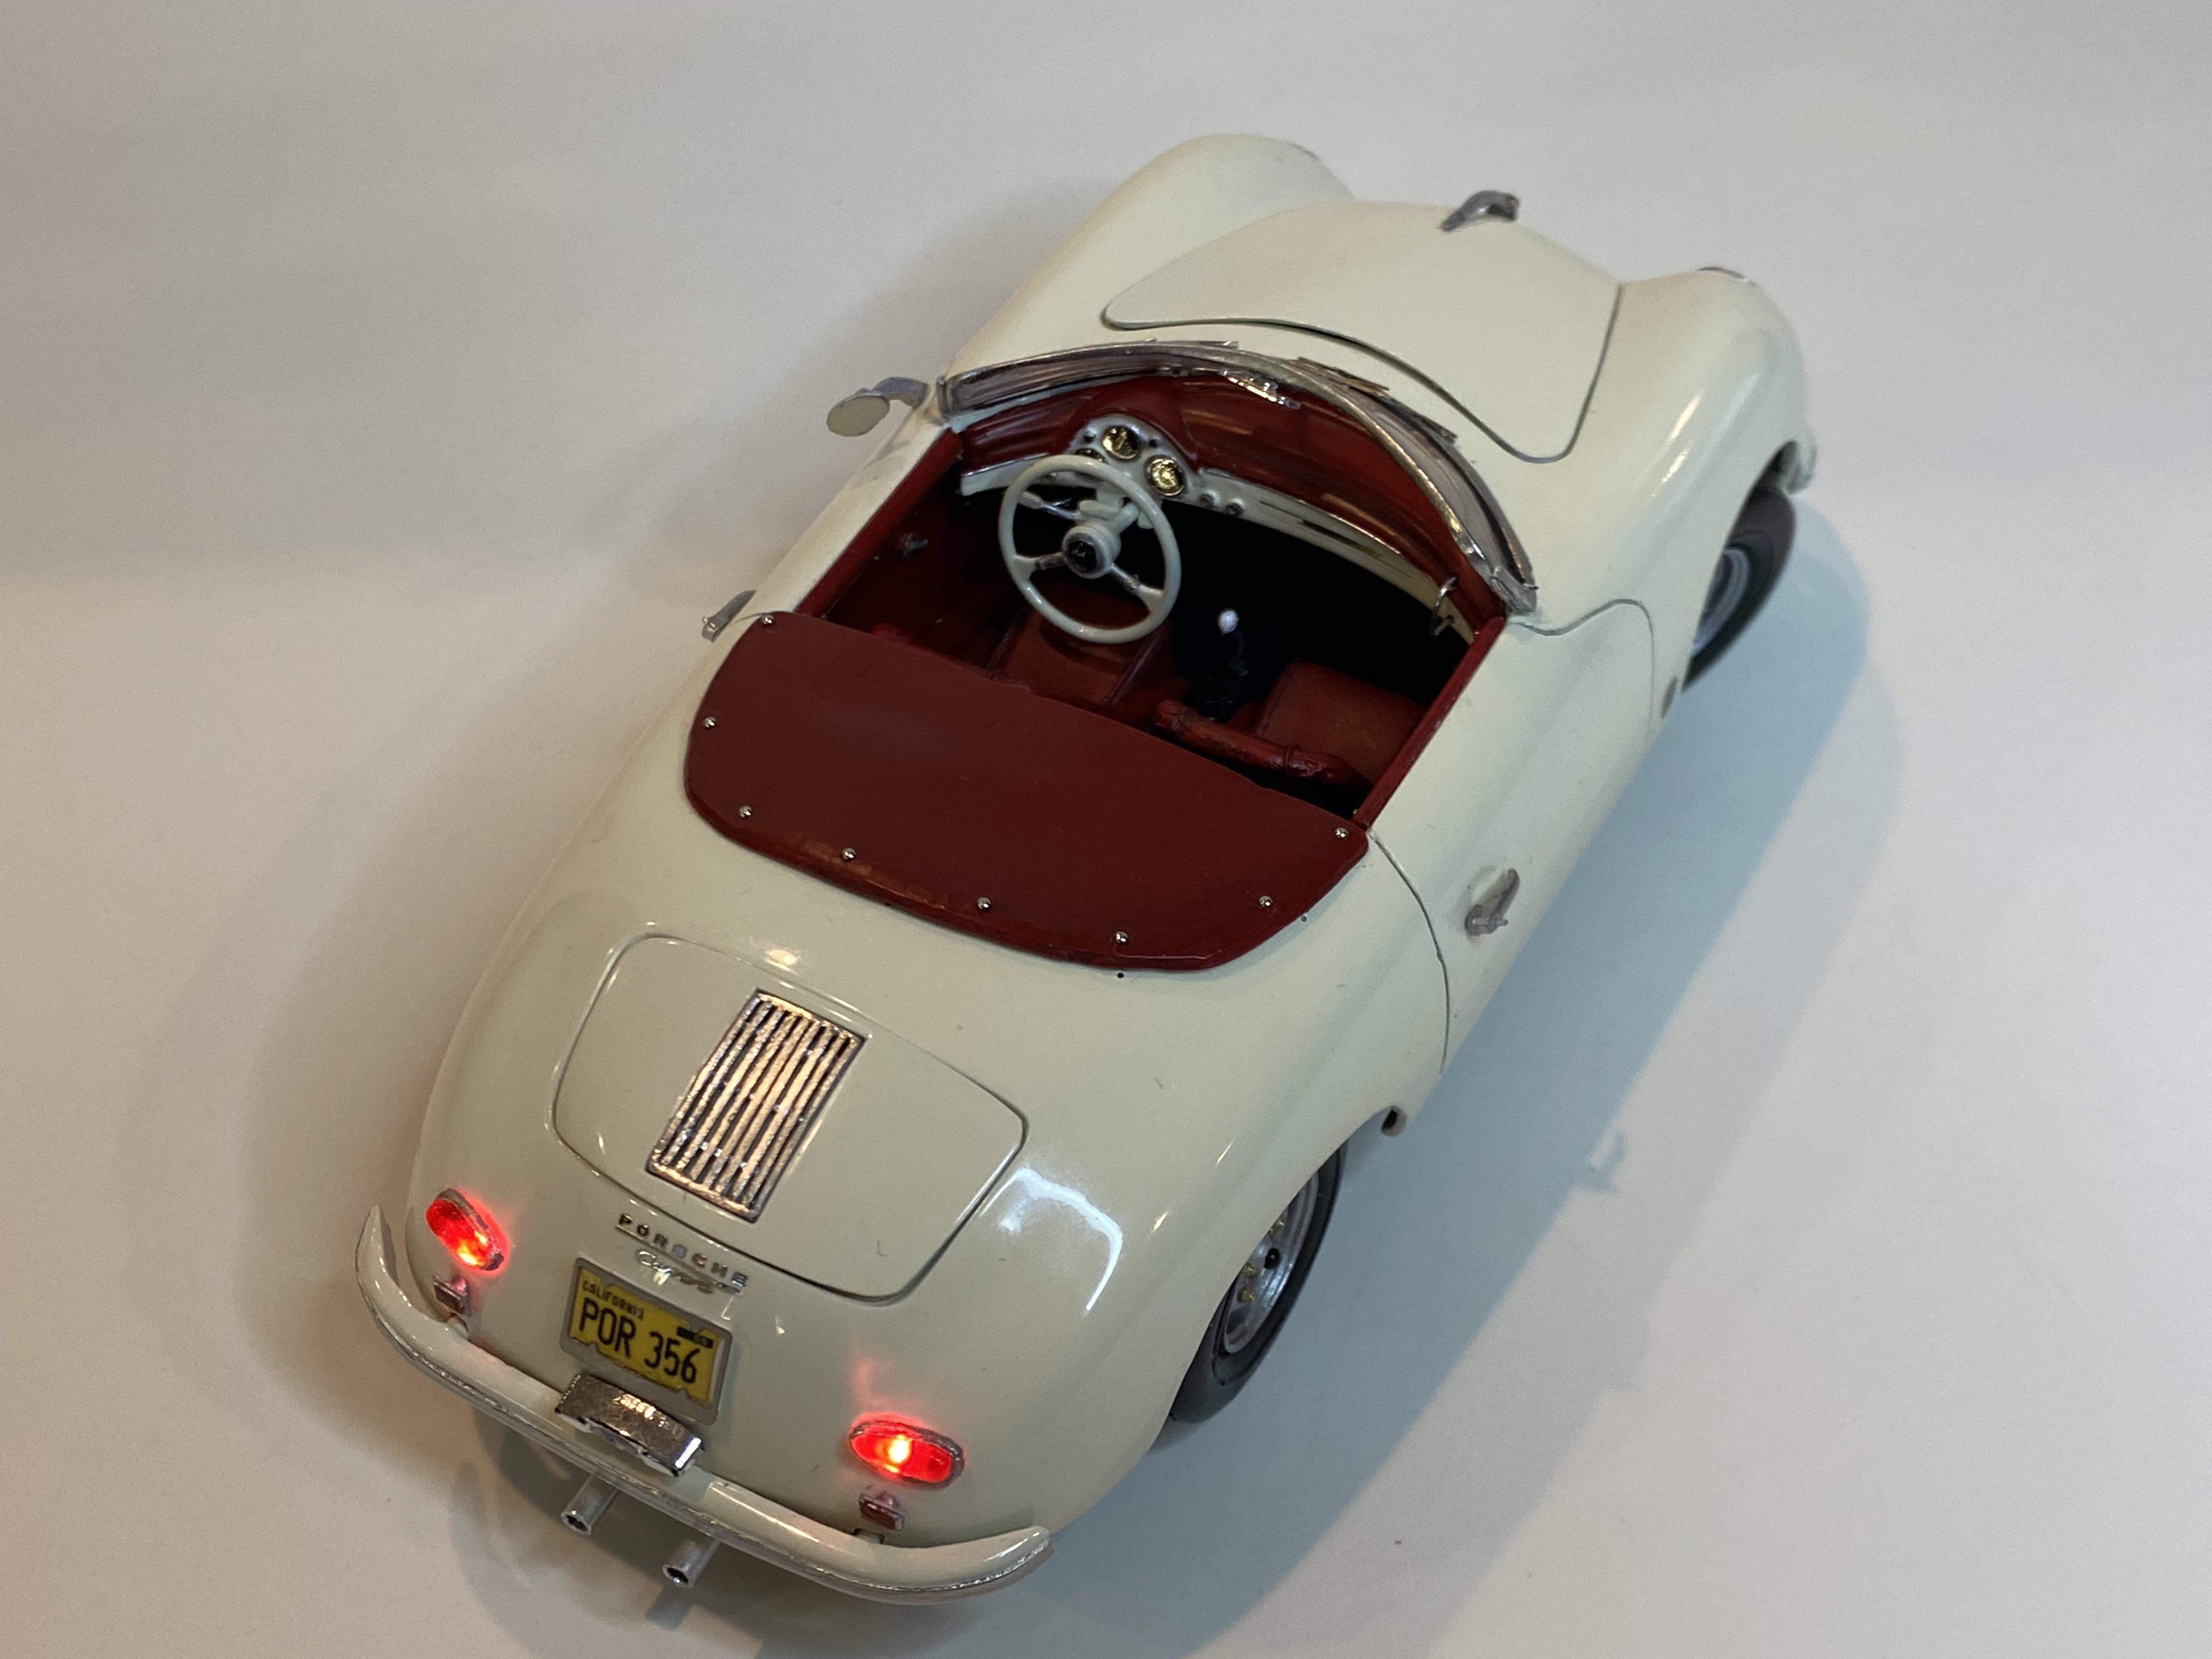
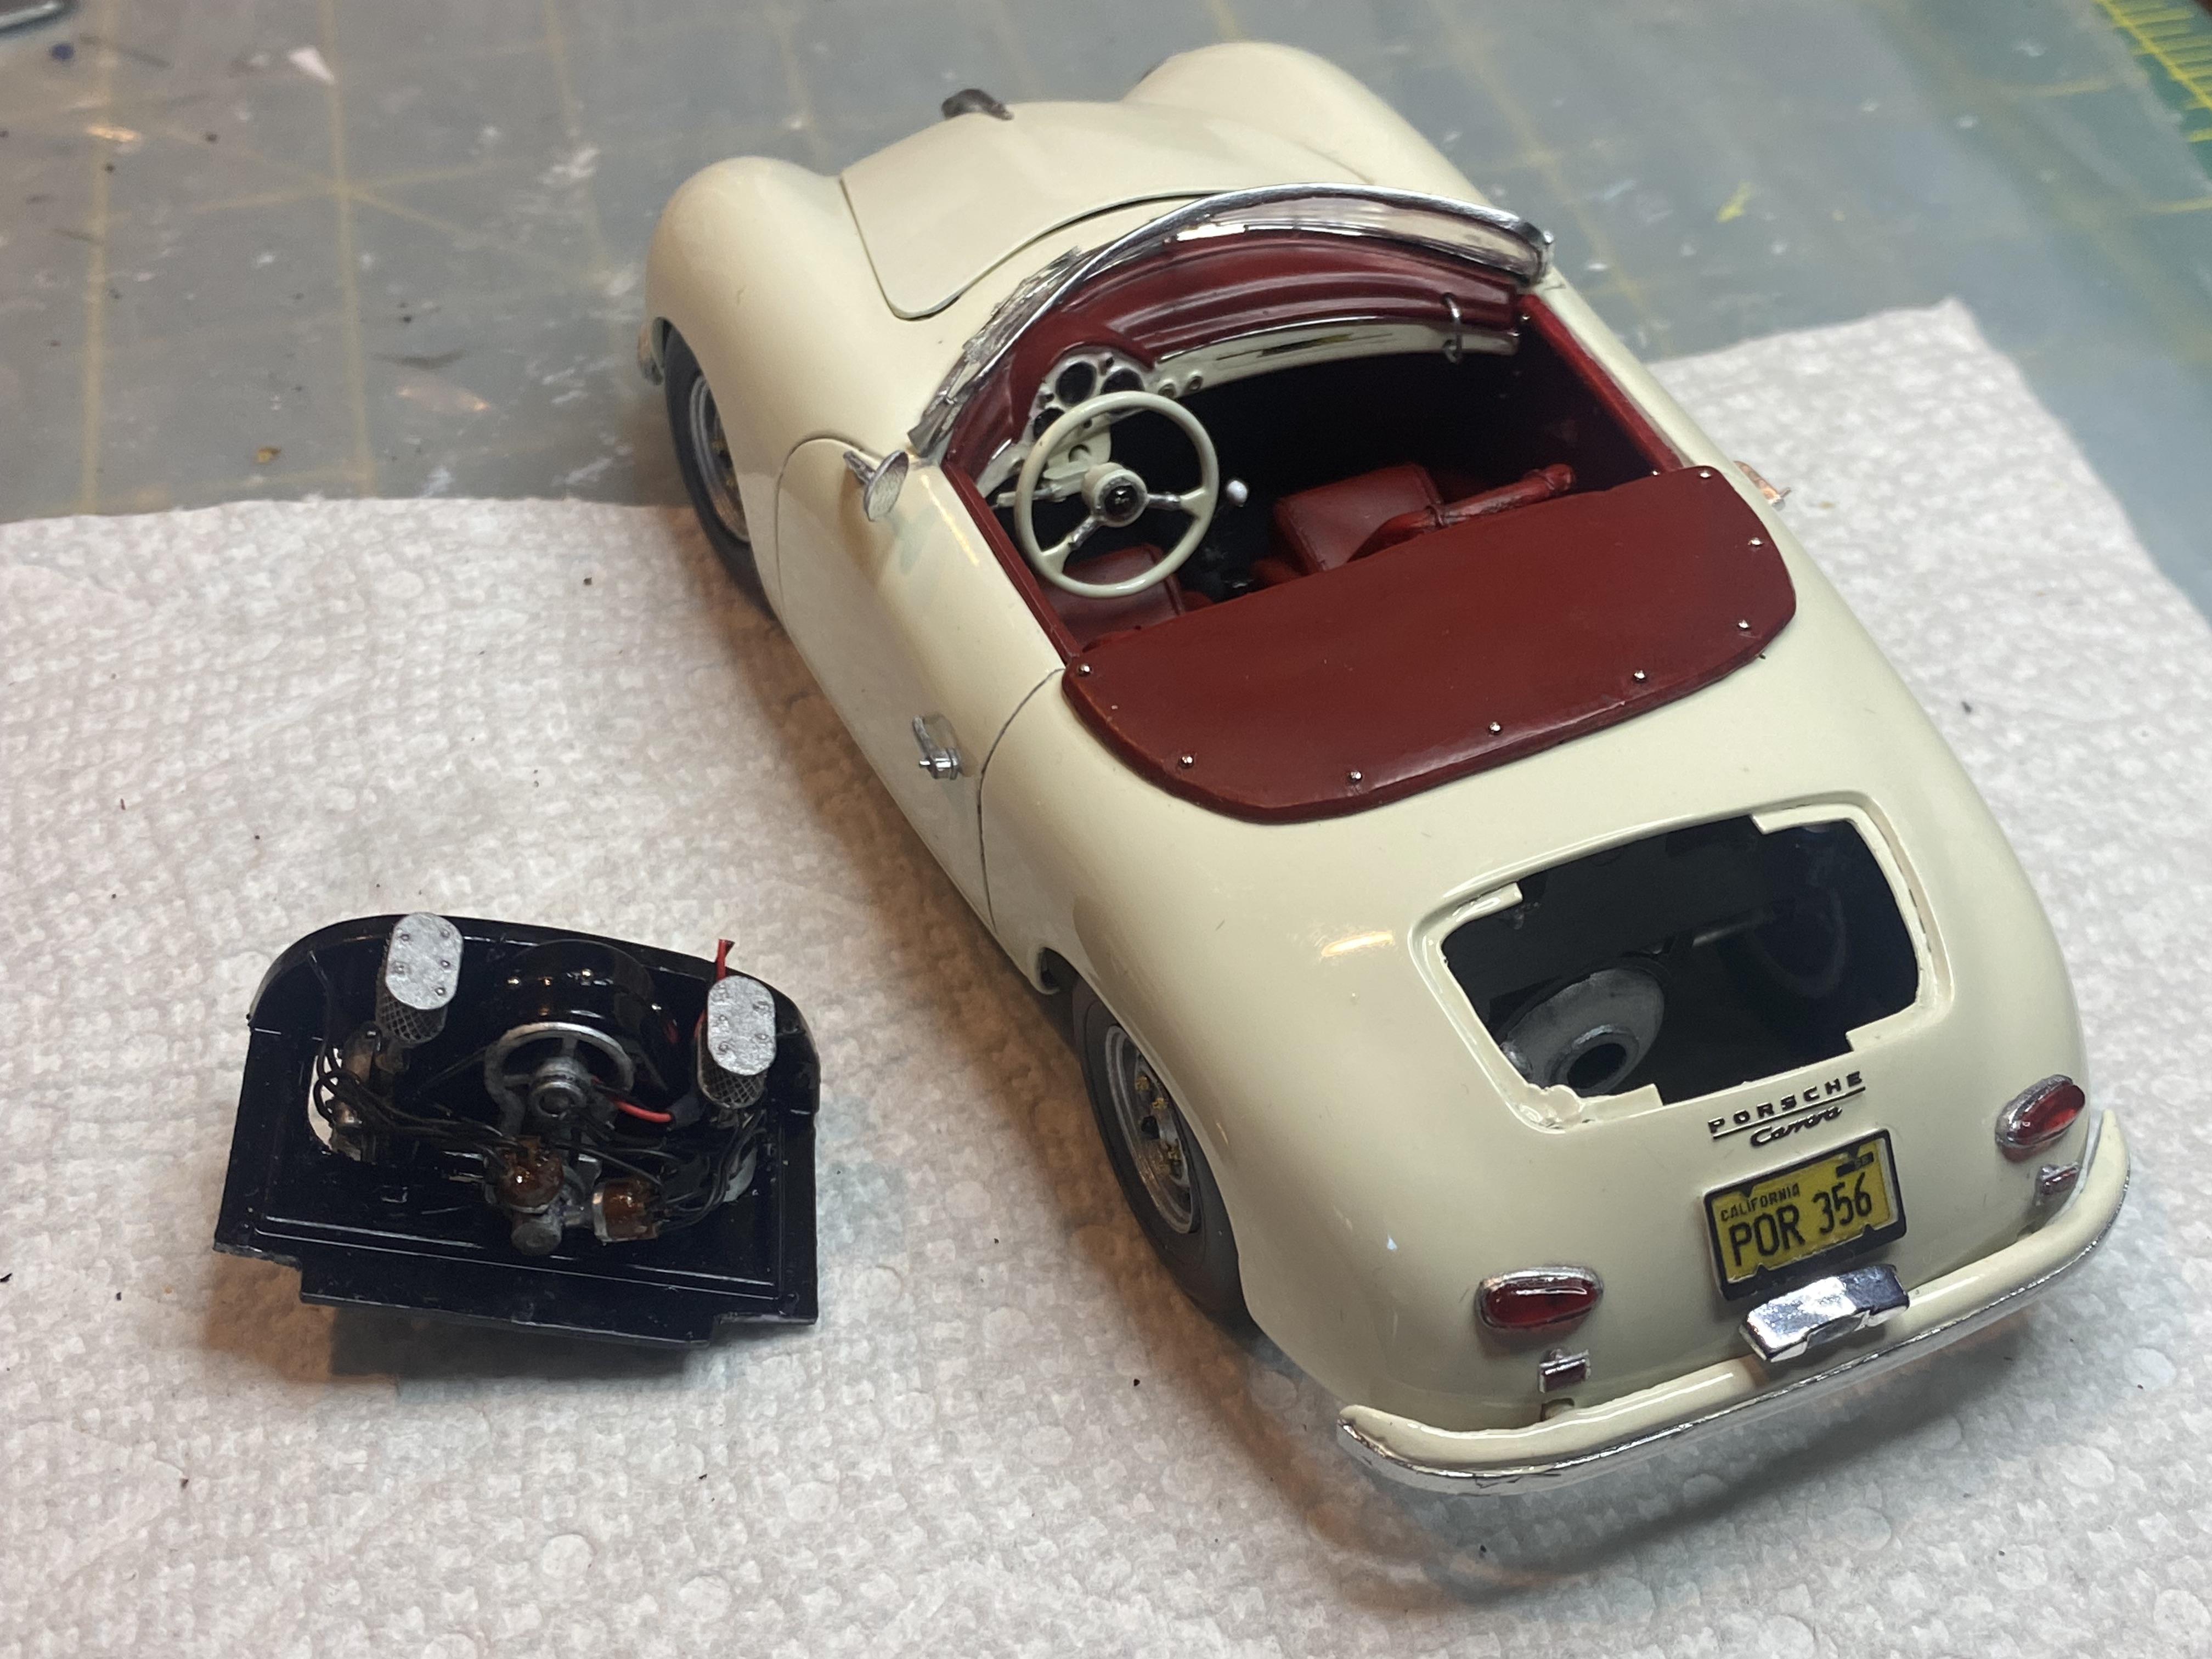
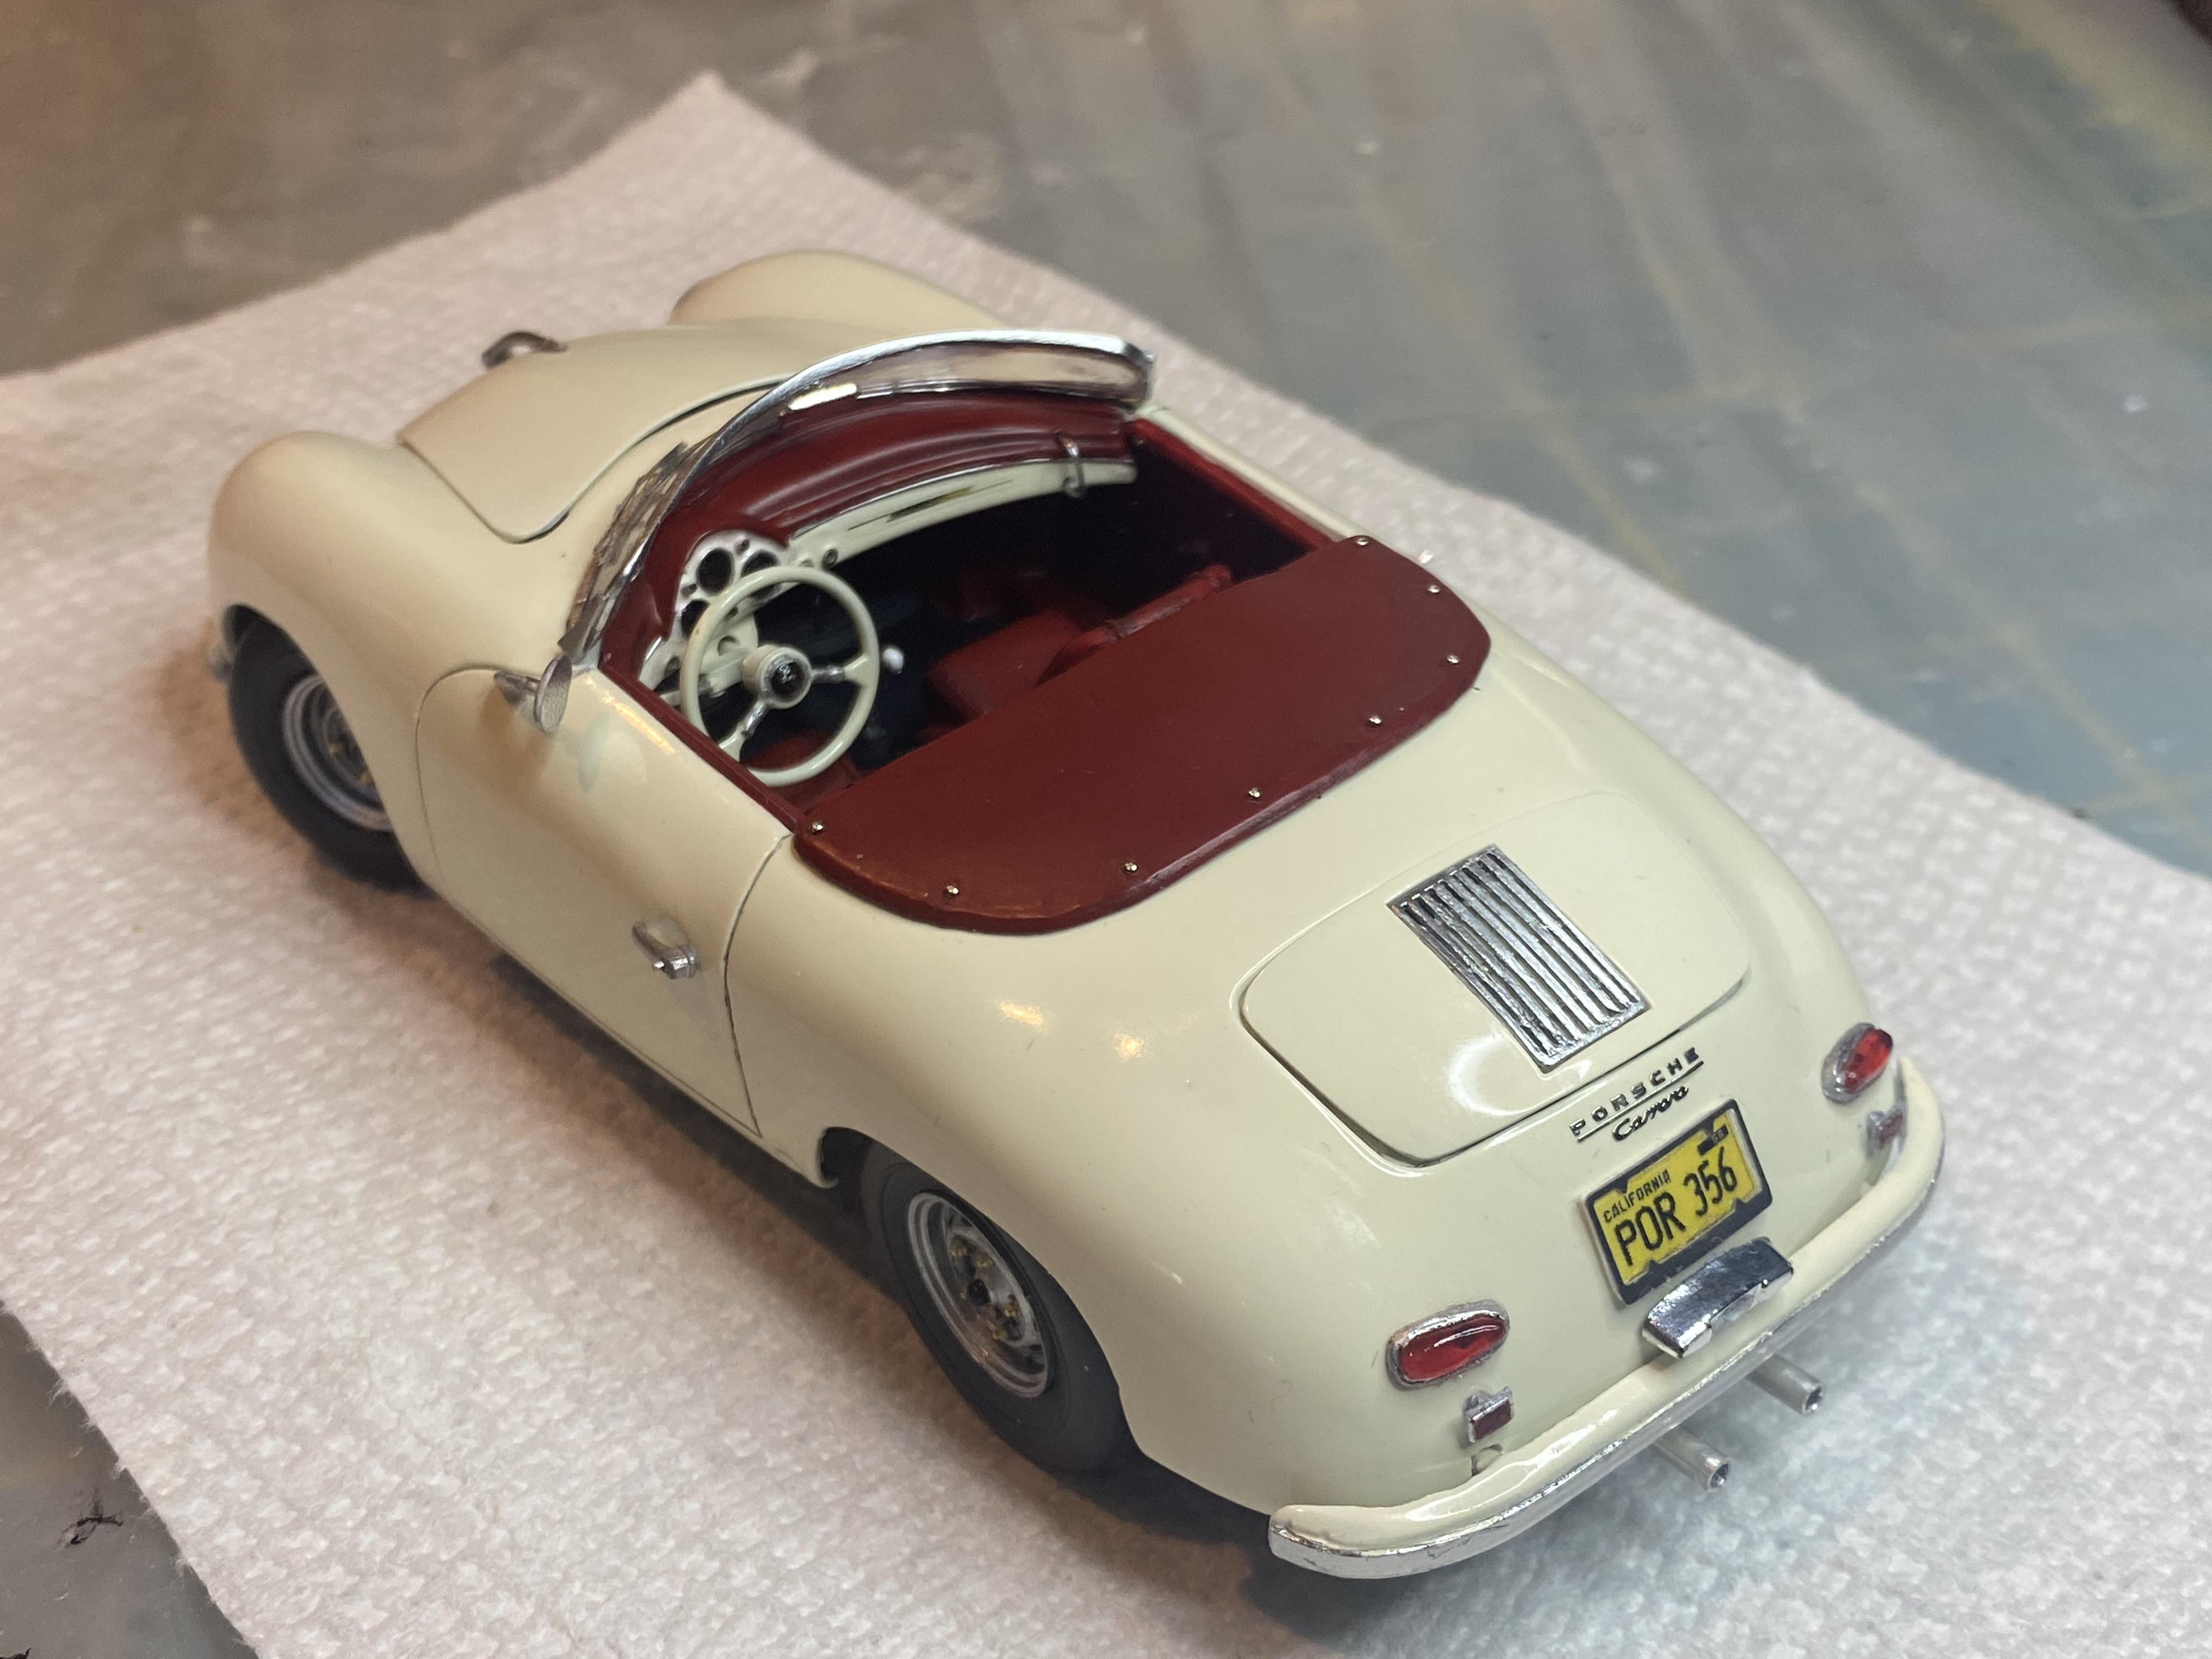
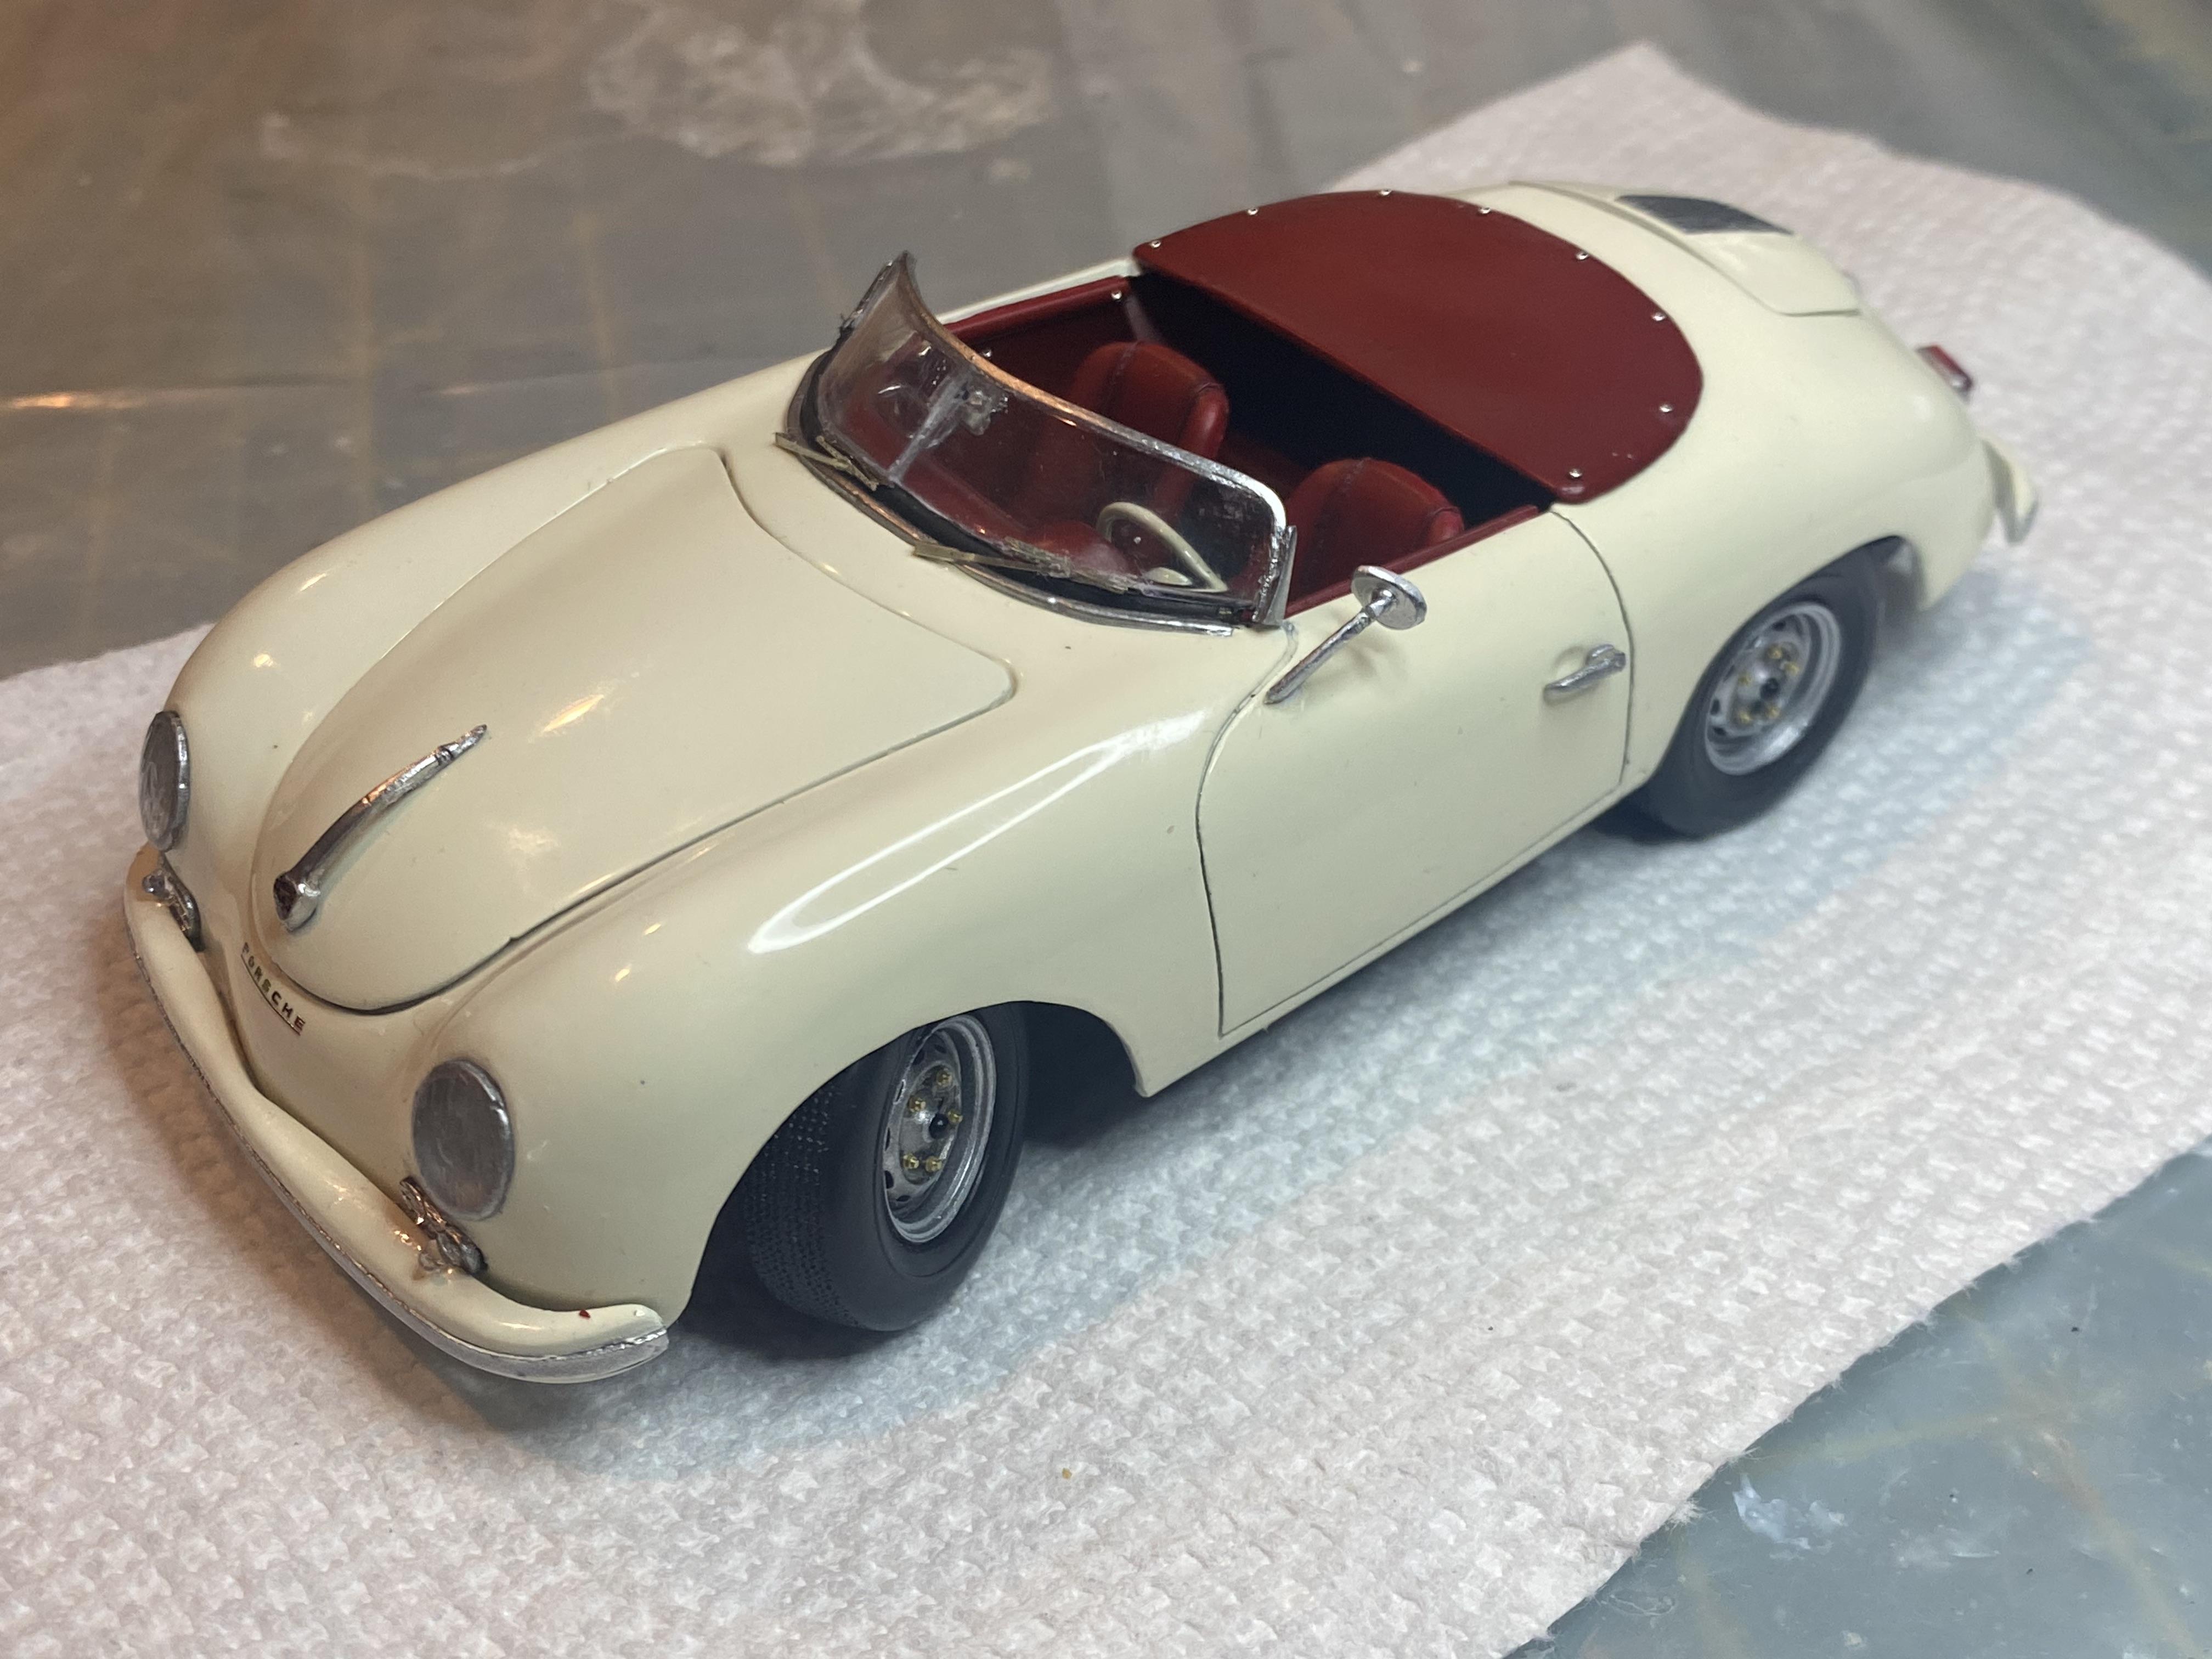
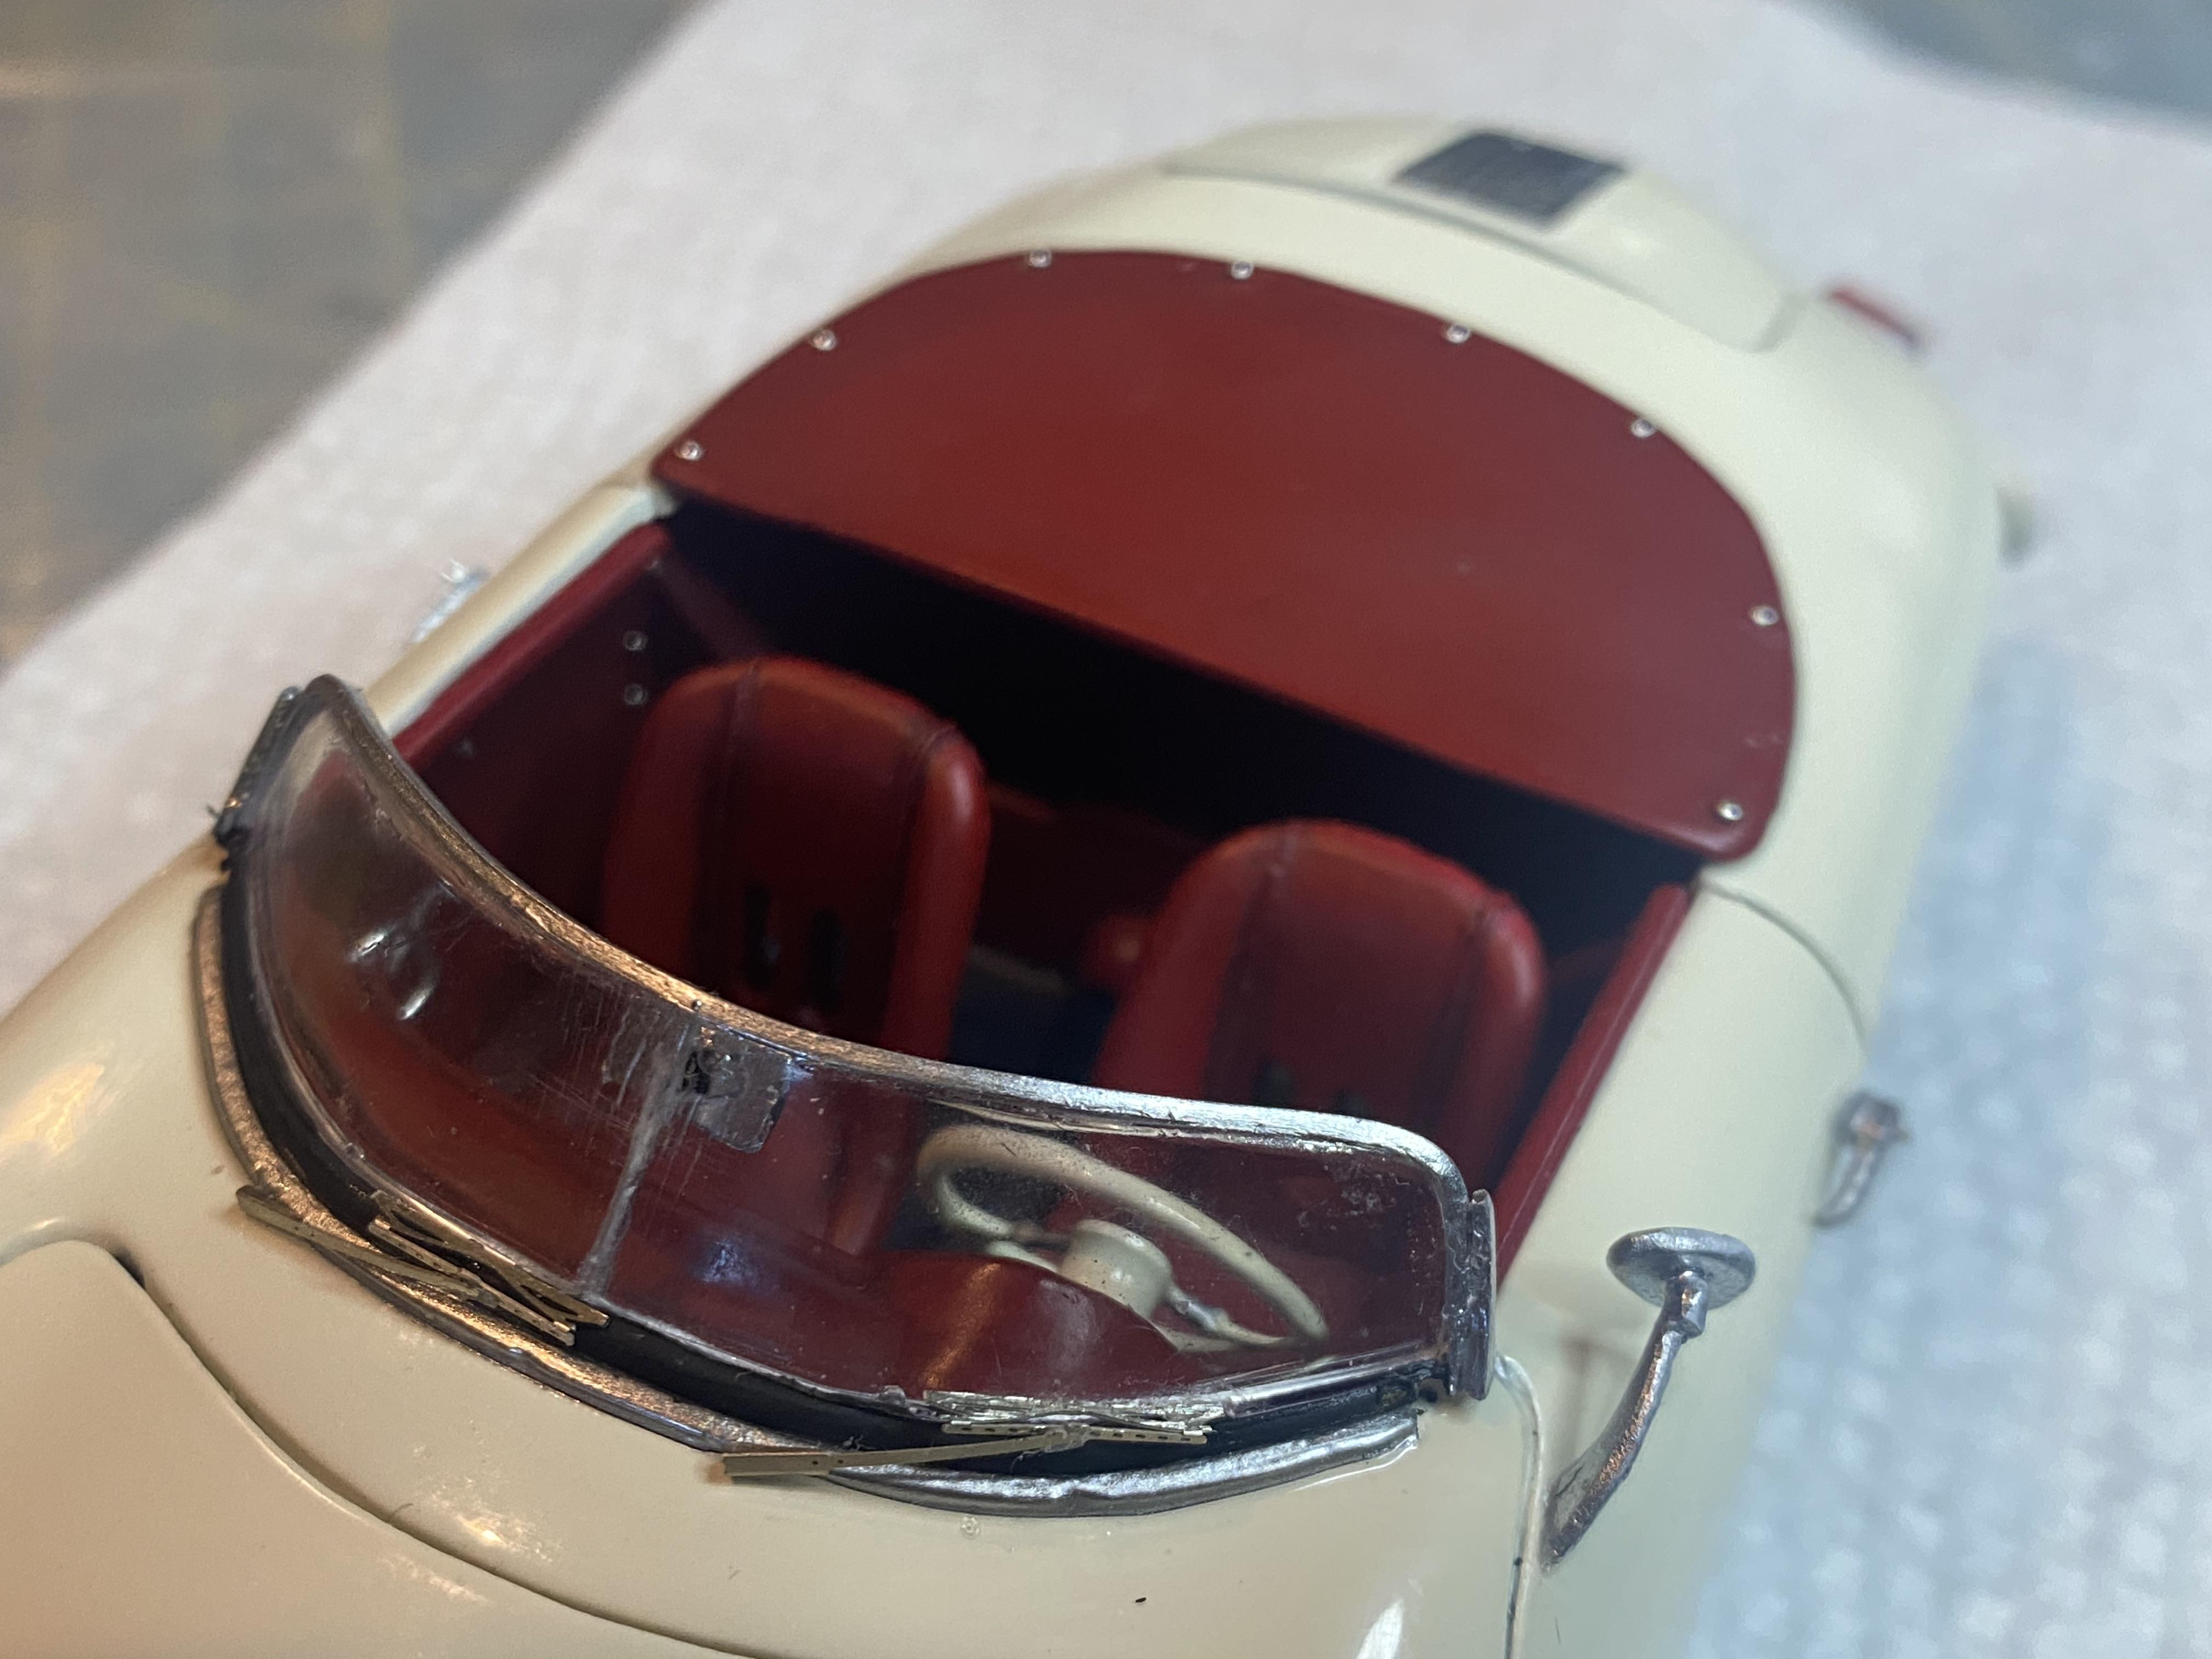
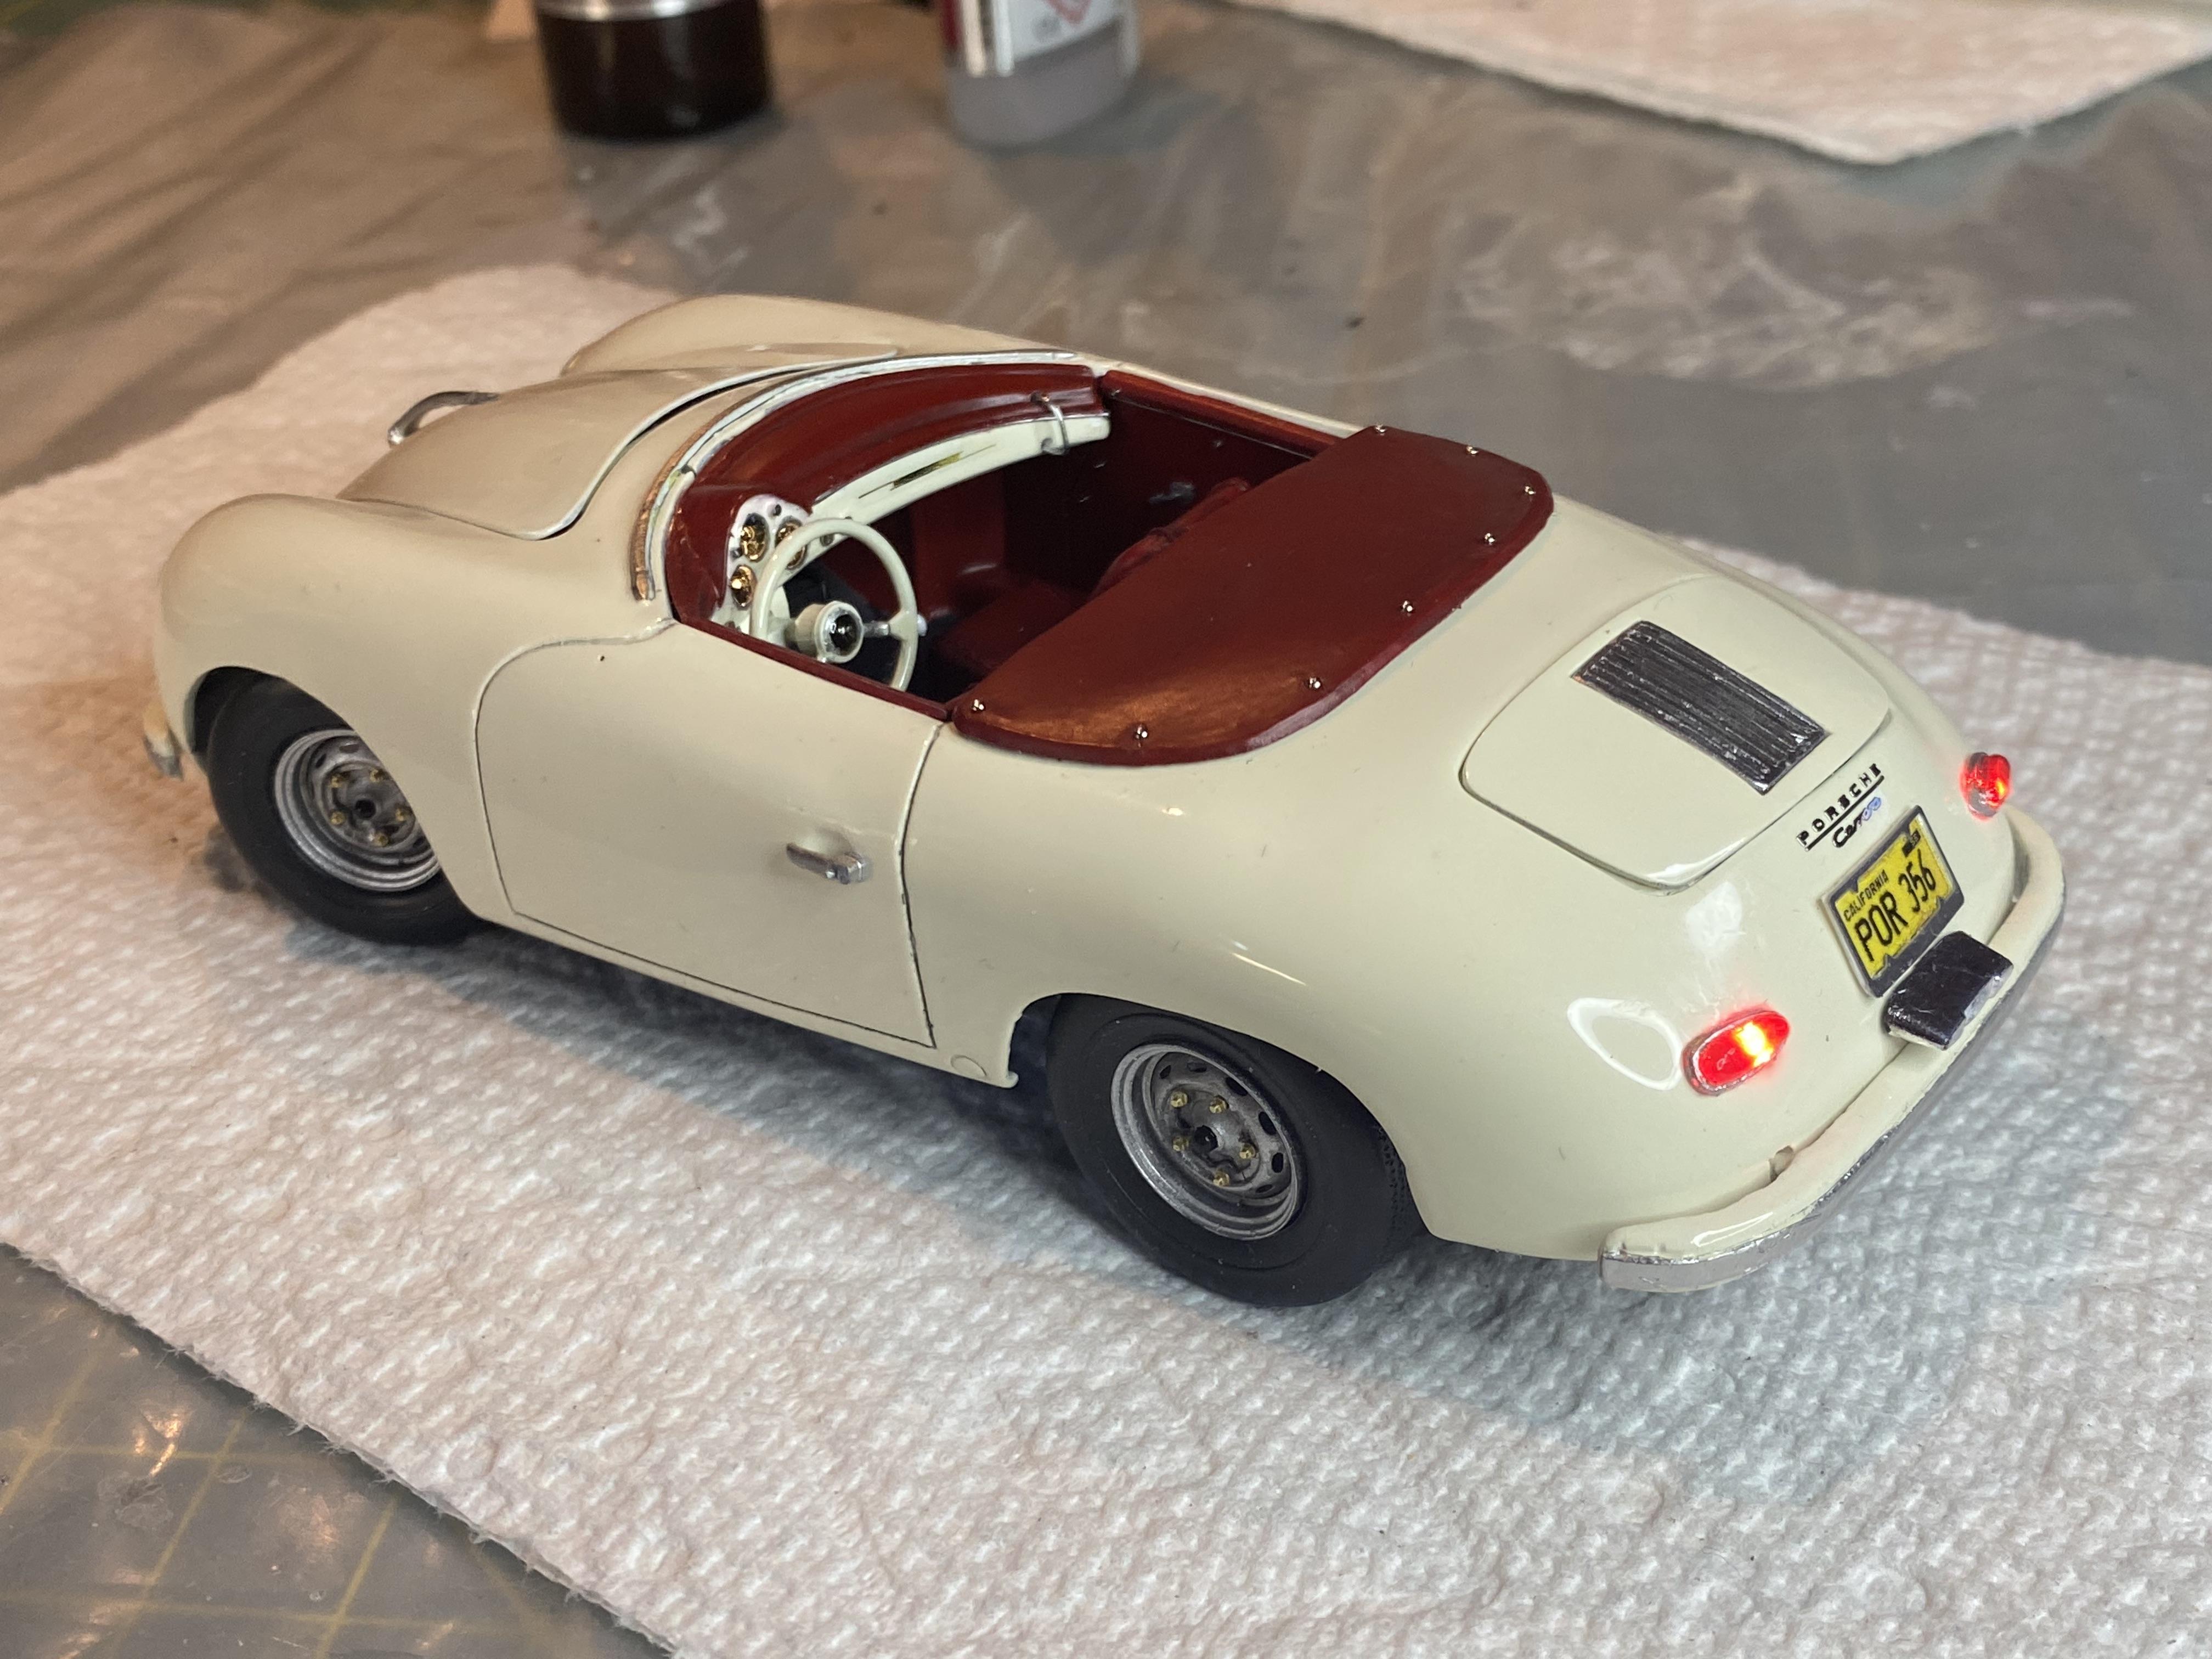
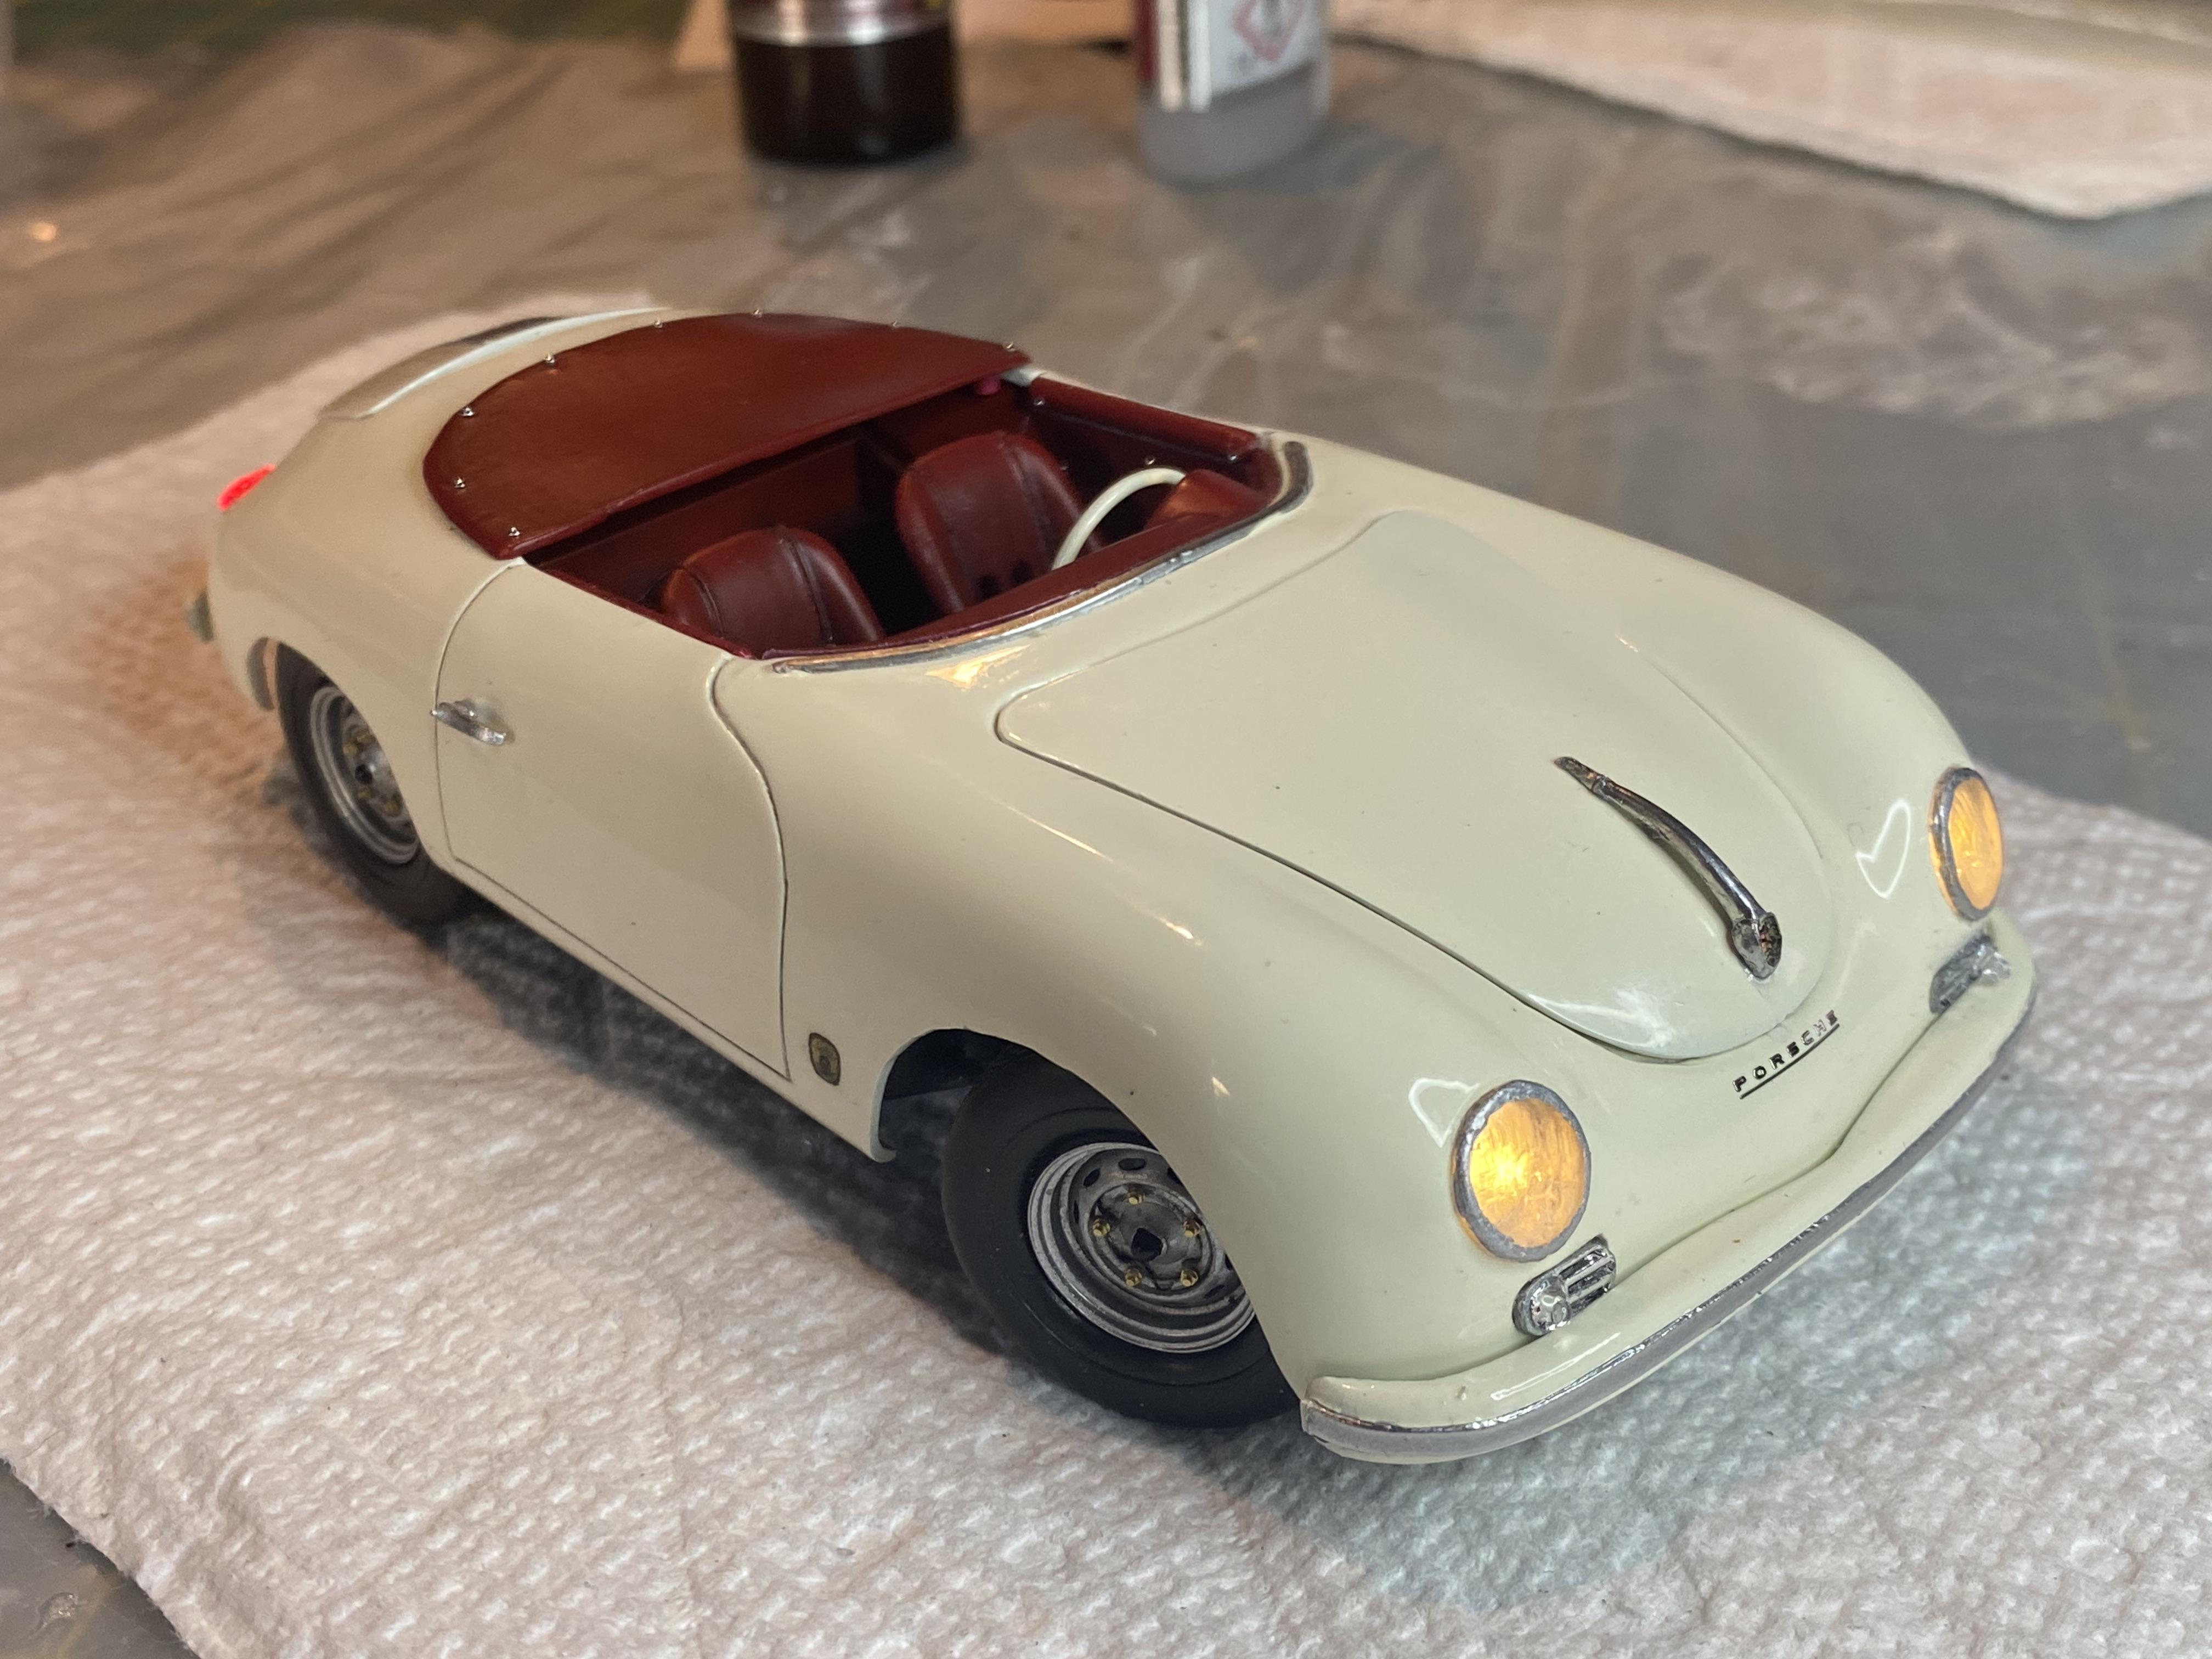
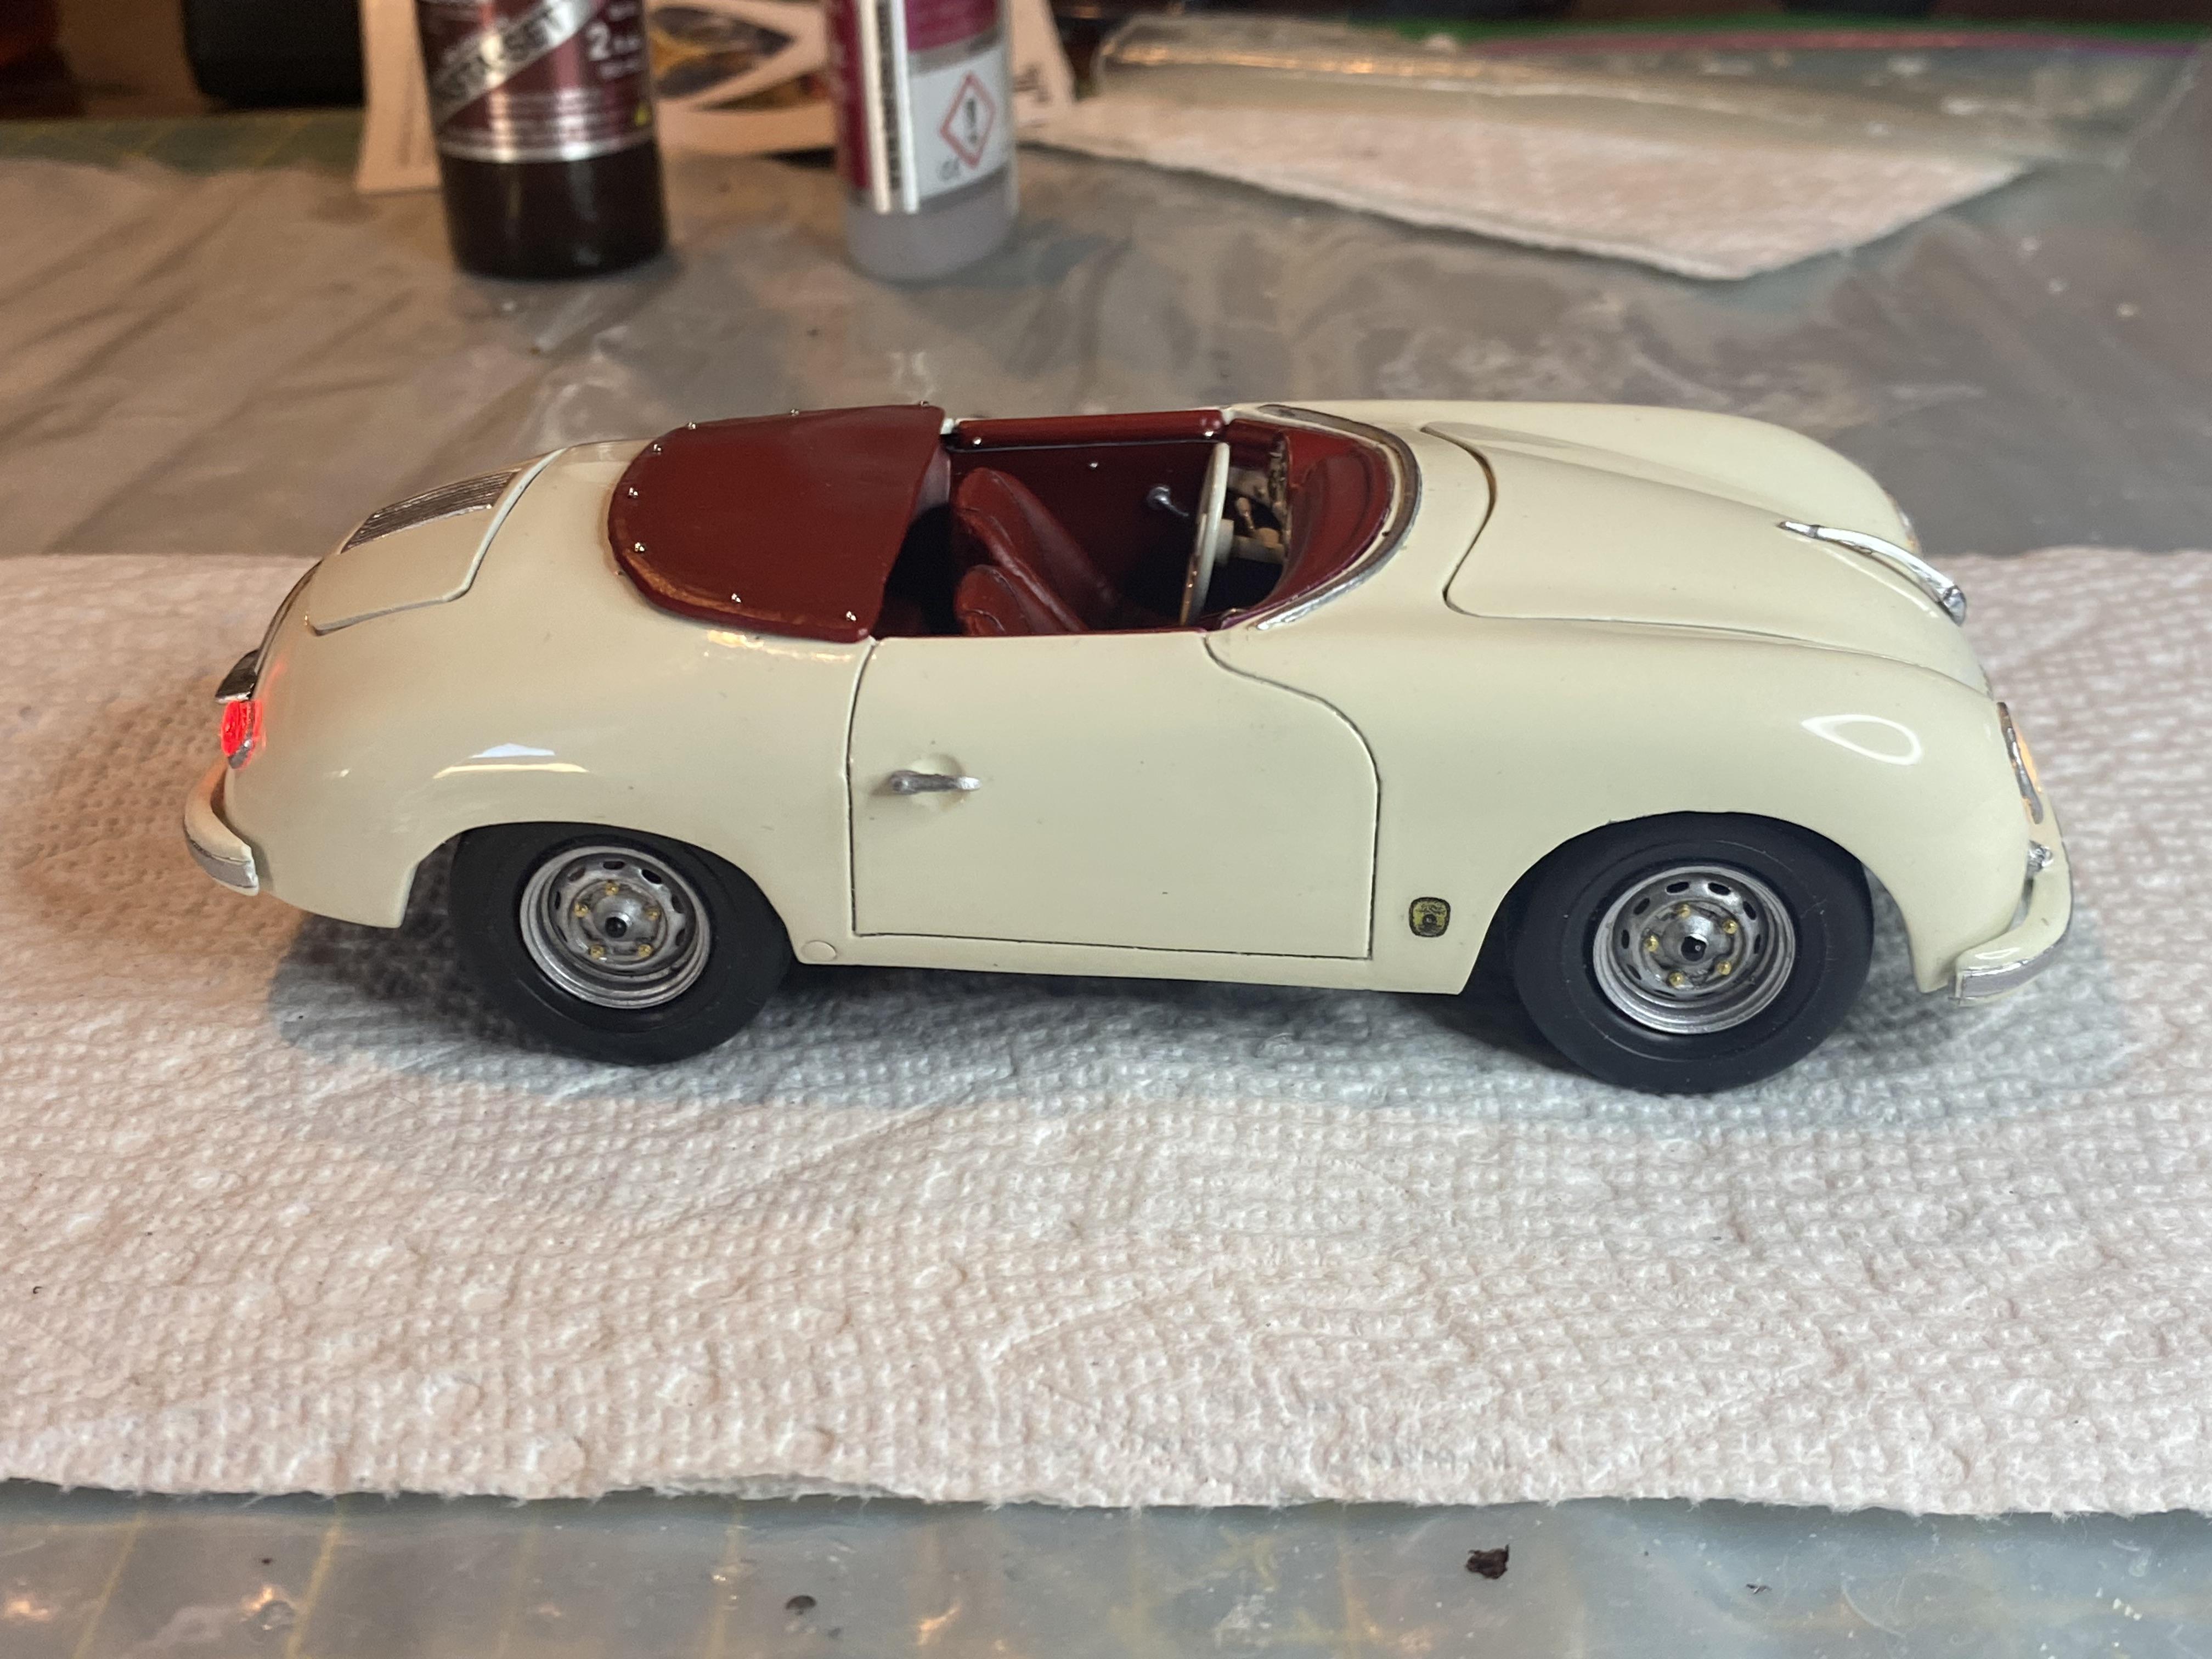
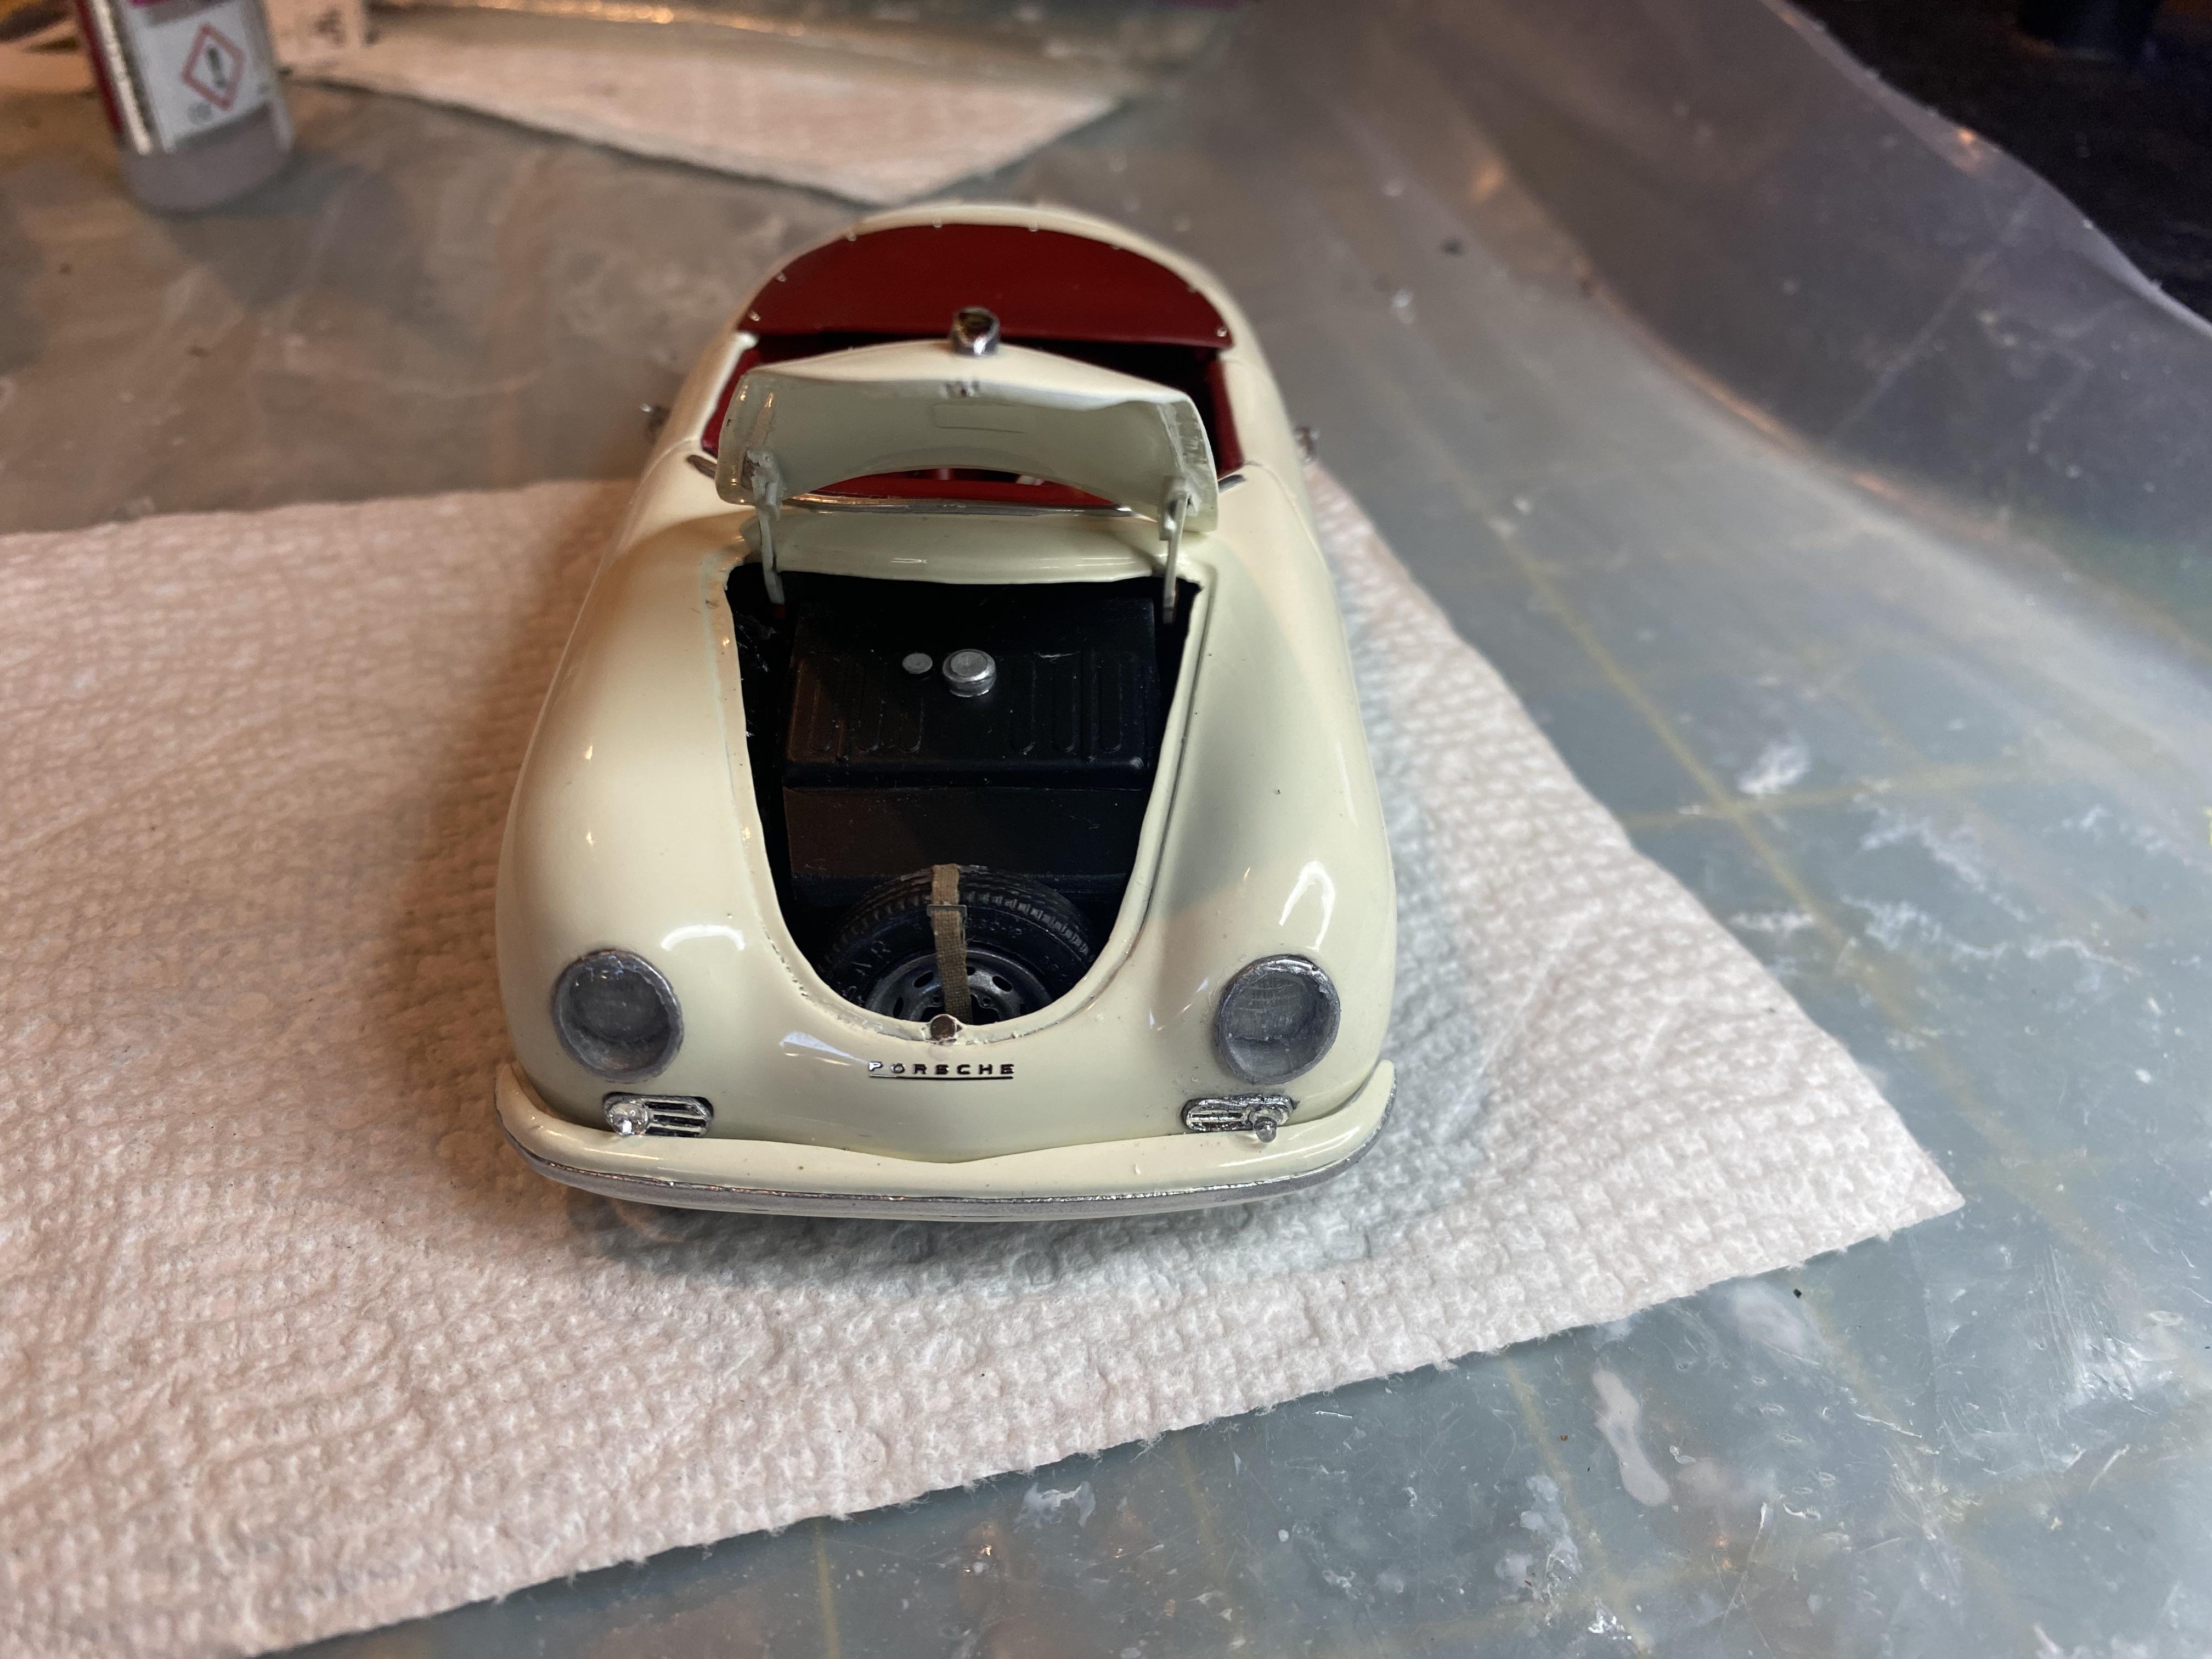
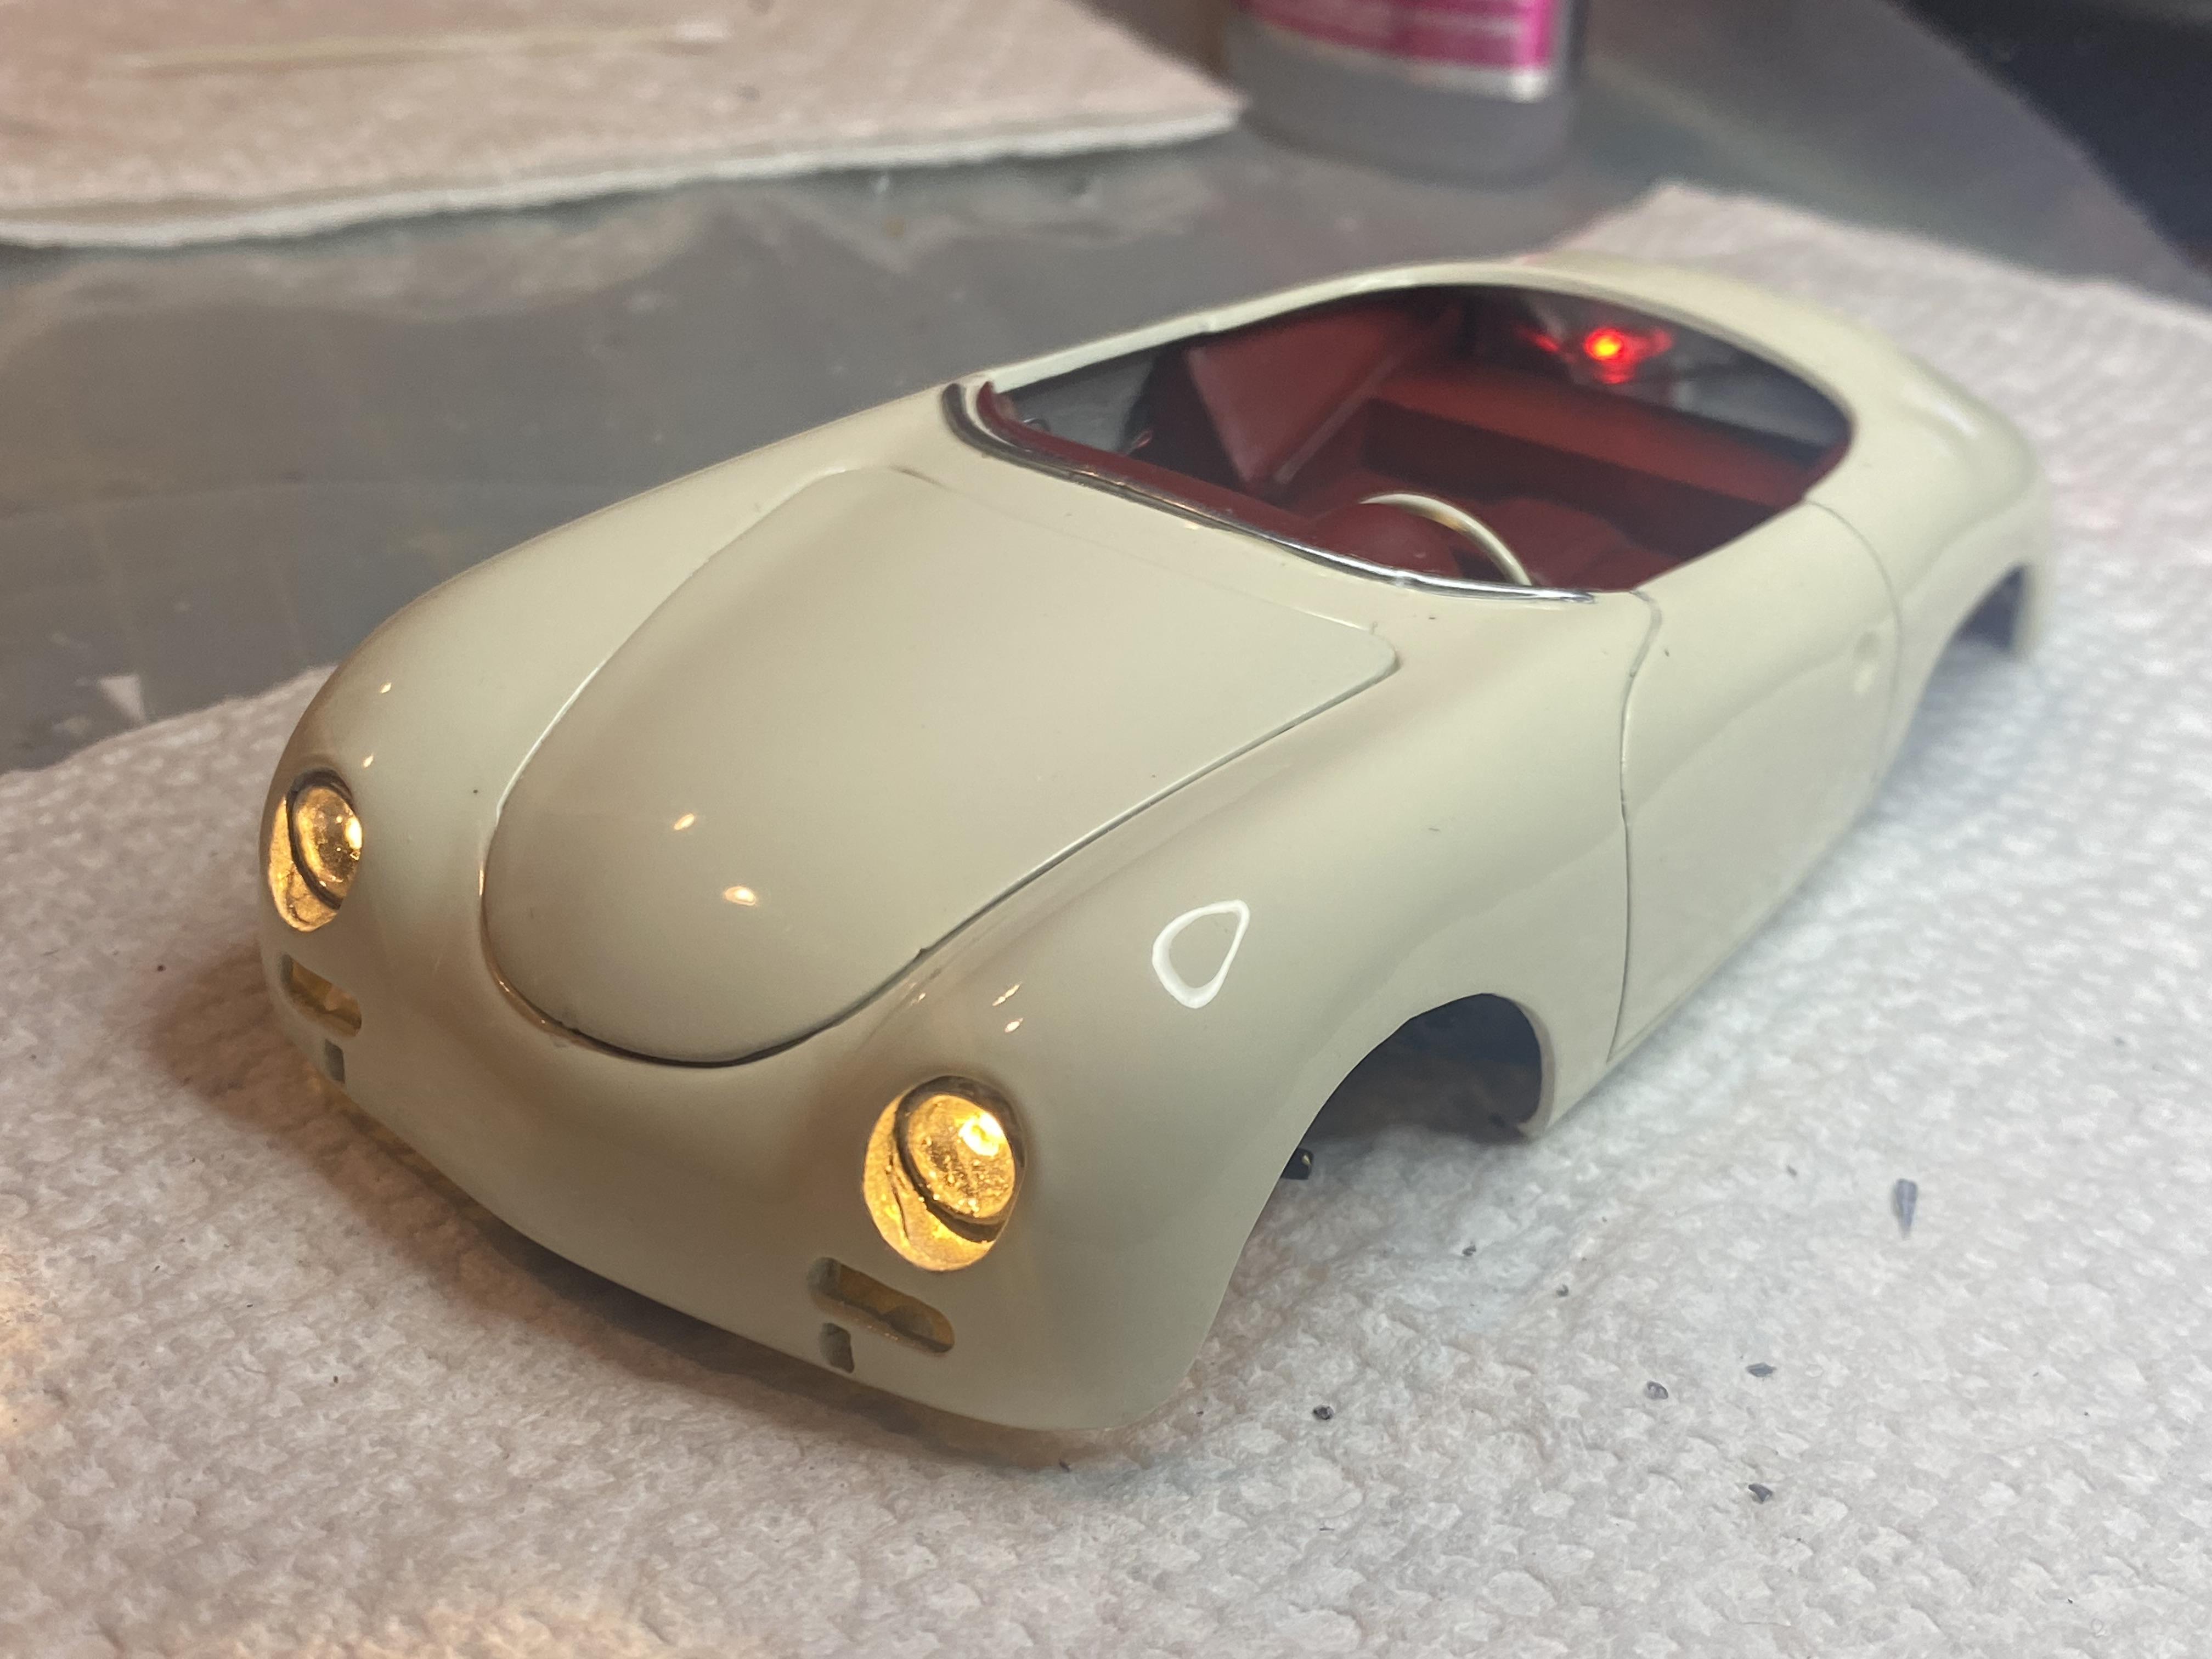
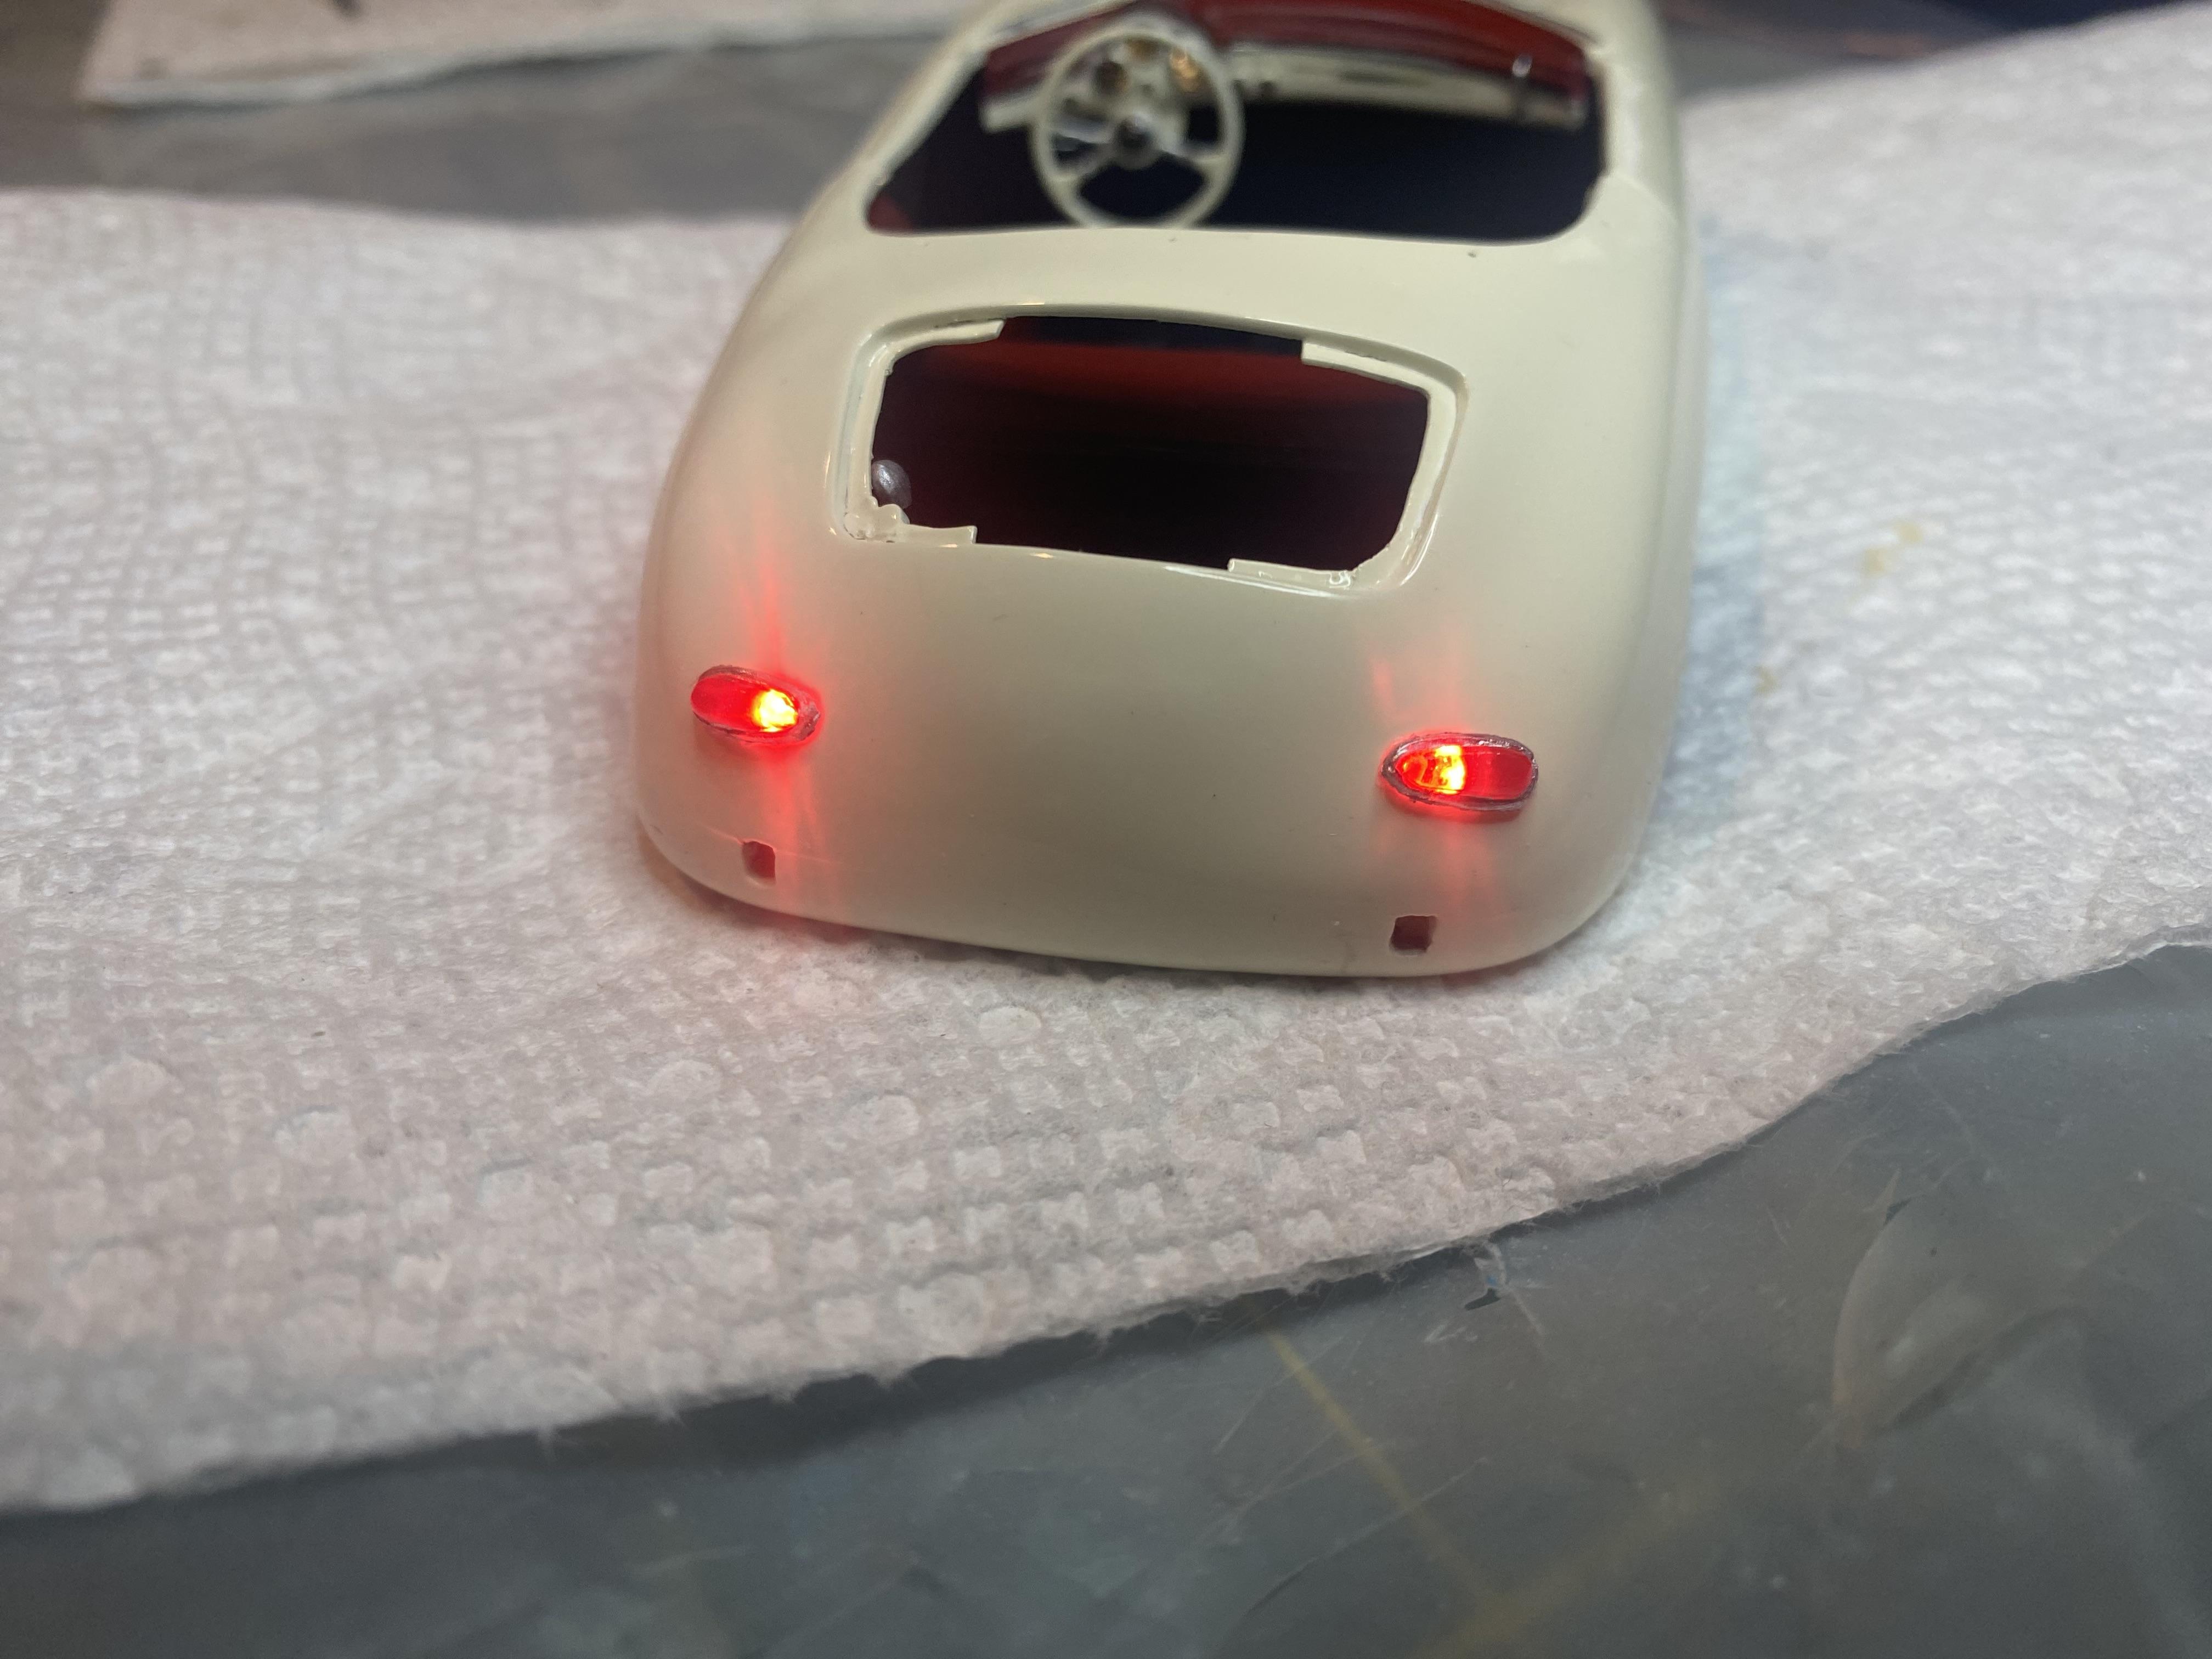
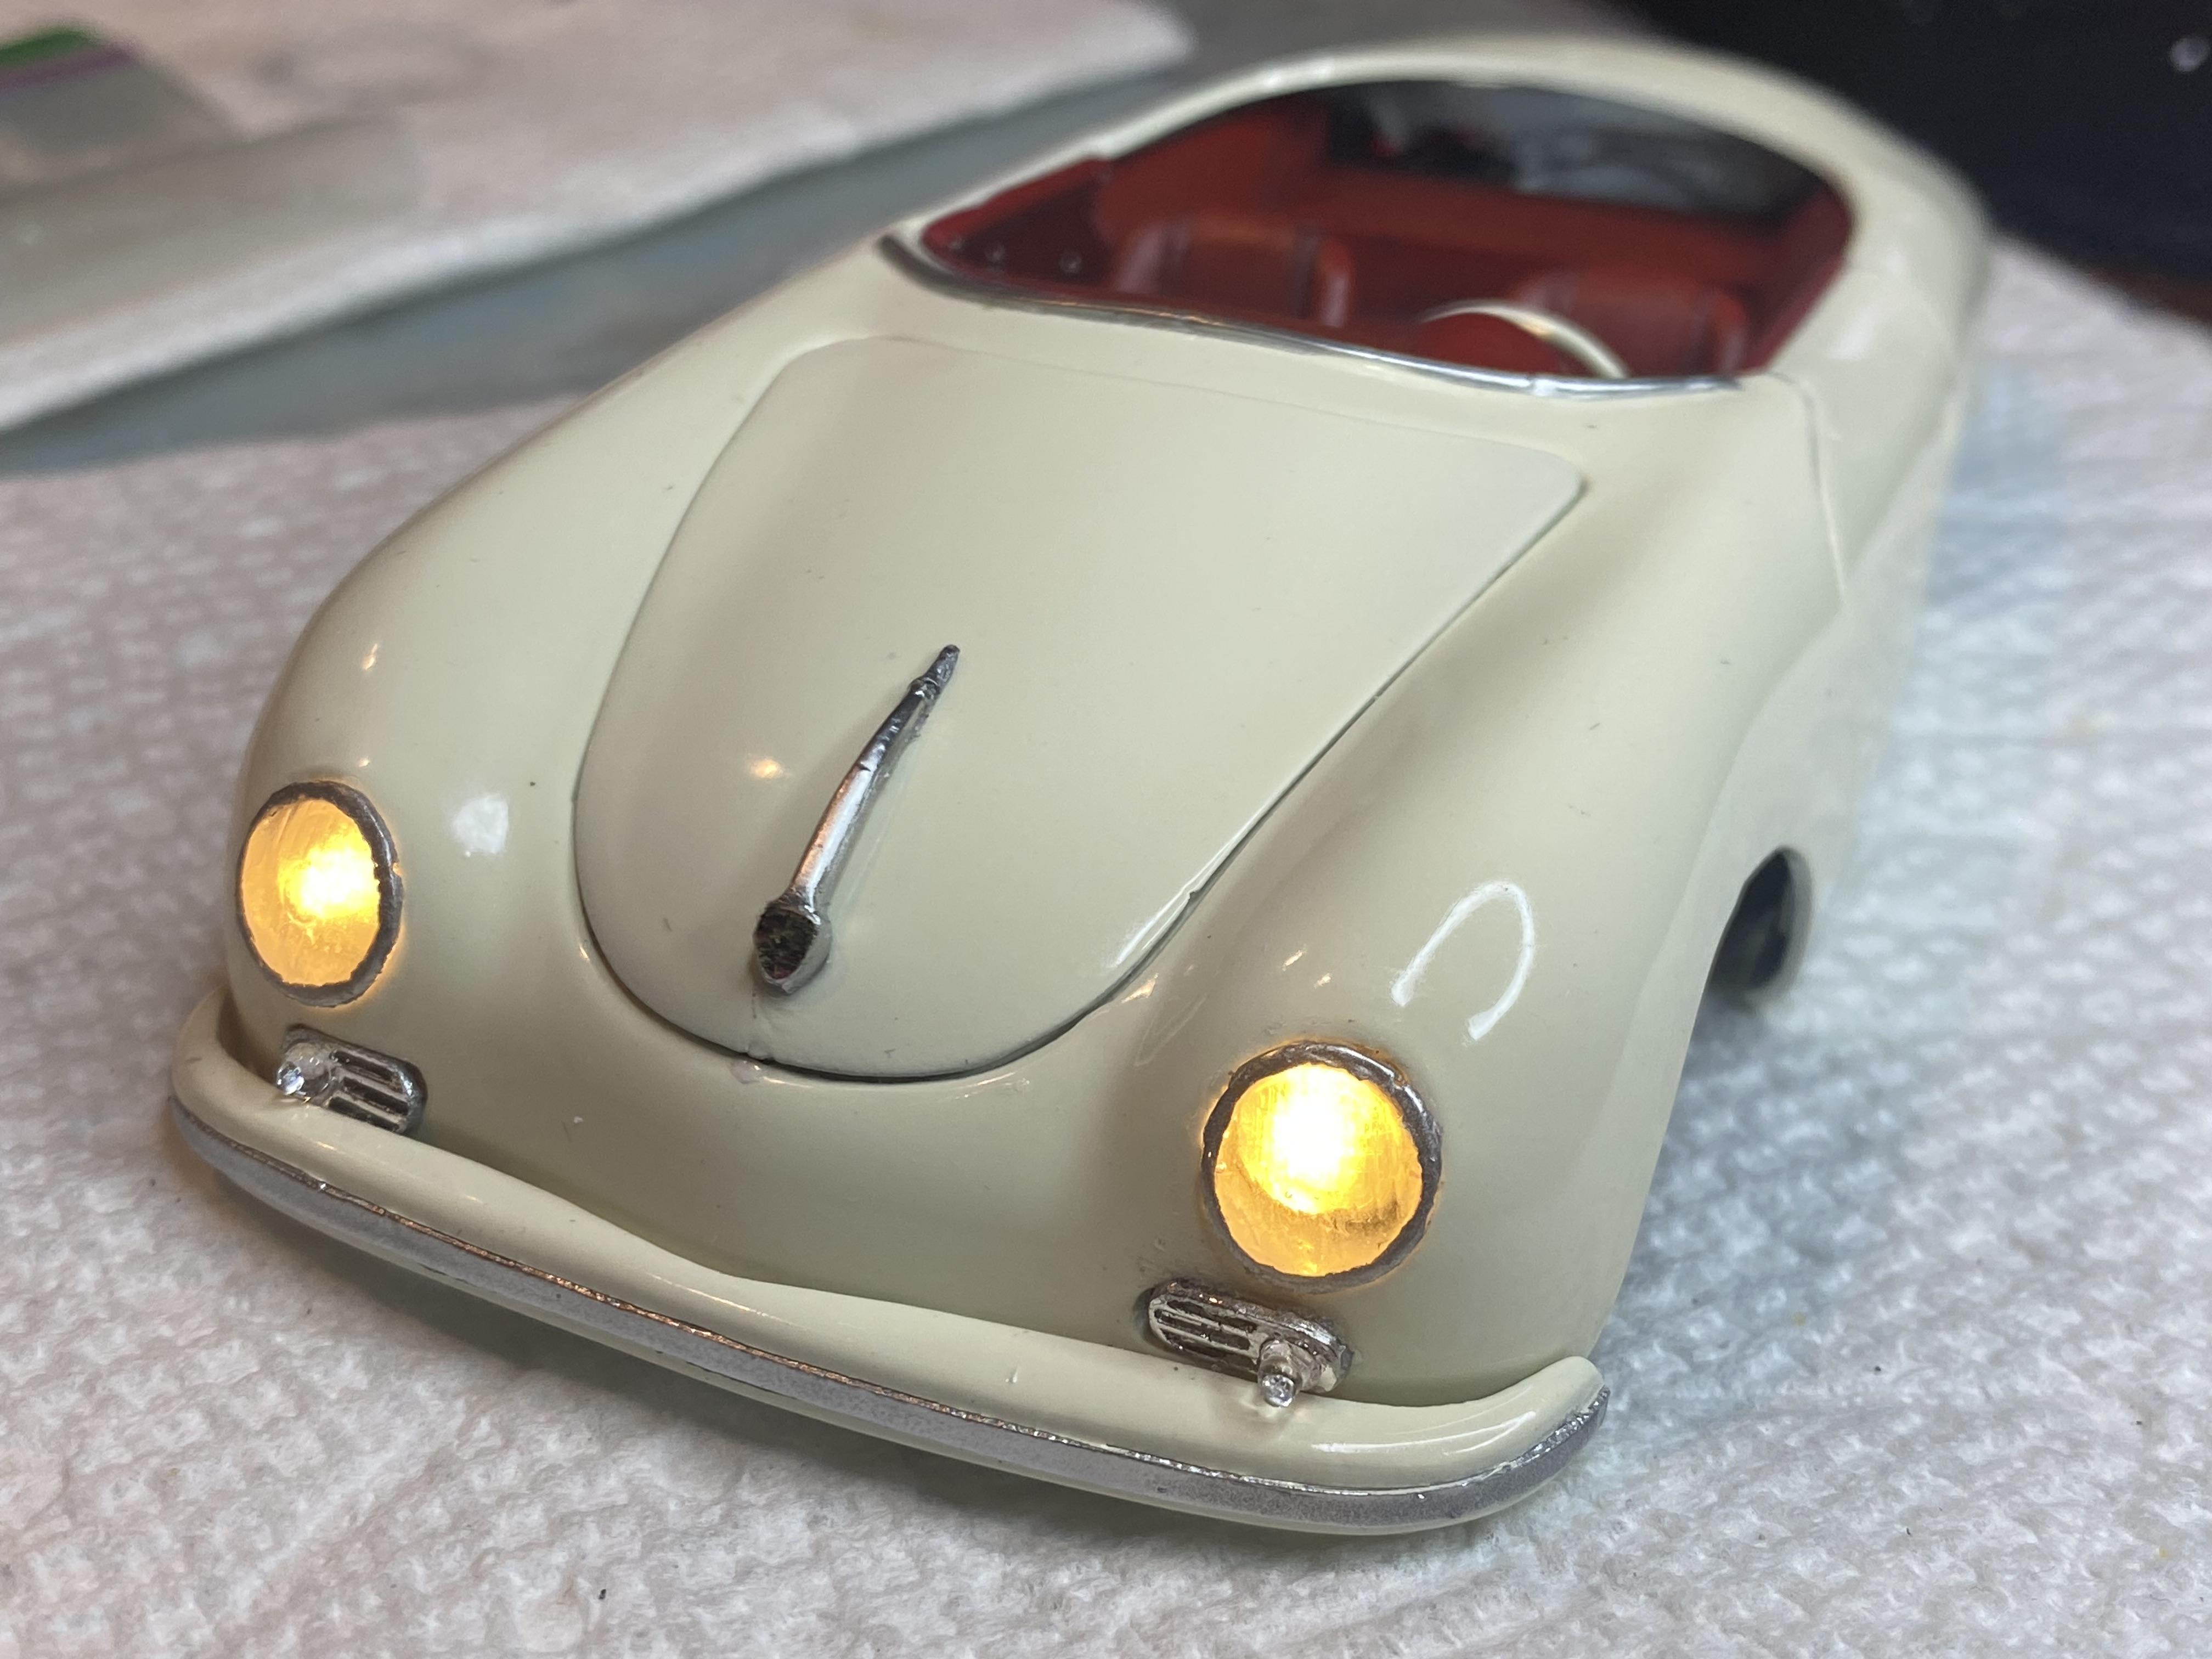
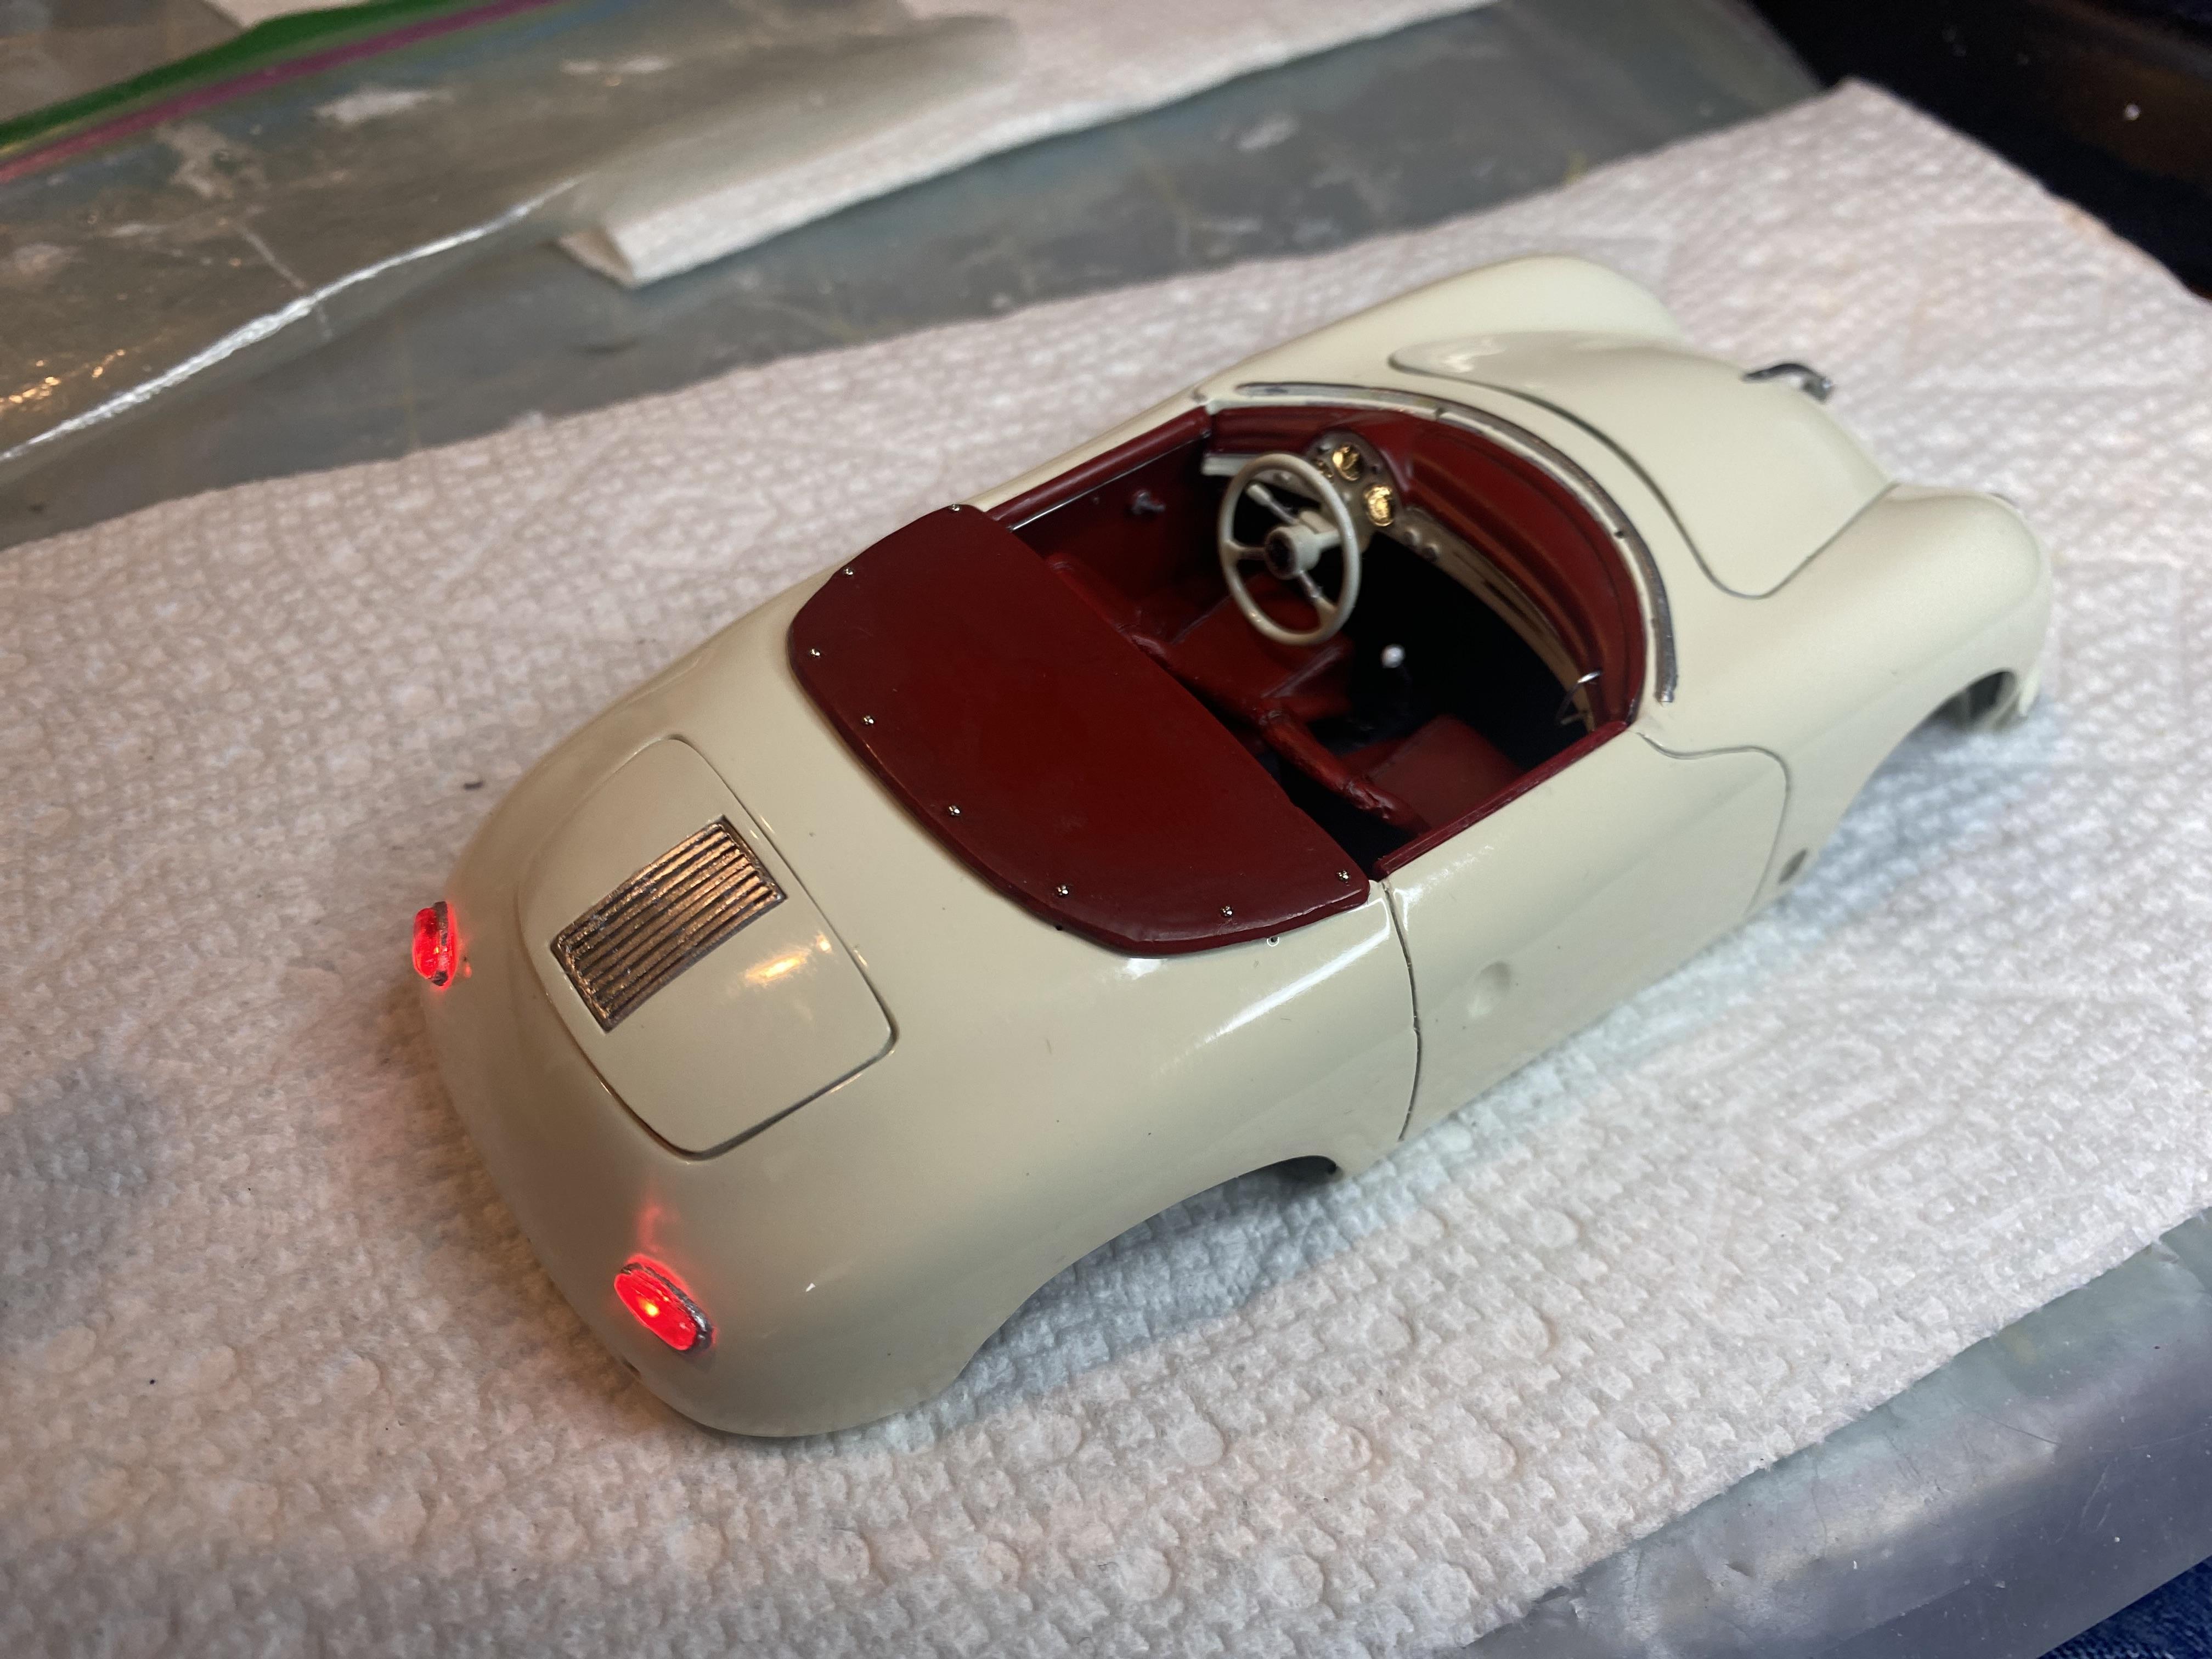
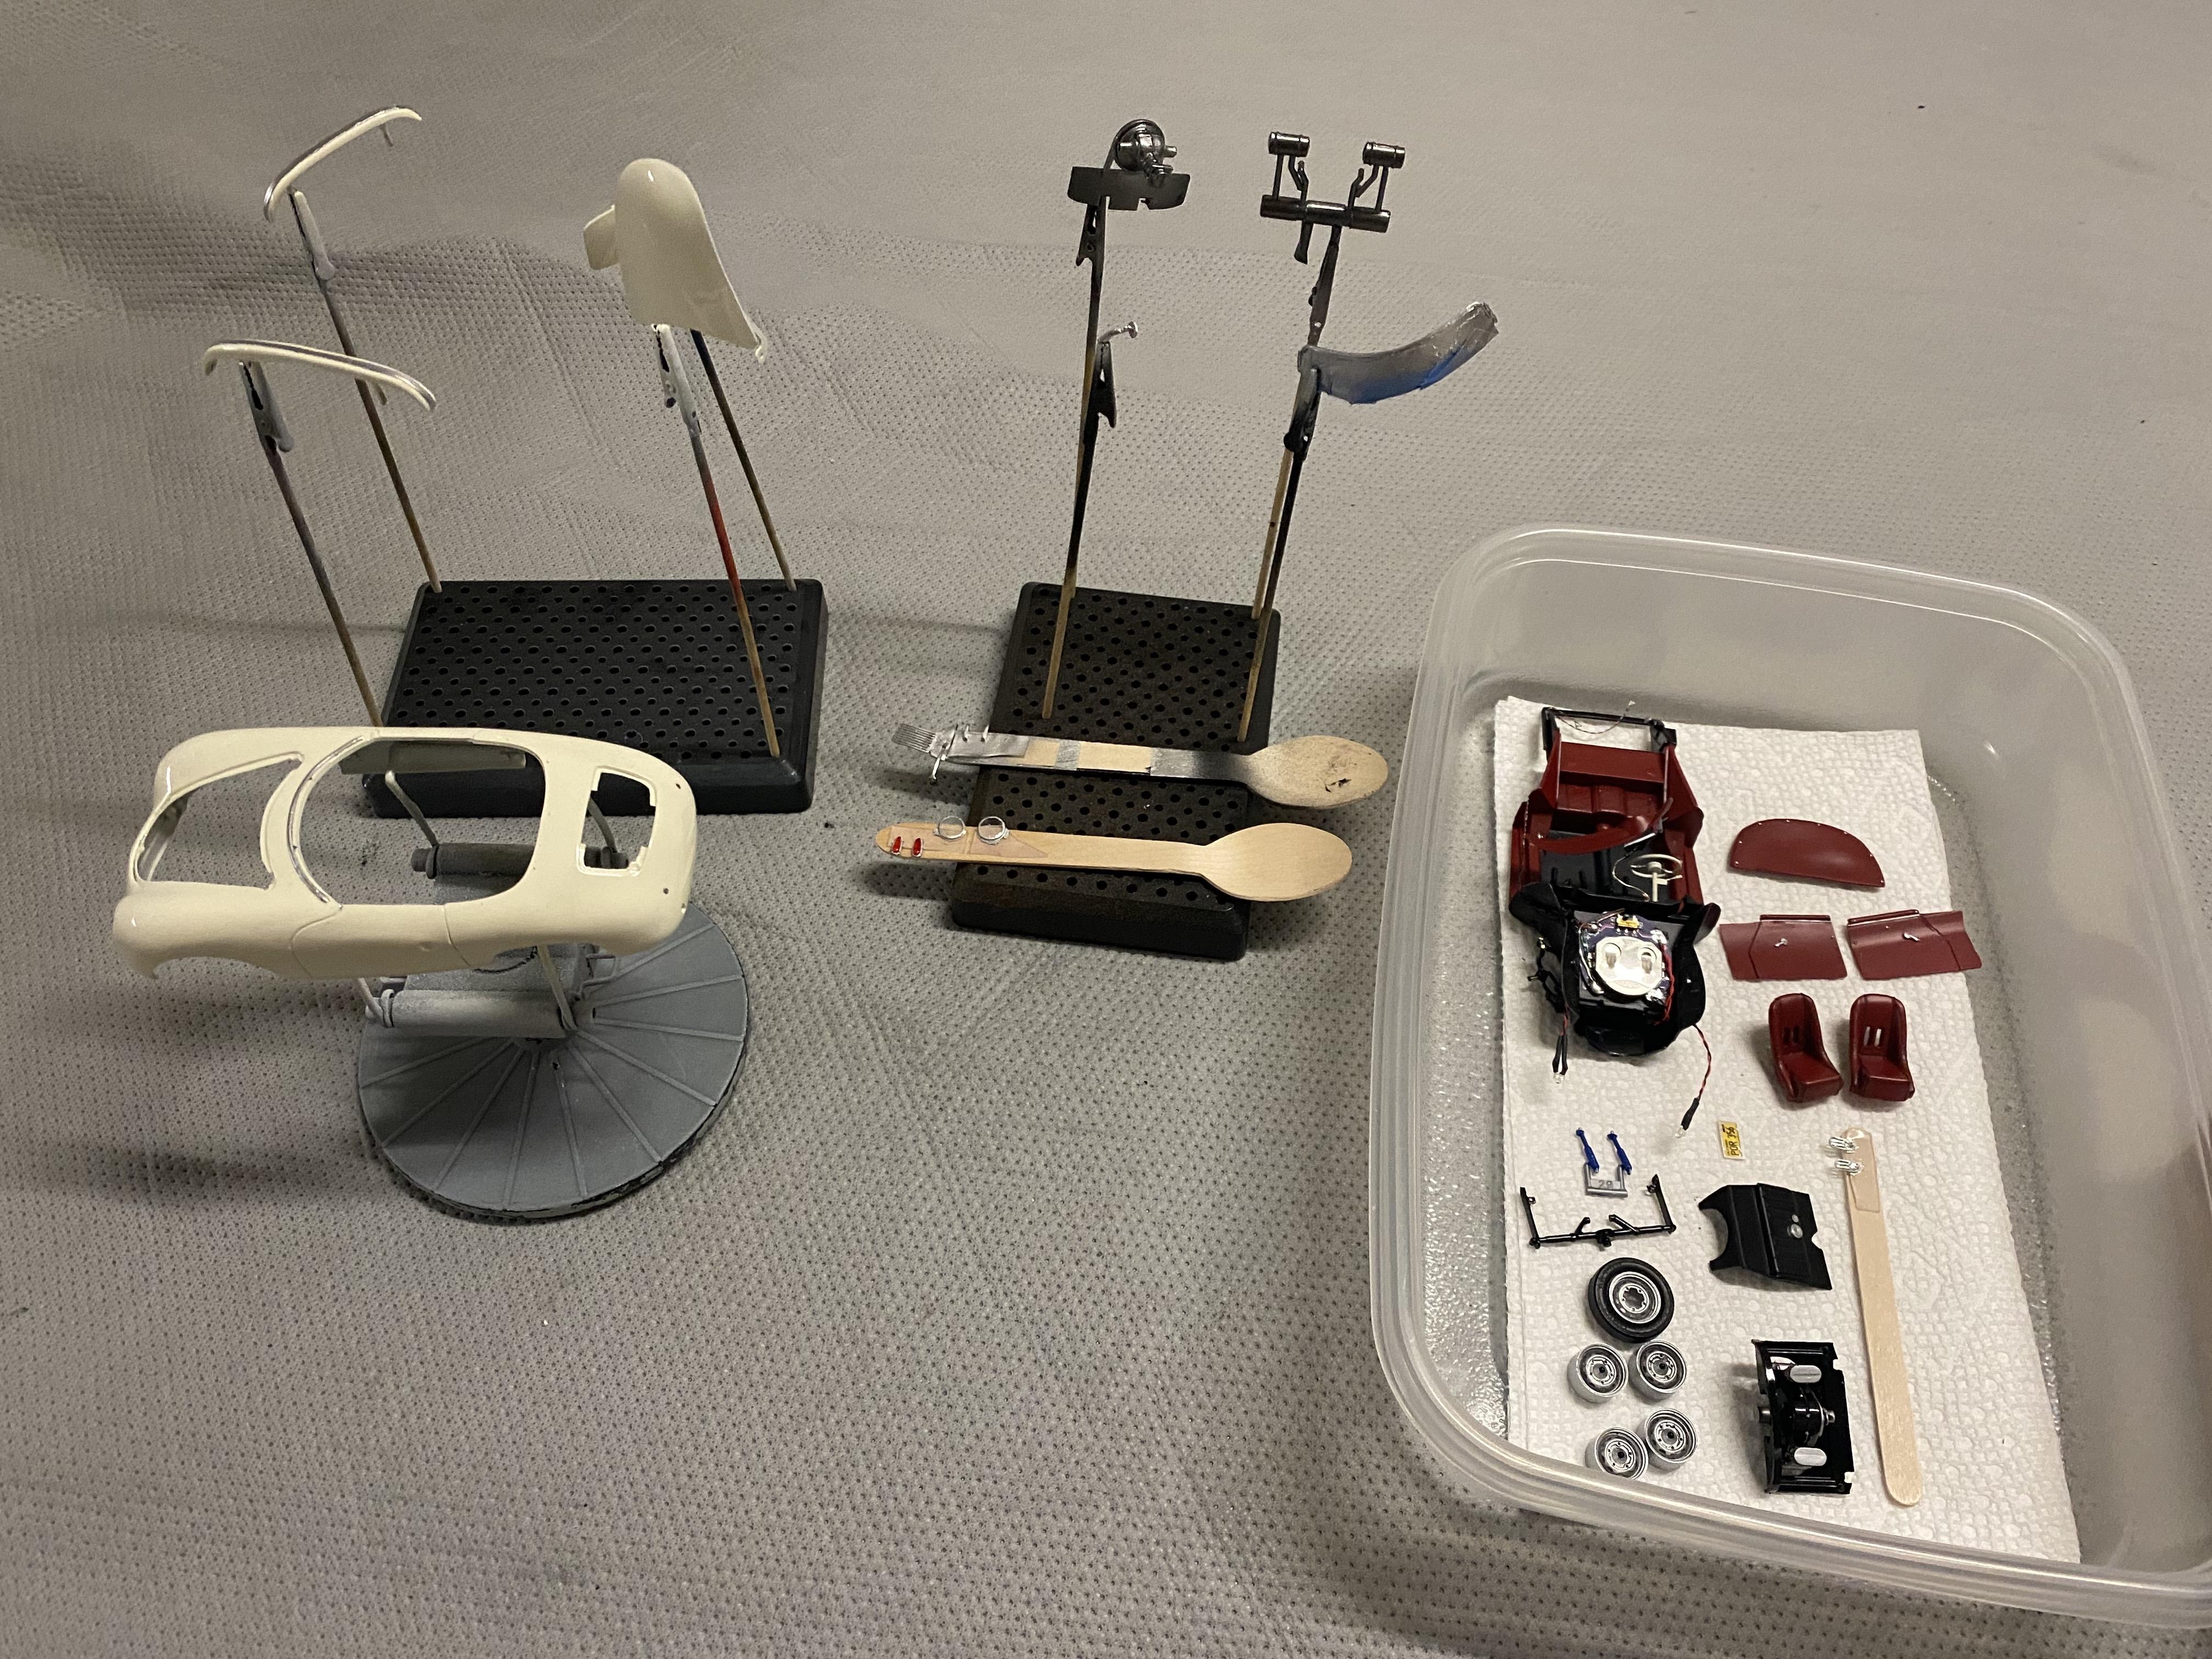
First build complete for 2025 a 1957 Porsche 356 Carrera Speedster GS-GT. I had posted in progress a short while ago but completed today. I started with a Revell 1/25 Porsche Speedster kit requiring a ridiculous amount fabrication and scratch building. Considering what I started with I am pretty happy with the final results. All of my builds include LED lighting for headlights, taillights and gauge lights. I have also started making my builds include poseable steering meaning I basically had to rebuild the front suspension with brass rod to do so. In case you missed the WIP thread:
- 33 replies
-
- 13
-
-
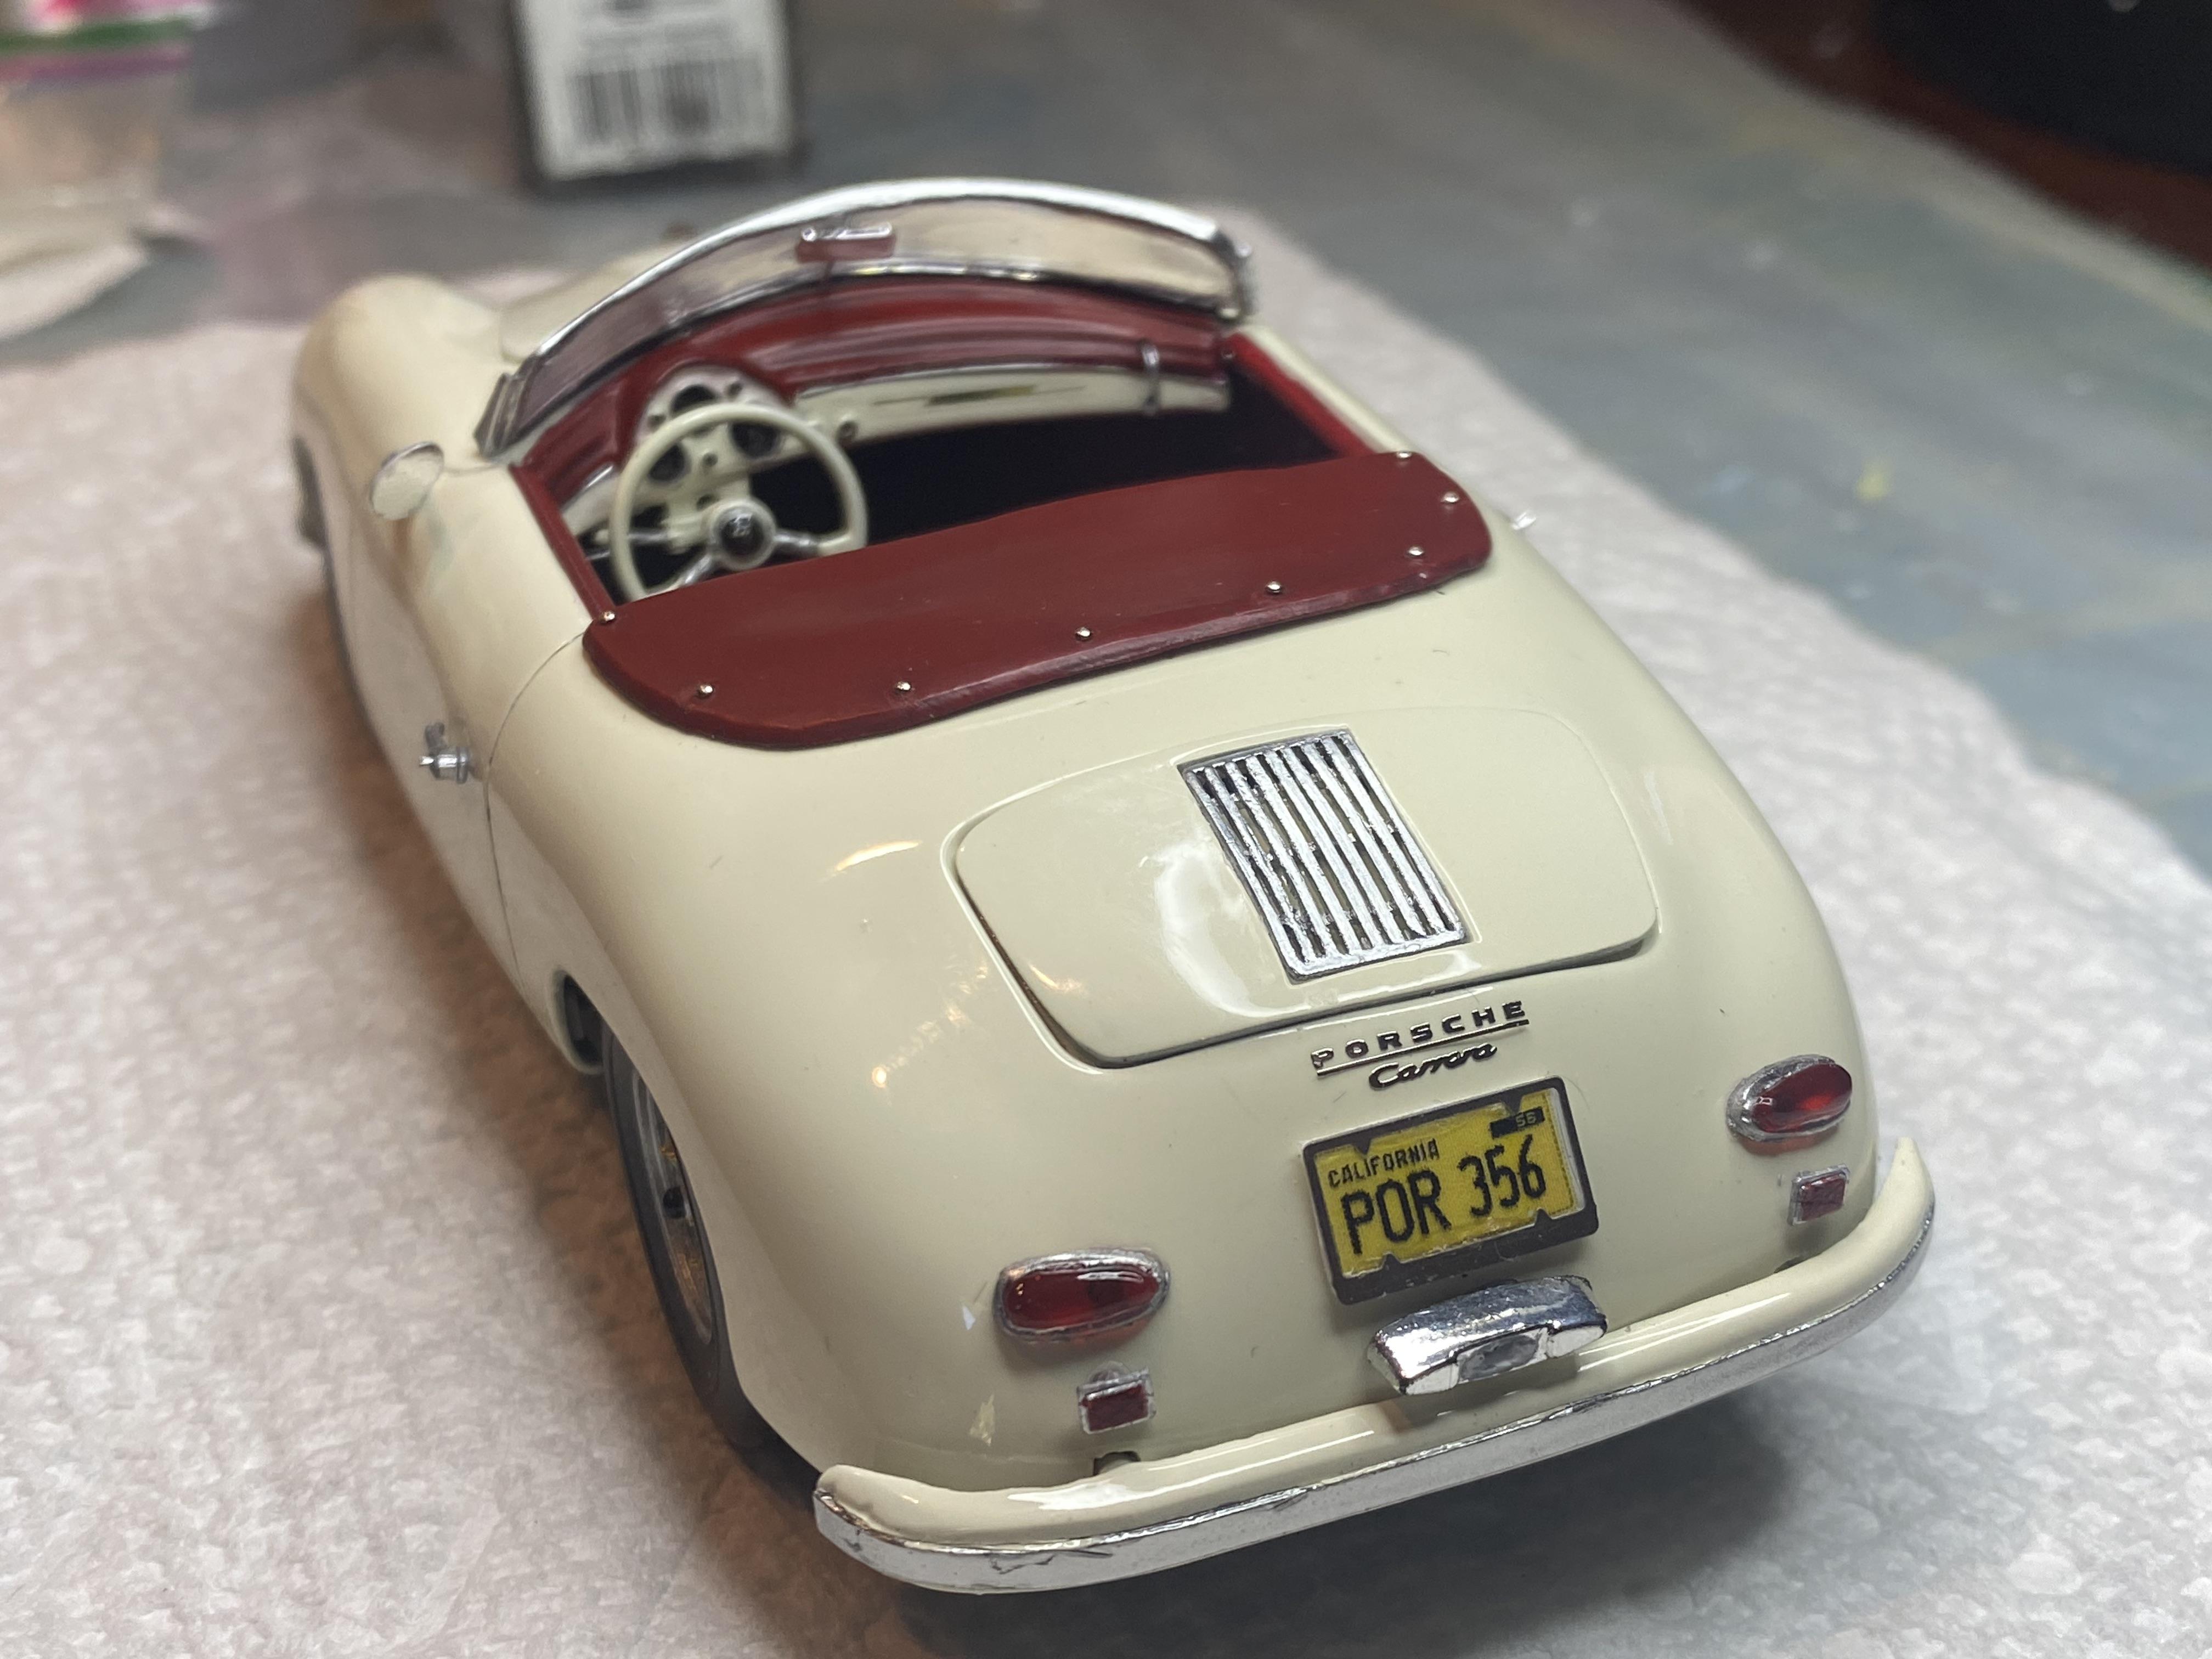
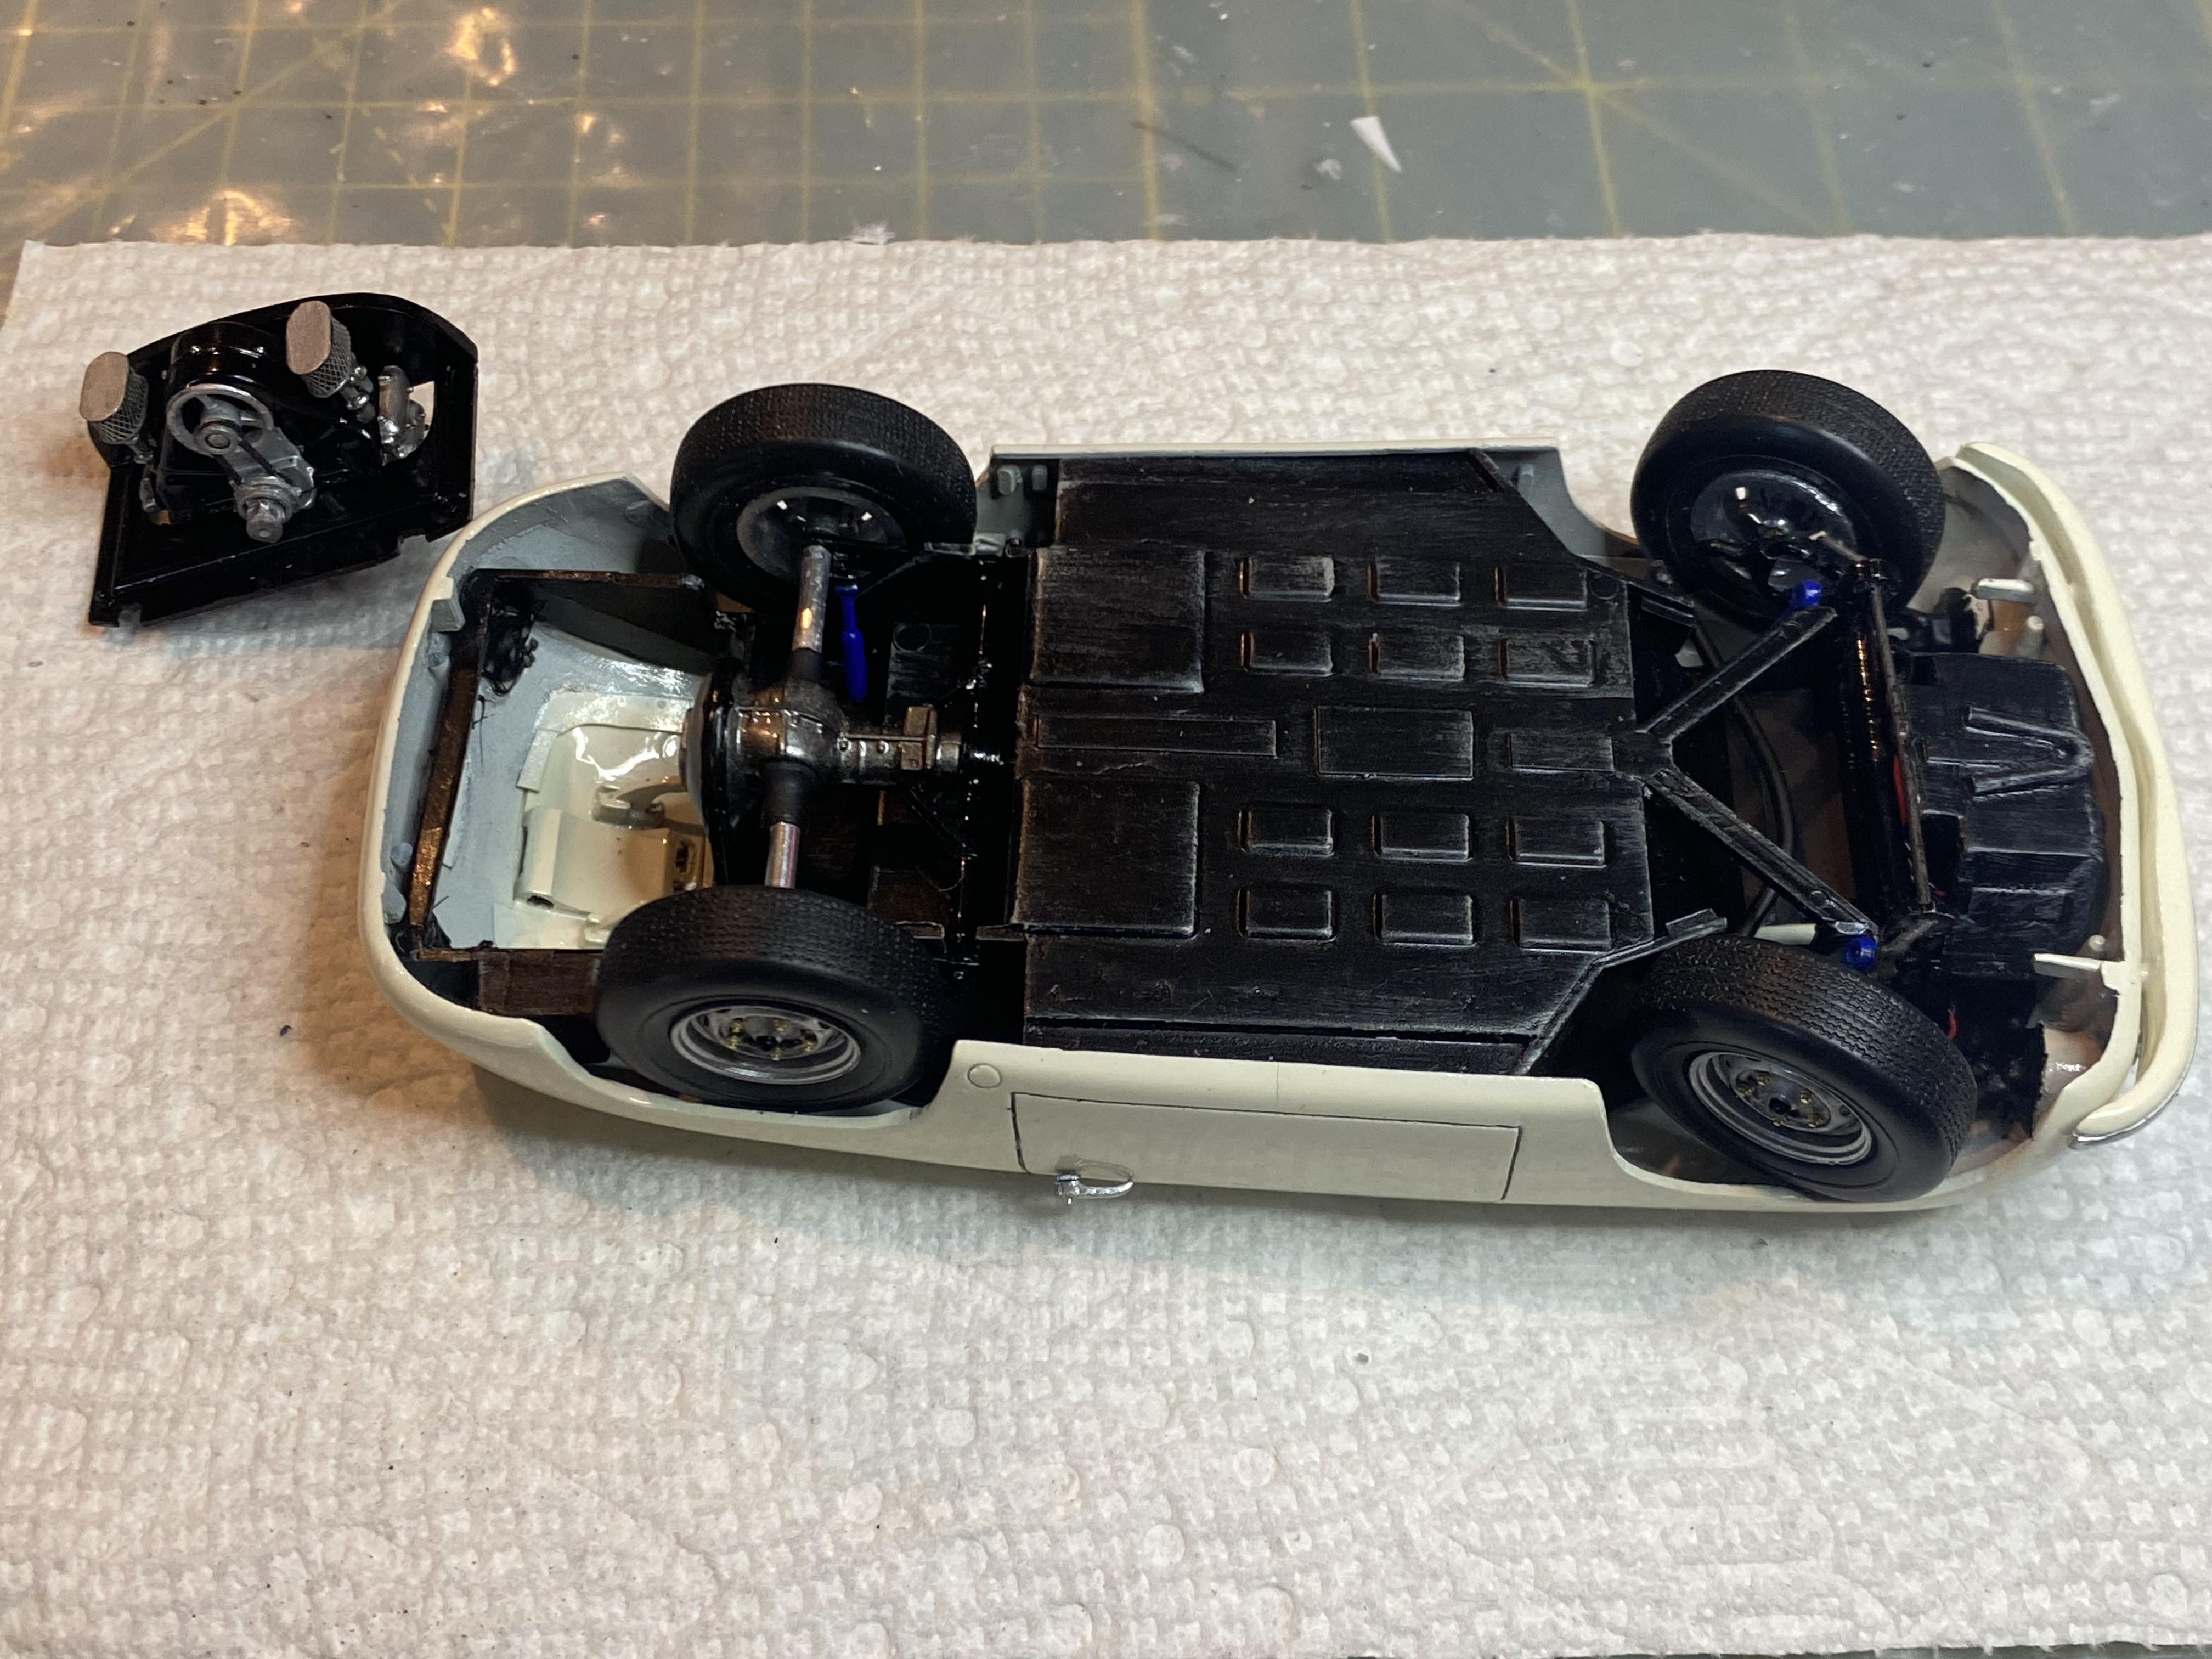
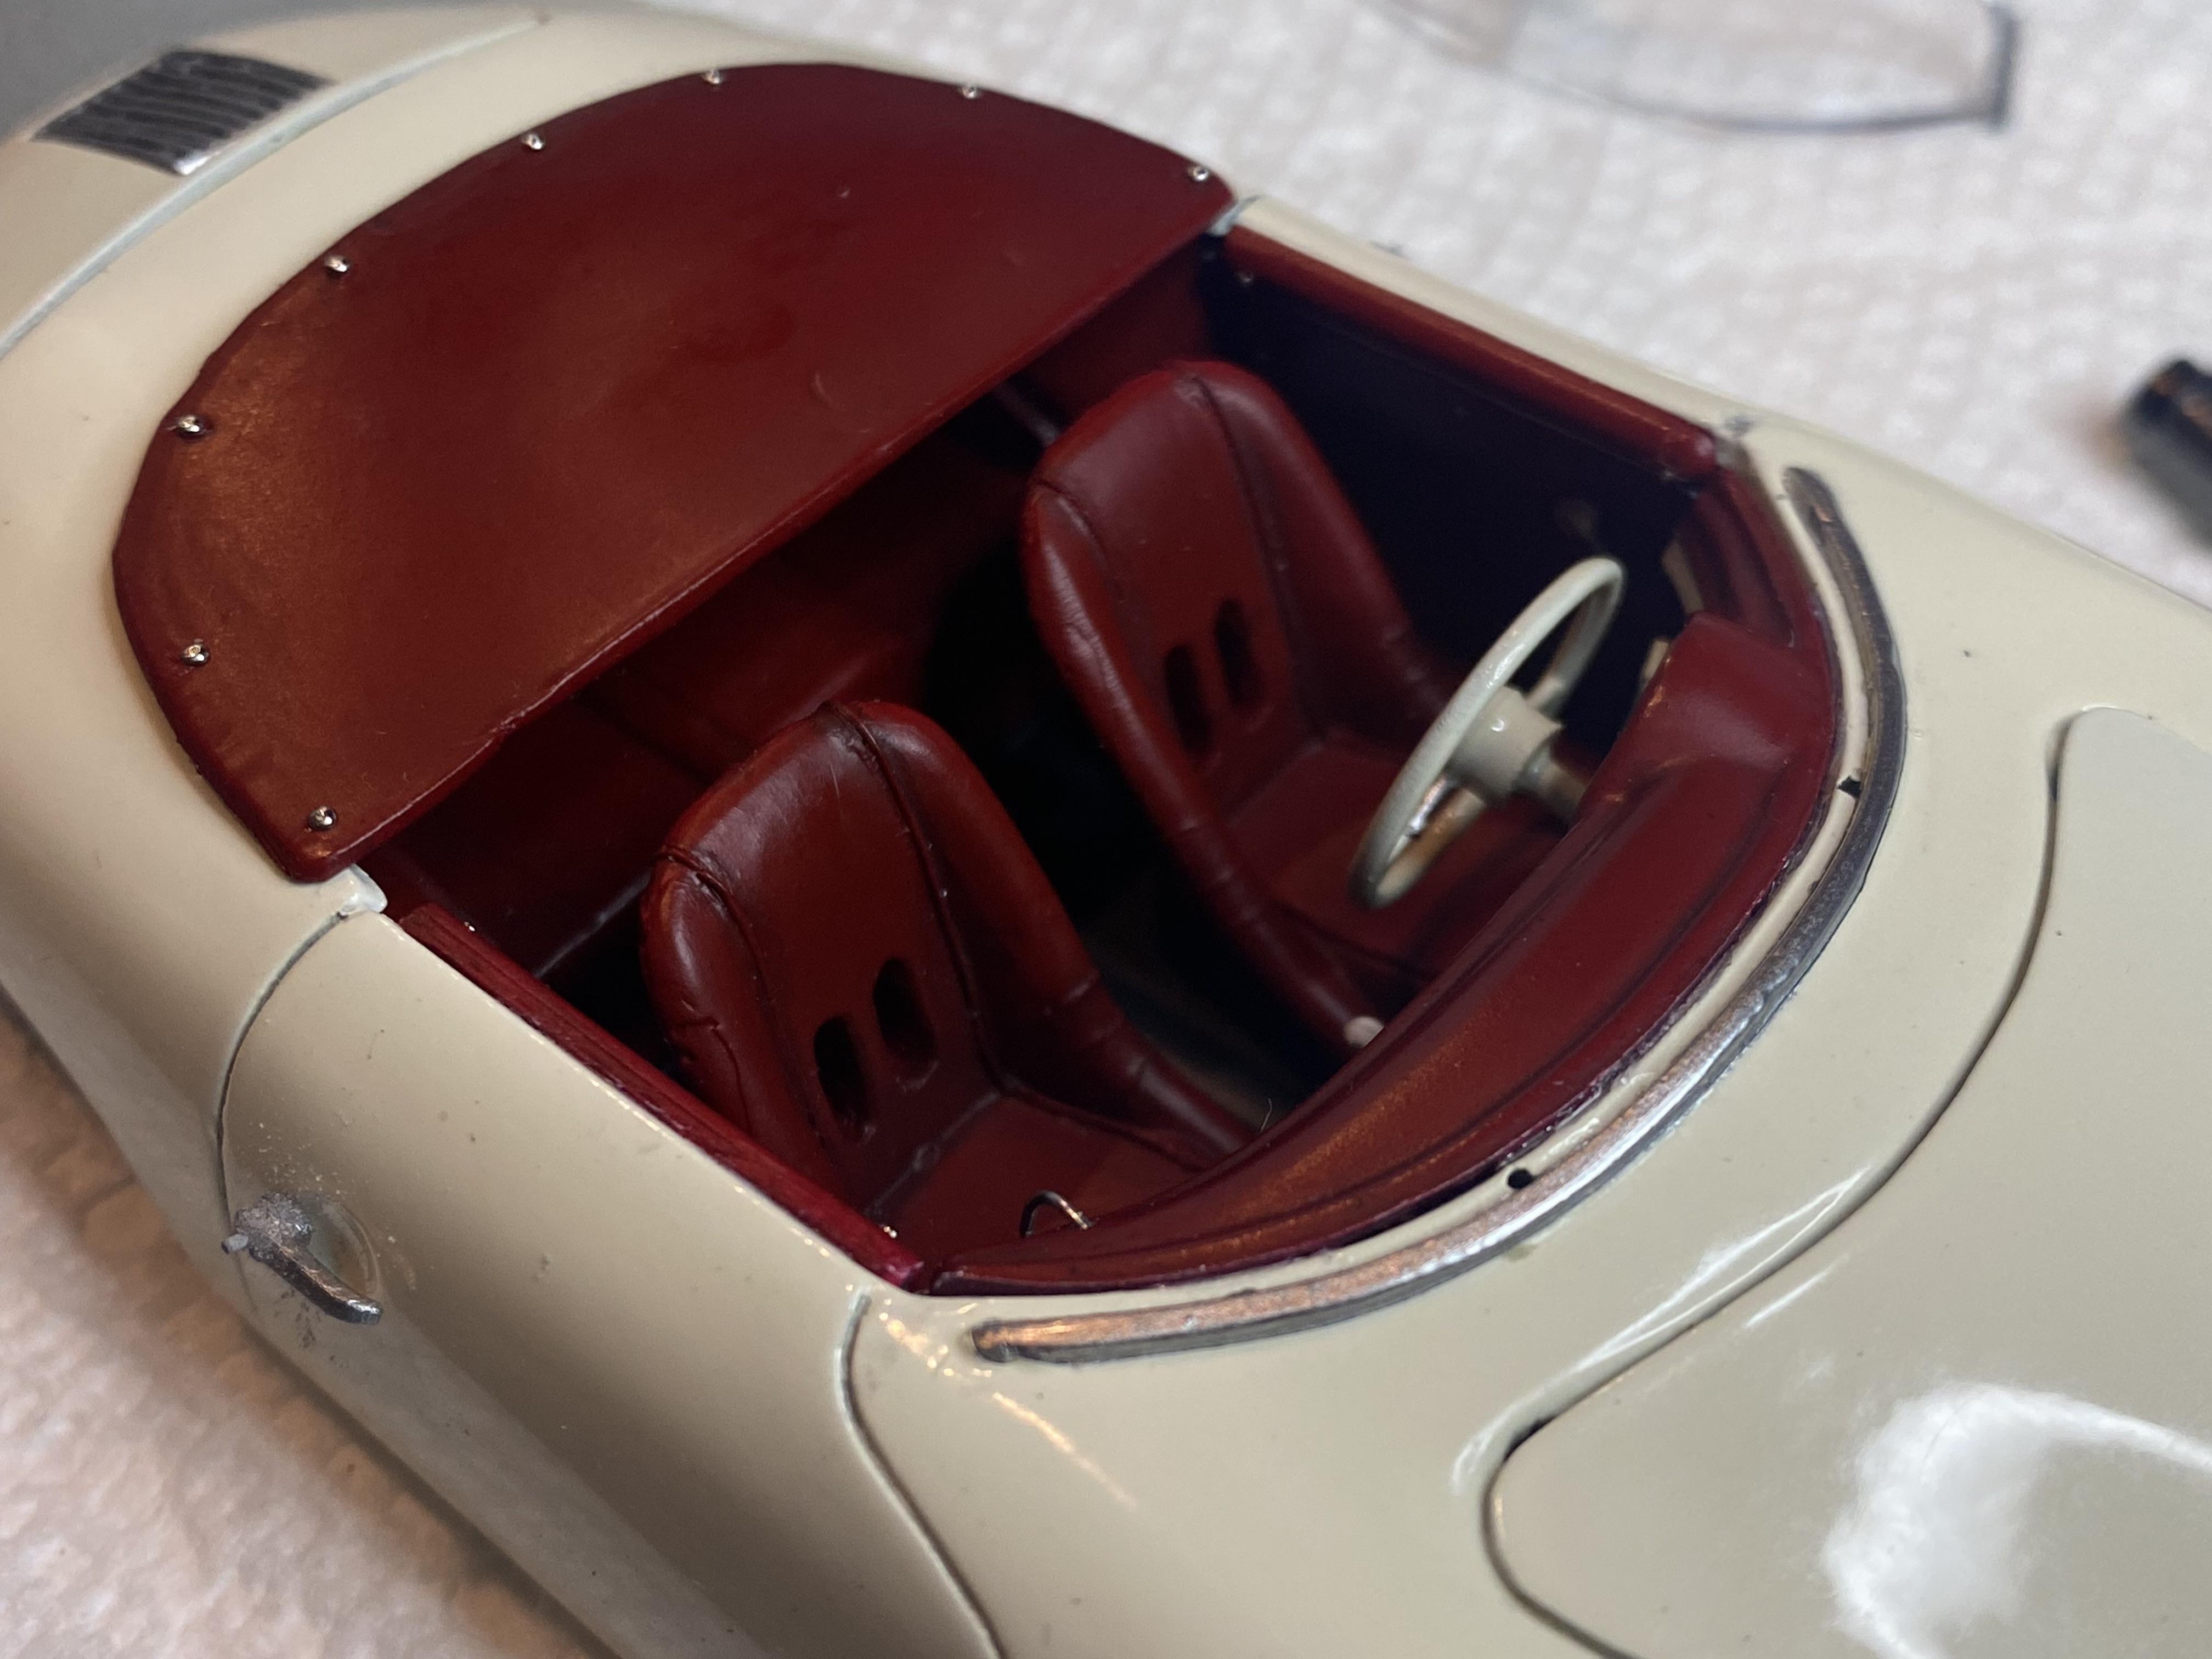
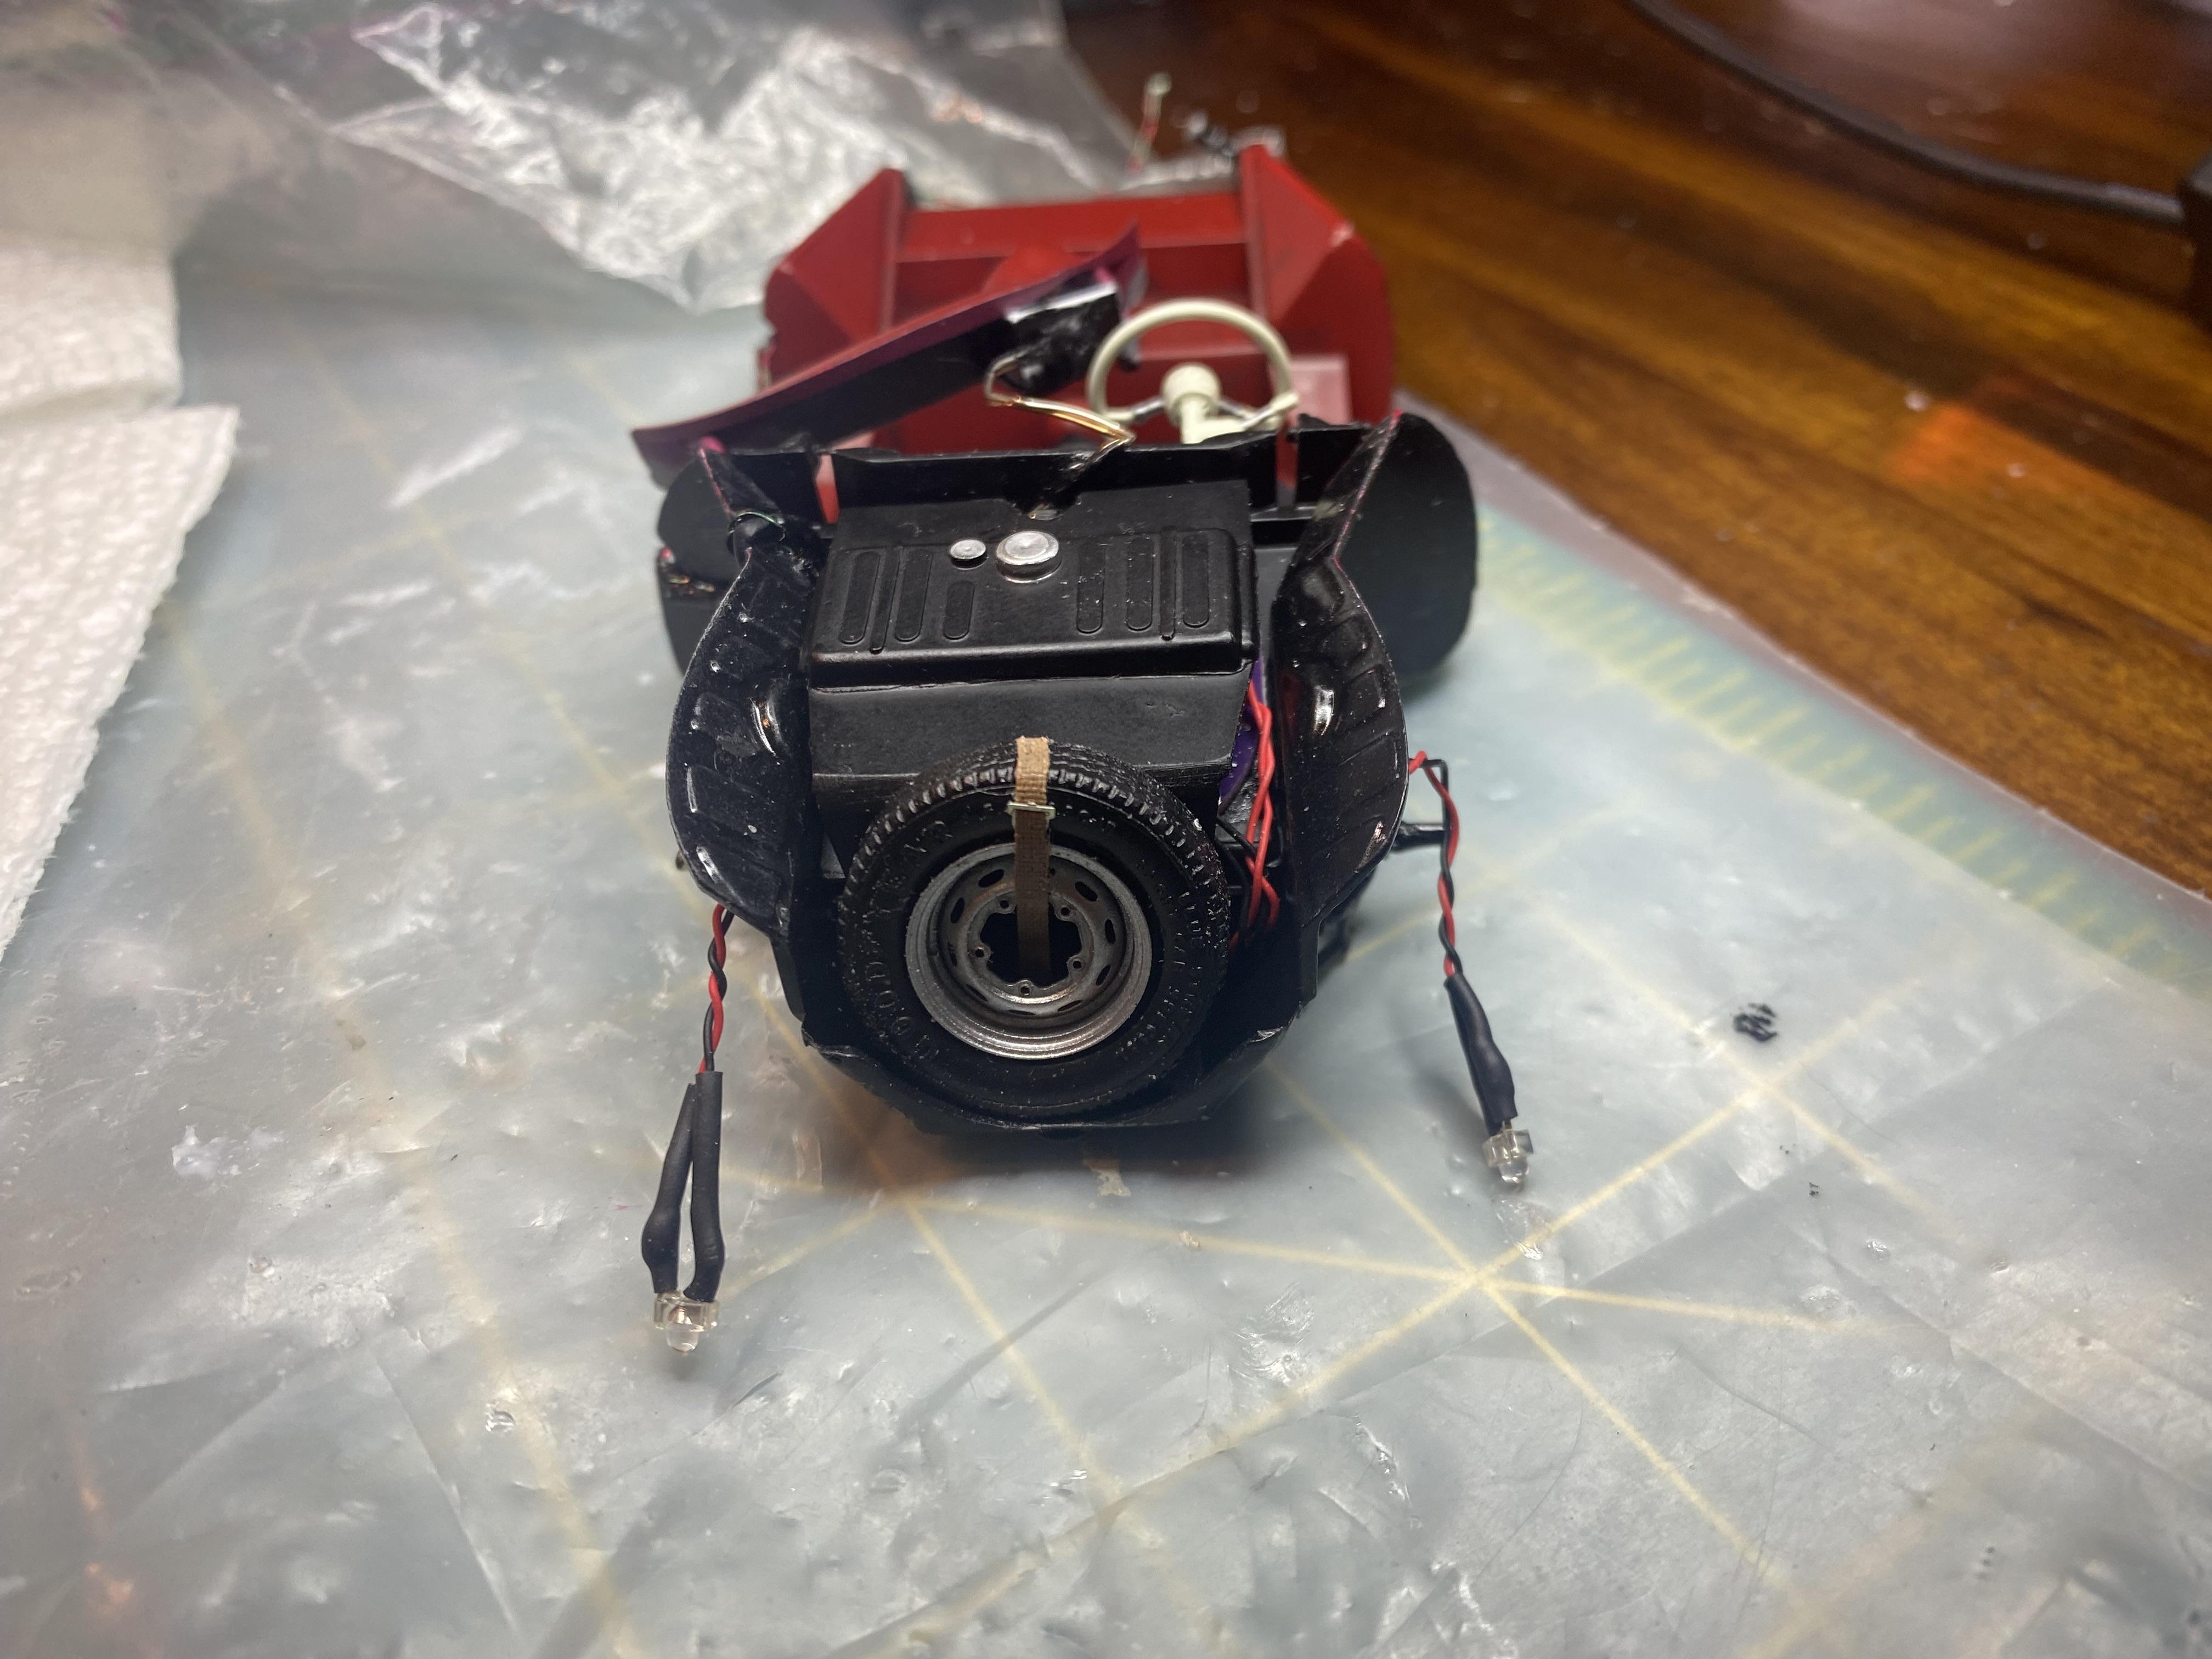
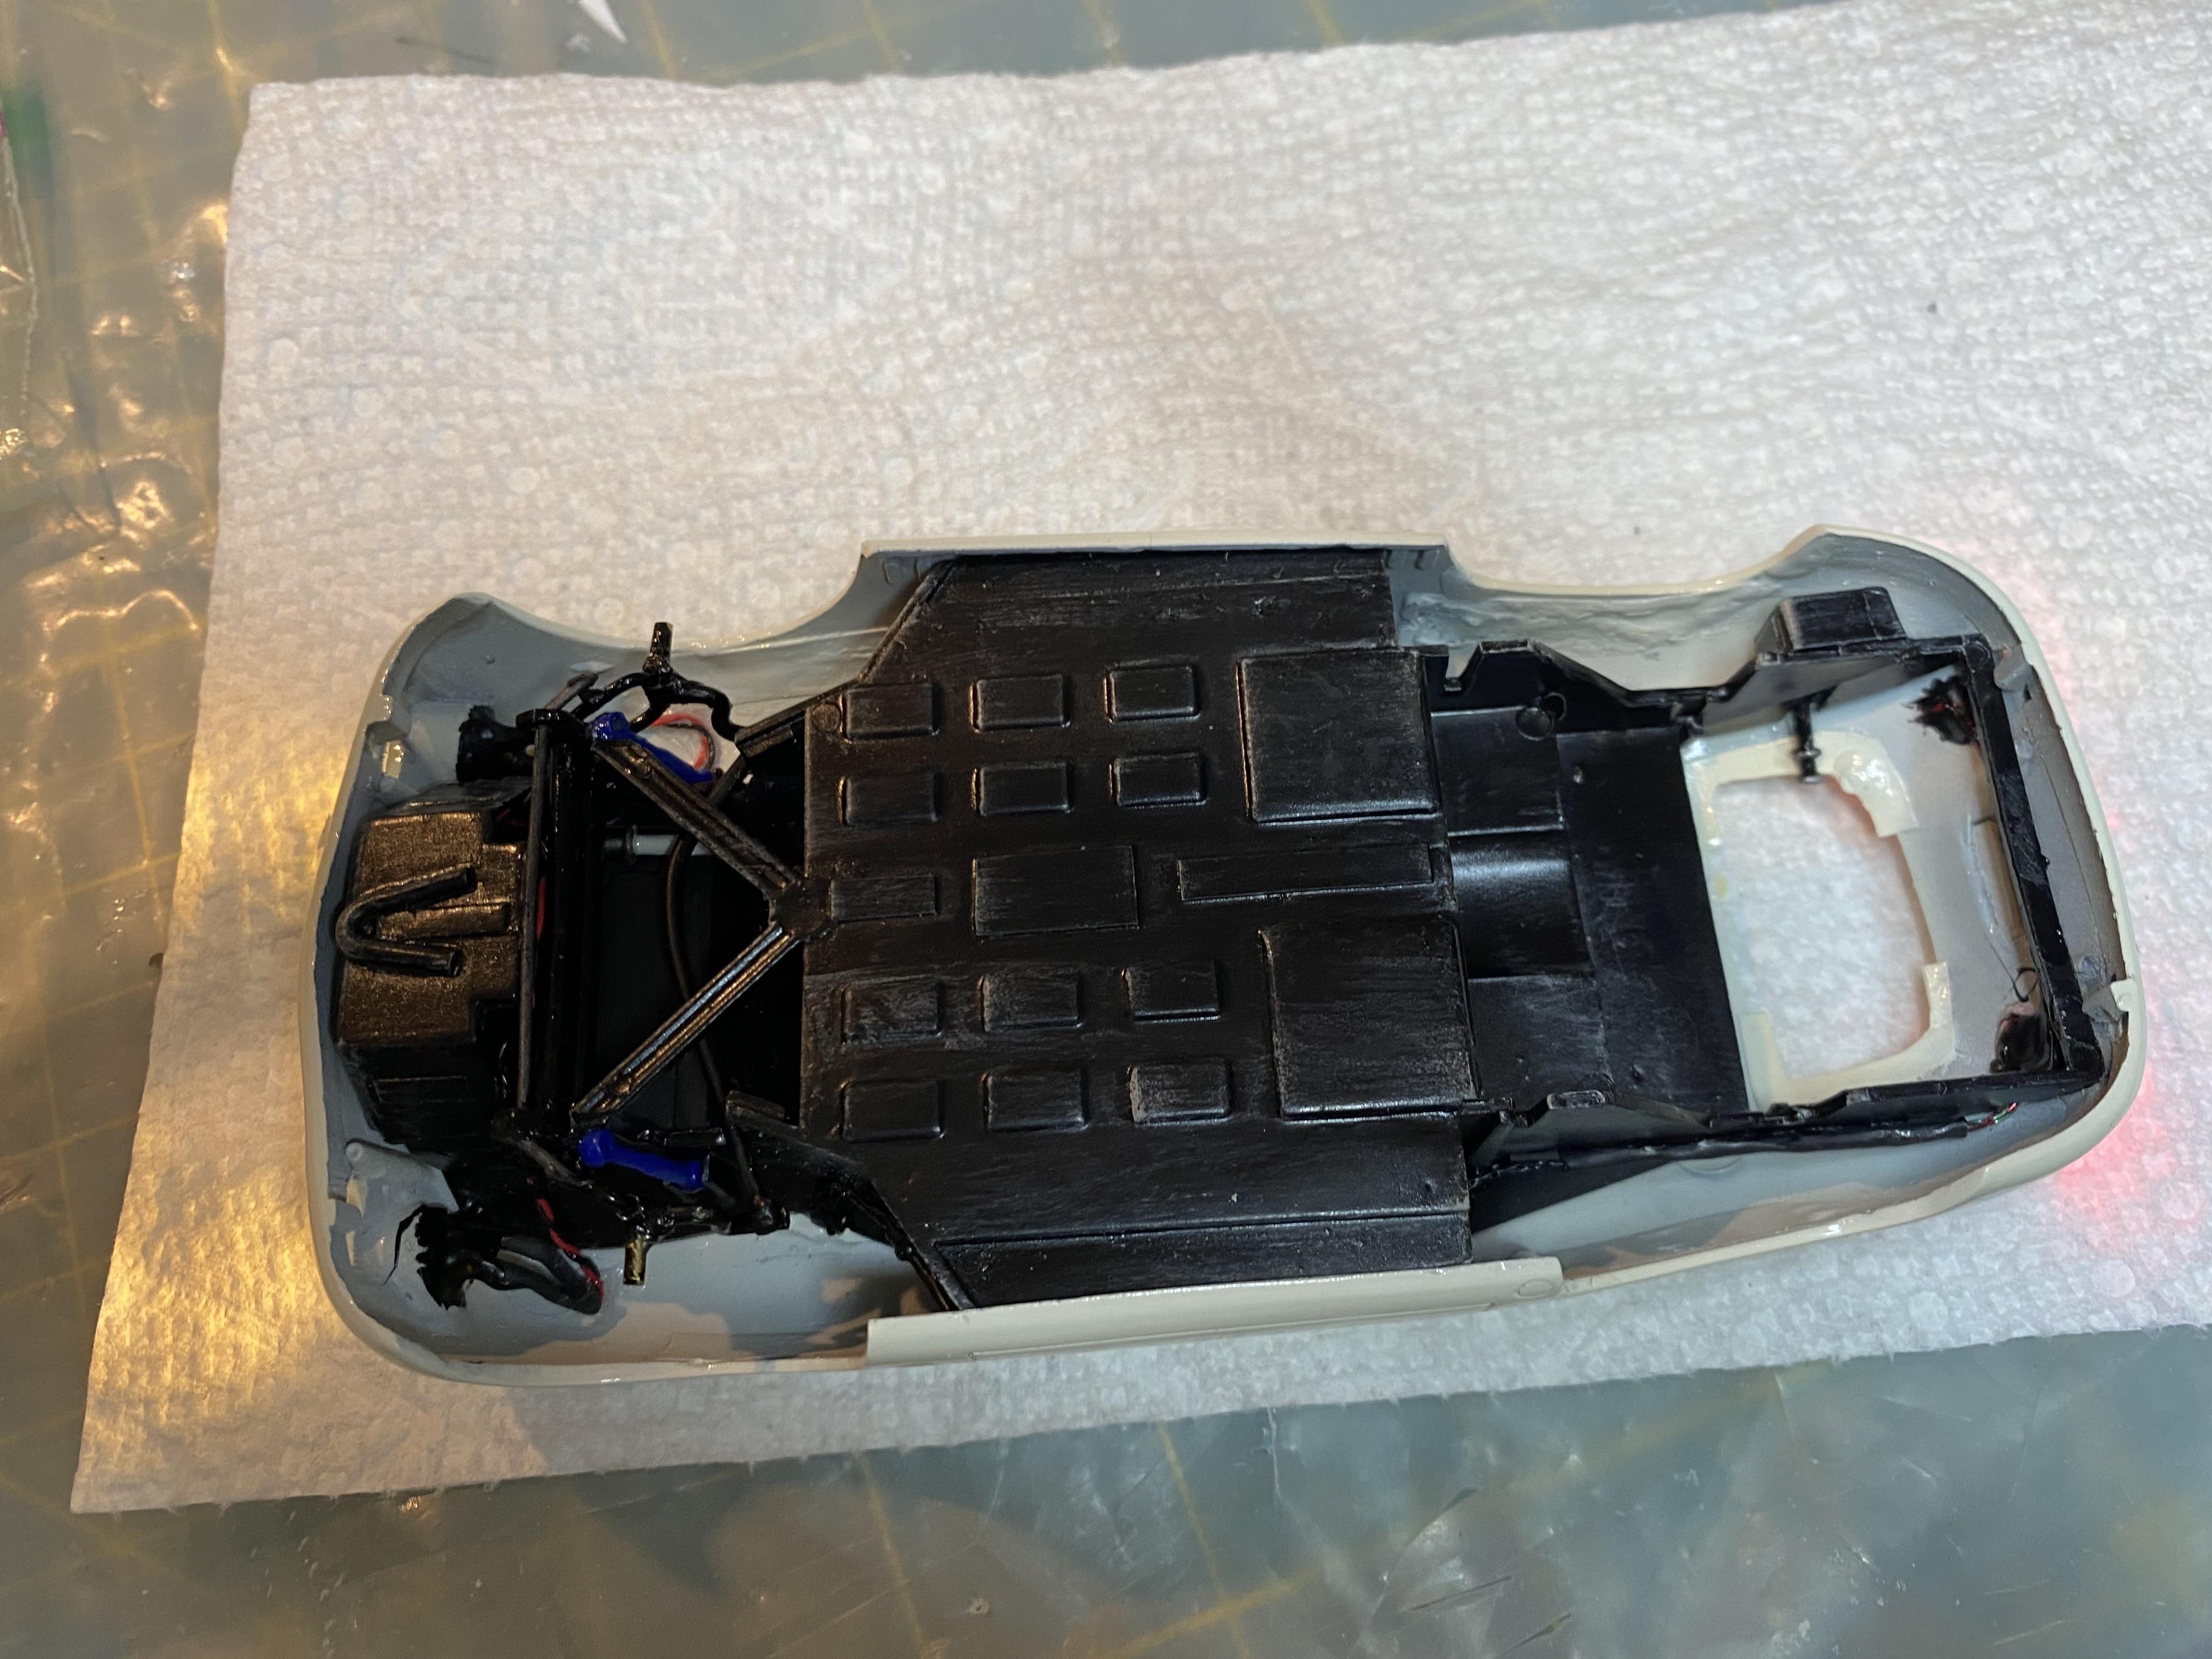
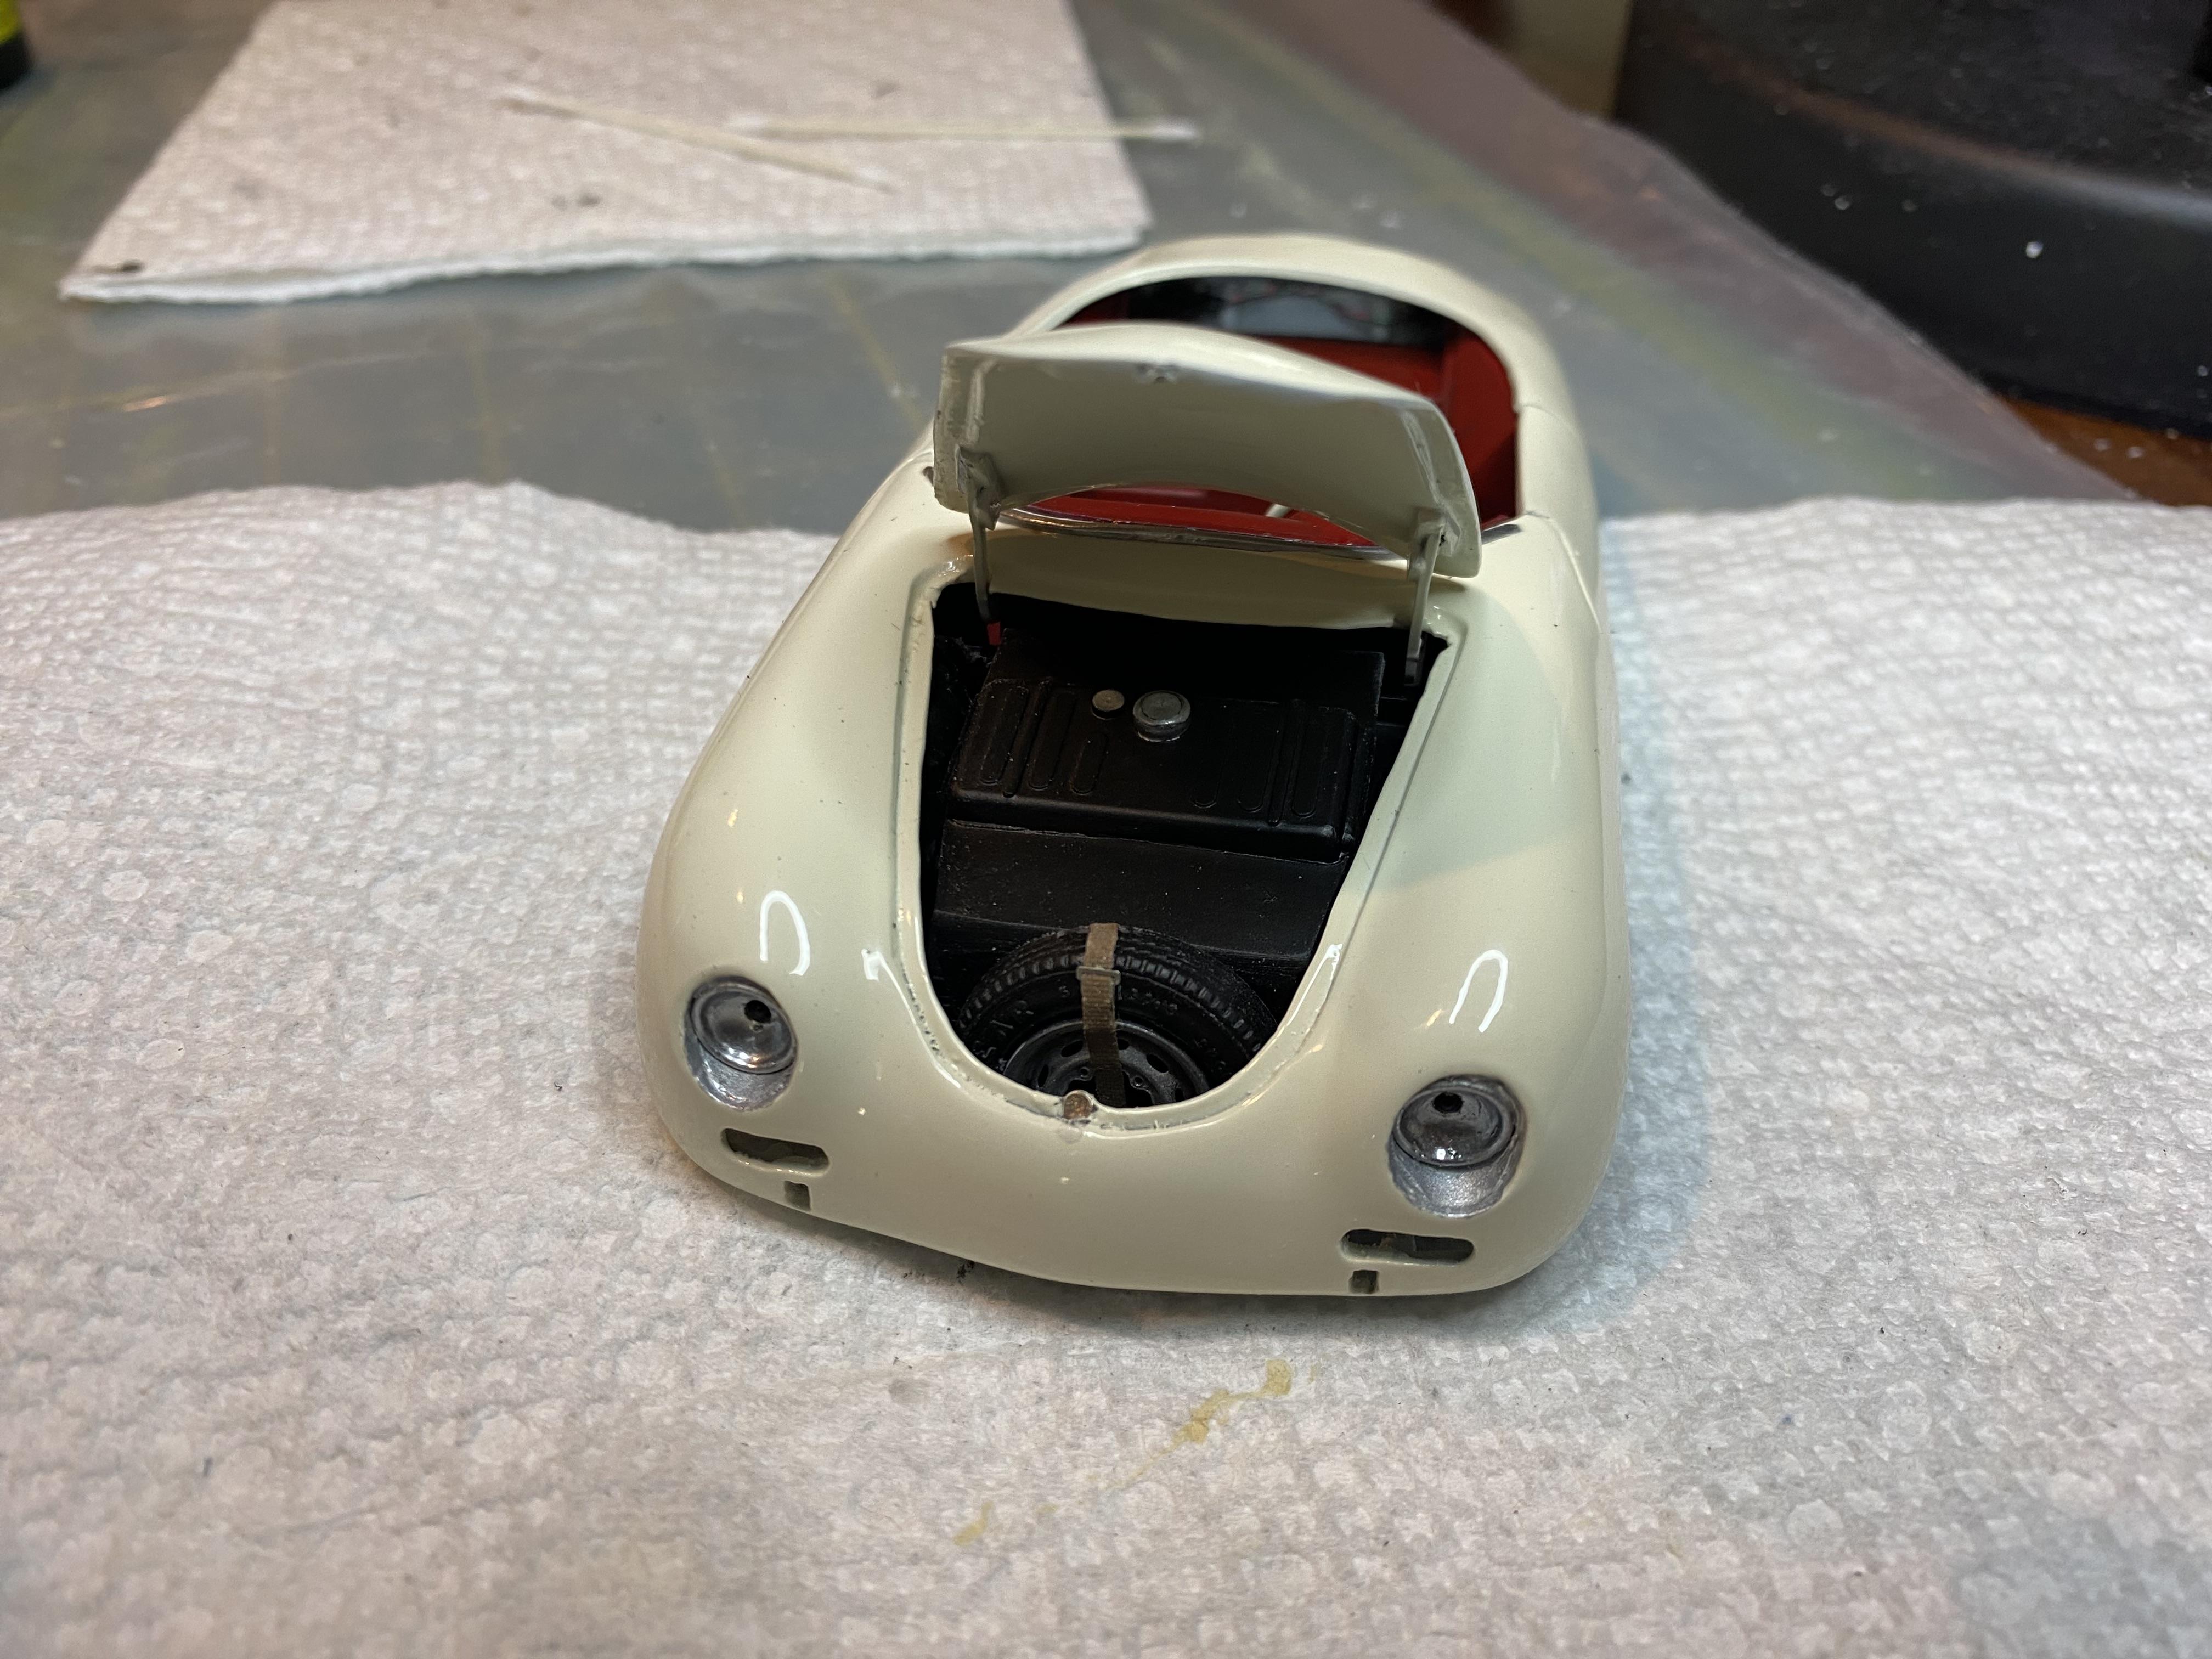
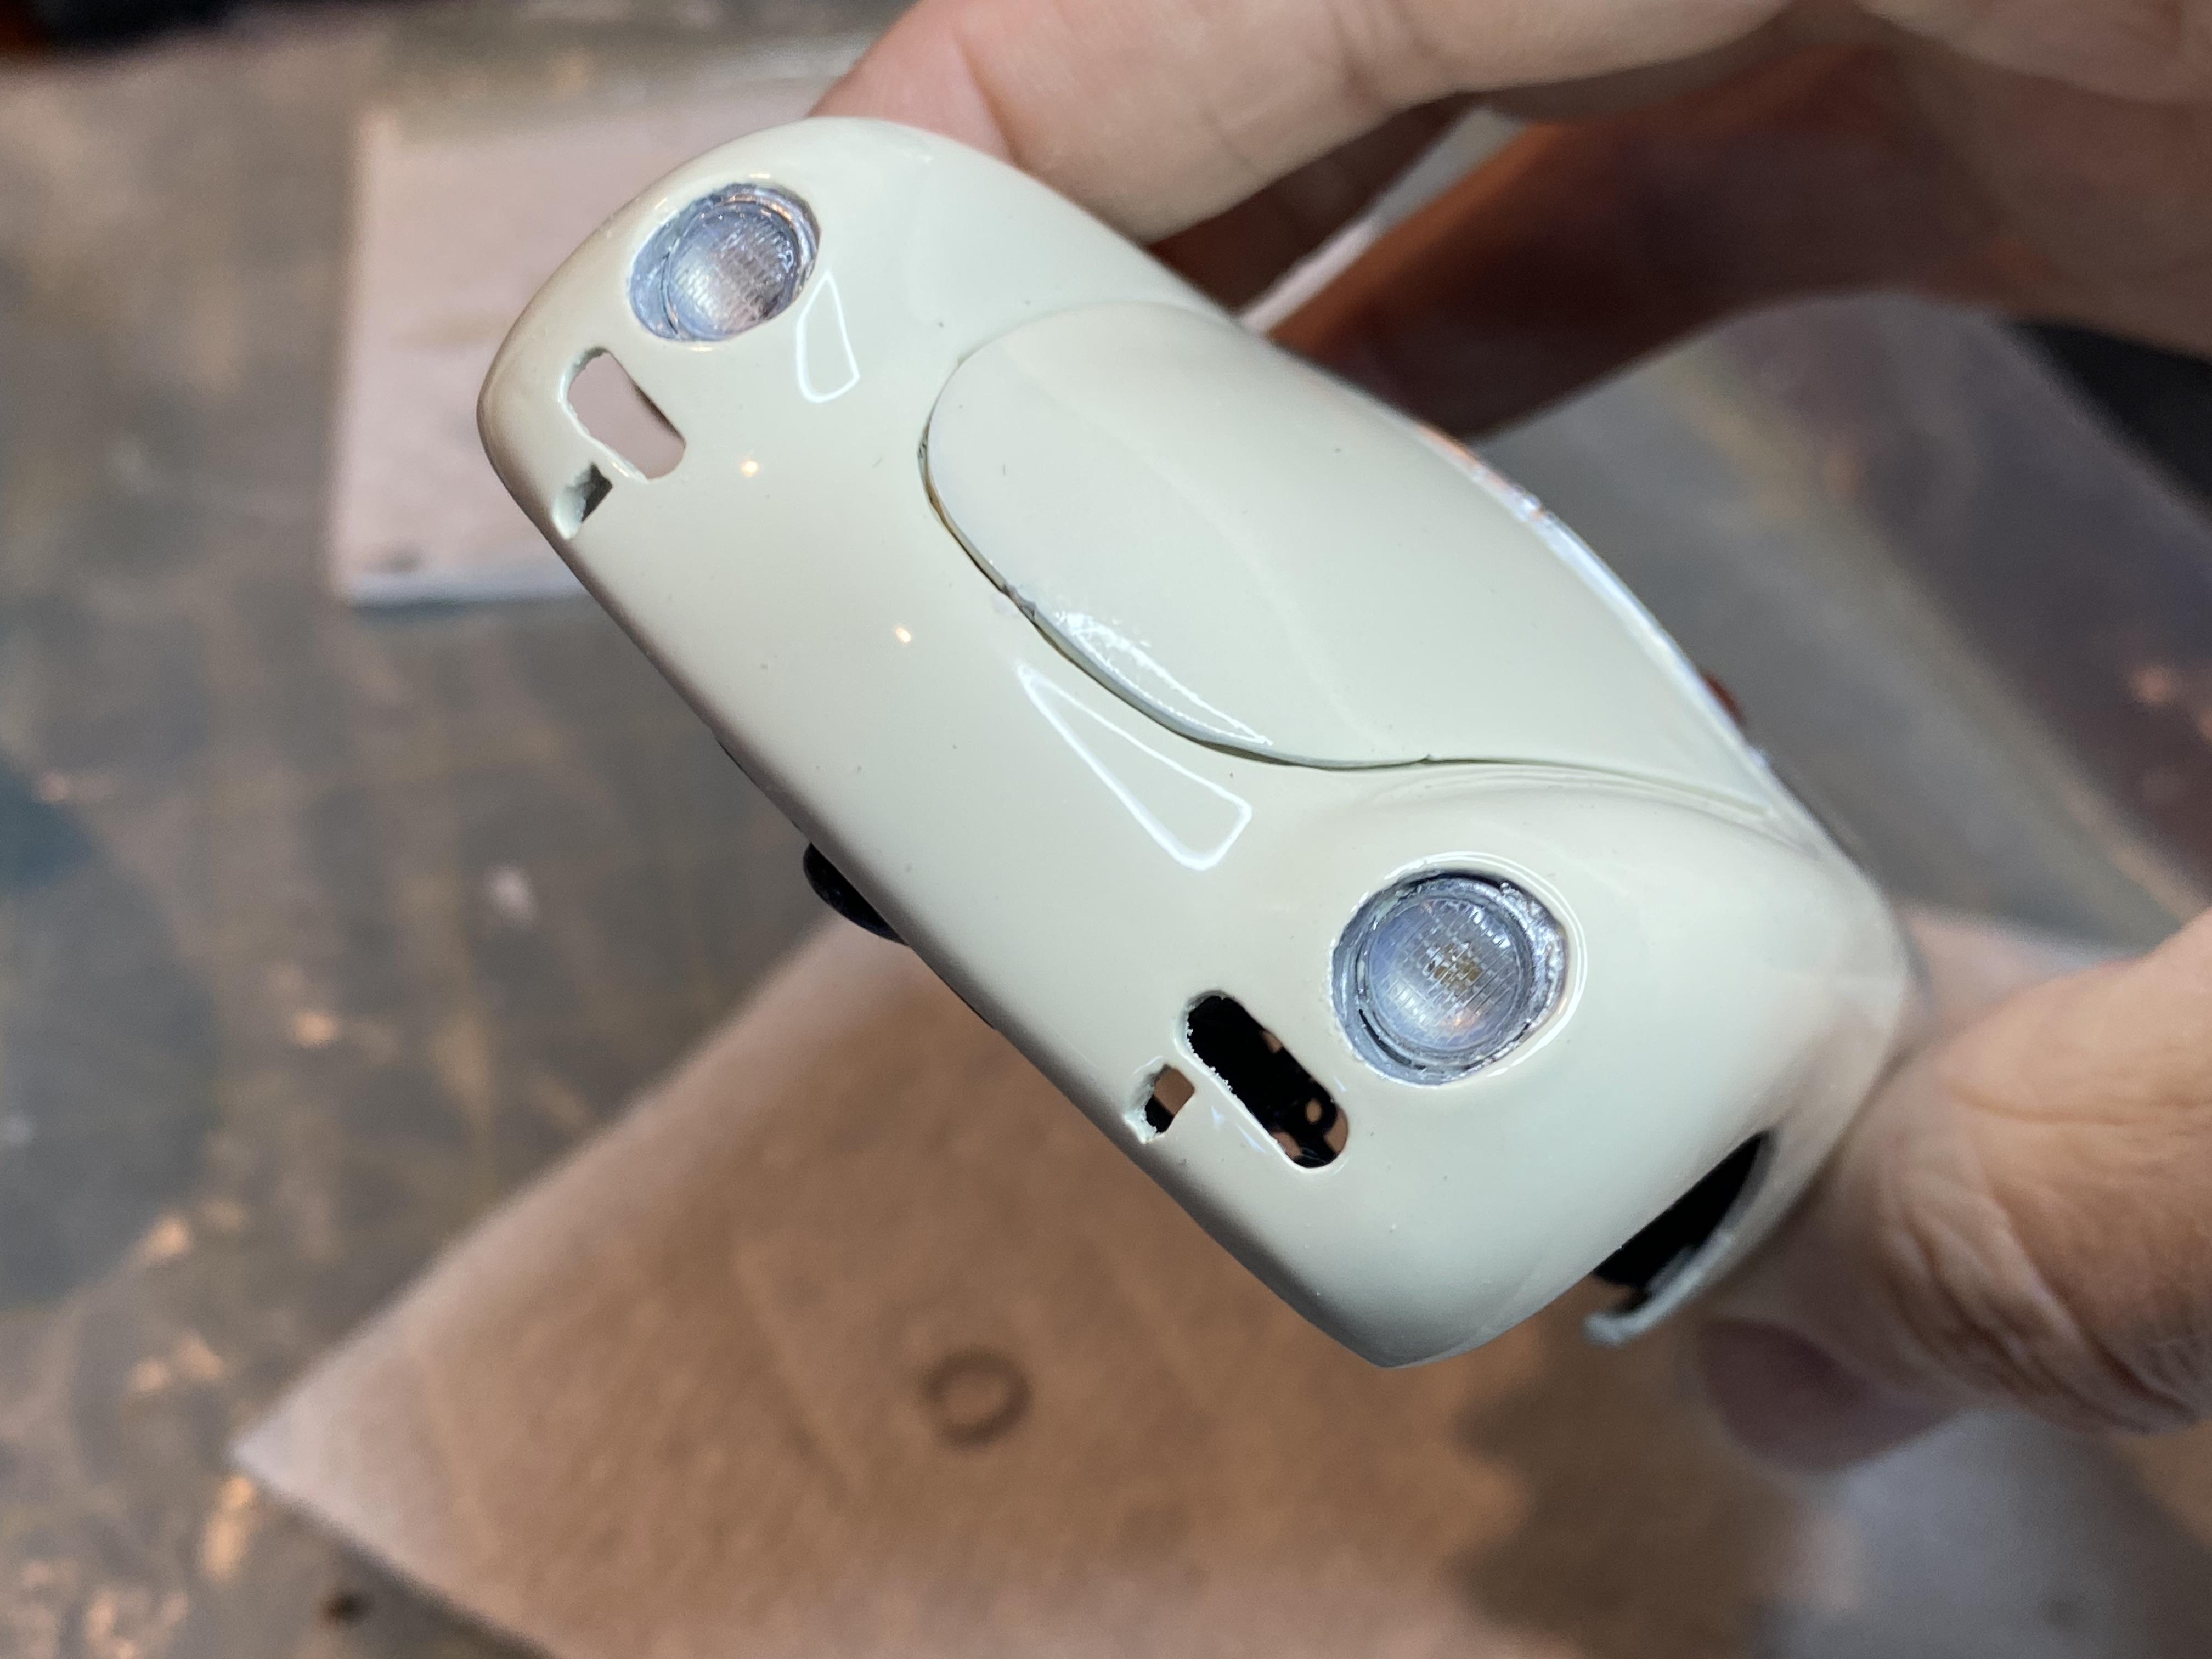
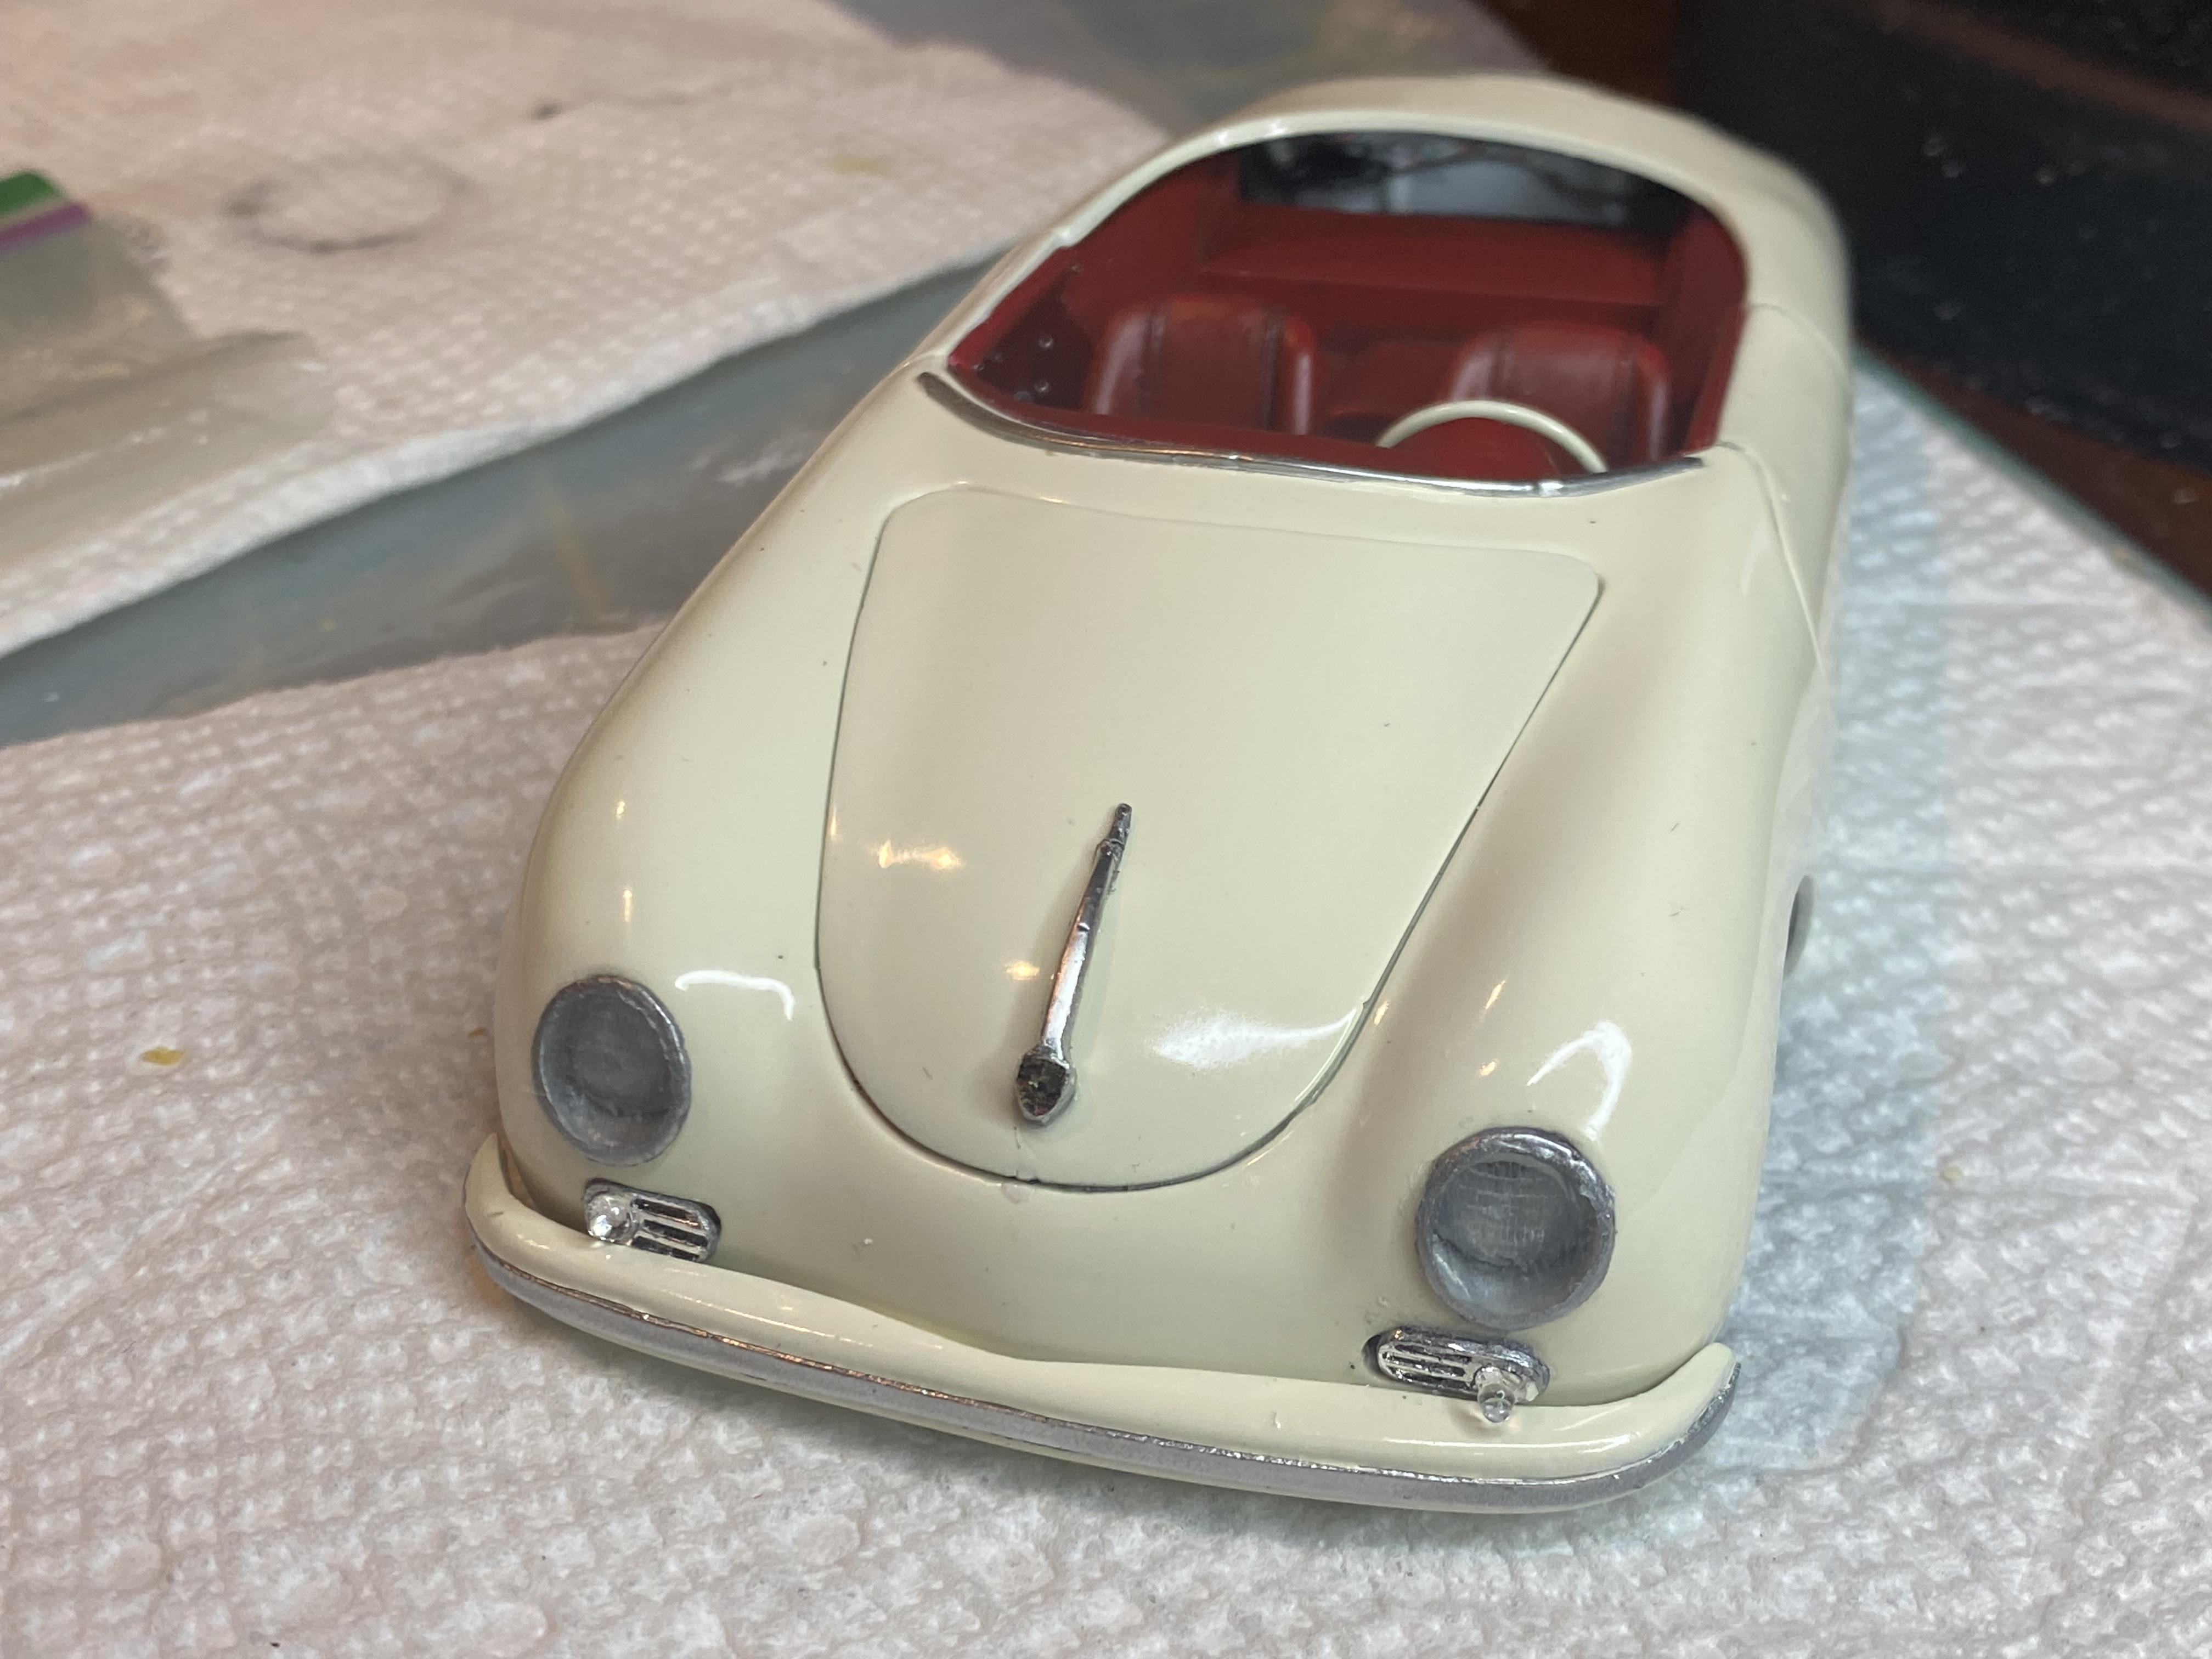
The Porsche build is basically completed and will be taking pictures soon to go to under glass section. created the rear reflectors. Installed the windshield, wipers and rear view mirror. Detailed the engine and installed. Can barely even see the engine detailing, but I know it is there, I am pretty happy with it, considering what I had to start with.
-
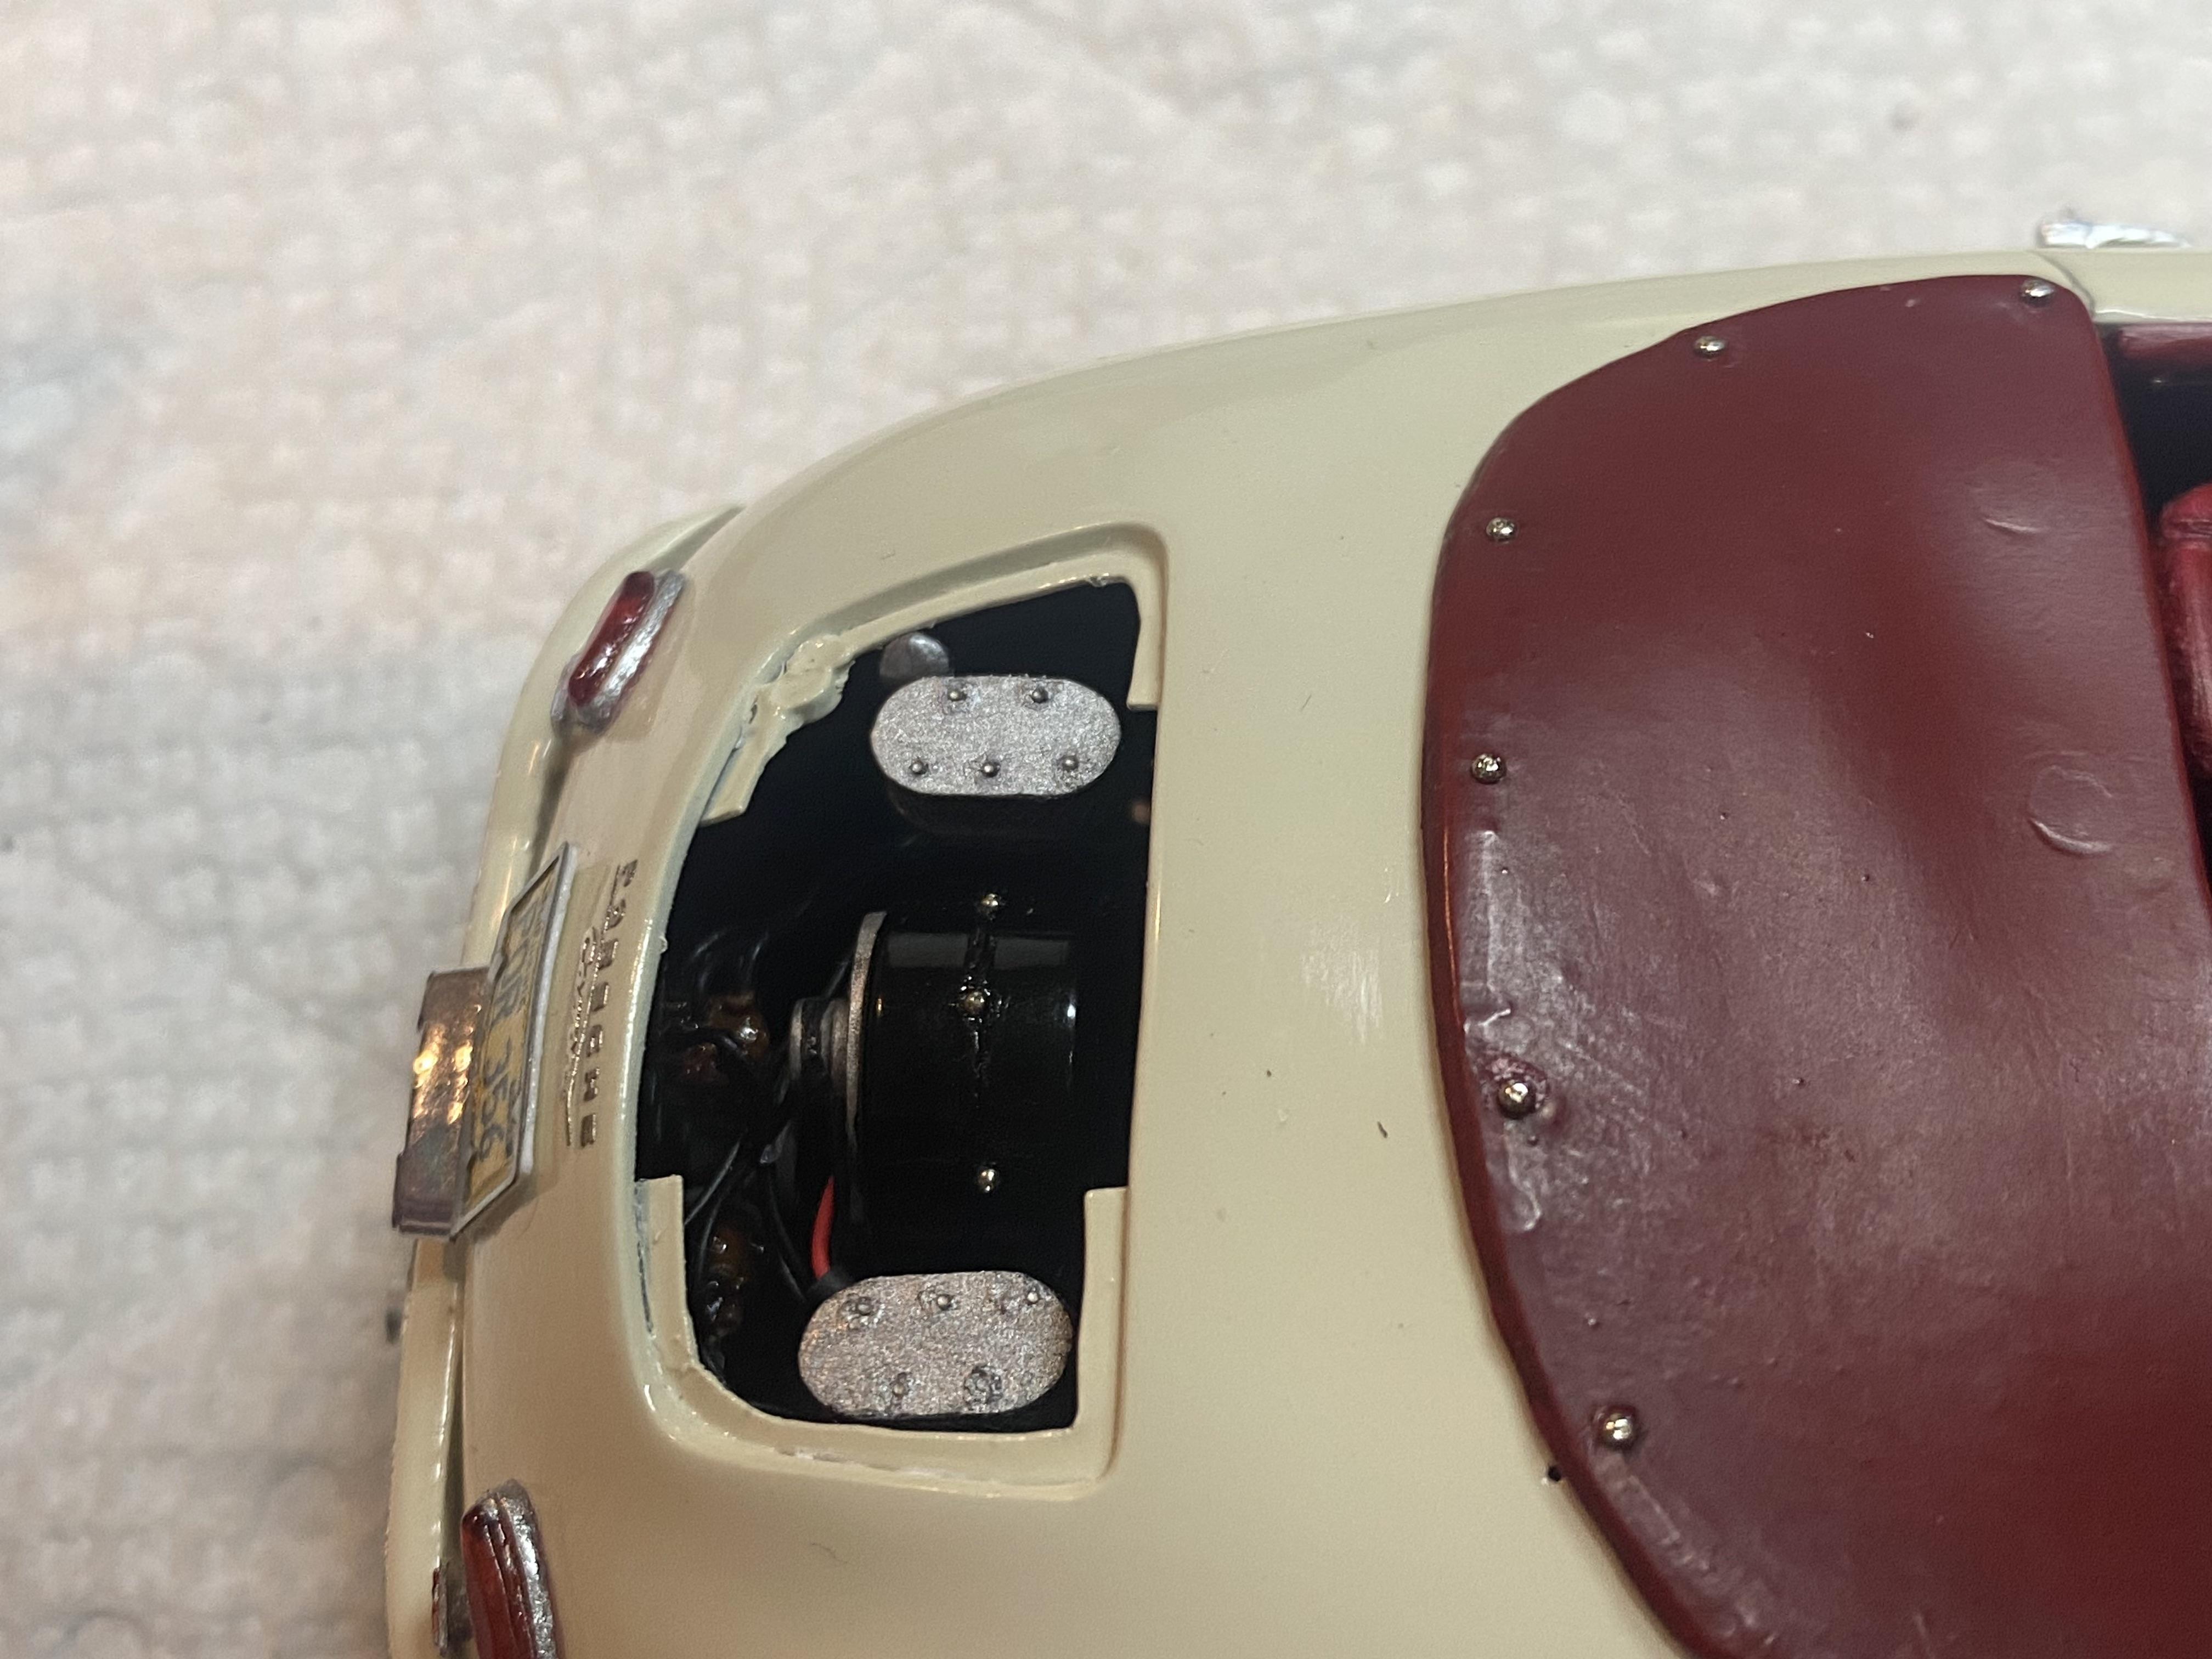
Thank You! The hardest part this time was finding a place I could place the battery holder and hide it.
-
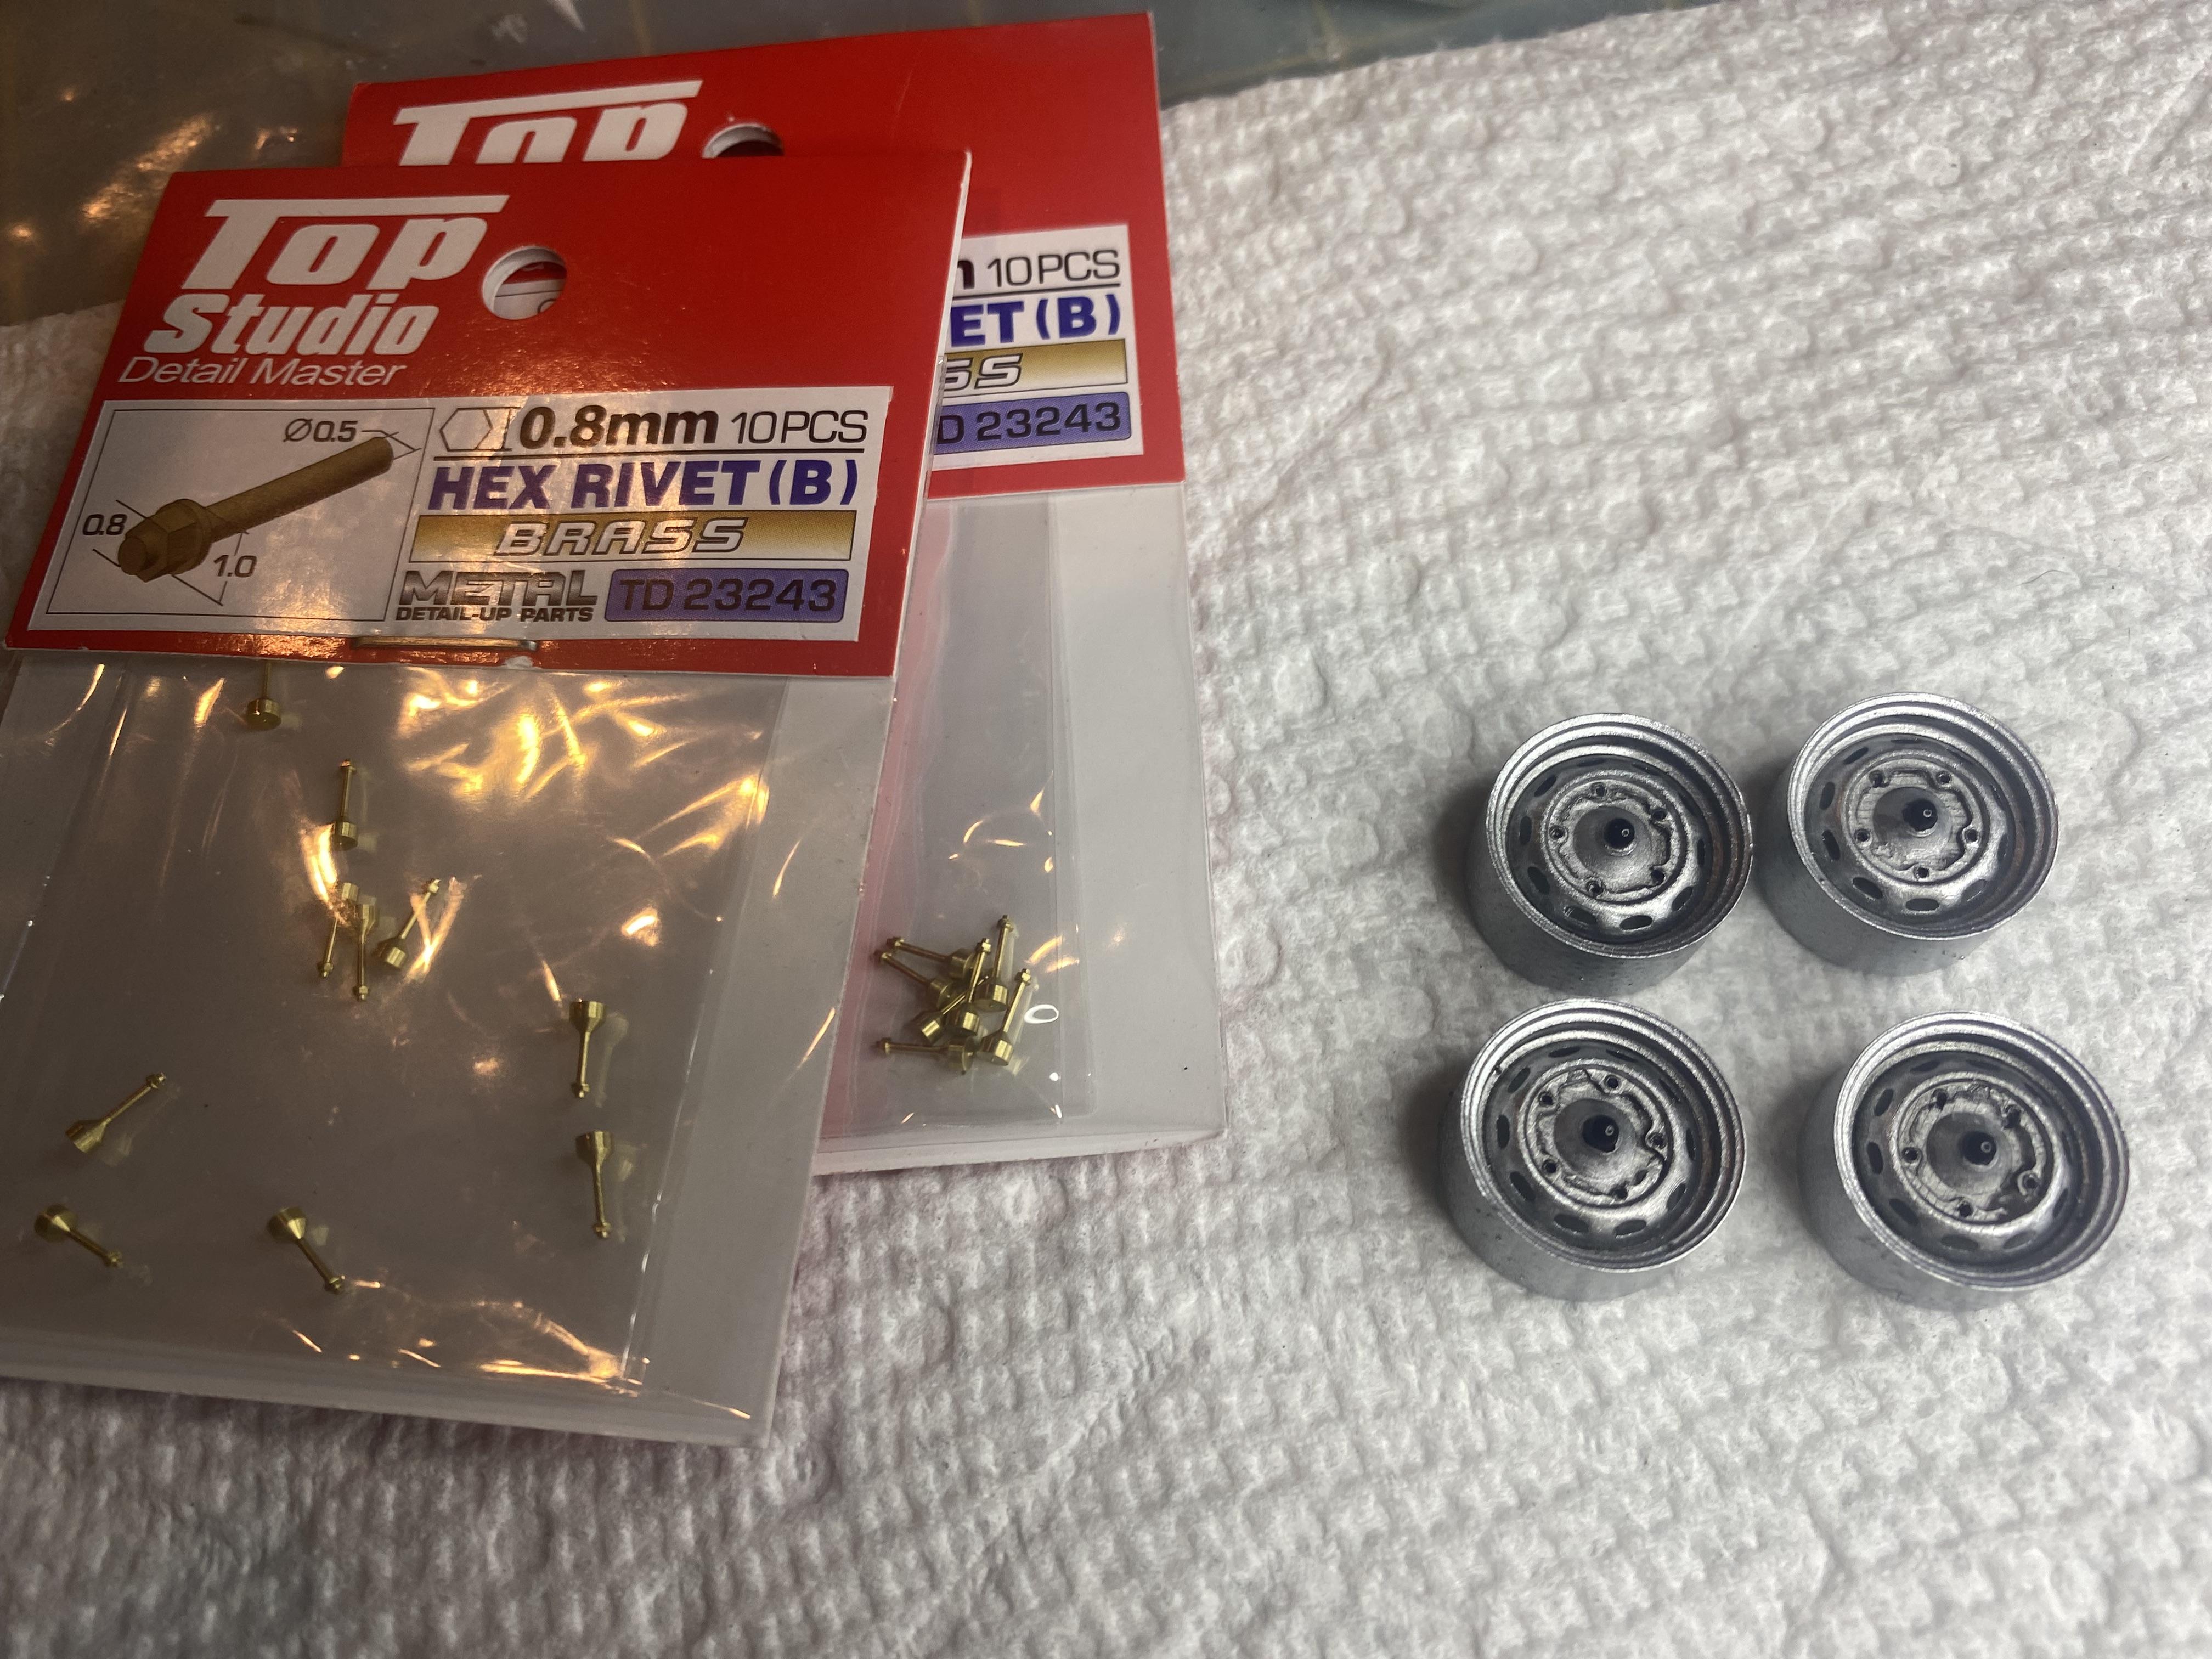
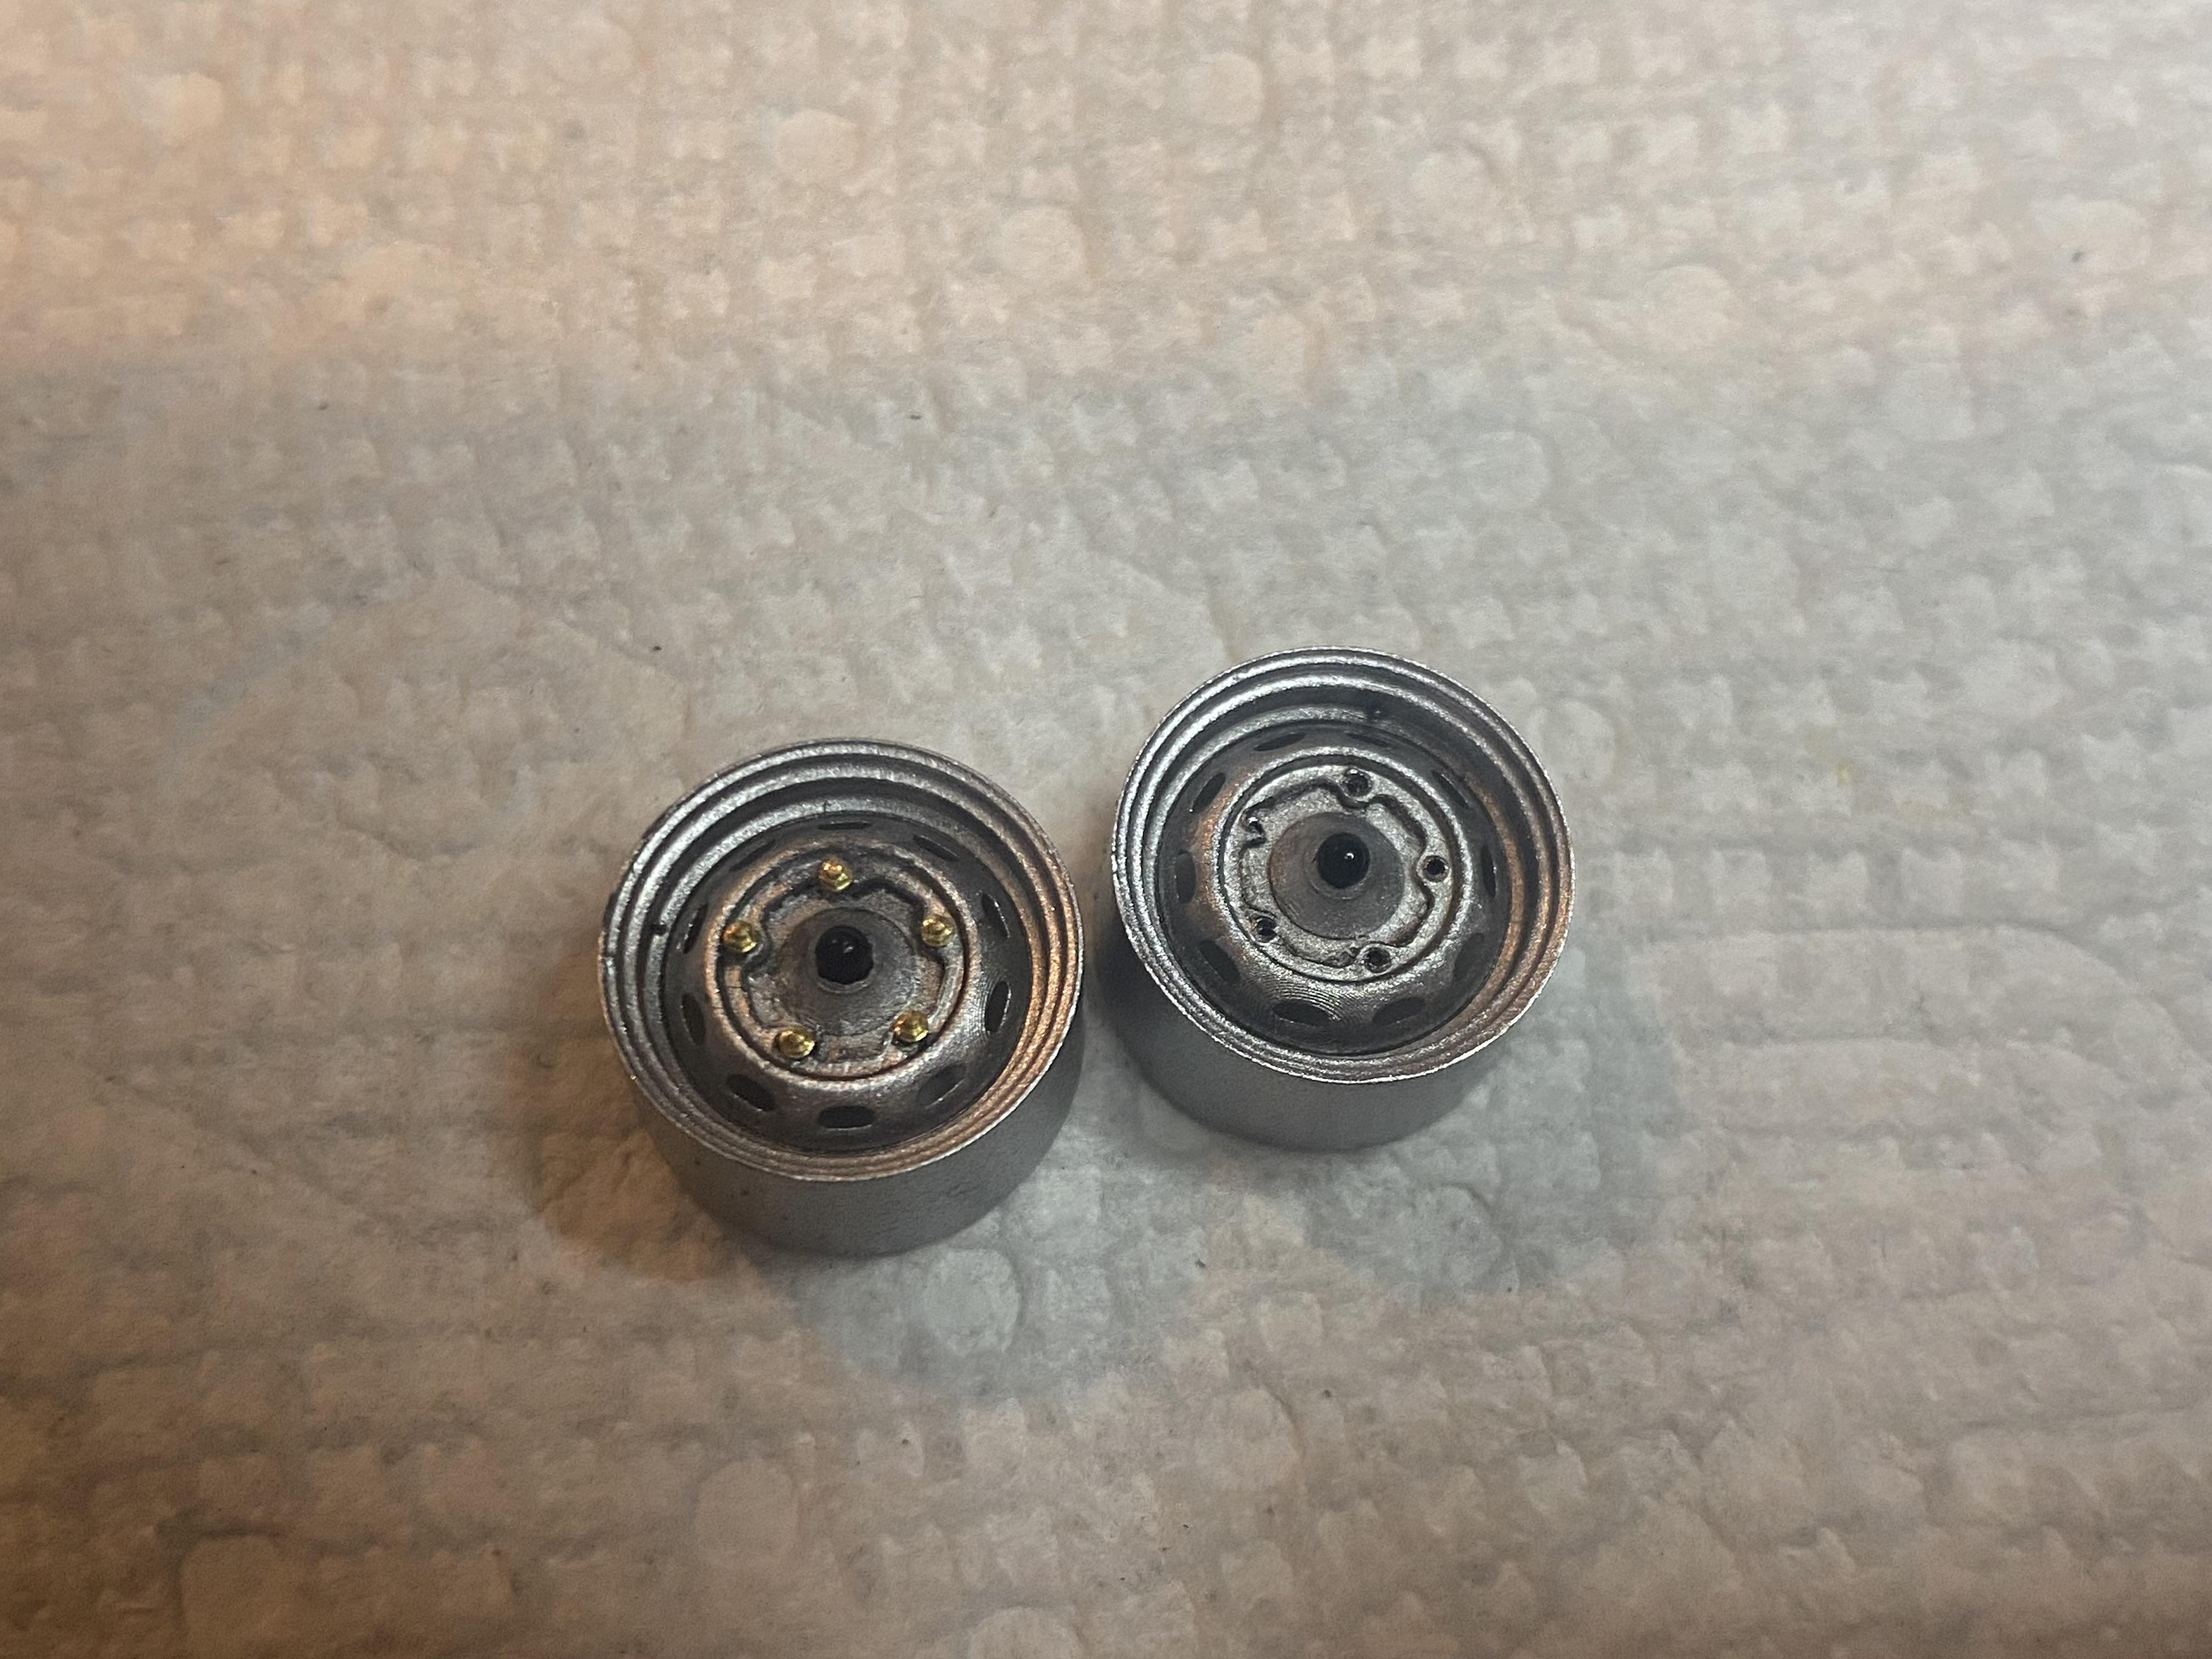
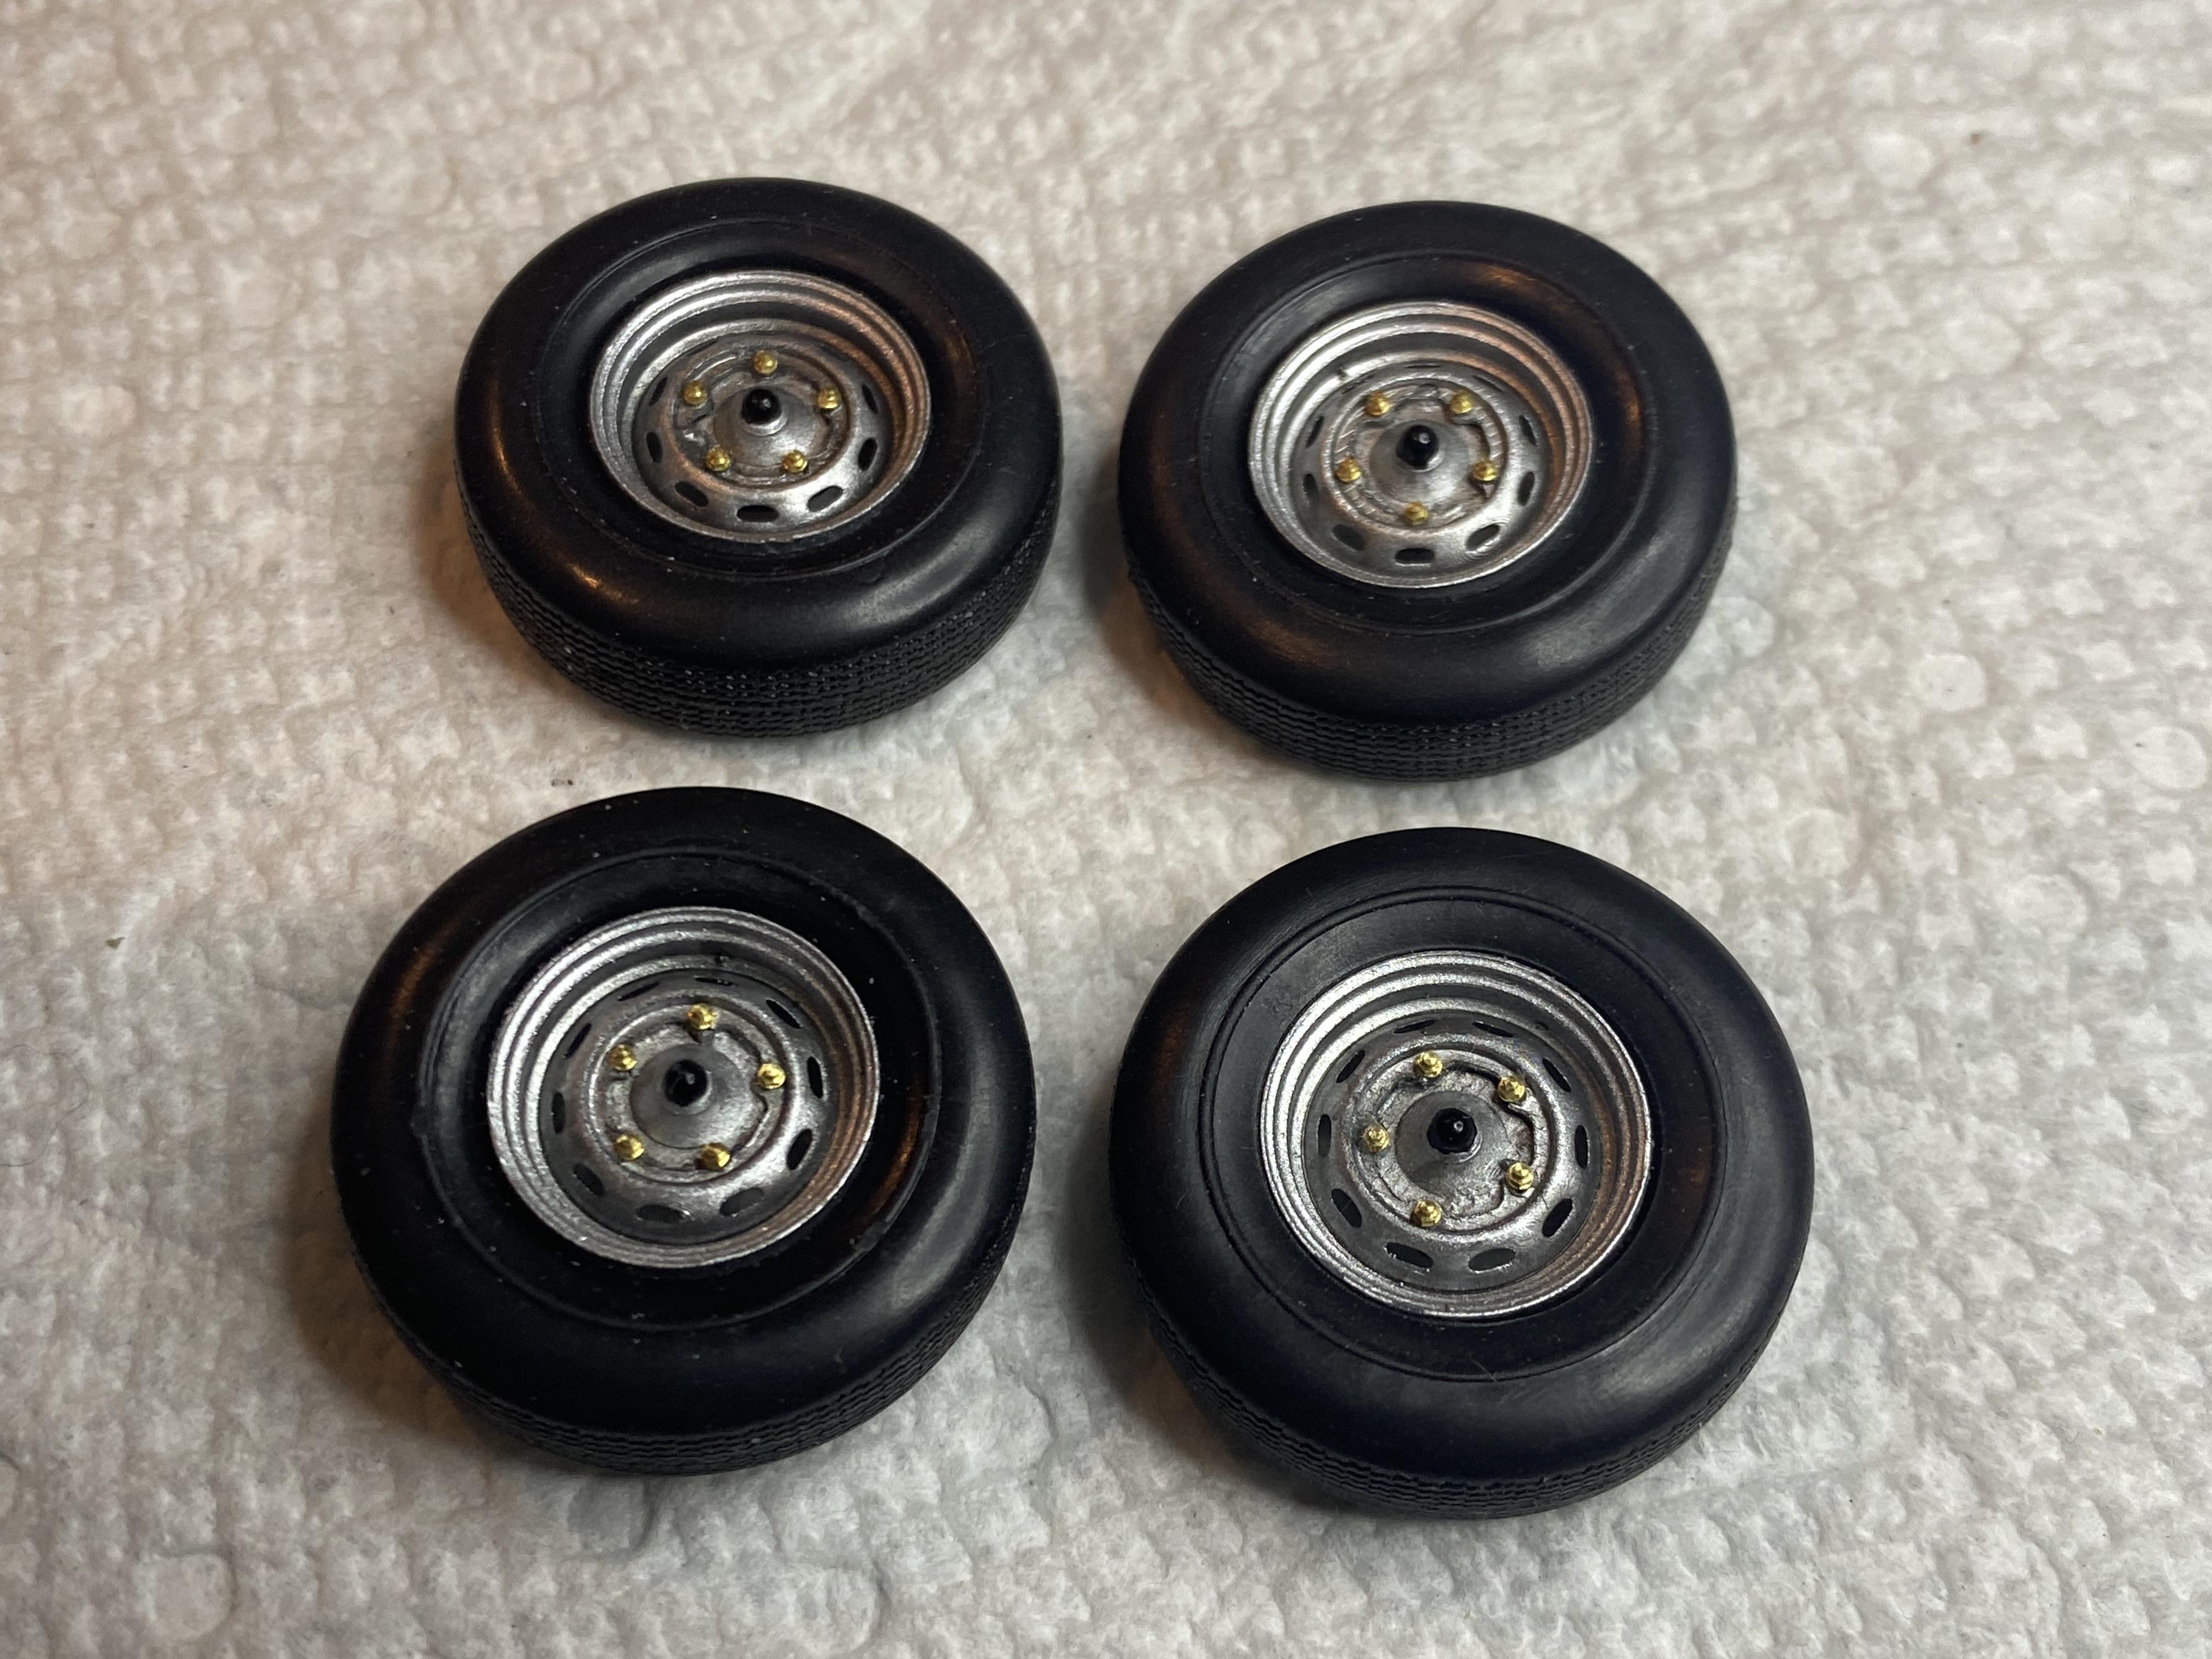
Got quite a bit more work done today. Drilled the holes and added the rivets for lug nuts to the wheels. Installed the suspension to the chassis. added the emblem scripts to the front. Added the bumper, license plate and emblem scripts to the rear.
-
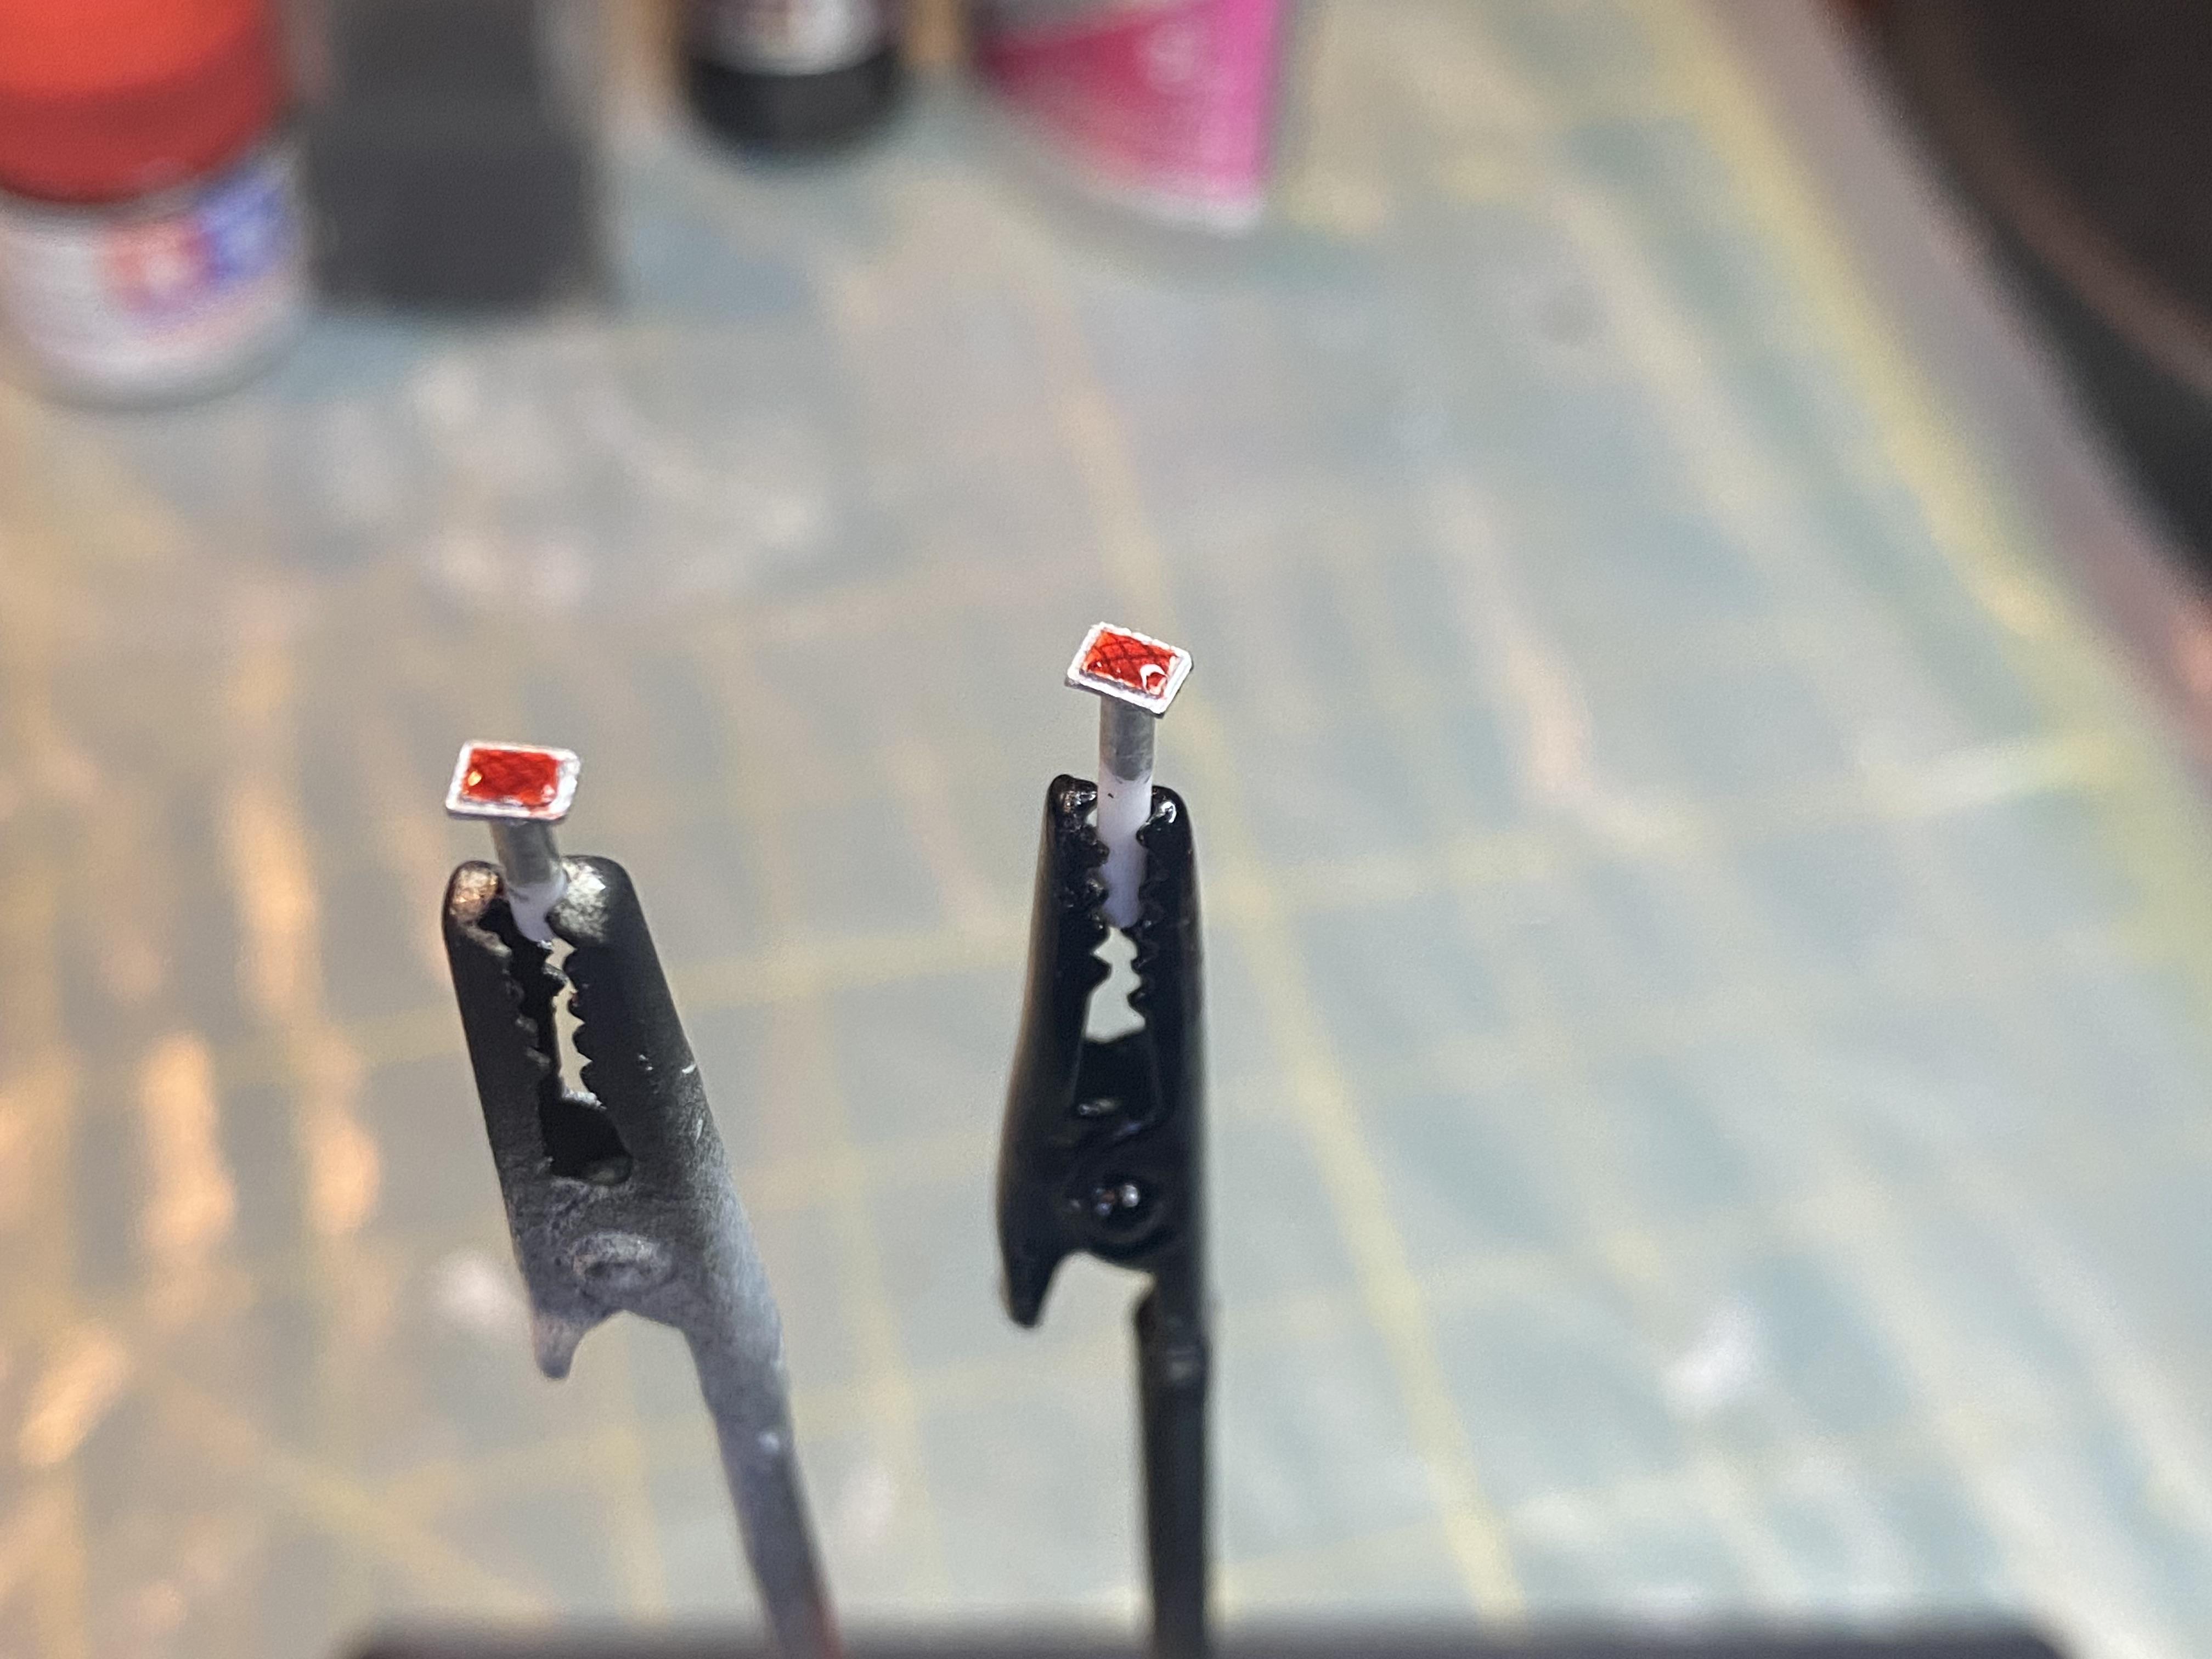
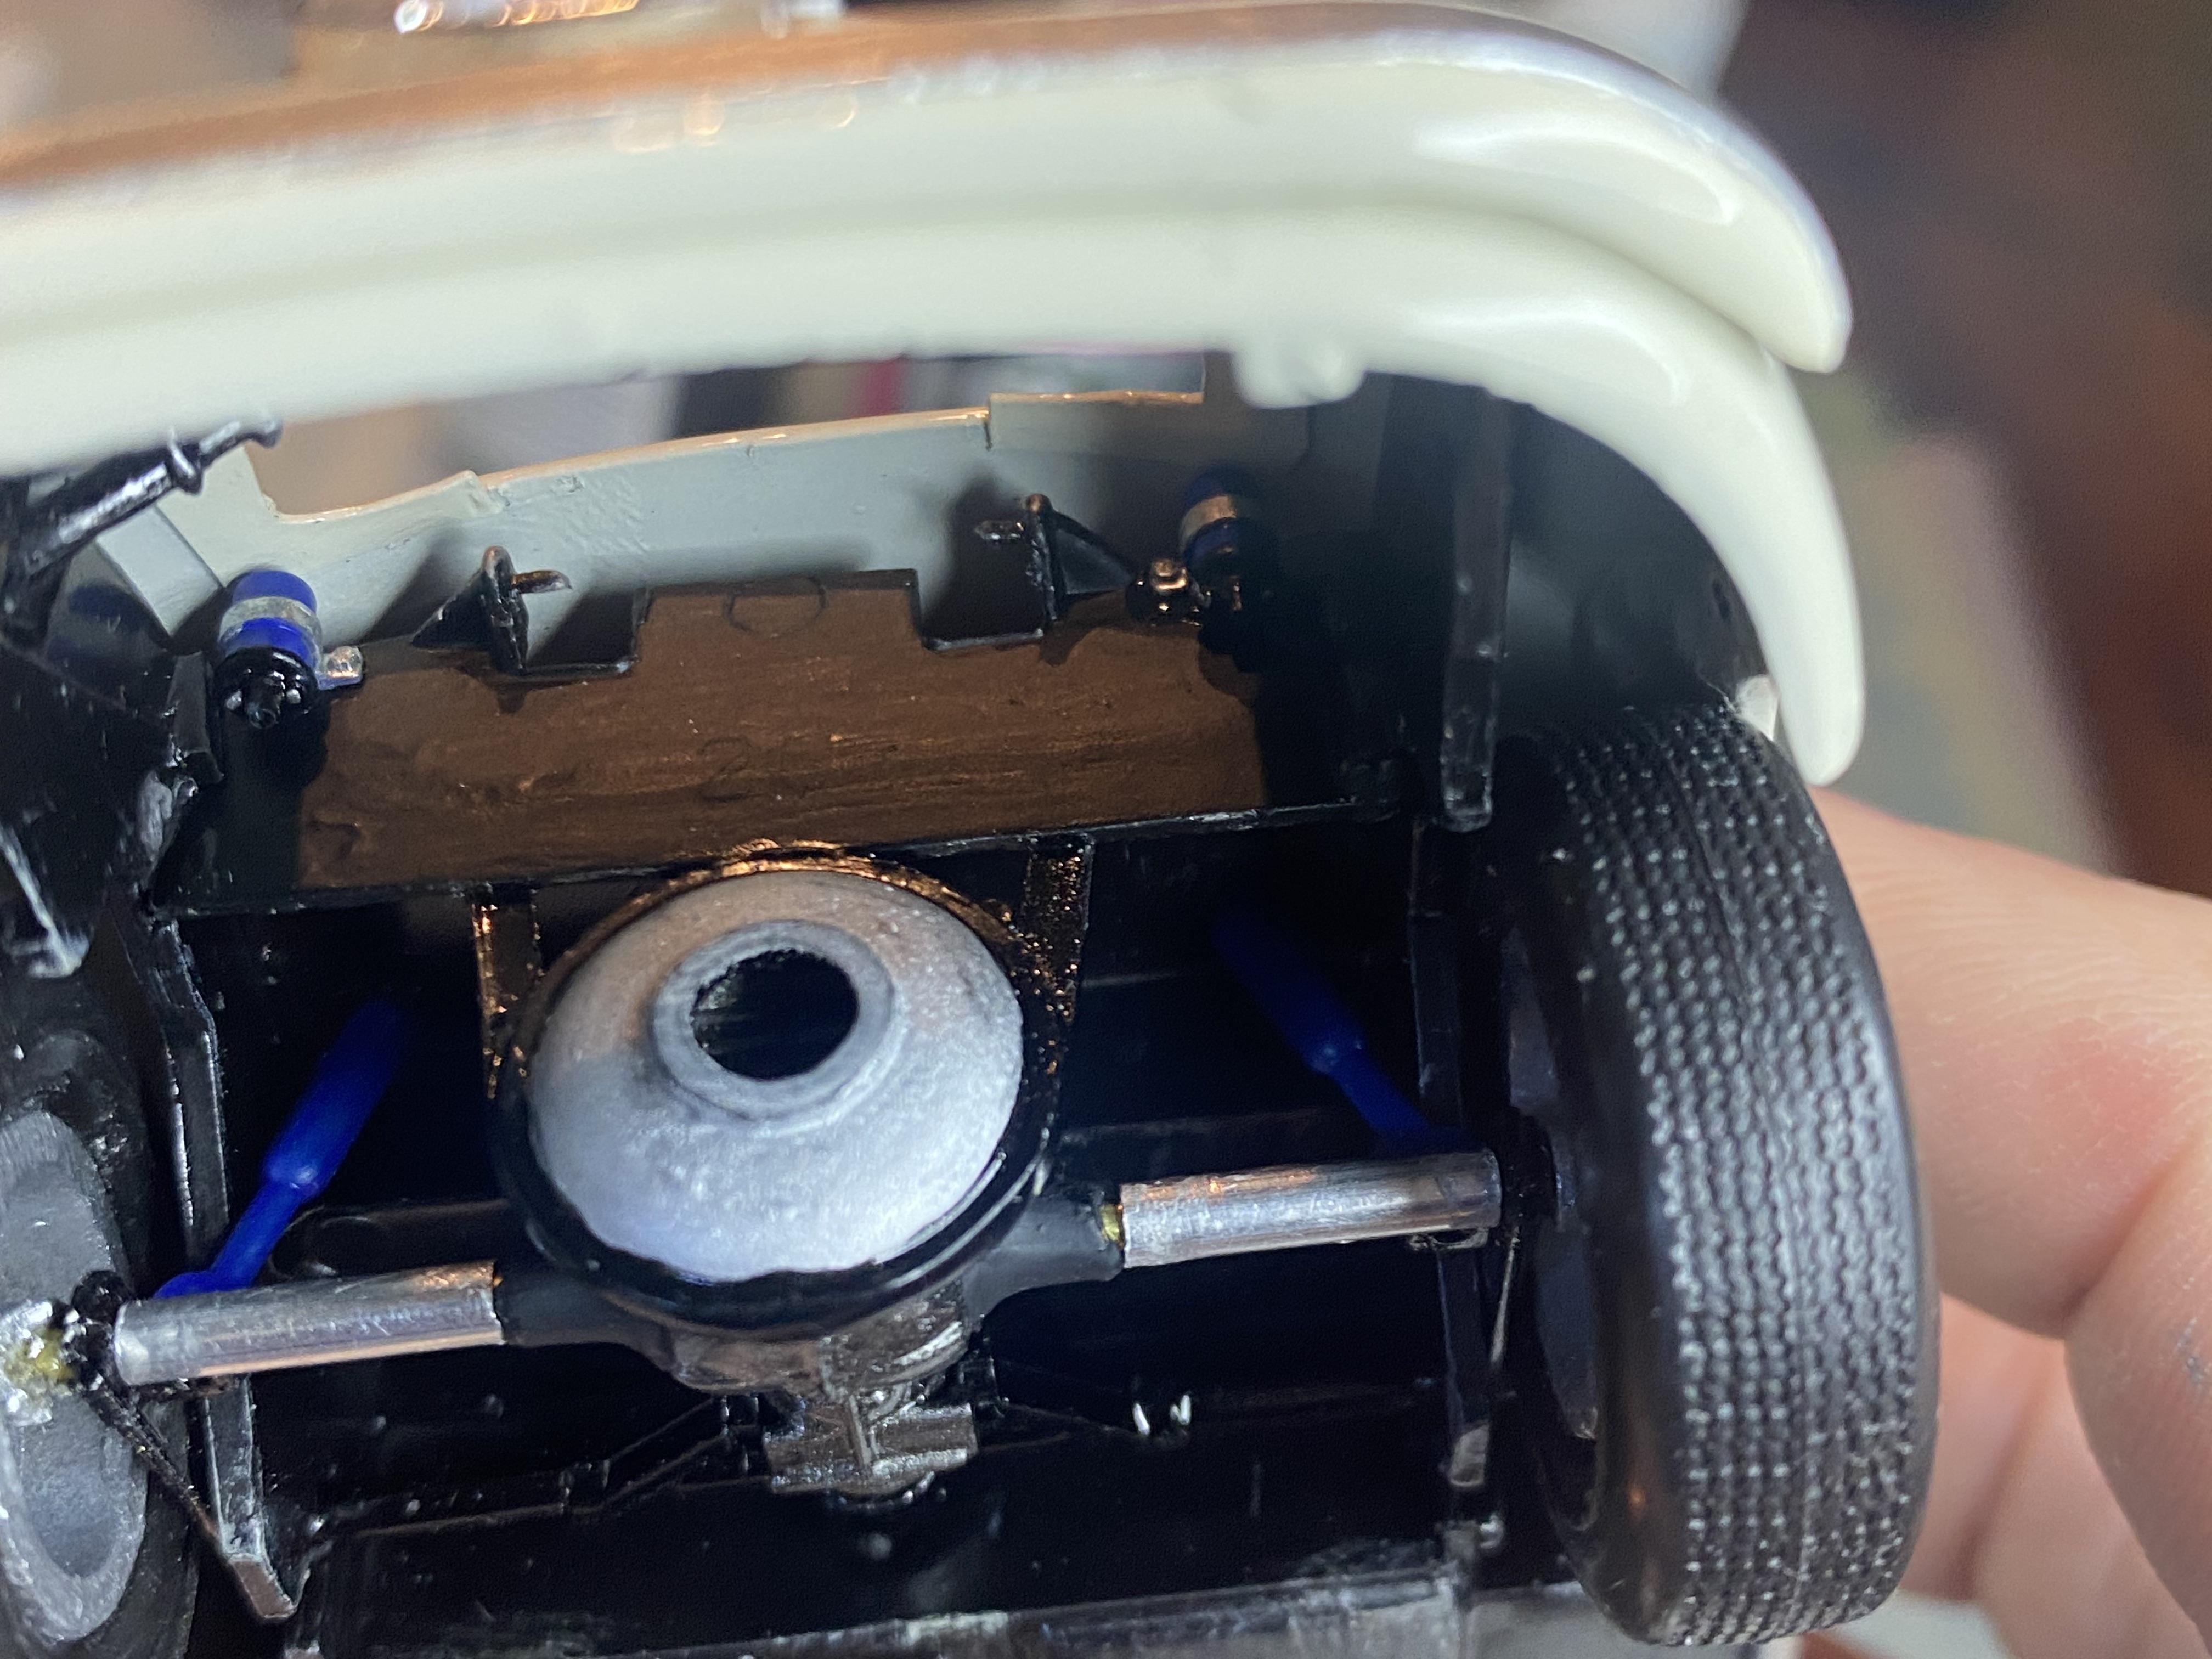
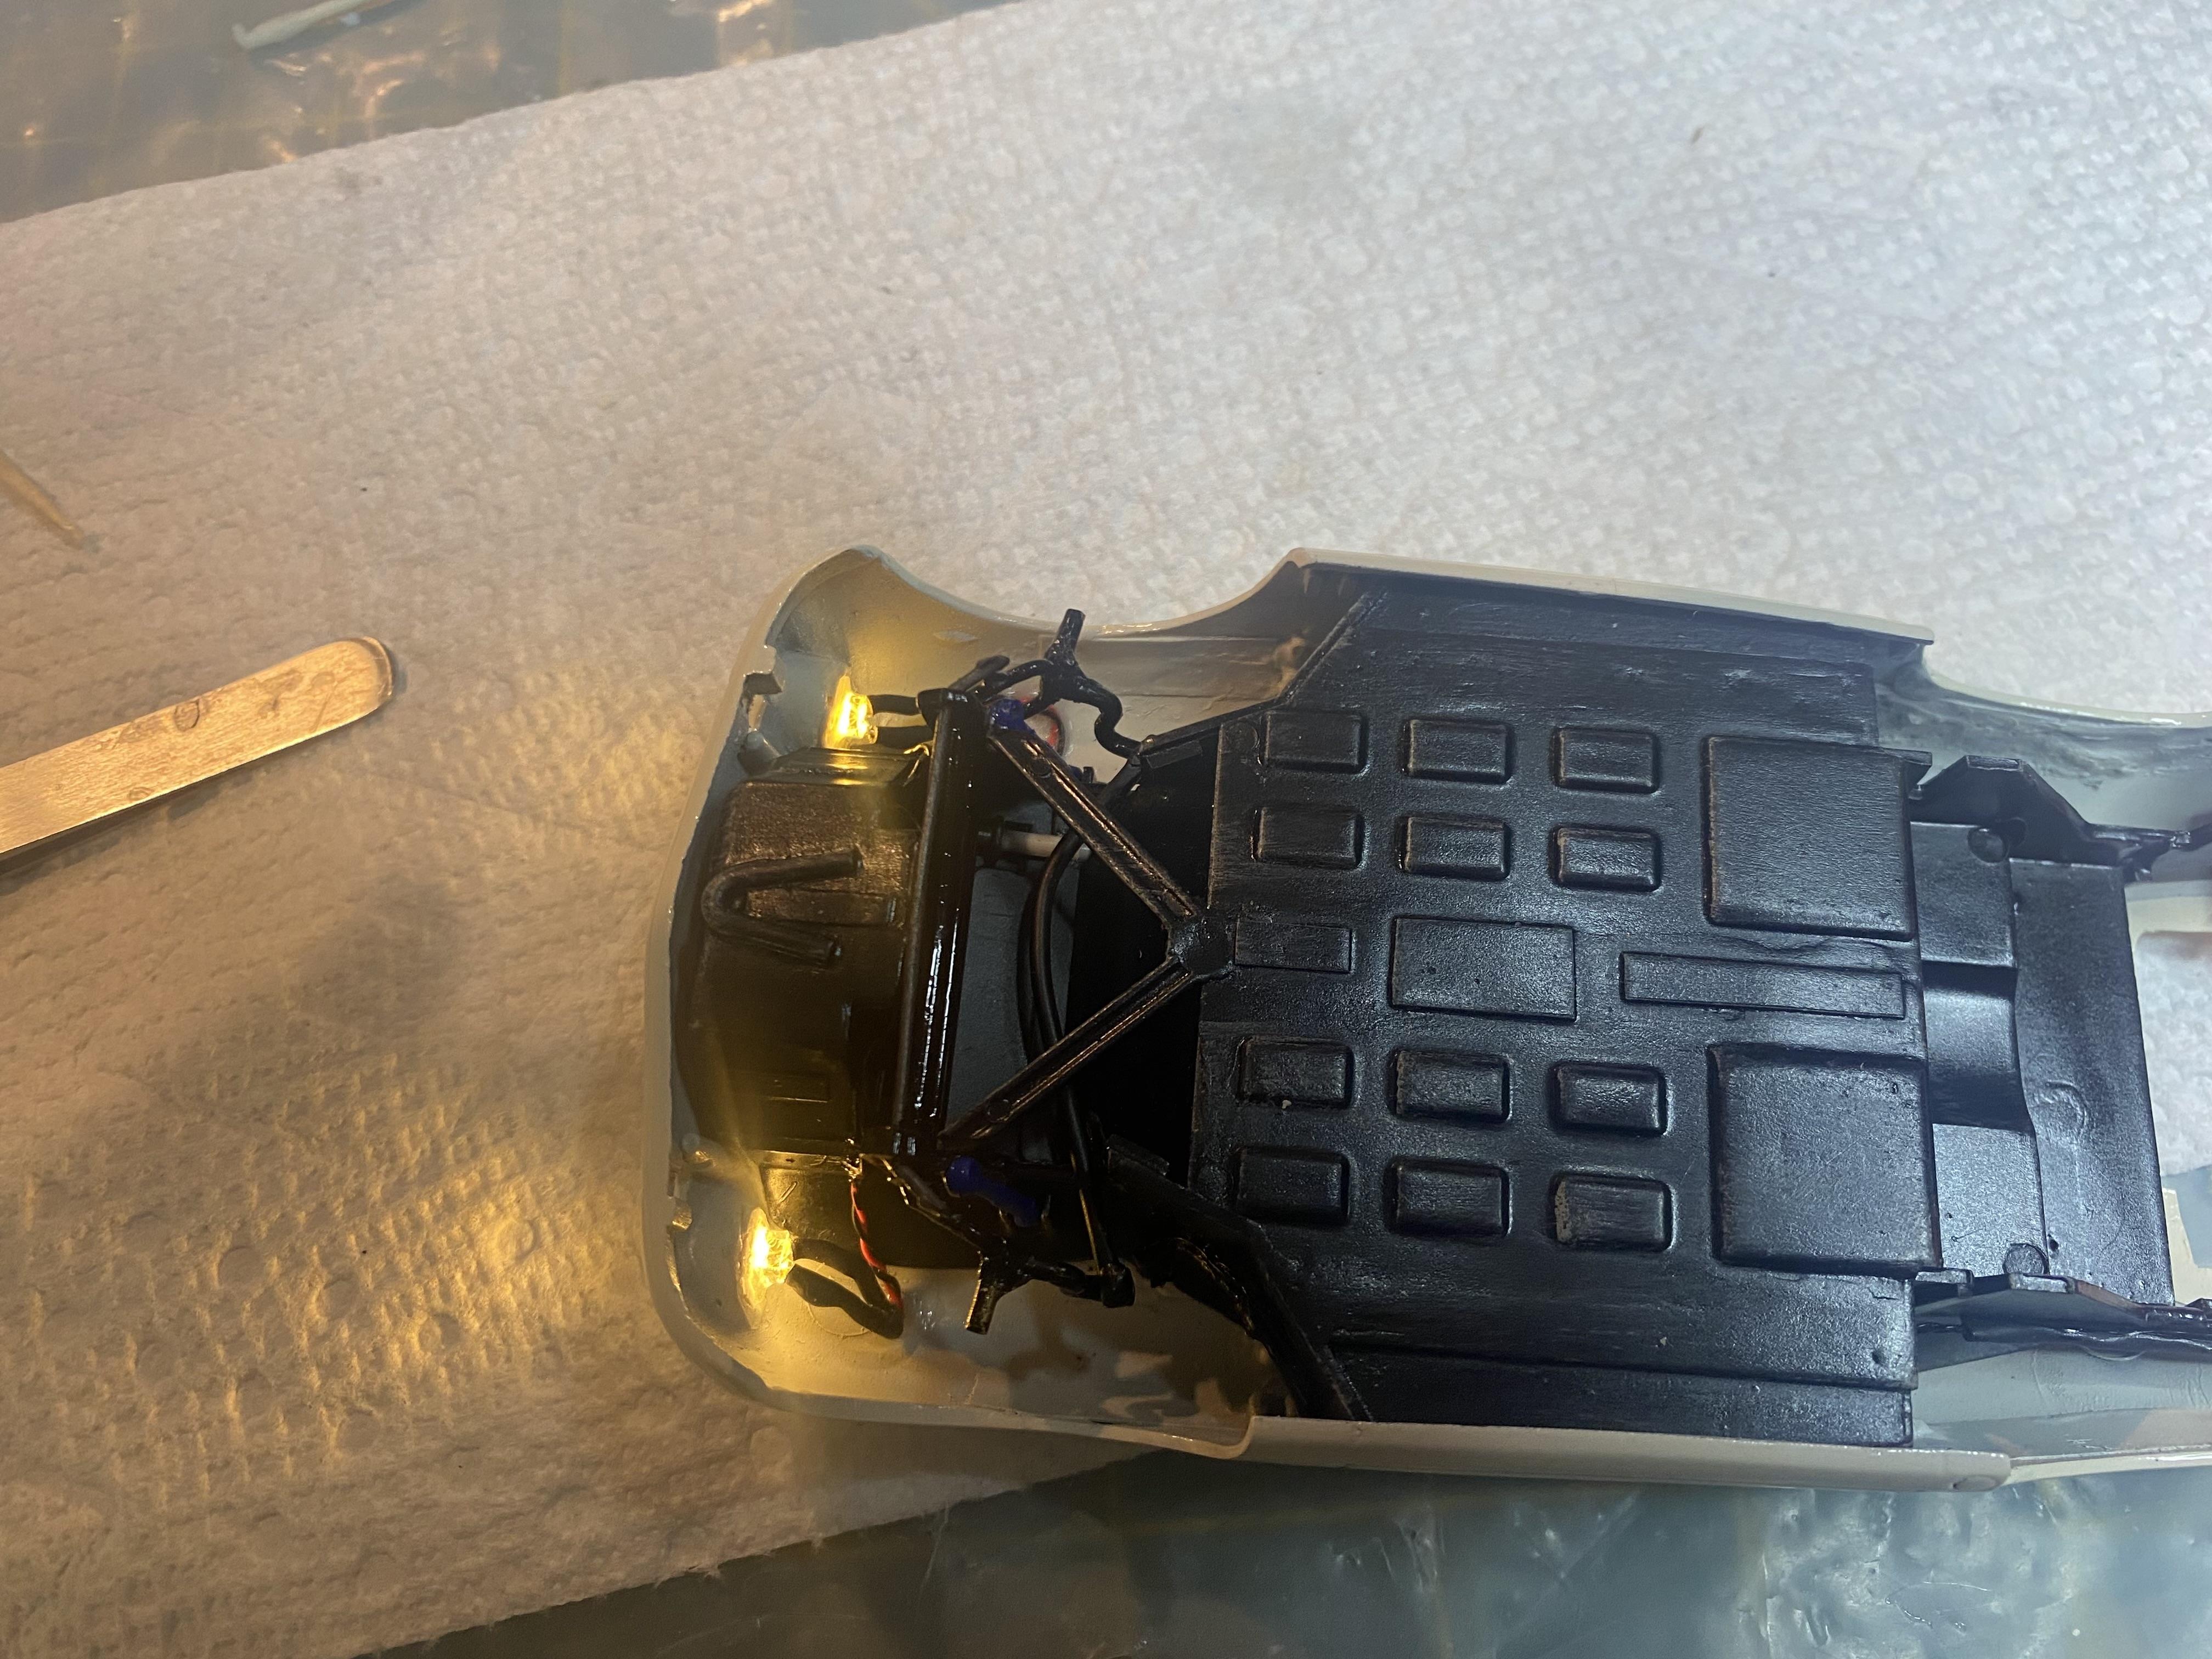
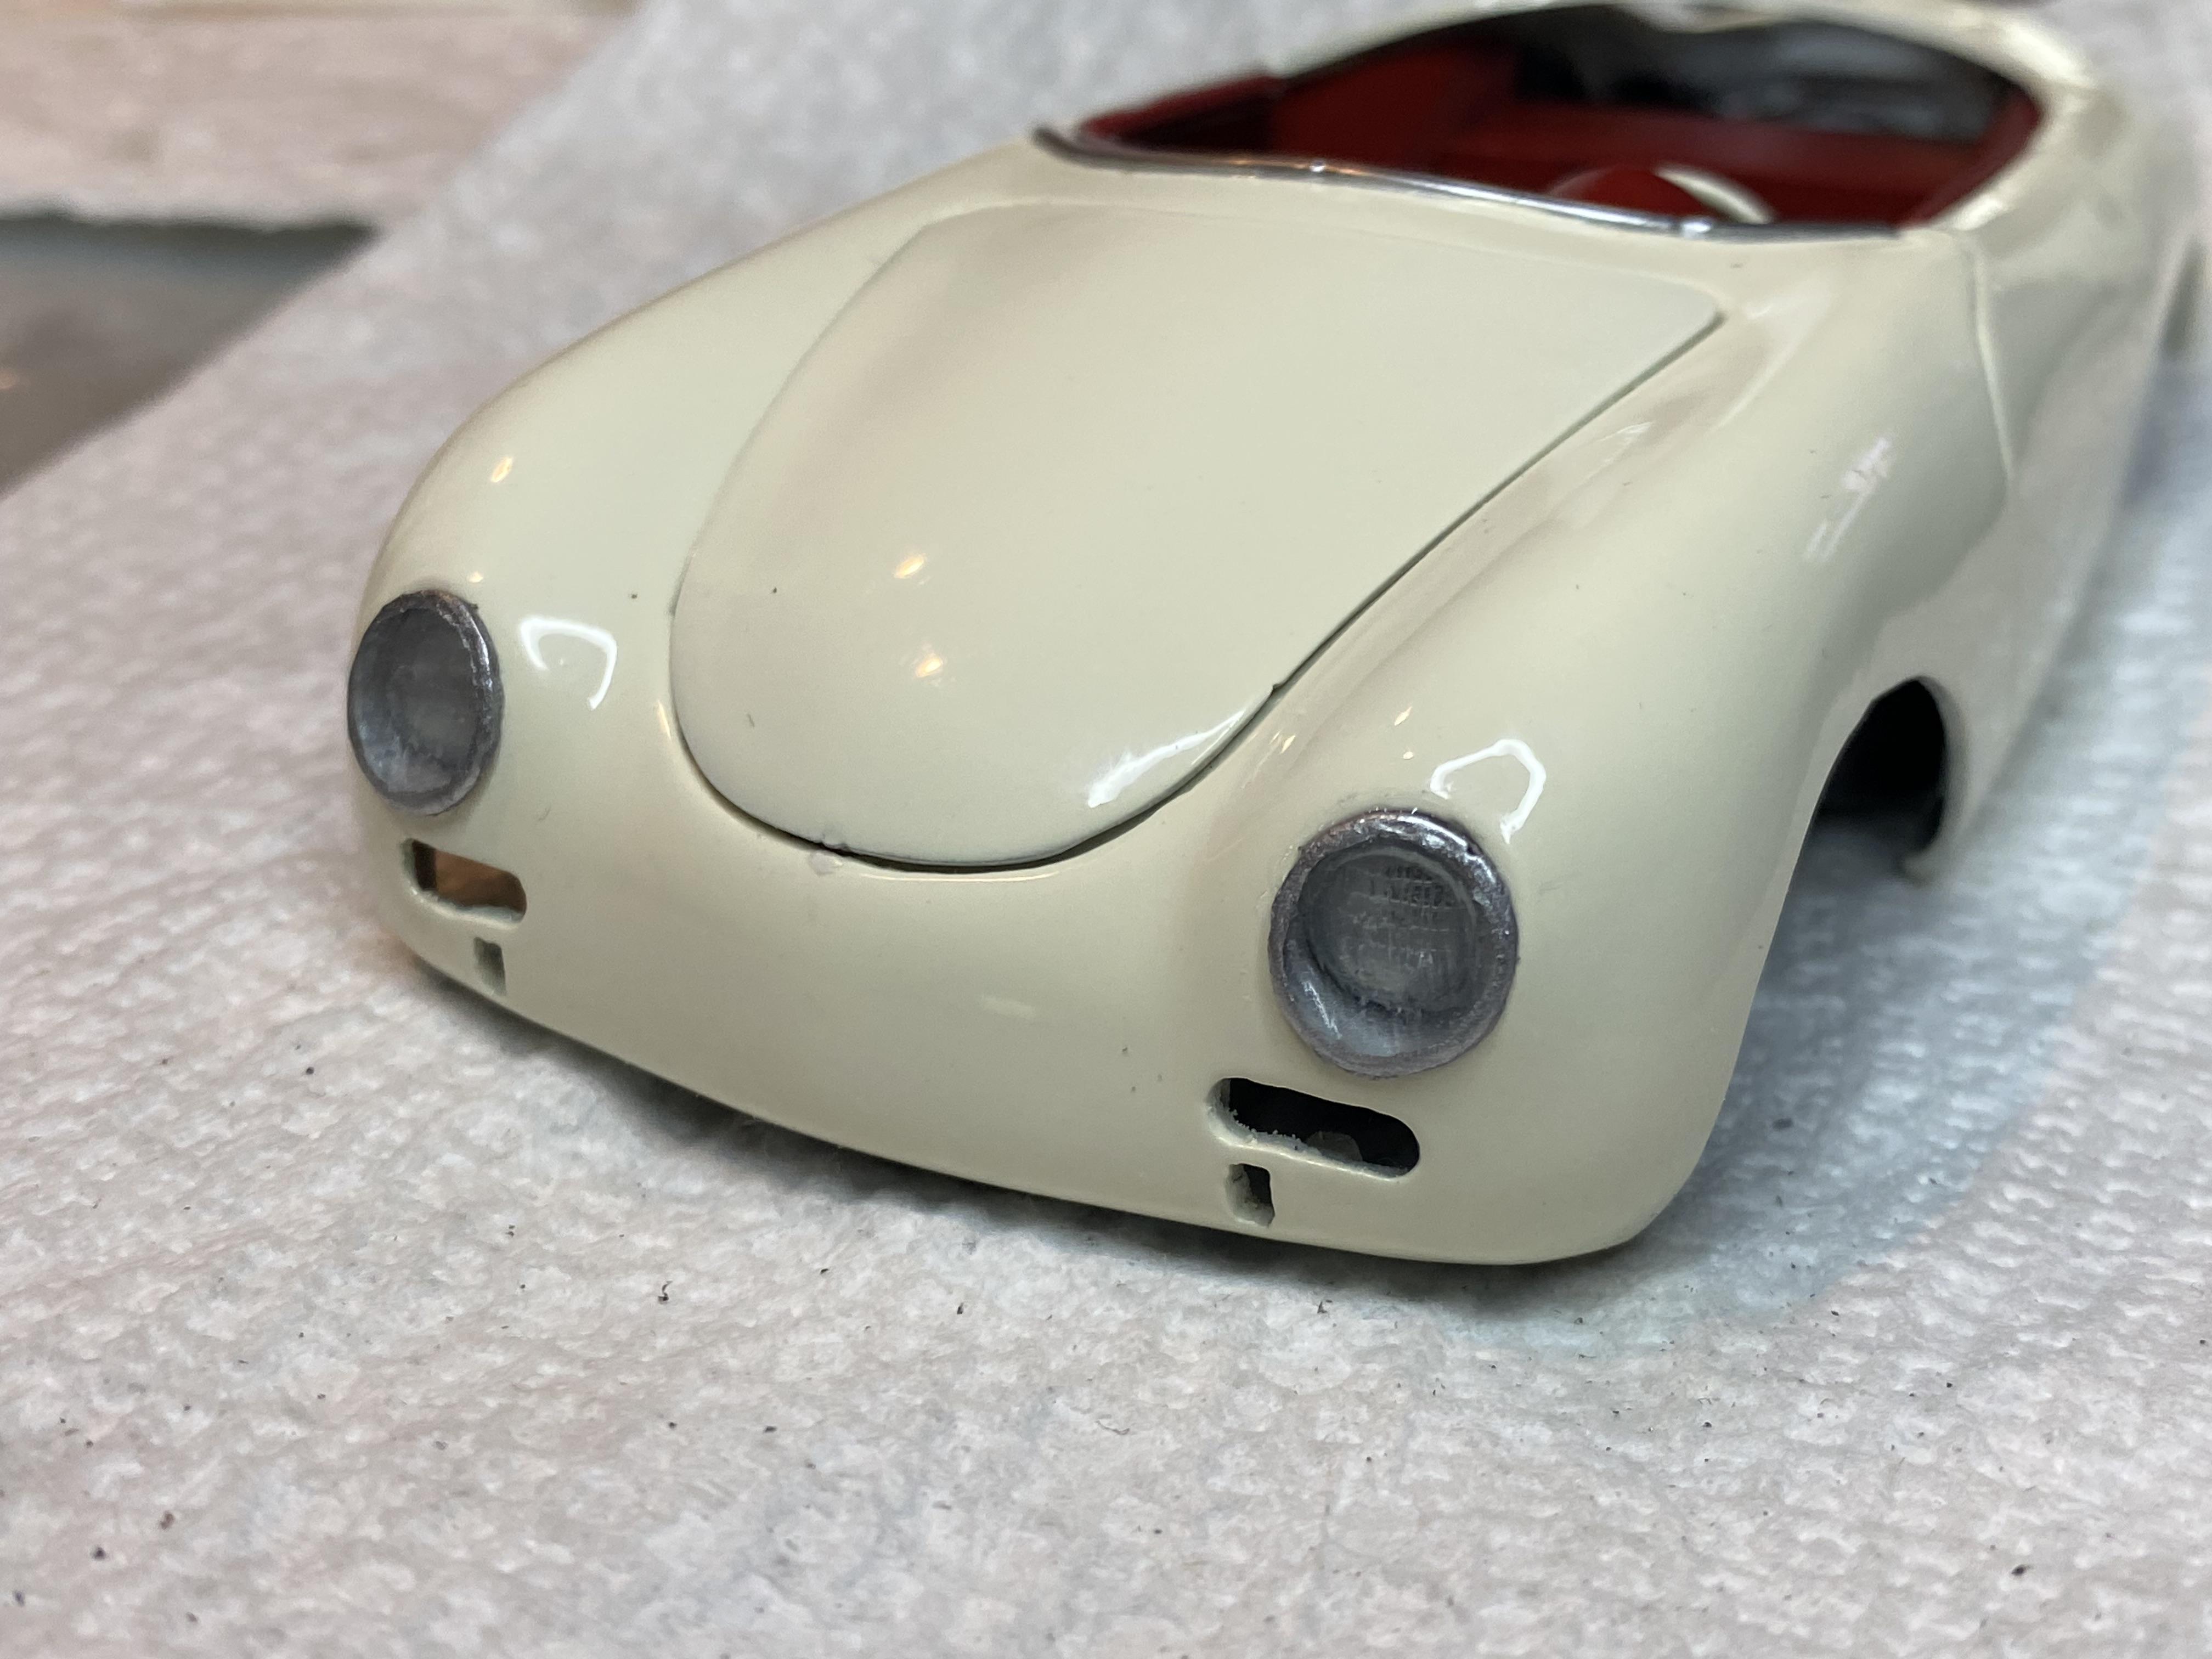
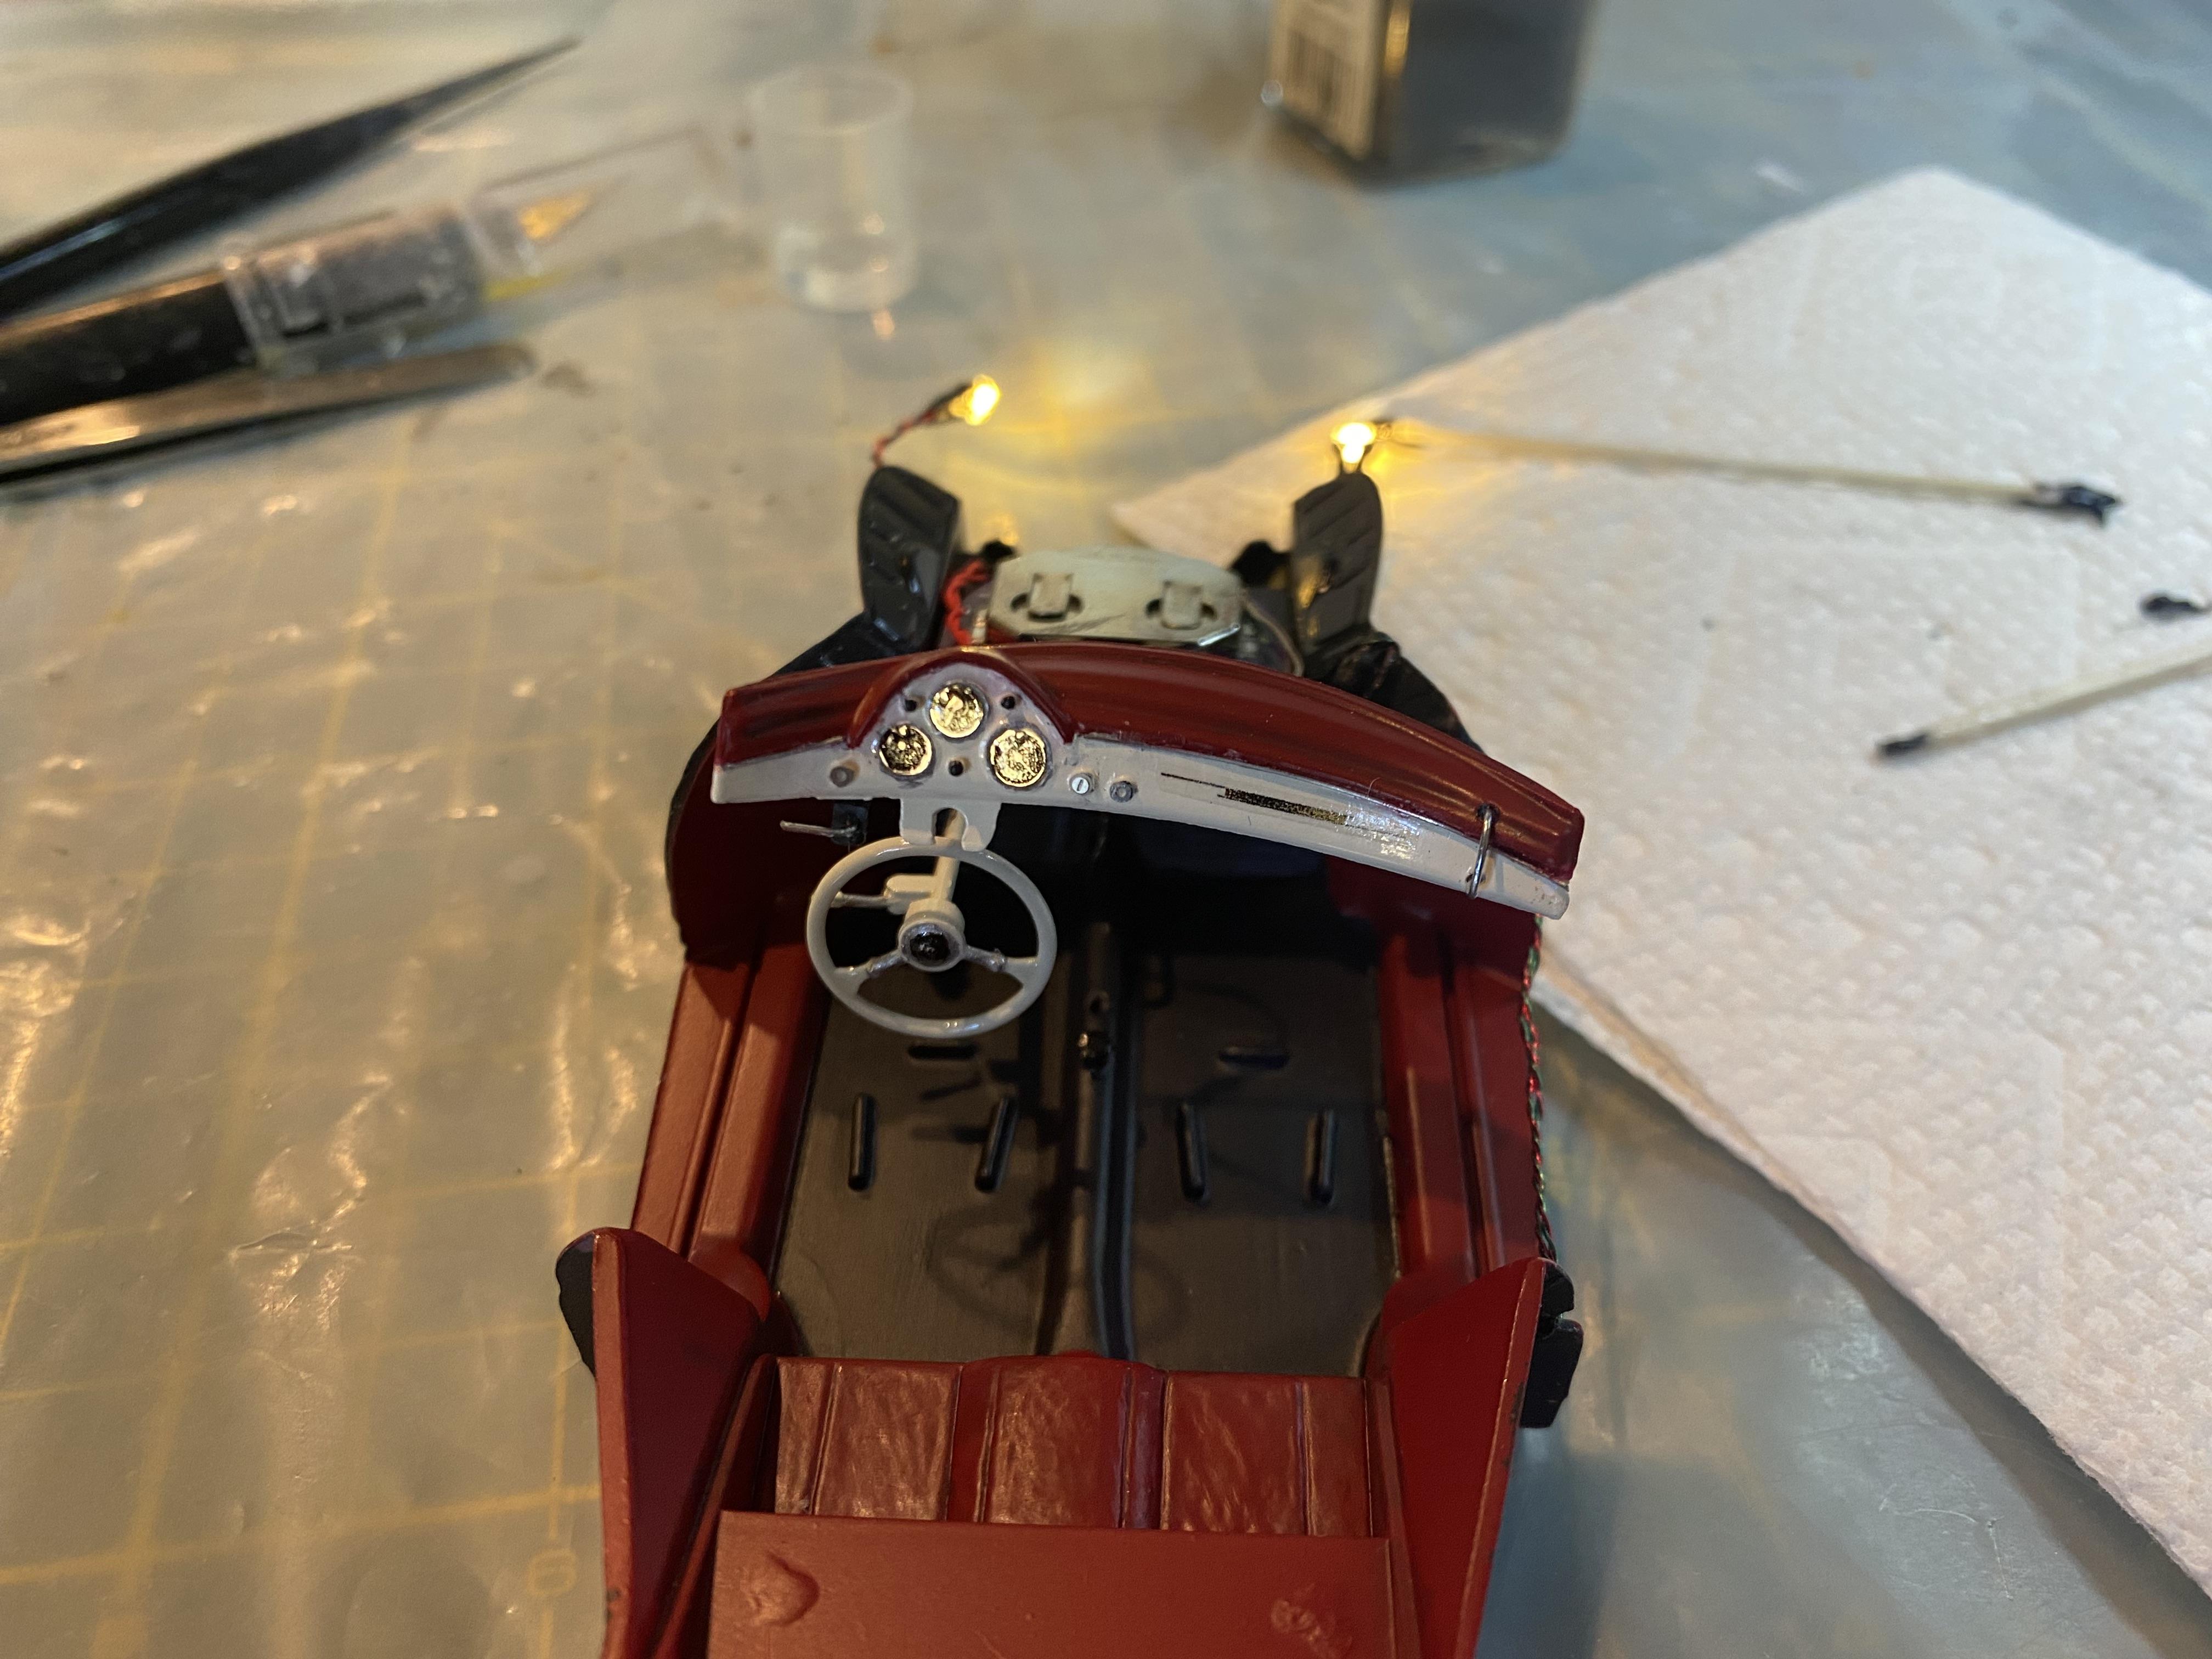
Final assembly is now well under way after wet sanding and polishing the body today. I created the battery cover spare with a hold down strap and gas tank top. body polished and assembled with the chassis. LED attached and sealed. inner headlight lenses and covers installed as well as front bumper and some trim.
-
Thank You! Oddly enough the 57 Thunderbird is one I am least happy with, but considering the kit I started with it turned out pretty well but did require a lot of work. It does seem to get a lot of praise and was photographed at the Spirit of Speed Model show this last Nov. It should be in a coming issue of Auto Modeler Magazine. Just never know what is going to be most liked by others so always build for what you like right?
-
Thank You! Glad to hear someone enjoys seeing my process. Thank You!
-
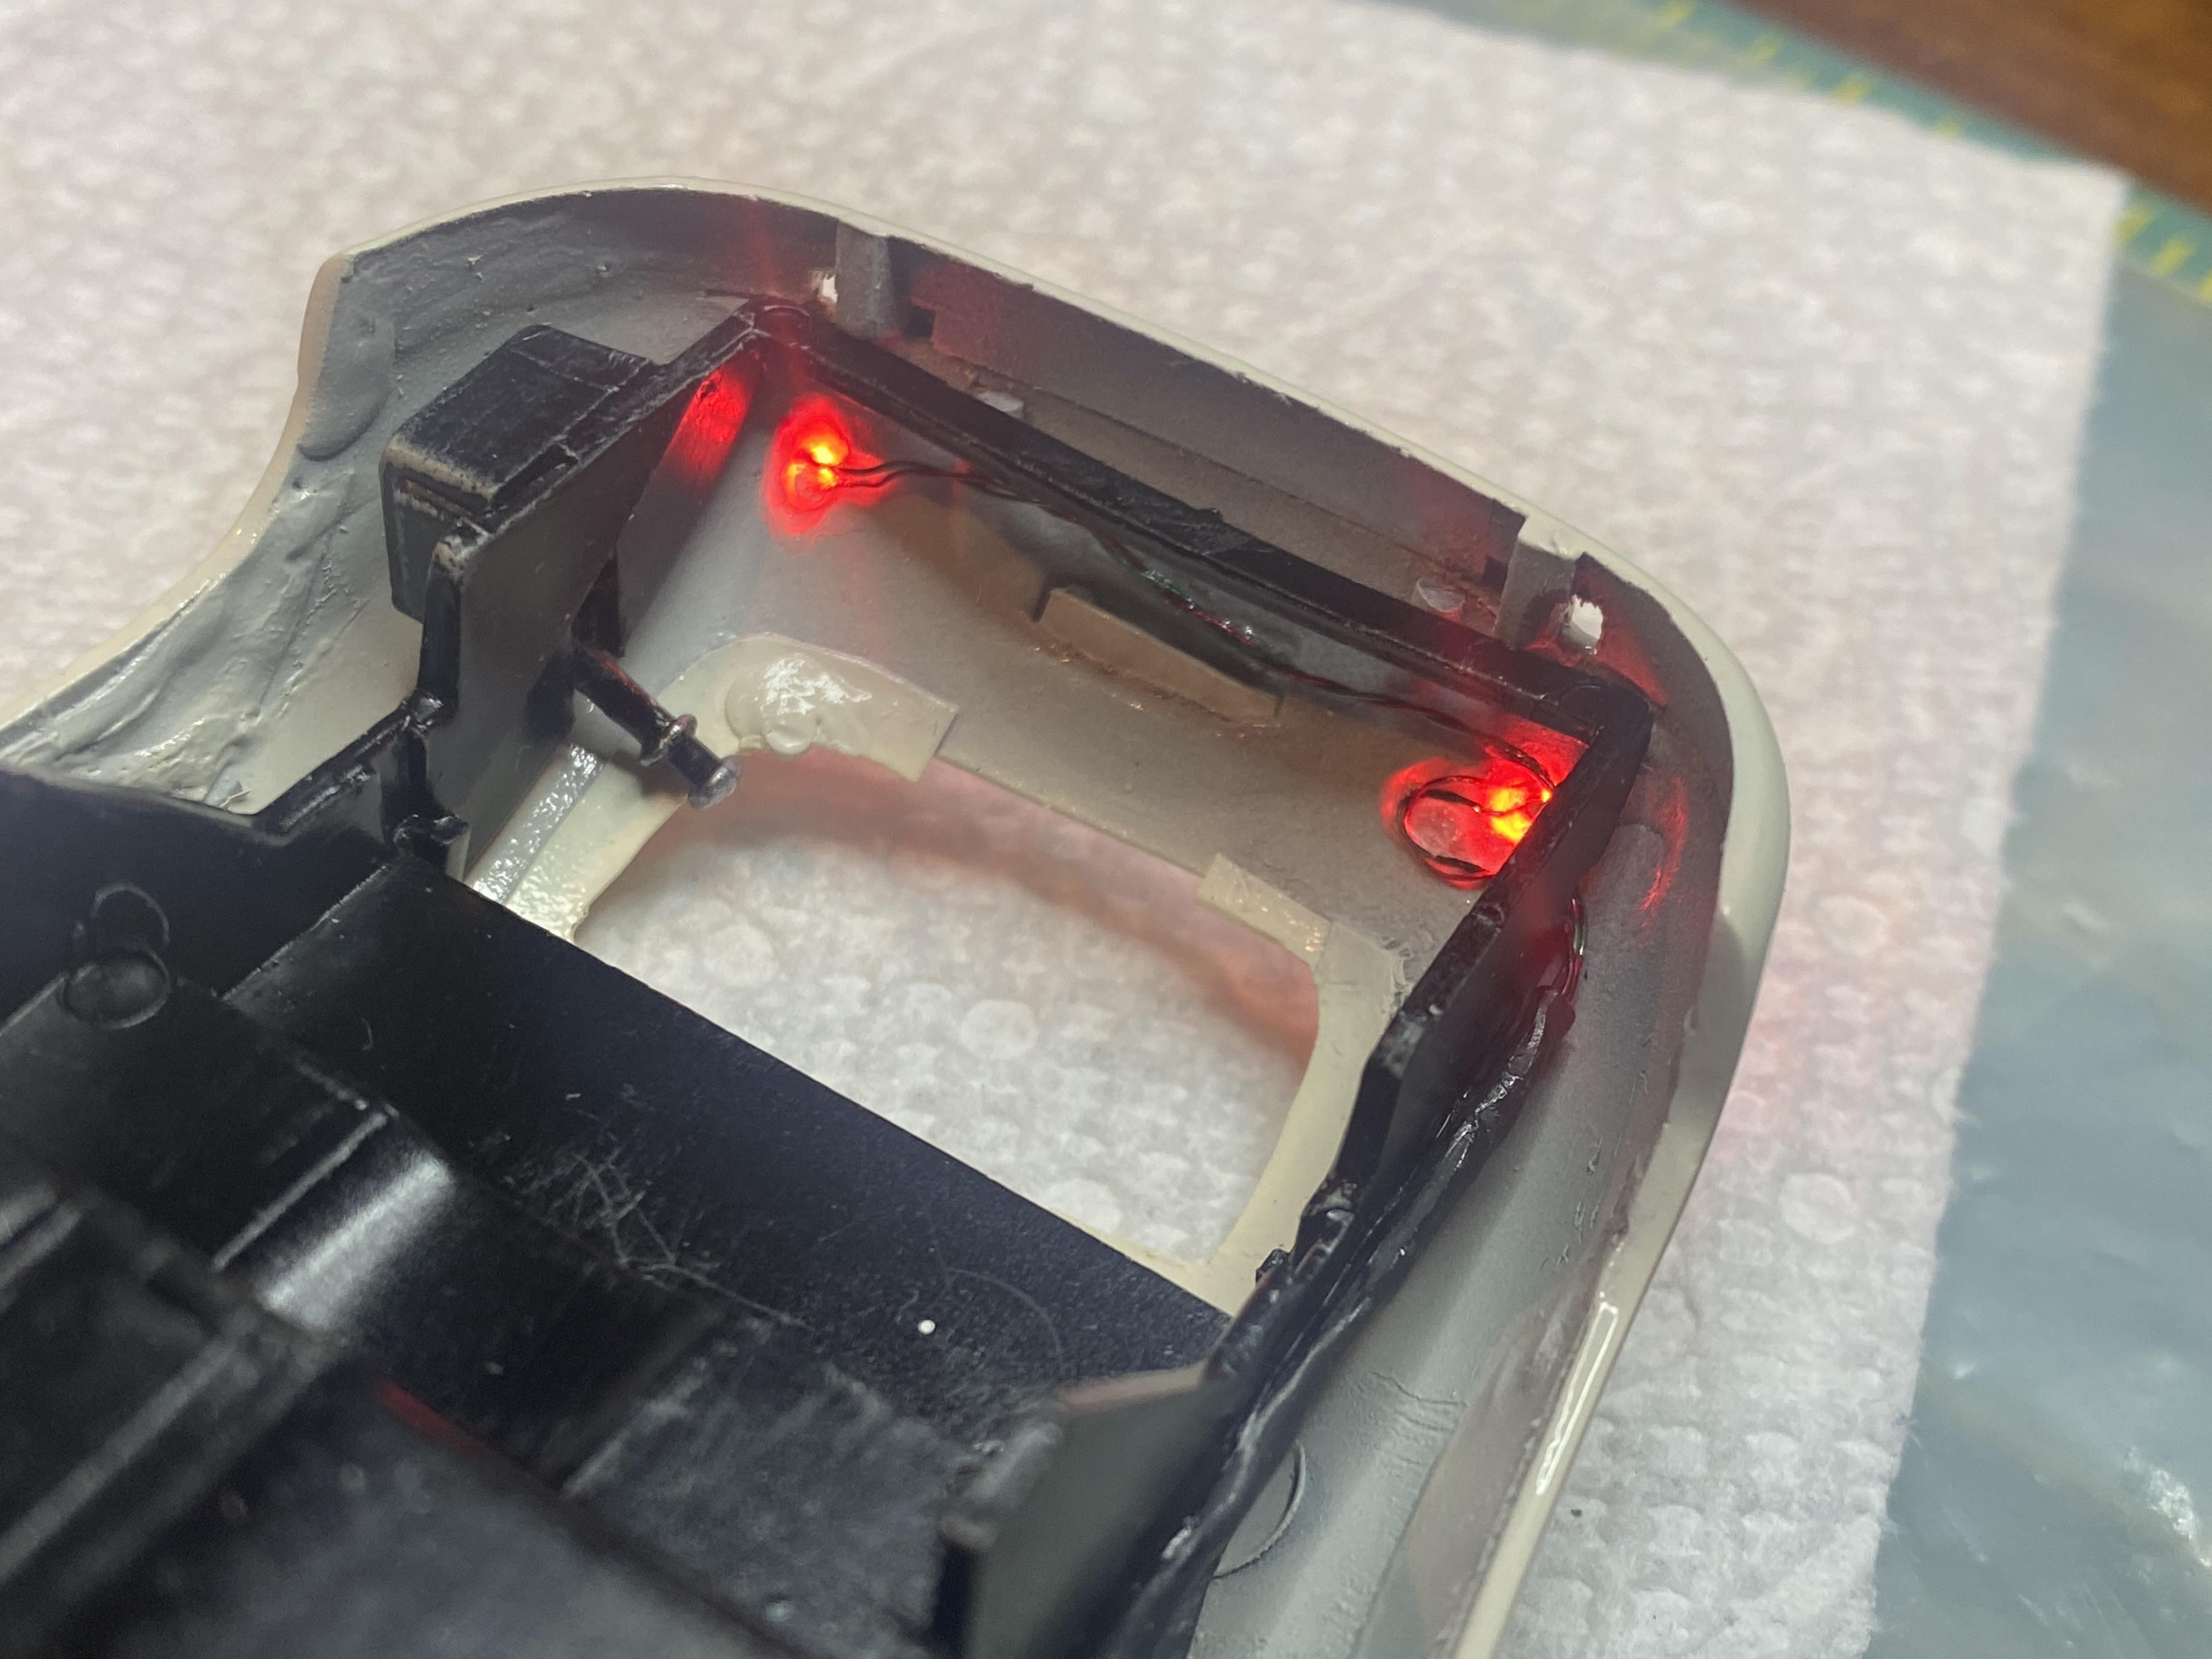
Today I sprayed 2k on all of the body components as well as a few others. I now wait at least 48 hours to wet sand and polish. LED wiring harness added to chassis including sealing to dash panel.