LennyB
-
Posts
3,214 -
Joined
-
Last visited
Content Type
Profiles
Forums
Events
Gallery
Everything posted by LennyB
-
Looks like an interesting project. Don't know that I've ever seen that custom gill treatment, it that from an early tooling?
-
One of my favorite Fords, looks sweet
-
Looks really nice. I’m guessing this is the monogram kit.
-

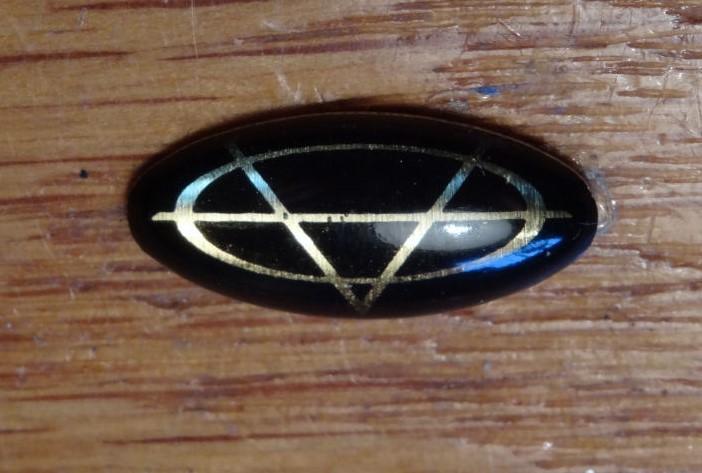
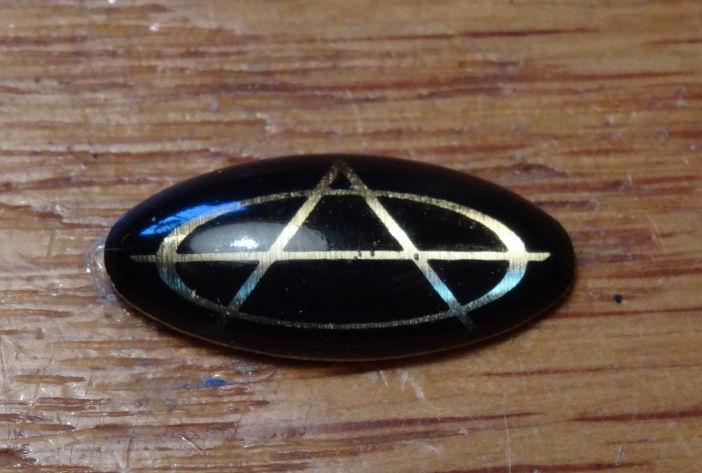
Can anyone identify this emblem?
LennyB replied to LennyB's topic in Model Building Questions and Answers
Yes, it’s quite small. Only a half inch wide. Small enough to work as a 1/25th car emblem? -
Can anyone identify this emblem?
LennyB replied to LennyB's topic in Model Building Questions and Answers
I just found it lying on a sidewalk. It had adhesive on the back so it obviously fell off of something. BTW it’s made of plastic. Interesting, thanks for doing the work. As it was found in New York a UK connection is possible but unlikely. As I mentioned above it is plastic and is dome shaped with the logo imbedded in the plastic. Could be a one off logo but professionally done. Often thought it might be off of the box an item came in but not the actual item, such as a watch box. The quest goes on? -
David At the time the first movie came out my father worked for VW. While corporate may not have had an agreement with Disney the dealers were all over it. Locally the dealer worked out an arrangement with the theater and they had a brand new beetle on display on the sidewalk in front of the theater. No it wasn't white and no it wasn't #53. I think it was actually red.
-
Ken, it came out killer. ?
-
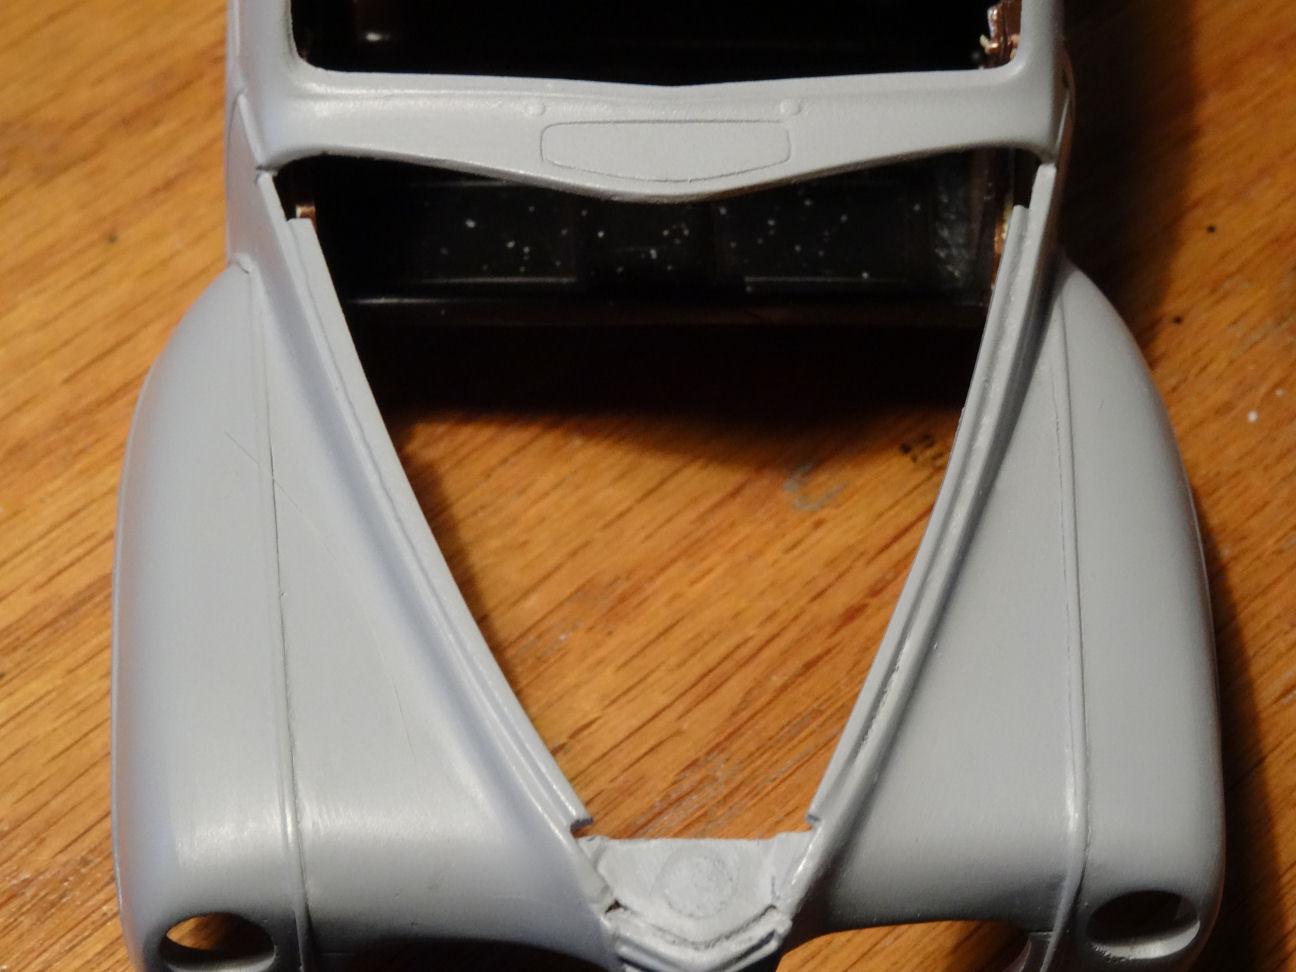
Well, I guess we can't blame AMT for this one.? I think inspector #25 is to blame, according to the mark under the trunk lid he approved it. All nonsense aside, I think it's looking pretty good. Considering the simplicity of the kit it has some nice details and you have highlighted them well. The headlights in particular. I am surprise they don't have the VW crest on the hubcaps.
-
Cool color choice, what do you call that color?
-
Can anyone identify this emblem?
LennyB replied to LennyB's topic in Model Building Questions and Answers
I don't disagree that it looks like an "anarchy symbol", and I have no problem with it being one, but that's not the answer I'm looking for. This came off of something and I'm interested in finding out what. I also don't know which way it should face, my image for all we know could be upside down. I actually did a reverse image search, where you upload an image to Google, and I got a lot of Celtic symbols and the like but no exact matches and no hits for an anarchy symbol.
-
Can anyone identify this emblem?
LennyB replied to LennyB's topic in Model Building Questions and Answers
True I suppose,but they are not usually gold and oblong. I thought for a while it might be from a bottle of perfume or cologne but never found a match. -
OK, this is a bit out in left field but just wondering if anyone can identify this emblem. I have a custom AMT 1949 Mercury project that dates back to the 70's. I built it once painted Testors orange, and then tore it down. Built it again in a dark blue, and tore it down. Started building again and then put it back in the box. At one point I found this emblem lying on a sidewalk. It's about 1/4" high and 1/2" wide. Thought it would make a nice crest for the trunk. It's been floating around in a plastic bag for over 40 years. I thought I had lost it but it turned up recently. But I have no idea what it's from. So if anyone has a clue, please let me know.
-
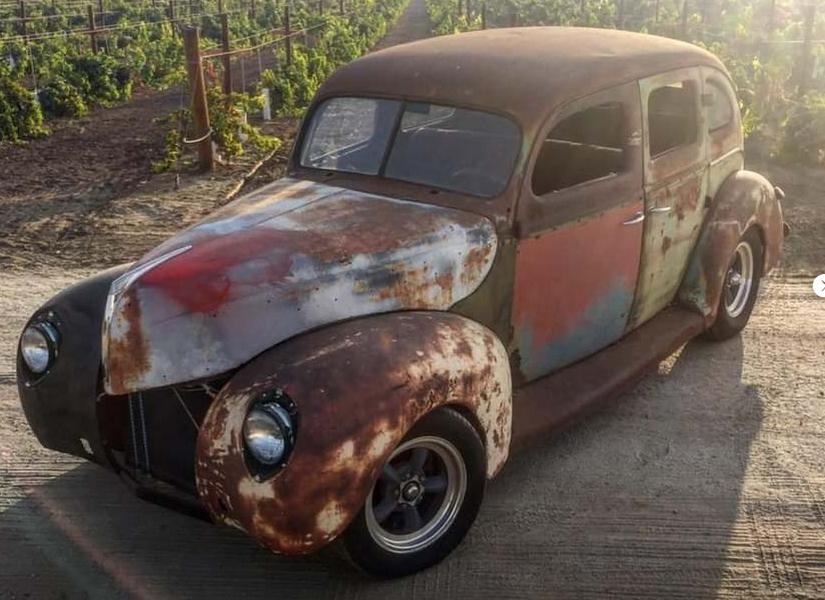
Season 6 Episode 7 of Roadkill Garage they converted General Mayhem back to vintage HP. Just started watching Season 9 Episode 1 and they are bringing back the Bootleg Ford Fordor. Now I got the bug to build it. This is a pic from a few years back, couldn't find a current shot. But check out the episode if you can.
-
David, I agree it works. And of course we're going to blame AMT for the gap.?
-
Some commentators hold that since kudos is a singular word it cannot be used as a plural and that the word kudo is impossible. But kudo does exist; it is simply one of the most recent words created by back-formation from another word misunderstood as a plural. Kudos was introduced into English in the 19th century; it was used in contexts where a reader unfamiliar with Greek could not be sure whether it was singular or plural. By the 1920s it began to appear as a plural, and about 25 years later kudo began to appear. It may have begun as a misunderstanding, but then so did cherry and pea.
-
I’m pretty sure that came out again. So much better with vintage horsepower.
-
Hey, go right ahead Jim. I used your magnet idea so it’s only fair.?
-
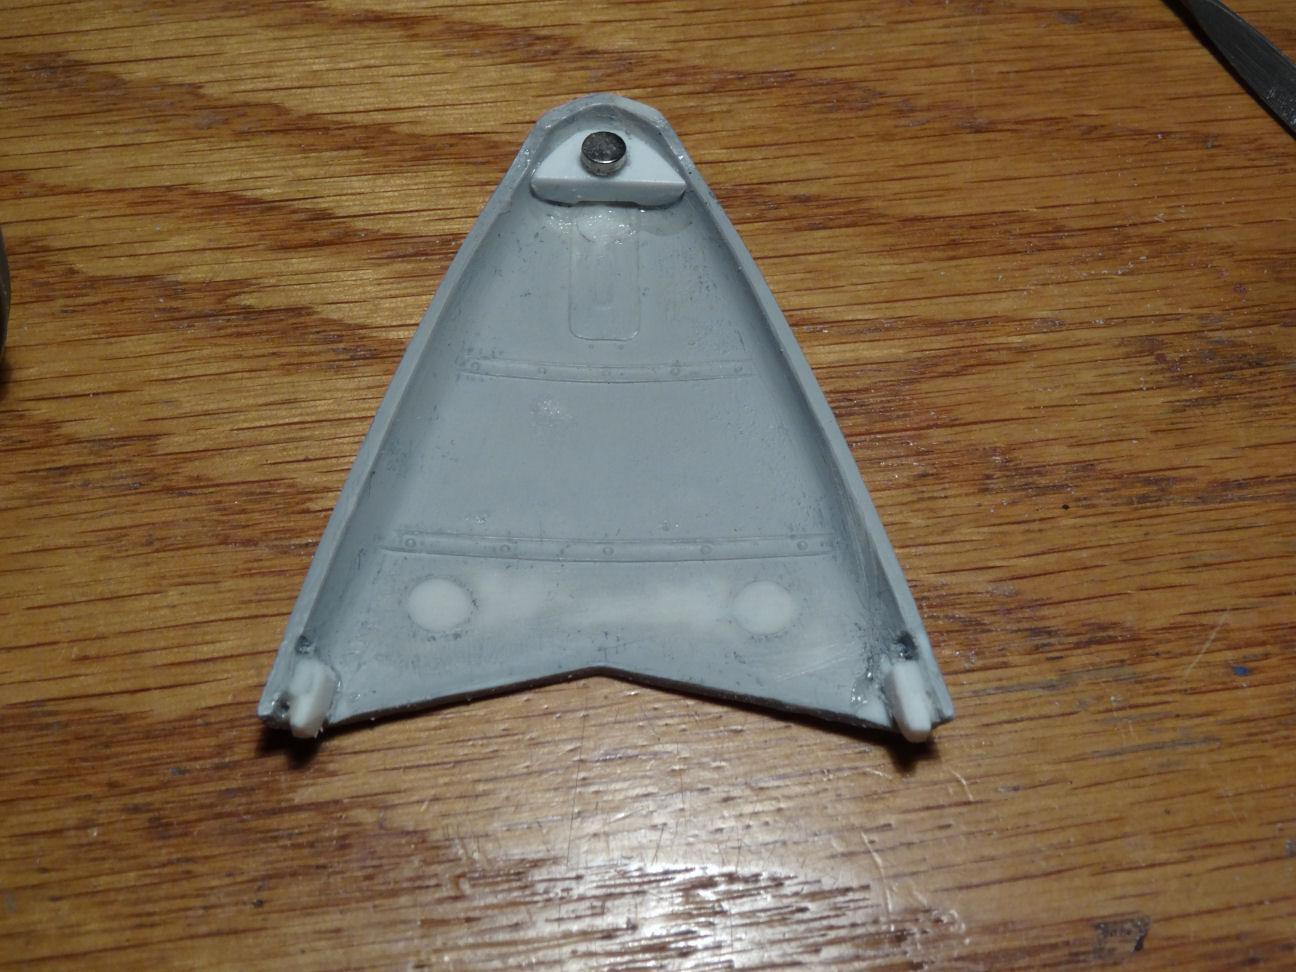
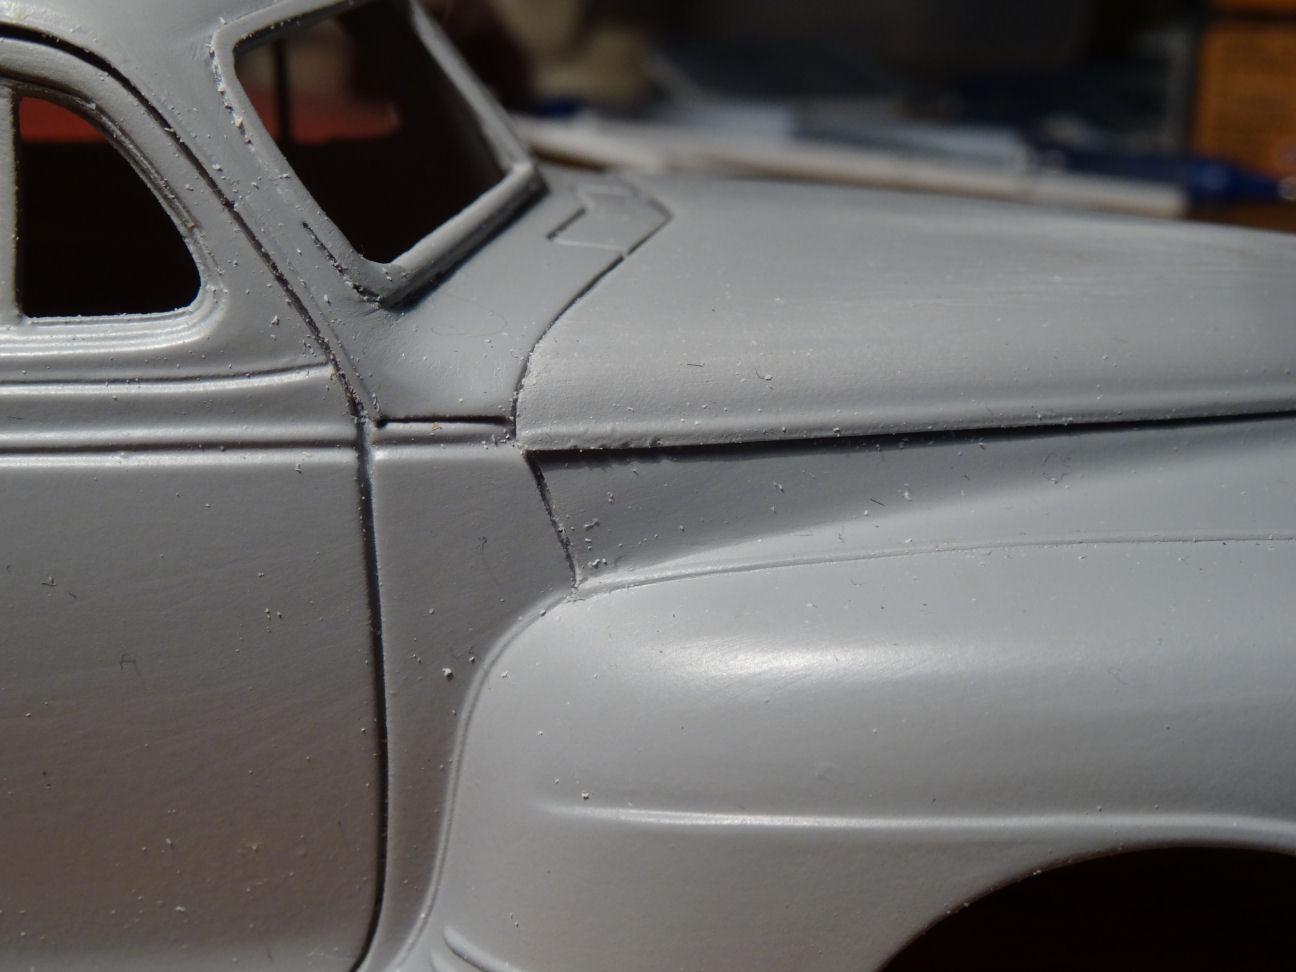
The Coupe It will beeee haaaave now. Added two ears at the rear of the hood from some scrap sprue. And now it sits flat and is locked solidly in place. Take that you AMT engineers. ?
-
AC 289 Sports MkIII, starting with a Monogram Cobra
LennyB replied to Matt Bacon's topic in WIP: Model Cars
Looking good. I like the paint detail around the opening for the weatherstripping ? -
'76 Ford Torino - “Starsky and Hutch Tv serie” - Revell 1:25
LennyB replied to Rod the Fixer's topic in WIP: Model Cars
I would have to say #3. But it’s hard to tell looking at it in the jar. I would do a spray out on some spoons with the same primer first. -
I'm waiting to lay down some paint but have not had the time when the weather was decent. Hopefully this weekend.
-
I ran two strips down the inside of each fender for the same reason. They keep the hood centered, now I just need to get the rear edge to lay down and behave.
-
I thought of putting magnets at the back but I think I could also just put a small lip at the two rear corners to keep it down. Like take those tabs at the corners and add a leg to them.? No not a Chicken leg ? That's better. As for the mailbox I used to joke with the guy that he spent his spare time licking stamps. Ticked him off something serious. "you don't lick these stamps, they loose their value........?
-
David, the windows looks great. I was thinking of doing something like that on the windshield of the '41 Plymouth but was not sure how to approach it. I think you found the answer, thanks.
-
Jose, welcome on board. Looks to be a pretty nice mess to me. If I was home right now I'd show you a real mess? Looks like you have a good starting point for a few cool Camaro's. Keep it up.?