Mark W
-
Posts
332 -
Joined
-
Last visited
Content Type
Profiles
Forums
Events
Gallery
Everything posted by Mark W
-
Salt Flats Streamliner
Mark W replied to Dave B's topic in Other Racing: Road Racing, Salt Flat Racers
Great flats racer, there’s not enough of these around. Enjoyed seeing this. -
ARII Chaparral 2C
Mark W replied to Mark W's topic in WIP: Other Racing: Road Racing, Land Speed Racers
My guess is that Steve would have a tight squeeze in there. -
ARII Chaparral 2C
Mark W replied to Mark W's topic in WIP: Other Racing: Road Racing, Land Speed Racers
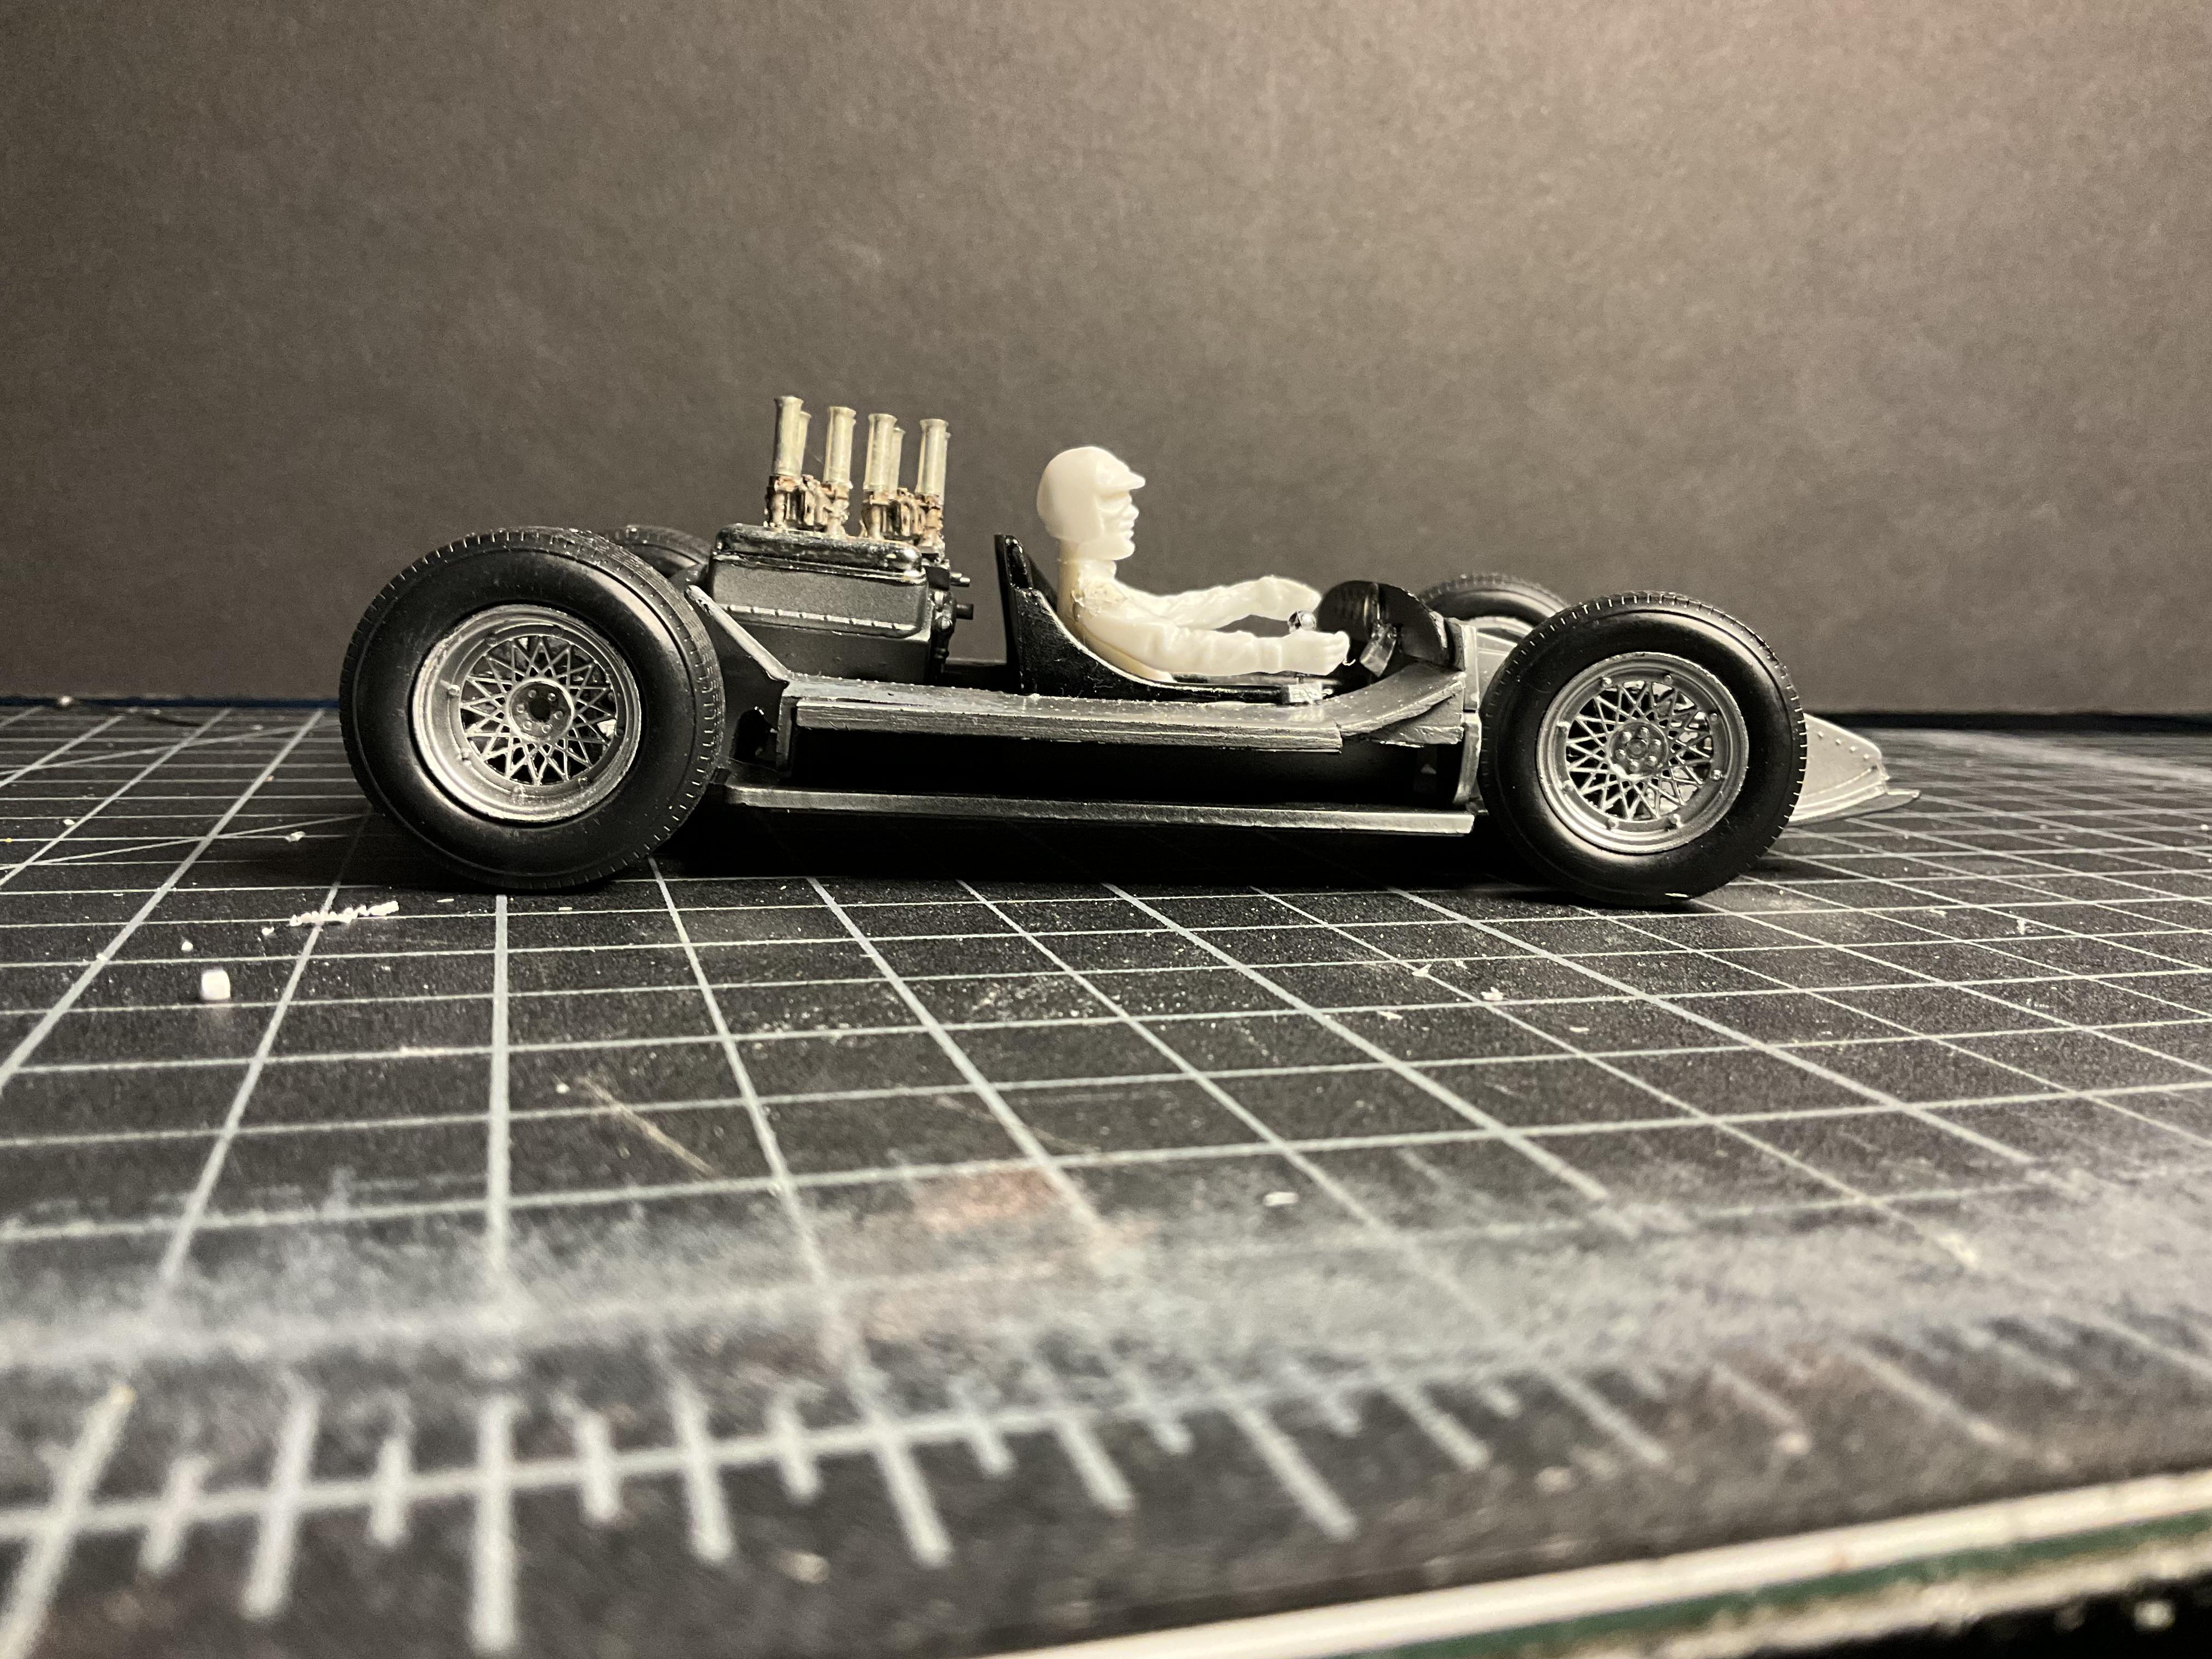
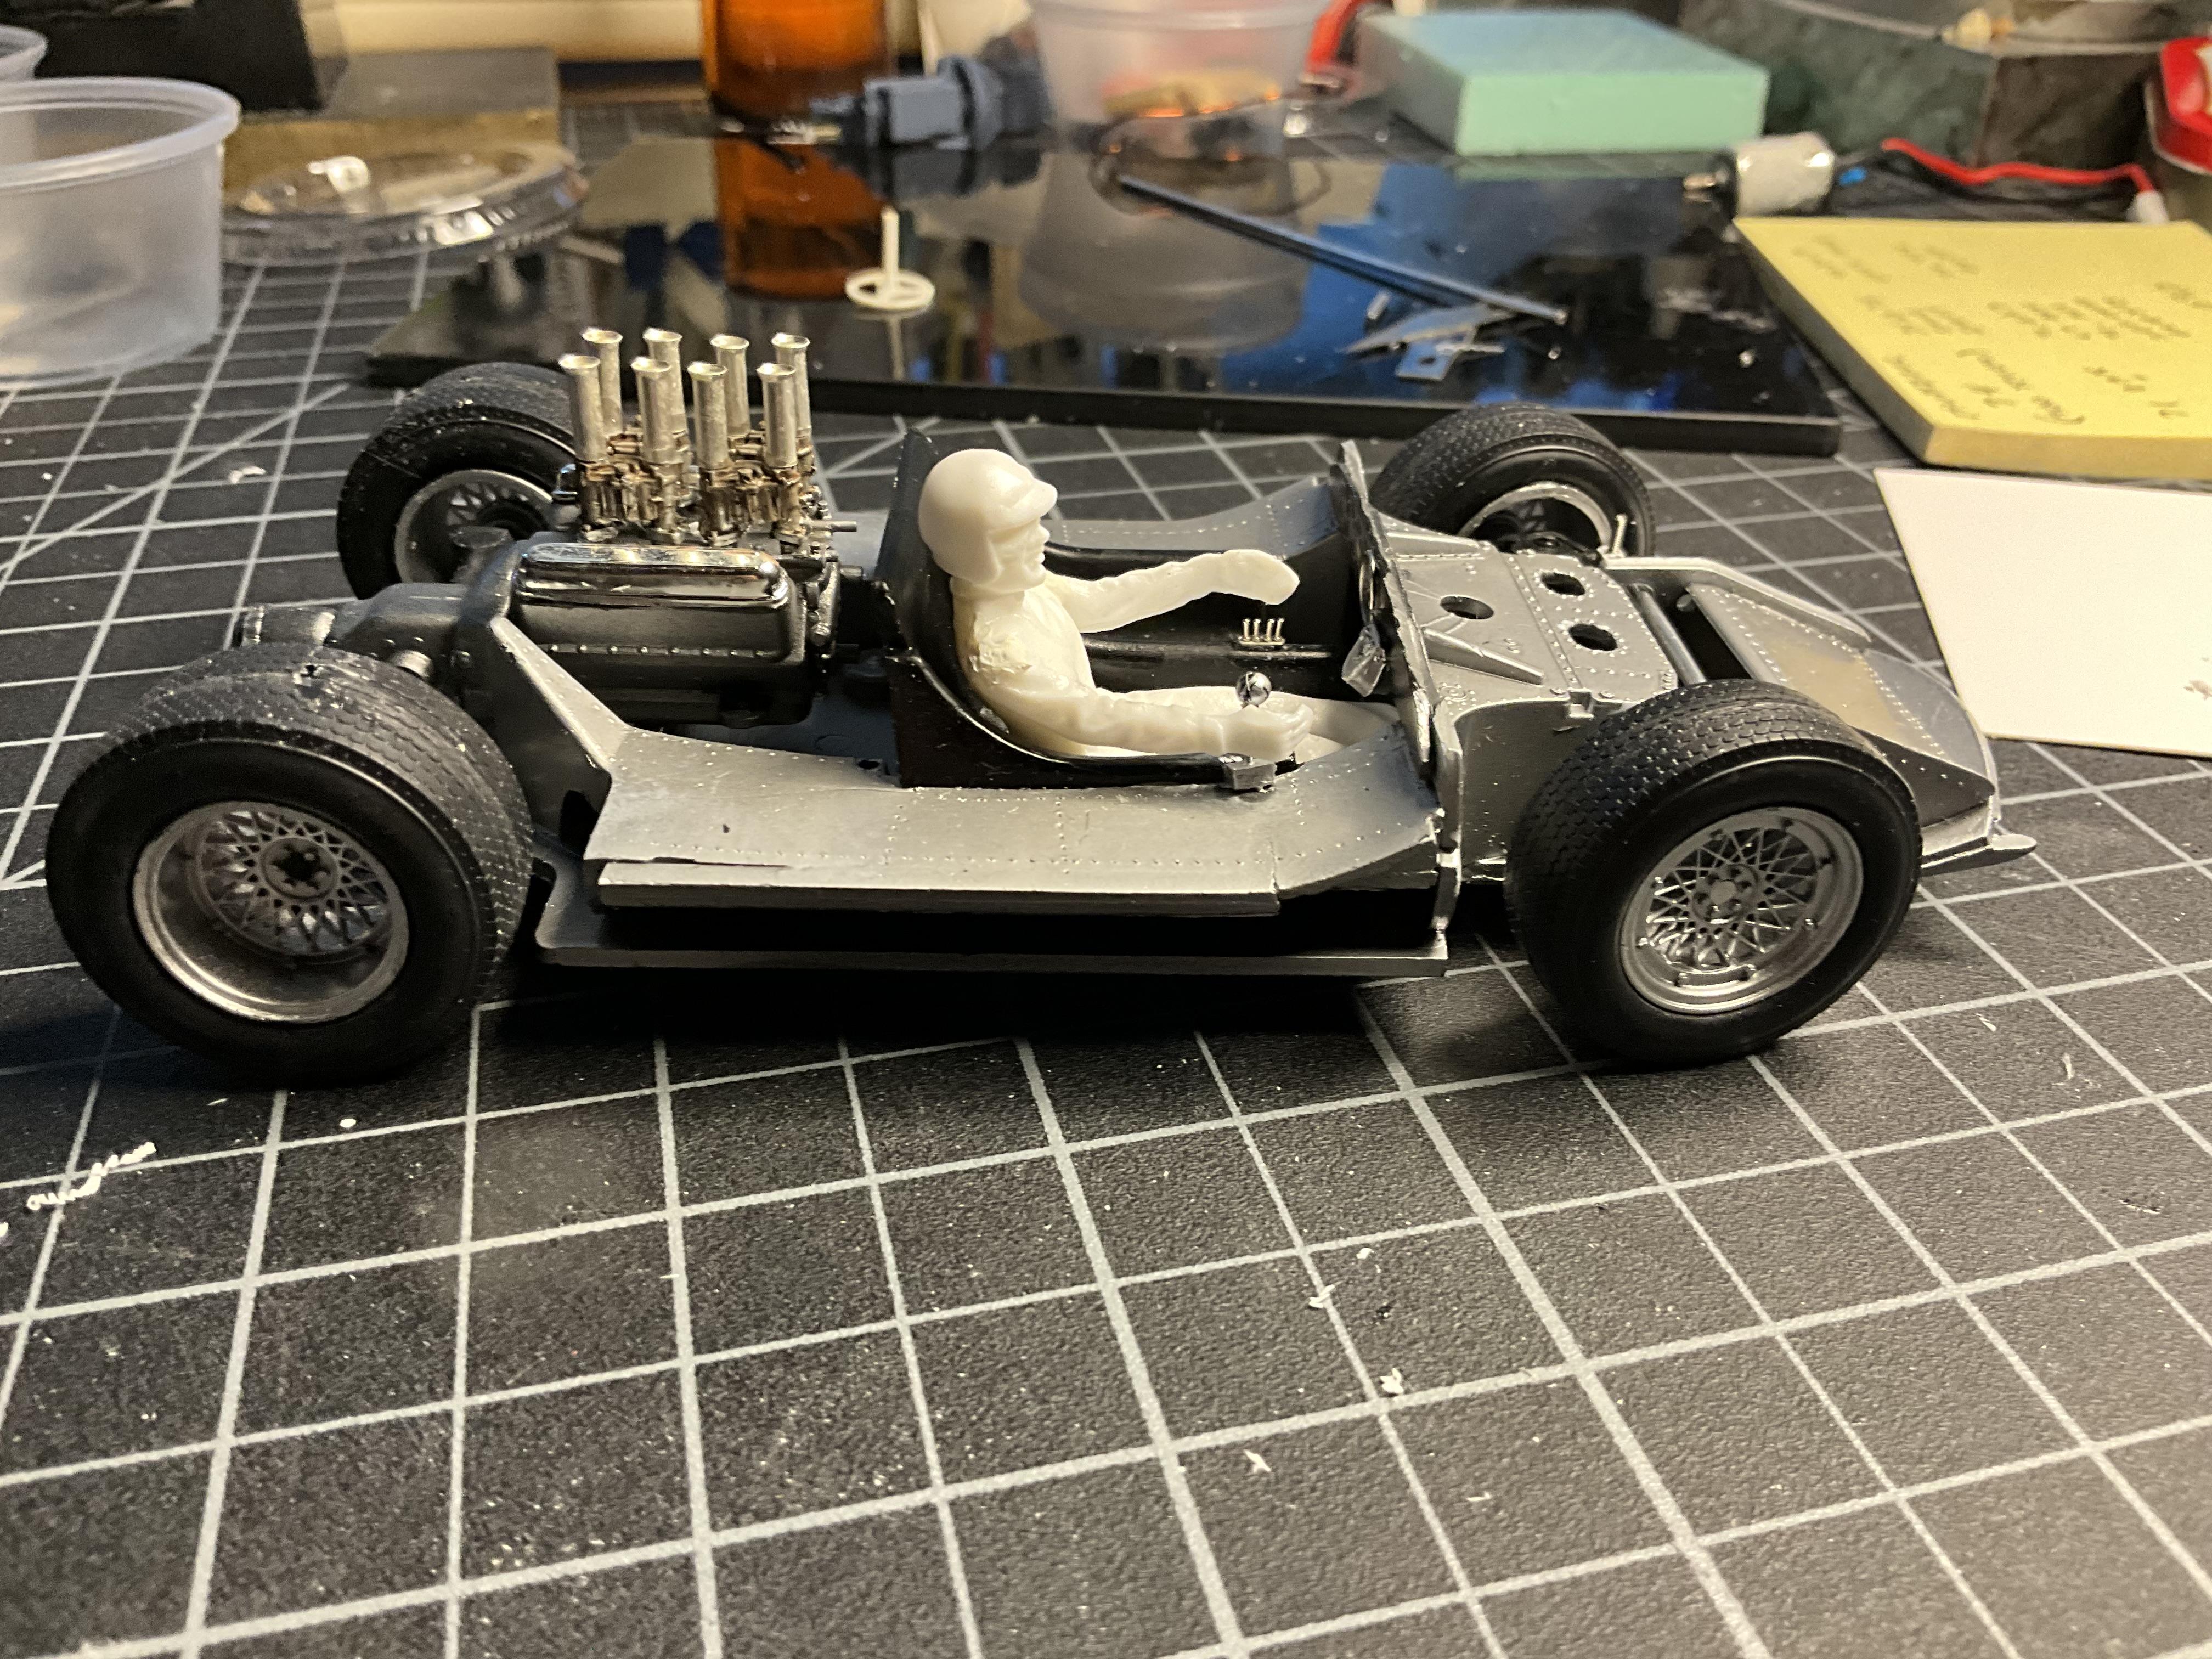
Got some Alclad on the wheels and mounted them. Jim now has both arms and is ready for paint. Injector stacks are on the Webers and I’m calling the engine done. The exhausts will be mounted separately. Next, a bit more polishing and the body will be ready for it’s screens.
-
Sharp Chevelle, nice detailing.
-
Nice paint and interior, beautiful build!
-
Good job. The BMF turned out great. The Halibrands are a nice touch.
-
Rich said it perfectly Helmut, beautiful build.
-
Link-Belt HC-218 Truck Crane
Mark W replied to redneckrigger's topic in WIP: Model Trucks: Big Rigs and Heavy Equipment
Tom, I agree with everyone else, this is truly impressive build. Not just because of the skills involved, but it’s informative on how this equipment works. Following with pleasure. -
Very nice Jaguar.
-
ARII Chaparral 2C
Mark W replied to Mark W's topic in WIP: Other Racing: Road Racing, Land Speed Racers
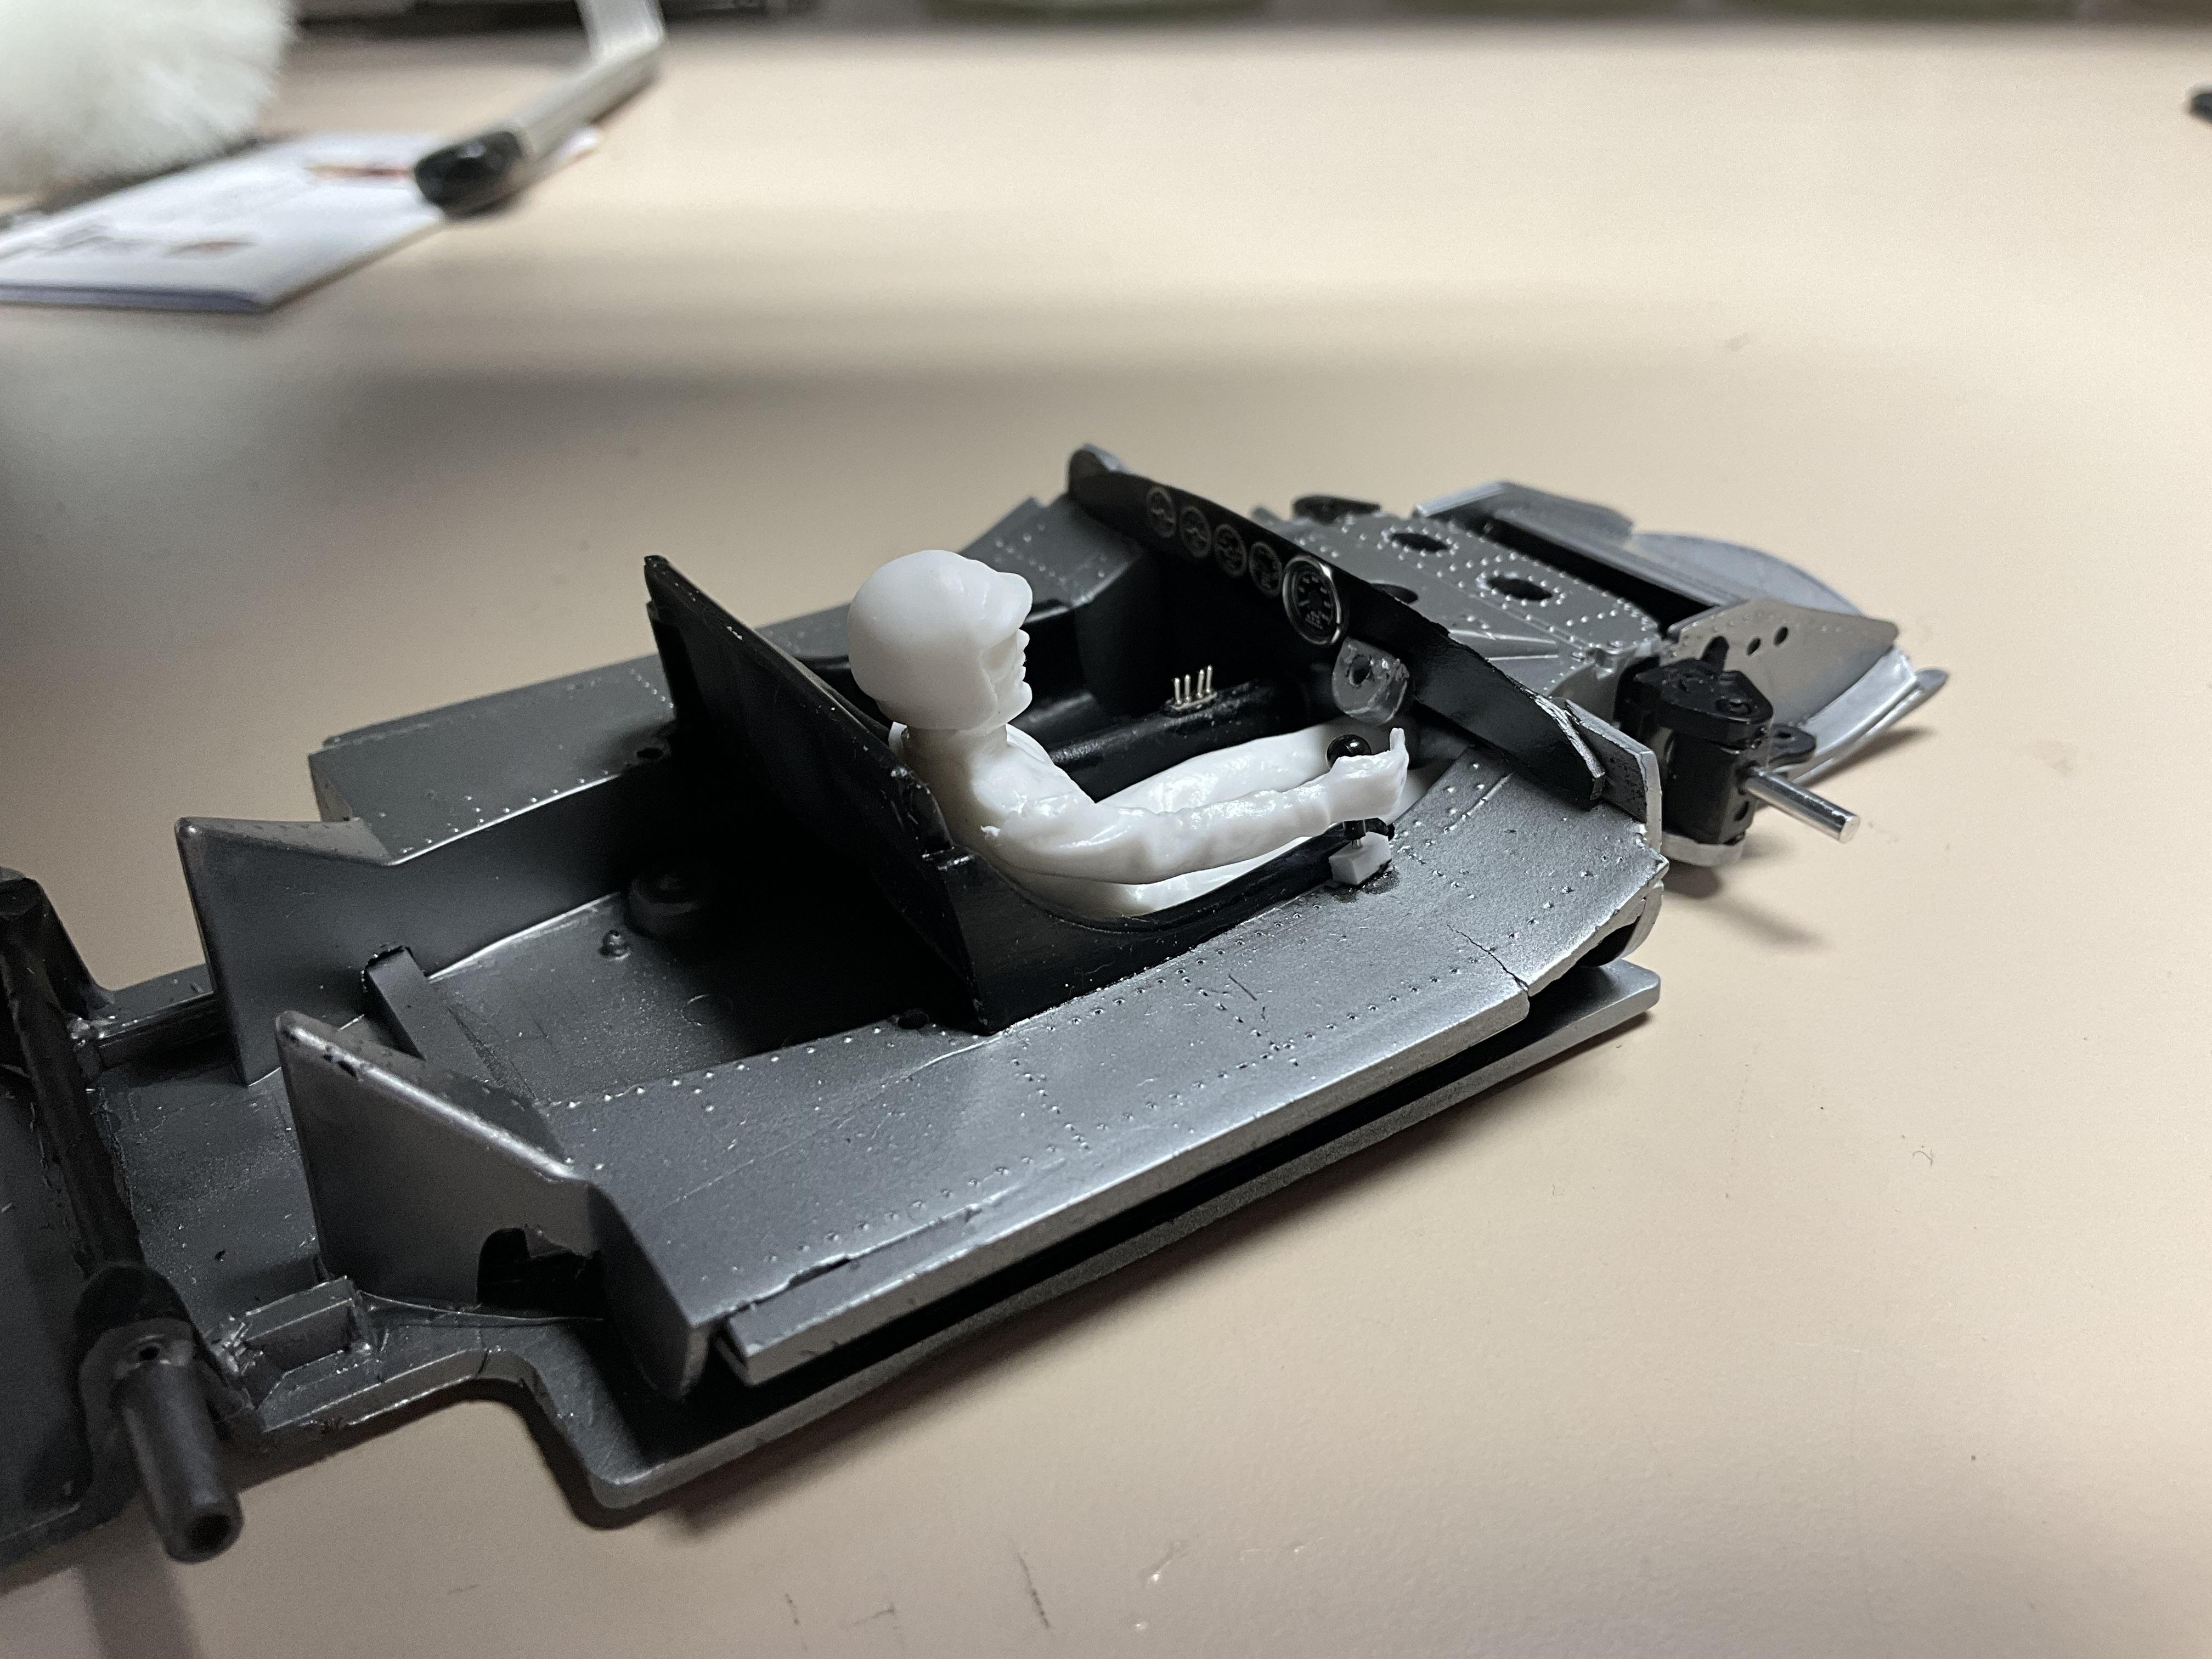
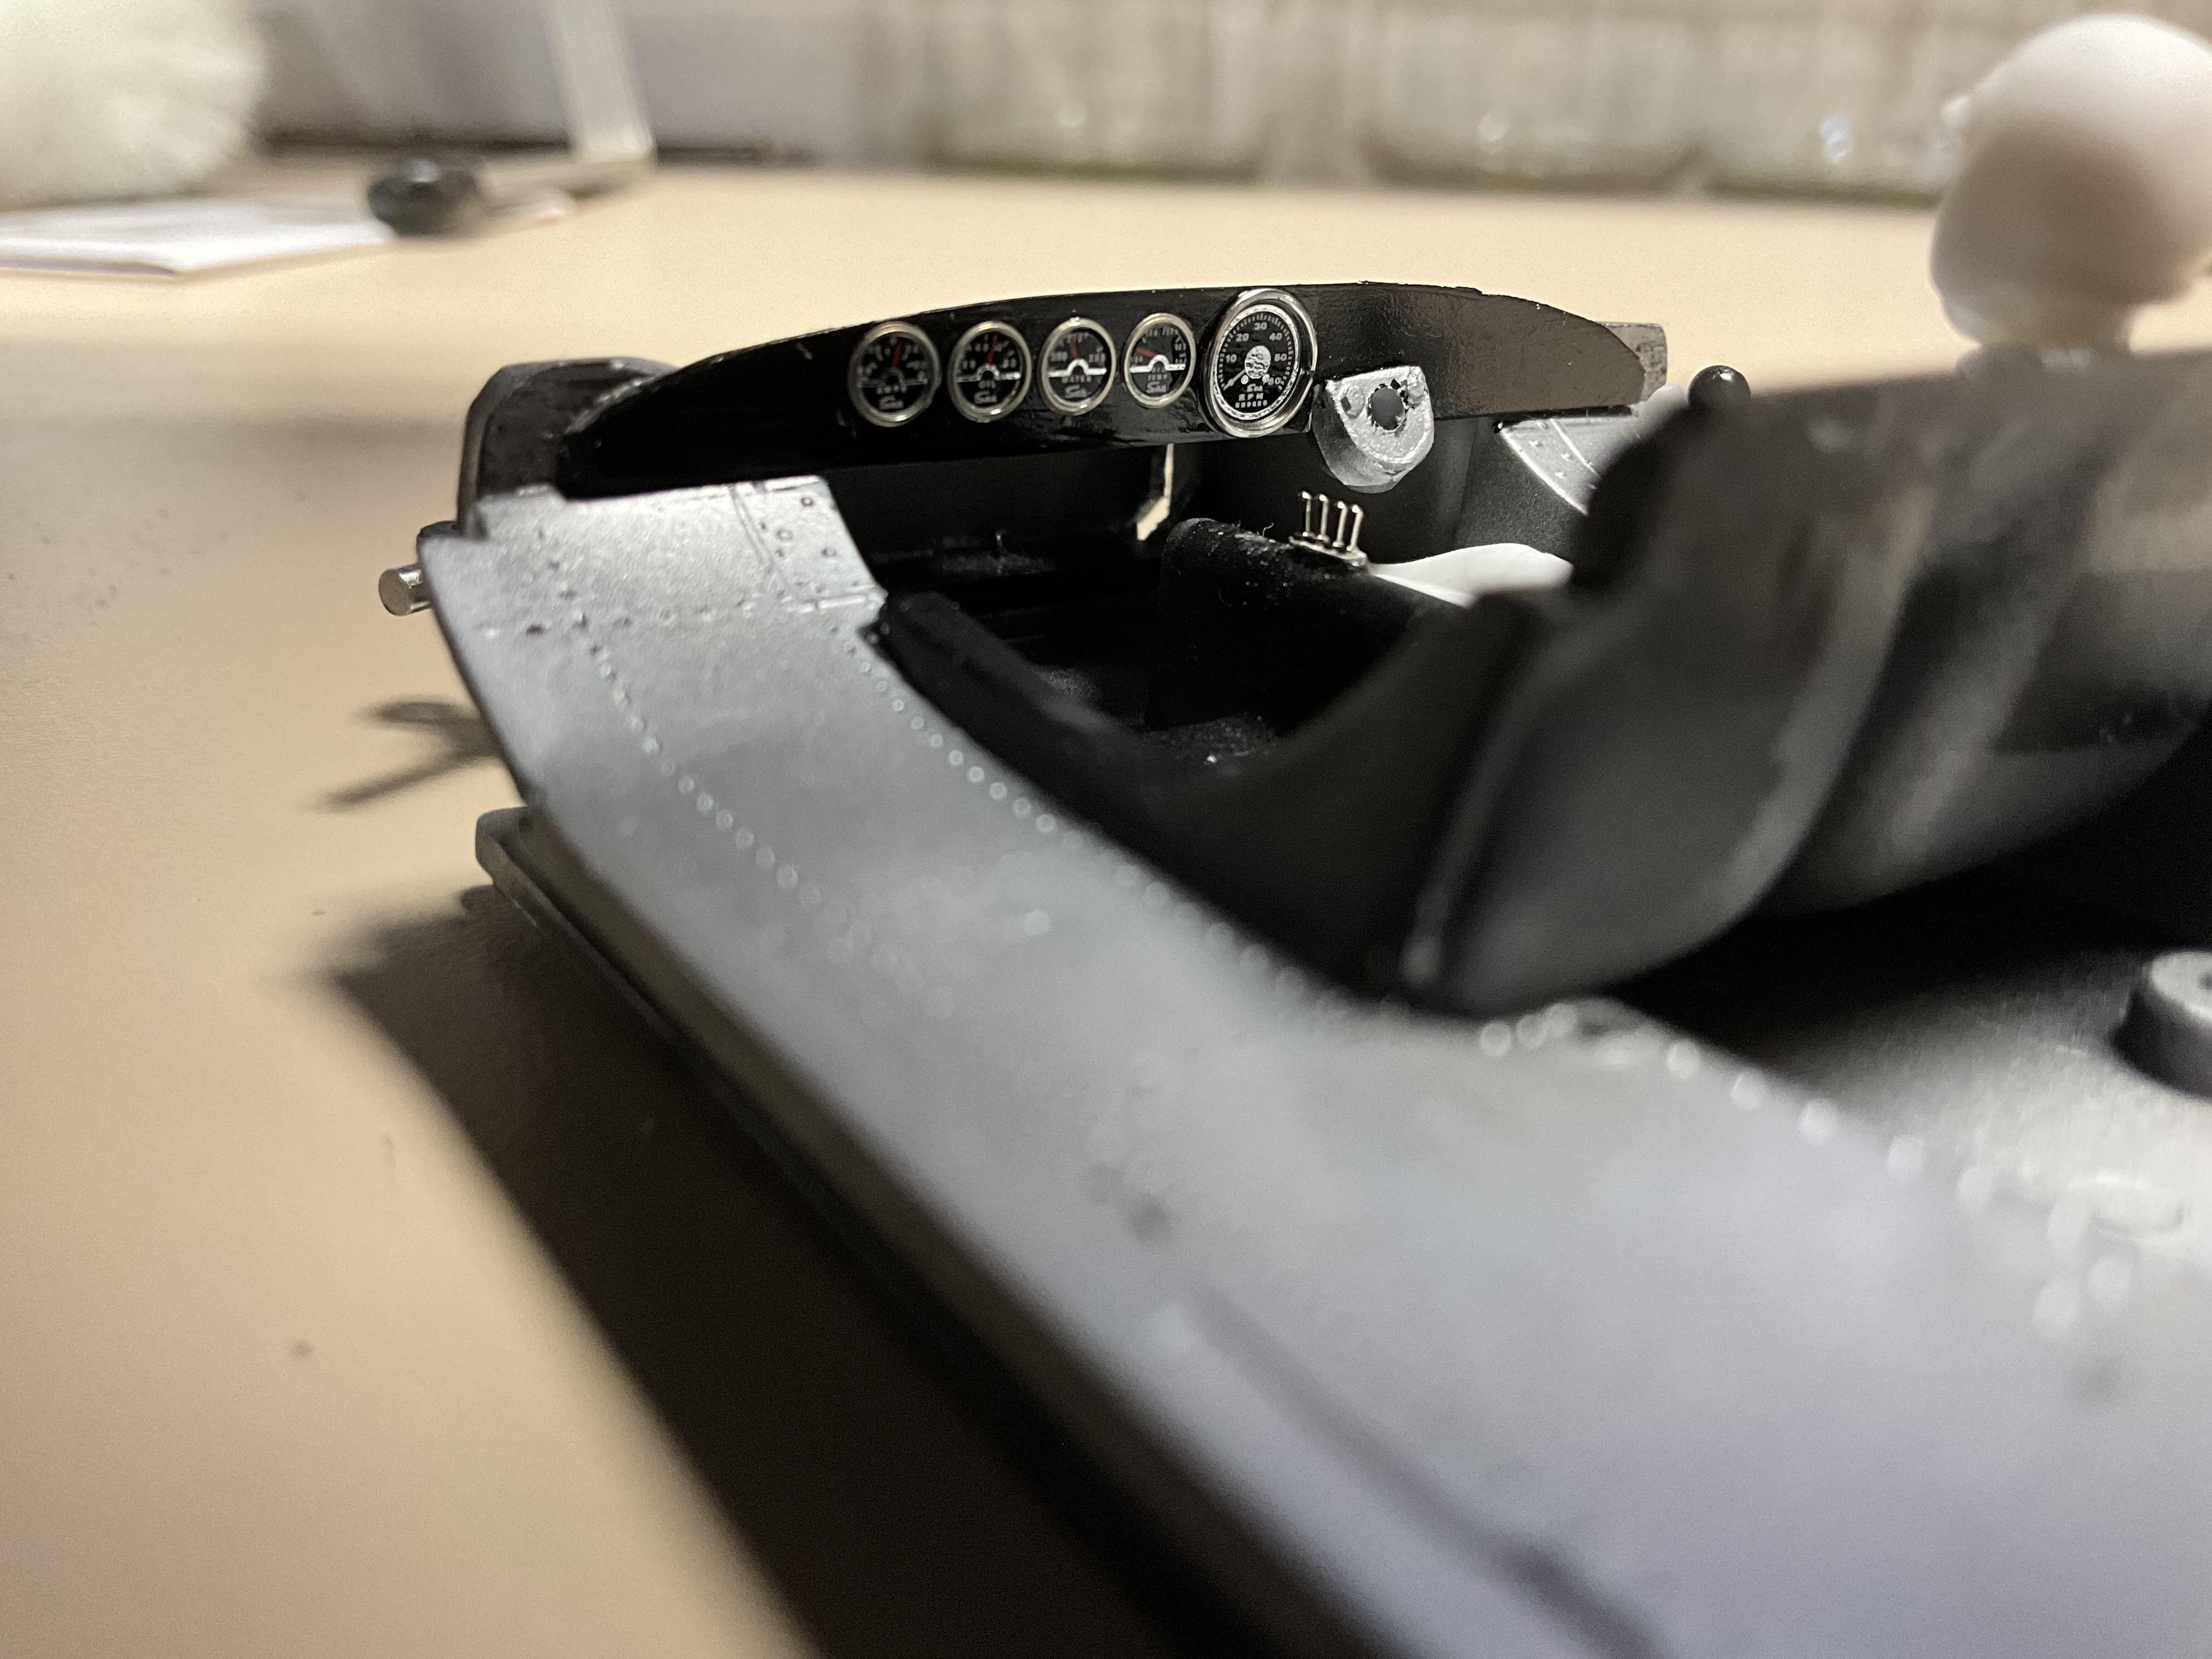
Interior update, got the gauges and console toggle switches in. Our “driver” is in for a test fit. Got his hand to set in the shifter, next step is the left arm on the wheel. Some sort of seat belts are needed. Front spindles are on, just need to make a tie rod.
-
Following
-
Looks like a very interesting project.
-
Dan, just had the proverbial brain fart. While looking for the aluminum wire and being a retired electrician, I naturally thought wire for wiring motor armatures. I found it under craft wire. It’s used for making frameworks for various crafts, the framework is called an “armature”! I use hard aluminum for turning and this soft stuff I needed was right in front of me. Great tip for model builders!
-
Aluminum armature wire, eh? That might just be what I need! Also Greg, we might not make it perfect, but lathe work is just one cut at a time. Go for it and ask for help when needed.
-
1967 Ford F-100 Service bed
Mark W replied to nyguy's topic in Model Trucks: Pickups, Vans, SUVs, Light Commercial
This came out really nice. Lots of cool details. -
cheetah reboot
Mark W replied to charlie libby's topic in WIP: Other Racing: Road Racing, Land Speed Racers
Aahhhhh, no Dave your Cheetah is awesome. Now this build is on the next level. Really can’t compare it to our plastic kits. I’ll never attempt anything like this, but I’ll follow it every step of the way! -
cheetah reboot
Mark W replied to charlie libby's topic in WIP: Other Racing: Road Racing, Land Speed Racers
This is another level of modeling. Molding a body on a buck is a talent I can only wish I had. This will be most interesting. Are you making this a full build? -
cheetah reboot
Mark W replied to charlie libby's topic in WIP: Other Racing: Road Racing, Land Speed Racers
This will be one I will be following. -
ARII Chaparral 2C
Mark W replied to Mark W's topic in WIP: Other Racing: Road Racing, Land Speed Racers
Maxx, take a close look at the chassis. It is indeed an early skinny tire, no fender flairs Grand Sport. -
ARII Chaparral 2C
Mark W replied to Mark W's topic in WIP: Other Racing: Road Racing, Land Speed Racers
Good eye Maxx, but what makes this one a very limited production Corvette? -
This absolutely the way to go. If anything goes awry, it can be removed with H2O. Also what Greg said about mounting pins, good idea, it works.
-
ARII Chaparral 2C
Mark W replied to Mark W's topic in WIP: Other Racing: Road Racing, Land Speed Racers
Aaaaagggghhhh!!!!! Yes, keep going! No, stop here! Don’t think I don’t lose sleep over this decision. But in the interest of moving on to other projects, I’m going to concentrate on what you would see on the 1:1 car if standing 5 feet away. And that does not include lying down! -
ARII Chaparral 2C
Mark W replied to Mark W's topic in WIP: Other Racing: Road Racing, Land Speed Racers
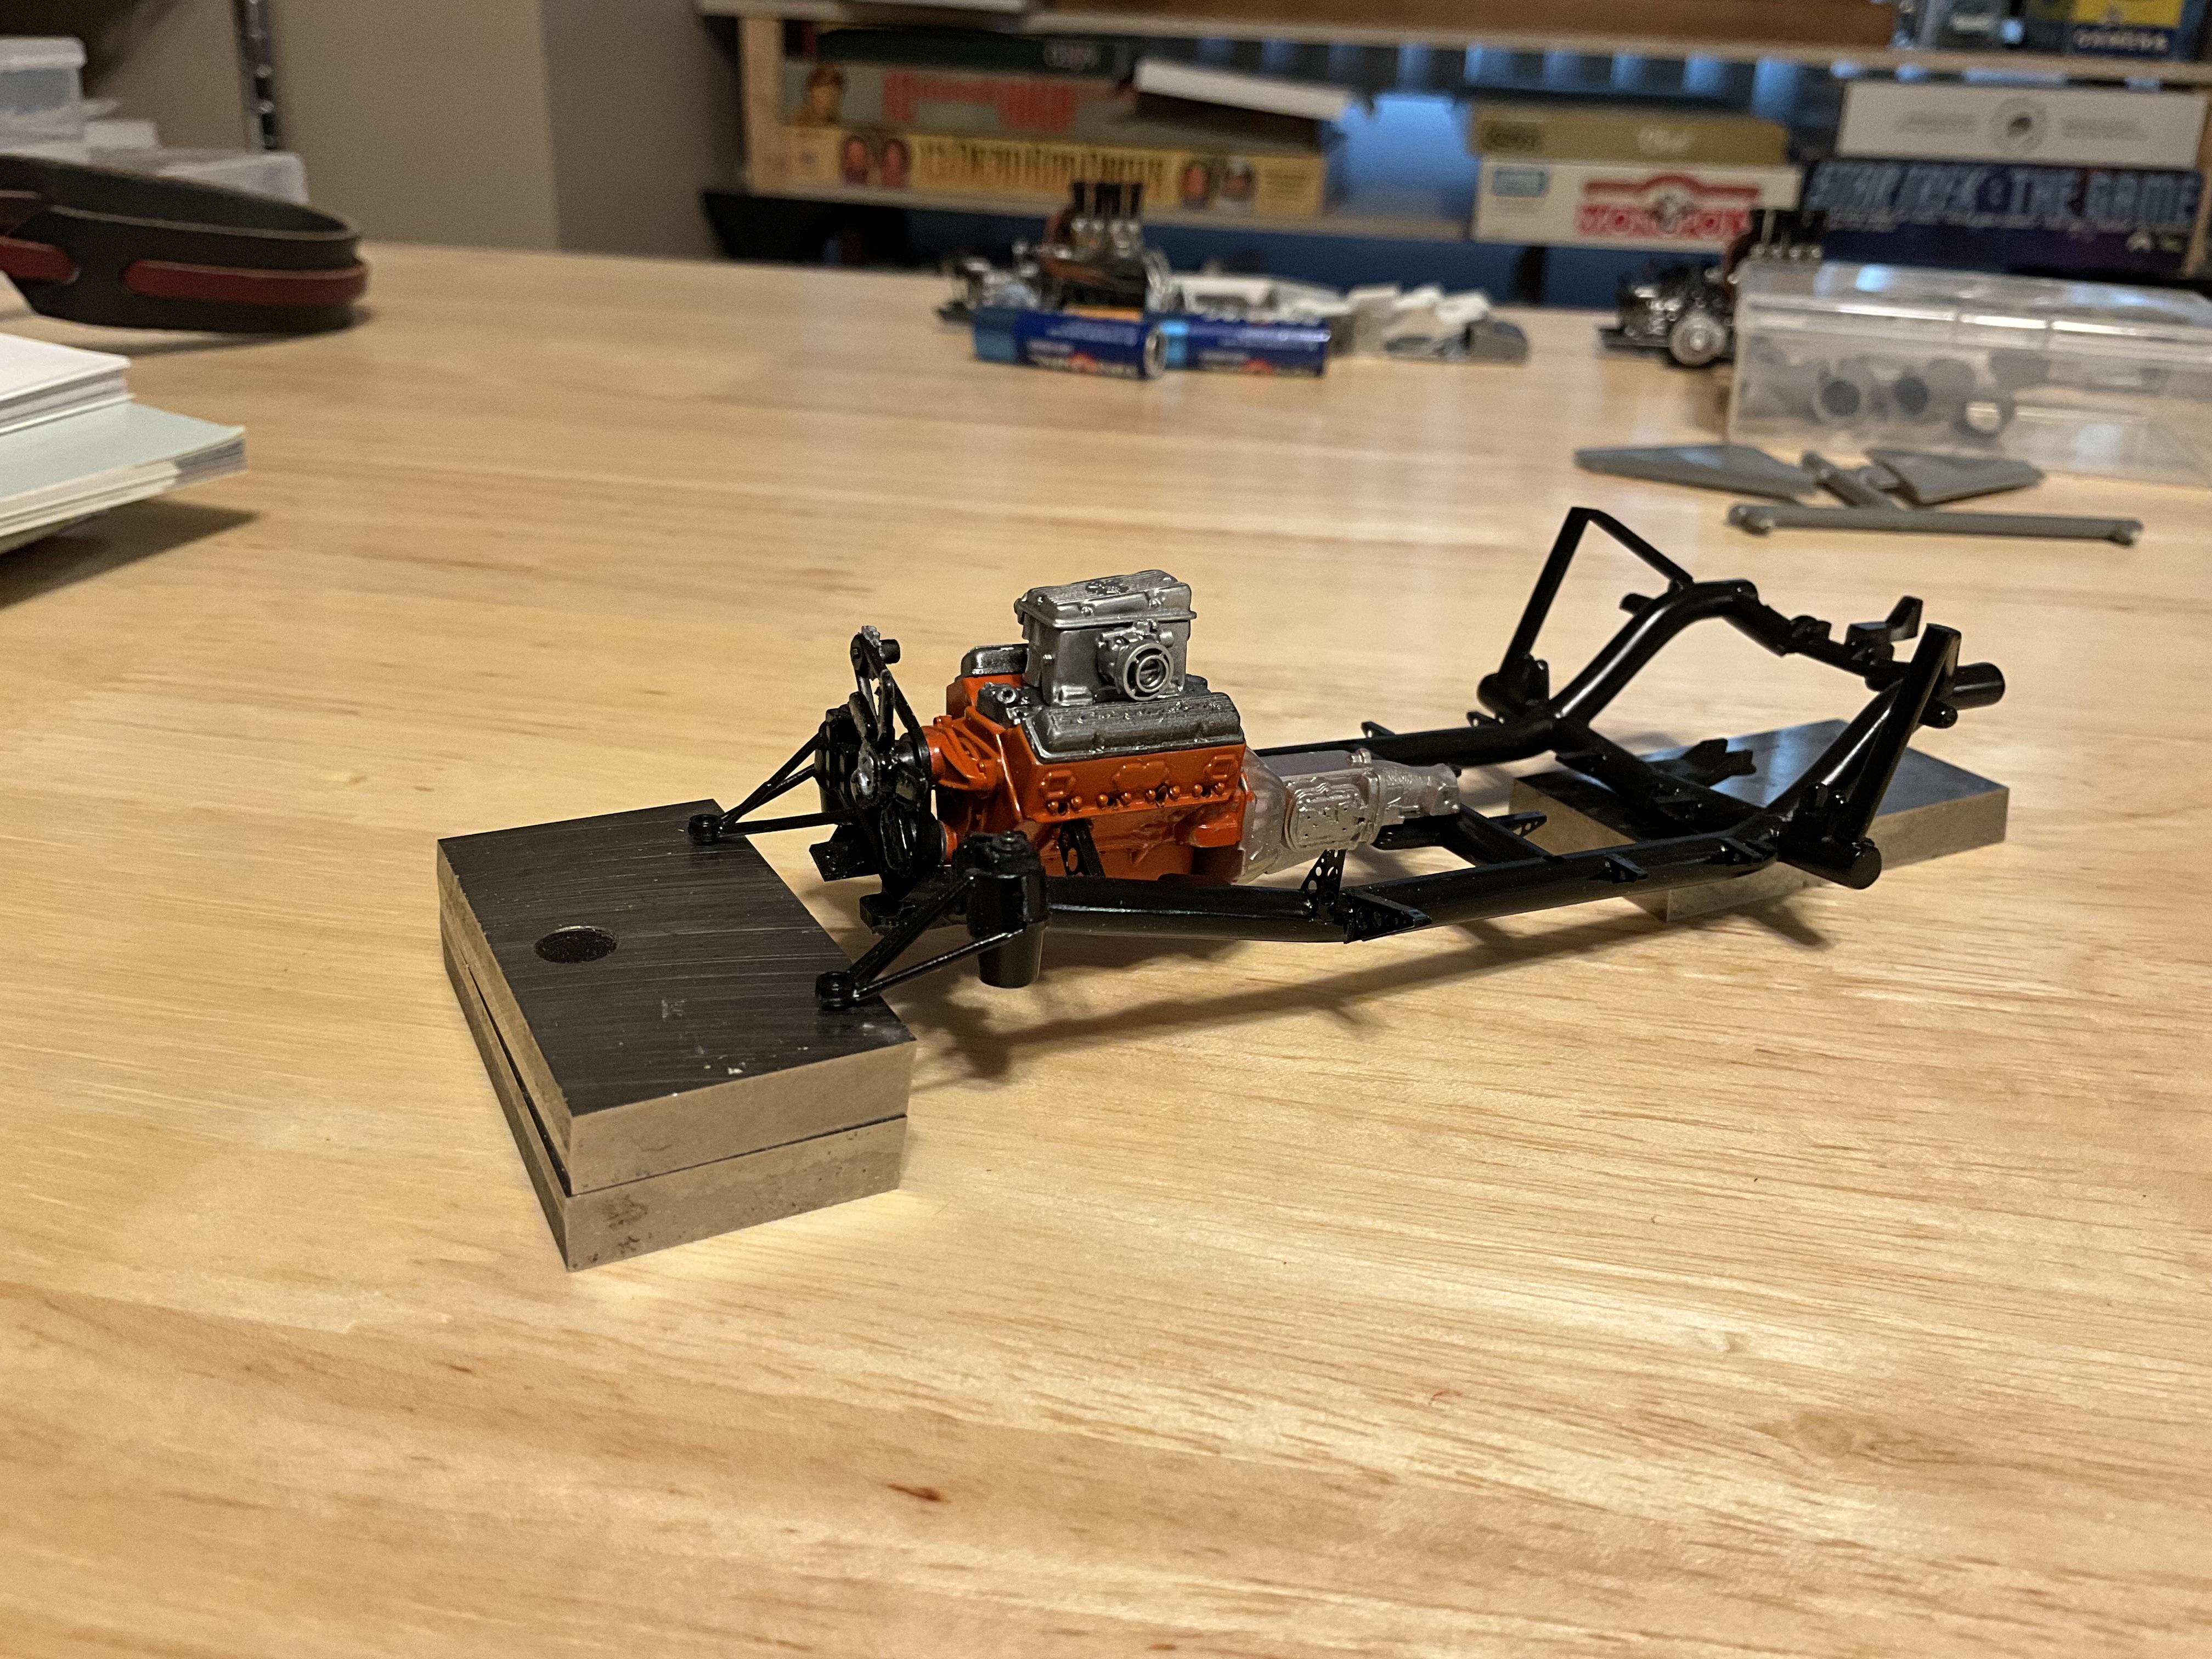
Thought I’d throw out this little teaser for a coming winter project.
-
Looking very, very good so far Jim. The head and taillight mod is going to flow with the body lines perfectly. I agree about doing something with the roof, just don’t think you should do an “extreme” chop. More like 2” maybe? This type of custom is one of the best, glad you decided to resurrect it.
-
ARII Chaparral 2C
Mark W replied to Mark W's topic in WIP: Other Racing: Road Racing, Land Speed Racers
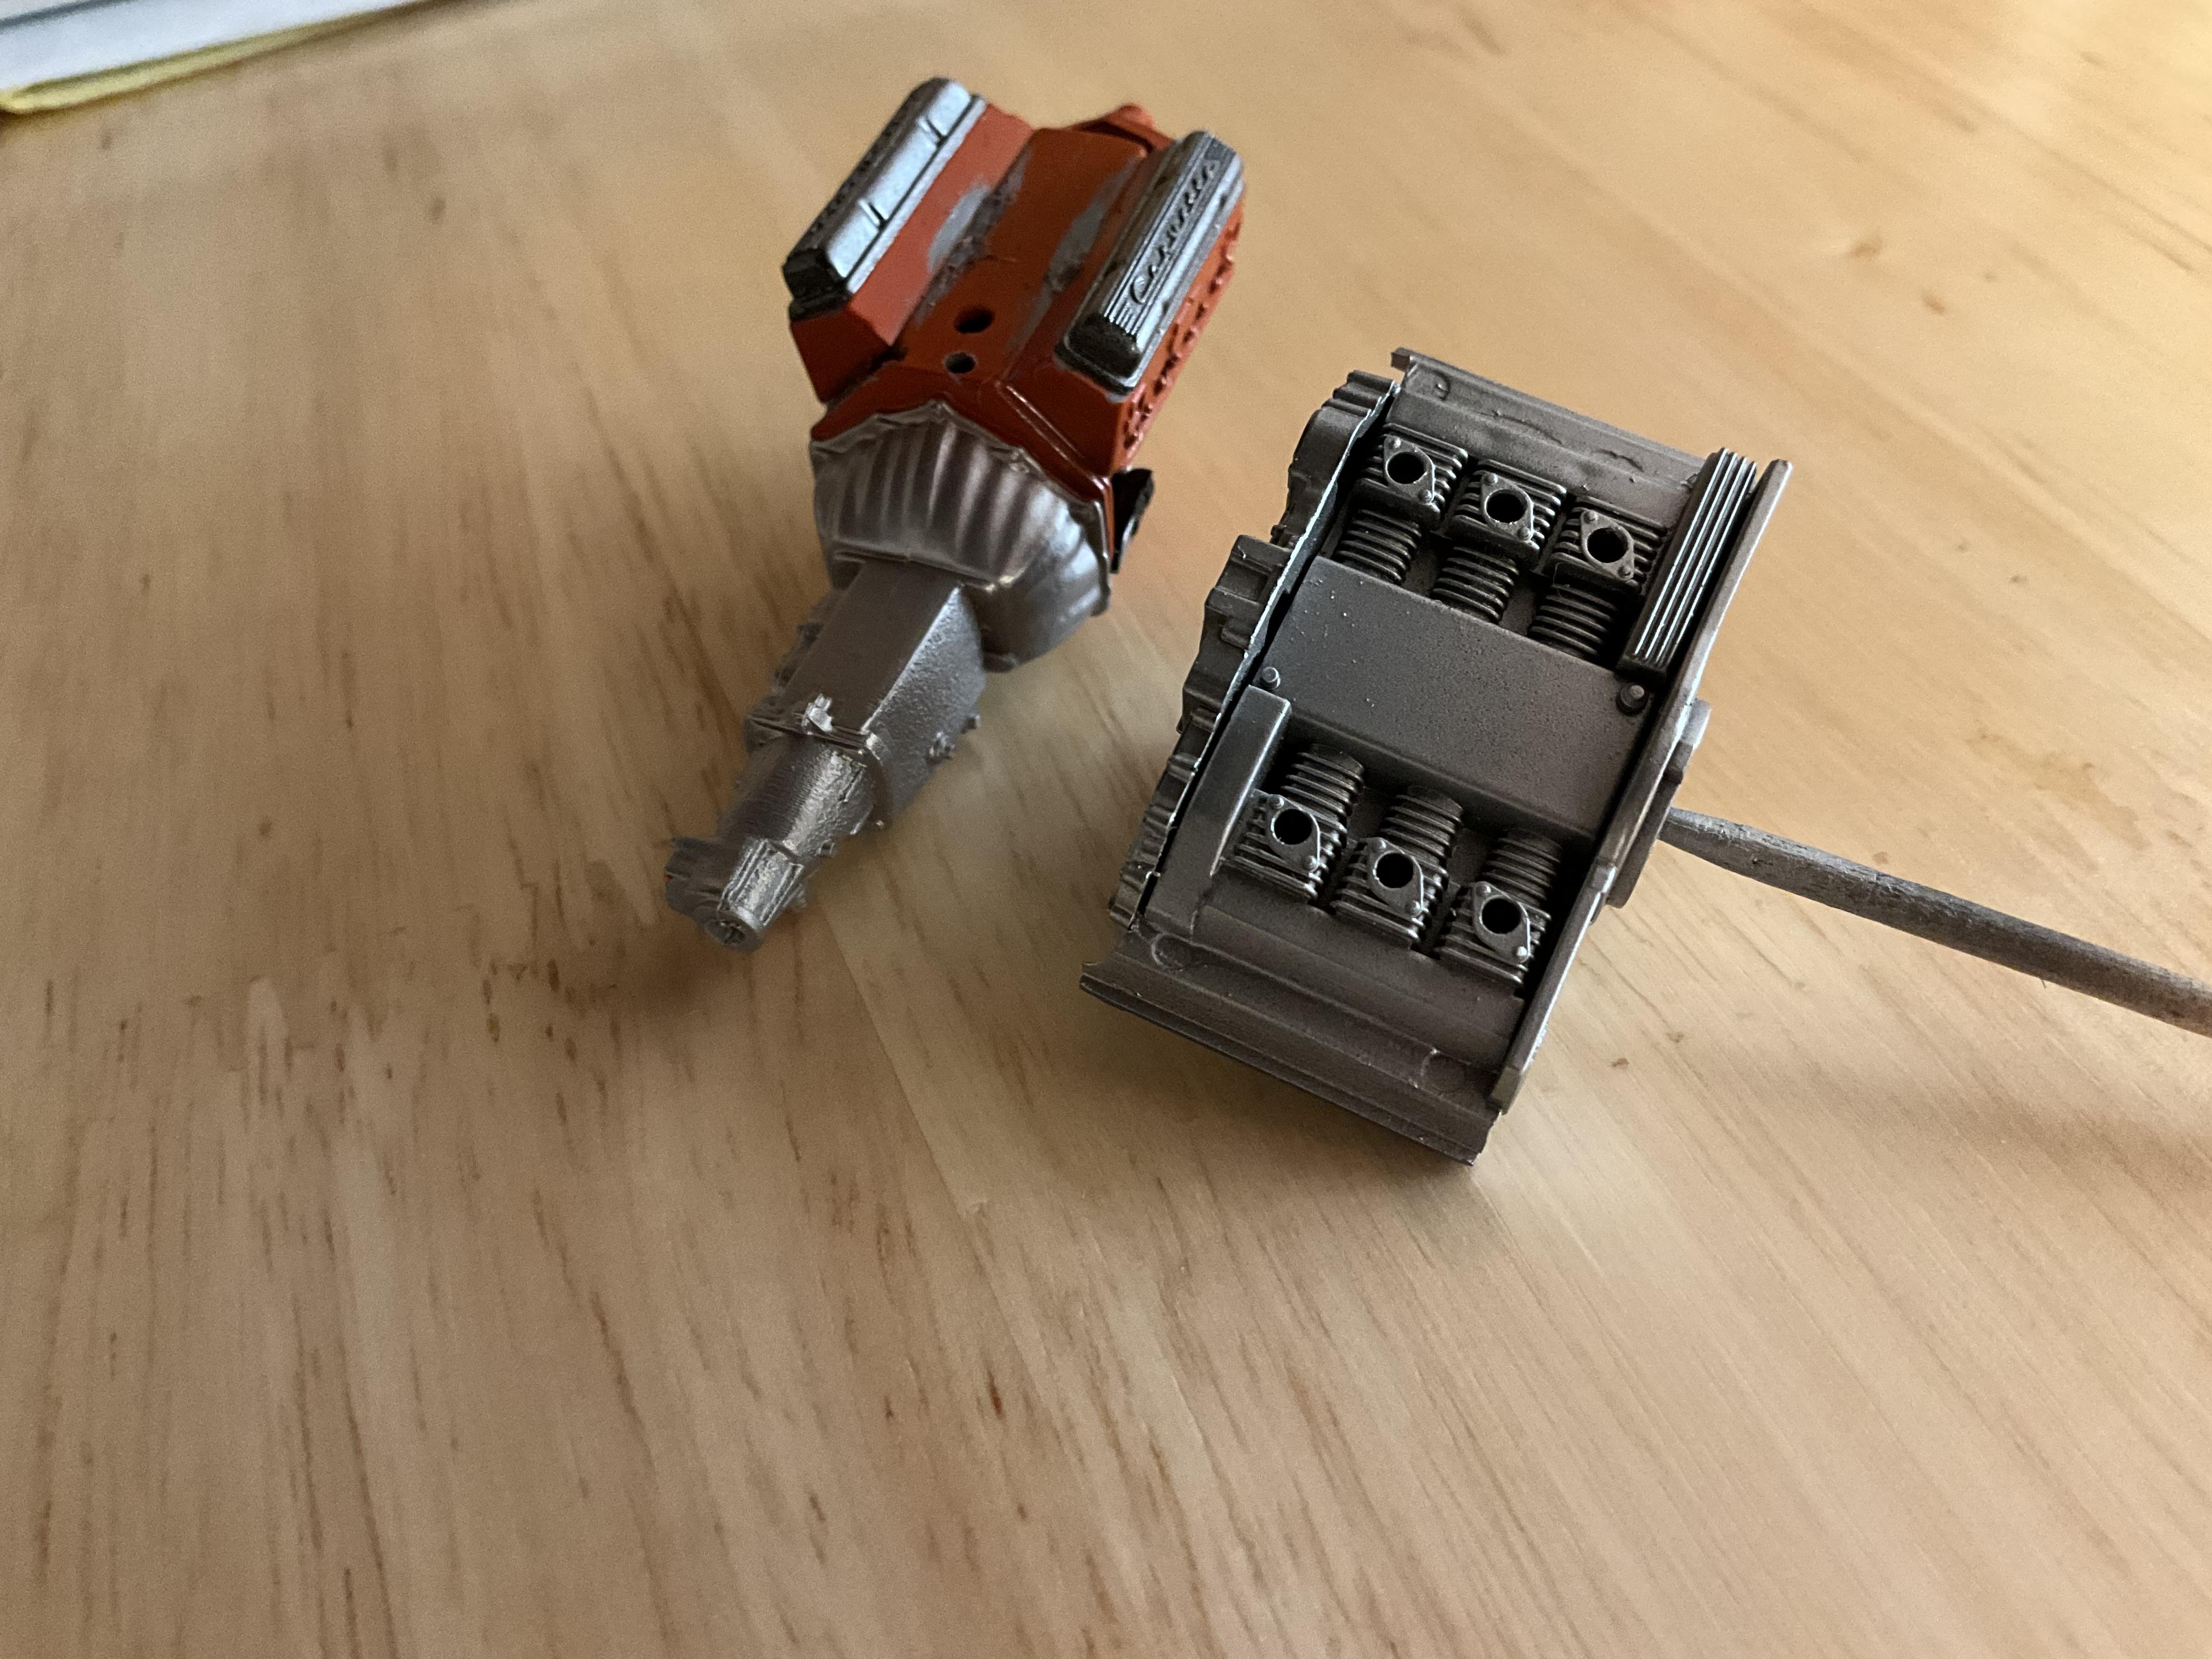
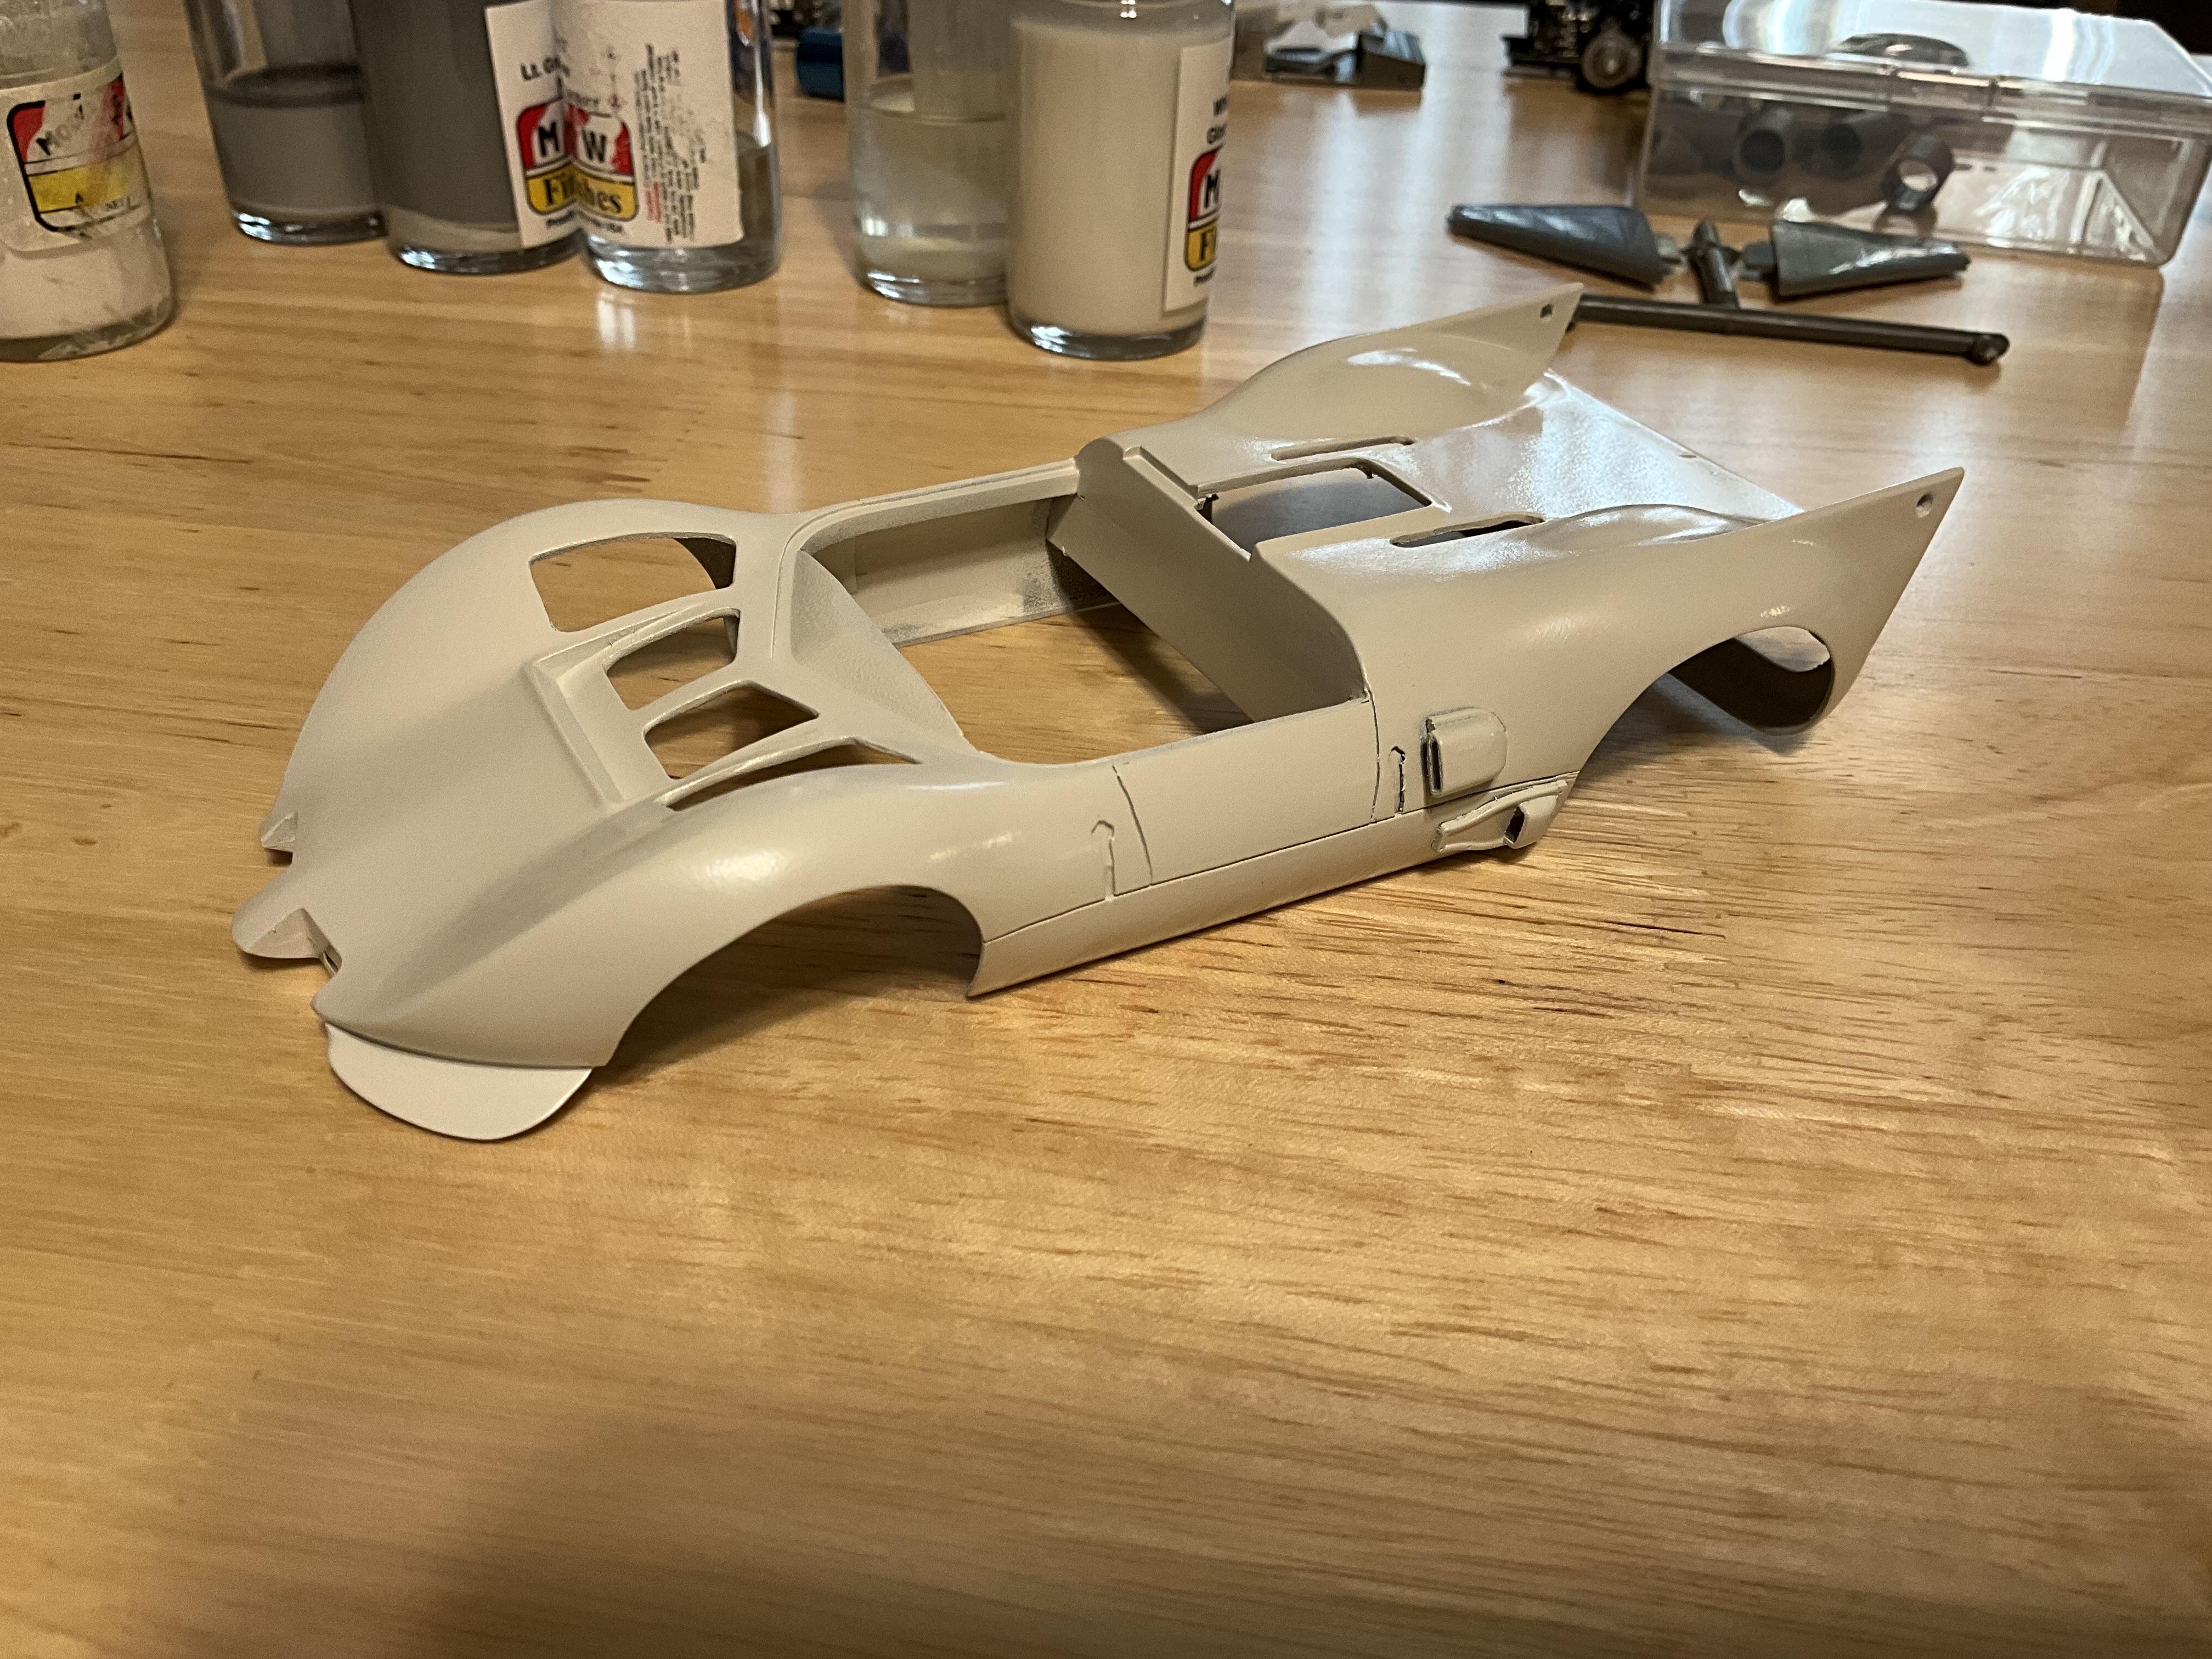
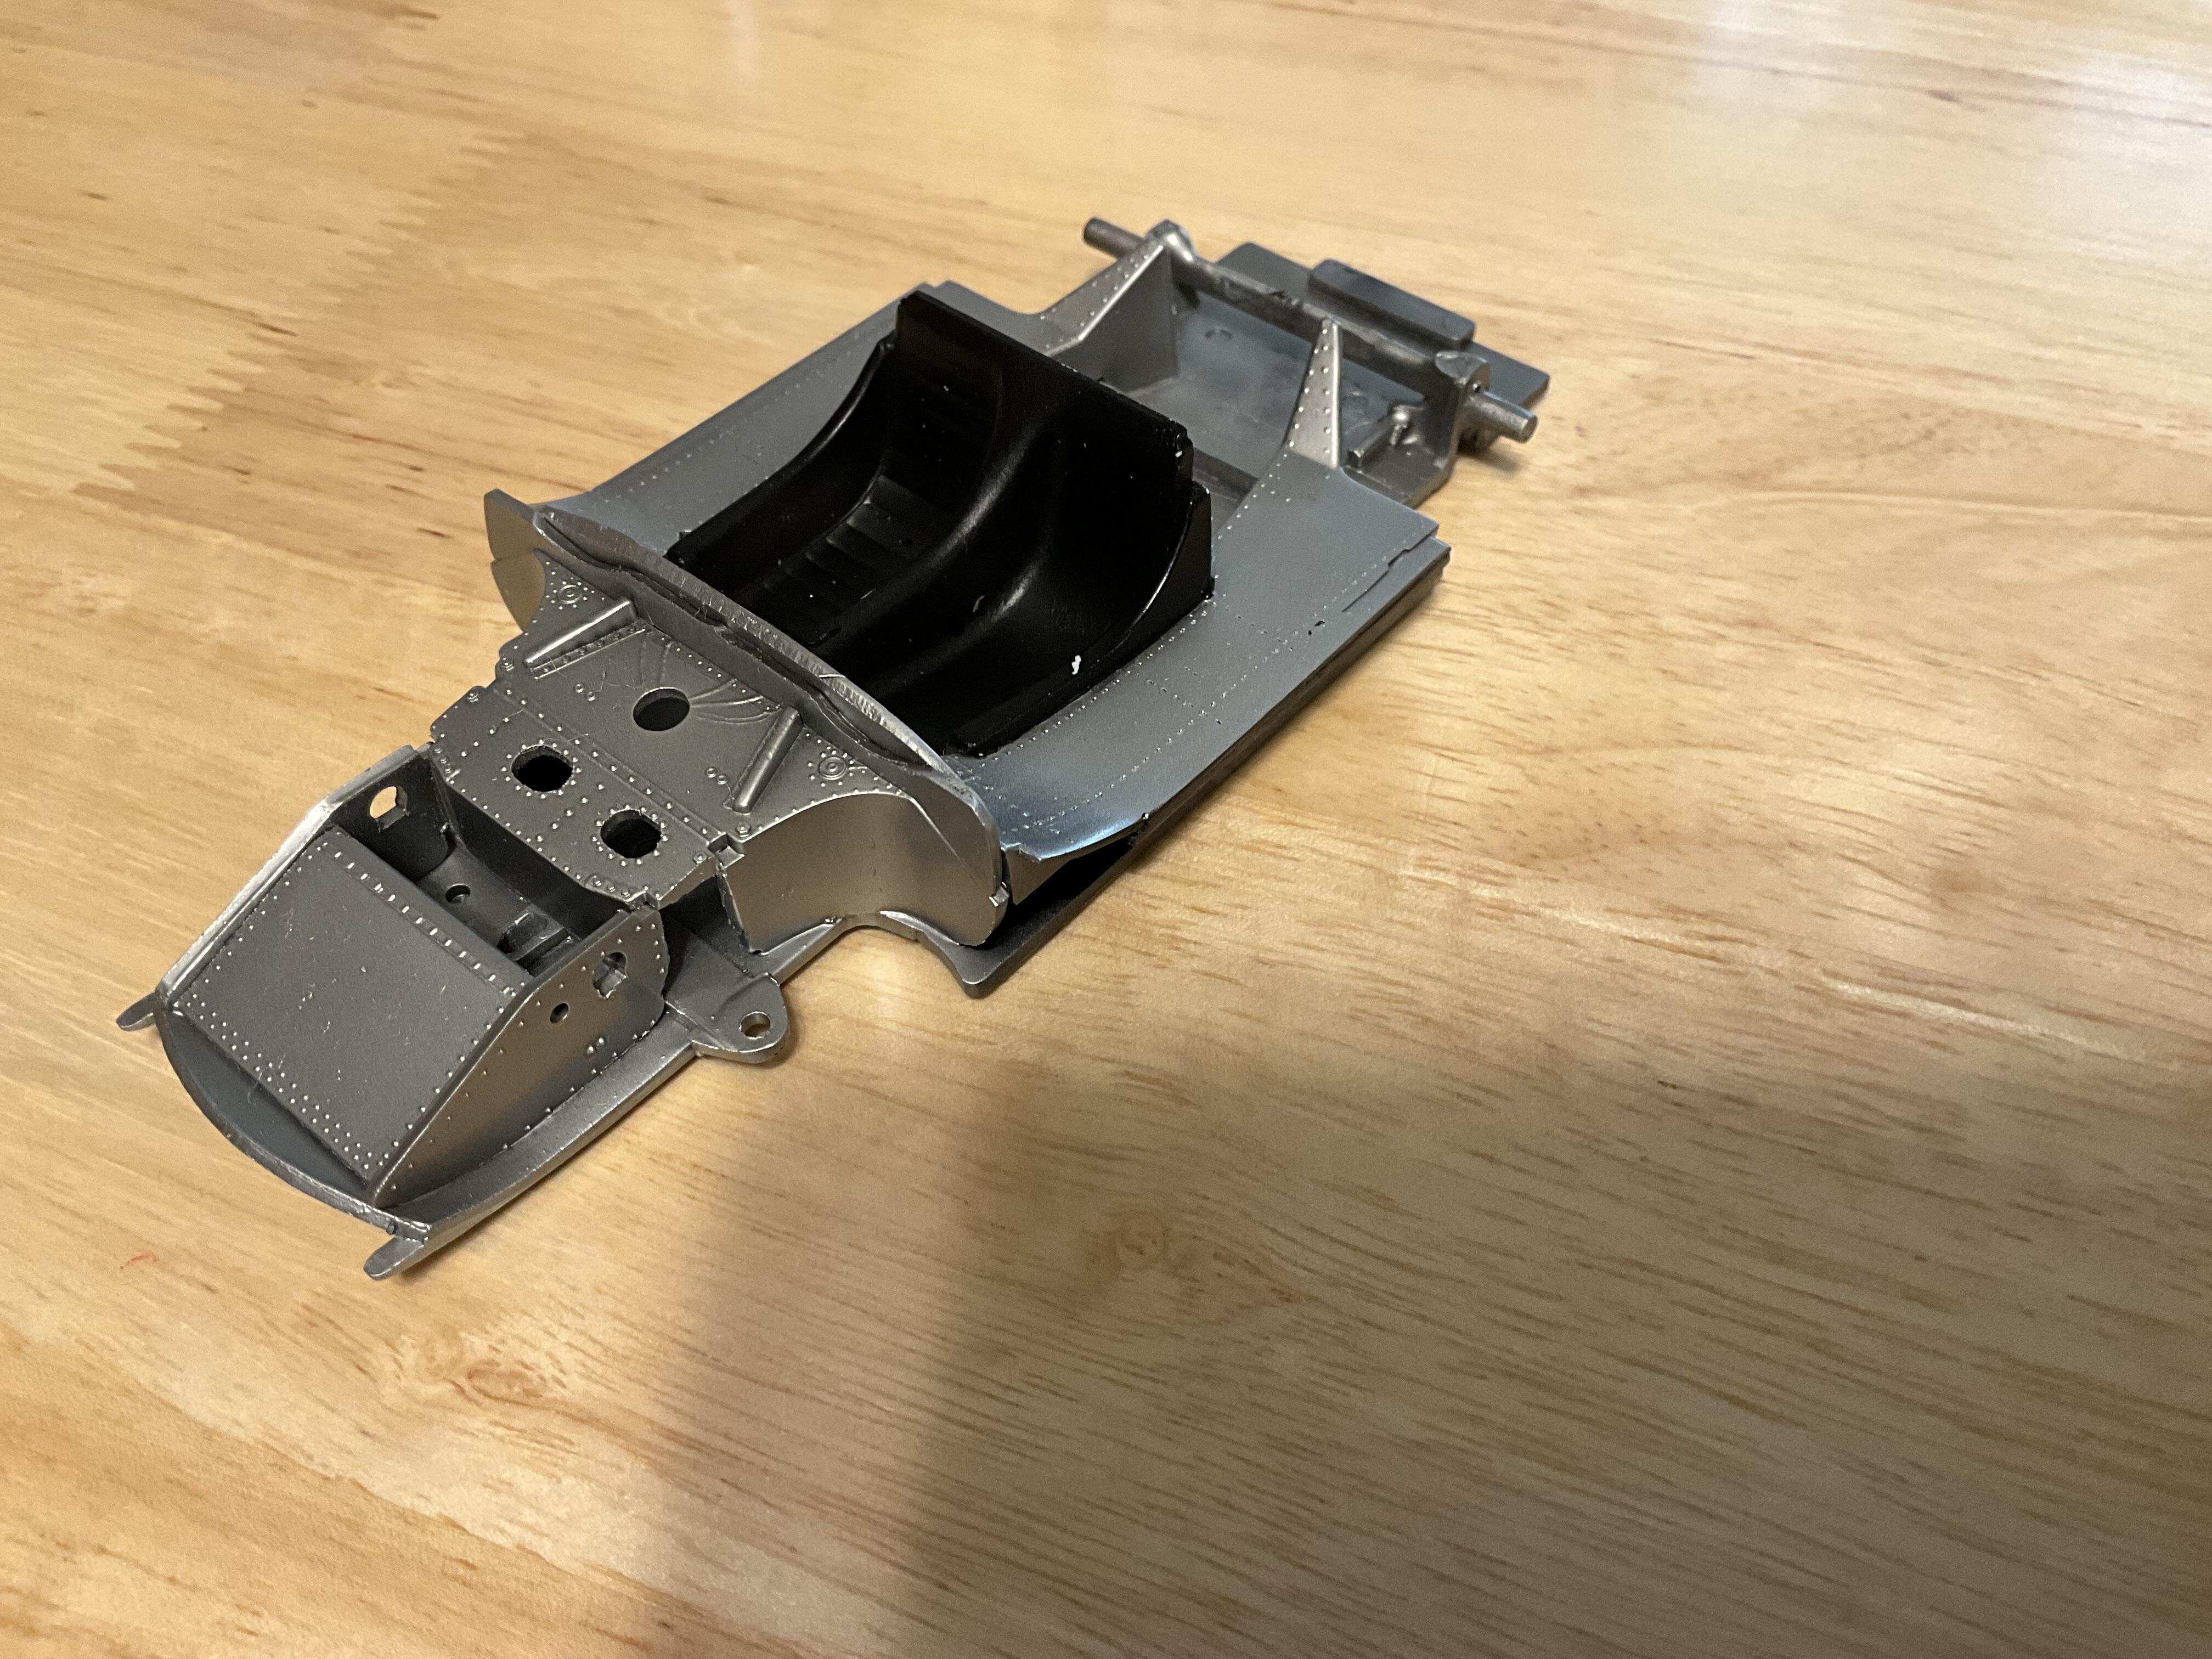
Progress today, and a bit of backstepping. But I learned a few things. Paint is on the body and I don’t see a clear coat going on. When I started spraying, seemed like the paint was going on a bit thick. But did I stop? No, just sprayed it on and hoped it would flow out. Which it did, but not totally. So when I sprayed the spoiler, I thinned it a bit and it flowed perfectly. Then I picked up the body and it really looked bad by comparison. Figuring I had little to lose since stripping it was in my mind, I put straight thinner in the gun and wet the body down. Sure enough (and to my surprise) it leveled a good bit. There will still be some sanding and polishing, but not near as much as I feared. Lesson learned, if it starts going bad ,stop! Fix the problem. Now the interior, after gloss black, on went Alclad aluminum. It turned out a bit grey. But a transmission that was sprayed at the same time was very bright. Later, figuring the metallics could have settled, I resprayed it and it was a bit better. Now the transmission was orange (overspray from the engine) and I just sprayed over it. I’m going to experiment with base colors and if it turns out well, I’ll share the results.