Mark W
-
Posts
332 -
Joined
-
Last visited
Content Type
Profiles
Forums
Events
Gallery
Everything posted by Mark W
-
Best to stick your hand out the window: if it's wet, it’s raining if it’s white: it’s snowing if it’s hot… well, you get the picture
-
1/25 Chevy Nova Salt Rat
Mark W replied to Pierre Rivard's topic in Other Racing: Road Racing, Salt Flat Racers
This looks perfect! Well done. -
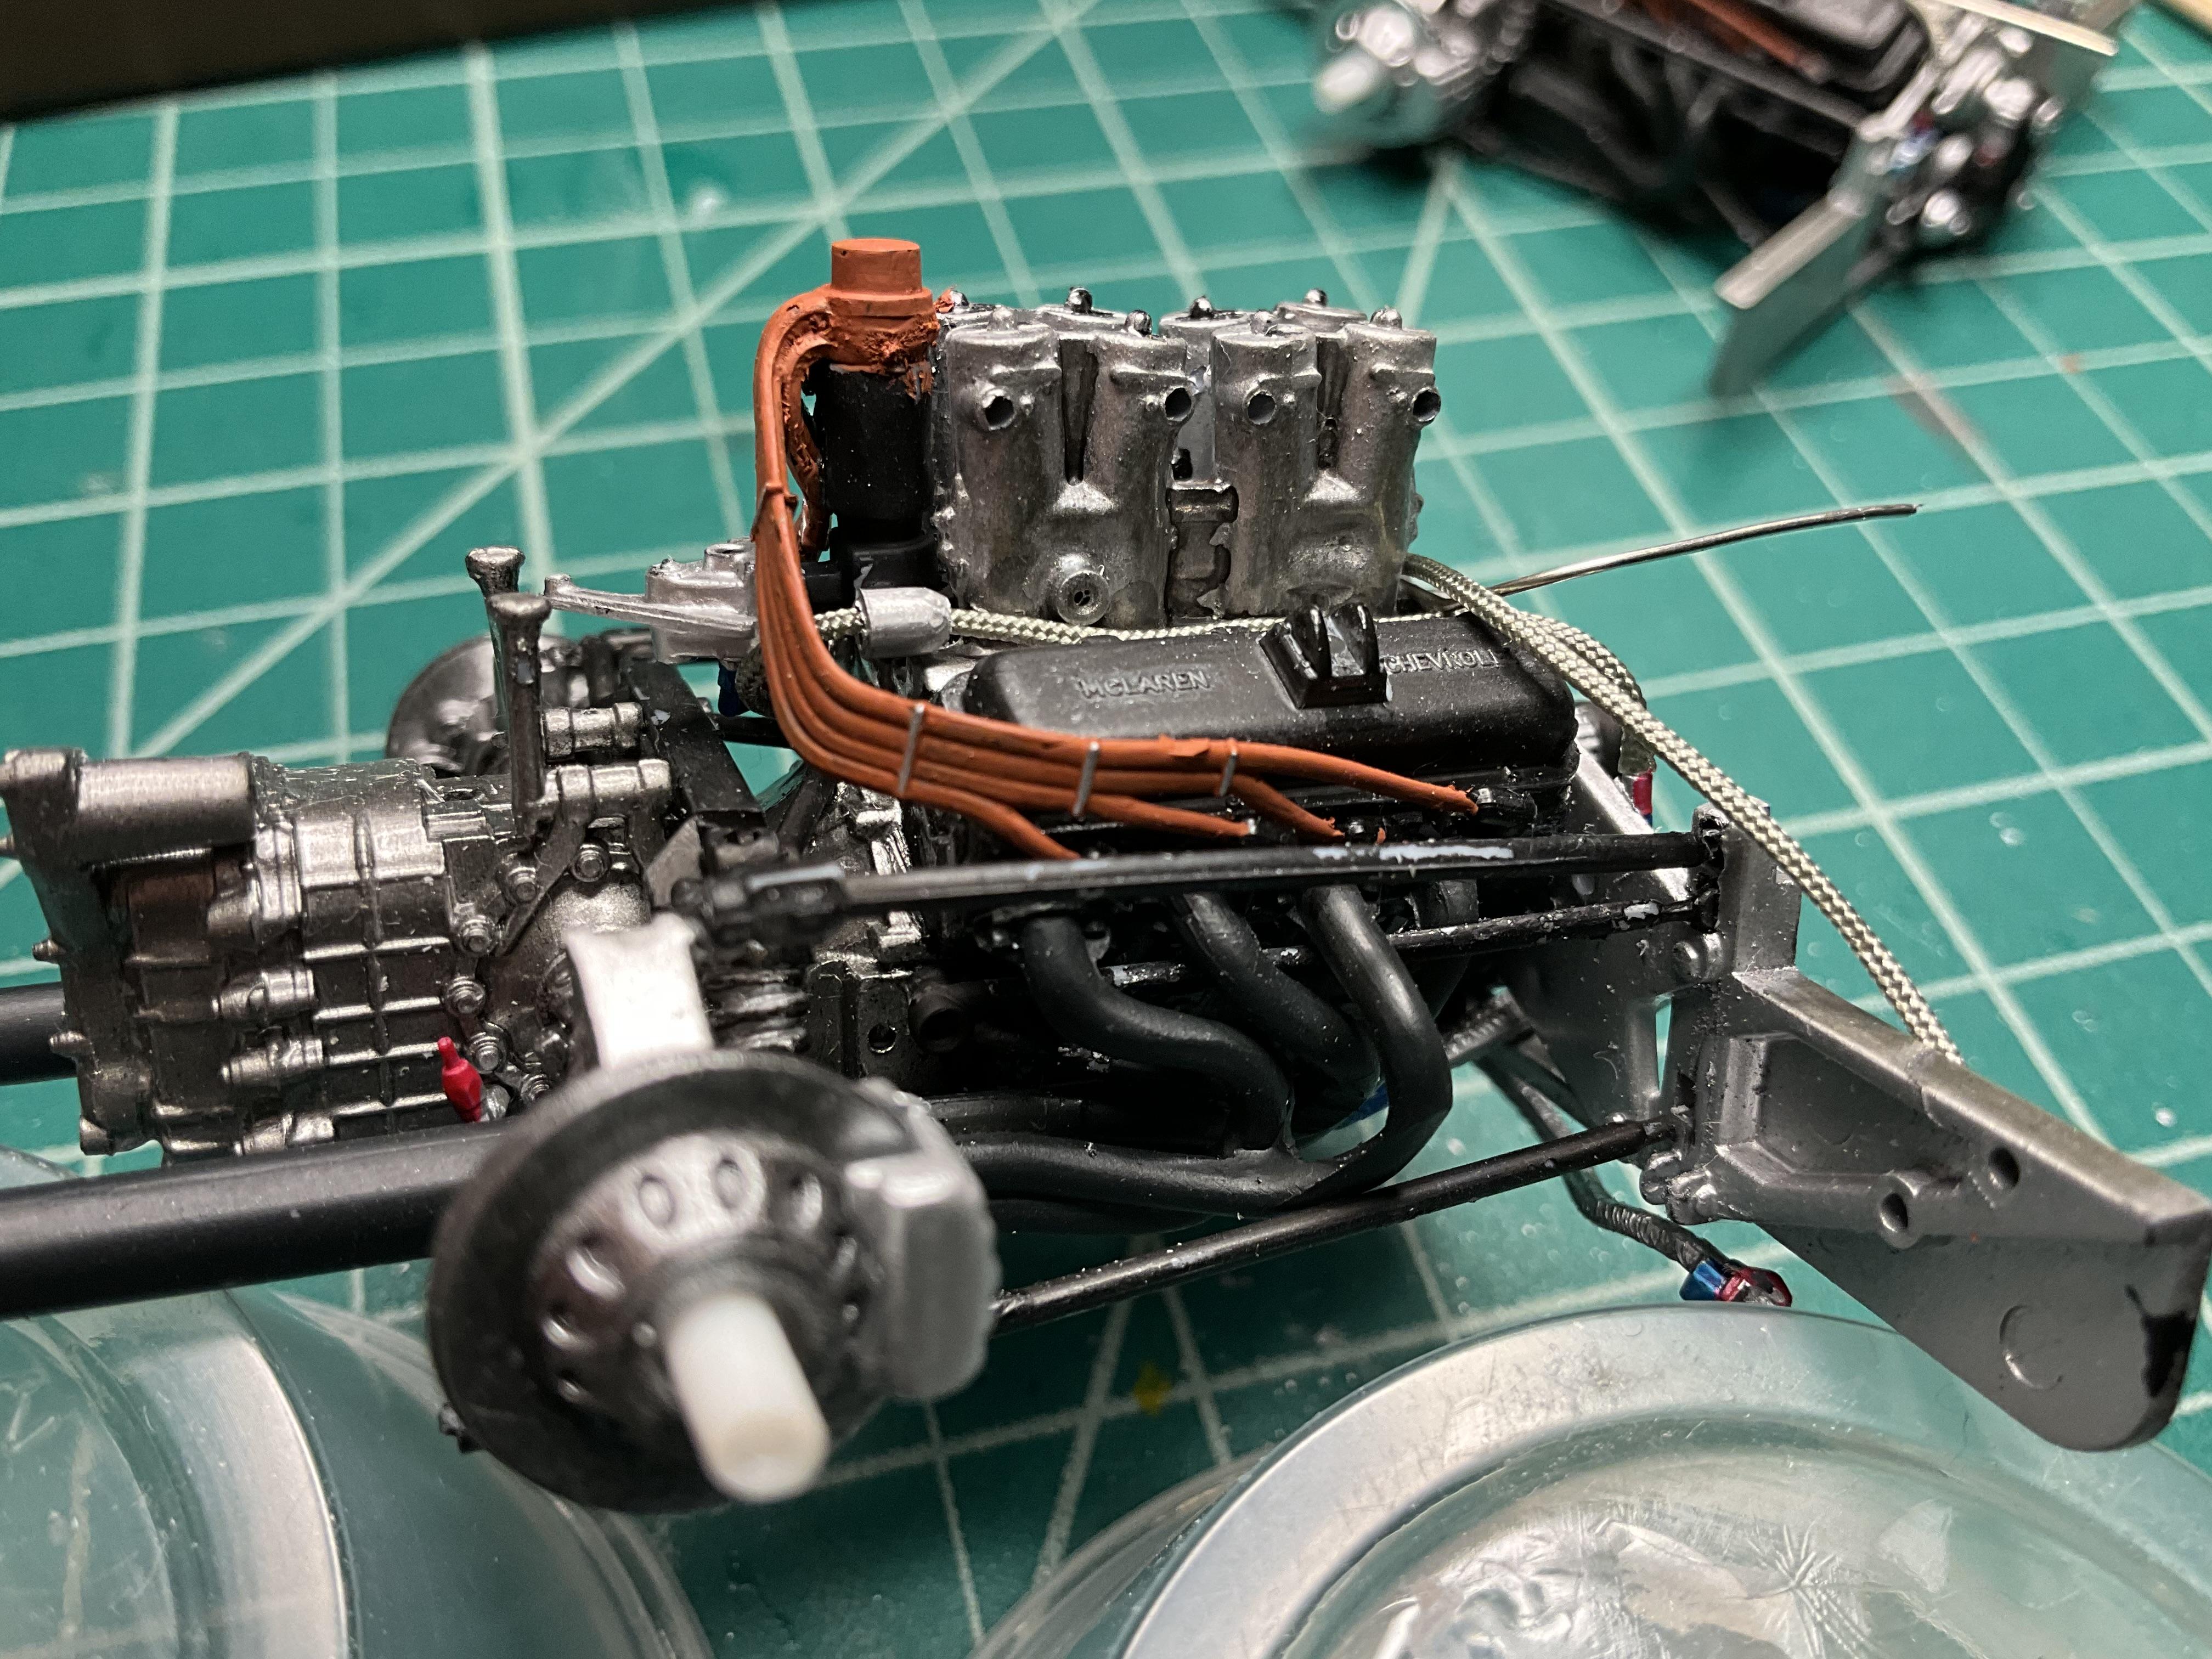
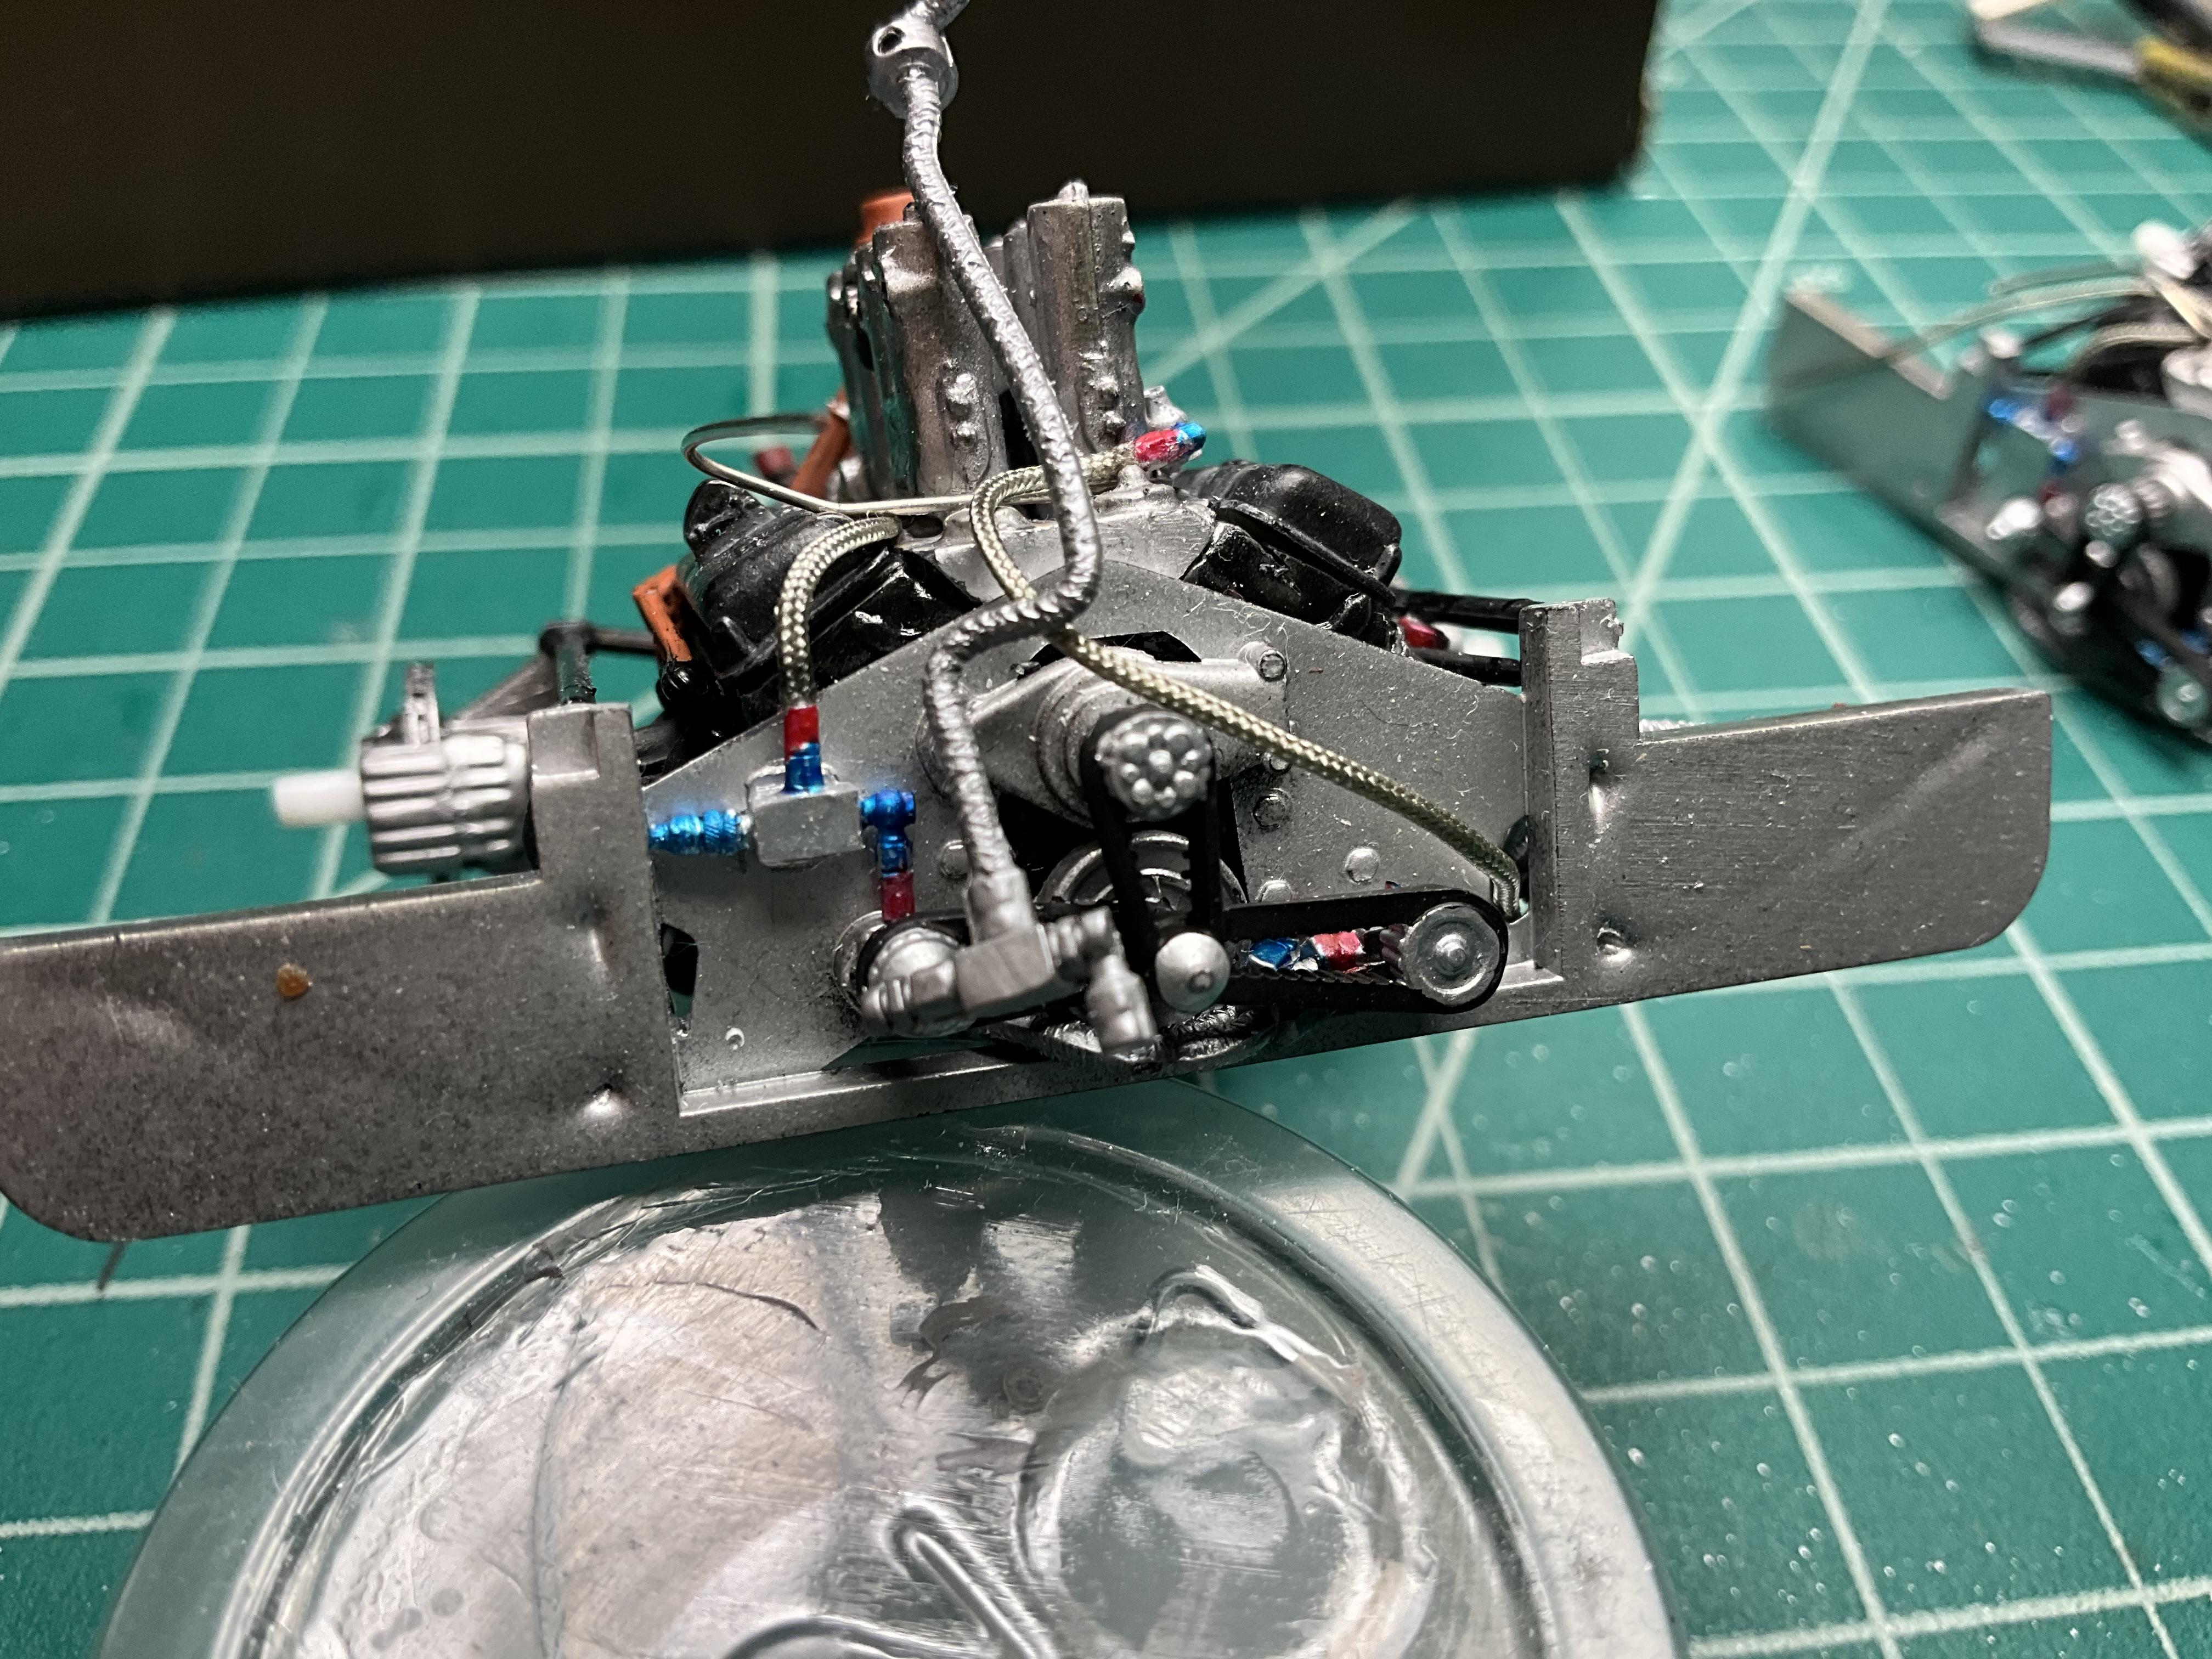
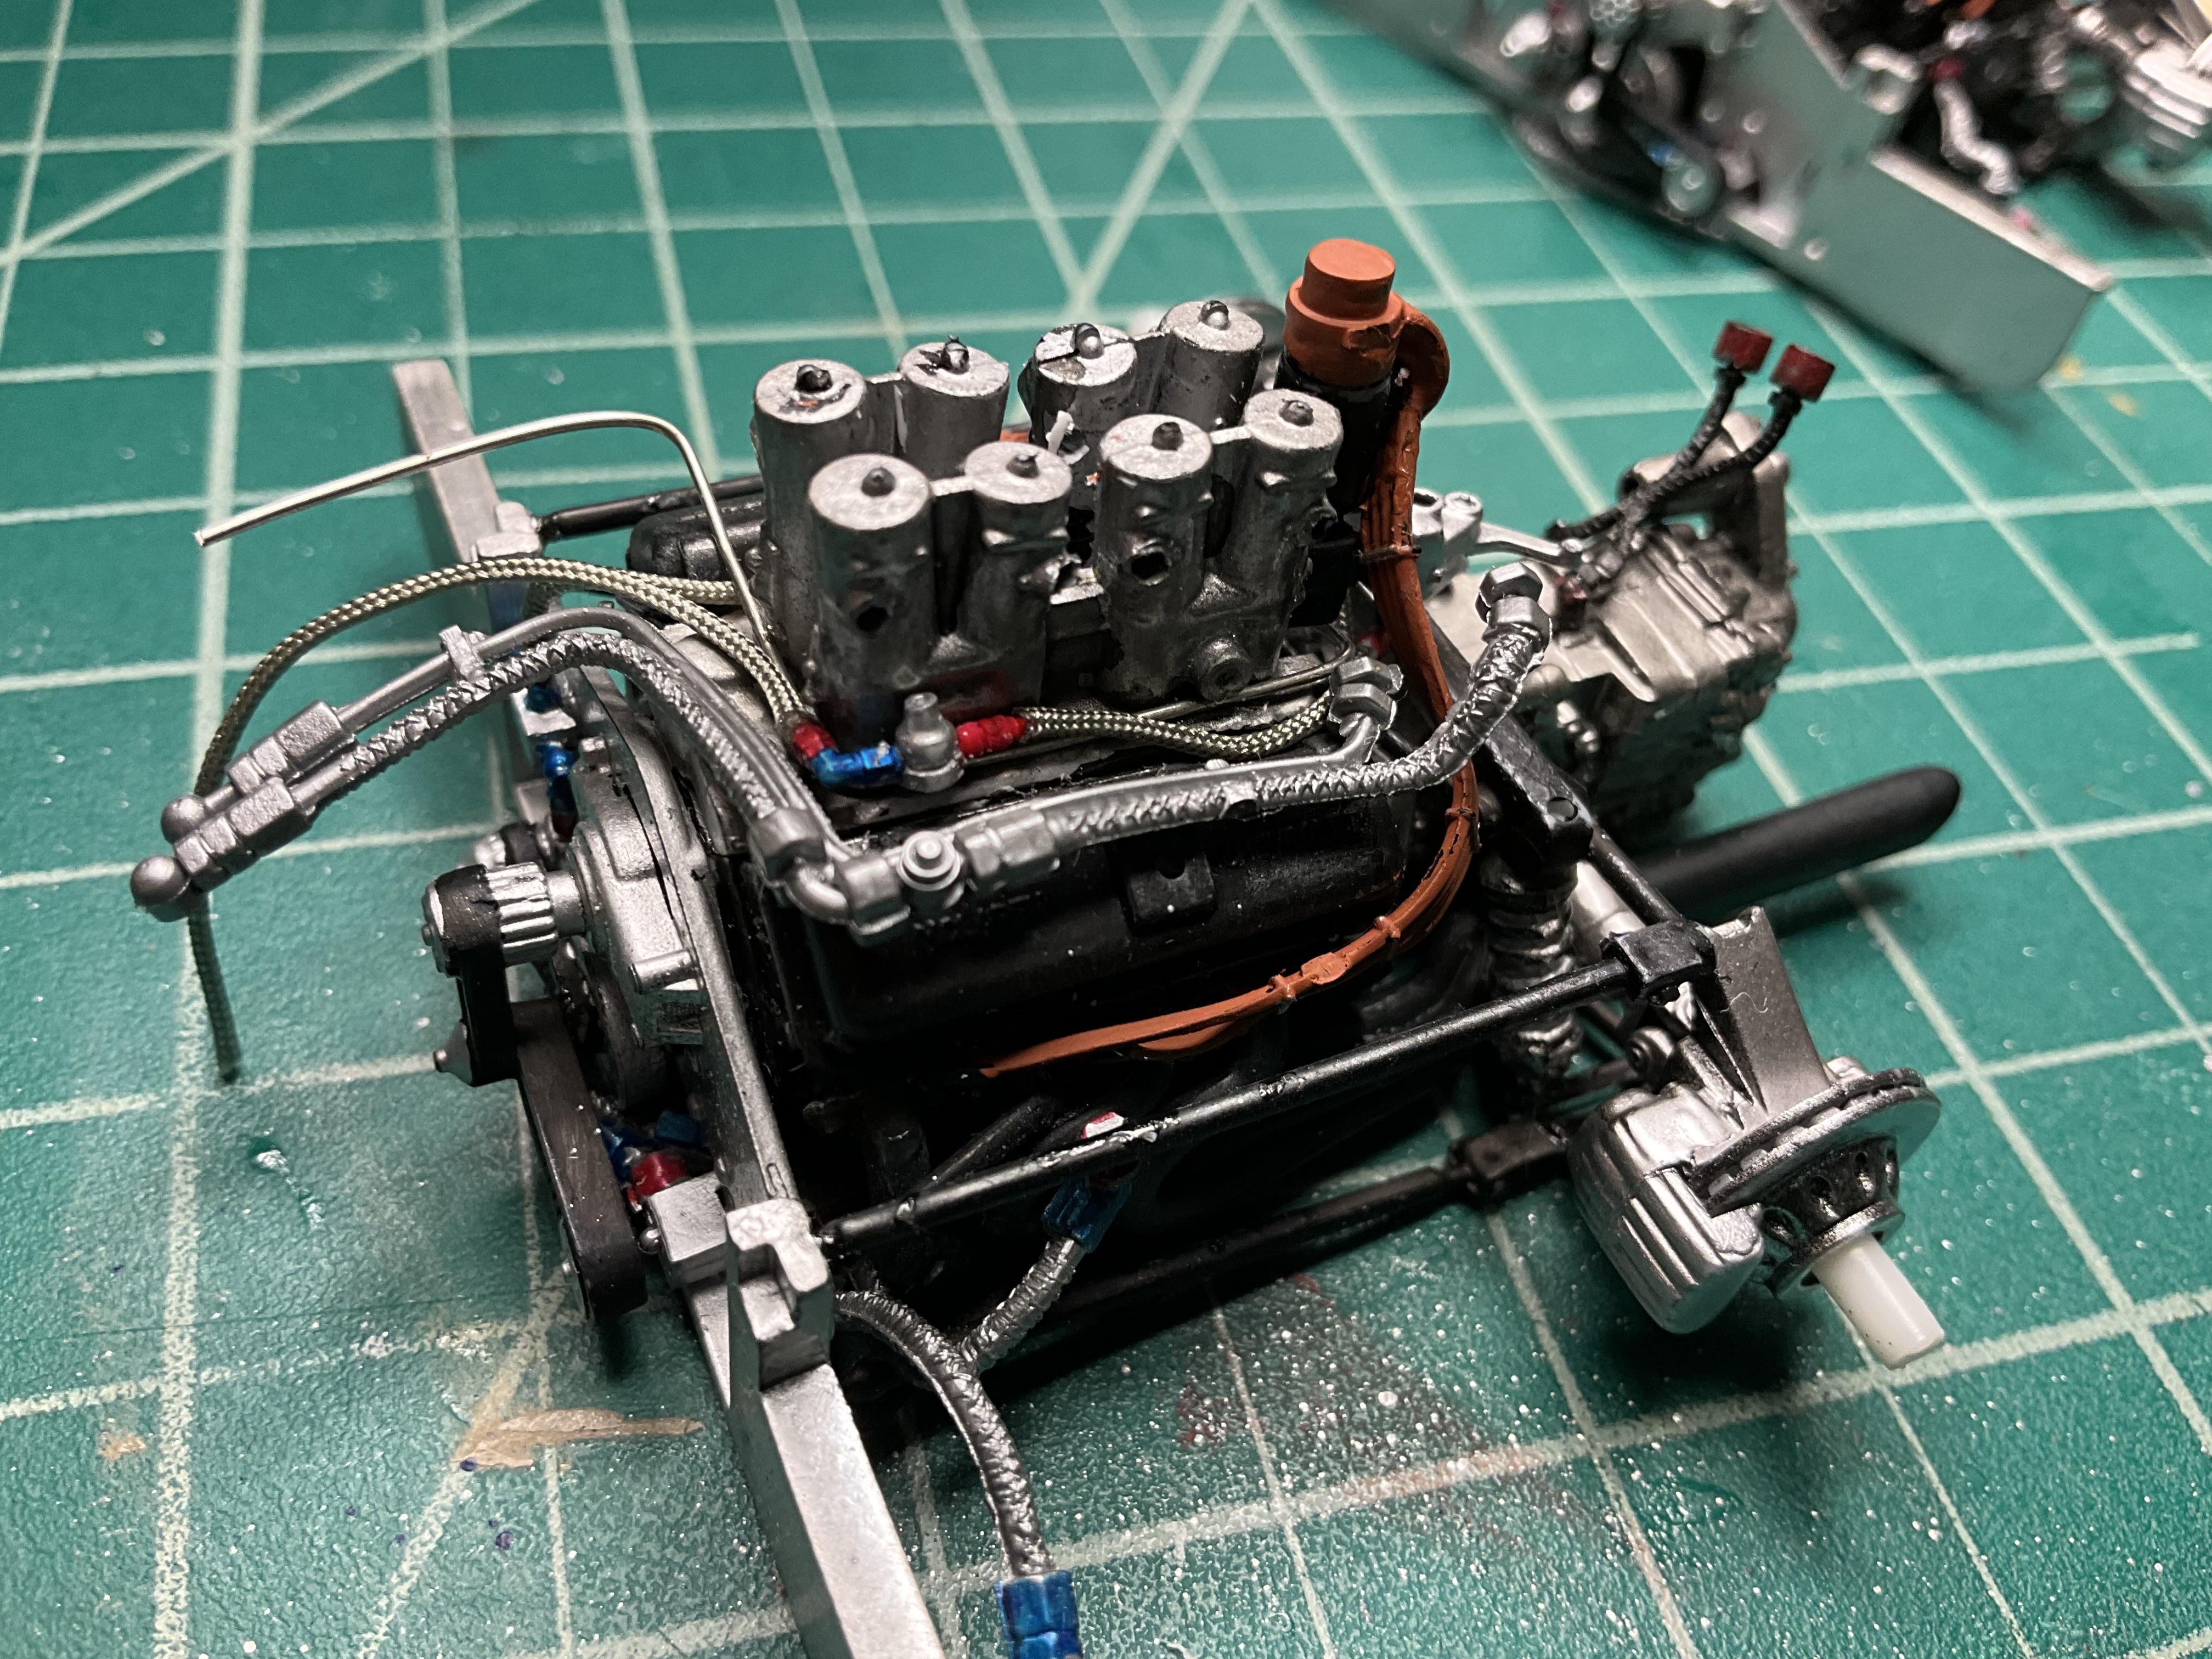
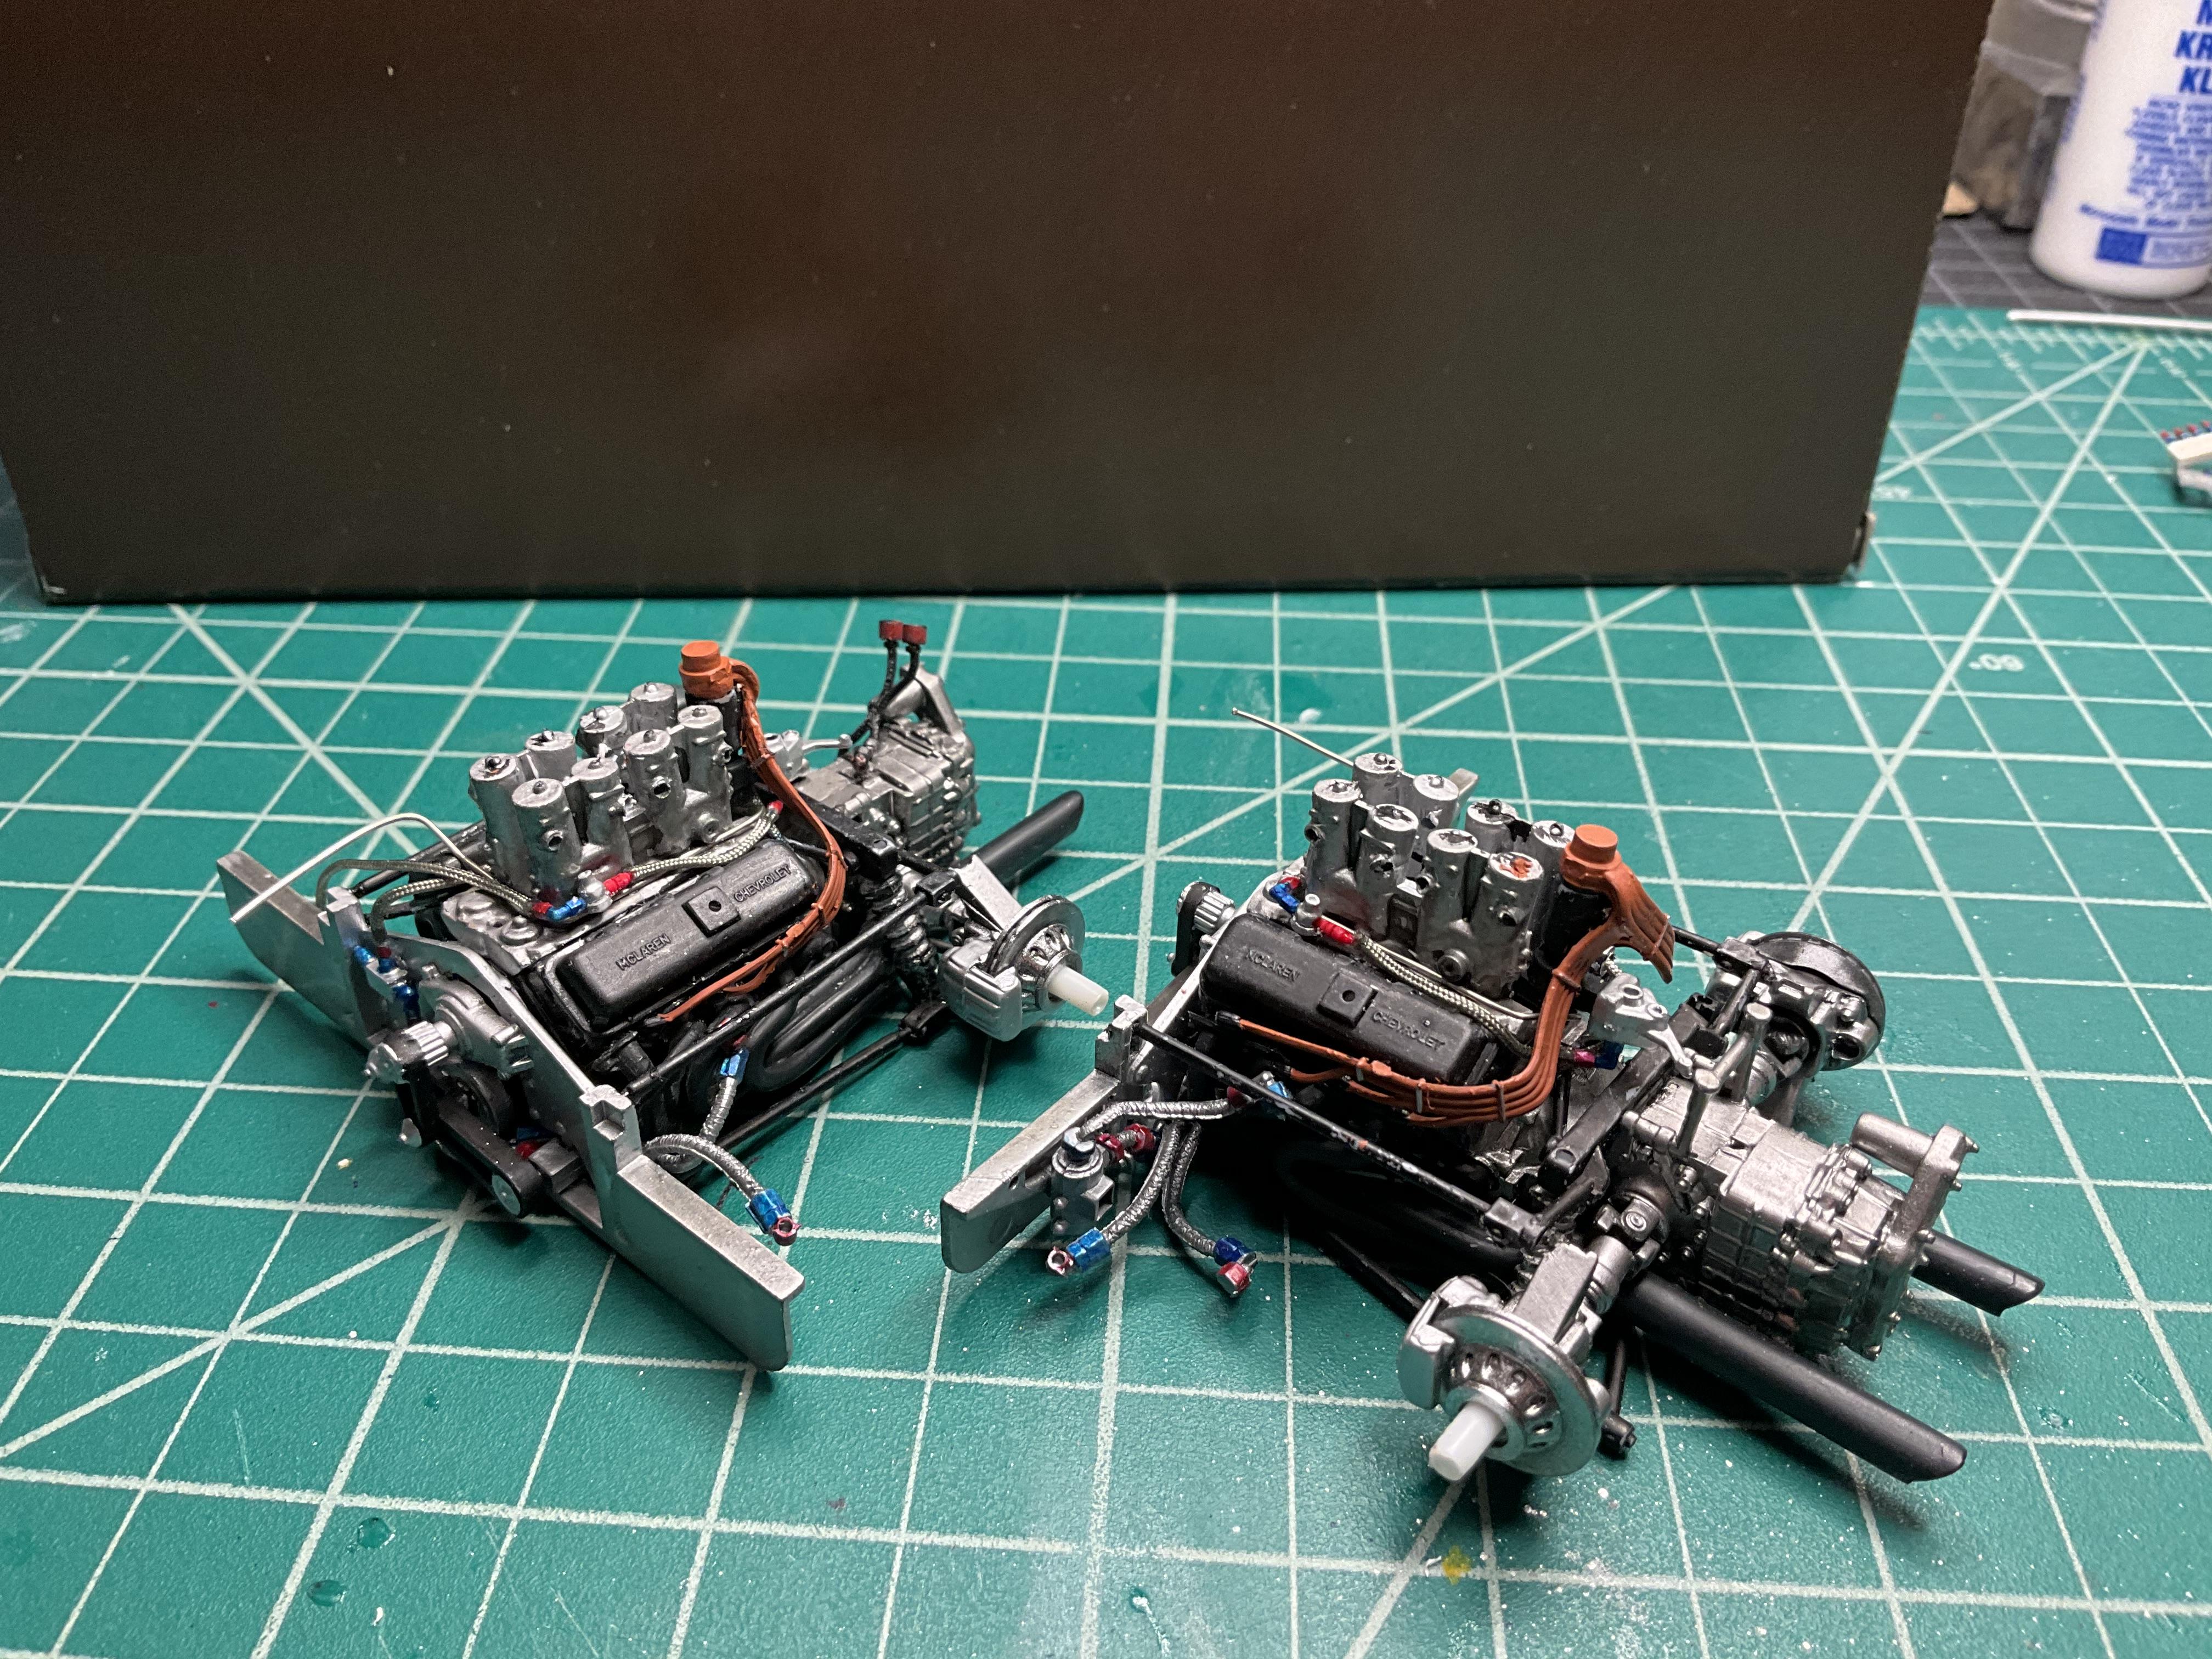
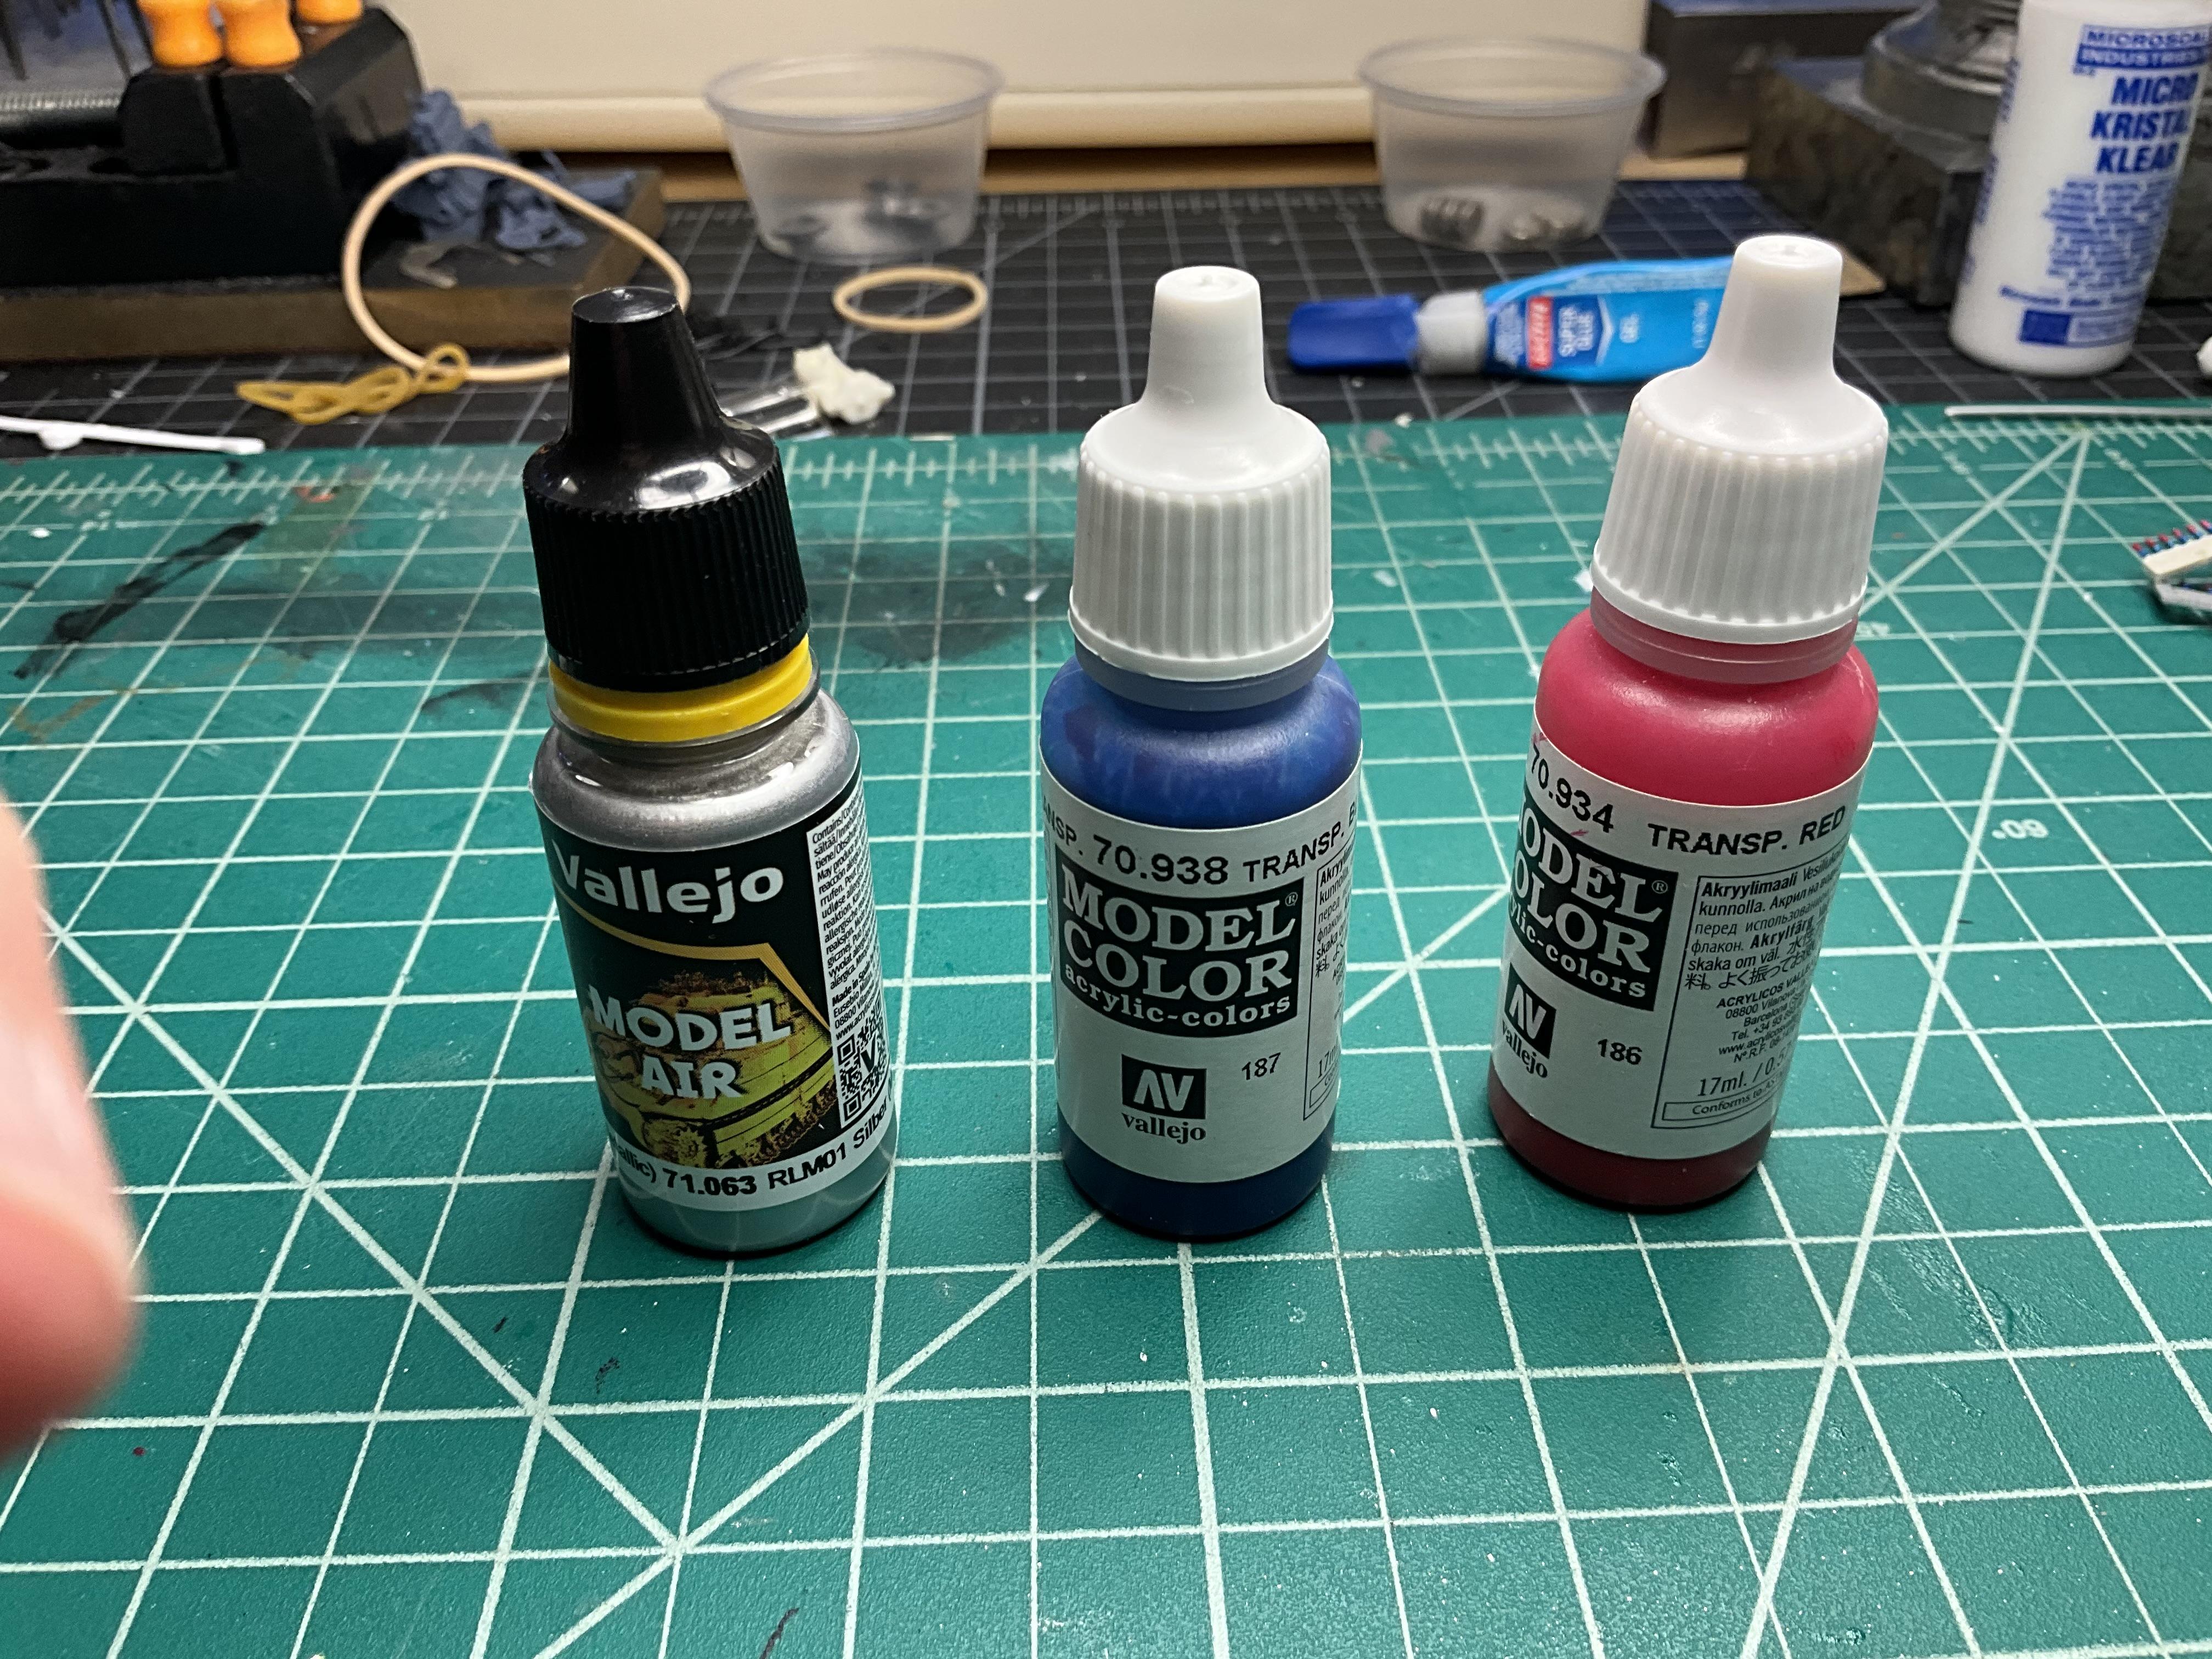
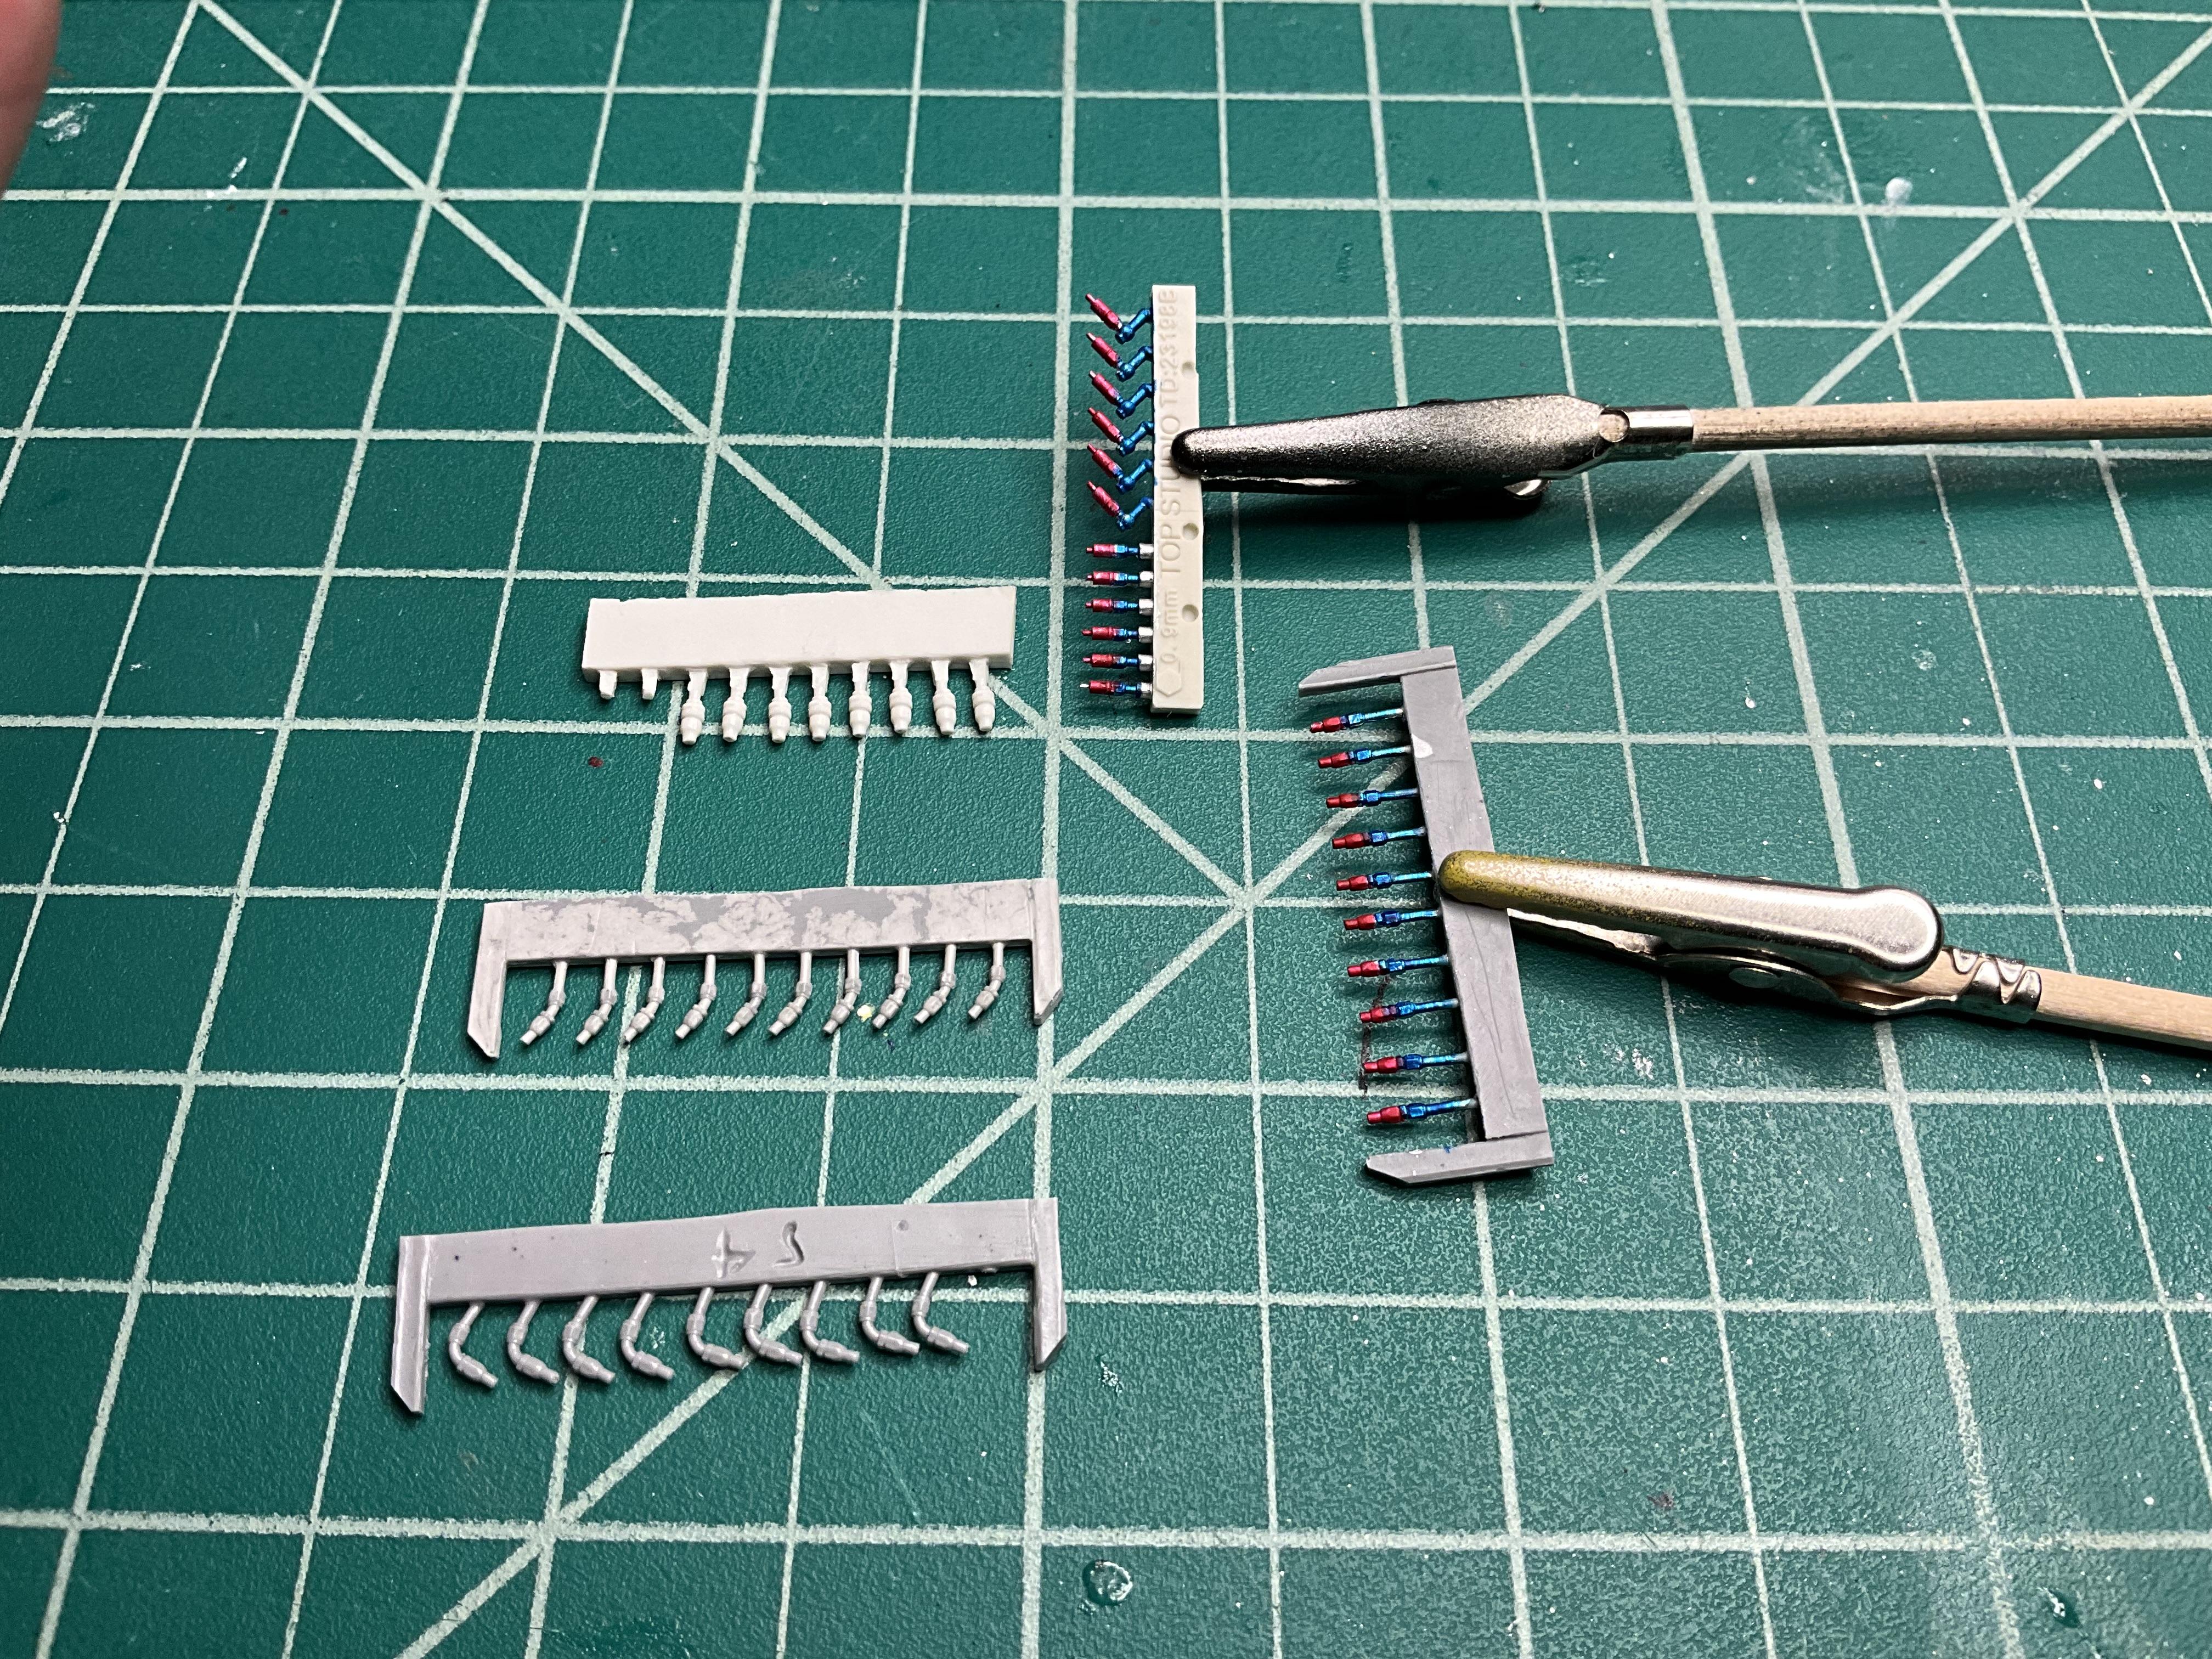
I have an update (and a small tutorial) on the cars. My order came for Top Studio fittings and braided line. I started the install and painting, quickly found that it’s better to paint them first while on the trees. These are resin fittings and were first coated with Vallejo silver. Next went the blue and red. I found it’s better to wet your brush often so it thins the paint a bit. The anodizing looks more convincing. Finally a gloss clear coat. Initially I was going to leave the previously installed vinyl lines alone, but the contrast between the two was too great. I will be replacing them. But you can’t drill a hole in vinyl, it closes up immediately. So plastic blocks and filters need to be made, you can see a couple I’ve done so far. Please ask any questions because even though they look different from the metal fittings, I believe this is a viable alternative. A lot less expensive and much less fiddling. This project will be put aside for a bit to rest my eyes and to make some progress on the Chaparral.

-
Have You Ever Needlessly Ordered Anything?
Mark W replied to Bill Anderson's topic in Model Building Questions and Answers
Bob, just this year I did buy a couple plastic boxes with dividers, like you I put a tag with each item as to where I bought it. Need to go further, but it’s a start. -
Donnie Allison's '74 Monte
Mark W replied to Belugawrx's topic in Stock Cars (NASCAR, Super Stock, Late Model, etc.)
Hey Bruce, the build turned out beautiful! Glad I could help. -
Have You Ever Needlessly Ordered Anything?
Mark W replied to Bill Anderson's topic in Model Building Questions and Answers
Jim, we all try to keep that promise, it lasts for a while. However, as I get older, I’m getting rid of those older less detailed kits. Keeping the higher quality ones. -
Have You Ever Needlessly Ordered Anything?
Mark W replied to Bill Anderson's topic in Model Building Questions and Answers
Every time I send for something I need, I keep searching till I add those needless items. -
Nice clean build. Looks like something I’d see on the road back in my 20’s.
-
Nova Salt Flat Racer
Mark W replied to Pierre Rivard's topic in WIP: Other Racing: Road Racing, Land Speed Racers
Pierre, your attention to detail is incredible! The “Salt Rat” effect you were after came out perfect! I like all kinds of building techniques, but the weathered/rusted look is right on top. My compliments! -
‘55 El Camino
Mark W replied to NOBLNG's topic in WIP: Model Trucks: Pickups, Vans, SUVs, Light Commercial
The scribe line is perfect! Nice. -
The upside of the hobby- What part or parts do you enjoy the most?
Mark W replied to James2's topic in The Off-Topic Lounge
I like detailing, engines, interiors, the bottom of the chassis. But mostly being here. Seeing everyone's work and I’m really in my glory when someone compliments mine! lol -
The downside of the hobby - what annoys you?
Mark W replied to Mike C's topic in The Off-Topic Lounge
Number one, hands down: loosing that miniature part on the floor!!! You know exactly where it fell, then after 1/2 hour, you find it 6 feet away. -
My First Car
Mark W replied to Wickersham Humble's topic in General Automotive Talk (Trucks and Cars)
Not the actual car, but this was it, $125.00. With a 283, and stock hubcaps.
-
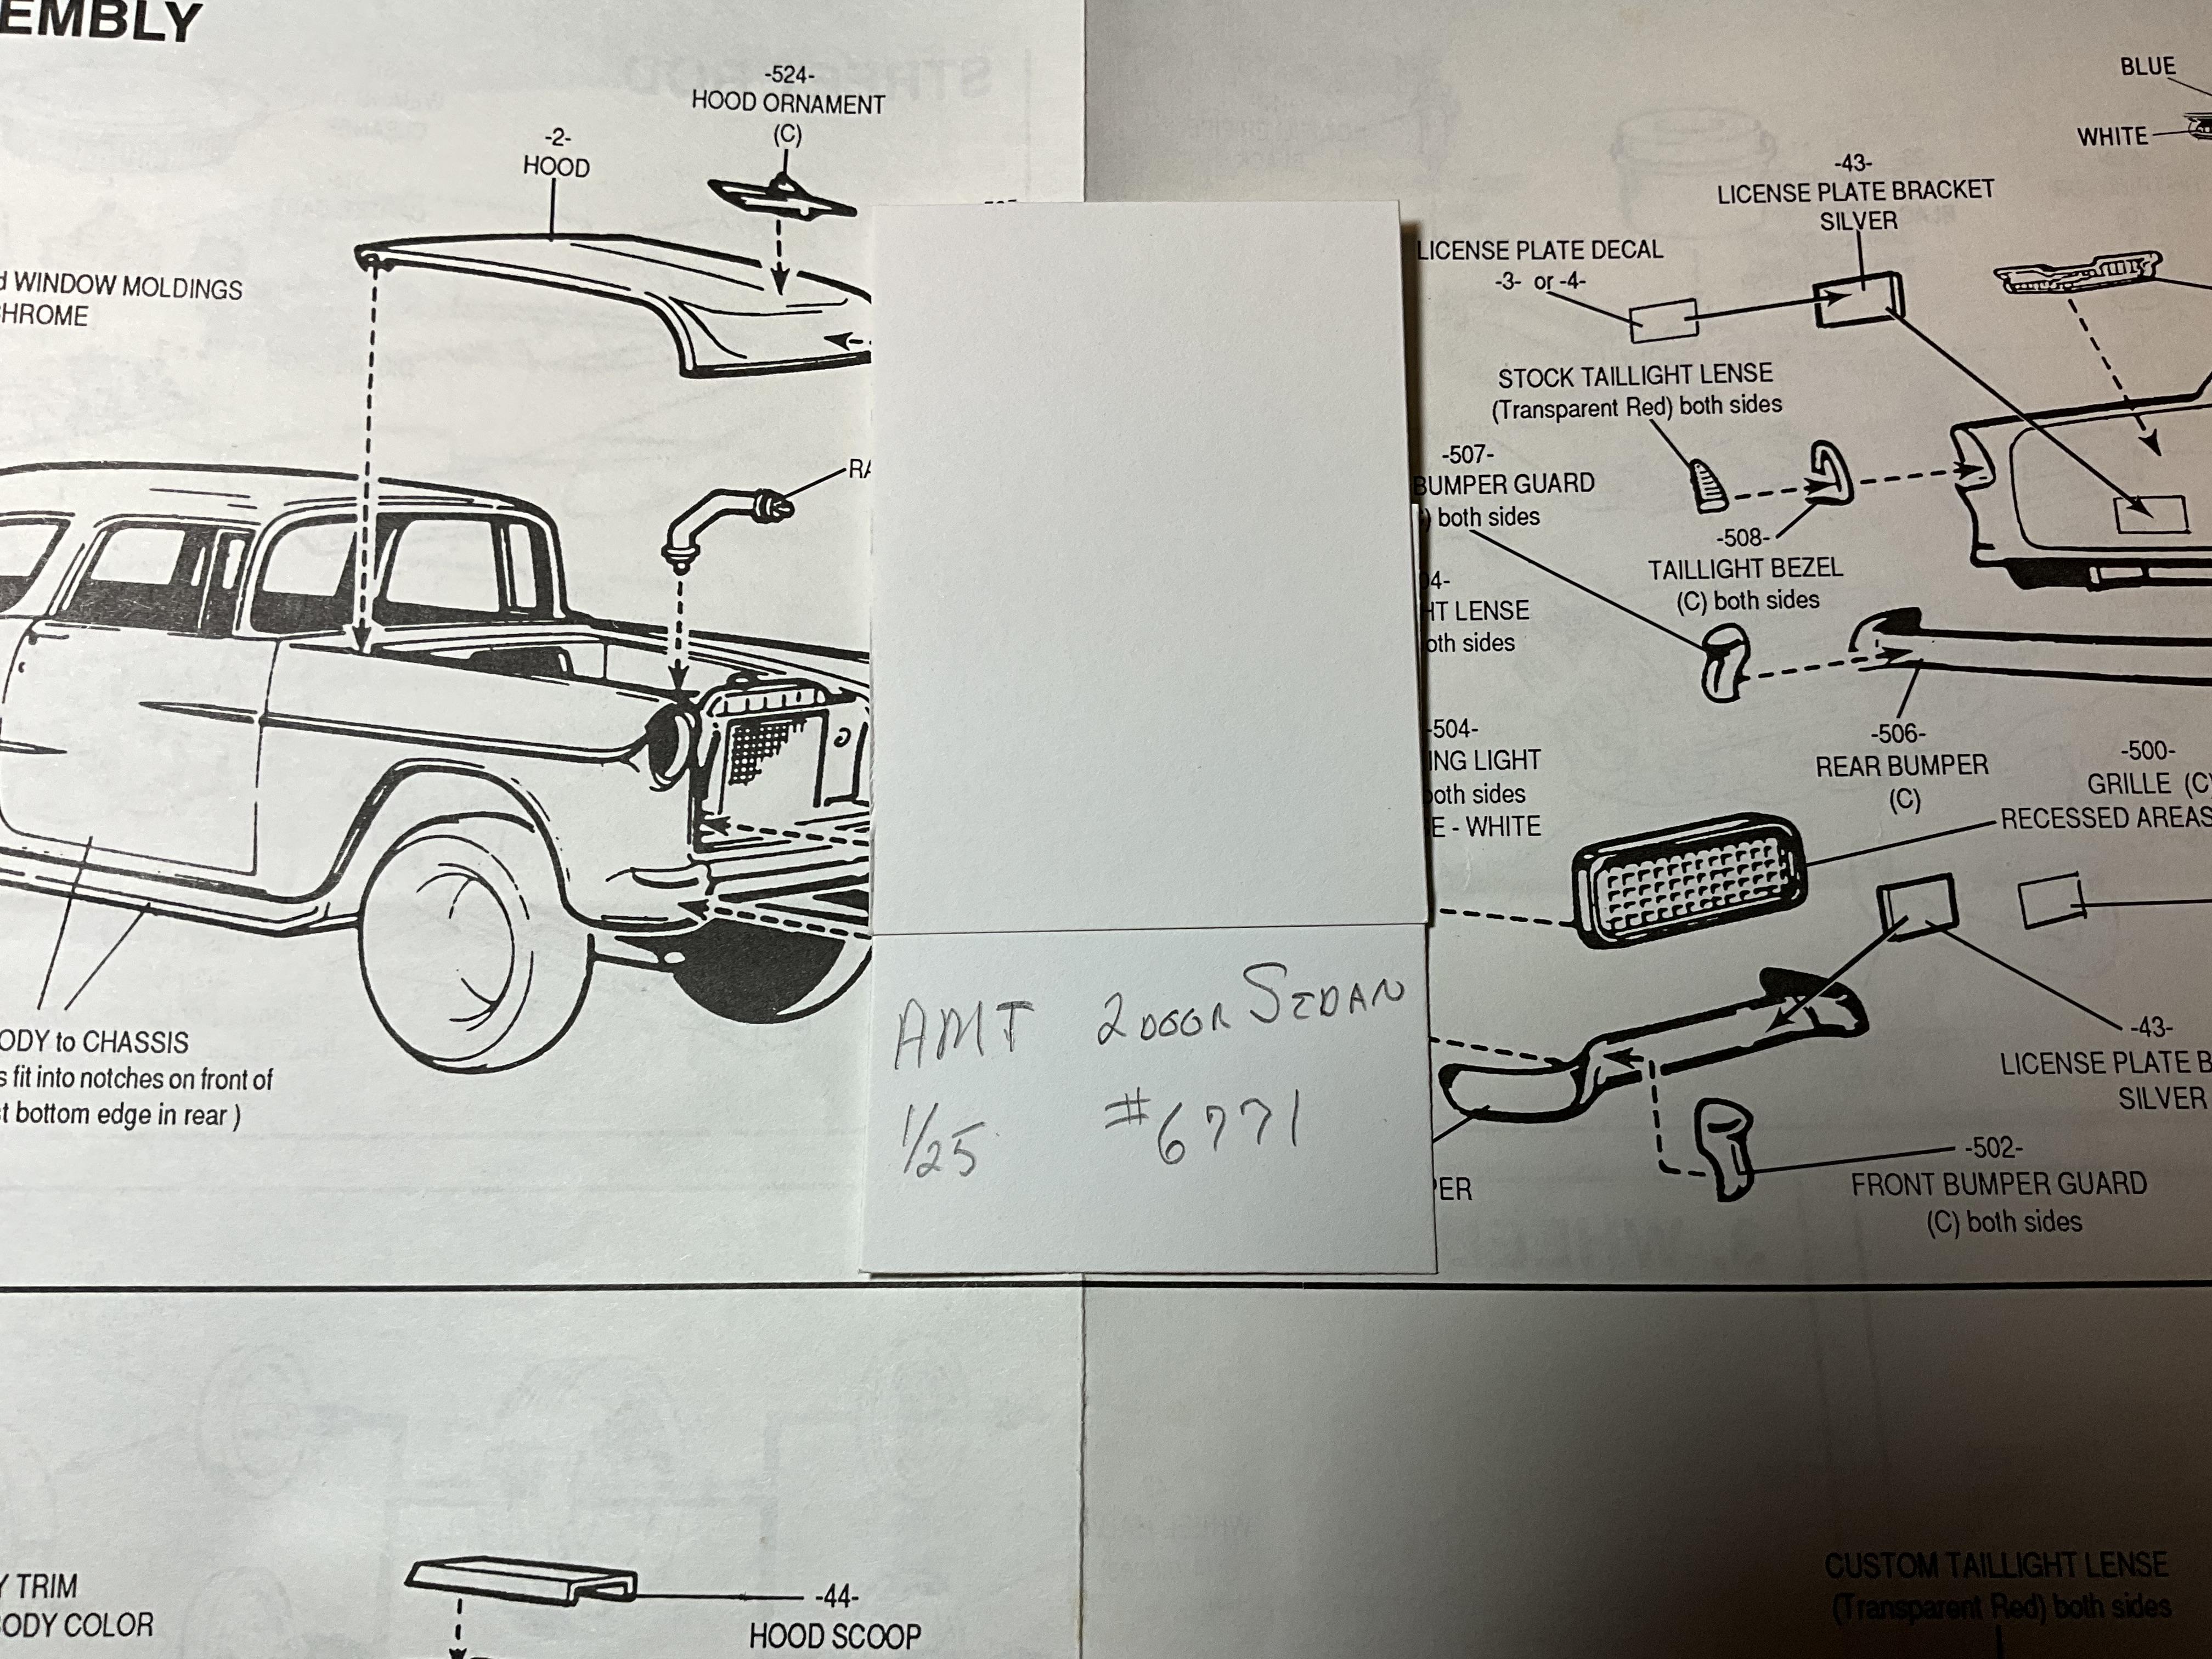
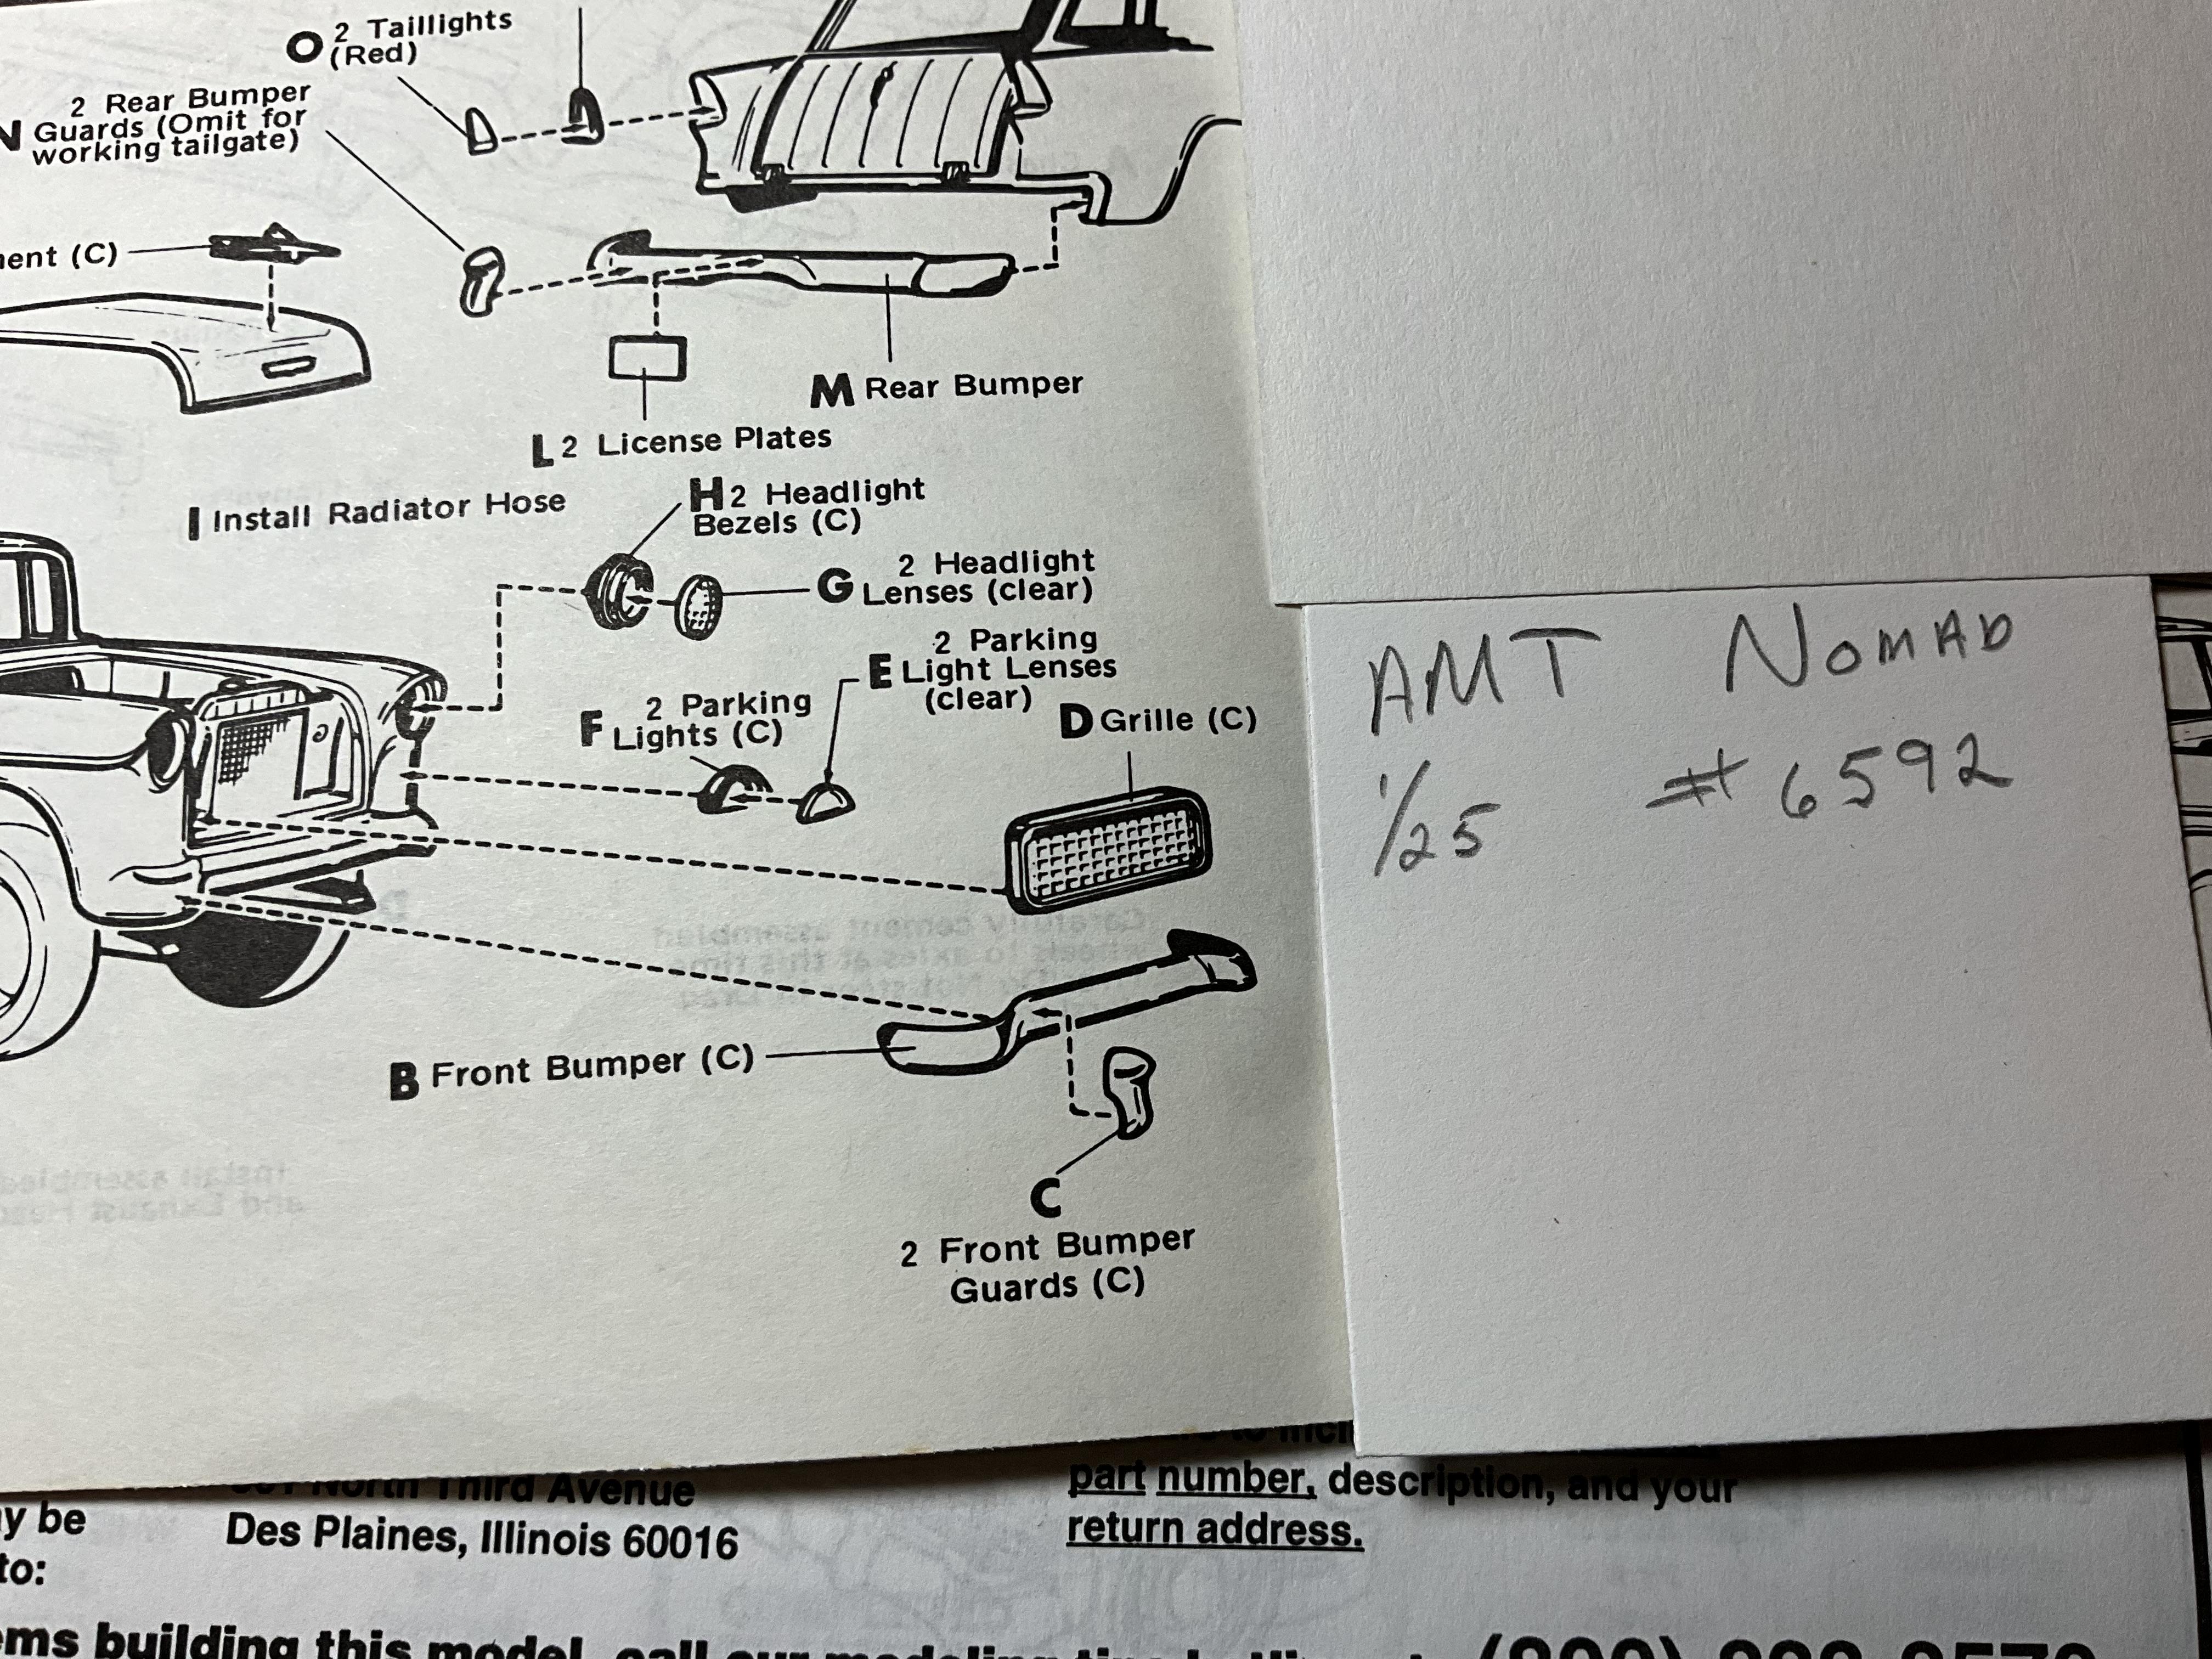
AMT ‘55 Nomad grill question?
Mark W replied to NOBLNG's topic in Model Building Questions and Answers
This is what I found Greg, hope it helps. If you need more conformation, I can dig out the kits and look for you.
-
Who doesn't love a mock-up? Let's see yours!
Mark W replied to Belairconvertable's topic in WIP: Model Cars
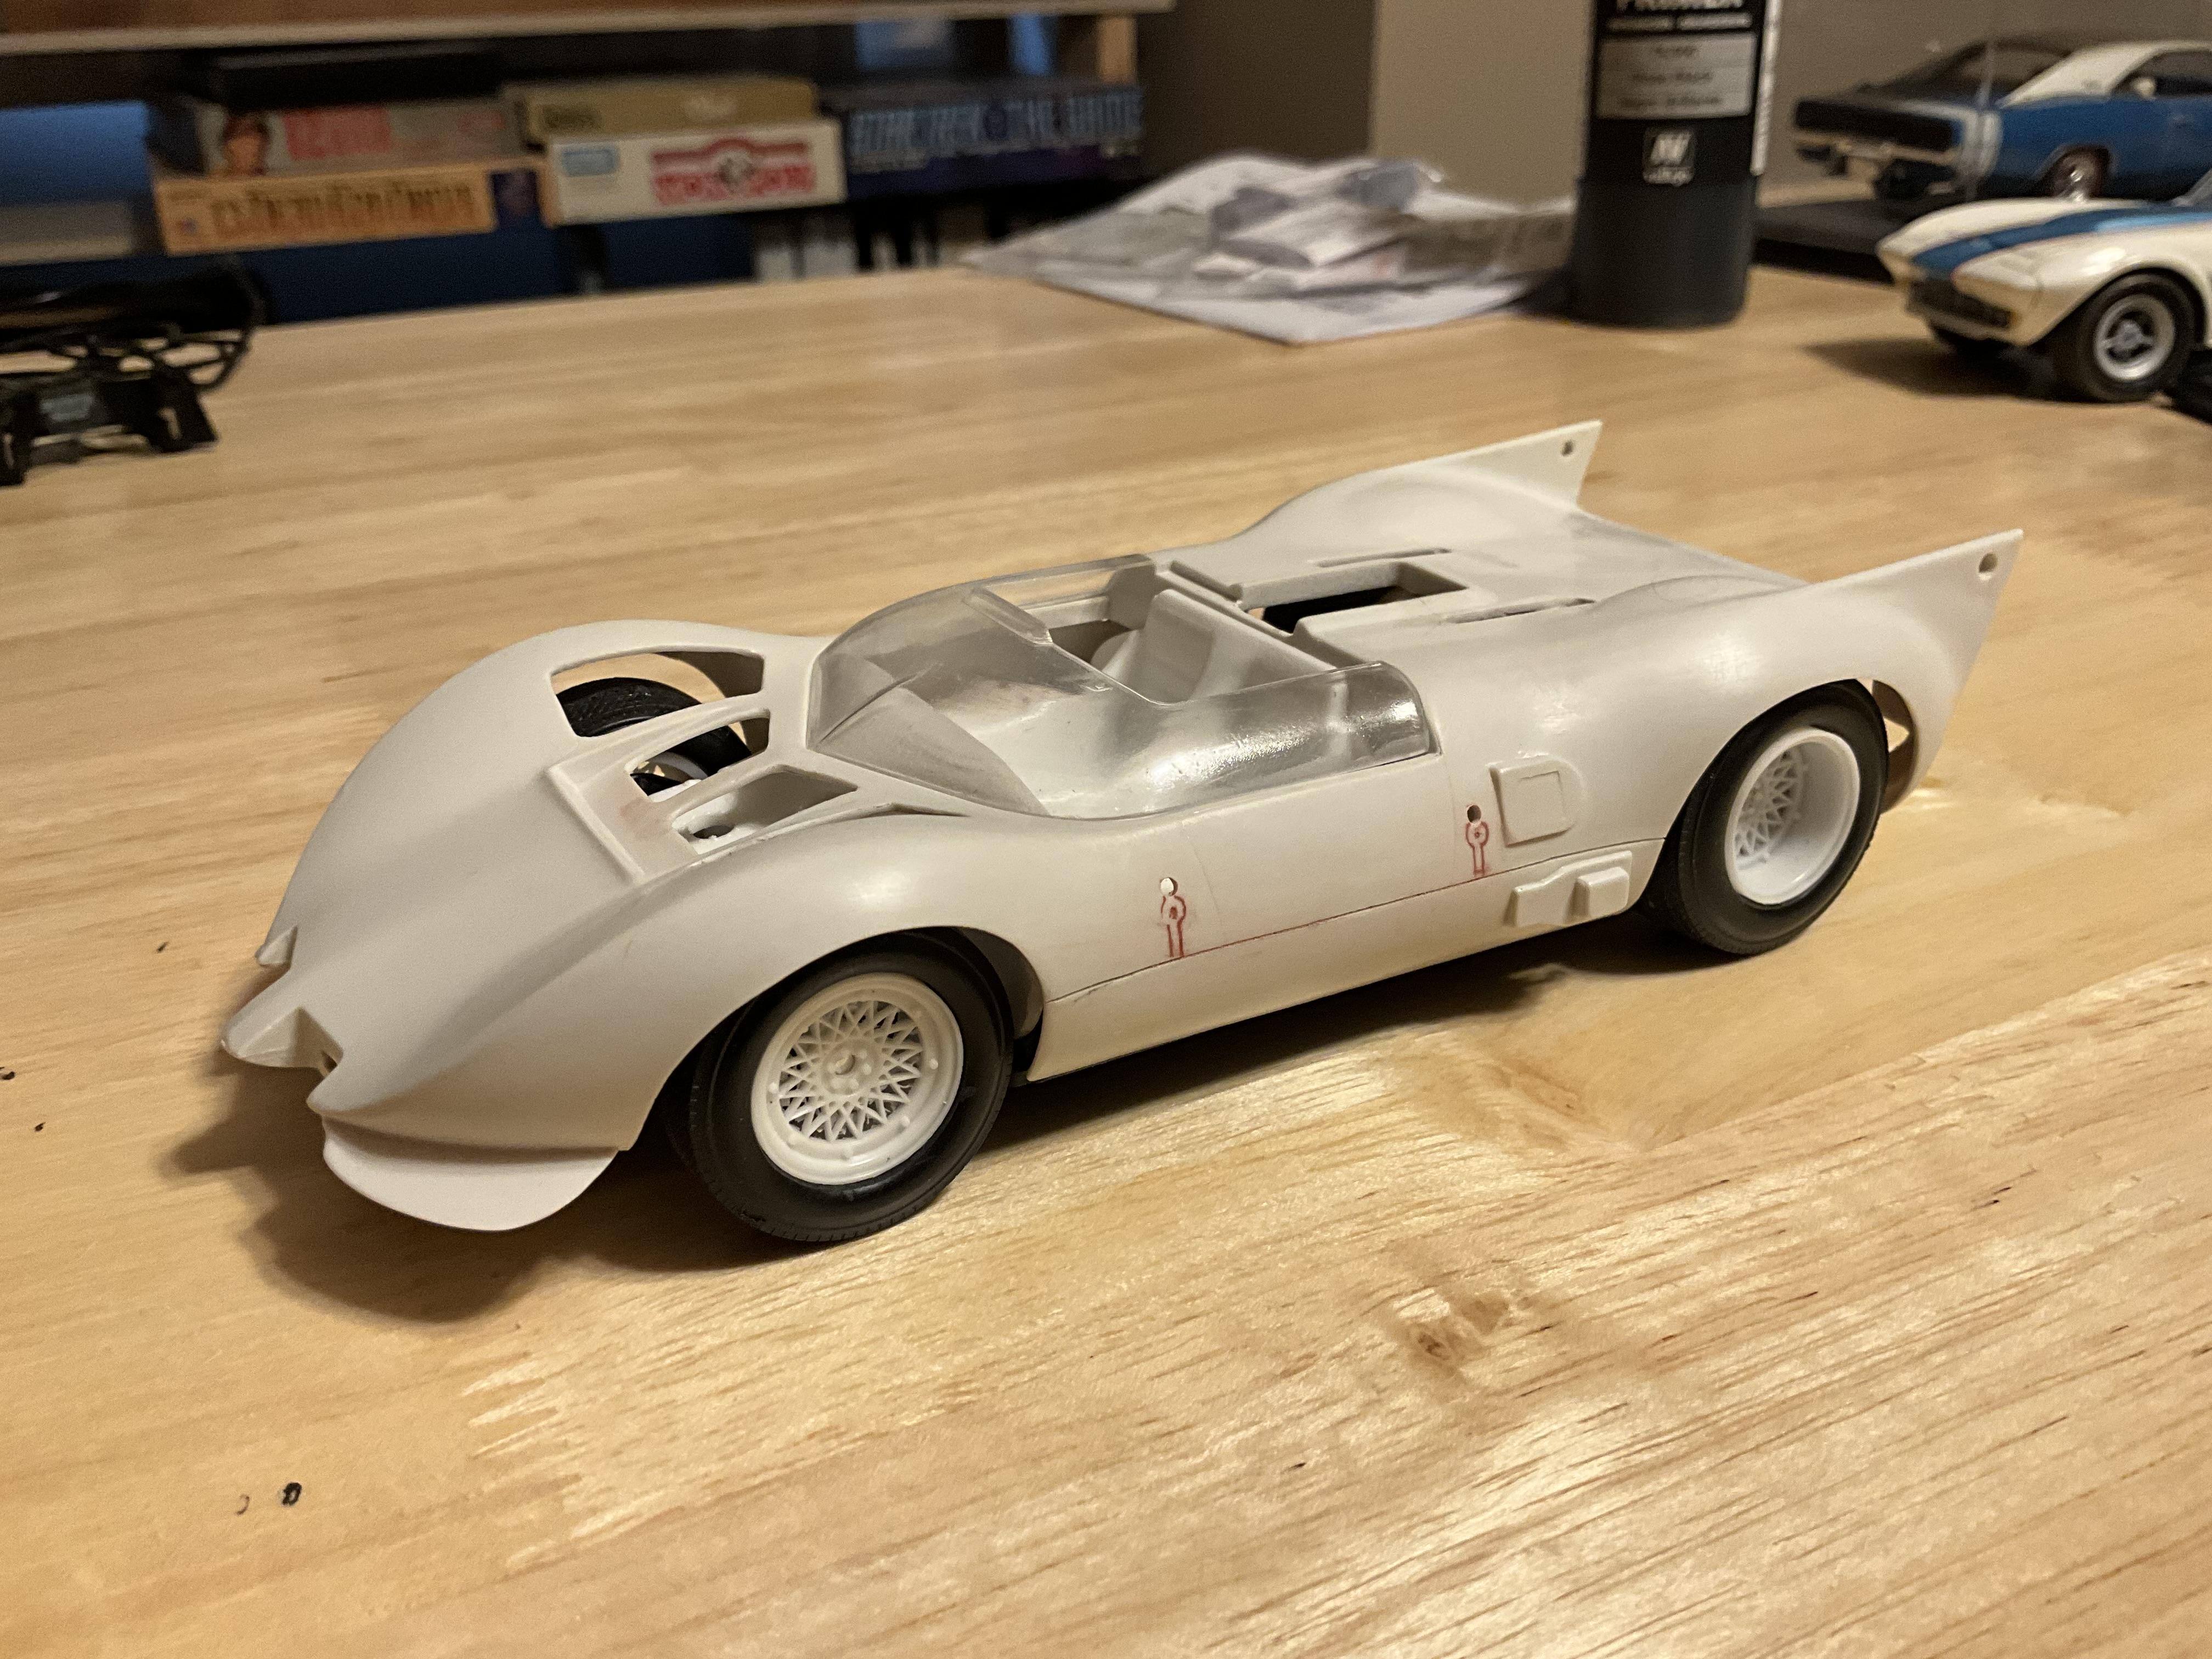
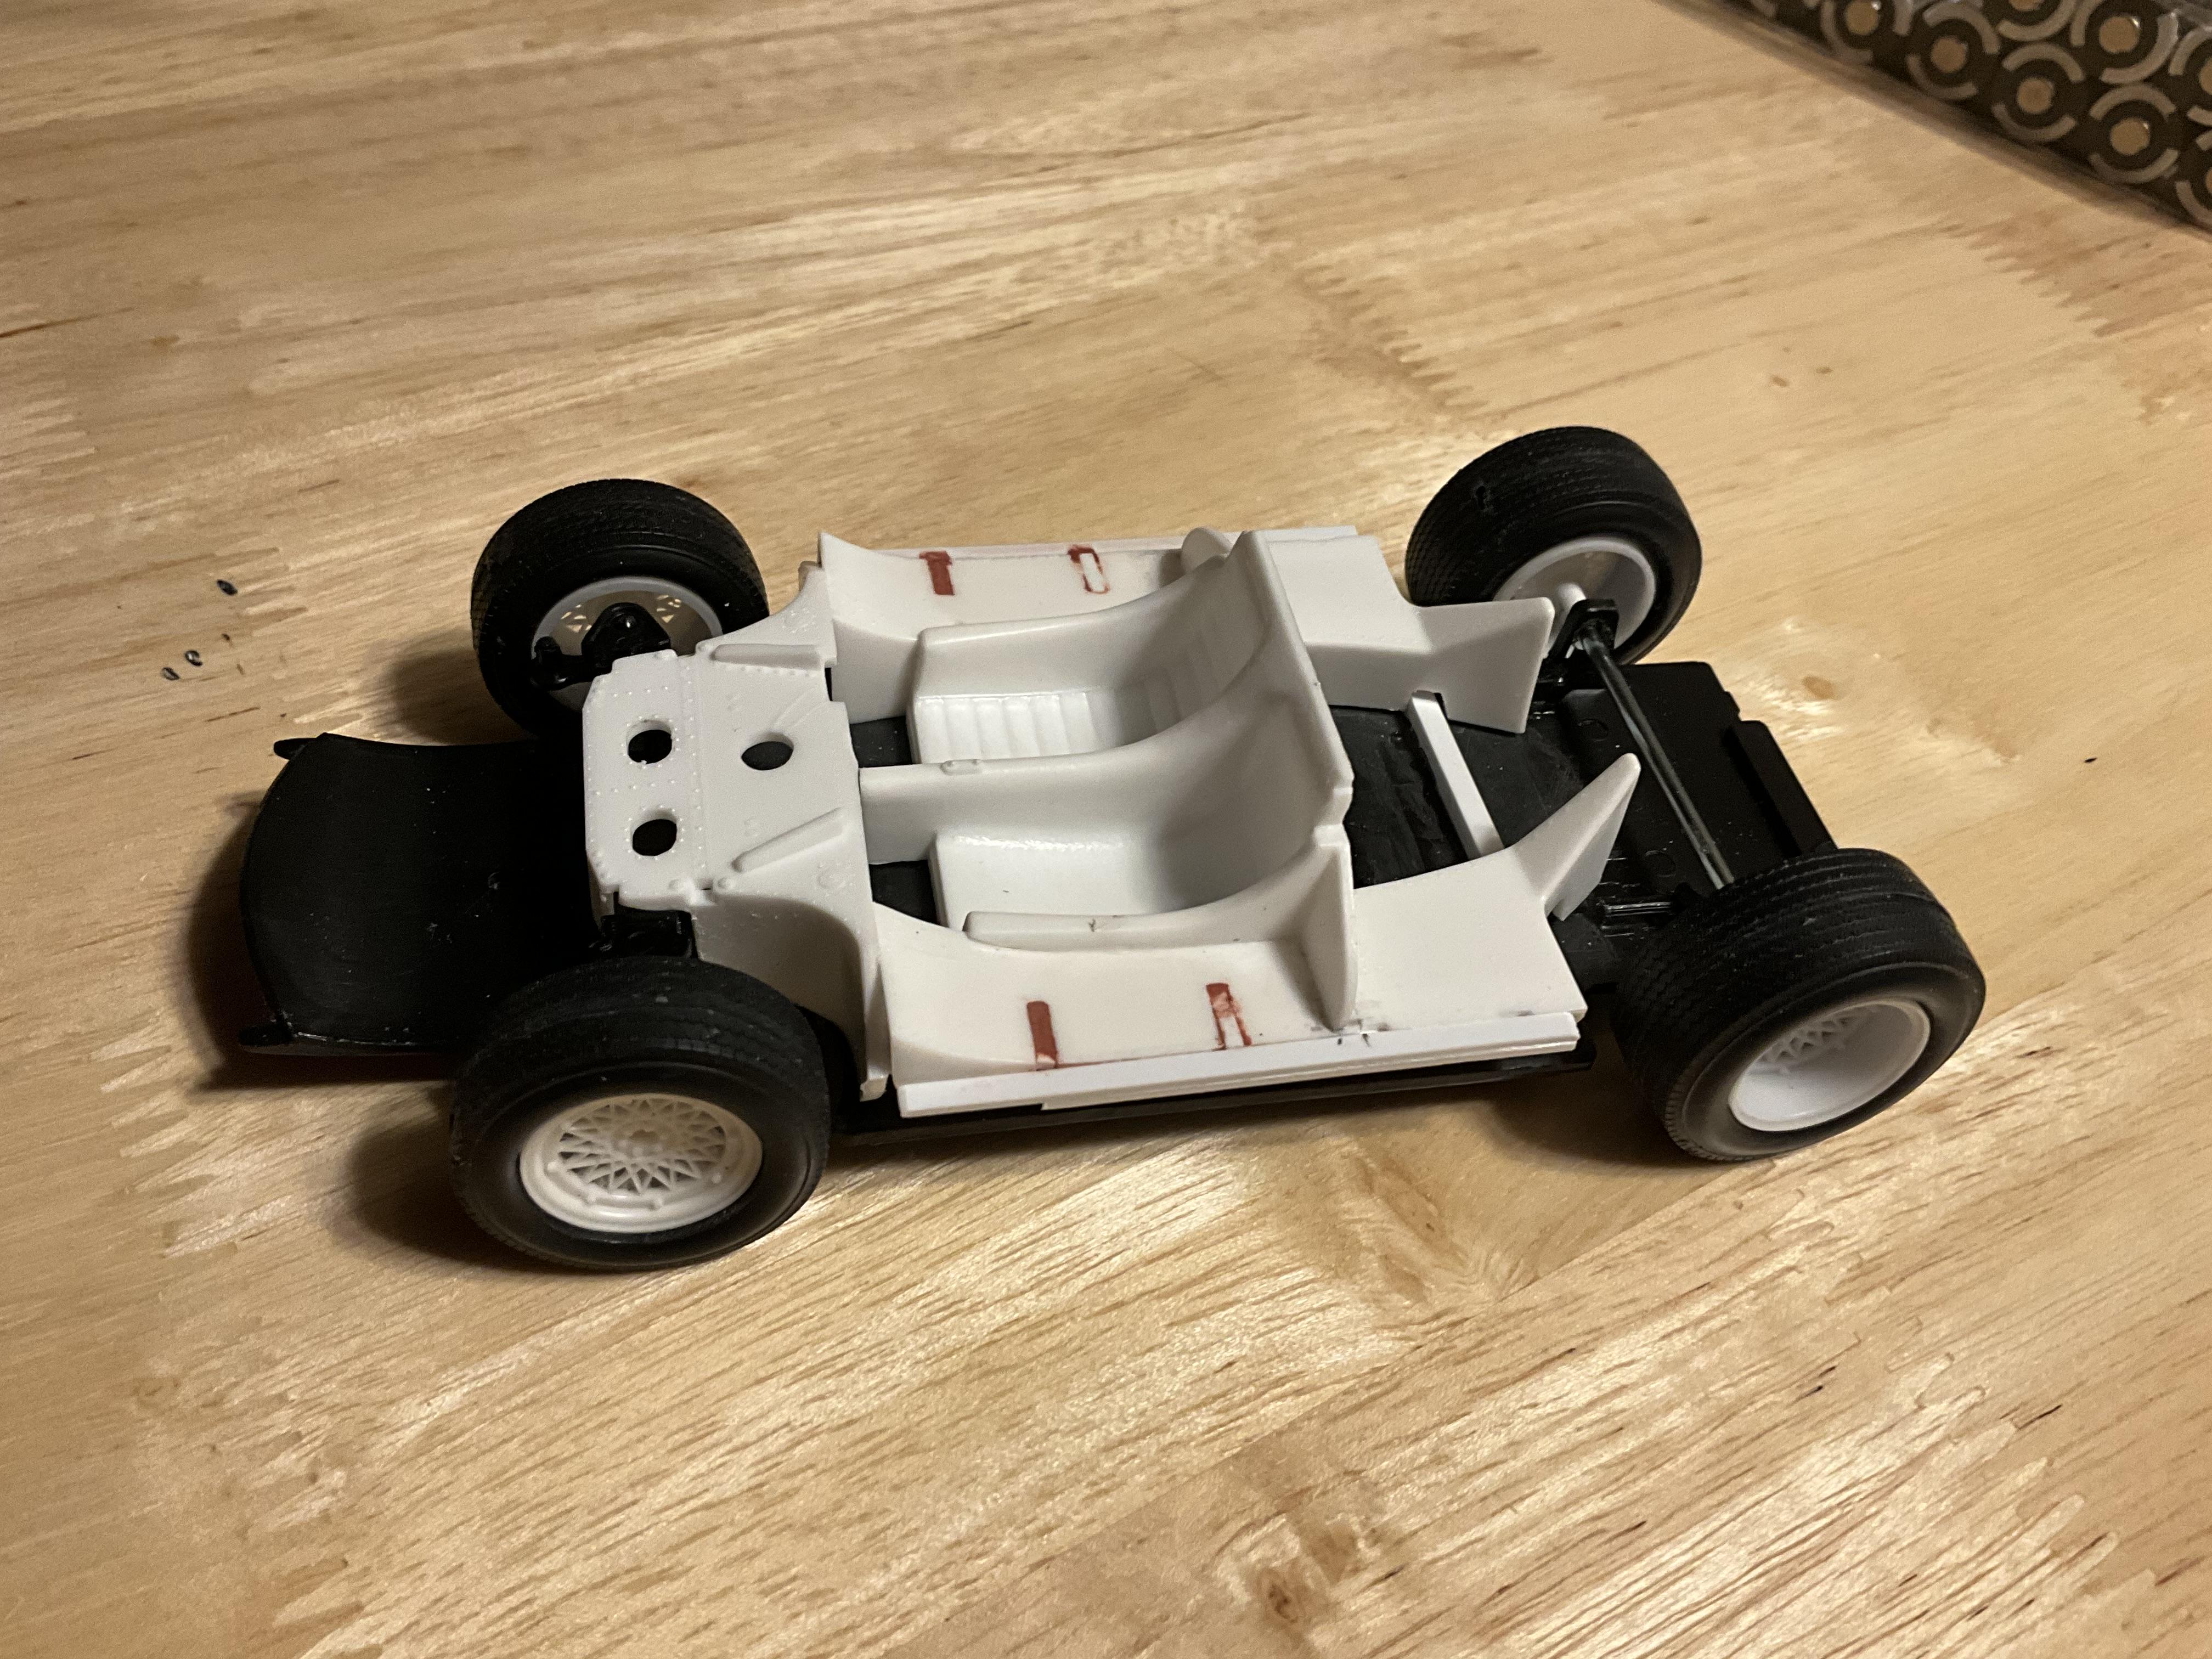
ARII Chaparral 2C, IMC/Union interior, HRM wheels/tires. Checking the fit of all parts, now on to the body work!
-
ARII Chaparral 2C
Mark W replied to Mark W's topic in WIP: Other Racing: Road Racing, Land Speed Racers
The IMC/Union interior is a great improvement. Perhaps you can find a junker at a decent price. good luck -
ARII Chaparral 2C
Mark W replied to Mark W's topic in WIP: Other Racing: Road Racing, Land Speed Racers
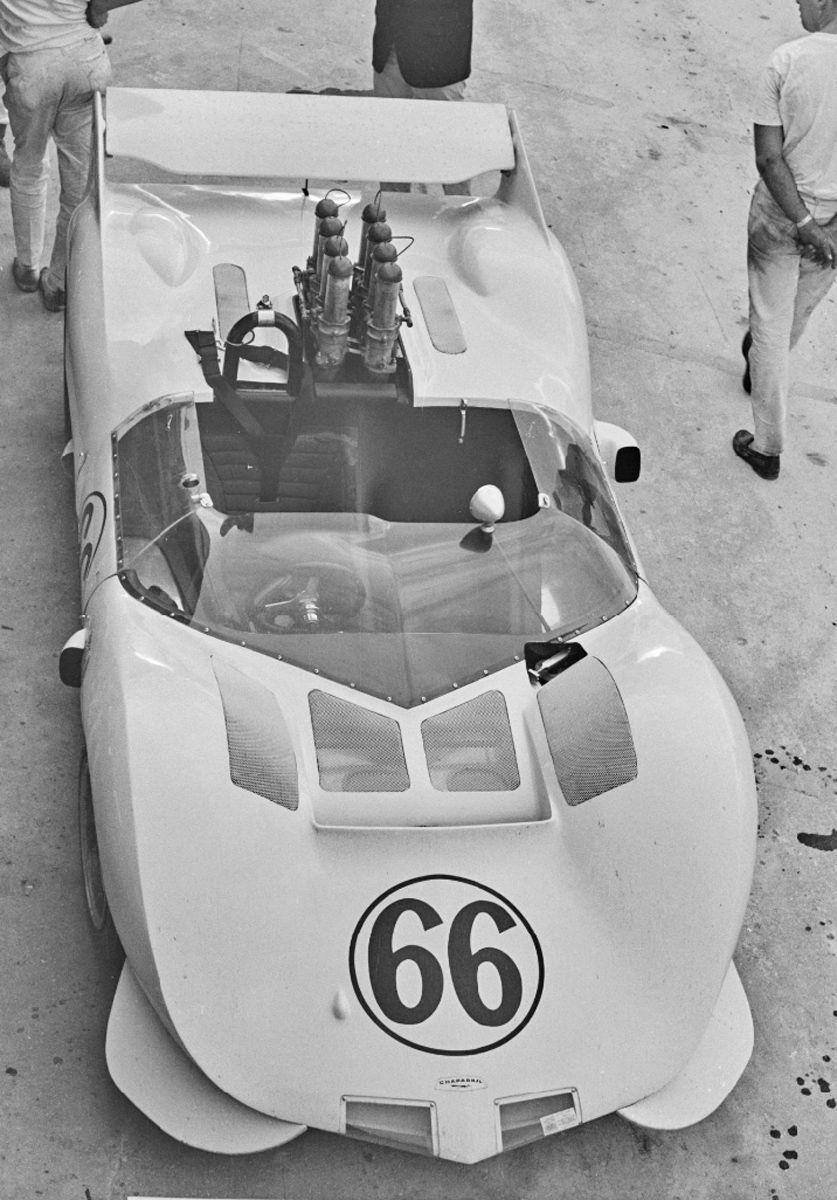
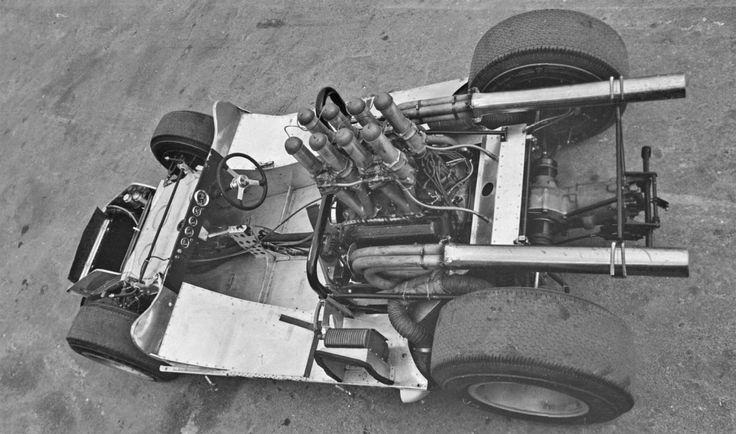
DW, read Pierre’s response below. It’s pretty spot on with the b/w photos I have. Looks like the black material on the driver’s seat was duct taped on.
-
ARII Chaparral 2C
Mark W replied to Mark W's topic in WIP: Other Racing: Road Racing, Land Speed Racers
Hey Dan, What you’re showing is a 2A. The 2C went to an aluminum monocoque, thus the lower half was painted white. But the pictures you sent will be a great reference when I do my 2A. many thanks -
ARII Chaparral 2C
Mark W replied to Mark W's topic in WIP: Other Racing: Road Racing, Land Speed Racers
Ok, the 2C had an aluminum monocoque chassis, so this I will paint aluminum. My reference photos show the seat area as “dark” (black and white). I will follow your suggestions, brown with black padding, which in the photo looked pretty basic. Thanks! -
Nova Salt Flat Racer
Mark W replied to Pierre Rivard's topic in WIP: Other Racing: Road Racing, Land Speed Racers
Thank you, I printed a picture of your work to have as a model when I do mine. -
Nova Salt Flat Racer
Mark W replied to Pierre Rivard's topic in WIP: Other Racing: Road Racing, Land Speed Racers
Perseverance Pierre, those belts look beautiful! And the color of the interior is perfect. I think those belts would look fine on my Chaparral, what brand are they? The material also. -
Perfect Plastic Putty Question
Mark W replied to oldcarfan's topic in Model Building Questions and Answers
The three recommendations above are the best choice. I’ve used two part Bondo body putty, Bondo spot putty and Milliput. All with excellent results. I will add Mr Hobby Surfacer. It comes in three grades 500, 1000 and 1500. But I only use the 500 and 1000. They are great for pin holes and scratches. Just brush it on. -
ARII Chaparral 2C
Mark W replied to Mark W's topic in WIP: Other Racing: Road Racing, Land Speed Racers
A bit of progress on the Chaparral. Anyone that has built this kit knows the interior is pretty basic, as it was designed around two AA batteries. The rear of the chassis is offset to accept a tint electric motor. This was supposed to be a quick build for me, that ended after the first modeling session. So now I’m firmly caught in the “I can do this better trap”. Ah well, at least I enjoy it. So here’s my efforts to insert the Union Chaparral 2E interior in the 2C. It needed to be widened a bit and reinforced to fit the AARI chassis. Paint will be aluminum, but does anyone know what color/material the seats were?
-
Great work so far Justin. I have the same build going myself, so I will watch closely.
-
That’s ingenious! I’ve used magnets to keep a stubborn hood down, but never up. Thanks for sharing.