OldNYJim
-
Posts
250 -
Joined
-
Last visited
Content Type
Profiles
Forums
Events
Gallery
Everything posted by OldNYJim
-

How to be competitive at contests.
OldNYJim replied to Jantrix's topic in Tips, Tricks, and Tutorials
If the bar was high at that show in 2017, it’s probably even higher now ?? -
That’s gonna look GREAT!
-
Good question! Also, is that a red Solo cup to the left?
-
Thanks Tom! Plenty to do still...and not many weeks left!
-
Brilliant! Love the tailgate, and that record player is a GREAT touch! Way cool!! What color flake are you going with? Got a colorscheme in mind already?
-
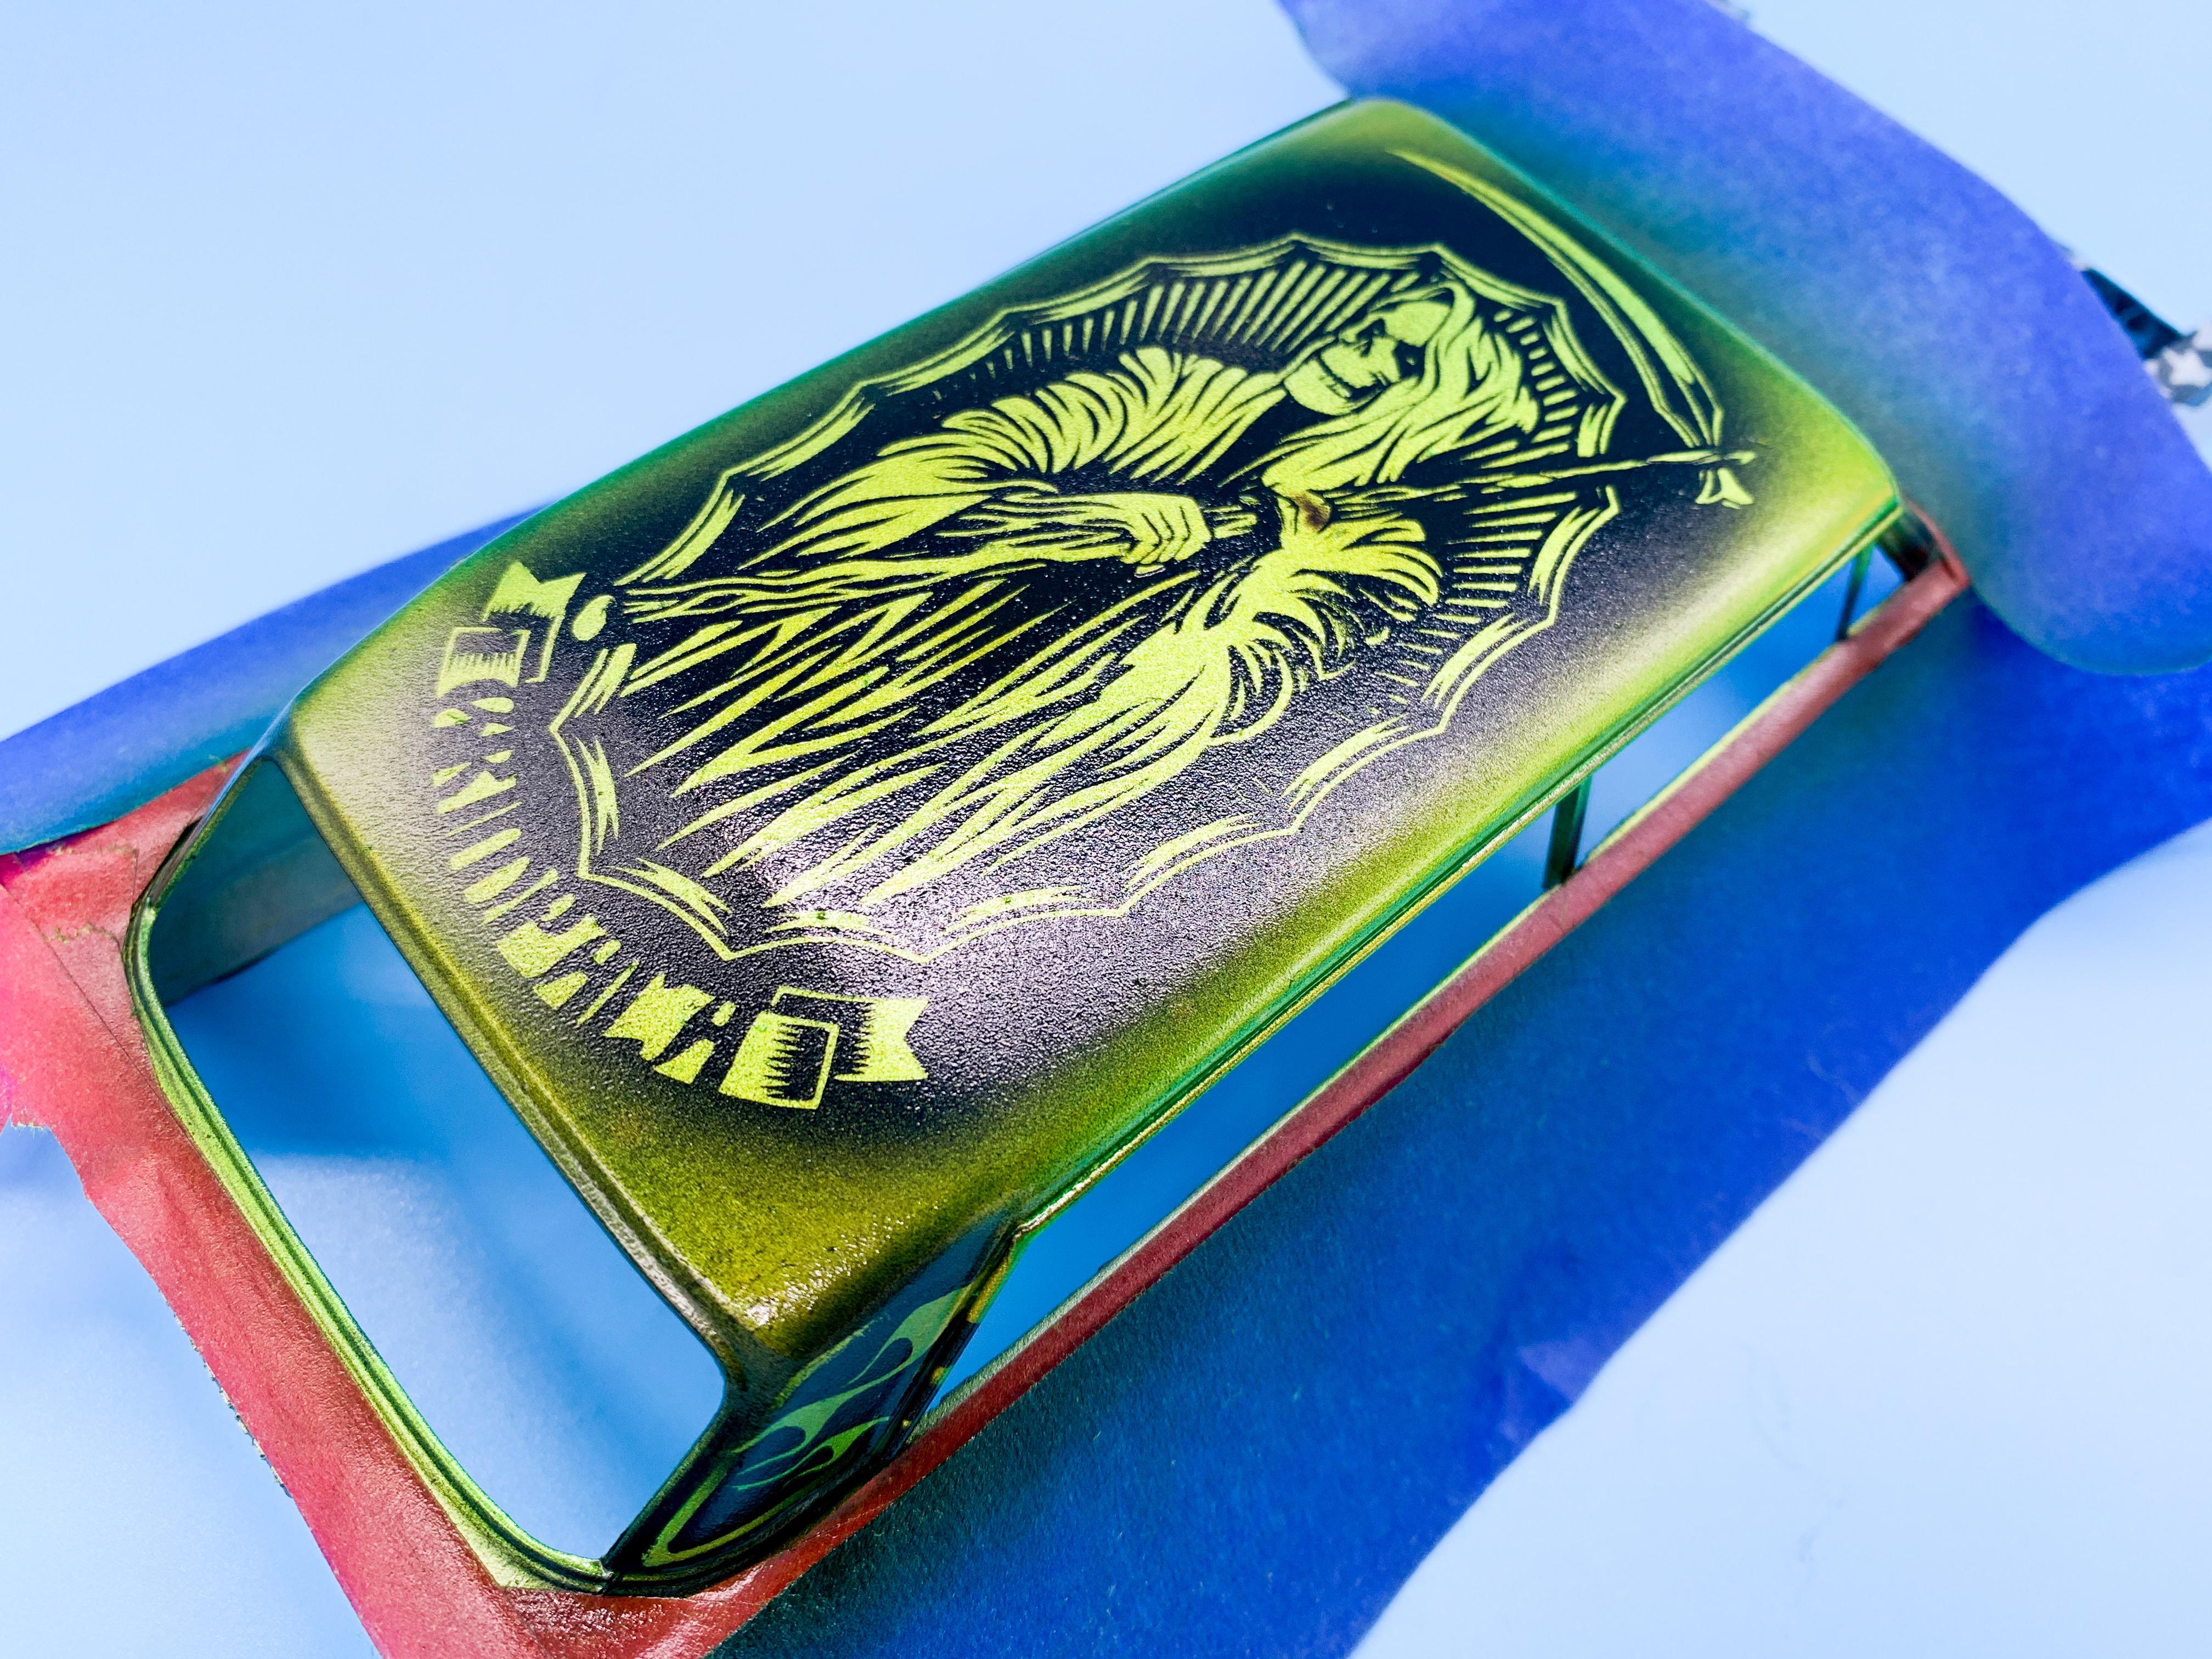
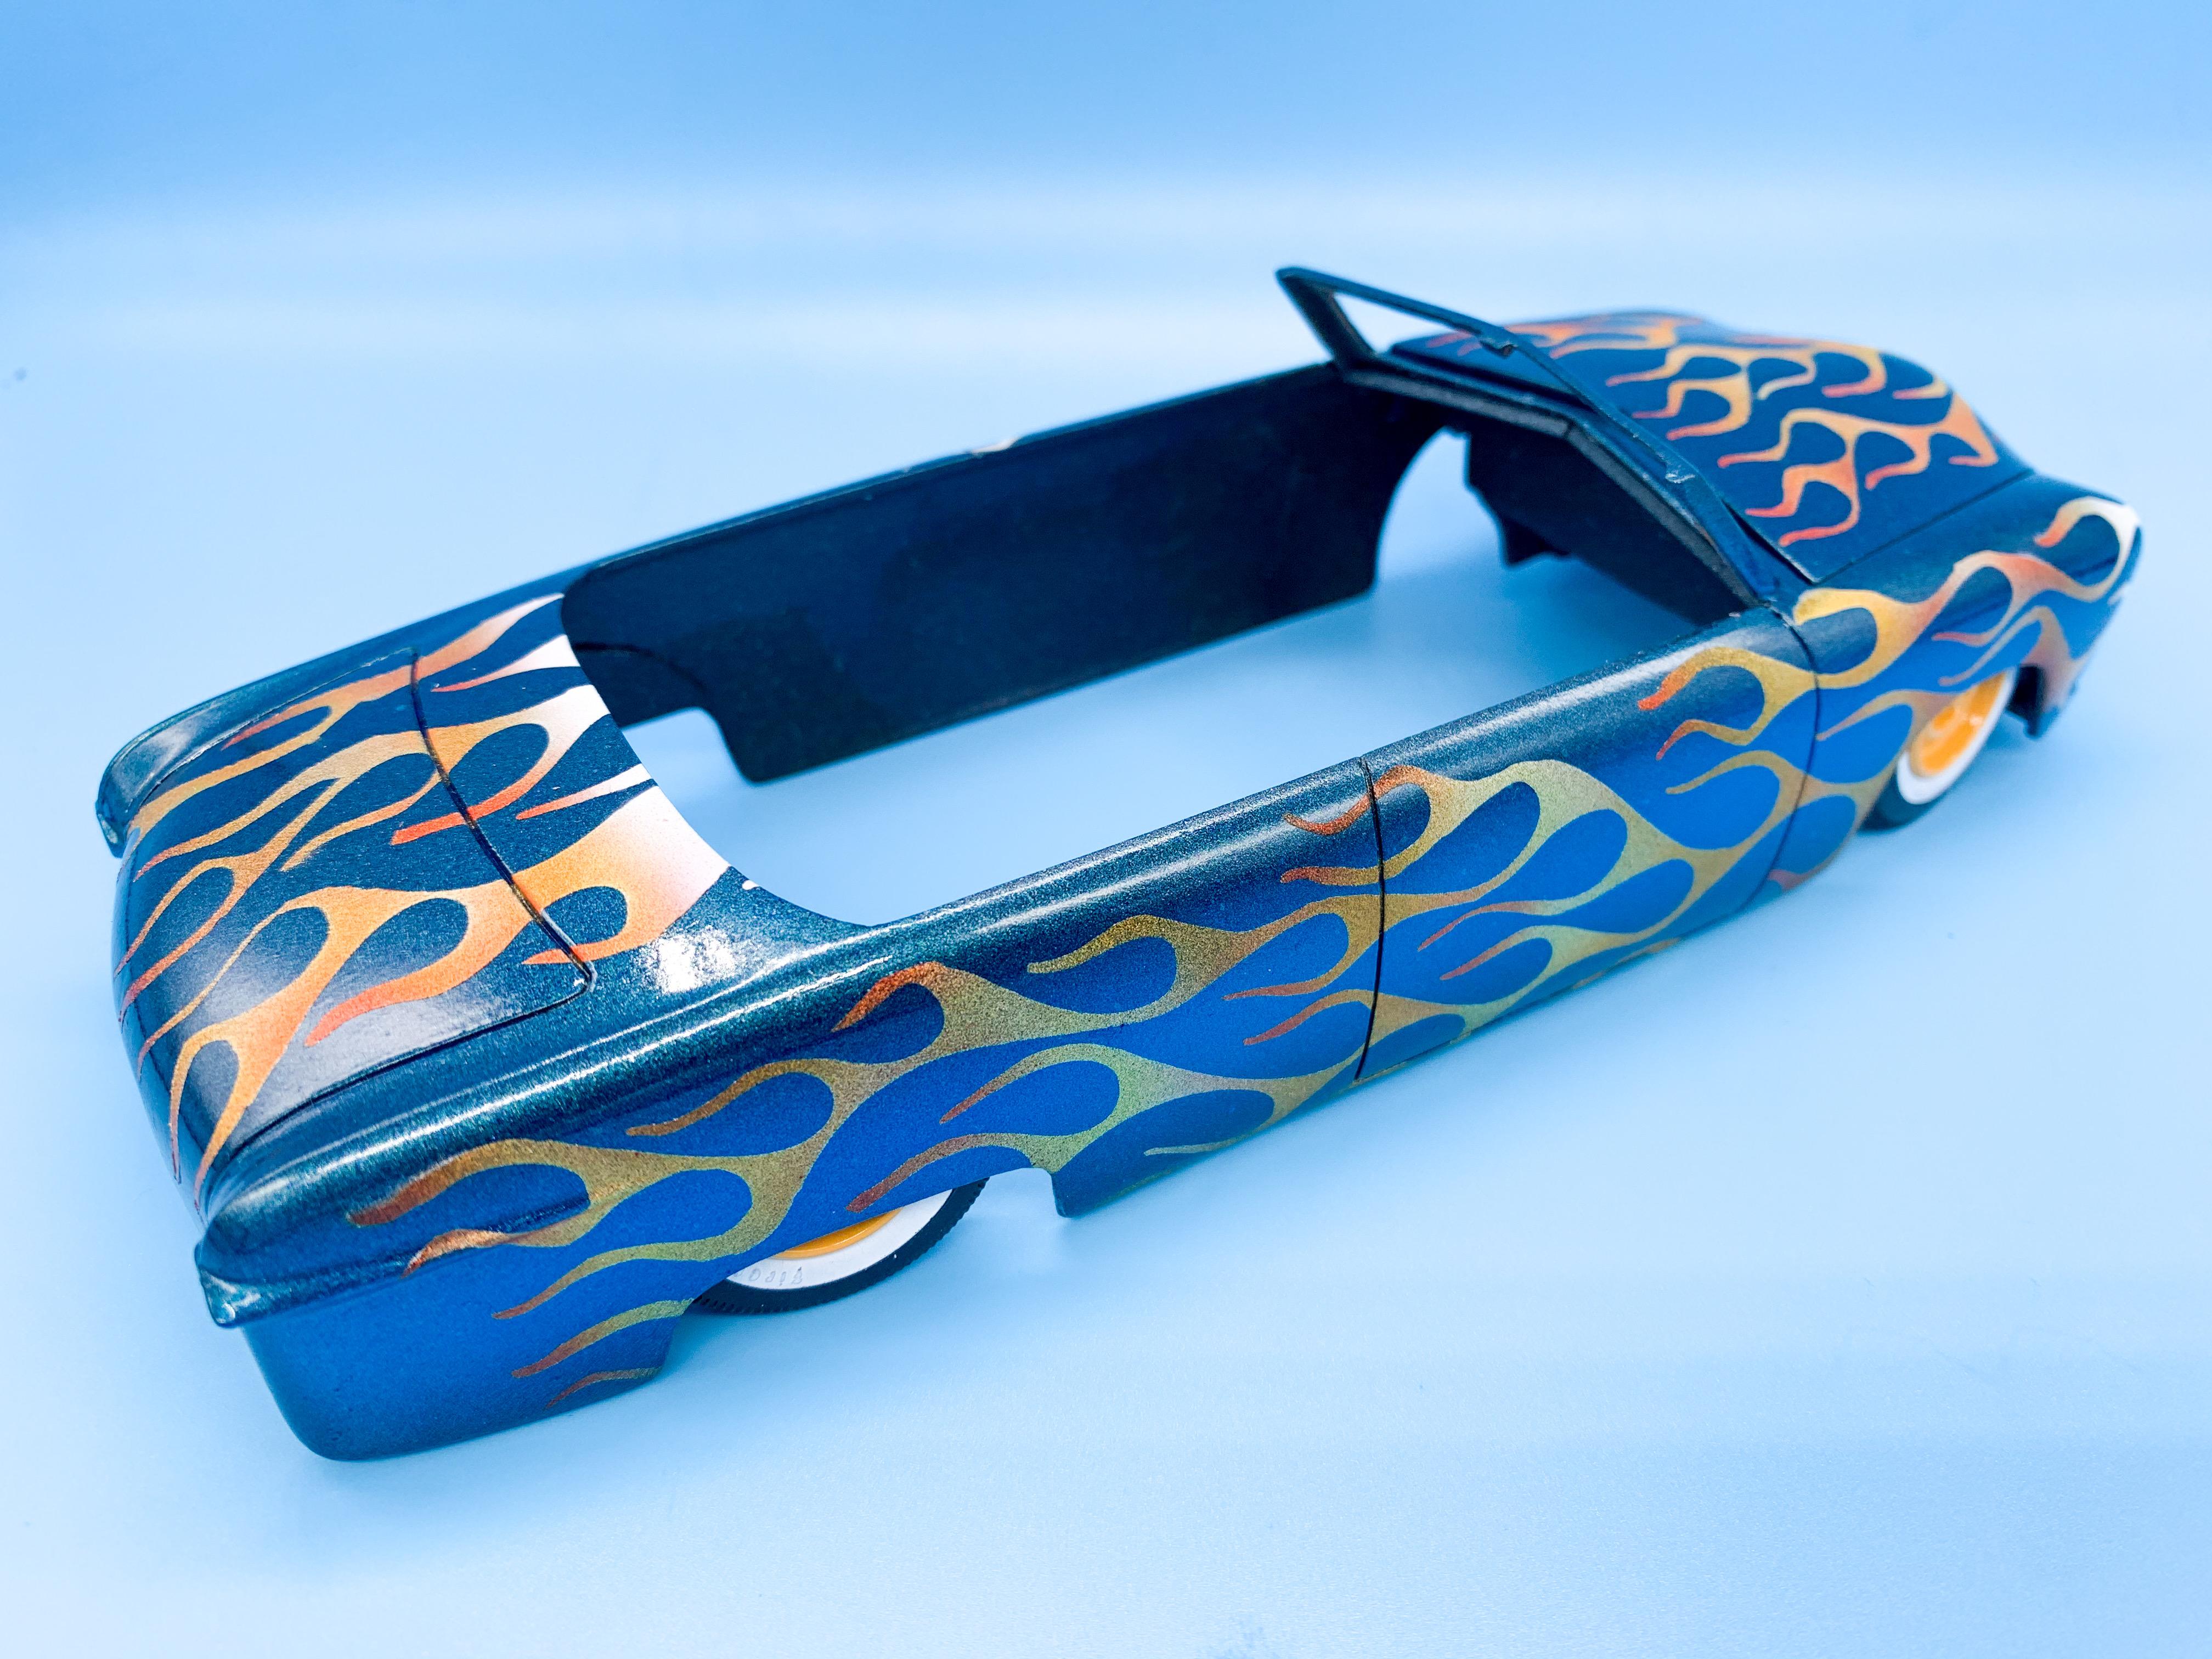
Beautiful Steve! I shot some candy on my ridiculous Impala Street freak for NNL East - the roof was the biggest and easiest part - the rest will take a little longer with masking and layering:

-
The High Cost of the Hobby
OldNYJim replied to Nitrobarry's topic in General Automotive Talk (Trucks and Cars)
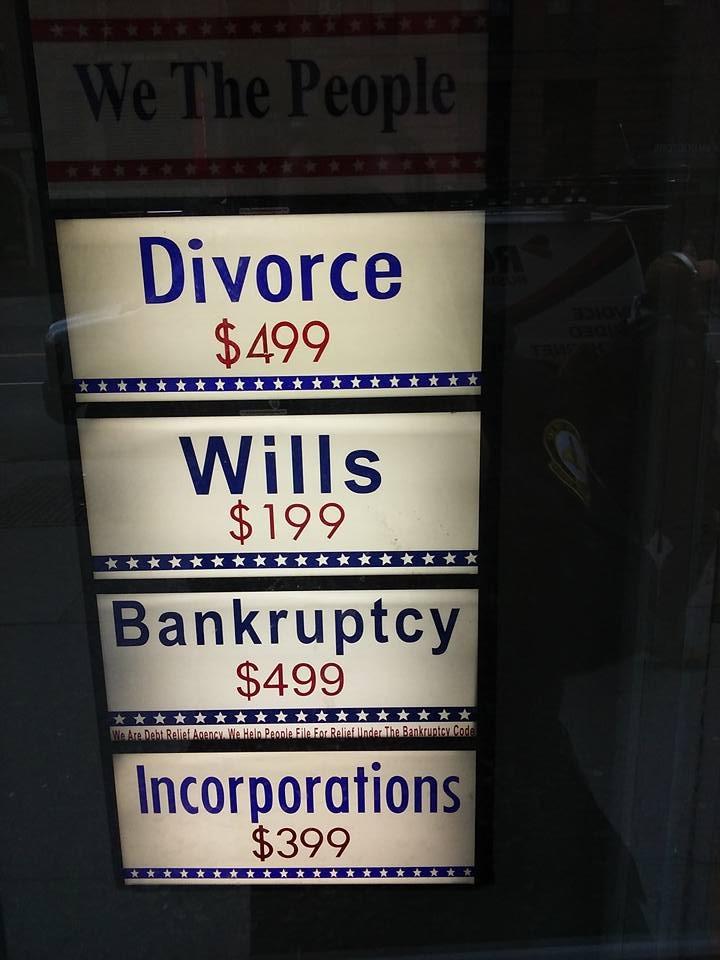
I’m not sure why, but this topic made me think of a sign I see by my wife’s place of work: It’s MUCH cheaper to die than to get divorced or go bankrupt, apparently! I probably spent less than $500 all told last year on kits and supplies, and it was WAY more fun than dying, getting divorced or going bankrupt so I guess it was pretty good value all told ?♂️?
-
So, I didn’t see this specifically addressed in the various other Revell 2020 threads that got closed...but with all the Corona stuff happening is this one likely to be delayed?
-
Modeler's Lola T89 Formula 3000
OldNYJim replied to Art Laski's topic in WIP: Other Racing: Road Racing, Land Speed Racers
Really enjoying this build! The extra detail you’ve added really adds a lot! -
Who makes/sells the best distributor/wire kits?
OldNYJim replied to 2zwudz's topic in Model Building Questions and Answers
Absolutely! I really need to try those MAD ones, they look GREAT! -
My Dad, Chocolate Ice Cream, and New Kits
OldNYJim replied to Snake45's topic in The Off-Topic Lounge
I’m gonna try that one out ? -
Who makes/sells the best distributor/wire kits?
OldNYJim replied to 2zwudz's topic in Model Building Questions and Answers
I keep looking at these on eBay - they look pretty nicely made I think: https://rover.ebay.com/rover/0/0/0?mpre=https%3A%2F%2Fwww.ebay.com%2Fulk%2Fitm%2F372740611970 I also picked up a Gopher Racing one last week when I was ordering something else anyway so I could see what theirs were like...they’re definitely pretty low down the scale in terms of detail and if you have a couple of sizes of tube and some wire you can make your own just as good I’d say -
Those little rhinestones are good for making mirrors. Or putting on a jacket, I guess ?
-
Interesting - I got the 1200dpi line from Silhouette themselves when I asked...maybe if you use their line trace tool for an image higher resolution than that it won’t add any extra ‘points’ to the vector? The vector was just a black and white image that I vectorised in the Silhouette software - I guess the Cricut probably does something similar. I’d love to see your experiments with this trick!
-
Apparently it’ll cut at an accuracy of 1200 dots per inch..not totally sure I believe that it actually hits that in real life but in THEORY it can! Not totally done messing with this technique yet, I’m sure there’s more tricks to discover to improve the end result ??
-
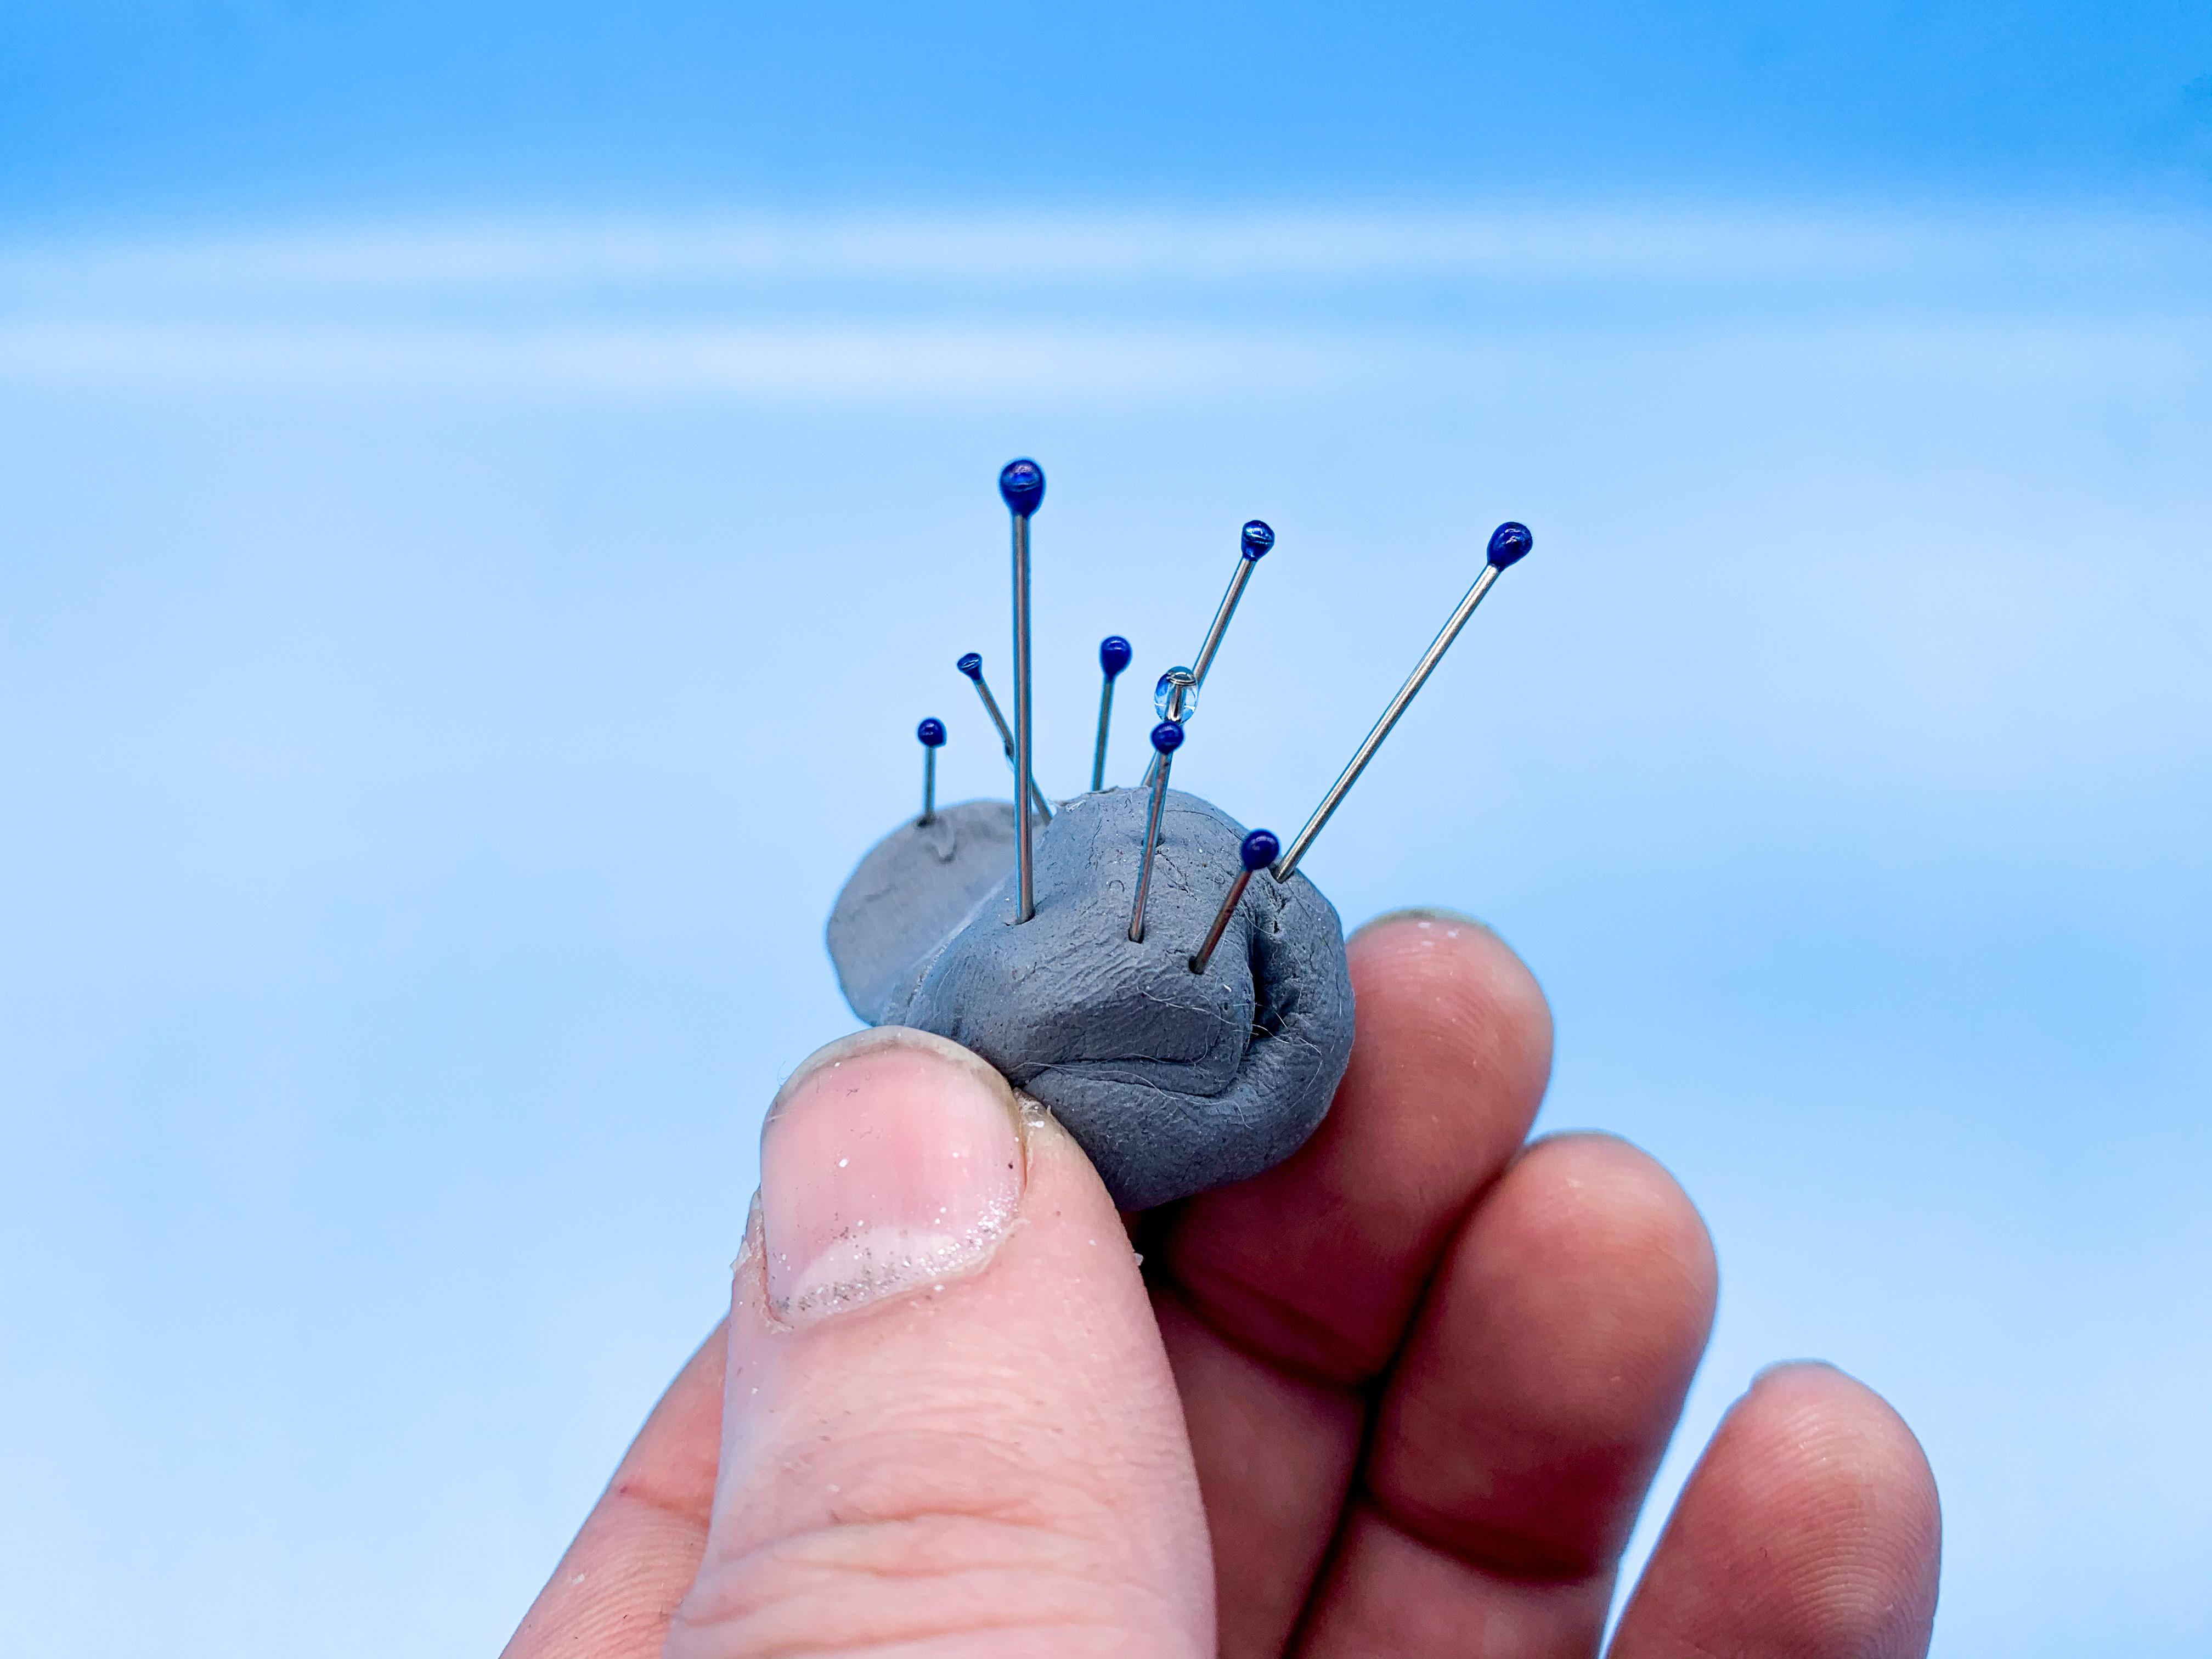
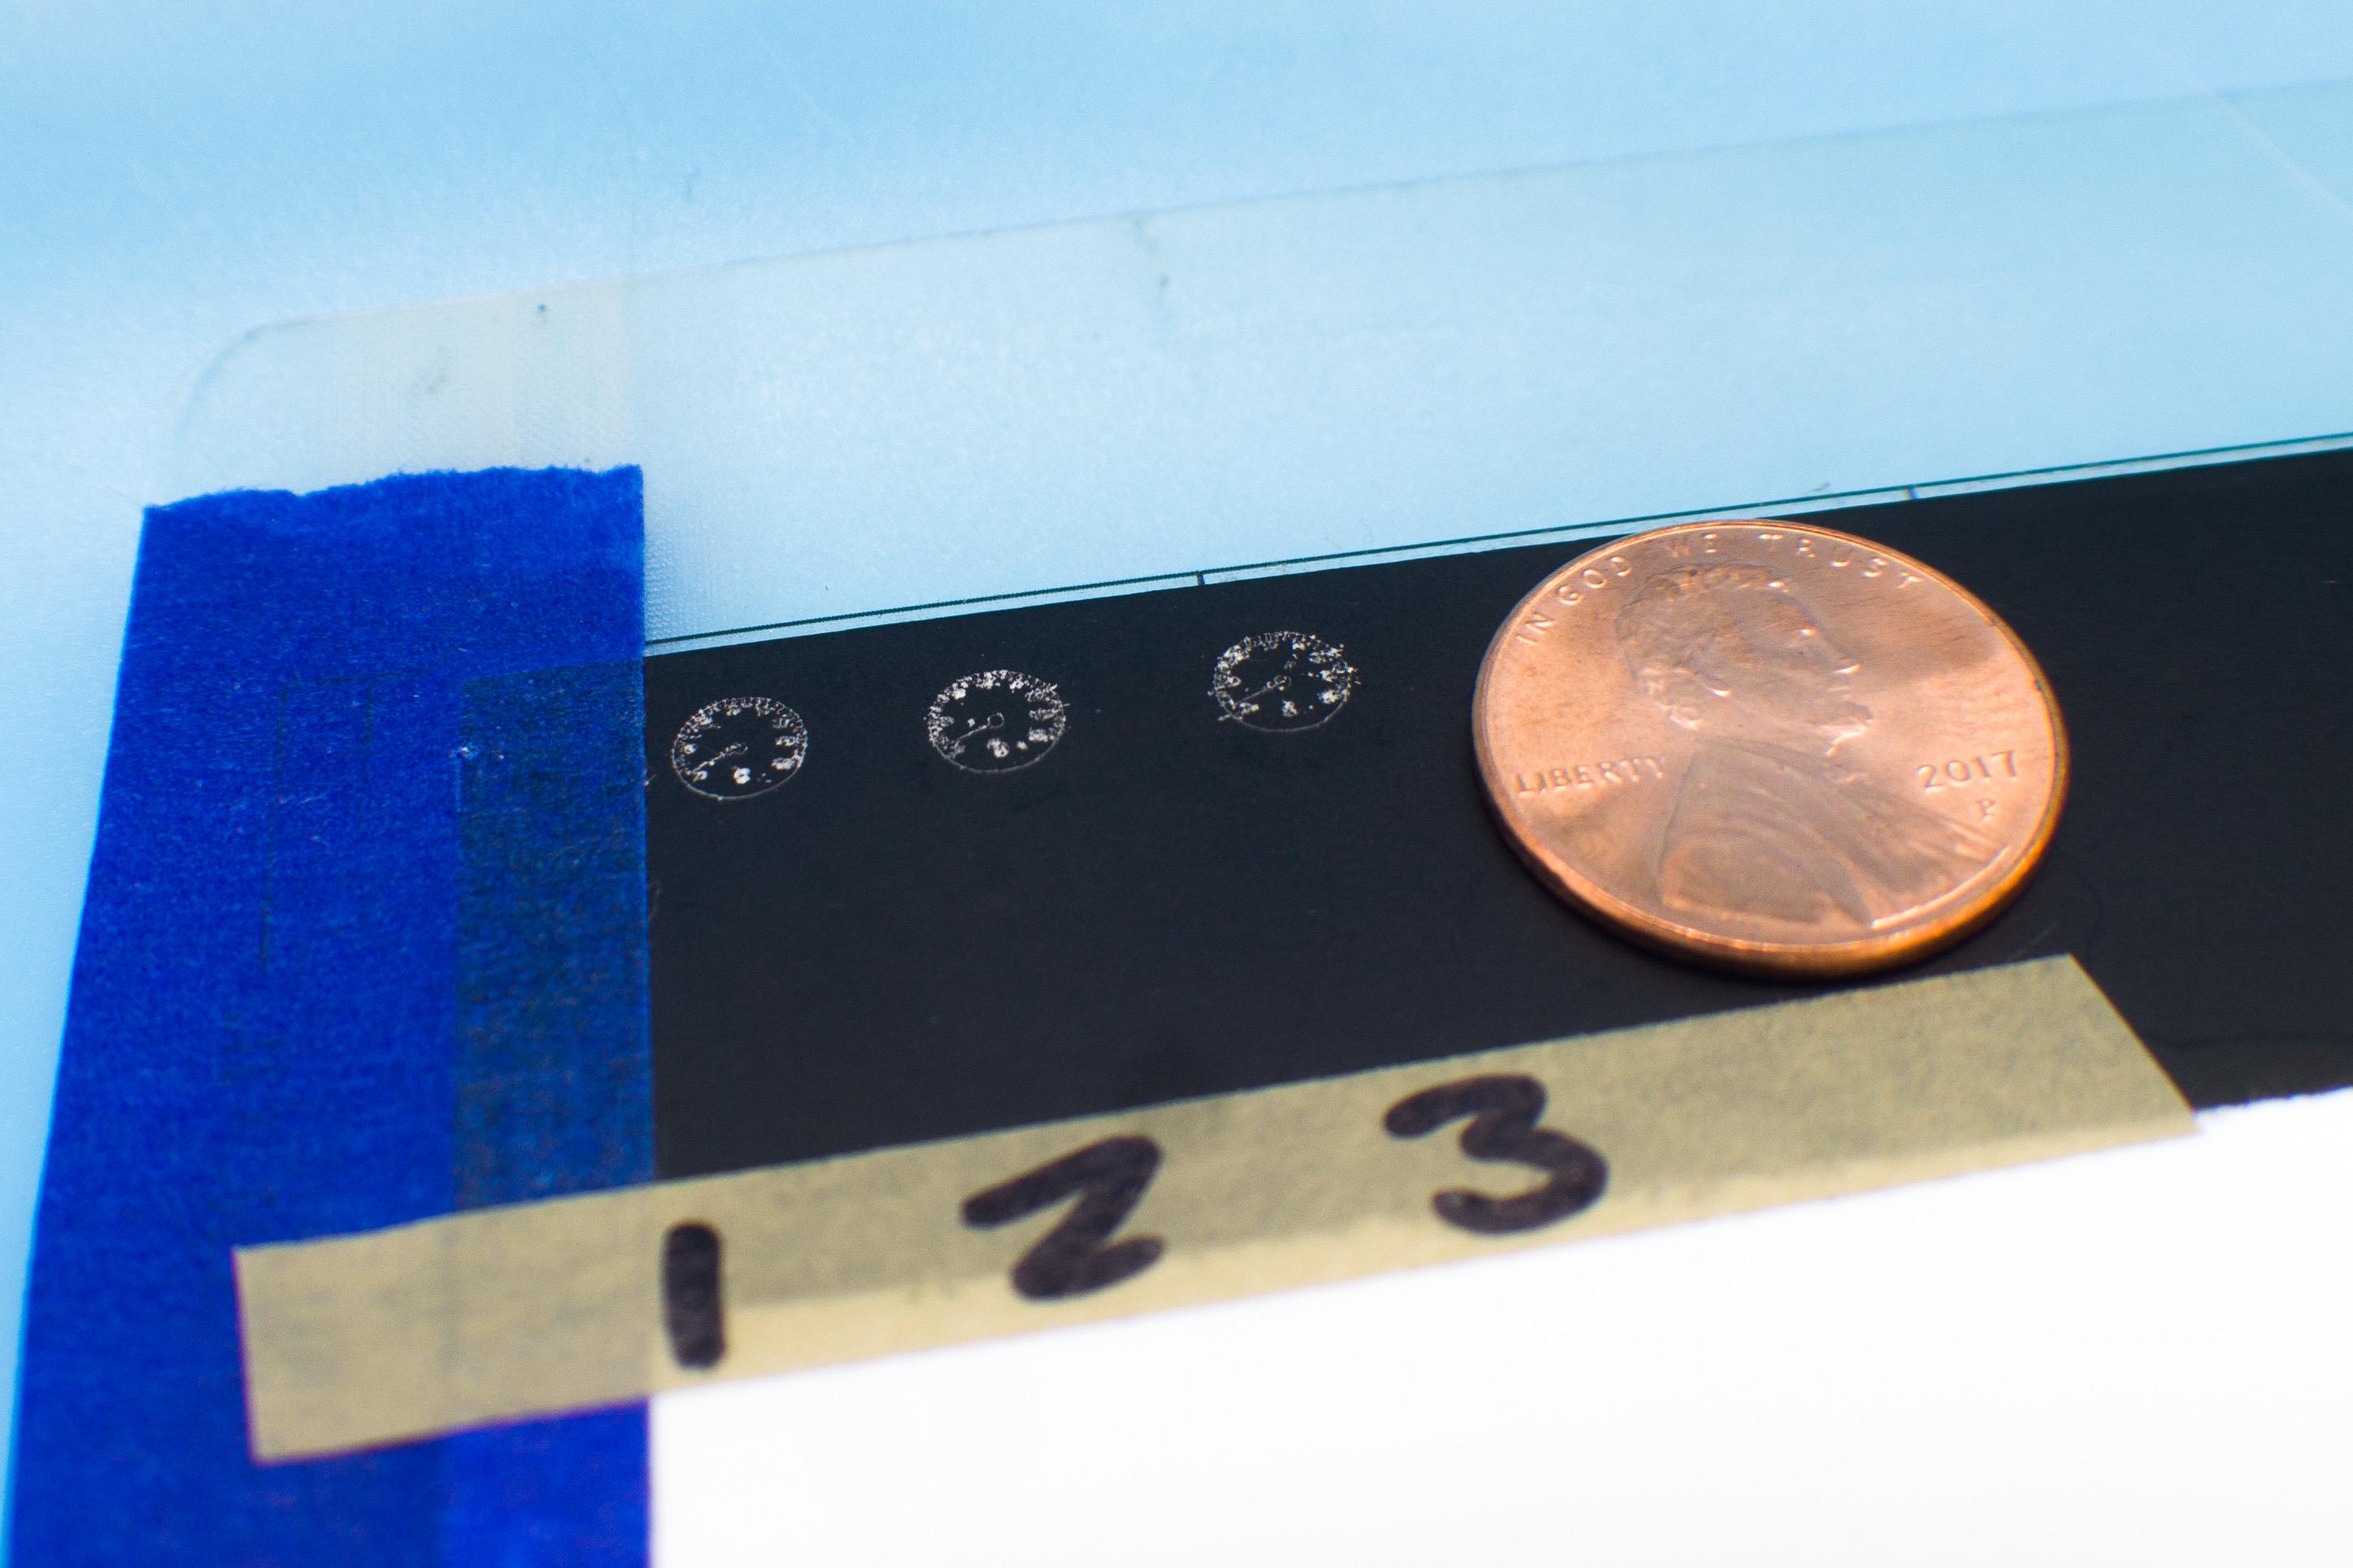
I decided that it’s science experiment Sunday today - had a few new techniques I wanted to try and see if they worked. First, I’d never tried using 2 part epoxy for gauge glass so I messed with that for a while and then I got curious and wondered if I could mix a little candy paint into it to make some little colored-glass-looking knobs for tiny switches or shift knobs maybe: Not bad - I’m going to leave them to sit for a while and make sure the paint doesn’t affect how well the glue sets up before messing with this some more. Then, I tried using my scrapbook cutter as an etcher to make some little gauge faces...sprayed a light coat of flat black on some styrene sheet, and had the cutter ‘cut’ as lightly as possible with a pin rather than the blade. The first test was the lightest blade pressure and the third was the highest pressure...I wanna put a blob of epoxy over the good one and see how it looks!
-
I remembered that you had reviewed one of these kits recently but hadn’t taken the time to look it up to re-read it yet - you beat me to it! Thanks Tim! Appreciate the recommendation! Jim
-
Thanks bud! ❤️ Did the hood and trunk today: Next job on the body is to lay down a bunch of clear and then polish it out - got PLENTY to do yet but glad to have the body (almost) ready for clear!
-
I can already see myself ending up doing them all, like I can see myself doing all 6 of those MPC trikes too ??
-
I still agree ?
-
That’s pretty much what I figured the answer would be from reading this thread and googling pics of them, but I figured it was work asking in case one was a LOT better than the others for some reason. Thanks buddy!
-
So, as someone who would like to build one of the kits from this series, is there one that stands out in particular as being a better builder than the others? I don’t much mind WHICH of the series it is - I just feel like building a roundy-racer! Any recommendations before I pick one at random?
-
Well, the art for this series of reissues says “collect all 6” so it seems like that’s the plan. I hope so too - I’d particularly like the Black Max and Cobra myself!
-
A saw a news report a while back on someone who was planning to test (and eventually launch) a fleet of autonomous cabs on the streets of New York...but they figured out that because the sensors would stop a car if a pedestrian walked in front of it the New Yorkers of the future would pretty quickly just start wandering in front of cars on purpose knowing that the car would HAVE to stop because they’d trigger the sensor. Automatic always-right-of-way for everyone on foot! Of course, a real life New York driver is as likely to speed up to scare a pedestrian out of the way if they dare trying to cross the street in front of them as they are to slow down for them, so it could be a while before they can programme something to work well here ?
-
The Future will work as a good barrier coat for jobs like this...plus you can USUALLY then spray your clear of choice over the top so you can actually polish, if you want/need to. I’d be cautious of Future over Tamiya acrylics personally, I seemed to ALWAYS have it craze and crack on me if I laid it down too heavy, but it’s really useful as a kind of in-between coat to protect the paint underneath if you’re doing a bunch of masking or trying to bury something that might get hurt by subsequent coats