OldNYJim
-
Posts
247 -
Joined
-
Last visited
Content Type
Profiles
Forums
Events
Gallery
Everything posted by OldNYJim
-
I don’t know if you HAVE RTV resin already for this project, but I’ve seen people use this stuff for similar projects: https://a.co/d/iRP3Ka4 Benefit is, you roll it into a ball, press it onto the thing you’re replicating and then it hardens whilst maintaining it’s shape - no need for dams or boxes
-

What Did You Get Today? (Not Model Related)
OldNYJim replied to LOBBS's topic in The Off-Topic Lounge
Yeah, you definitely need to watch where you’re riding - gotta dodge all the pebbles and cracks in the sidewalk for sure! -
What Did You Get Today? (Not Model Related)
OldNYJim replied to LOBBS's topic in The Off-Topic Lounge
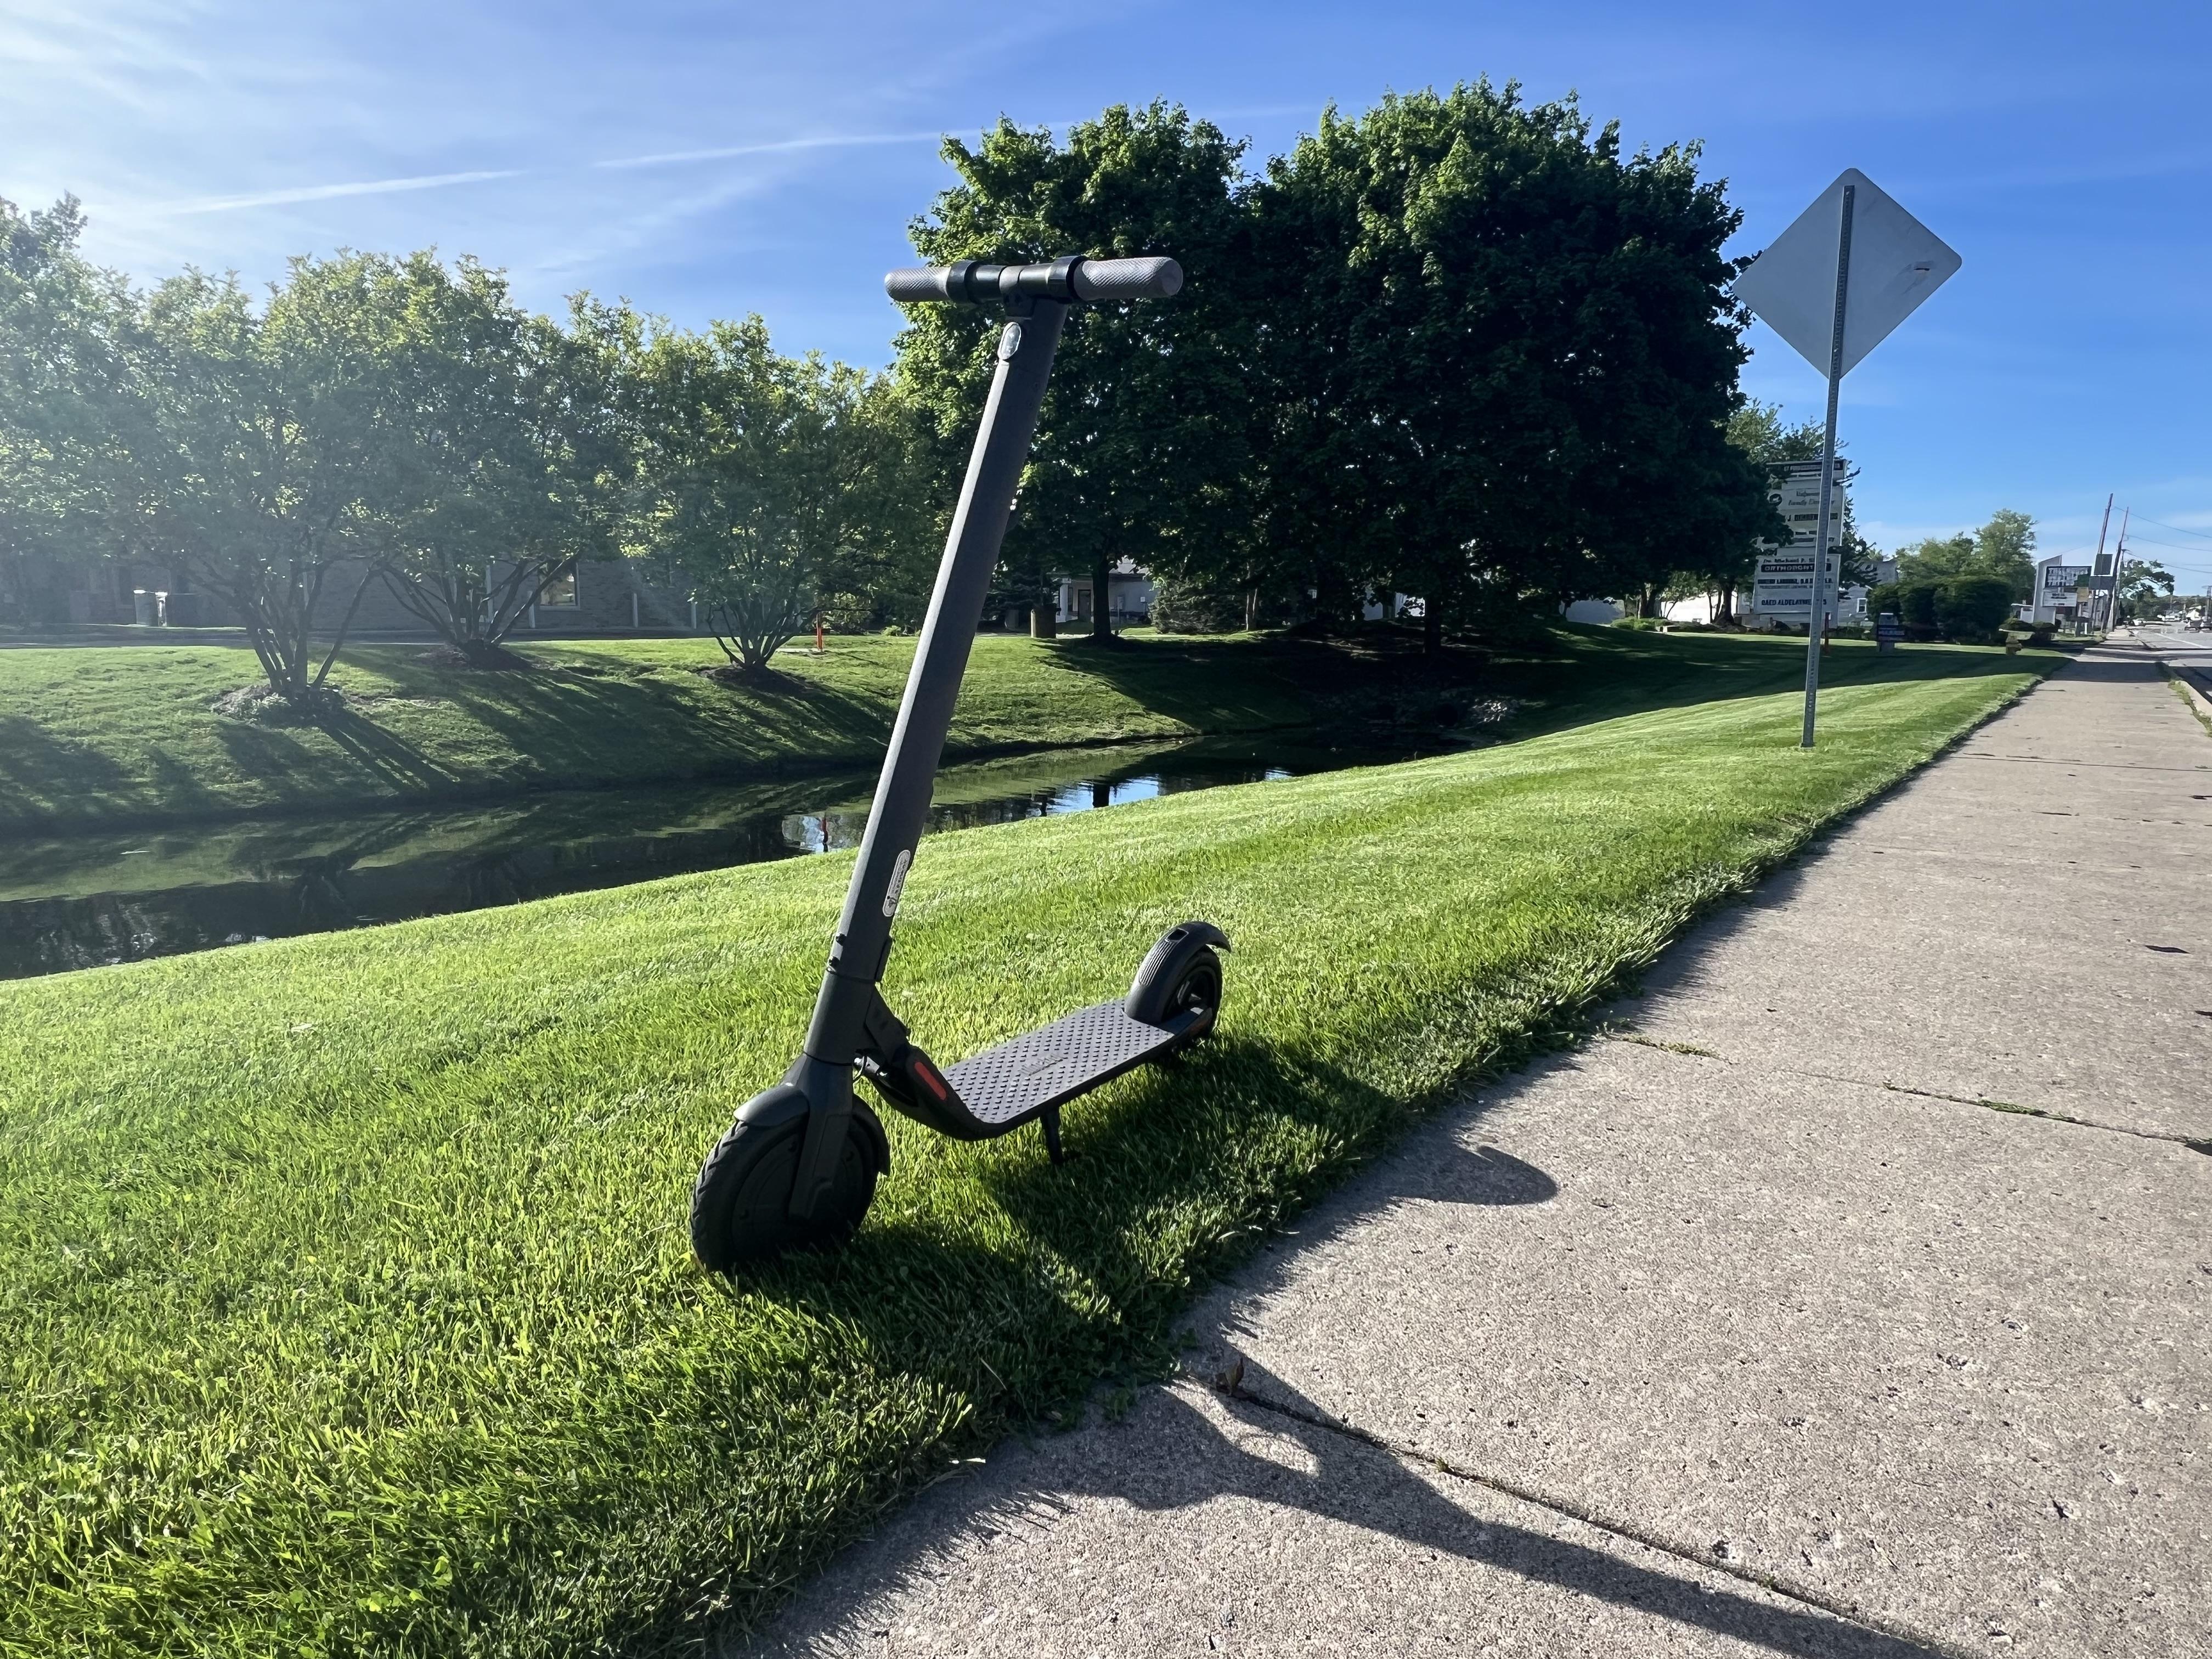
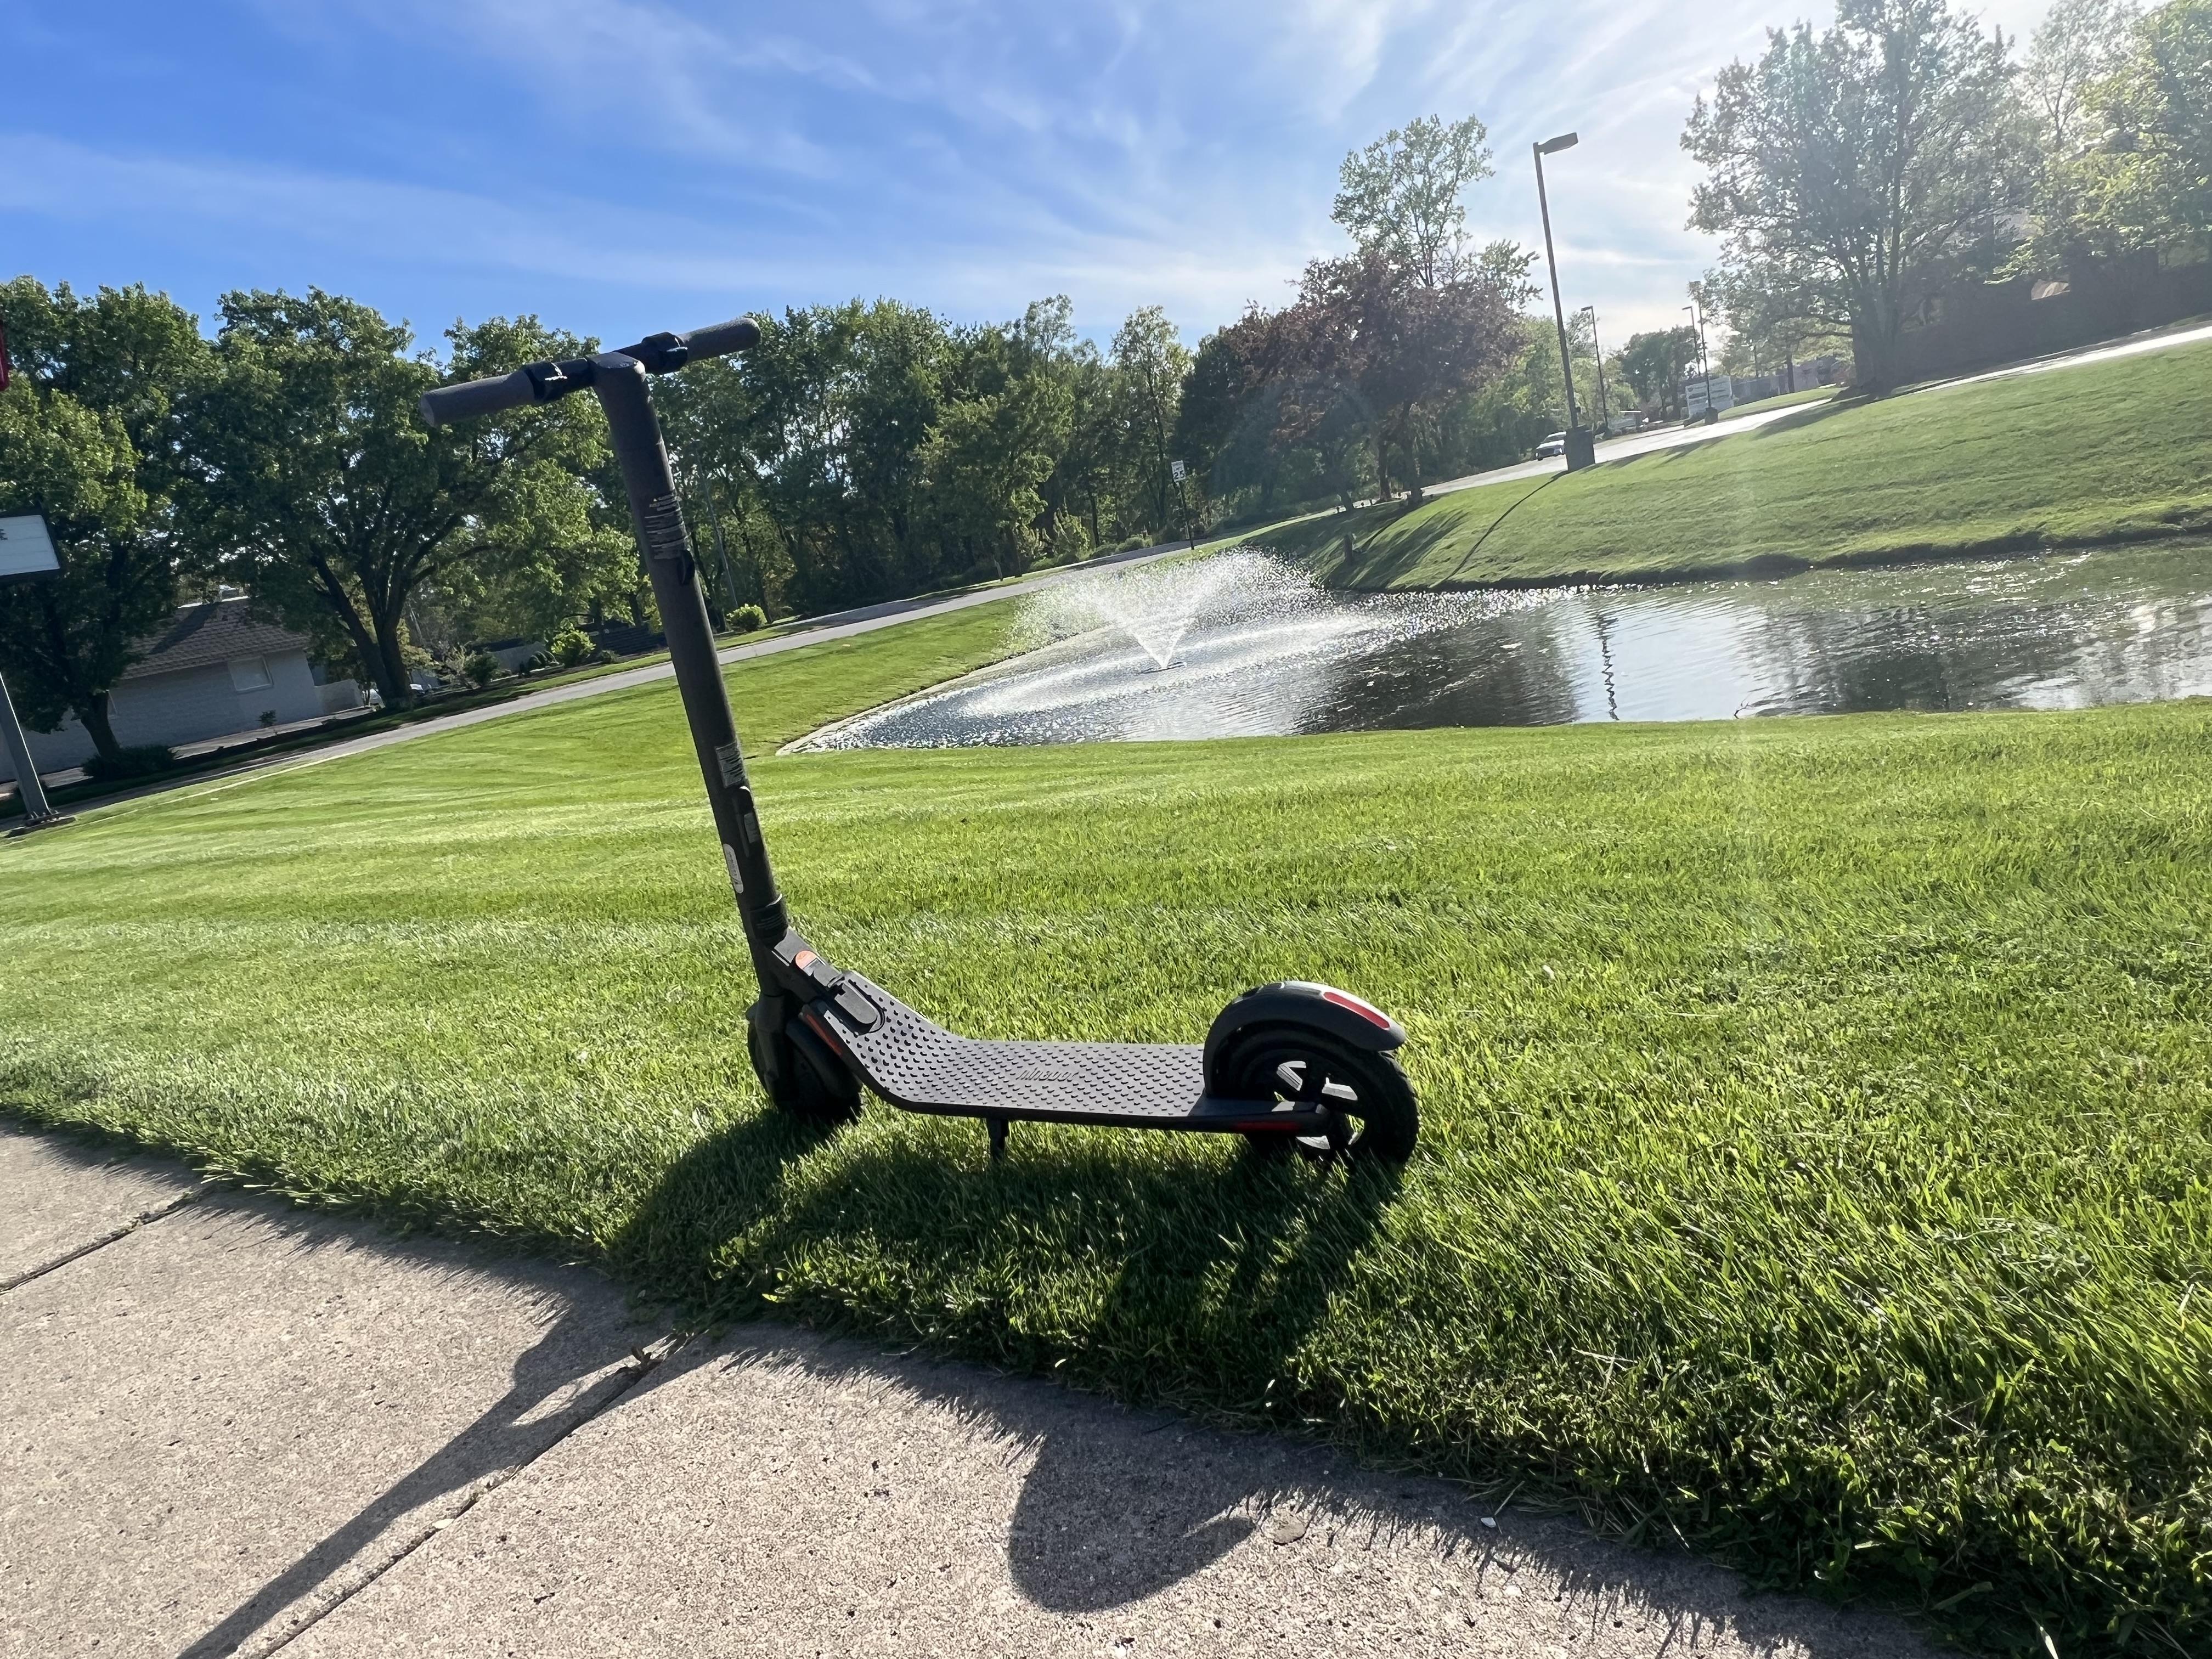
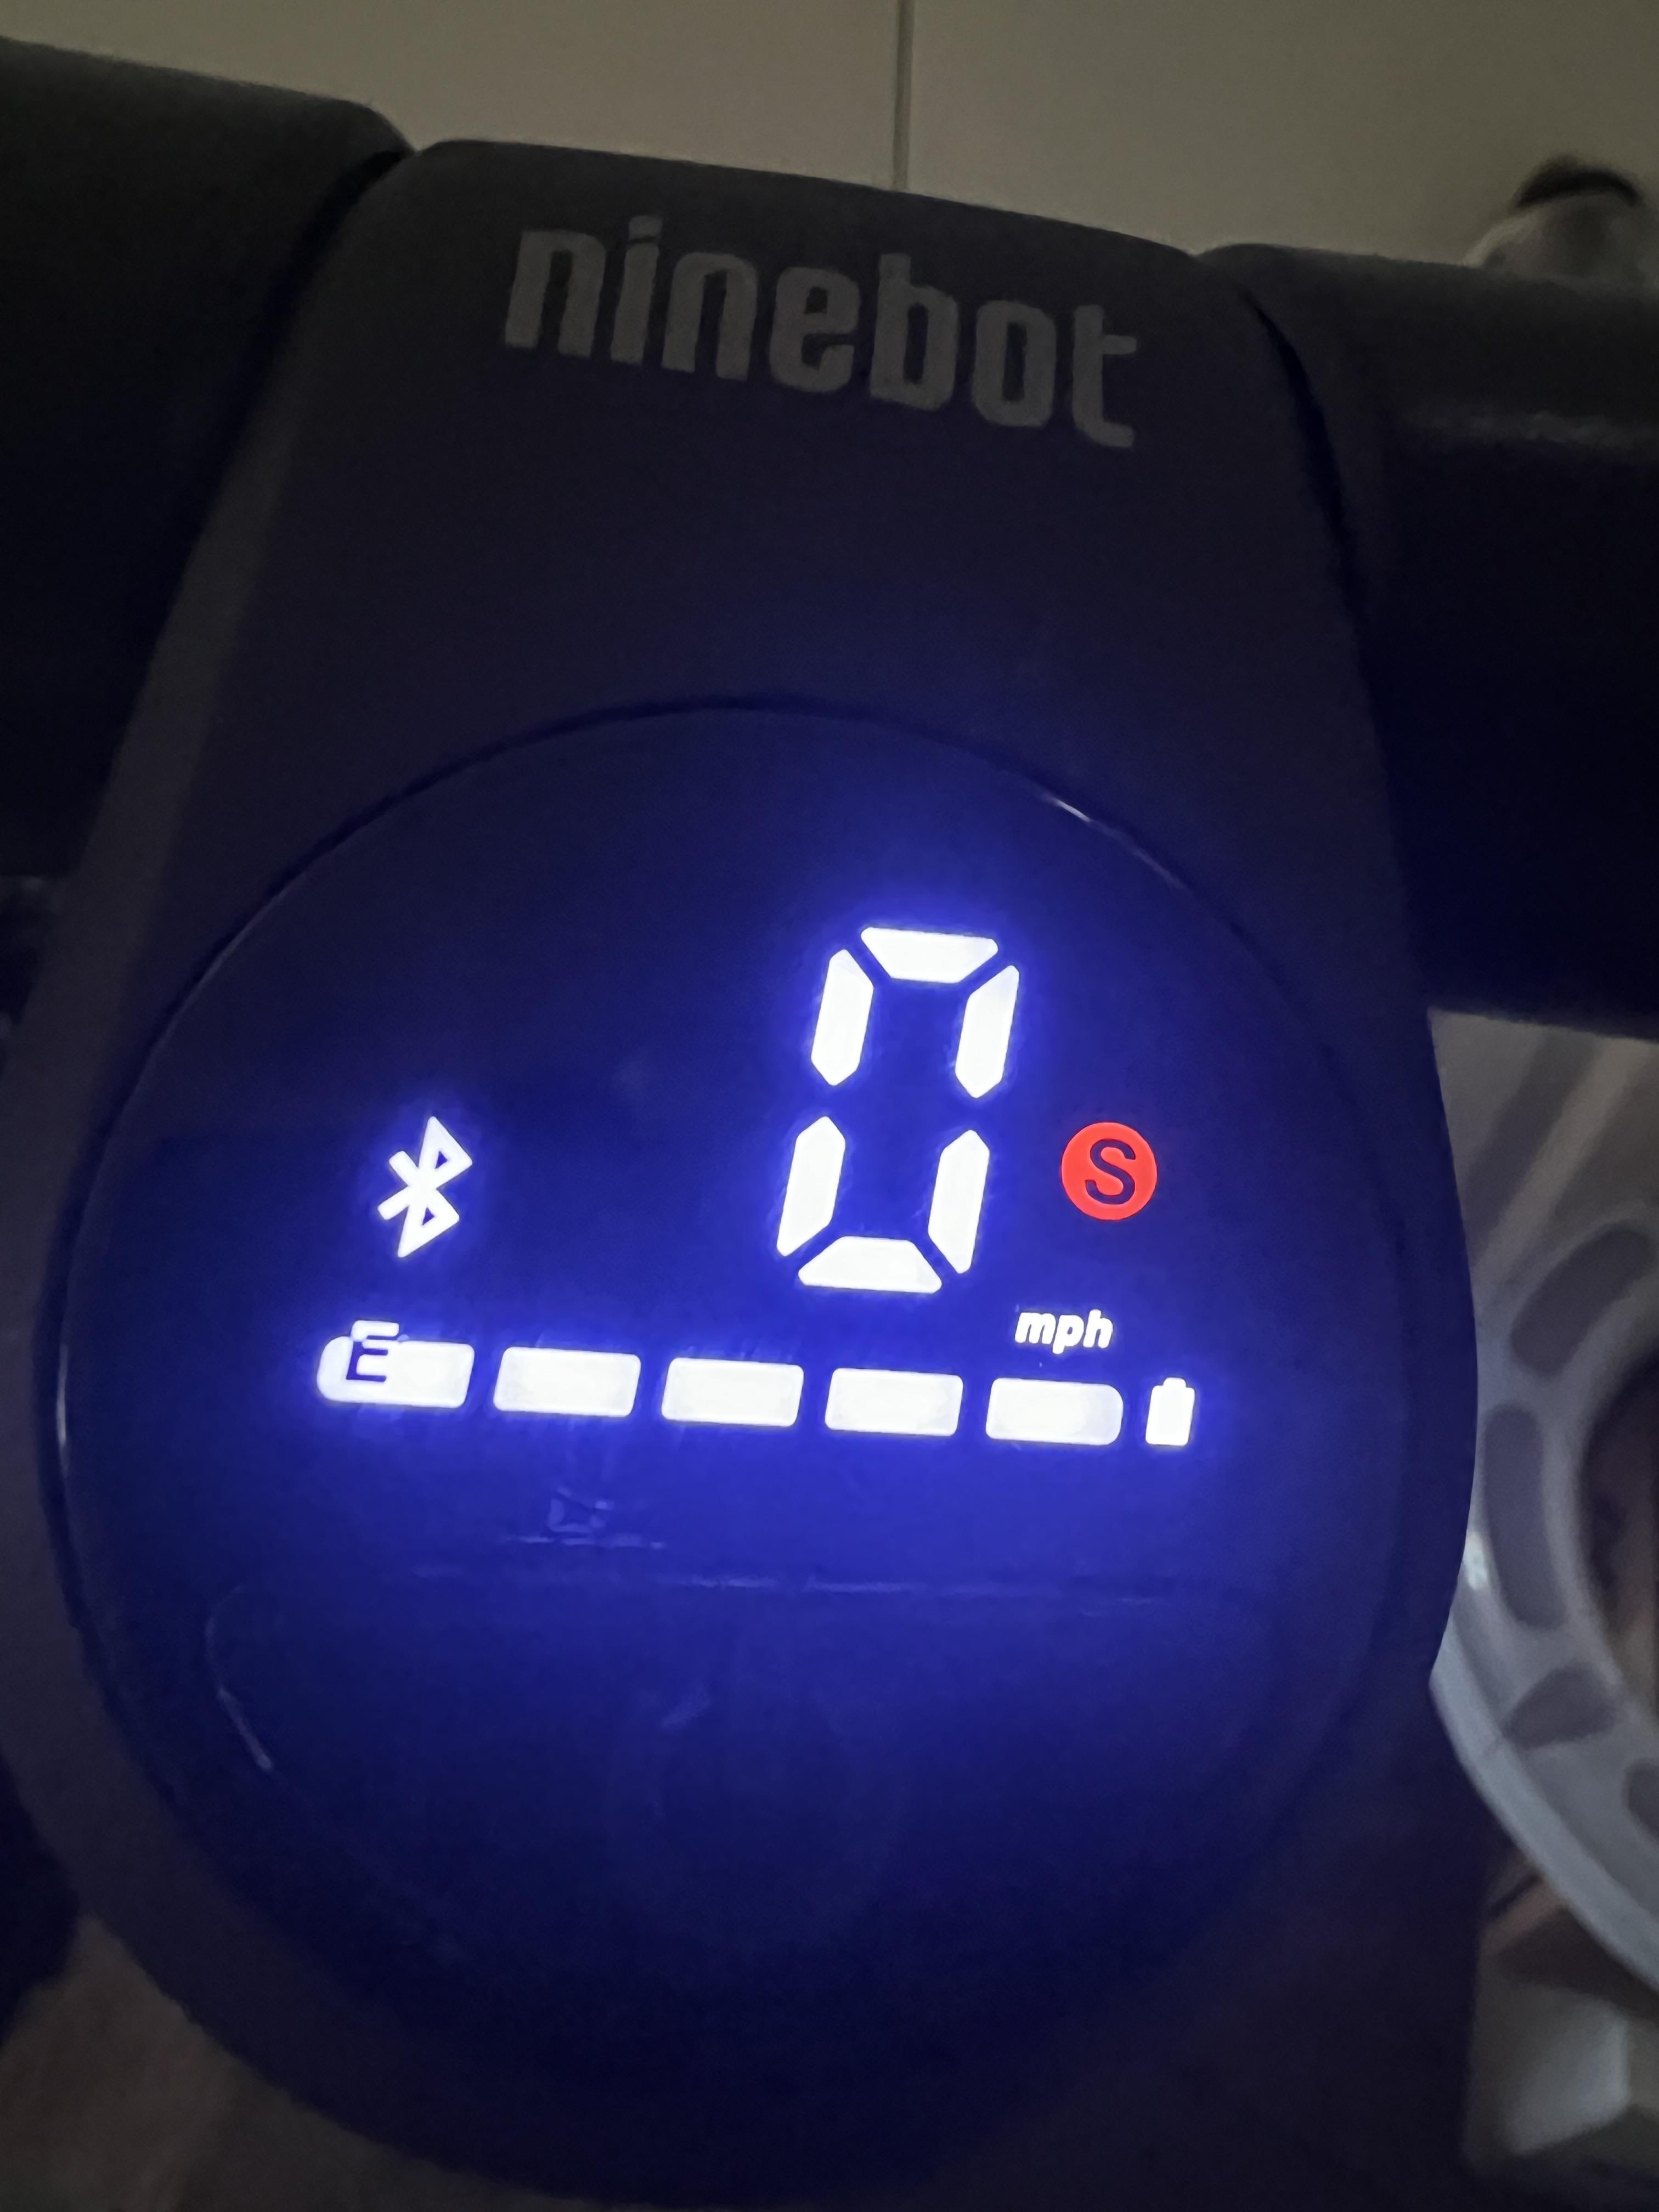
I rode one of these in Florida a few weeks back and really wanted one for running nearby errands now I’m back home… Segway electric scooter - hits around 15, has traction control and ABS braking (!), regenerative charging when you brake or ride downhill, super-bright head and brake lights, digital display… Charges in 3.5 hours and has a 15 mile range or so (although not if you’ve got it cranked to flat-out mode like I have currently) and you can install a software upgrade that will give you another 10mph or so if you’re feeling brave. Fun little summer toy!
-
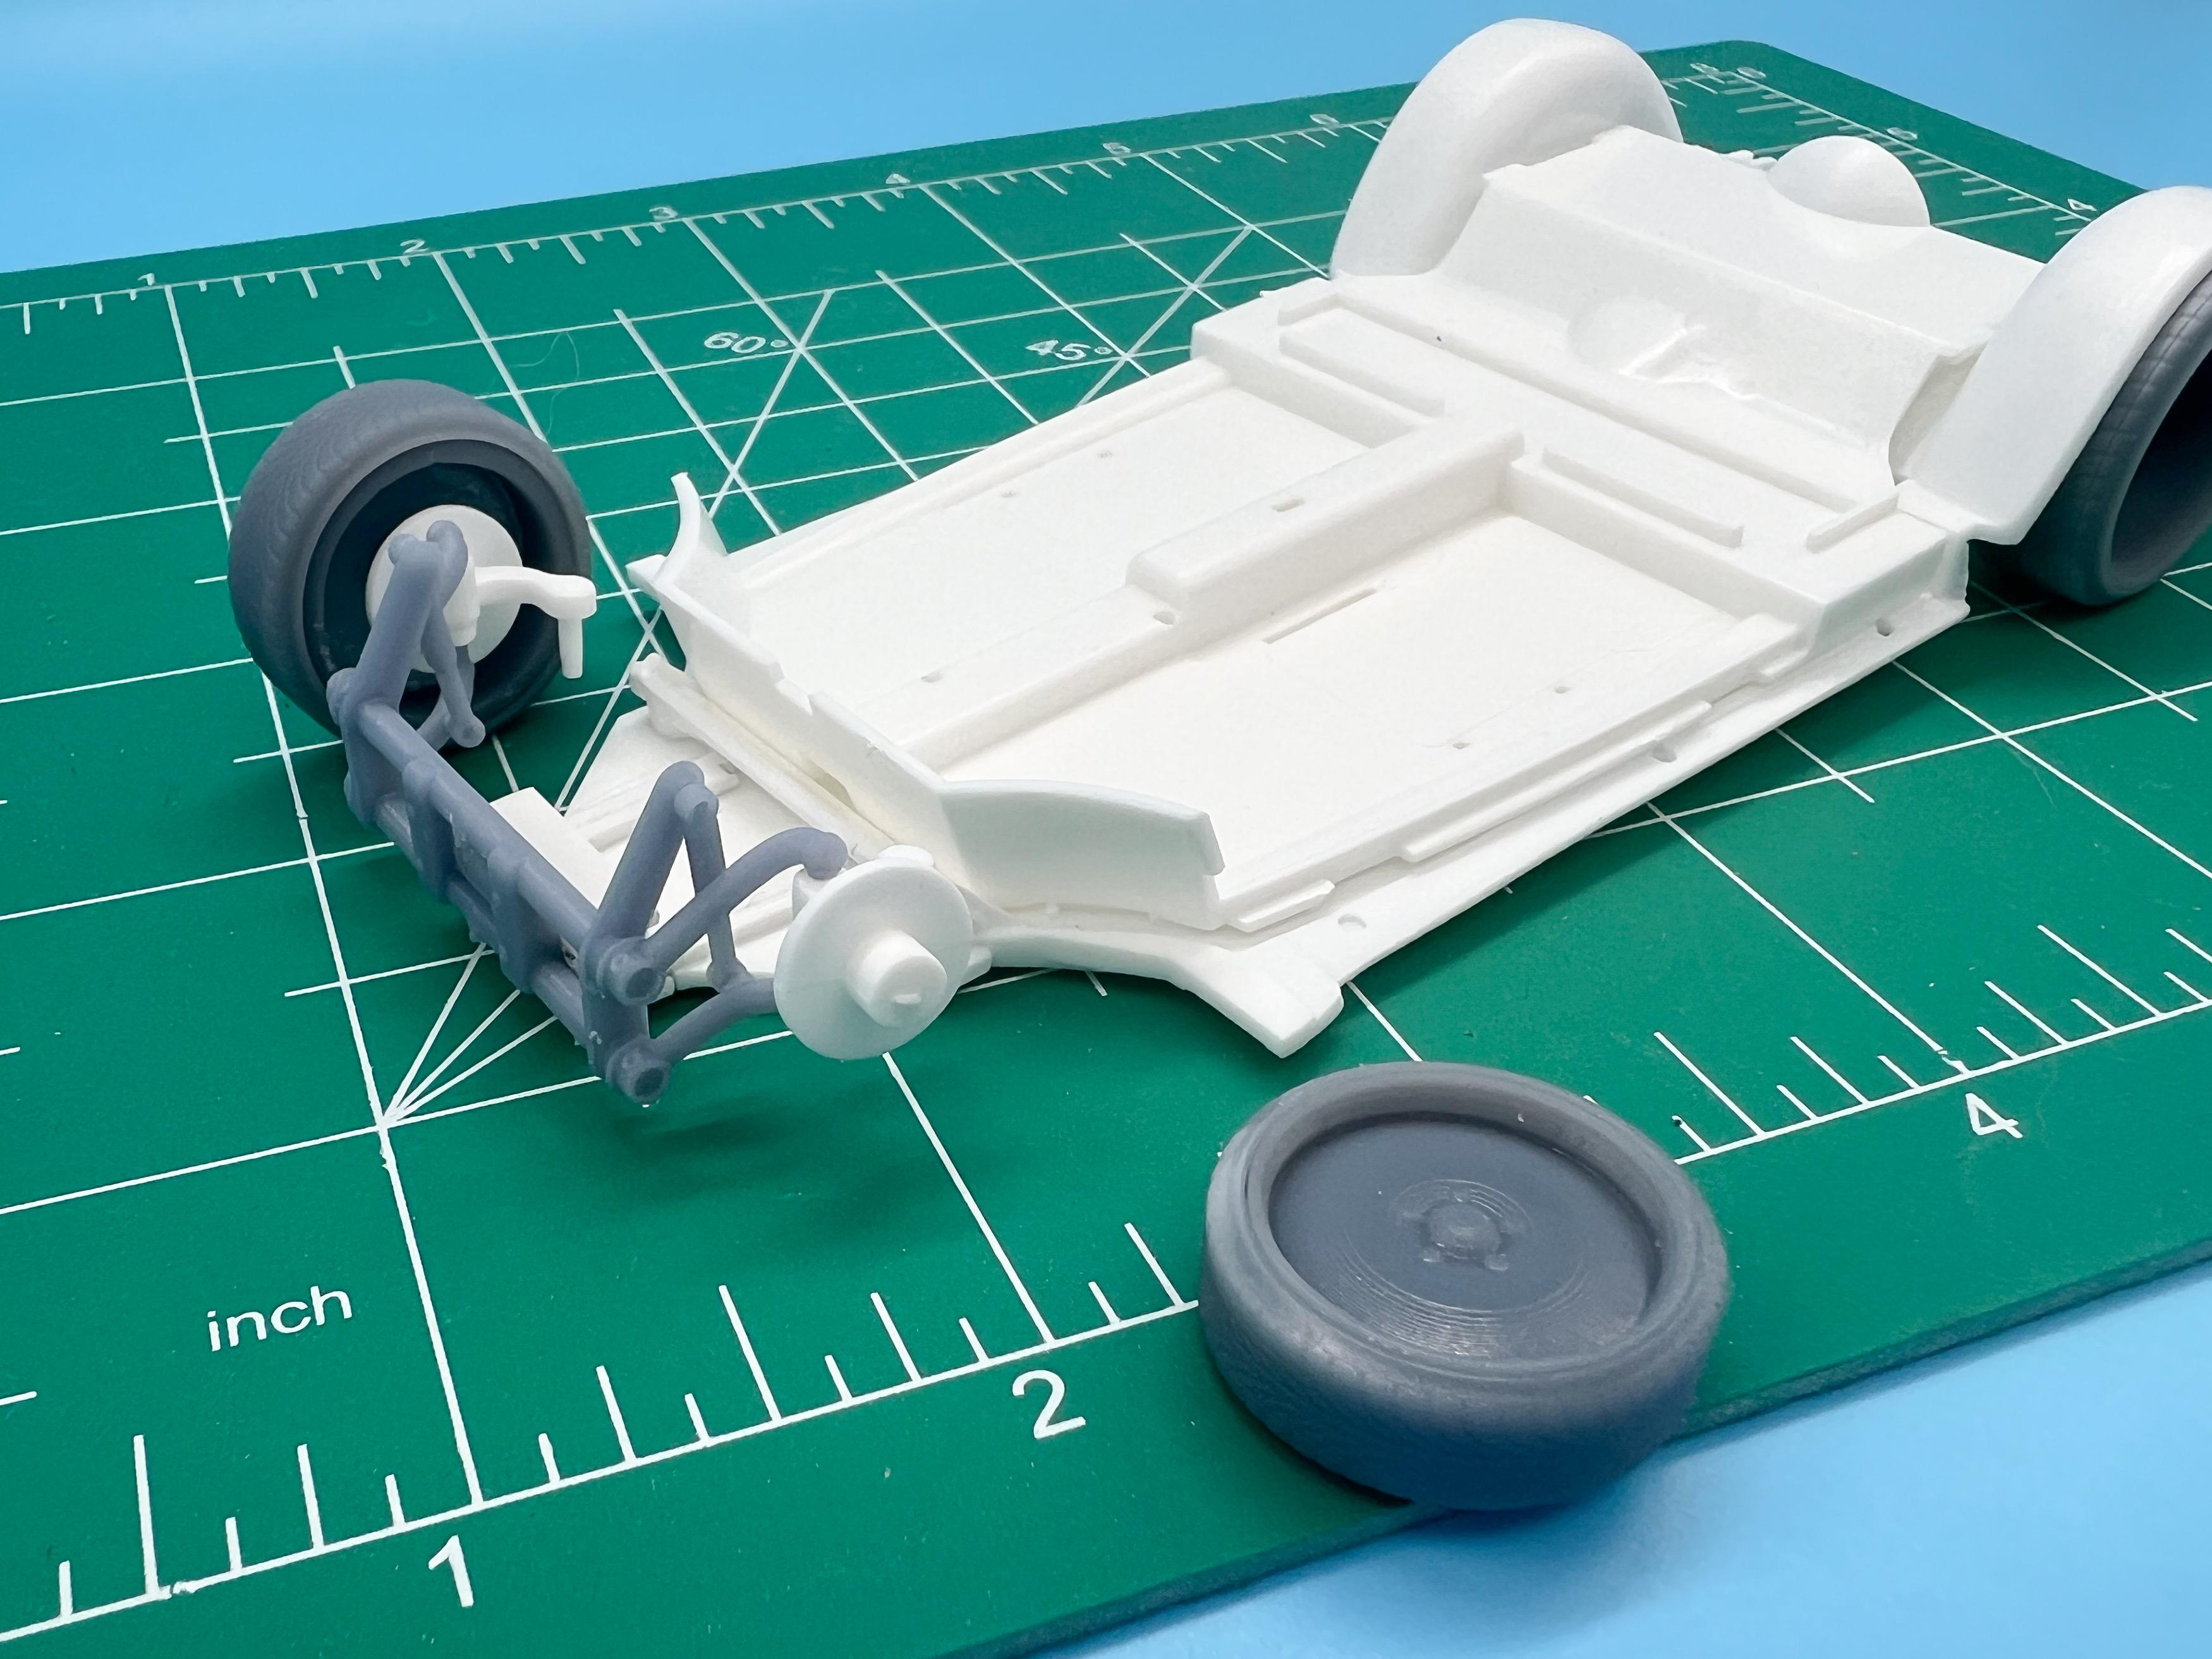
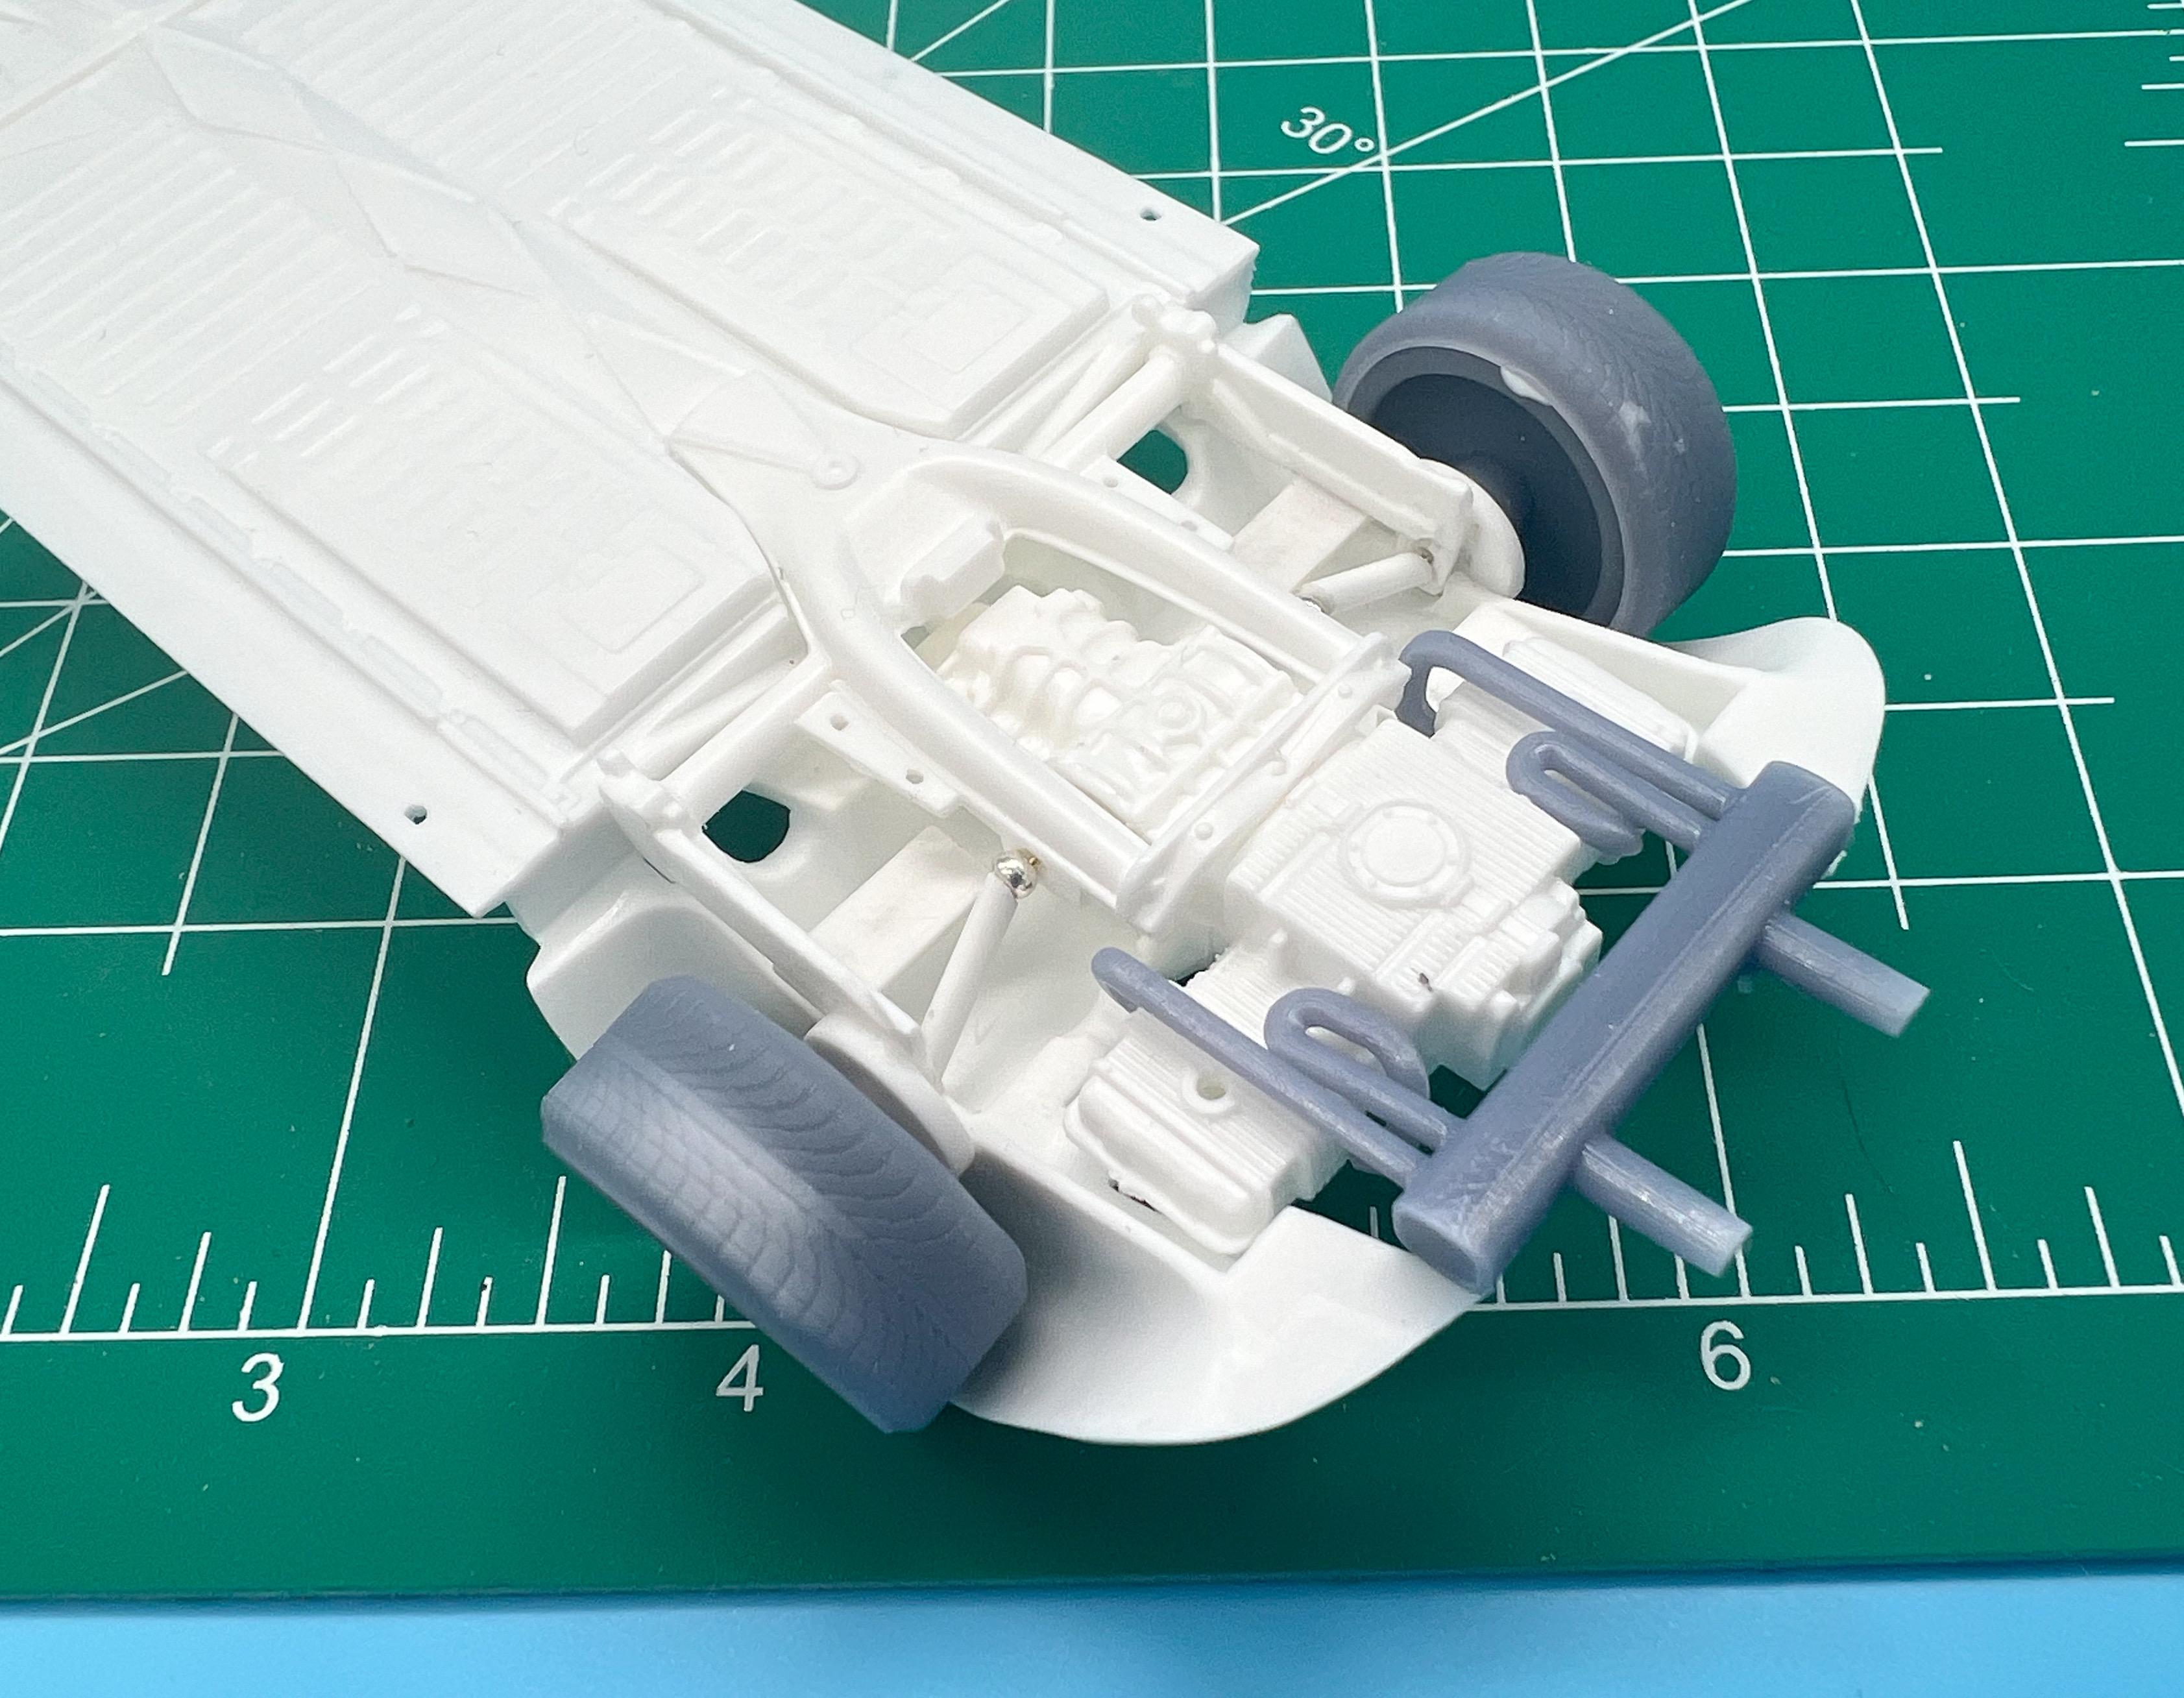
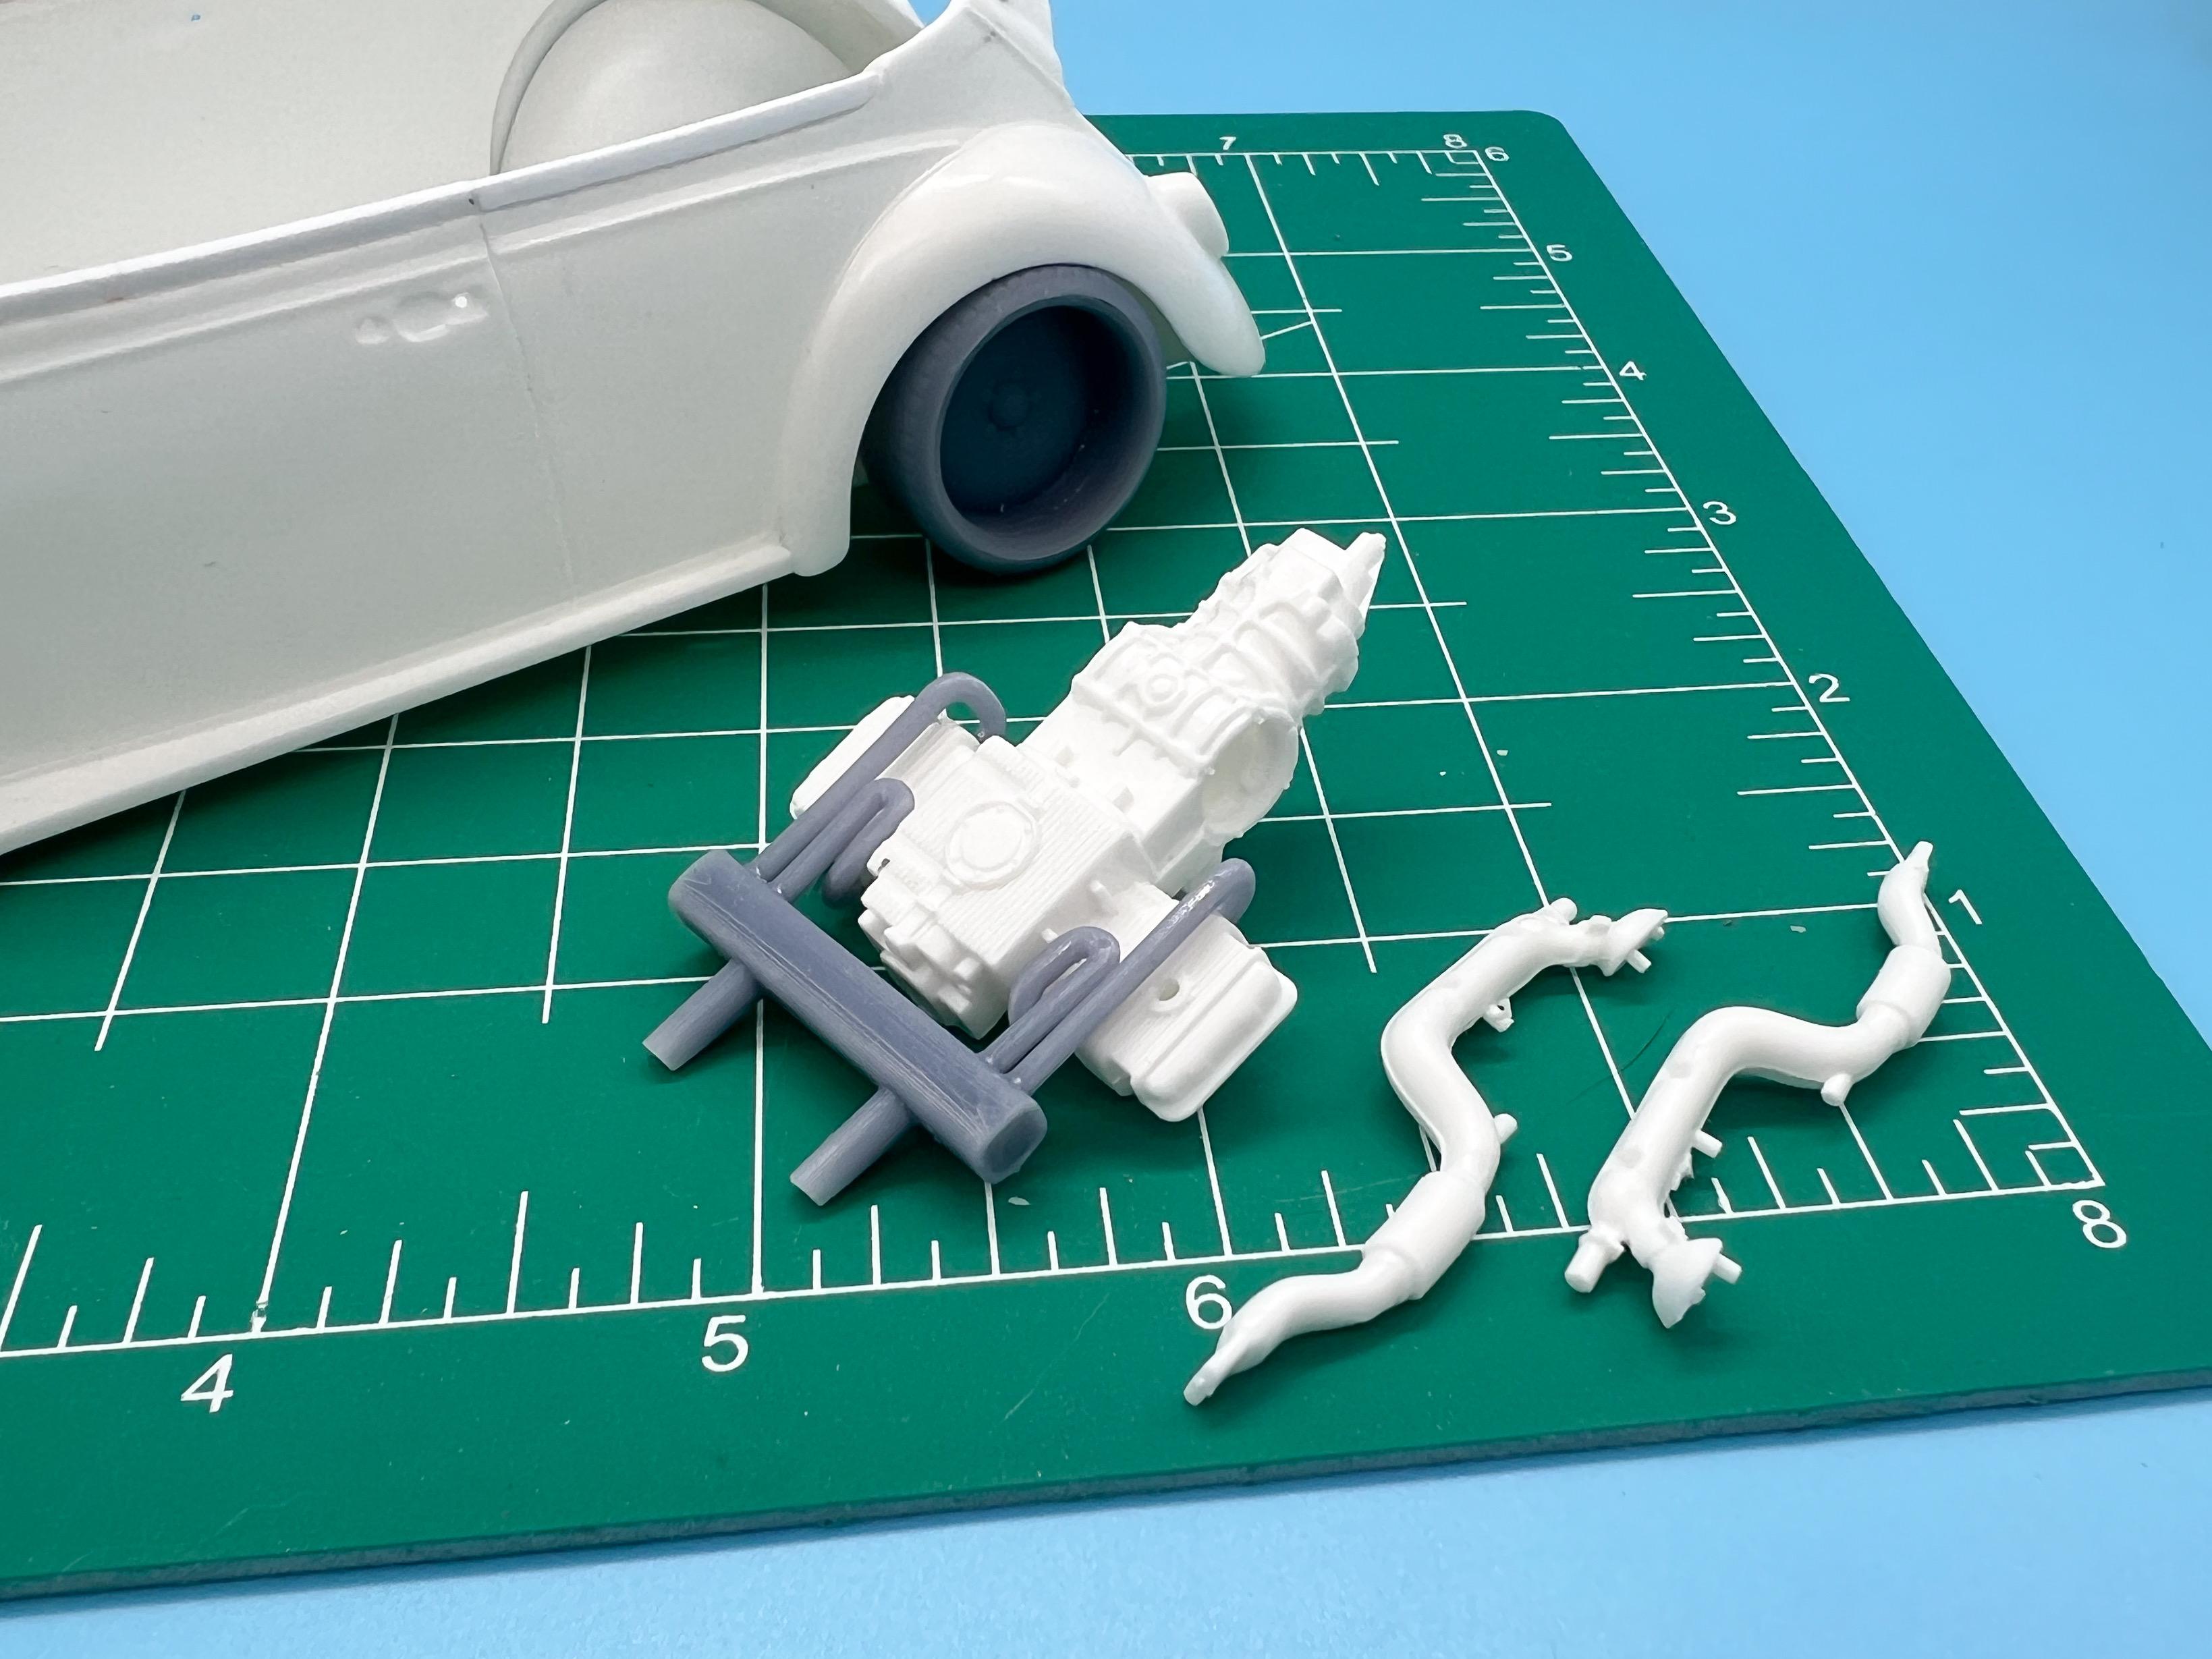
I actually don’t have any of those kits, but I have a couple of the Revell boots here somewhere for sure…thank you! So, next project on this one, now I’ve got the body sorta half done is figuring out front and rear suspension. I really like these air-ride Beetle setups: I like the technology, I like that you can sit a car right in the dirt and raise it up in seconds and I like the relative simplicity of them, so I’m going to modify my Revell pan to somewhat resemble one of these… First step, a 3D printed dropped front axle (designed for the Tamiya 1:24 Beetles, but works ok here too with a little rescaling): I modified the chassis a little to mount the front end (the kit has part of this detail molded in) and modified the kit swing arms to fit, but nothing too complicated… The rear end needed some tweaks too so I could get the wheels I’ve chosen to snuggle into the arches - I relocated where the wheel centers land relative to the swing arms (which is kind of a cheat, but would work in 1:1 too I’m pretty sure) and made some new, more angled, driveshafts to reflect what dropping the rear end this far would do to them… The airbags for the rear end will sit just forwards of the driveshafts up against the floorpan, which meant the stock Beetle exhaust (which I think routes backwards to provide heat to the interior?) won’t work anymore, hence the aftermarket exhaust… It’s much cleaner looking anyway, which I like, so I’m happy with that… And as you can see, I selected a wheel - something kinda modern, VERY simple, kinda classic and not something you see commonly applied to a Beetle…these are Smoothie rims by Slowly’s Models: I’m doing the stages I think of as “sketching in” the build right now - just getting the major components kinda in place and correct before working back thru and adding detail…next job will be the interior. Thanks for looking - more soon, soon as I’ve done more!
-
Michaels getting rid of models?
OldNYJim replied to gbdolfans's topic in General Automotive Talk (Trucks and Cars)
Well, that was a wasted trip ?
-
Michaels getting rid of models?
OldNYJim replied to gbdolfans's topic in General Automotive Talk (Trucks and Cars)
If your Michael’s DOES have models, they have 50% off regular priced items right now in the Michael’s app - I’m going to check out my local store this morning -
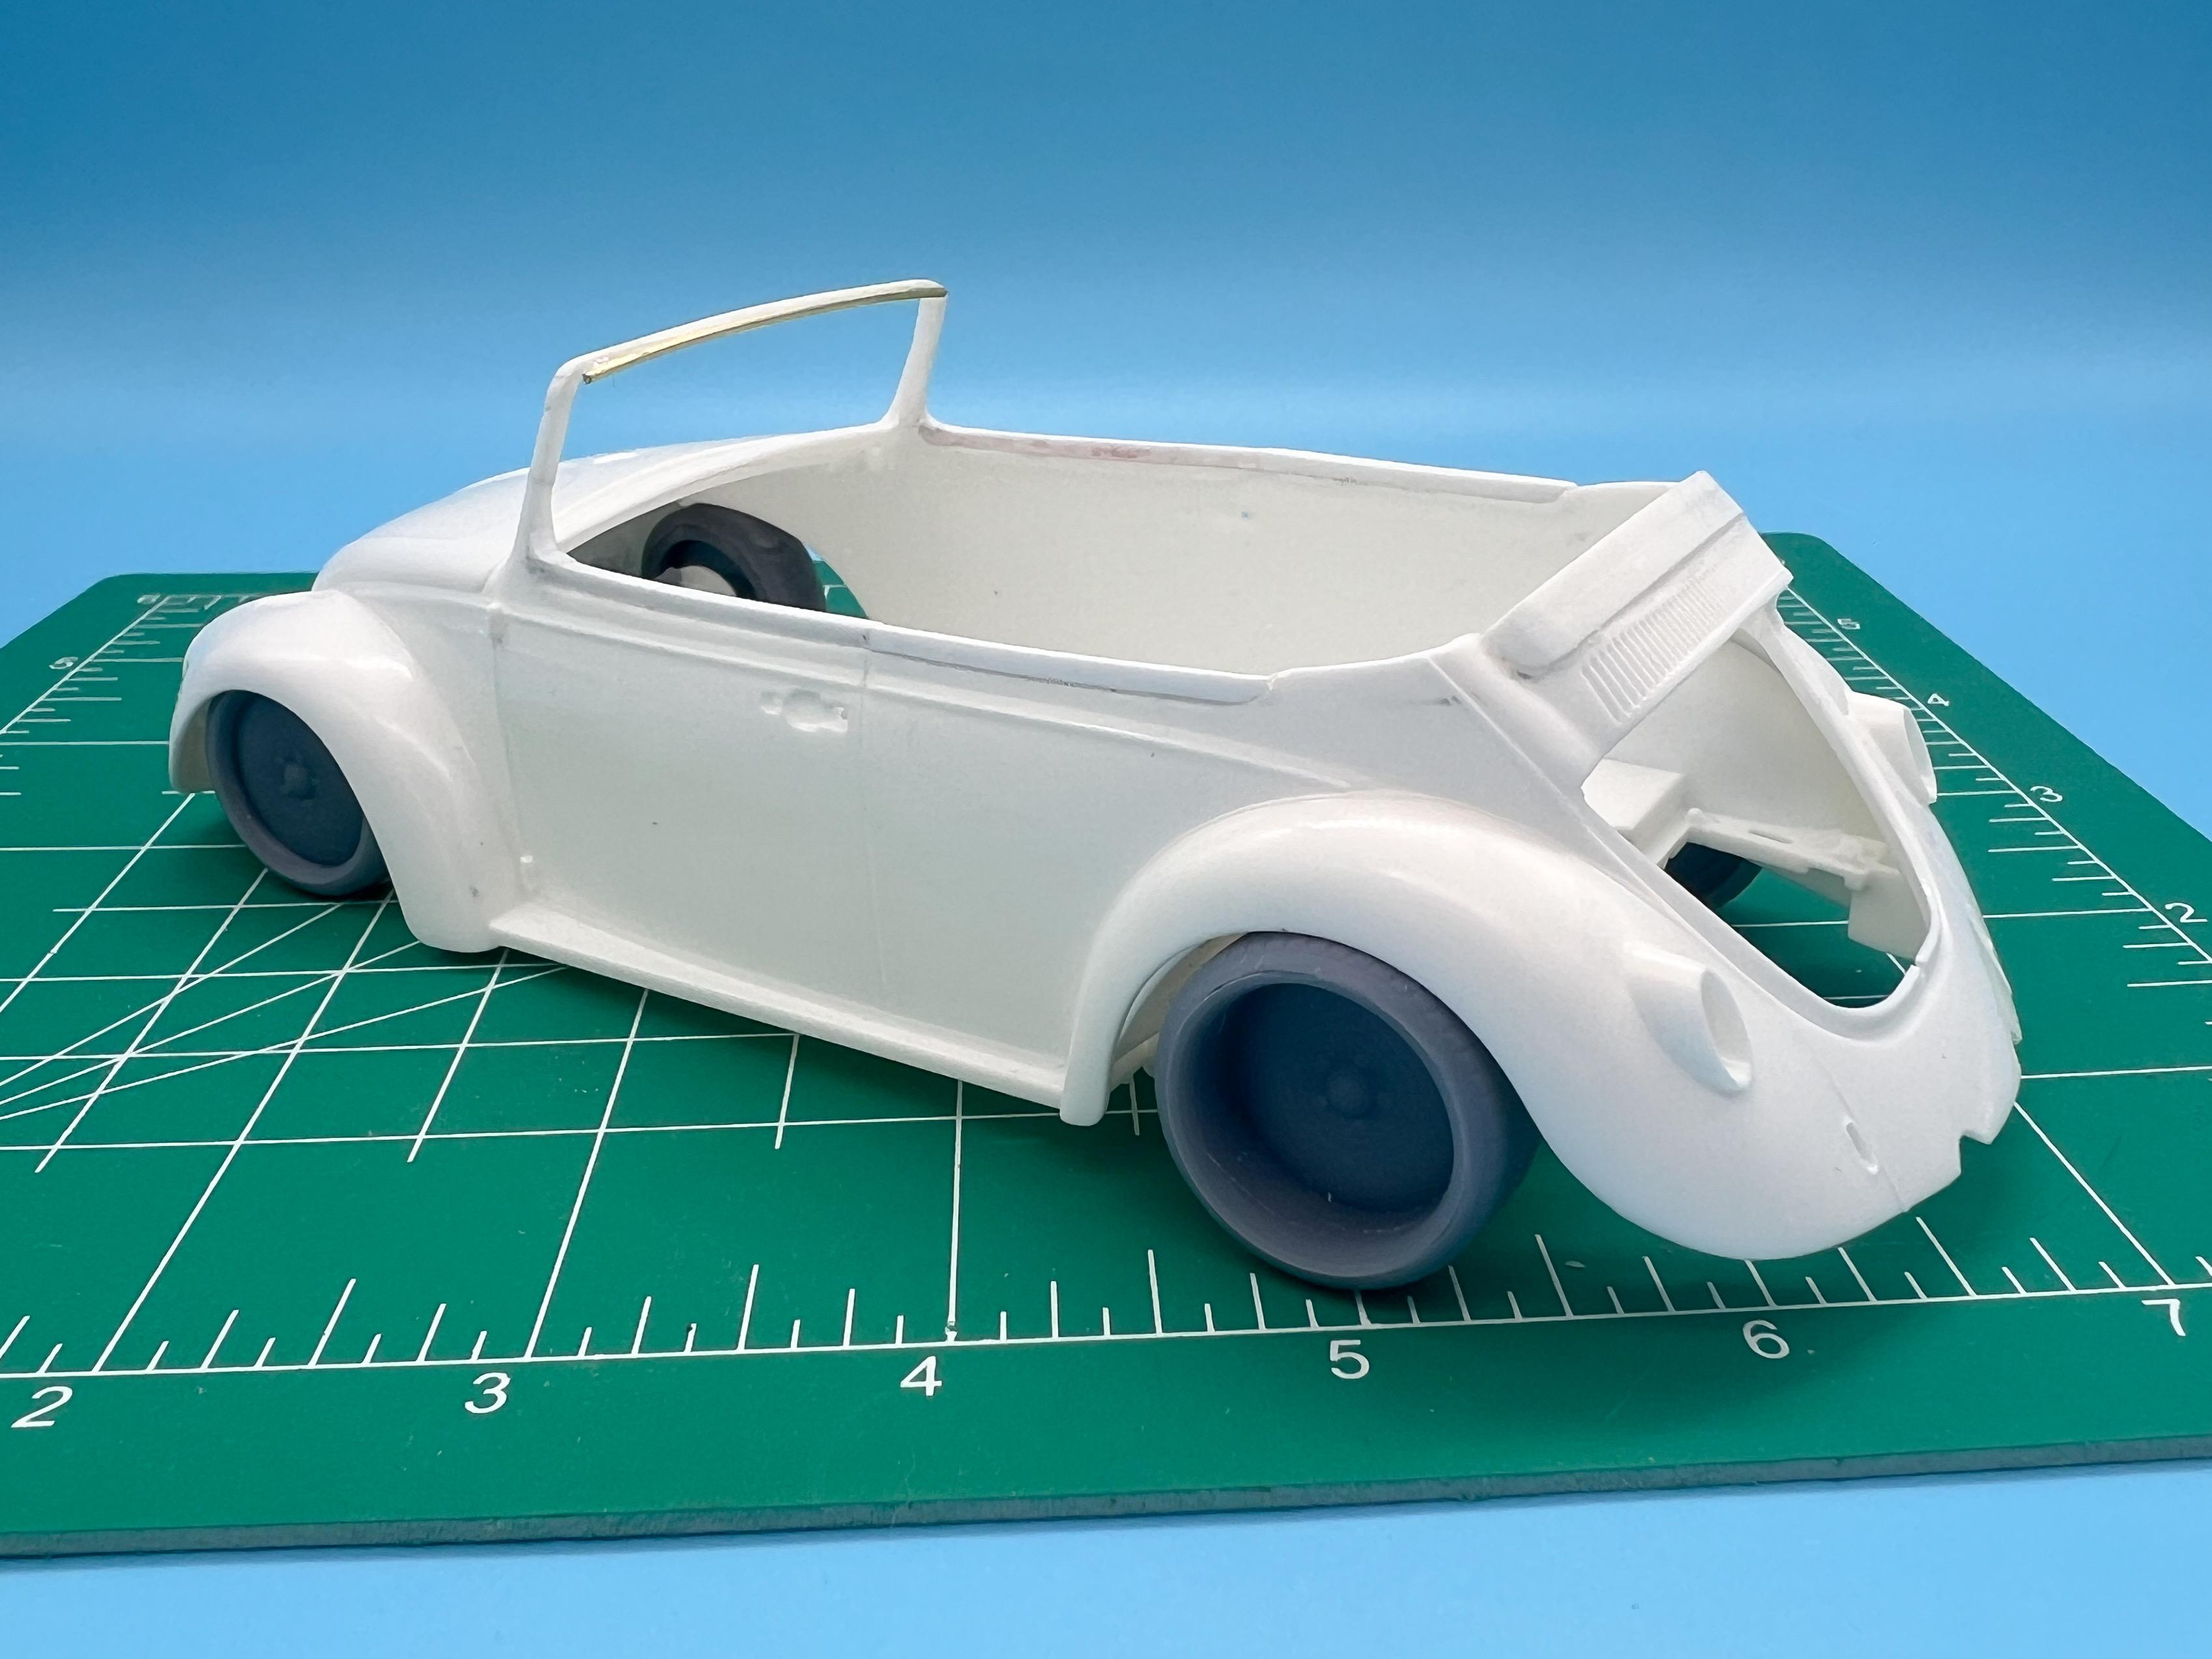
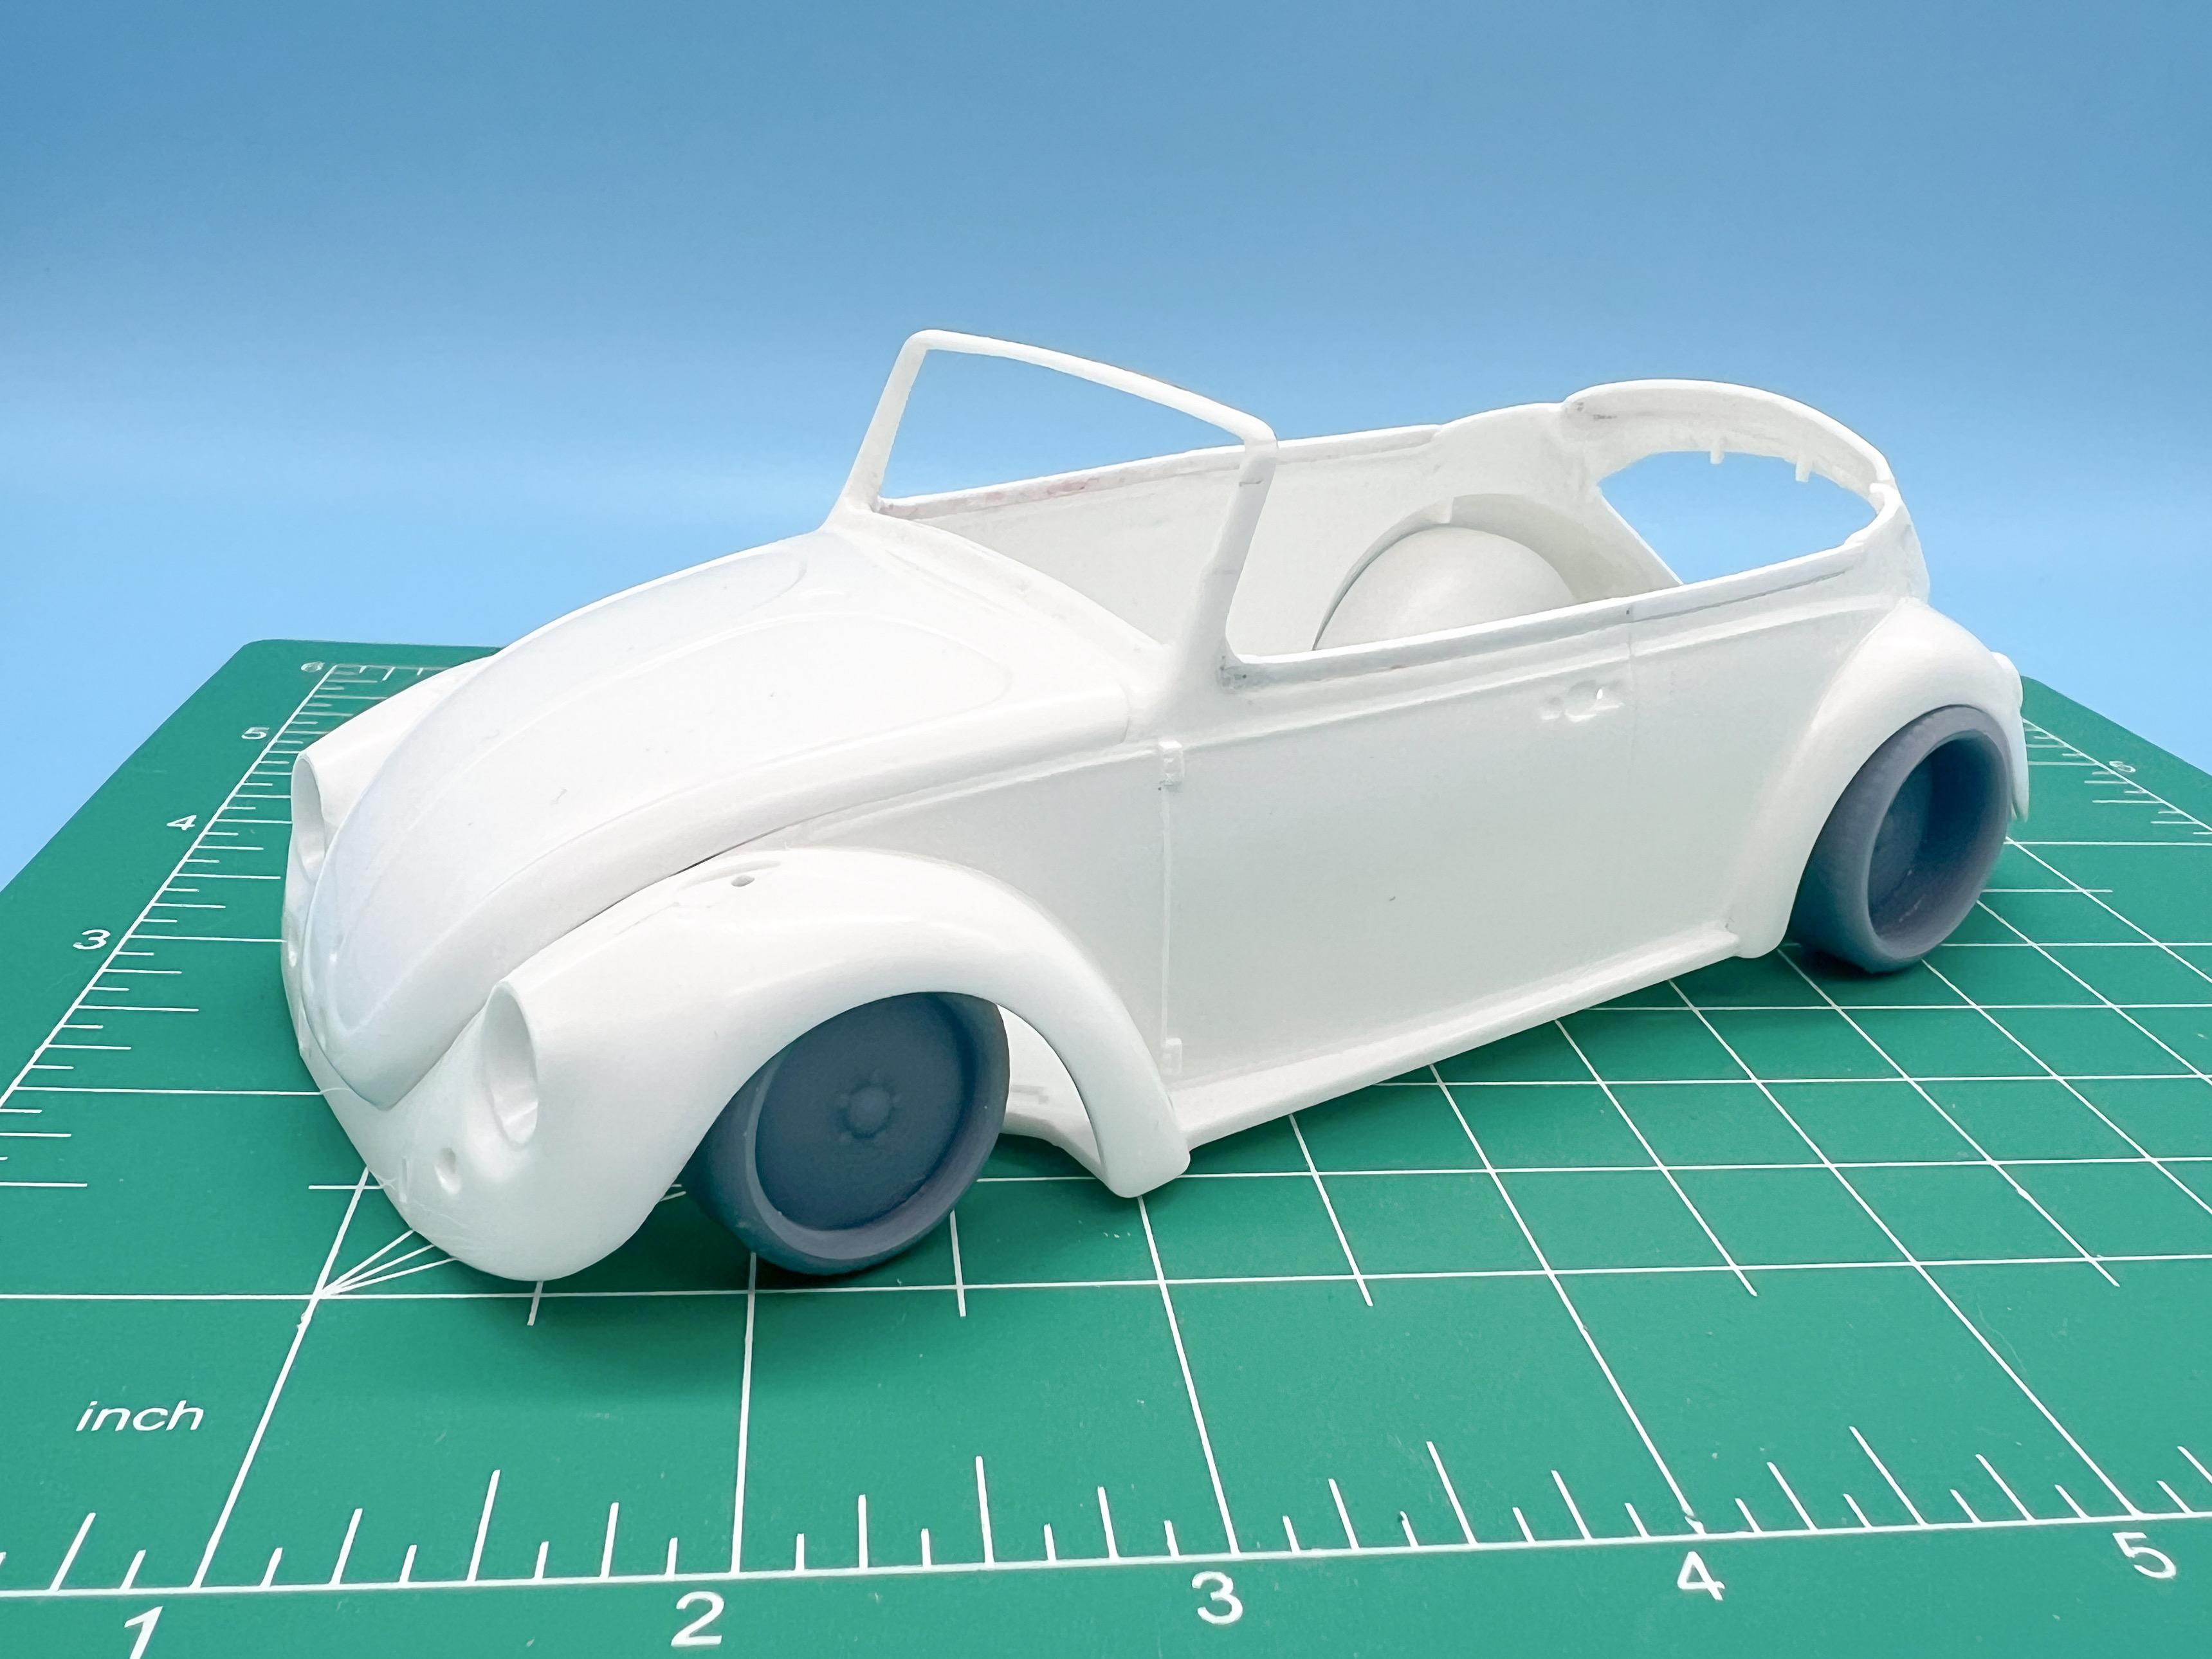
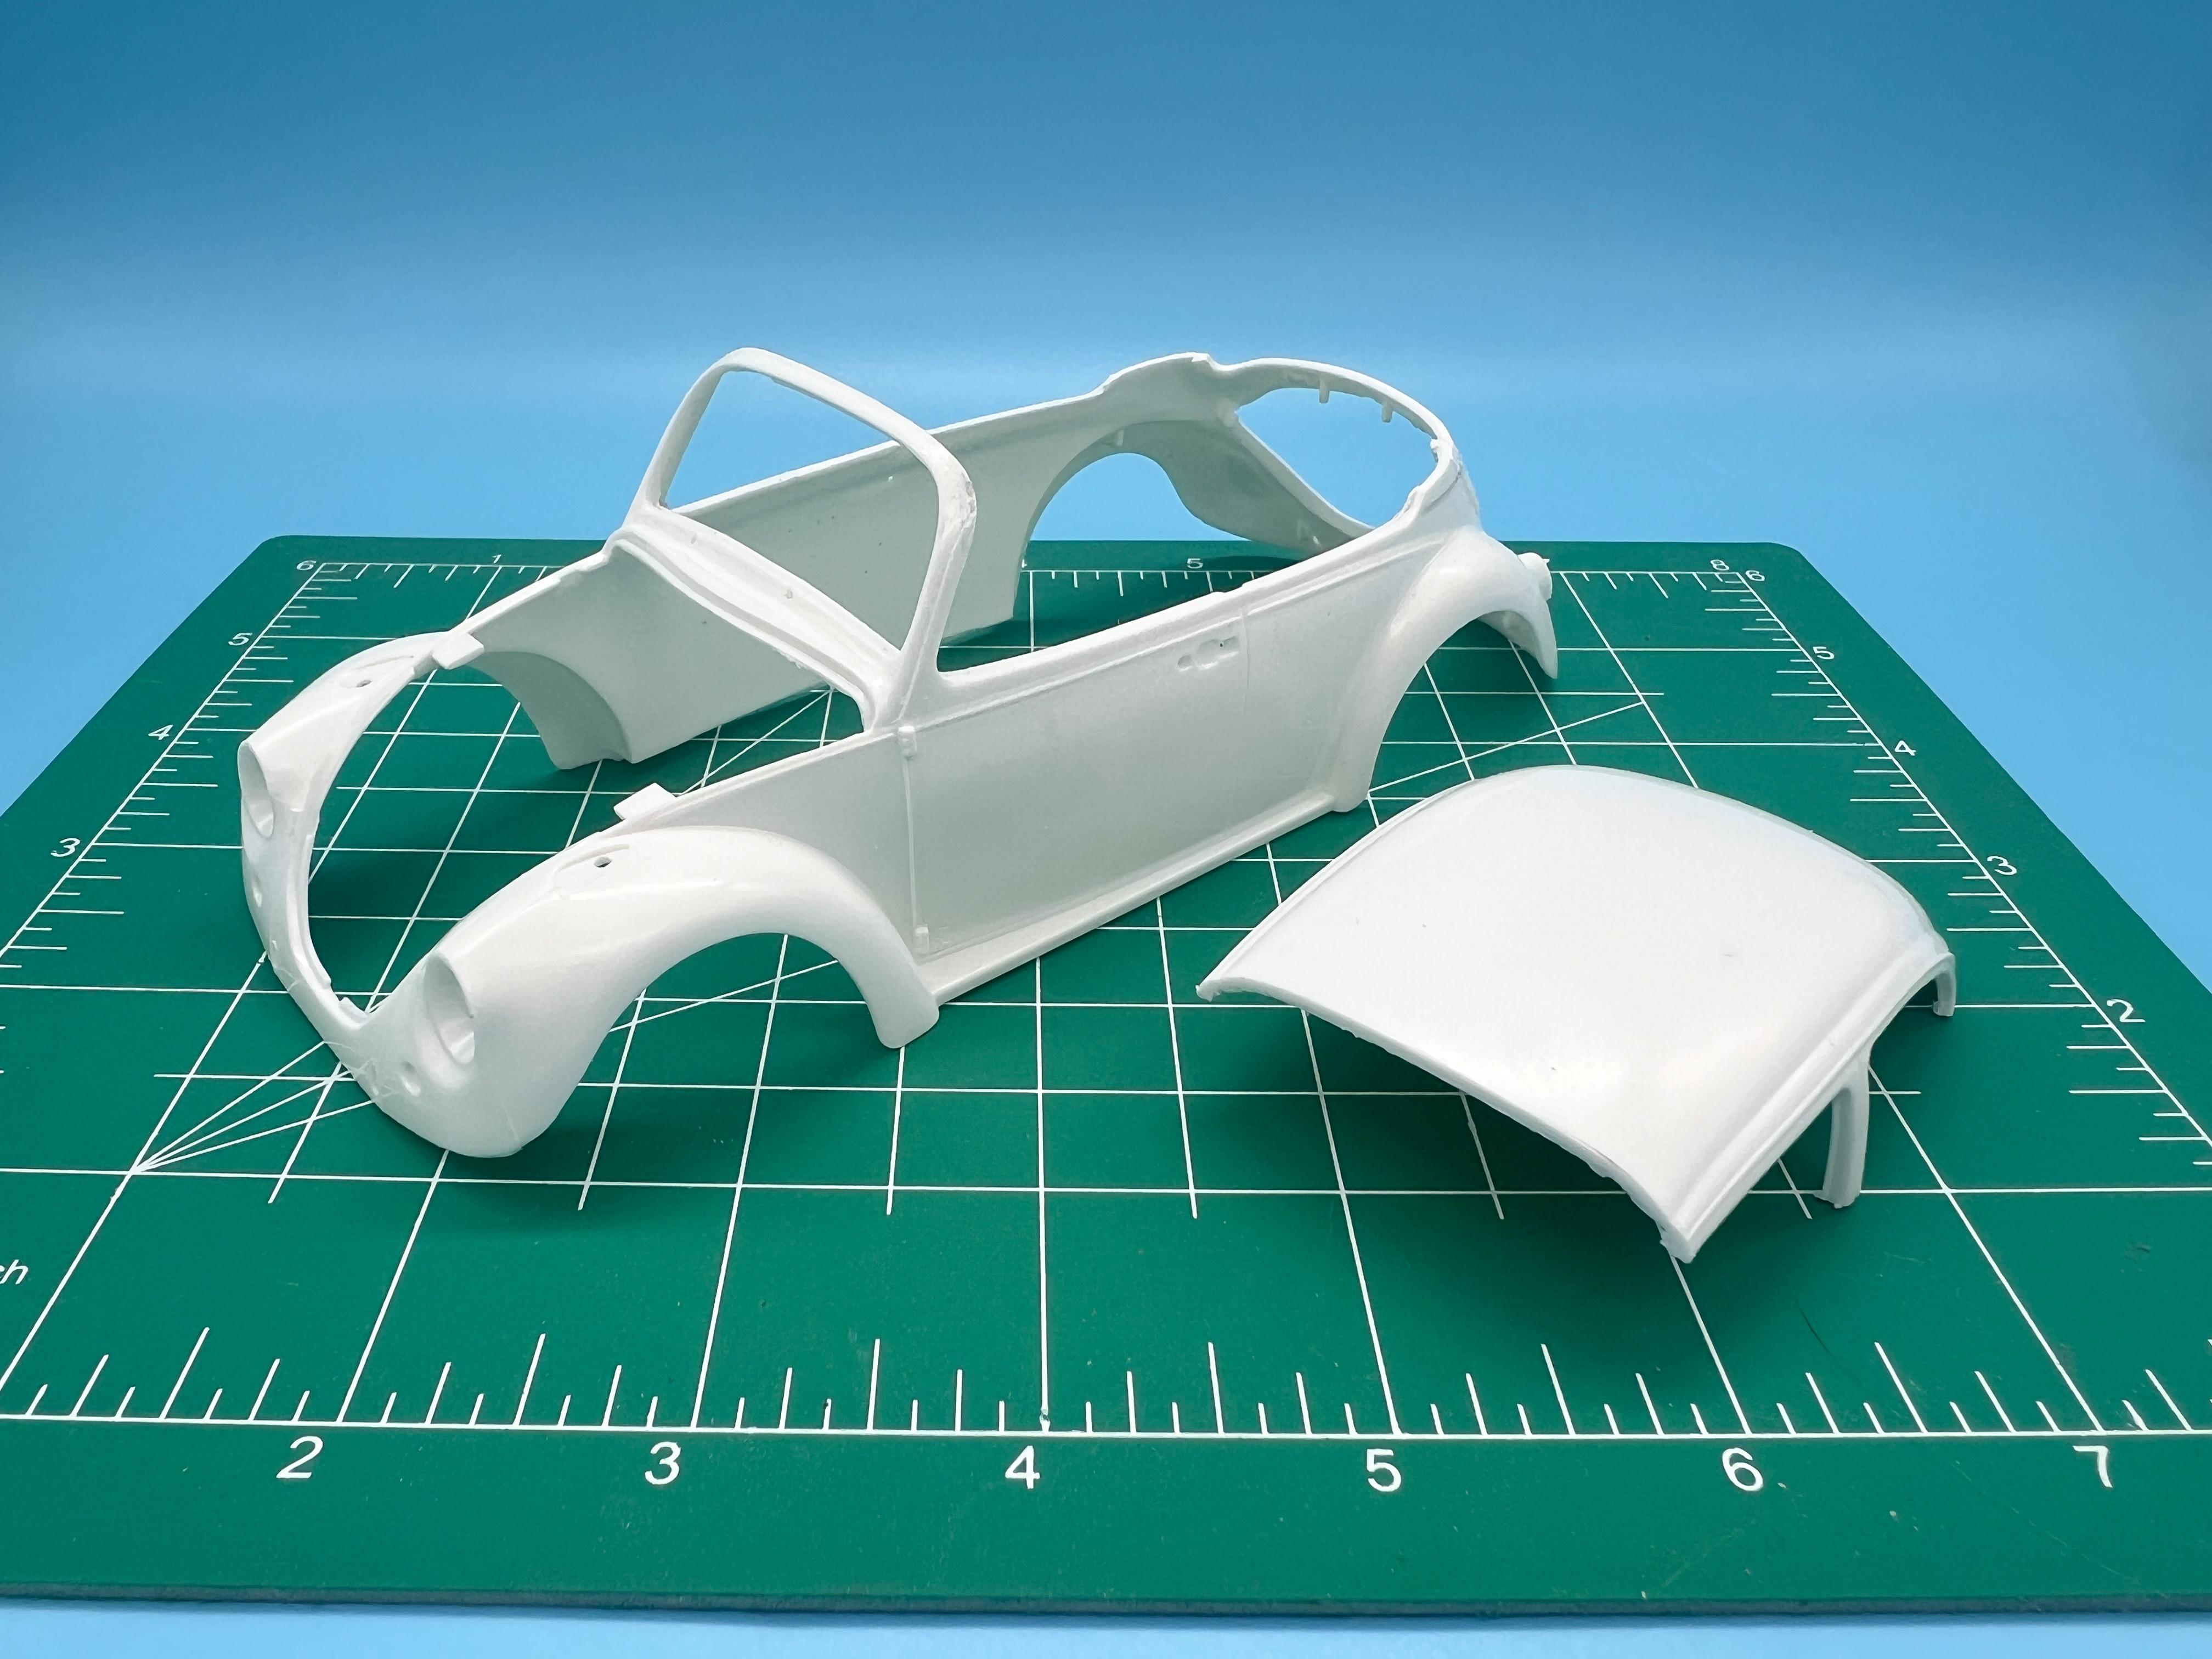
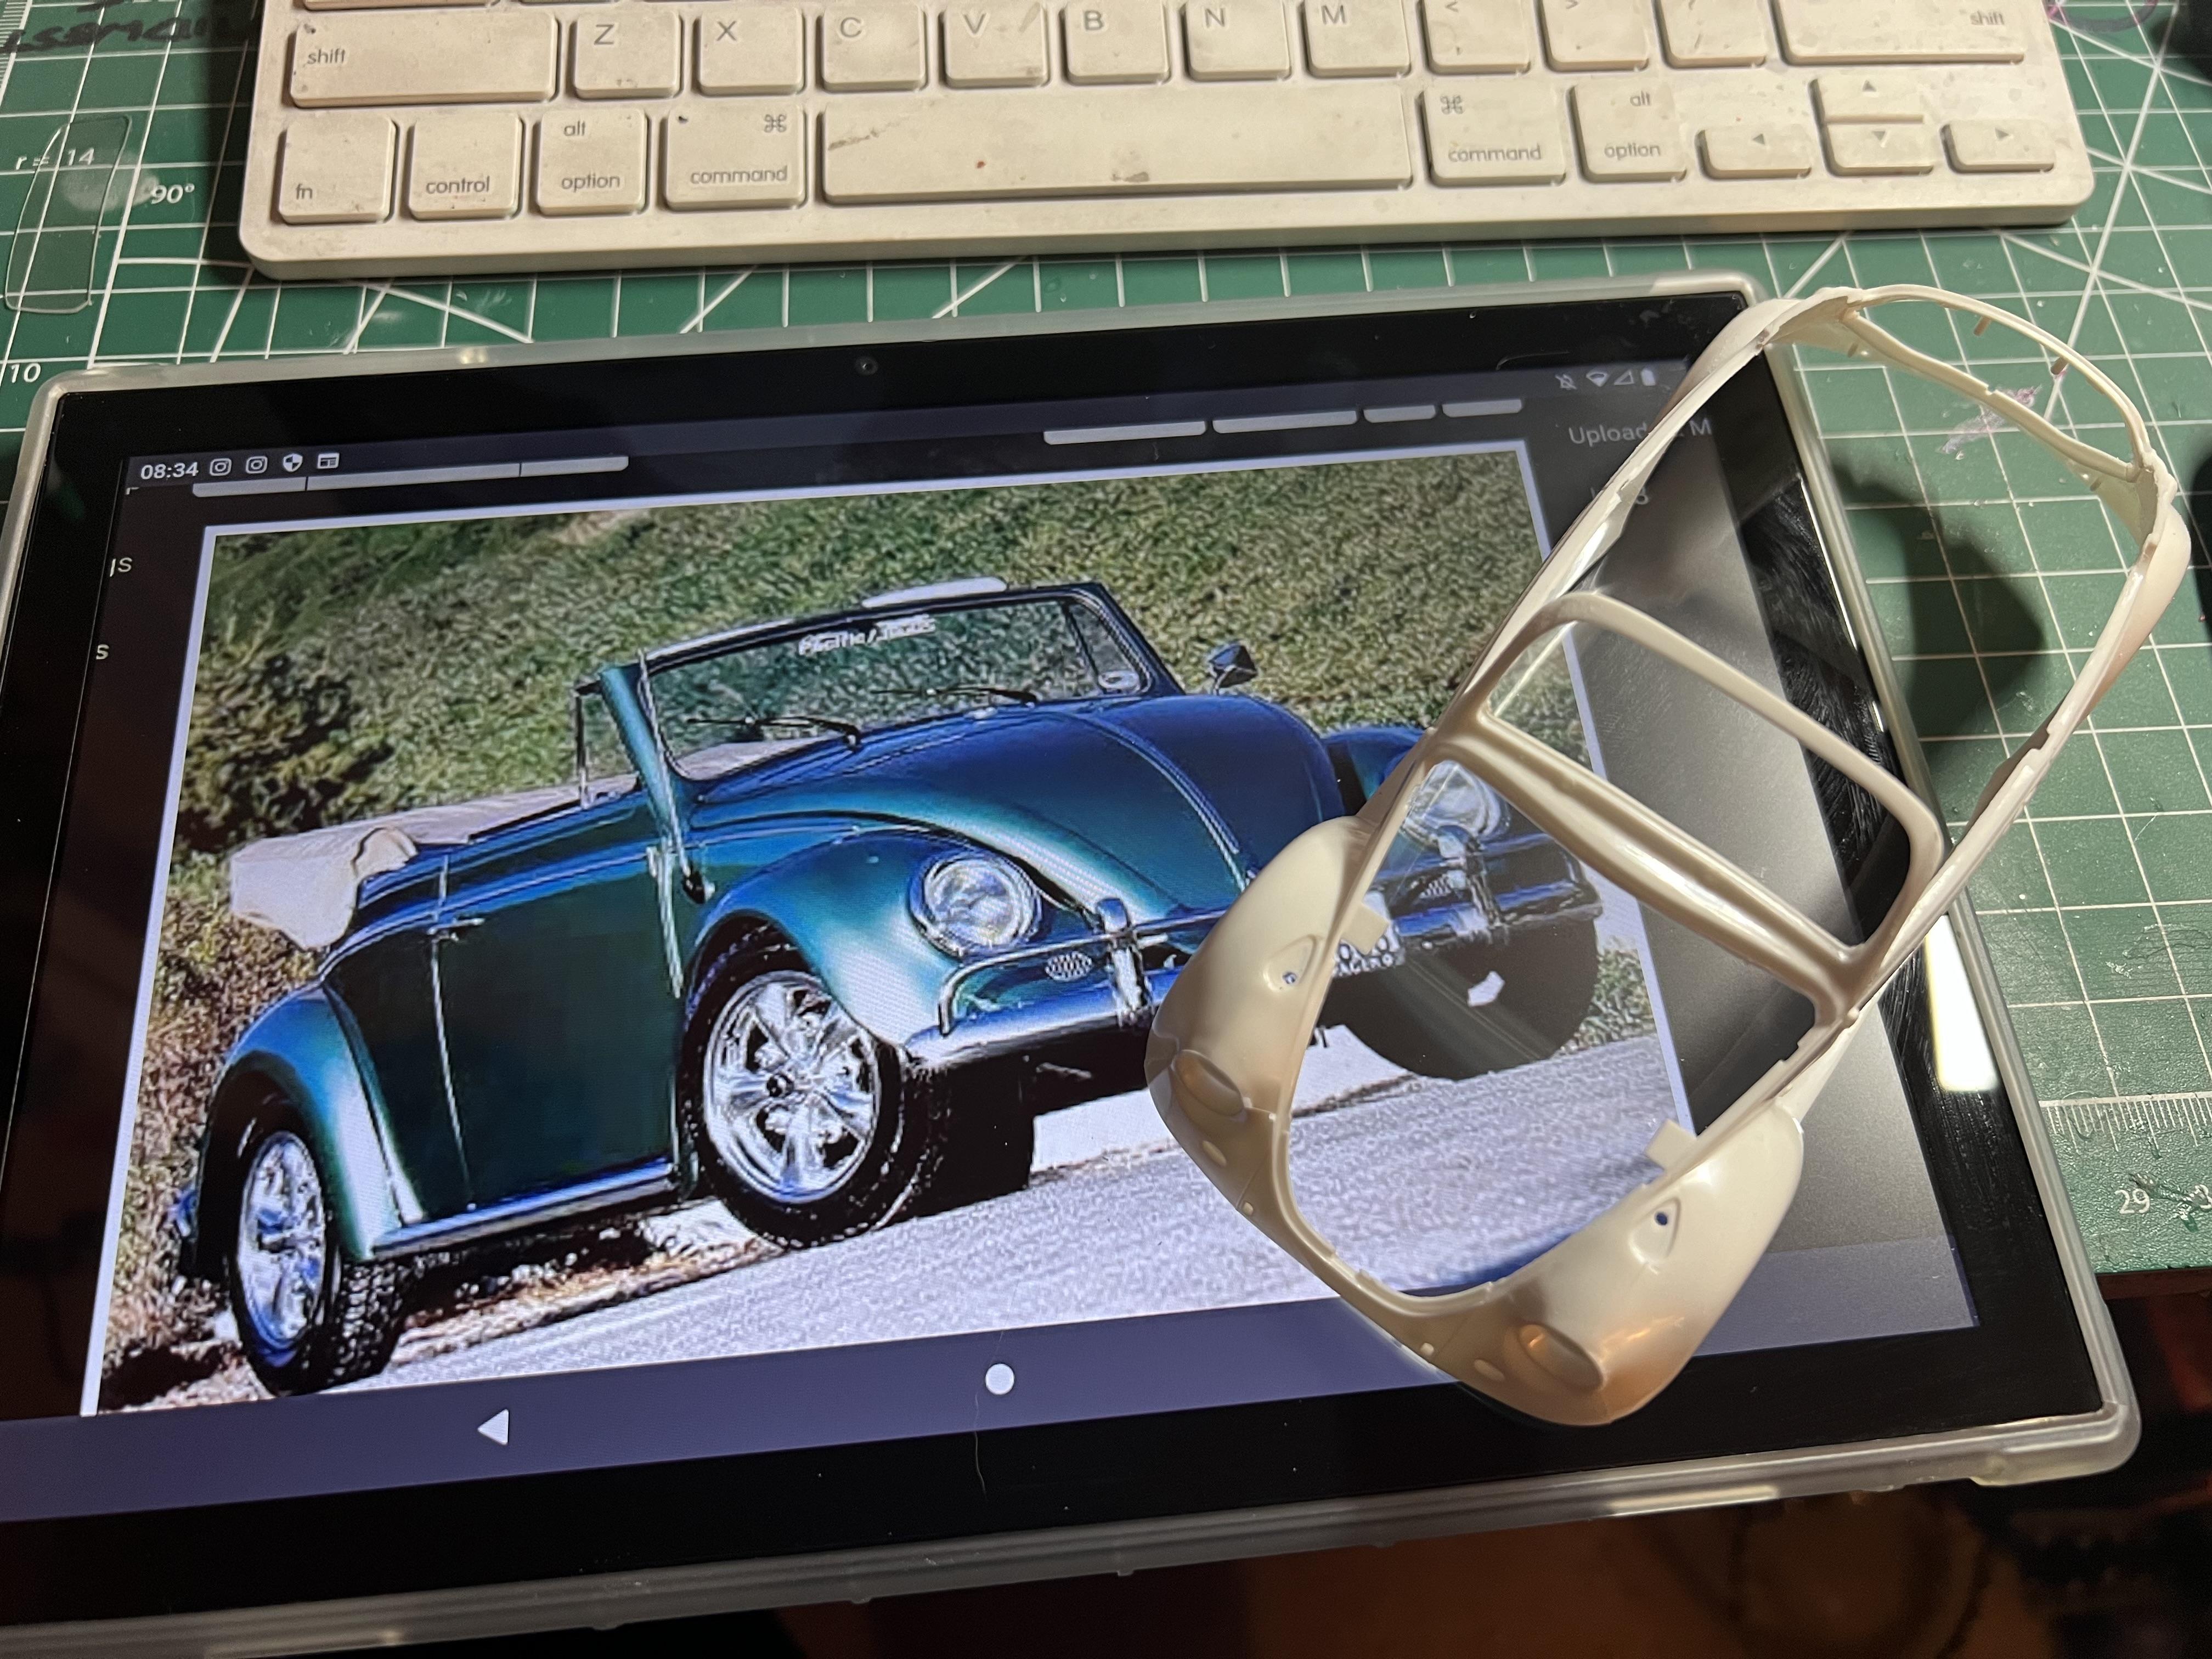
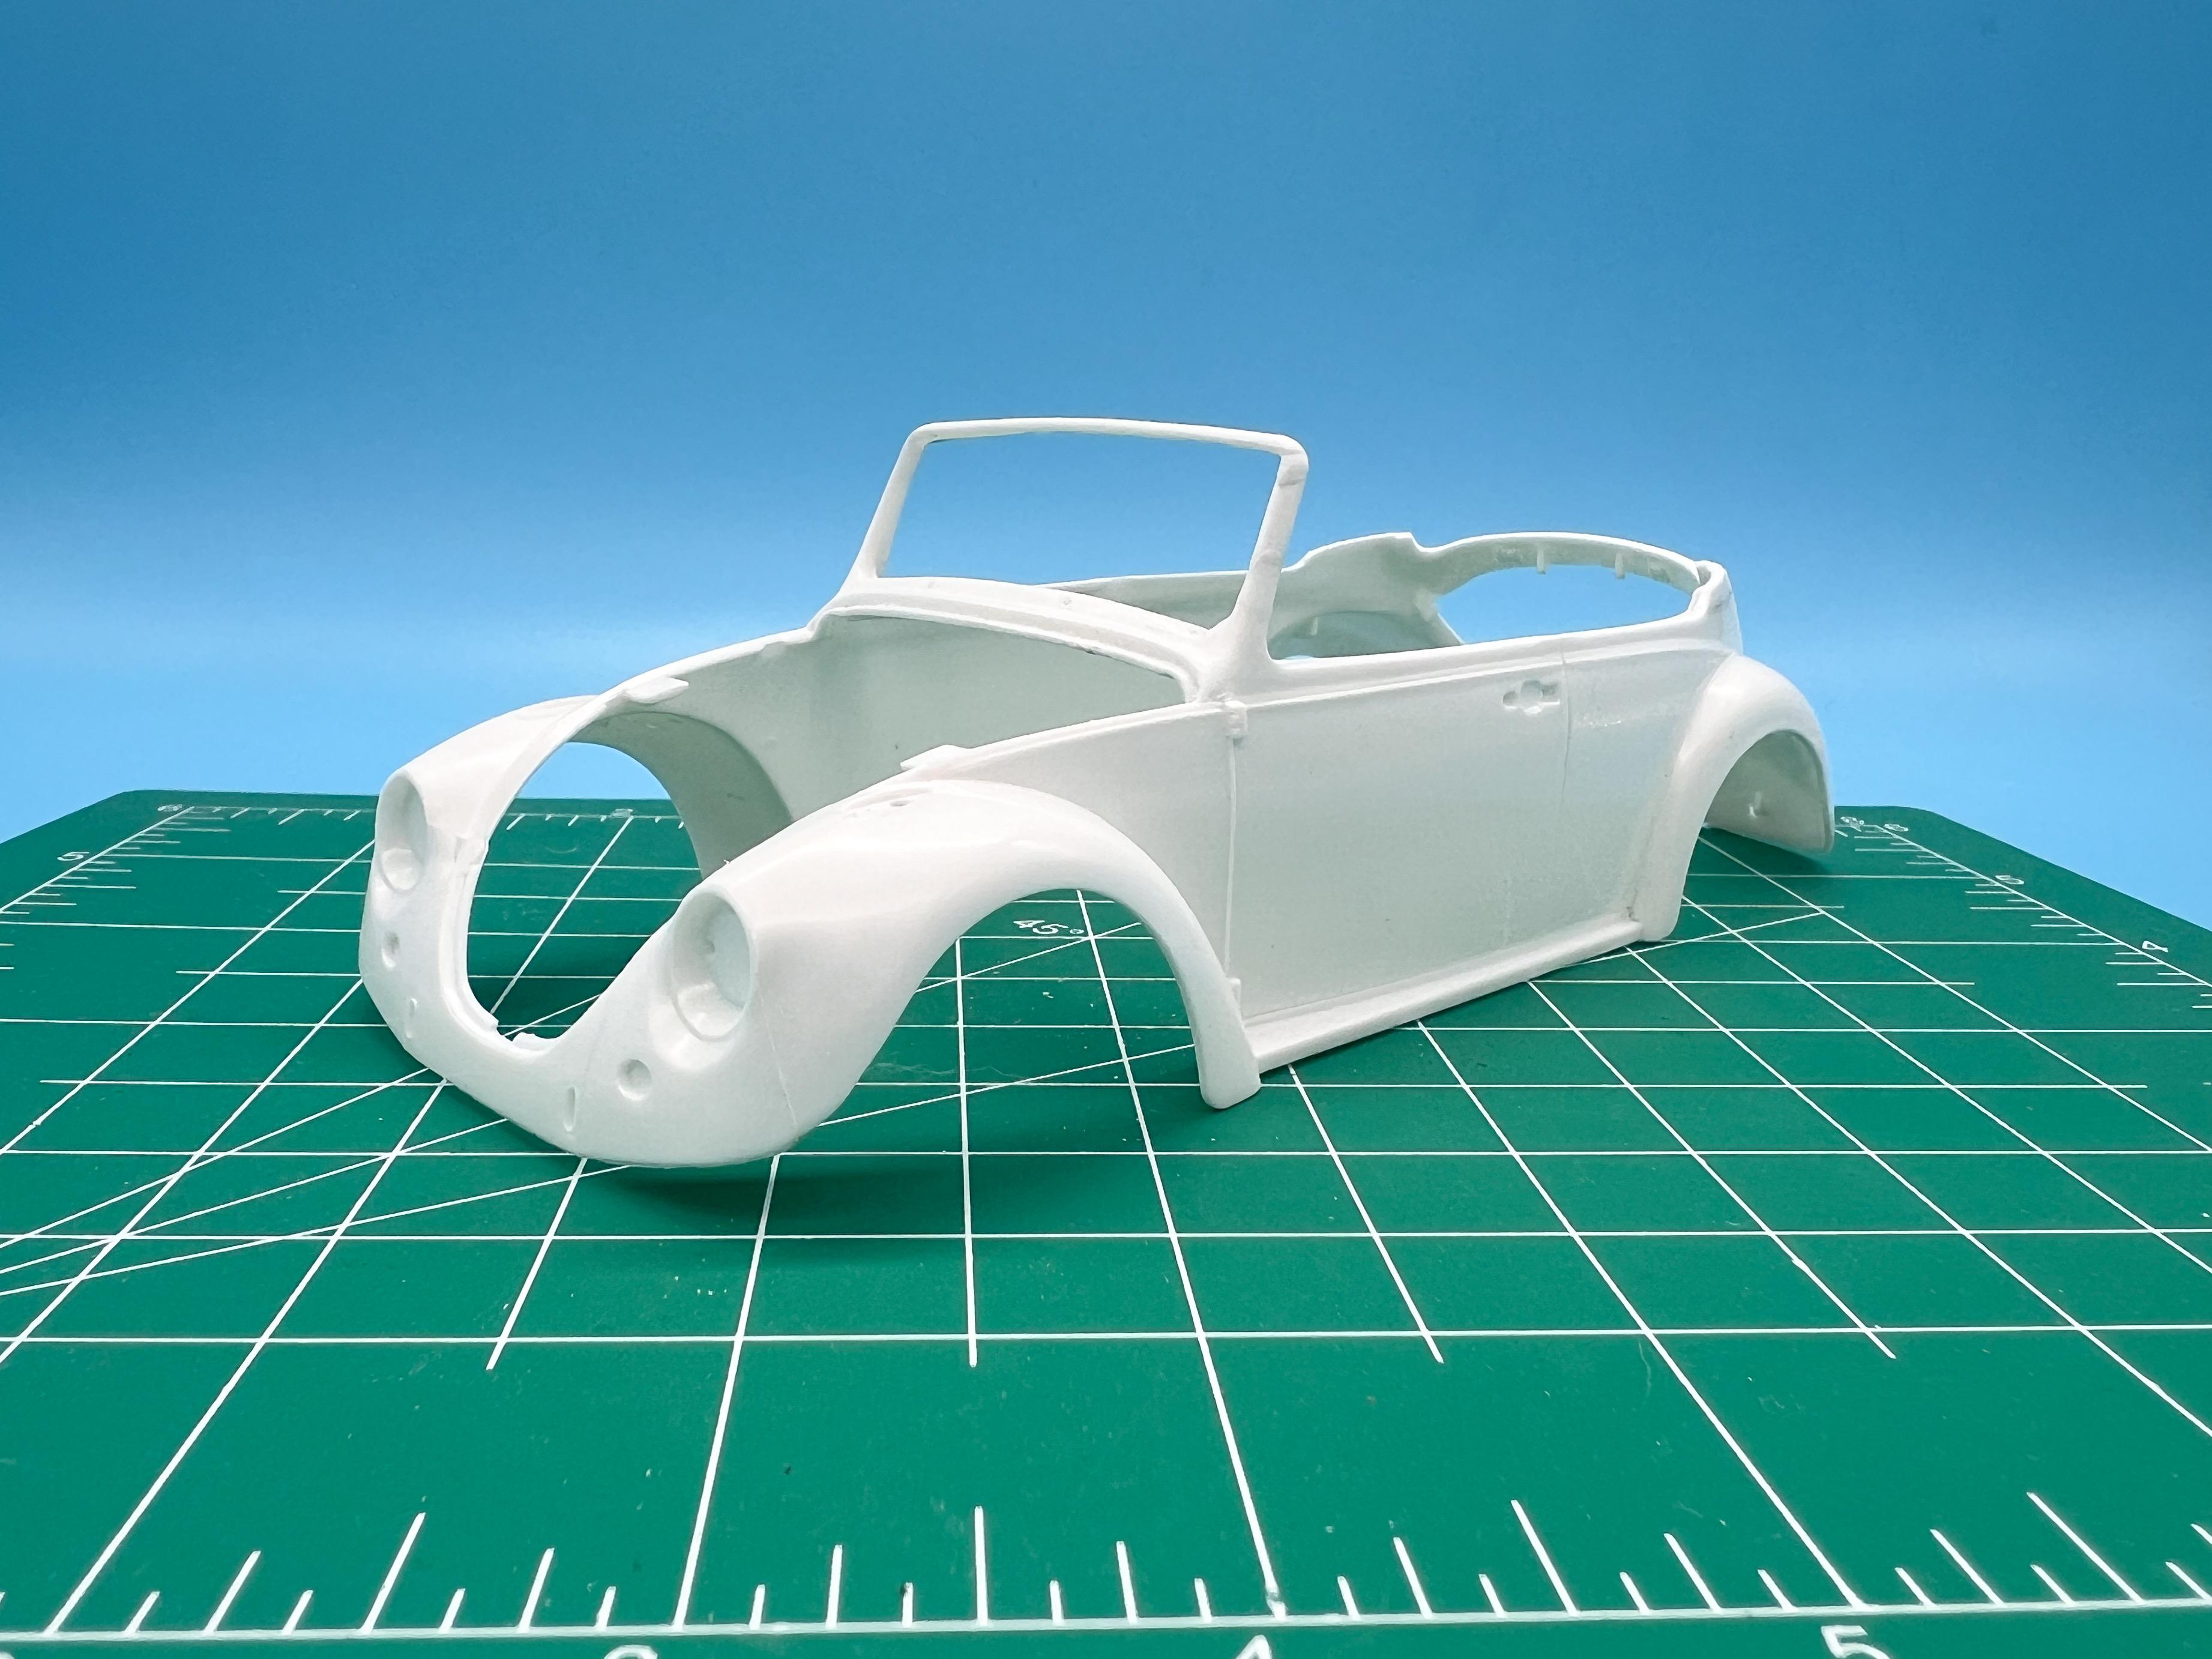
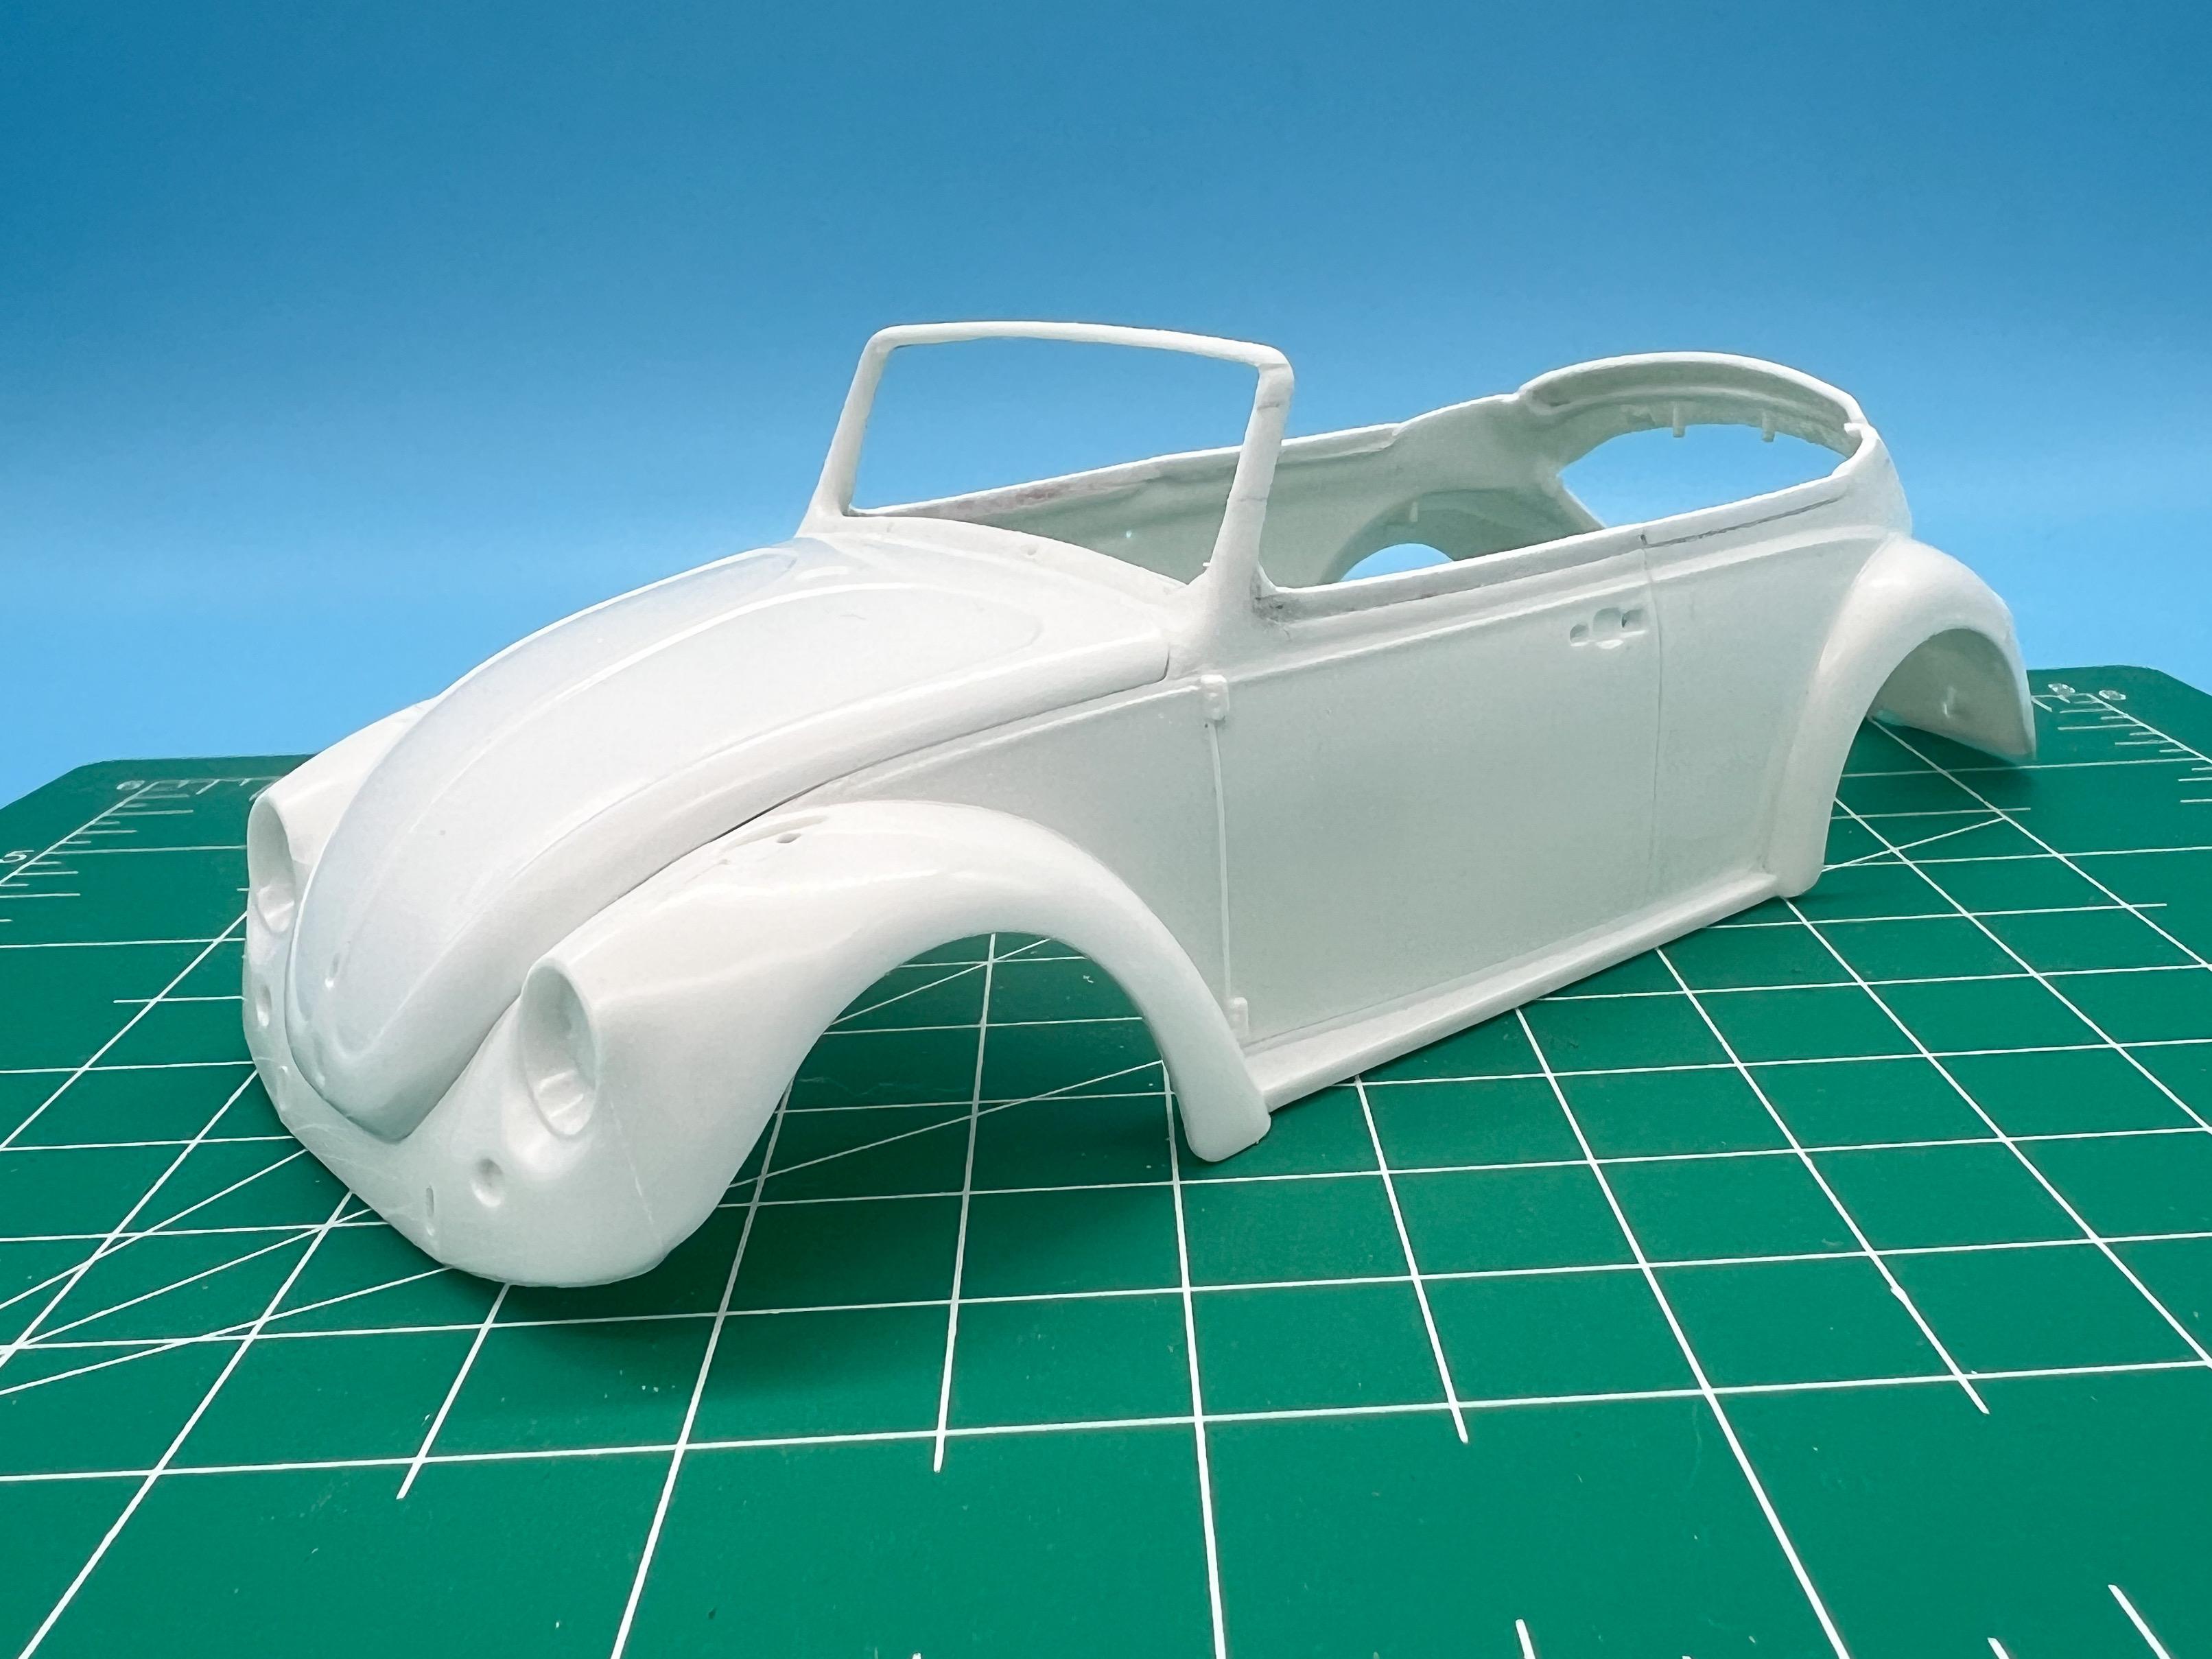
So, I started a drop-top Bug build earlier in the year and got REALLY close to finishing it but there were three or four little things bothering me about it, and I had three or four more ideas on things I could do…but I really didn’t want to ruin the work I had done on it already. I’m still kinda nibbling away at it but I wanted to try a version with a ‘clean slate’ too. Luckily, styrene is cheap(ish) so I’m going to do just that…picked this up from the Lobby of Hobby for under $10 a while back… Now, clearly, this is the sedan version - but I like how these kits go together (they practically FALL together, in fact) and it was cheap enough I won’t be mad if I ruin it… First up - roof chop! I’m really not any kind of a Beetle expert, and I doubt I’ll ever become one - there’s so many subtle variations between different models that it’s tough to keep track of them all…but an obvious difference between the regular sedan bodies and the drop tops is the height of the belt line and the shape and height of the top of the windshield: So, first step on this project was separating the pillars from the body, adding some super-thin gauge steel rod for strength and reassembling with a flatter top piece: I need to add back in the rubber gasket detail that I’m missing here, which makes the frame look too large…but first, I added some height to the doors to more accurately reflect how the 1:1 drop tops look: Only just getting started on this one the last couple of nights, and obviously plenty to do…I’m sure I’ll make some mistakes that will jump out to VW aficionados but this won’t be a stock build by a long-shot anyway so hopefully I have some wiggle room…next job will be squaring off the top of those pillars and adding whatever you see from the top view… Thanks for looking - more soon!
-
That’s a great color!
-
Thanks everyone! I did try something similar to that but couldn't quite nail it - still ended up with a visible seam, just on the pillar itself...more practice needed!! Wrapped this one up and shot a few pics - probably not work it's own 'Under Glass' thread...thanks for following along! Onto the next one!
-
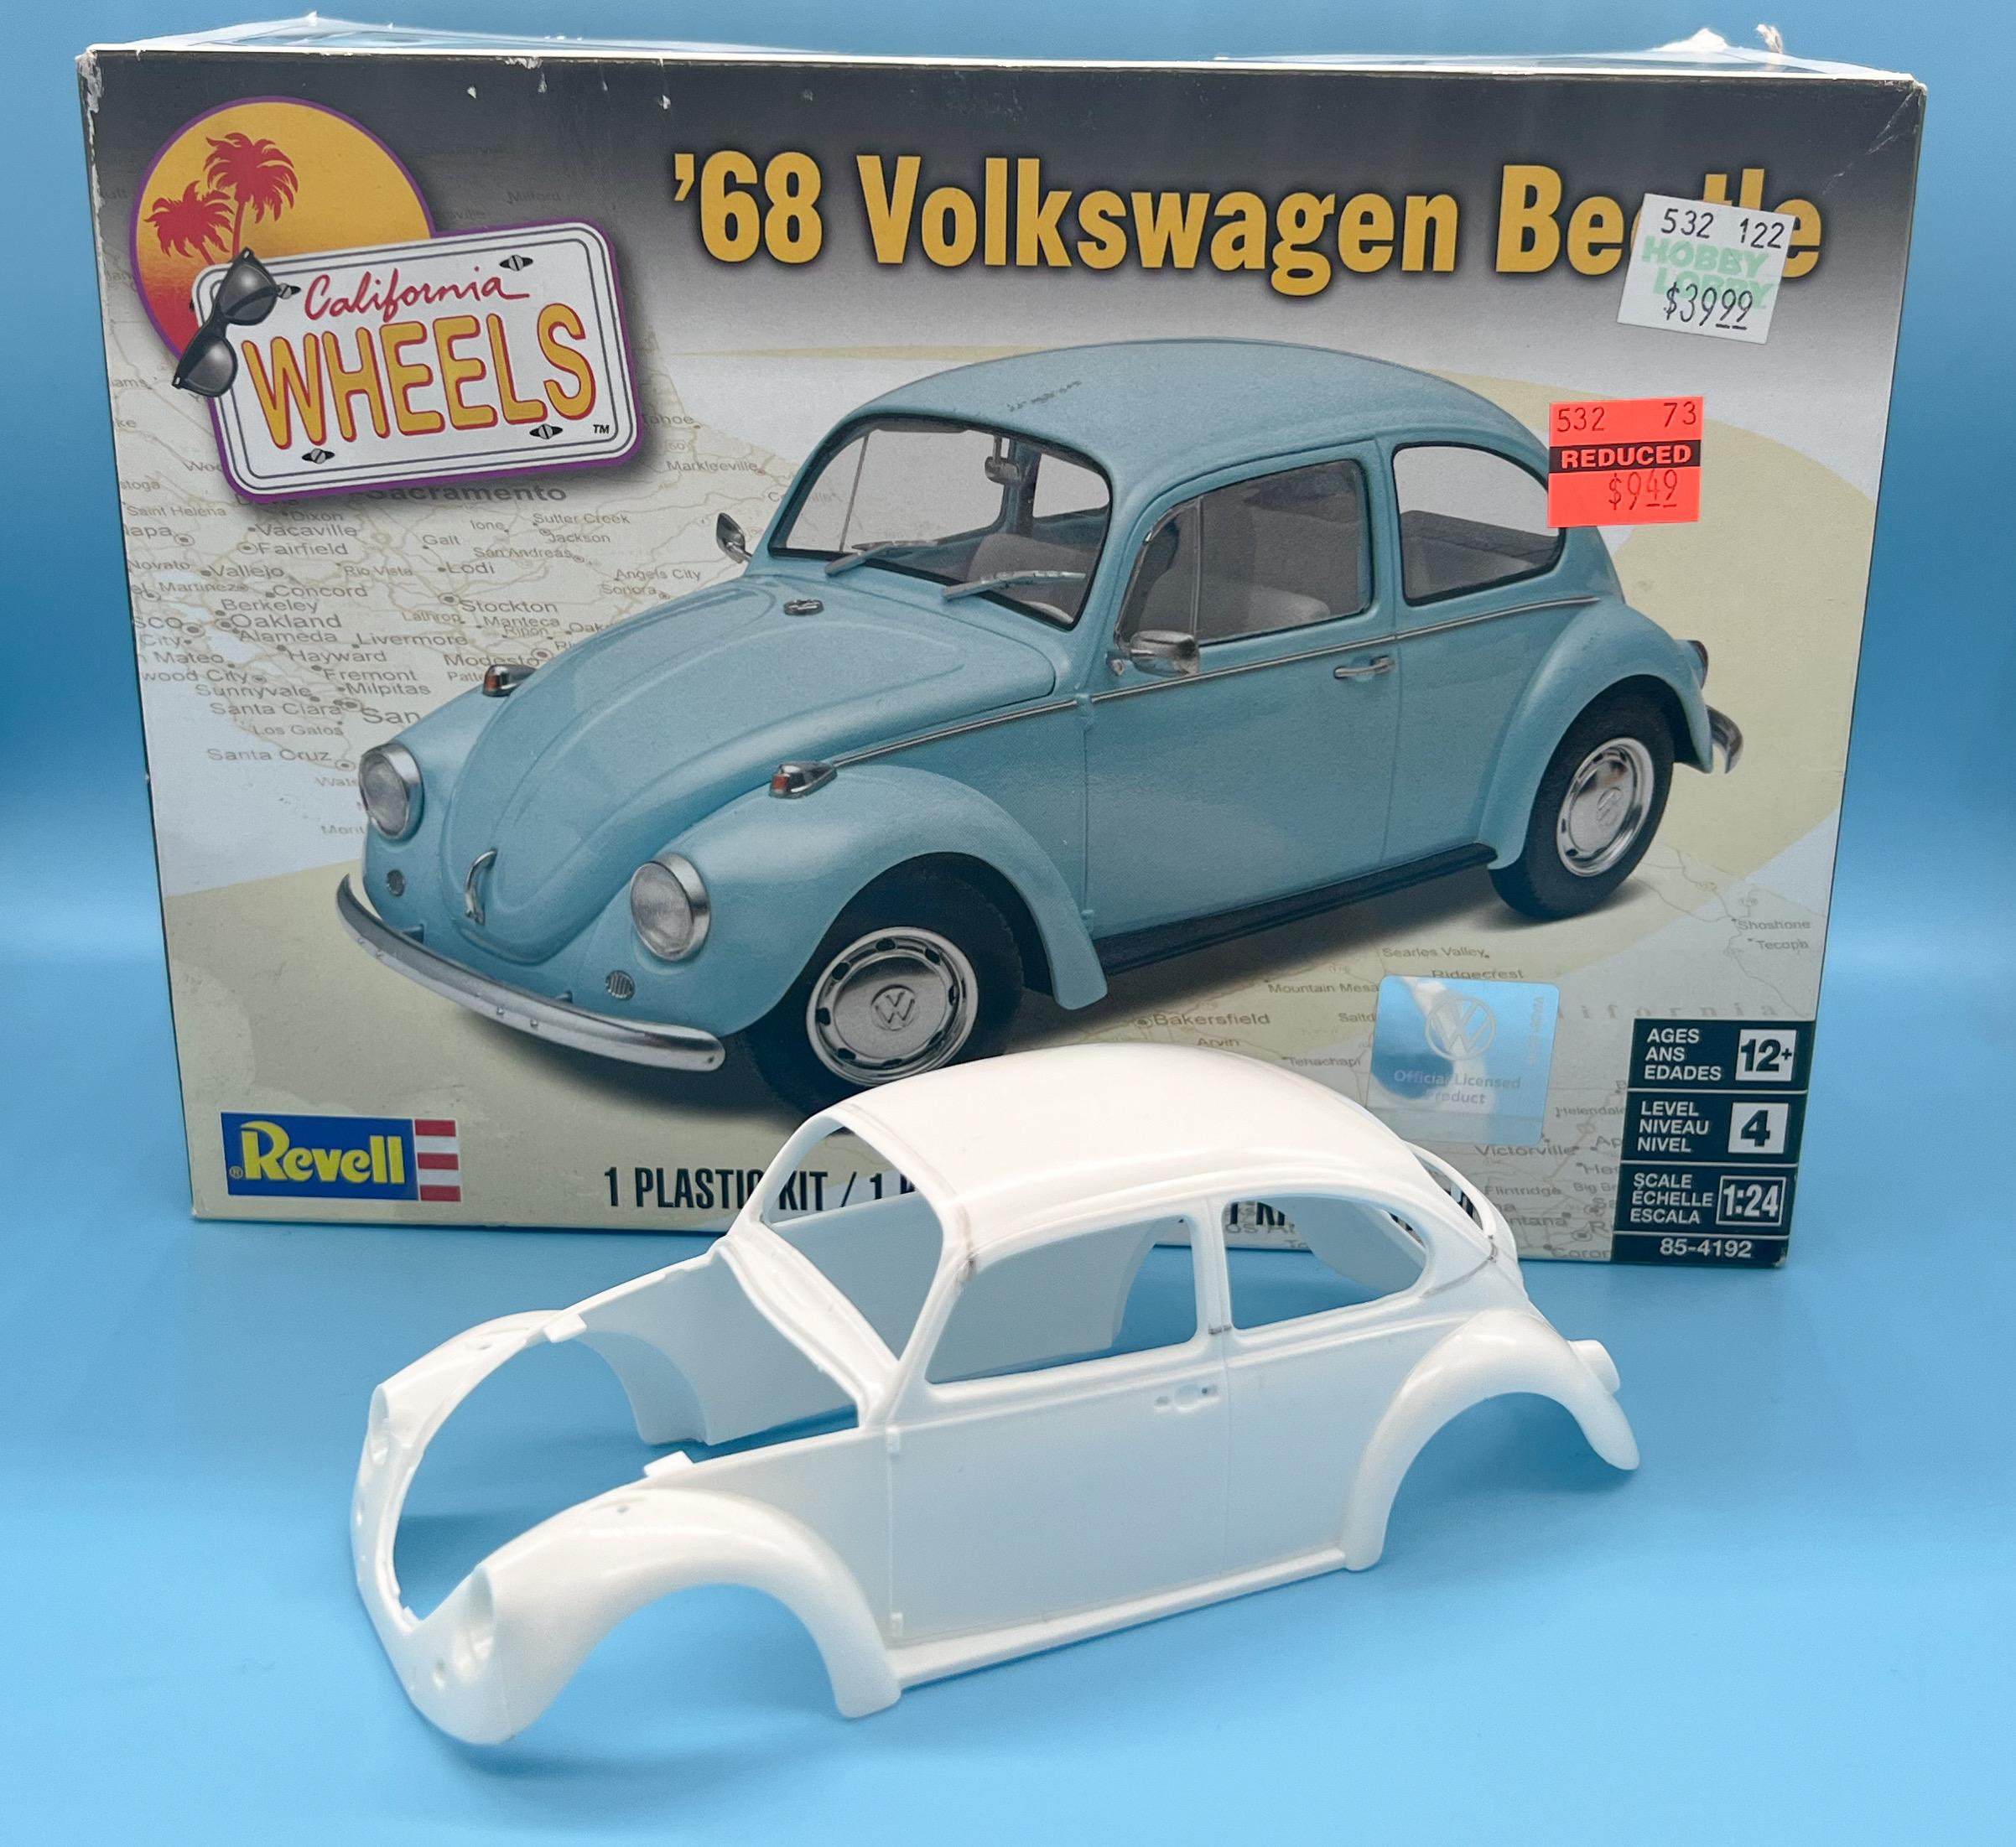
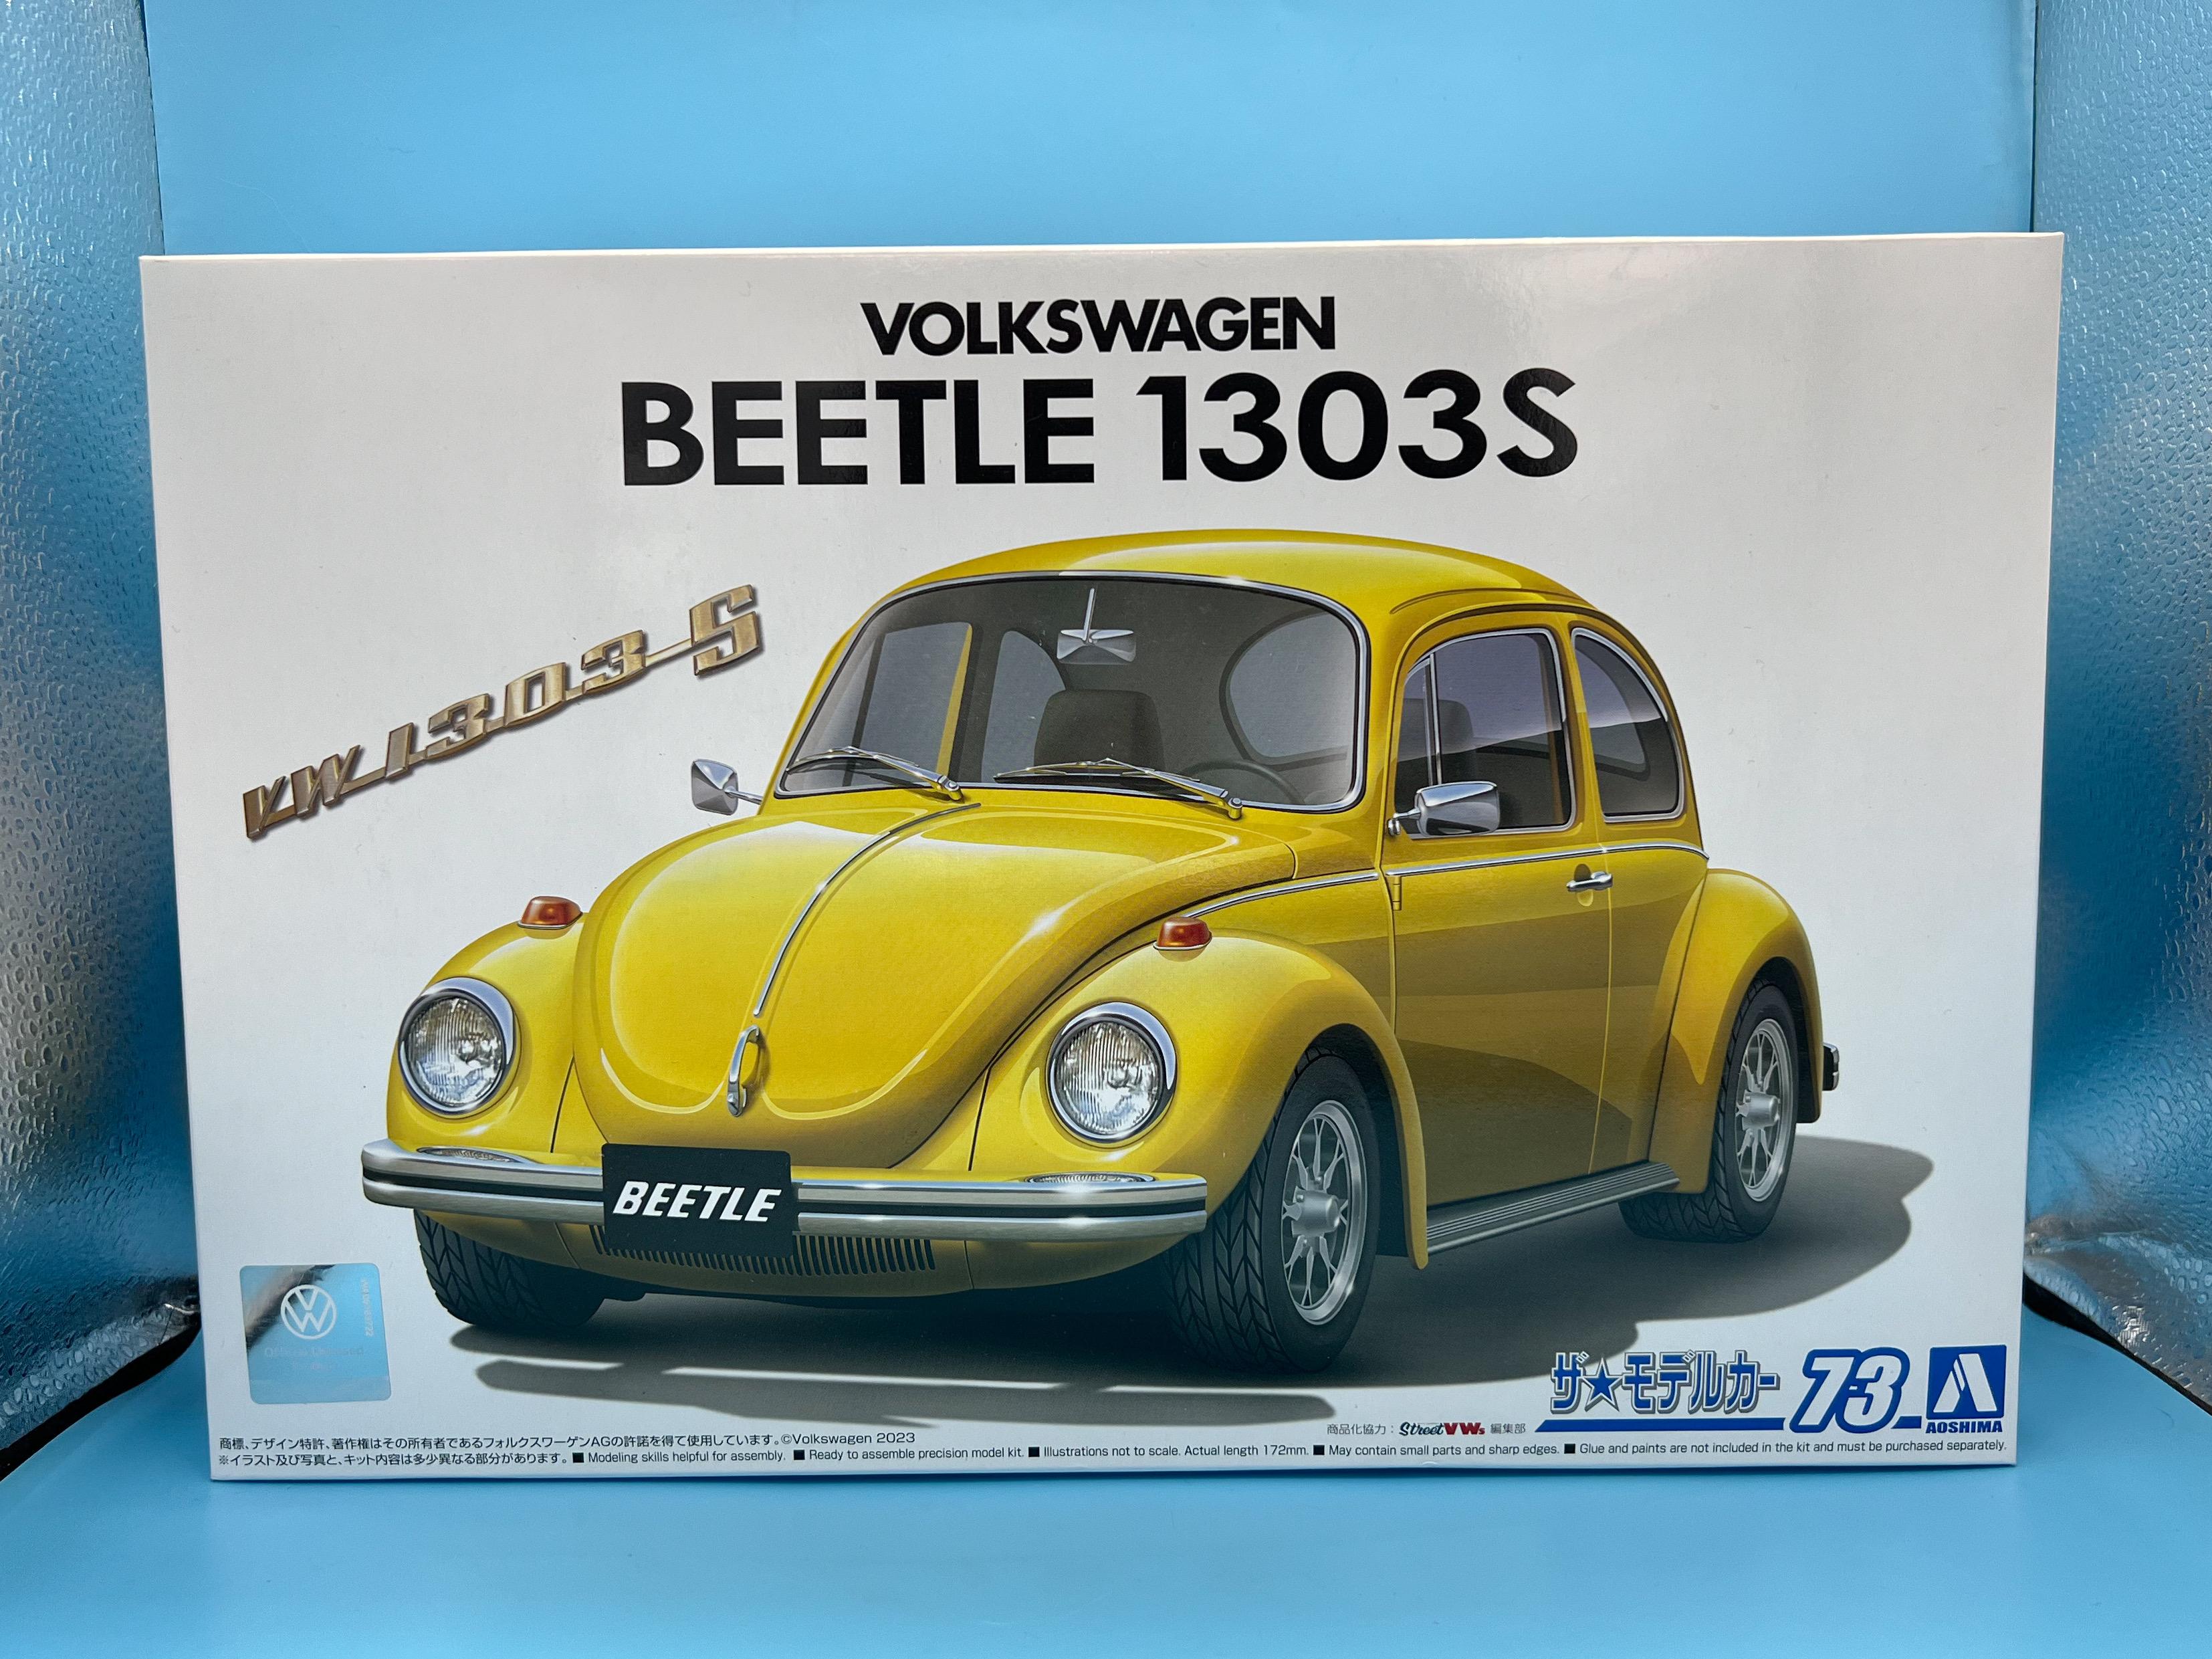
And today’s stash addition… It’s not a particularly amazing kit, but I’m casually collecting Beetle and VW kits and it was only $18 shipped on Amazon…I’ll definitely get $18 of fun out of it!
- 38,867 replies
-
- 3
-

-
- johan
- glue bombs
- (and 1 more)
-
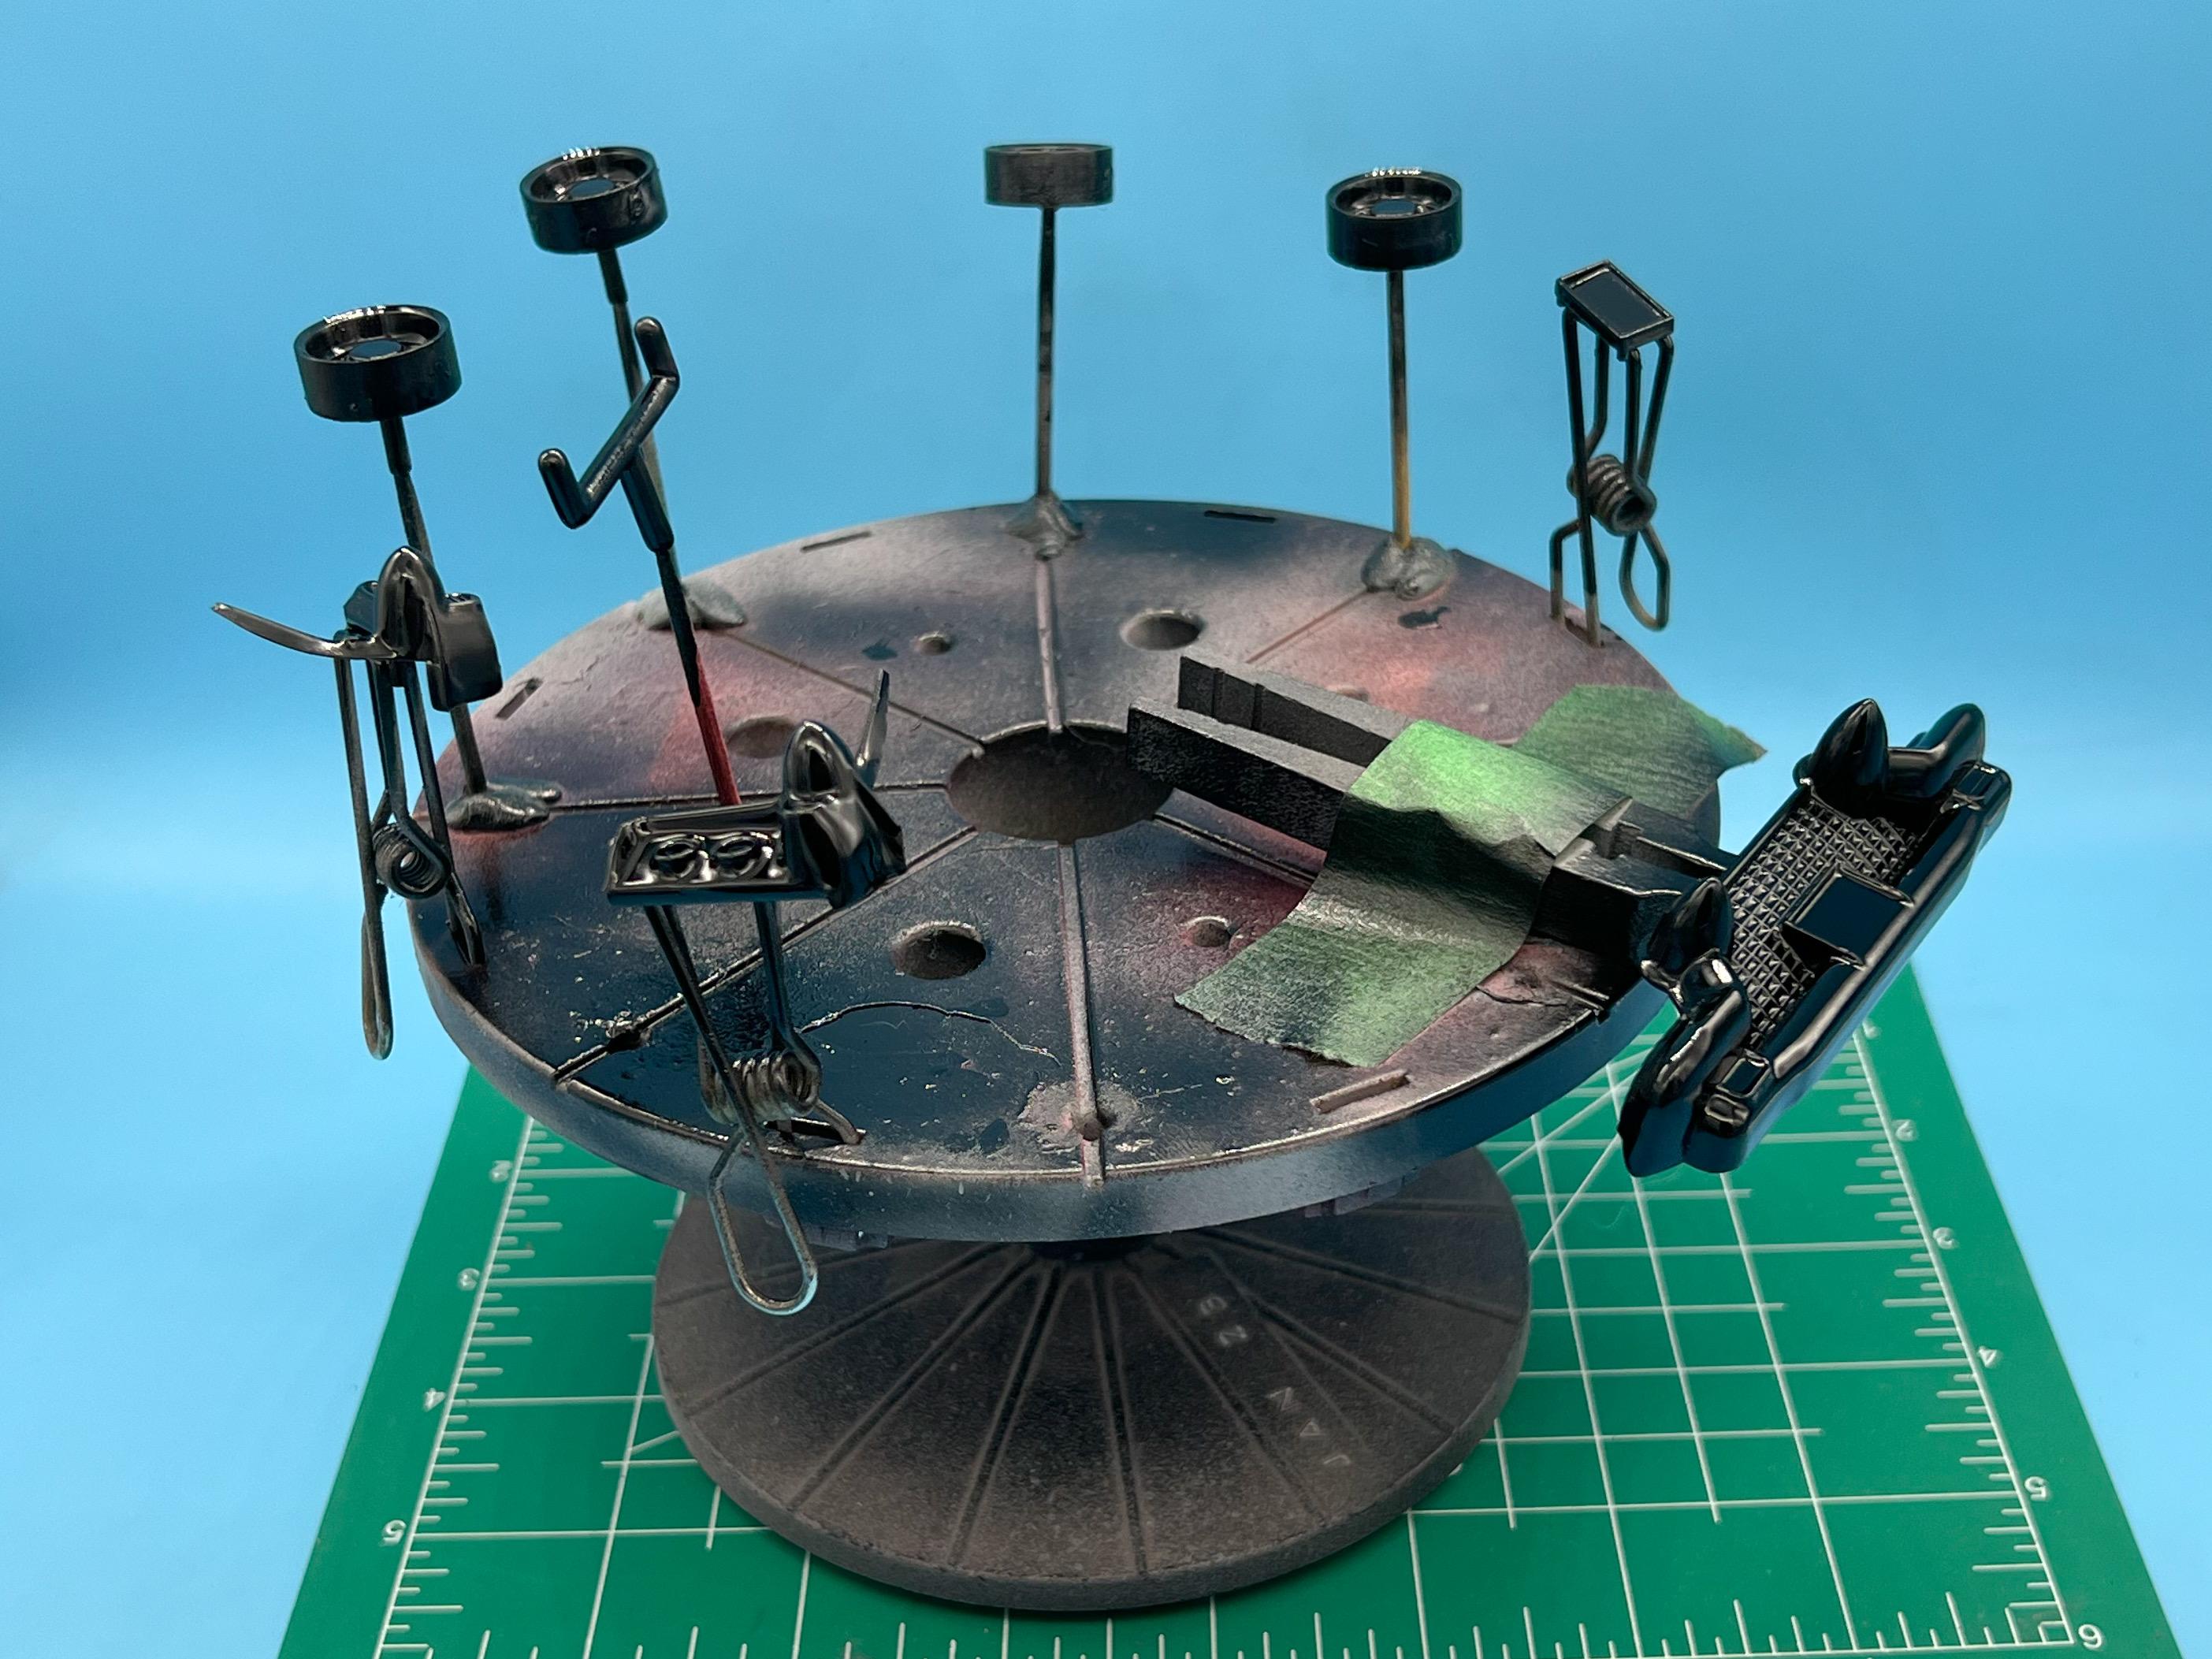
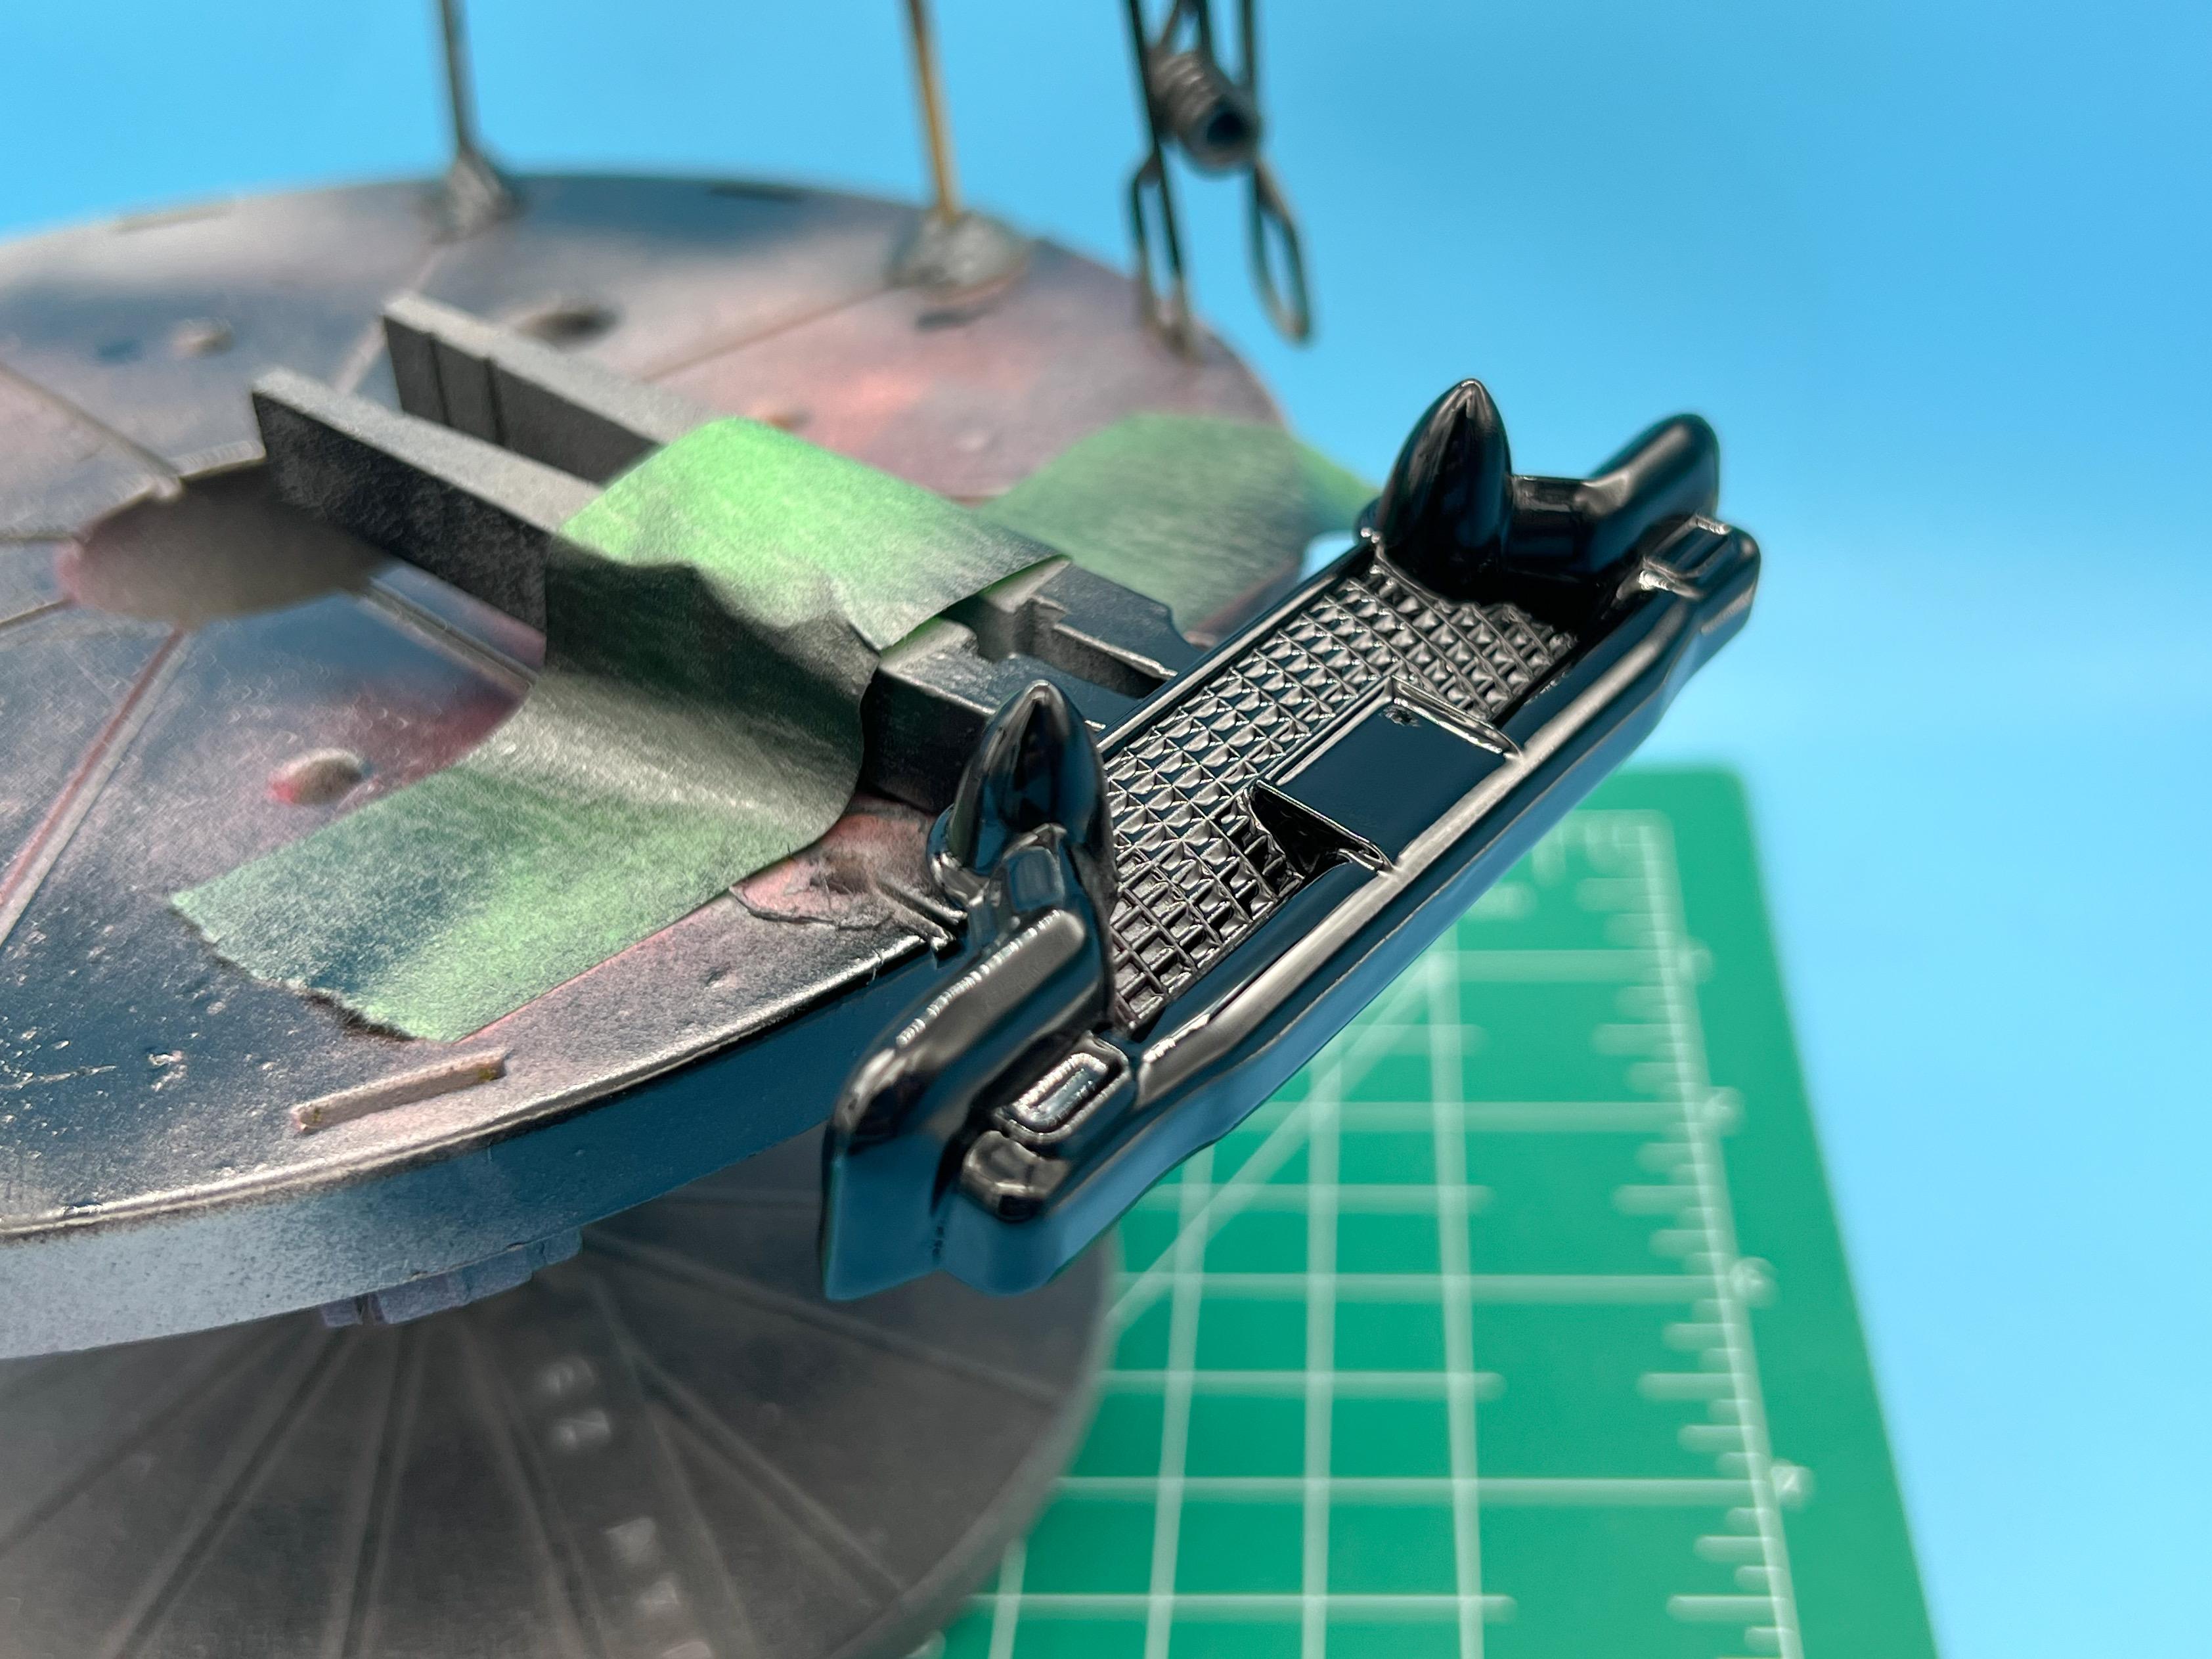
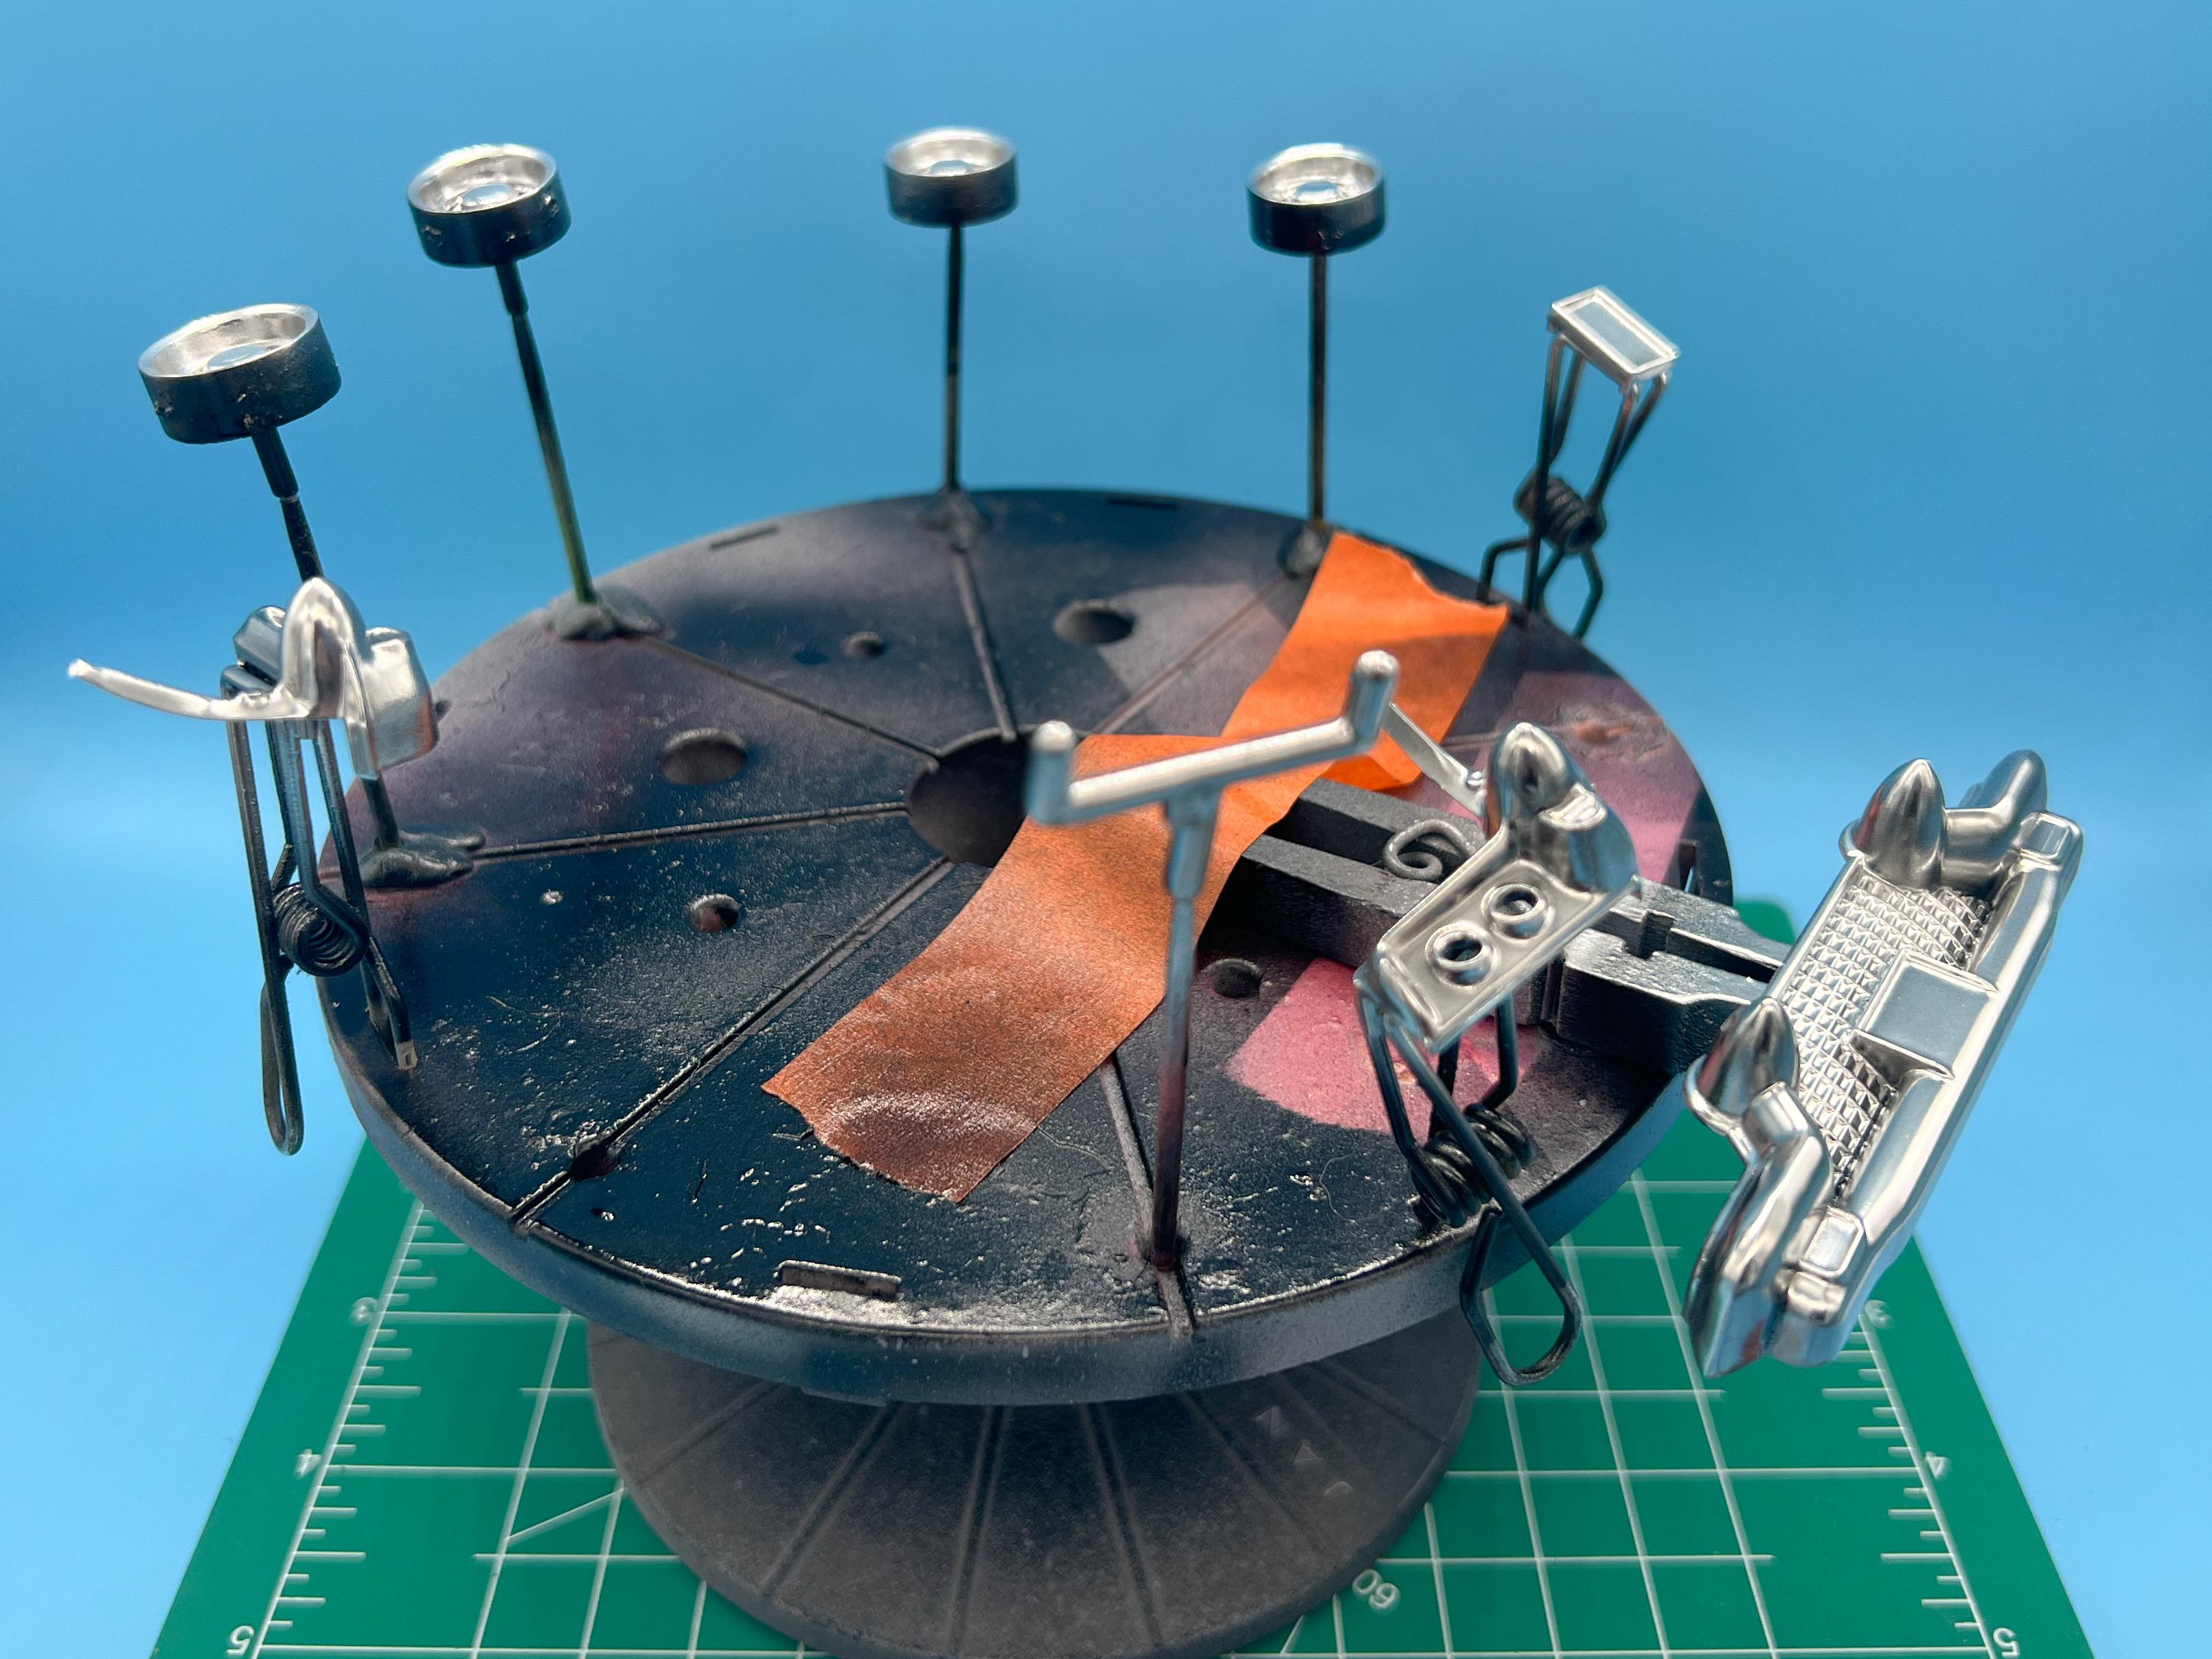
One of my favorite things is parts lots - although I don’t pick them up THAT regularly. Often they’re semi-destroyed built-ups of subjects that don’t interest me, but this little auction lot caught my eye… All kinds of cool little kustom parts - Appleton spotlights, Caddy bullet taillights, custom grills and wheels and AMT mini-trophies…I suspect most of these parts are from AMT kits actually but I’d have no idea which ones… Weeks of fun ahead sorting thru them looking for treasures! ?
- 38,867 replies
-
- 4
-
-
- johan
- glue bombs
- (and 1 more)
-
I saw these kits on Amazon for $24 shipped this weekend - added a couple to my cart, soon as I saw them and it errored when I tried to check out and they’d gone out of stock already…
-
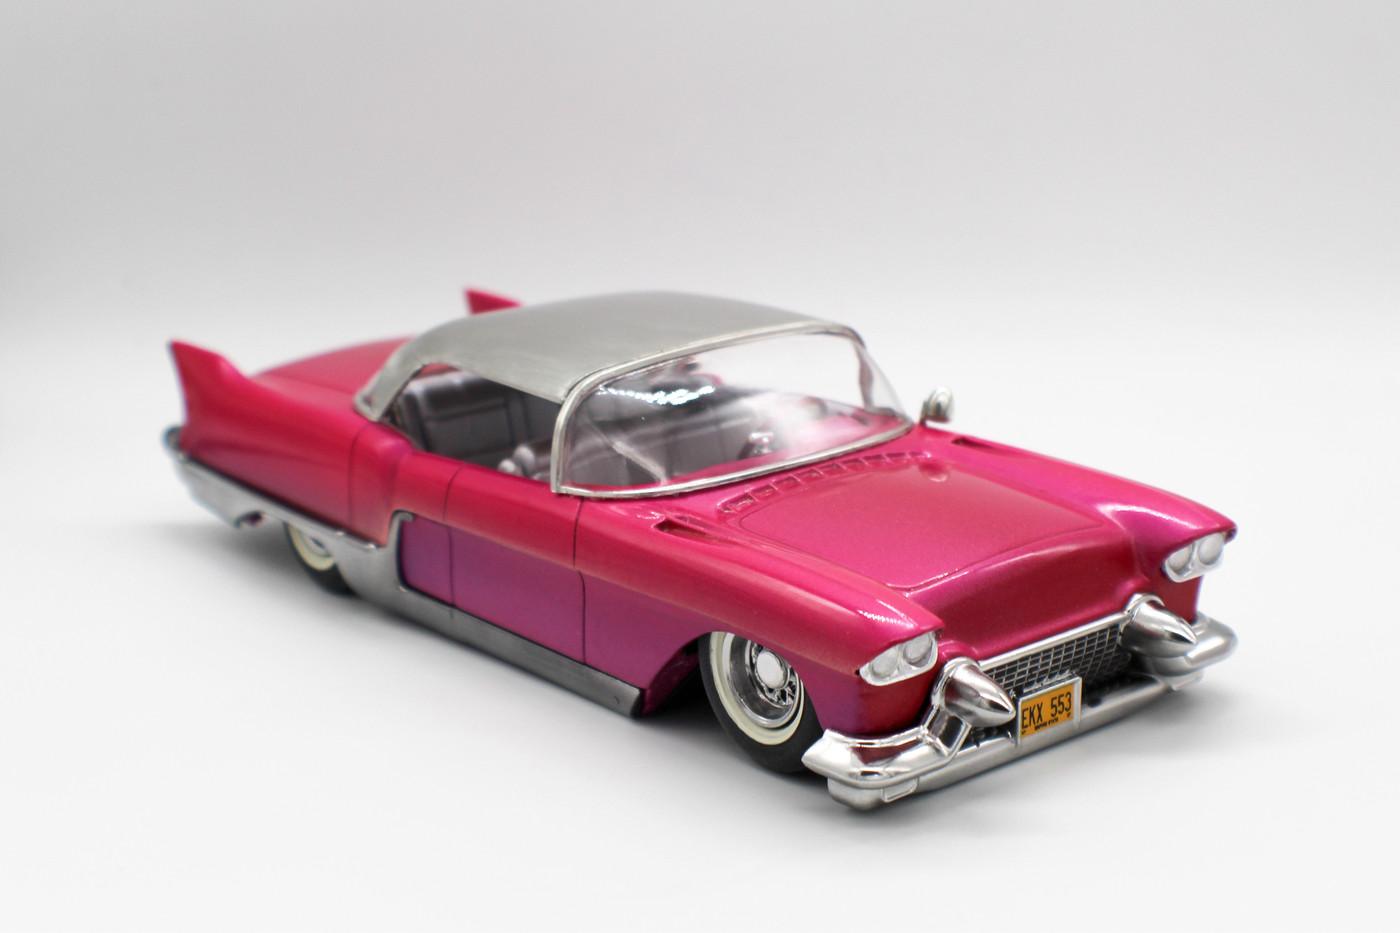
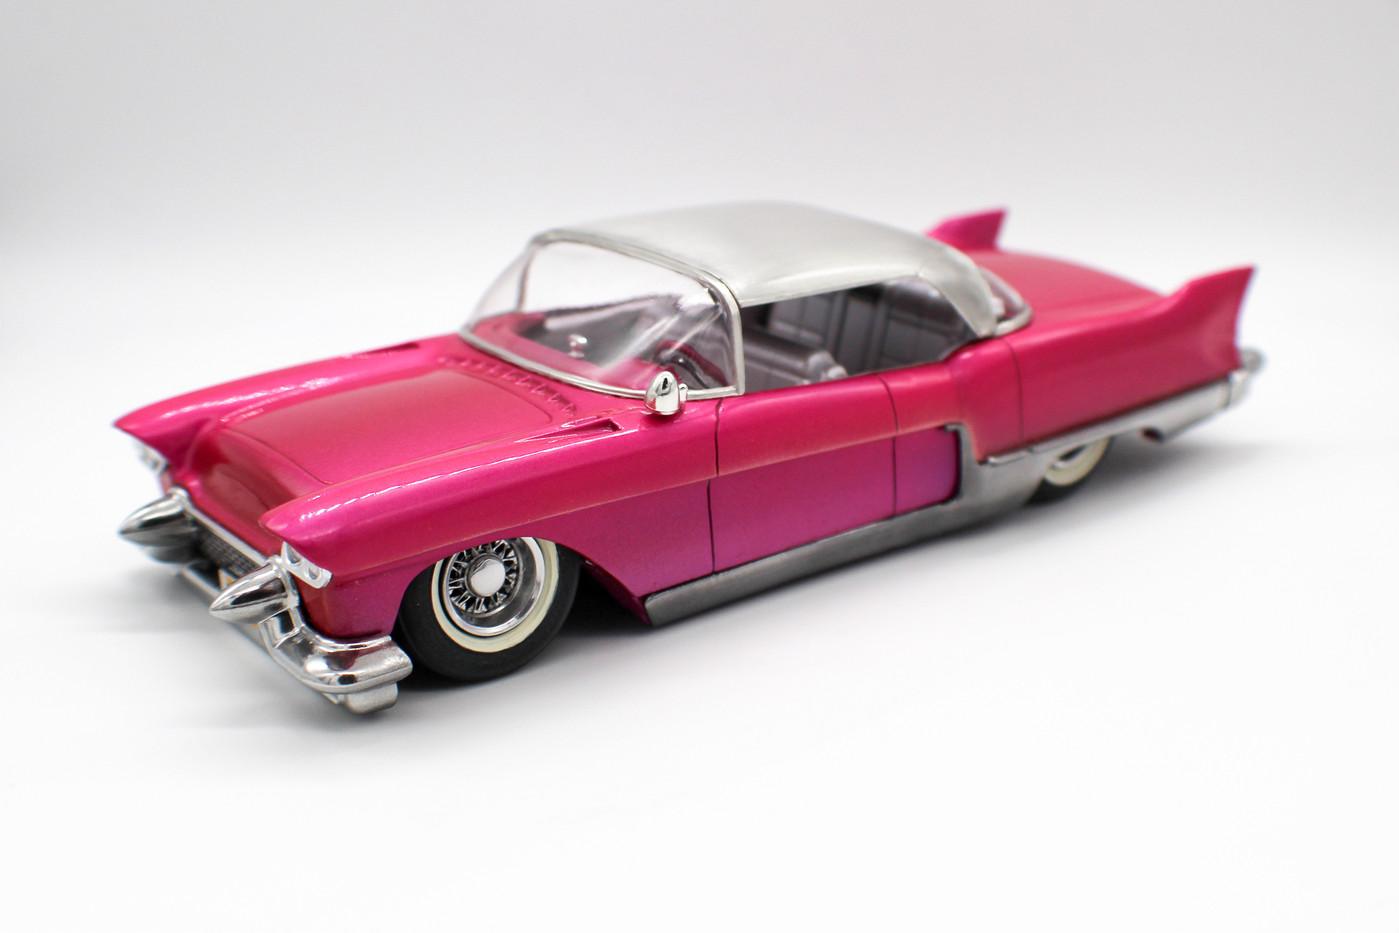
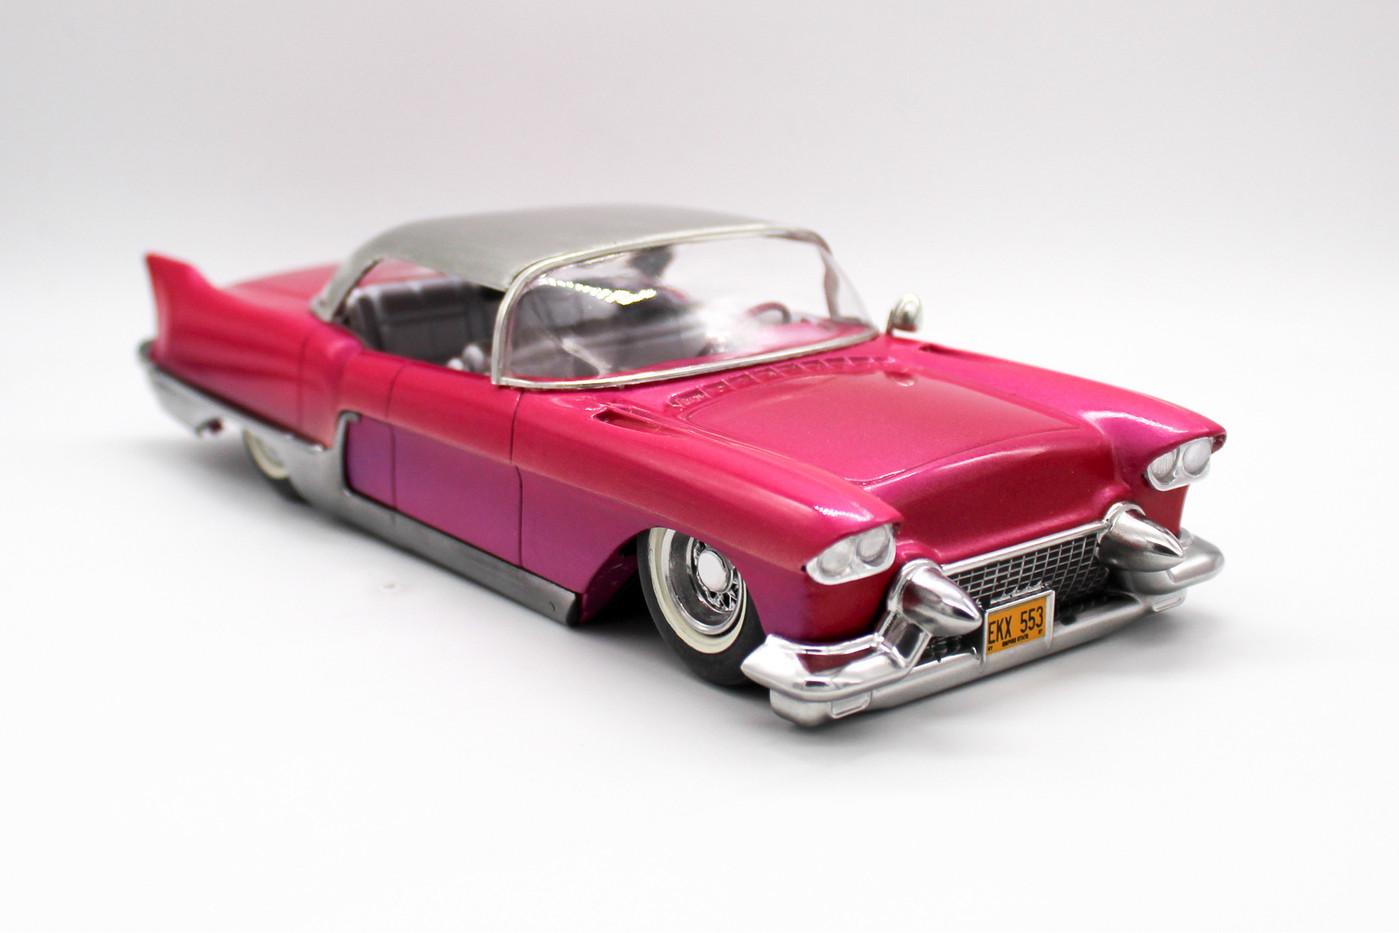
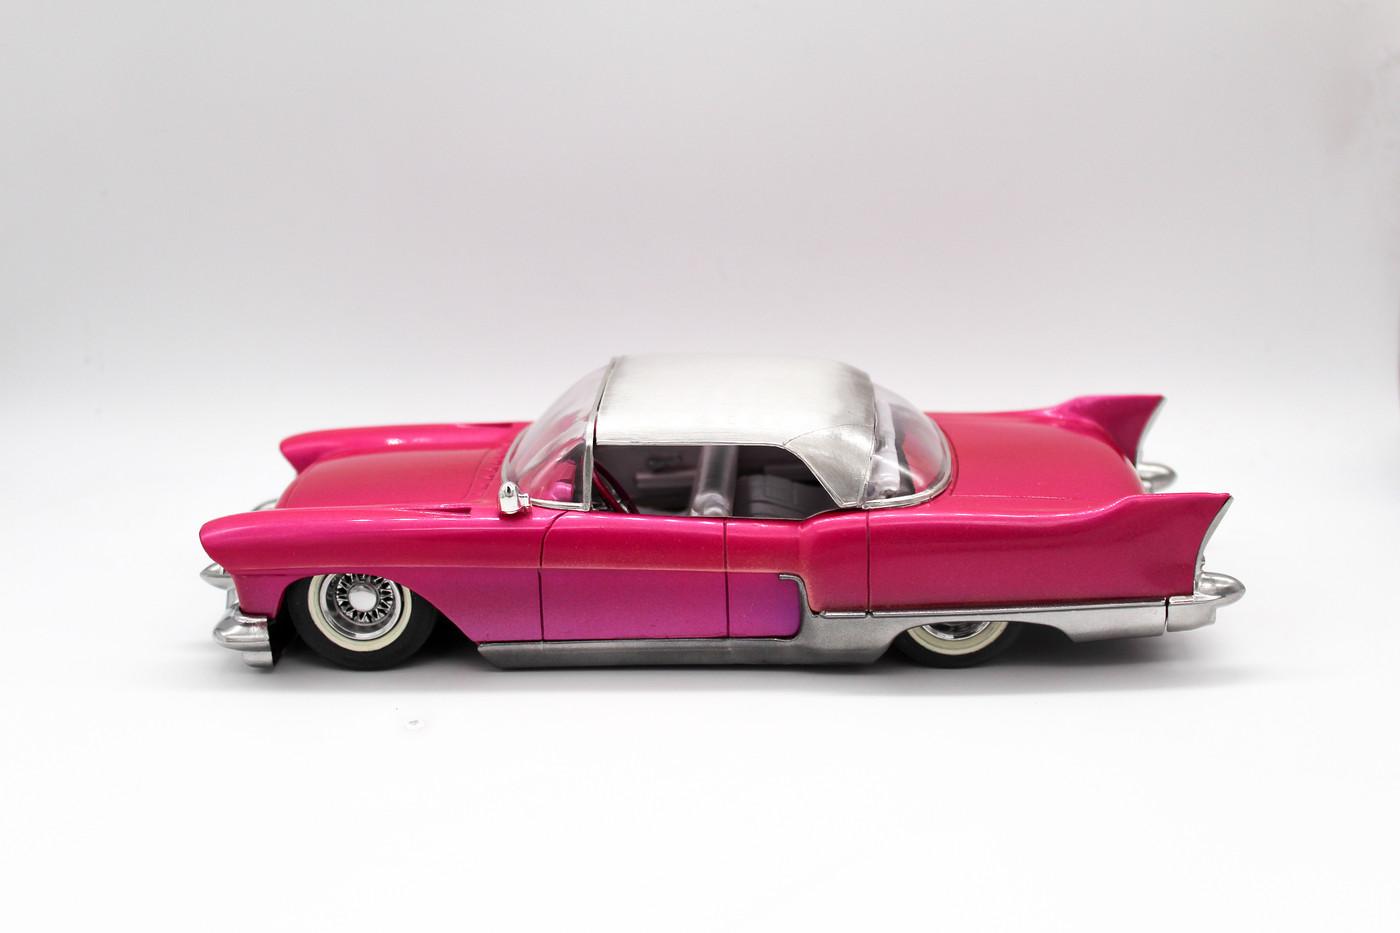
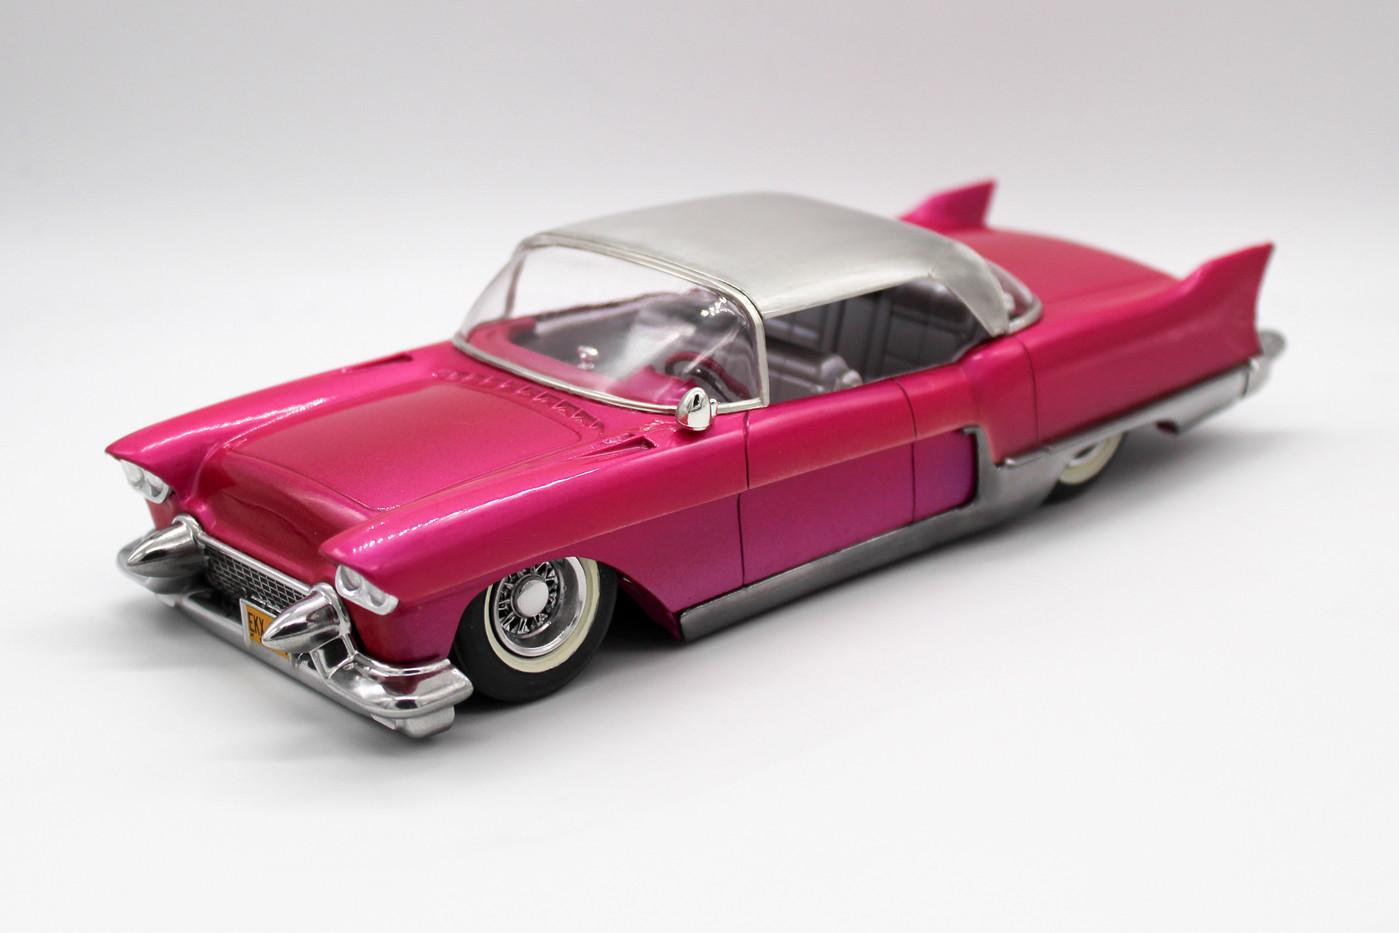
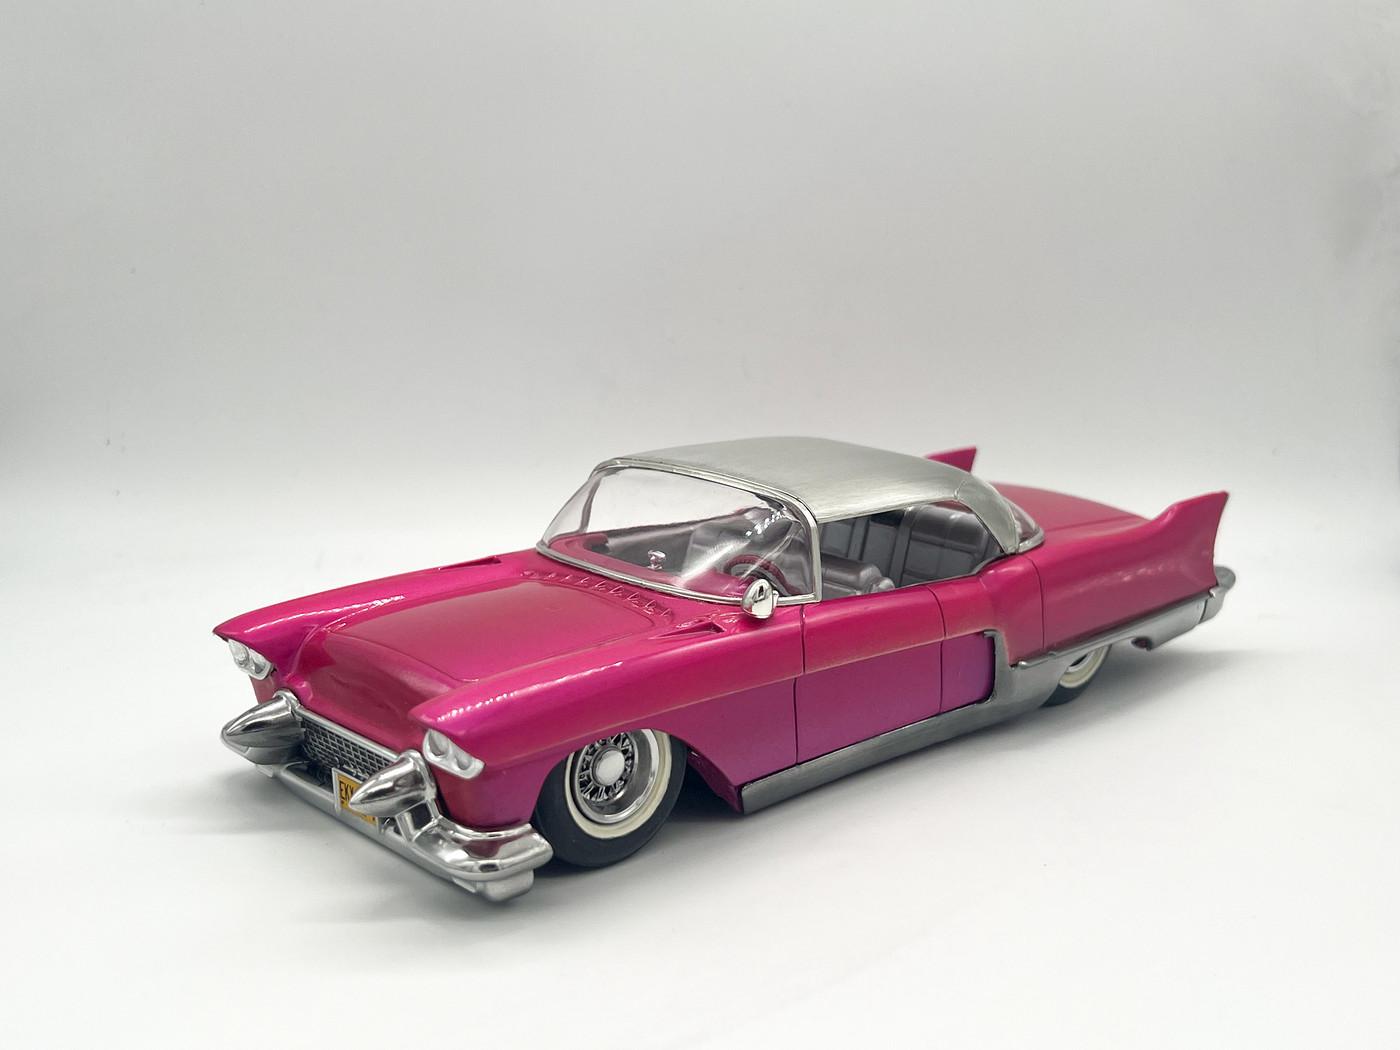
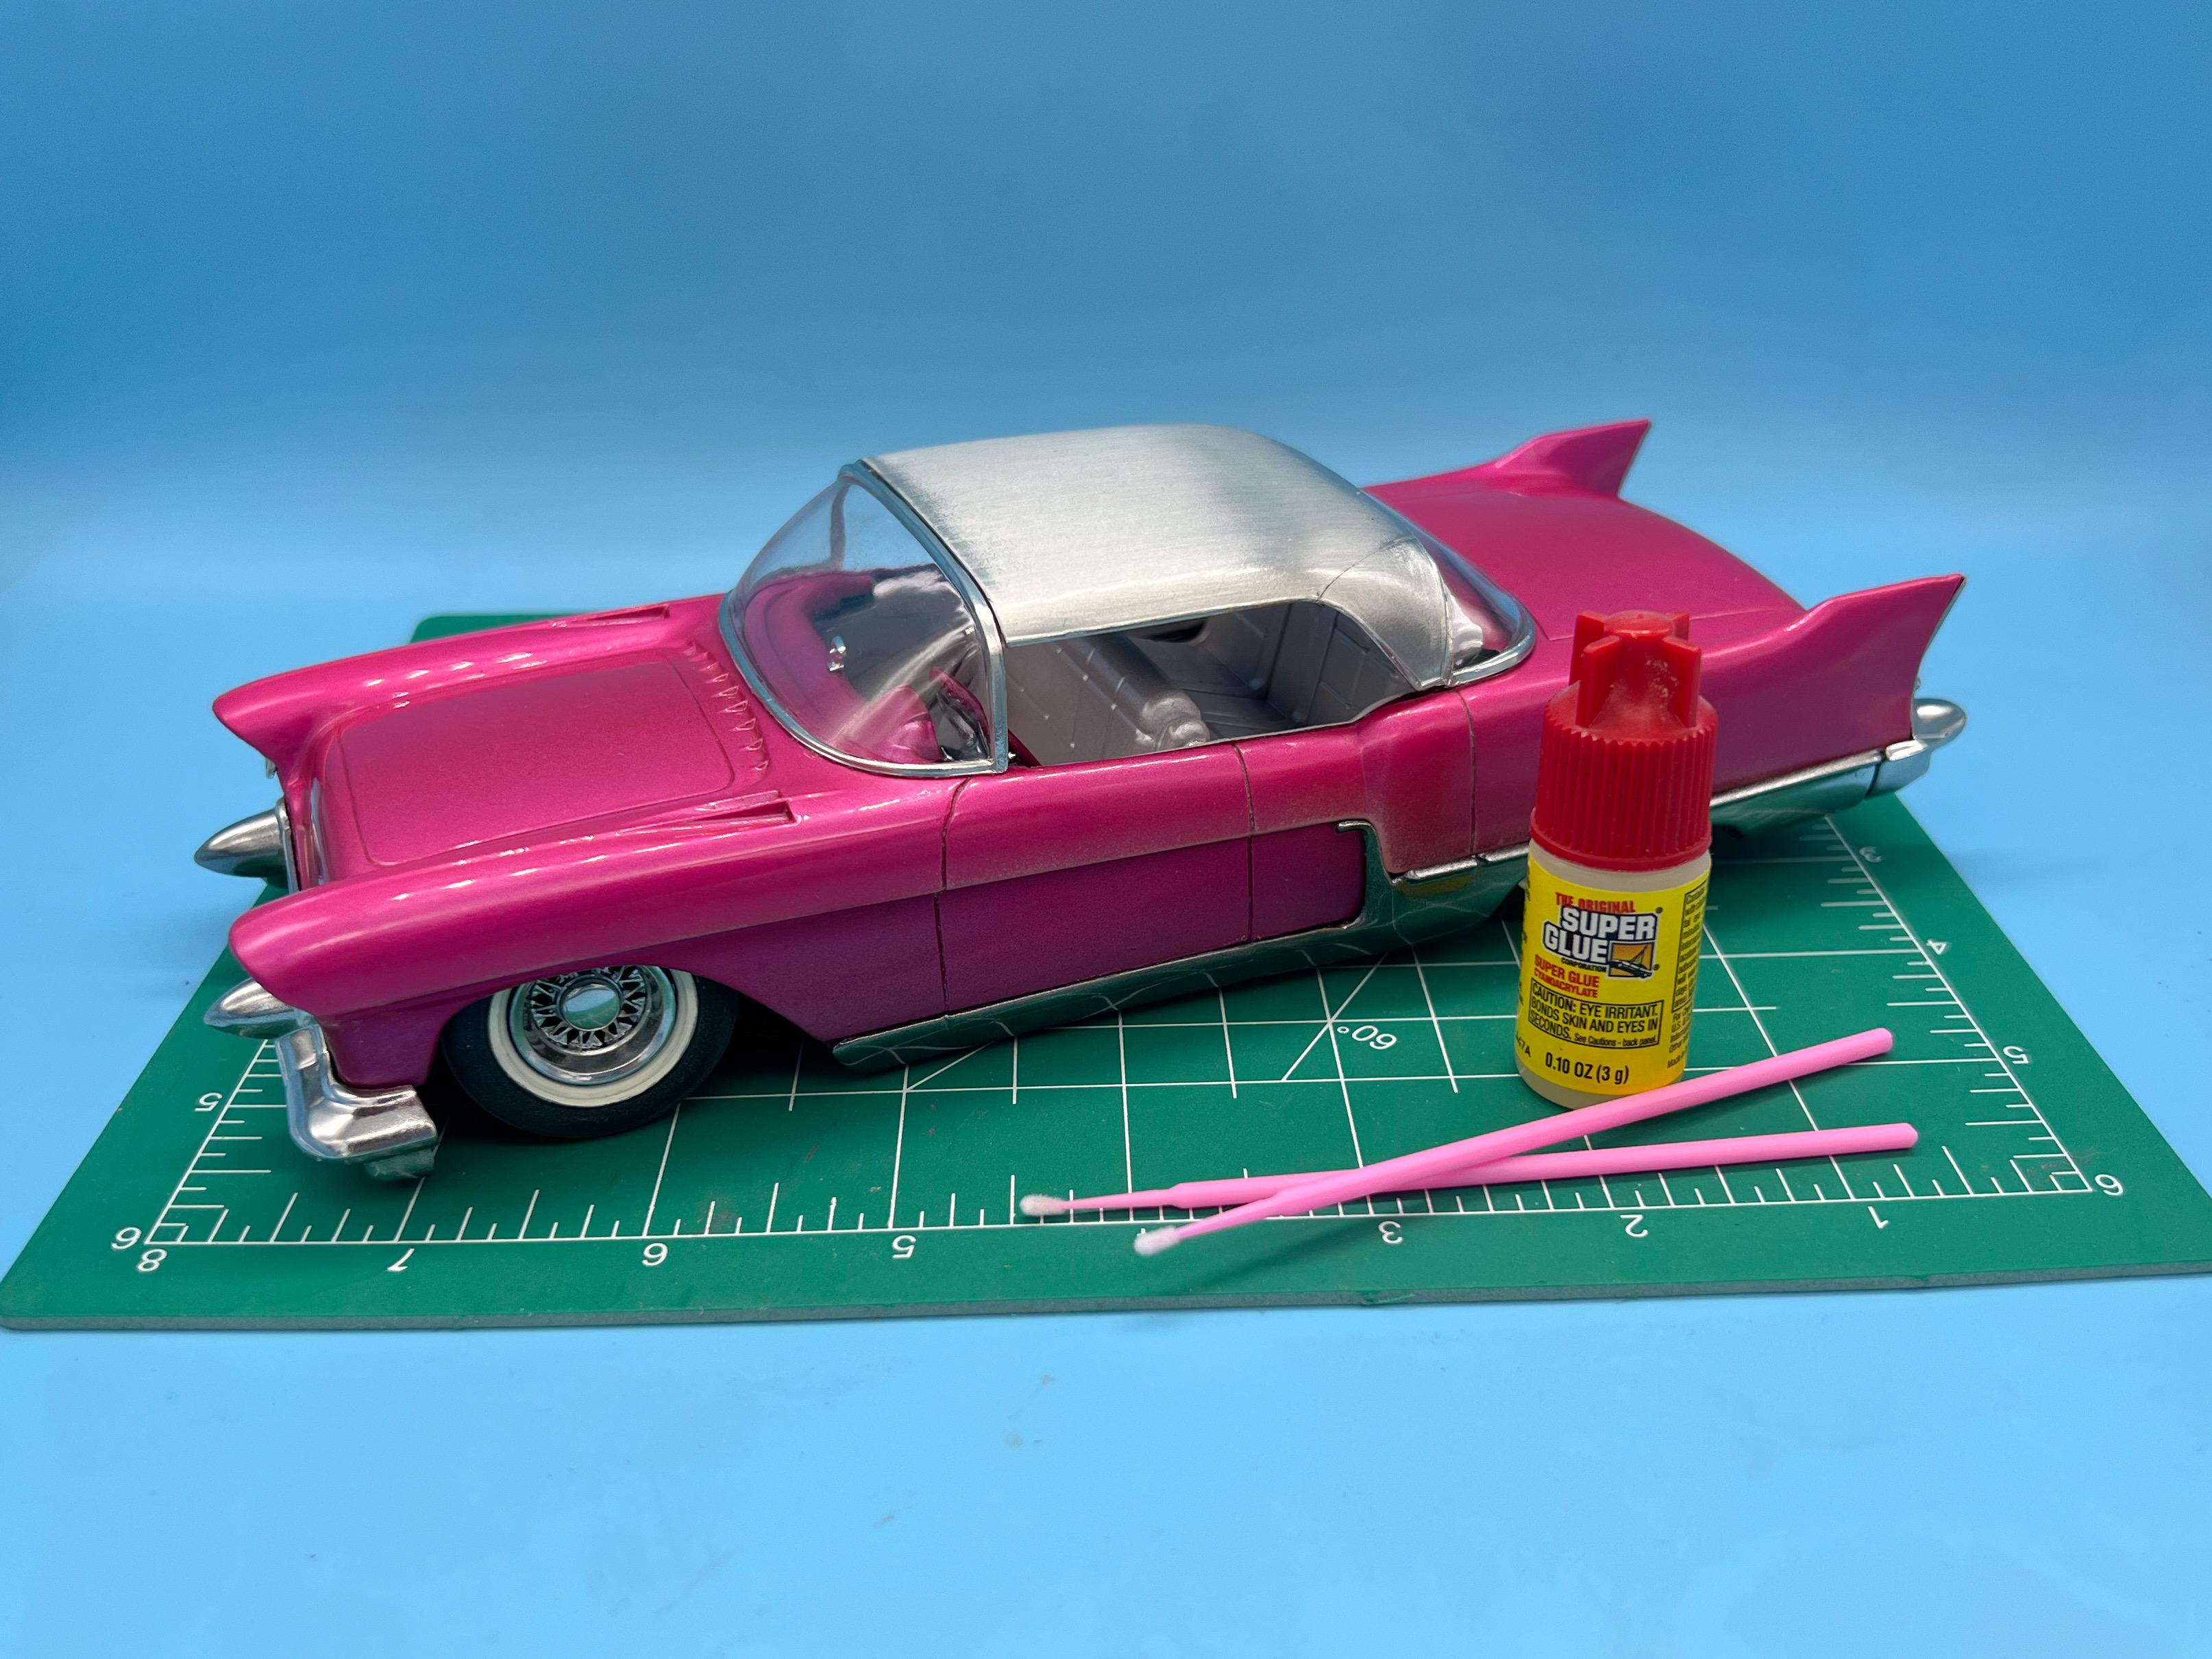
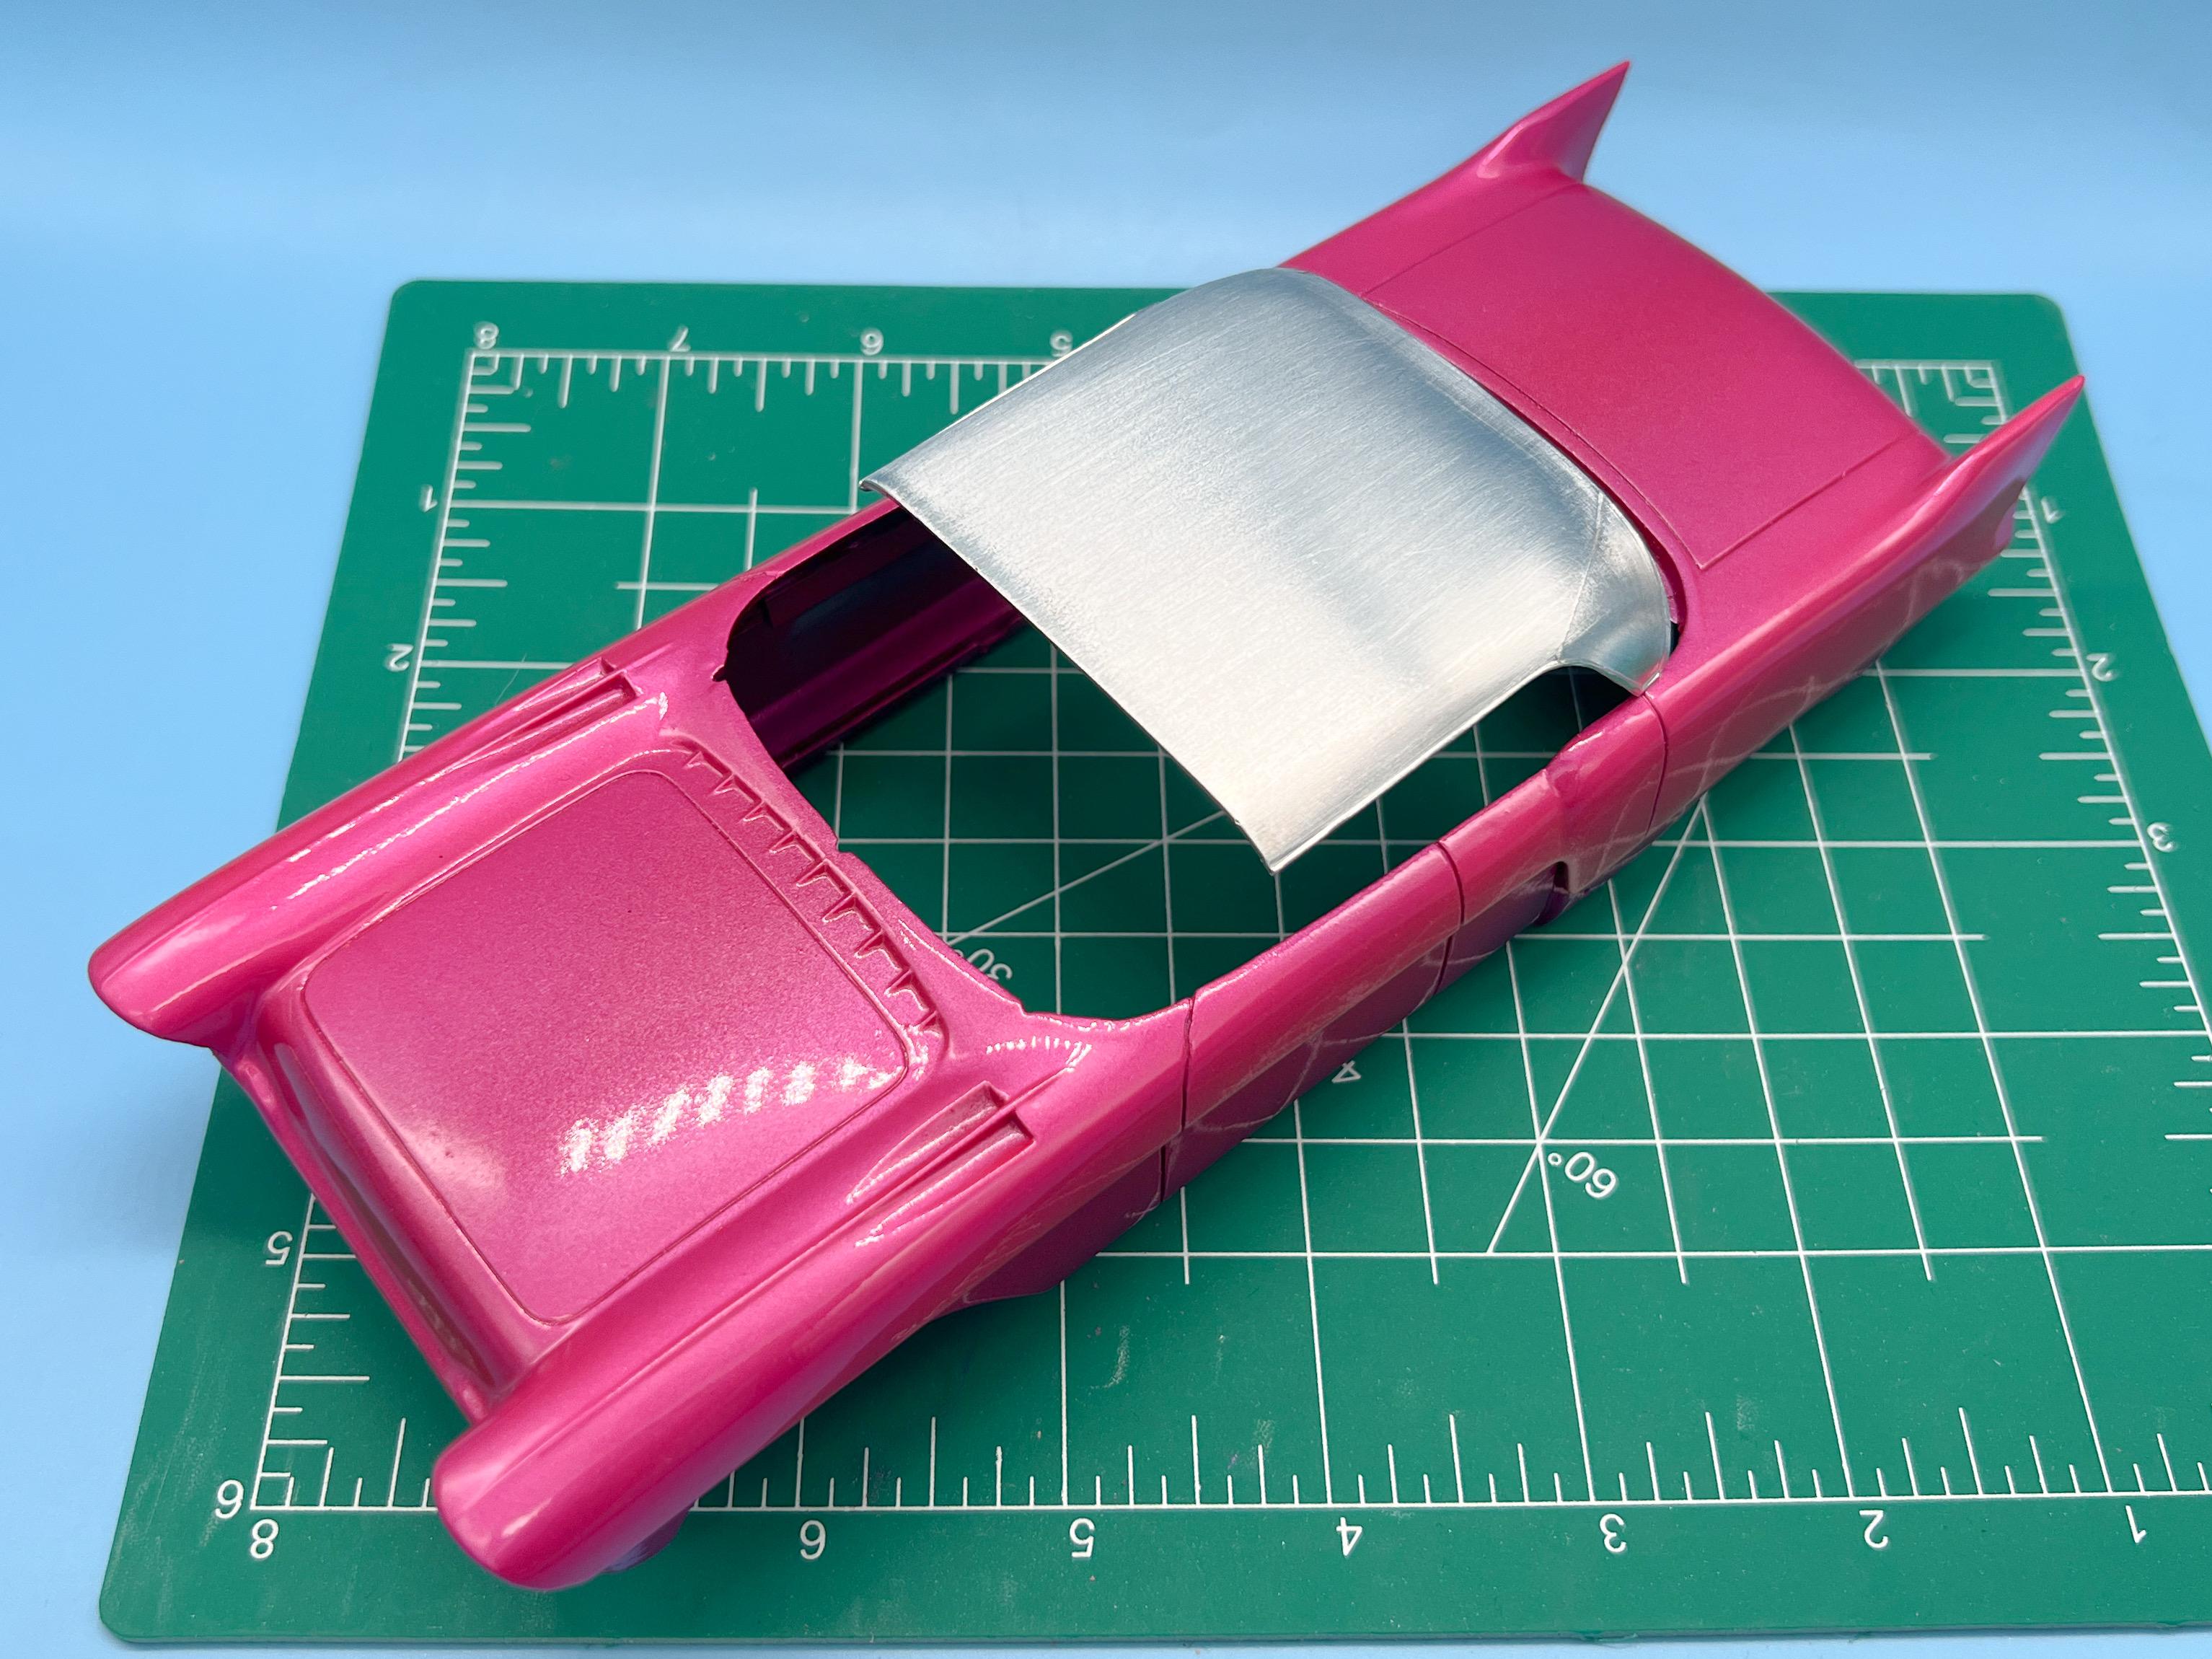
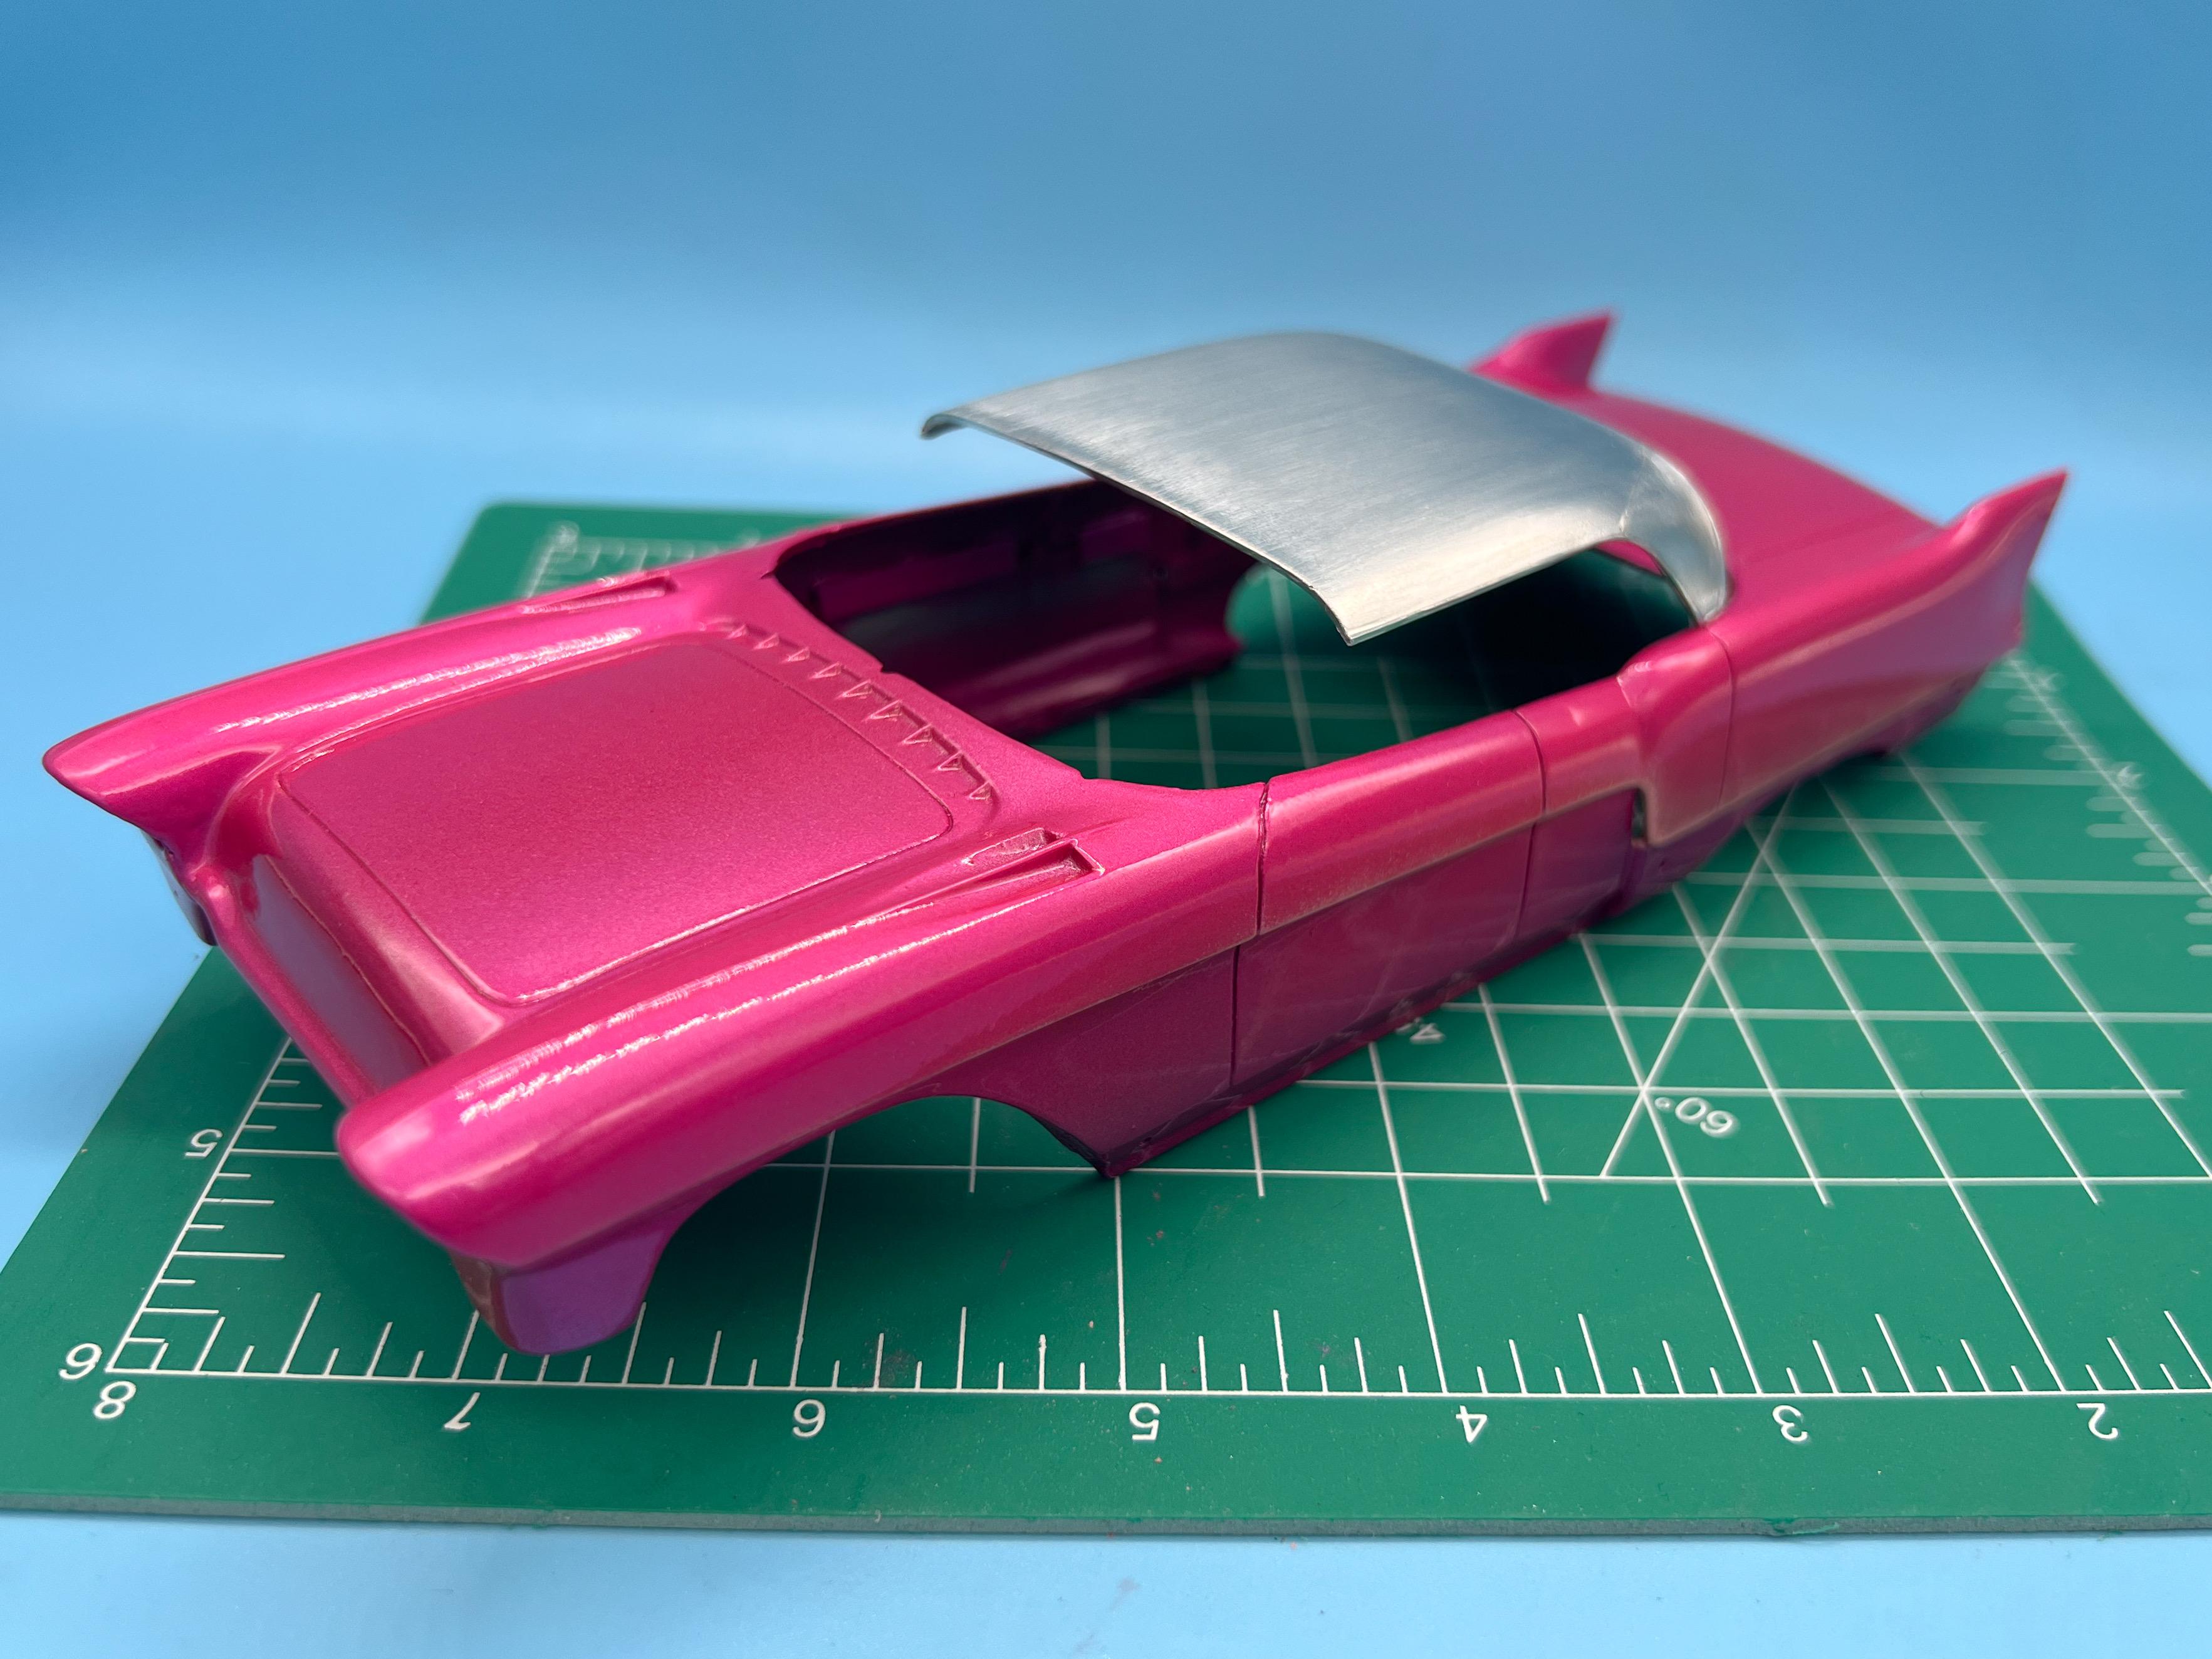
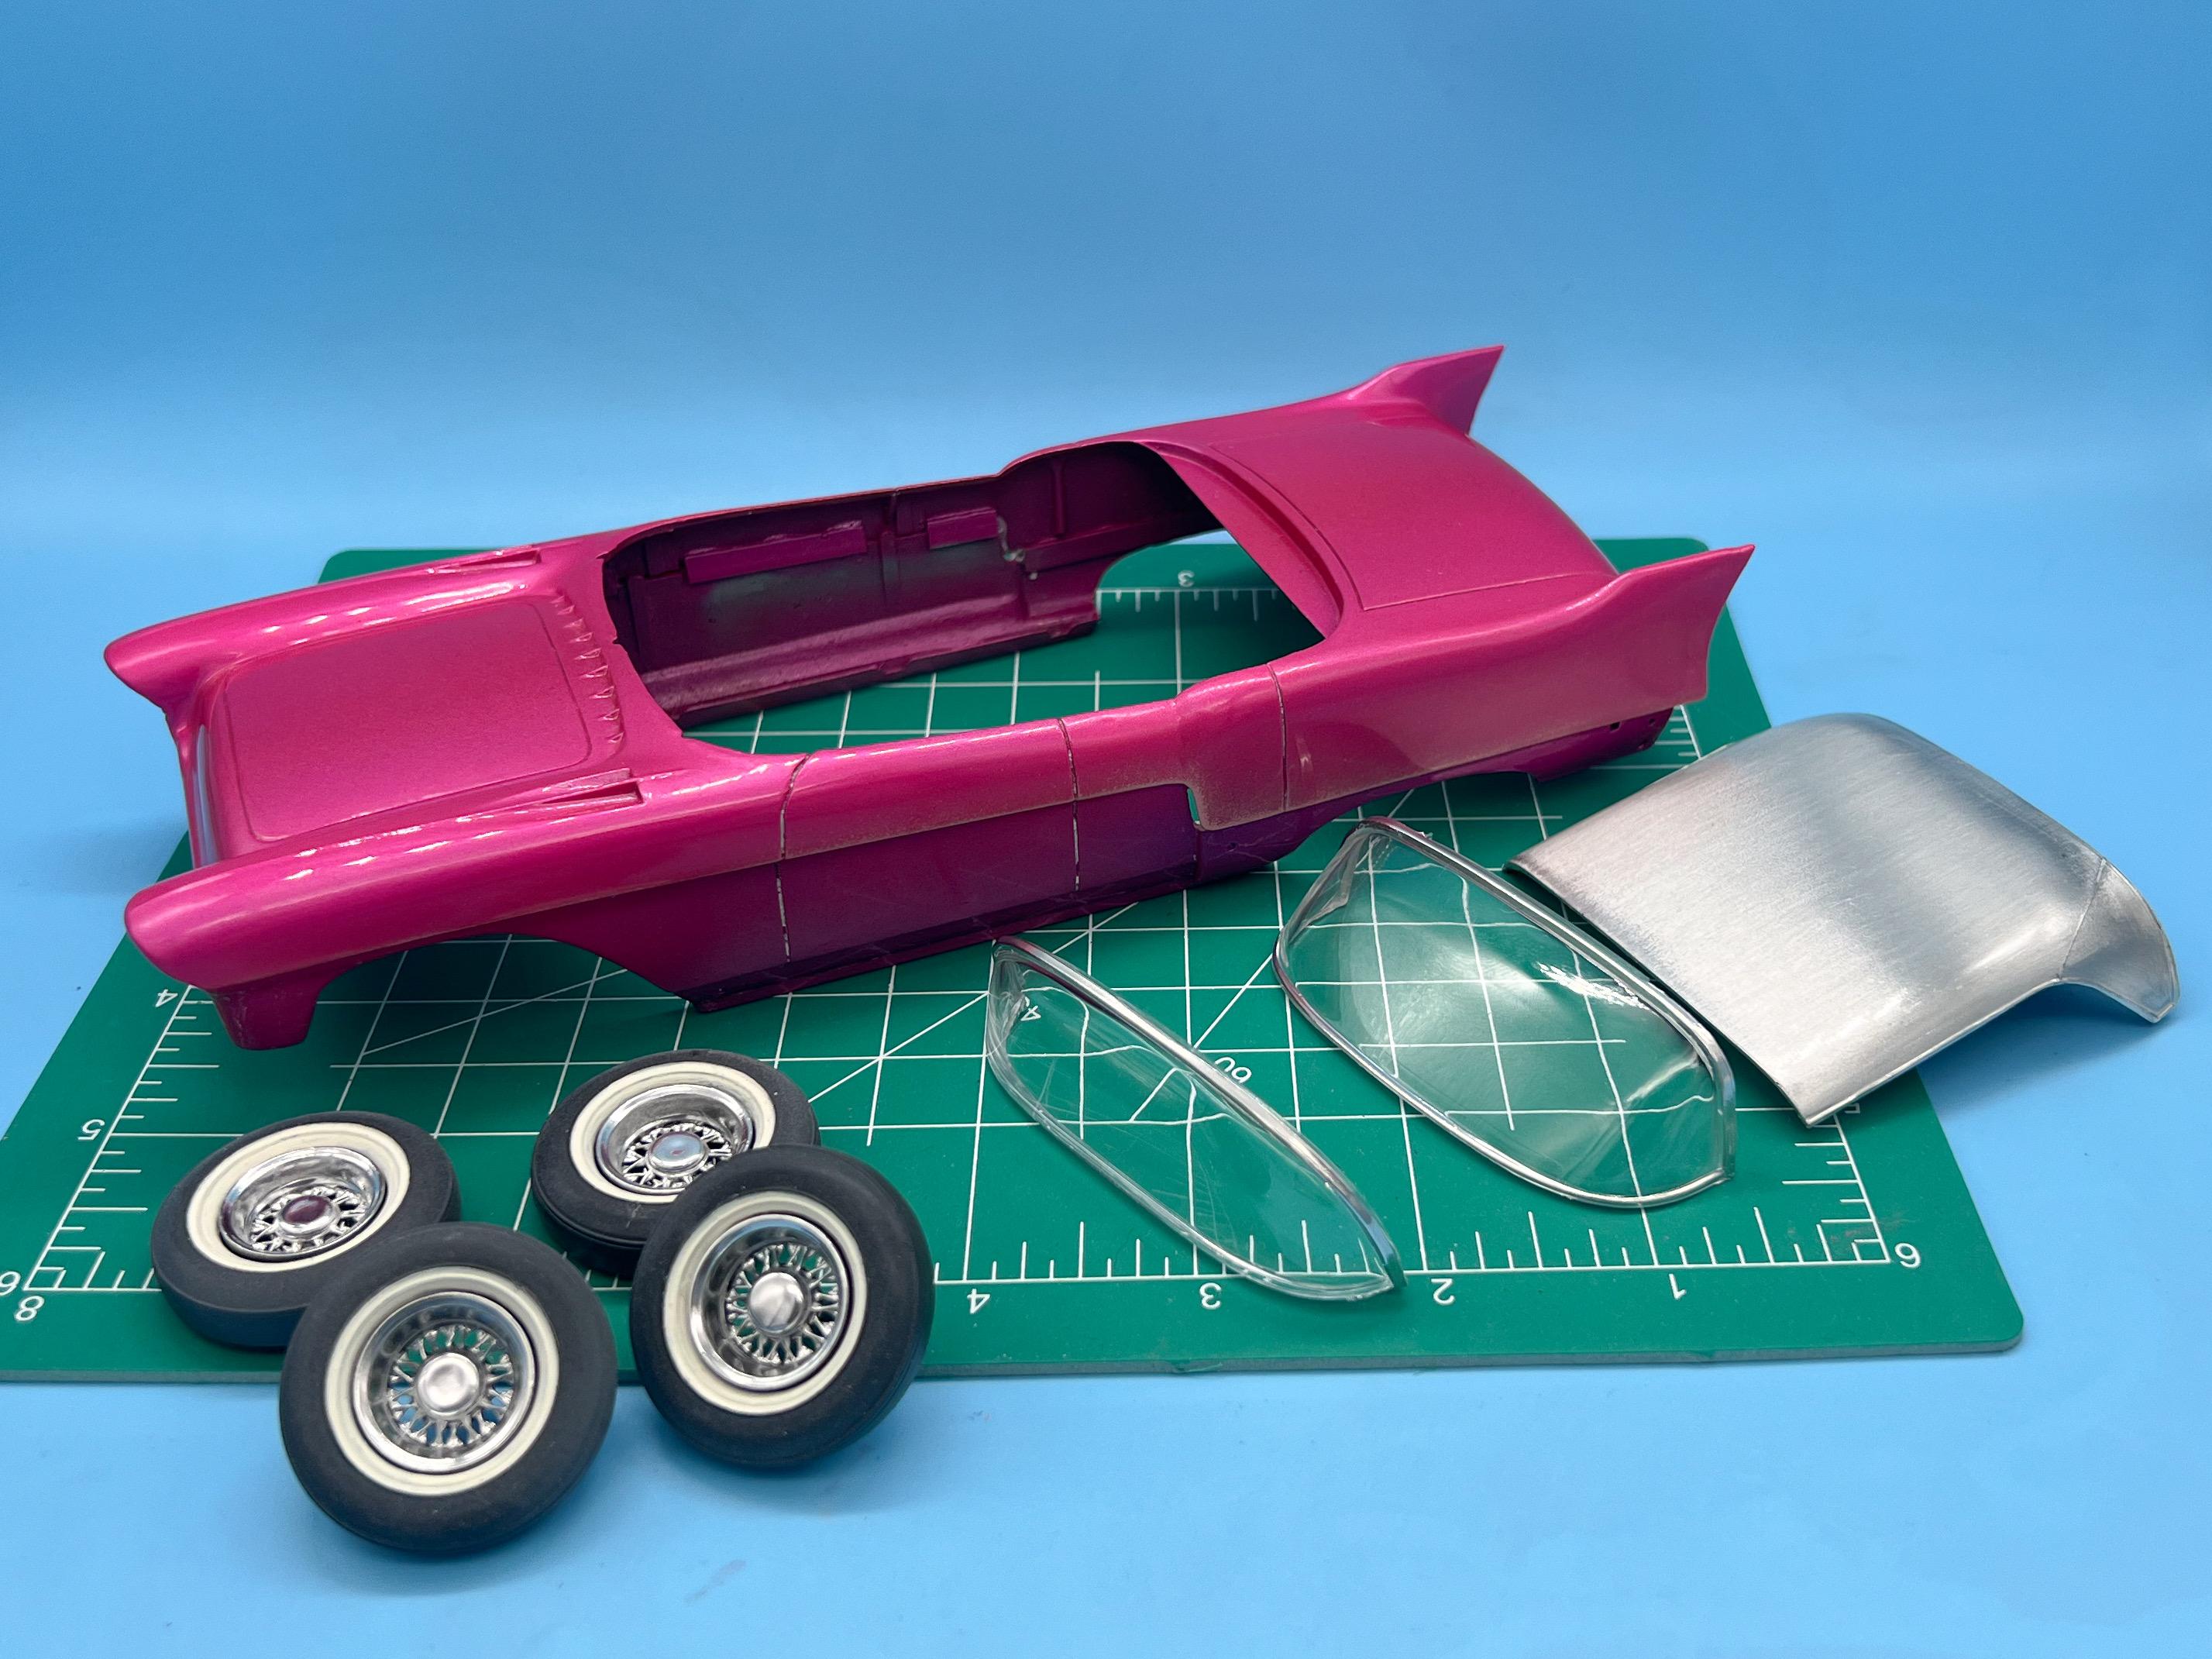
Waiting on USPS to deliver the last couple of parts I’m waiting on for this thing…but basically got it wrapped up today, bar a couple of minor details…love getting to see that chrome and the ‘stainless’ roof with that hot pink ?
-
What did you see on the road today?
OldNYJim replied to Harry P.'s topic in General Automotive Talk (Trucks and Cars)
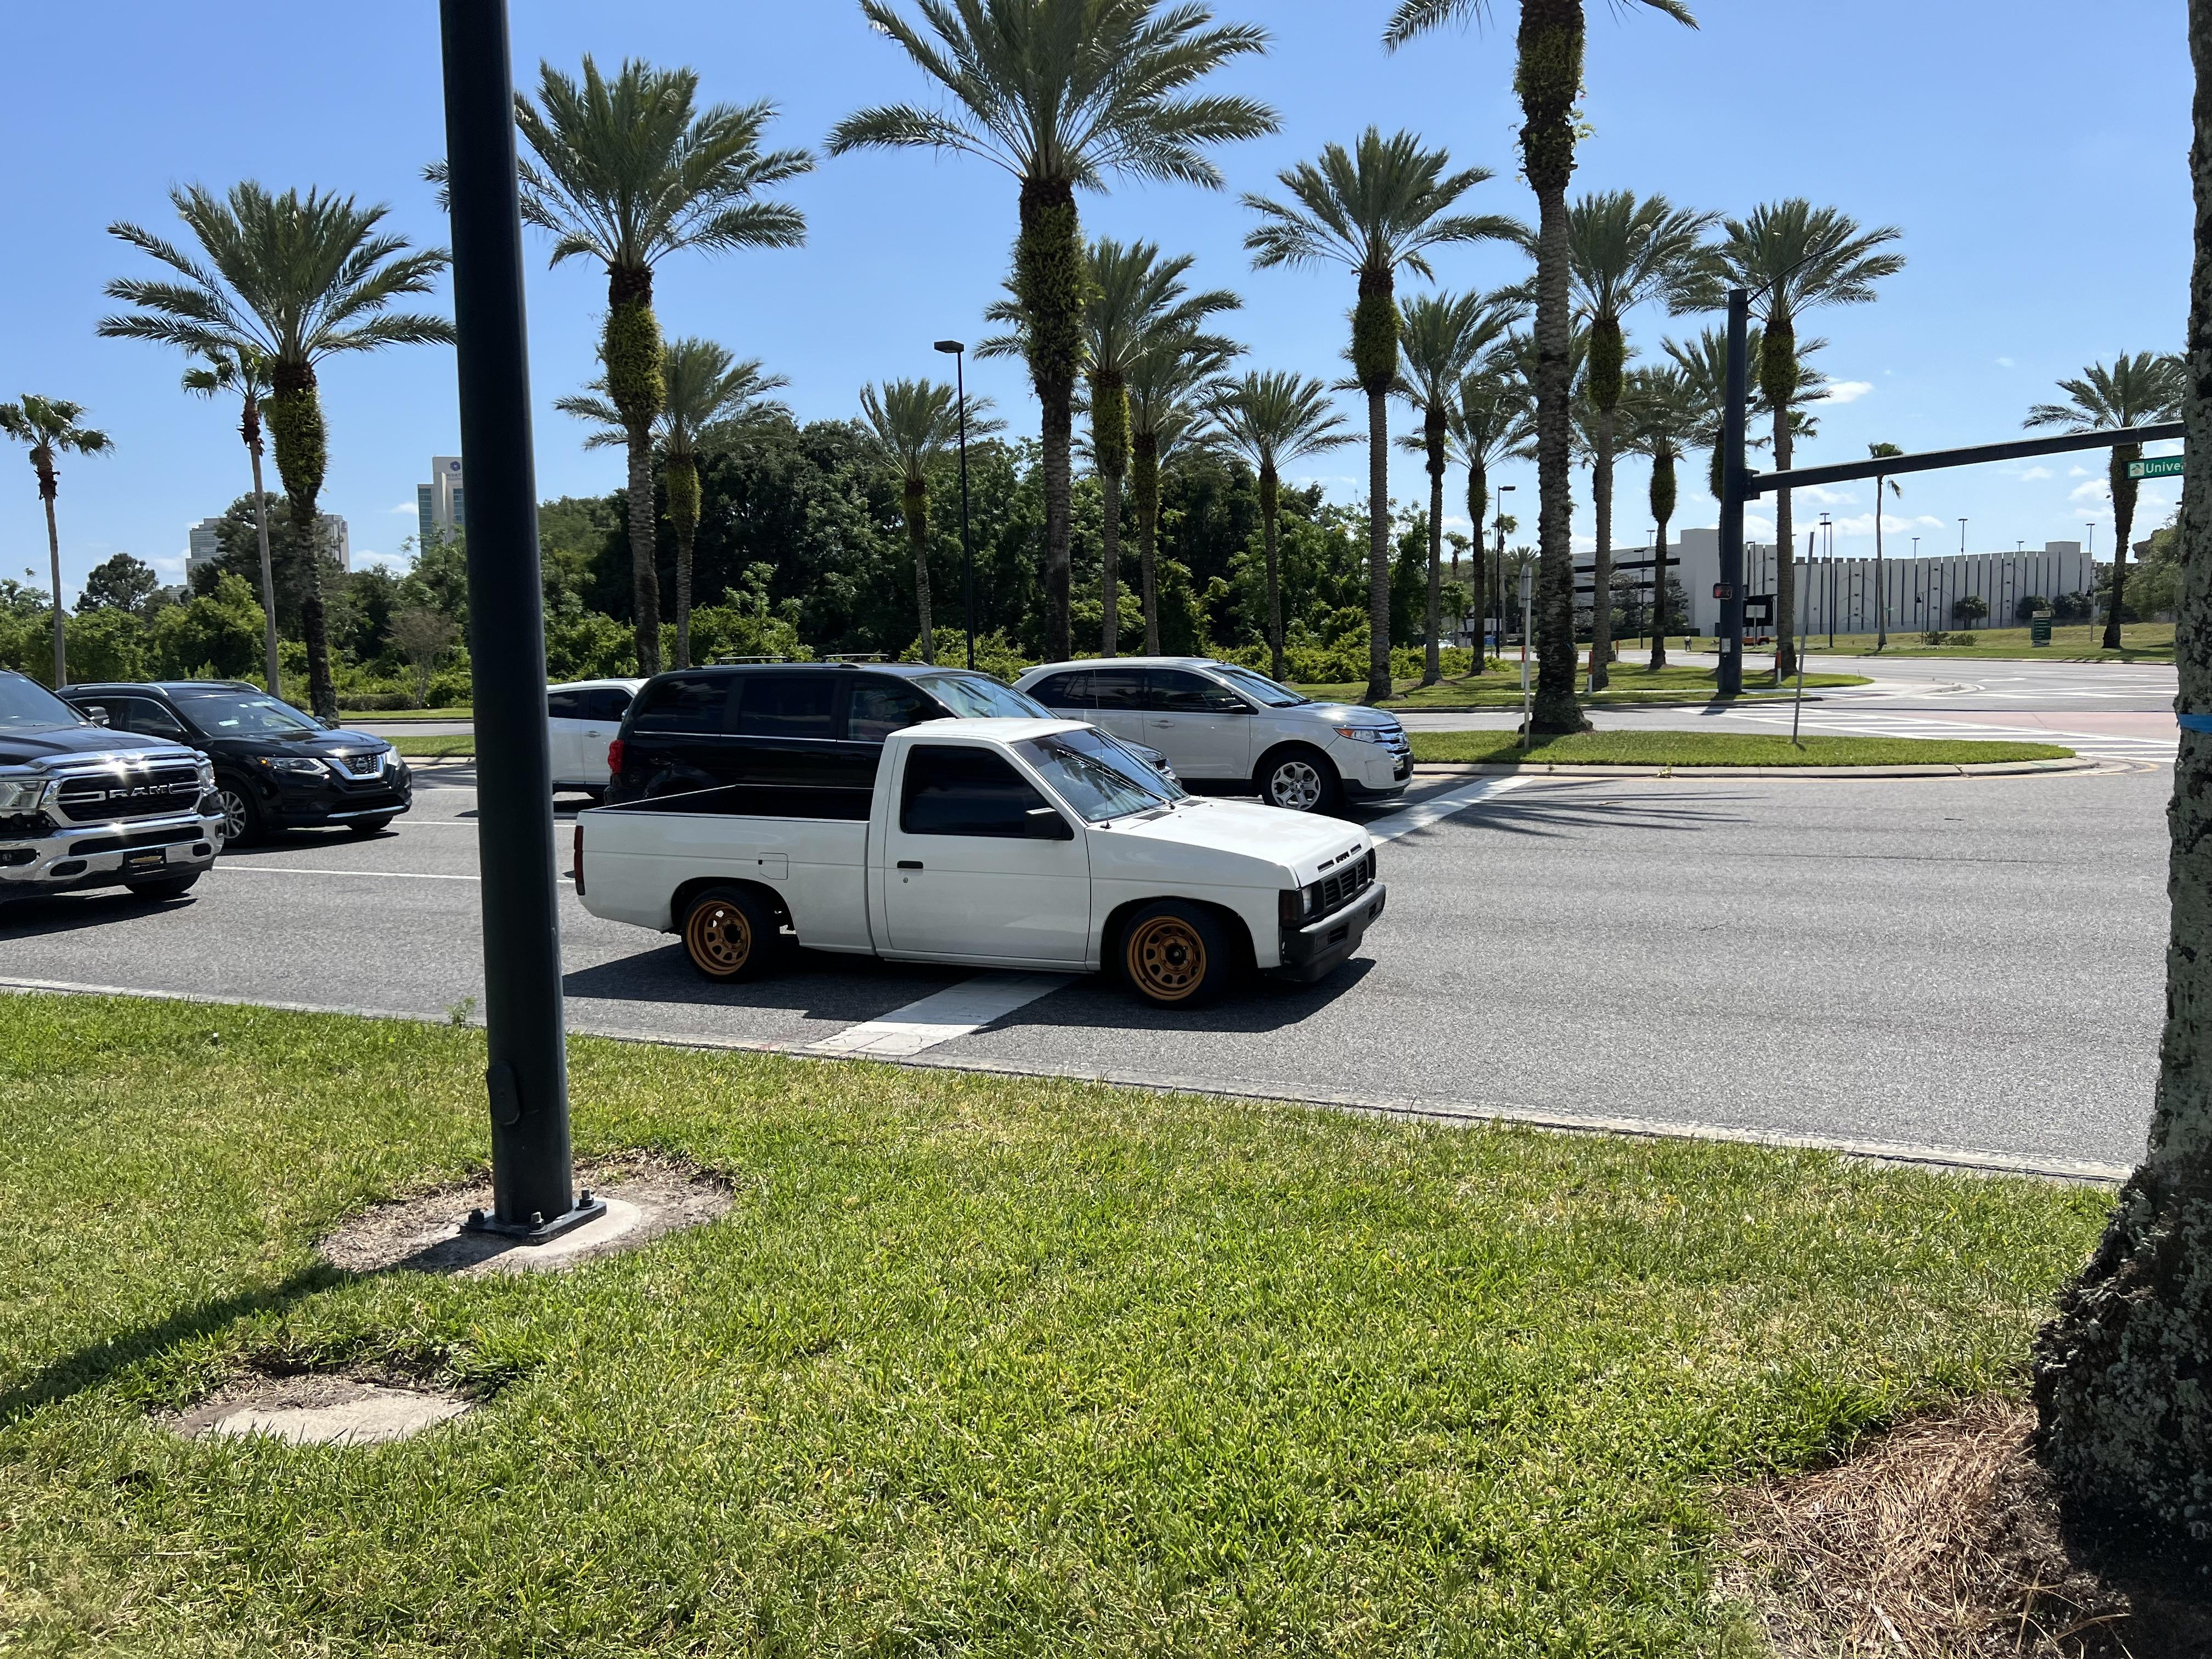
Cool little mini truck that caught my eye…and not technically on the road, but not worth a thread of it’s own probably, Mario’s Indycar…
-
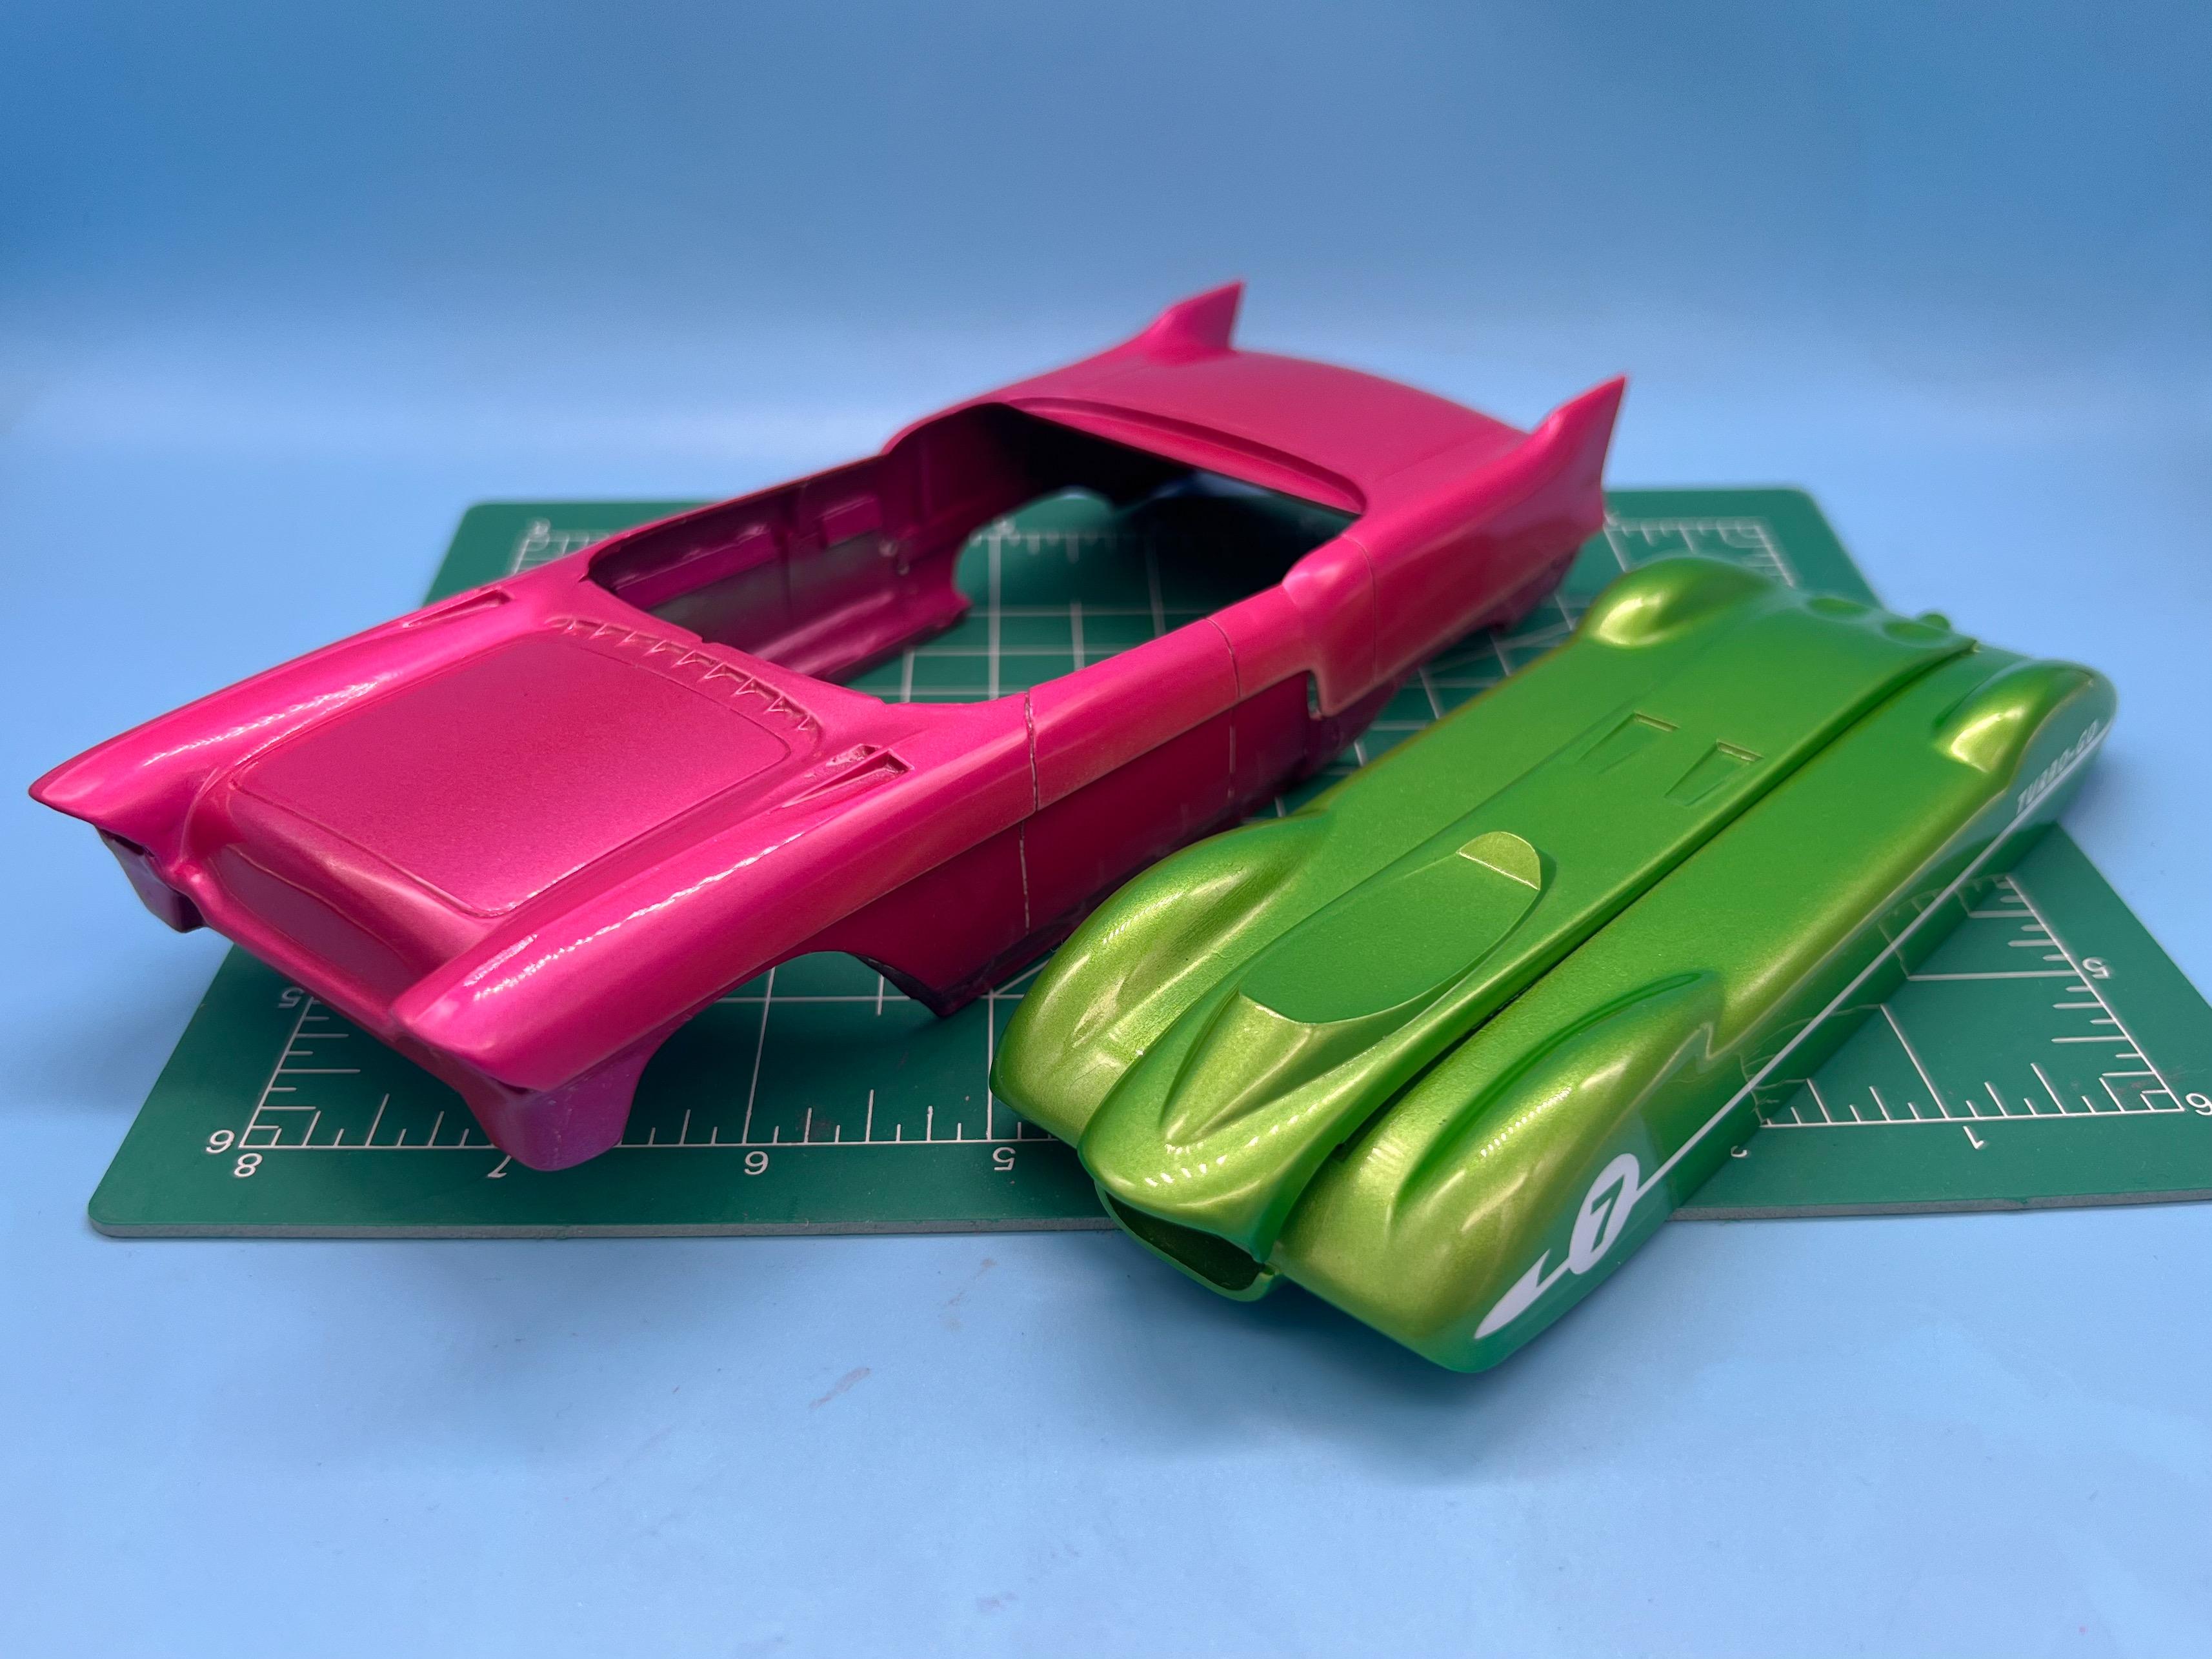
Polished out two bodies today - and I don’t really like polishing. I like the results tho!
-
Nice! Congrats!! I’ve wanted one of these for a while myself!
- 38,867 replies
-
- 1
-
-
- johan
- glue bombs
- (and 1 more)
-
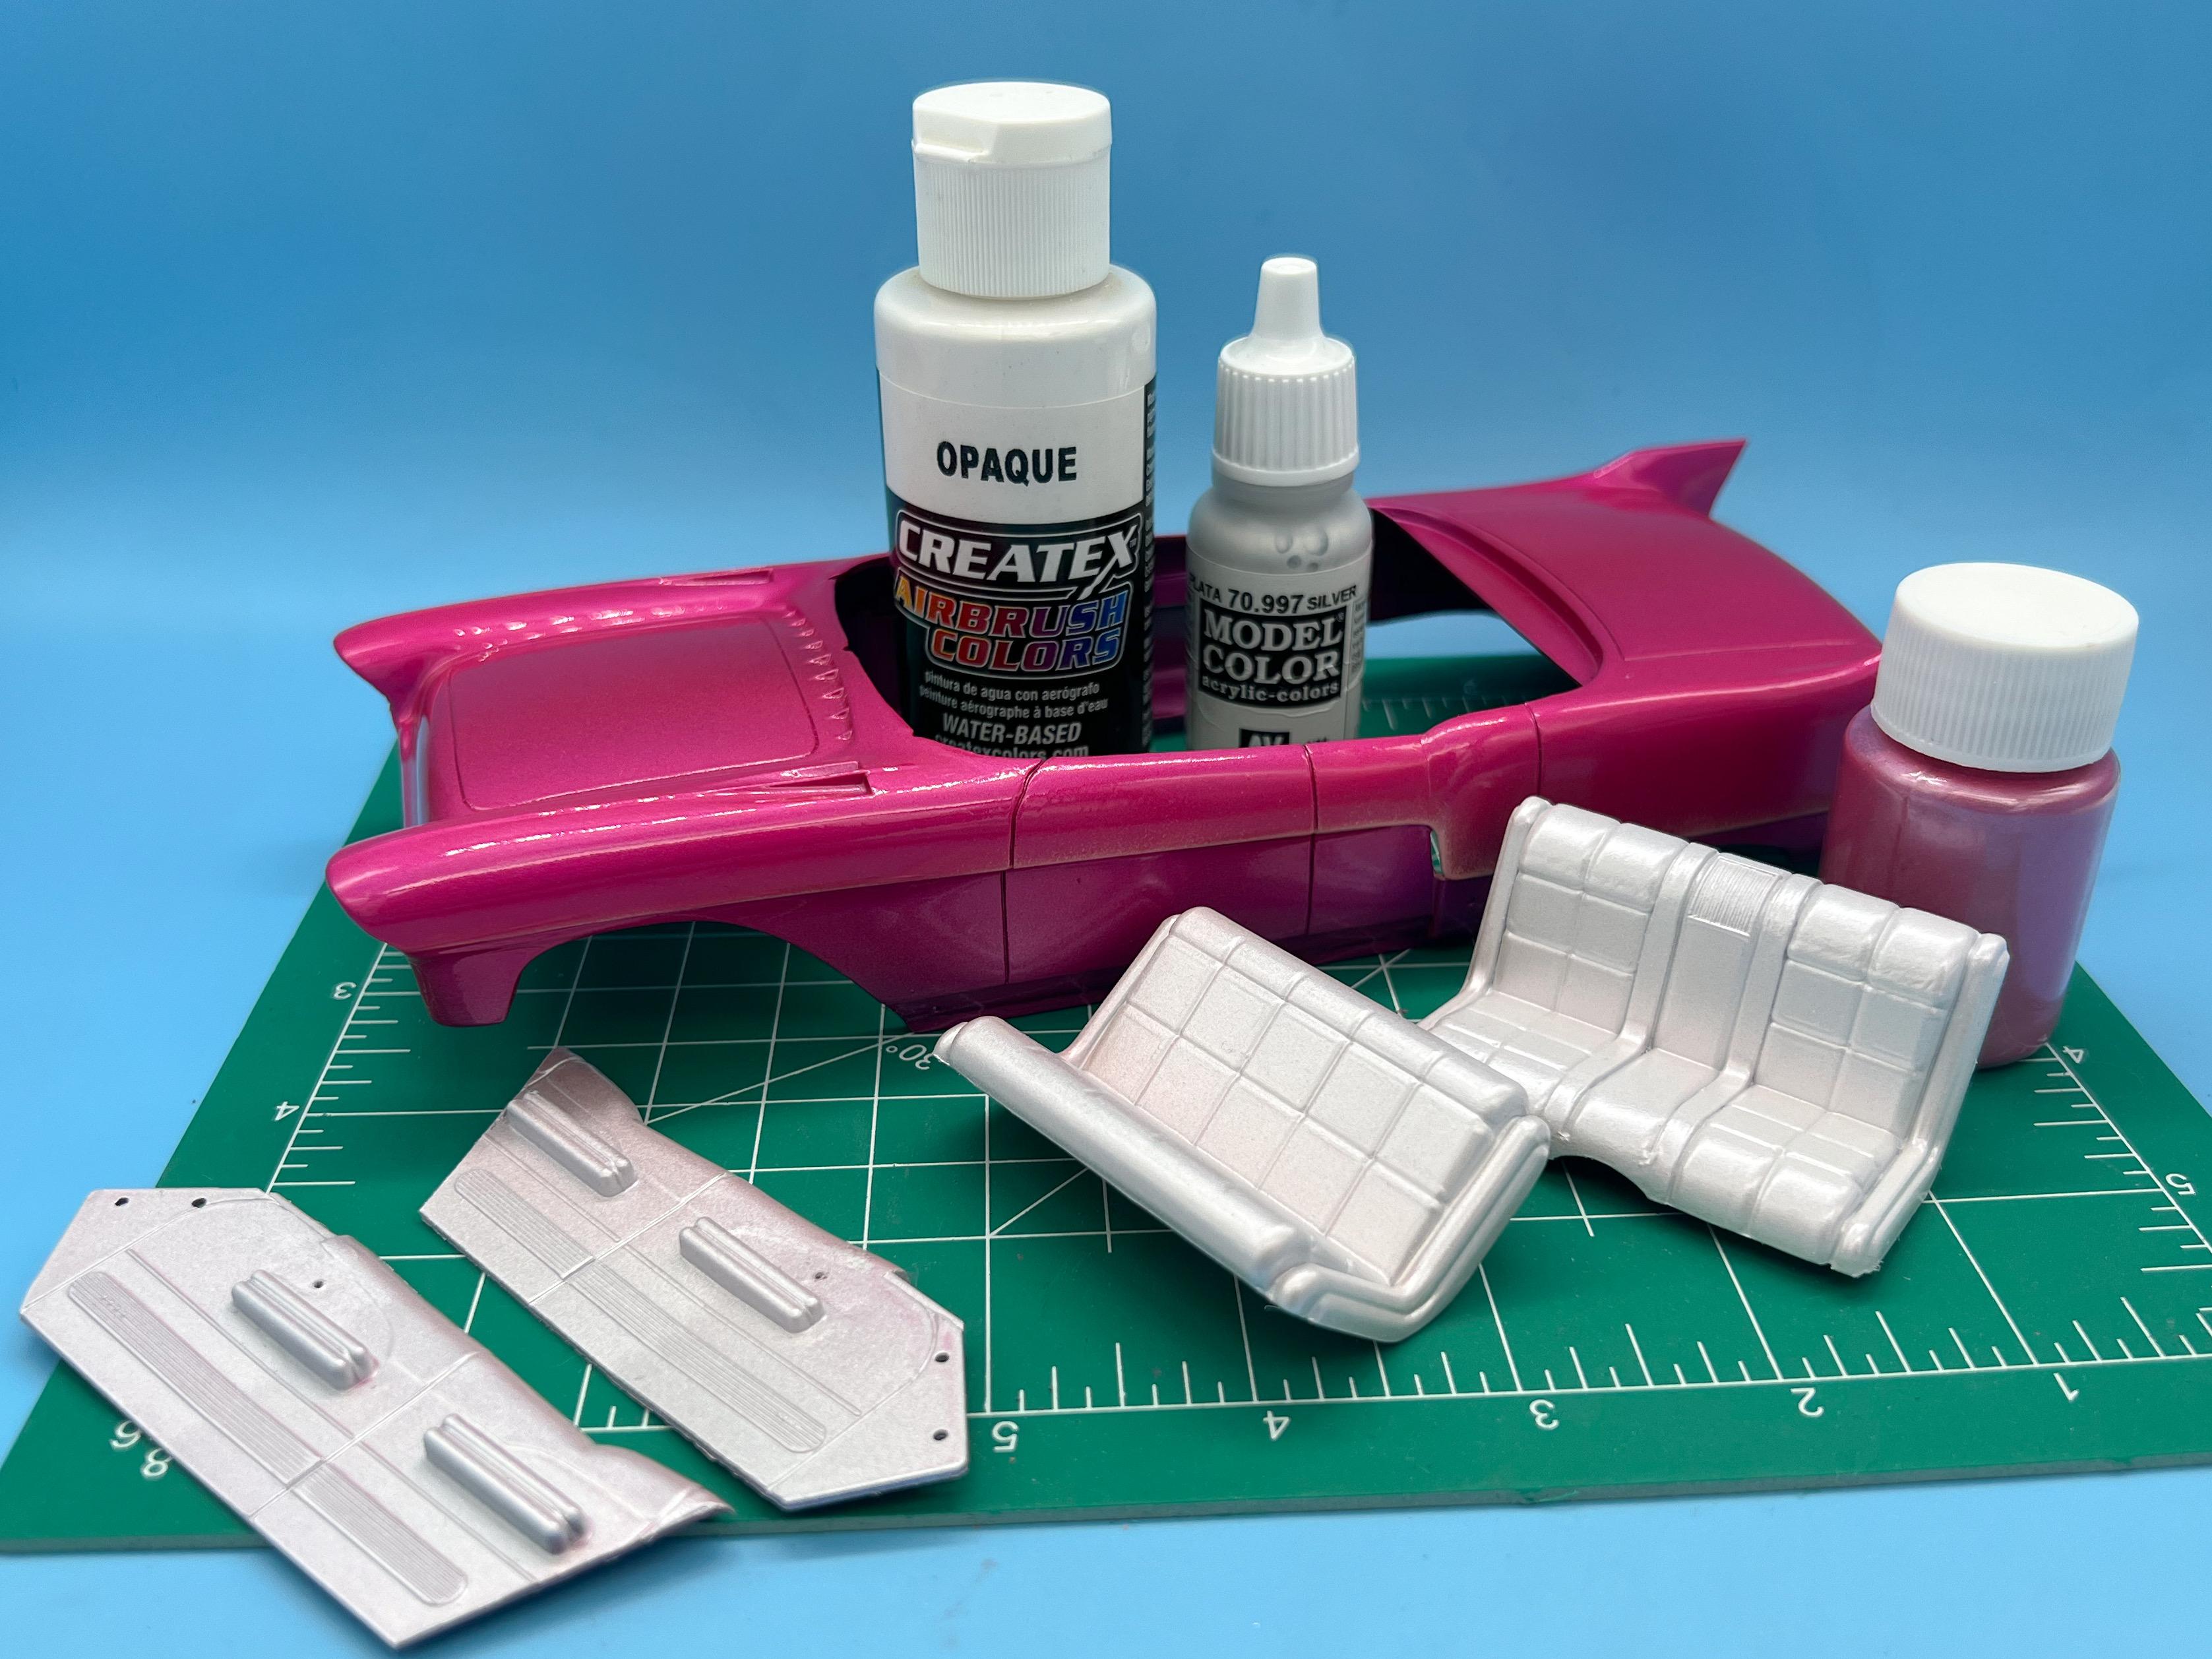
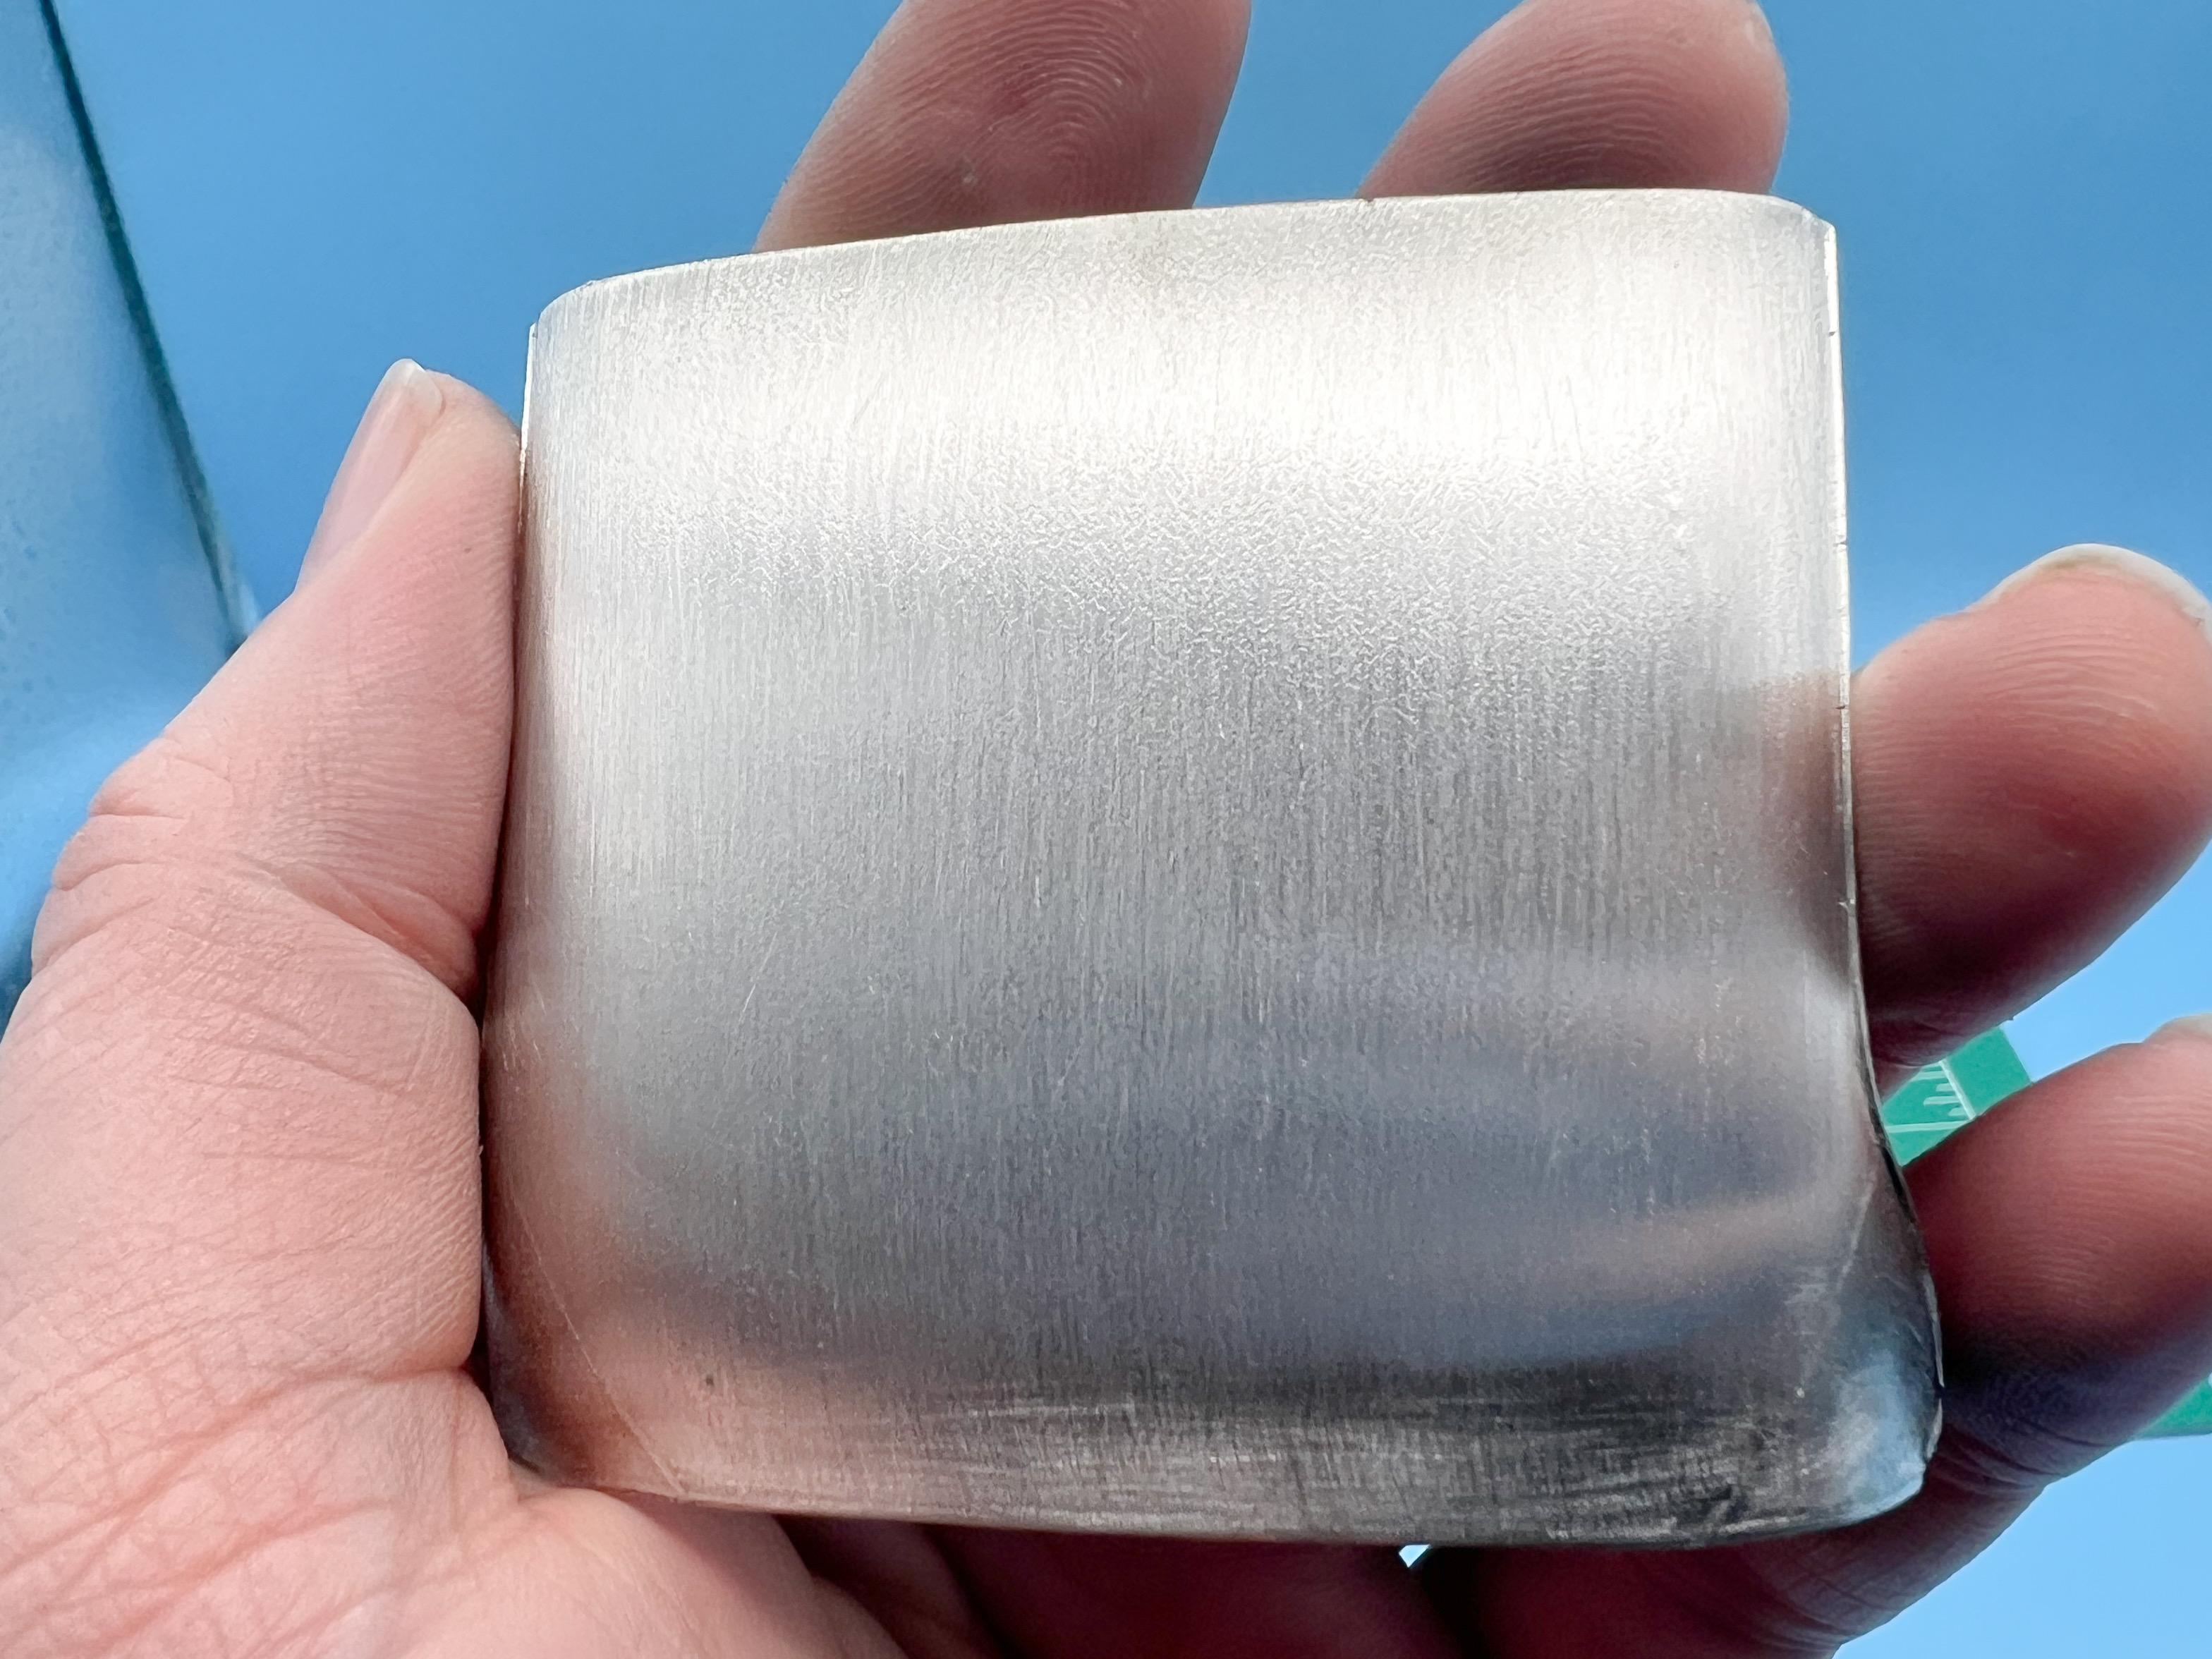
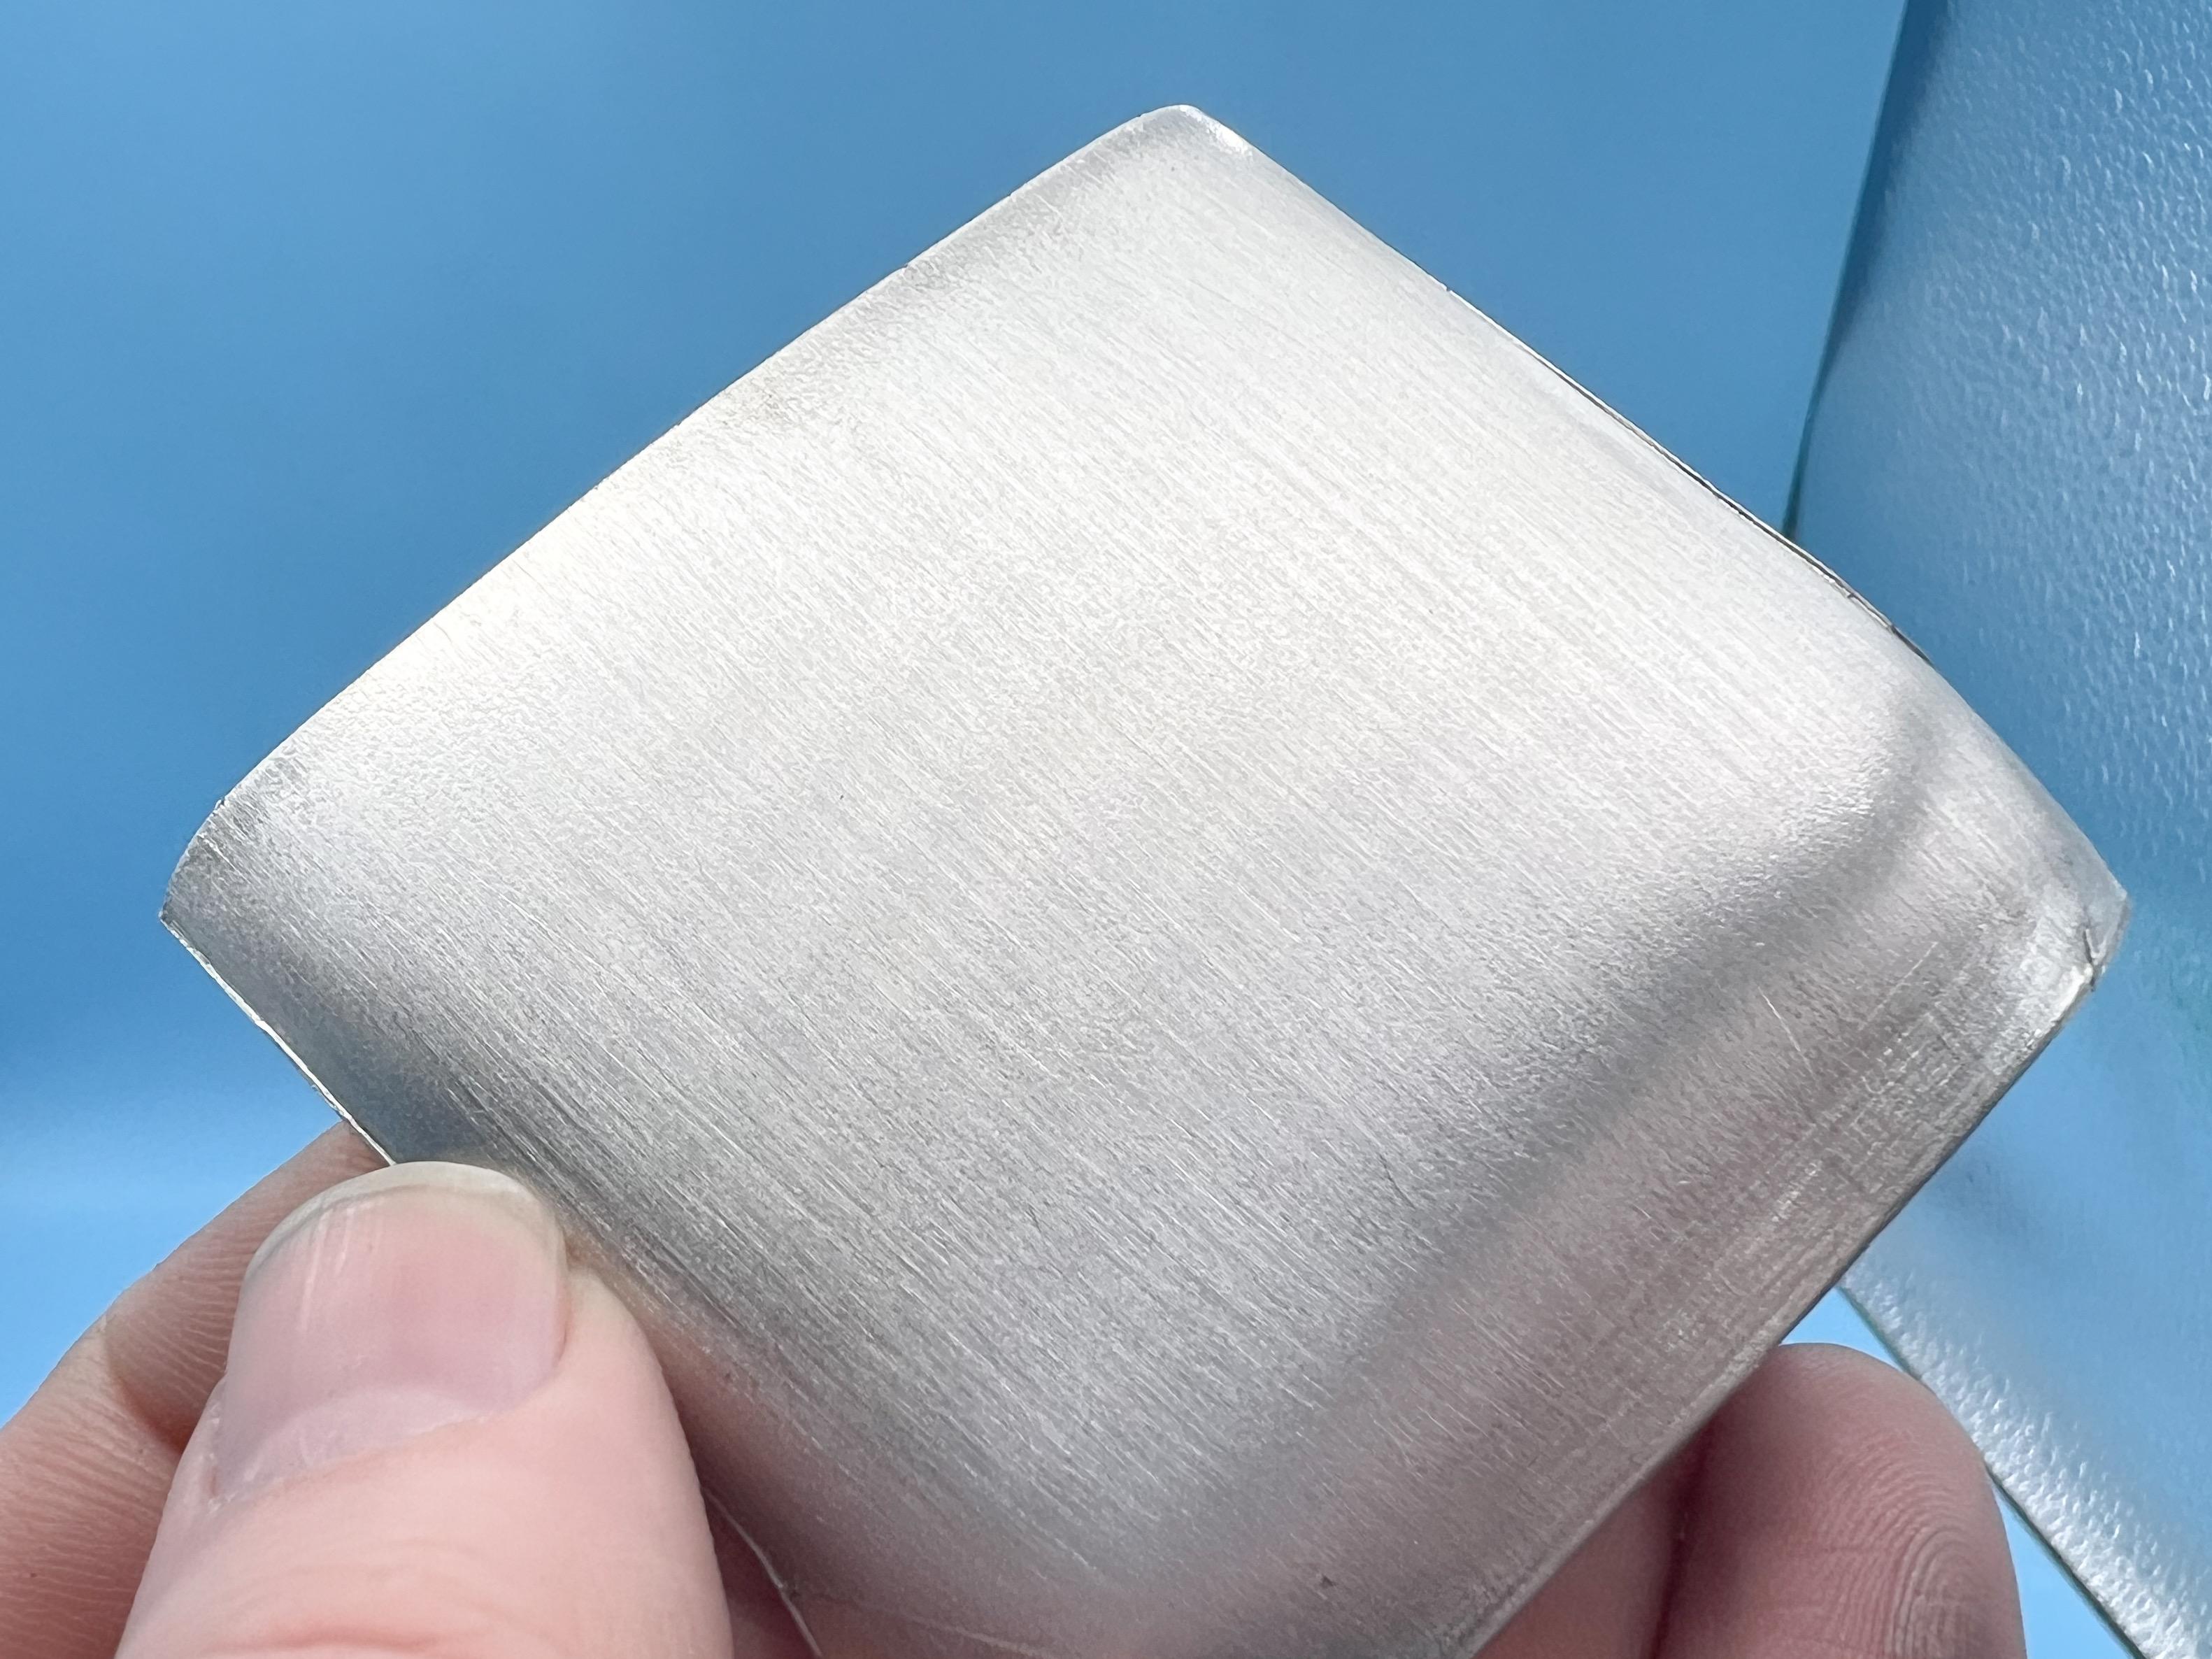
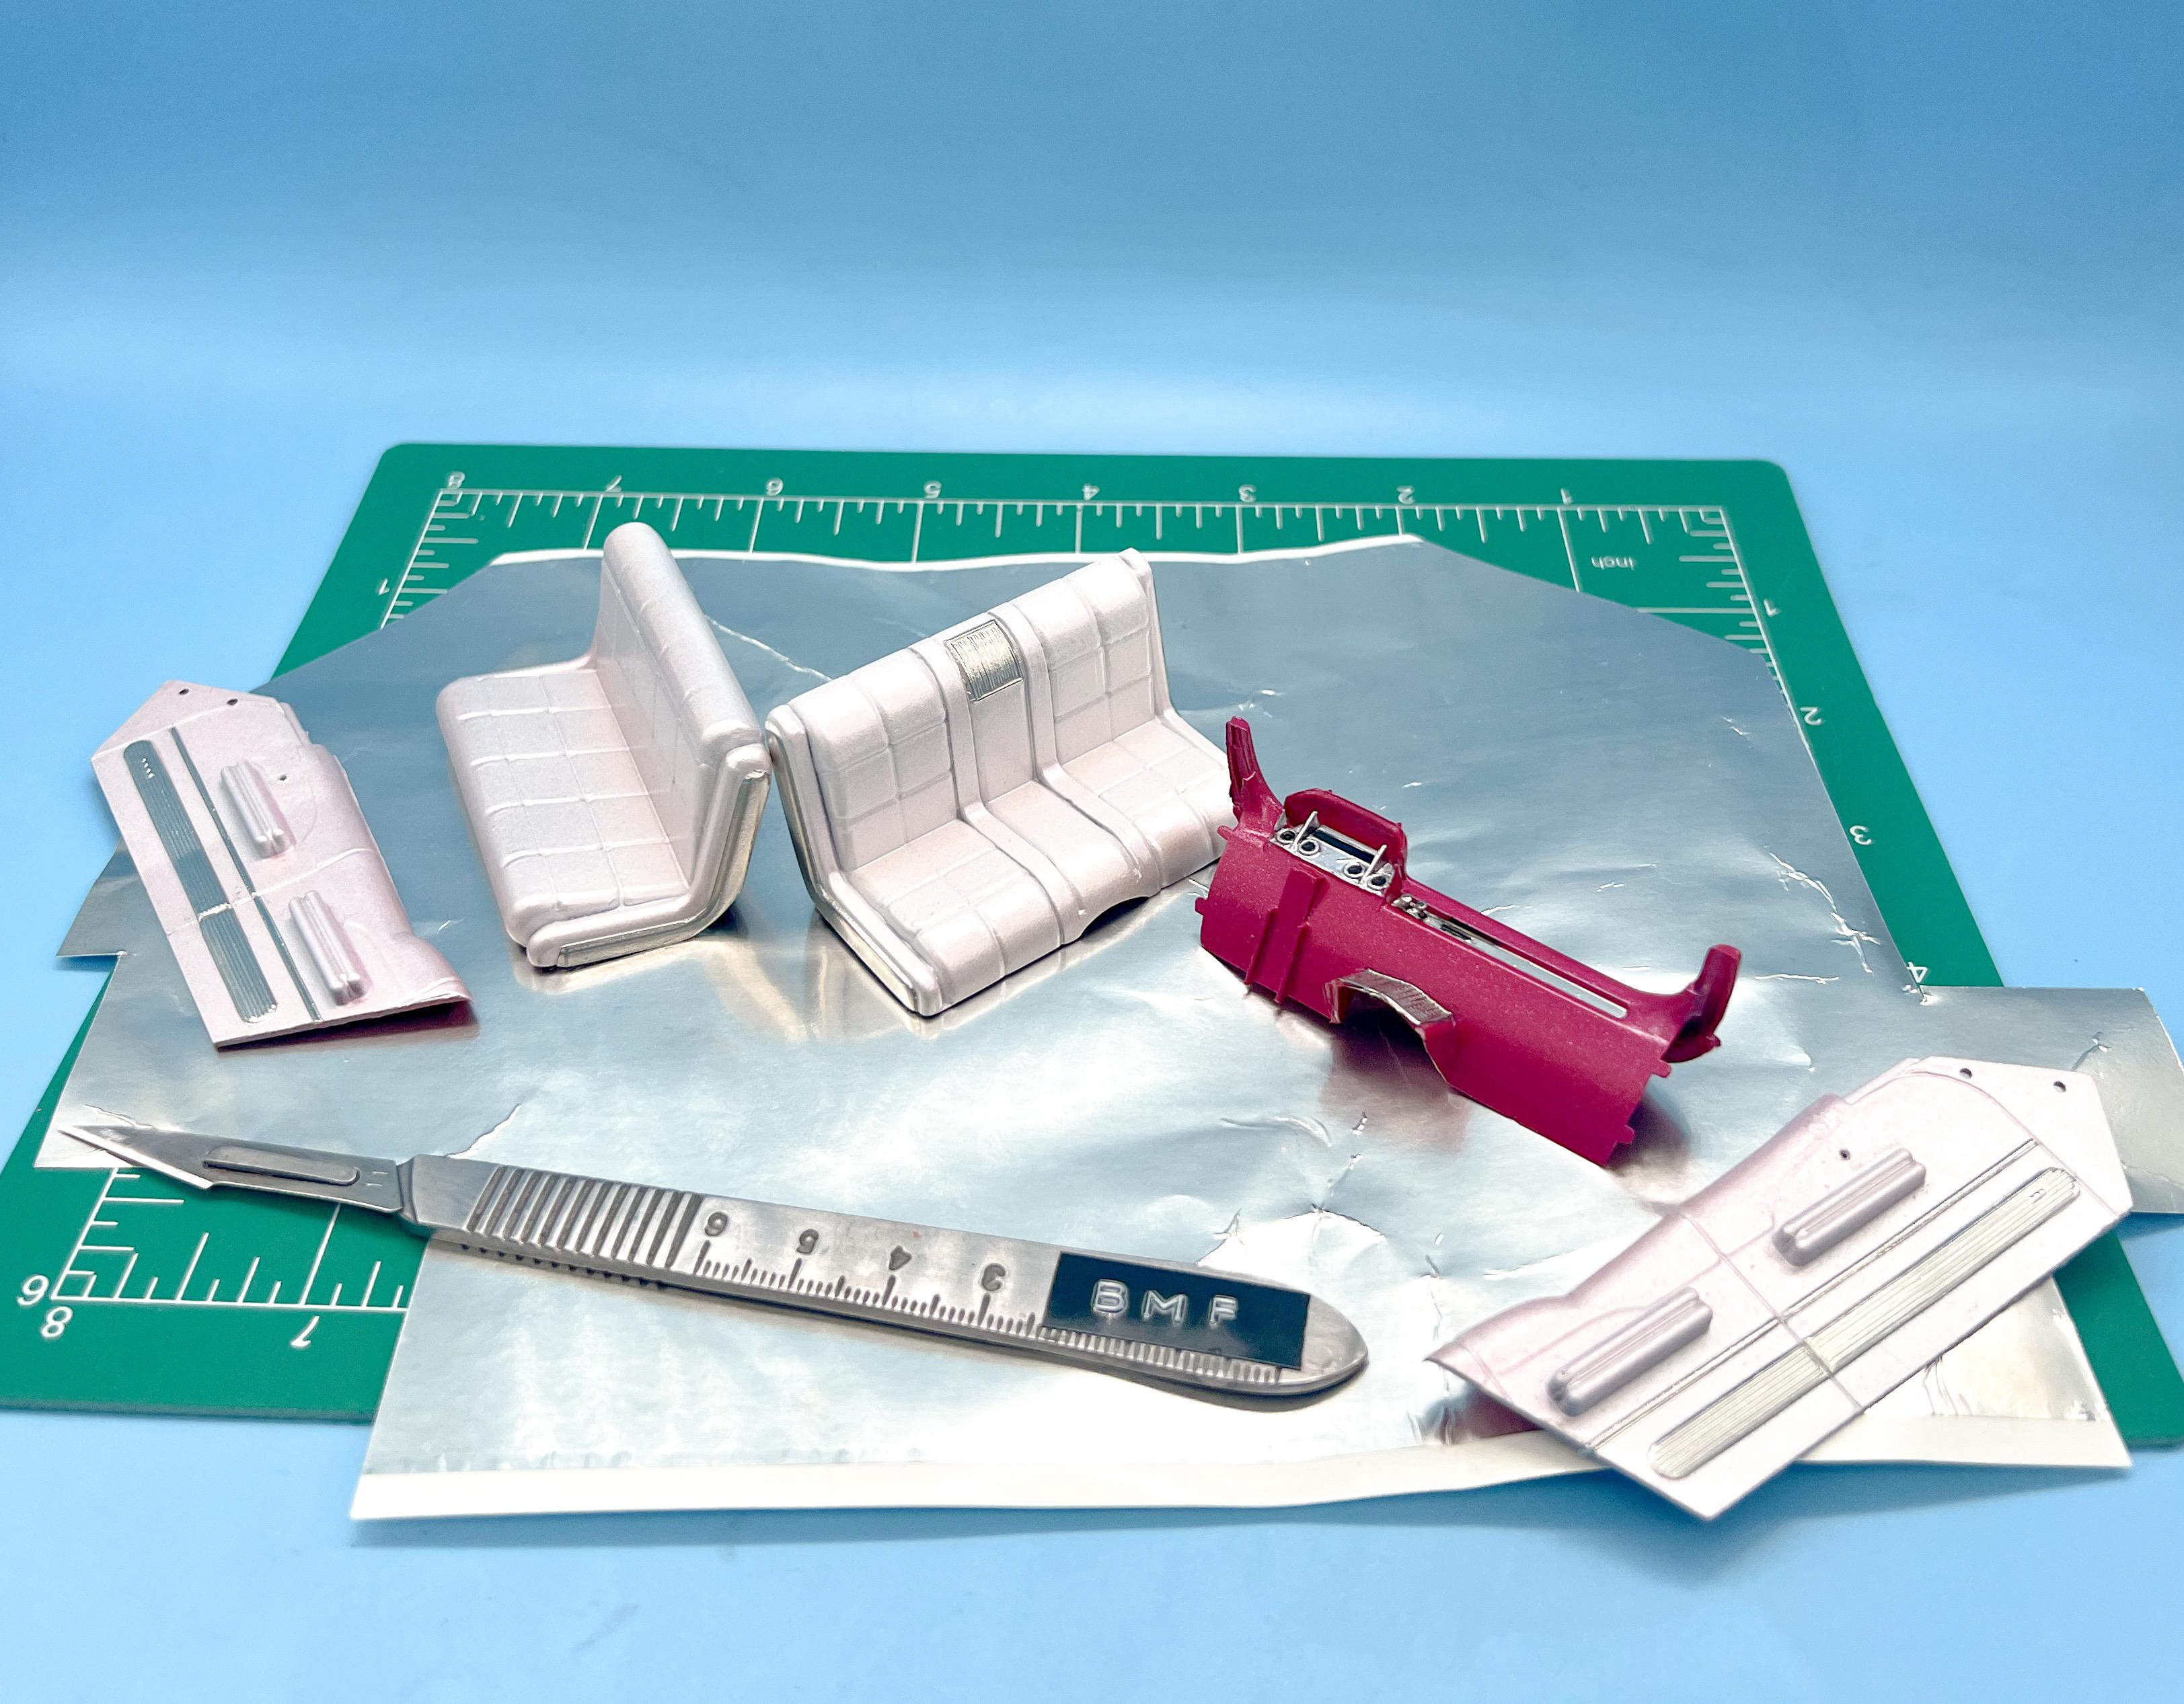
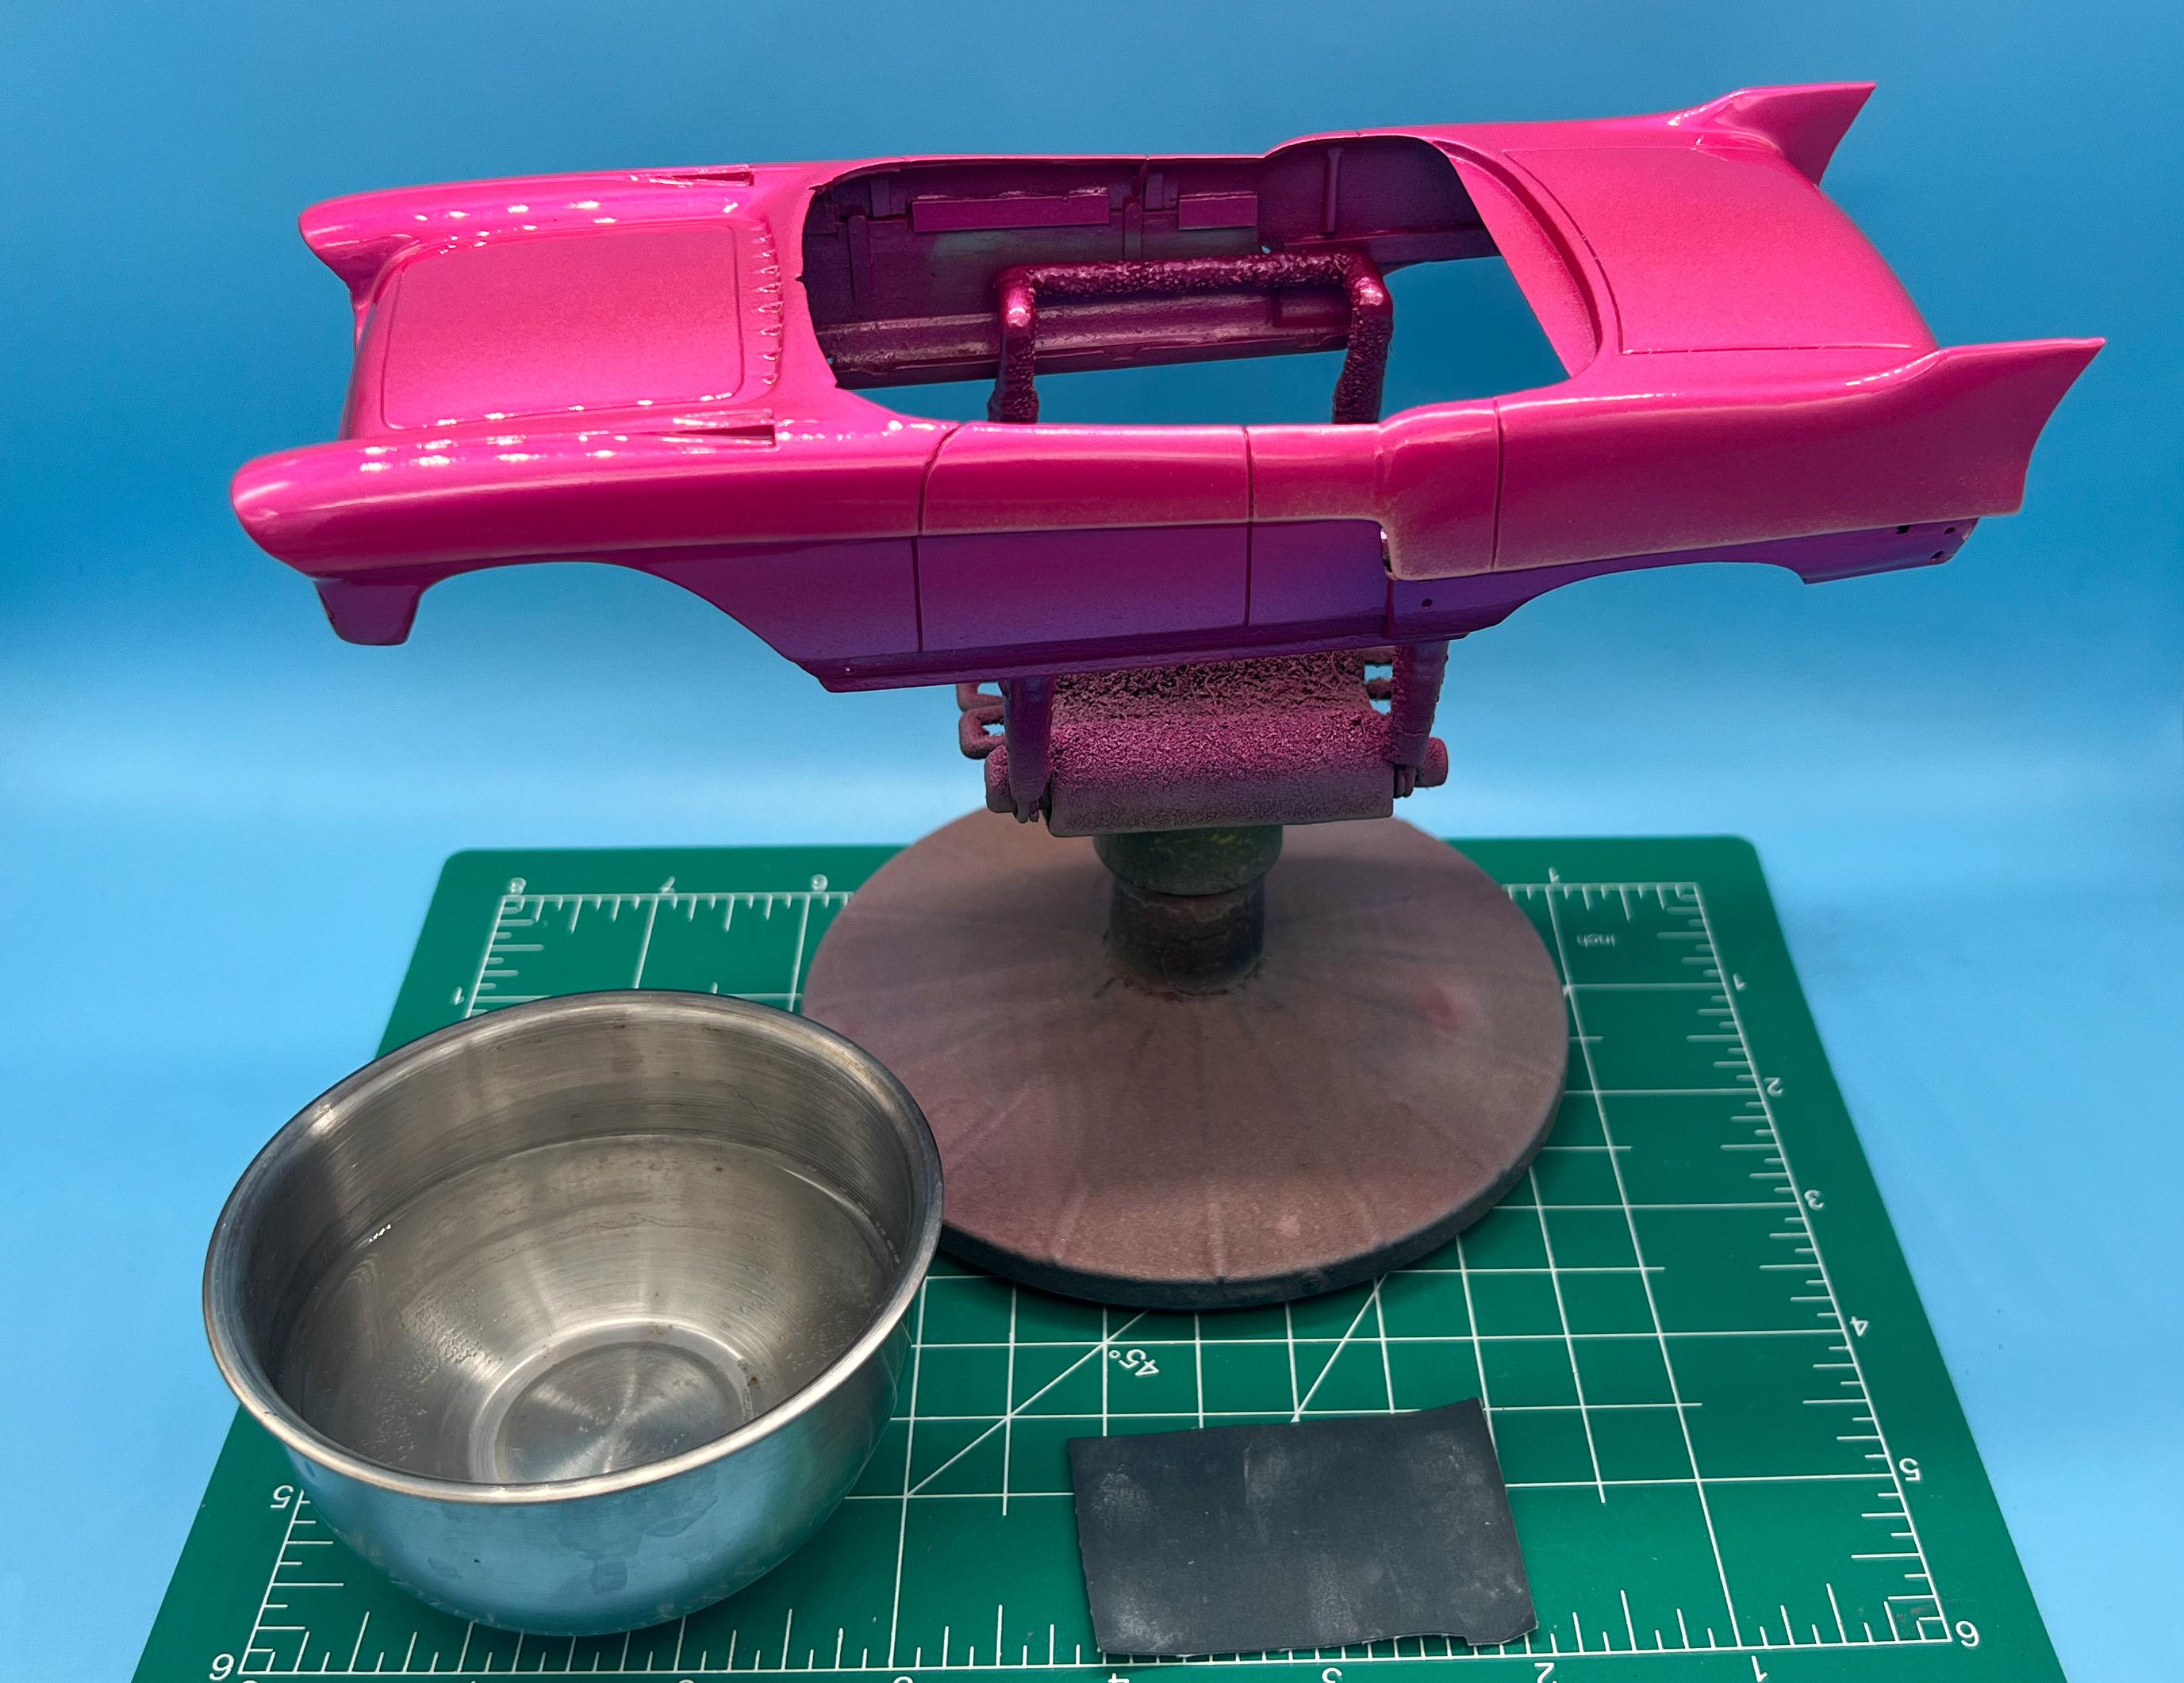
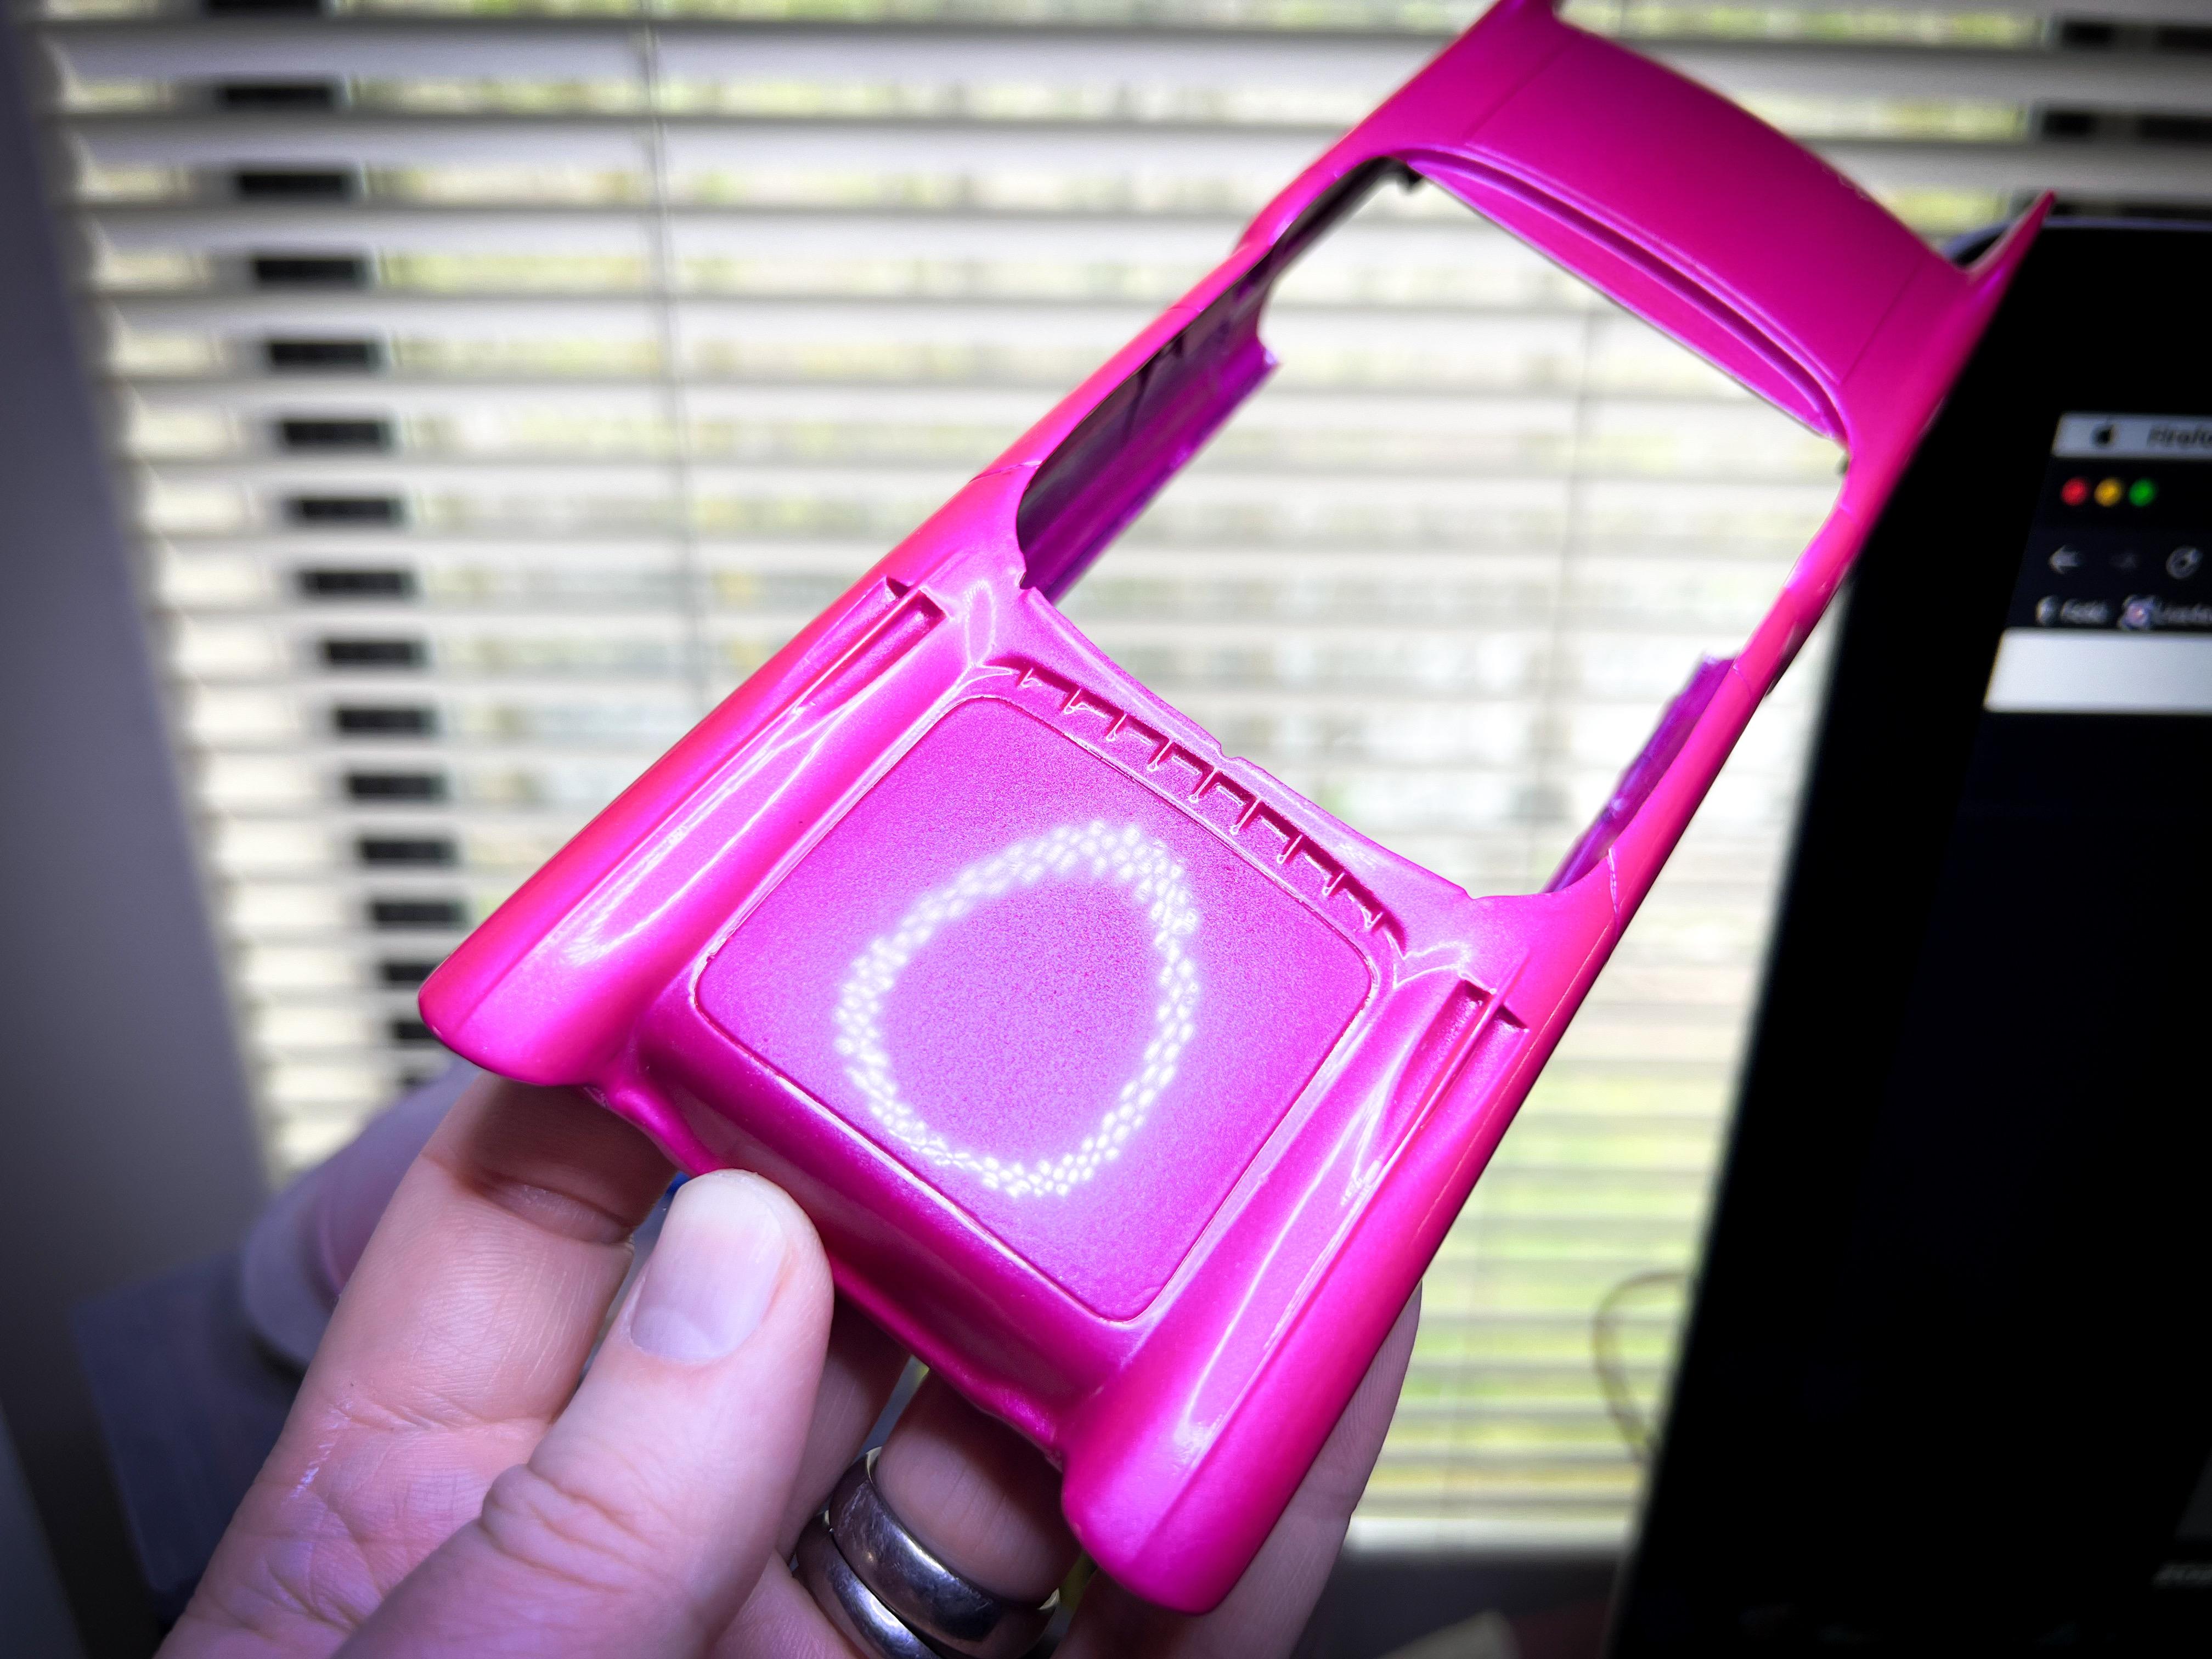
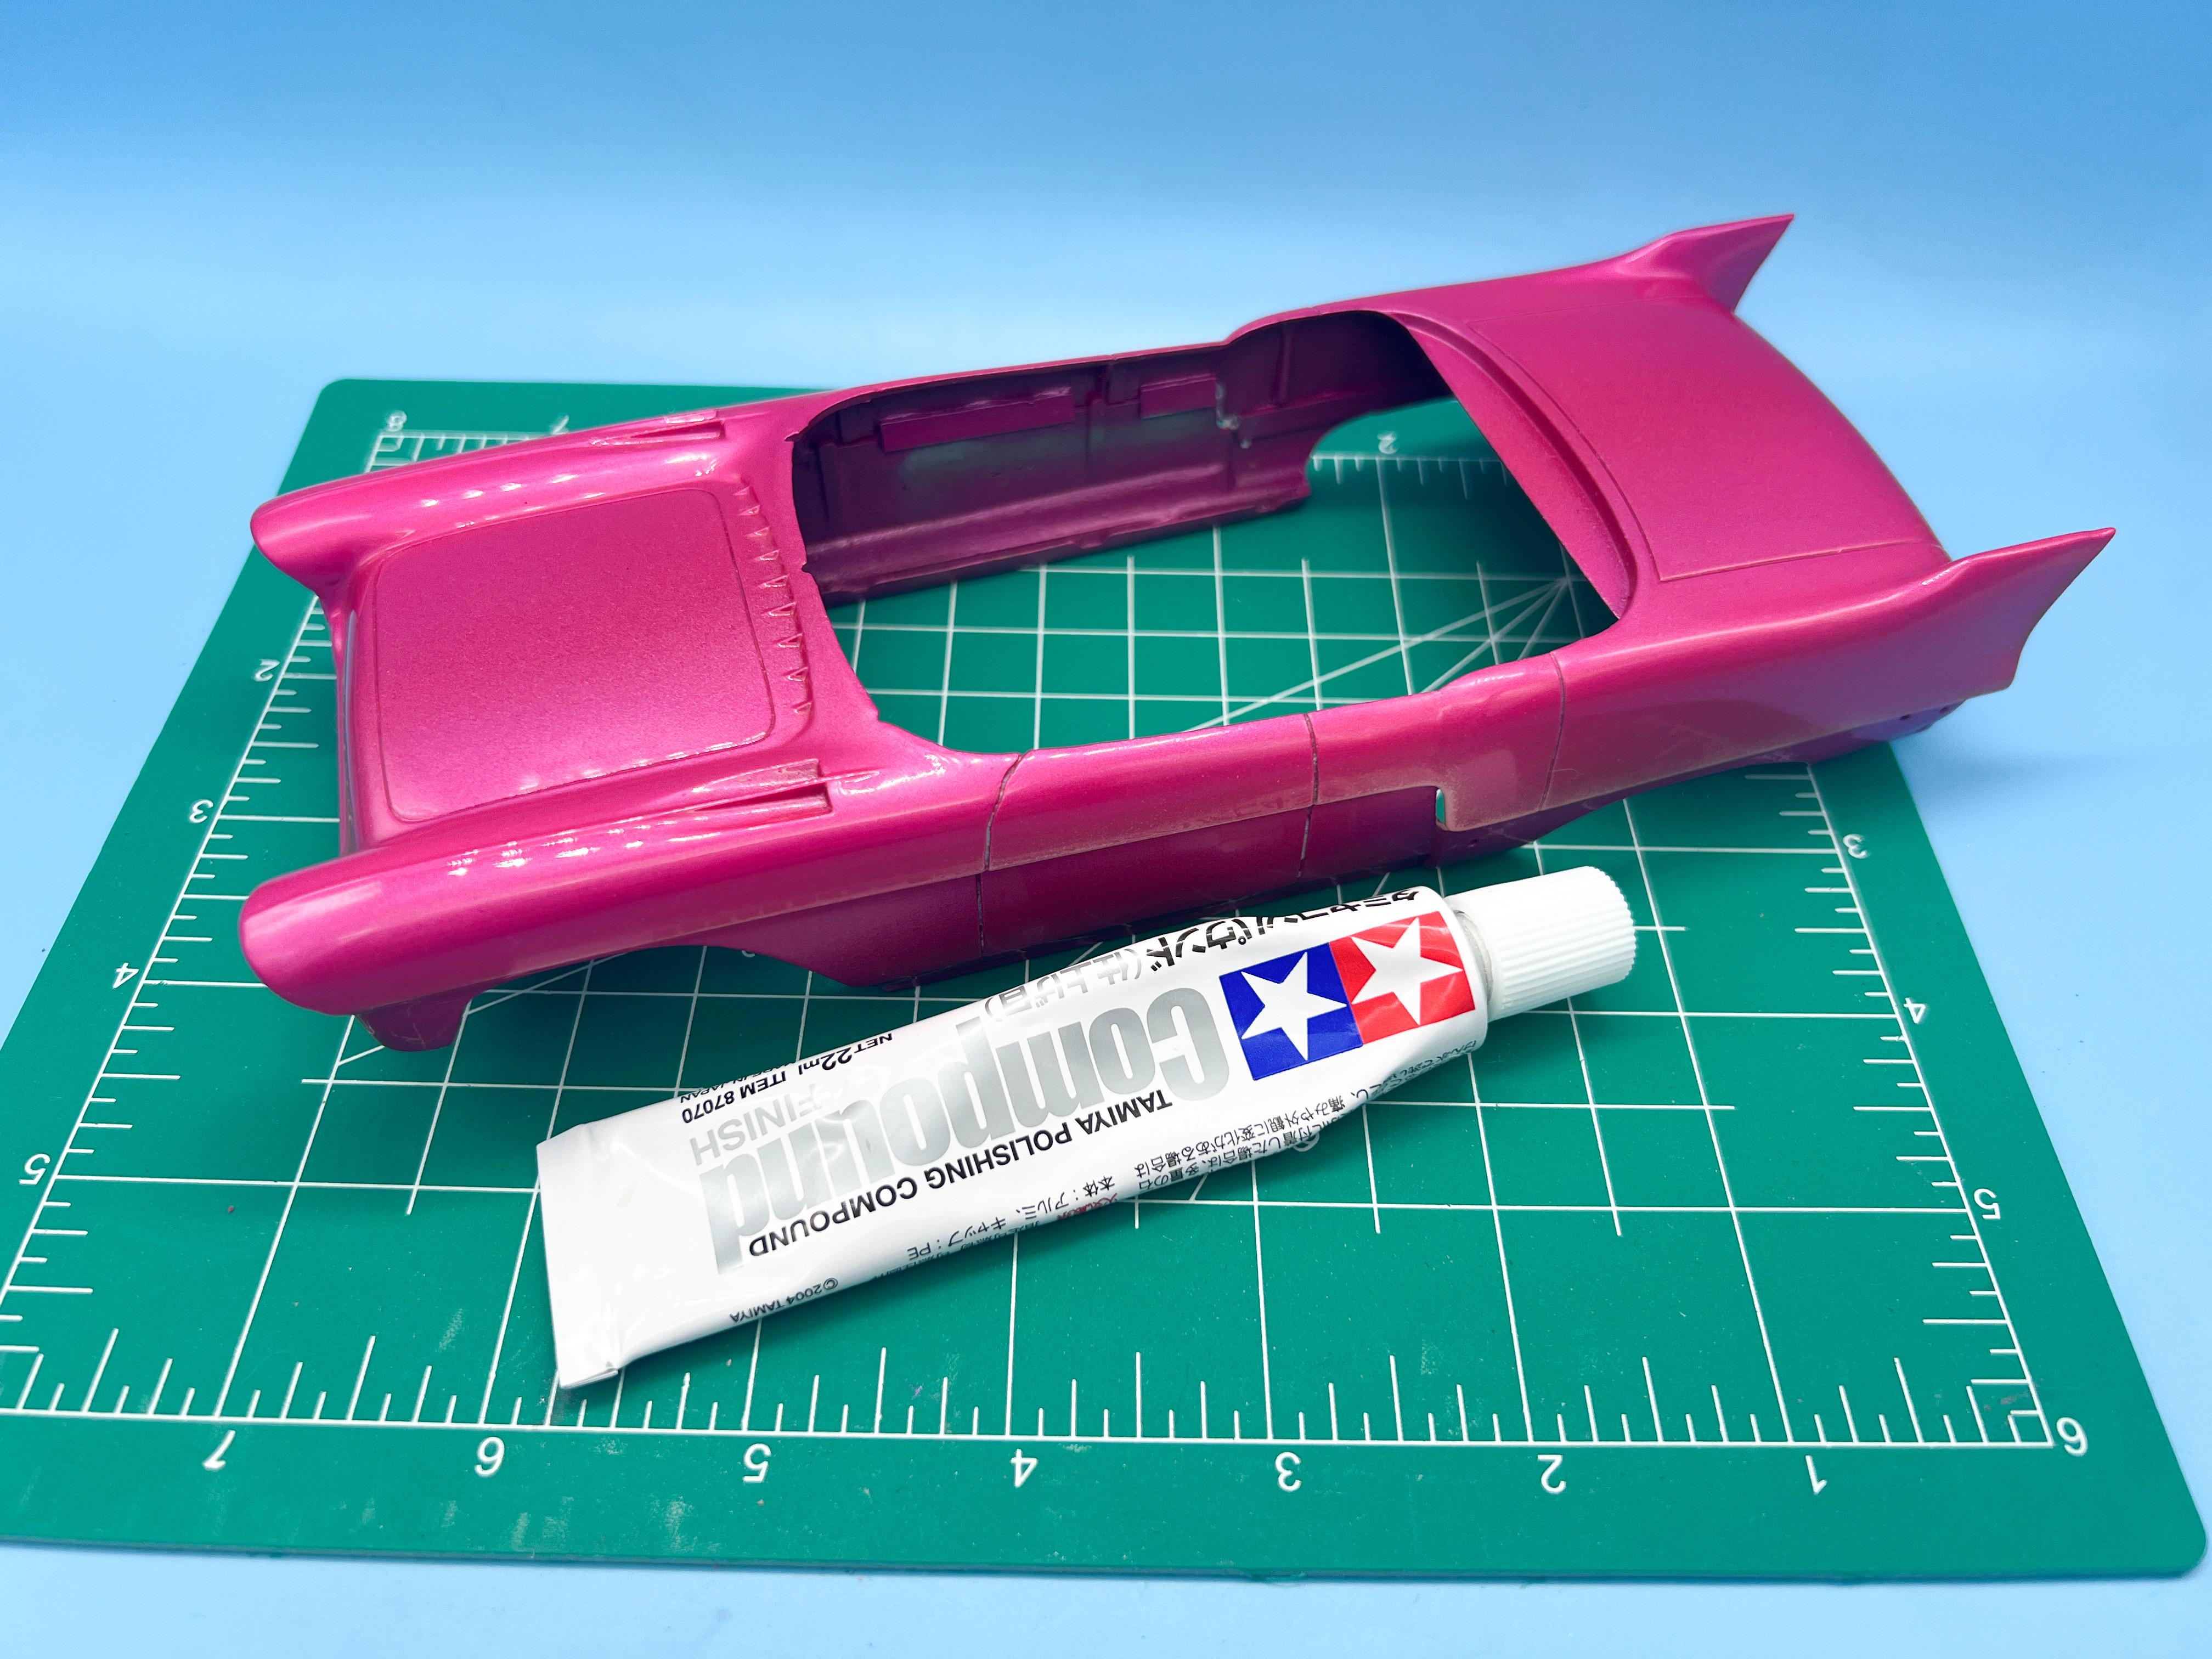
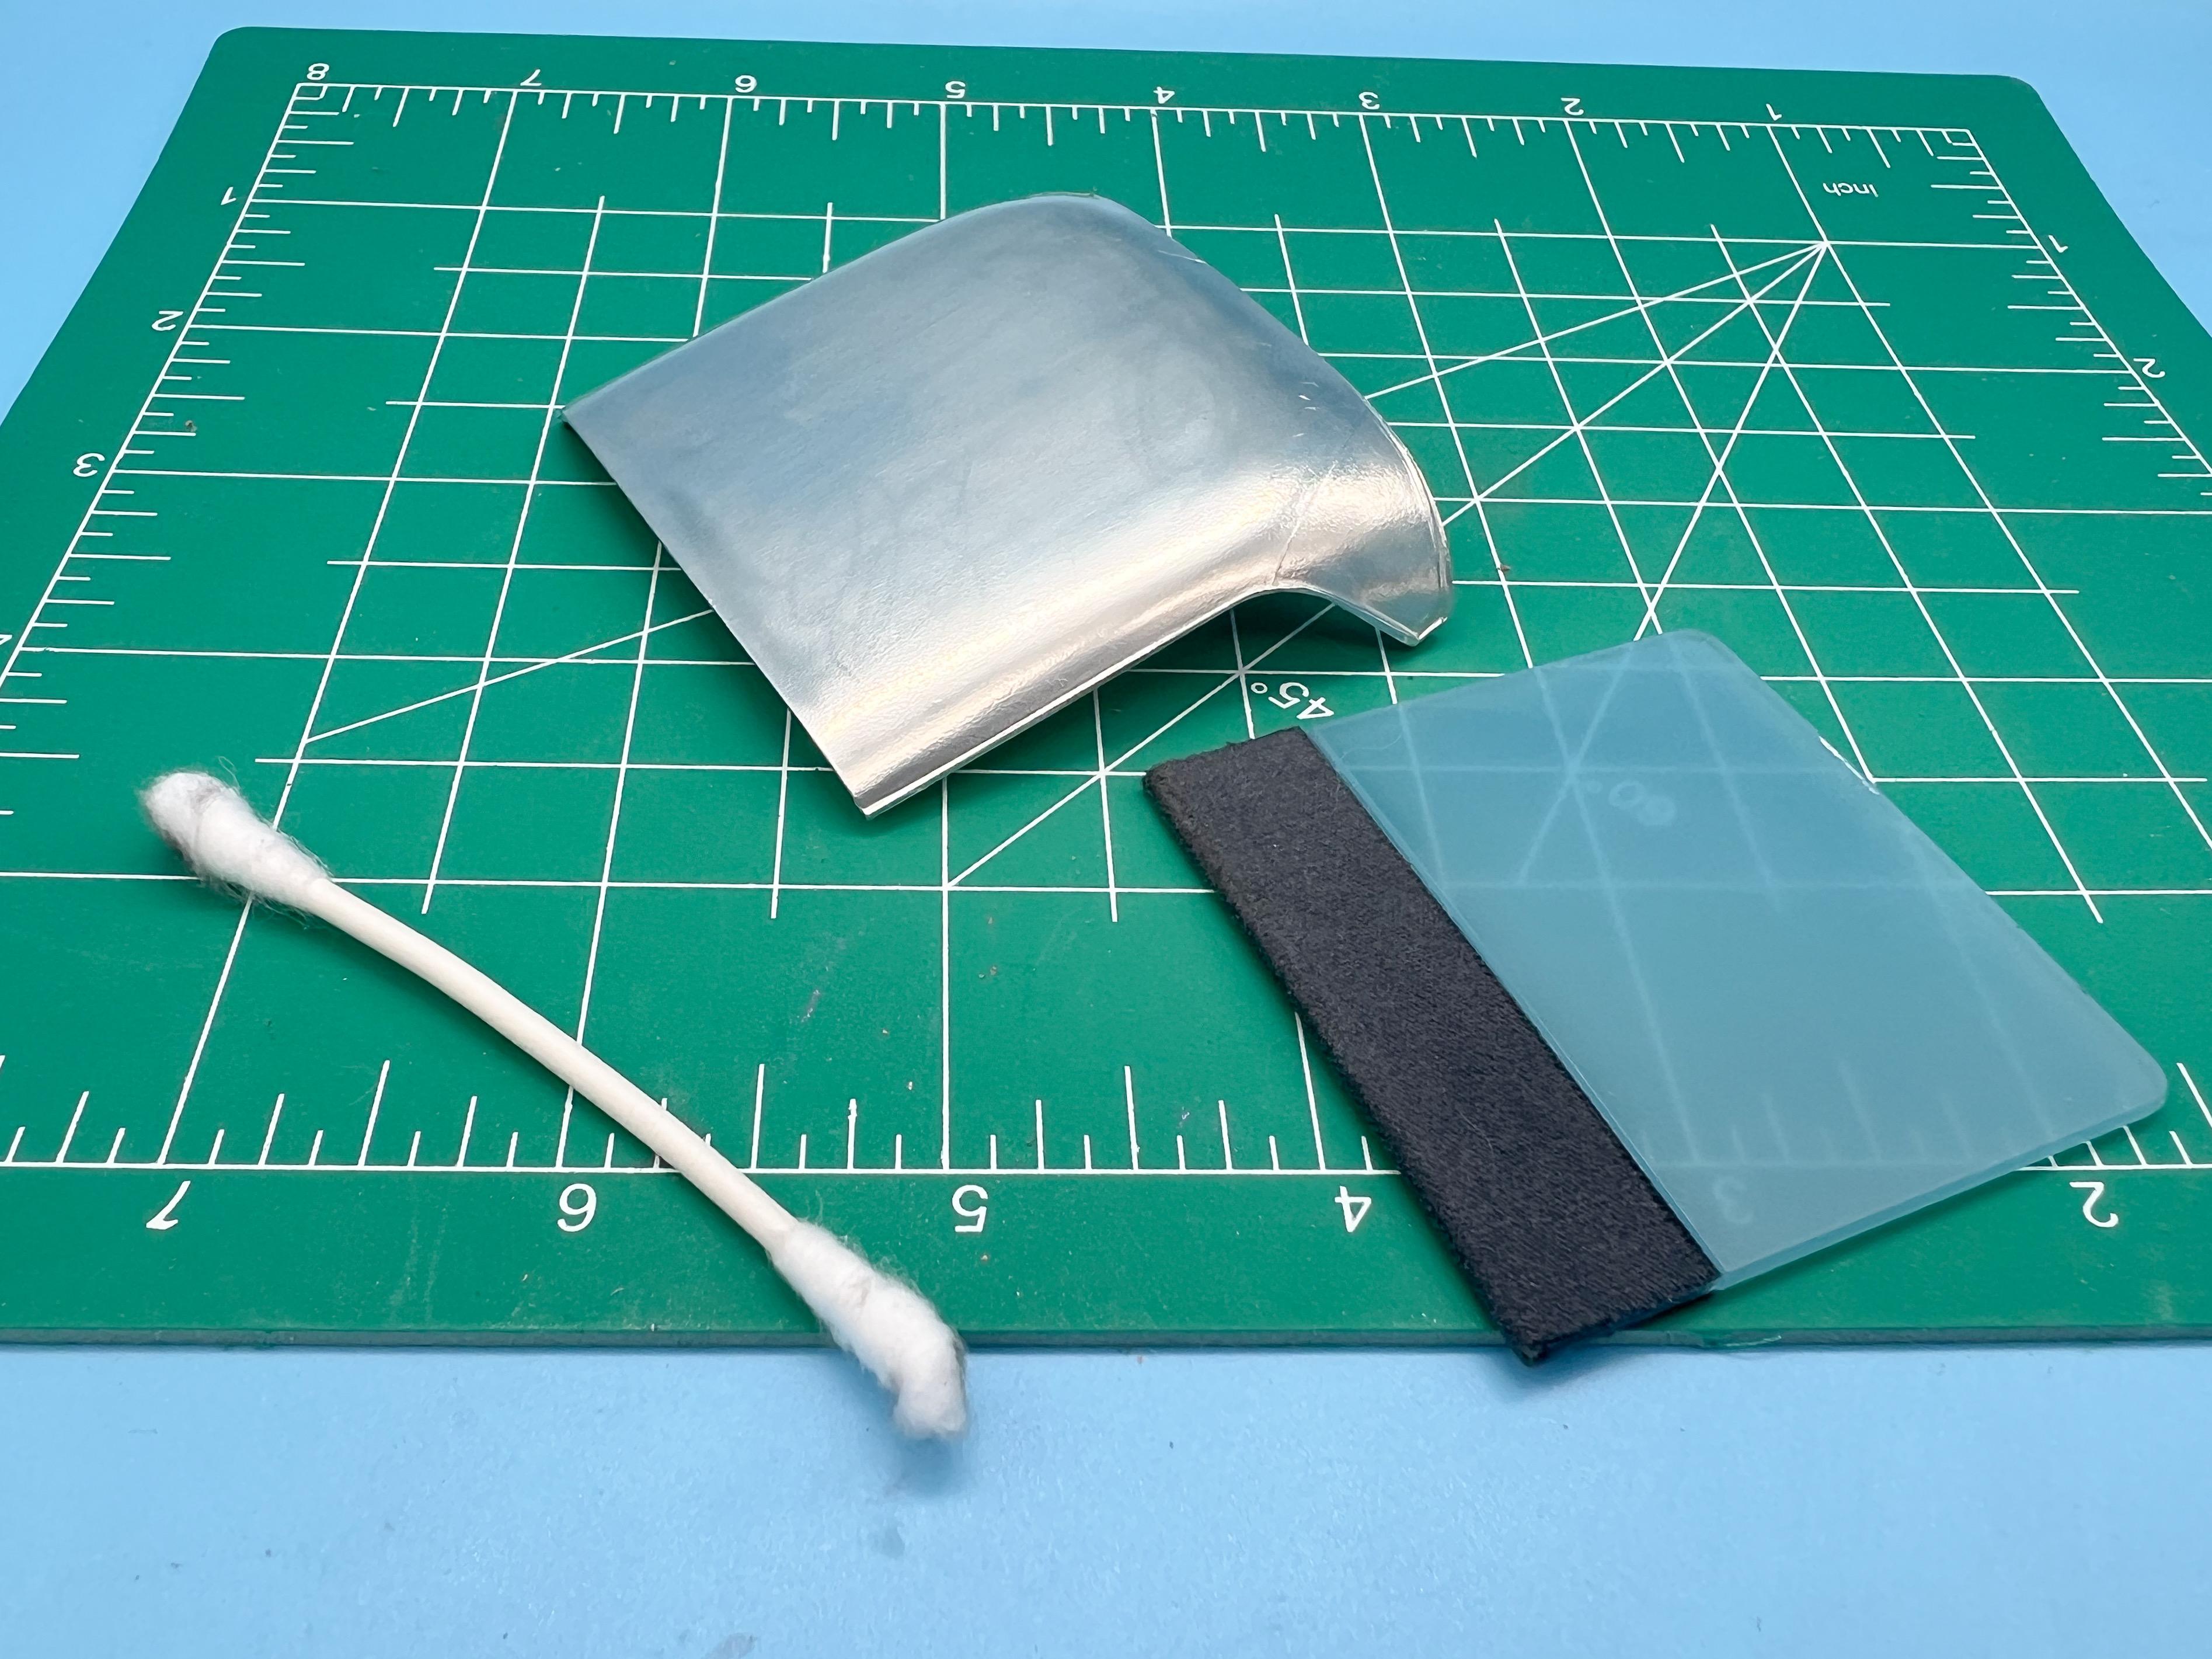
Thank you!! A little more progress this week, and today…painted the interior pieces - went for a white base, with a little tiny dash of pearl powder to tie the look to the body. Shot white base, then Vallejo silver, then Future with a dash of pearl: Then added the chromework: Speaking of chrome, shot black enamel on everything that needed to be chrome-y: Key to good Alclad, like any paint, is that nice shiny base: I’m no Alclad expert, but I was fairly pleased with these bits… Next shiny thing to tackle was the roof; the real car has a brushed stainless steel roof, so to replicate that I first laid down regular old BMF… Then brushed it with a 4000 grit cloth to add the grain: Looks ok-ish to me - I wish I hadn’t had to have a couple of seams to get the BMF to lay flat, but I put them about where I guessed there might be a seam in the real one (although I’ve never seen one of these in person to take a look-see): Once I’d finished laying down clear on the body, time to polish… I’m playing with my polishing technique a little to make it a little faster and easier (I HATE polishing) - but the Tamiya compounds definitely help a lot: And now I’m down to little bits before assembly, like blackwashing the grille and adding the license plate decals… Looking forward to seeing all these parts start to come together! Thanks for looking - more soon, soon as I’ve done more!
-
Atlantis Models has bought another lot of tooling/molds.....
OldNYJim replied to Dave Van's topic in Car Kit News & Reviews
? -
Atlantis Models has bought another lot of tooling/molds.....
OldNYJim replied to Dave Van's topic in Car Kit News & Reviews
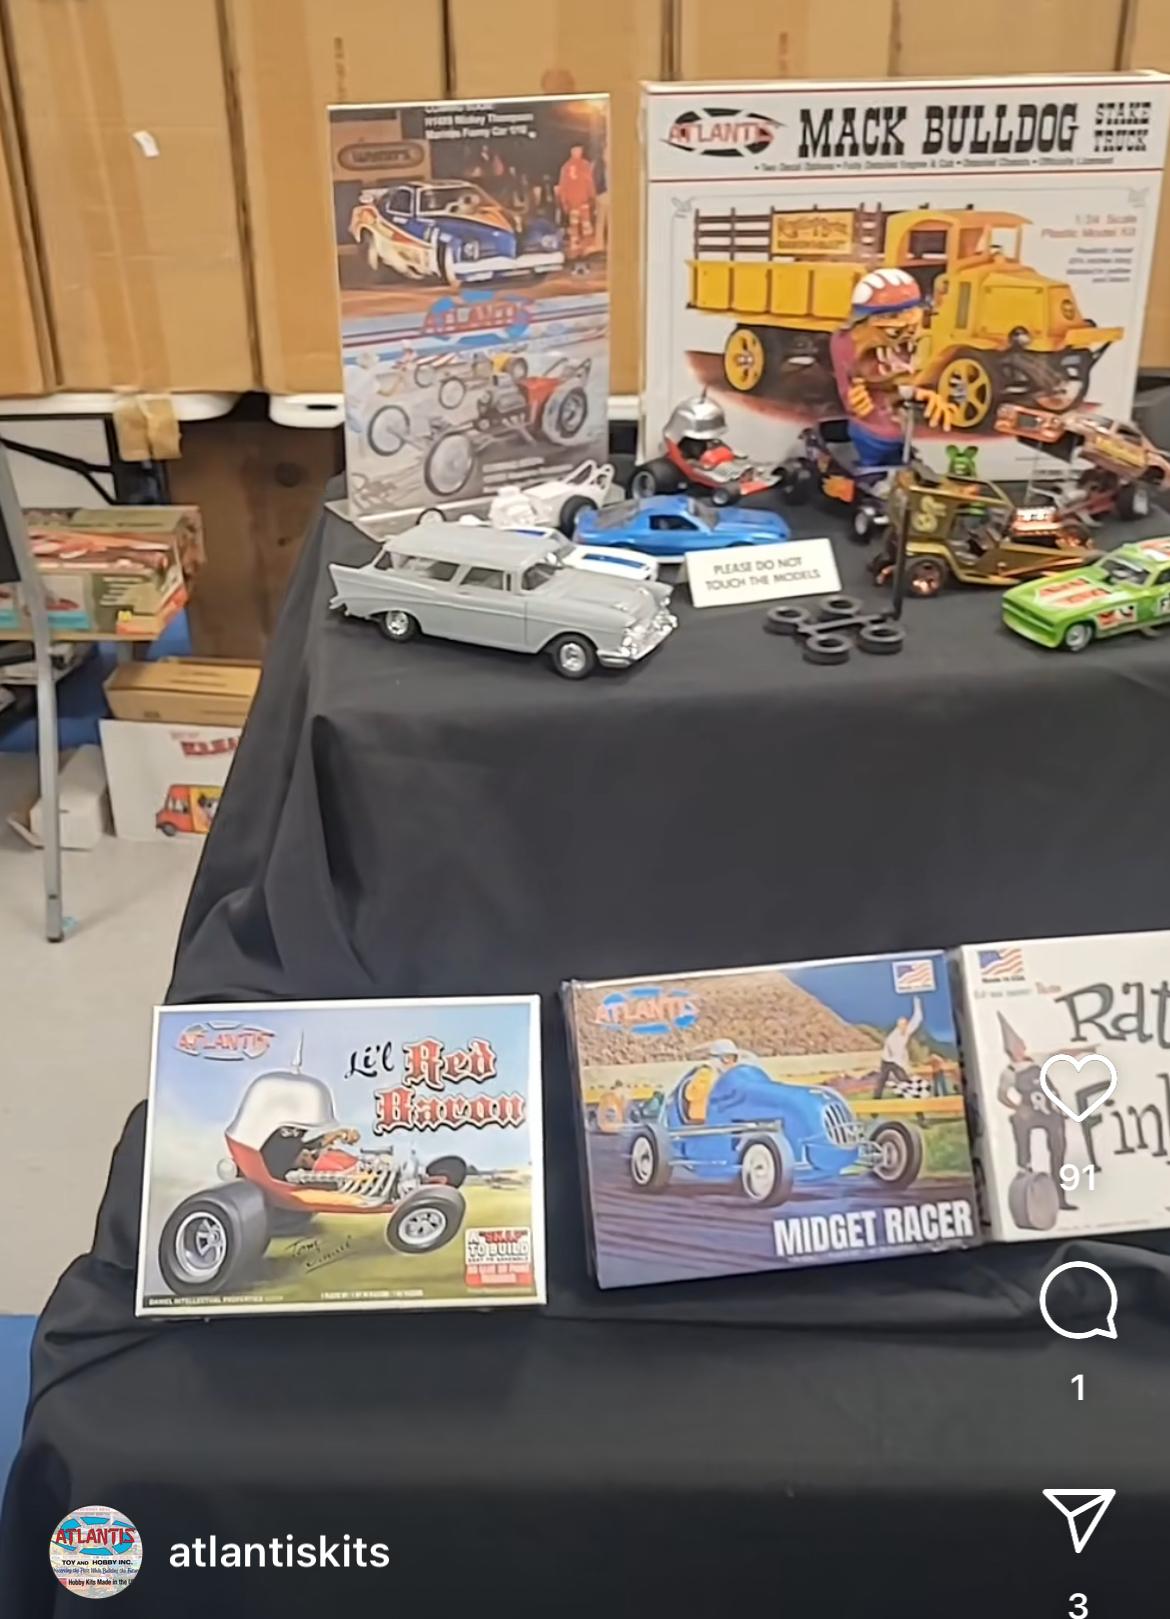
Jim Keeler said in this interview that he’s working on 55, 56 and 57 Chevy kits for Atlantis currently, it looks like they have a Nomad on display at NNL East today:
-
That’s even simpler than I suspected the answer would be - I figured you might have added a vent hole somewhere, but I couldn’t spot where it would’ve been… Nice work - and thanks for the detailed explaination!
-
How DID you solve the air bubble issue, out of curiosity? Great build so far!
-
Stunning! You’ve got a real skill when it comes to paint (I spotted that 30 Coupe on your IG too…that one’s equally great!!)
-
Some BMF from Amazon. They shipped it in one of those bubble envelopes ?
- 38,867 replies
-
- 3
-

-
- johan
- glue bombs
- (and 1 more)
-
I’d drink that tea all day long…GREAT looking project! I’ll be following along!