OldNYJim
-
Posts
250 -
Joined
-
Last visited
Content Type
Profiles
Forums
Events
Gallery
Everything posted by OldNYJim
-
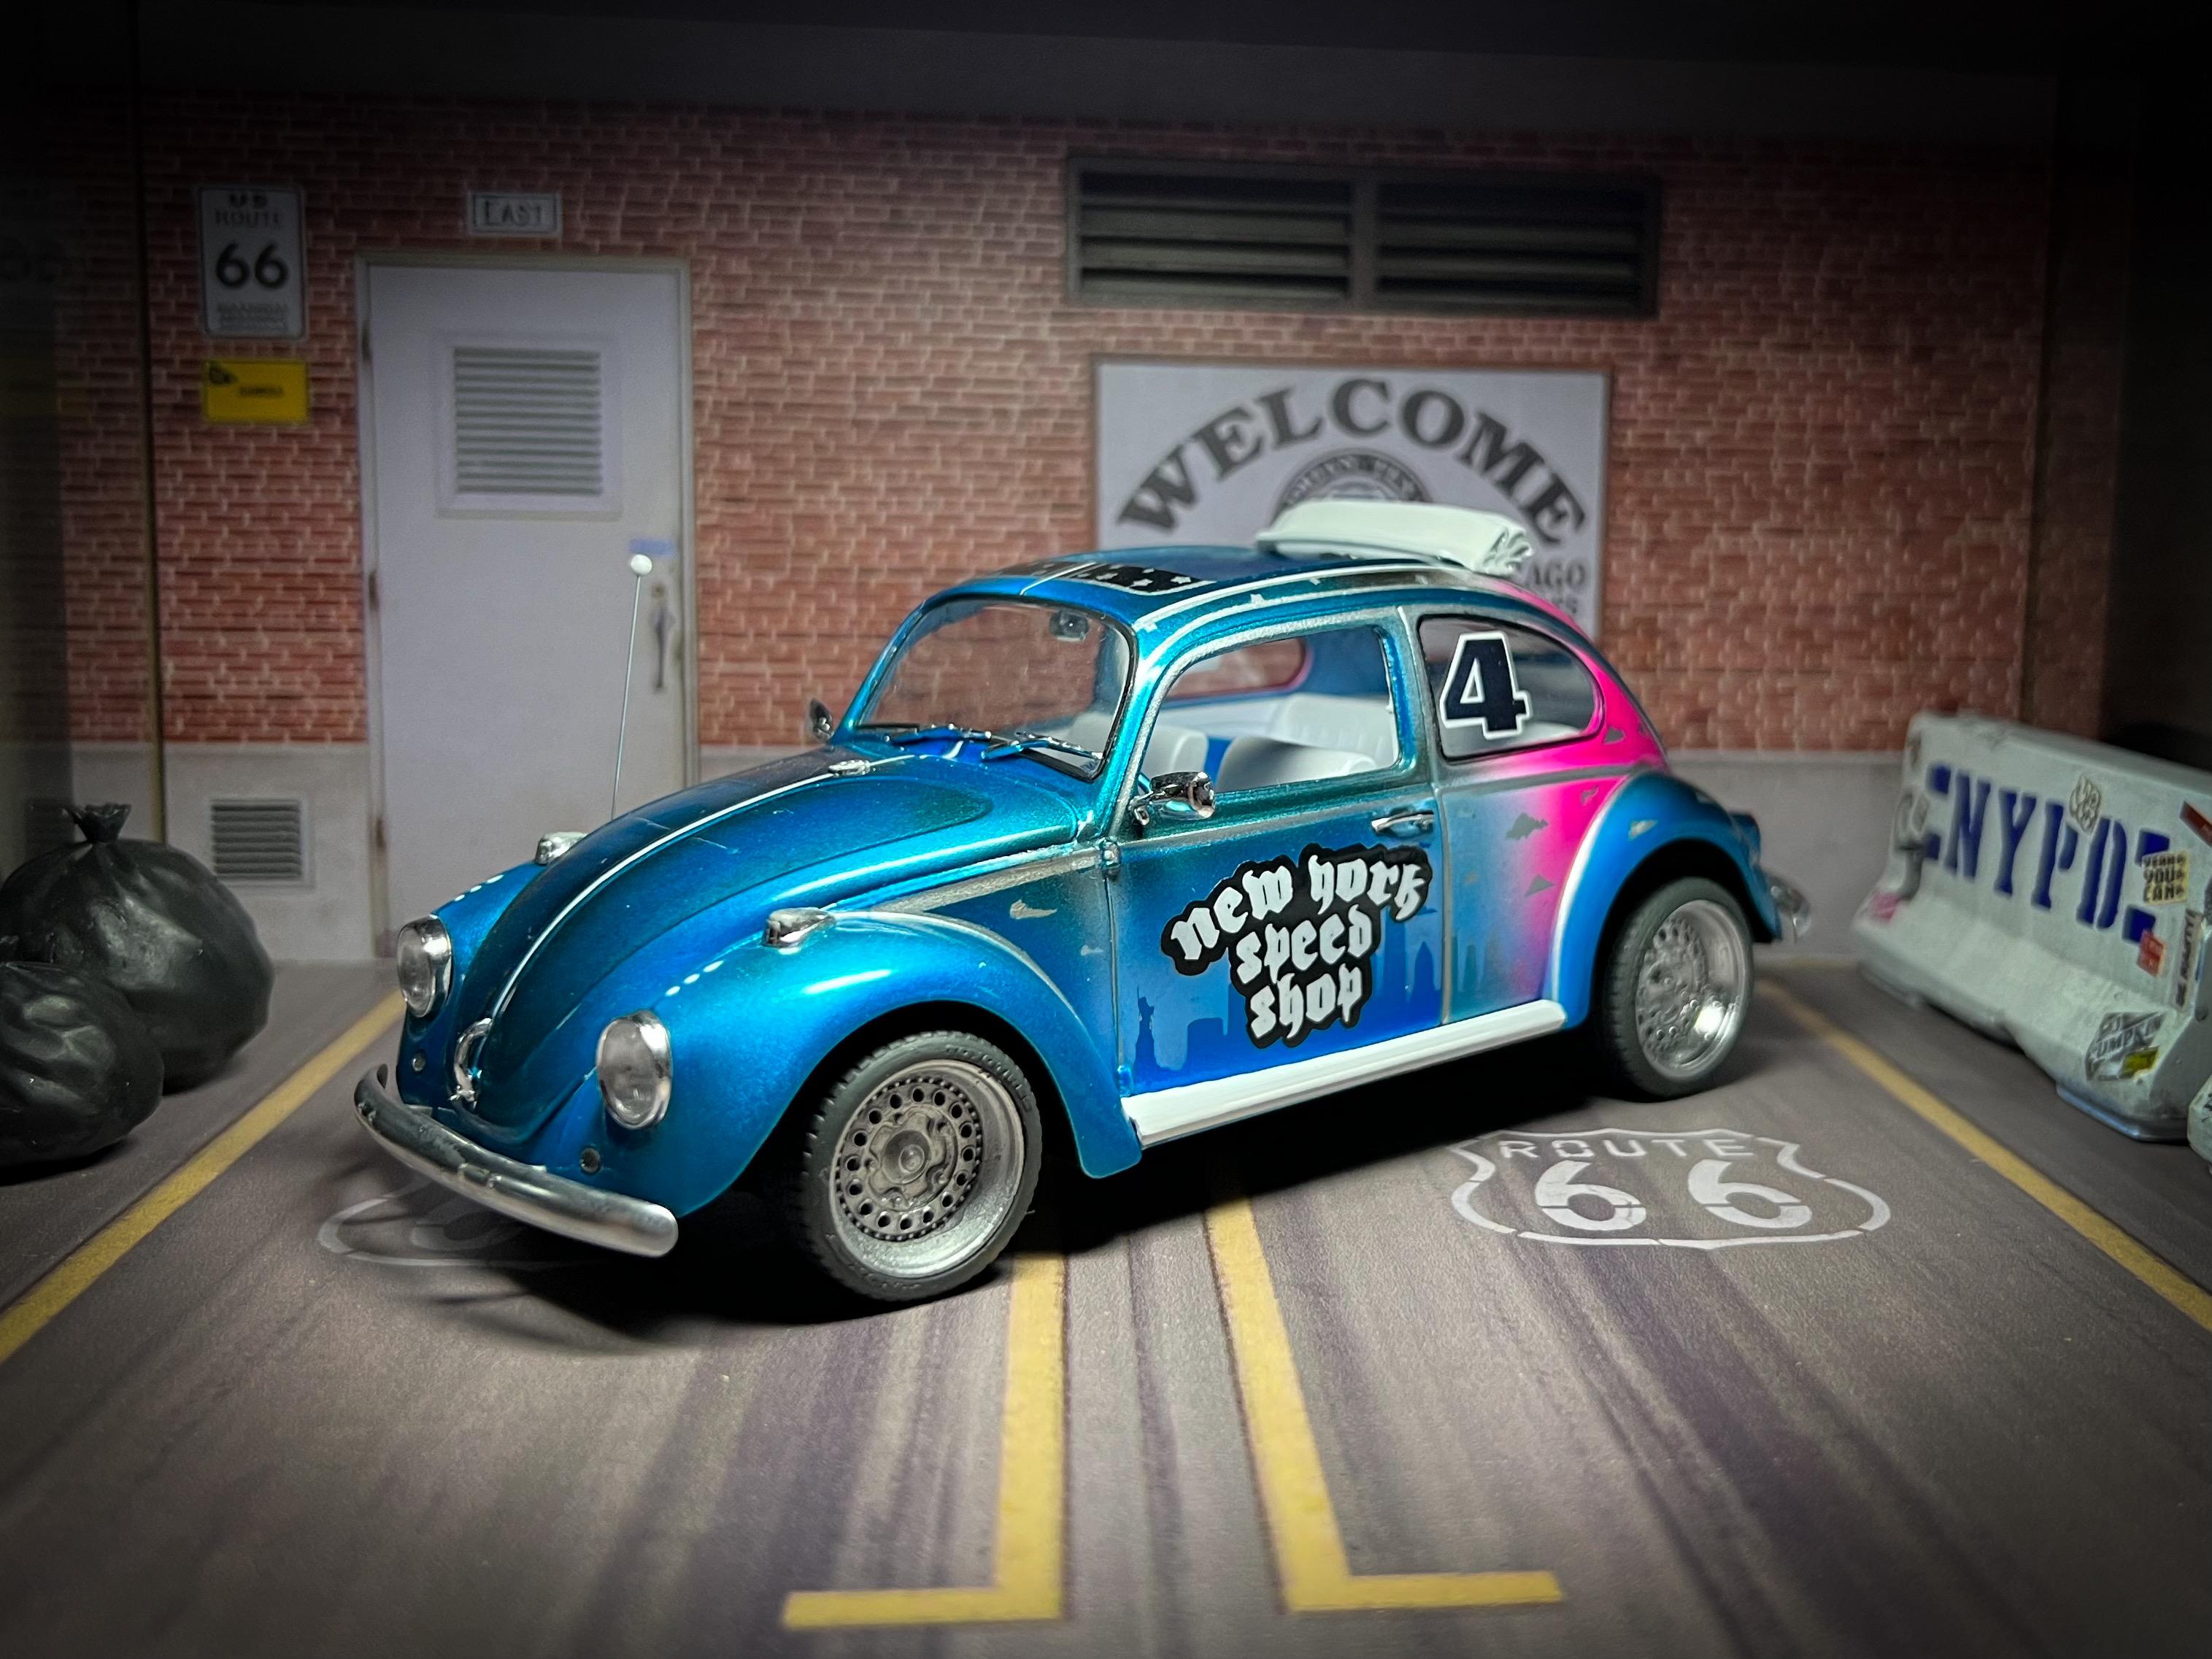
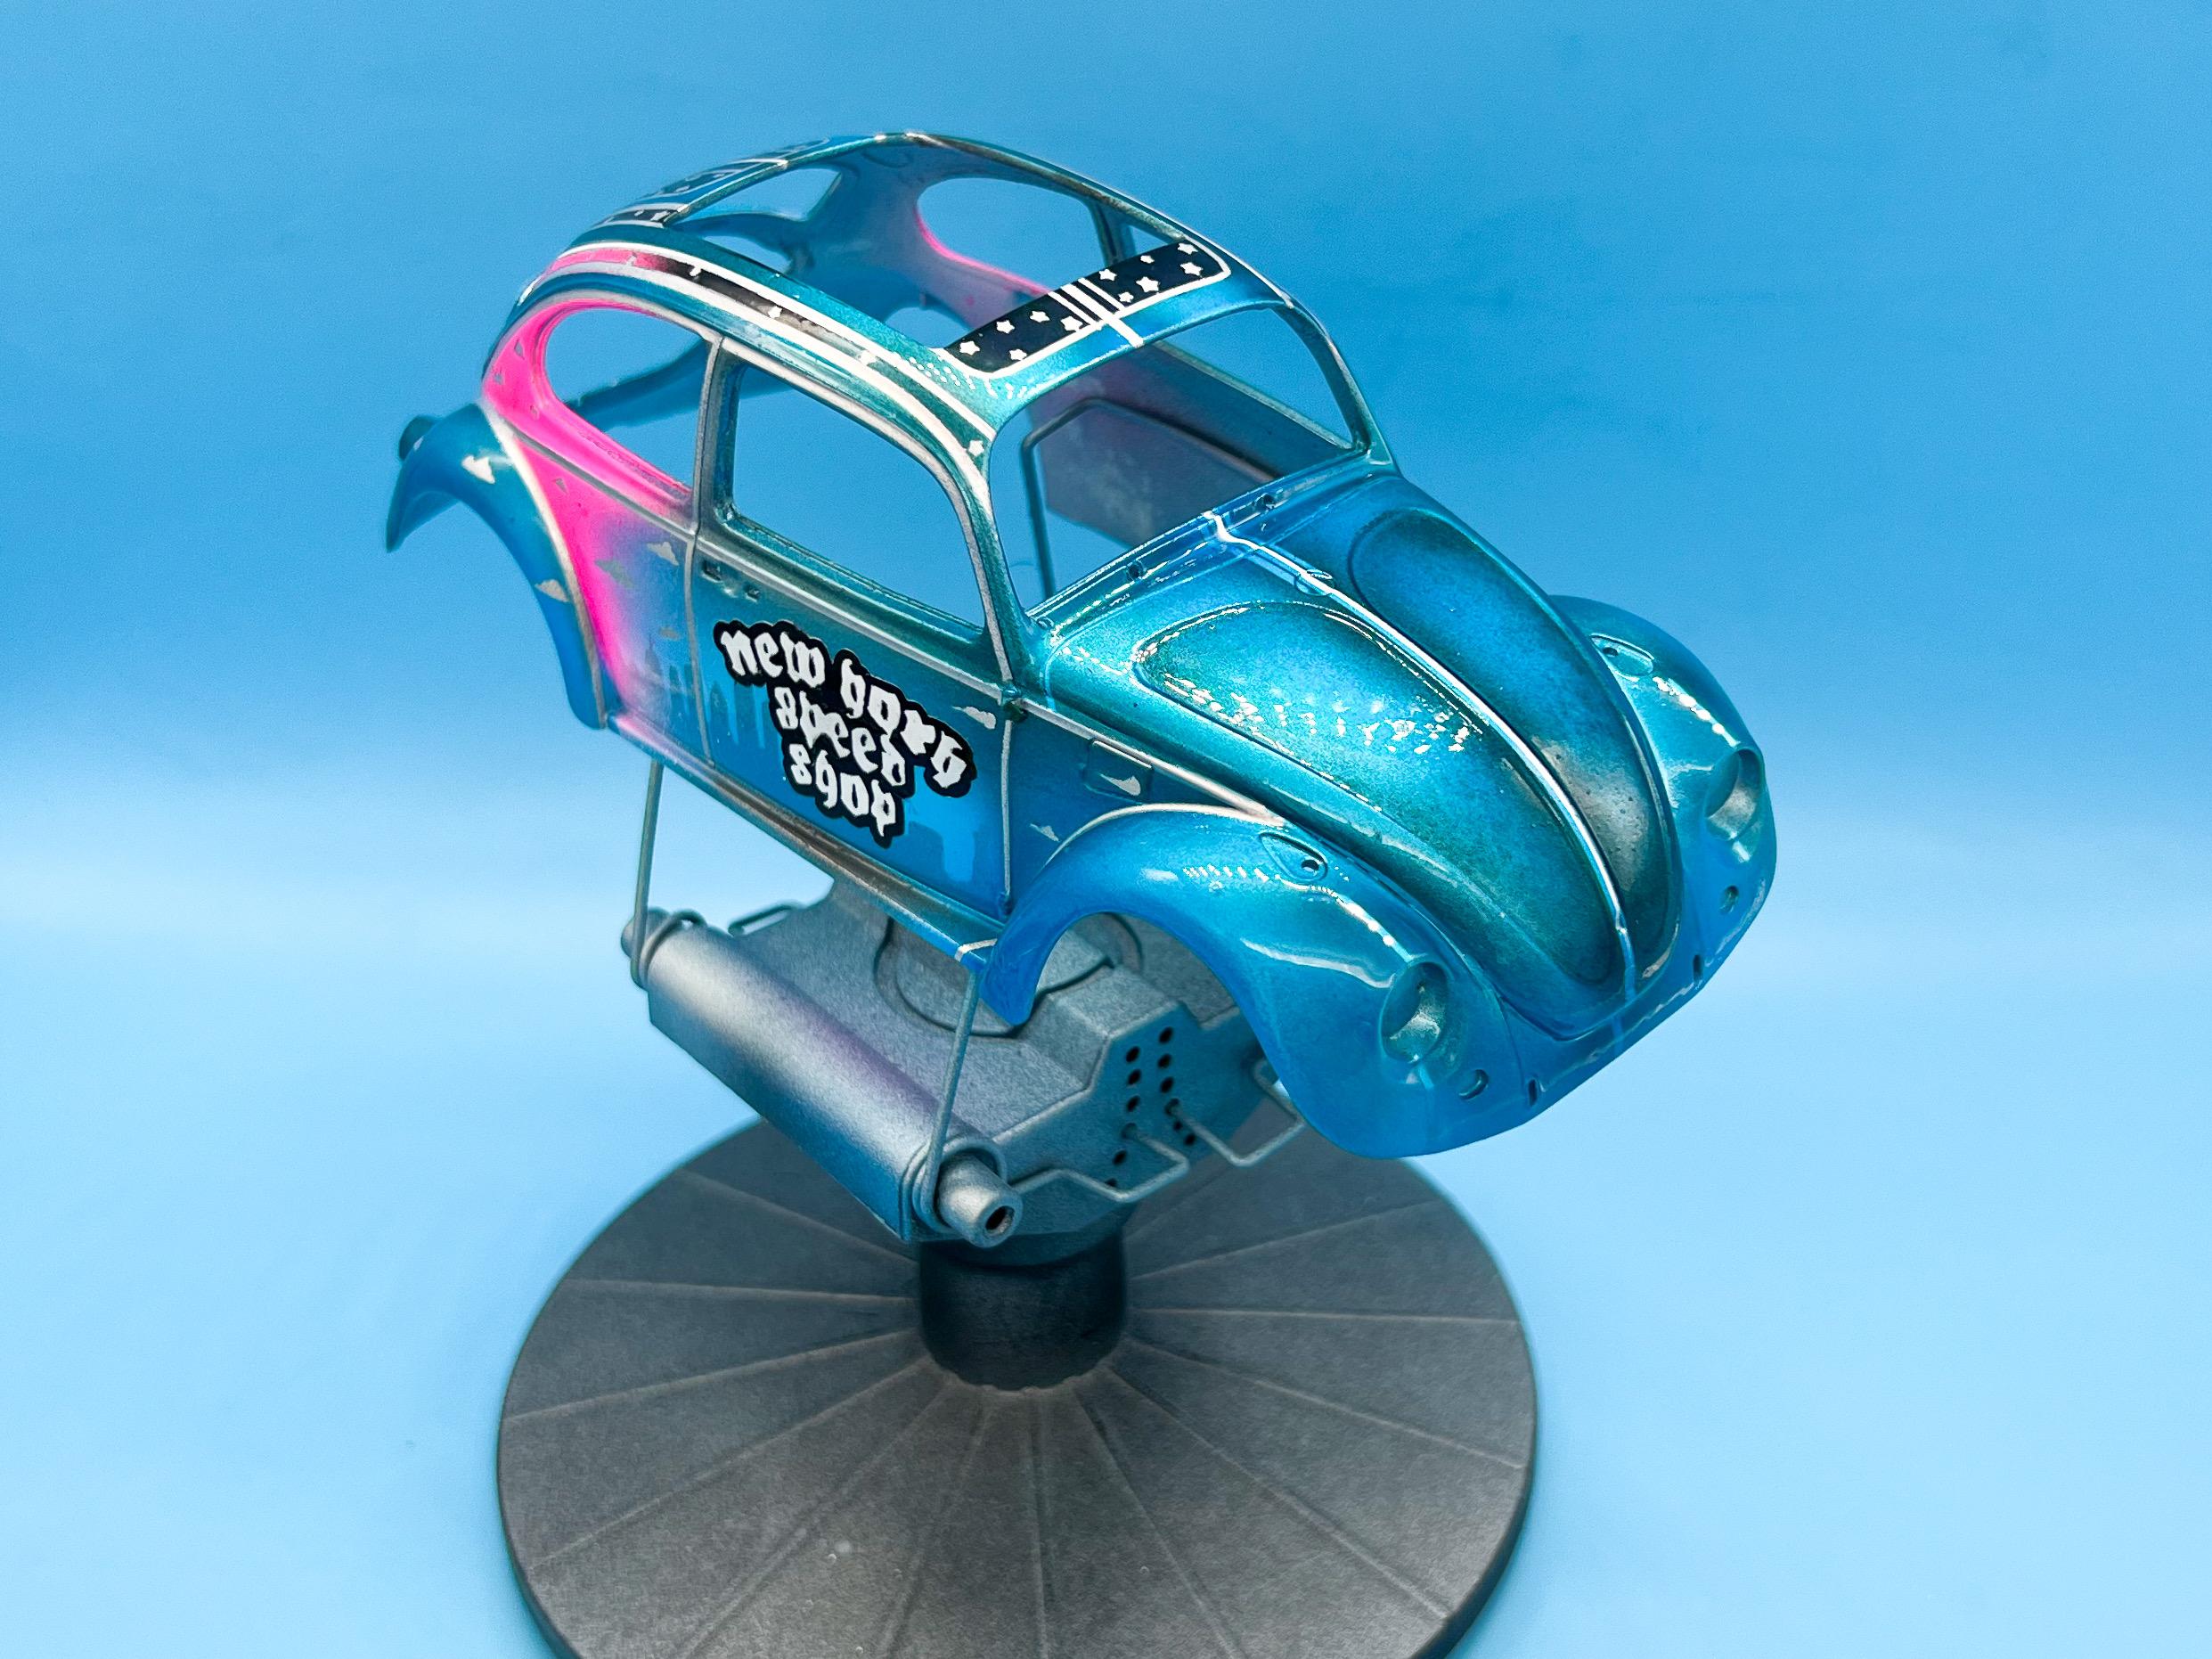
I'll probably do a 'New York-aged' version at some point too My original train of thought was 'what would happen, in an alternate reality, if the 'SoCal-look' trend never happened out West, but on the East Coast instead. I reasoned less emphasis on performance modifications (less hot-rod / drag influence than in Cali, worse roads), less lowering (same reason) stock bumpers would remain (because - crowded city, people parking by braille), and a little more emphasis on paint and styling given the lack of modification elsewhere. Oh, and I'd want a moon-roof, because I like seeing the buildings and sights when I'm driving around the city There's a clear difference in look between early East and West Coast hot rods - I wanted to do a little thought exercise to see what the logical version of an East Coast VW might end up being.
-
Thank you! Thank you too Greg! And thank you too David! Yes sir, it's a thin self-adhesive vinyl. My wife picked this up at Michael's, but any Cricut / Silhouette vinyl would work just as well. I don't know if they sell a straight chrome, but I have seen that product available elsewhere: https://www.amazon.com/VViViD-Chrome-Permanent-Adhesive-Silhouette/dp/B08HR79R9C/ref=sr_1_3?crid=3T8HU3DXW10JU&keywords=CHROME+VINYL&qid=1677686068&sprefix=chrome+vinyl%2Caps%2C137&sr=8-3 Generally, the good quality vinyl (3M for example) is better quality and usually thicker, and the cheaper stuff tends to not be as thick, which is important for a scale look. This stuff that I used is way too thick to be in-scale too, but it's not SUPER noticeable at least... Most important thing with any chrome/reflective vinyl is to make sure the surface underneath is as smooth and glossy as you can possibly get it - nothing shows imperfections like chrome!
-

Monogram 1/24 T engines?
OldNYJim replied to junkyardjeff's topic in General Automotive Talk (Trucks and Cars)
ICM makes a range of Ts in 1:24, with engines - they’re nicely done (think almost as if Tamiya did a Model T) -
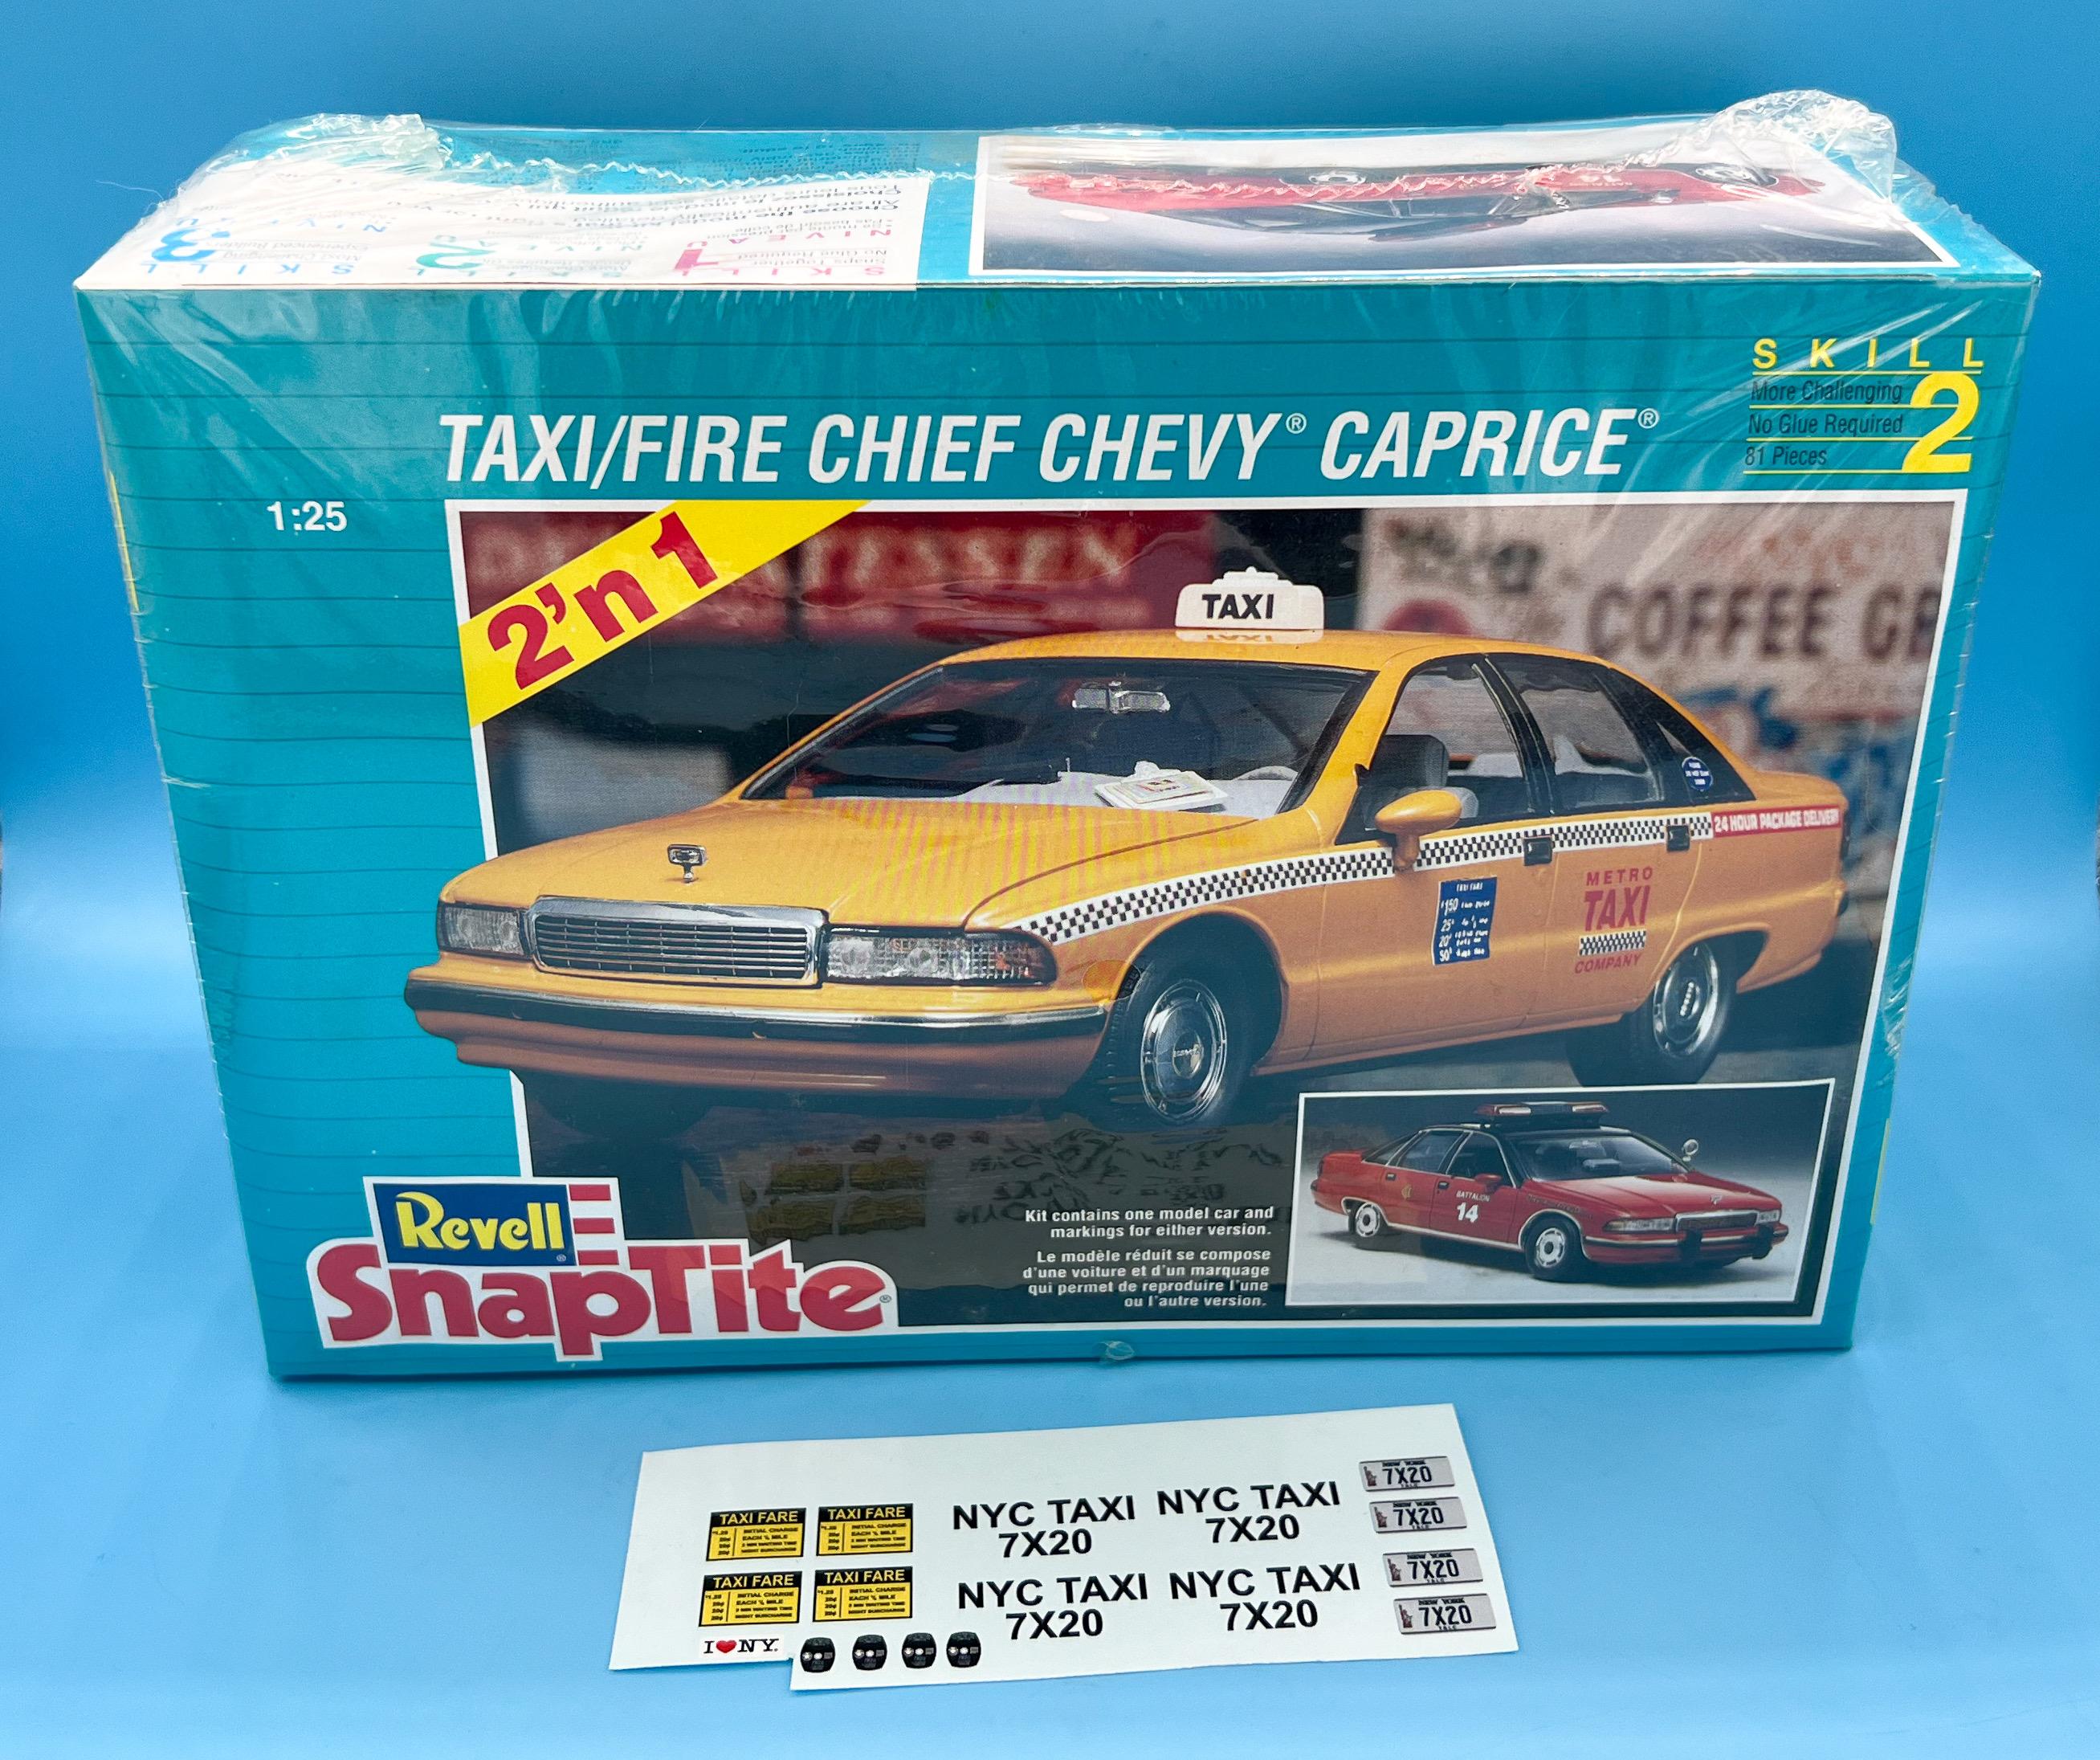
I picked up a tape-sealed ‘complete’ one of these at a show last year…and found out when I got home that it wasn’t complete in the slightest. I still wanna build it though, so picked up a second FACTORY sealed one this time: I laid out and had printed some 90s era NY taxi rate cards and door lettering - need to print a better placard for the roof and some little bits and then this will be ready to go into the queue

- 38,884 replies
-
- 2
-

-
- johan
- glue bombs
- (and 1 more)
-
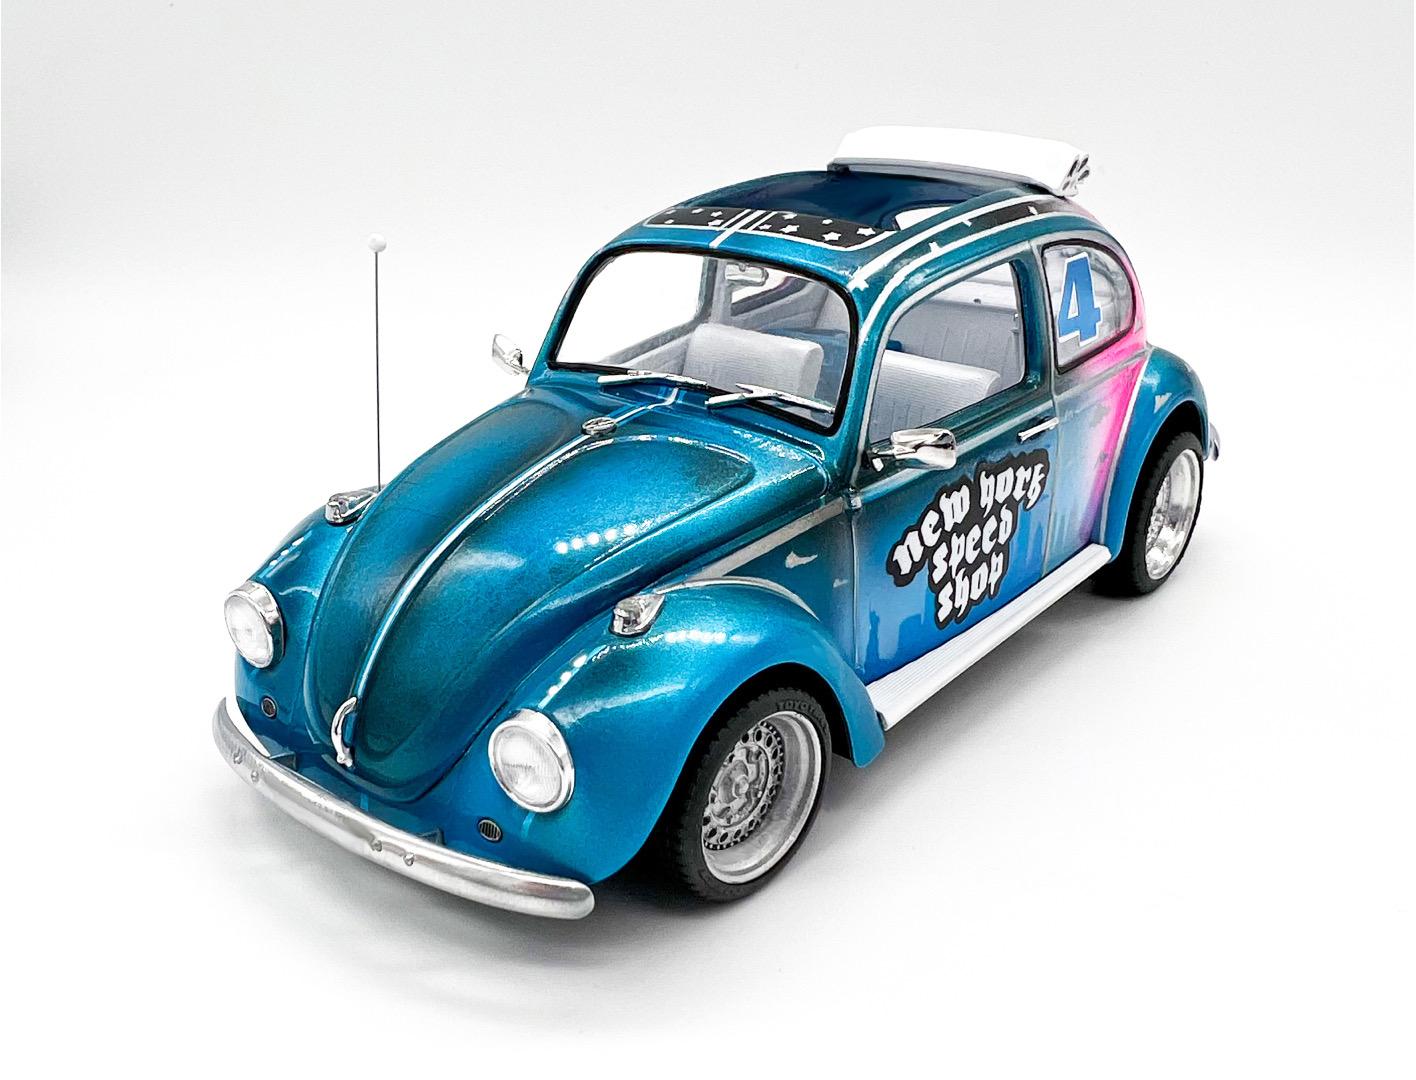
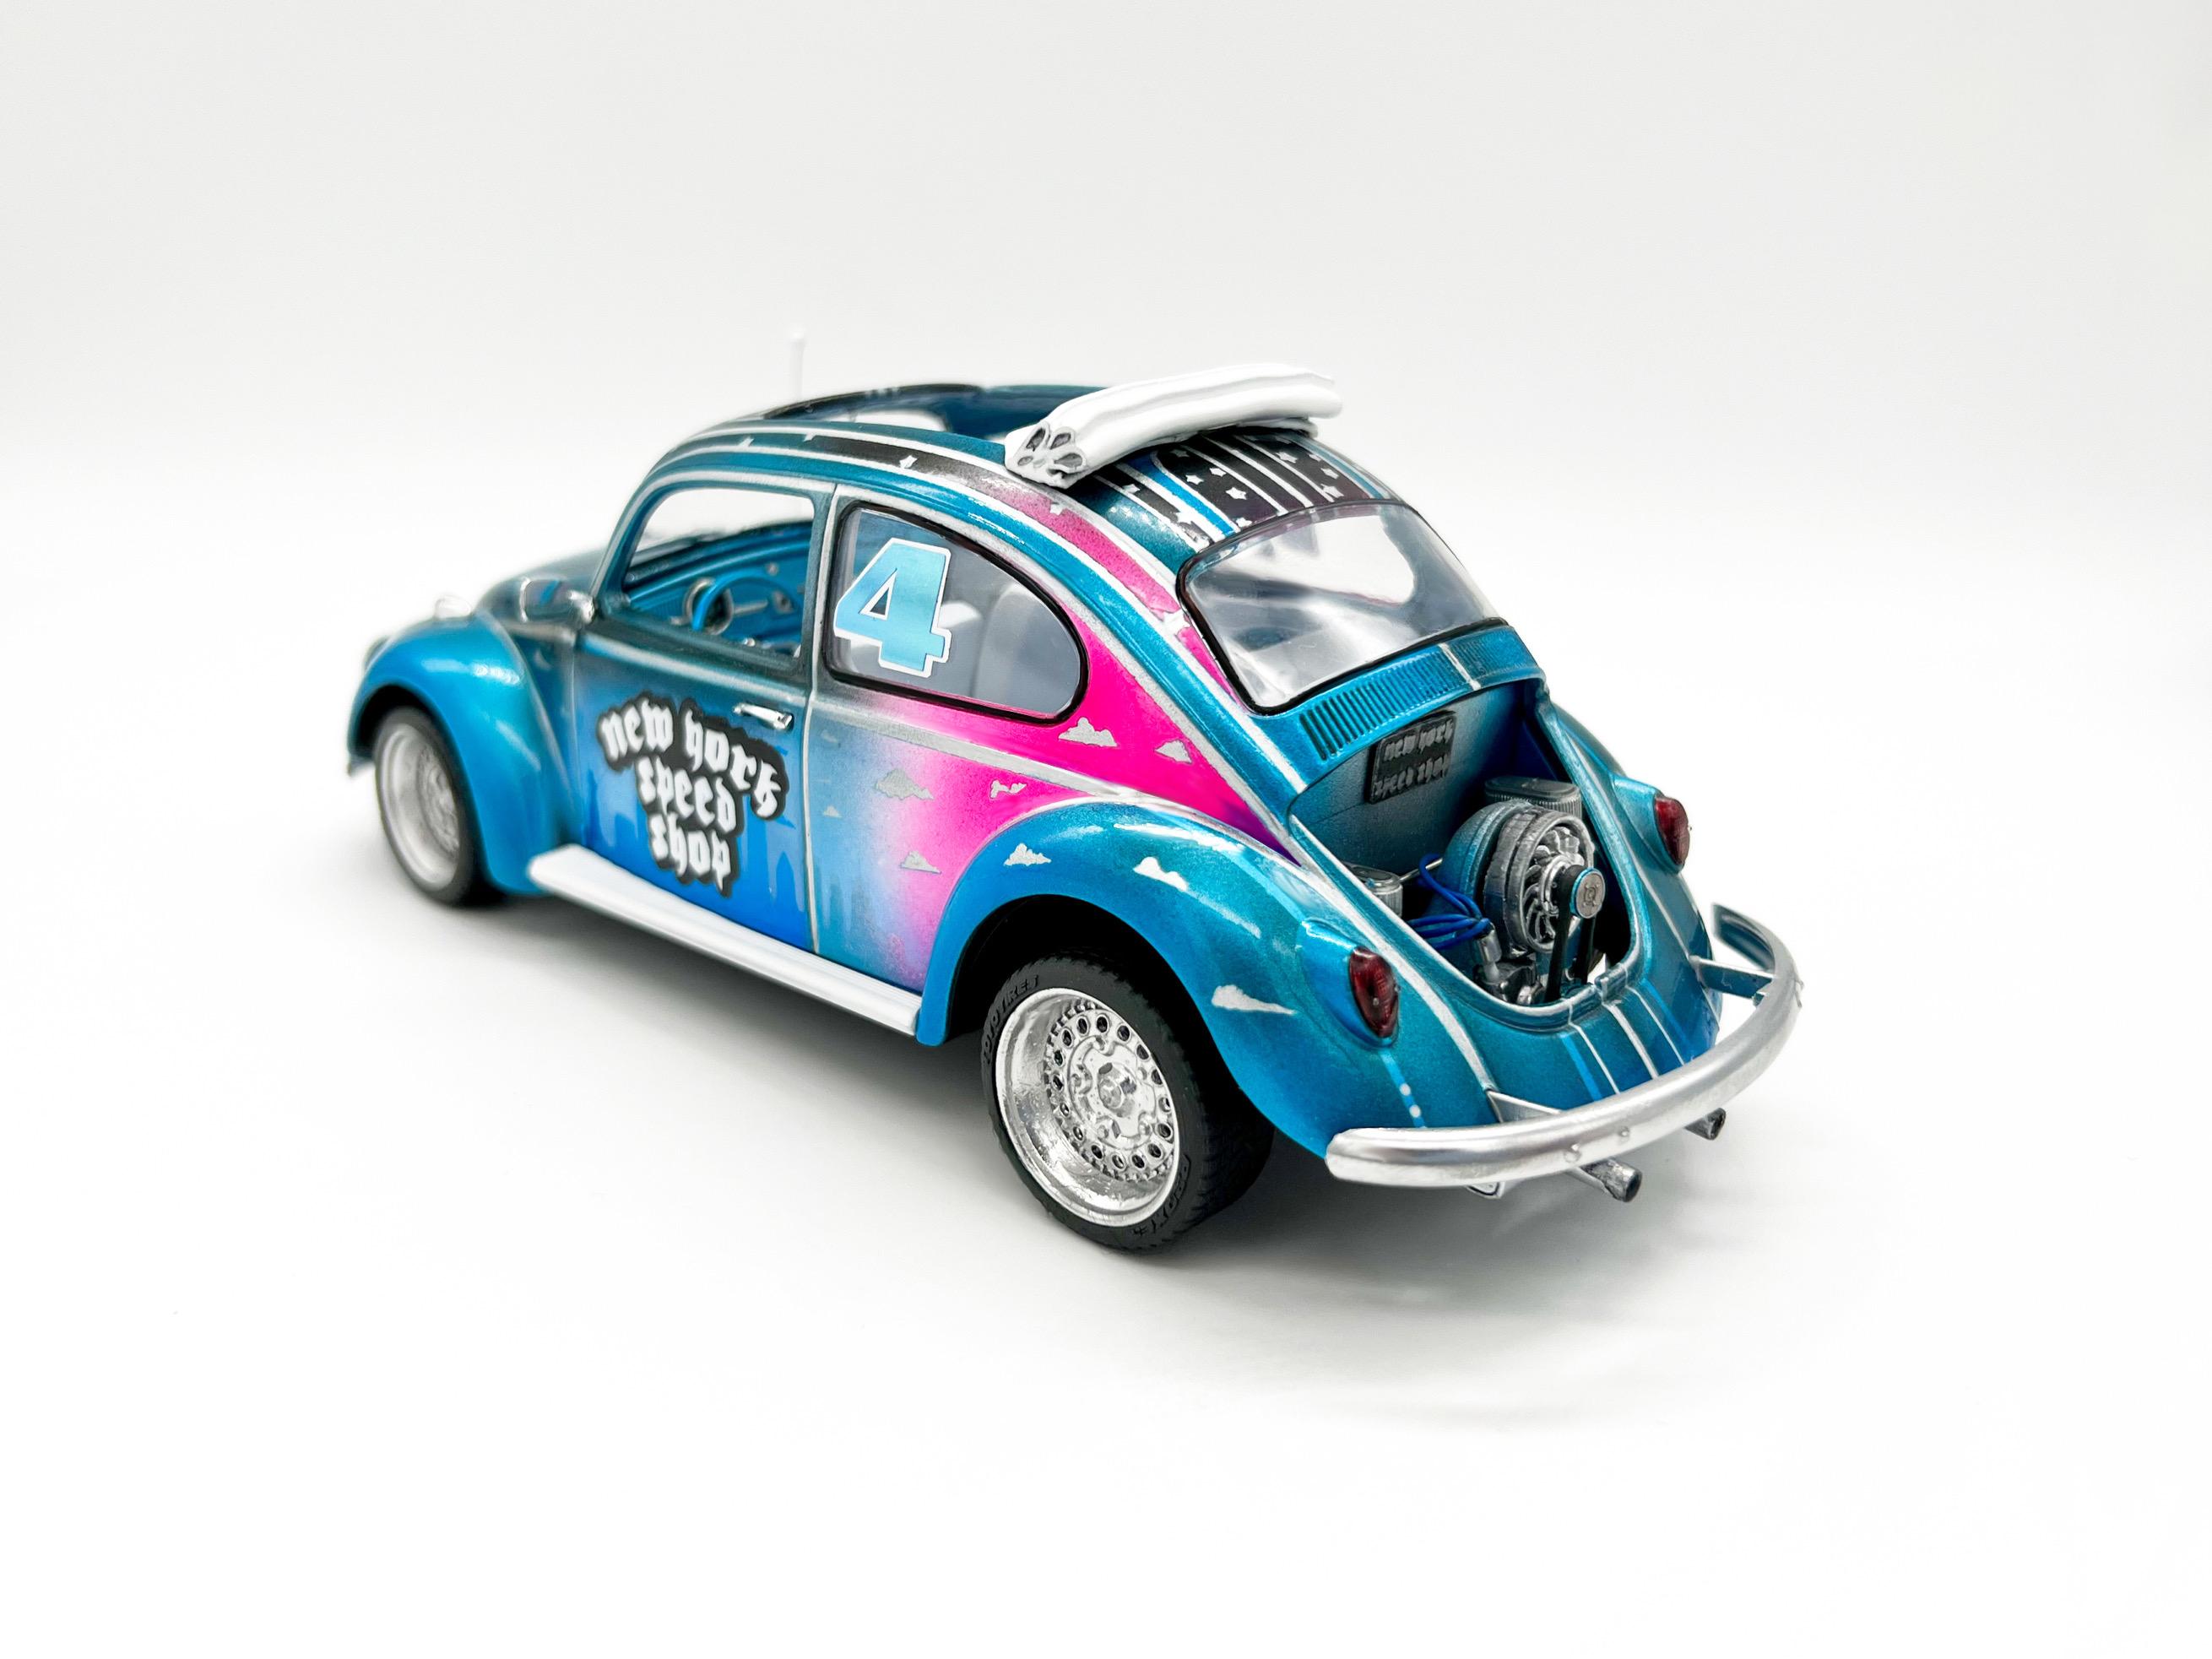
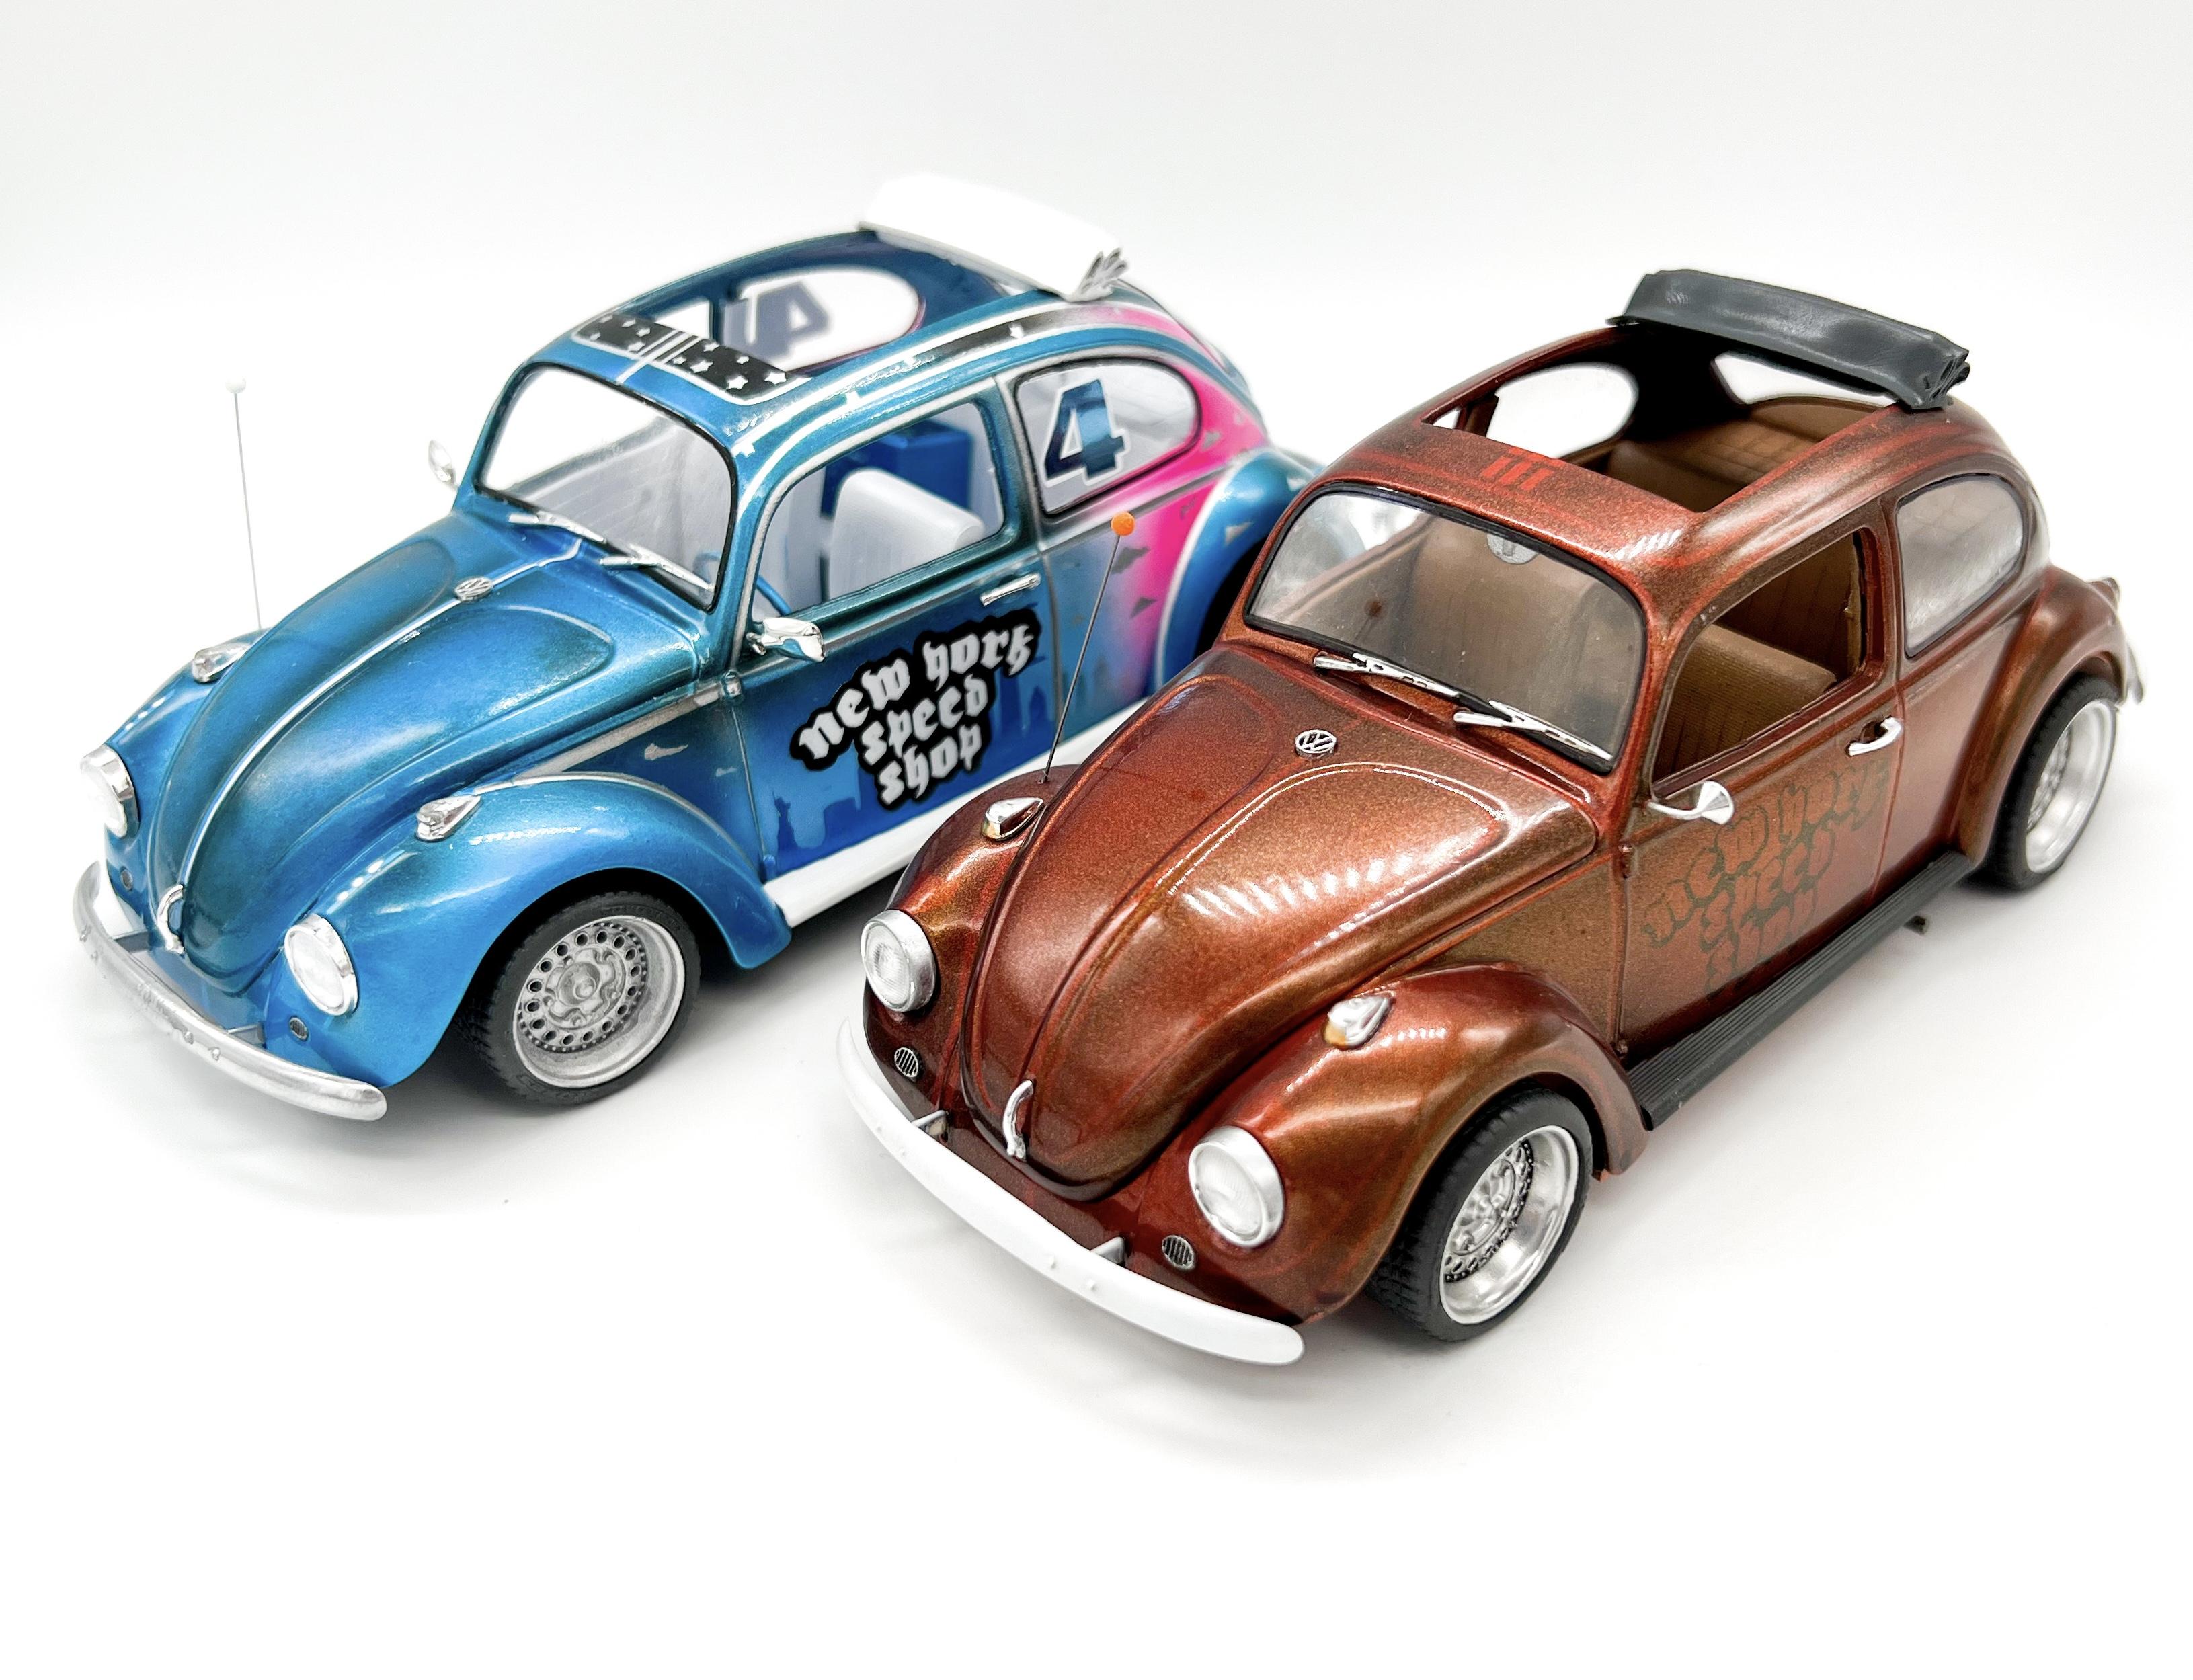
So, most of the rest of this build was just assembly - these Revell VW kits practically build themselves once you’ve got the main assemblies together…so this past weekend I got this one about finished up and on the shelf: And a pic with it’s sister build that I did last year: And my new favorite photo location - in the gloomy ol’ parking garage: Thanks for all the nice comments everyone - onto the next one!!
-
That’s a great start - nice work! Keep the progress pics coming!!
-
-
Atlantis Models has bought another lot of tooling/molds.....
OldNYJim replied to Dave Van's topic in Car Kit News & Reviews
Confirmed!
-
So, guess I don’t have to wash my wife’s car this weekend
OldNYJim replied to OldNYJim's topic in The Off-Topic Lounge
Oh, I'm absolutely waiting to hear that he'll find a way to blame my wife somehow and have his insurance company play hardball...I made a specific point of getting contact details for both of the officers on the scene and written confirmation from them that they considered him to be 100% at fault, with no blame attributable to my wife. I had someone rear end me at a stop sign a few years back...I was waiting my turn, and a guy was texting and failed to see me, OR the stop sign, or the 4-lane highway he would've blown onto, blind, if he hadn't met the back of my little Yaris that I had at the time. Cops estimated he was probably going 50 or so, he didn't even attempt to brake...he told his insurance company after the event that I "rolled back into him" and hit HIM. I did a good job of it too - totaled both our cars and smashed his windshield from the inside when his iPhone flew out of his hand and hit it ? Being honest and honorable seems increasingly be a lost personality trait... -
So, guess I don’t have to wash my wife’s car this weekend
OldNYJim replied to OldNYJim's topic in The Off-Topic Lounge
You can just see him and his young lady friend in the background in that pic of the Fusion, sauntering over to Baskin Robbins for some ice cream whilst the police and the tow truck sort out that nasty mess they made - thank God they were close to somewhere where they could get a snack and a coffee after all that ghastly business ? -
So, guess I don’t have to wash my wife’s car this weekend
OldNYJim replied to OldNYJim's topic in The Off-Topic Lounge
Thanks for all the nice comments everyone!! We’re struggling to get a claim started properly with the insurance company because the local PD didn’t supply an incident number yet…guess I’m gonna be doing some additional driving this week until we get a loaner. The other car didn’t look quite as bad as ours…but not too good either:
-
I can’t stop buying Beetle kits lately - do I need to speak to someone about this before it becomes a more serious problem?
- 38,884 replies
-
- 2
-
-

-
- johan
- glue bombs
- (and 1 more)
-
So, guess I don’t have to wash my wife’s car this weekend
OldNYJim replied to OldNYJim's topic in The Off-Topic Lounge
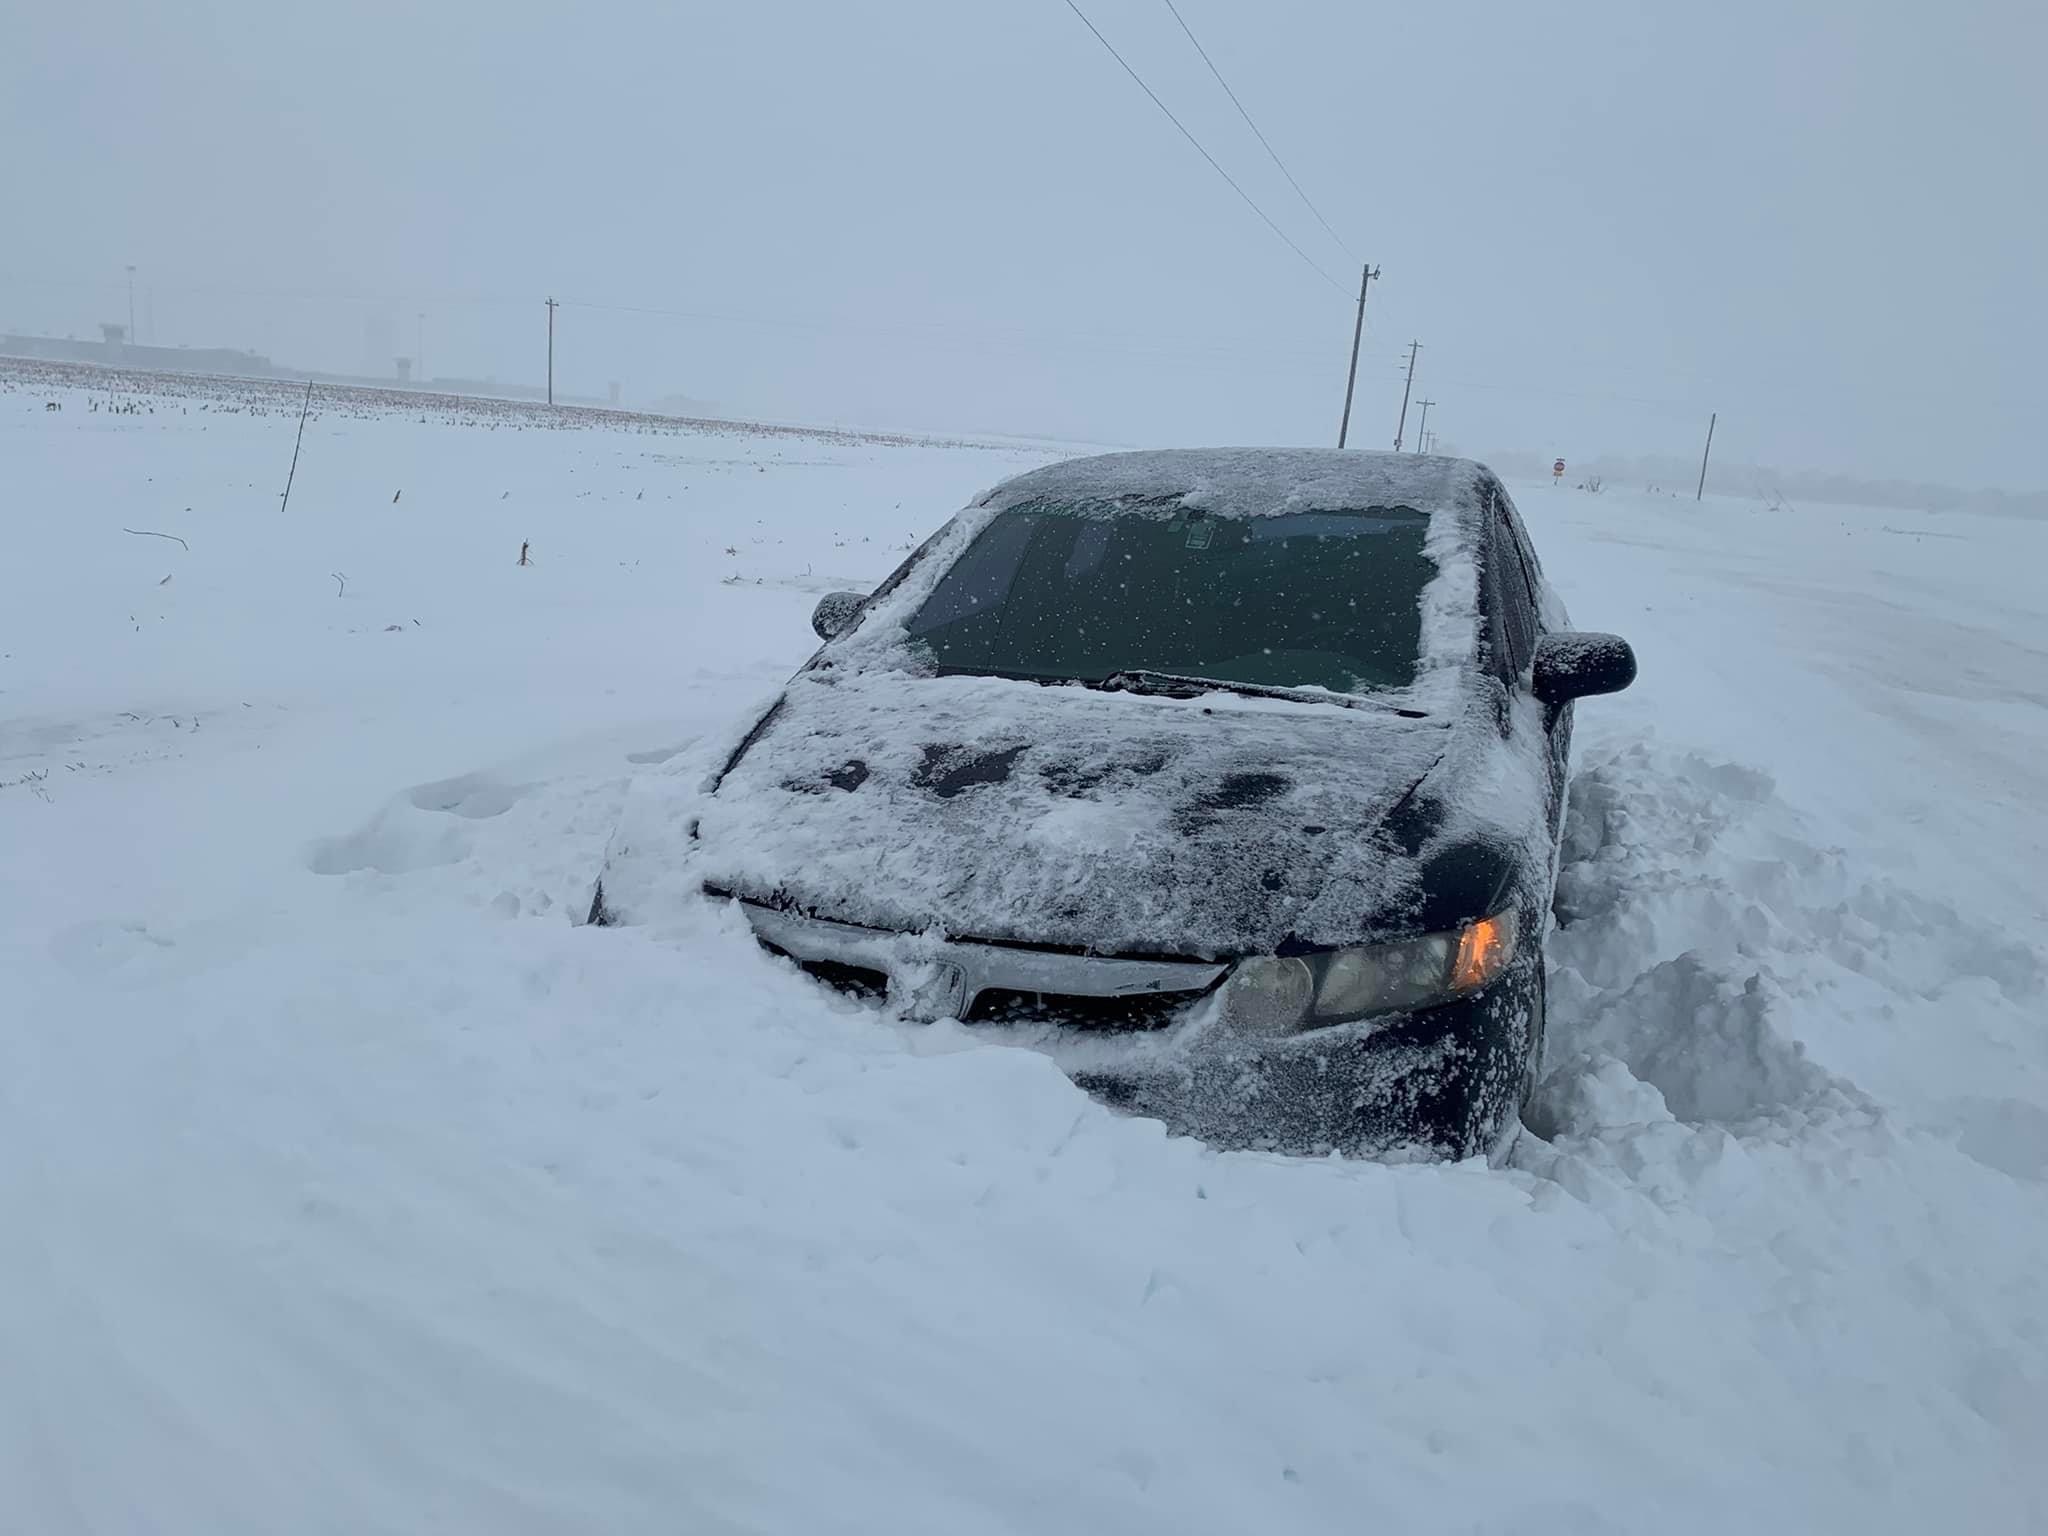
As always, your insight and experience are appreciated Bill - always thankful to hear from someone with your knowledge and expertise! That car even made a good snowplow one time when we got hit with a foot of snow between me getting to work and me (belatedly) deciding I ought get out of there before it got REALLY bad…this is on the HIGHWAY right by where I work, and I successfully made it home in that hardly little Honda that day even if I did get it stuck once…didn’t even have snow tires on, at the time! If I was smarter I would’ve slept at the shop that night, but it wasn’t quite this bad until I was too far committed to turn back and surrender ? A great car!
-
So, guess I don’t have to wash my wife’s car this weekend
OldNYJim replied to OldNYJim's topic in The Off-Topic Lounge
Thank you! I’m not sure how hard of a hit it was, but it was enough to push her all the way across the intersection and into the curb on the other side where she ended up (and where the bumper ended up in the pics there). Apparently the airbag tripped as she hit that curb suddenly rather than at the time of the impact, and it looked like the front wheel has been pushed back towards the drivers door a coupla three inches. Although the windshield was intact and in-place, the A pillar had a noticeable ripple in it or a little tweak which I’m sure wouldn’t be the easiest to fix…I guess if they were determined enough, about everything else COULD just be bolted on. Poor little thing - it just passed 175,000 miles and ran like a champ in all seasons - I’d bet on it being good for another 100,000 if some idiot didn’t manage to not see an entire car blocking the piece of road they were trying to get to… -
So, guess I don’t have to wash my wife’s car this weekend
OldNYJim replied to OldNYJim's topic in The Off-Topic Lounge
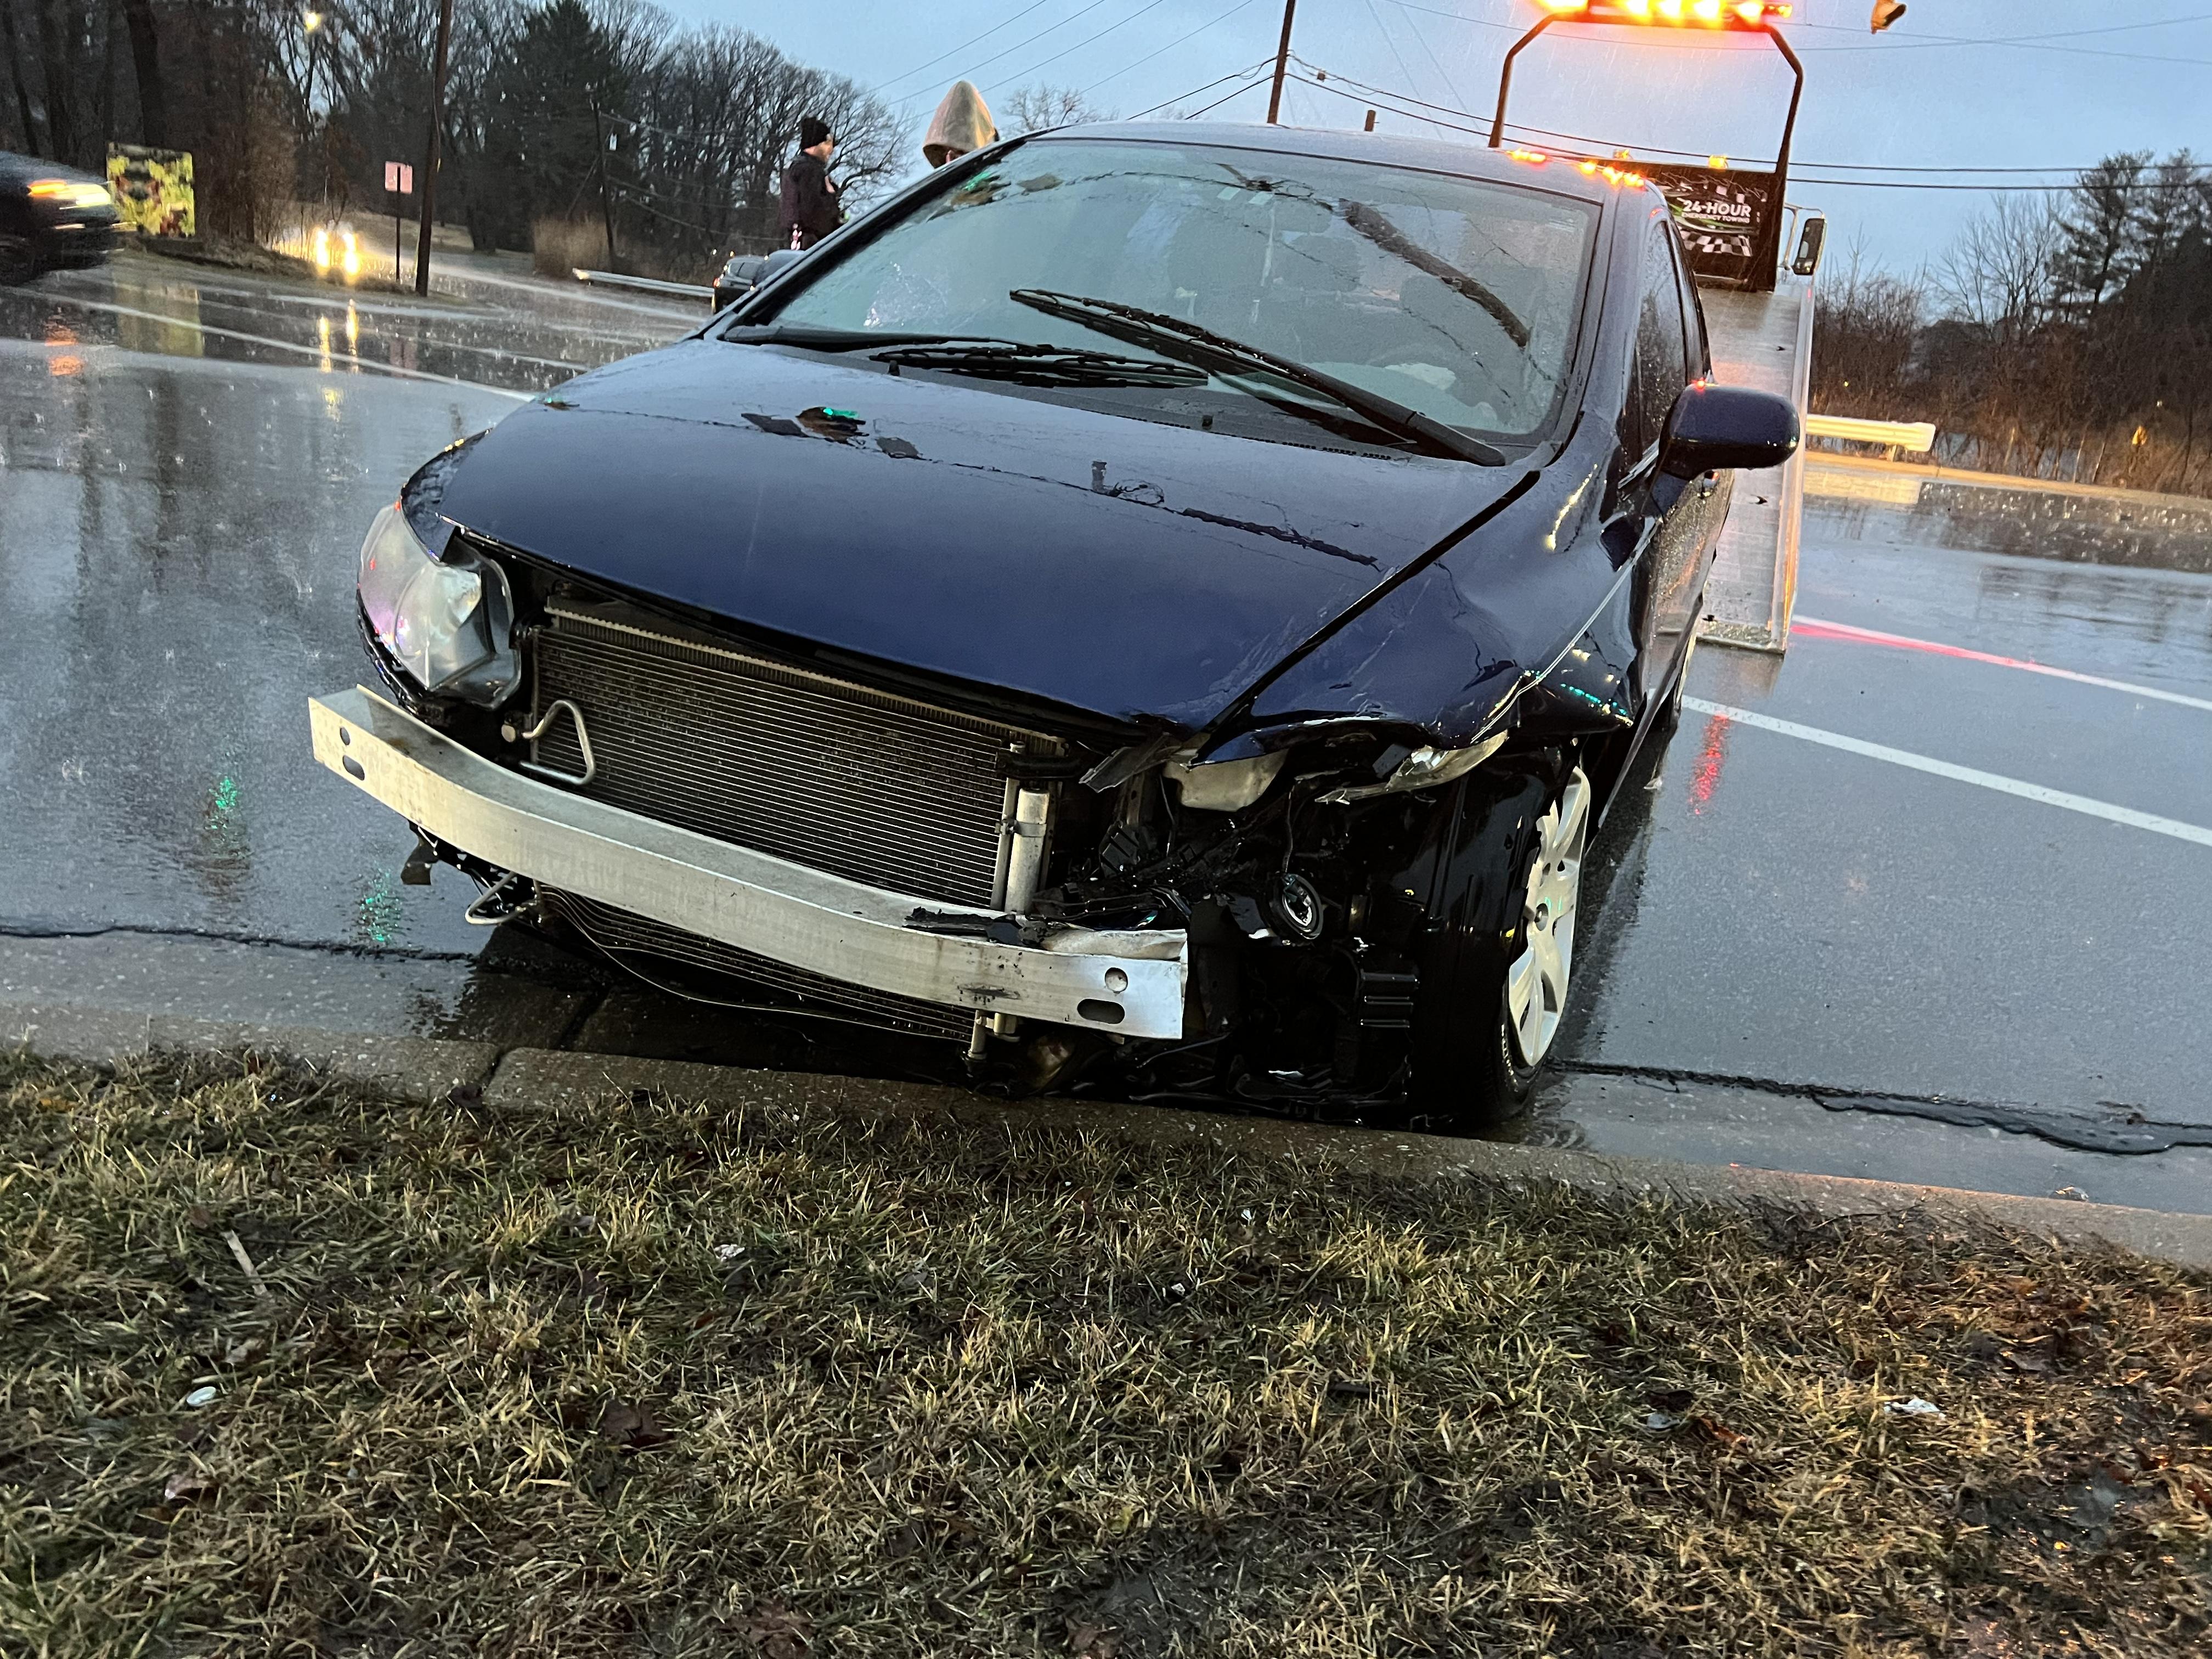
Interesting! I wouldn’t be totally disappointed if they DIDN’T total it - it’s been a great reliable car, and I did a bunch of maintenance on it last year to take care of some of the little jobs it was due to have done (valve train maintenance, coolant system flush, brakes, tires, new battery, trans fluid, oil change and so on…). I doubt we’d get enough back from the insurance company to get another one as good. I wonder if, being a 2010 model they may err on the side of it not being worth a bunch of work - the radiator puked all over the floor, definitely needs a hood, headlamp, bumper, driver’s door, new steering wheel (the airbag deployed), and the muffler was dragging on the ground as they towed it, plus it looks like it’ll need some work on the front suspension given the new ‘stanced’ camber angle on just one corner. Guess we’ll see! -
My wife’s Apple Watch messaged me on my drive home (!) and told me she was involved in an accident - and she called me right after…it also called the police and an ambulance for her too! All ok, a kid in a Fusion blew through a light and took her out - he had his hood on his hooded sweatshirt up and said he didn’t see her OR the light ? I told the officer I bet that little Civic probably would start up and get itself out of everyone’s way if he wanted me to try, but he didn’t - they already had a tow truck coming Lucky it wasn’t more serious - she’s 100% fine, just shaken. Curious if the insurance company will total it now, or if we’ll get it back? That thing will probably be good for another 100k miles if they think it’s worth repairing…
-
I’m not sure if the particular paint that you’re using is acrylic, but I’ll use Createx Balancing Clear to thicken up paints without changing their color. It’s designed to be added to their (very watery) candy colors so you can spray them successfully, but it works for about any acrylic you need to thicken up a little. https://a.co/d/6HYiQ2j There’s likely a similar product for lacquers and enamels, but I play with those much less frequently…
-
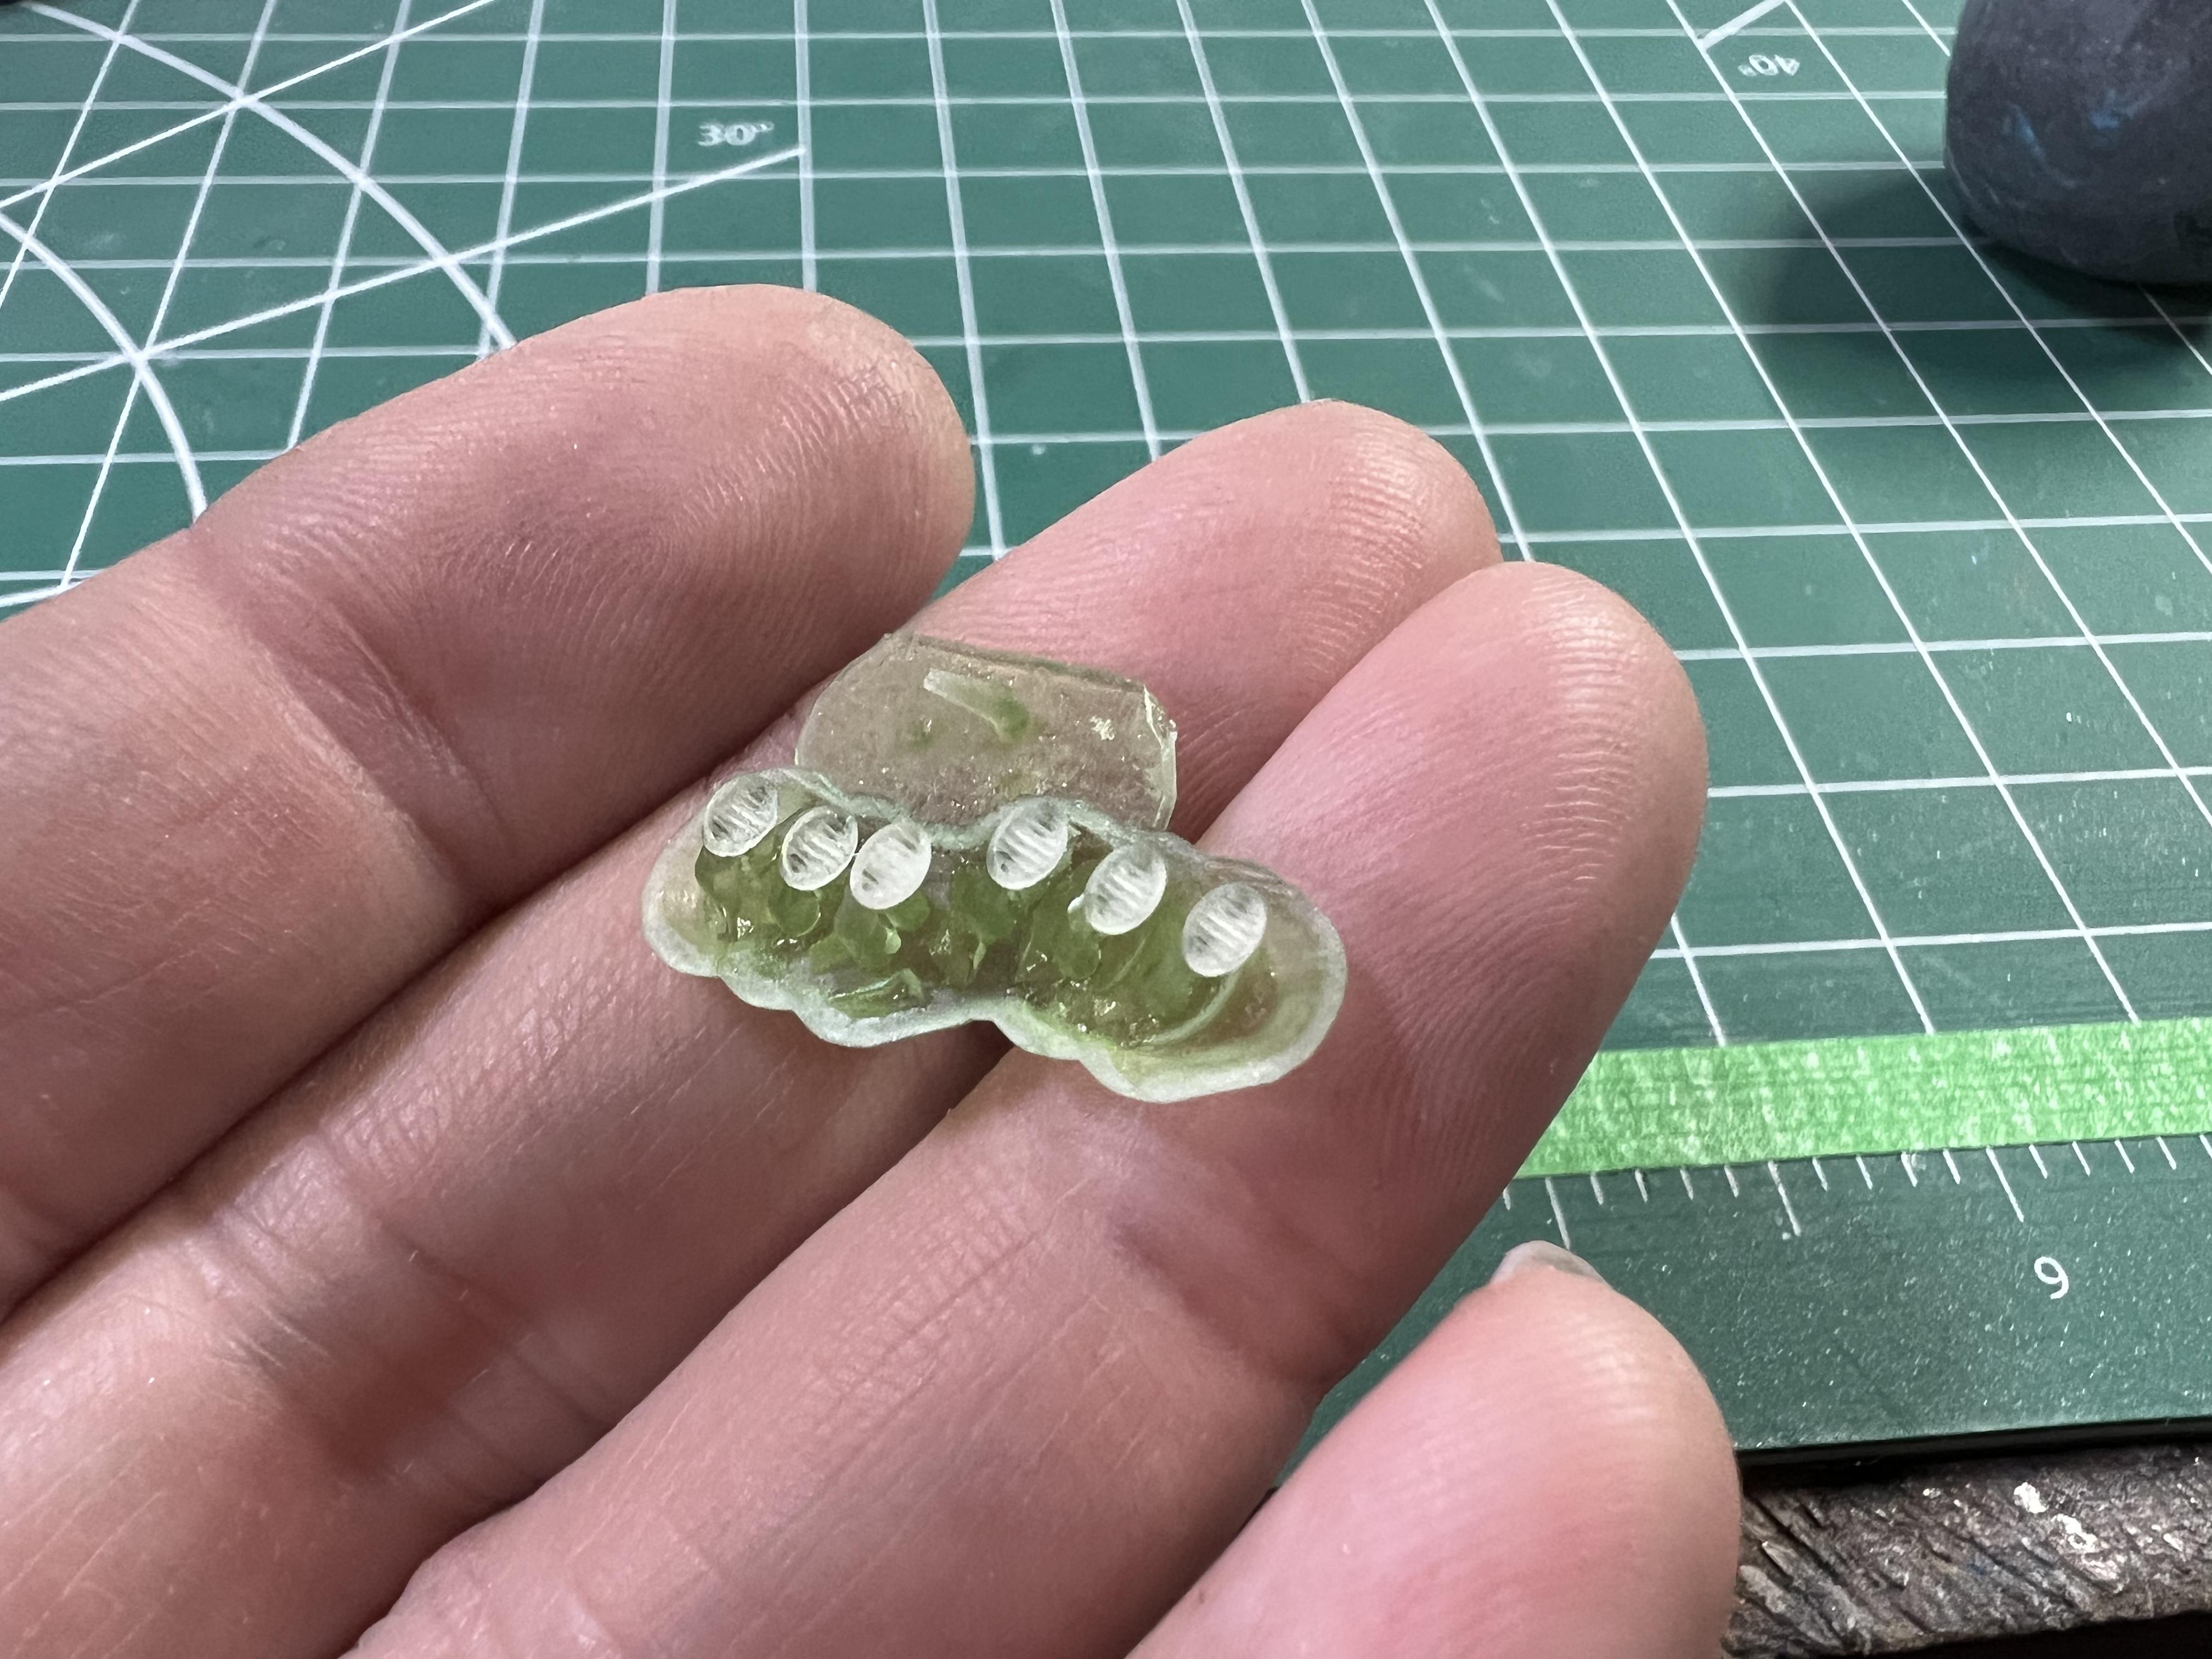
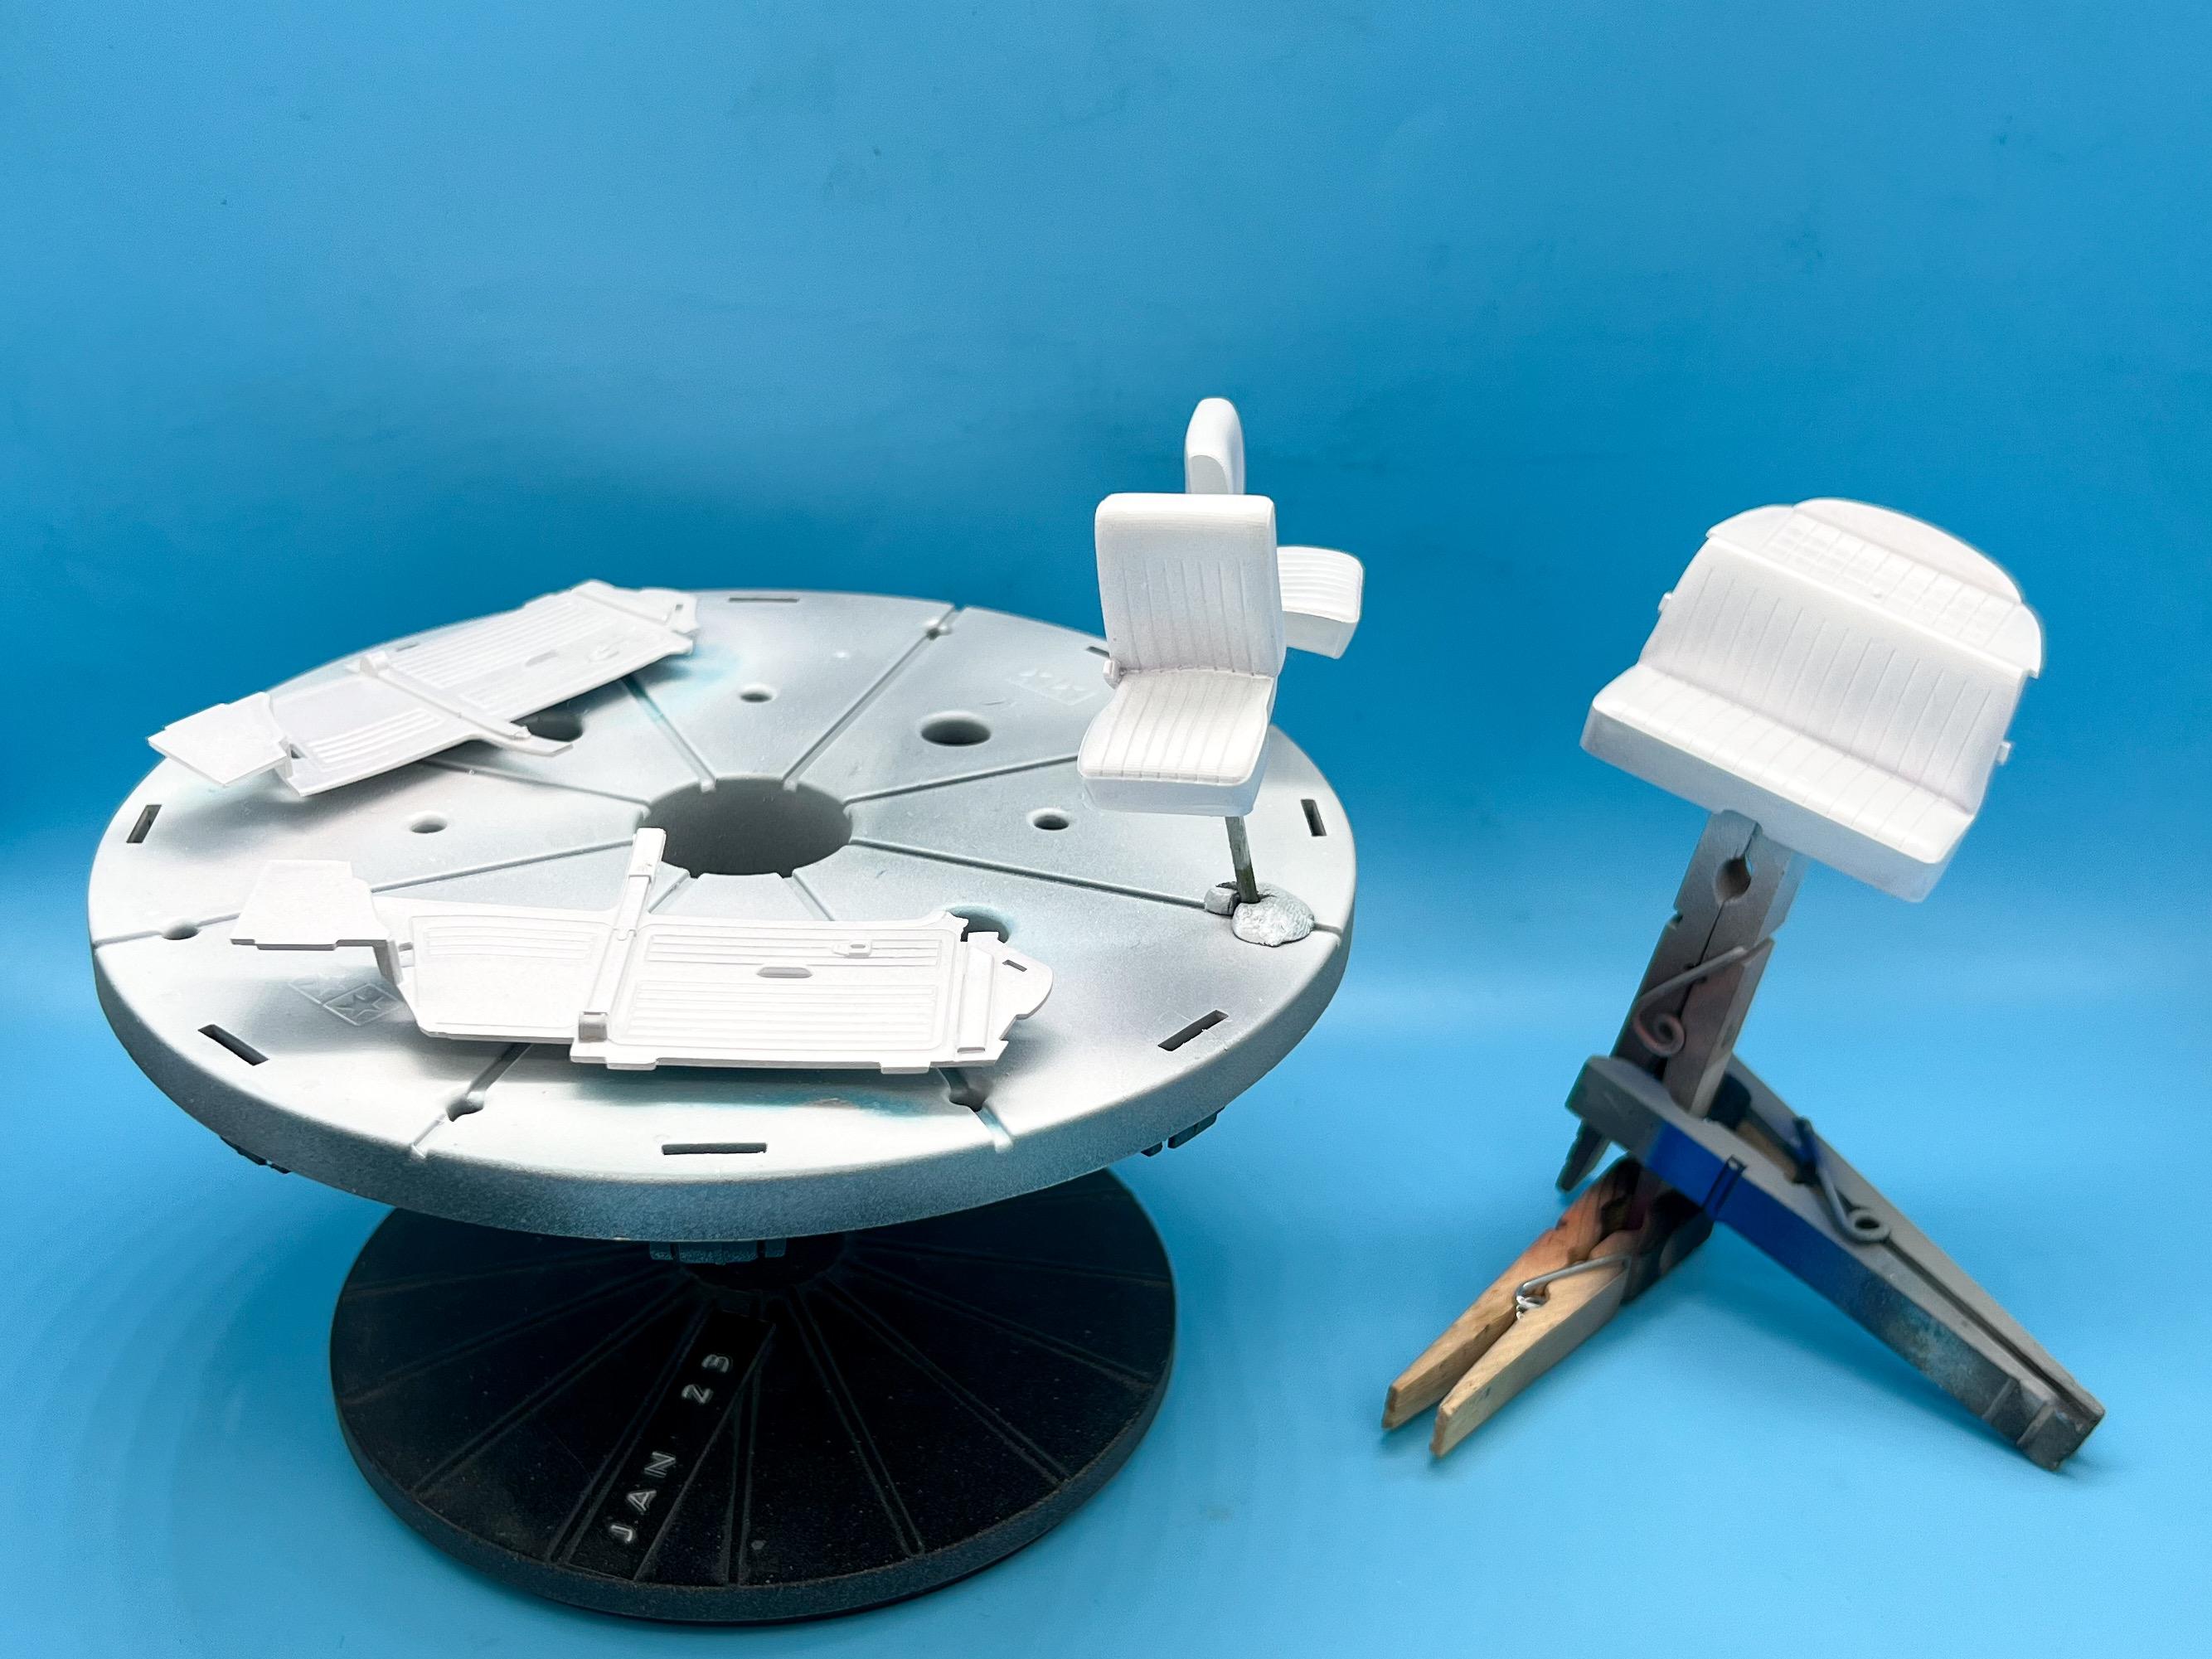
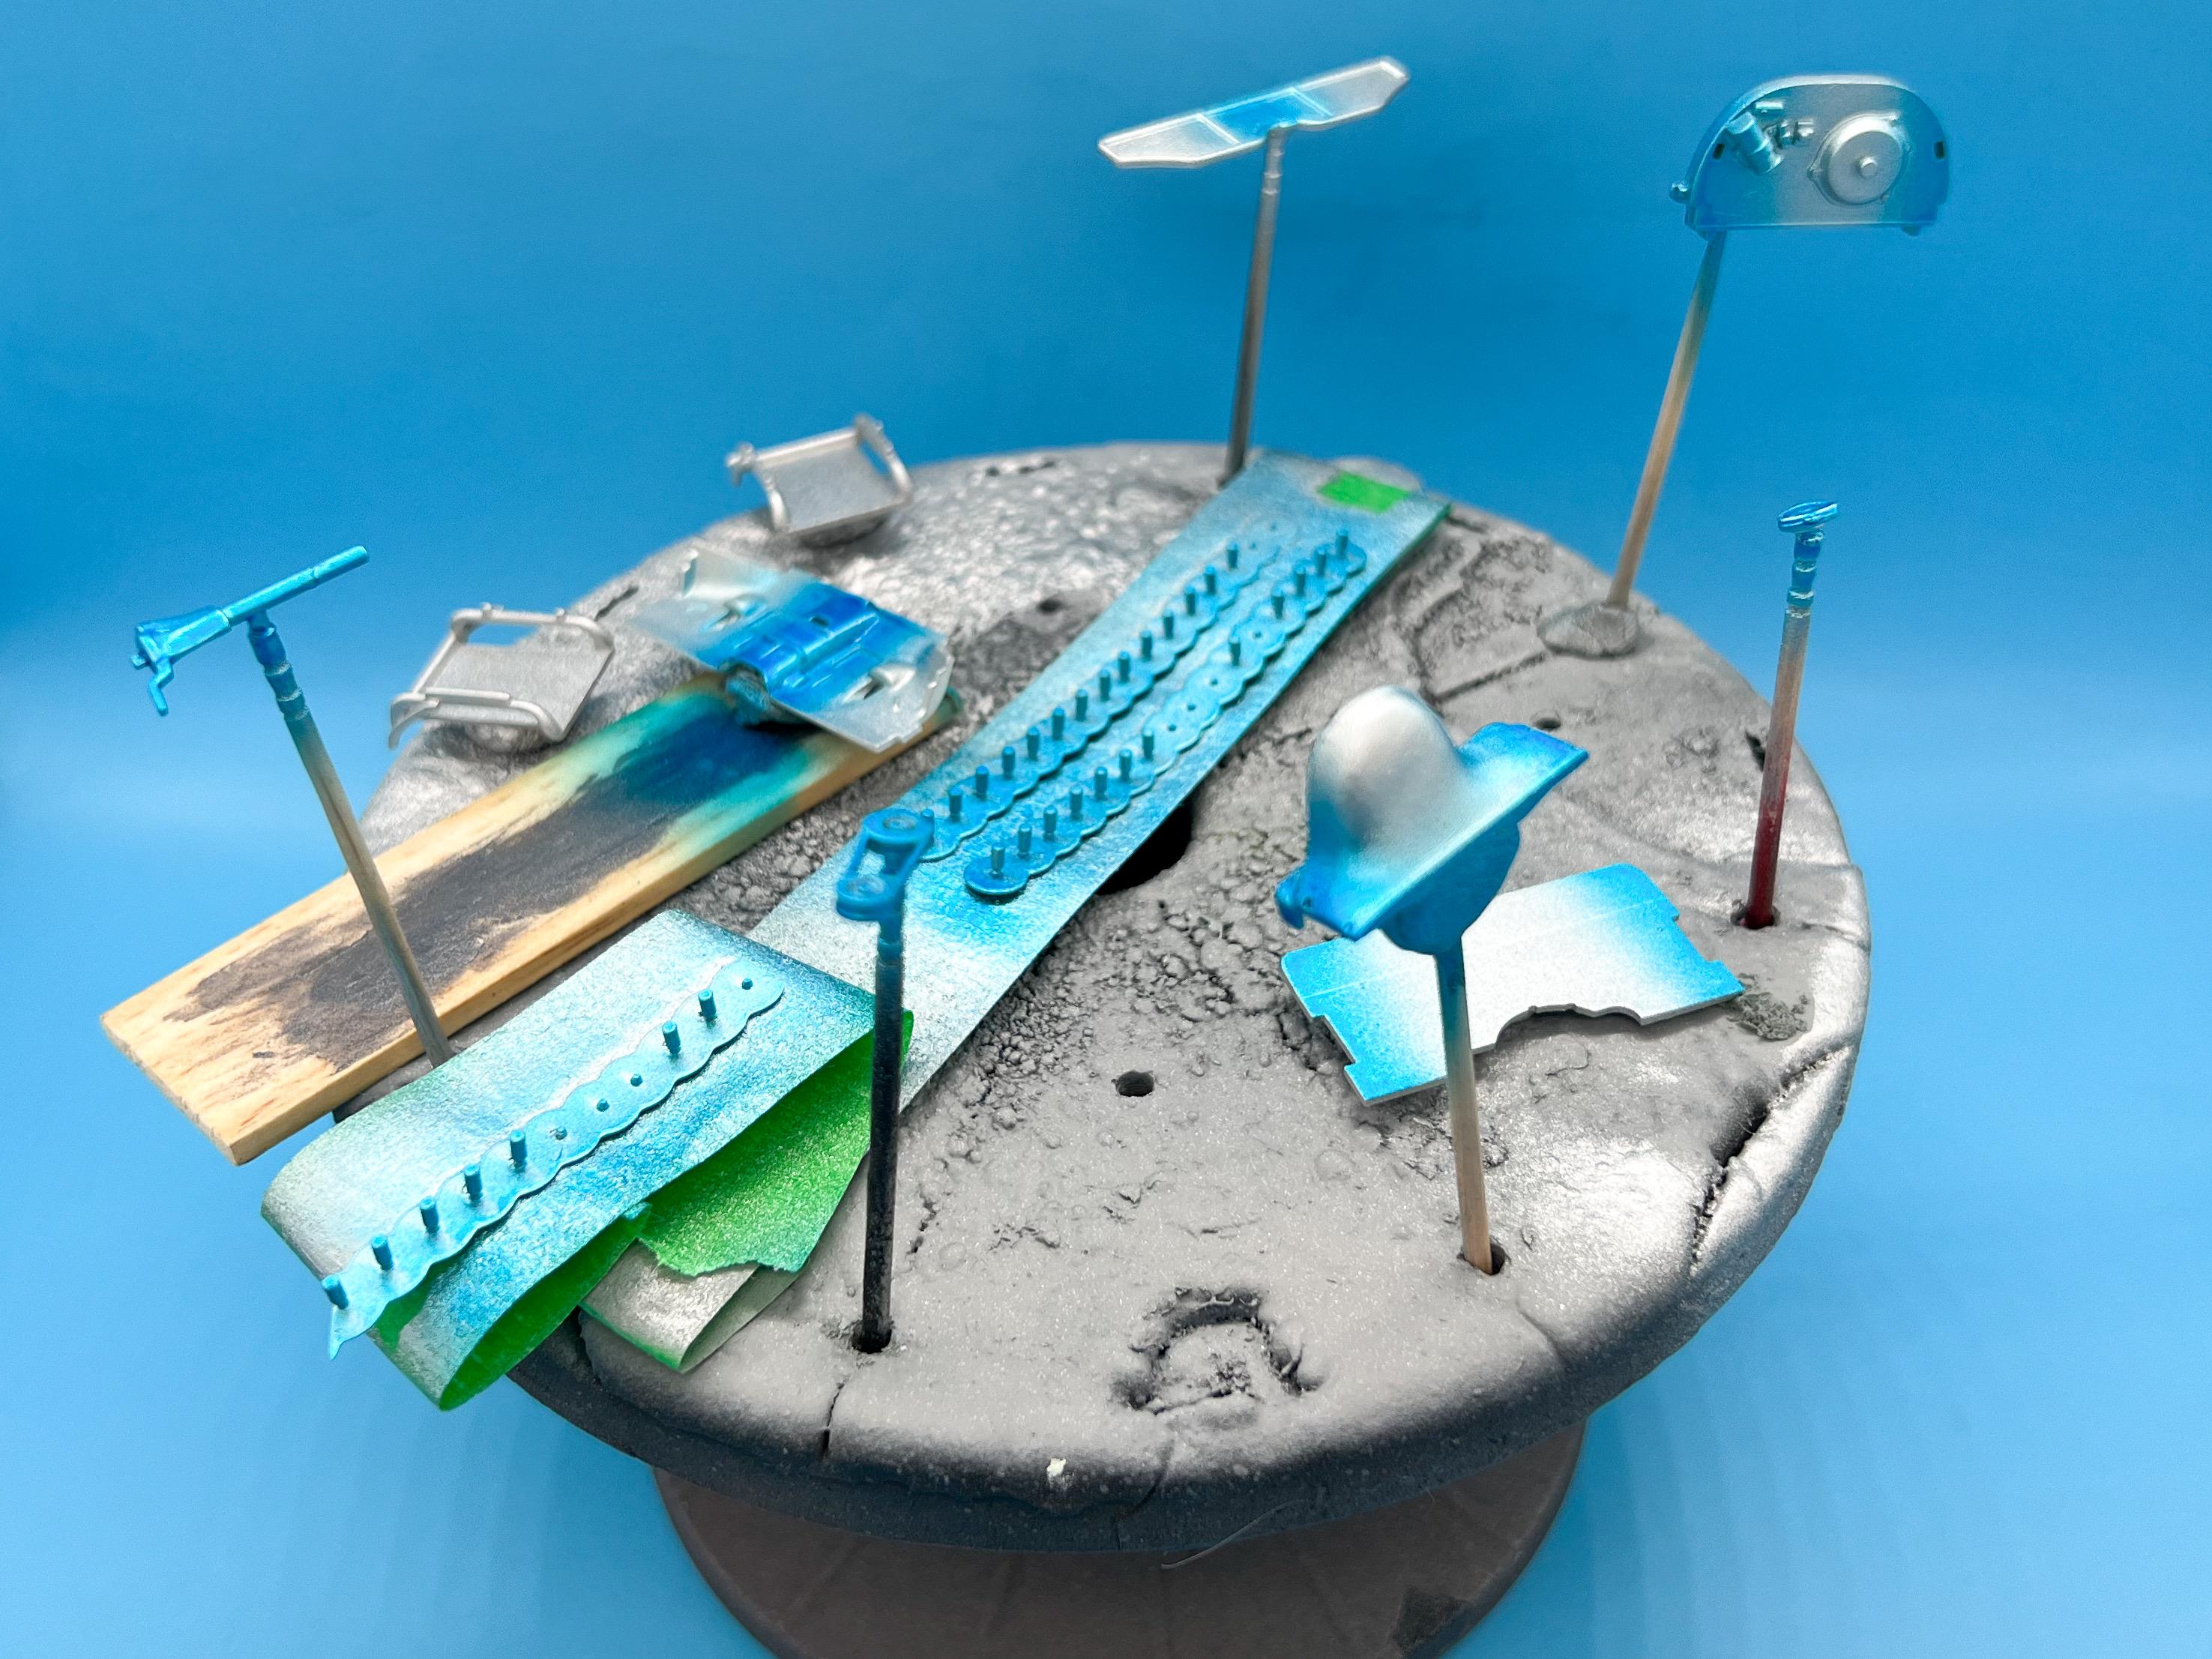
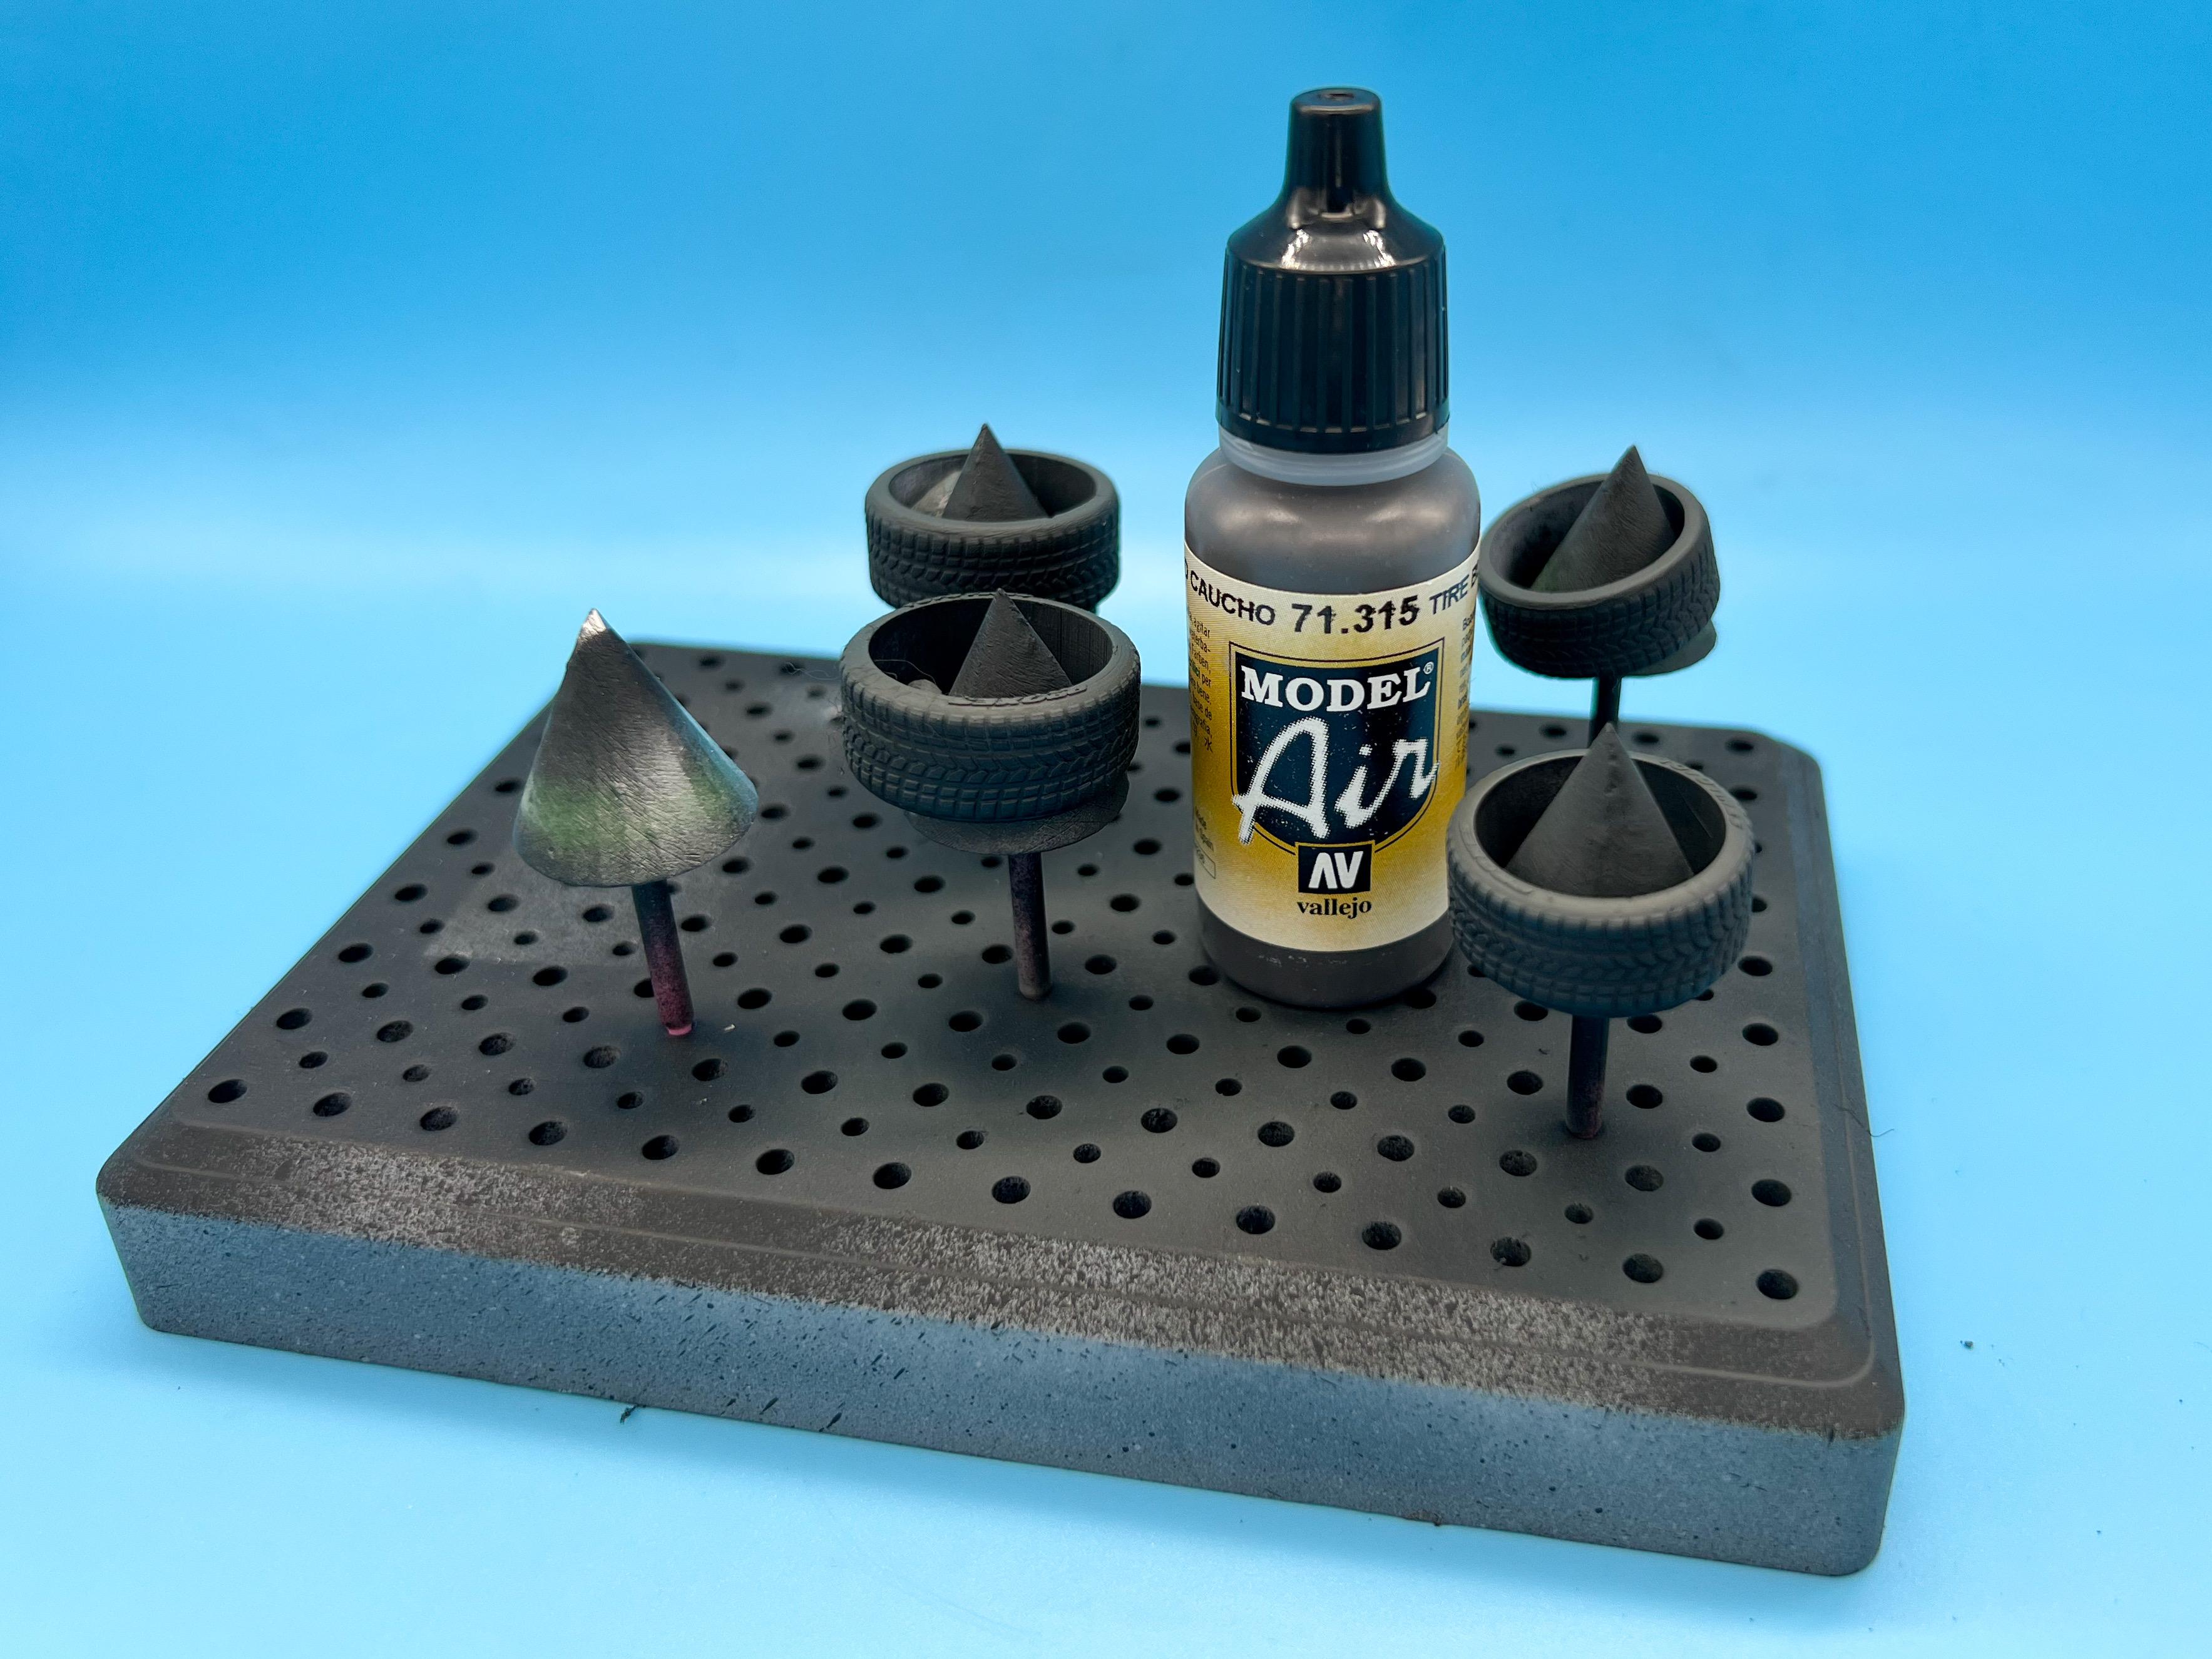
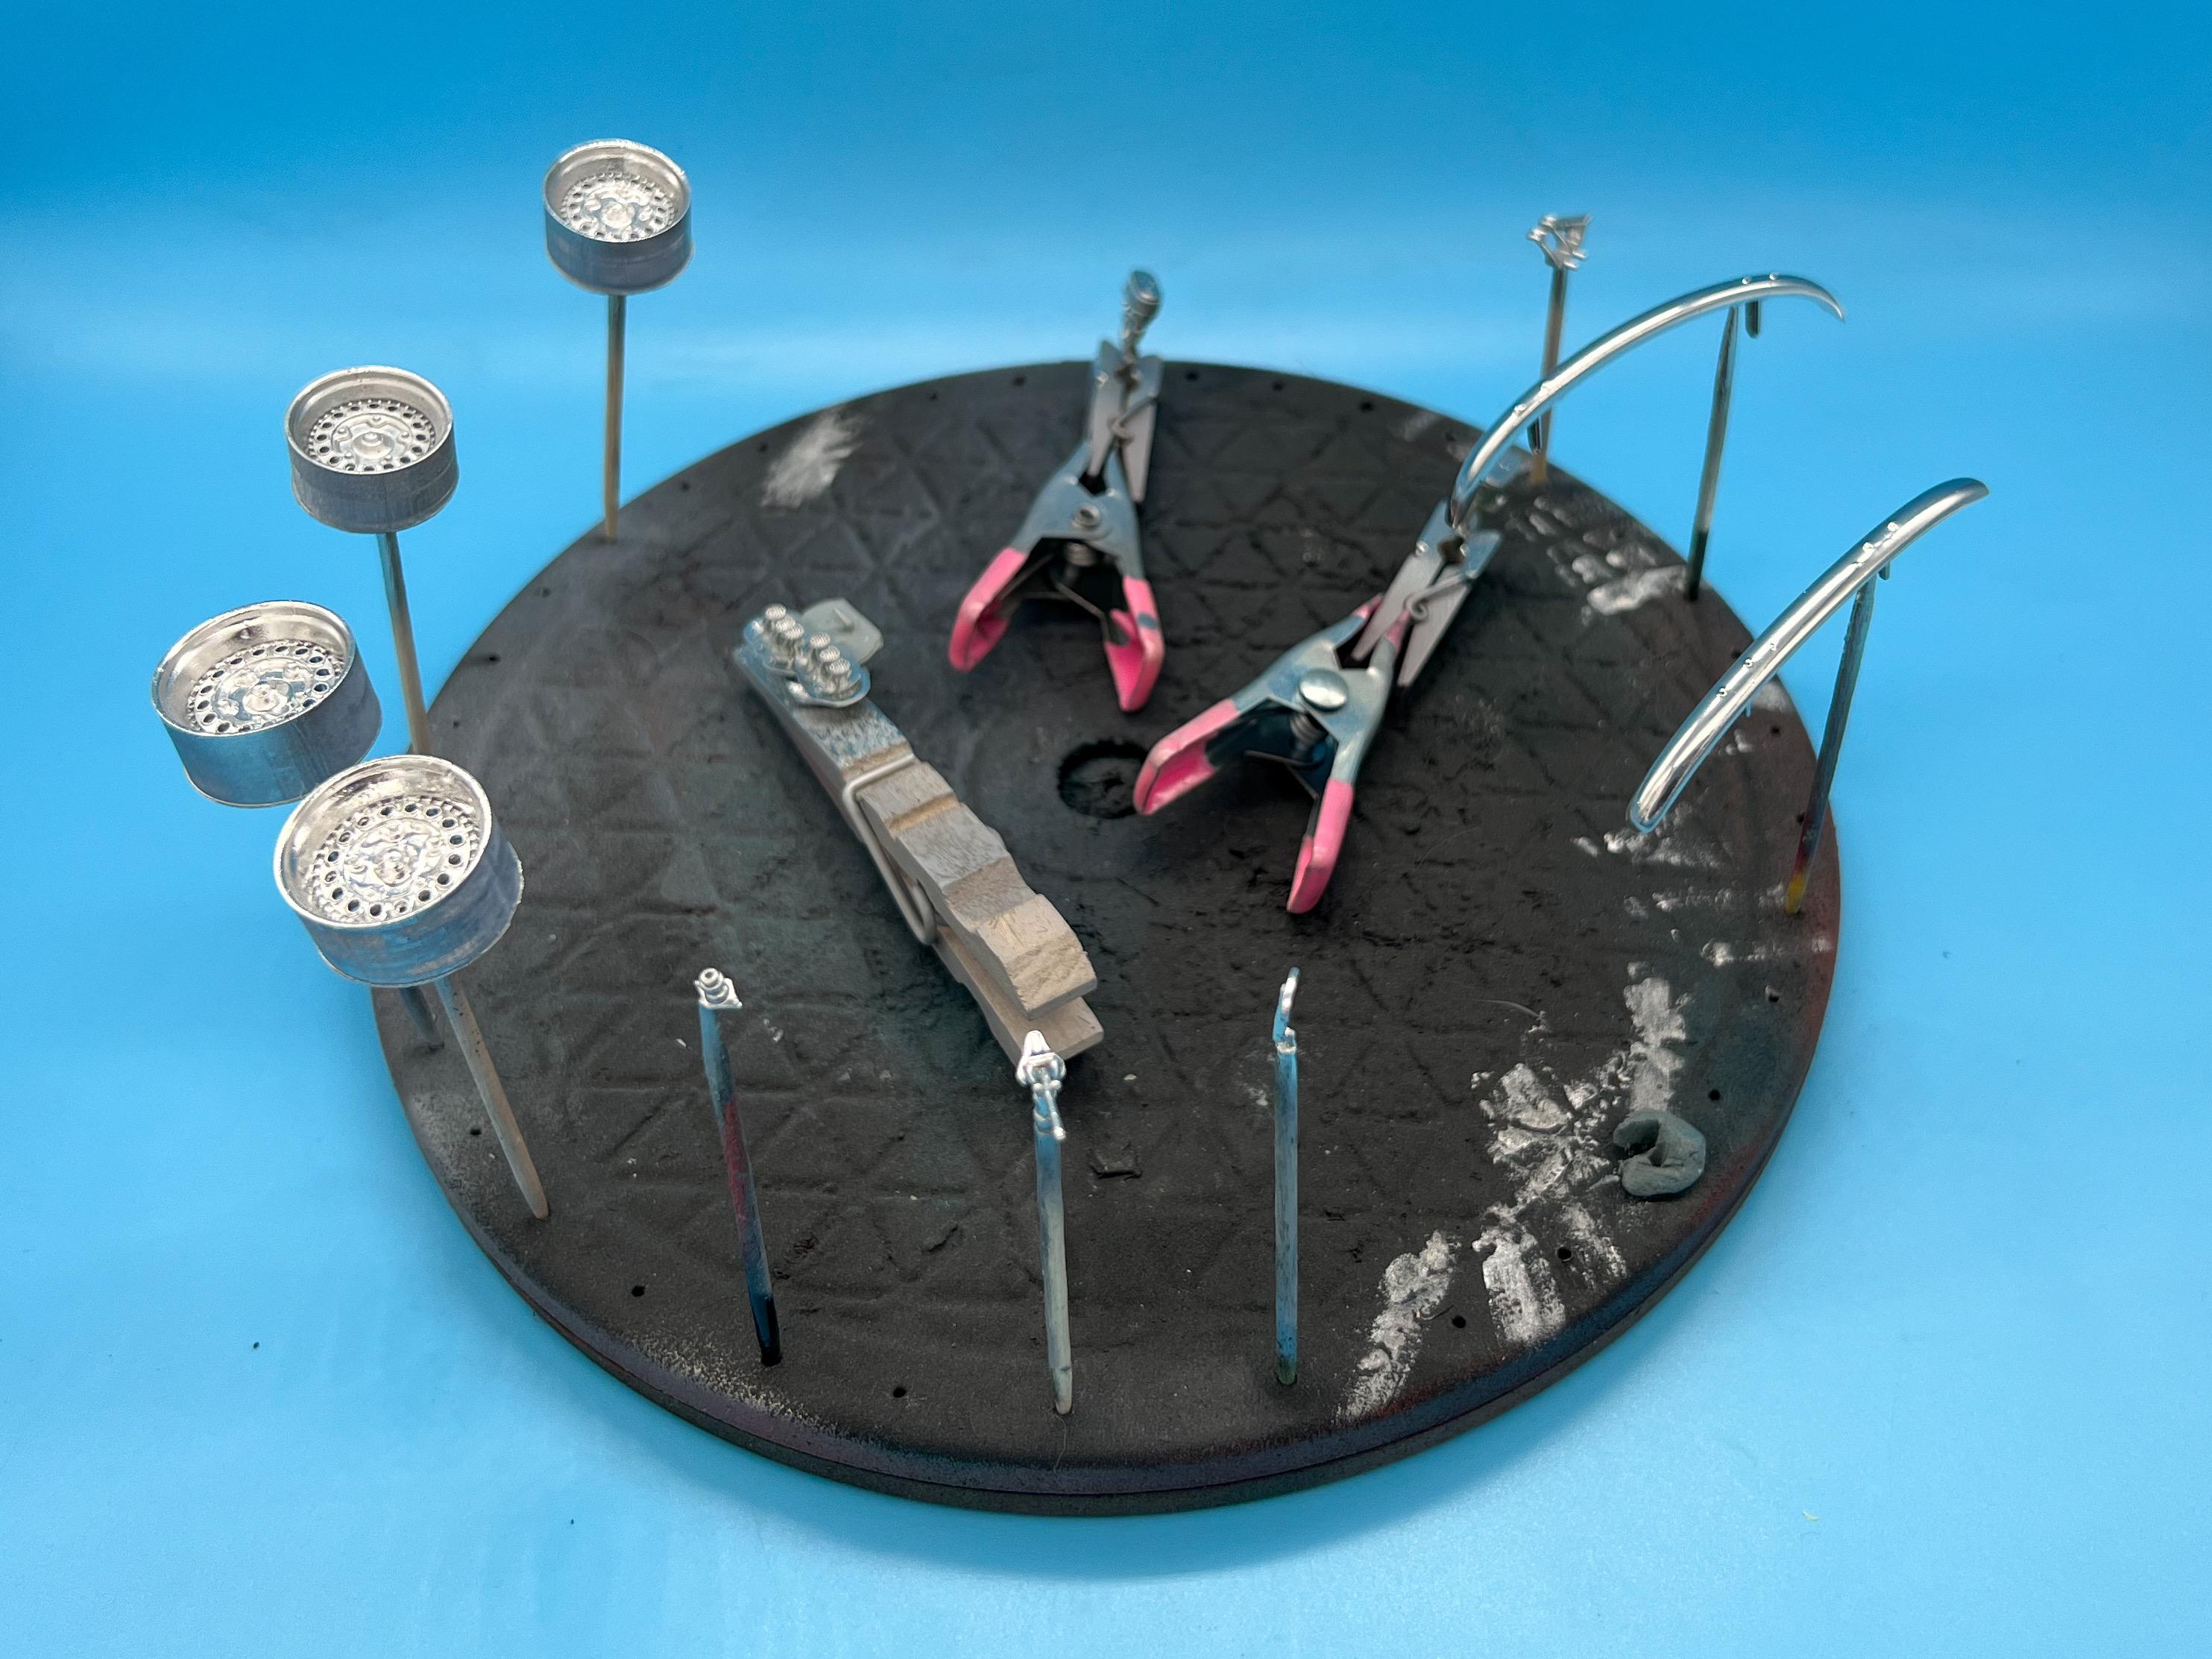
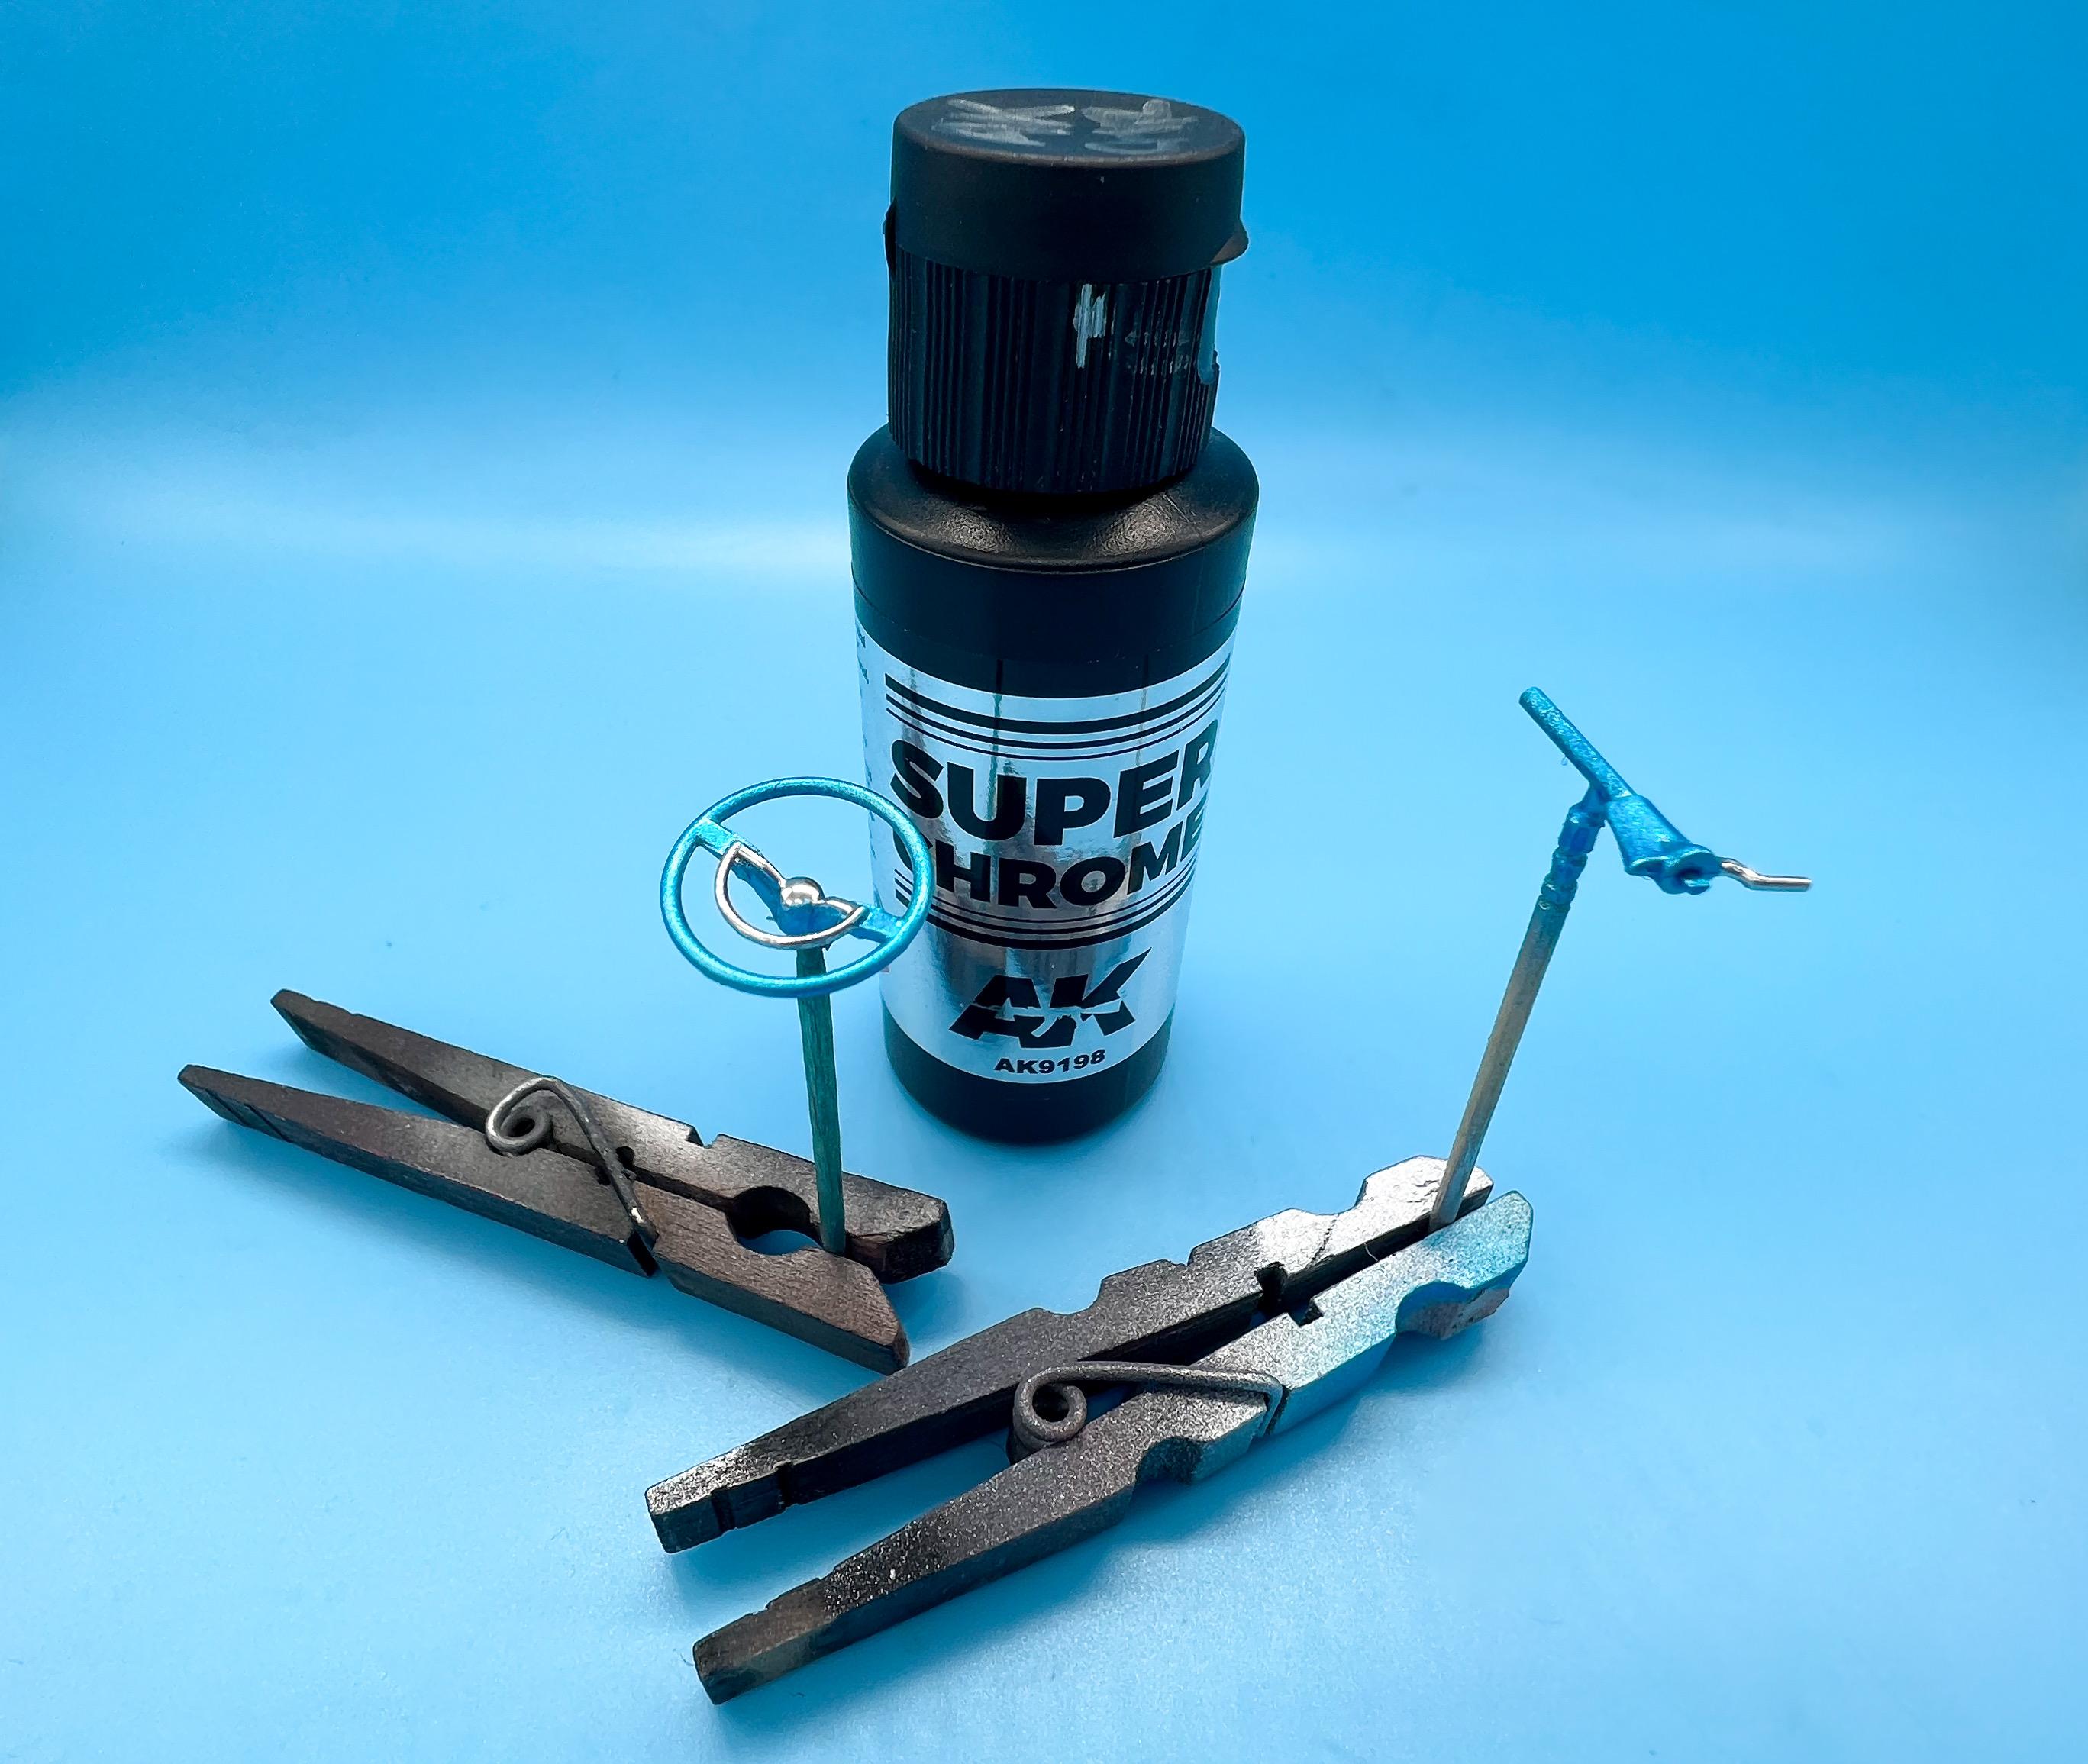
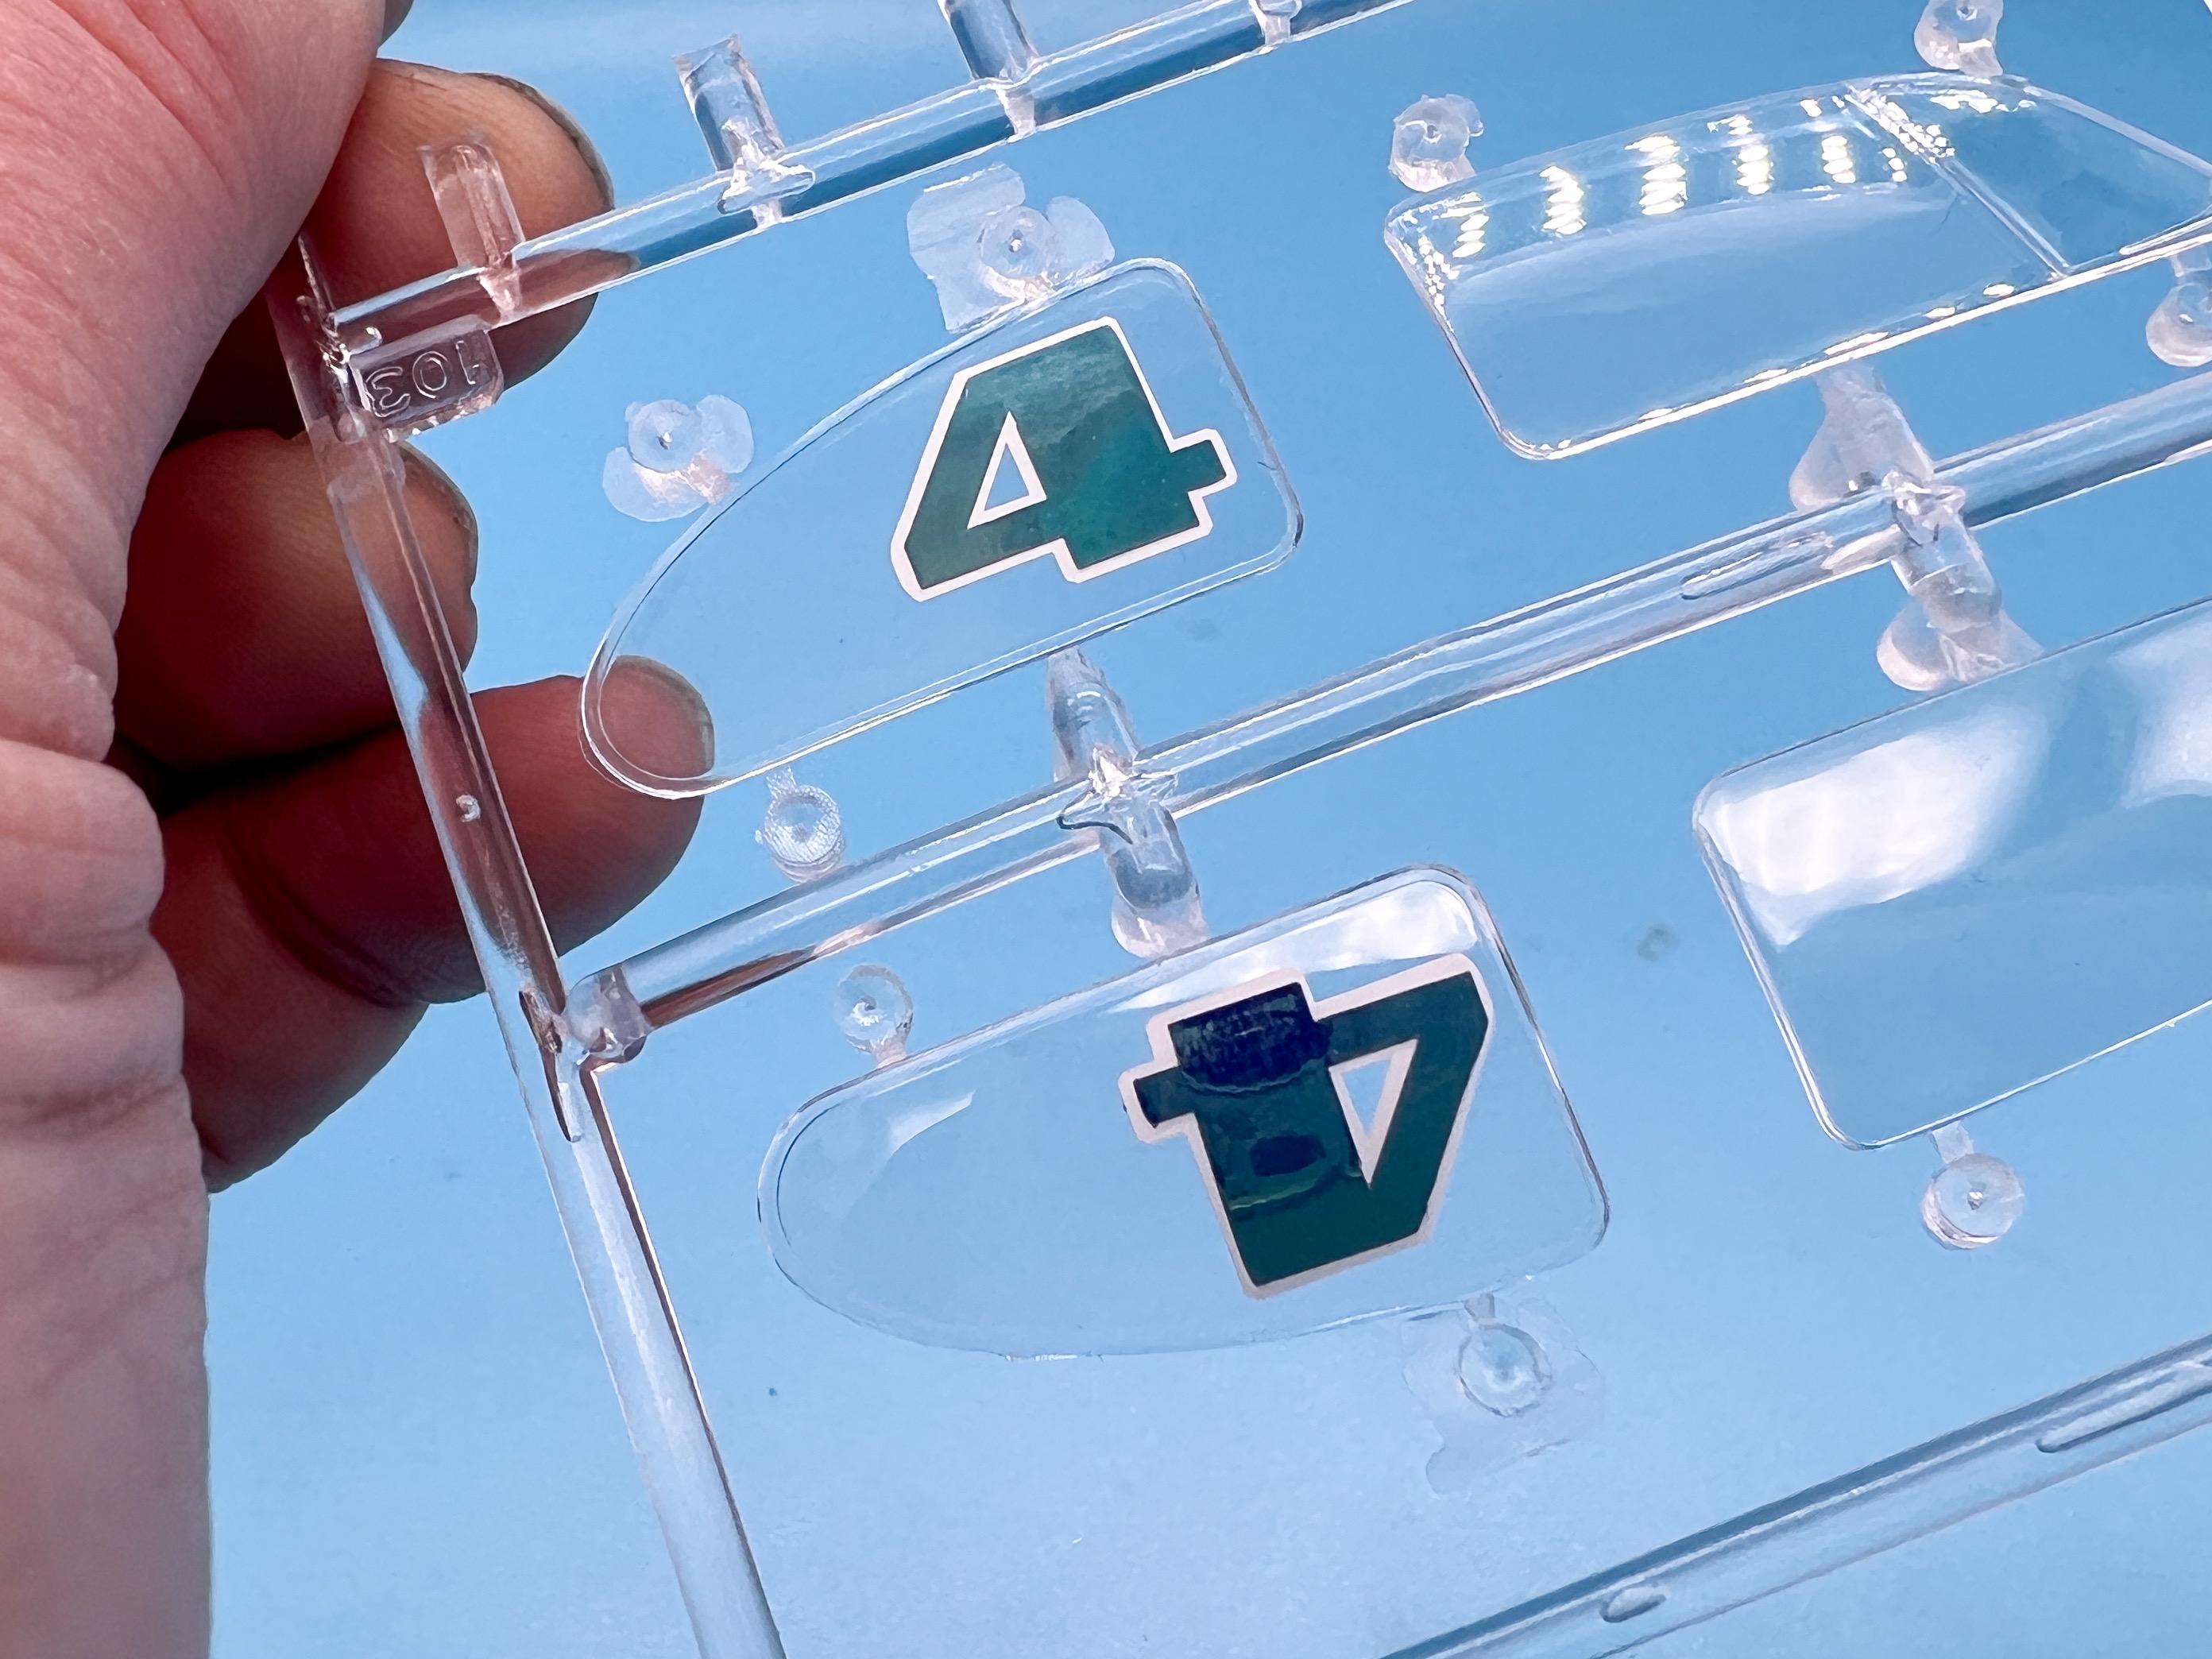
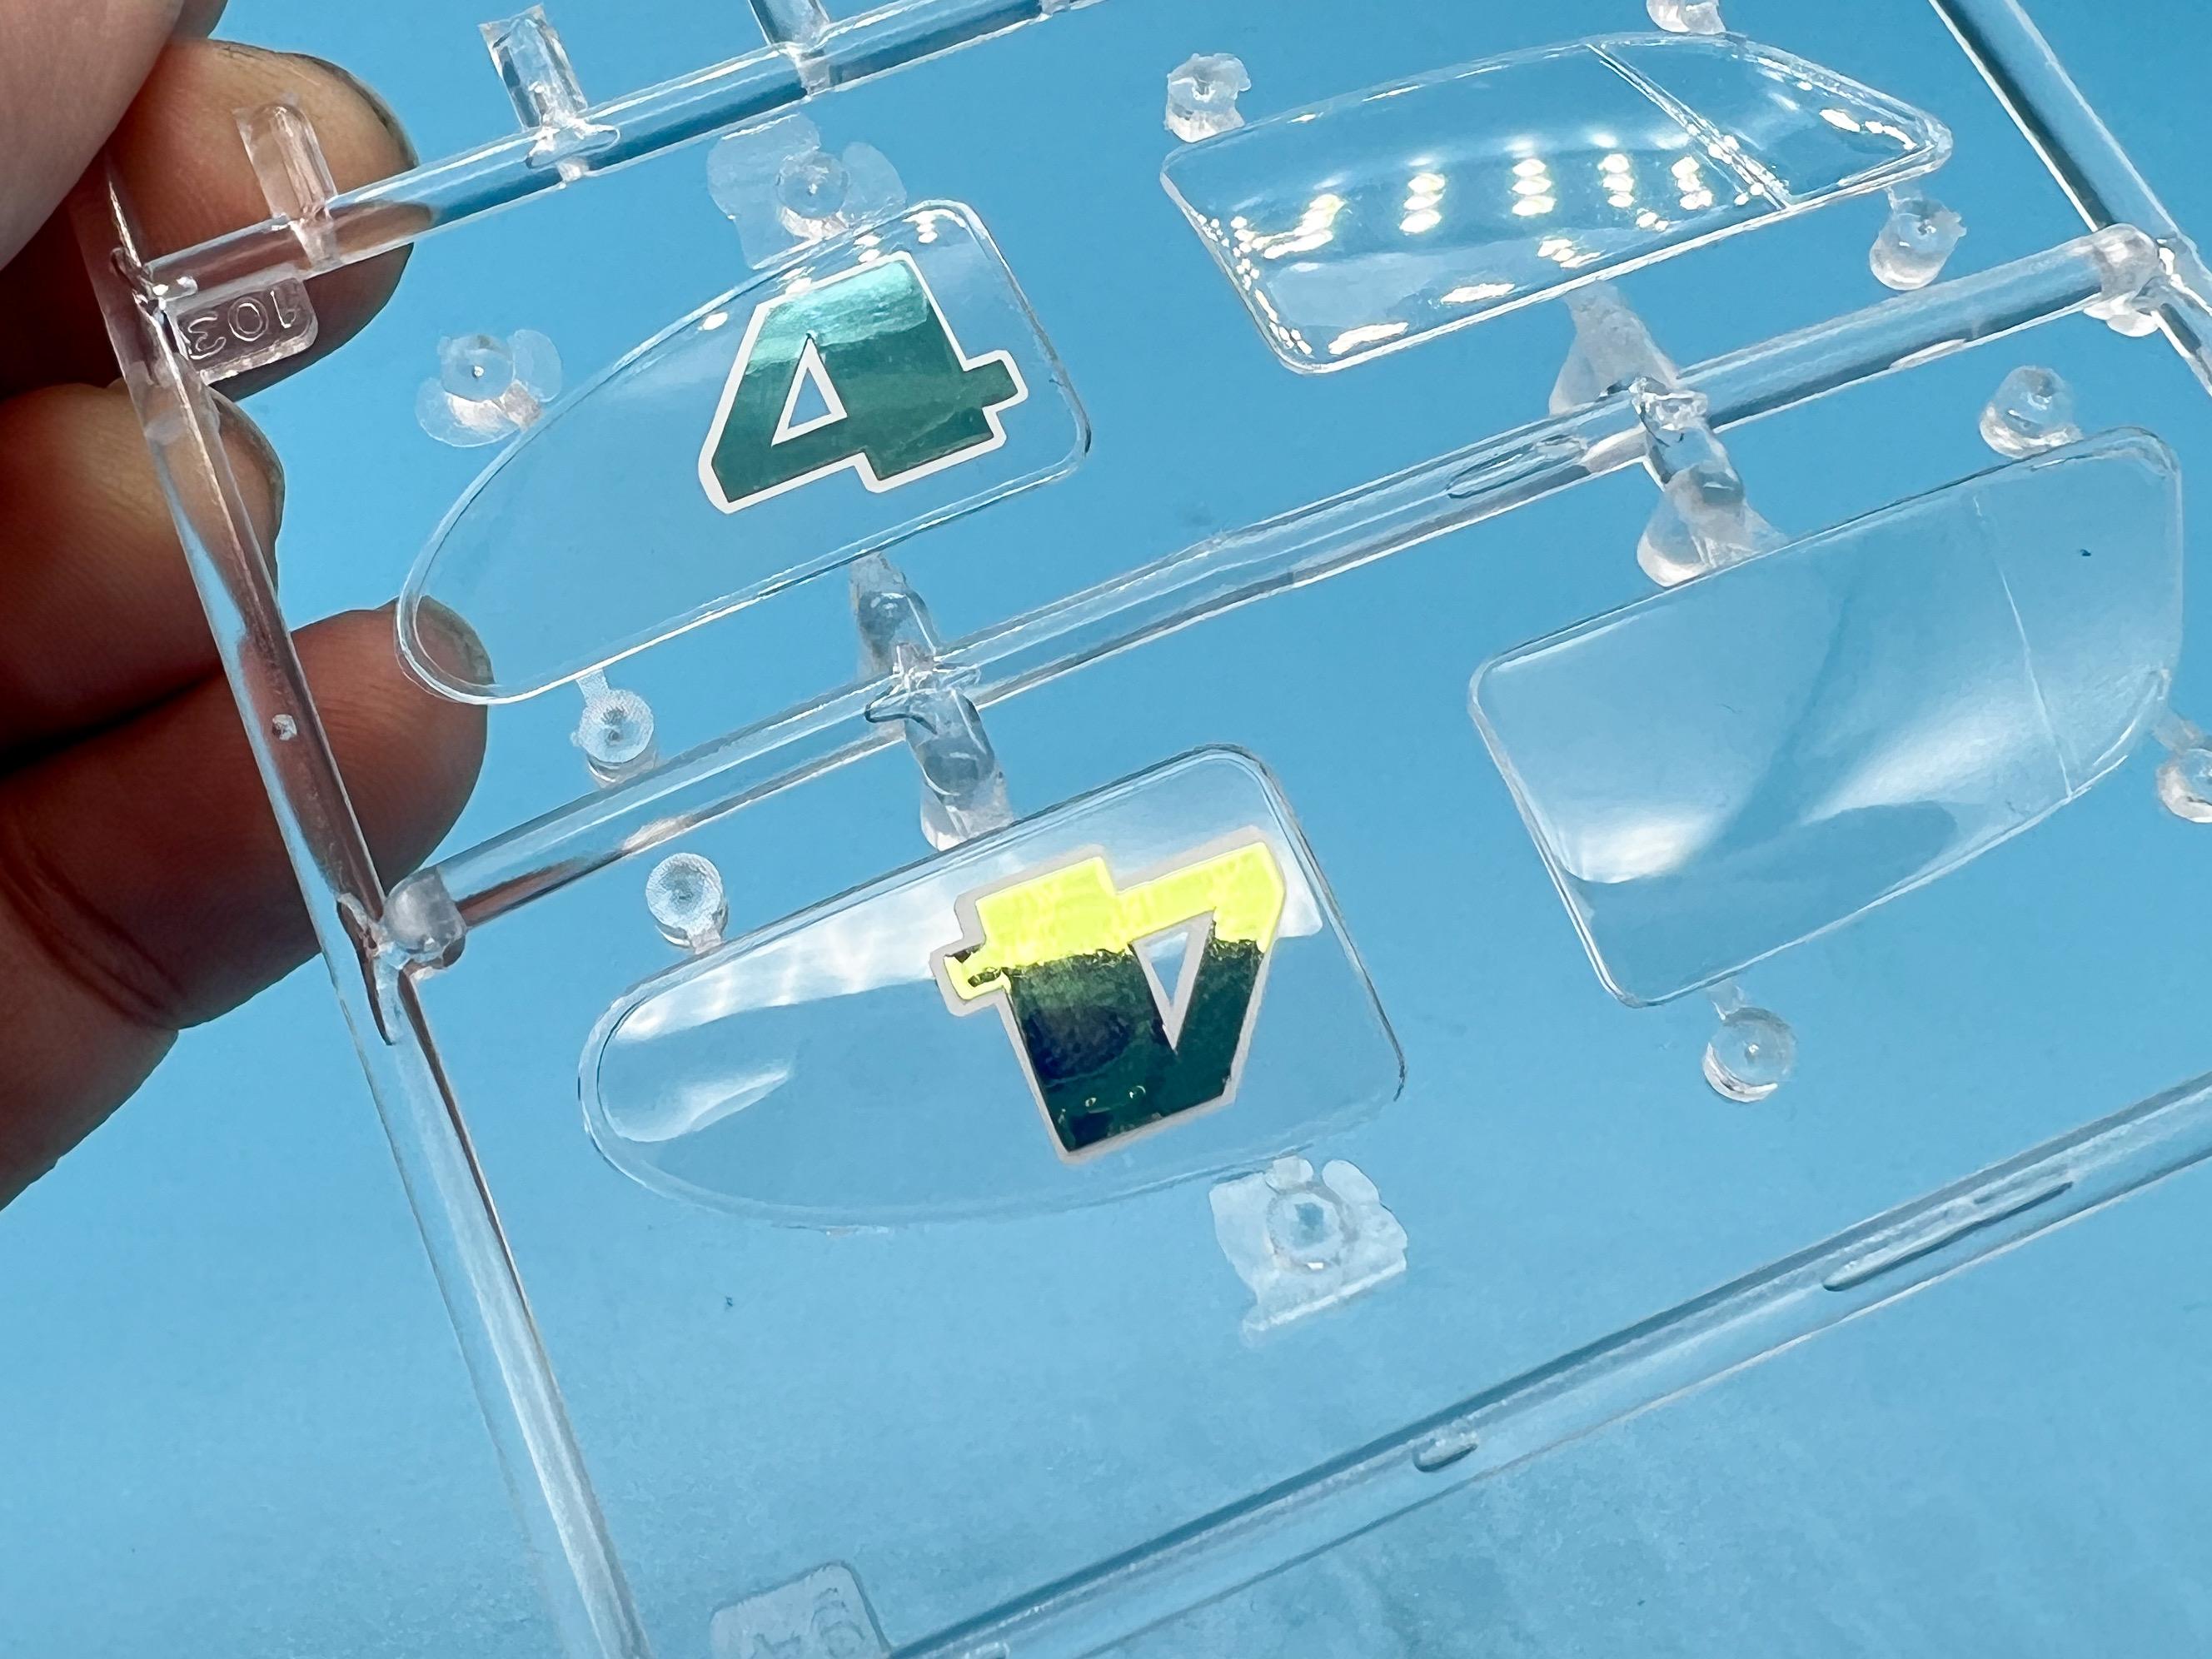
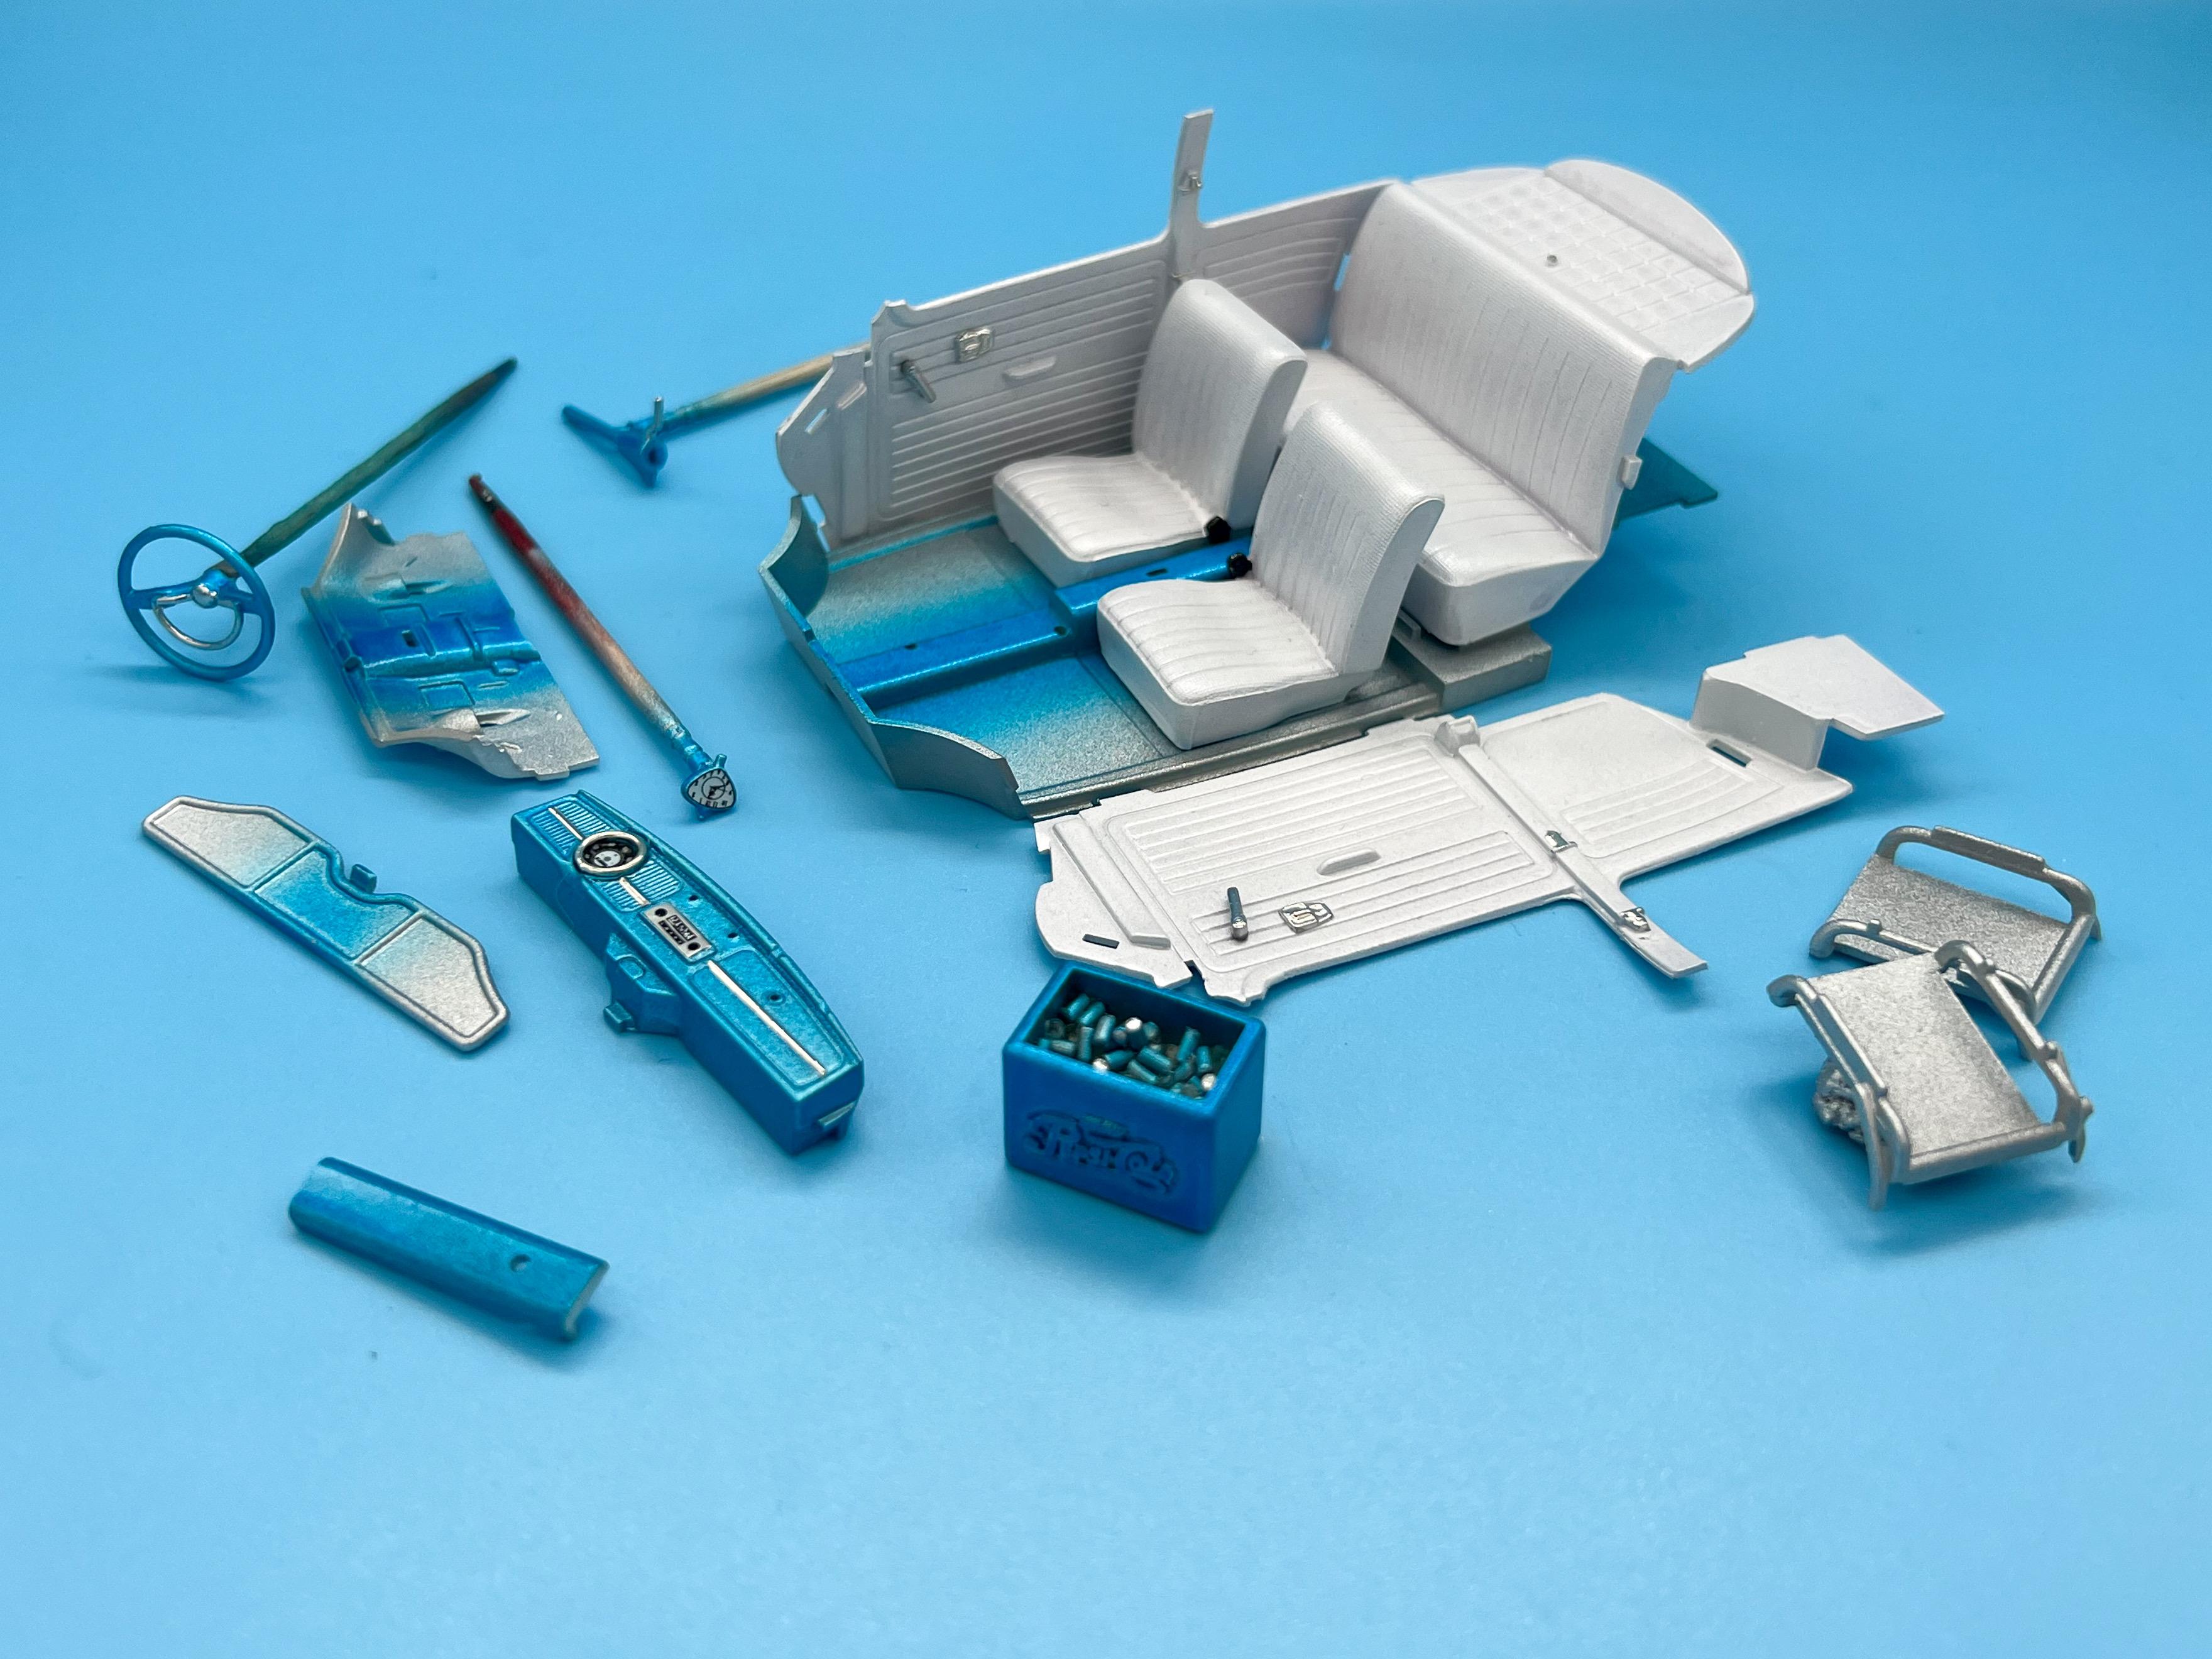
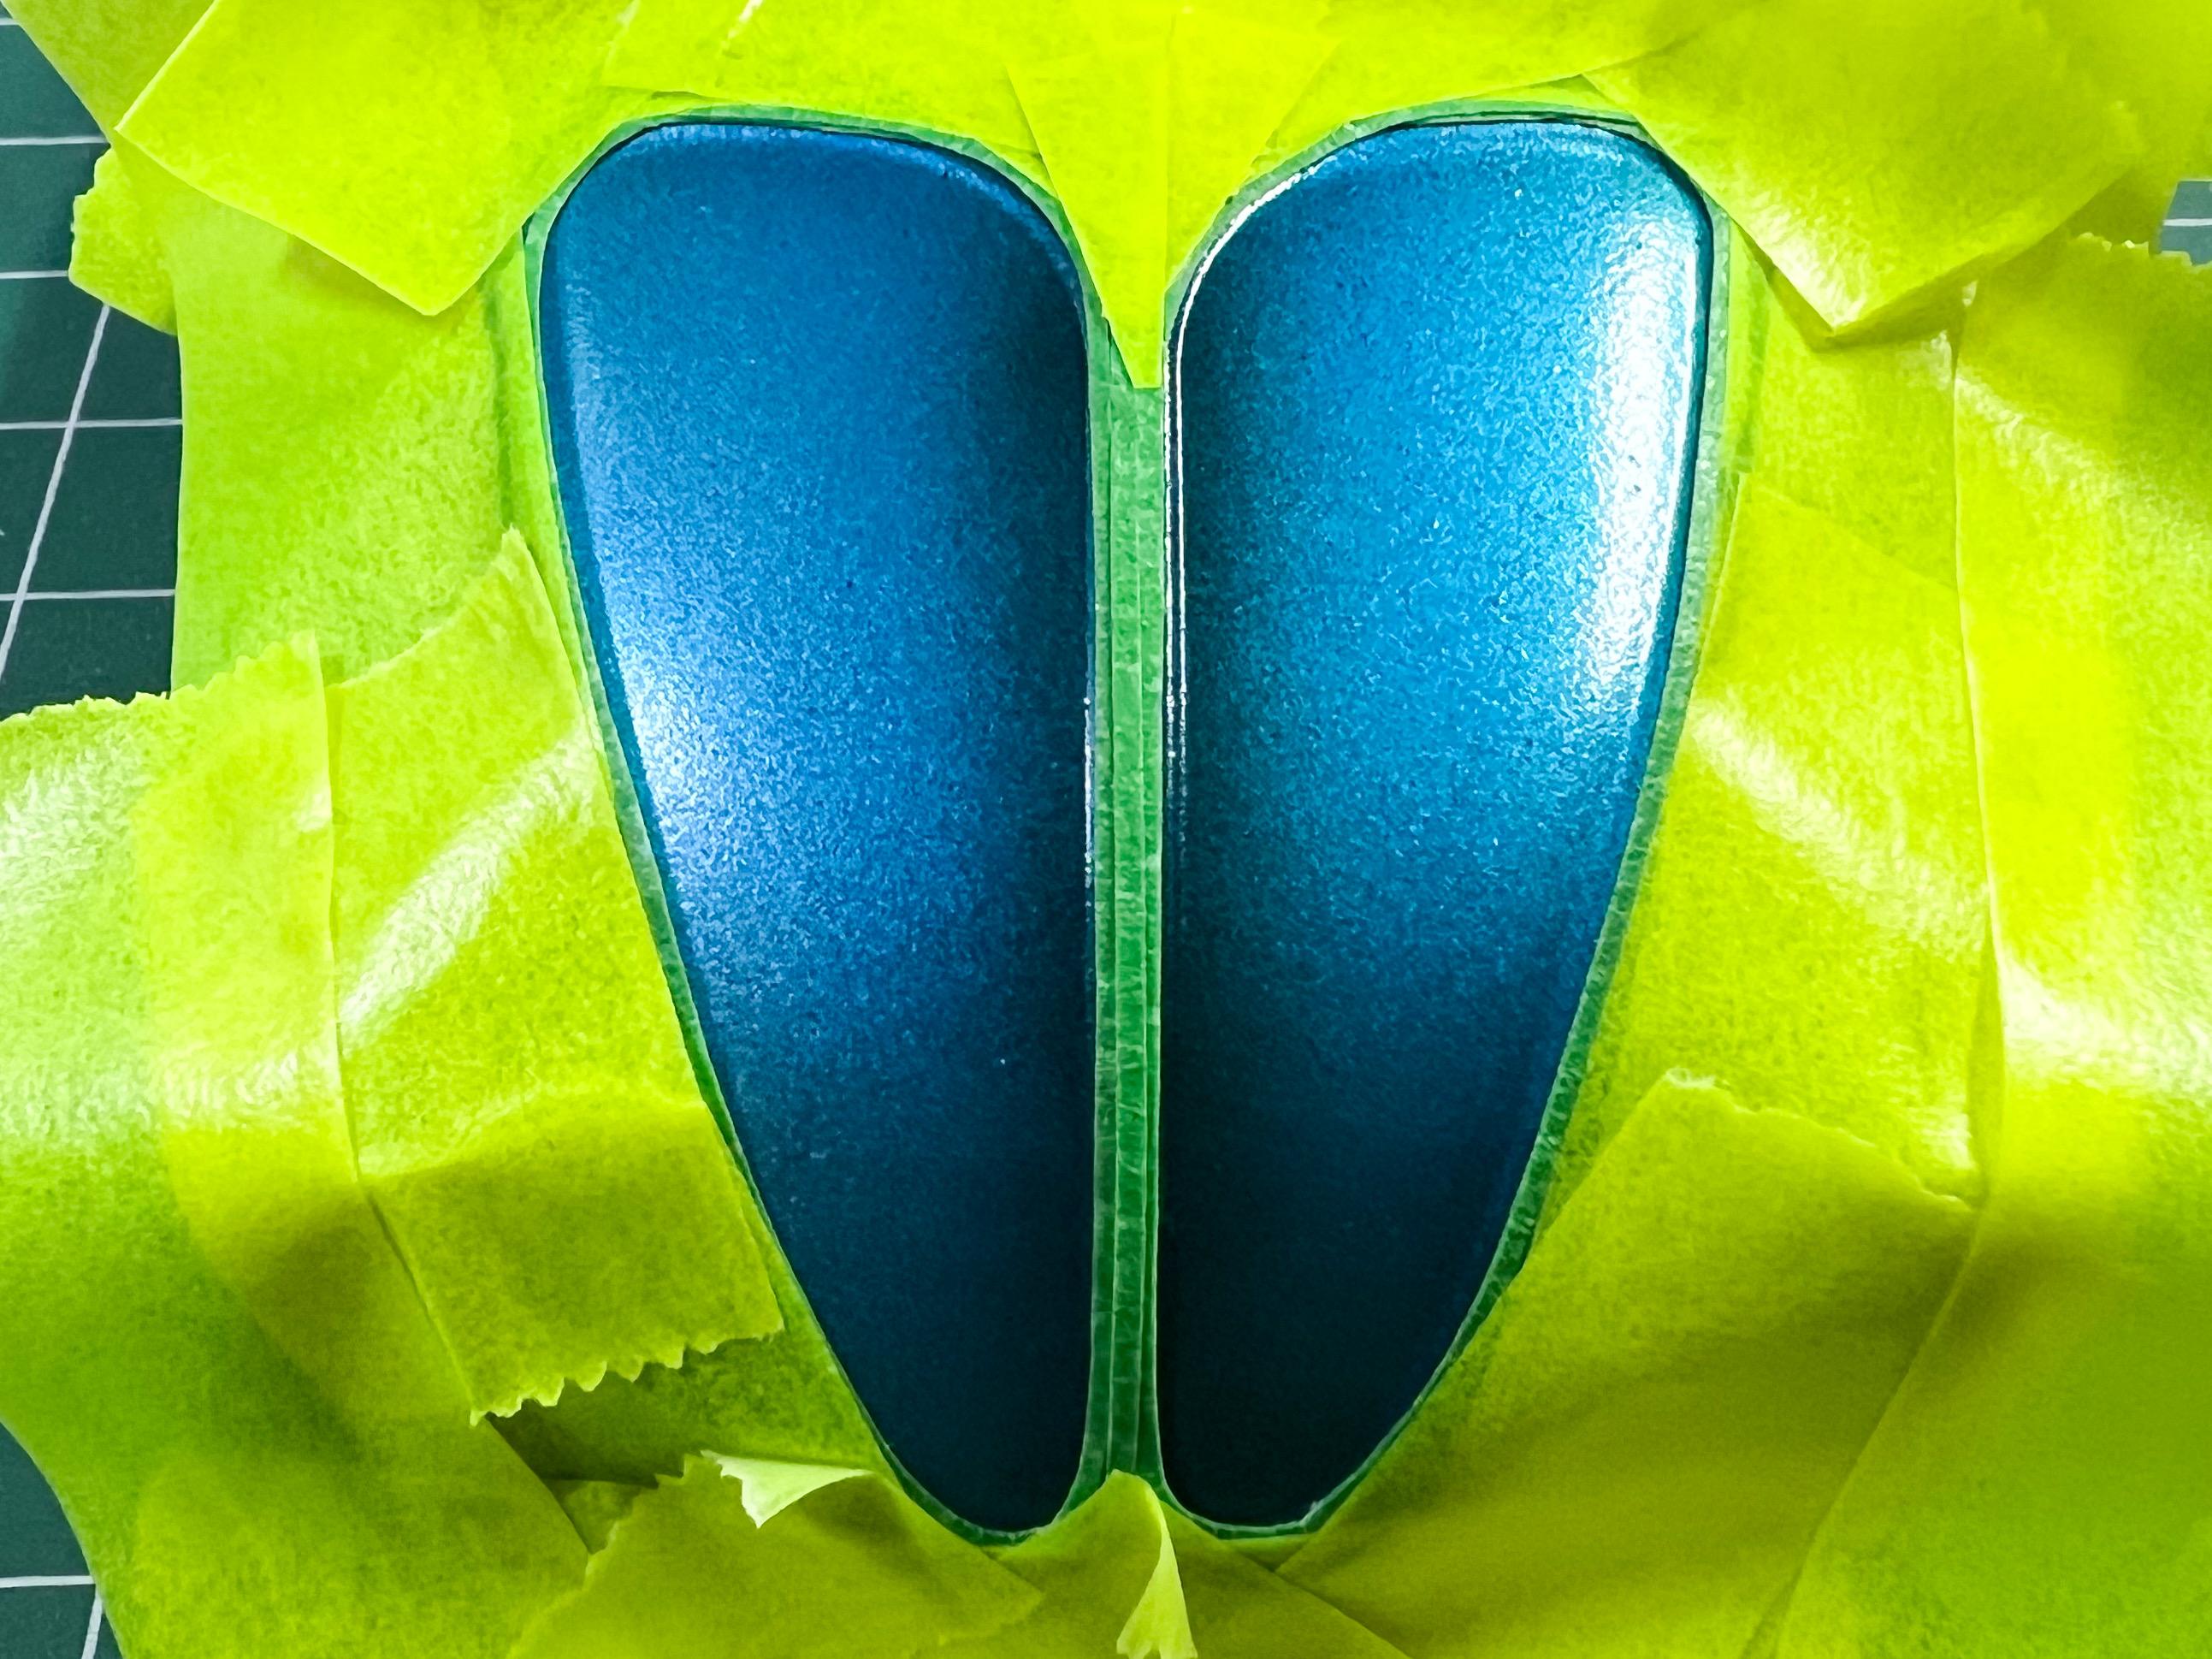
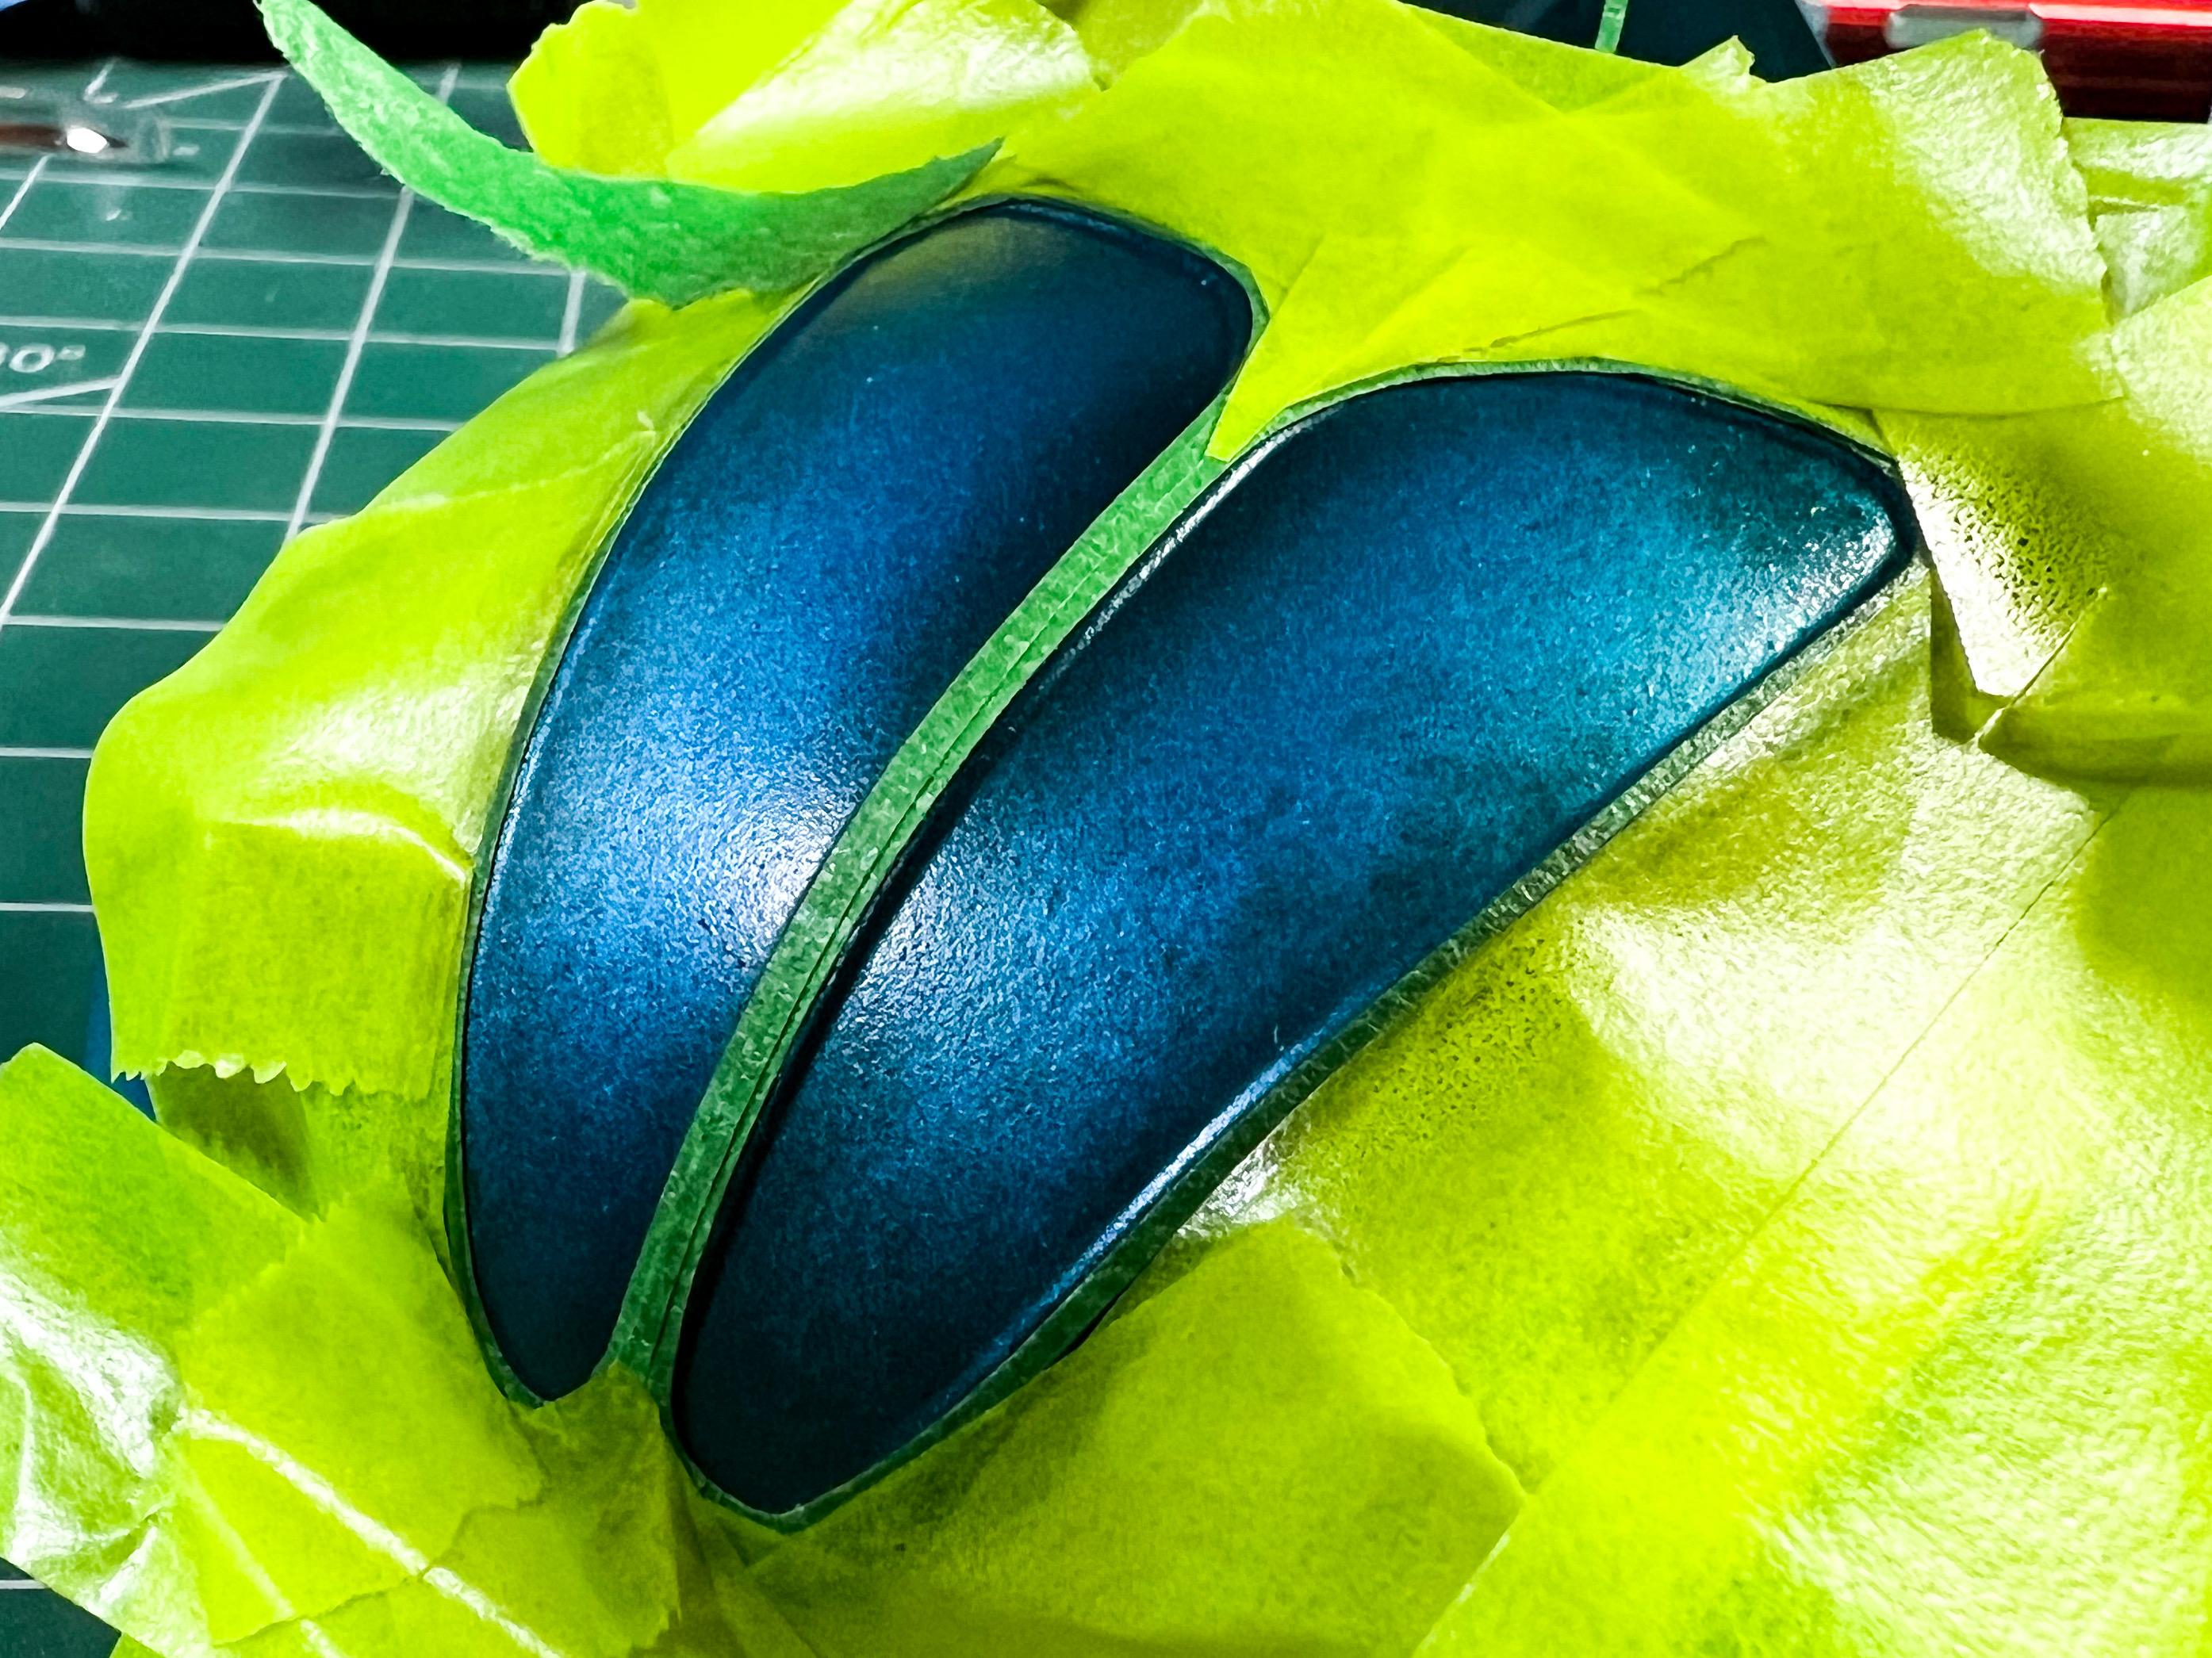
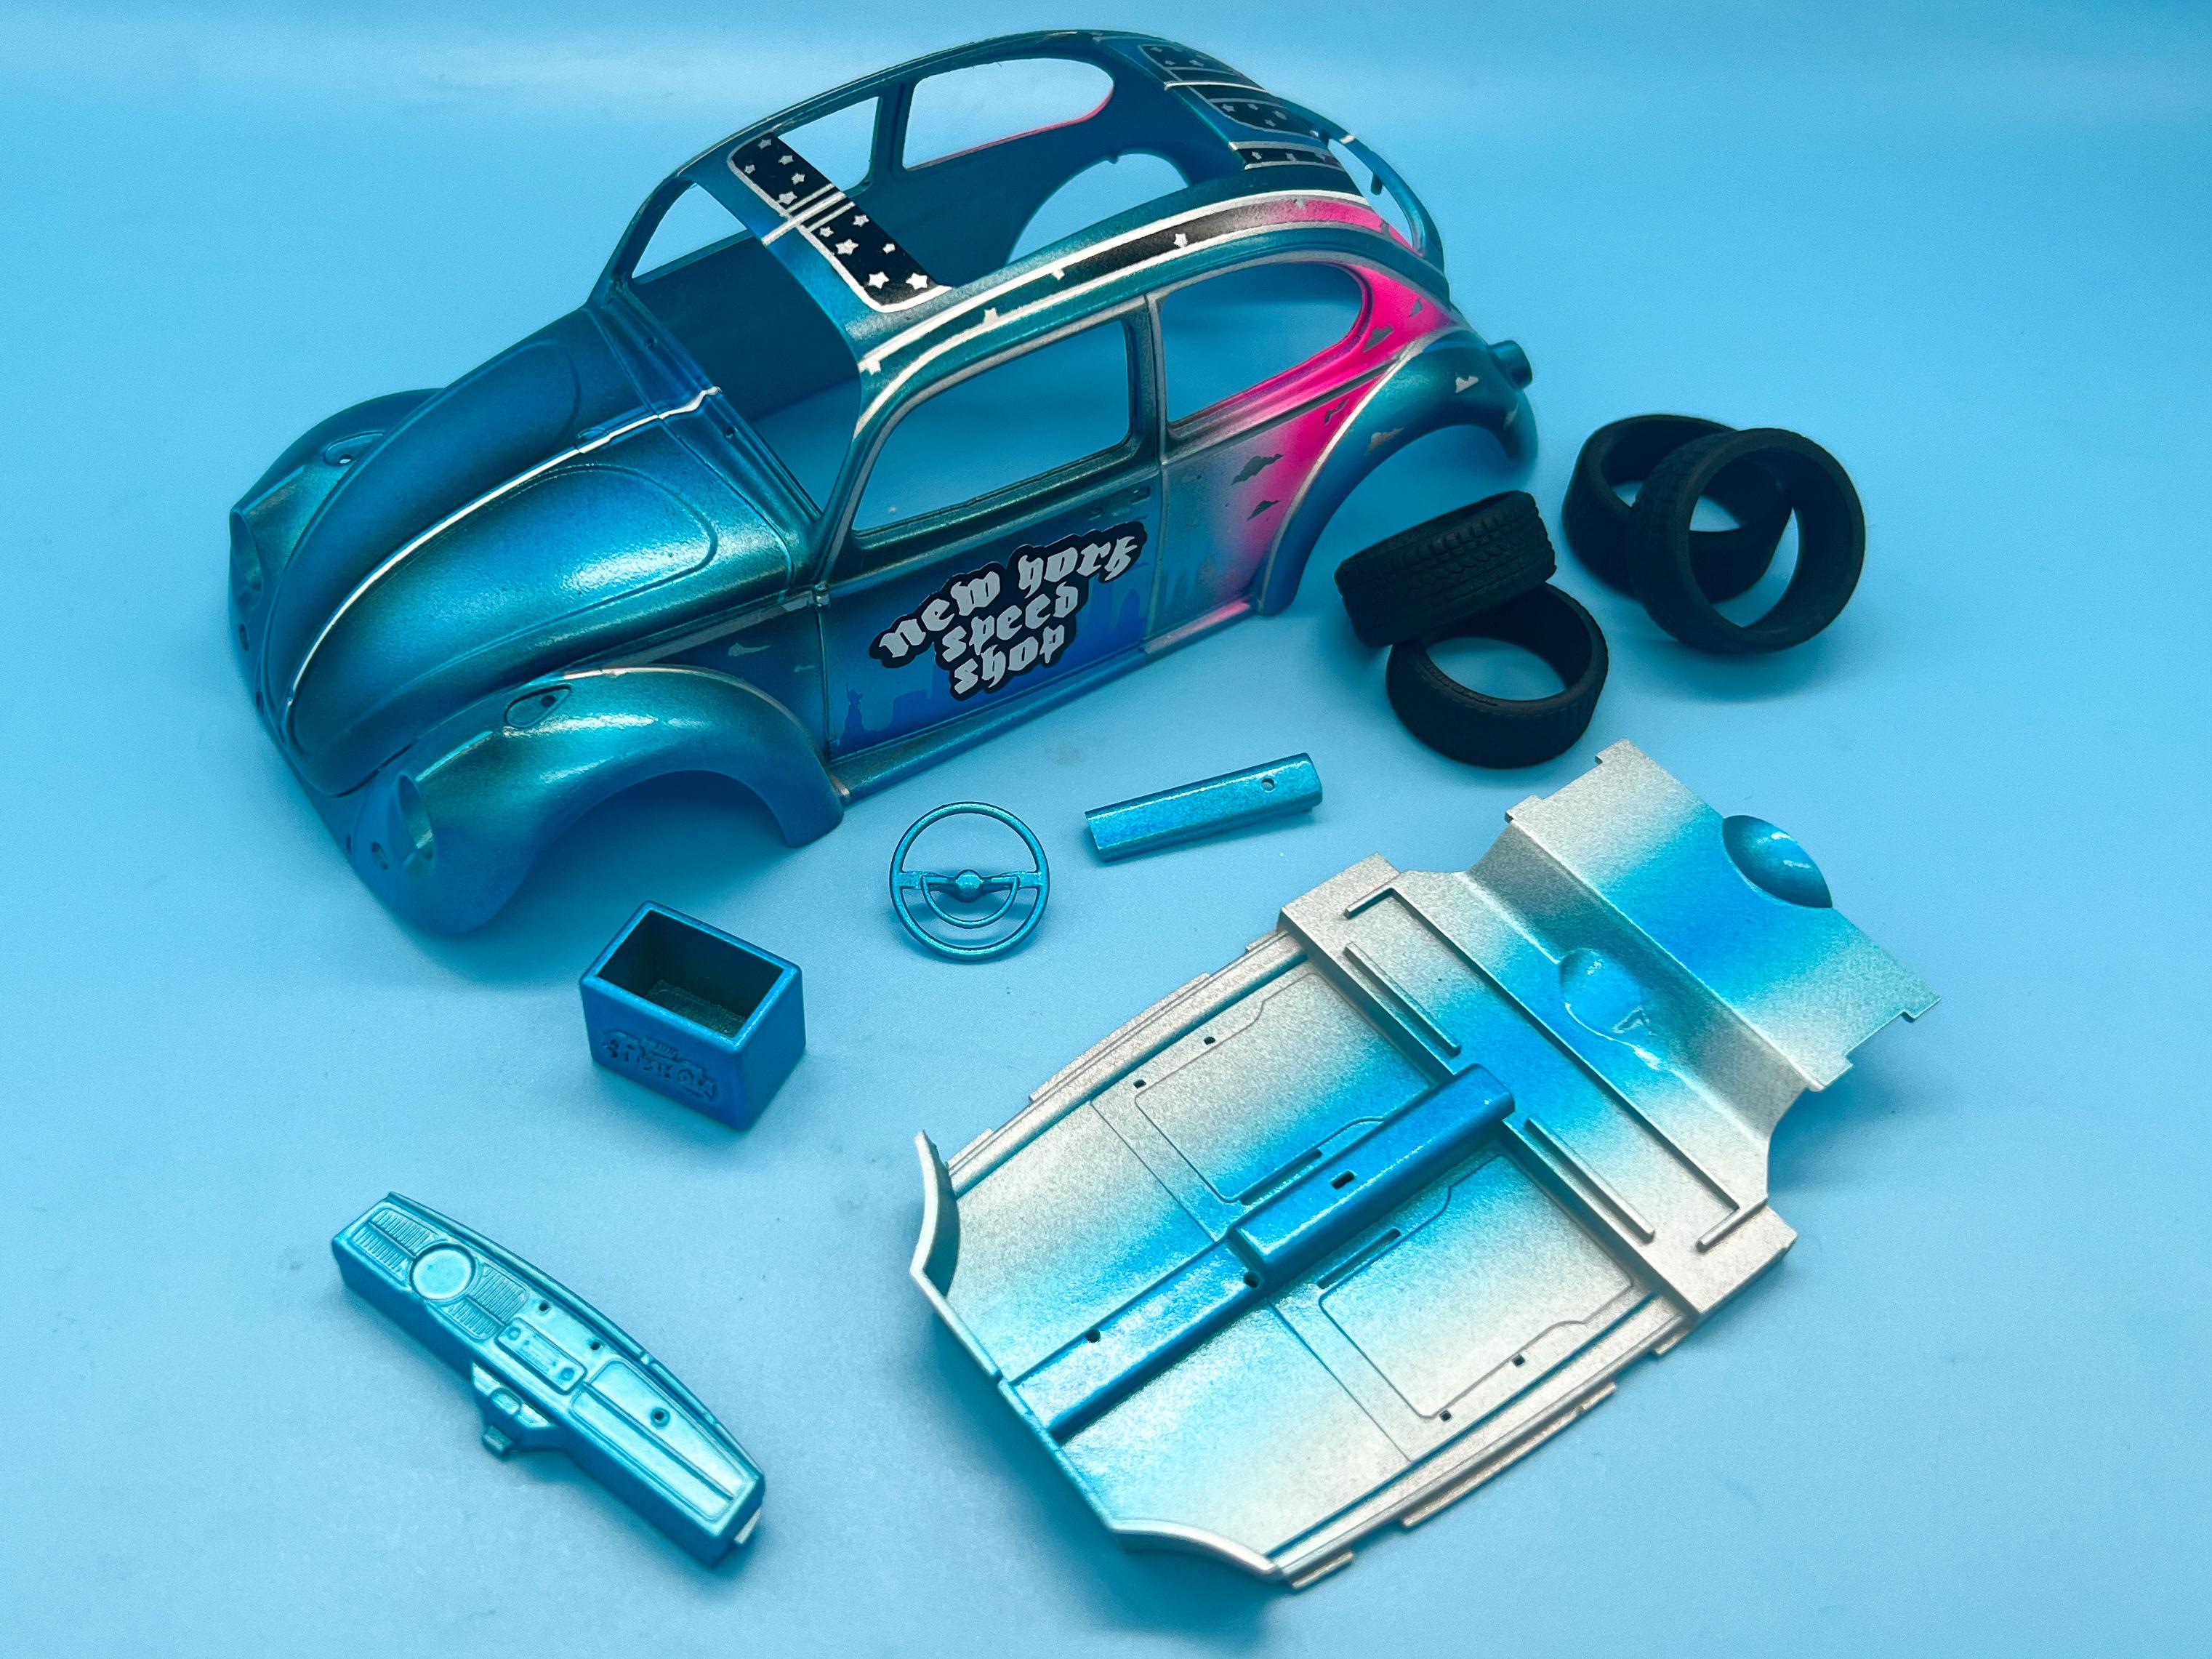
It’s the weekend, so I’ve been prepping and painting a bunch of parts and playing with some little details the last couple of days…and handling some other stuff I hadn’t handled yet… First little job was printing some horn vents - my last kit was missing them so I had to design and print some: Shot some color on the interior pieces - went with Createx opaque white as a base, followed by clear with Pearl Ex with white pearl power and a little blue flake (not that it shows up in the photo ?): Next up was some more silver and candy fades for some of the less interesting bits I hadn’t handled yet - interior parts, firewall, trunk inners and so on: Then, shot some Vallejo tire black on the tires - it’s actually more of a brown-y gray but I like it more than straight black: By the way, I printed those little Christmas trees to help hold tires when I paint them - they’ve been a LIFESAVER… Next up, a bunch of chrome: And then a bunch of engine parts in a mix of metal tones (but mostly in the brighter end of the spectrum - more chrome, polished aluminum and so on…) Brush painted some little details with this AK chrome as a test - worked great! My wife picked up some chrome blue vinyl for me because “I know you’ll find a use for it” and I laid down some number graphics with it: It has a real nice flip to a green-y gold…definitely not going for a subtle look on this build… And then final bits of progress today were starting to lay down some foil on the door cards, 3D printing some window cranks and fitting them, foiling the dash, making a ‘chrome’ ring for the speedo with some wire and filling up that cool vintage cooler with a bunch of 3D printed drinks cans (in matching candy blue:) I need another weekend to rest from this weekend after all that painting…but I think that’s MOST of the major stuff painted to where I can start some assembly now. Definitely need to figure out the exhaust and stuff like the taillights and license plates, but it’s starting to come together! Thanks for looking - more soon!
-
Maybe he got his idea and left ?♂️
-
What did you see on the road today?
OldNYJim replied to Harry P.'s topic in General Automotive Talk (Trucks and Cars)
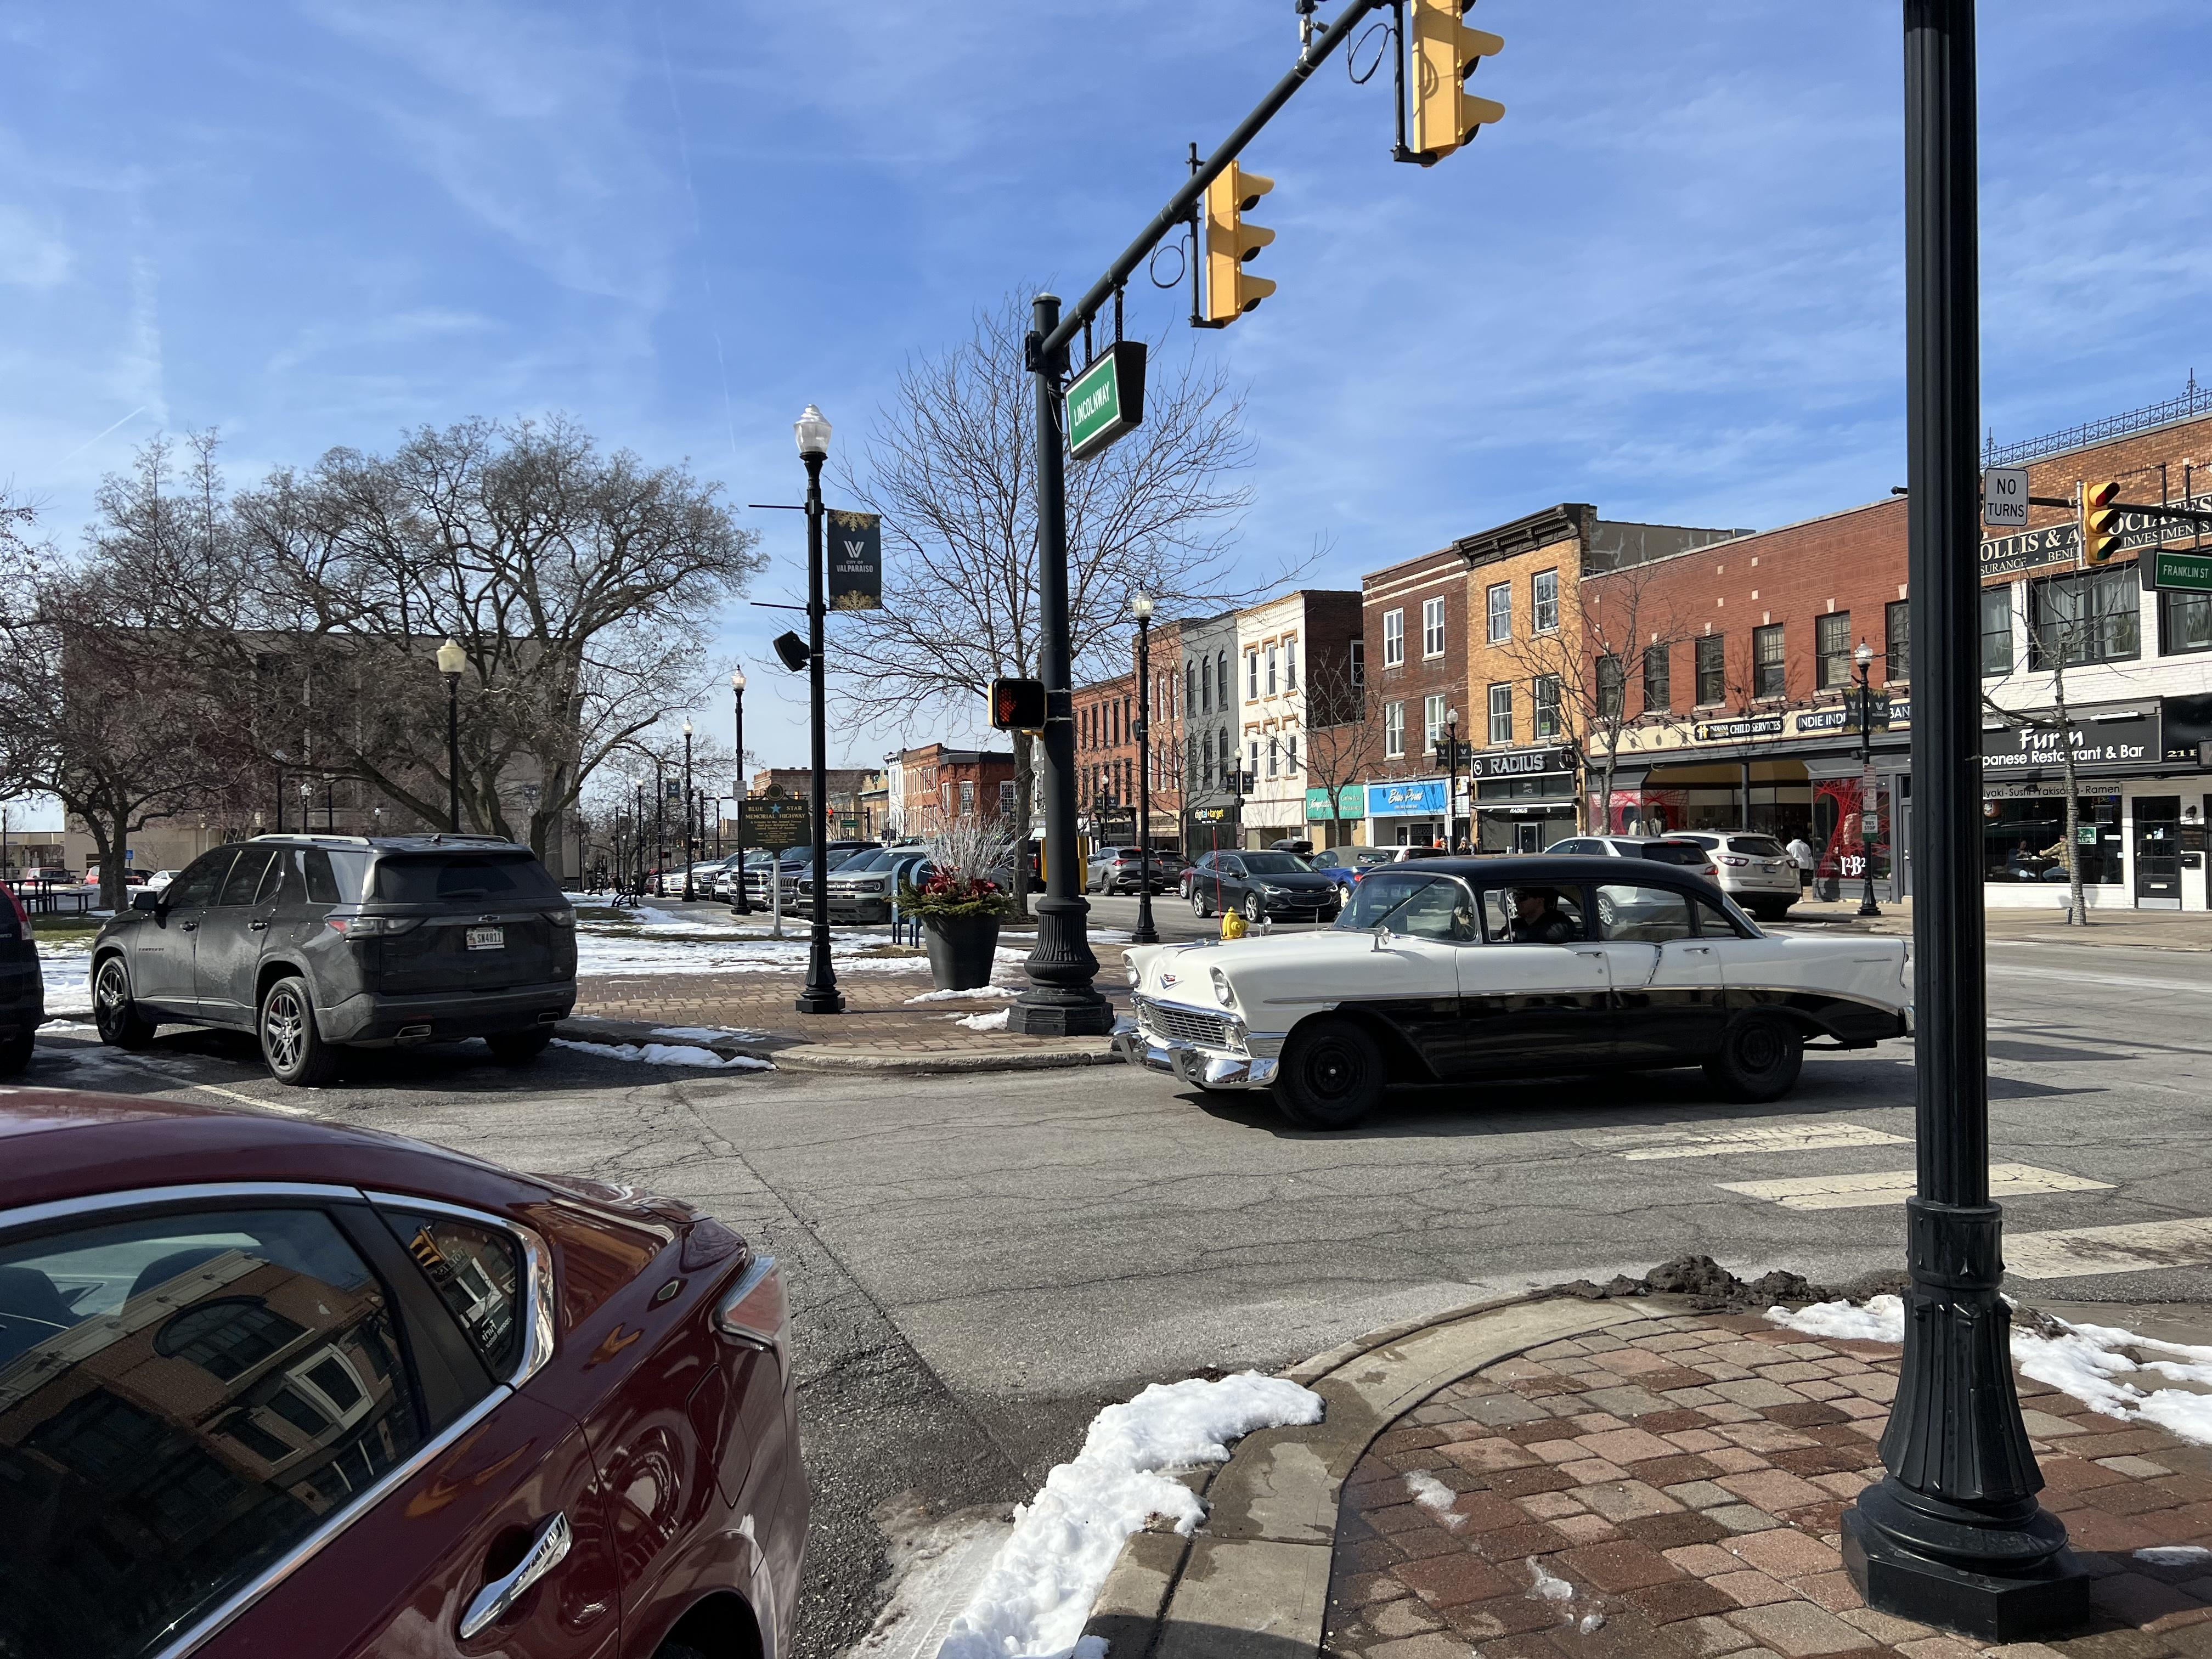
Nice clean 56 rolling around town today:
-
“Barn Find” C-cab street rod from Australia
OldNYJim replied to LDO's topic in General Automotive Talk (Trucks and Cars)
Yessir! https://www.jalopyjournal.com/forum/threads/shipping-container-find.1285641/ -
“Barn Find” C-cab street rod from Australia
OldNYJim replied to LDO's topic in General Automotive Talk (Trucks and Cars)
Huh - I just saw a thread on this car on the HAMB today - I like it! -
GSL Common Kit: [revision] just another Model A Roadster
OldNYJim replied to 89AKurt's topic in WIP: Model Cars
I’m really enjoying this build - you’re doing a beautiful job of detailing up this relatively-simple kit. You did great at that leather technique - I’ve tried that too but haven’t mastered it yet… -
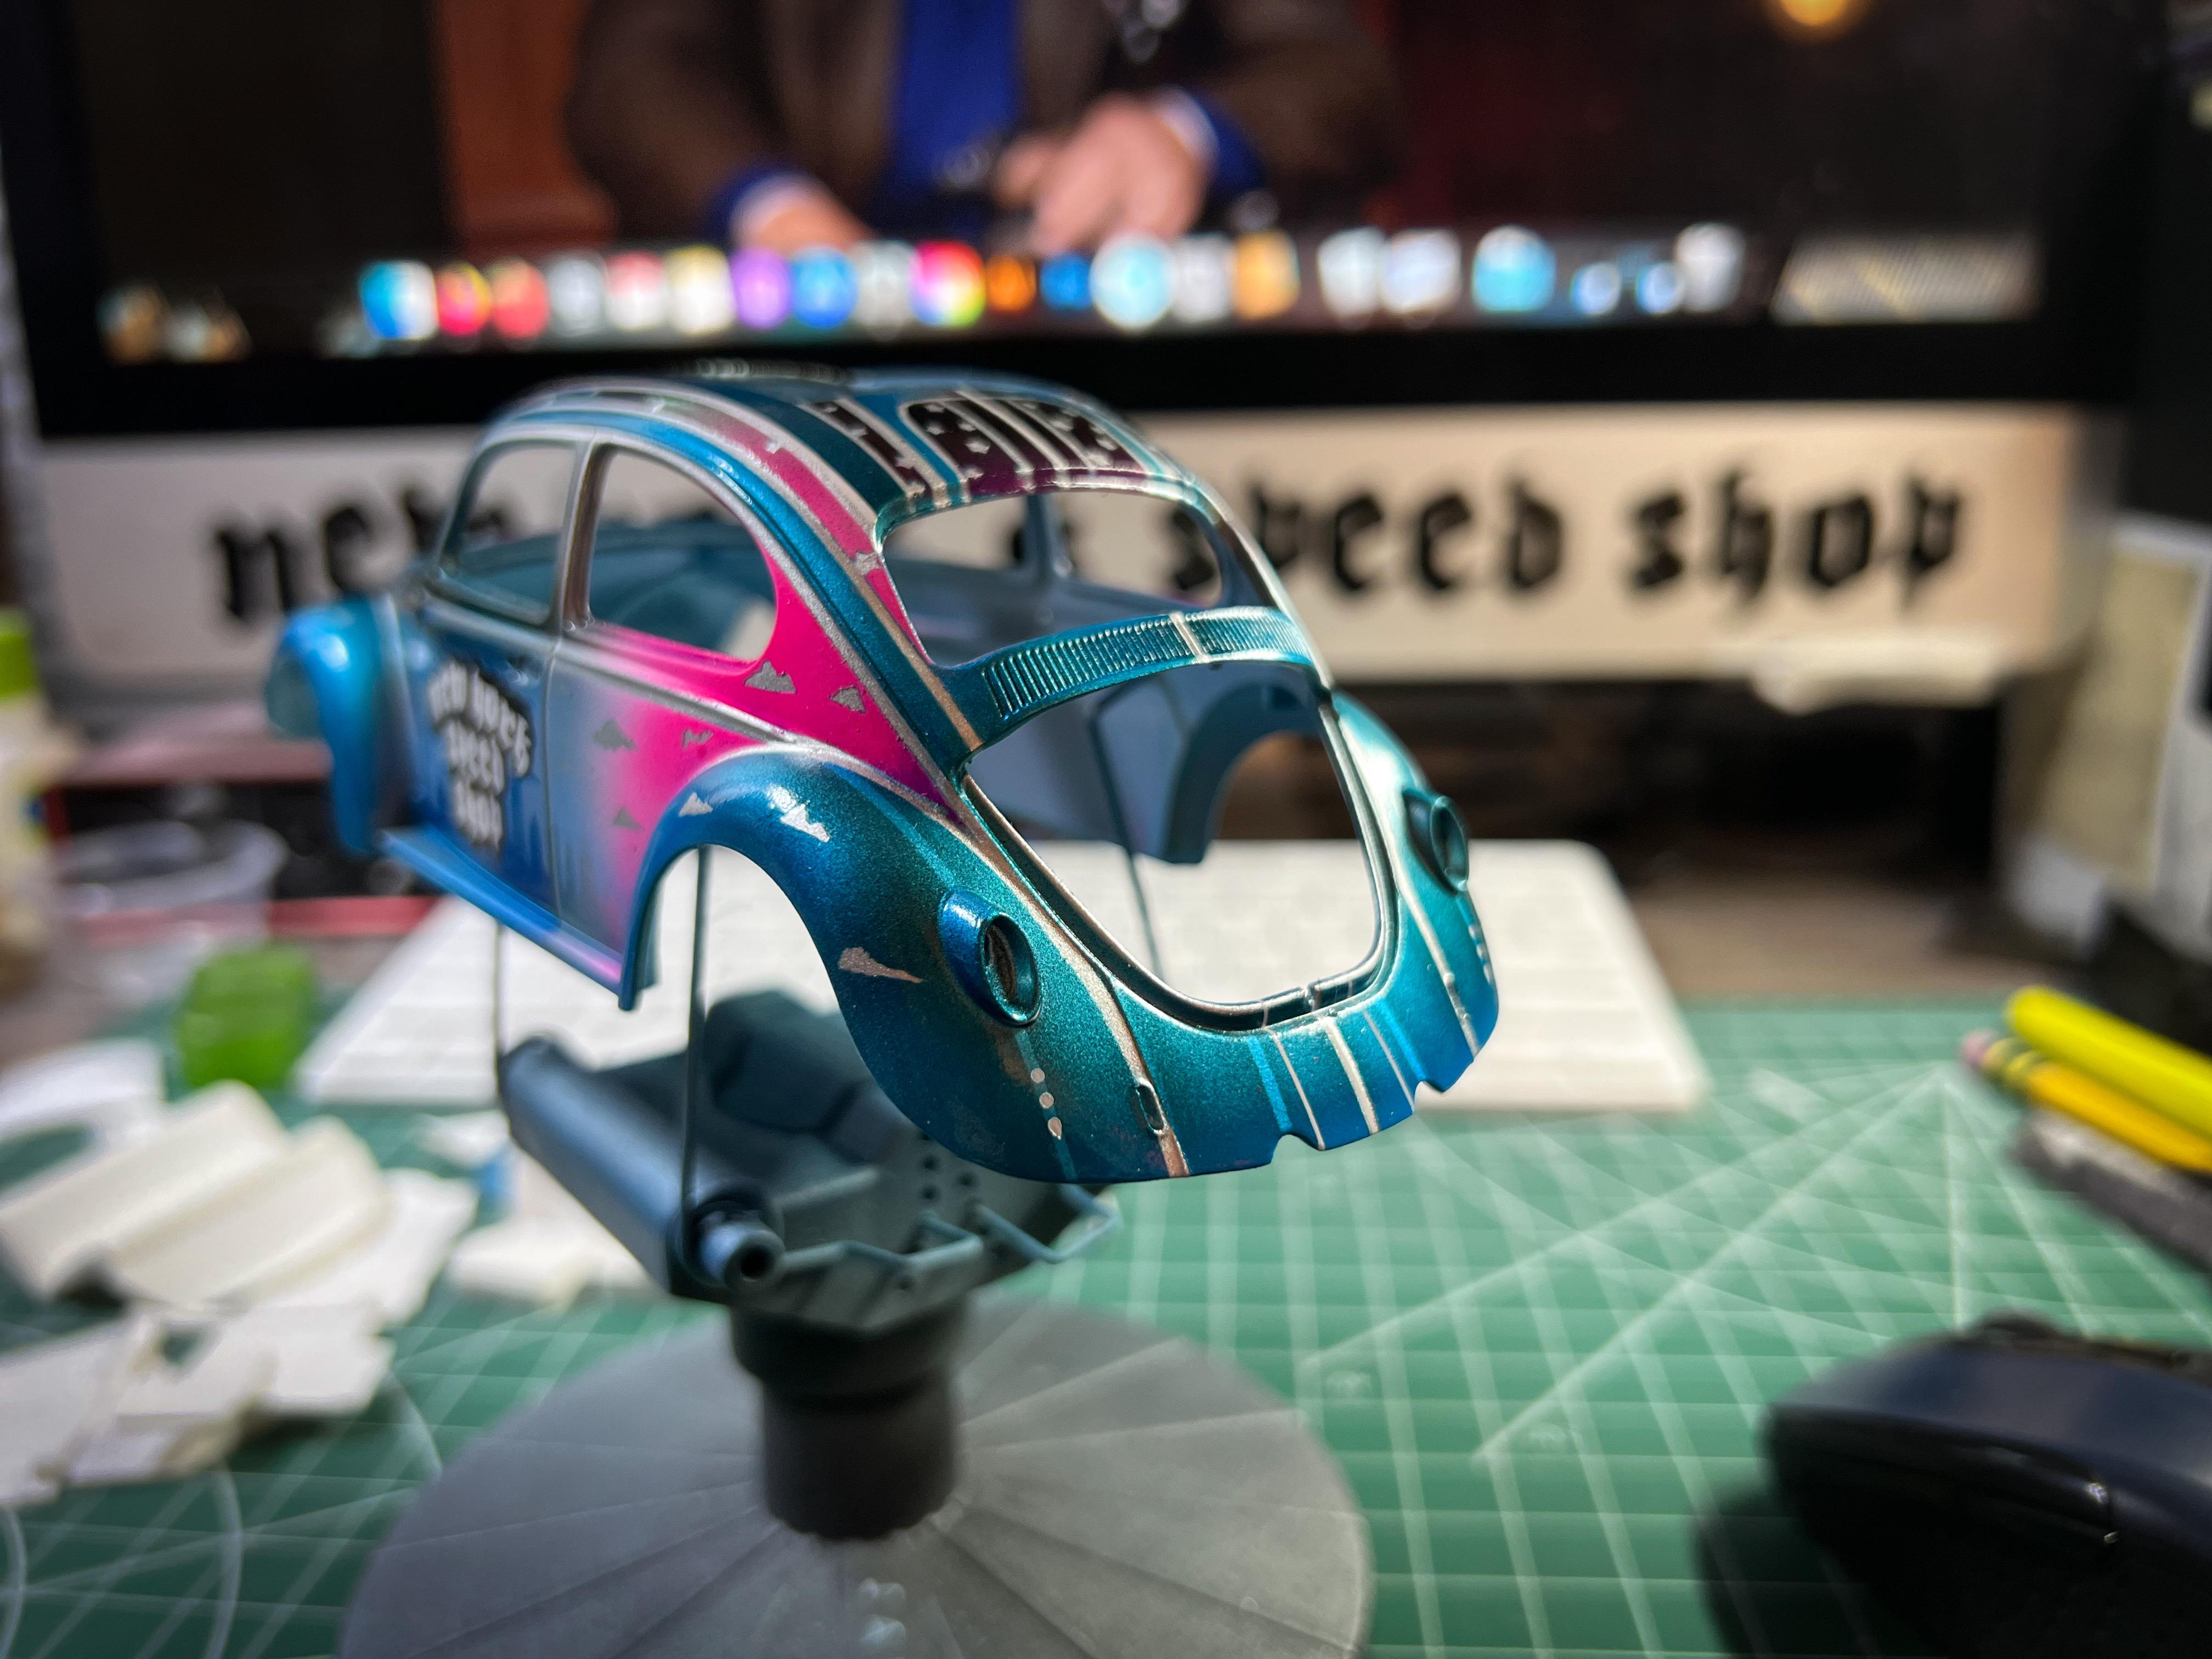
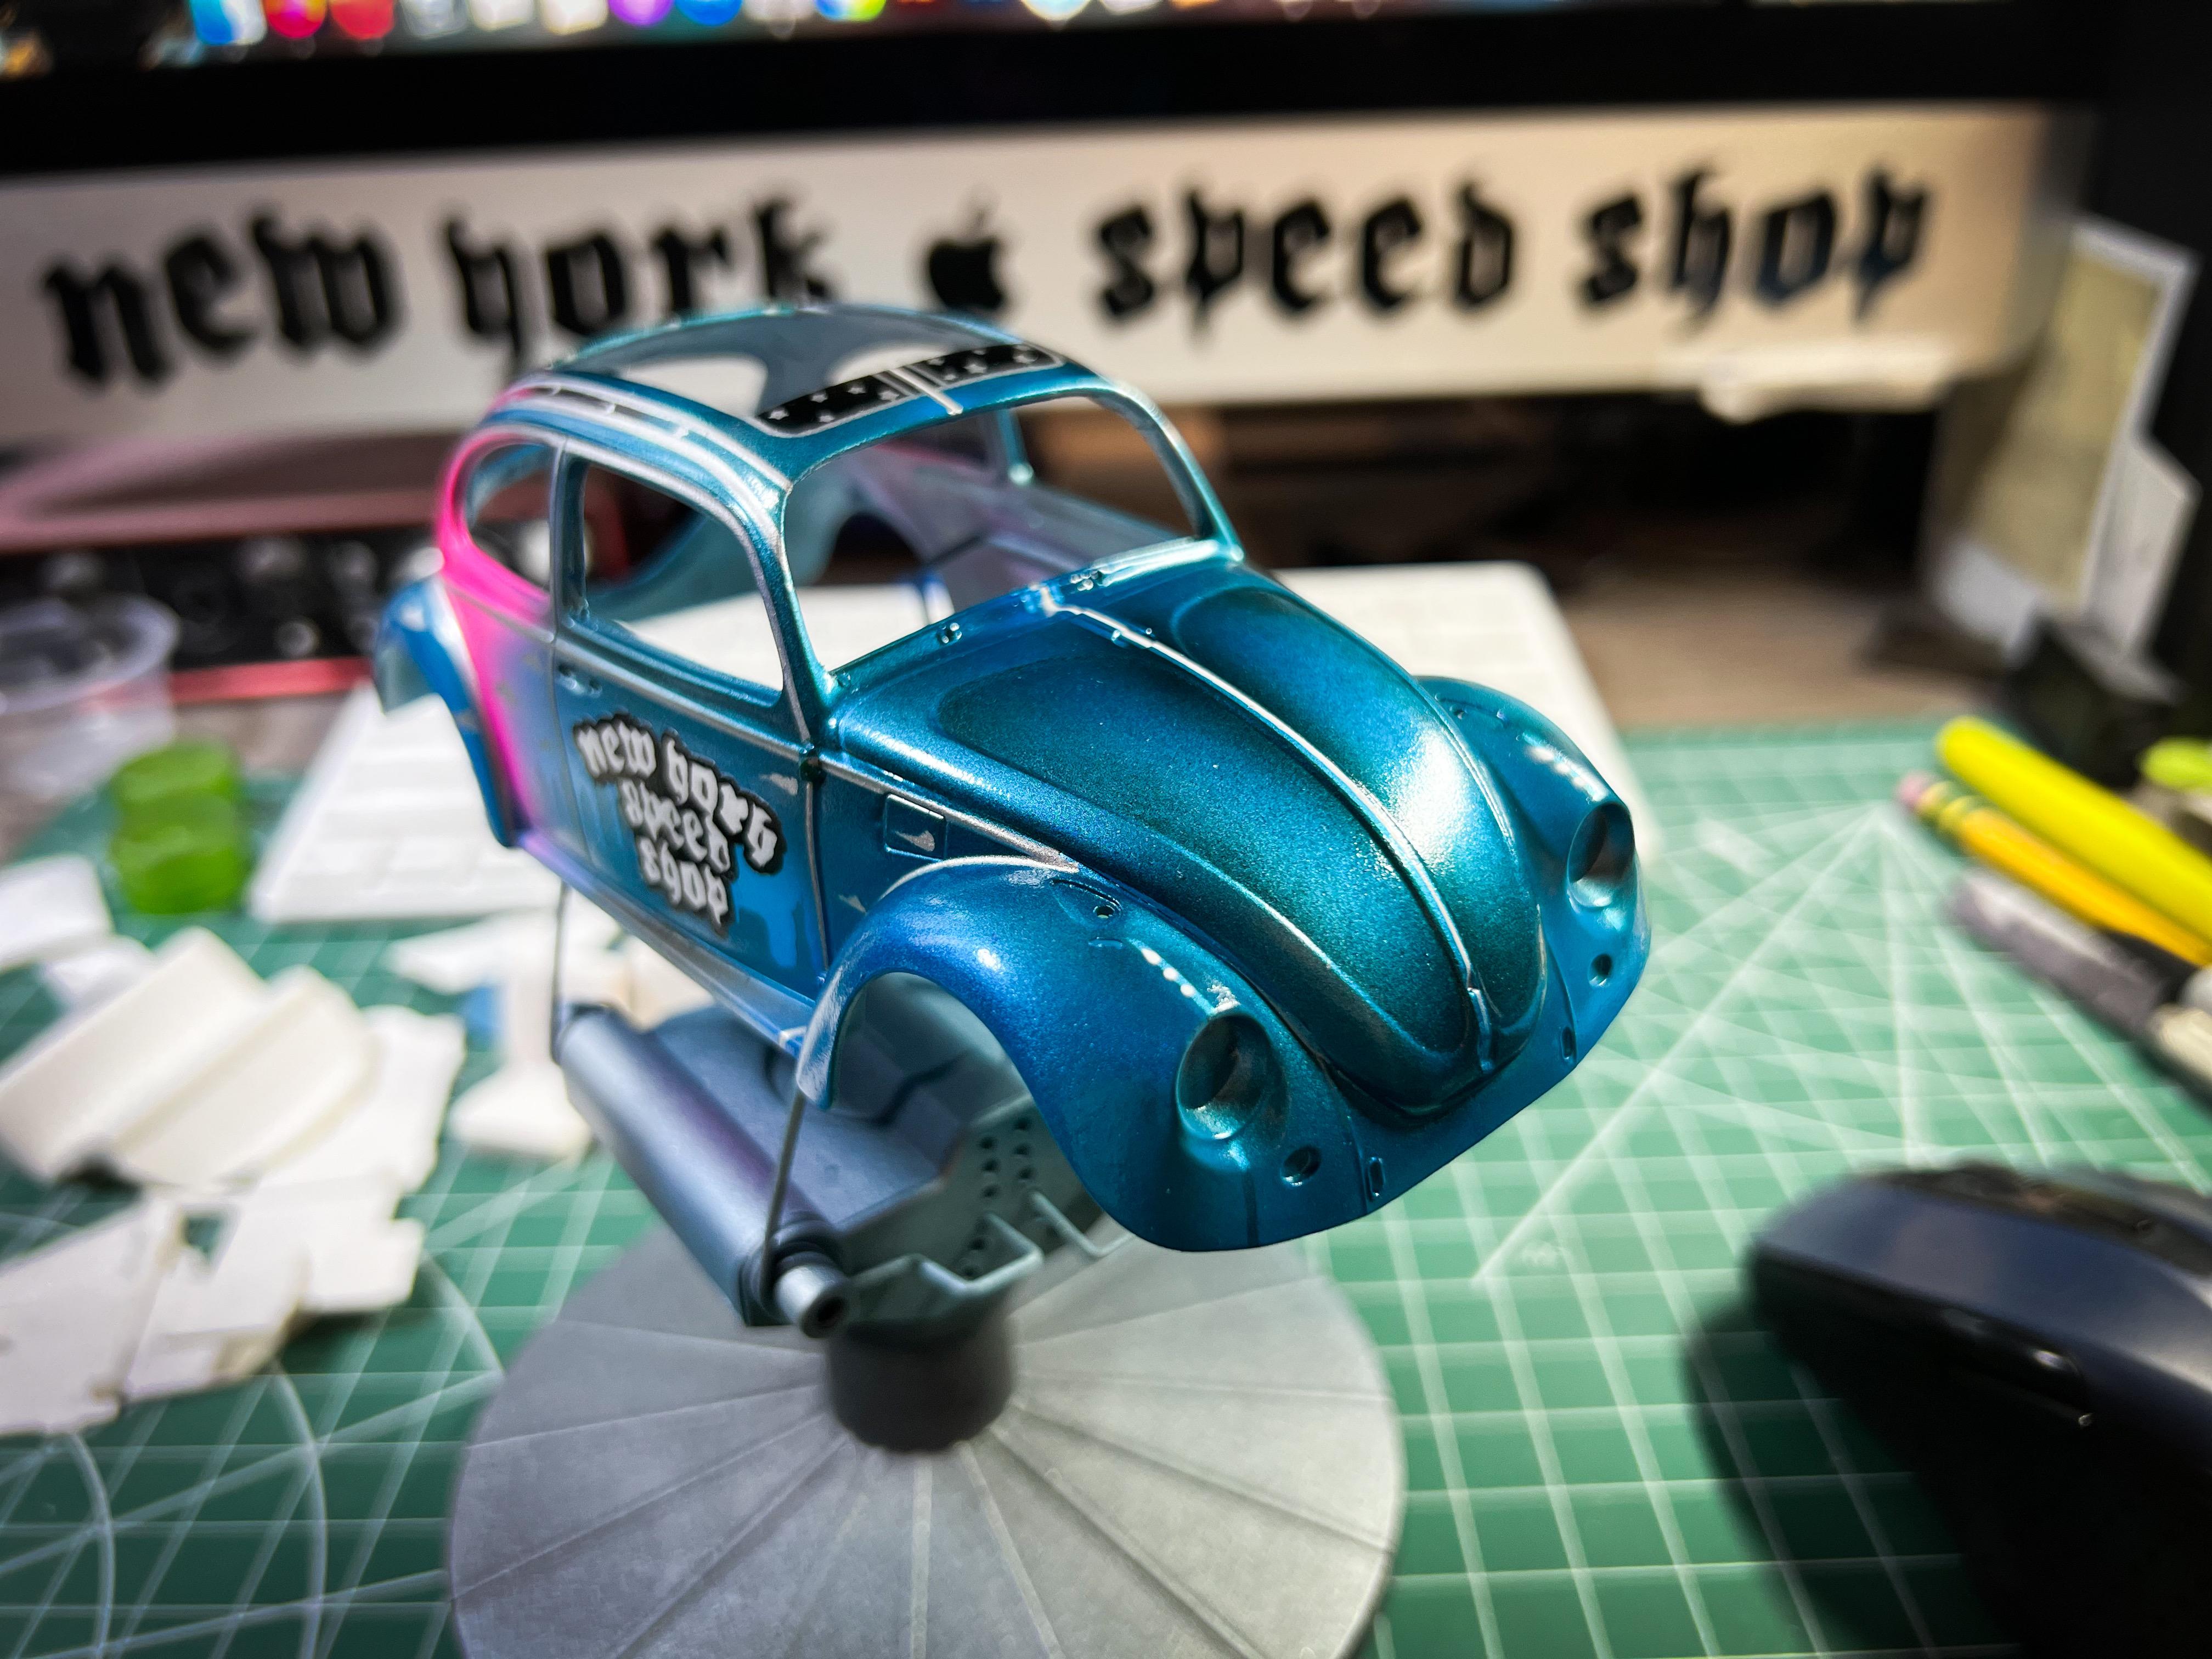
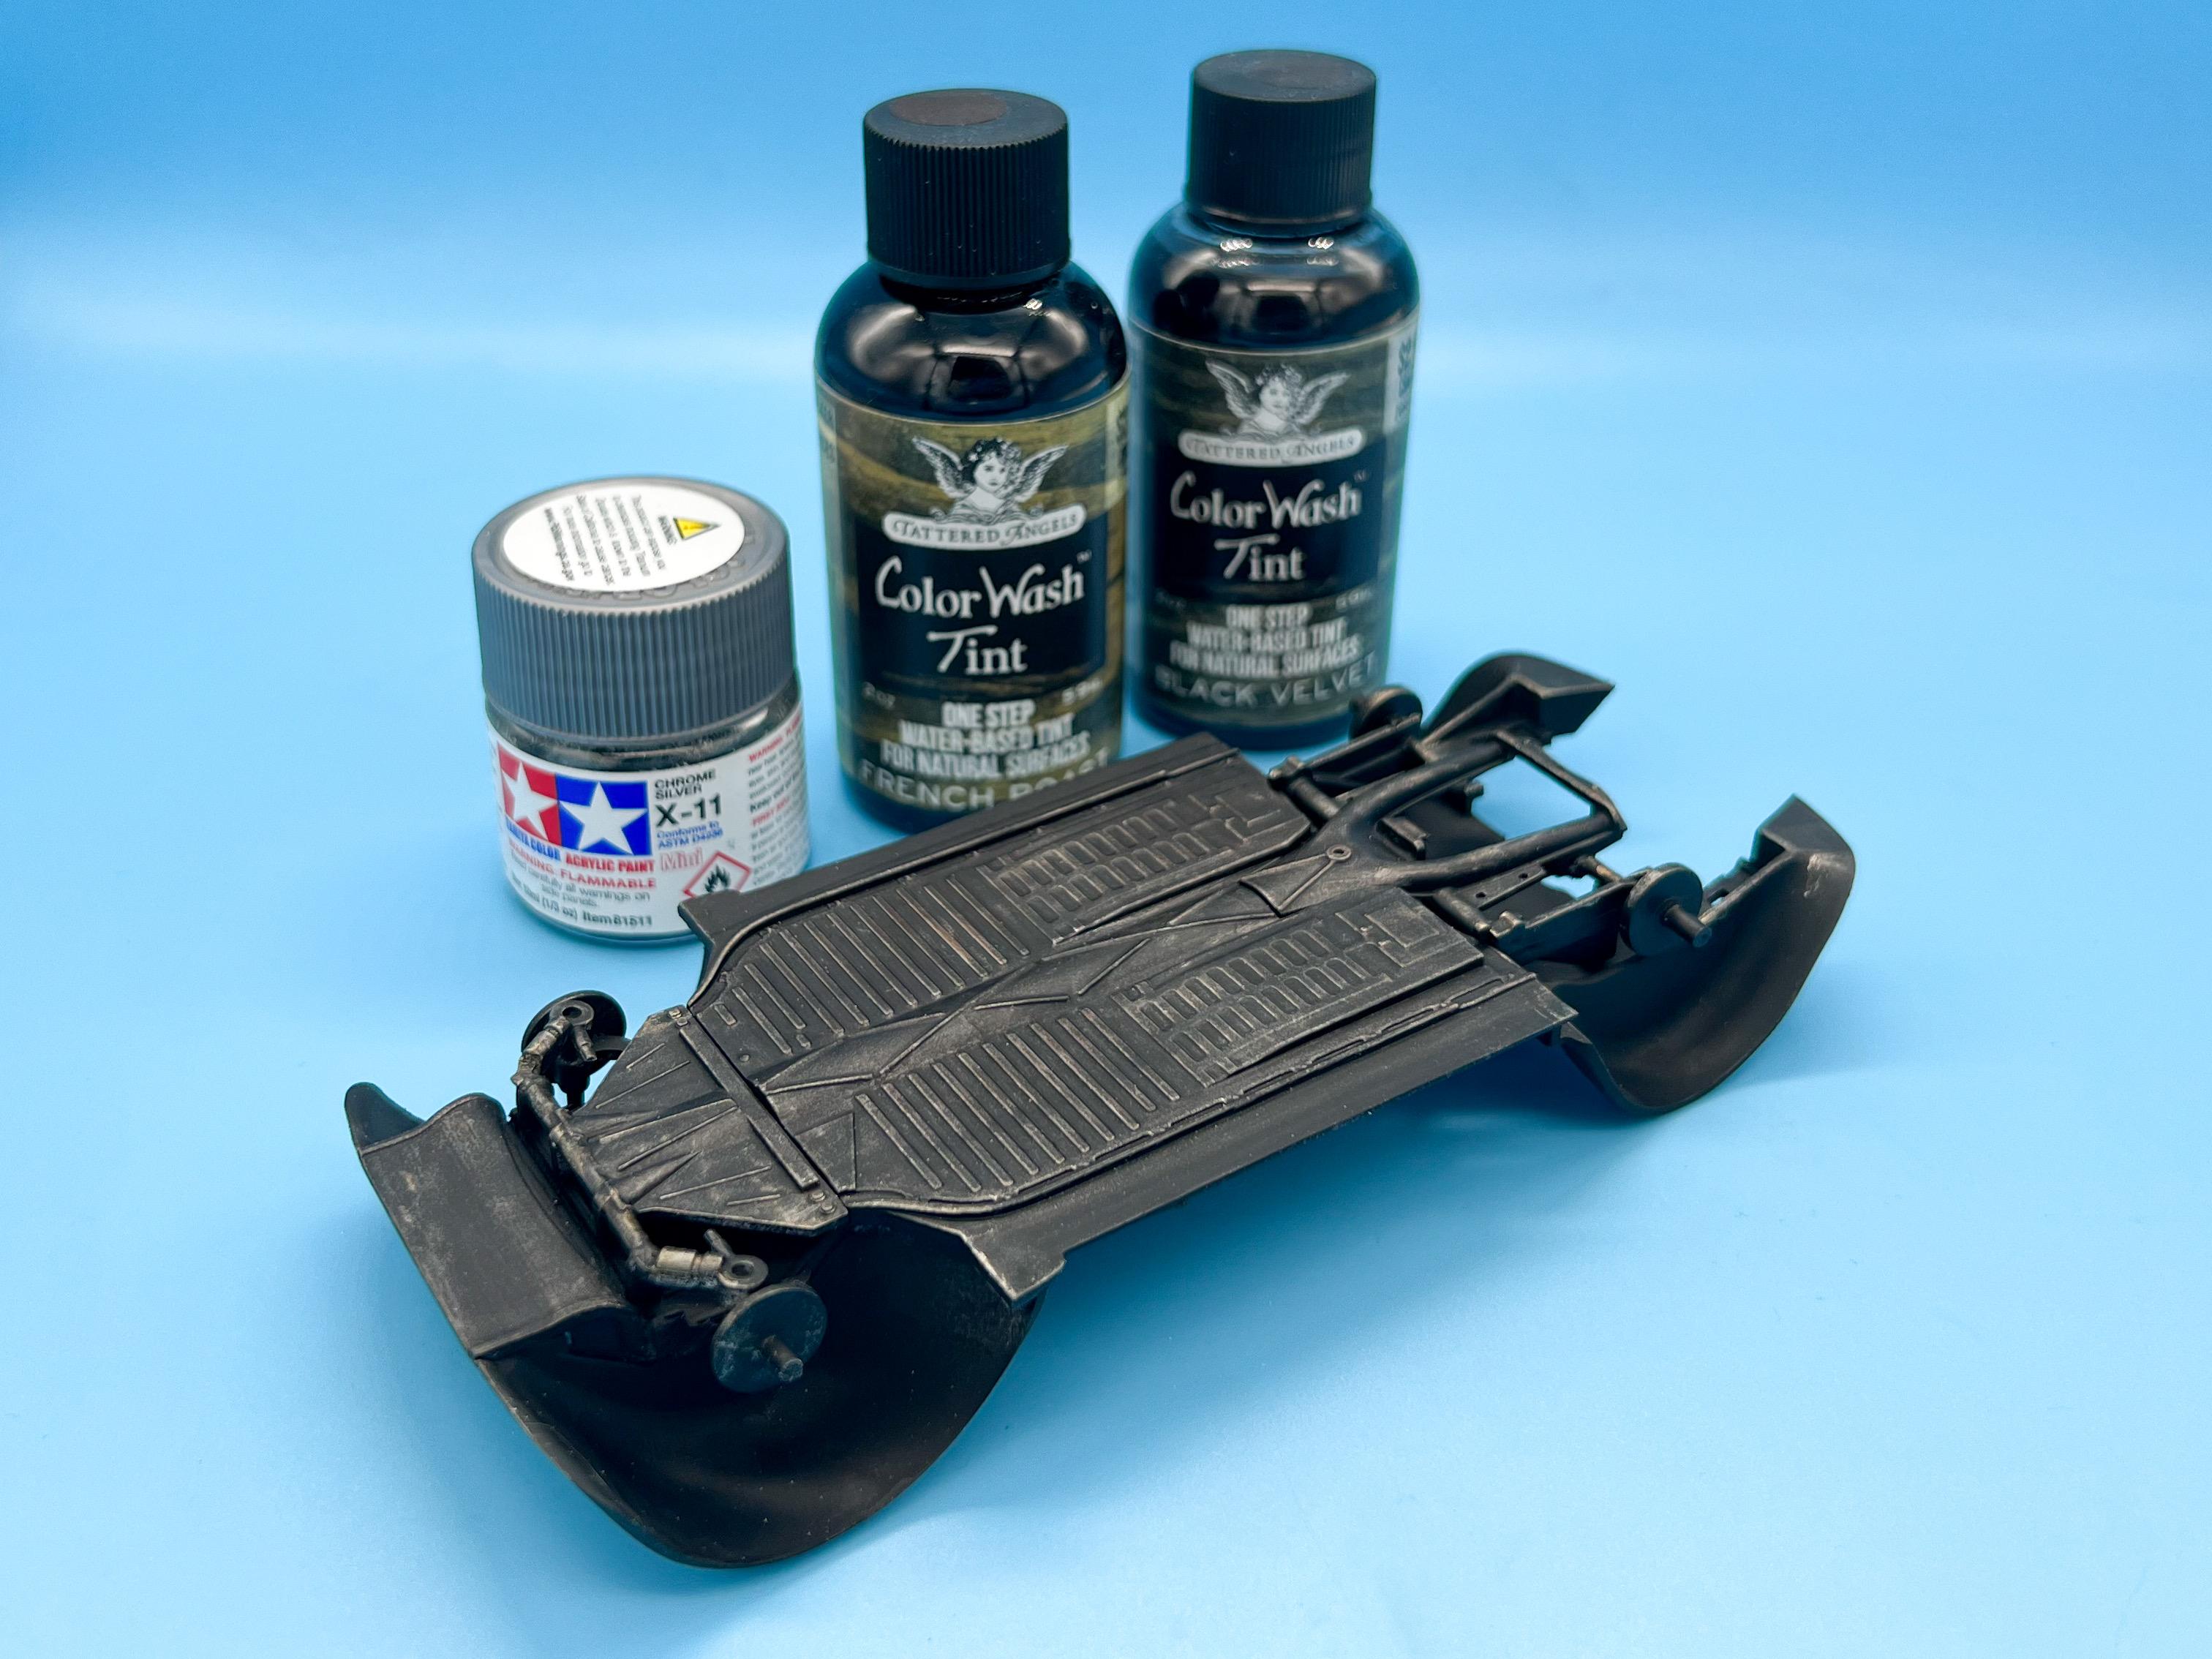
Thanks fellas! I had an idea for a more subtle version of the same kind of paint job (sans logos) that I’d like to try too - but I’m having fun with painting something modern and in-your-face! Next couple of little bits of paint were masking up the hood for some subtle shading… I wanted to add some subtle airbrushed texture, just a mottled kind of look over top the candy: And then tonight’s adventure was shooting some little pinstriped dots on the front and rear fenders, trailing off the lights: And that’s about all the ideas I had for paint on this particular one…it’s probably a love it or hate it type look, but I managed to mostly pull off all the tricks I wanted to try on this one - time to start laying down some clear: Next up will be some work on the interior pieces, which I’ve made a start of painting already… And, for my own amusement only (seeing as this will be a curbside entry for one of the shows this year that my first NY Beetle won at) I practiced some weathering on the underside…I’m not going for completely ruined, but well used and a little grimy if you look past all the sparkles and color - kinda like NY itself! Thanks for looking…more soon!
-
The thing is, to Dave Vans point, it would be cool to read some reviews of a brand new tooled kit, decide if you want it and THEN be able to buy one. Kinda hard if, by the time anyone has one in their hands and reports on it, they’re only available via eBay for over a hundred bucks. Of course, that becomes less of an issue when they’re releasing variations on existing kits with slight changes, but I’m with Dave, I’d probably own a bunch of Salvinos kits if they were actually AVAILABLE easily by the time I see a review or build thread for them and decide I want one Just my 2c, and I still want to add some of their kits to my stash…