OldNYJim
-
Posts
250 -
Joined
-
Last visited
Content Type
Profiles
Forums
Events
Gallery
Everything posted by OldNYJim
-
Beautiful work Greg! Those look great!
-
That came out GREAT! Way better than mine ?. I gotta post pics of mine, come to think of it… This is such a cool project - I love what you put together!
-
Love seeing these TD kits get built - looks great so far! Love the paint you chose!
-
 Love your Sunday updates @Dennis Lacy! It’s looking great - reminds me of the little red RPU that Boyd did on American Hot Rod EDIT: Actually, it looks nothing like the White Cap RPU on AHR, now that I googled it - ha! Time for another rewatch…
 -
I’ve got three of those (actually, a variation on those with more small trays and less big ones), and I’ve been gradually sorting all my junk into trays for the past year or so. I’ve been labeling the trays with one of those clicky clacky Dymo machines, and when I figure out the perfect arrangement parts to drawers I’ll pull them all out and organize alphabetically.
-
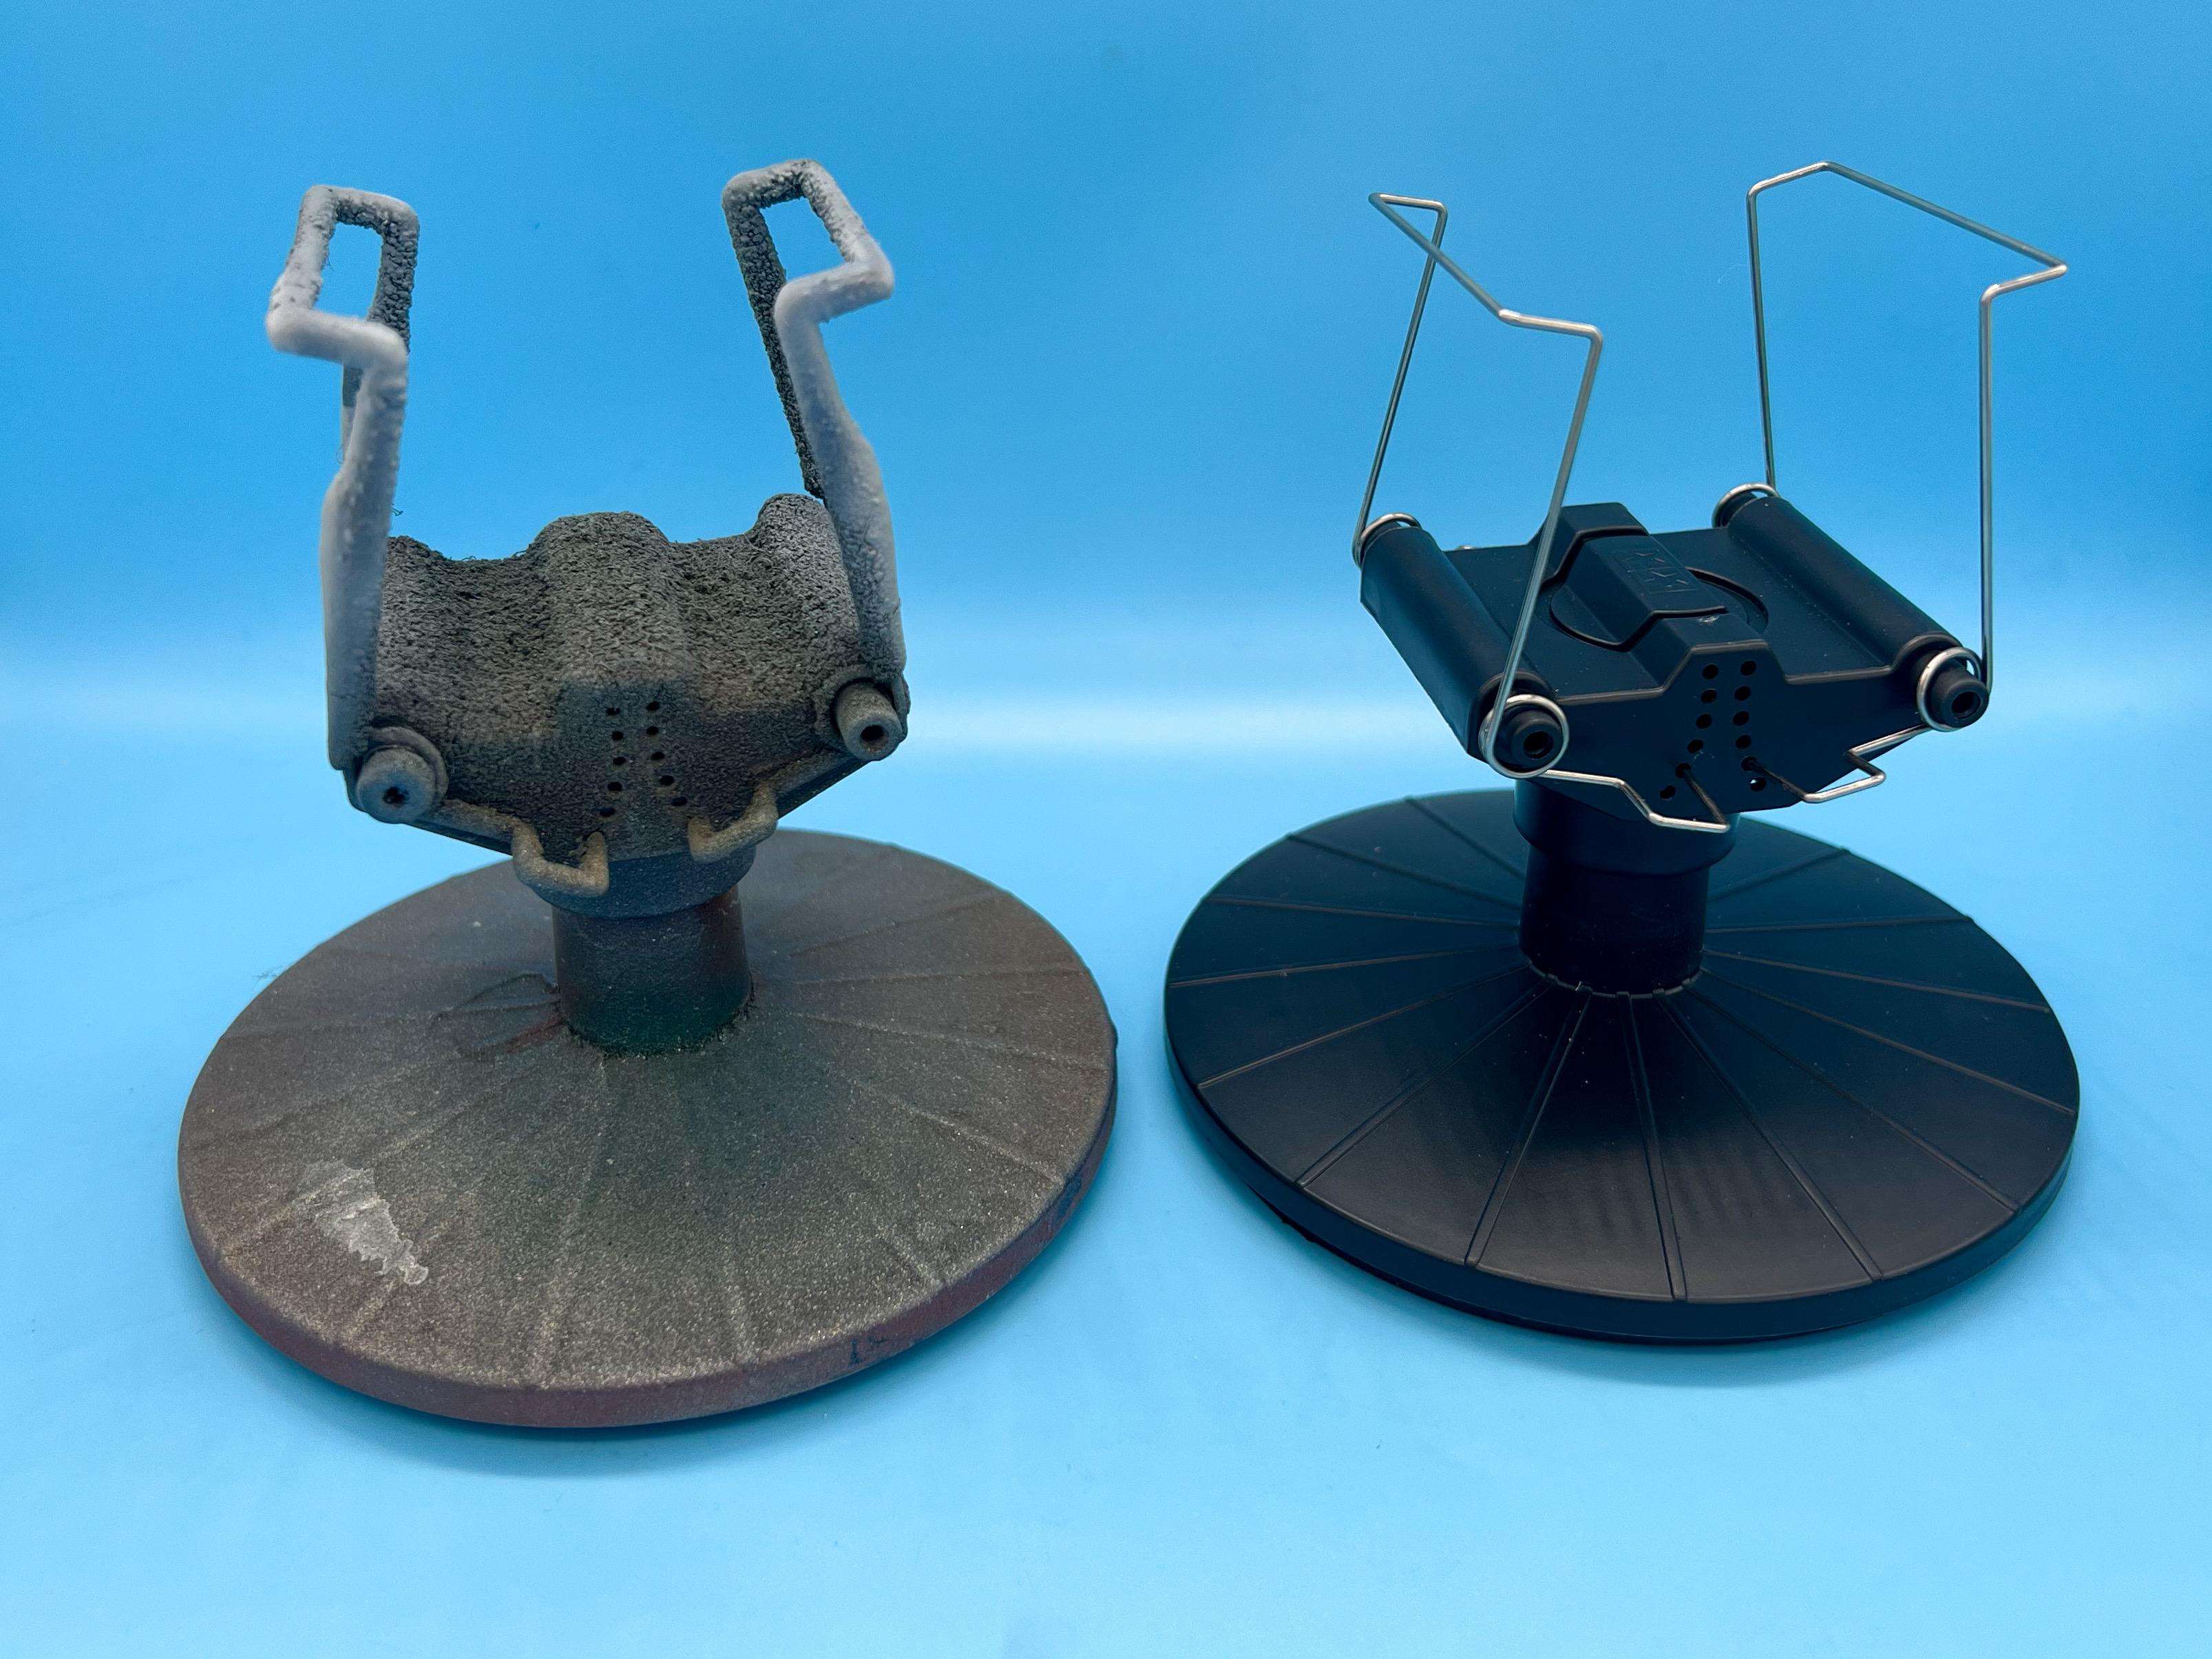
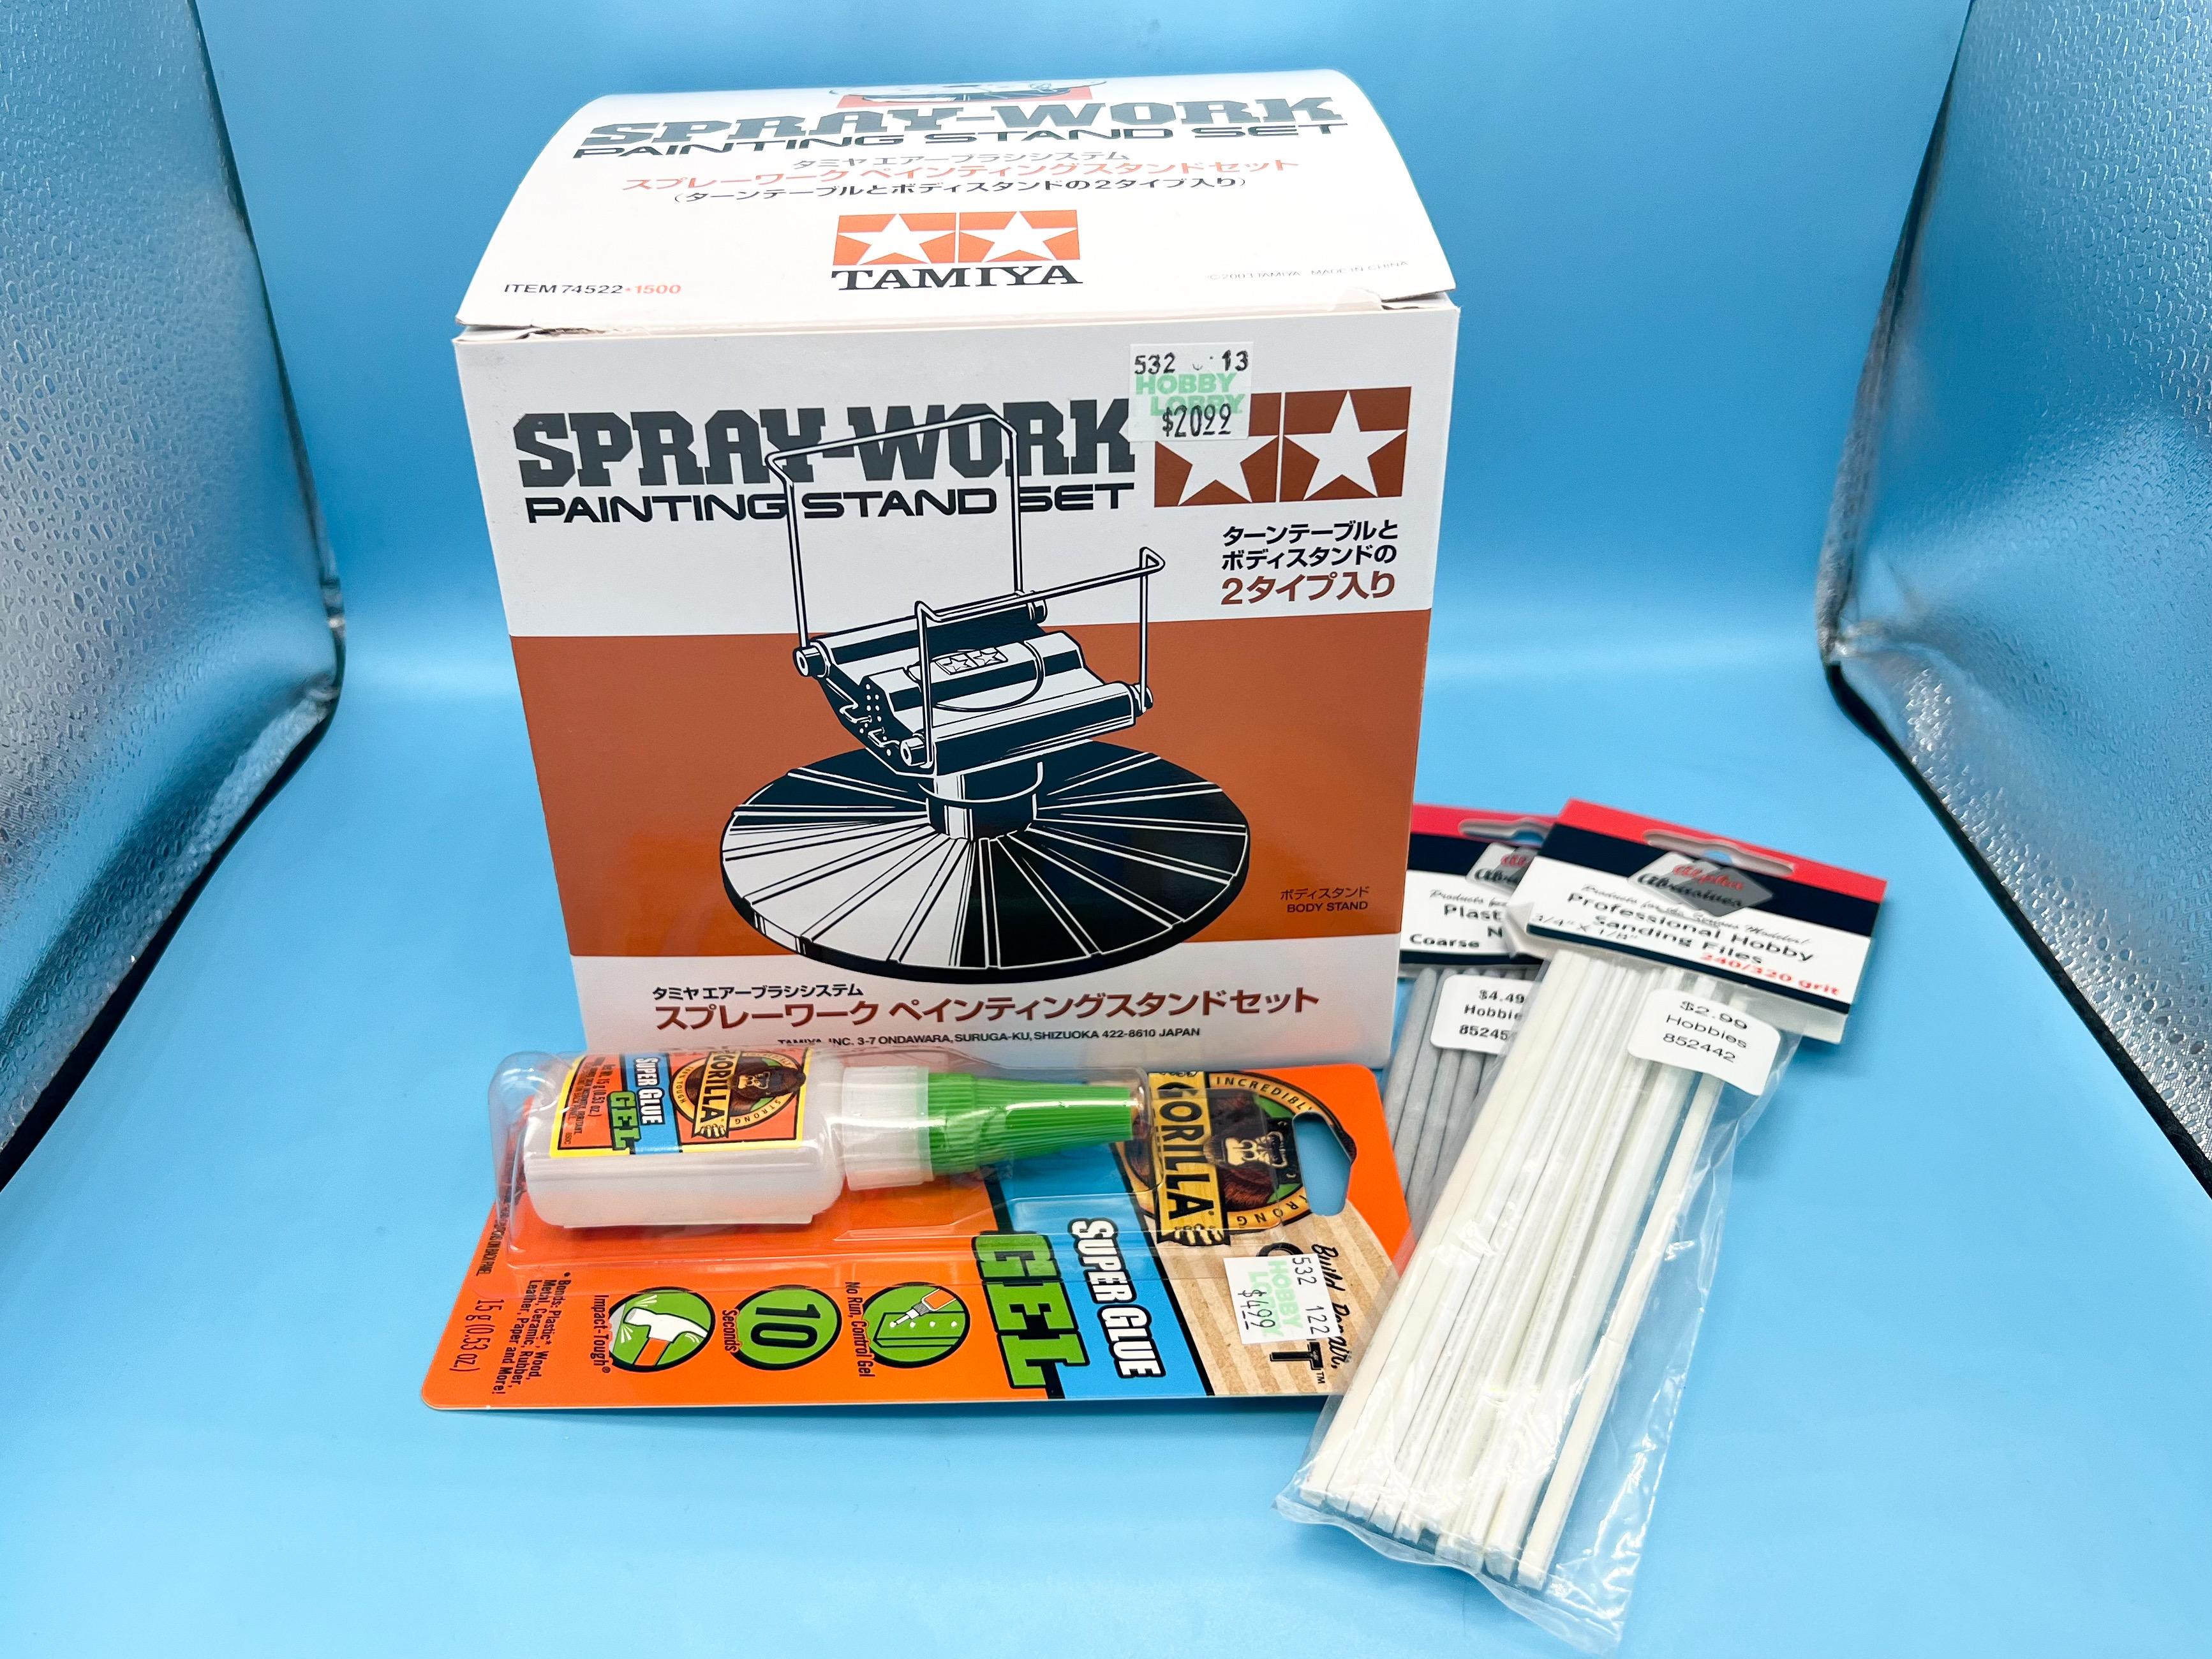
Ran by Hobby Lobby yesterday to look at their paint selection…didn’t find what I was looking for but a few bits and pieces followed me home… Those little thin sanding sticks helped with a particular task I was trying to accomplish, and I figured after testing my Tamiya paint stand for 15+ years I’m FAIRLY confident they’re good quality and invested in another: Funny thing…the new one feels really light by comparison ??

- 38,883 replies
-
- 6
-

-

-
- johan
- glue bombs
- (and 1 more)
-
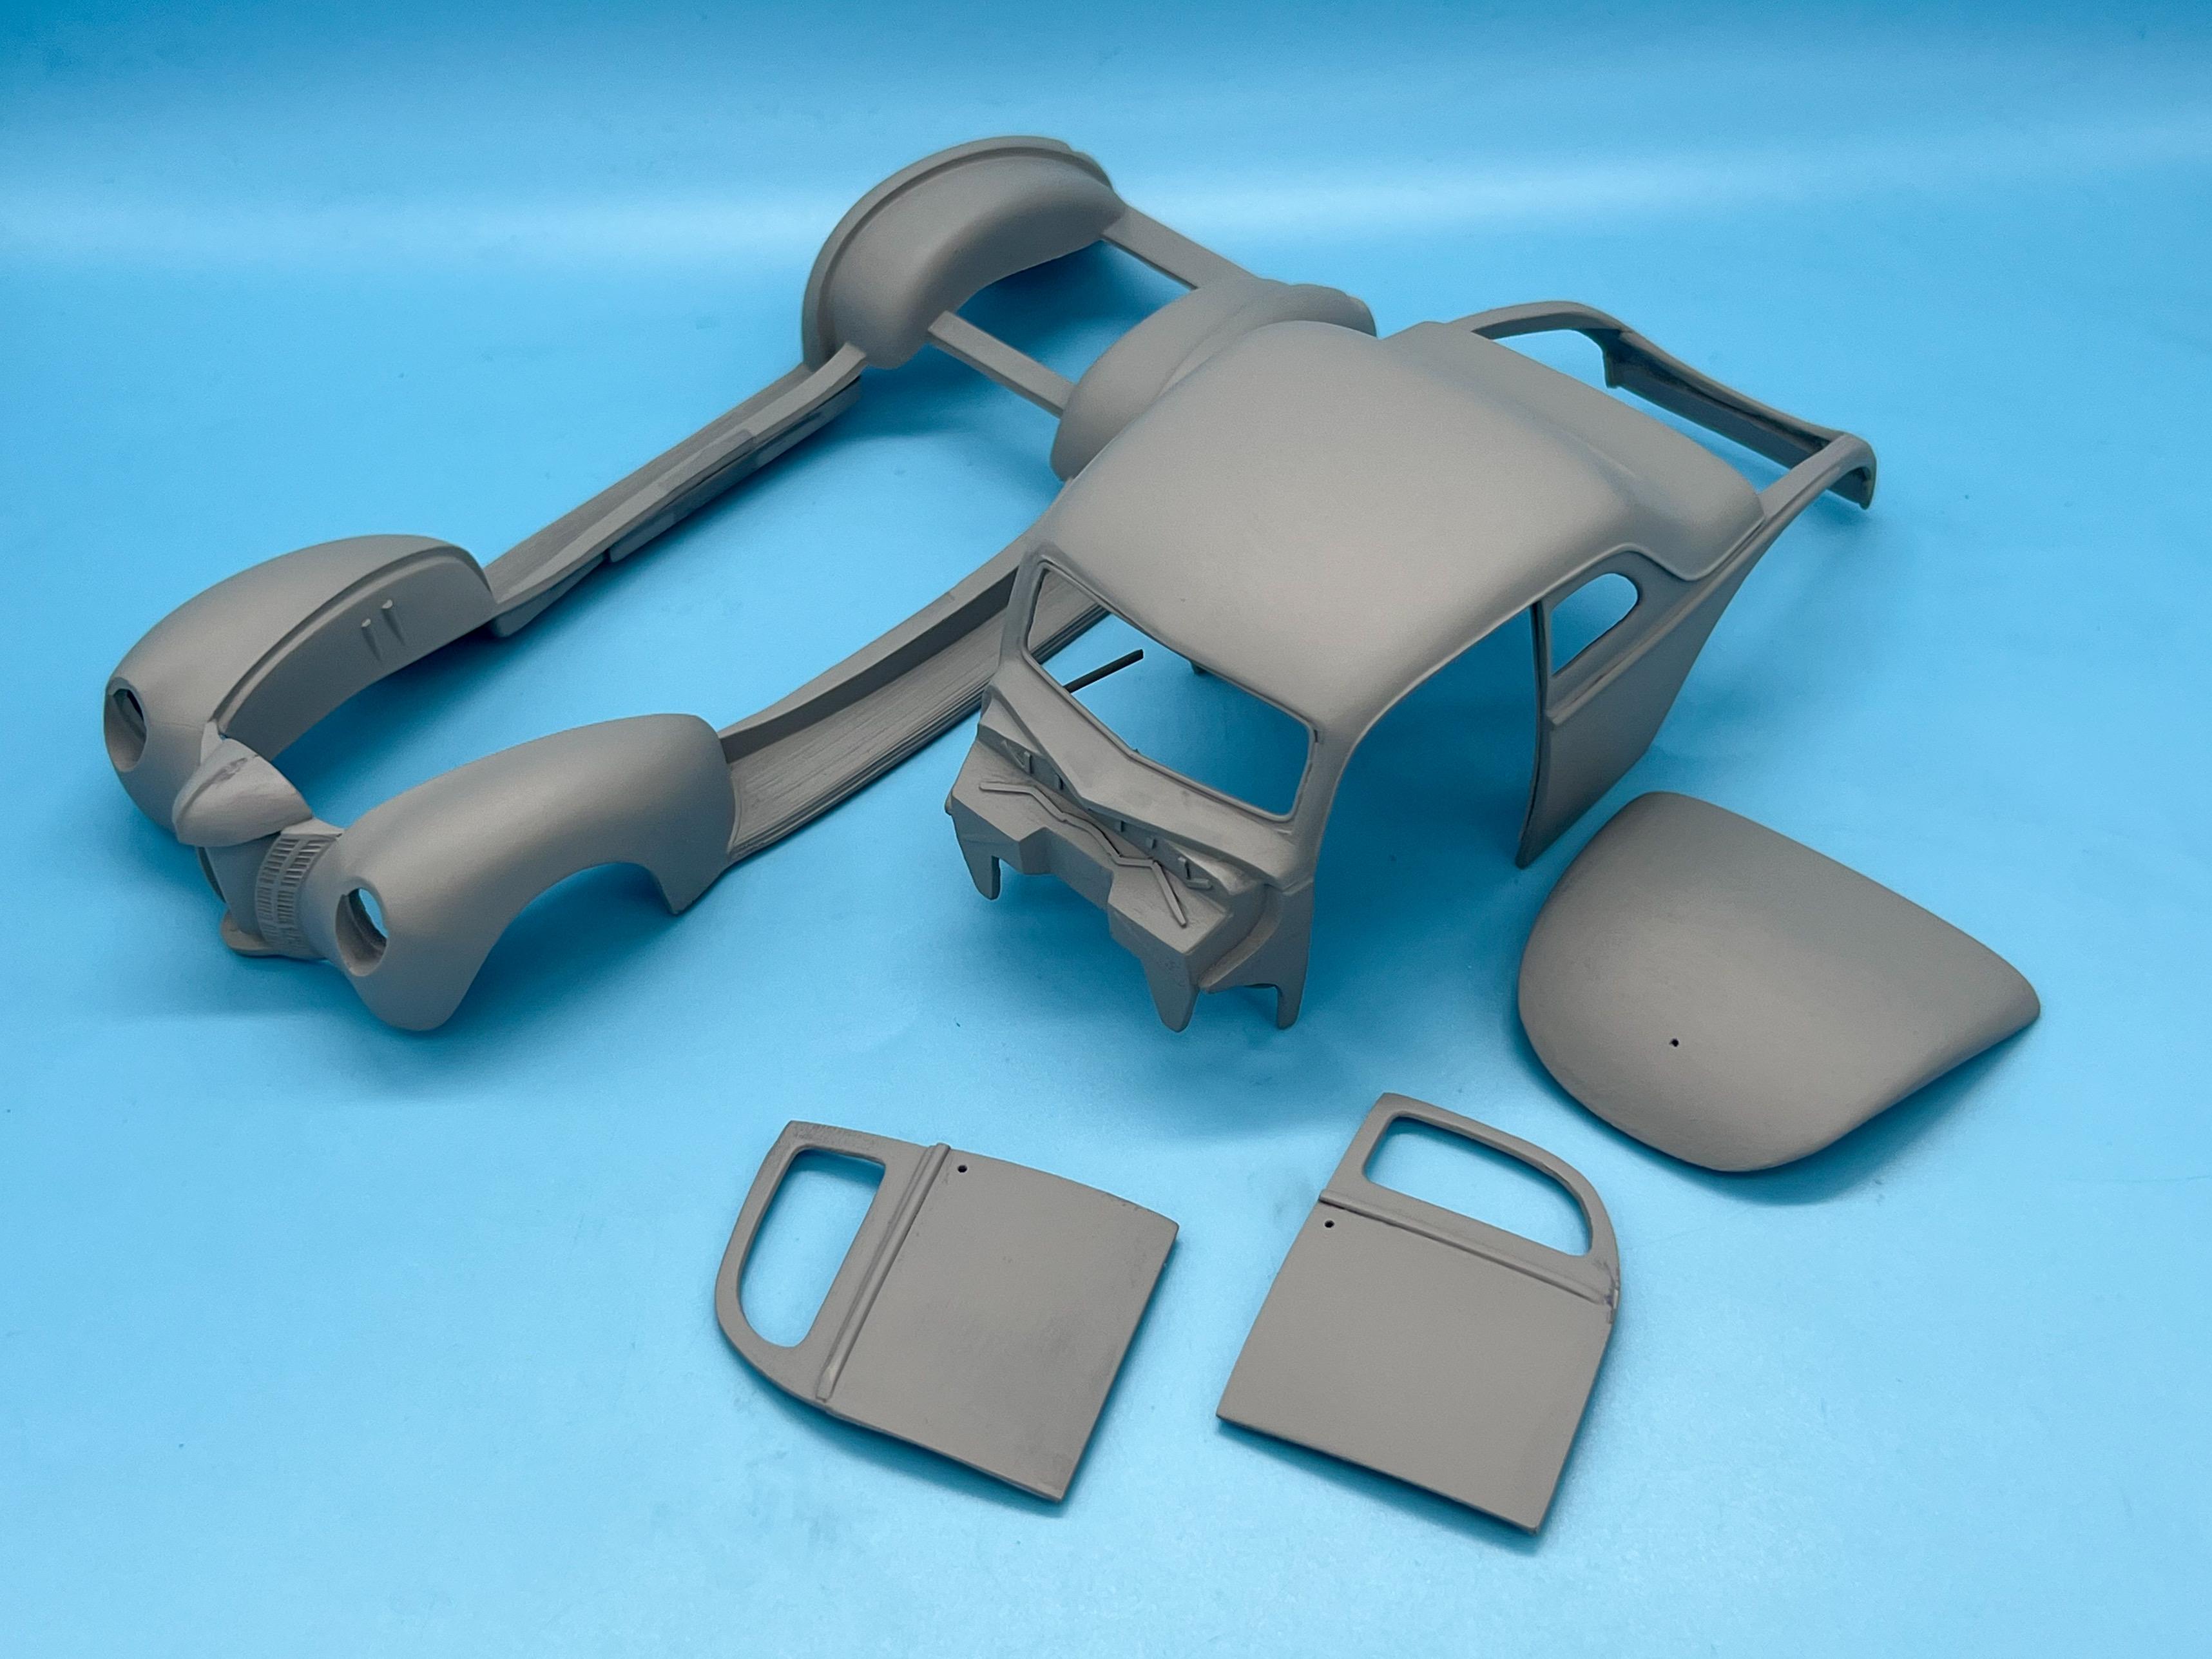
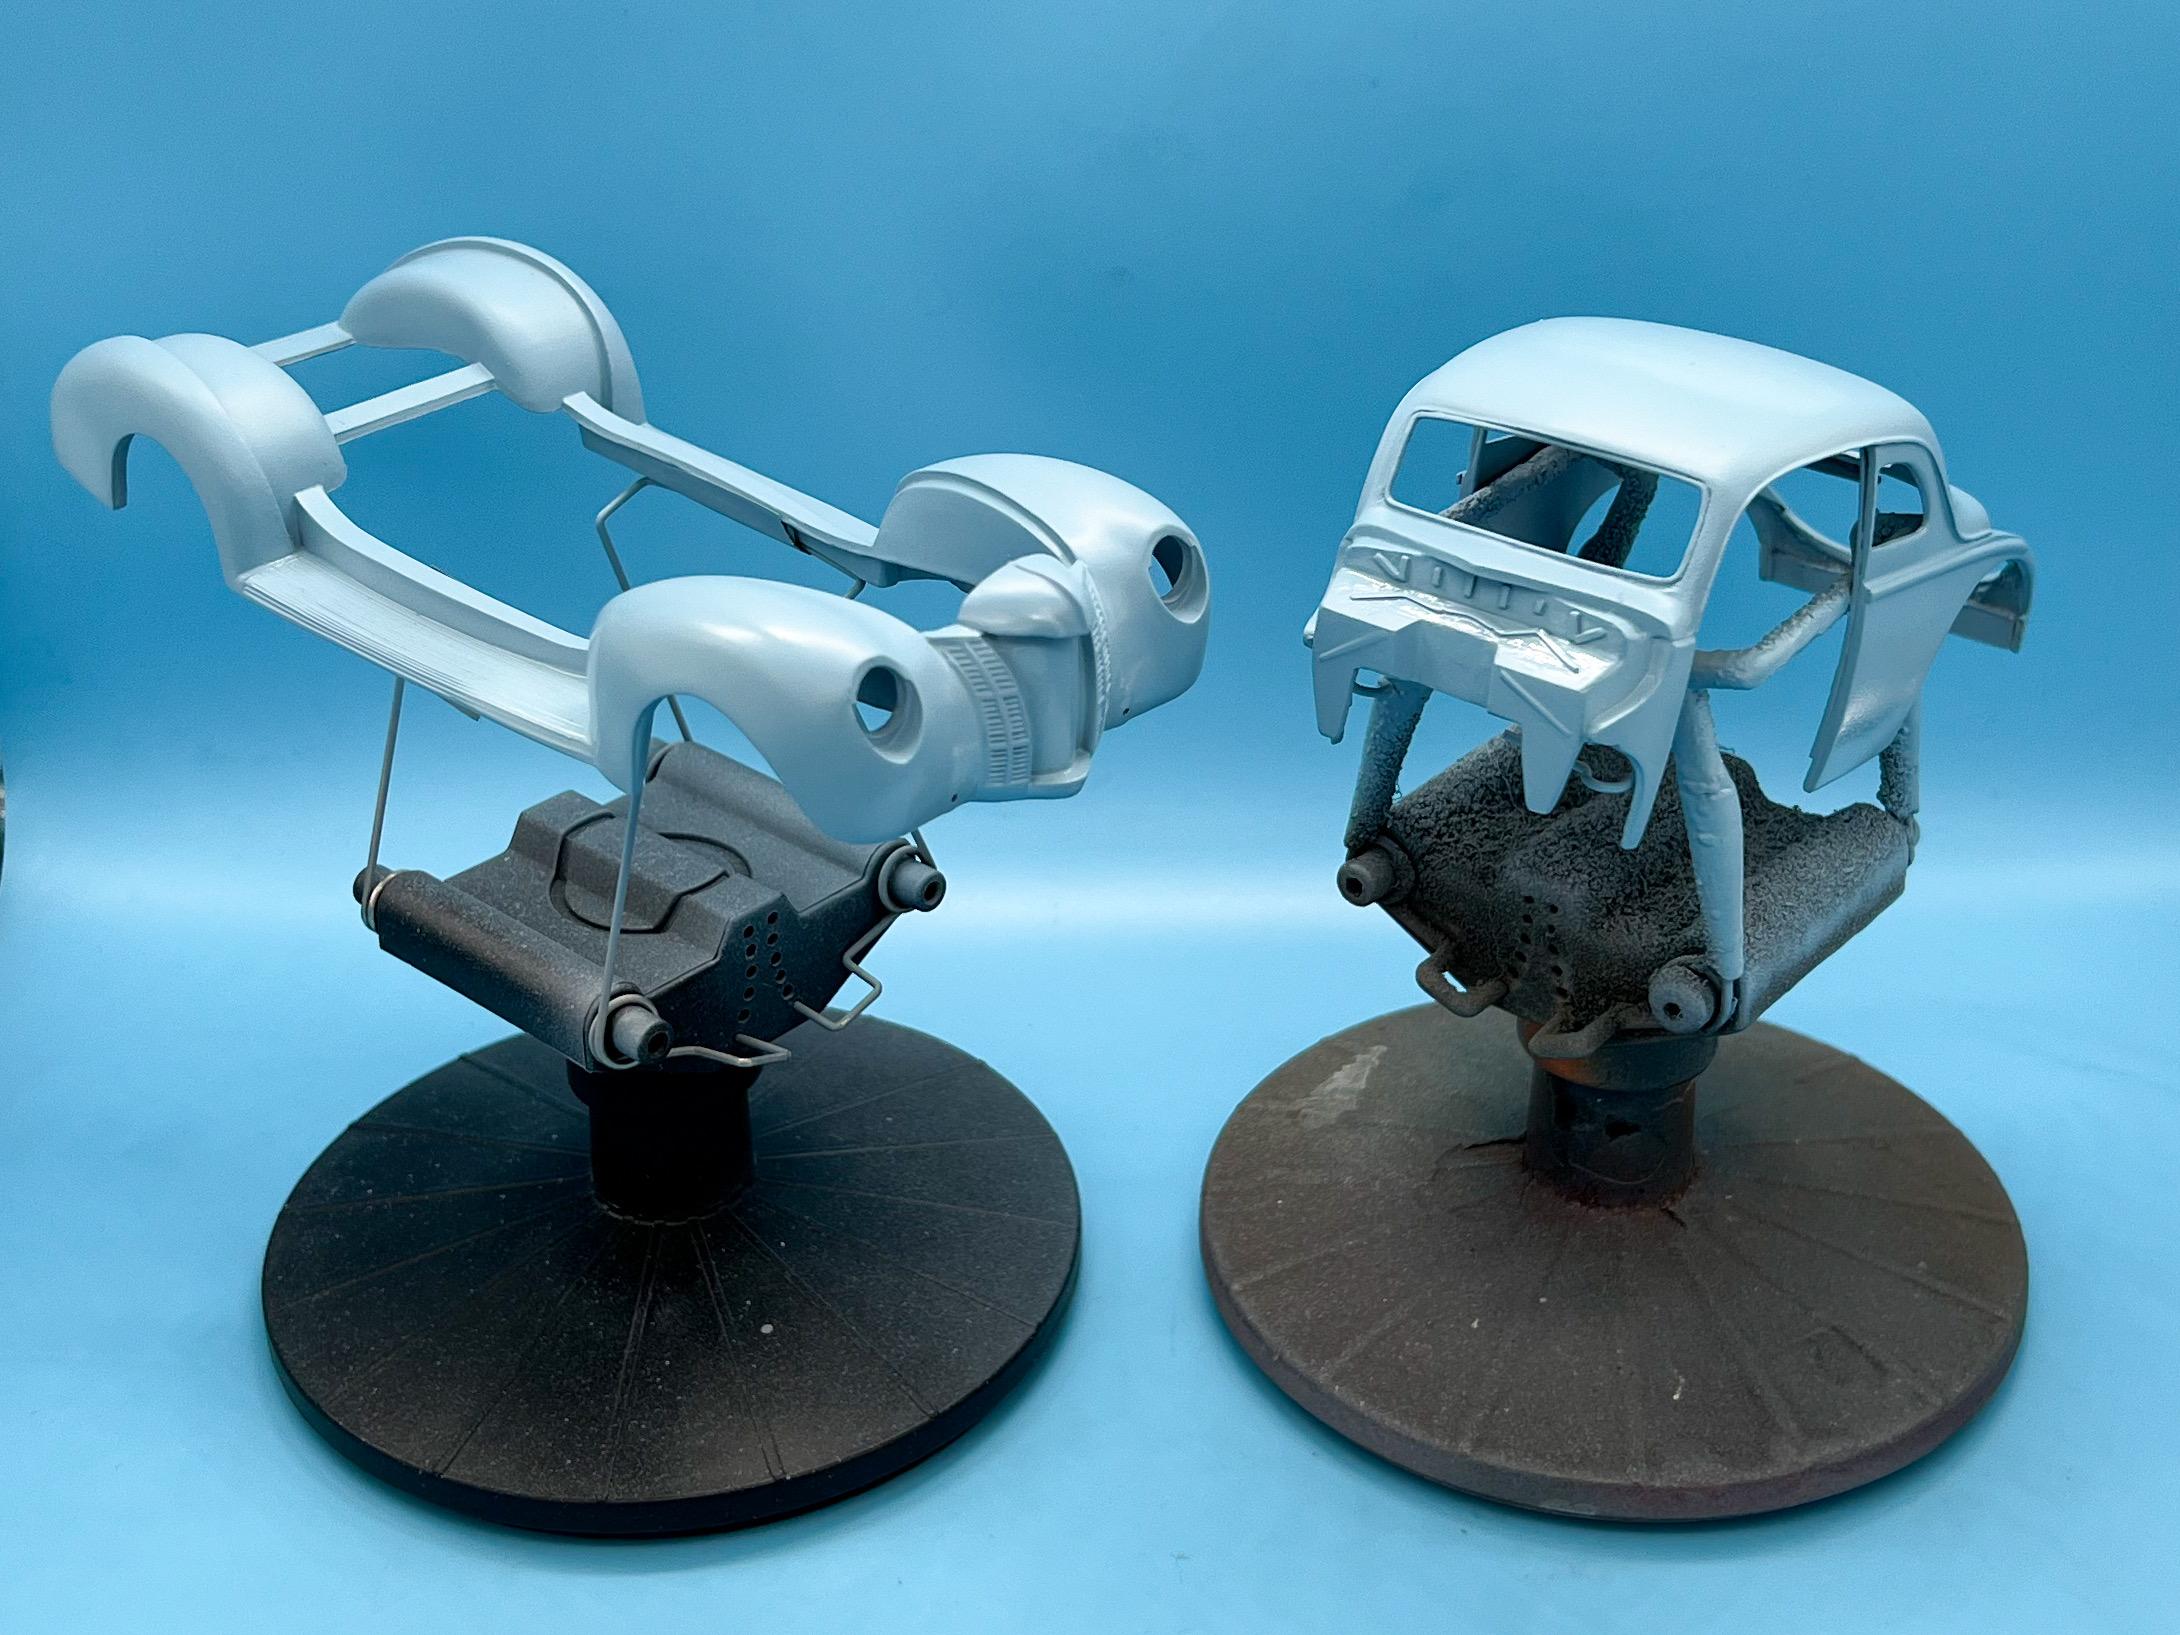
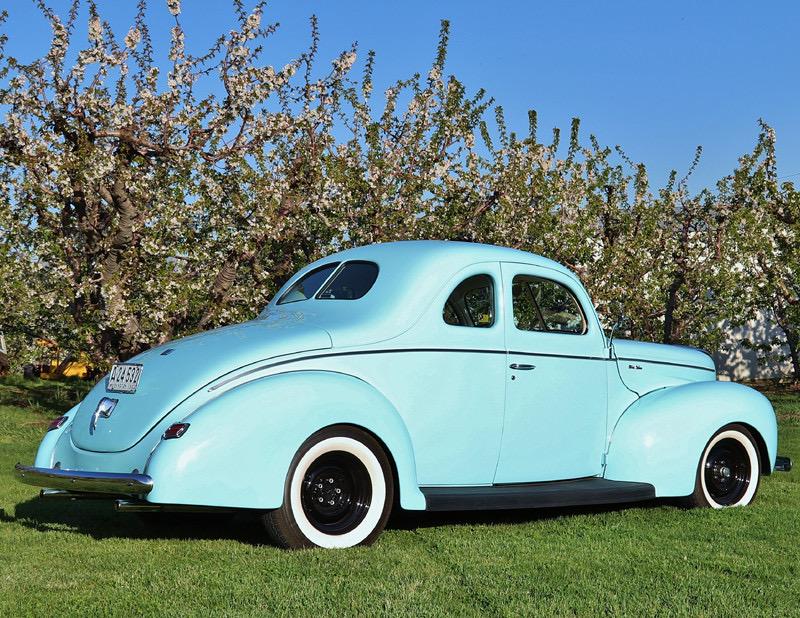
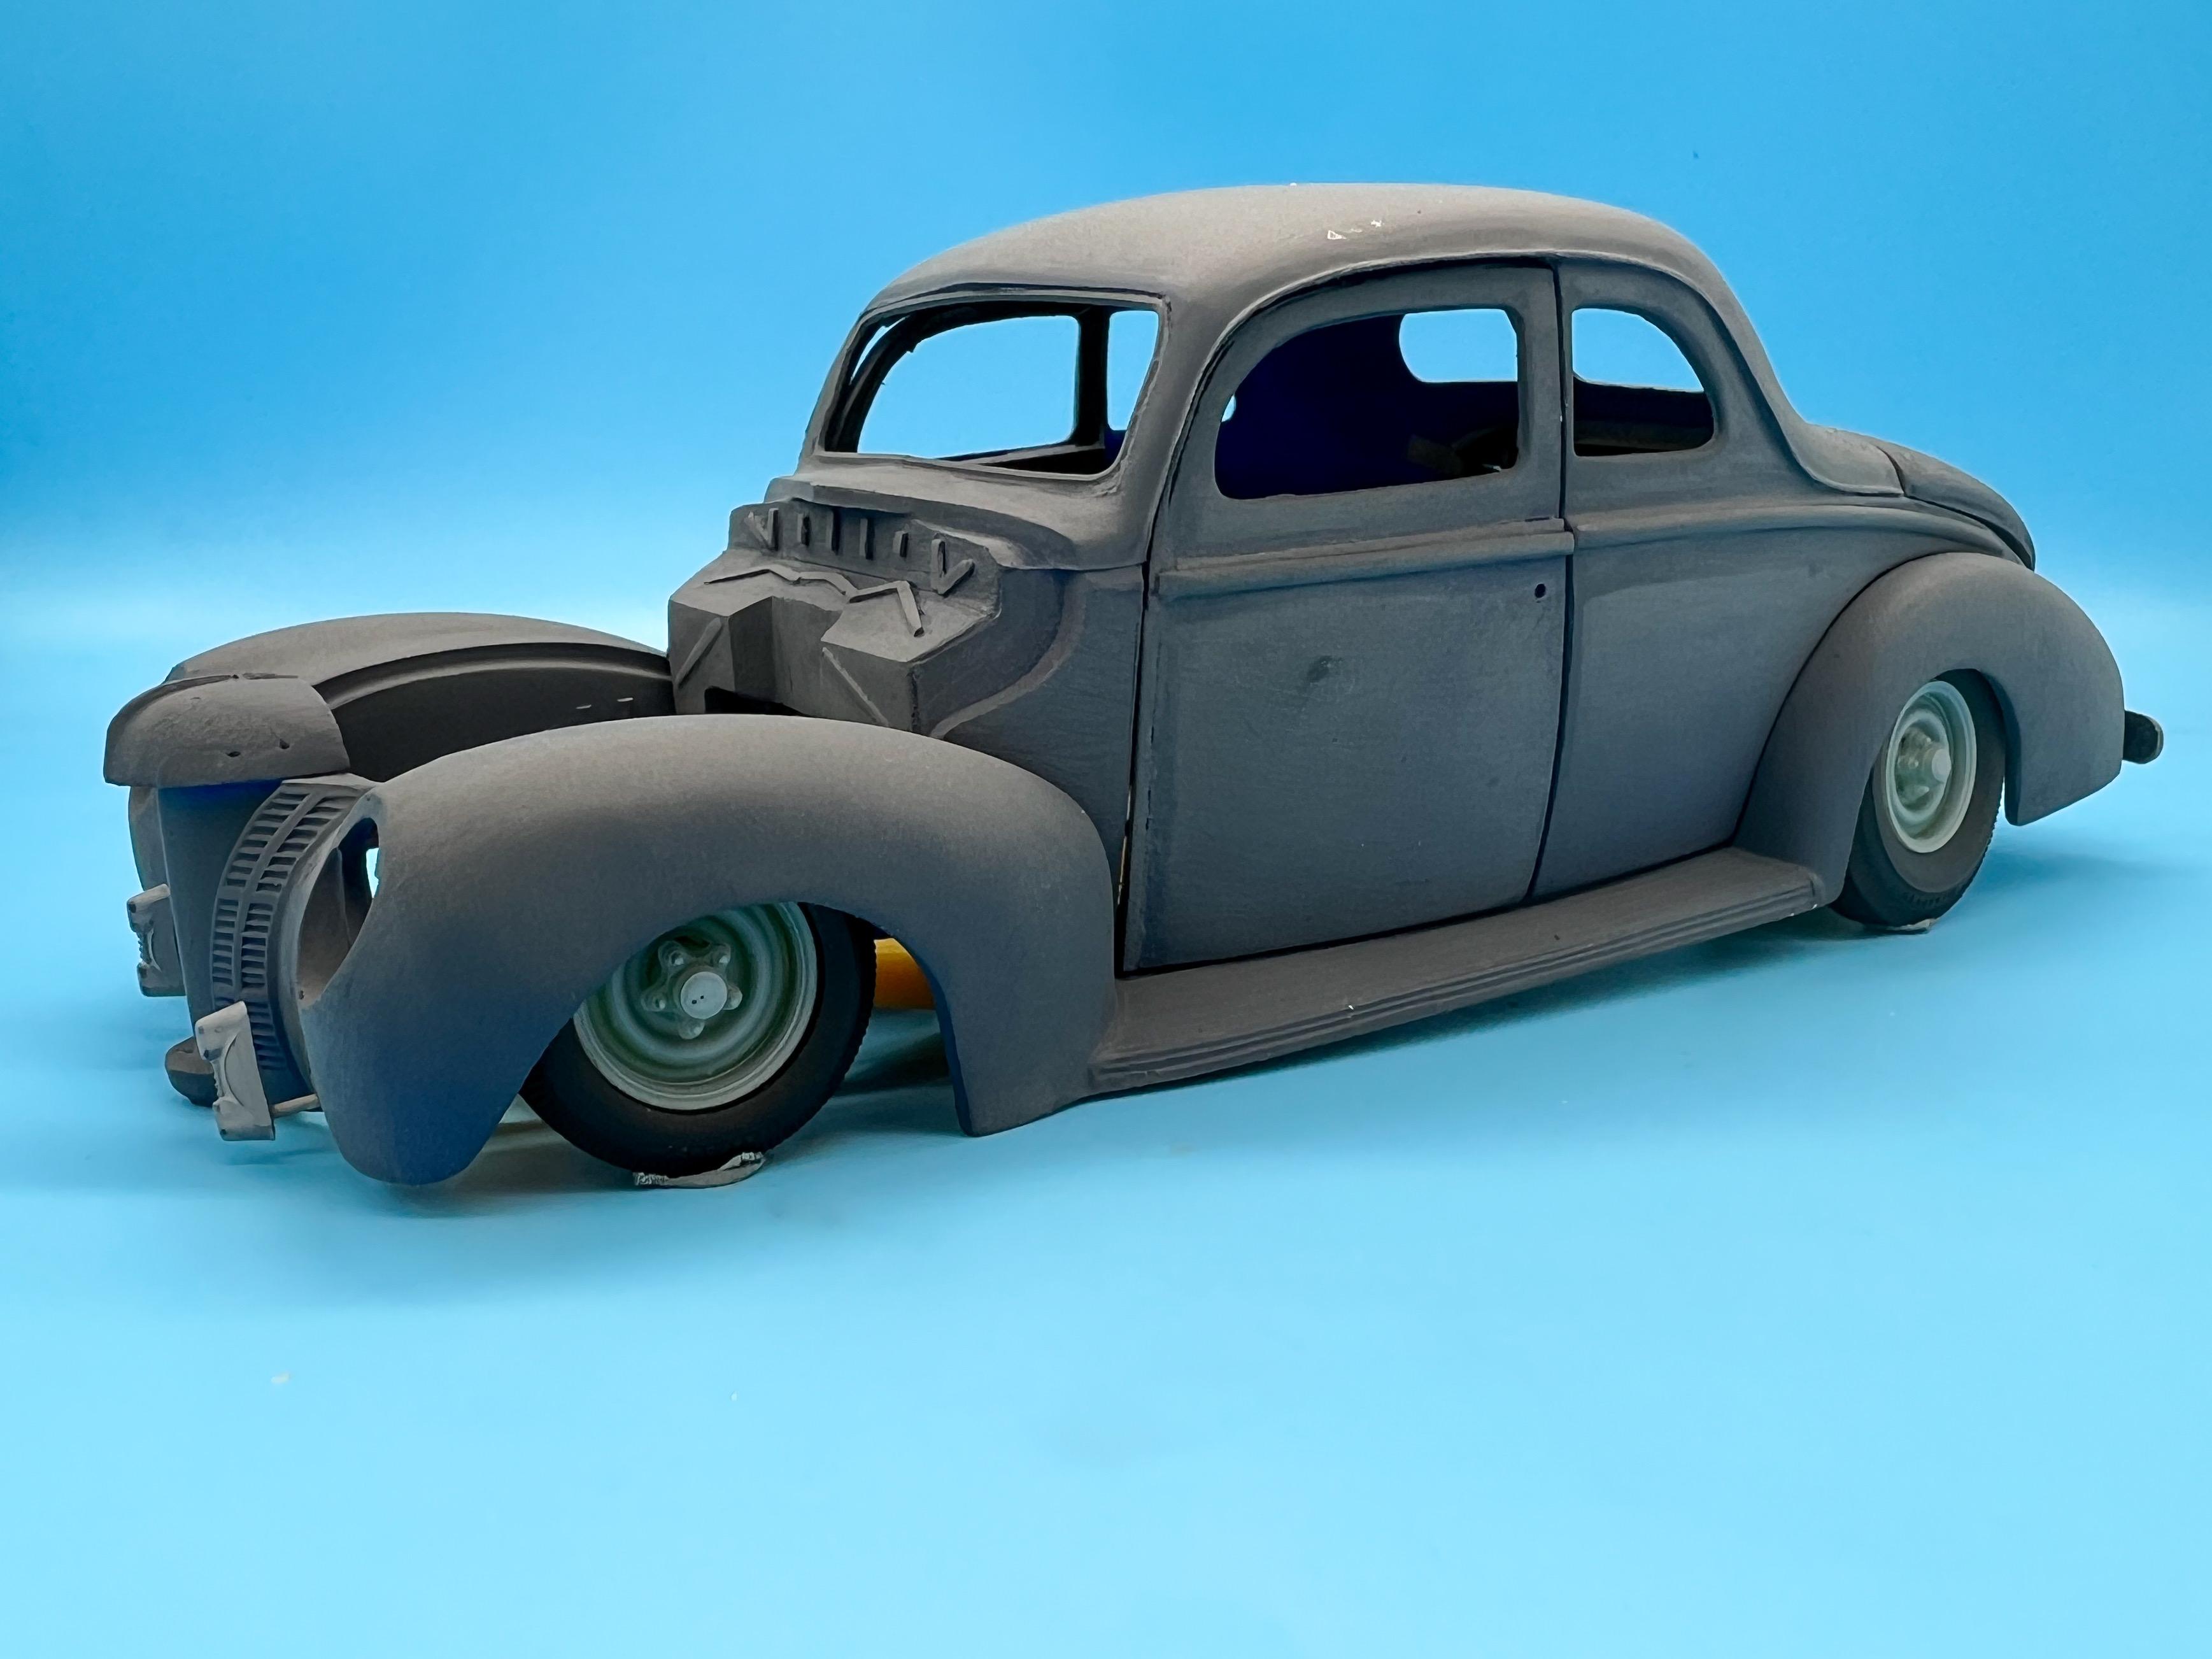
Yes sir…I replaced the floor with some sheet and I’m just figuring out the rest of it now…was messing with the start on some simple peashooter pipes today… In more exciting news though, I finally got the body smoothed out and ready for paint… Actually, I still had a couple of rounds of tweaking and fine-tuning to go when that pic was taken, but I forgot to take a ‘final’ primer picture… And this morning I mixed up some paint. I had always imagined this being a kind of light duck-egg blue but I spent some time yesterday morning hunting through all the colors at Hobby Lobby yesterday and didn’t find quite what I imagined so I mixed it up myself. Color is a blend of Createx white, light blue and gray in roughly these proportions: Came out something like this: I also prepped and primed a bunch of parts this weekend, so expect to see some paint progress this week…still have to figure out the interior but it’s getting closer! Thanks for looking - more soon, soon as I’ve done more!
-
Huge Auto Related Auction.
OldNYJim replied to Racephoto1's topic in General Automotive Talk (Trucks and Cars)
Oh wow, this is 5 minutes from my house - thanks for posting Guess I better remortgage the wife again… -
Paint flames the clean ‘n’ easy way
OldNYJim replied to OldNYJim's topic in Tips, Tricks, and Tutorials
That looks like the stuff, yeah! -
Yes please! That would be an AWESOME article! Congrats on a great year of builds…and the great magazine articles!
-
I thought about 3d printing a single rim with holes for the spokes, just like a real one - would make it super easy to assemble (relatively). I didn't get as far as figuring out how the hub would work though - it would be nice to be able to do something with the spokes passing through the rim to help keep everything straight and secure, but it may be too many holes in too small of a part to be feasible...
-
How big is your... stash?
OldNYJim replied to Pierre Rivard's topic in Model Building Questions and Answers
Blimp-rod -
How big is your... stash?
OldNYJim replied to Pierre Rivard's topic in Model Building Questions and Answers
See what I mean about rabbitholes? I don’t even care about blimps and now there’s TWO kits I want ?? -
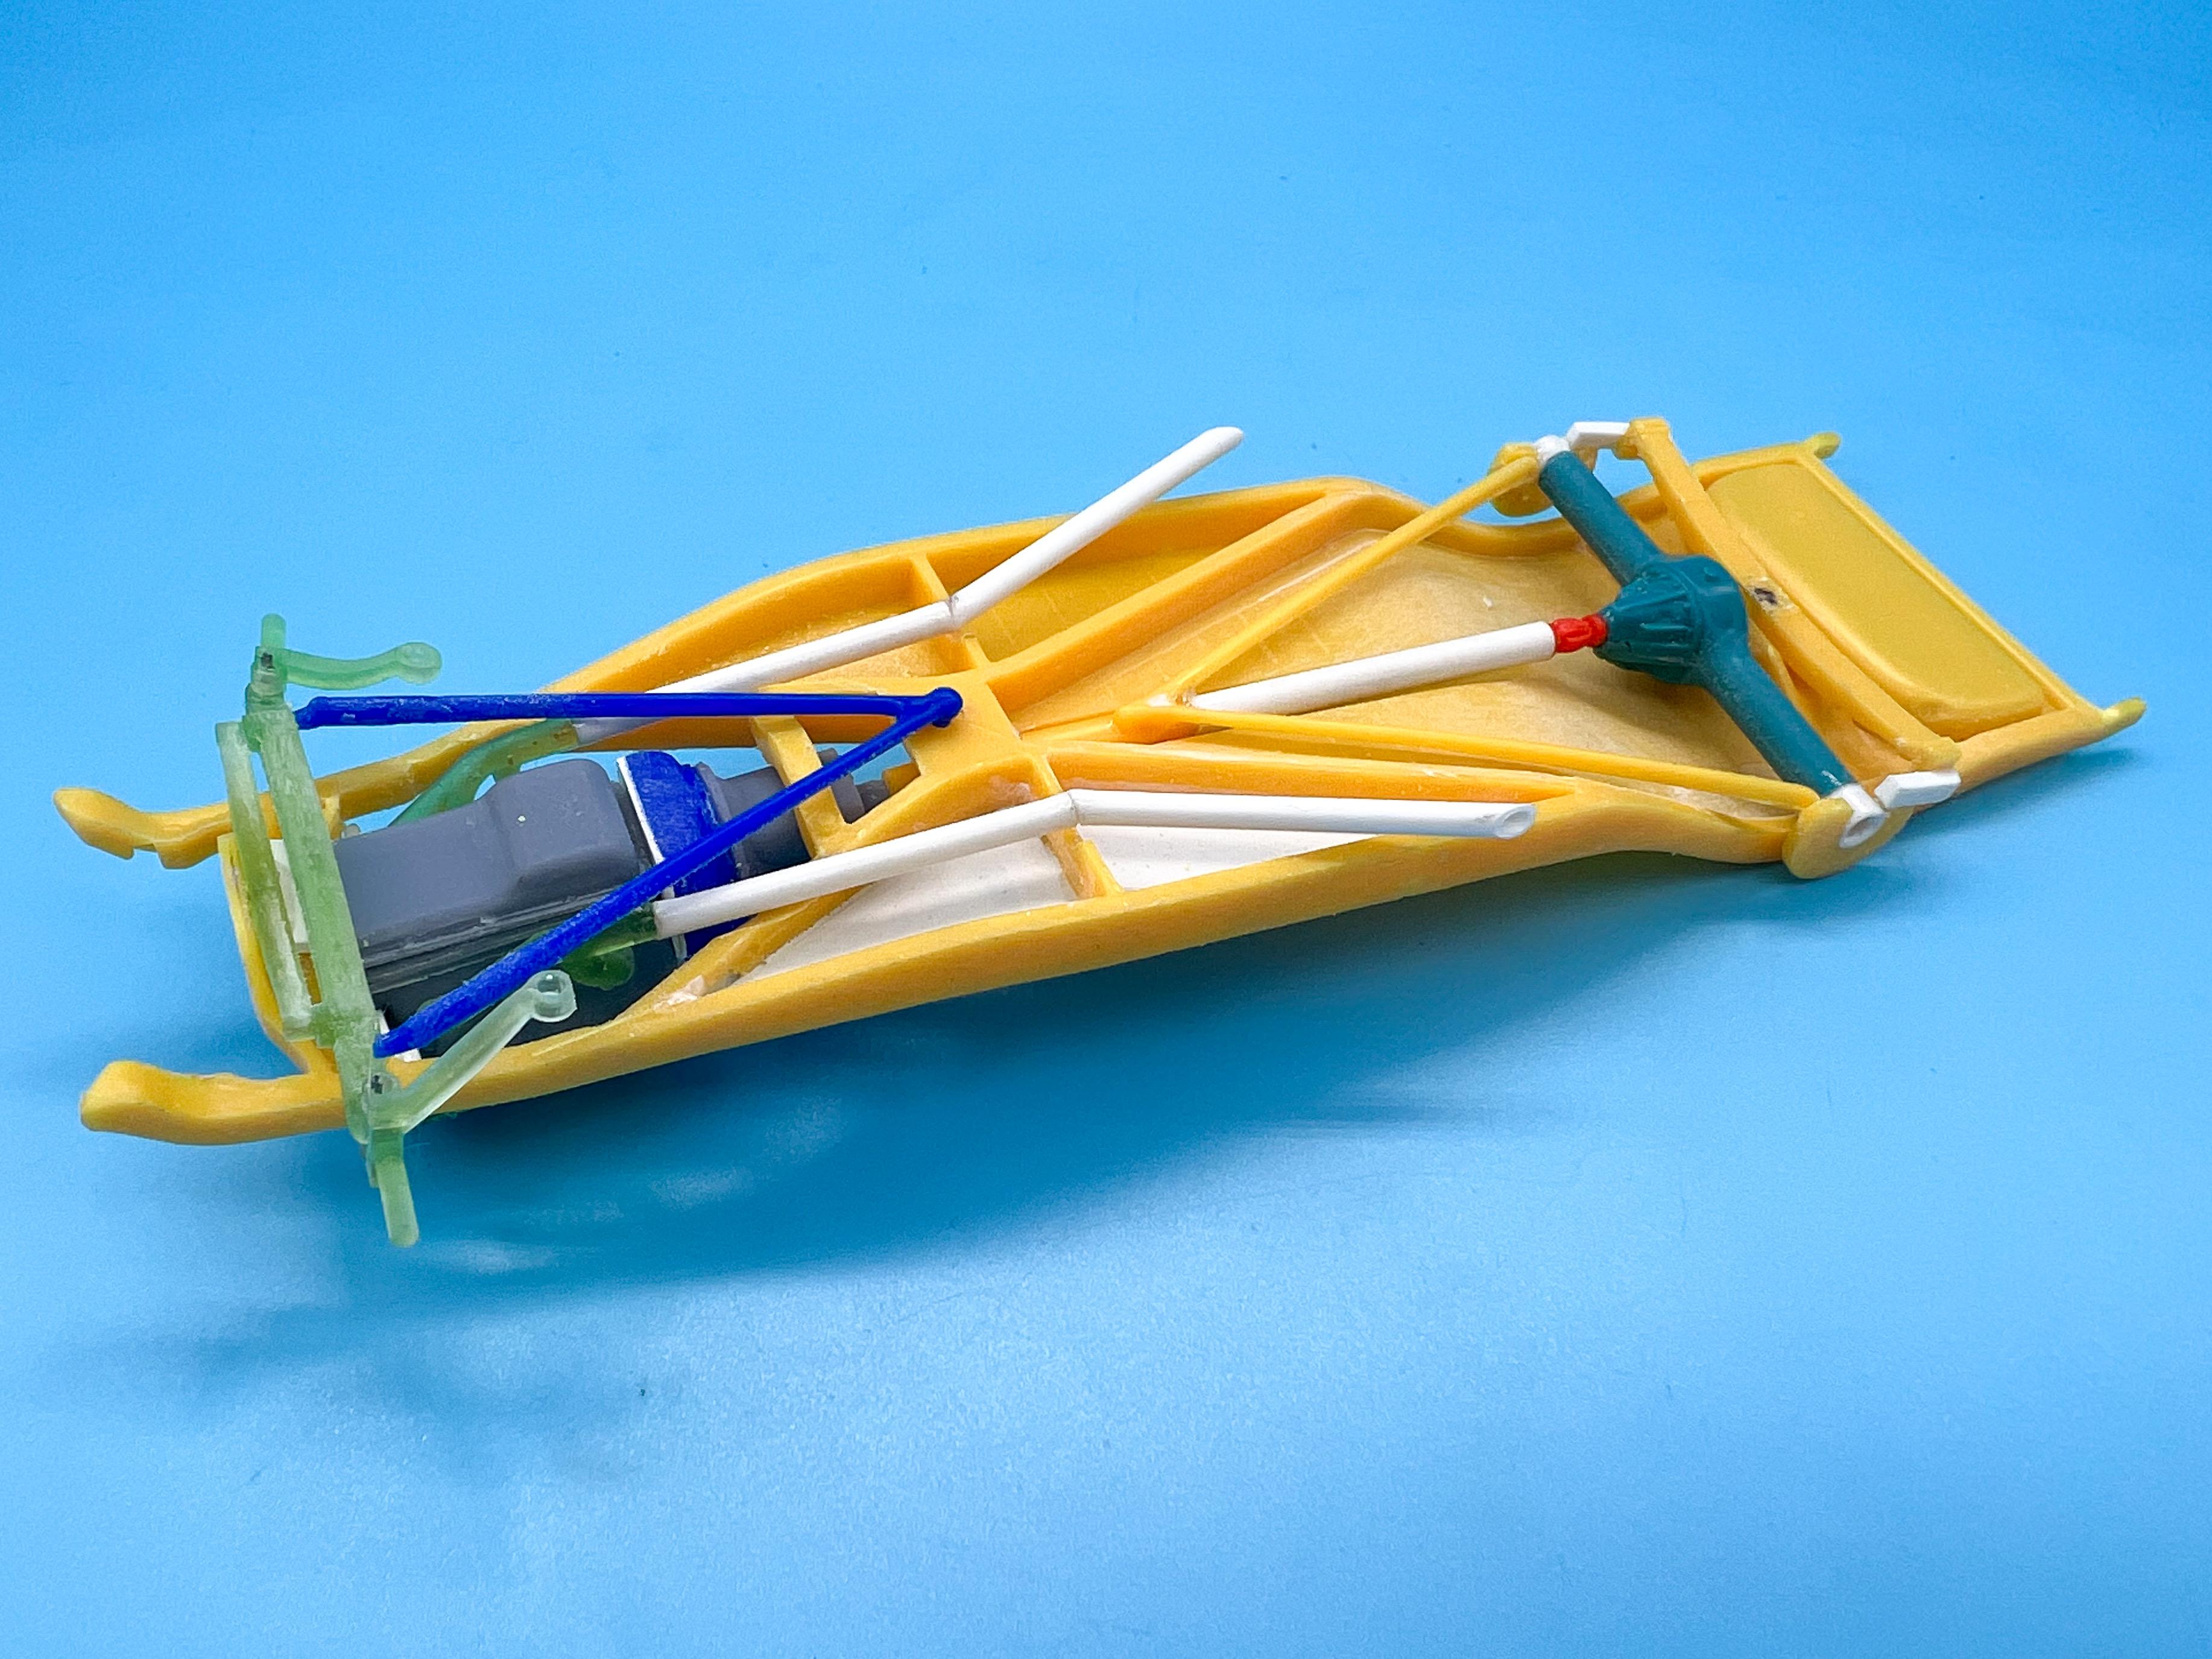
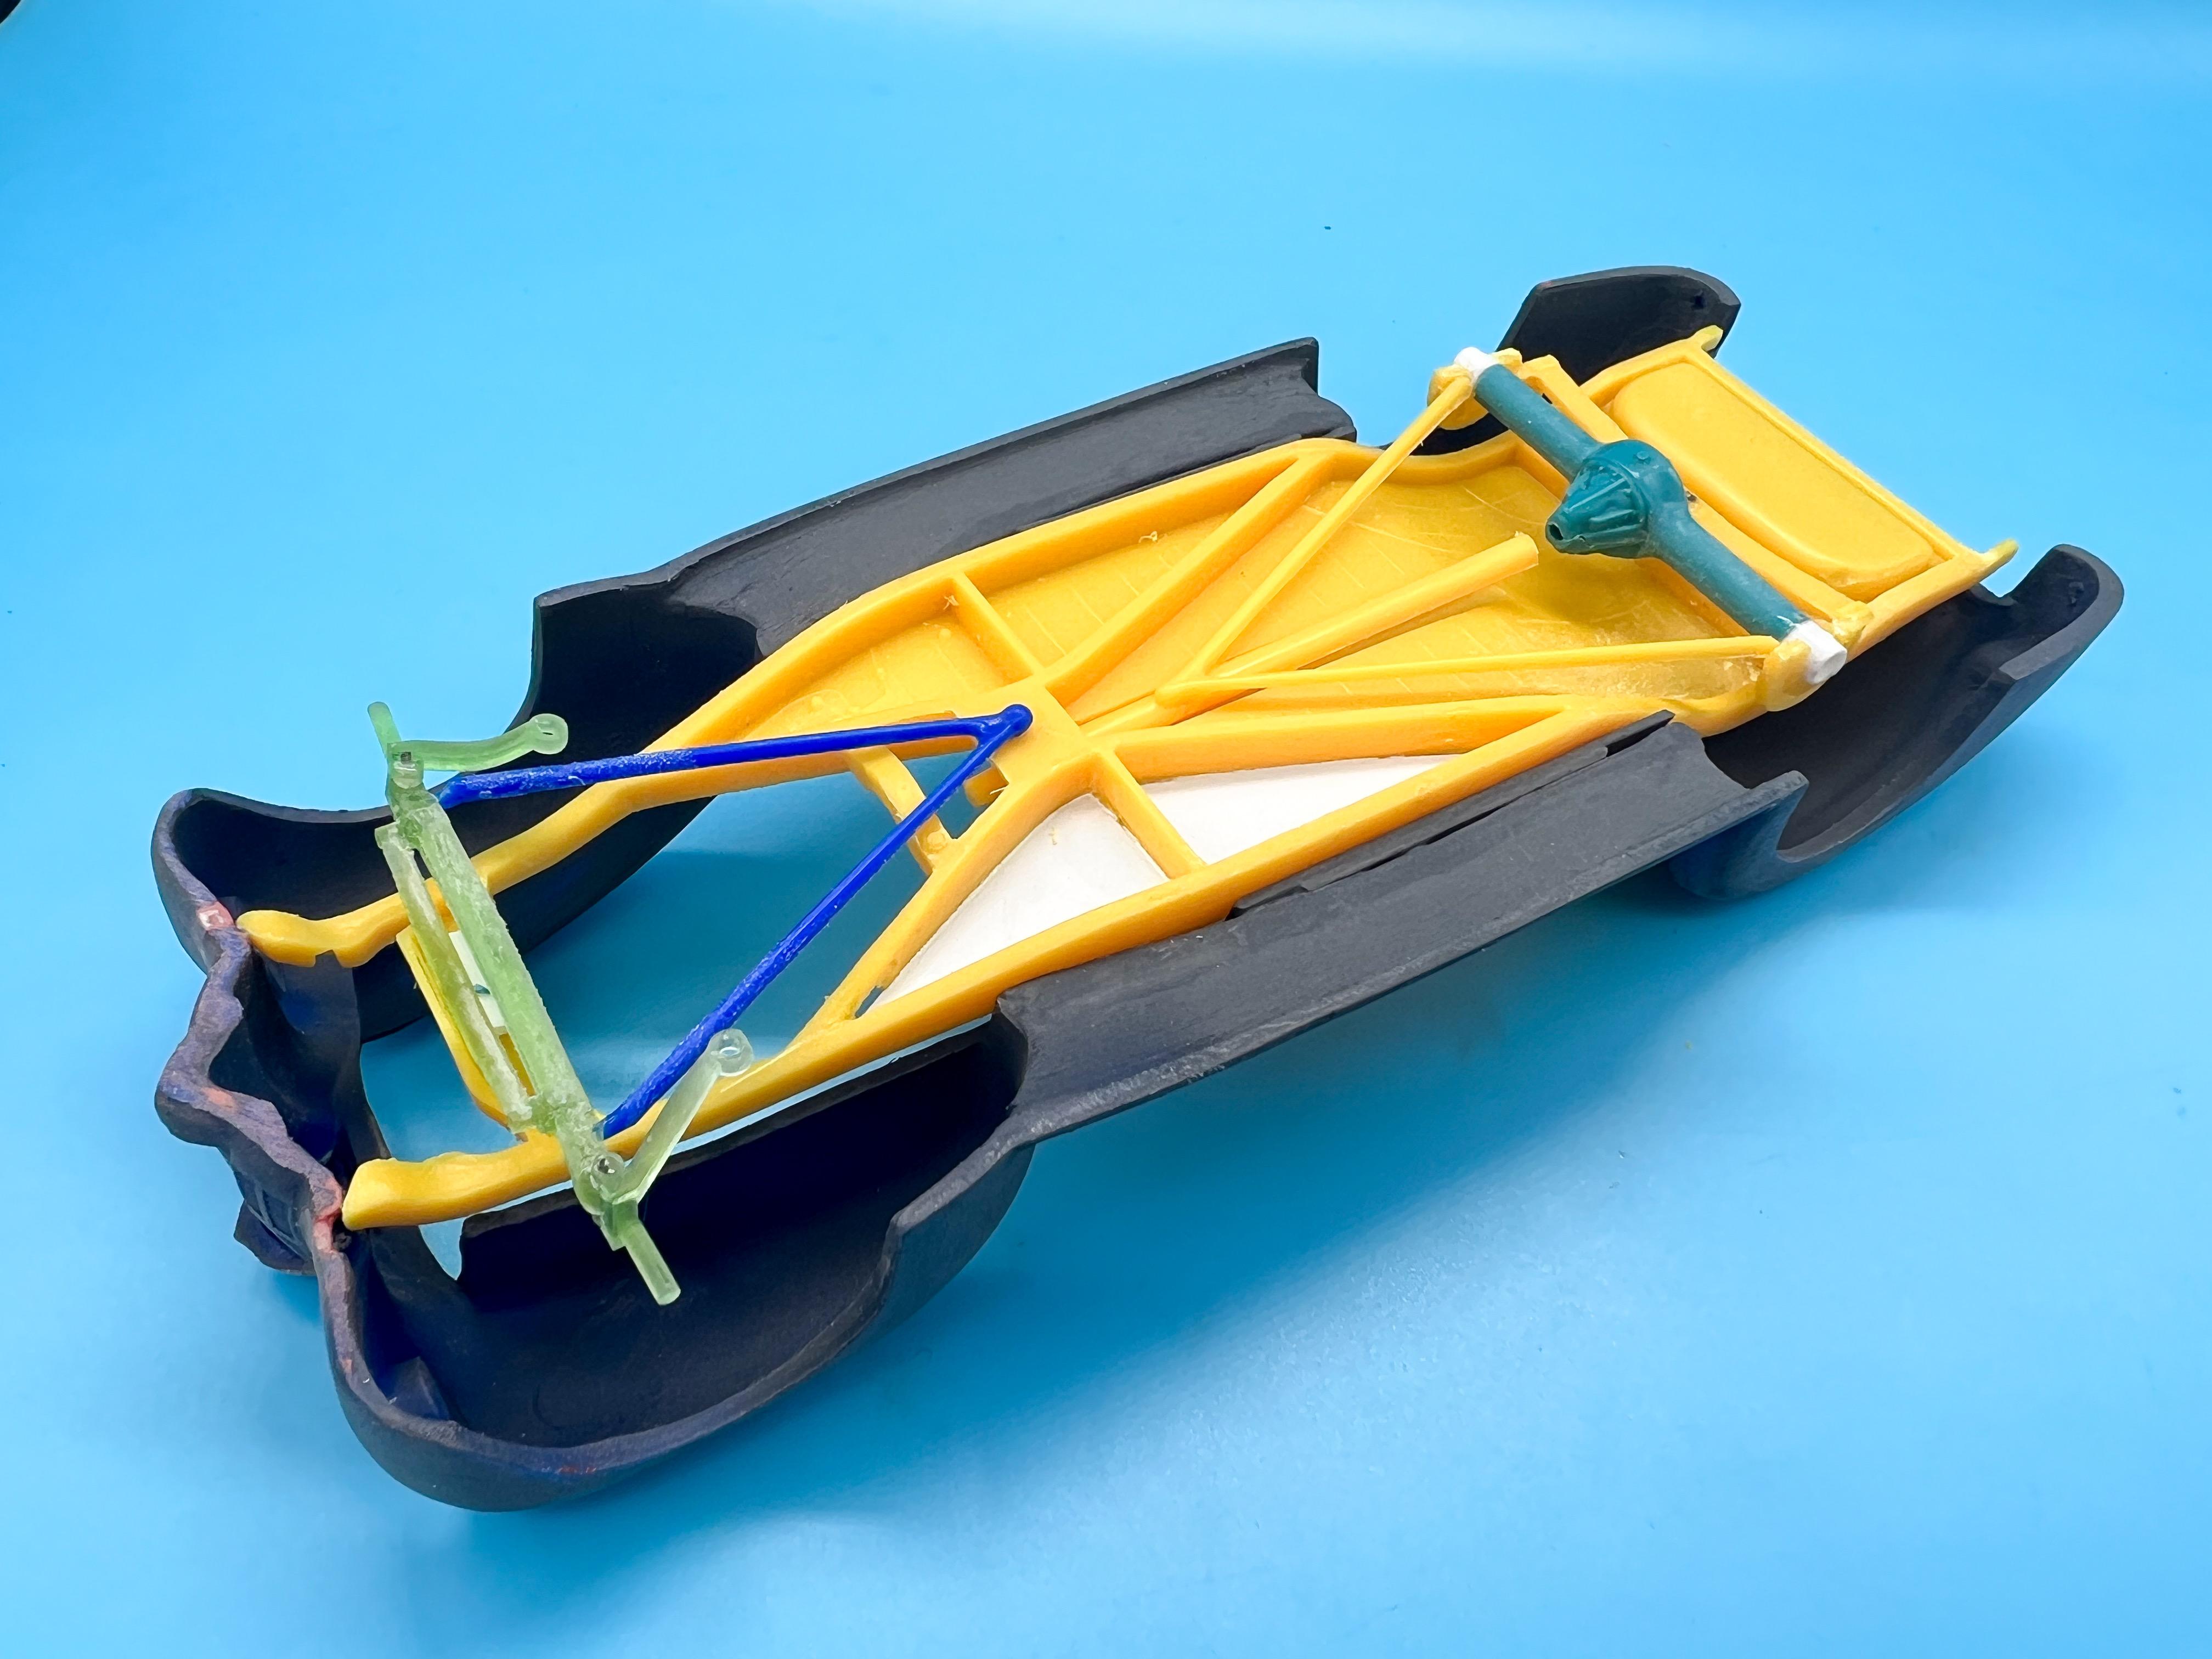
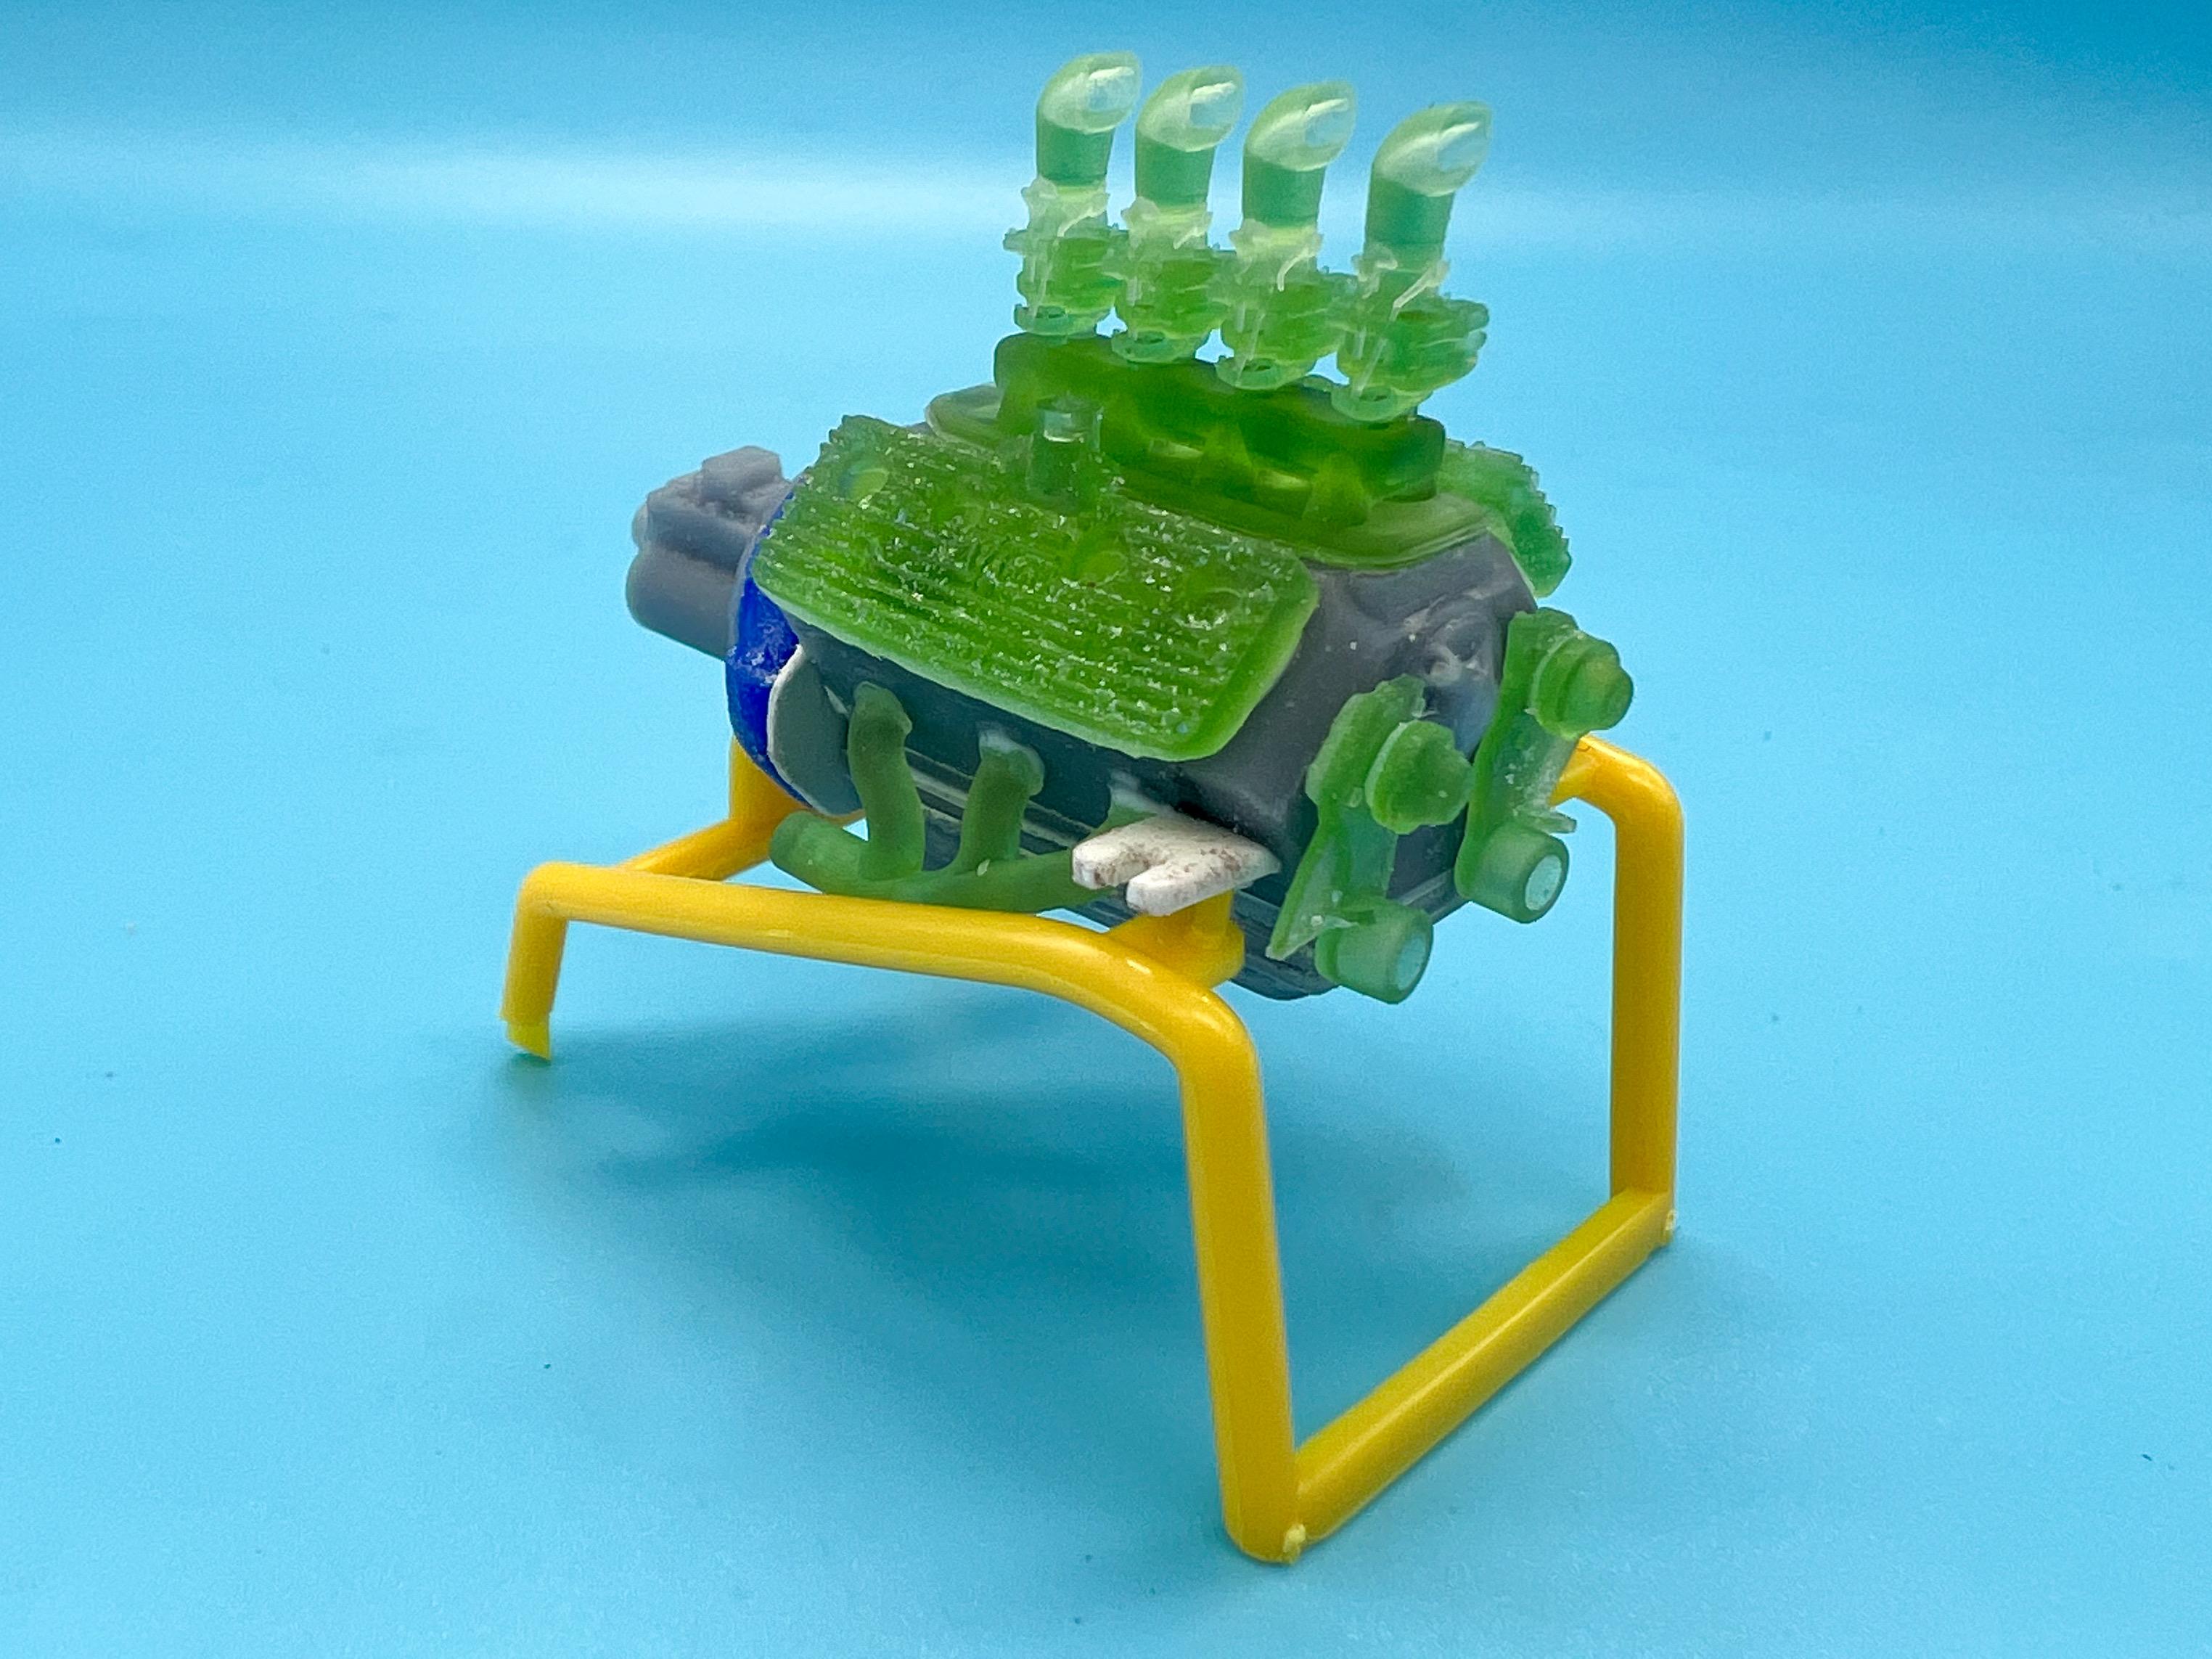
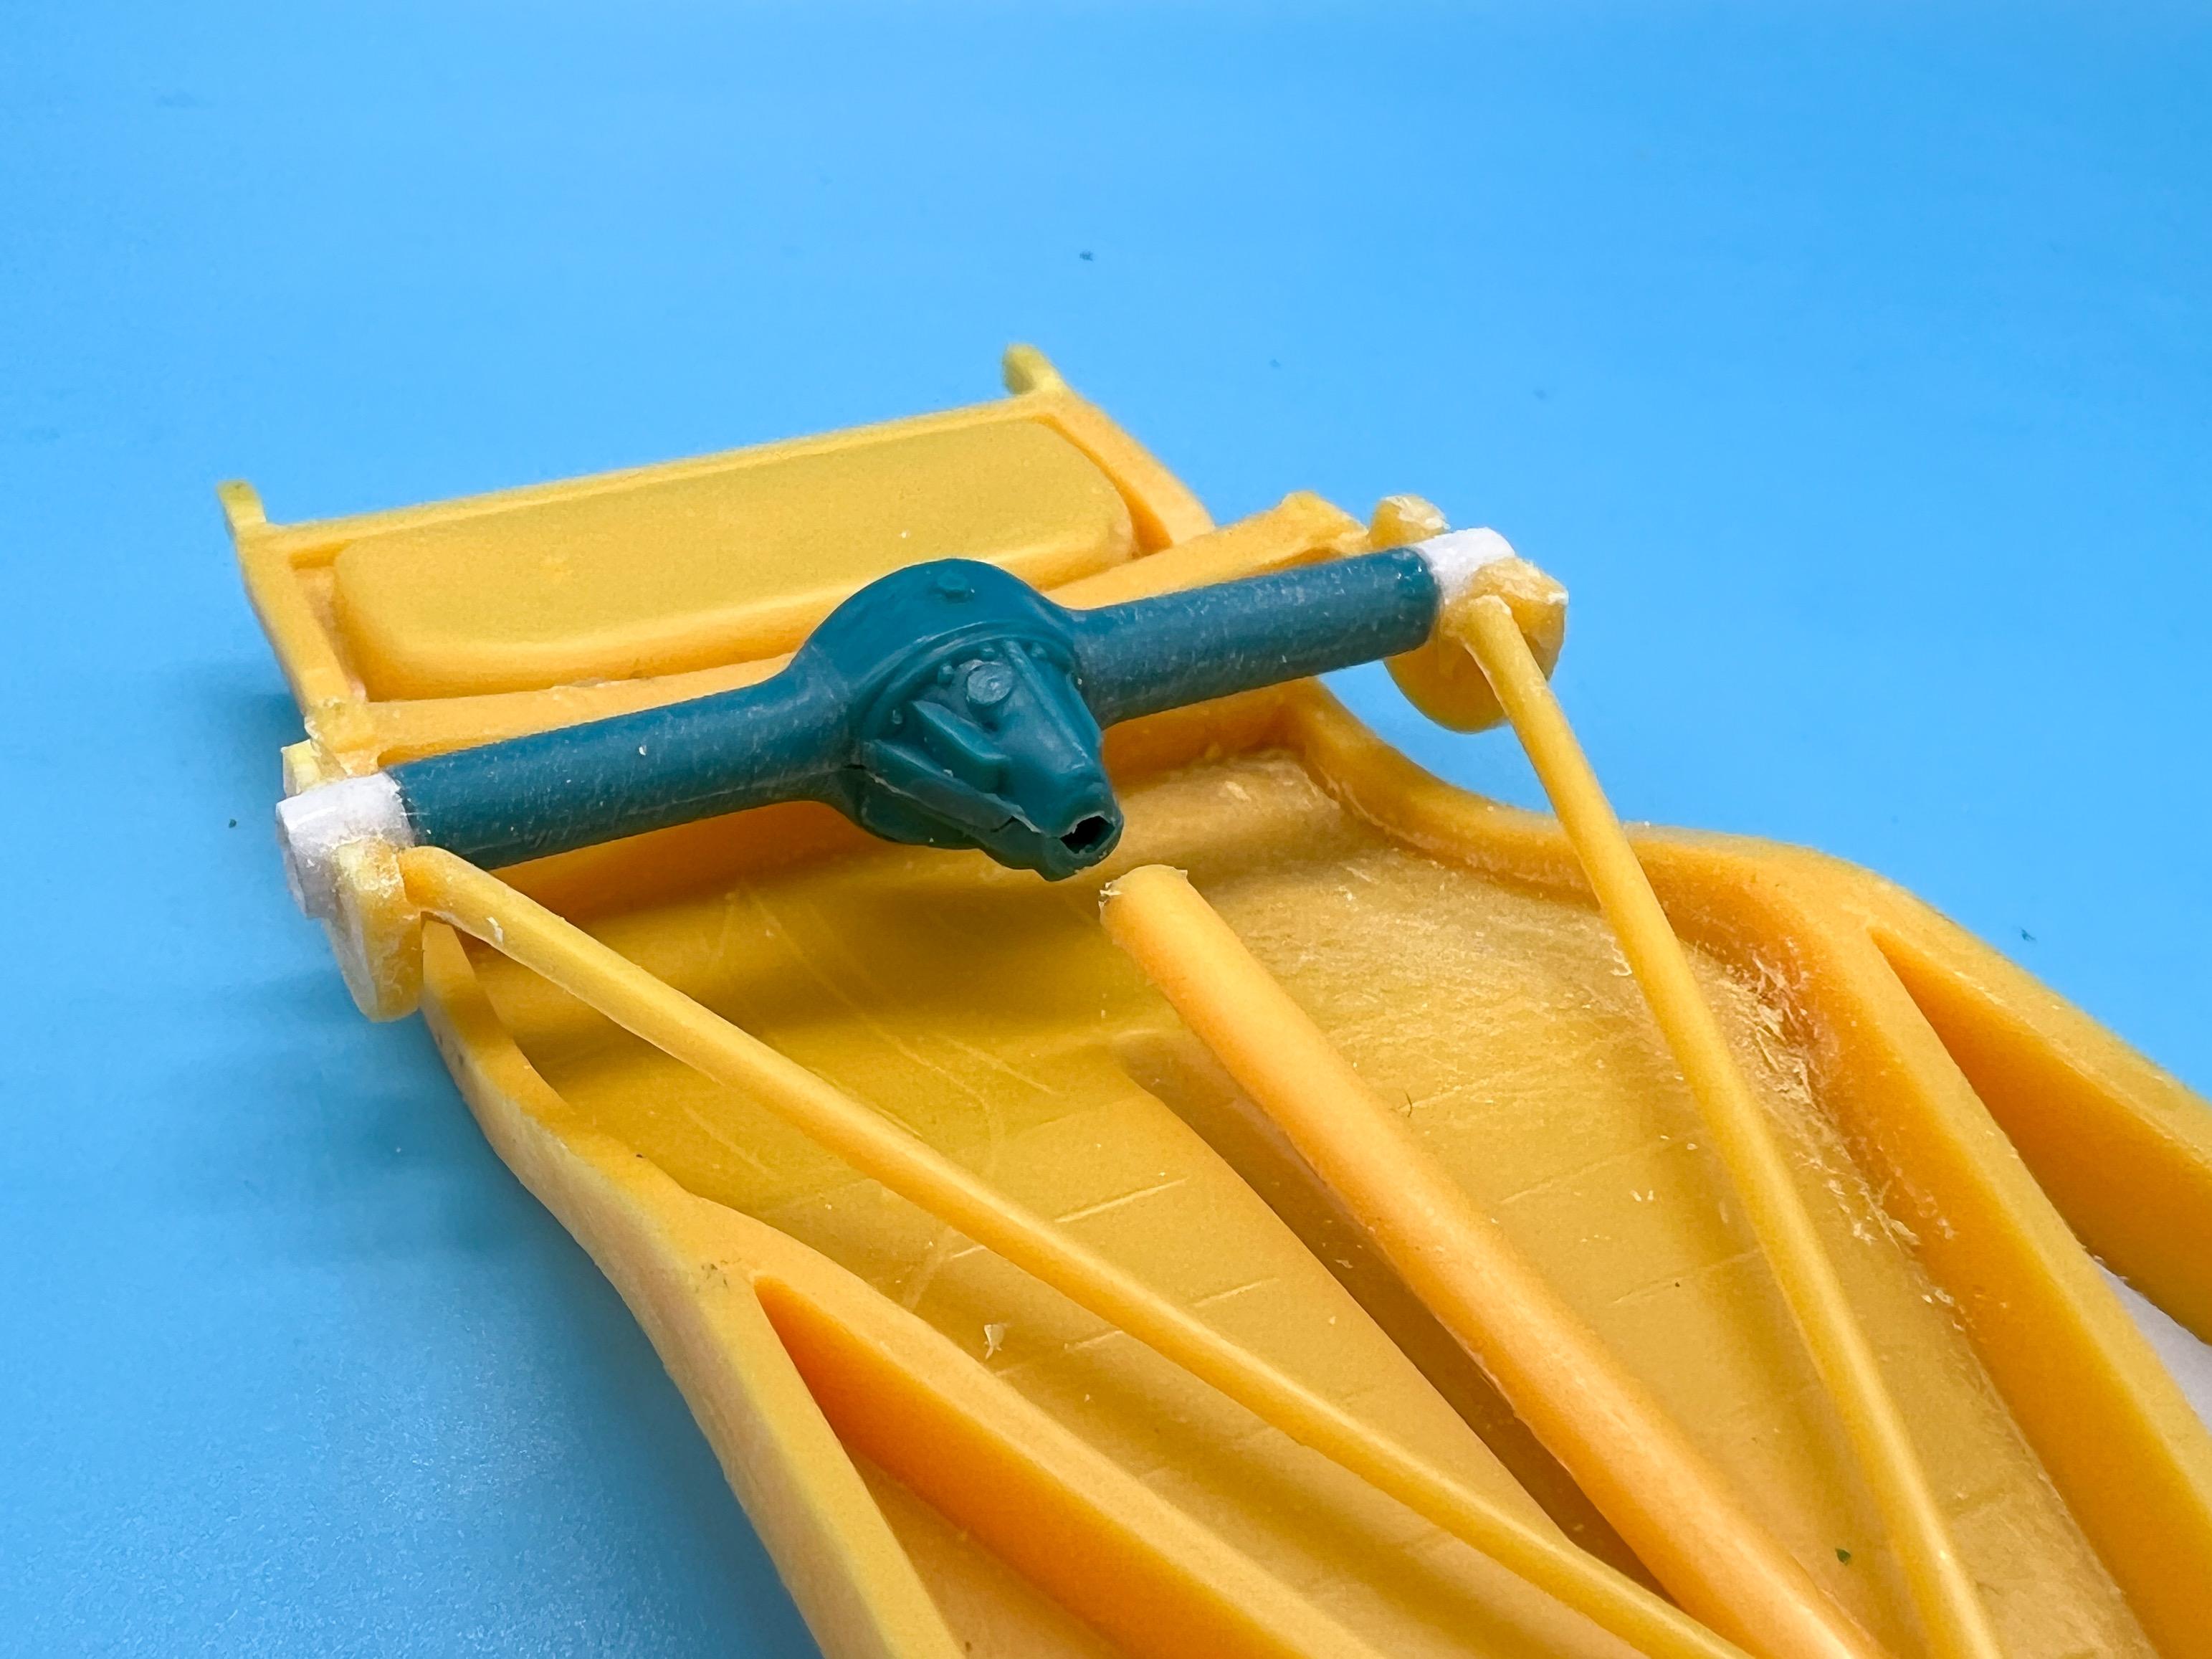
A little more this evening (I’m motivating myself to keep achieving some stuff every night so that I have something to post - it works pretty well!) Working on the front end this evening, getting some mock-up done and making sure the wheelbase is still correct after some parts-swapping: Used my 3D printed front axle, the linkages from the kit (albeit modified to remove the steering link, which I’ll be re-making) and a little modification to the frame so it all aligns nicely come assembly time… I didn’t want to modify the frame too much, so I’ll be relying on some classic rubber rake to get the stance I’m looking for. I need to figure out the exhaust, so I got the engine mocked up somewhat: And seeing as I was doing that anyway it’s a good chance to check the fit is ok again with these extra pieces in there…still good! As you can see I’ve been doing some cleanup on the body too, but still some more to do on that before I can try another cost of primer… And that’s another hour’s progress at the bench - next jobs are finishing up the work I started on the axles, cleaning up the frame and figuring out those headers…and maybe getting the body far enough along for paint this weekend. More soon, thanks for looking!
-
How big is your... stash?
OldNYJim replied to Pierre Rivard's topic in Model Building Questions and Answers
It’s those rabbit holes that’ll get ya! I saw the Goodyear blimp on a show over Christmas and thought “how come that was never a kit?”. Turns out it was! And it has an illuminated message display on it like the real one, and a (rudimentary) way to display your own messages…and now I’ve been watching blimp kits on eBay. -
3D printers - is it worth it?
OldNYJim replied to customline's topic in Model Building Questions and Answers
More impressive if it was scratchbuilt for sure! Which is funny to me, in a way - it makes me think of those guys who can build an amazing brass frame for a project rather than modify a kit piece, or print one. Clay Kemp, for example, does this a lot…and yet, when the build is done they’re painted and you might never know the difference compared to if he had made it out of styrene. It’s impressive because he did it a HARDER way…and, luckily for aspiring craftsmen, a 3D printer will rarely be the hardest way to do something. -
I love that little slingshot so much! The proportions are great, and I love the bodywork you did
-
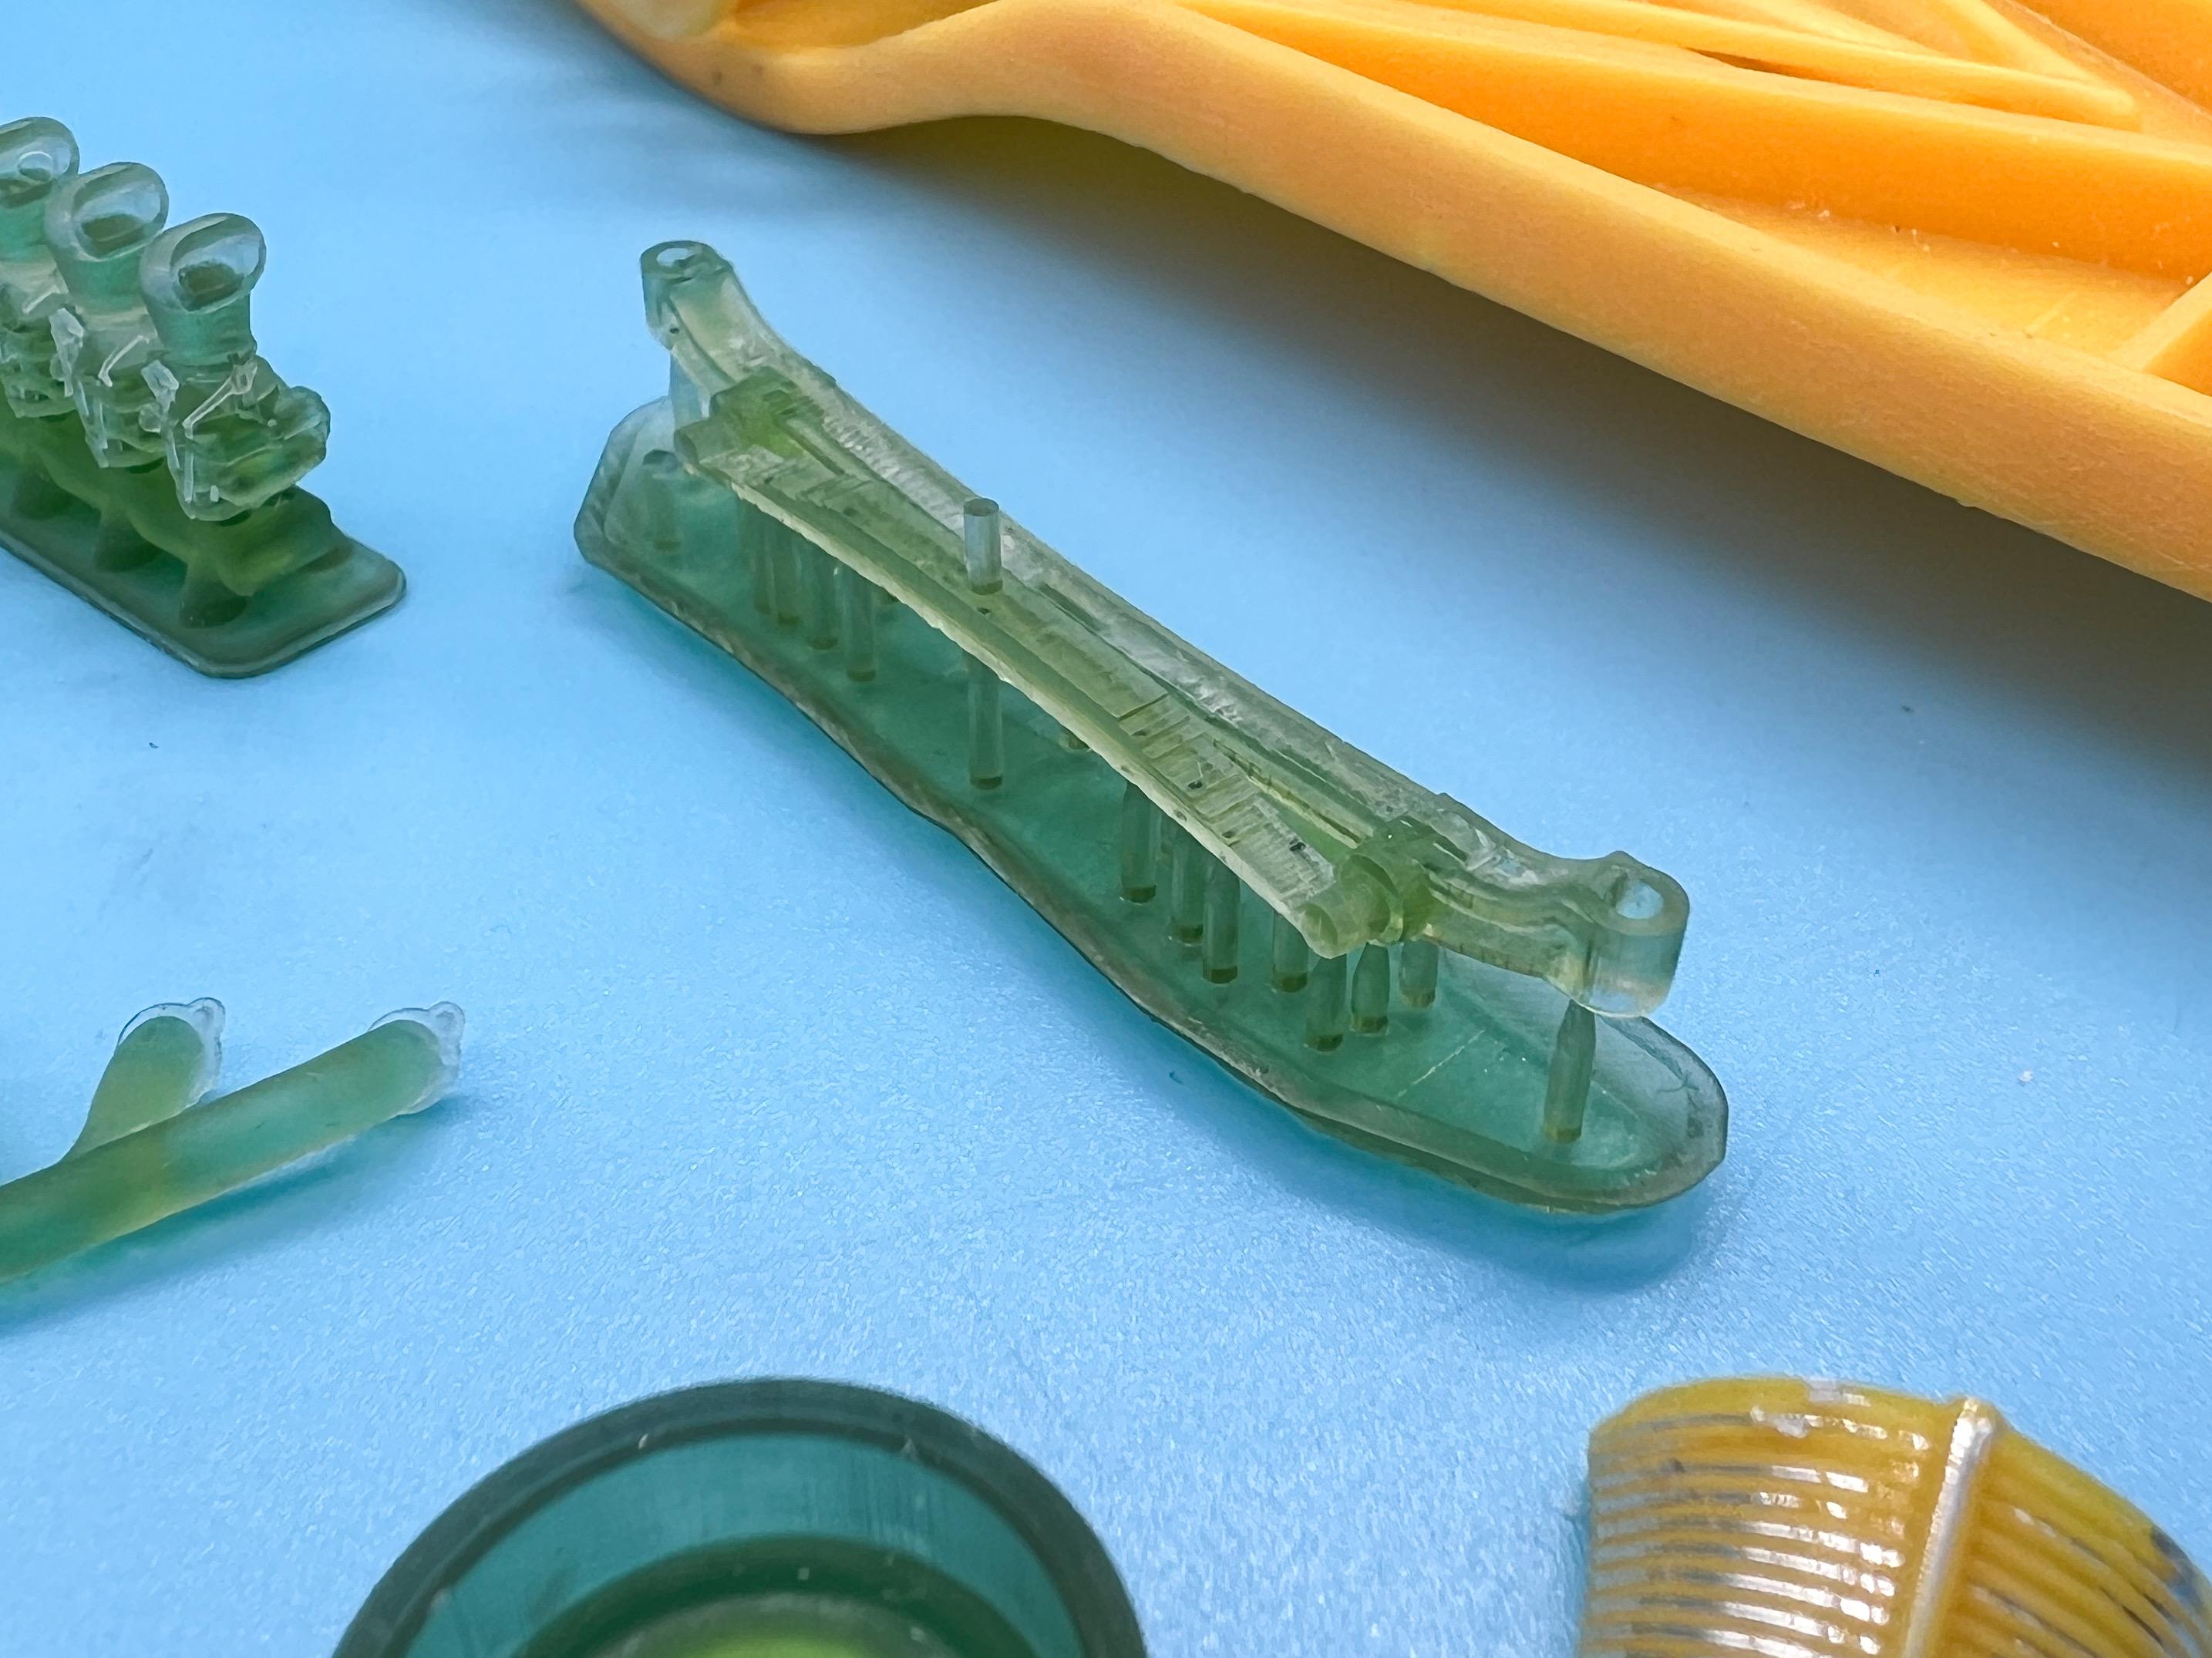
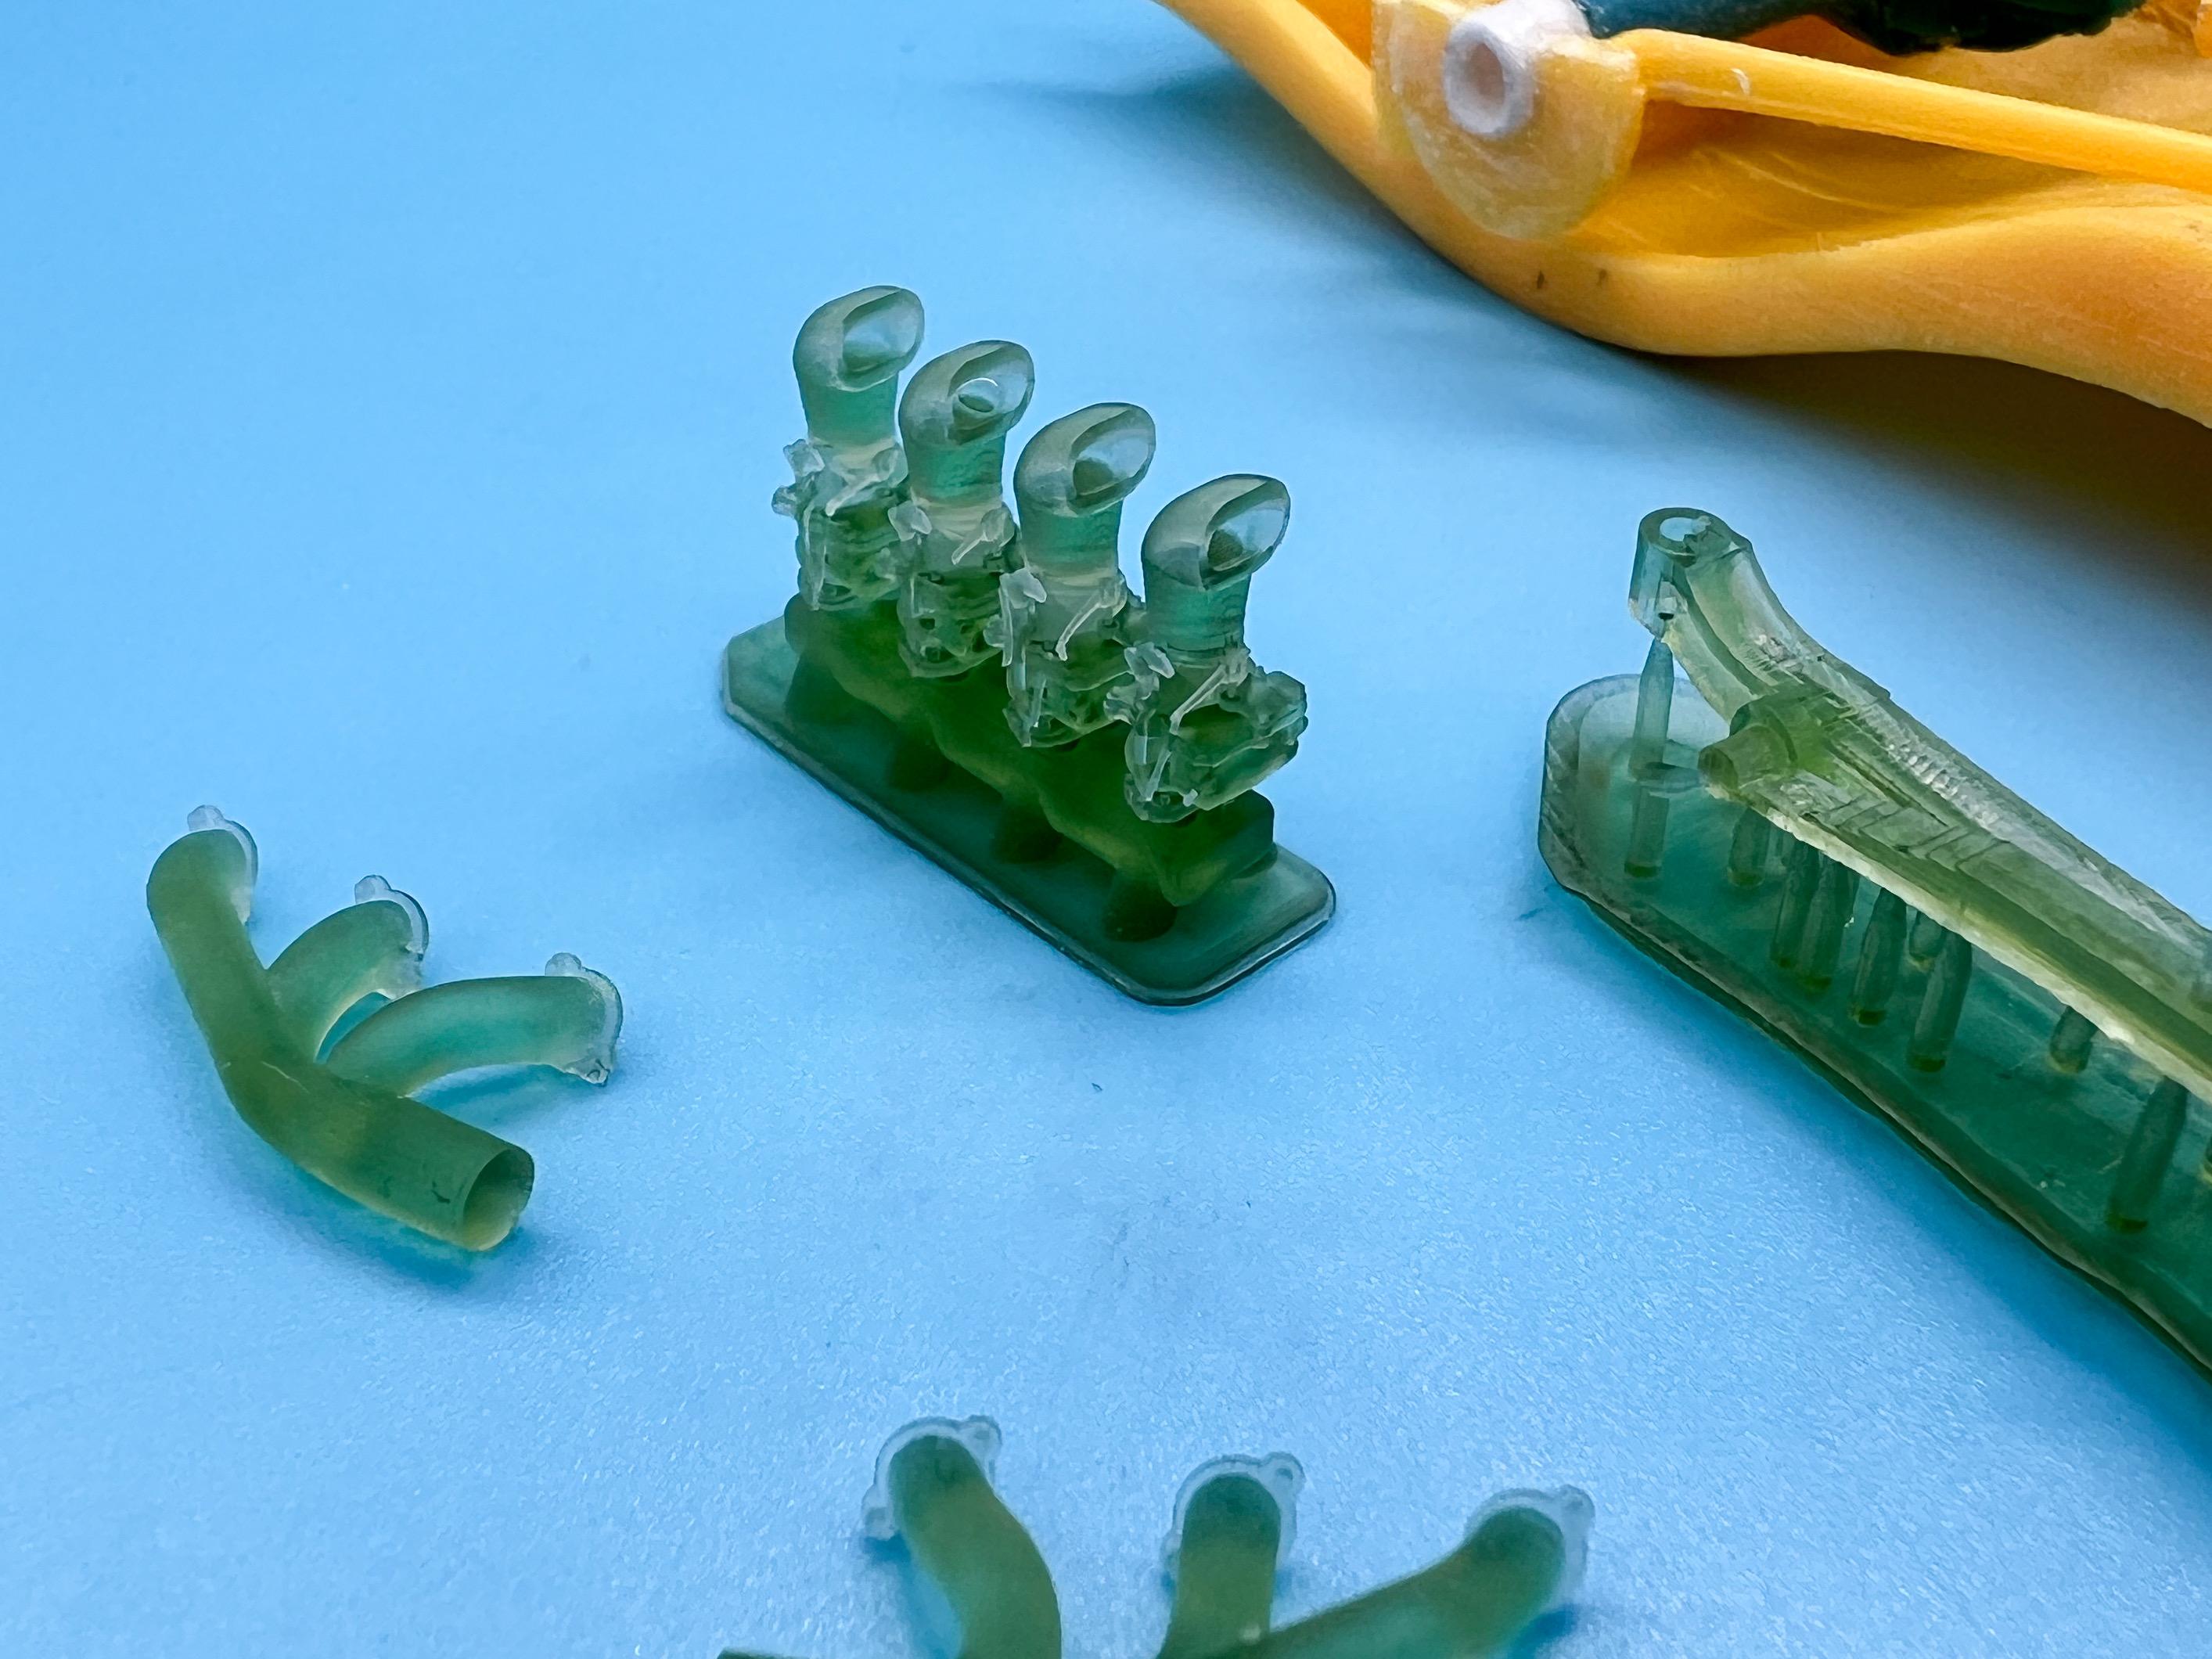
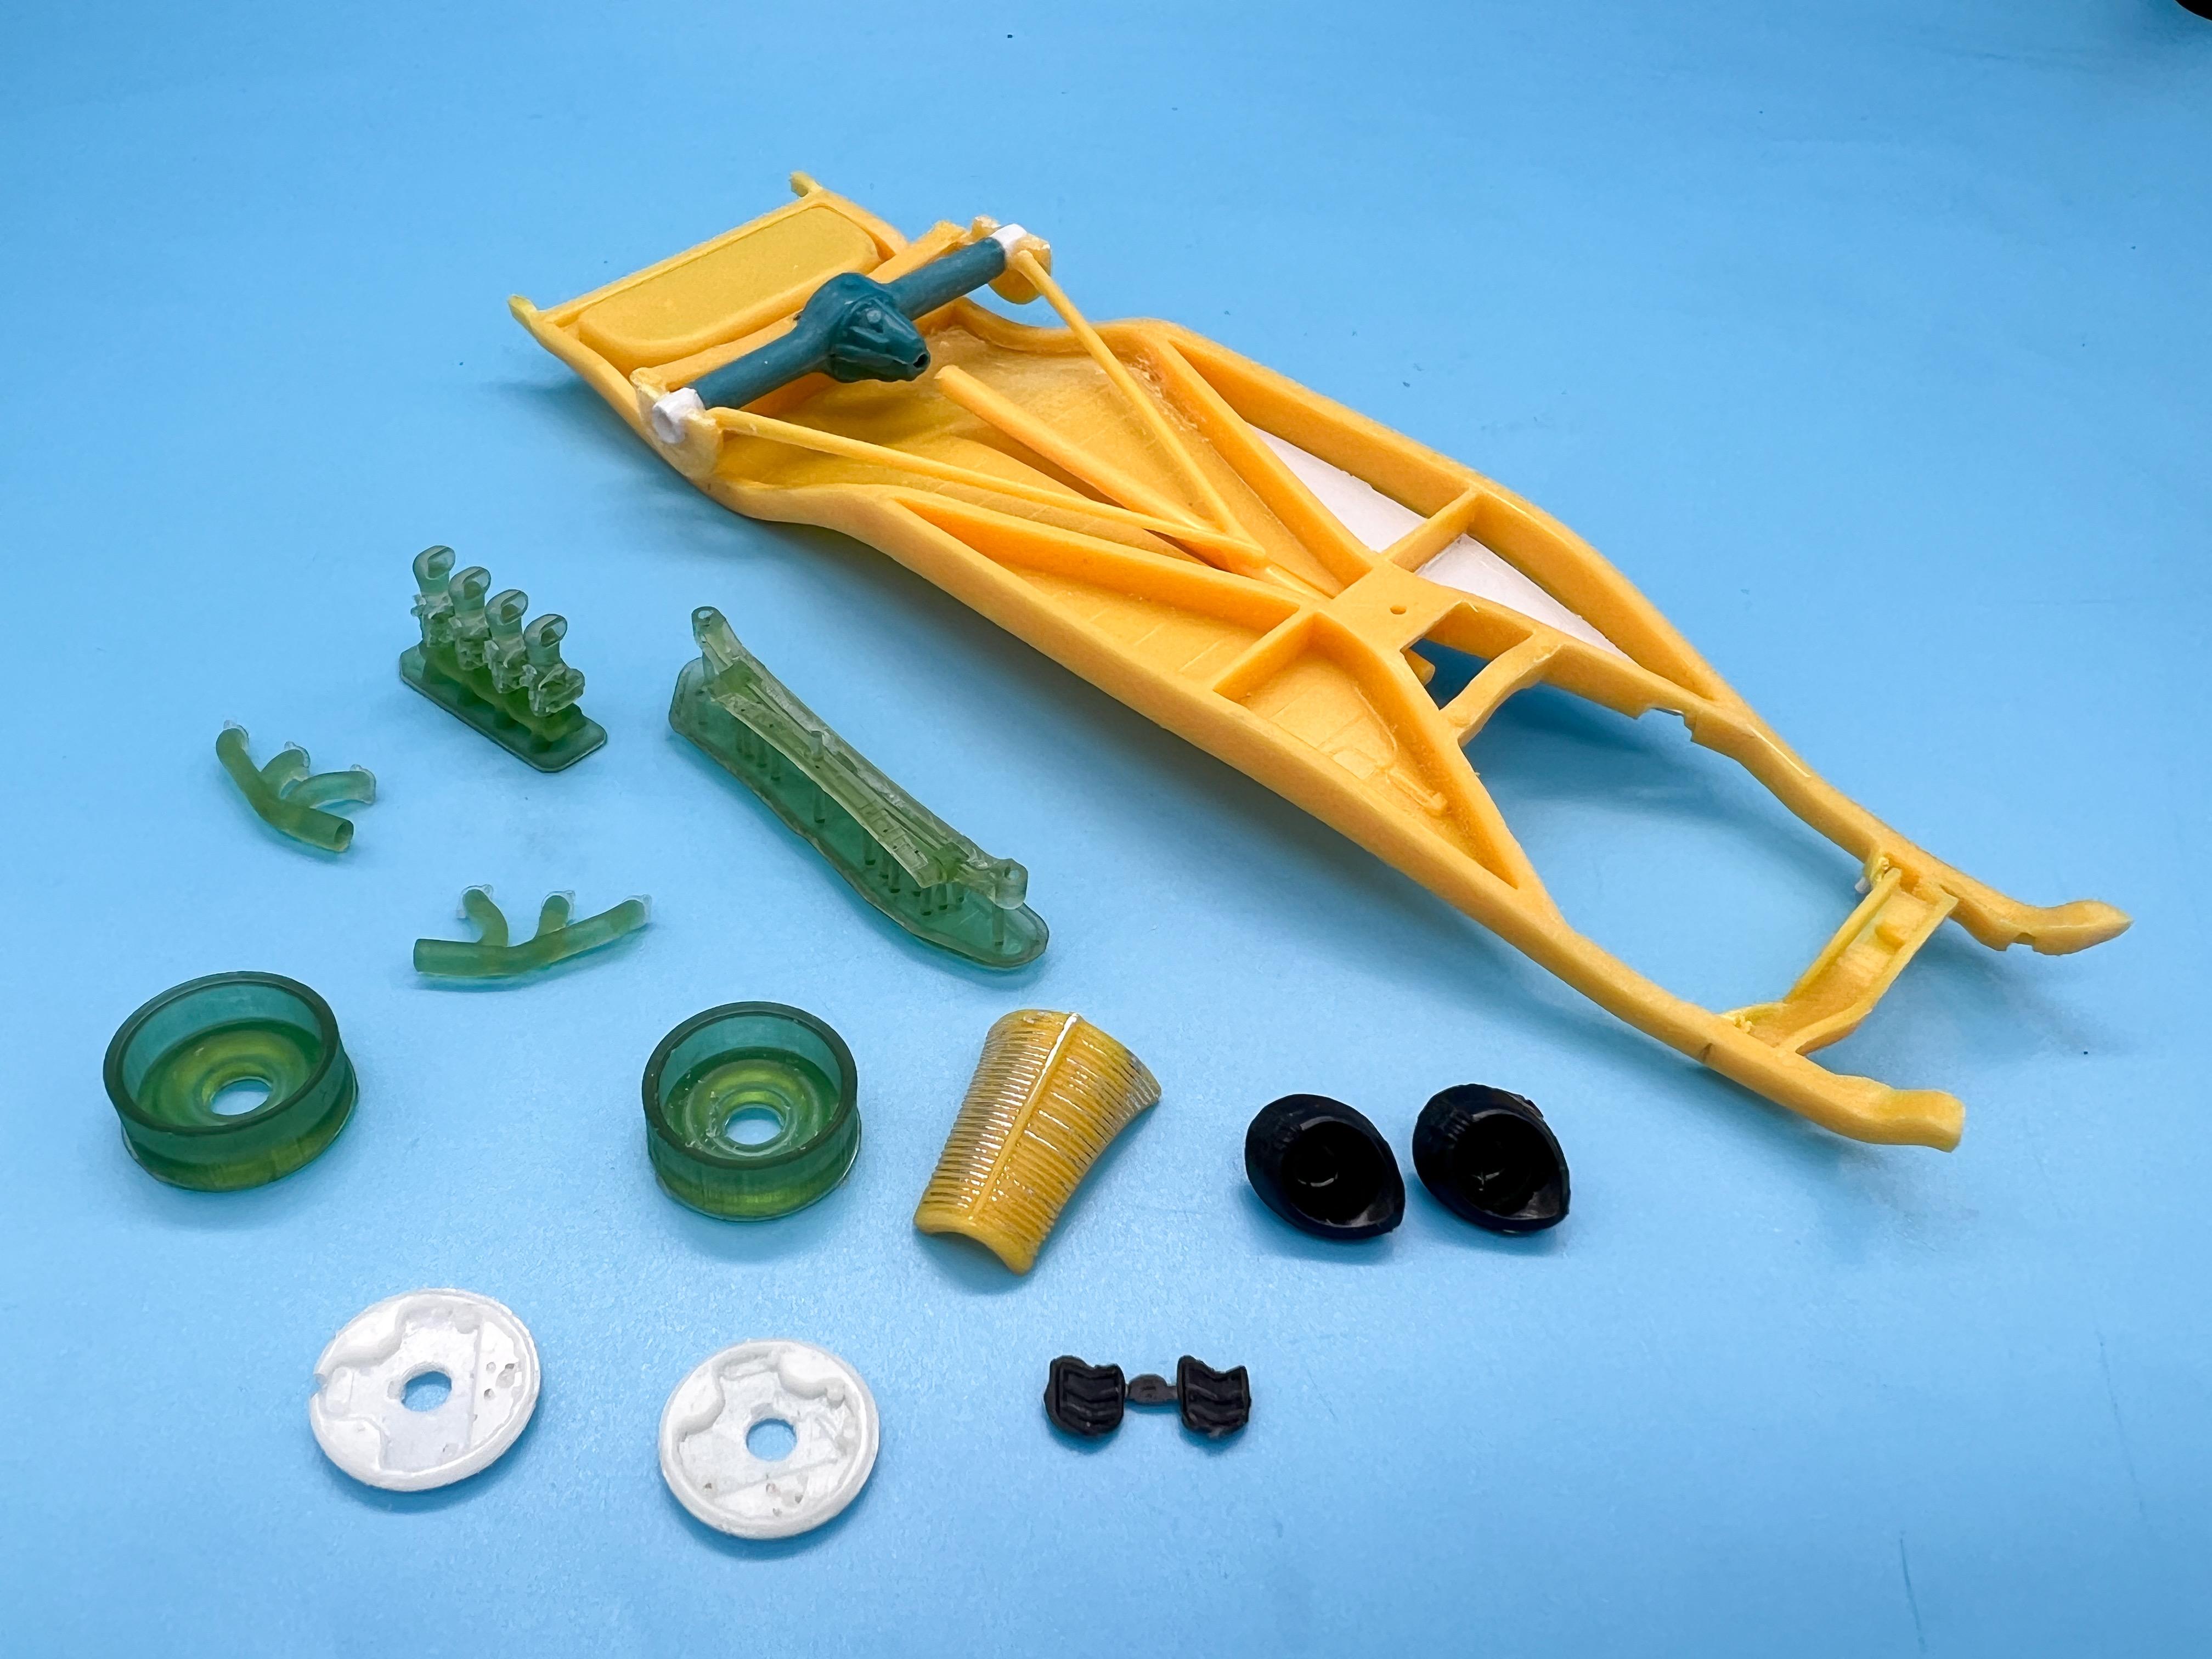
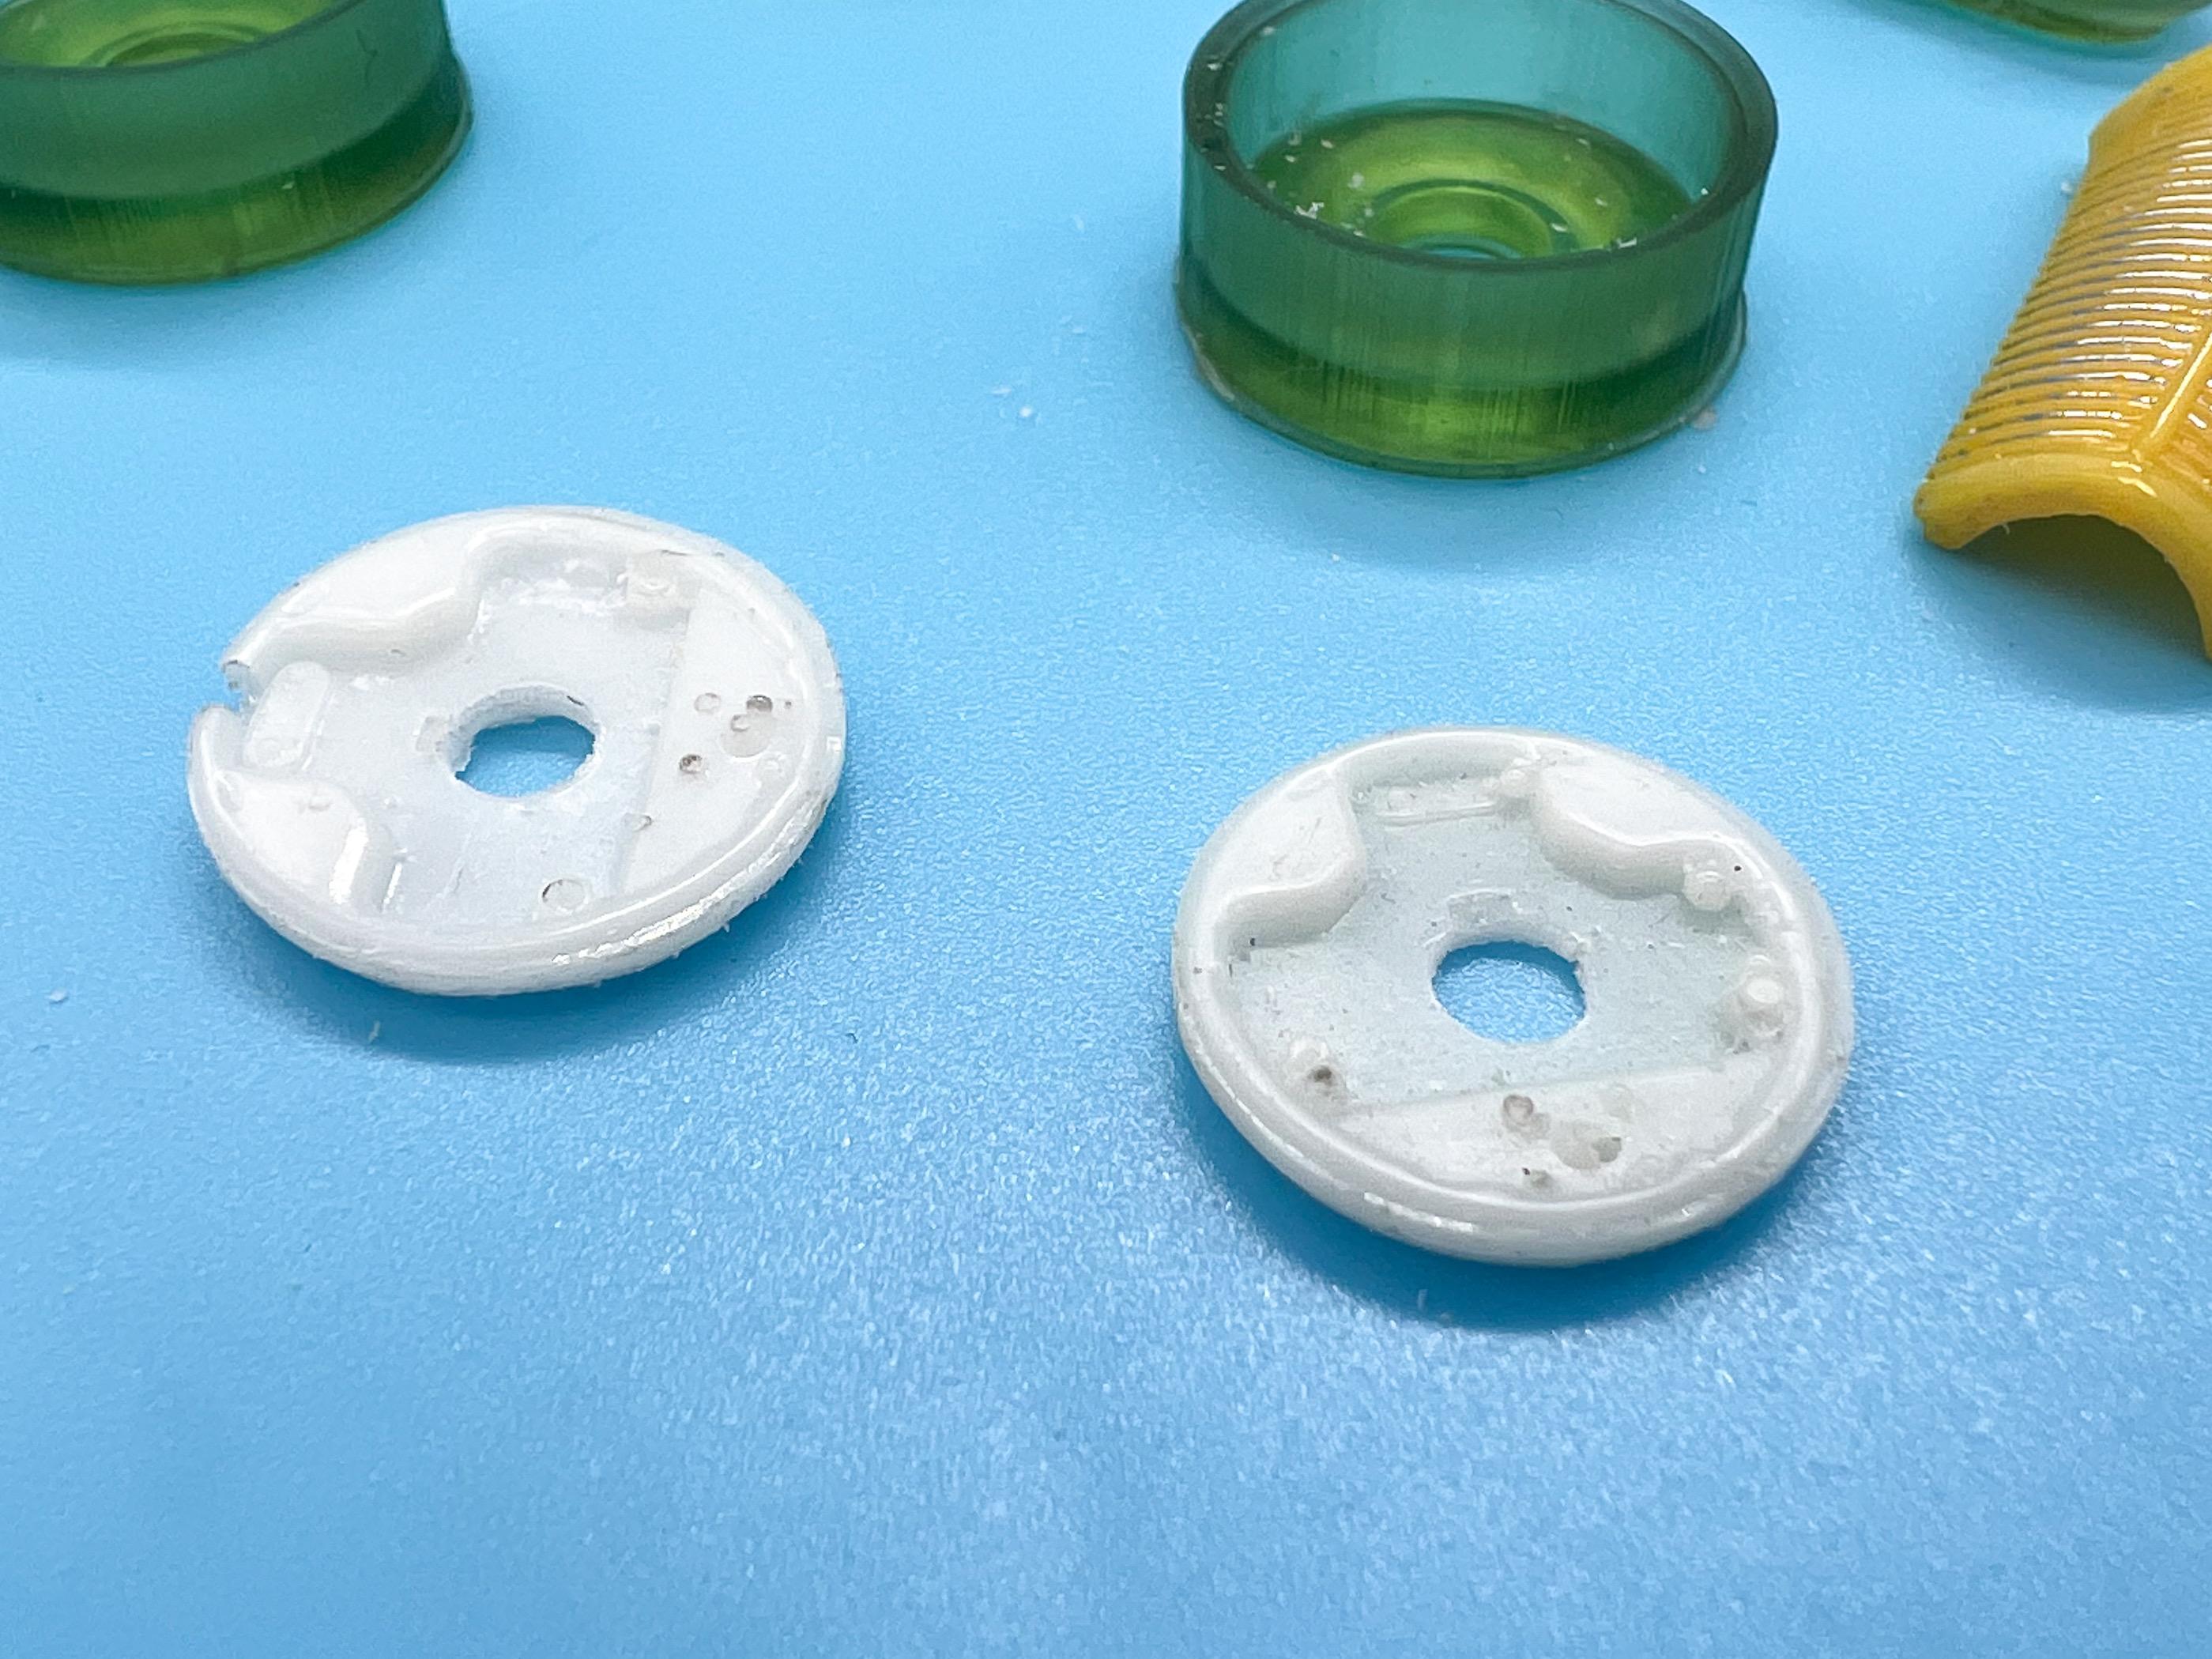
Yes sir! I have a bunch of these magnets…the doors seem like they close right into the correct position fairly well, but I may hide one in the trunk lid just to help it position properly… Thanks brother! Thank you for the info - I actually have been stealing parts from the ‘woody’ kit (that isn’t a woody) for this build so I should take a look and see what engine is in that one…will report back! Some minor progress, seeing as I’m replying anyway… Designed and printed the leaf spring for the front axle - I made them one assembly for now but I can separate if I need to later on: Whilst the printer was running, I tweaked the wheel design and reprinted those, printed some headers for the Flattie and an intake setup: Check out the detail on those carbs! I stripped the chrome on a few bits whilst the printer was running, and then broke out the resin supplies and cast some brake backing plates: Need to fix or remake the one with the ‘short shot’, but nothing major… And I also needed to do something about the half-hollow rear axle so I cast a Quickchange initially… …but it interferes with the leaf spring and I don’t want to TOTALLY re-engineer the suspension if I don’t have to, so I found this whatever-it-is in the parts box and it’ll work just fine: These axles are hard to improve without totally redoing those big clunky ‘brackets’ where where the linkages meet…I’m going to do my best to get those more in scale though without cutting everything apart and starting over. Need to add a u-joint to that axle still but it’s a start… Lots of little jobs done, but nothing that amounts to much - sometimes it be like that! More soon, soon as I’ve done more…I wanna get the frame figured out this week hopefully so I can keep on rolling (pun not intended)
-
Long term 1957 Buick Century Caballero Wagon
OldNYJim replied to Ace-Garageguy's topic in WIP: Model Cars
Operative word there ? Always enjoy your threads Bill - always educational and inspiring -
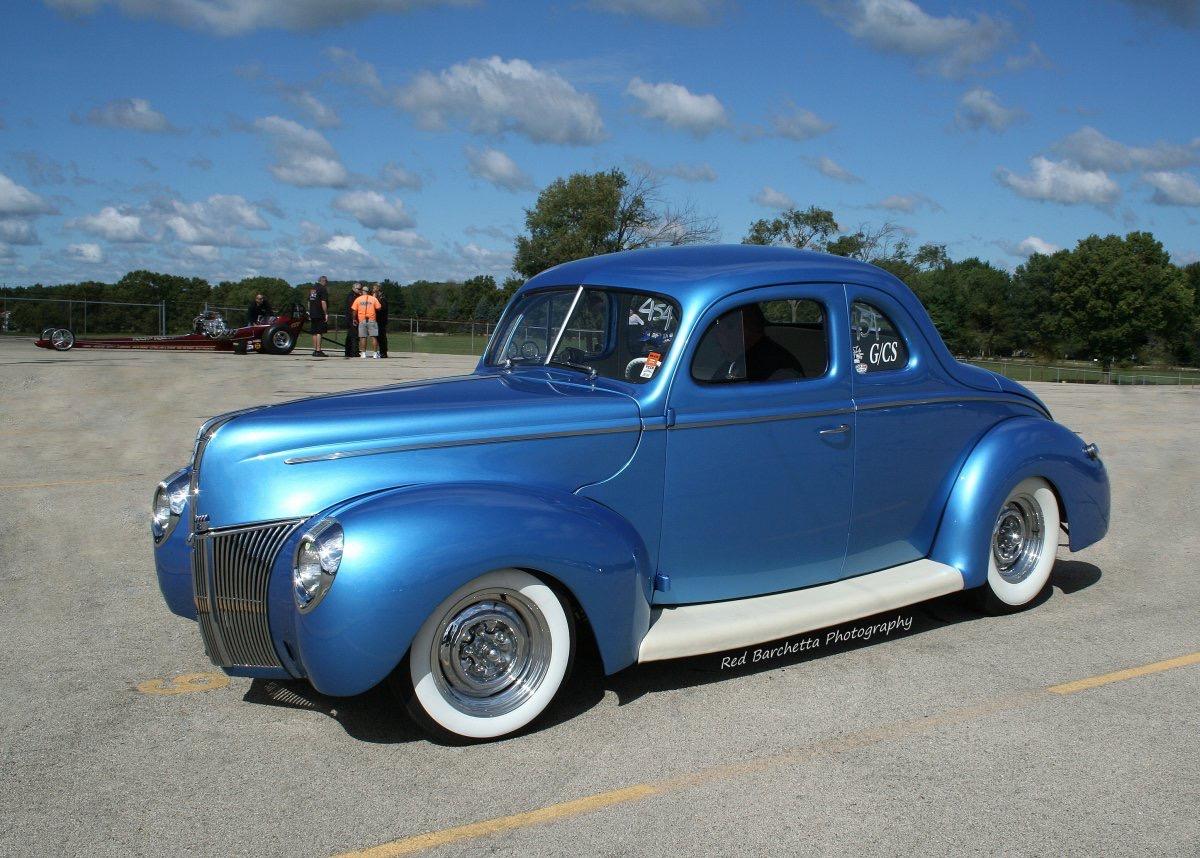
Can’t make me ? That car, in that color, isn’t too far off what I pictured this build looking like from the start! 40s look great in blue and white! It’s reassuring to see from the pic you posted that even in 1:1 getting that chrome trim nicely aligned on the doors can be tough…
-
I’m of the opinion that you’re doing it the right way NOW - painting on the sprue won’t get such nice results…and you’re getting great results! Cleaning up those mold lines before primer is a relatively minor job and adds a LOT in terms of a nice finished product; you’re clearly skilled with an airbrush and some simple prep before priming will just add to that!
-
3D printers - is it worth it?
OldNYJim replied to customline's topic in Model Building Questions and Answers
That’s a great thoughtful response Steve and I’ve thought about that too. As someone with SOME scratchbuilding skills and SOME 3D design skills, I’d like to counter that while in my experience you COULD work through a kit and re-design and print about every part, some stuff is just WAY easier to do the ‘conventional’ way than with a computer. For example, say I want to detail up a muscle car firewall, like you’re so proficient at doing. I COULD take the kit part, scan it, make a 3D model, duplicate all the electrical geegaws and bolts and wiring and whatnot and then print it in super-high resolution…but the much easier method would be to do it how you do. Sand off molded-in wiring, drill some holes for miniature bolts and detail as you see fit, and I bet you’ll be done a lot faster than if you started from scratch and printed your own pieces. Printers definitely have their place, and are useful, but they will no more make a exception craftsman out of an average builder than photoetch and resin parts do now. And for that…I’m kinda thankful! I WANT to have to do that work and feel proud for having done it -
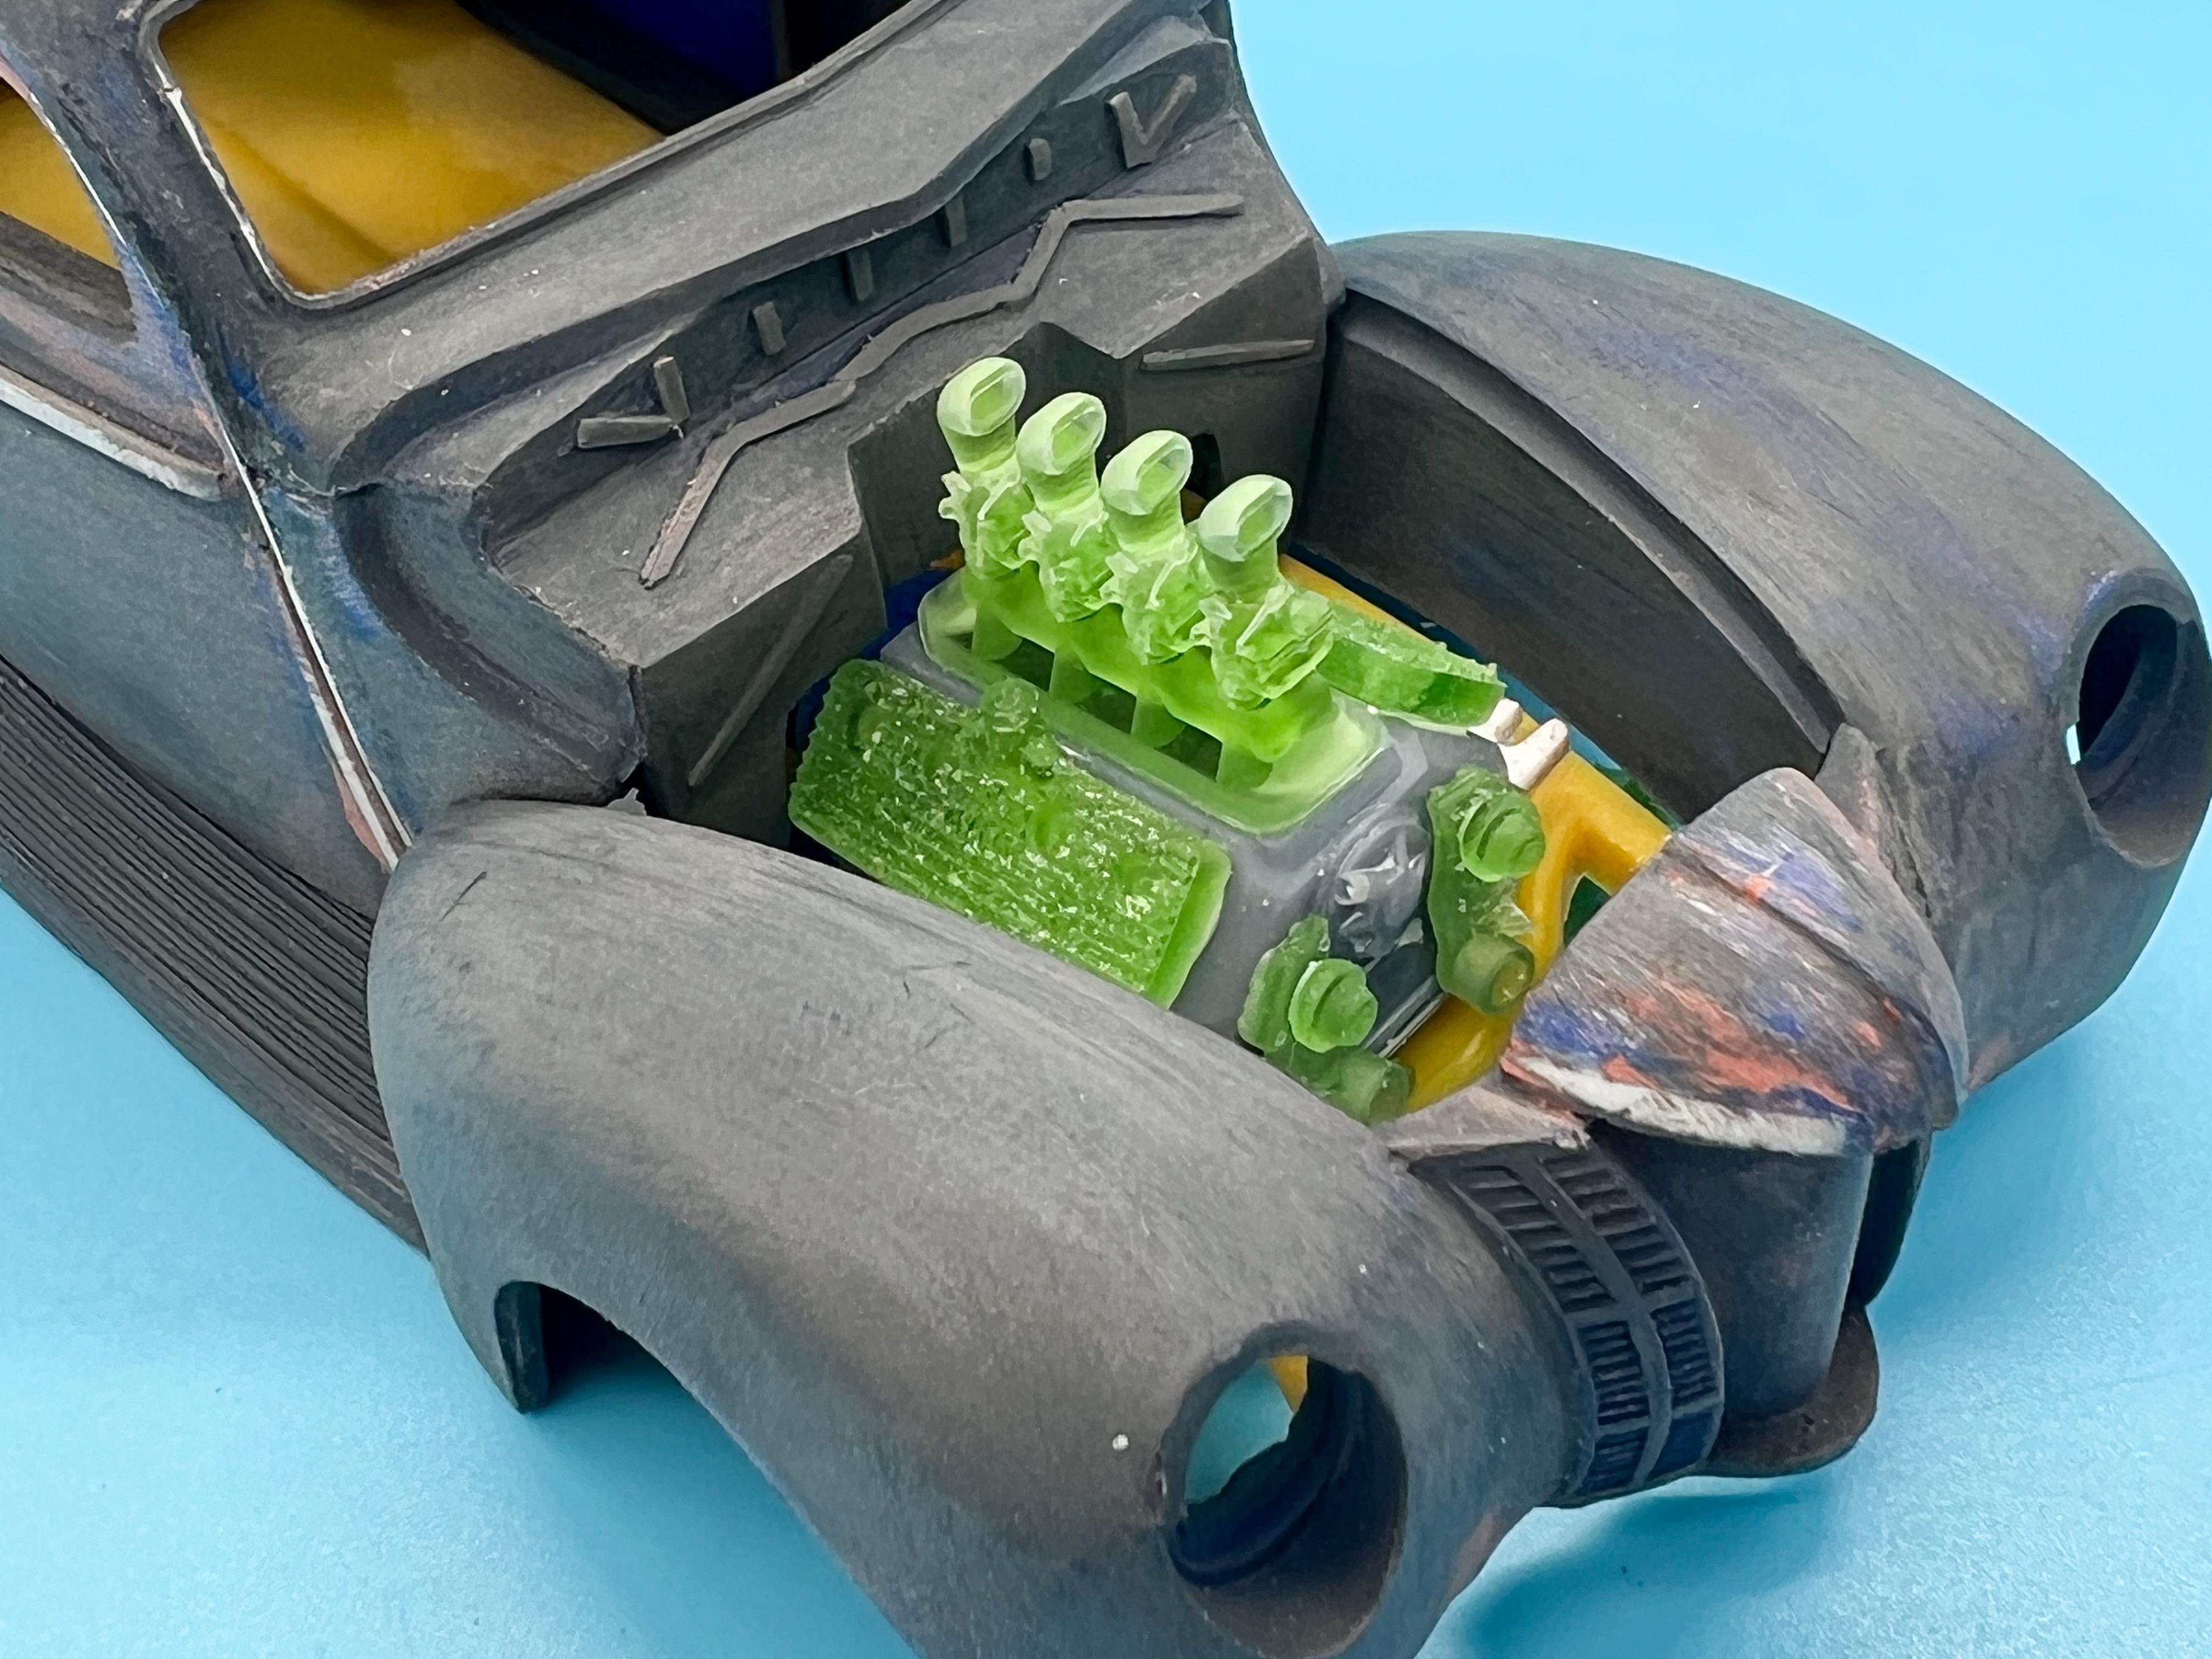
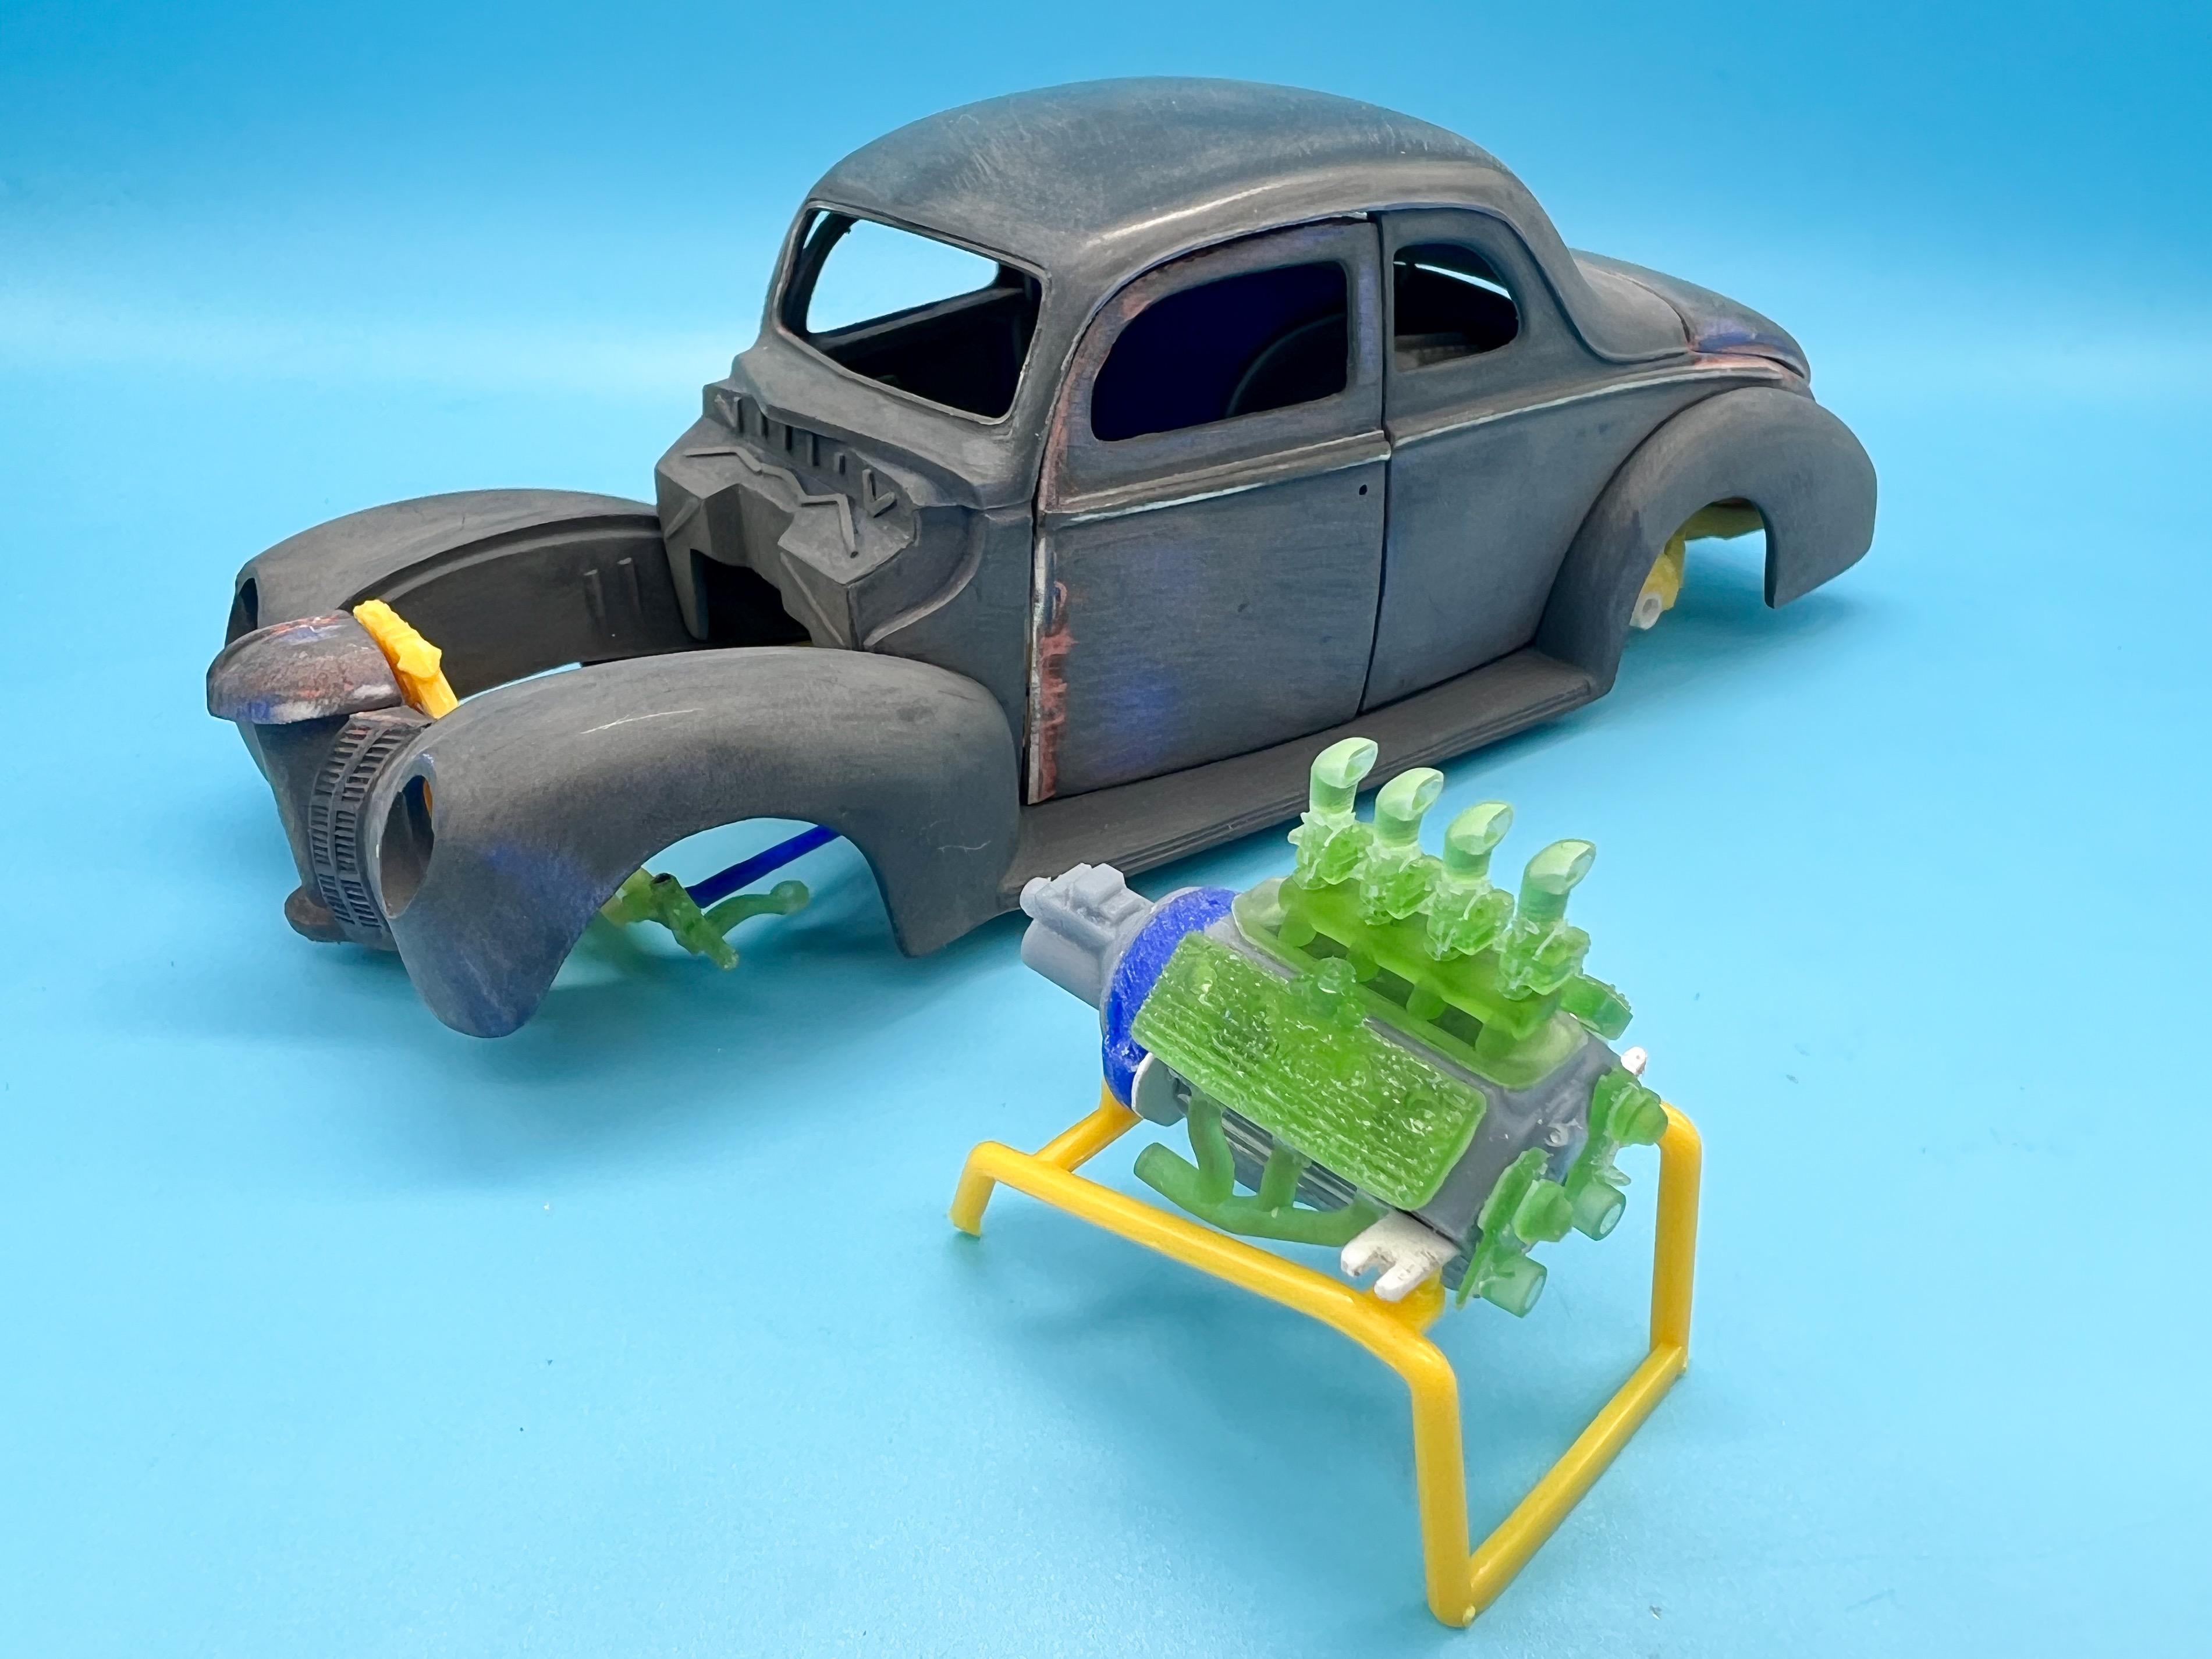
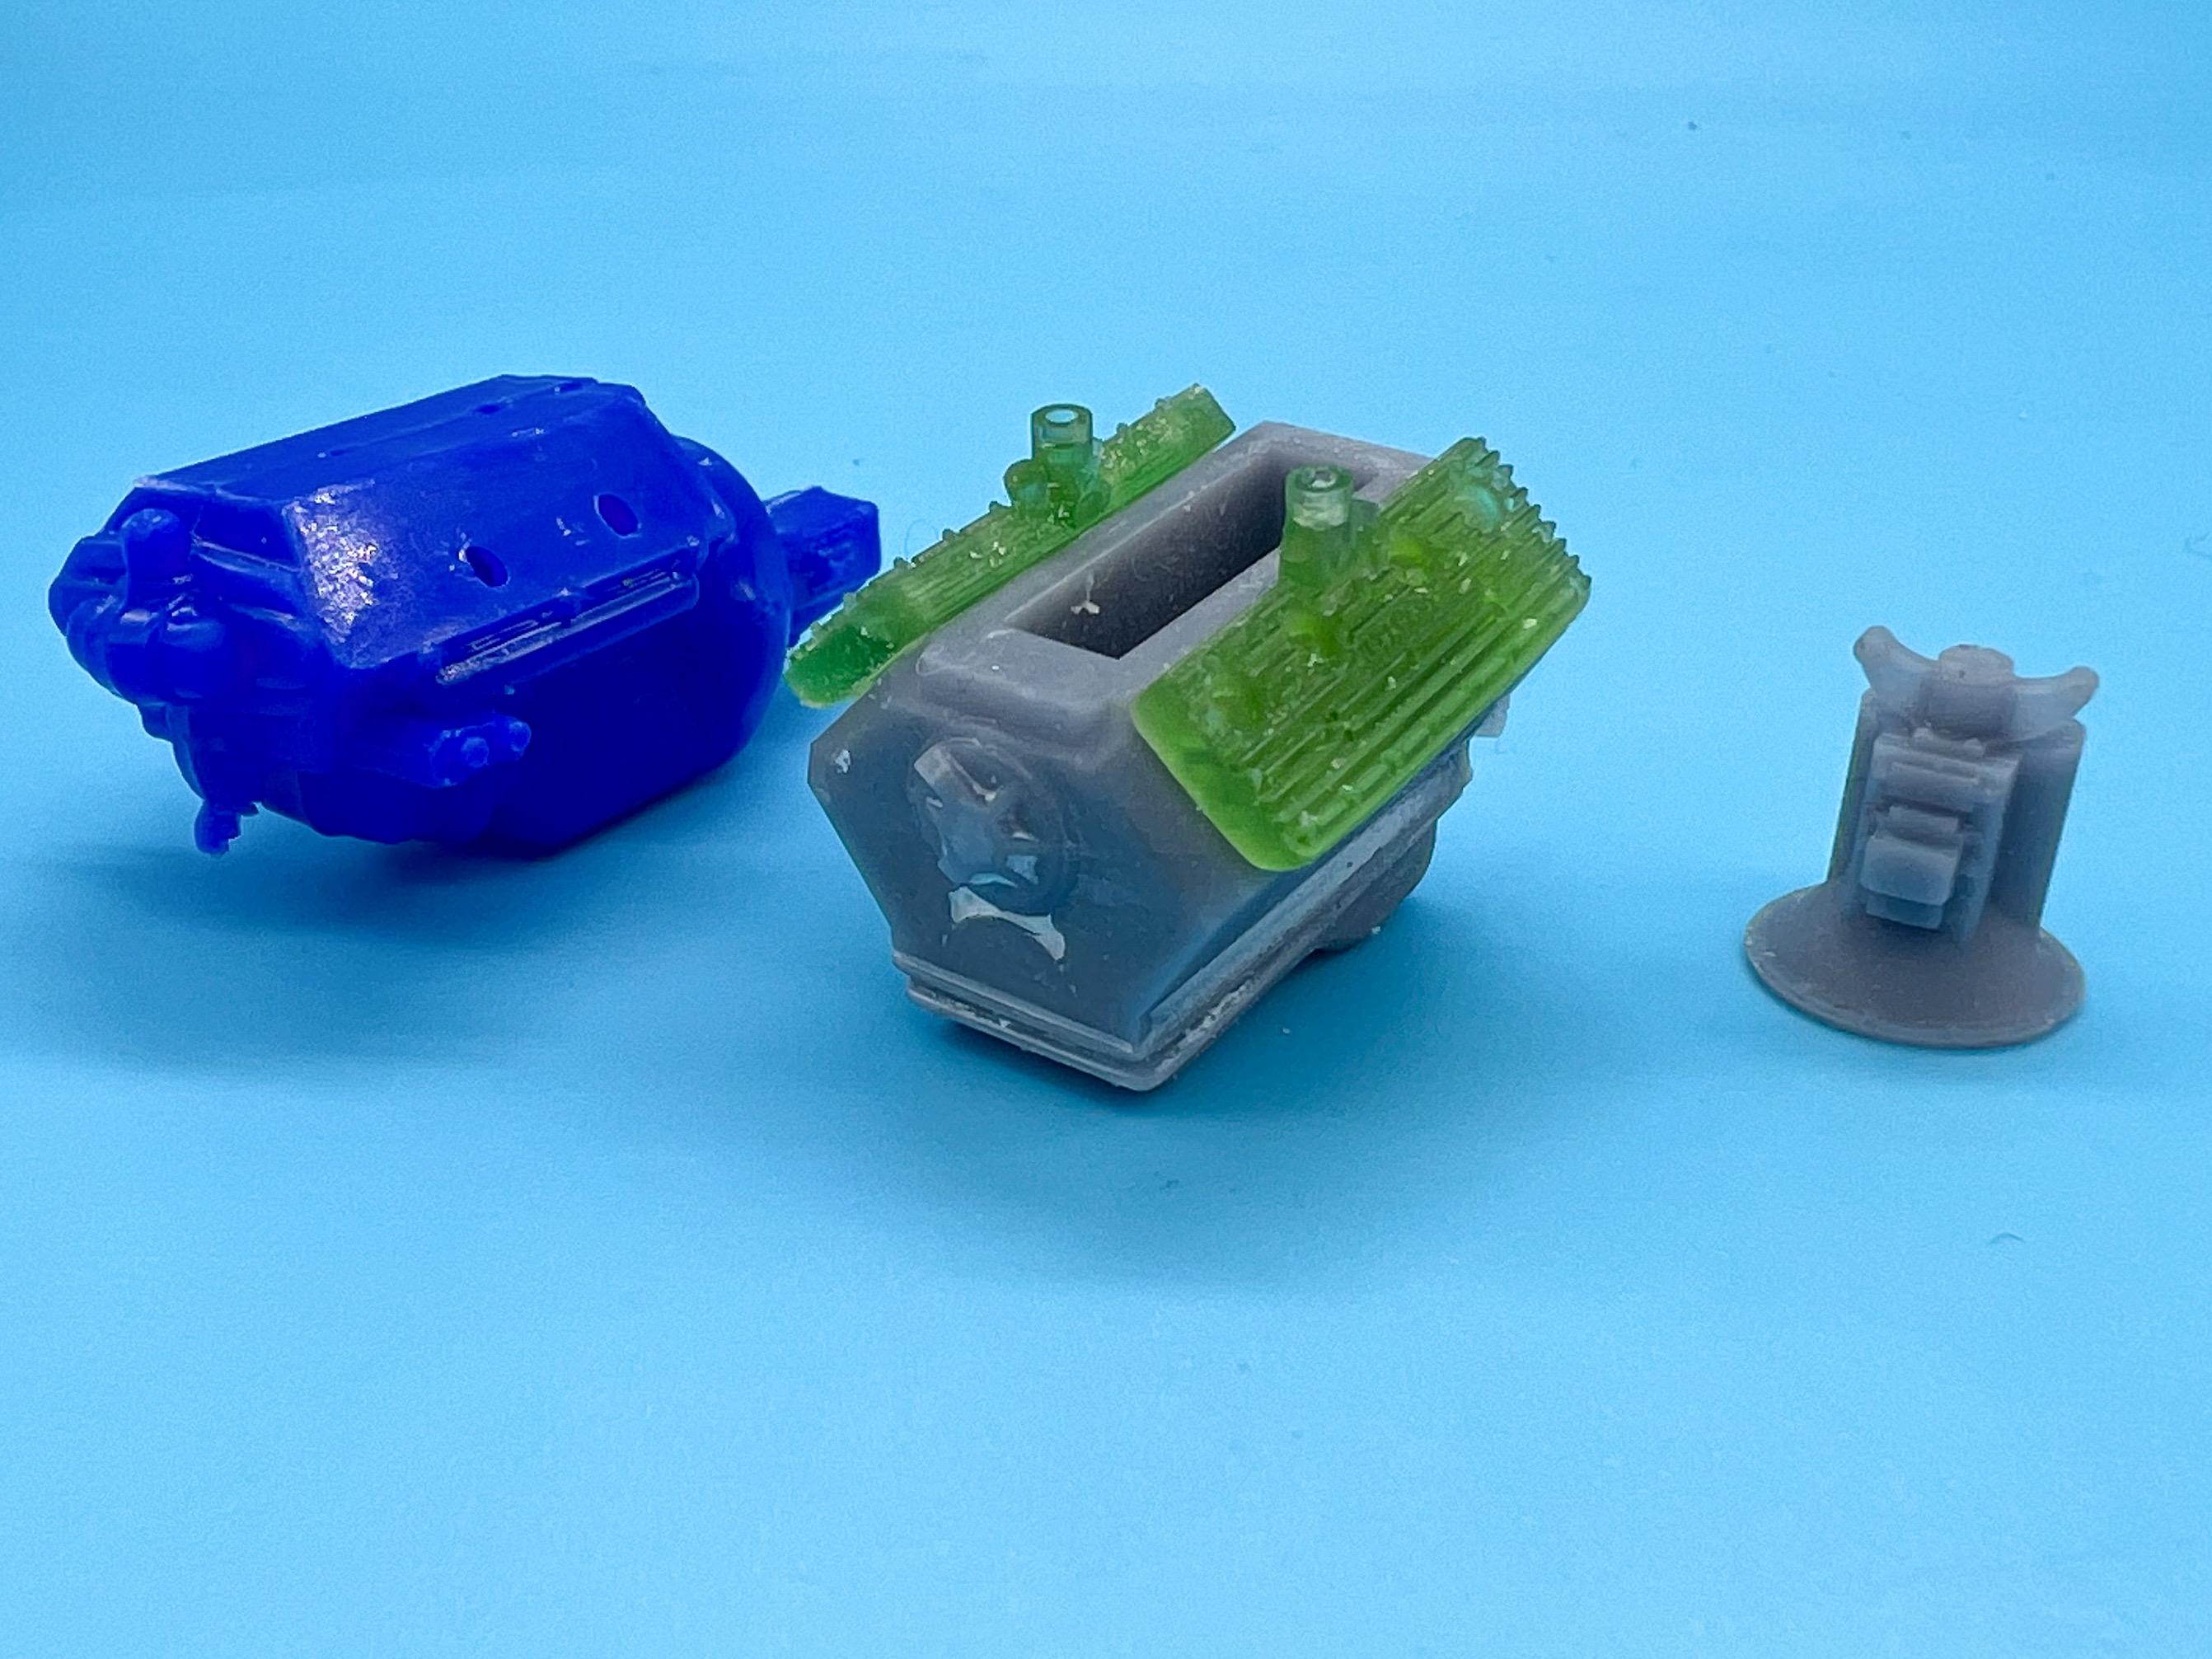
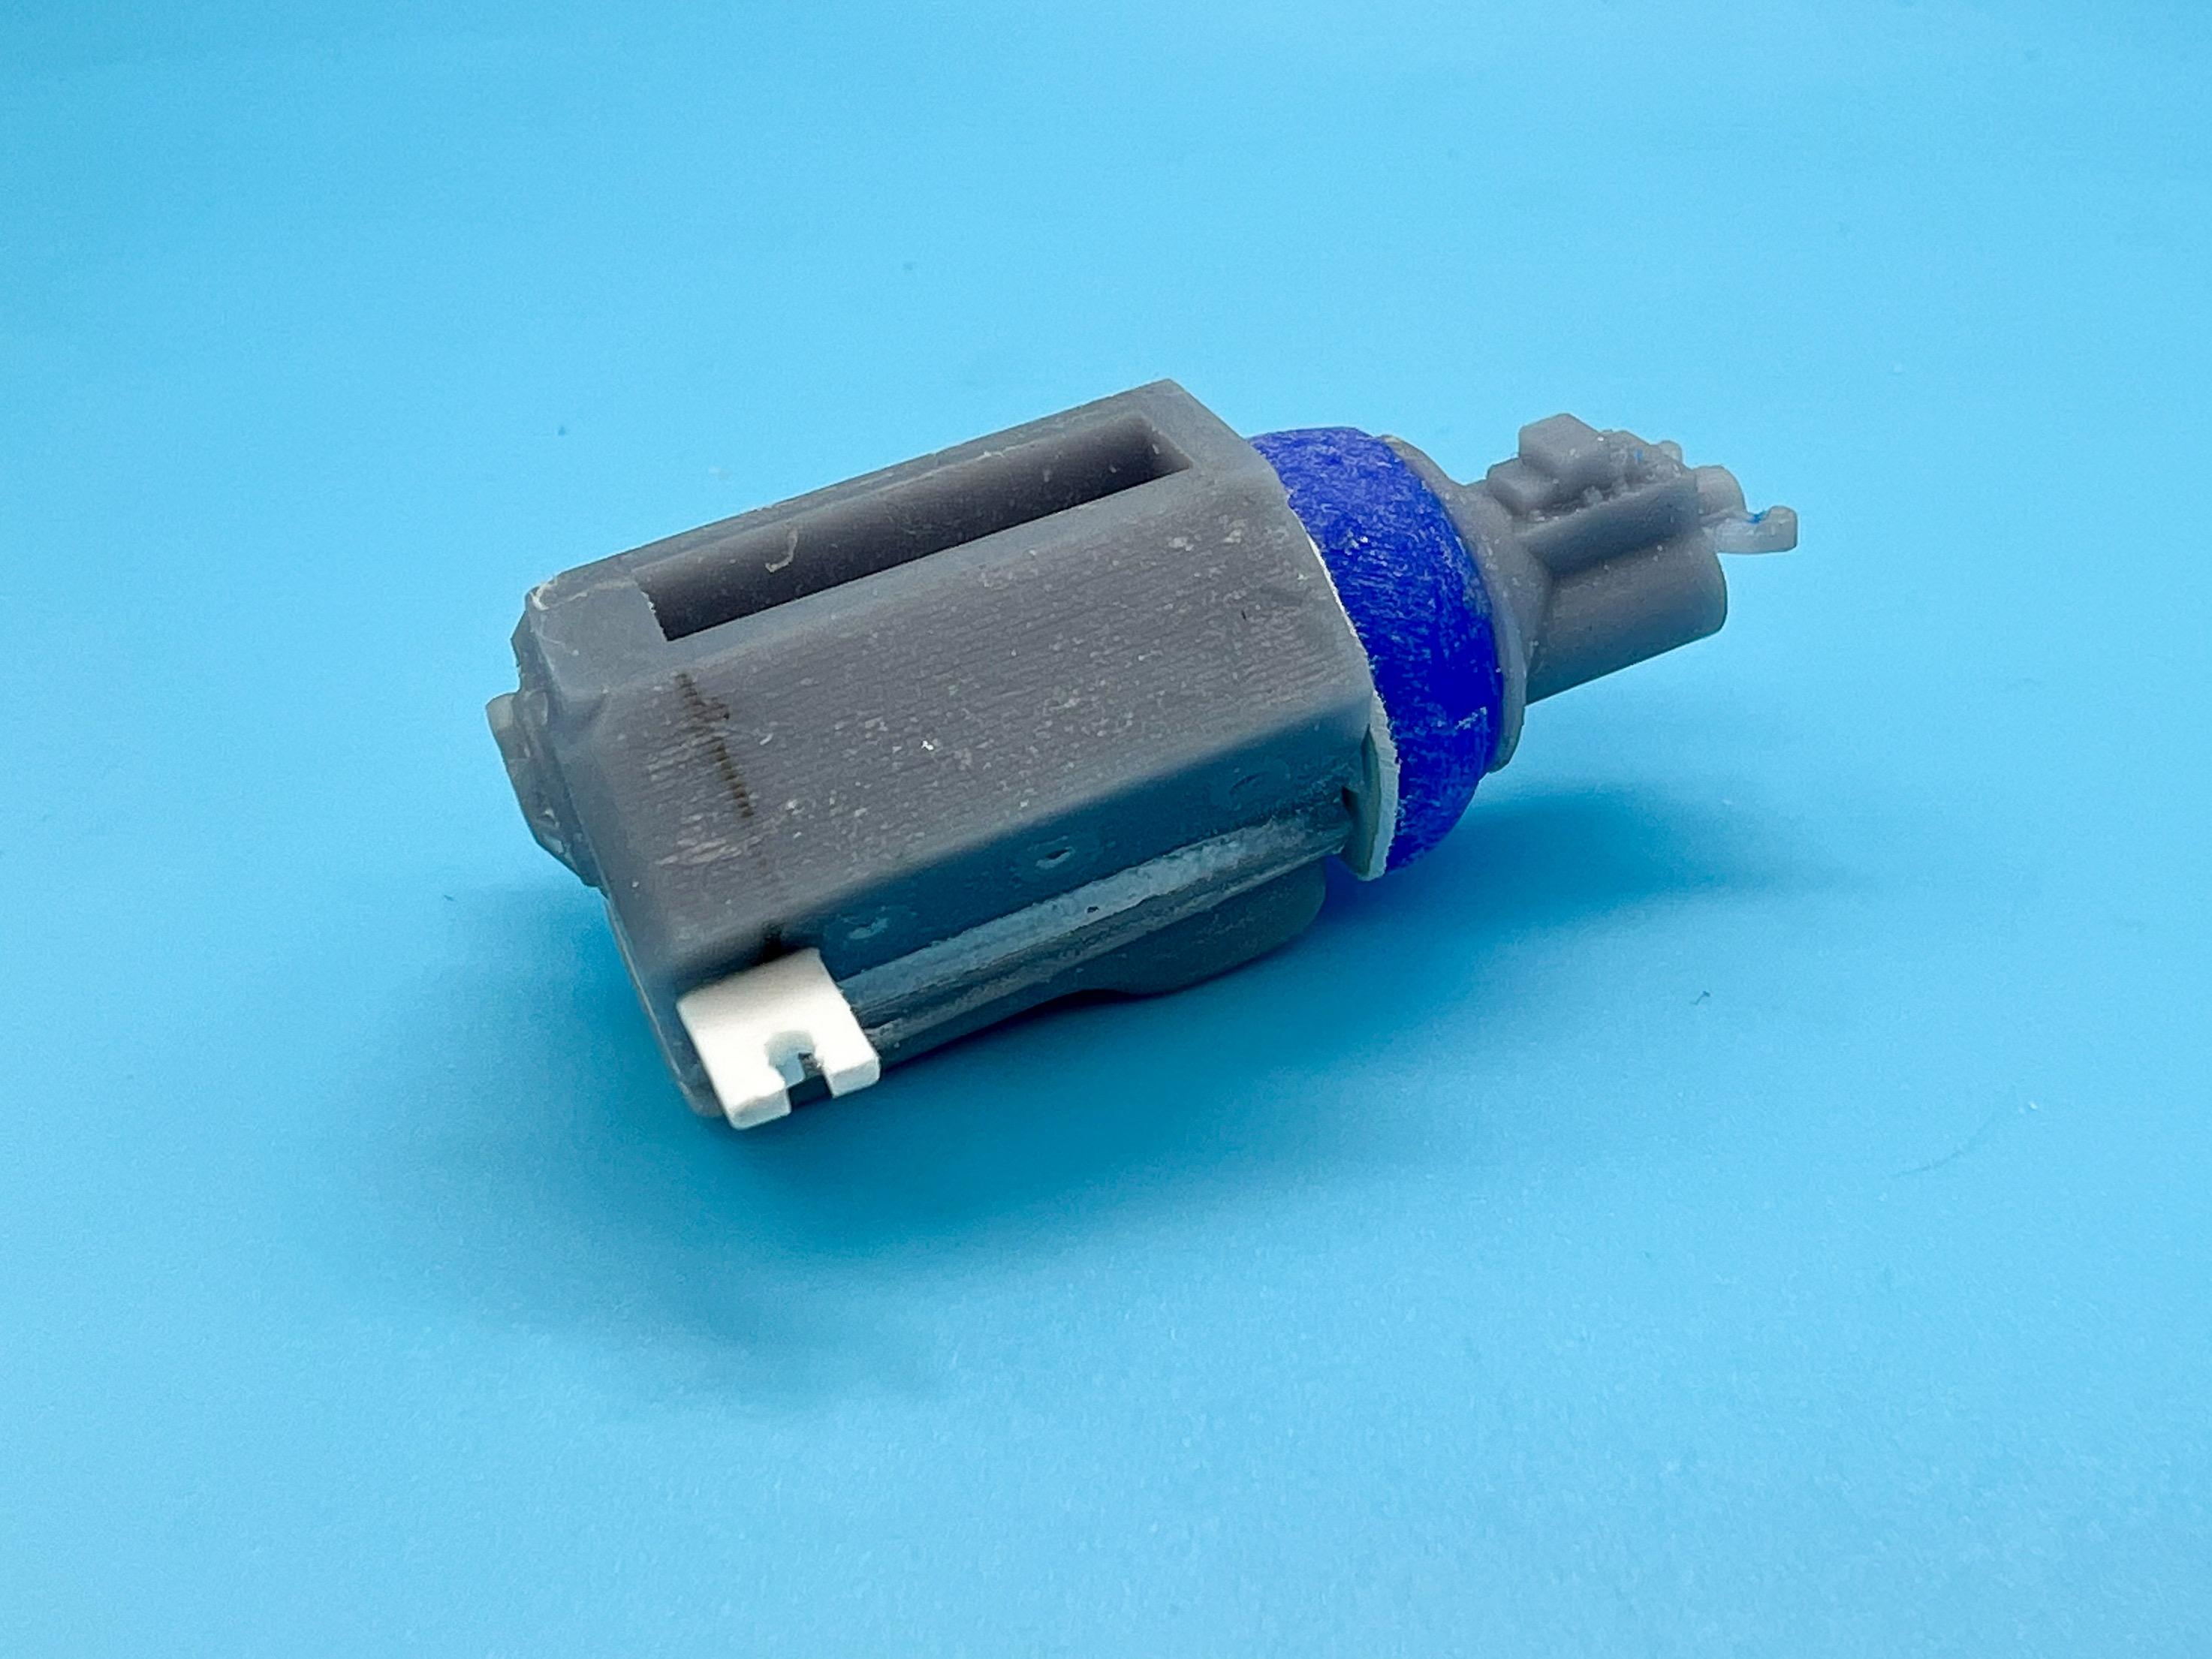
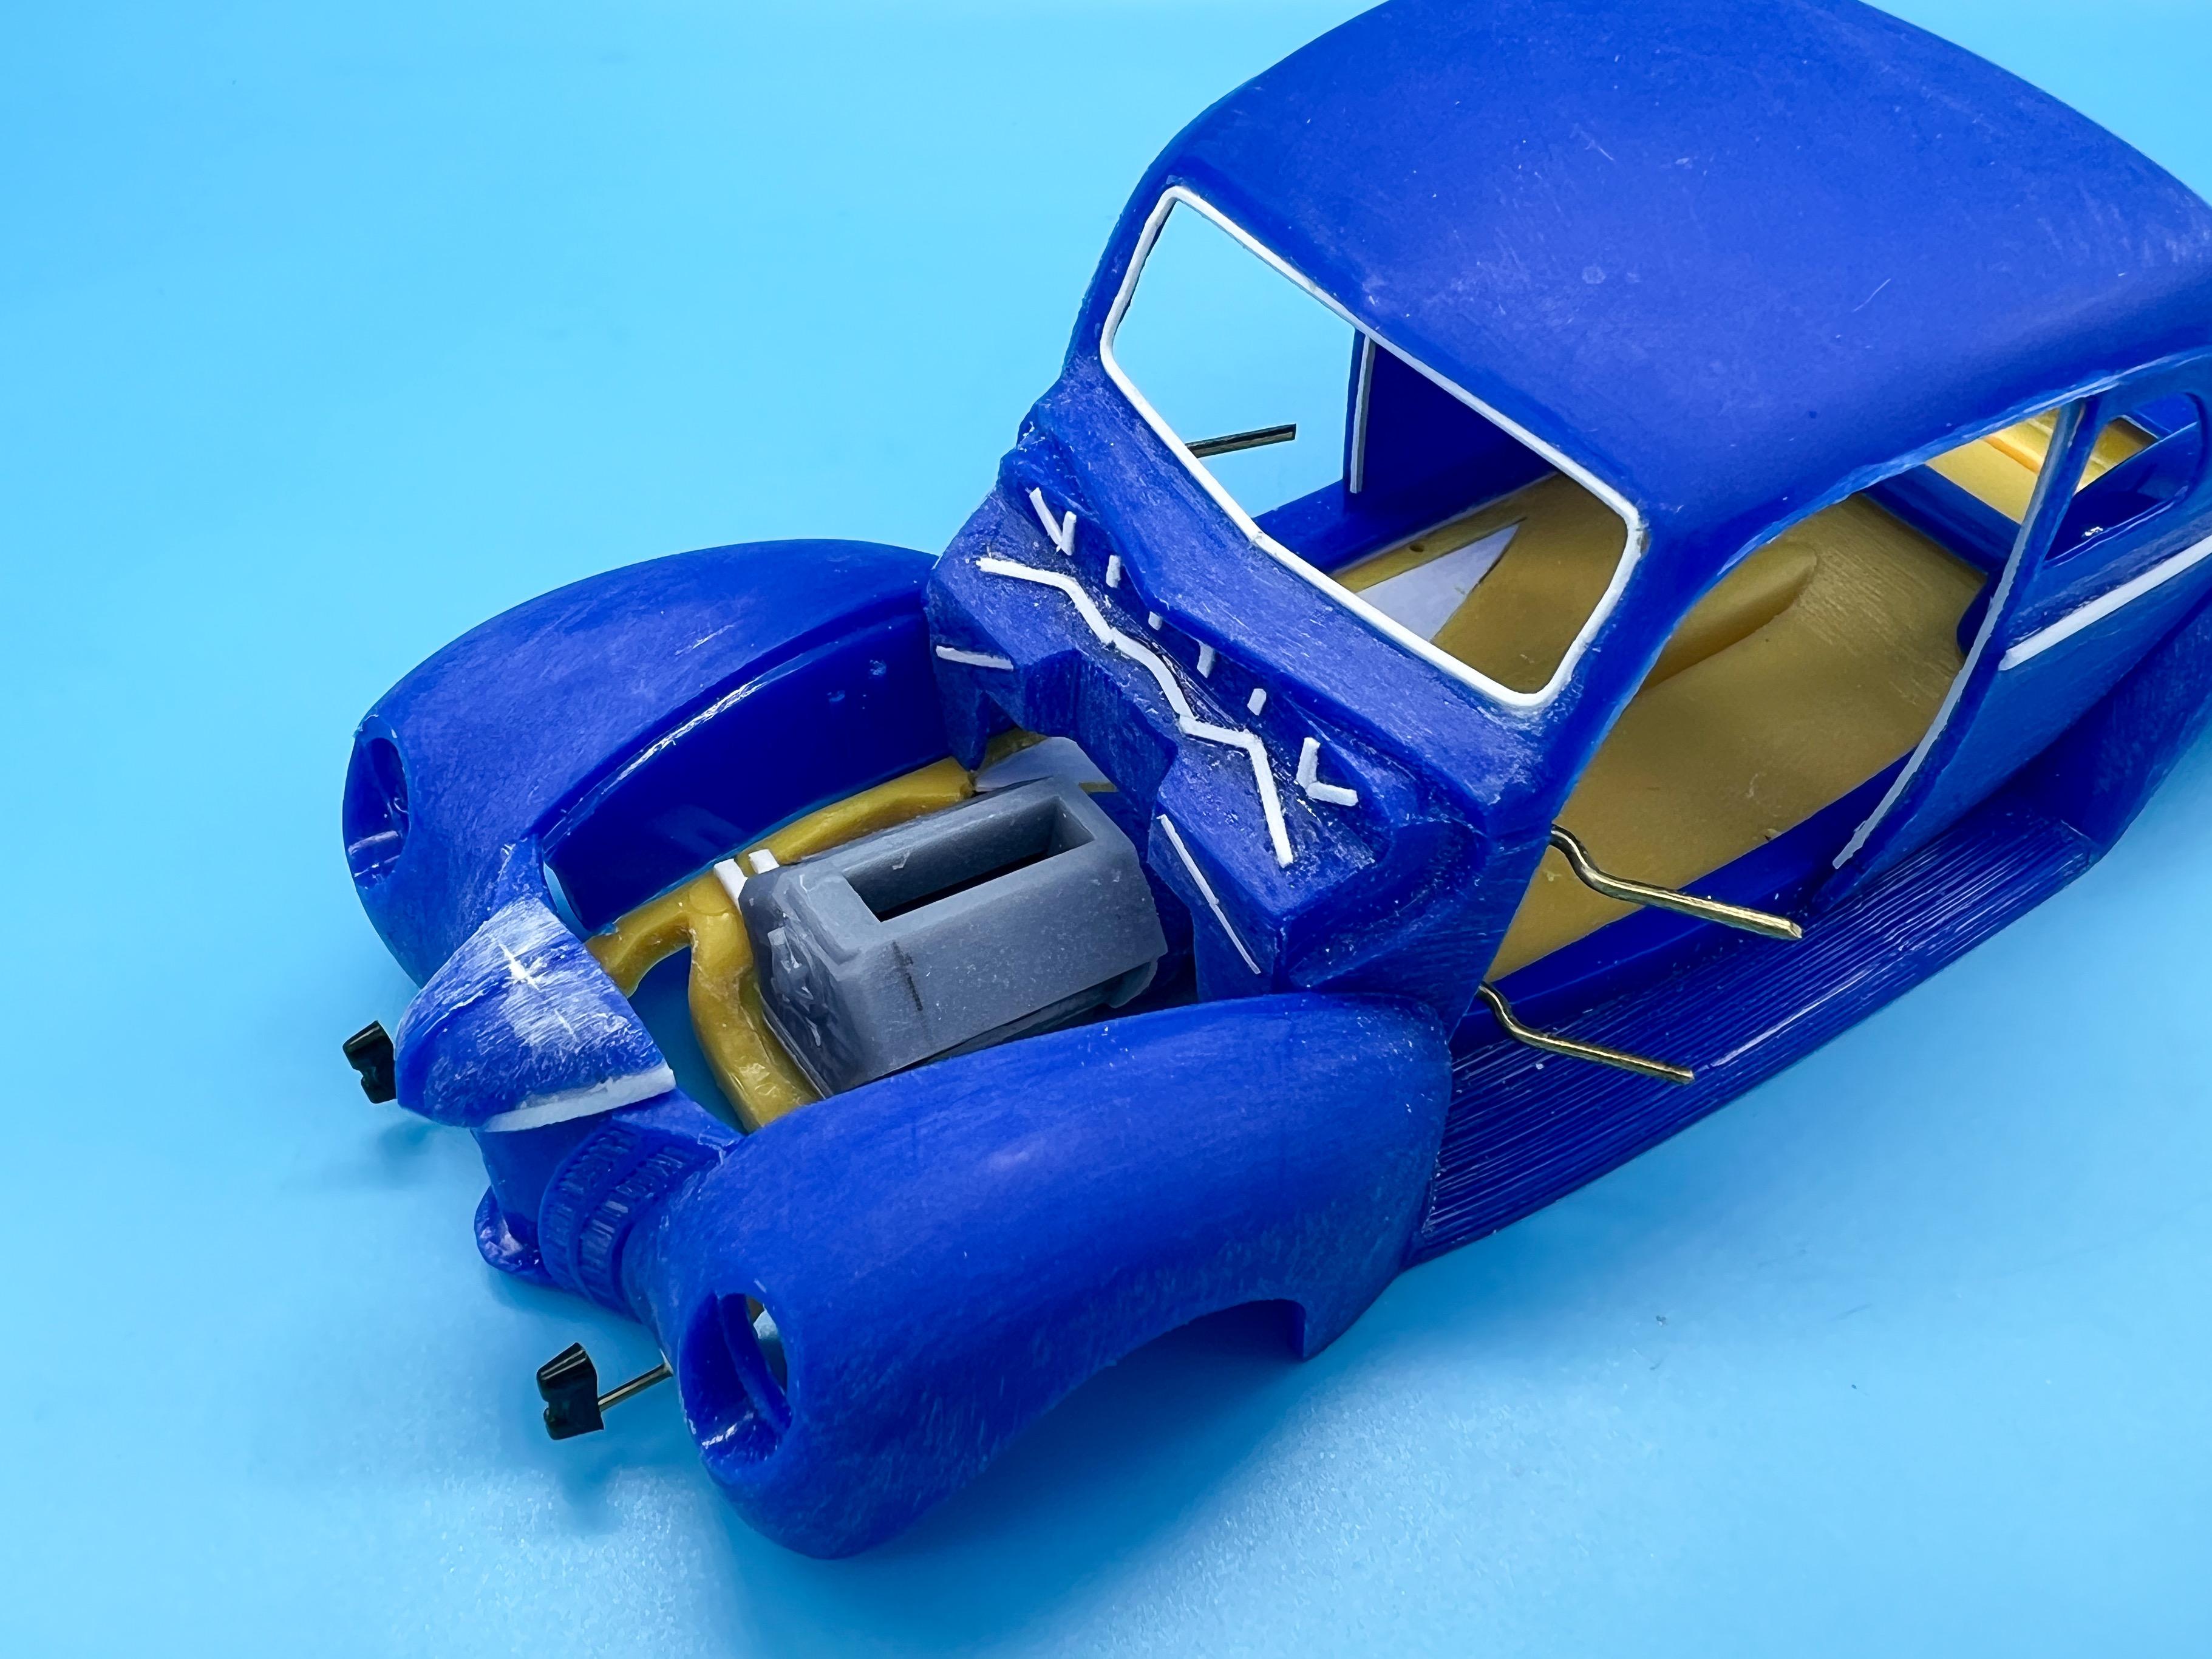
That’s a fine looking build too! That’s the Revell kit, I assume? I want to build one of those too! Today’s progress…first up, I wanted to fill that hole that’s revealed by not running a hood (so I used a piece of the hood…) Next job before I could get to priming was a test fit of the 3D printed Flathead I’m using - I don’t want any surprises or to be cutting up the firewall after paint…I used the bellhousing from the kit engine to mate the Flathead and the toploader trans together: (Those motor mounts will be skimmed down some once the glue is good and dry…) Test fit in the frame - it fits! And, the moment I’ve been waiting for…first coat of primer to hide that fugly blue color: And a mock-up with those 3D printed wheels and tires: Considering how much I had to sand on this body to get it straight and how much I’ve hacked it up, that’s not a bad start! But now the REAL bodywork begins… Thanks for looking - more soon, soon as I’ve done more!
-
Custom Decal Printing: Who Still Does It
OldNYJim replied to 69NovaYenko's topic in General Automotive Talk (Trucks and Cars)
I didn’t spot the half time ‘spottiness’ until I looked at these photos again - I wonder if some of that might be some fuzz from my camera or image compression. It definitely didn’t jump out during normal naked-eye viewing. I’m super pleased with their work though! Thanks for the recommendation! And yes, I sent them print ready Illustrator art - they had me make one tweak to it before it was how they needed it, but nothing major… I made an Adobe Illustrator format file, but they’ll work from anything vector based as I understand it. And Peteski’s right, some of them DO have a white layer underneath (I wanted the light colors to remain opaque if they’re laid down over something darker…) I tried them - sent them art made to their specifications and on their template and they never replied to my request for payment info. I gave them probably 6 weeks then gave up - business lost ?♂️ You got it Joe! -
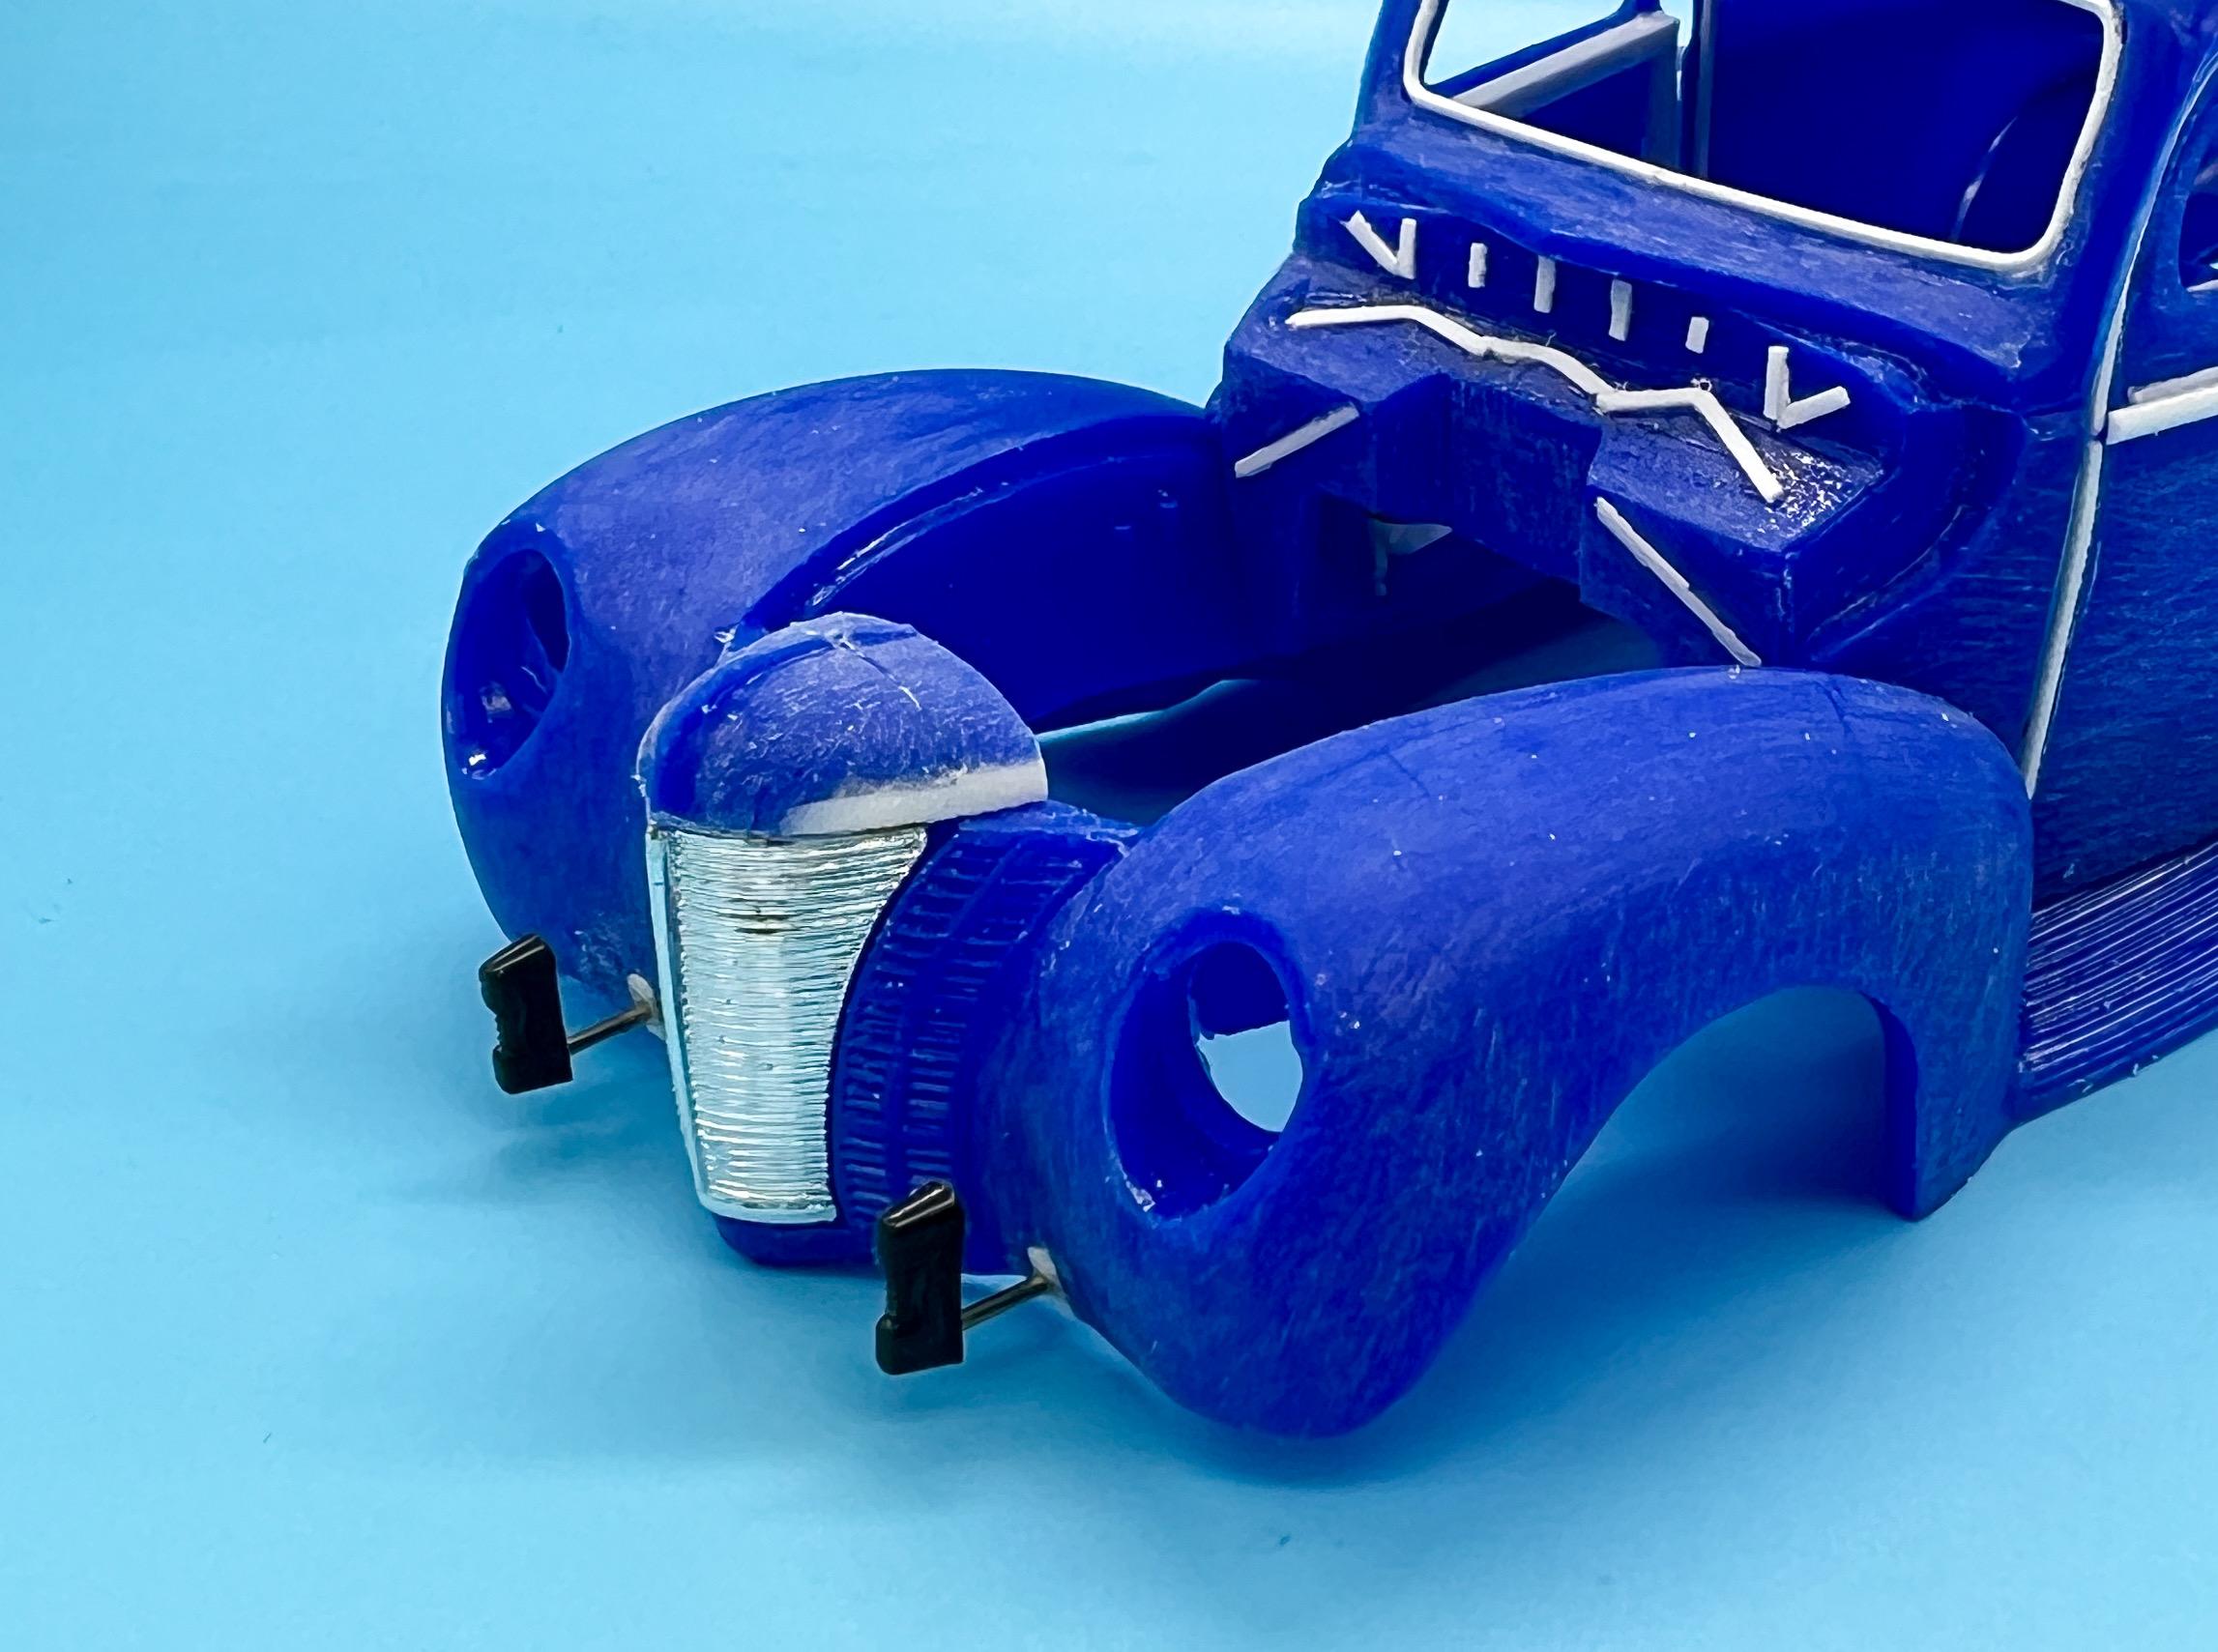
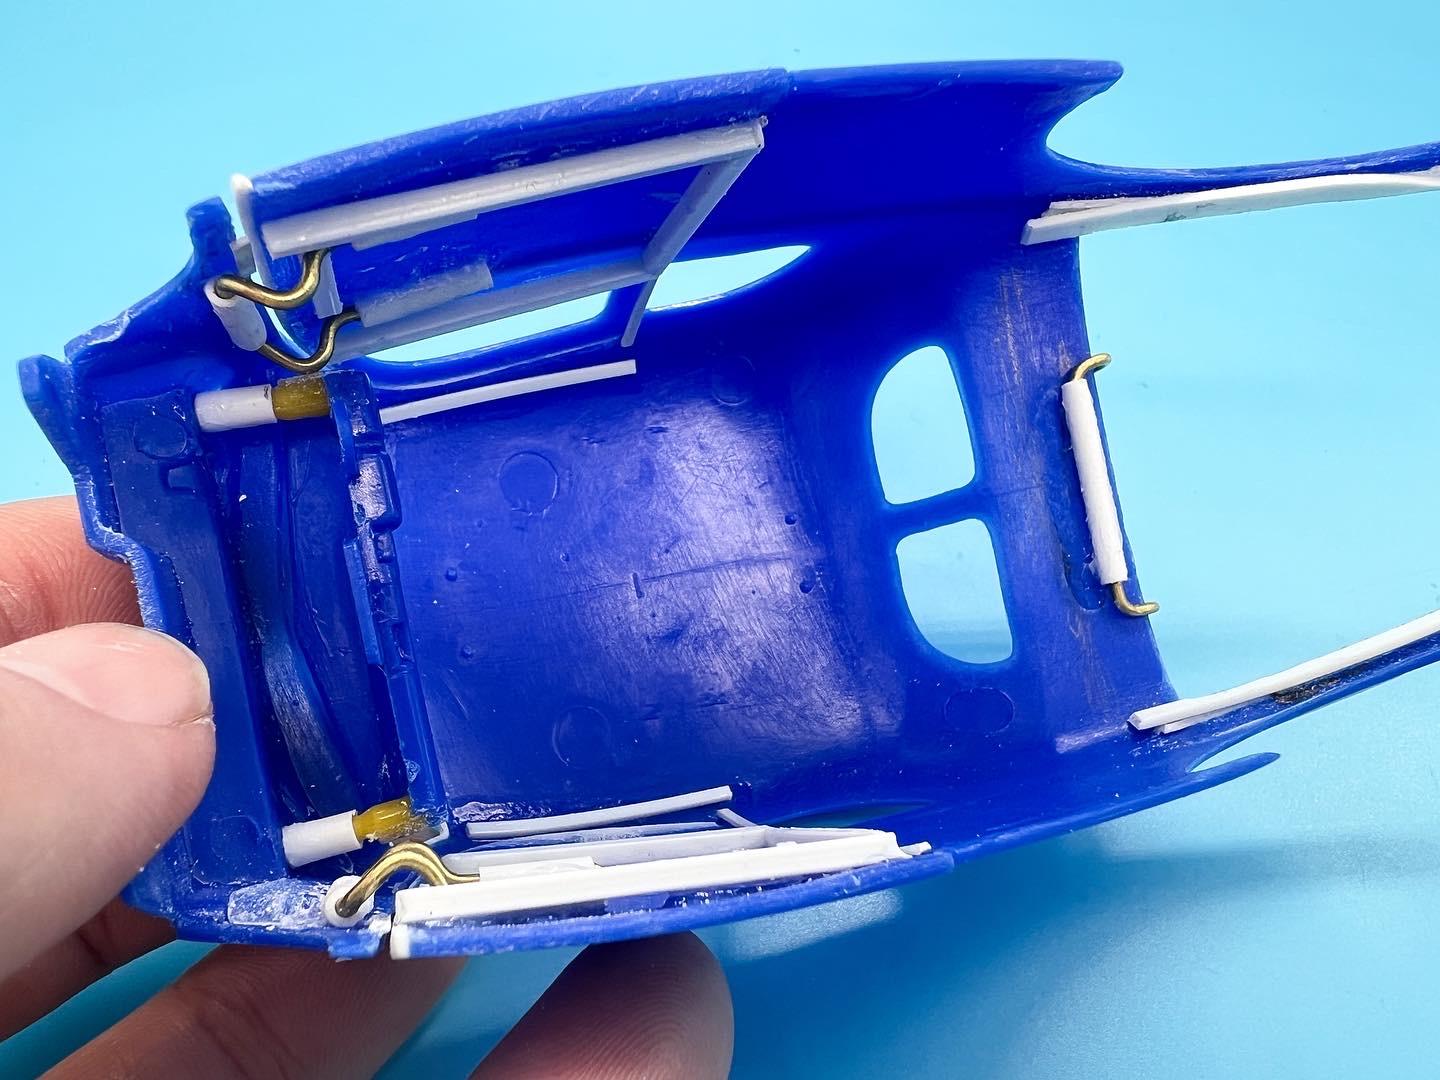
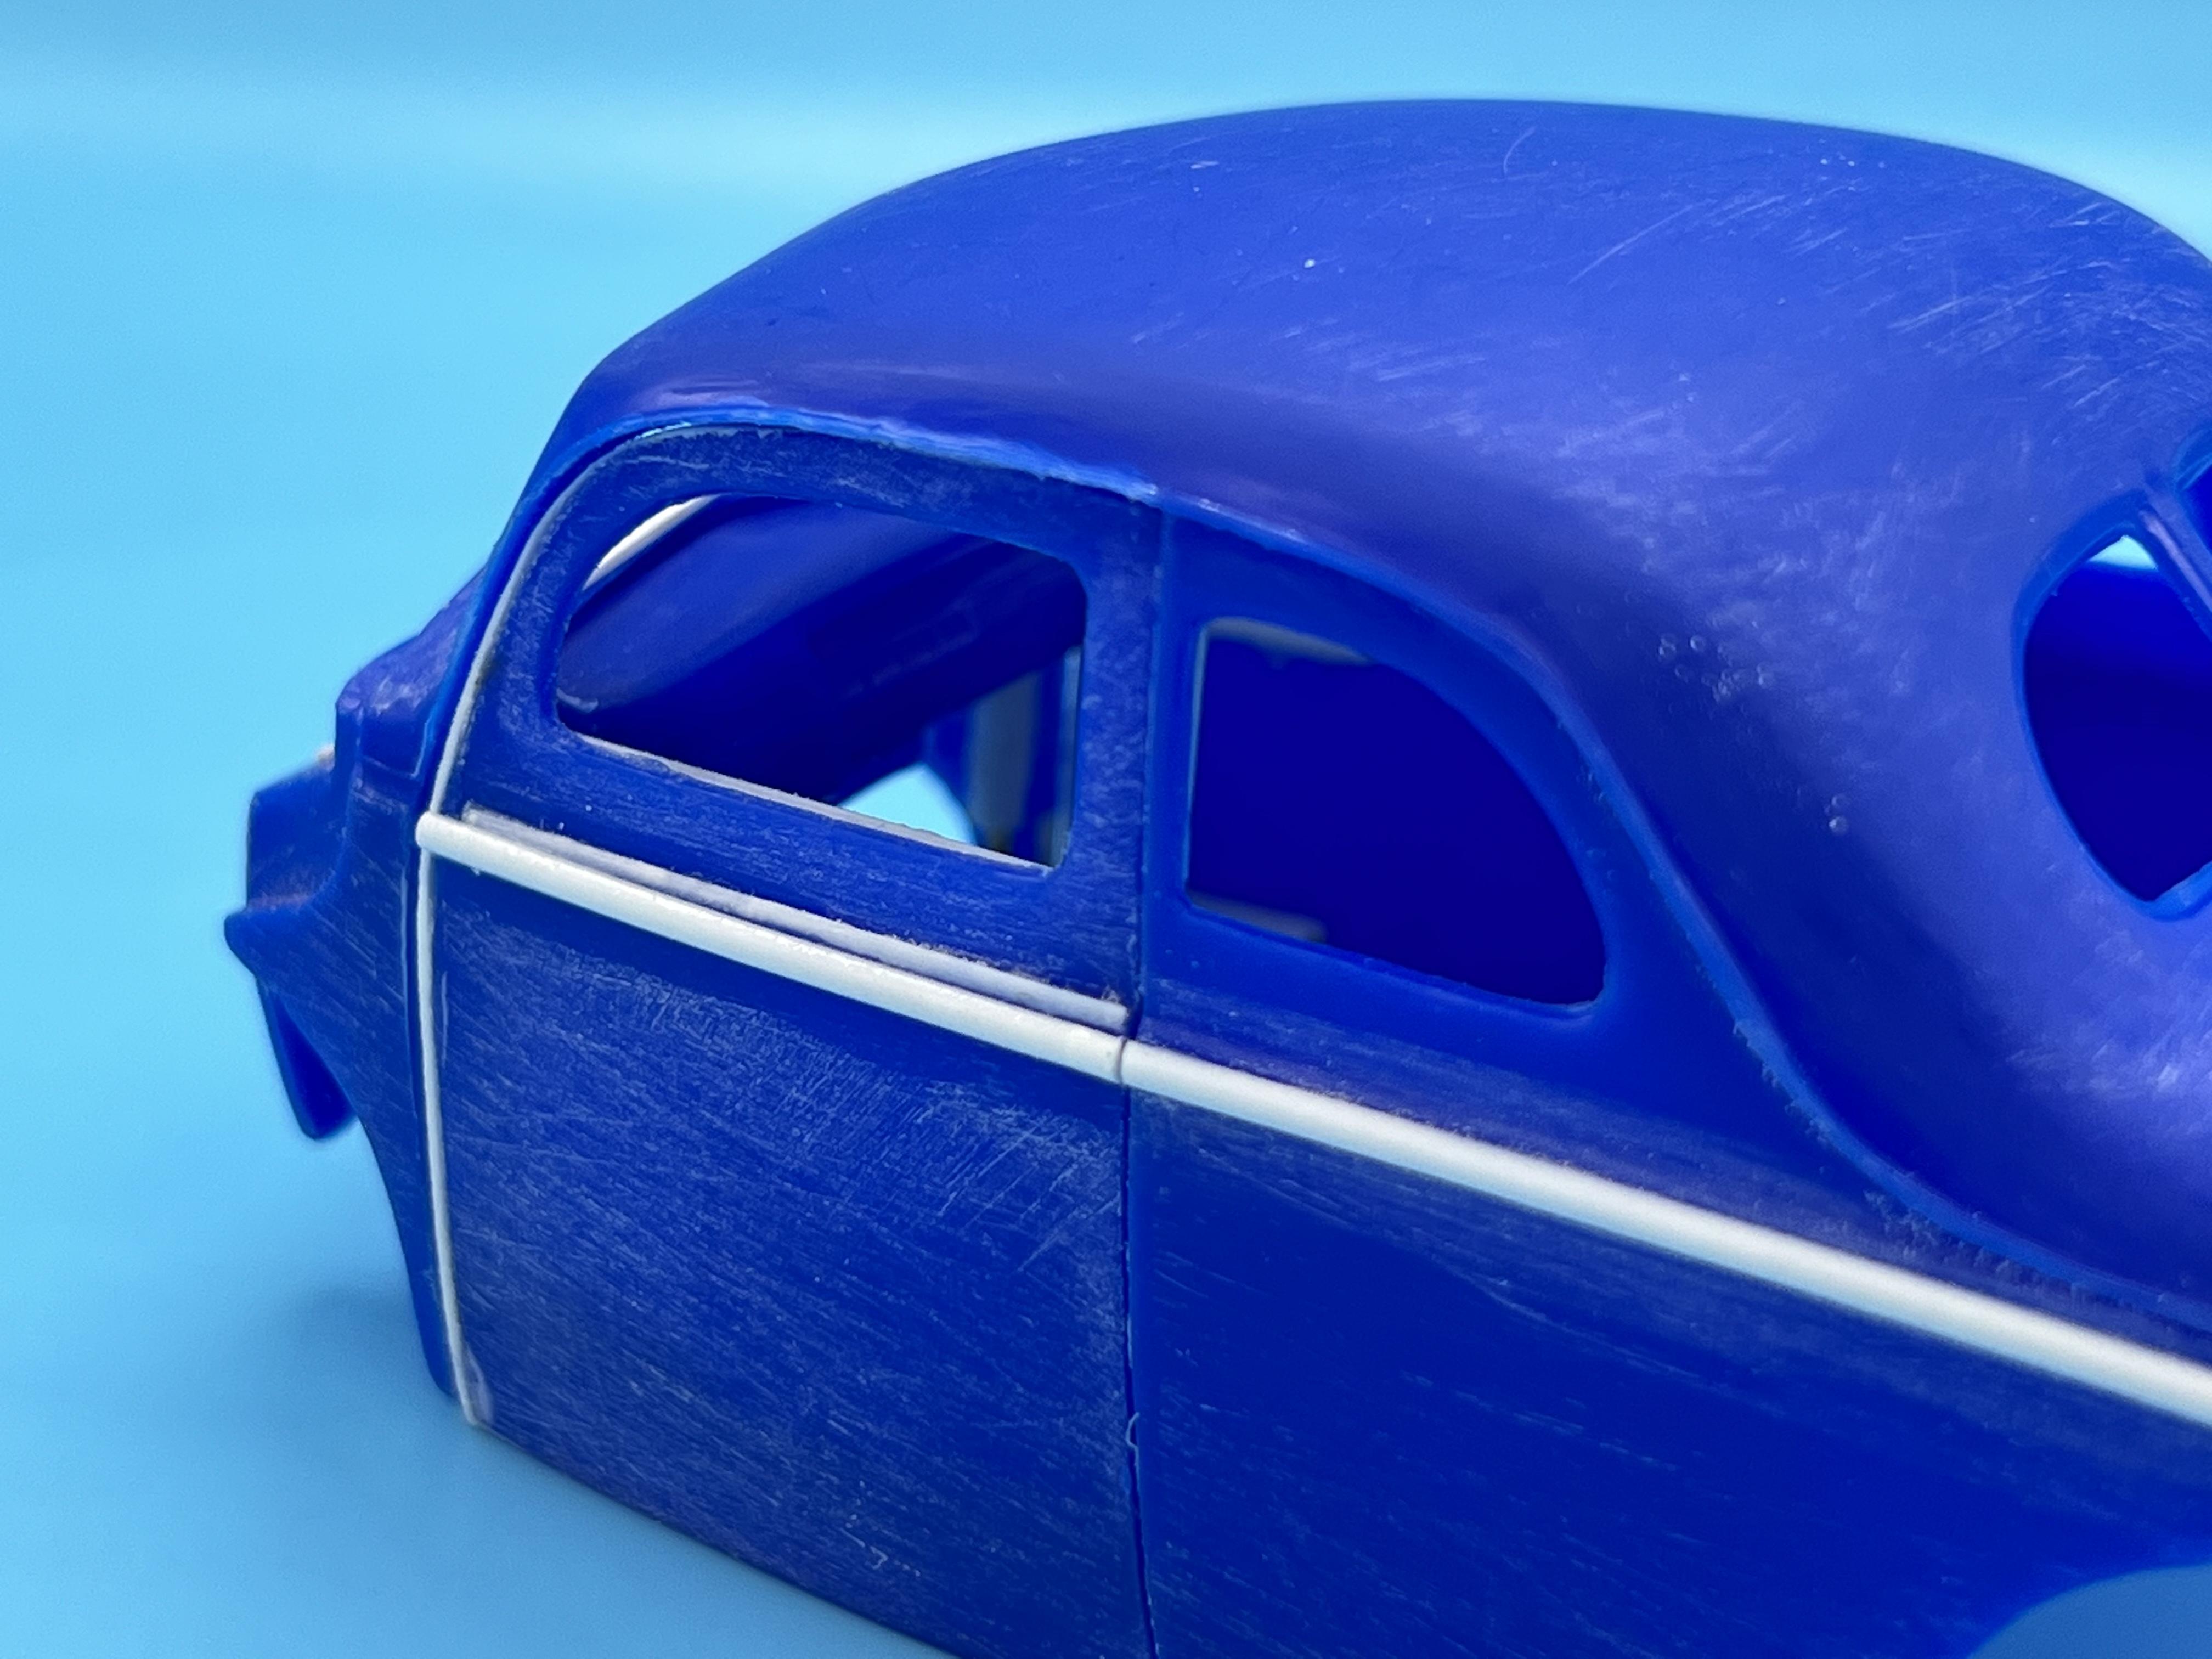
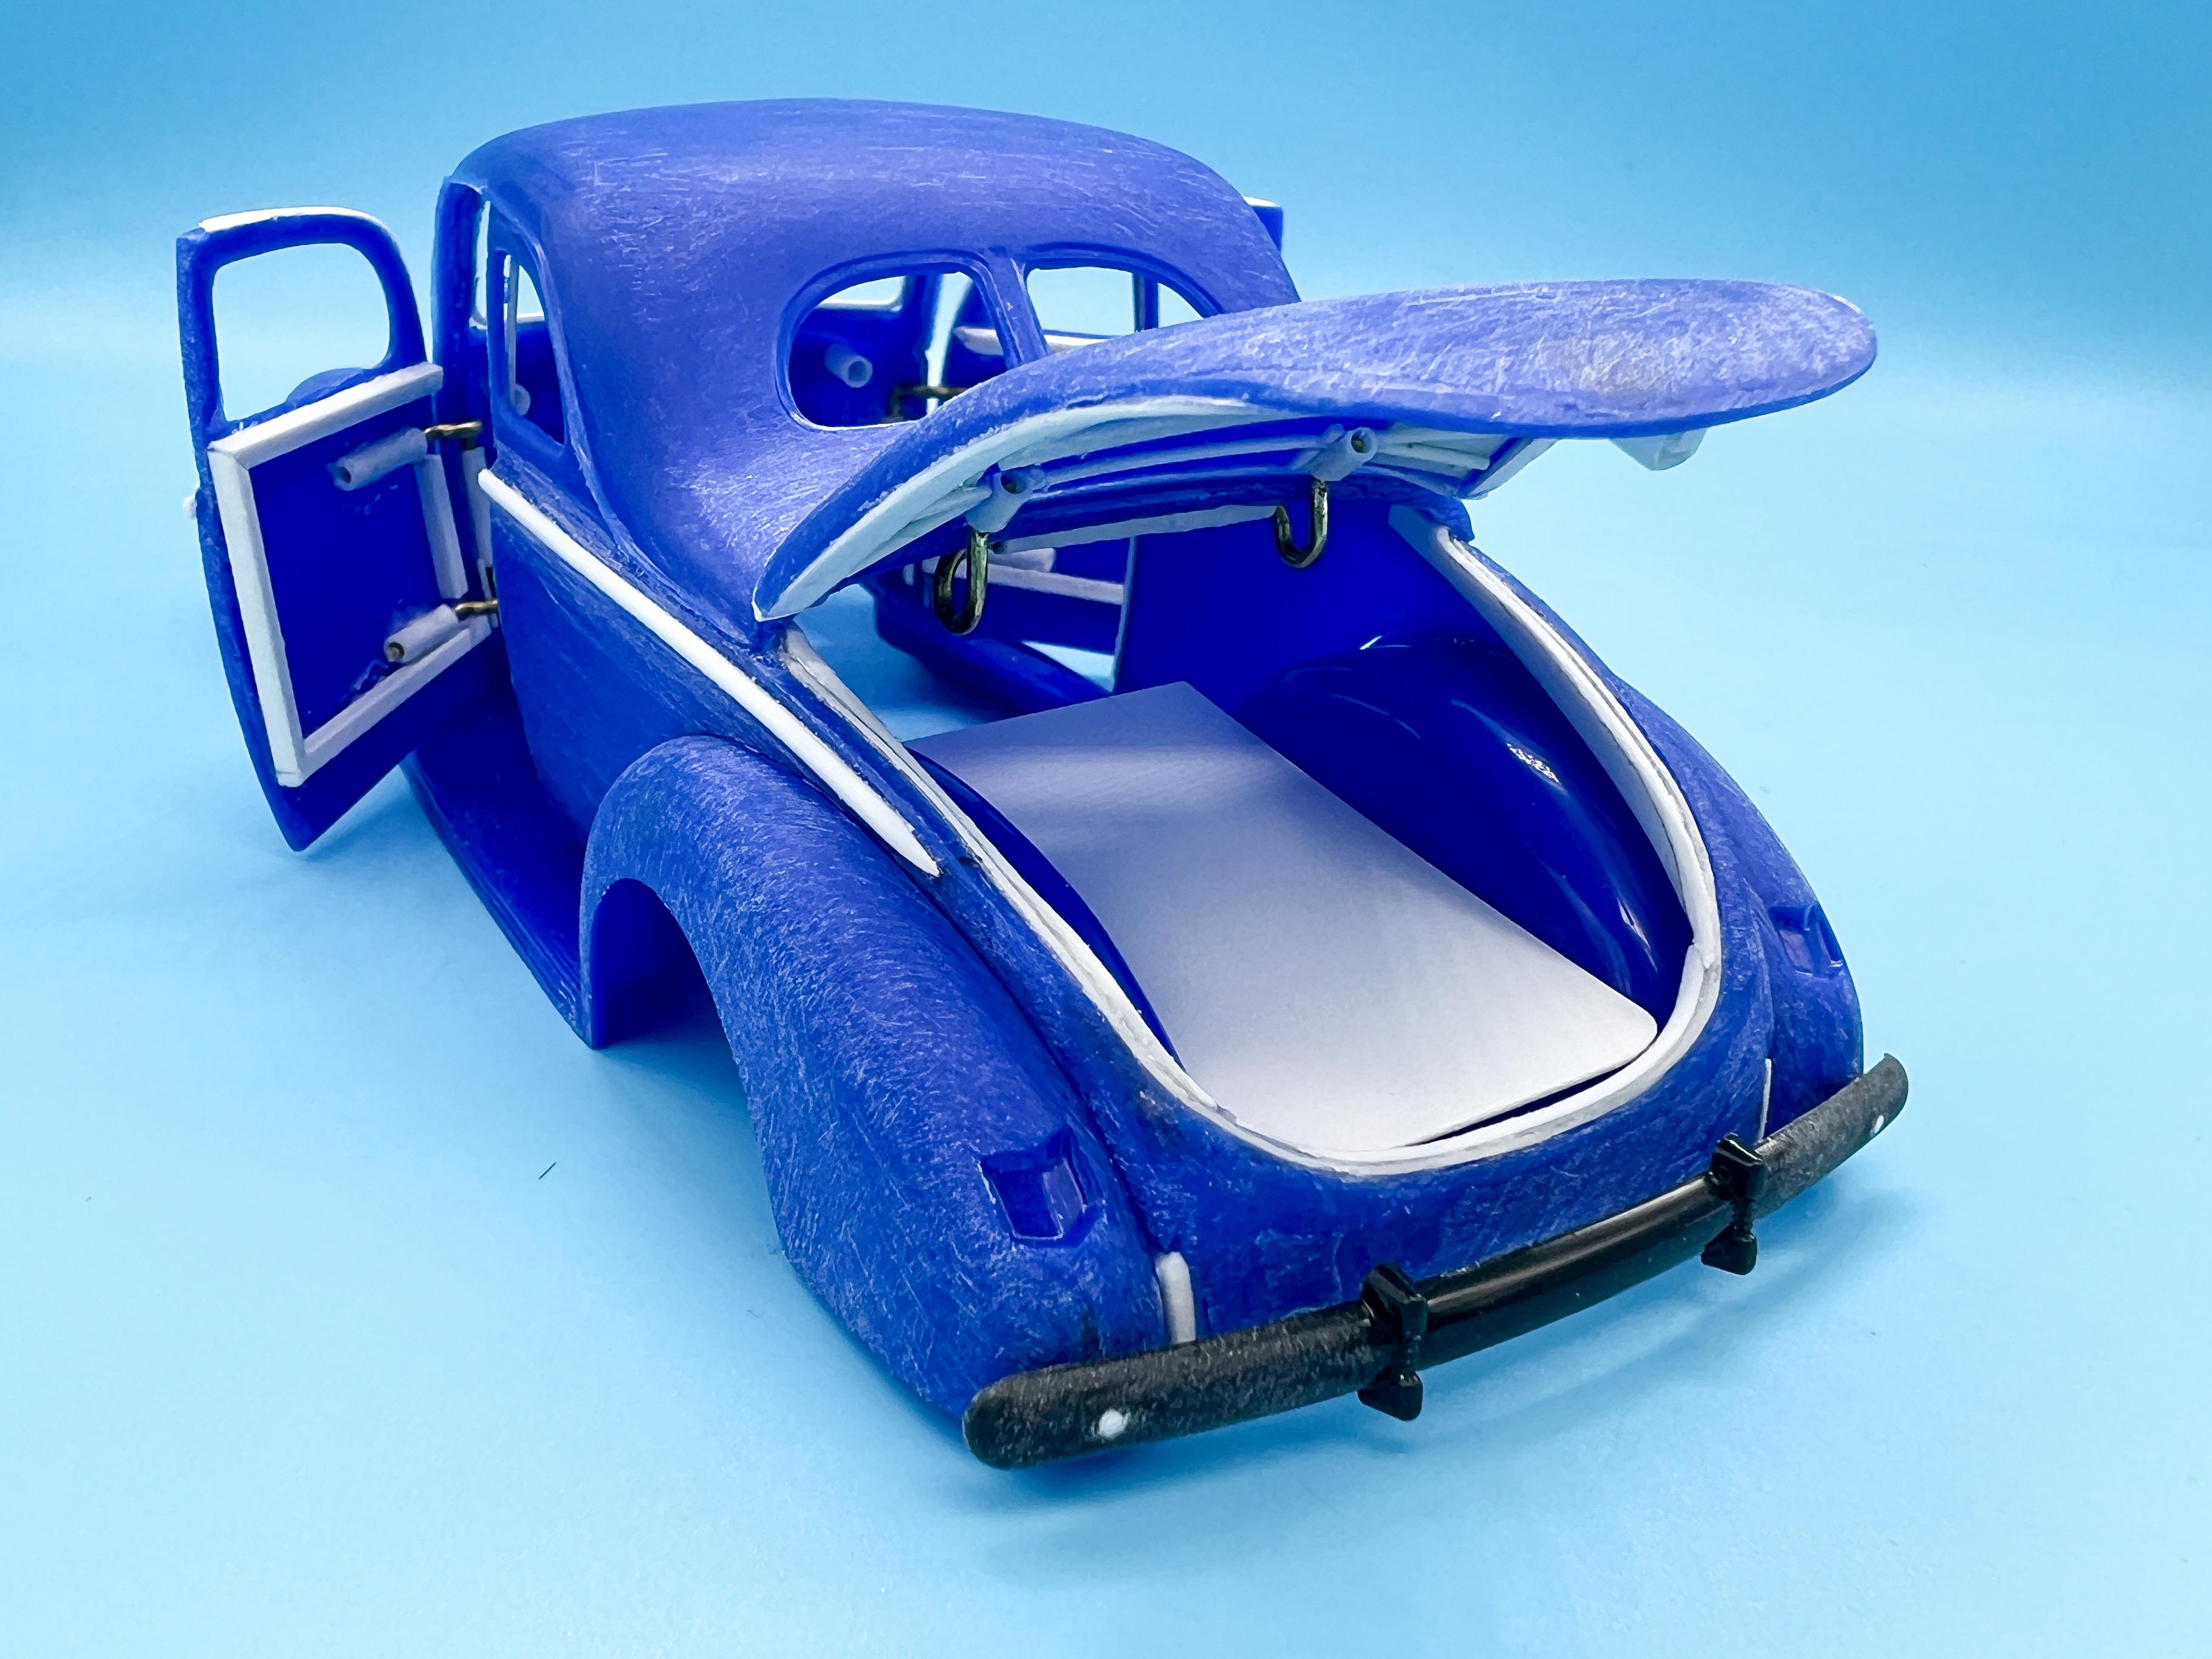
Another day at the bench… First project was figuring out how to attach the dash to everything else. It USED to attach to the interior tub, until I stupidly opened the doors and made that impossible ?. I ended up gluing some tapered plastic pins to the back of the dash, and some receivers inside the body - perfect push-fit every time! Everything clears… And the doors still close properly! Next thing I wanted to wrap up before primer was figuring out bumpers. 40s look completely different to me without bumpers; it changes the whole look of the car. I decided early on I’m going for a more traditional look, but I don’t like how far the rear bumper hangs out from the back of the body on a 40 (although I get why), so I removed the mounting brackets from the frame and tucked that thing in nice and tight: I couldn’t decide between designing some nerf bars for the front of the car, or modifying the stock bumper…I tried dropping it down low (looked ok, but too wide) narrowing it (looked better, but covered too much of the grille), removing the center section (looked like the center was missing), having no bumper at all (looked like the bumper was missing) before ending up with ‘nerf bars’ made out of the distinctive upright ‘teeth’ on the stock bumper: I haven’t seen this done before, but I like it, and I think they’ll look cool in chrome! Another step closer to that first coat of primer…thanks for looking, more soon!