OldNYJim
-
Posts
250 -
Joined
-
Last visited
Content Type
Profiles
Forums
Events
Gallery
Everything posted by OldNYJim
-

The Zen of Model Building
OldNYJim replied to afx's topic in General Automotive Talk (Trucks and Cars)
A comment I’ve seen more than once on your build threads Steve is “but you won’t see it when it’s done” - particularly relating to your masterful detailed-up interiors. Those comments are somewhat missing the point, in my opinion. Same way I stop at the rural stop sign in the middle of nowhere on my commute home every day even though 9.5 times out of 10, there’s no one to stop for and no one would see me if I didn’t. Like a modeling conscience! If you don’t do it, you’ll always know you didn’t… Plus, of course, we get to see those details whilst they’re in progress, even if they may not be very obvious when the project is done. All part of the journey! -
Revell 32 Ford Roadster REVISED (former Rat Roaster tool)
OldNYJim replied to Mr. Metallic's topic in Car Kit News & Reviews
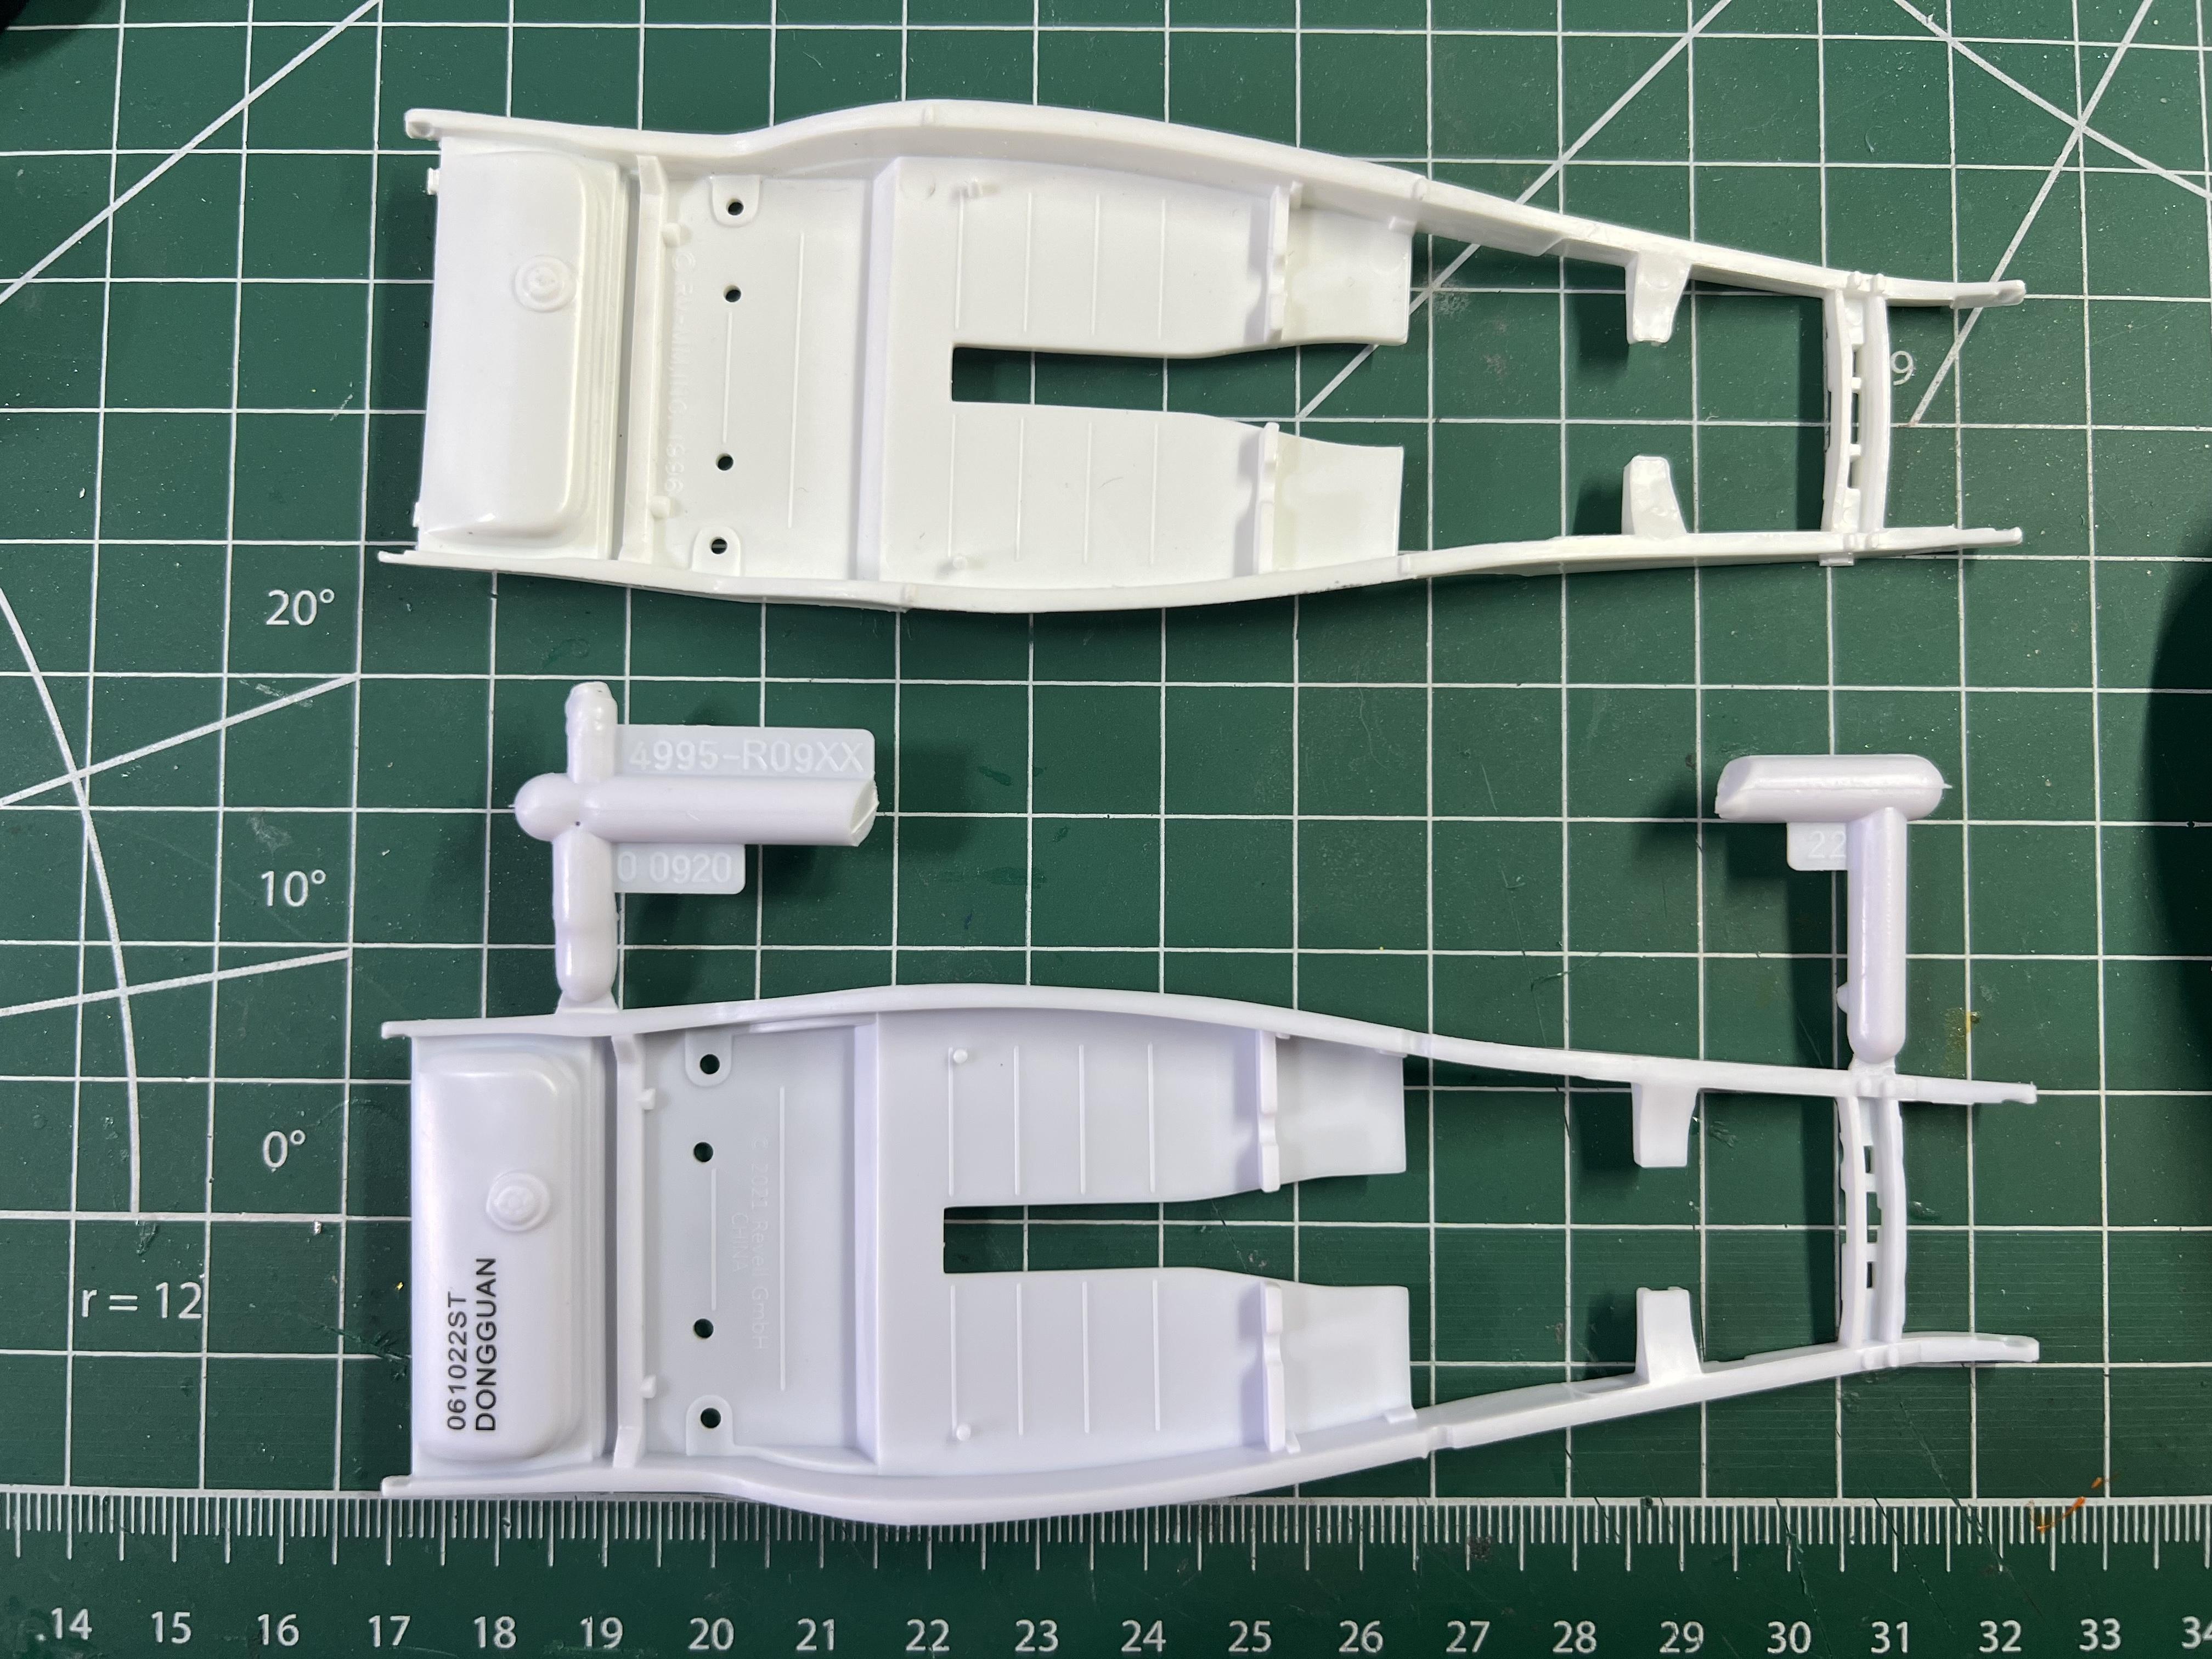
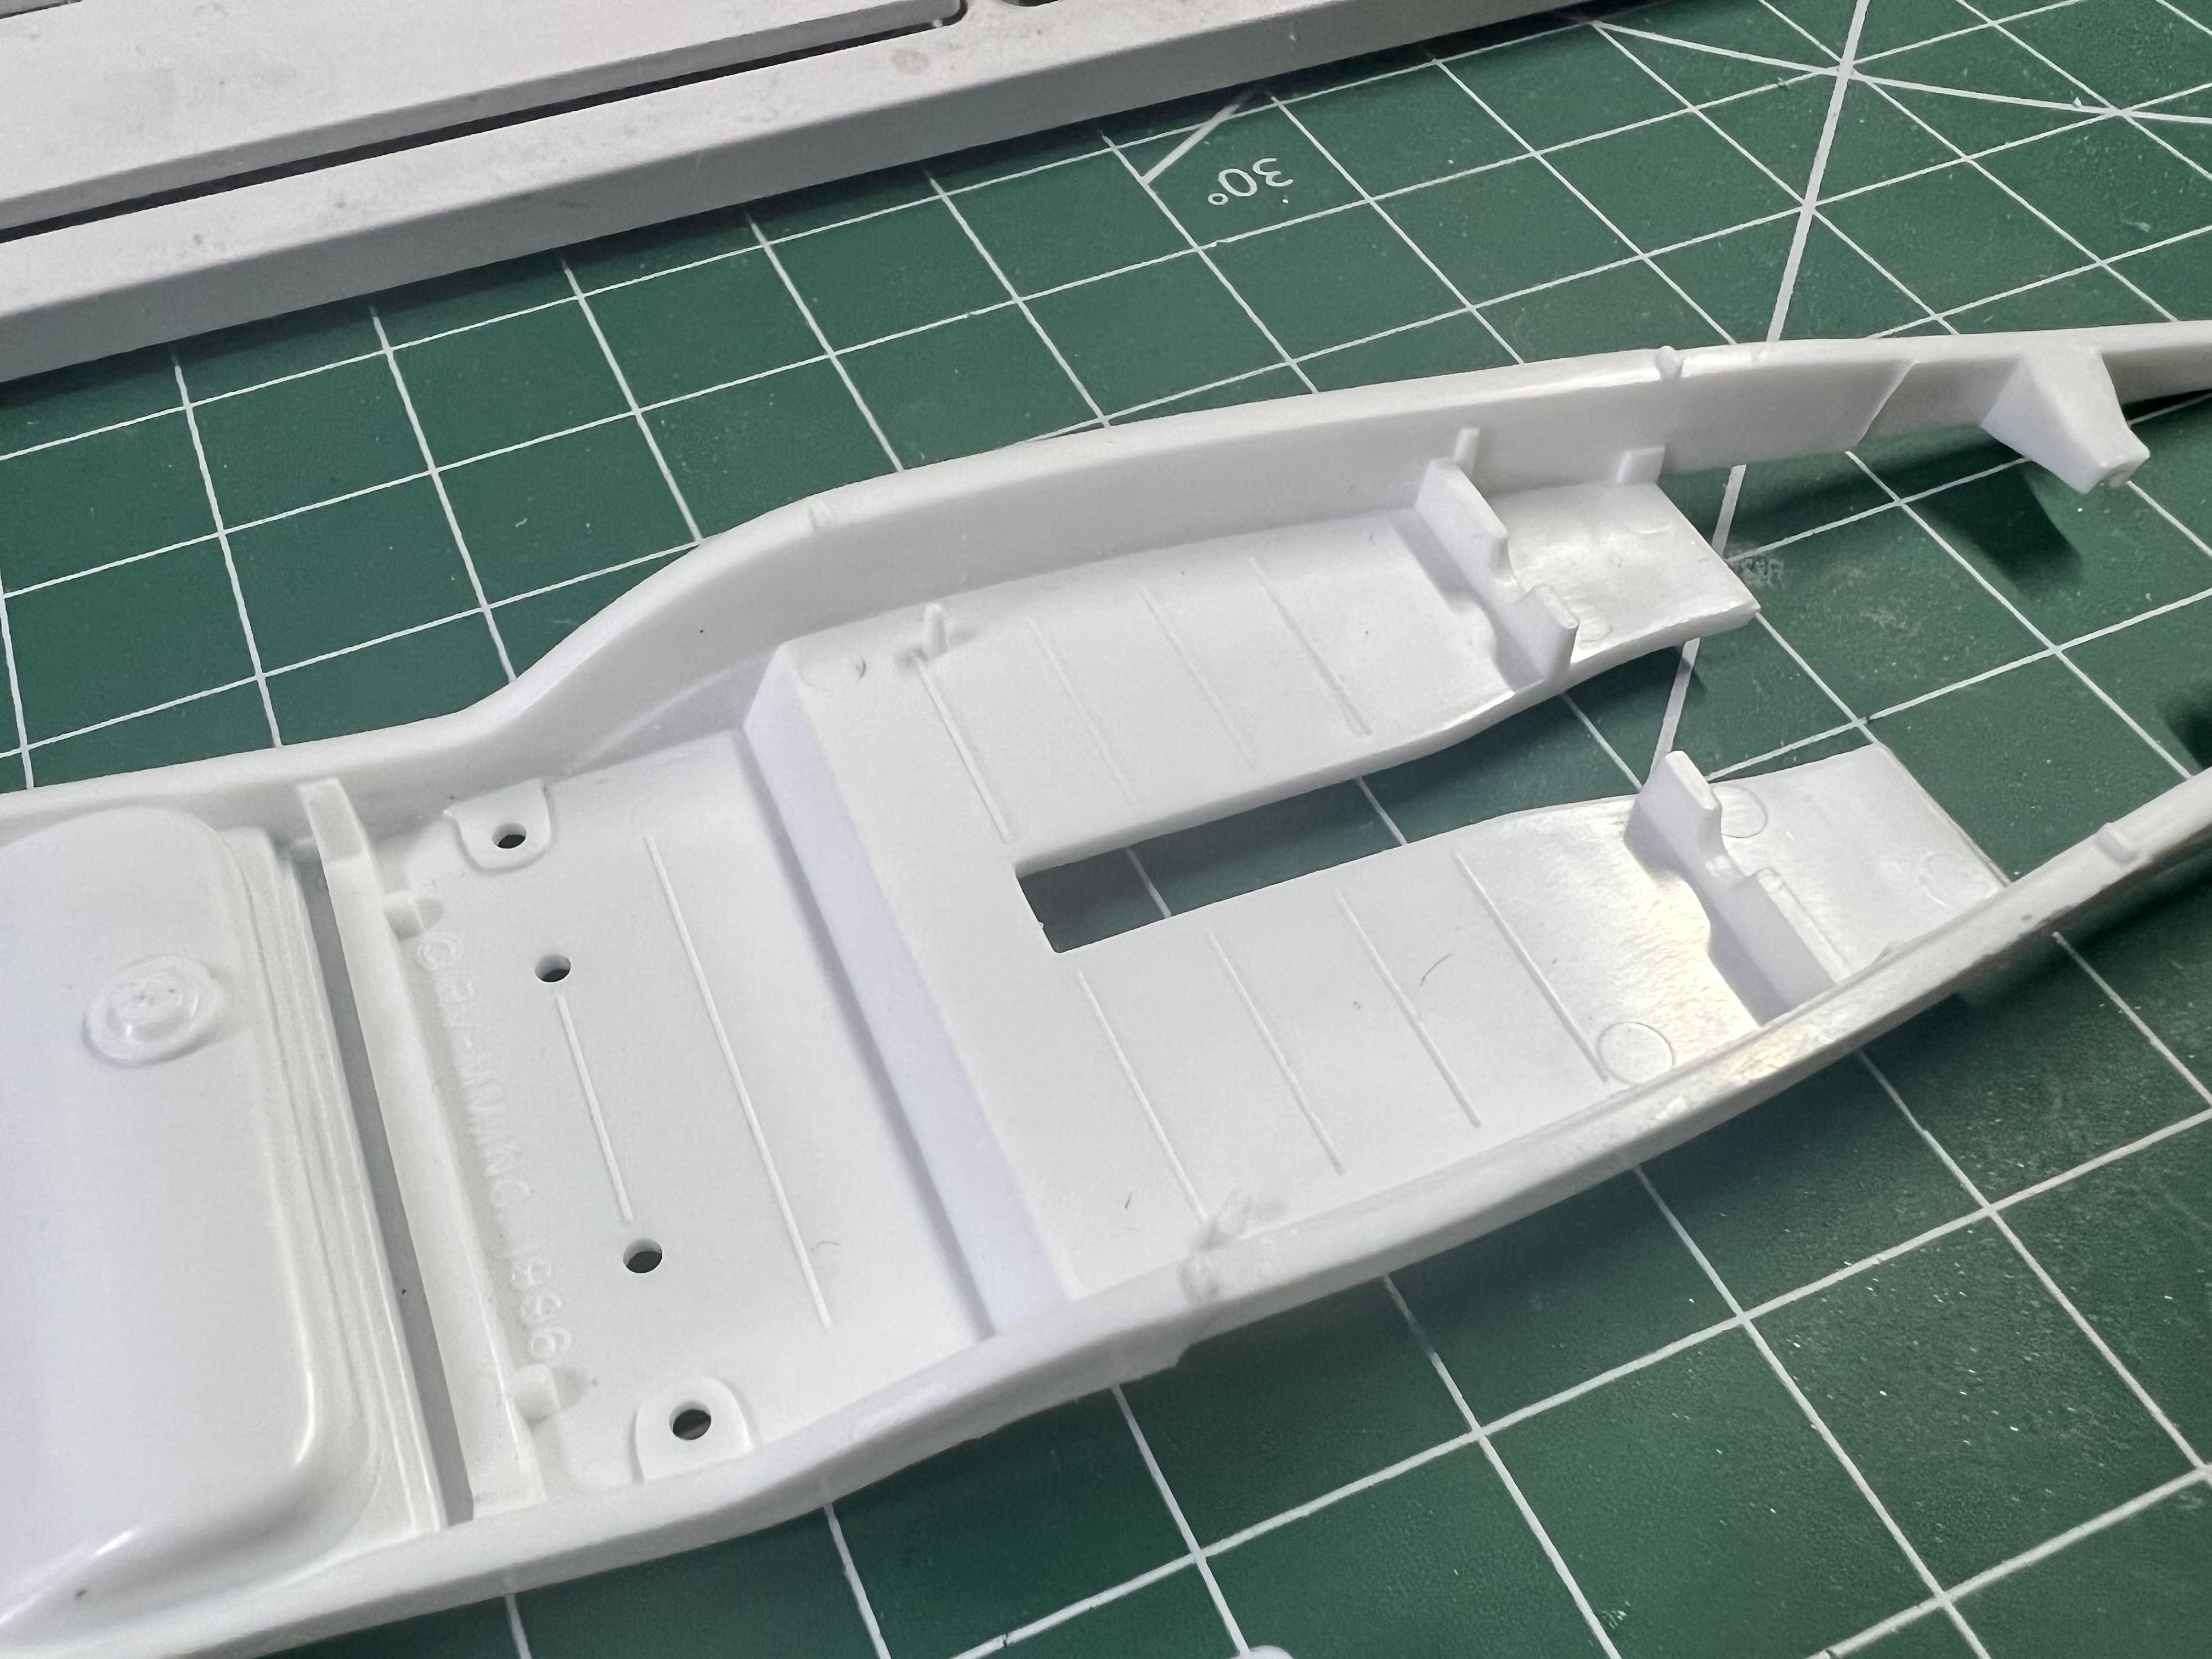
Following on from my previous post, and Tim’s comments above, I broke out my new Roadster frame and compared to an original ‘96 version. Turns out, as Tim notes, there’s some nice corrections, including that improved curve from the mid to the back of the frame…but best of all for me is that they DID do something about those awkward-to-clean-up ejector pin marks hidden down in the floorboards on all the original kits. You can kinda make them out here - there’s eight in total, plus the copyright notice: On the new one…not a single ejector pin on the bottom of the frame. Still has the copyright notice, with updated date, but WAY WAY WAY better:
-
Revell 32 Ford Roadster REVISED (former Rat Roaster tool)
OldNYJim replied to Mr. Metallic's topic in Car Kit News & Reviews
Interesting to note that this frame is the only one in the Revell 32 Series (I think) that has the notch in the frame rails for the exhaust. I hadn’t immediately spotted that. About the worse part of this entire series of kits for me was the awkward ejector pin marks on the floorboards under the frame. I didn’t unwrap my kit yet, but if they did something to help make that chore less chore-like then that would be a real bonus -
Cell phone cameras...what do you use & why?
OldNYJim replied to thatz4u's topic in Model Building Questions and Answers
I just got an iPhone 13 Pro - T-Mobile had a good deal on them. I like the Pro model because it has three lenses, including one for close-up macro type shots. Seems to work great for me! My wife’s Canon SLR camera still has it beat on about every level, but it’s amazing how good phone cameras are now… -
Aftermarket Air Filter
OldNYJim replied to TransAmMike's topic in Model Building Questions and Answers
I never tried it, but I'd look at a pair of earbuds for a perfect little piece of mesh to go on top of one of those pieces. A lot of them even have that nice dome shape already -
December Parts Box Build - a little Lincoln hot rod!
OldNYJim replied to OldNYJim's topic in WIP: Model Cars
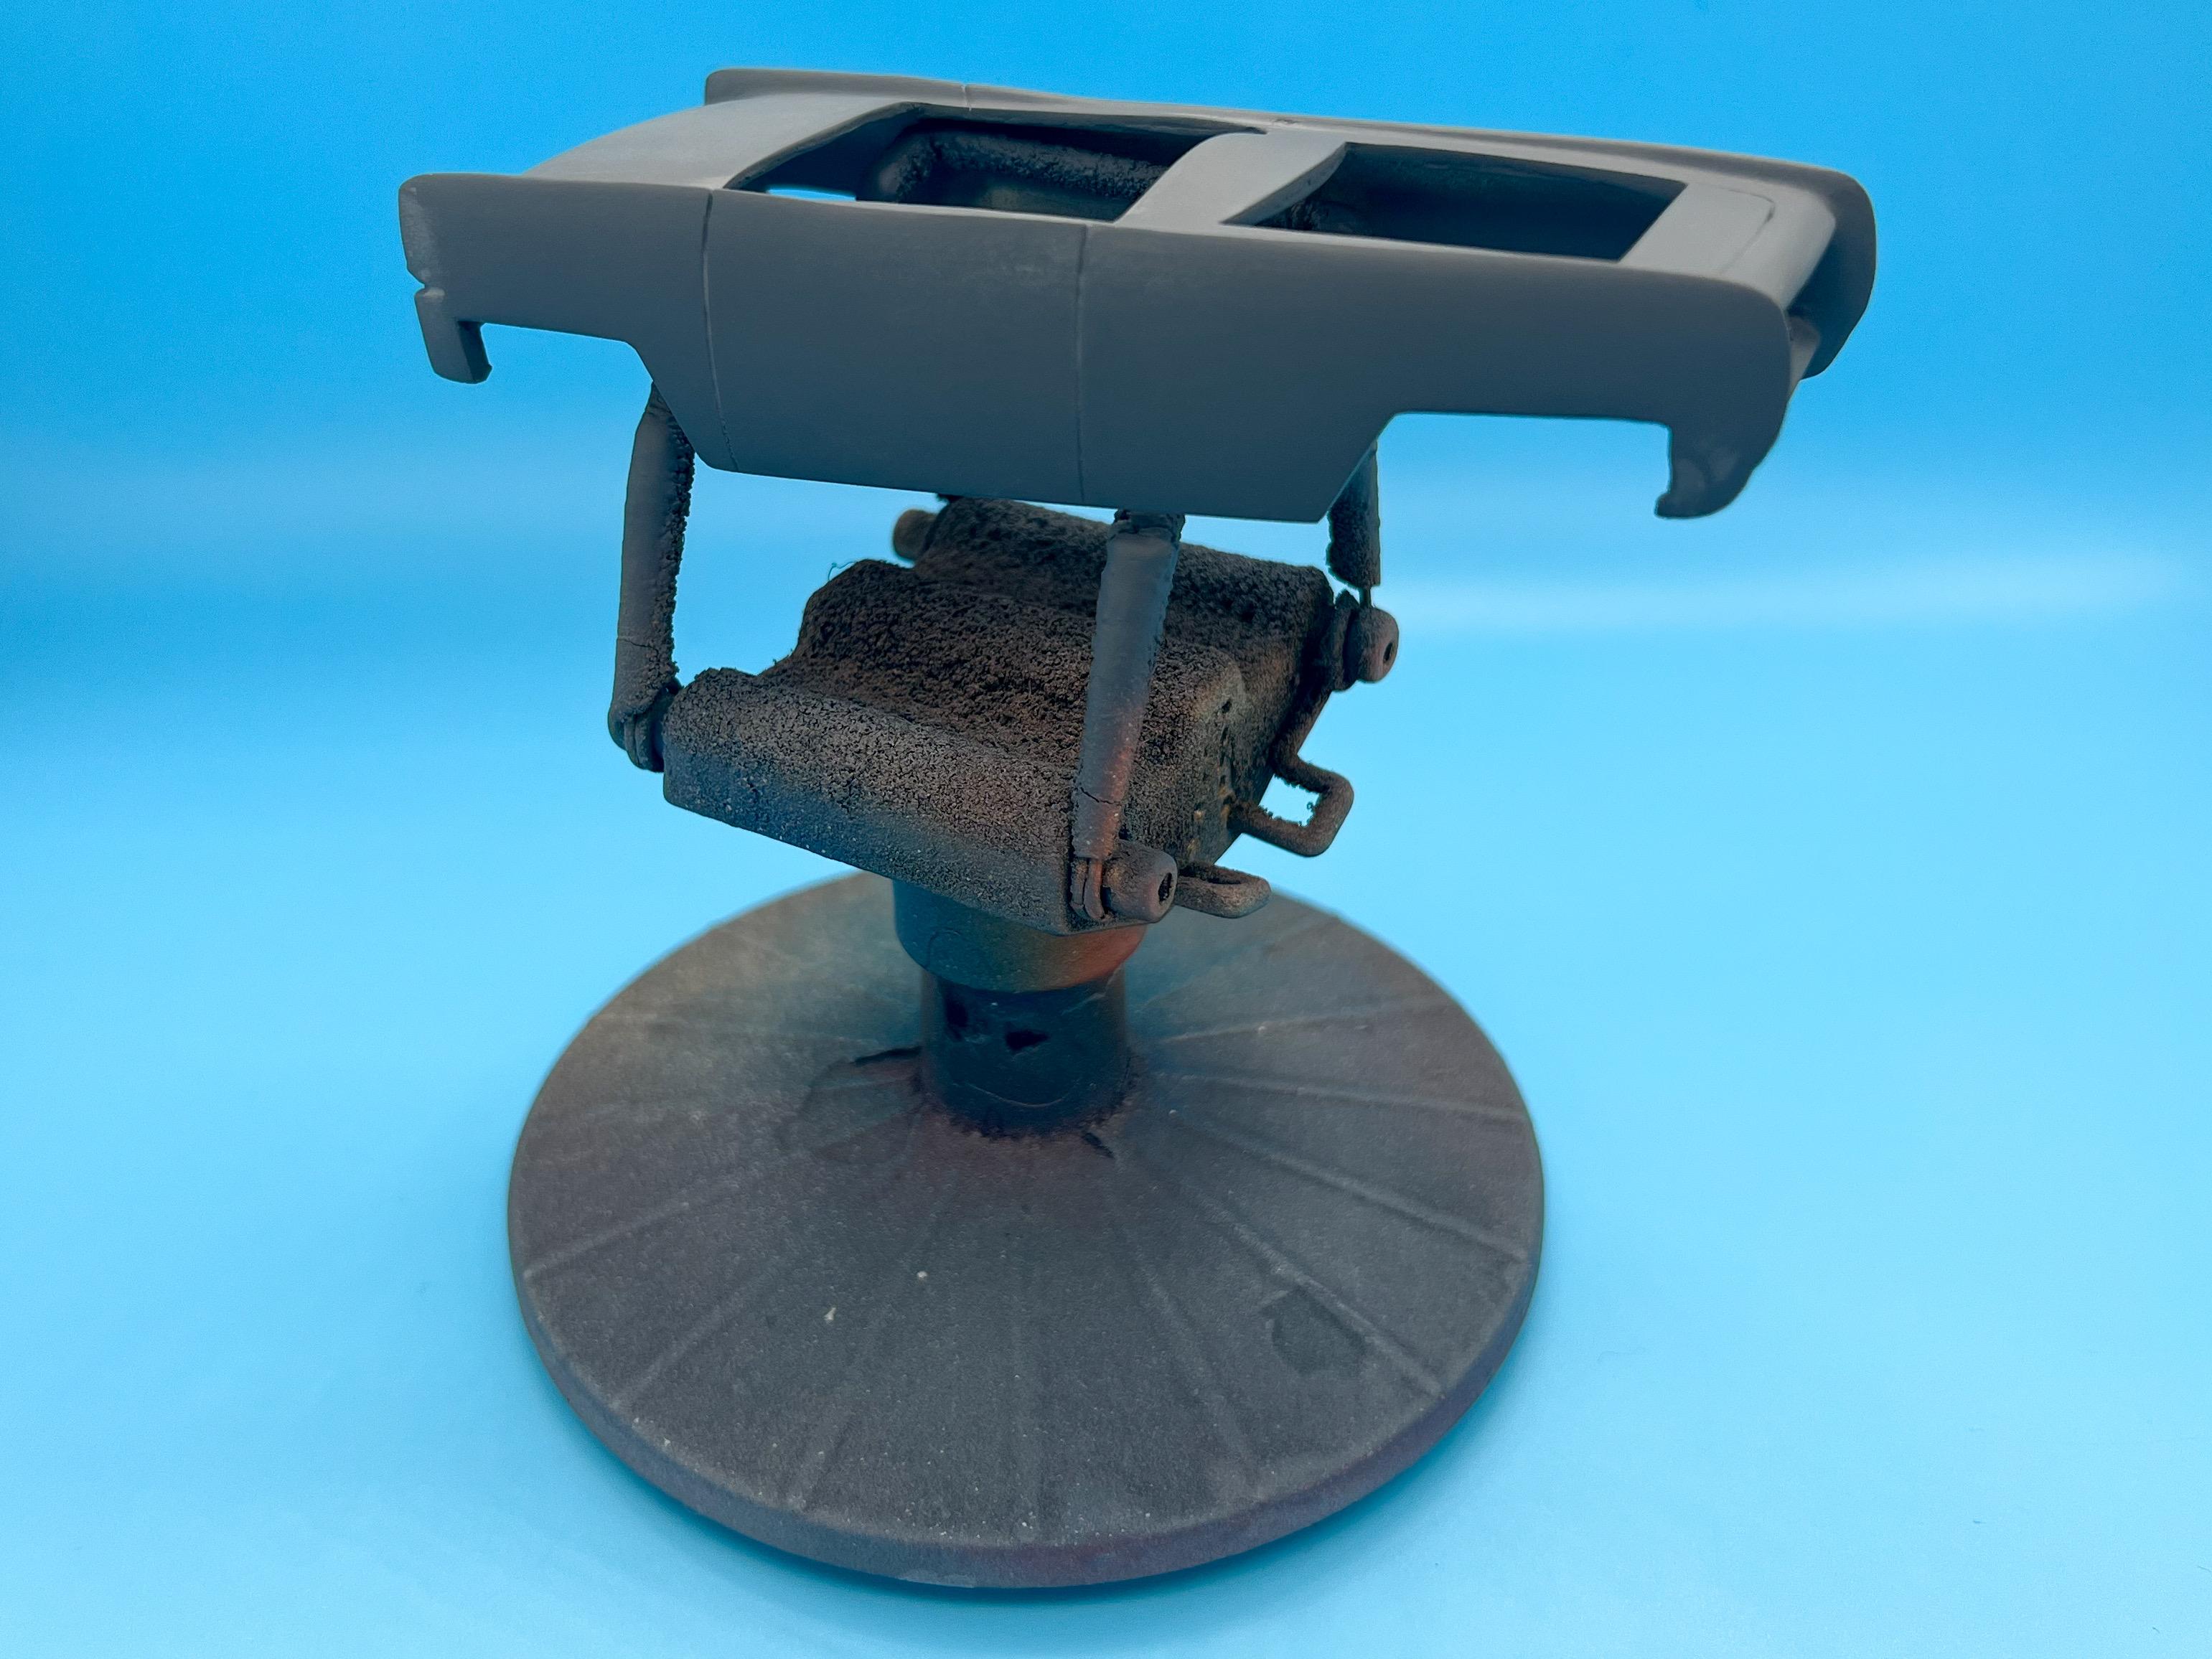
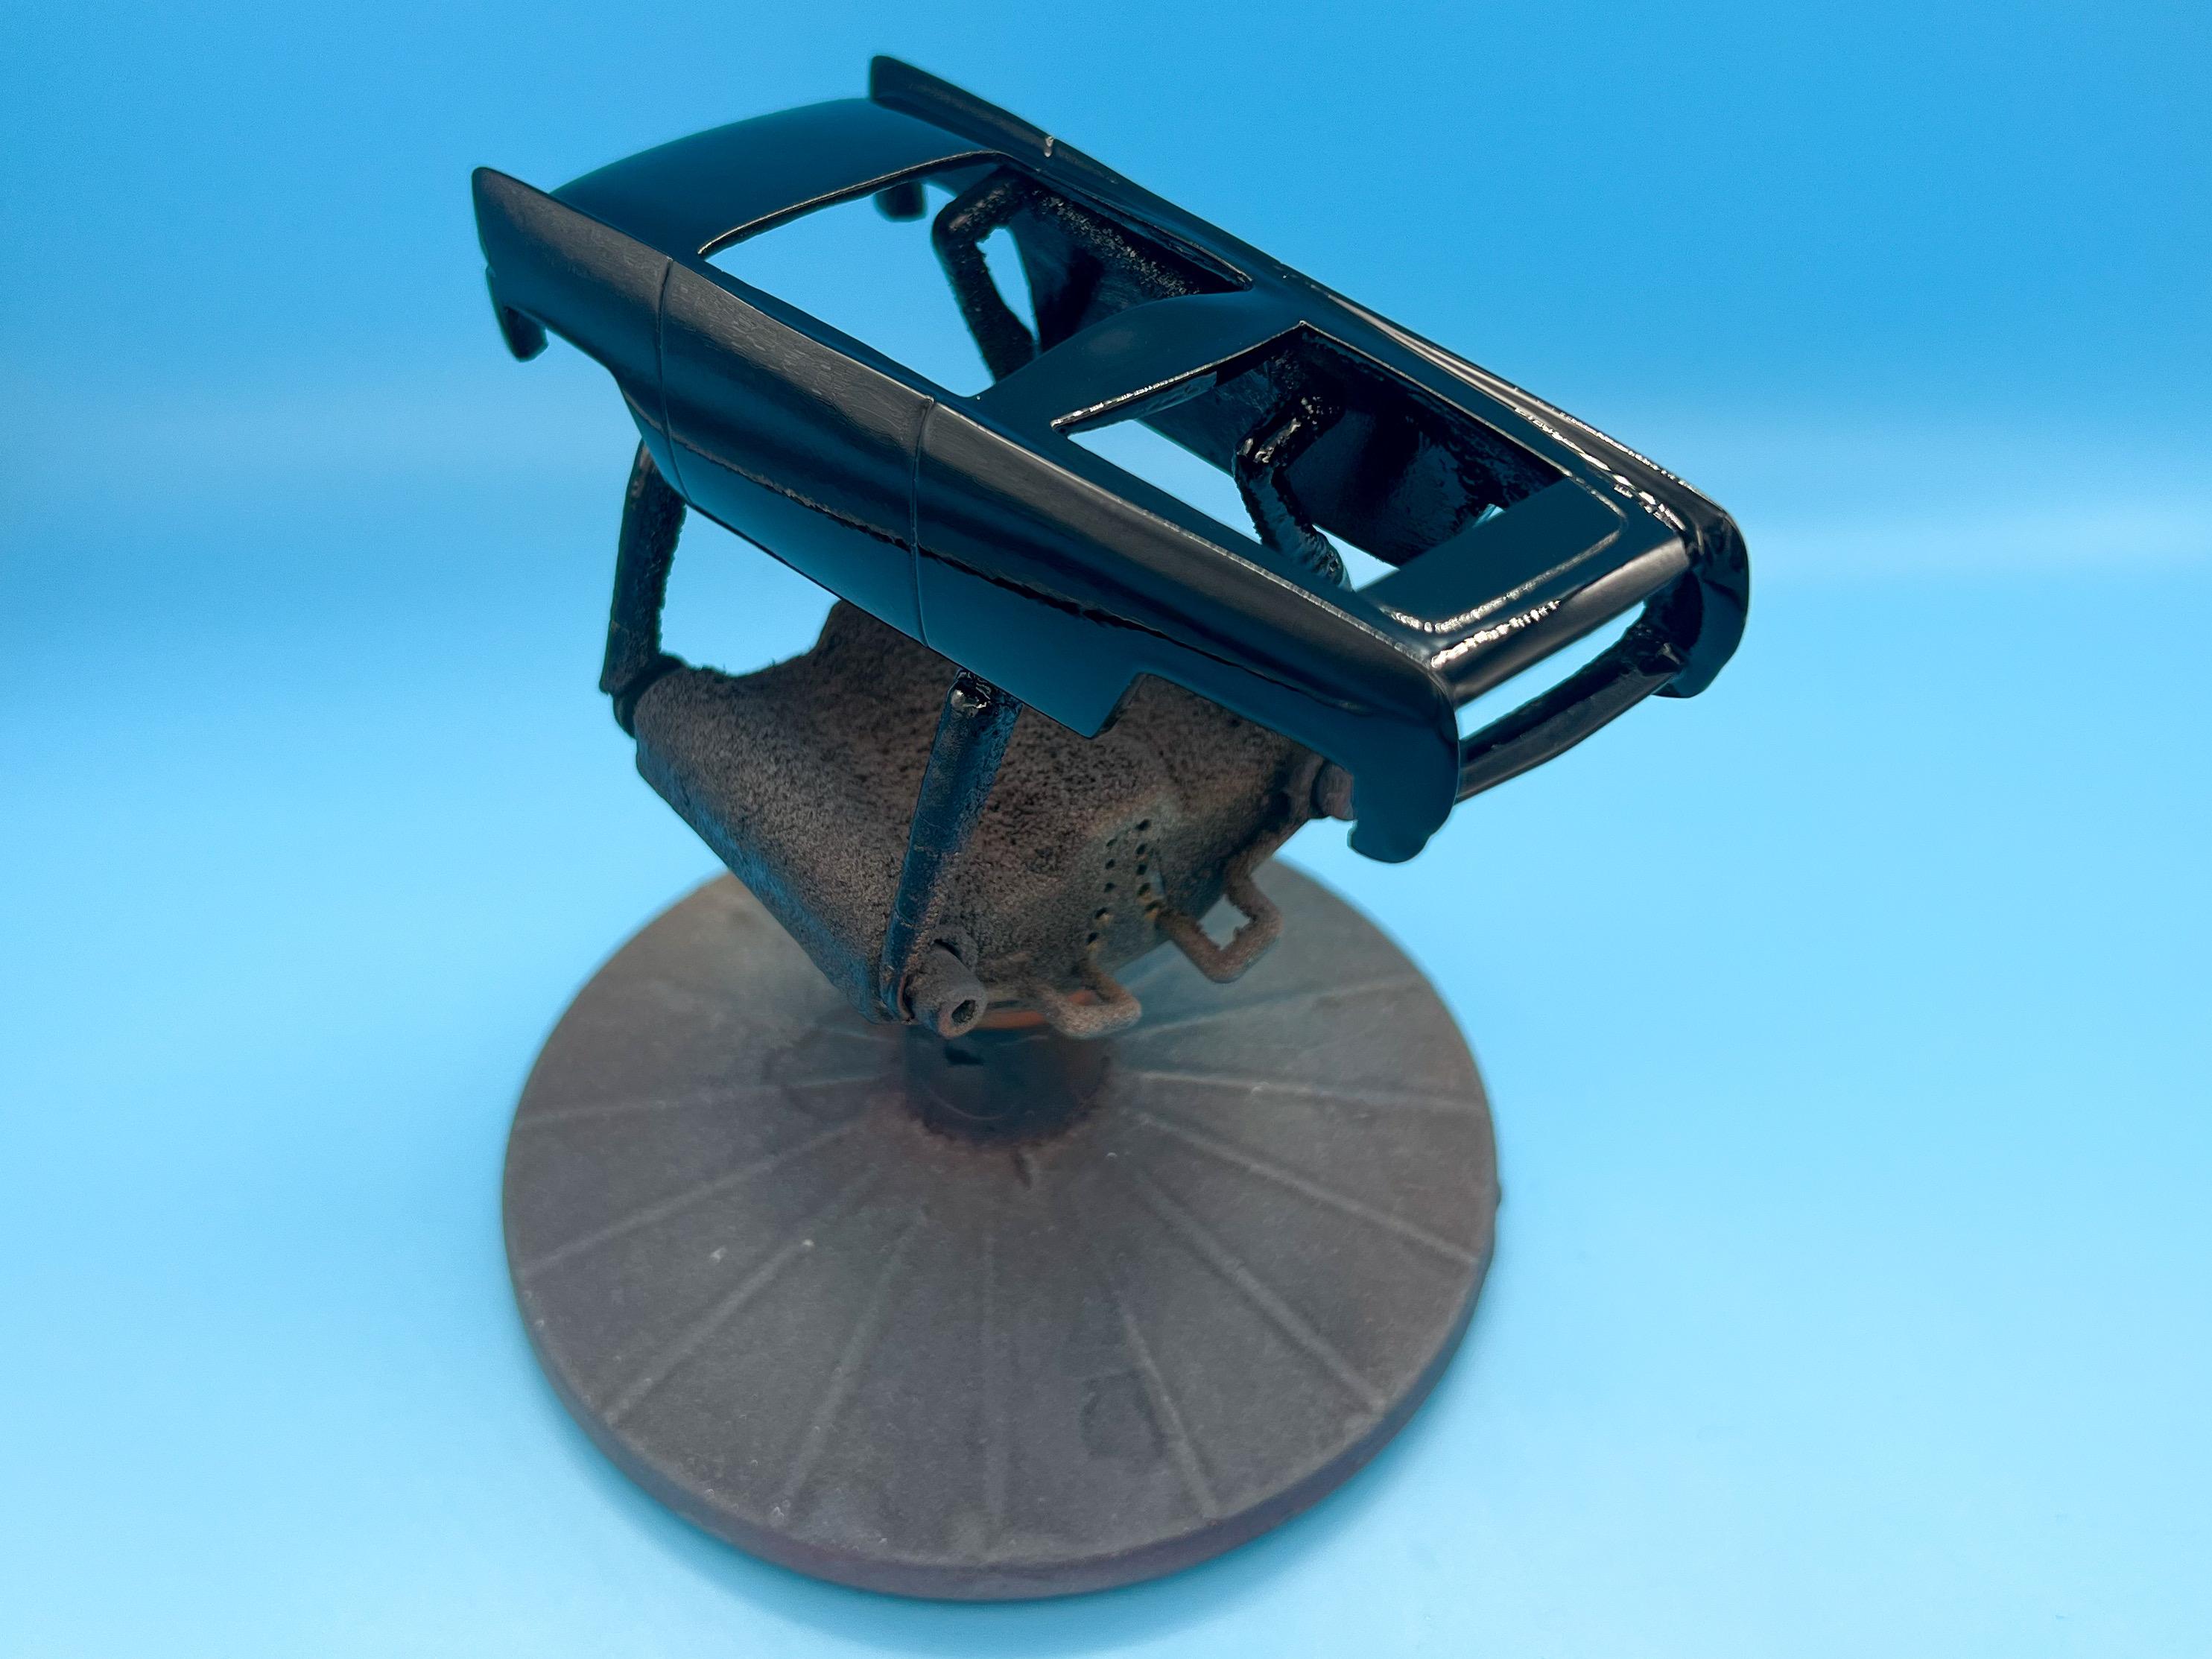
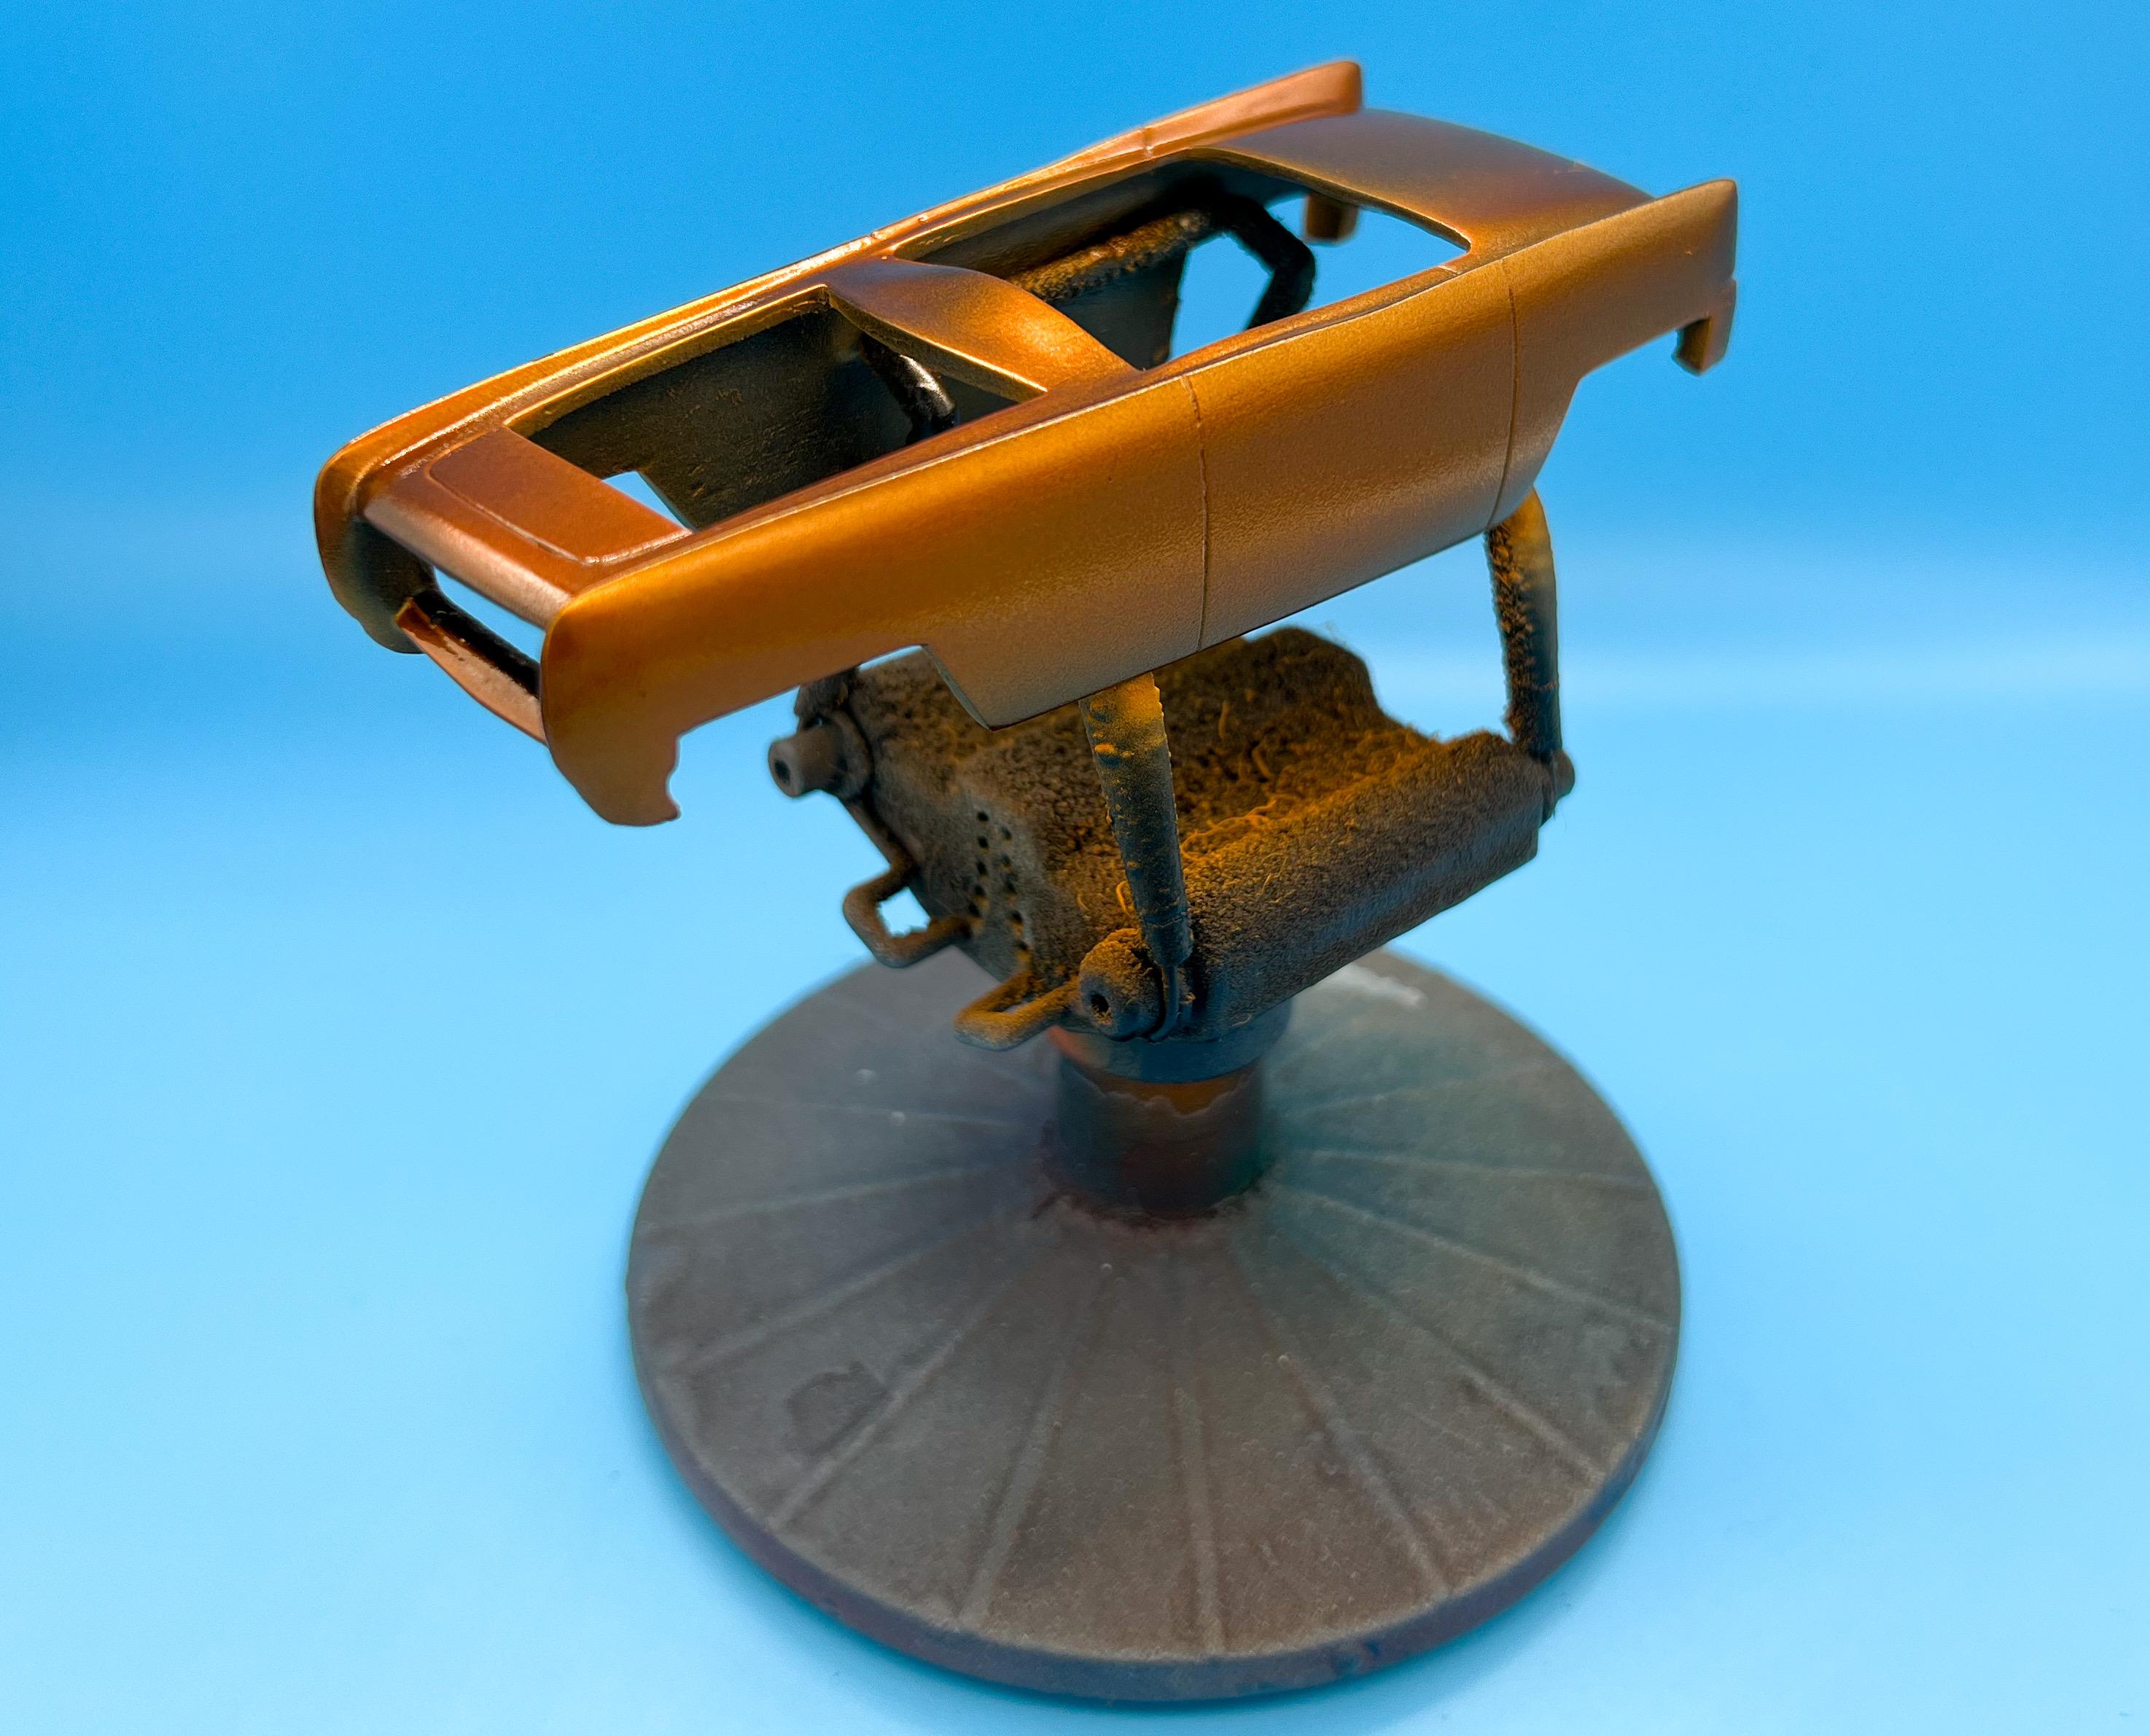
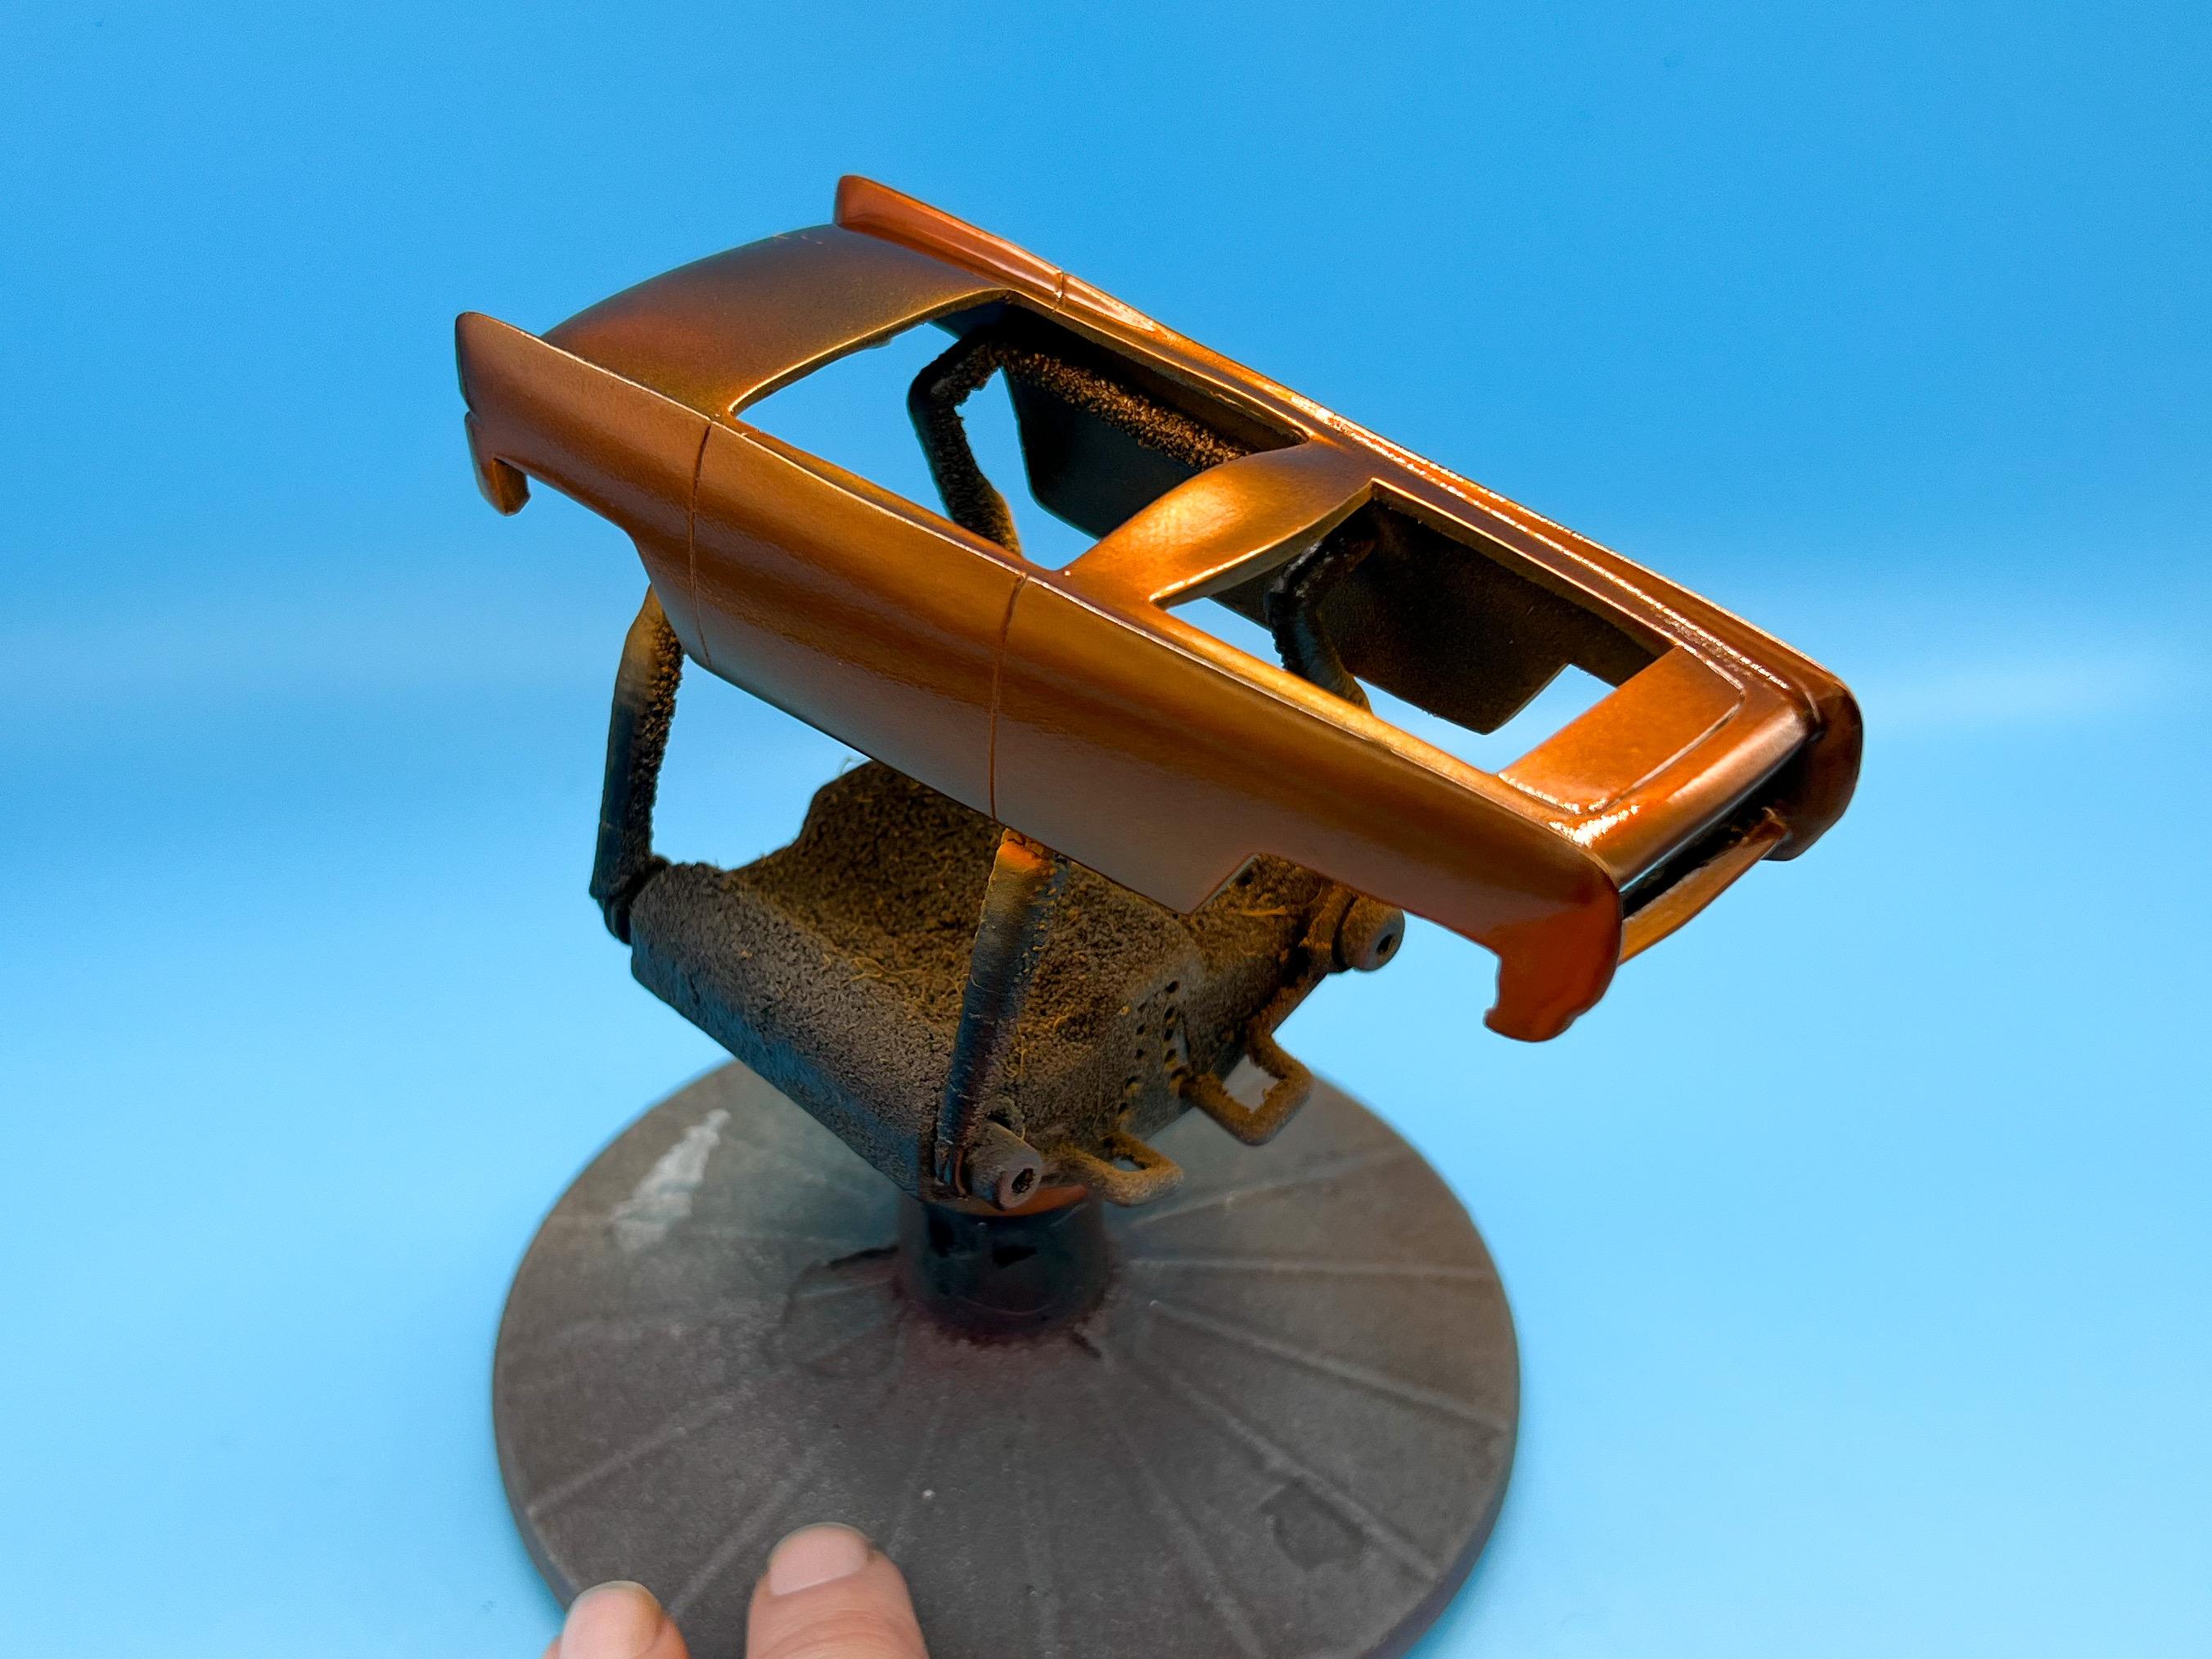
Thanks fellas! I’m down! Love me a showrod! Just plain ol’ styrene bar! This frame isn’t particularly realistic or detailed, but you’ll barely see most of it when this thing’s sitting on the shelf… I would love to see that! I’ll do some digging… Had a busy week - been finishing up some stuff I was building as Christmas gifts, but got a little more done…most interesting of which was some headers. I wanted to have them shoot forward, out of the (redundant) wheel arches and then wrap around the lip and back again. They look kinda weird without the body in place tho…also dissected a spare Revell 29 floorboard, inverted, for a floor for the interior: I’d got far along enough with the frame that I was confident I wouldn’t have to modify the body any, so getting some paint started was today’s project. First up, sandable primer (took a couple or three coats before I got the body as flat and nice as I wanted…) Then black enamel… I let that set up a while, then polished it, and then shot some Alclad: Then, Tamiya clear orange: Was going for a kinda Hot Wheels Spectraflame effect with the candy over the metal finish - I think I like it! Got some more paintwork to do still, but it’ll get a coat of intercoat tomorrow and then I can do the next part. Just a little progress, but I always enjoy when the body’s in color - more soon!
-
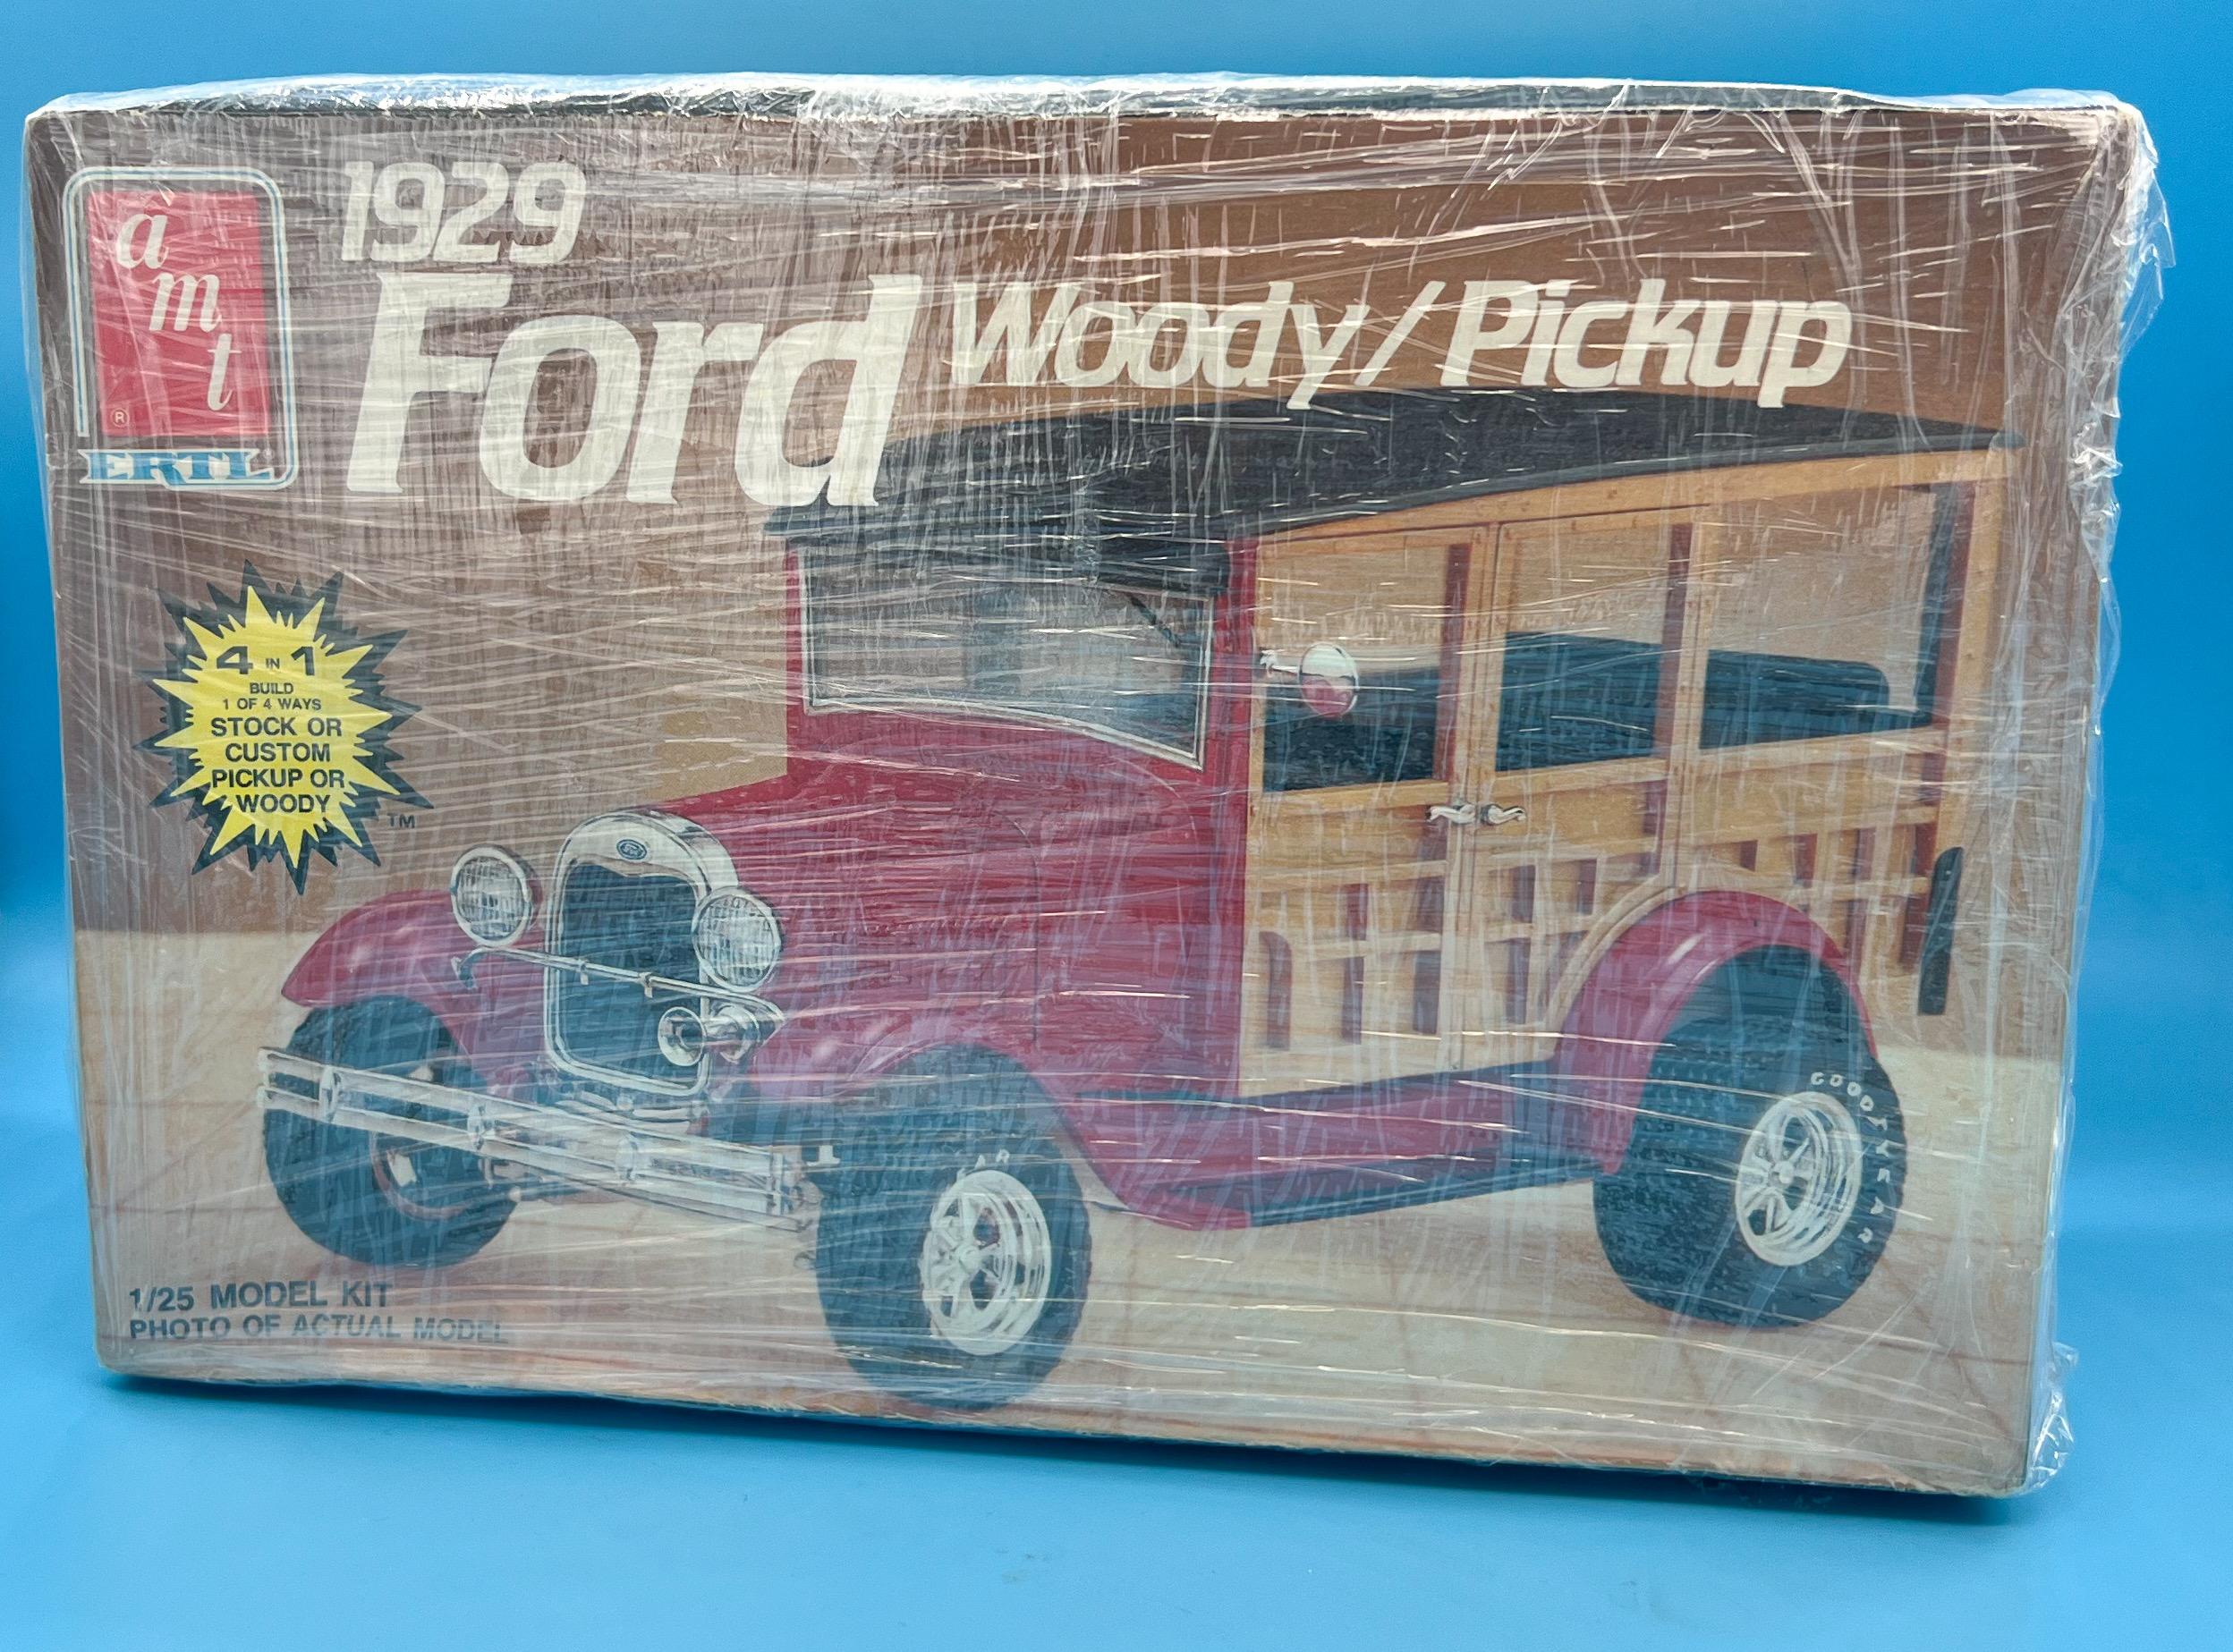
I was the only bidder on this kit on eBay, which arrived immaculately wrapped and packaged (almost mummified)… Twenty something bucks - contained the kit on the box art (a four-in-one including a roadster pickup variation), plus a complete molded-in-red AMT Model A roadster packed carefully in the same box too. Score!
- 38,884 replies
-
- 4
-

-
- johan
- glue bombs
- (and 1 more)
-
I like the long bed, no hood…but with the shorter wheelbase ?? (I know that wasn’t an option). Looking GREAT - keep going!!!
-
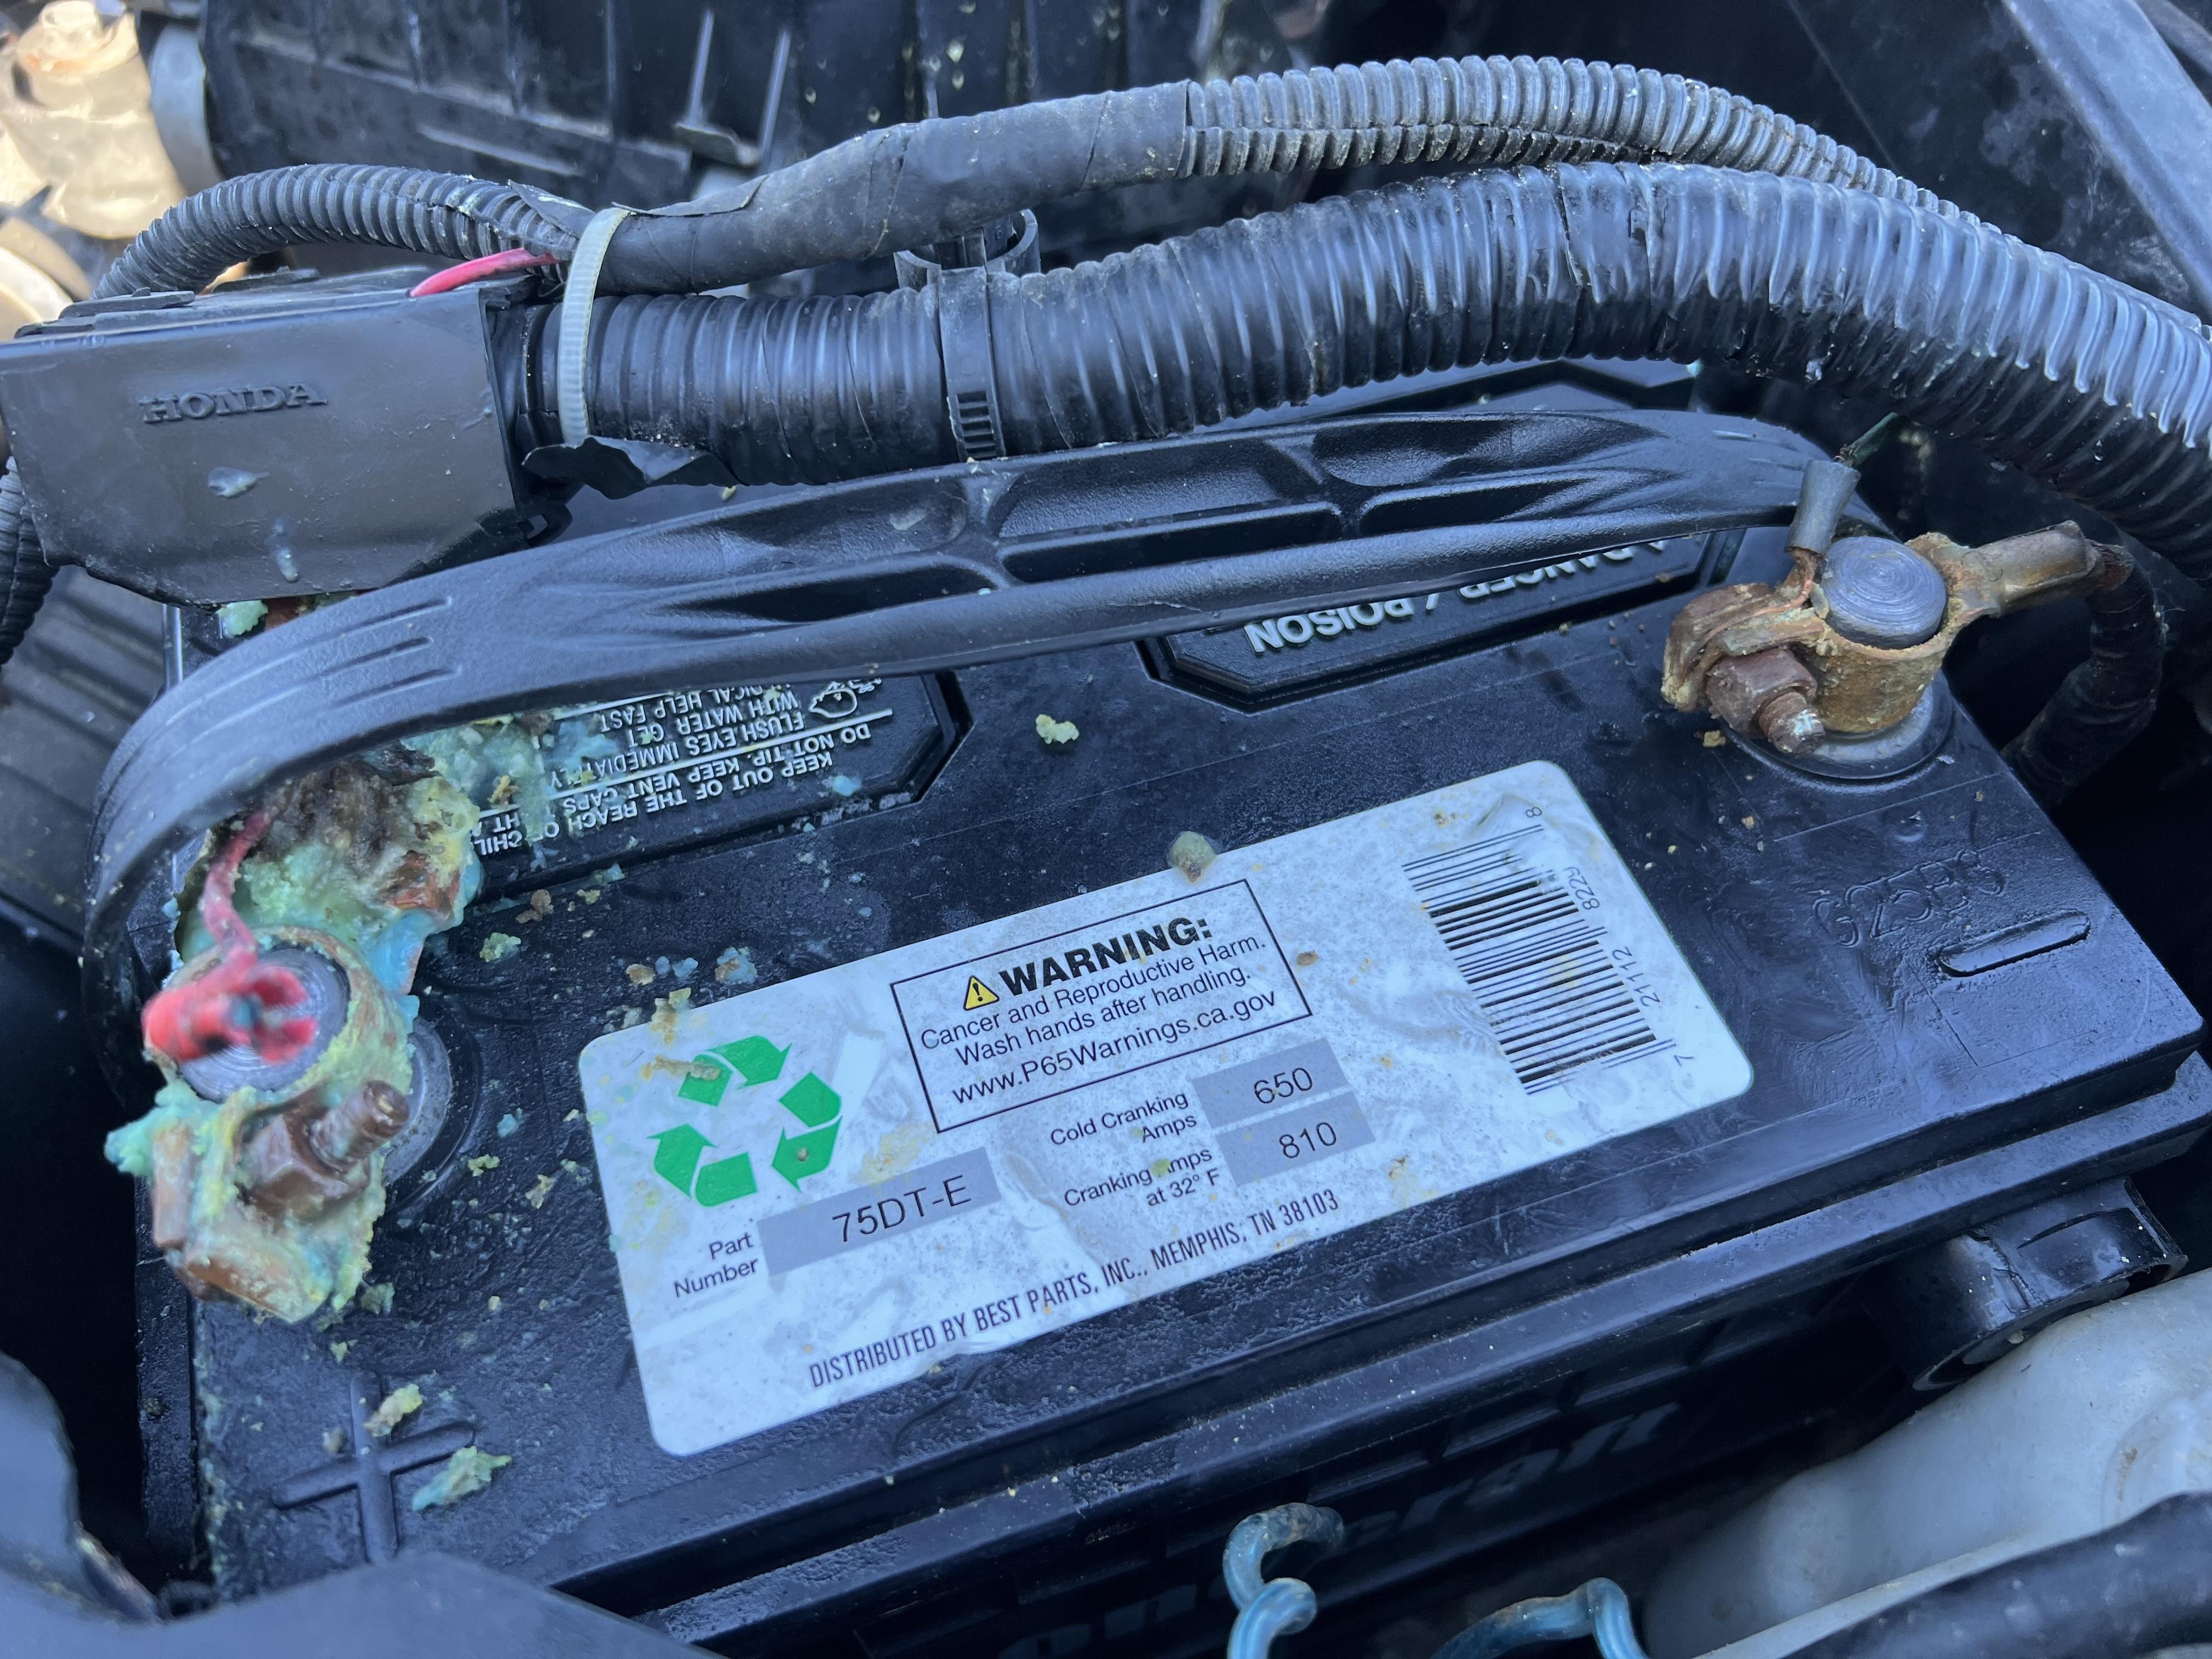
It’s only dangerous if you’re in California…but luckily I’m not ??
-
That my wife’s car ran at all with battery terminals like this (and that random disconnected wire on the positive side…I wonder what that should power?) Glad I popped the plastic covers off to take a look…of course, once I’d SEEN it, I had to FIX it ?
-
December Parts Box Build - a little Lincoln hot rod!
OldNYJim replied to OldNYJim's topic in WIP: Model Cars
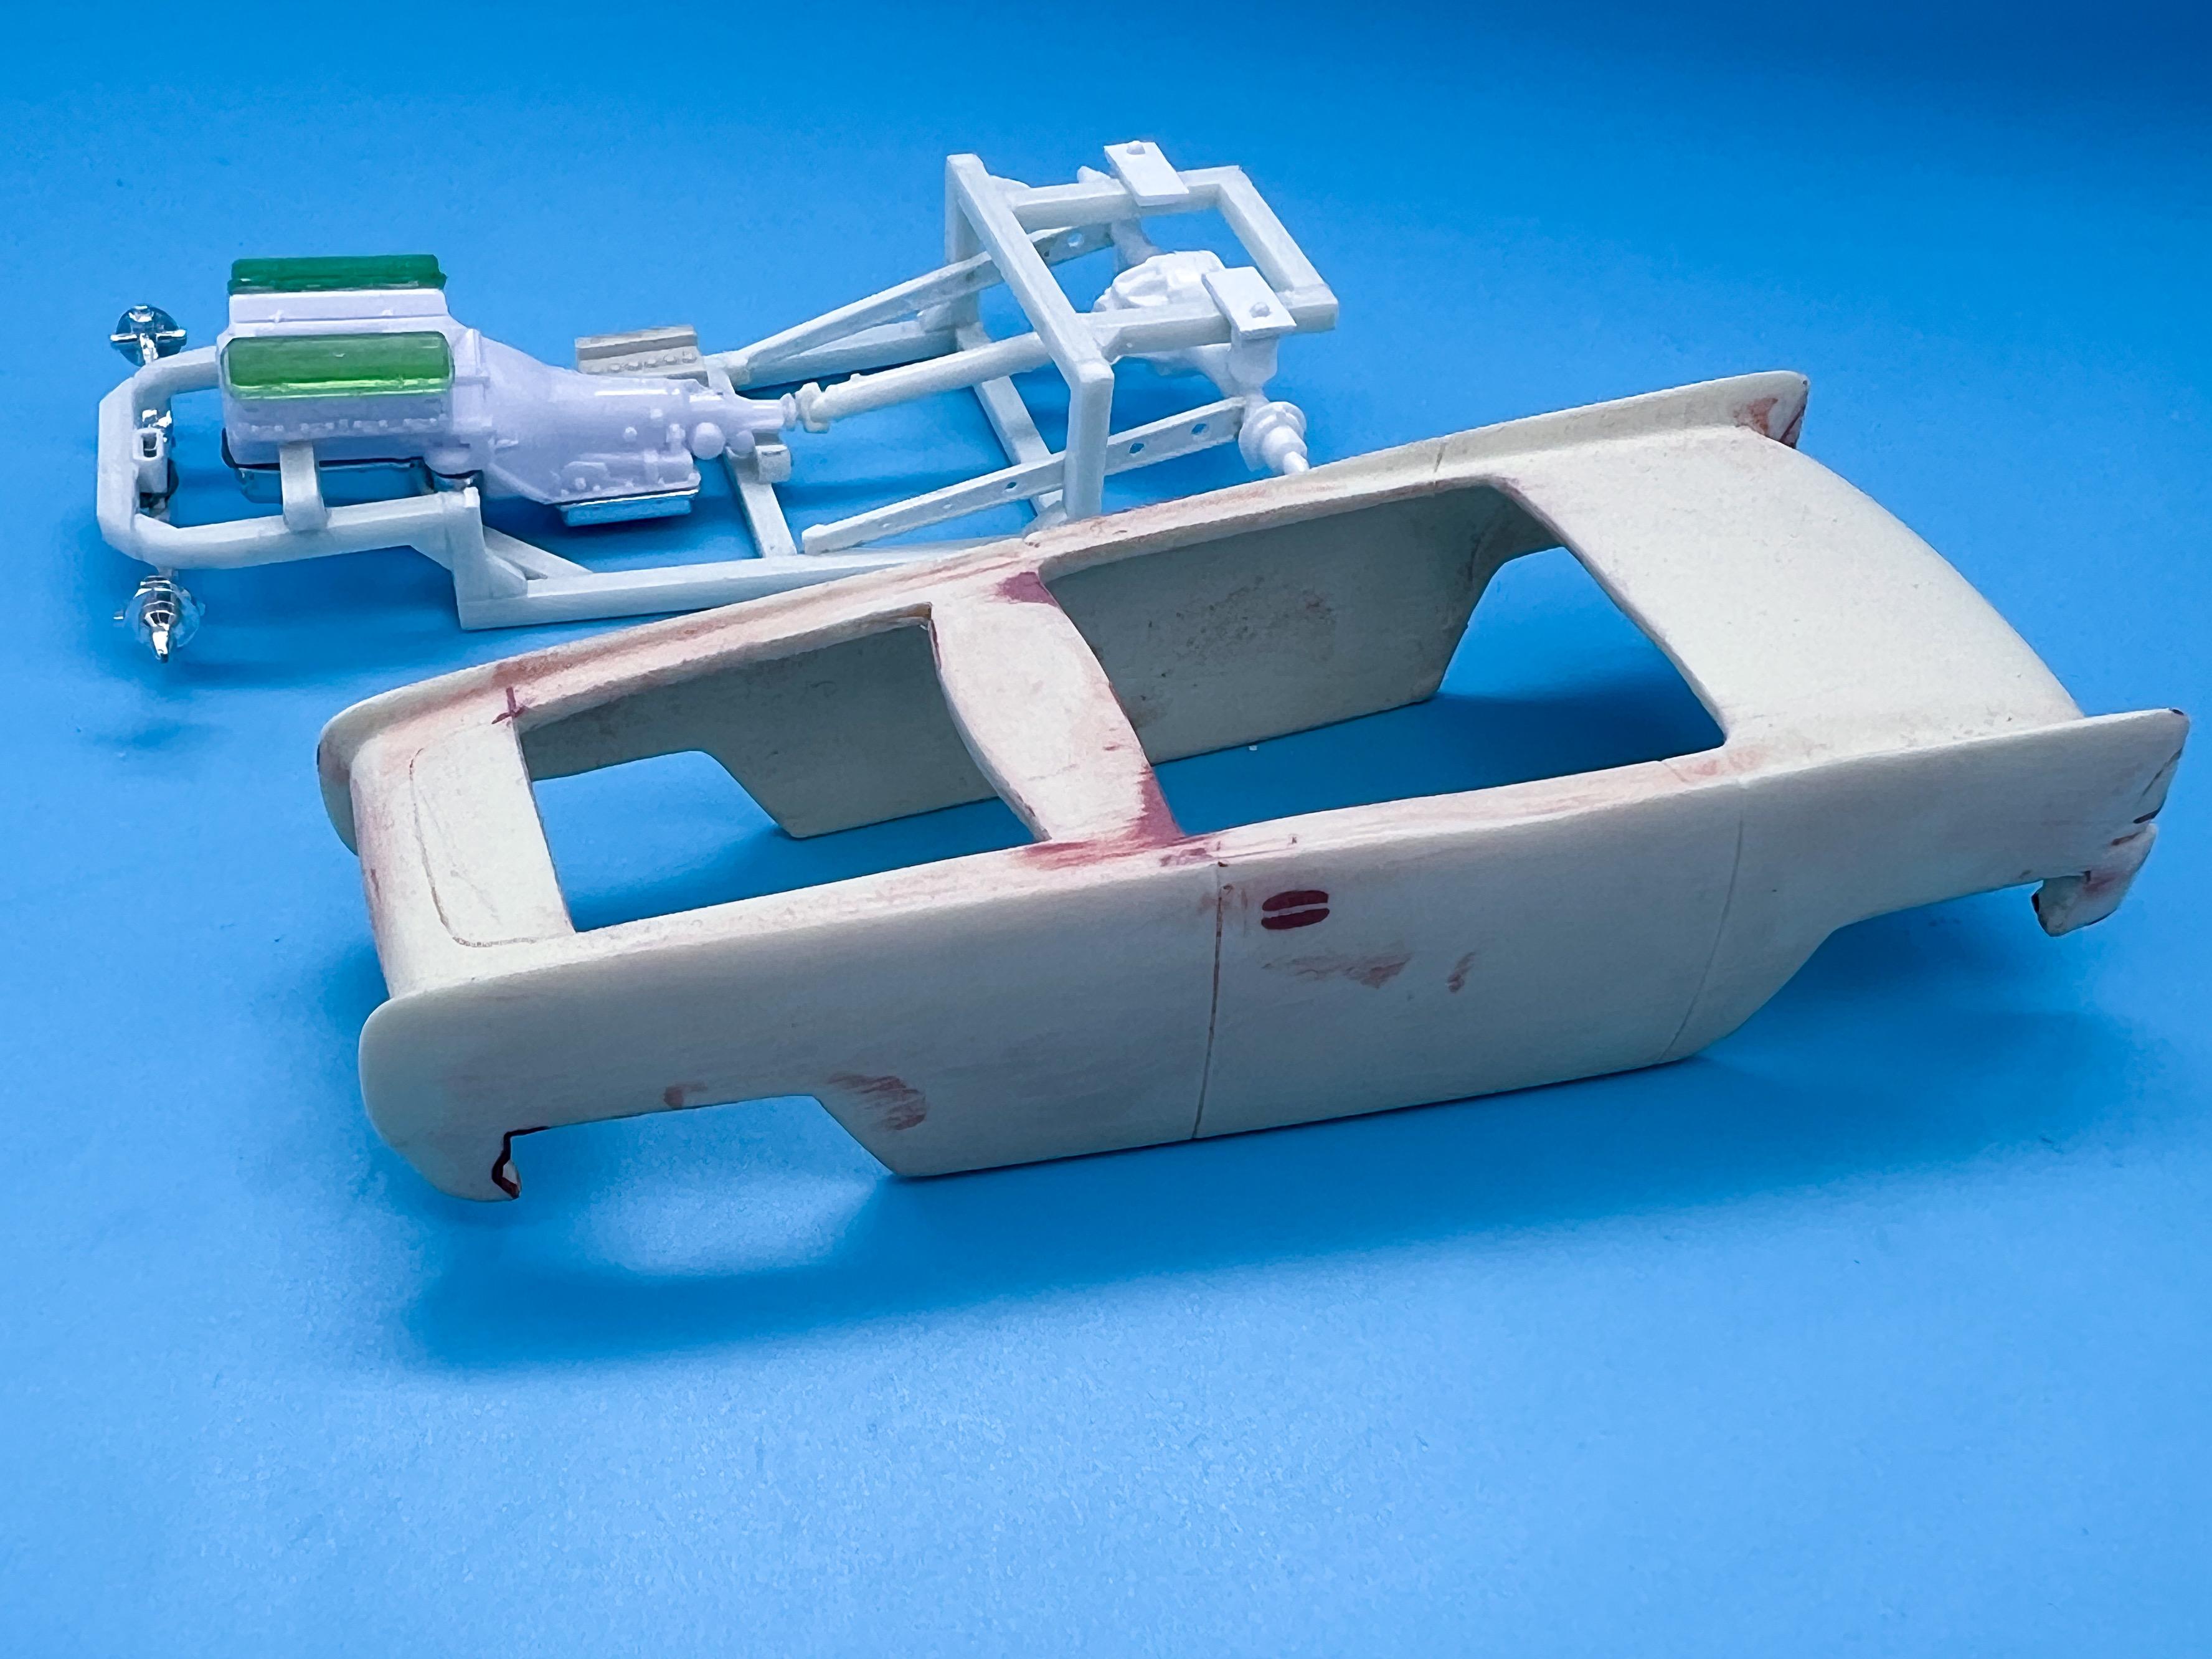
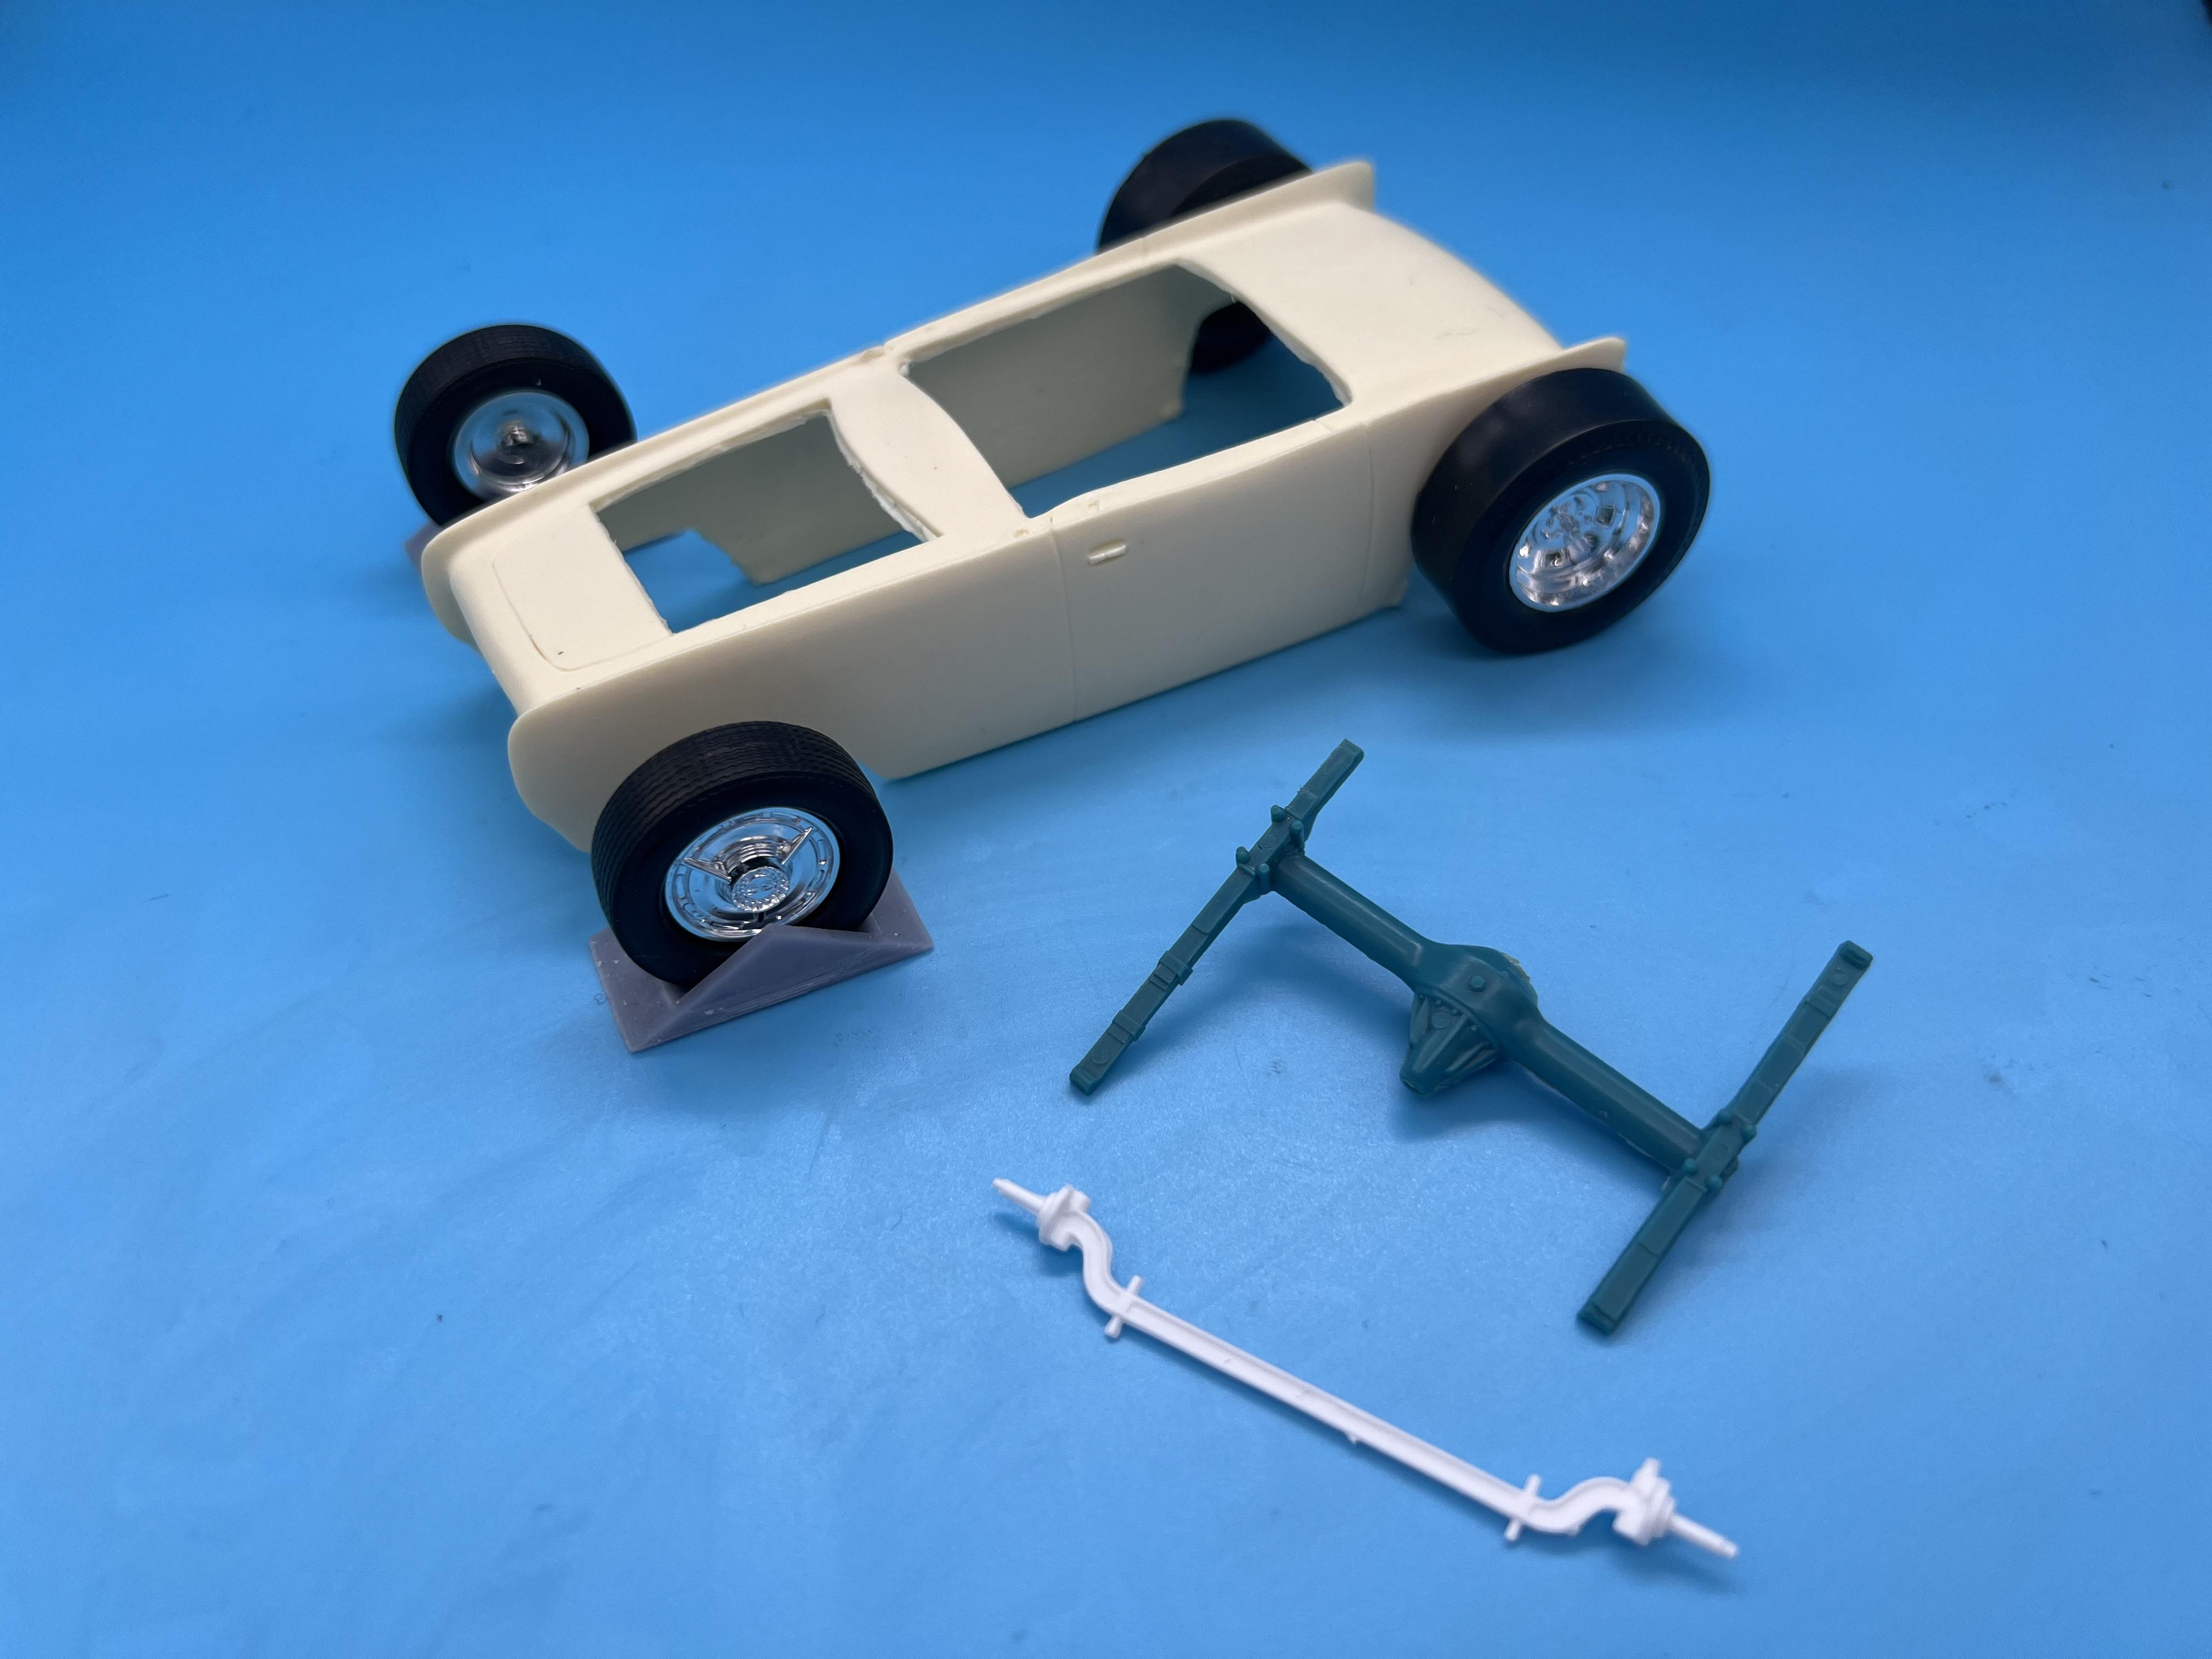
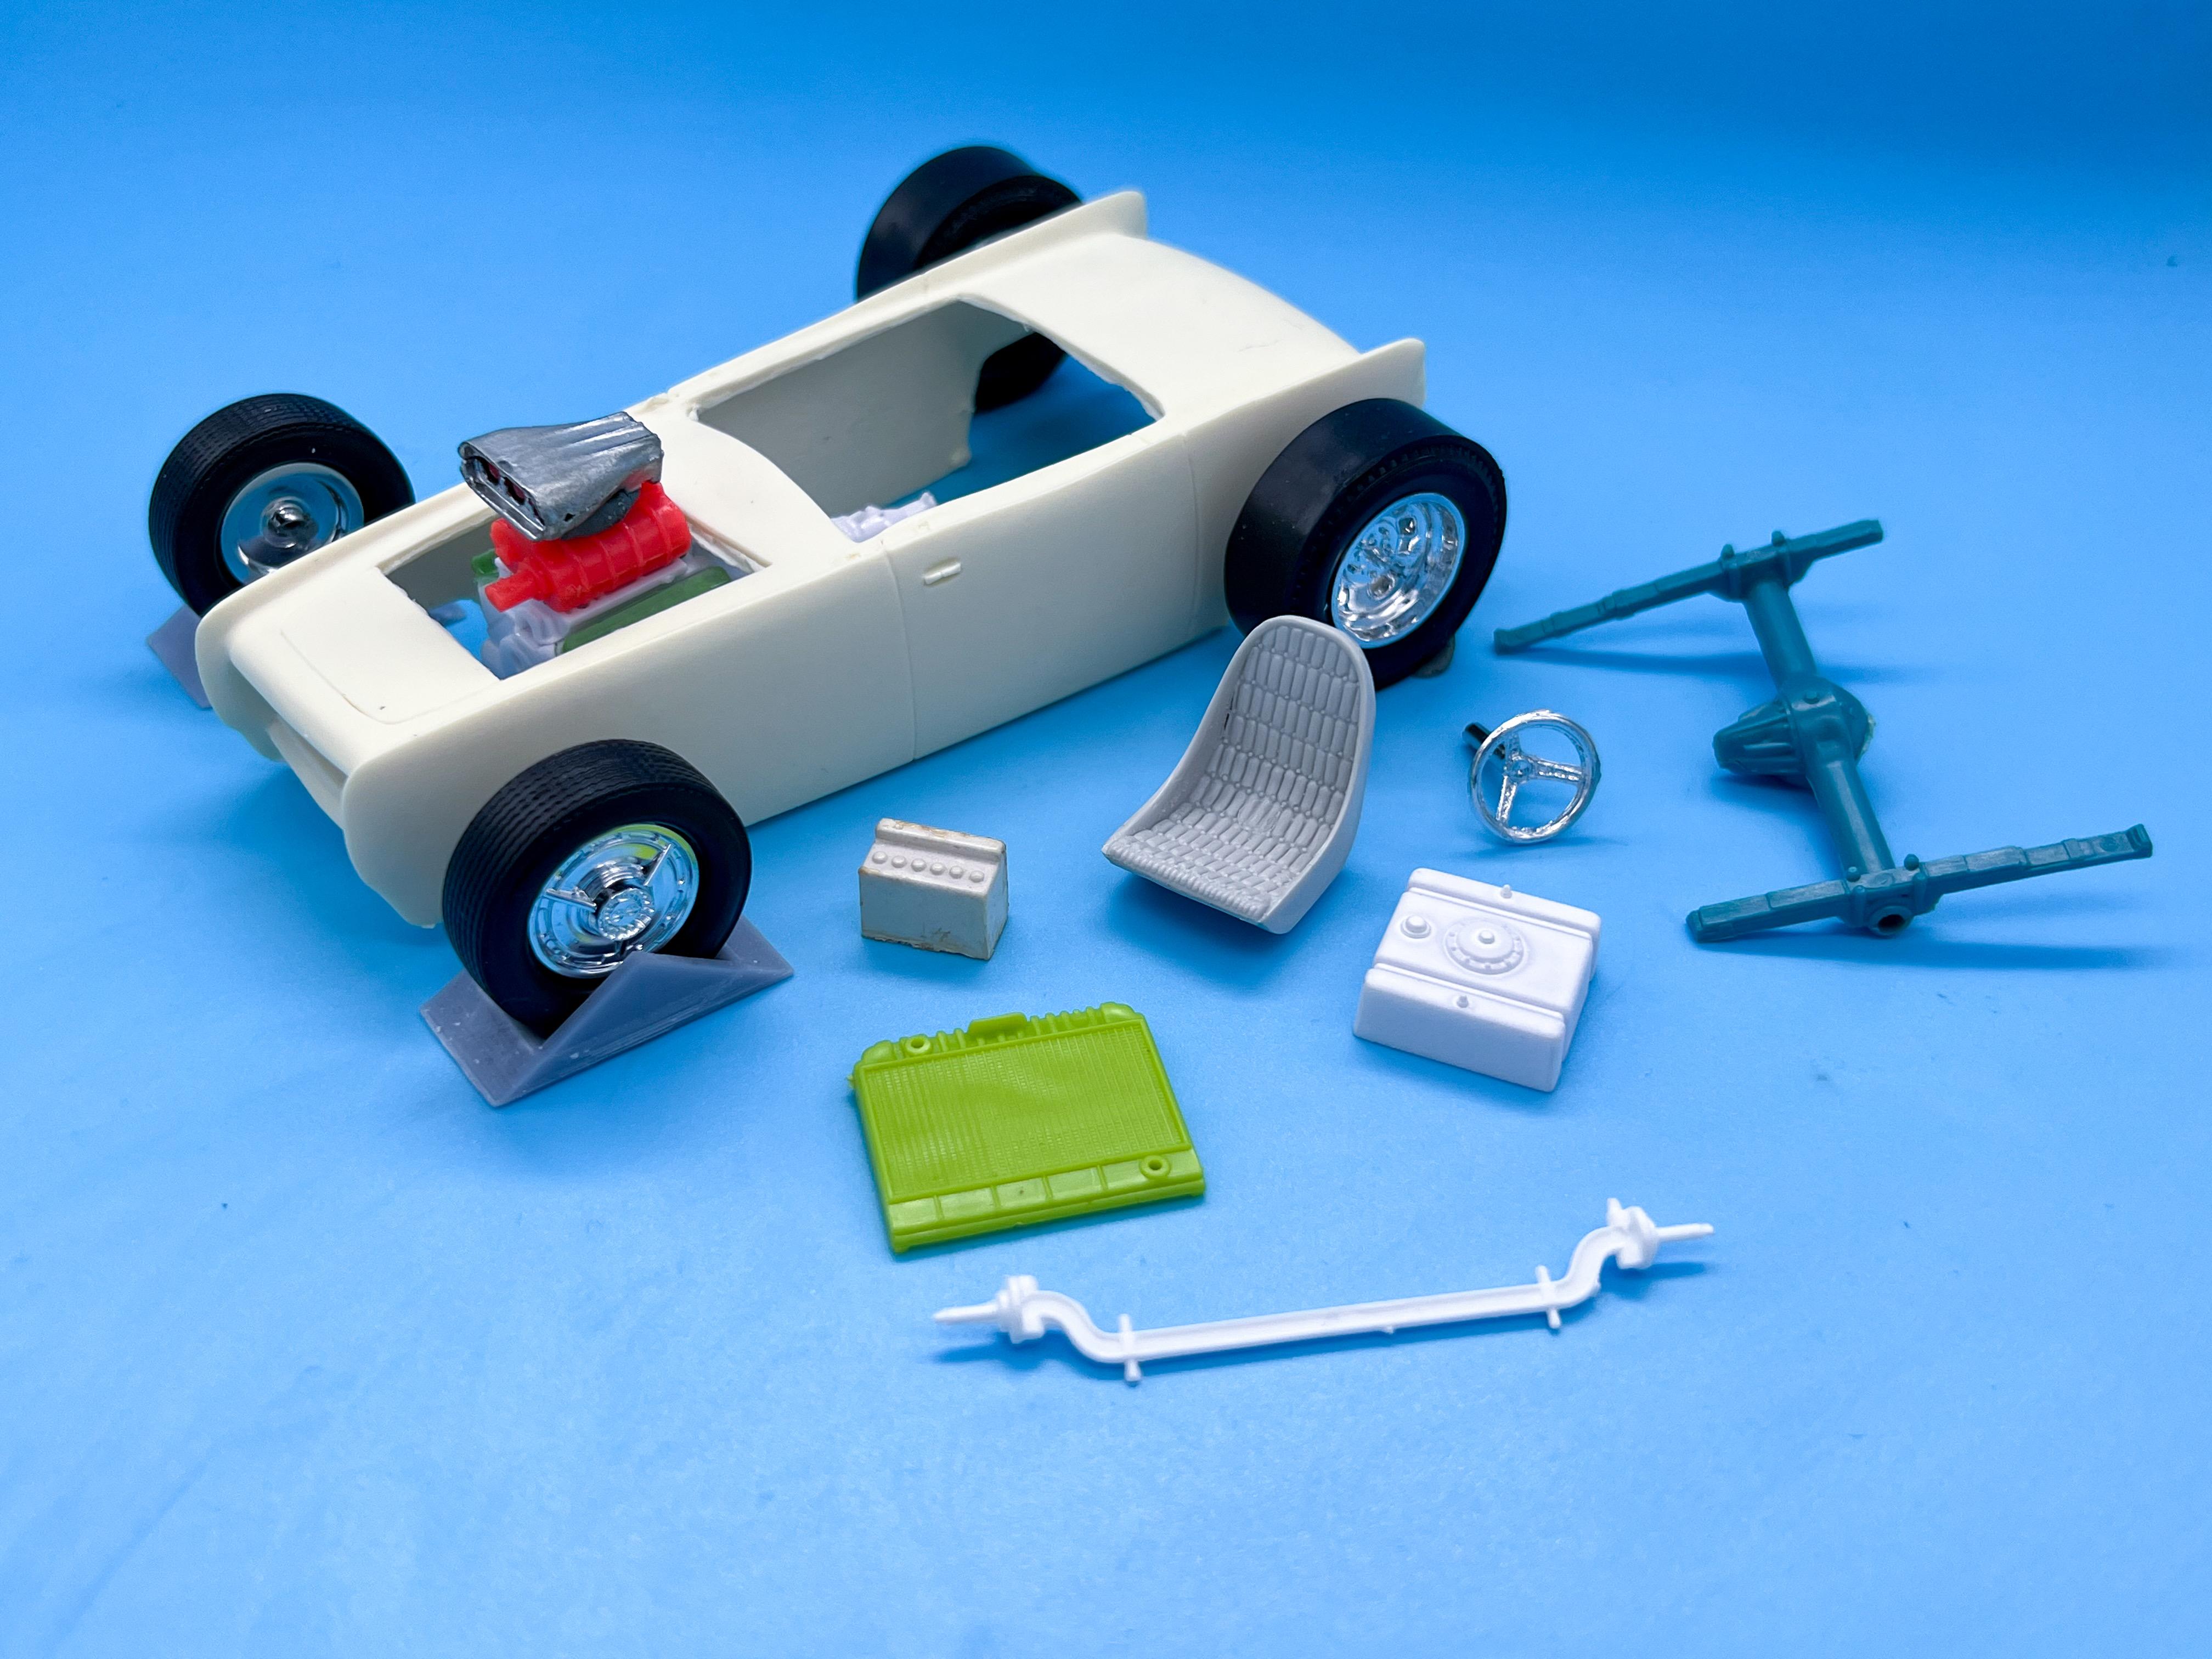
Progress! I was trying to find a solution to wanting airbags on the rear axle, and then my brain said “Revell 32 Ford…duh! Use THAT axle” - so I did! The front axle works pretty well too, as it happens… Found some trailing arms in my spares stash - no idea where they came from but they worked PERFECTLY! Need to find something short and stubby for the front too… Note I’m building this as tho the airbags are in their ‘deflated’ state, so I can justify having this thing sit on the deck and have it still be SOMEWHAT feasible, hence the uncomfortable driveshaft angle. Still need to find a good spot for a gas tank, battery and radiator…. Oh, and I started some bodywork - just a little smoothing-out and cleaning-up before primer: I’m having a blast with this one! More parts-box-raiding soon!
-
Oh wow, thats bananas! ? ?? Looks like a good start! Love the engine!
-
Ollie Lobbie
-
I like to shoot my Alclad when the black base is still a little tacky - not WET, but slightly sticky. My theory is that it helps the Alclad stick a little better, but I have no scientific proof that that works…but I don’t have a bunch of trouble with Alclad being too fragile to handle generally (within reason…)
-
December Parts Box Build - a little Lincoln hot rod!
OldNYJim replied to OldNYJim's topic in WIP: Model Cars
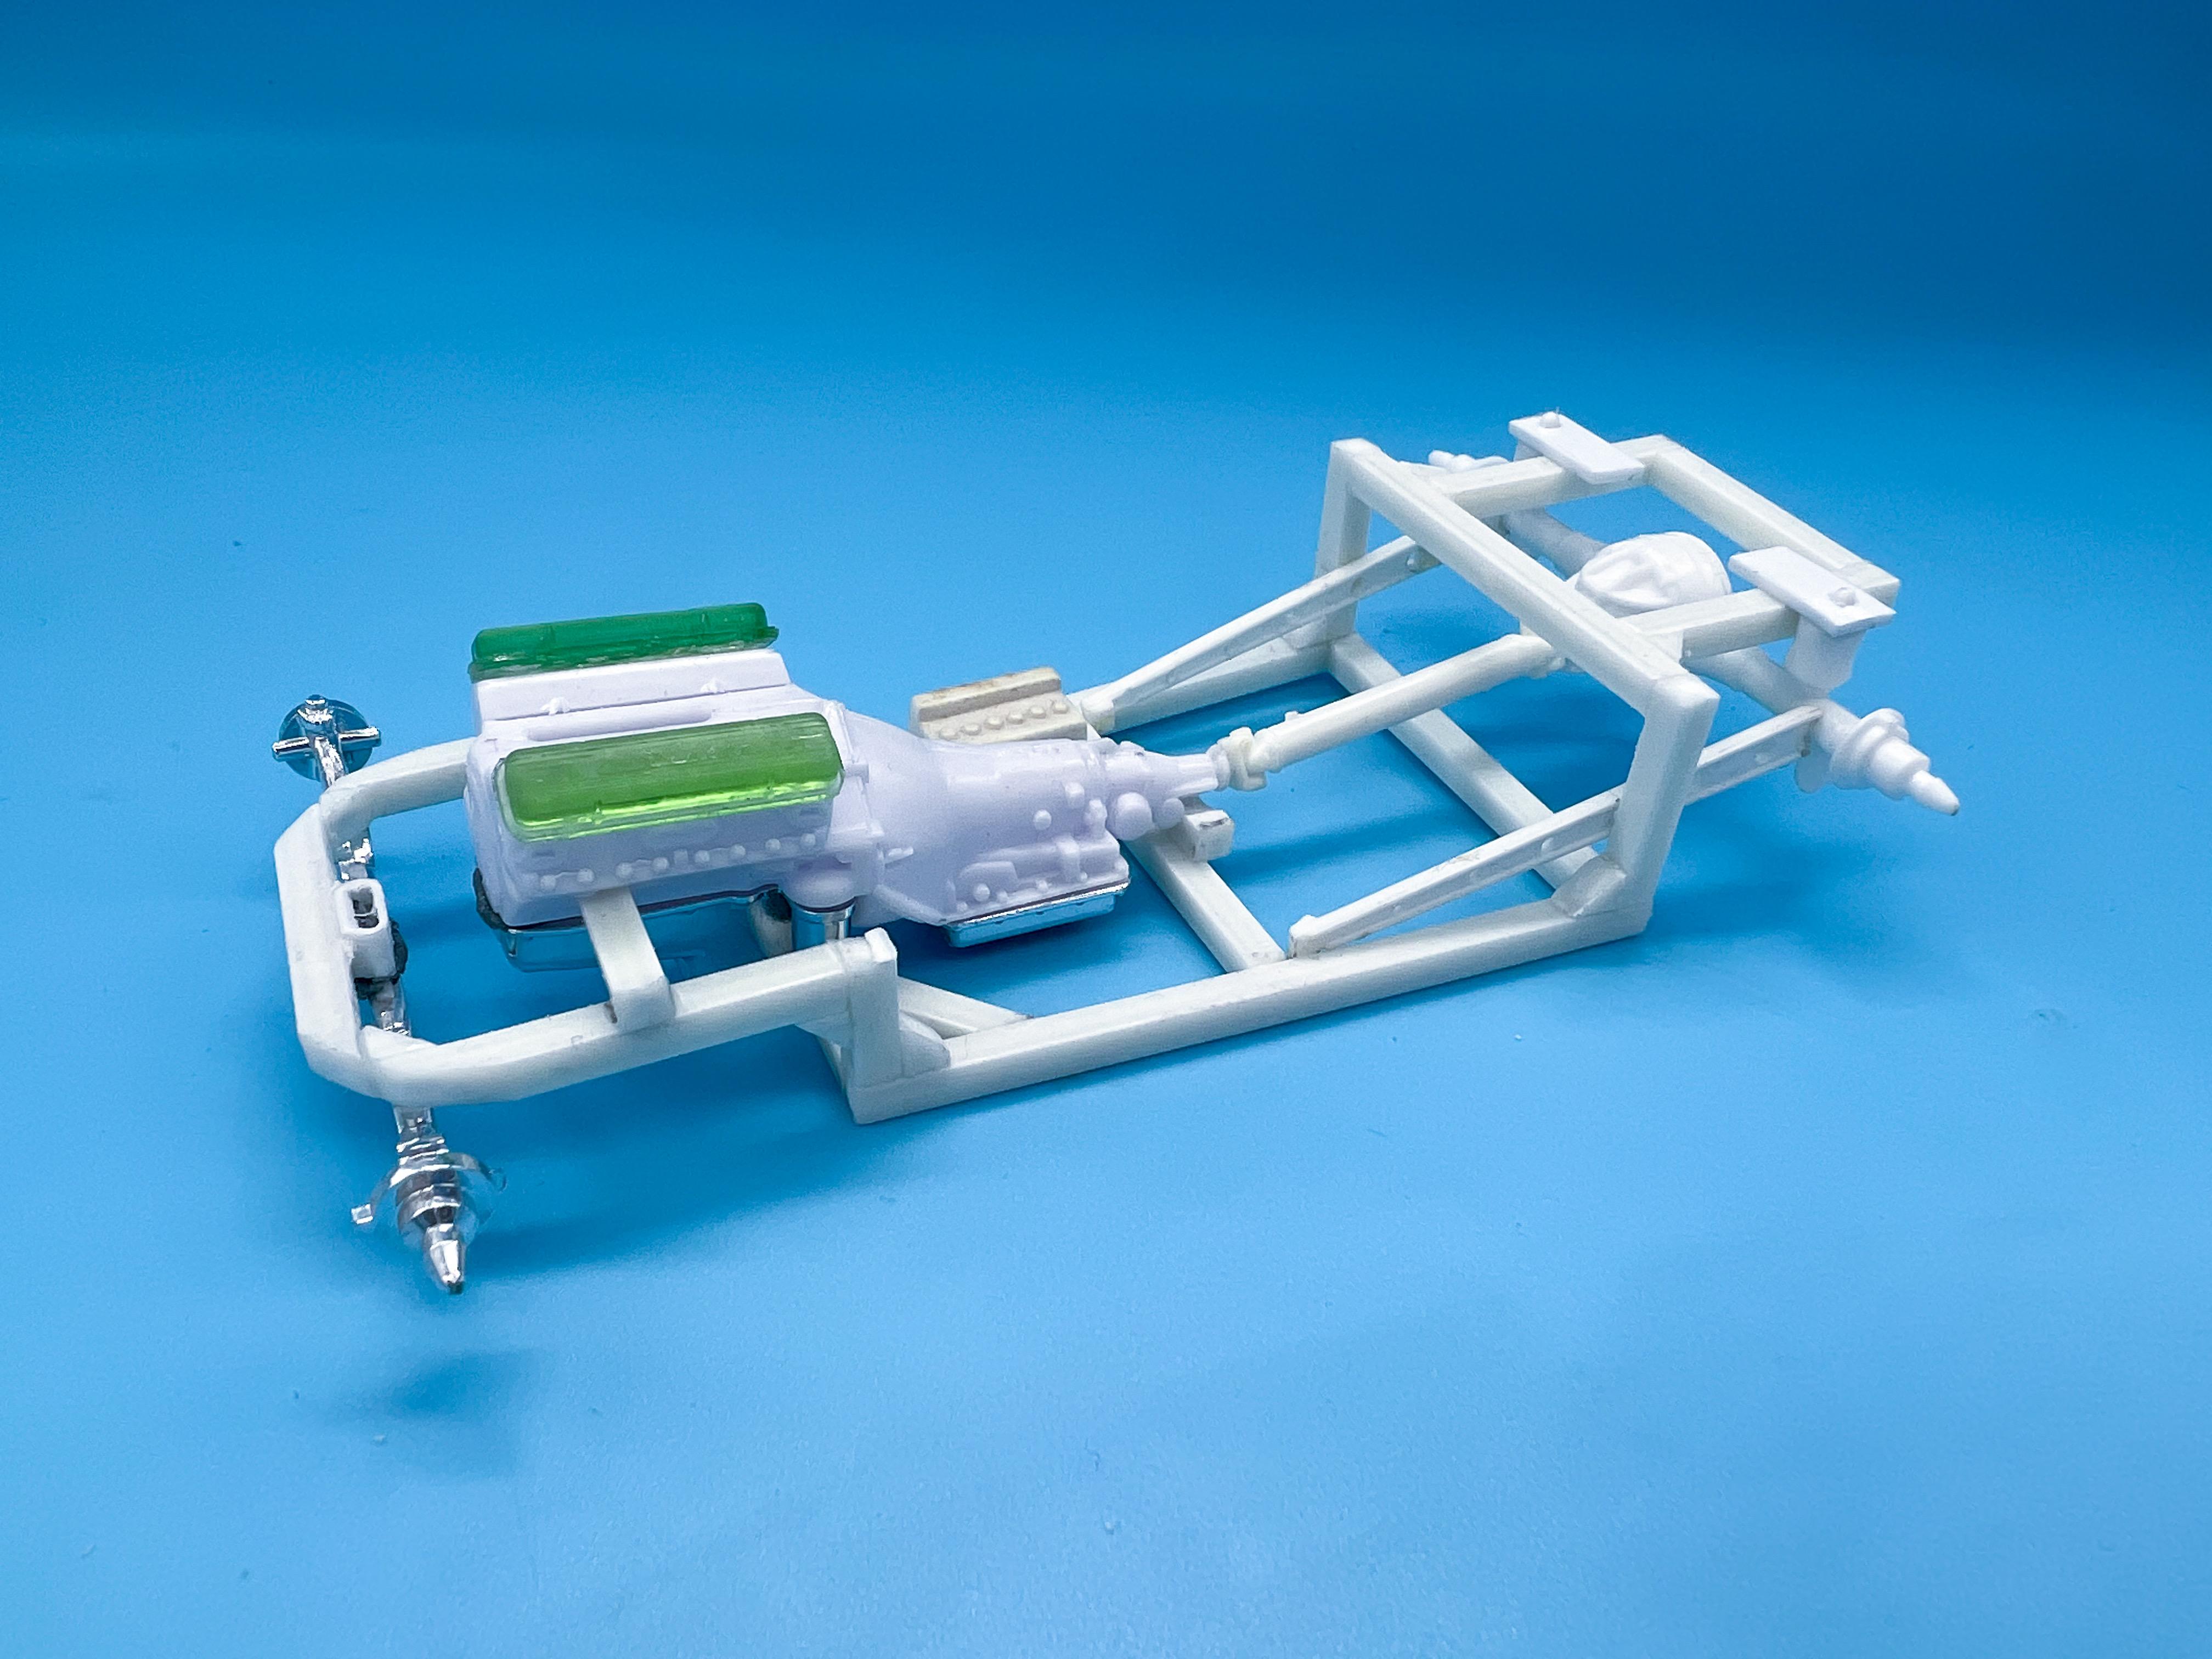
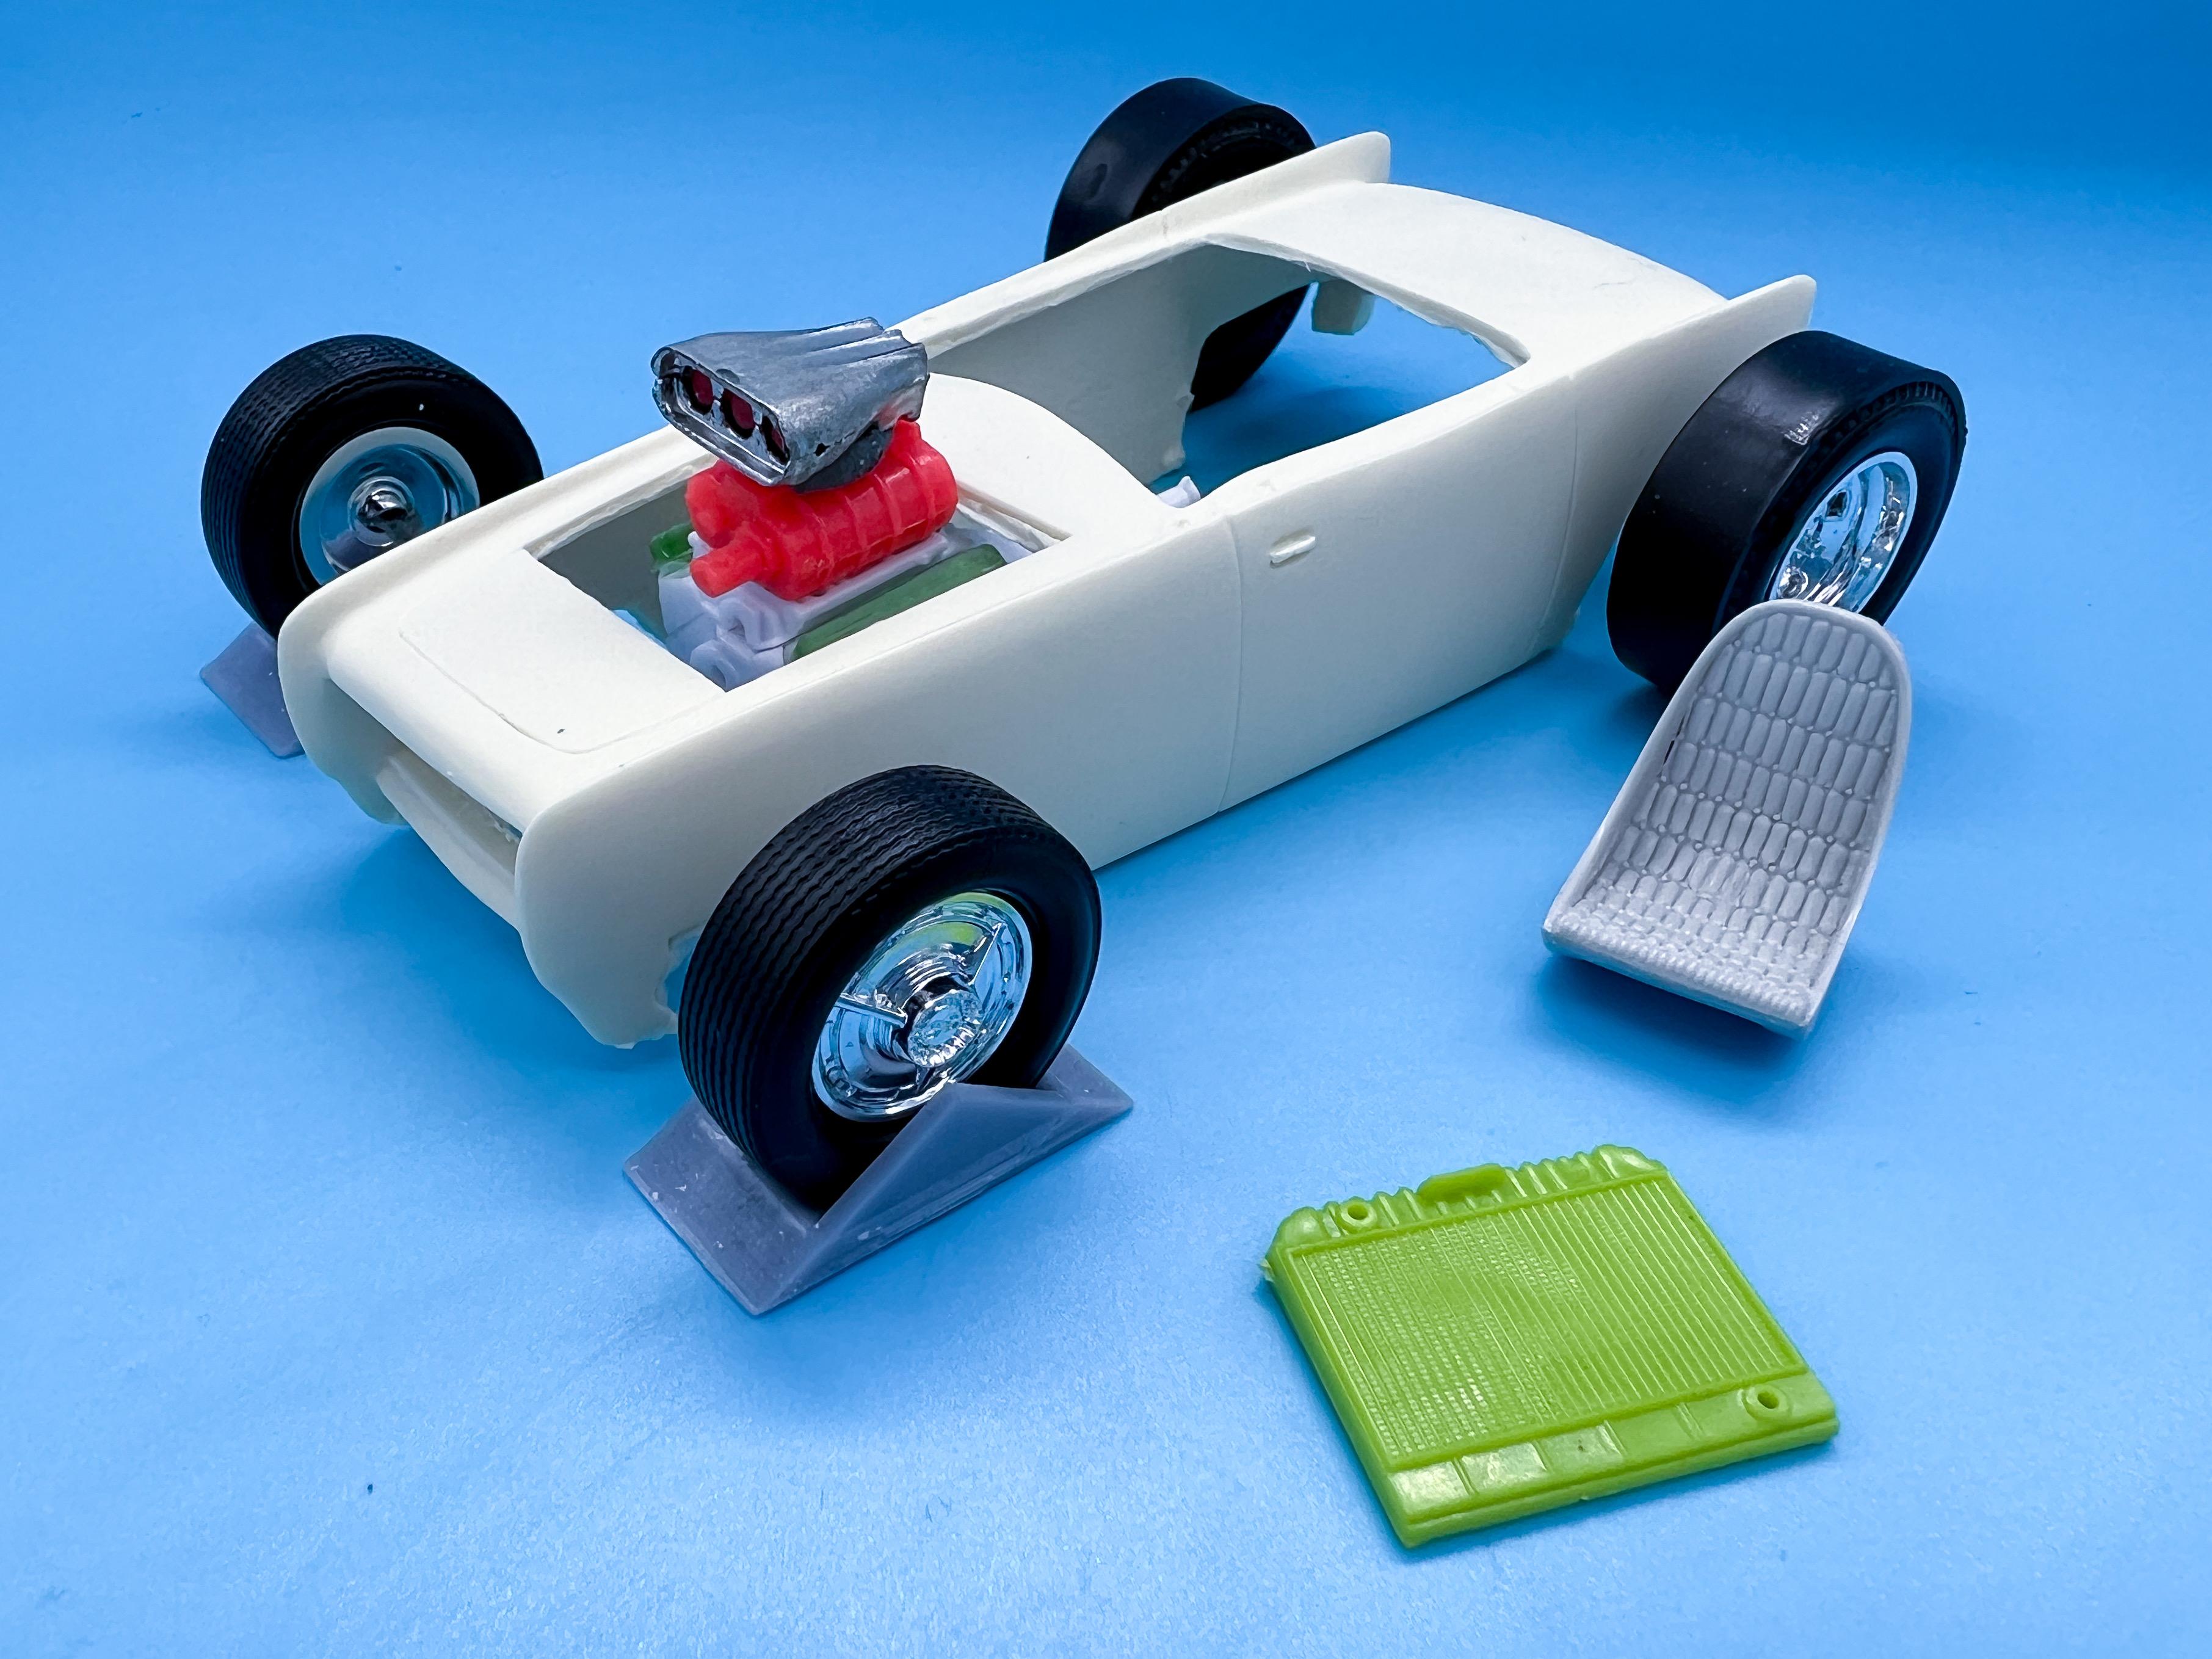
My carpet is SATURATED with model parts ?? Thank you! I really like the extreme proportions of a lot of rat rods - but I always think “imagine if it had a nice paintjob too!” This will probably be like that. My wife managed to break her 1:1 today which threw my evening into chaos, but got a start on a frame. If this was a more ‘serious’ project I would’ve tried making a birdcage-style tubular frame (and actually, that’s on my to-do list for next year), but for this project I went with plain old scale-2” square bar Plenty of work to go, but I’ve got it where the body slips right over it and you can’t see any of the frame - next job will a few more bars and then hanging all the stuff off it! TGI the weekend! More soon!
-
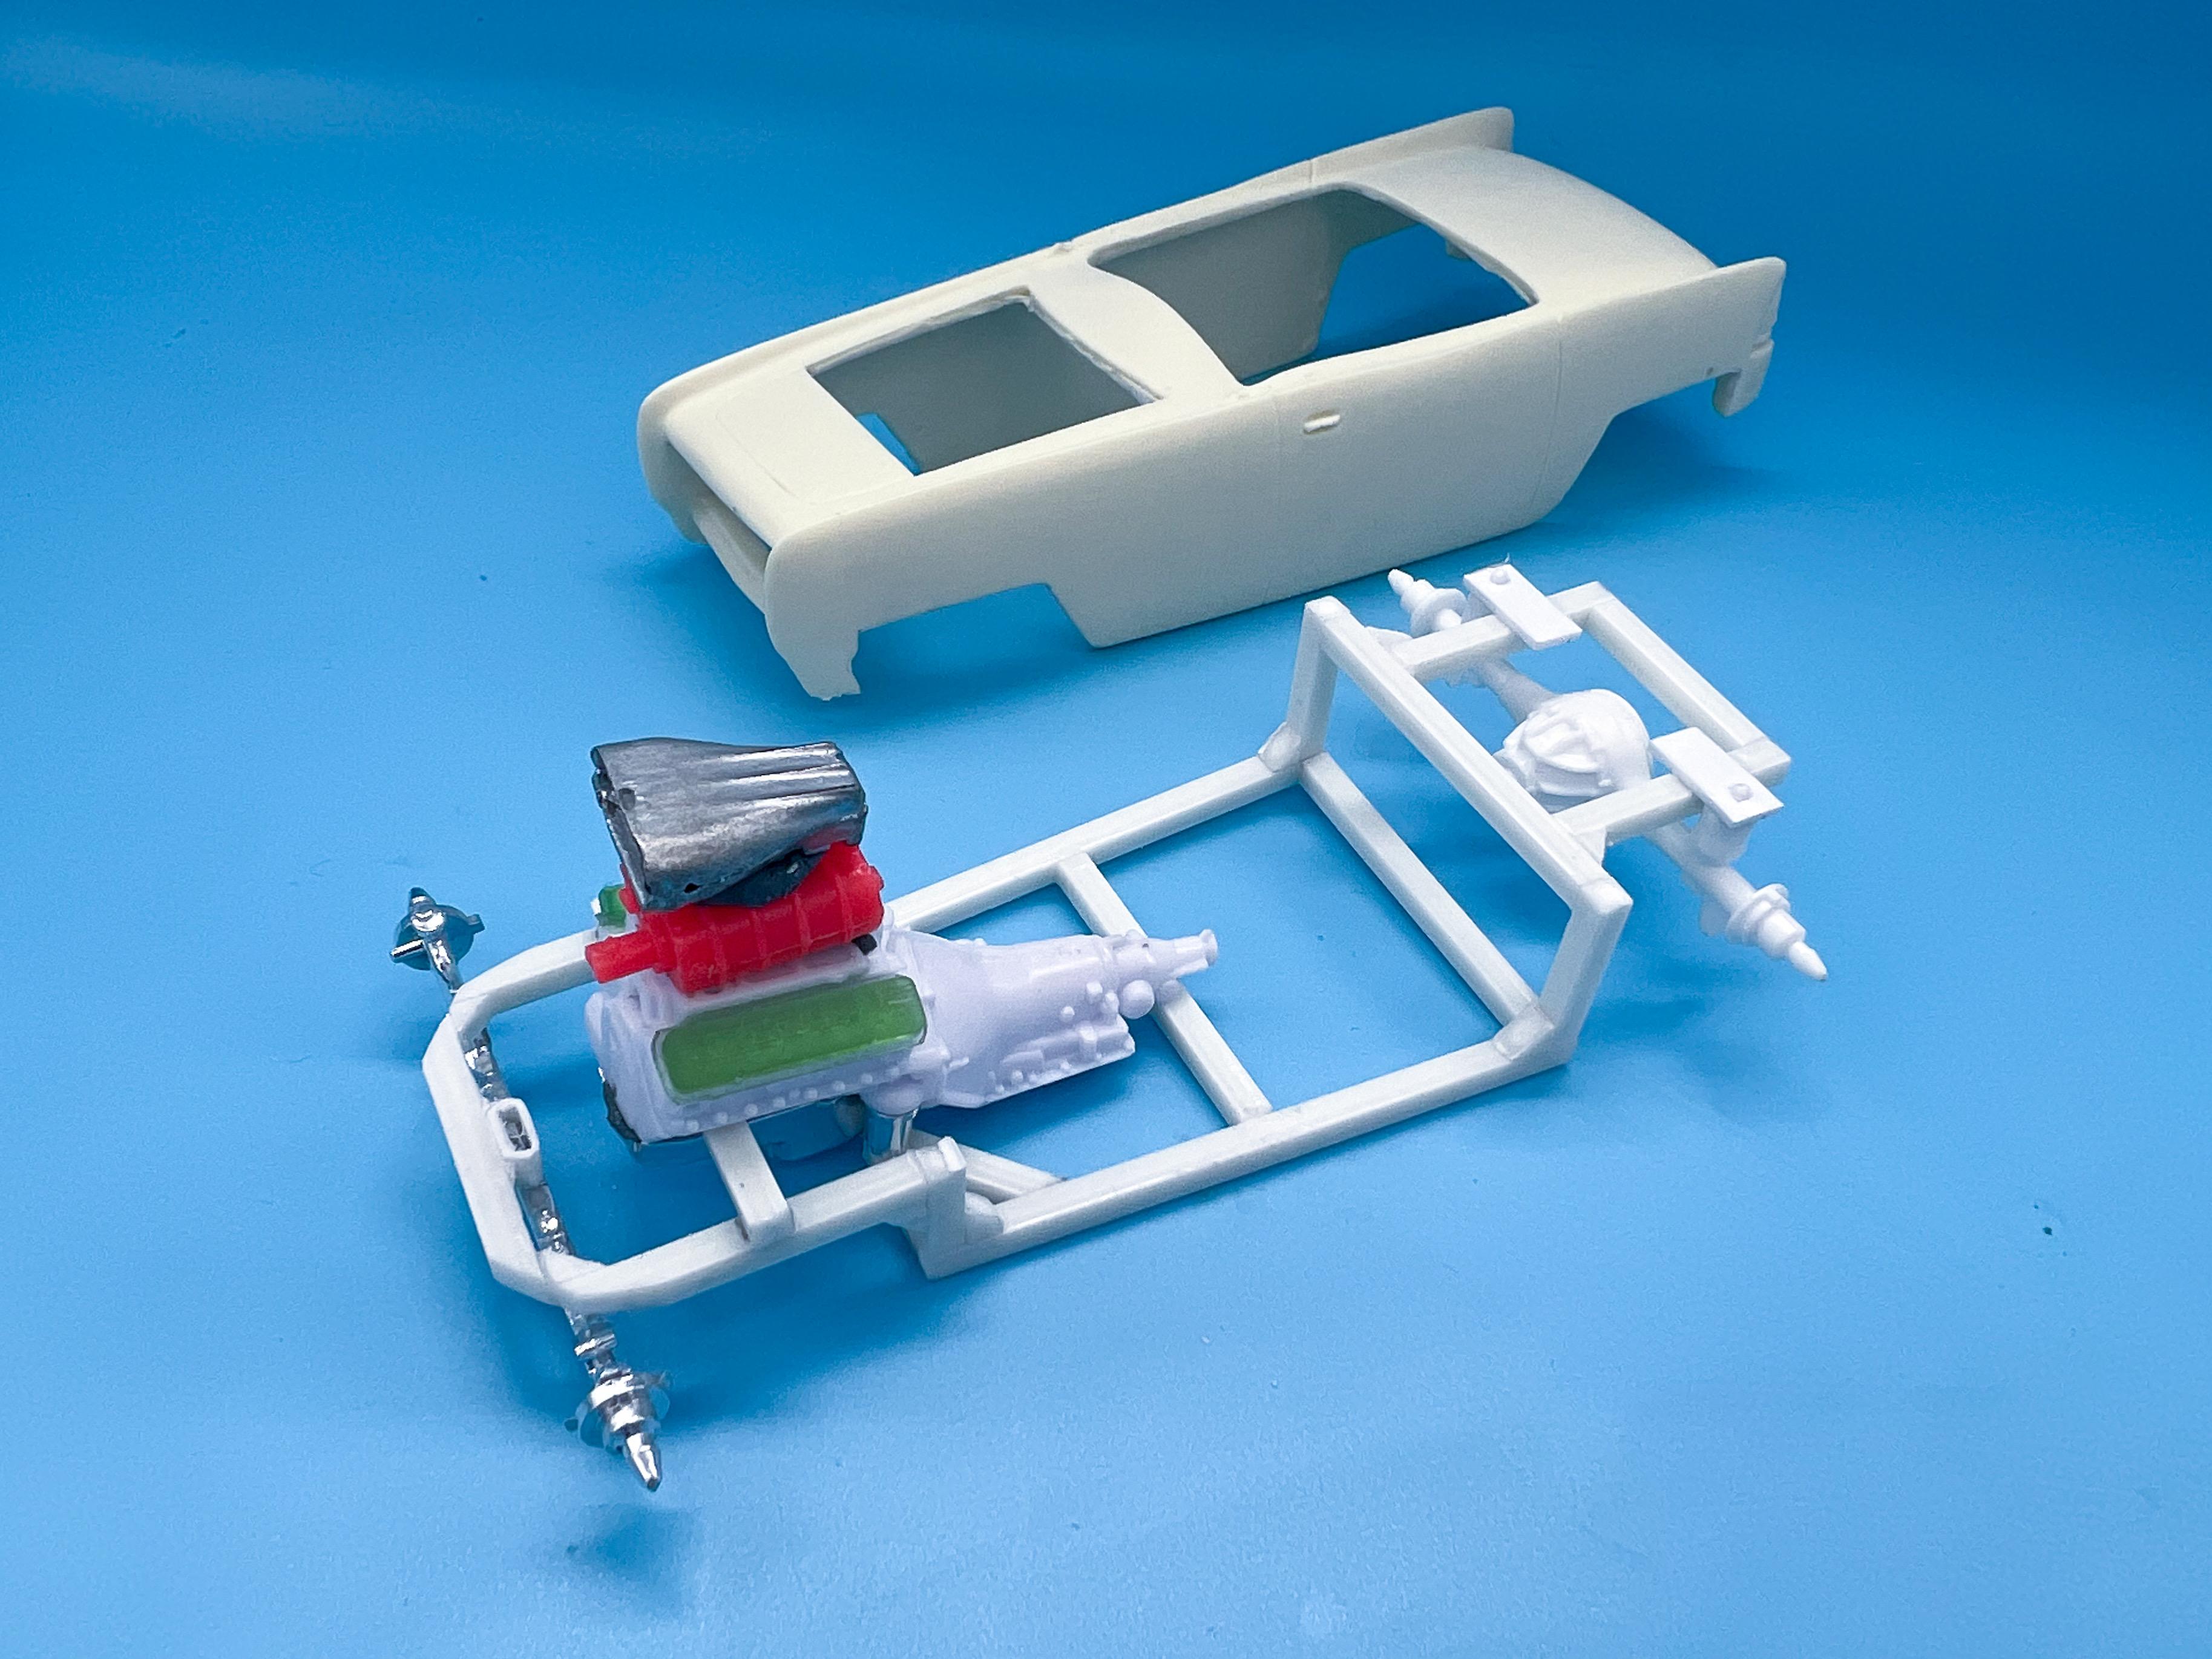
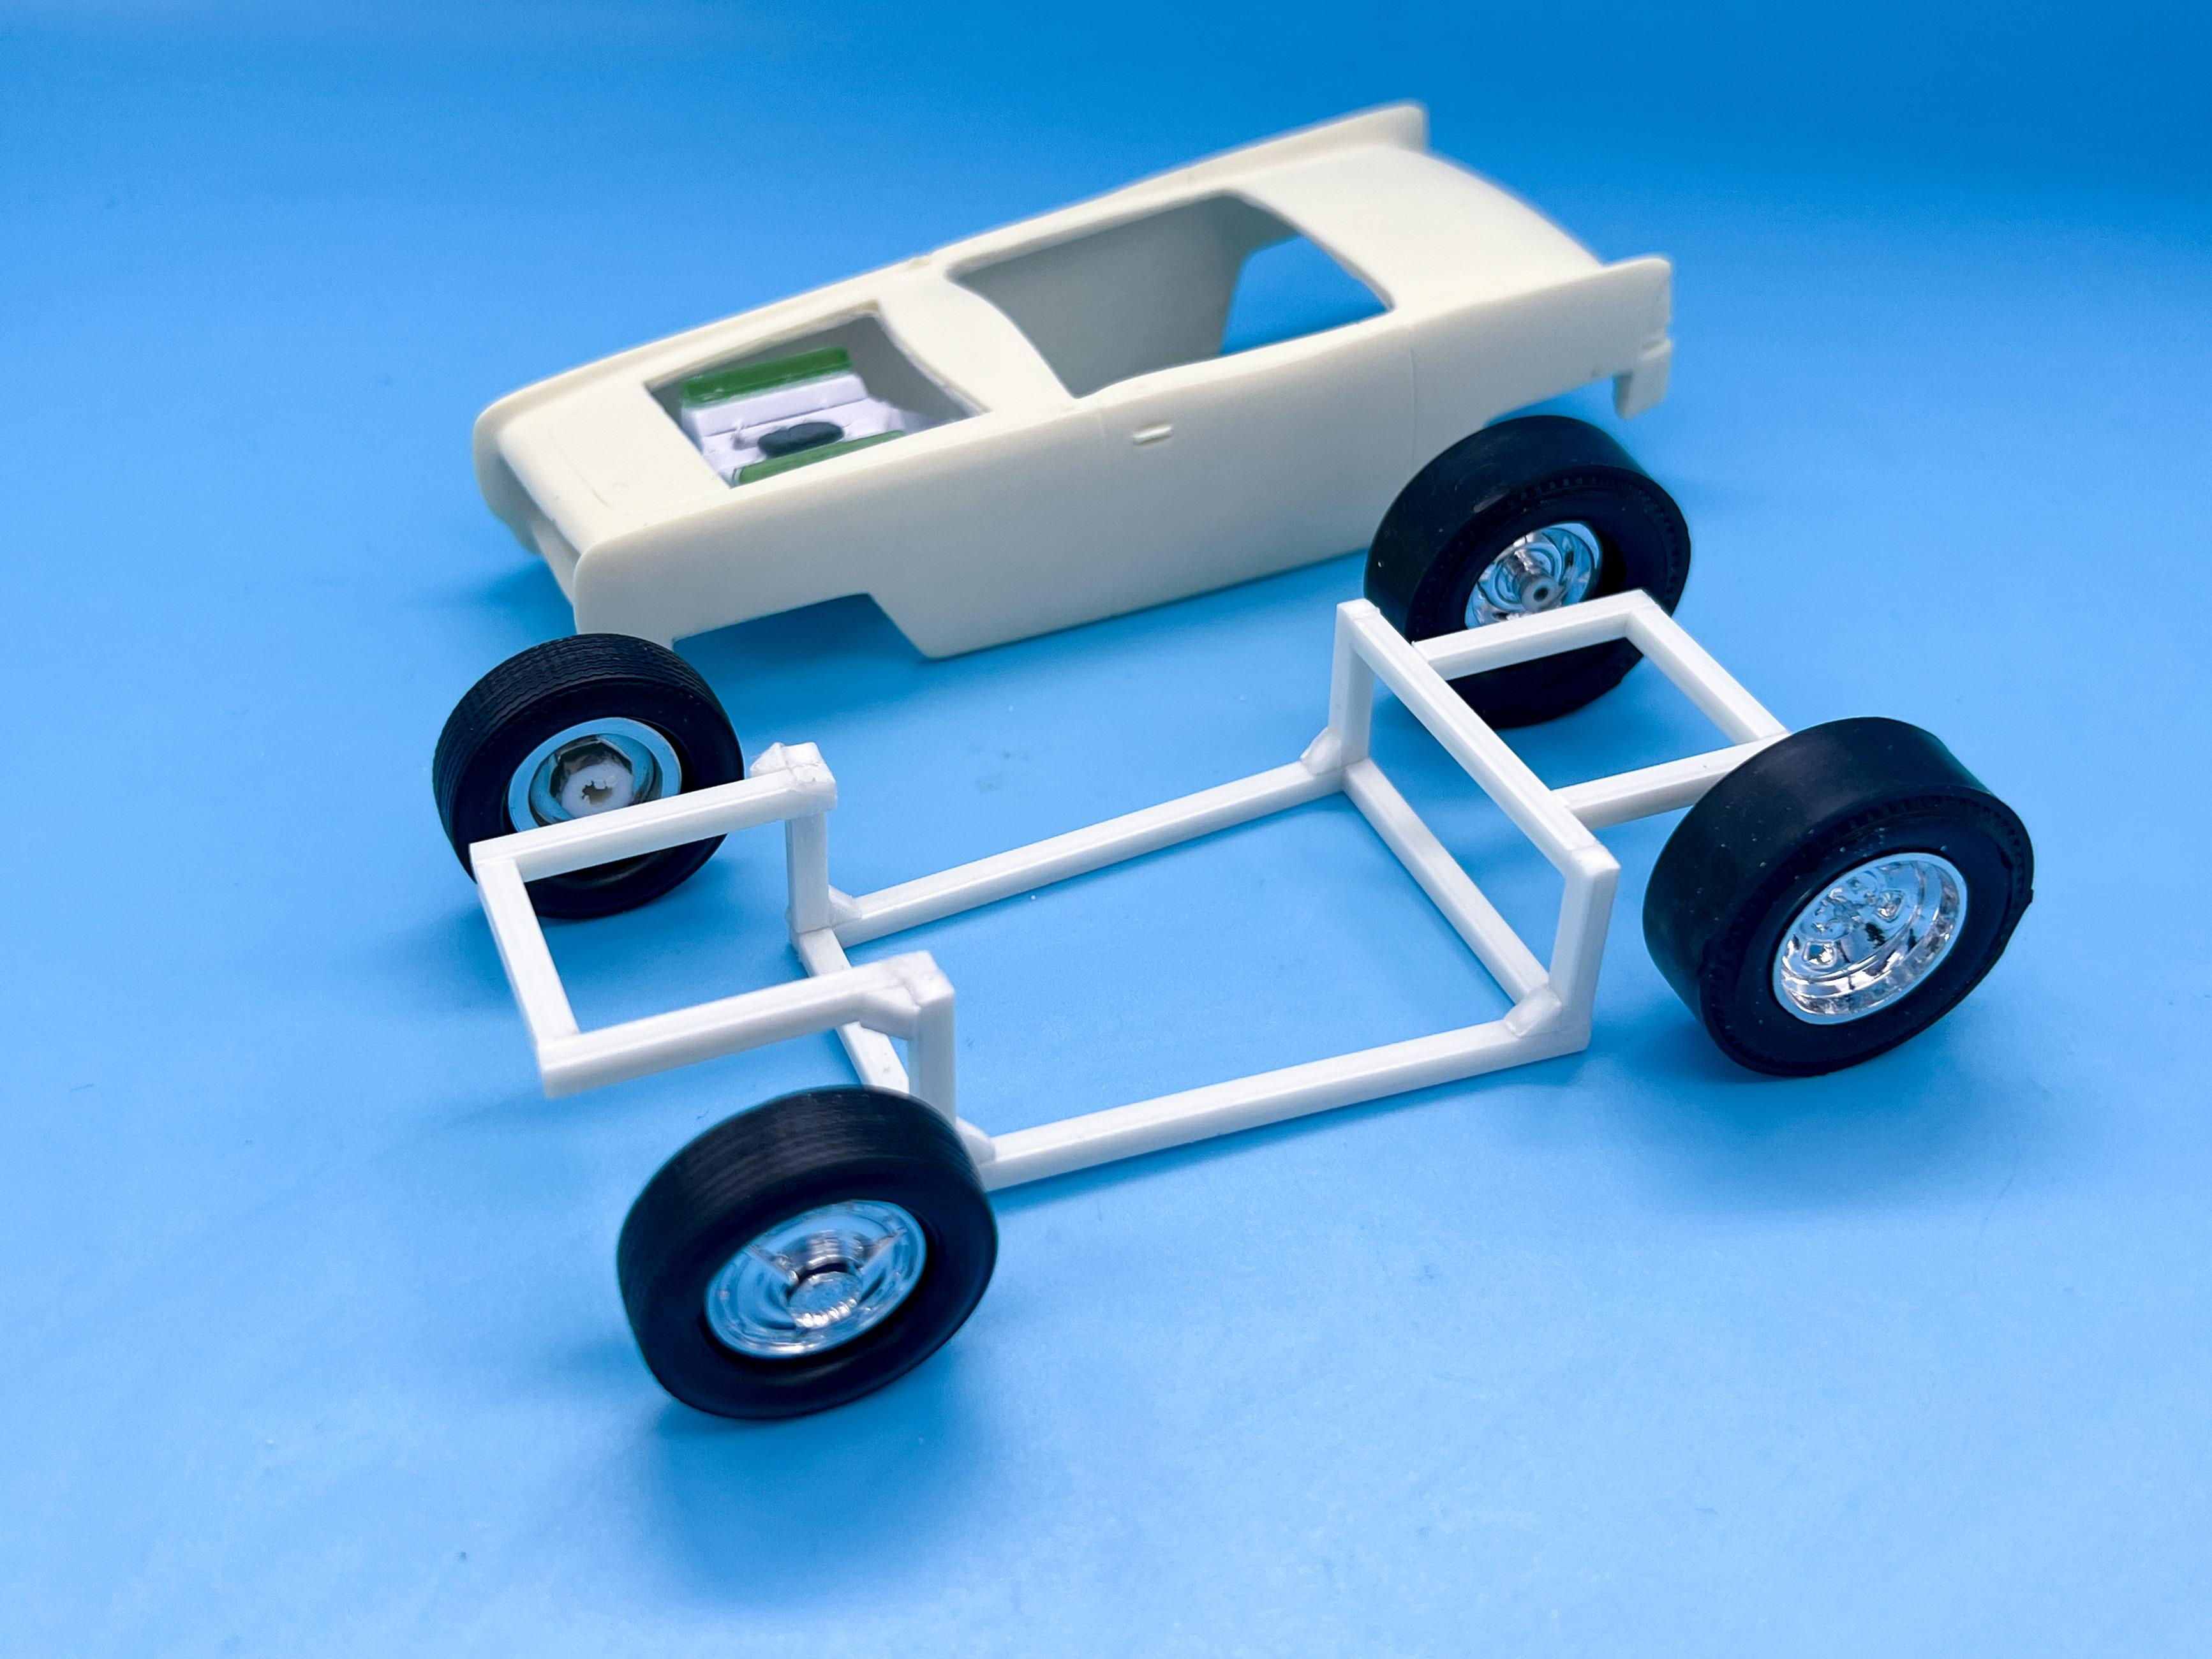
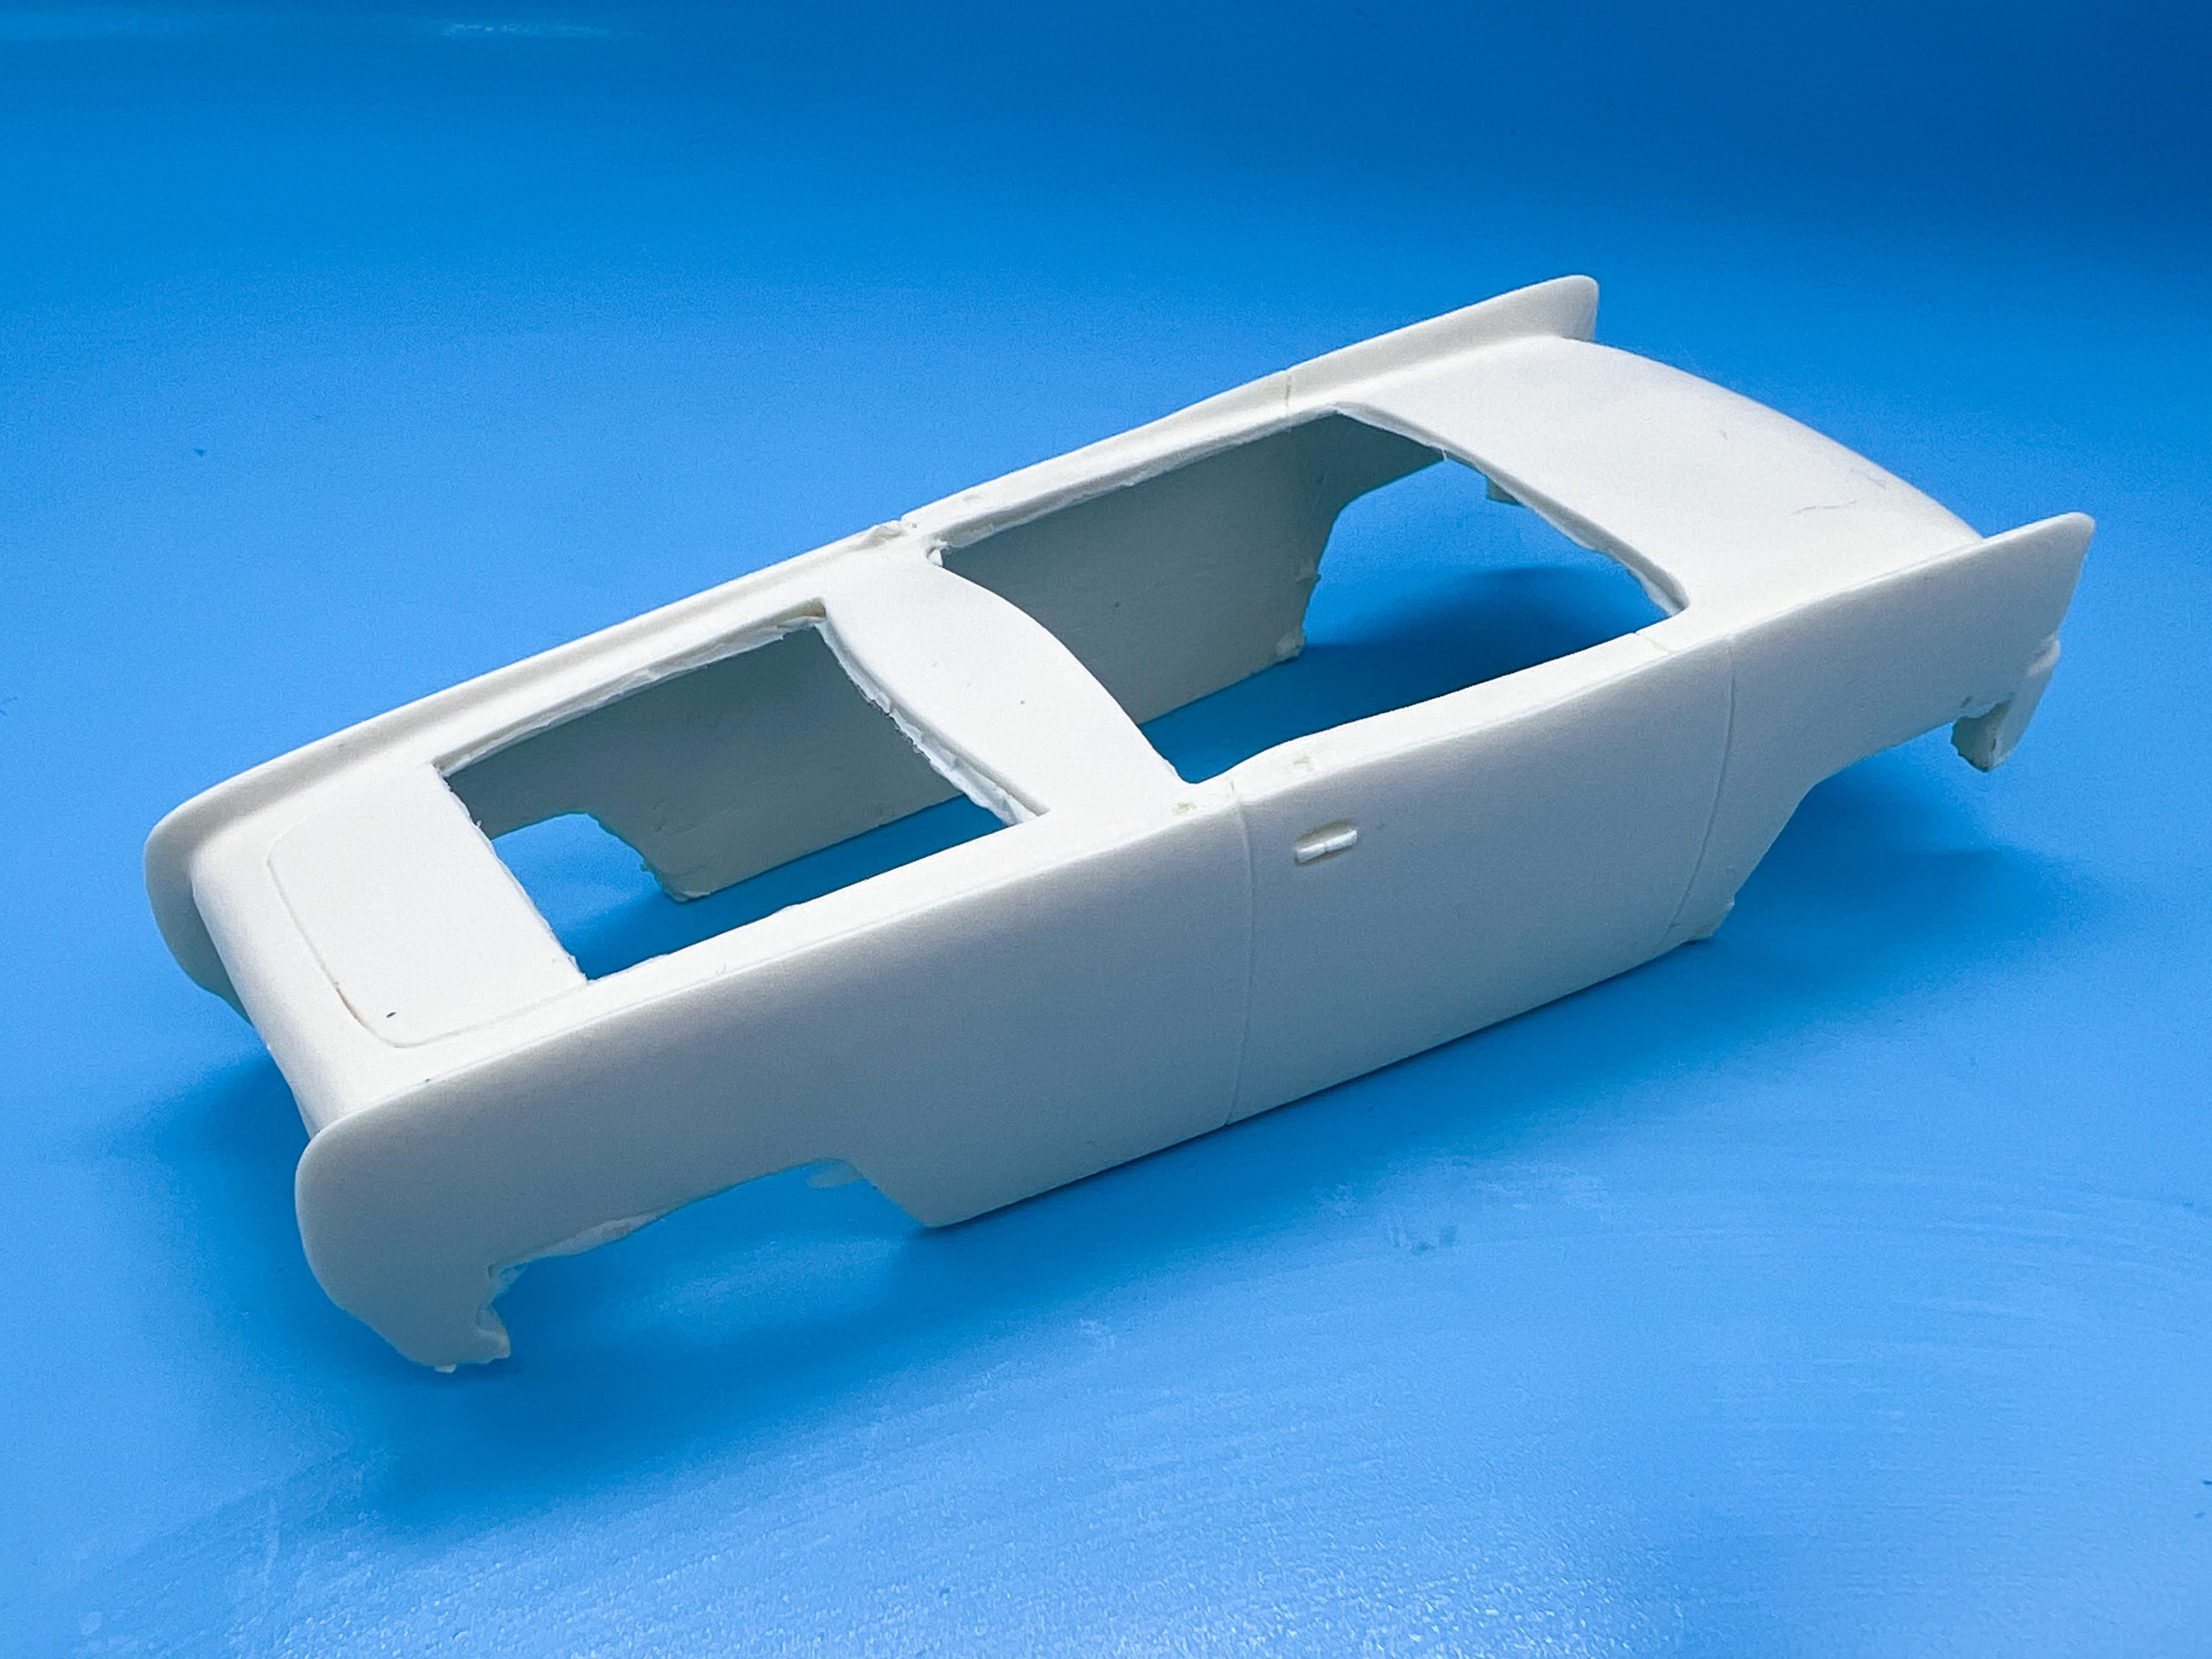
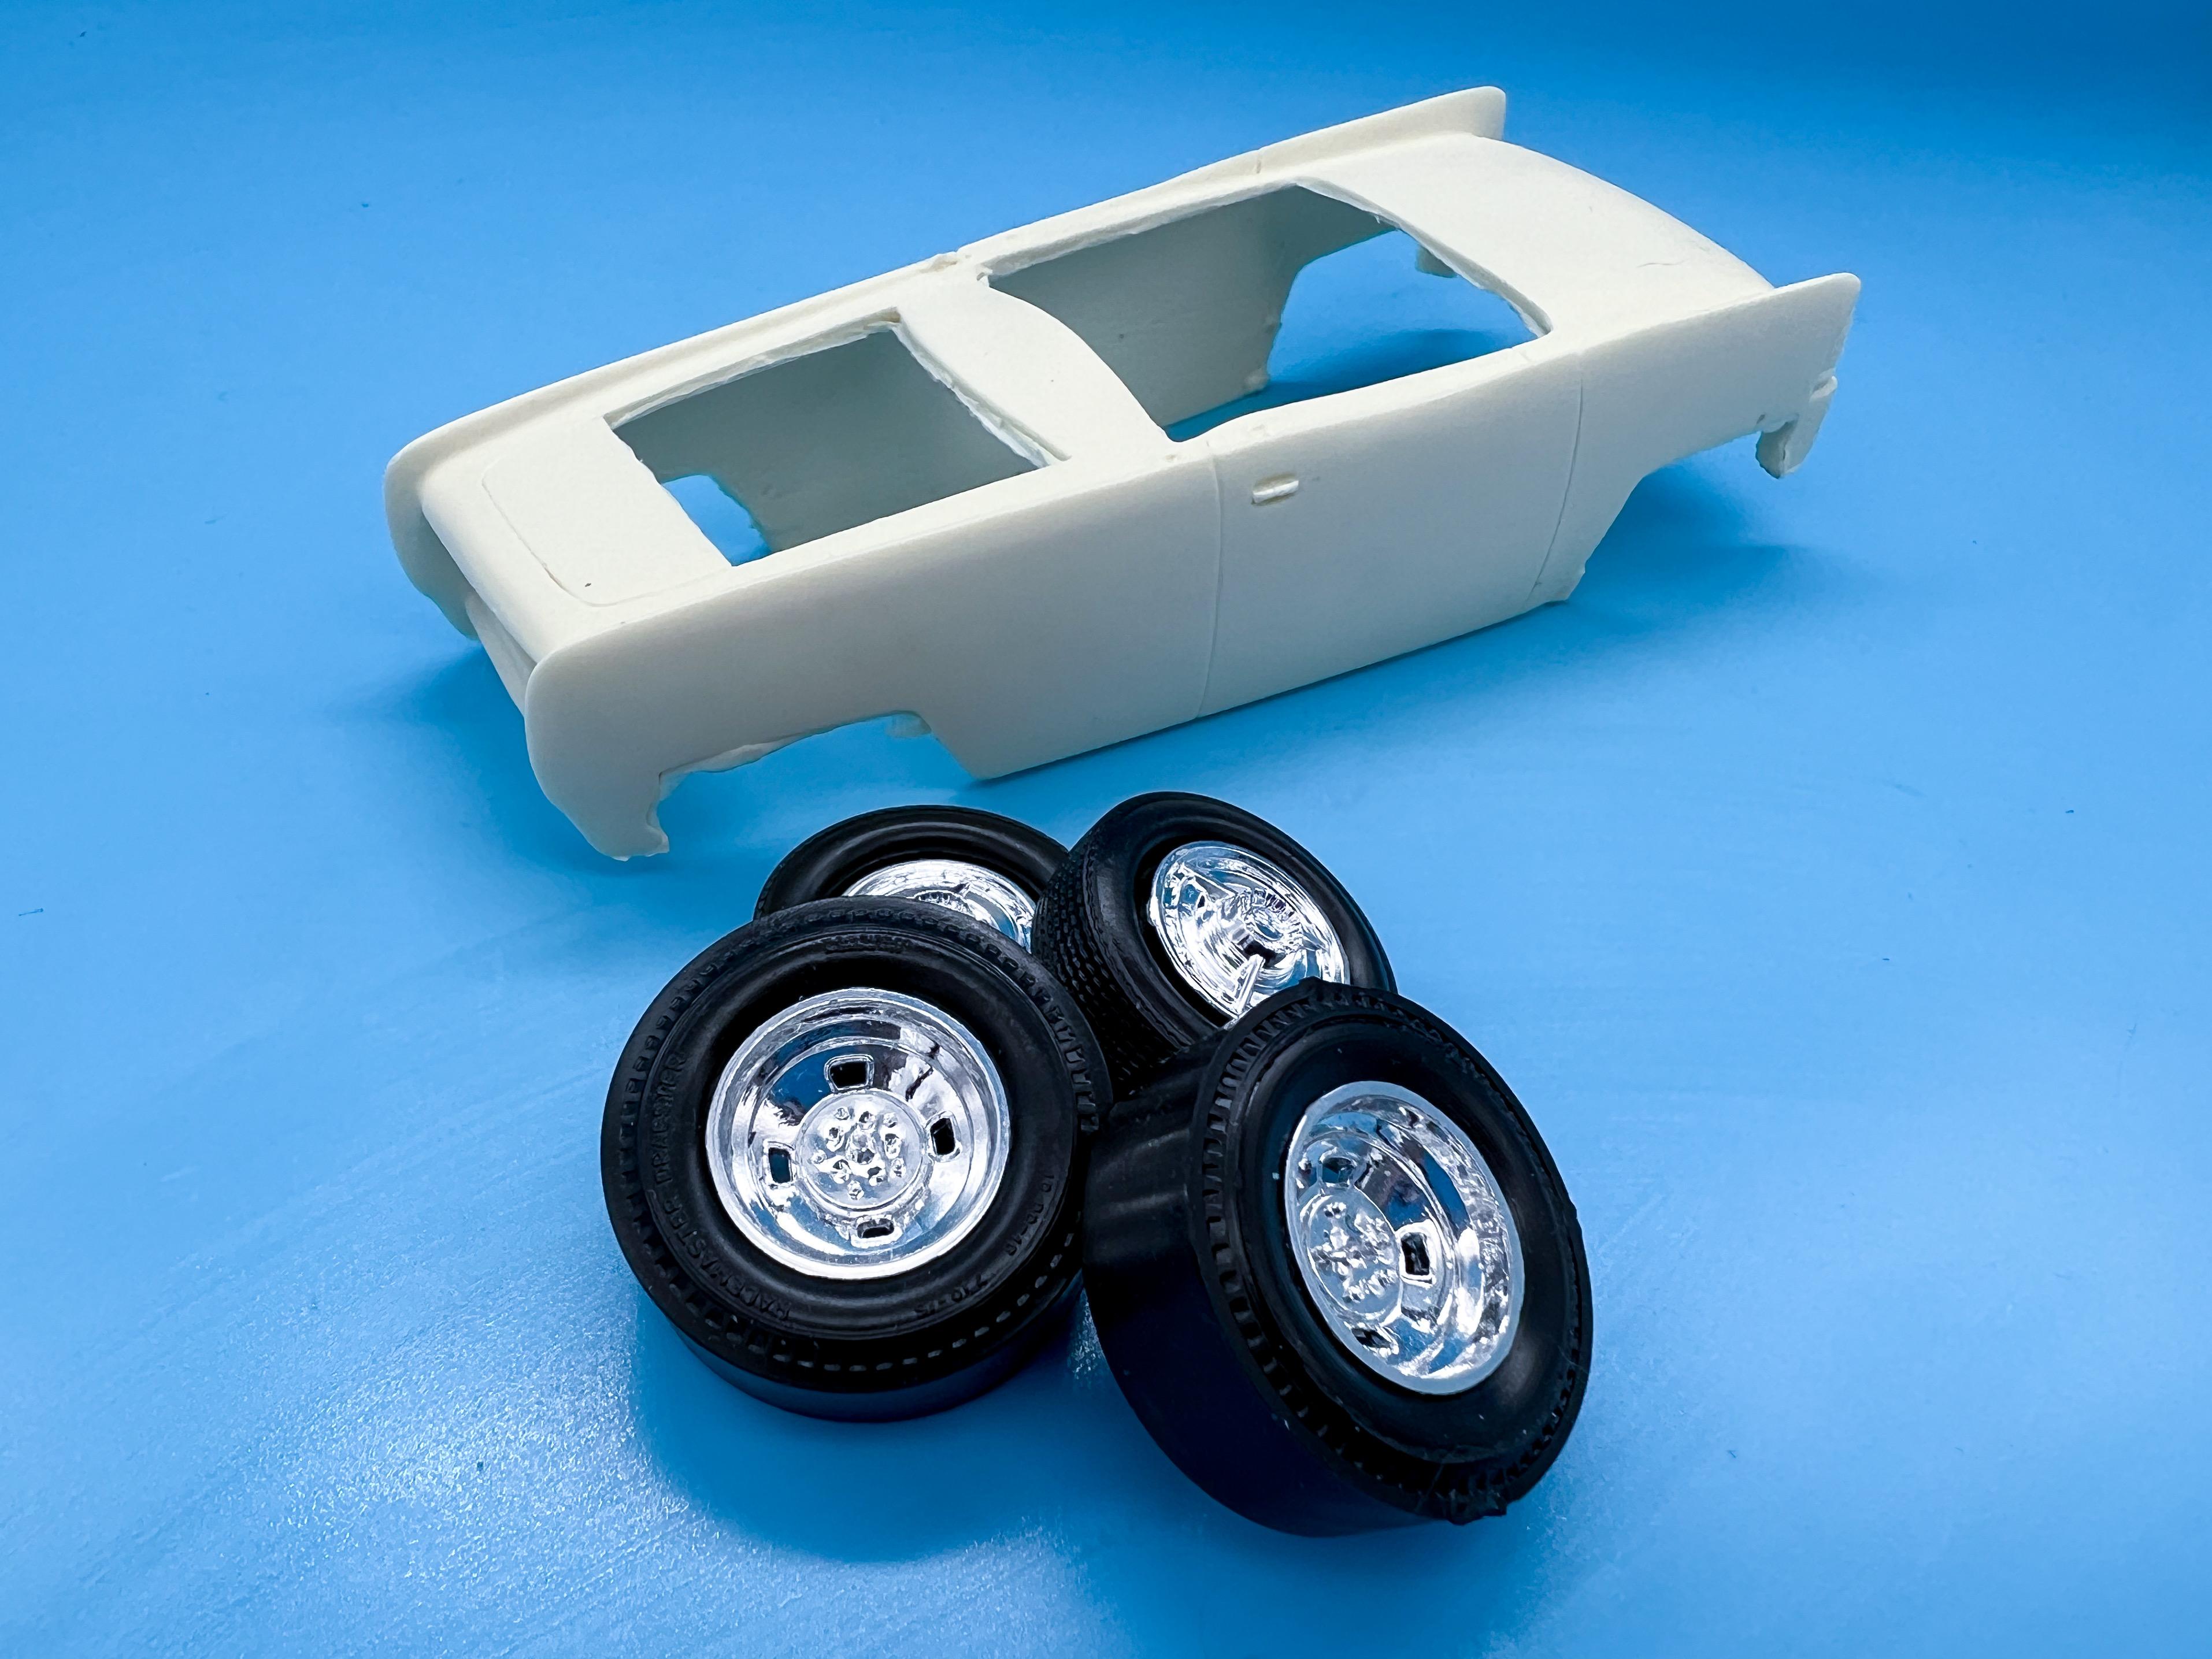
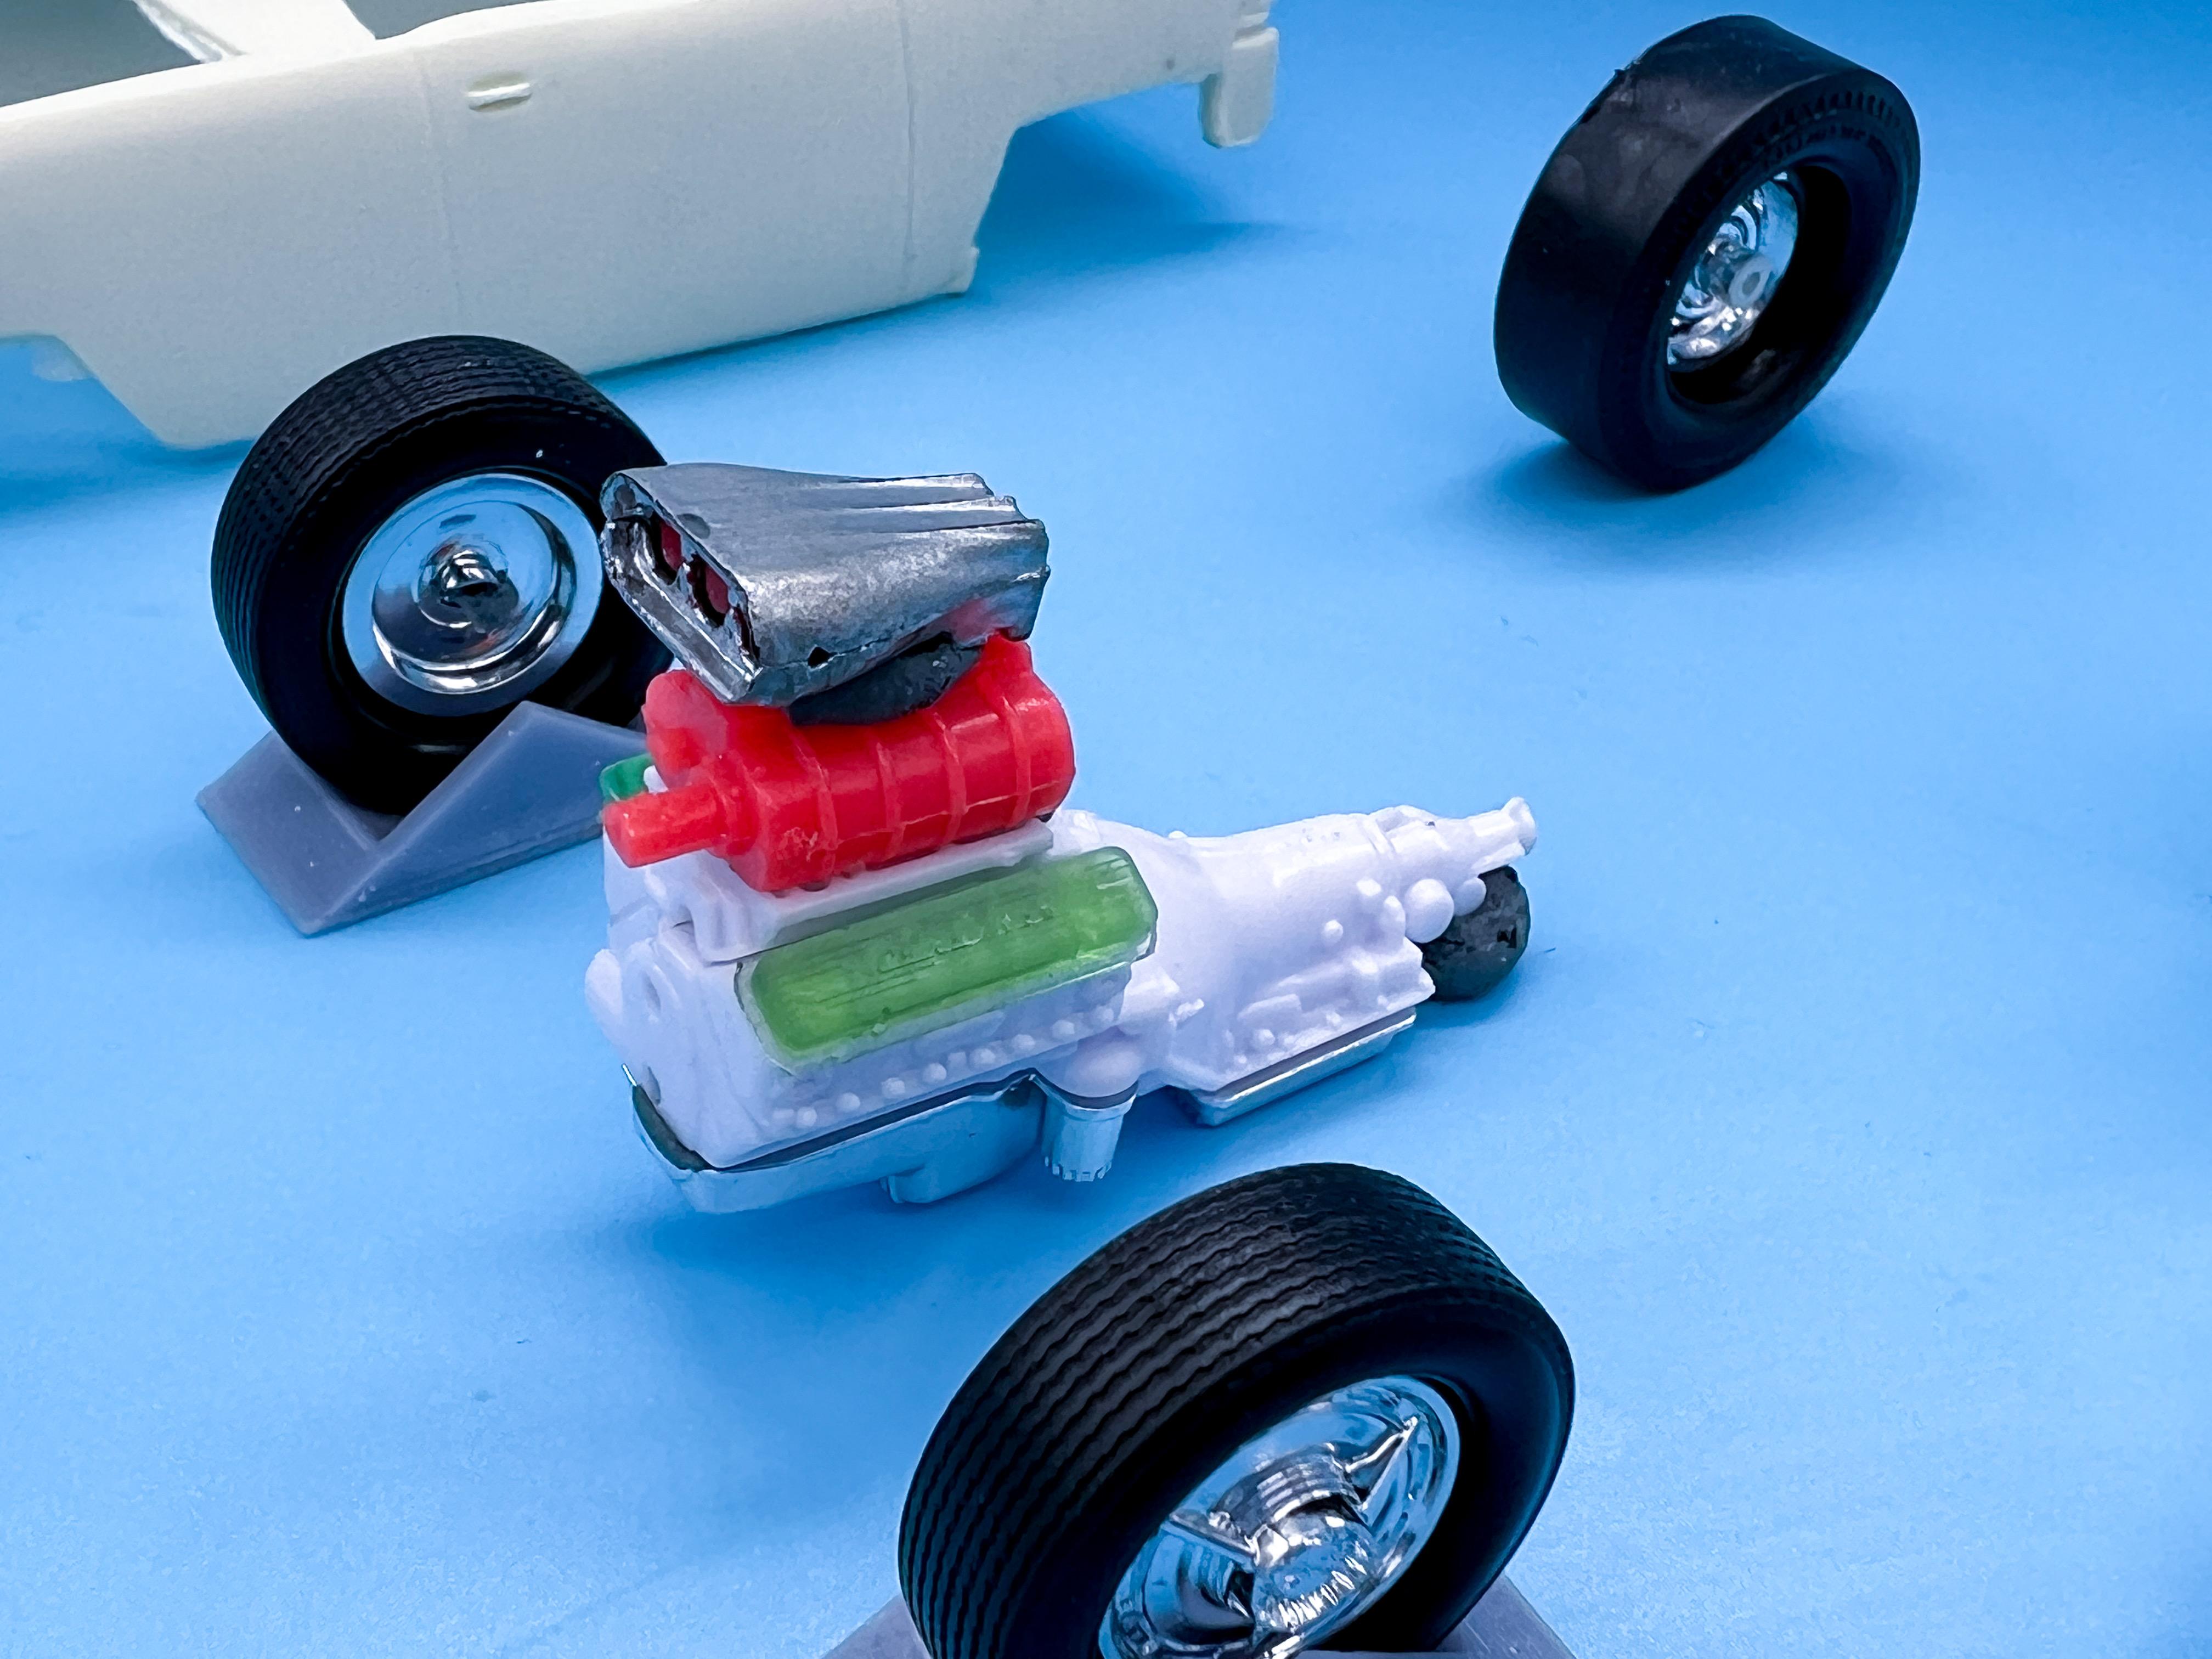
I’ve been thinking, inspired by this thread, that it would be a fun annual tradition to work on some kind of parts-box build and use up a bunch of stuff I have sitting around that might otherwise just keep gathering dust. It’s not like I don’t have a bunch of in-progress projects already, but I did promise myself I’d do this this year, so here goes… Didn’t really have any clear idea of what I was going to build; I’ve got a bunch of 30s Ford bodies sitting around and various Impalas and whatnot - but whilst digging through my stash I found this Flintstone cutdown Lincoln hot rod body that I didn’t have a particular plan for: Found some piecrust slicks, some Impala wheels and some Mustang tires - just the kind of junk (I mean, quality parts) someone might have lying around… I’d like bigger rear tires and smaller fronts ideally, but I’m resisting the urge to immediately fire up my 3D printer and make some… the idea is to USE existing parts, not create preciously un-existing ones… They’re not bad tho - might find some different front tires. Also found a spare Atlantis/Revell front axle and a rear axle from a….??? Next I went looking for engines - I was gonna use the (somewhat inaccurate) Lincoln engine from the AMT 25 T kits but it was too large…but I’ve got probably ten Revell SBCs sitting here. I’d kinda like something more interesting…but I’ve got some blower parts to play with: I know I said I wasn’t gonna print any parts, but I had some extra Vette valve covers left from another build so I’ll likely use those: Found a lonely single AMT custom seat, and a decent sized radiator to cut down (not sure what this is from, but I have probably twenty of them…) And with the addition of a parts box battery, a little racing steering wheel from something and one of those Revell fuel cells that isn’t worth installing in your 29/30 build because you can’t see it I’ve got a decent starting point for SOMETHING! I’m thinking I’ll scratchbuild a frame, figure out some air suspension so it can sit in the dirt without me feeling bad that it wouldn’t work in real life and have a wonderful Christmastime playing with styrene! More soon, soon as I’ve done more!
-
Assuming the missing part is missing, gluing it back on won’t help much… I’d pick up some solid aluminum bar of the same diameter and scratchbuild a new set - brass works too, but aluminum is the right color already and it’ll be a little easier to work than the brass would . If you’ll need to solder multiple pieces tho, obviously brass is the way to go. Plain old styrene round bar would do the trick too though to fix rather than replace
-
Definitely! The Ace Hardware near us had 20-something dusty old bottles on the shelf, for $5 or so a piece. Once news got out that it was about to become hard to come by, it disappeared before I even got around to picking up another bottle…wouldn’t be surprised if one or two modelers picked it all up while they could
-
Yes, and THAT product is also discontinued. Hence the price for the one and only bottle on Amazon being $50. There's a whole thread on it, somewhere here. I wouldn't doubt it's an acrylic paint - but that doesn't necessarily mean it's safe for any and all plastics. As you correctly noted from the photo you posted of the various chemicals in the product's makeup, it may be acrylic but it certainly isn't WATER based like some people interpret 'acrylic' to mean... Was the part you tried it on a spare that you didn't need? Fingers crossed you dont need it, because that paint crazed it pretty good, it looks like...
-
Pity it's discontinued...but yes, if you can find it, it's great for certain jobs
-
Building a model from SPARE PARTS ONLY!
OldNYJim replied to steveracer's topic in Model Building Questions and Answers
Ok, I’ve been thinking about this post since I read it, and I’m gonna start myself an annual tradition! December Parts Box Build! Seems like a fun way to use up some of the stuff I’ve had left over from whatever I’ve been working on all year - I’ll post a thread tomorrow once I’ve found a spare body and enough old junk to build something. Would be cool if anyone else was inspired to do the same and posted a WIP too! -
Agreed - and I’d still be interested in seeing screenshots of the Lychee layouts that aren’t working out
-
Agreed! Nice rule-breakin’!
-
You’ll definitely see the primer pop through if you’ve only laid a light coat on and then sanded back a little - doesn’t look like any cause for concern from this end If you were painting something transparent colored (a candy, or something that doesn’t cover very well and requires multiple coats) then you might have more issues, but that color you’re using looks pretty opaque. When I get a little dust or grit in my paint I’ll sand back to where it’s smooth and then carry on where I left off - no biggie (and best to fix it now rather than try burying it and ending up with a mess)
-
Gorgeous paint (predictably enough ?). That color looks GREAT on there!