dino246gt
-
Posts
2,247 -
Joined
-
Last visited
9 Followers


Recent Profile Visitors
9,153 profile views


dino246gt's Achievements
MCM Ohana (6/6)
-
First off, THANK YOU for taking the time to post all those pictures with easy to follow explanations of step-by-step lessons on how to properly chop a top! Awesome references for all of us. And your sense of proportions and customizing taste is commendable. Can't wait to see this Kool Kustom at the Rod-O-Rama!
-

1/12 Lancia Fulvia teaser from Italeri?
dino246gt replied to The Creative Explorer's topic in Car Kit News & Reviews
WOW! Nice build by Simon, cool kit, I want one! -
It's all coming along very nicely! I love how detailed those gauges look without decals, that's pretty amazing!
-
Nice builds and interesting solutions to "problems" encountered along the way. We all run into problems but we push ahead and make adjustments, big and small. Thanks for sharing your fun builds, I sure enjoyed it and learned a few new tips and tricks.
-
Man this is a fun thread for me and others to follow! I love building those old kits and making them better. What you're teaching us applies to all older kits, so.......... Thank you for making such easy to follow lessons on how-to-have-fun building a less-than-stellar kit!
-
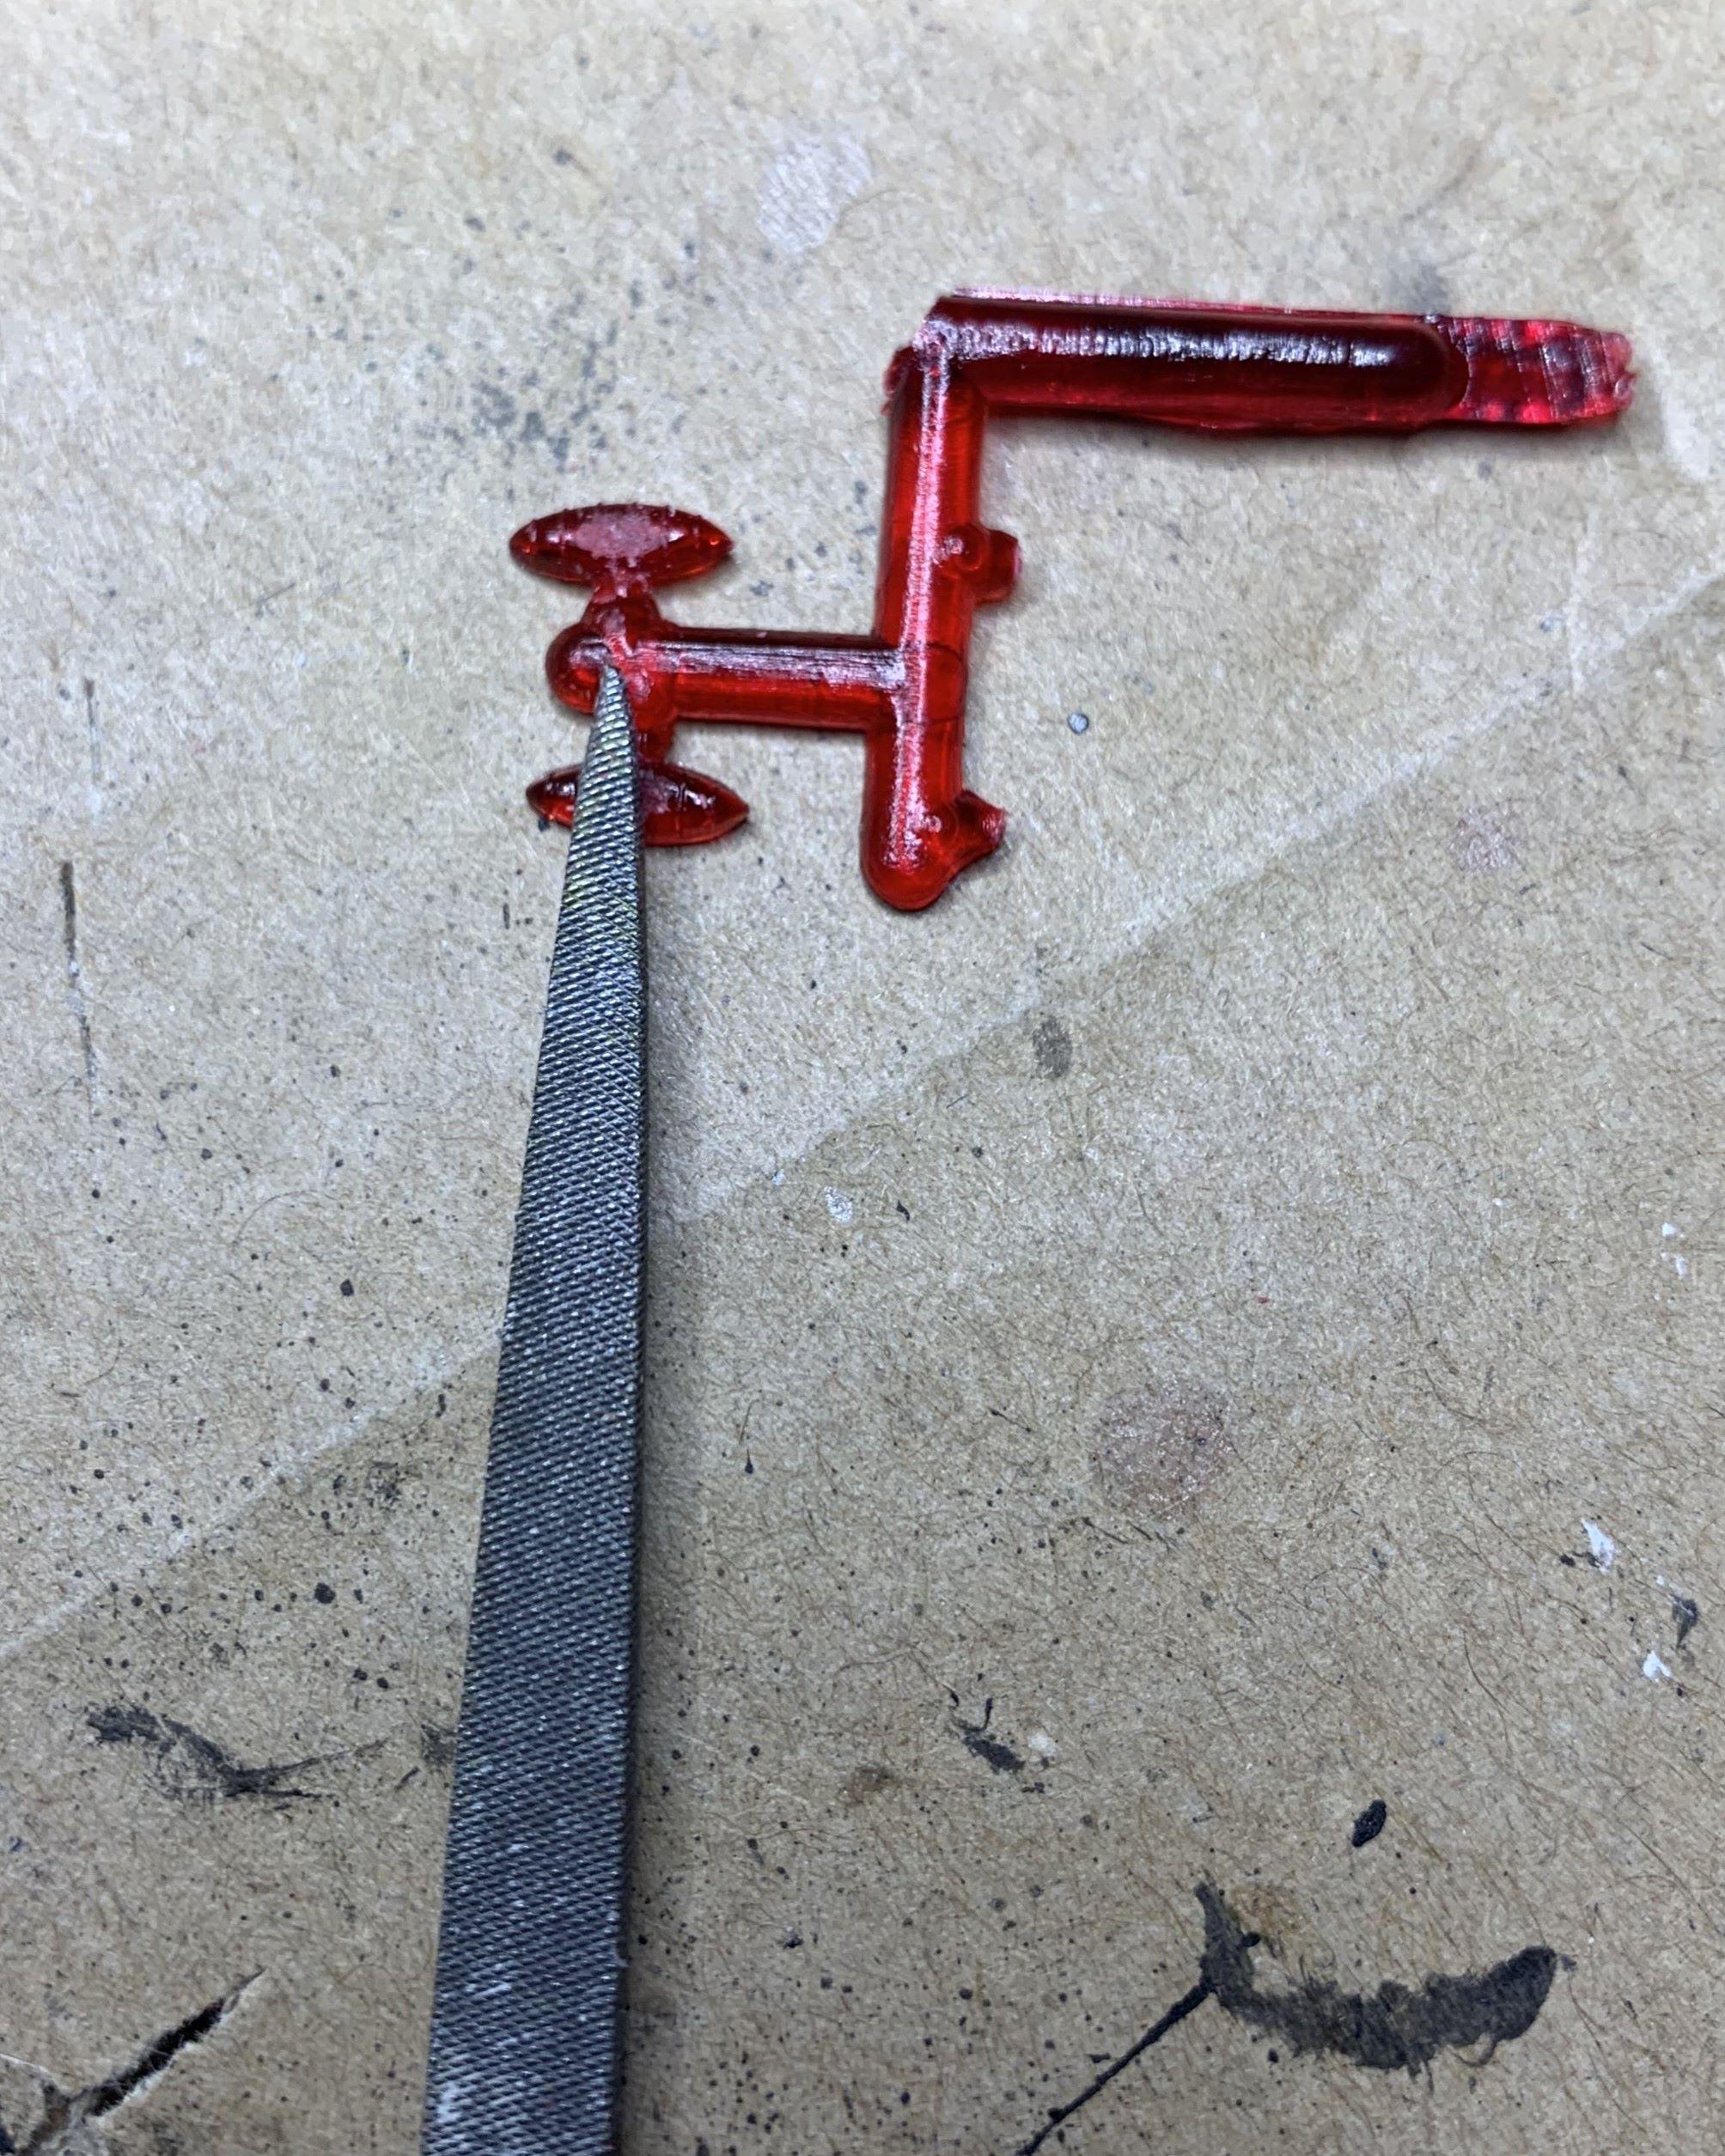
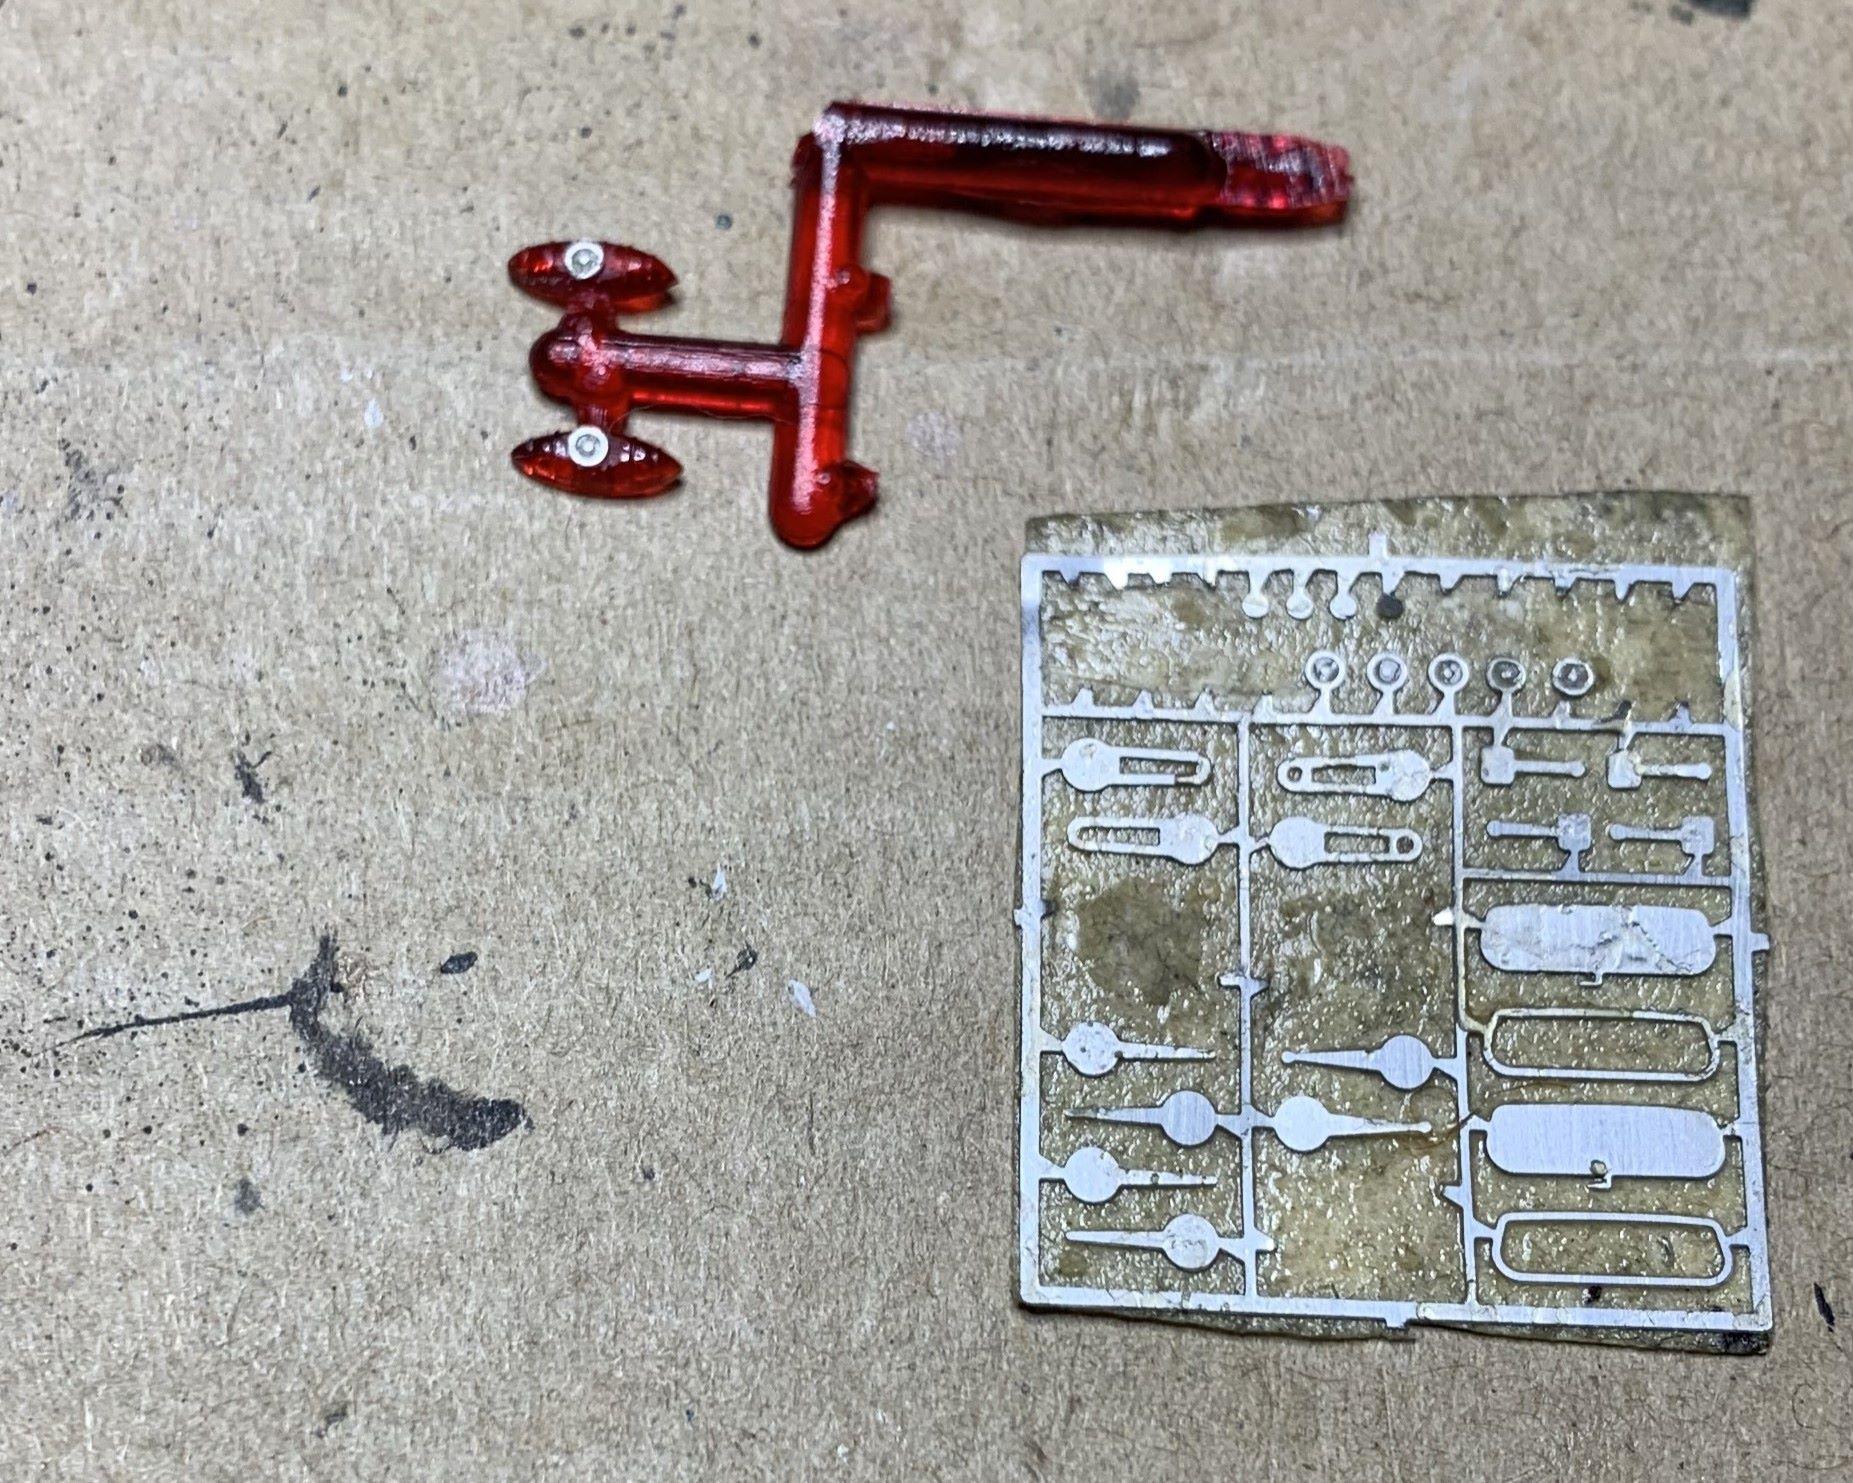
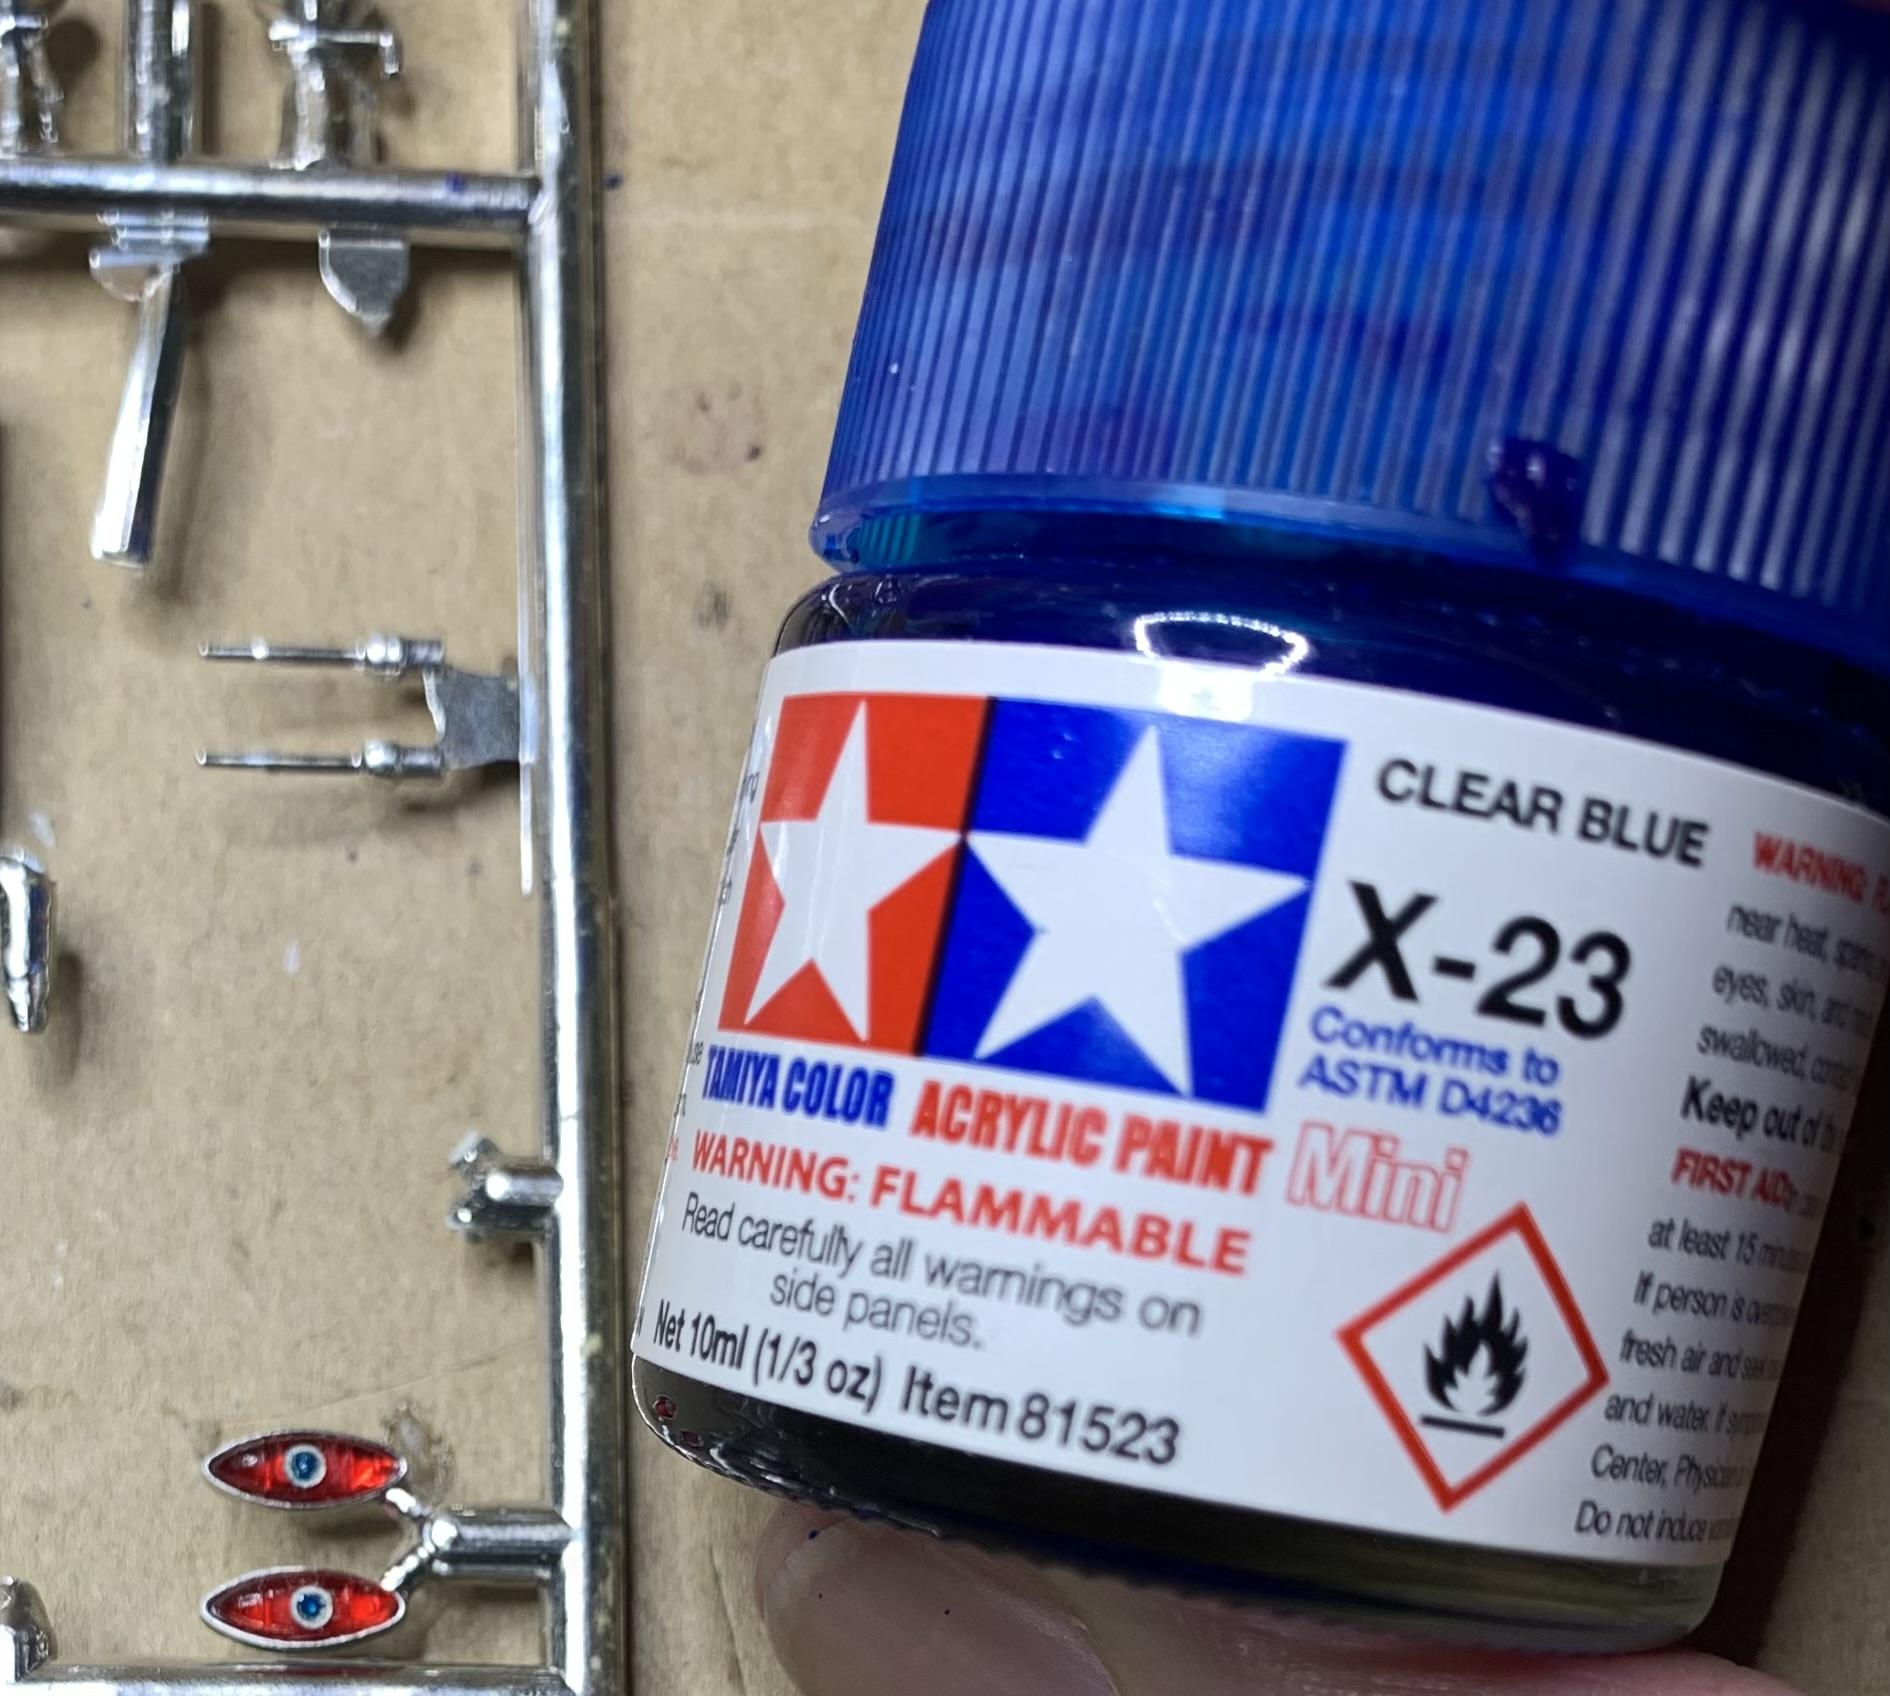
Ha ha, Jim, but for my NEXT project, AMT '50 Ford convert, also a period mild custom, I DID make some blue dots! Sanded the ribs down, glued some photo-etch small circles on and filled them with clear blue, cheers!

-
A REALLY REALLY BIG EXOTIC building the Pocher 1:8 Pagani Utopia my way
dino246gt replied to mrm's topic in WIP: Model Cars
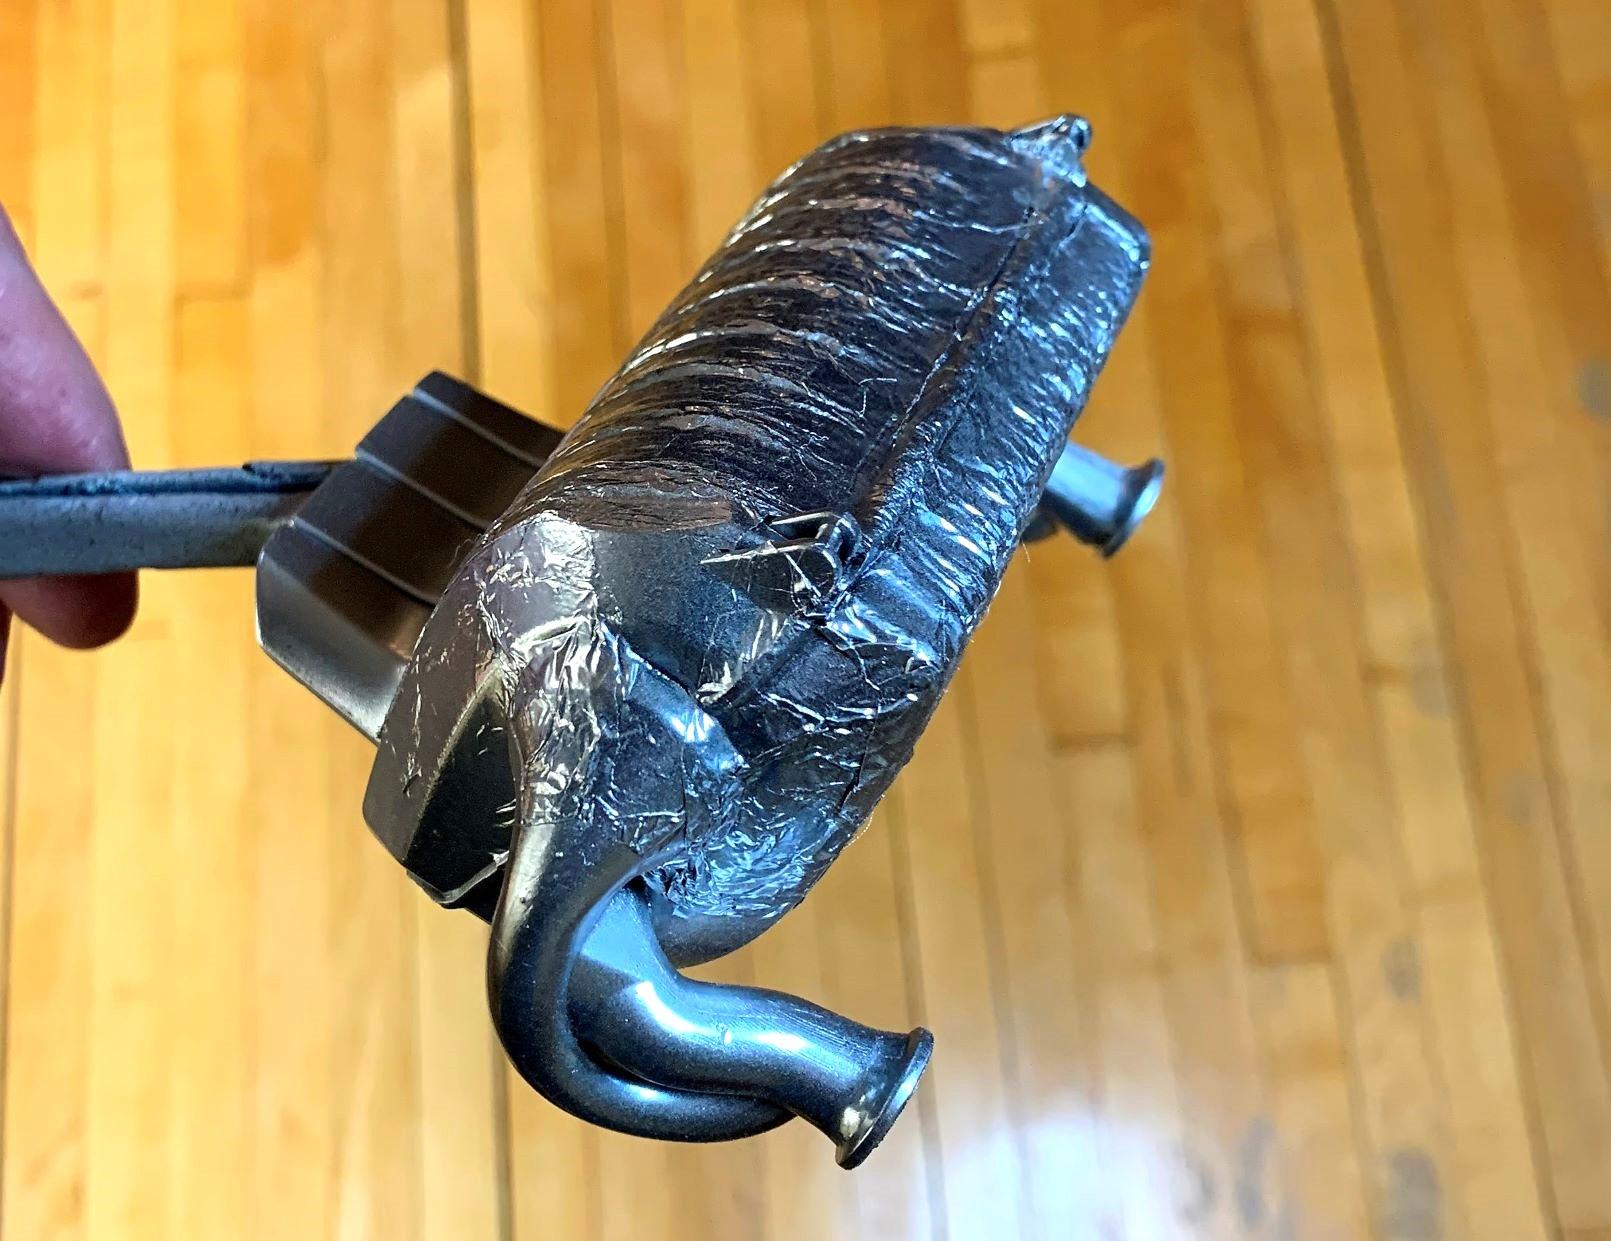
I just crinkled some foil then painted it with basic heat stain colours. (this pic is before heat stain) It's not perfect by any means but better than 2 pieces of plastic molded in silver/grey glued together! Loving your Pagani build here, very cool!
-
I see that here too, thought it was my computer, but I agree that this is a FABULOUS build and anyone building a similar kit would want to use this for reference, so PLEASE edit it so that the pictures properly align with the very interesting text! Beautiful build with excellent detailing!
-
Over the primer before the next layer of putty because the primer interacts with the putty. Clear, or any colour I suppose, I use clear mostly, creates a barrier. It works for me, maybe it's not the right thing to do, but it has saved me from doing putty, primer, putty, primer, over and over again.
-
What I found using Tamiya putty, (lacquer based) then either Tamiya or Dupli-color primer, (also lacquer based) is that they interact with each other and will pretty much never work out. Spraying actual PAINT (still lacquer) will create a barrier, primer over putty is a never ending problem, and I LOVE doing major mods that require several do-overs. So putty, sand, prime, paint, then sand, putty, prime, and paint again. (I use up spray cans that I won't every use on a car for the barrier as long as they're lacquer based) Once I'm happy, I'll prime the whole body to be uniform in coverage for the actual paint I want the car to be. The BEST solution is not to use putty for major filling, but as NOBLING suggests, use styrene bits instead of putty, it can be done and melted with Tamiya extra thin cement. I salute all of you who do major styrene surgery, cheers!
-
No gloss, no clear, chrome brushed right over putty and sanded styrene.
-
Since I removed the bumper guards and bolts, I had 3 pieces of bumper, but I glued them onto the car, then sanded, puttied, and sanded THEN brushed the FusionFirm on, bumper and grille, no clear. This is how they look!
-
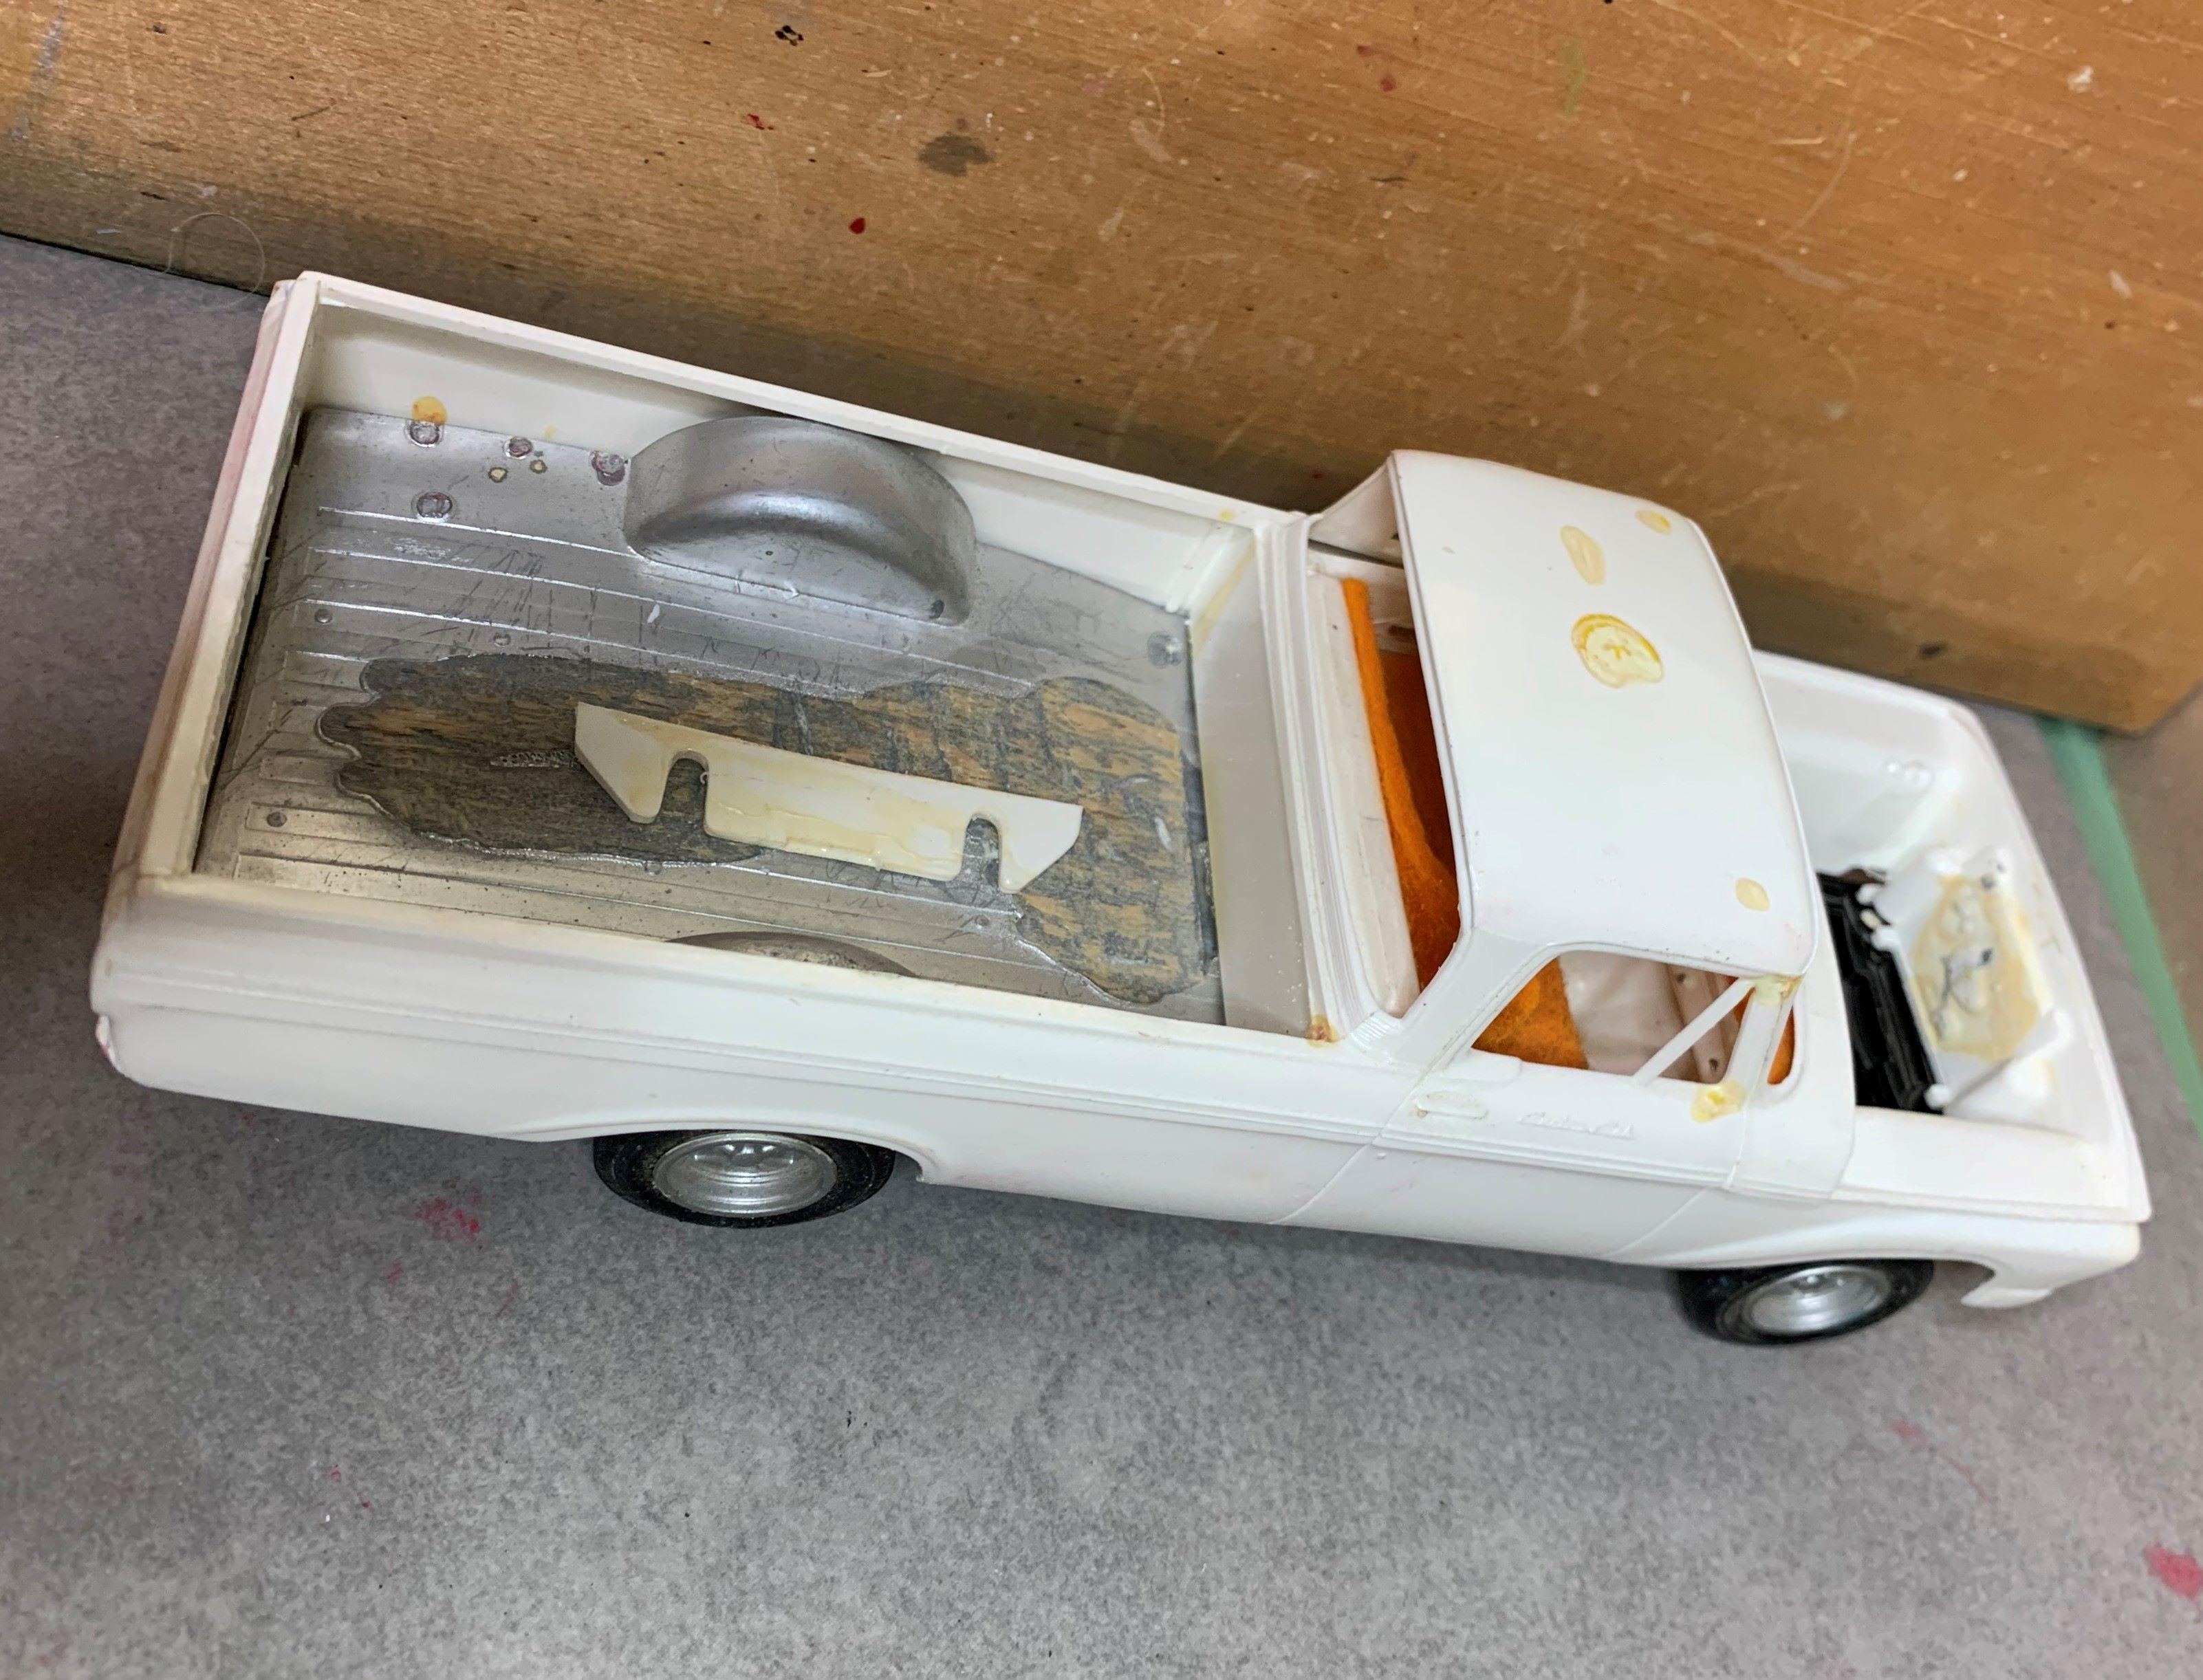
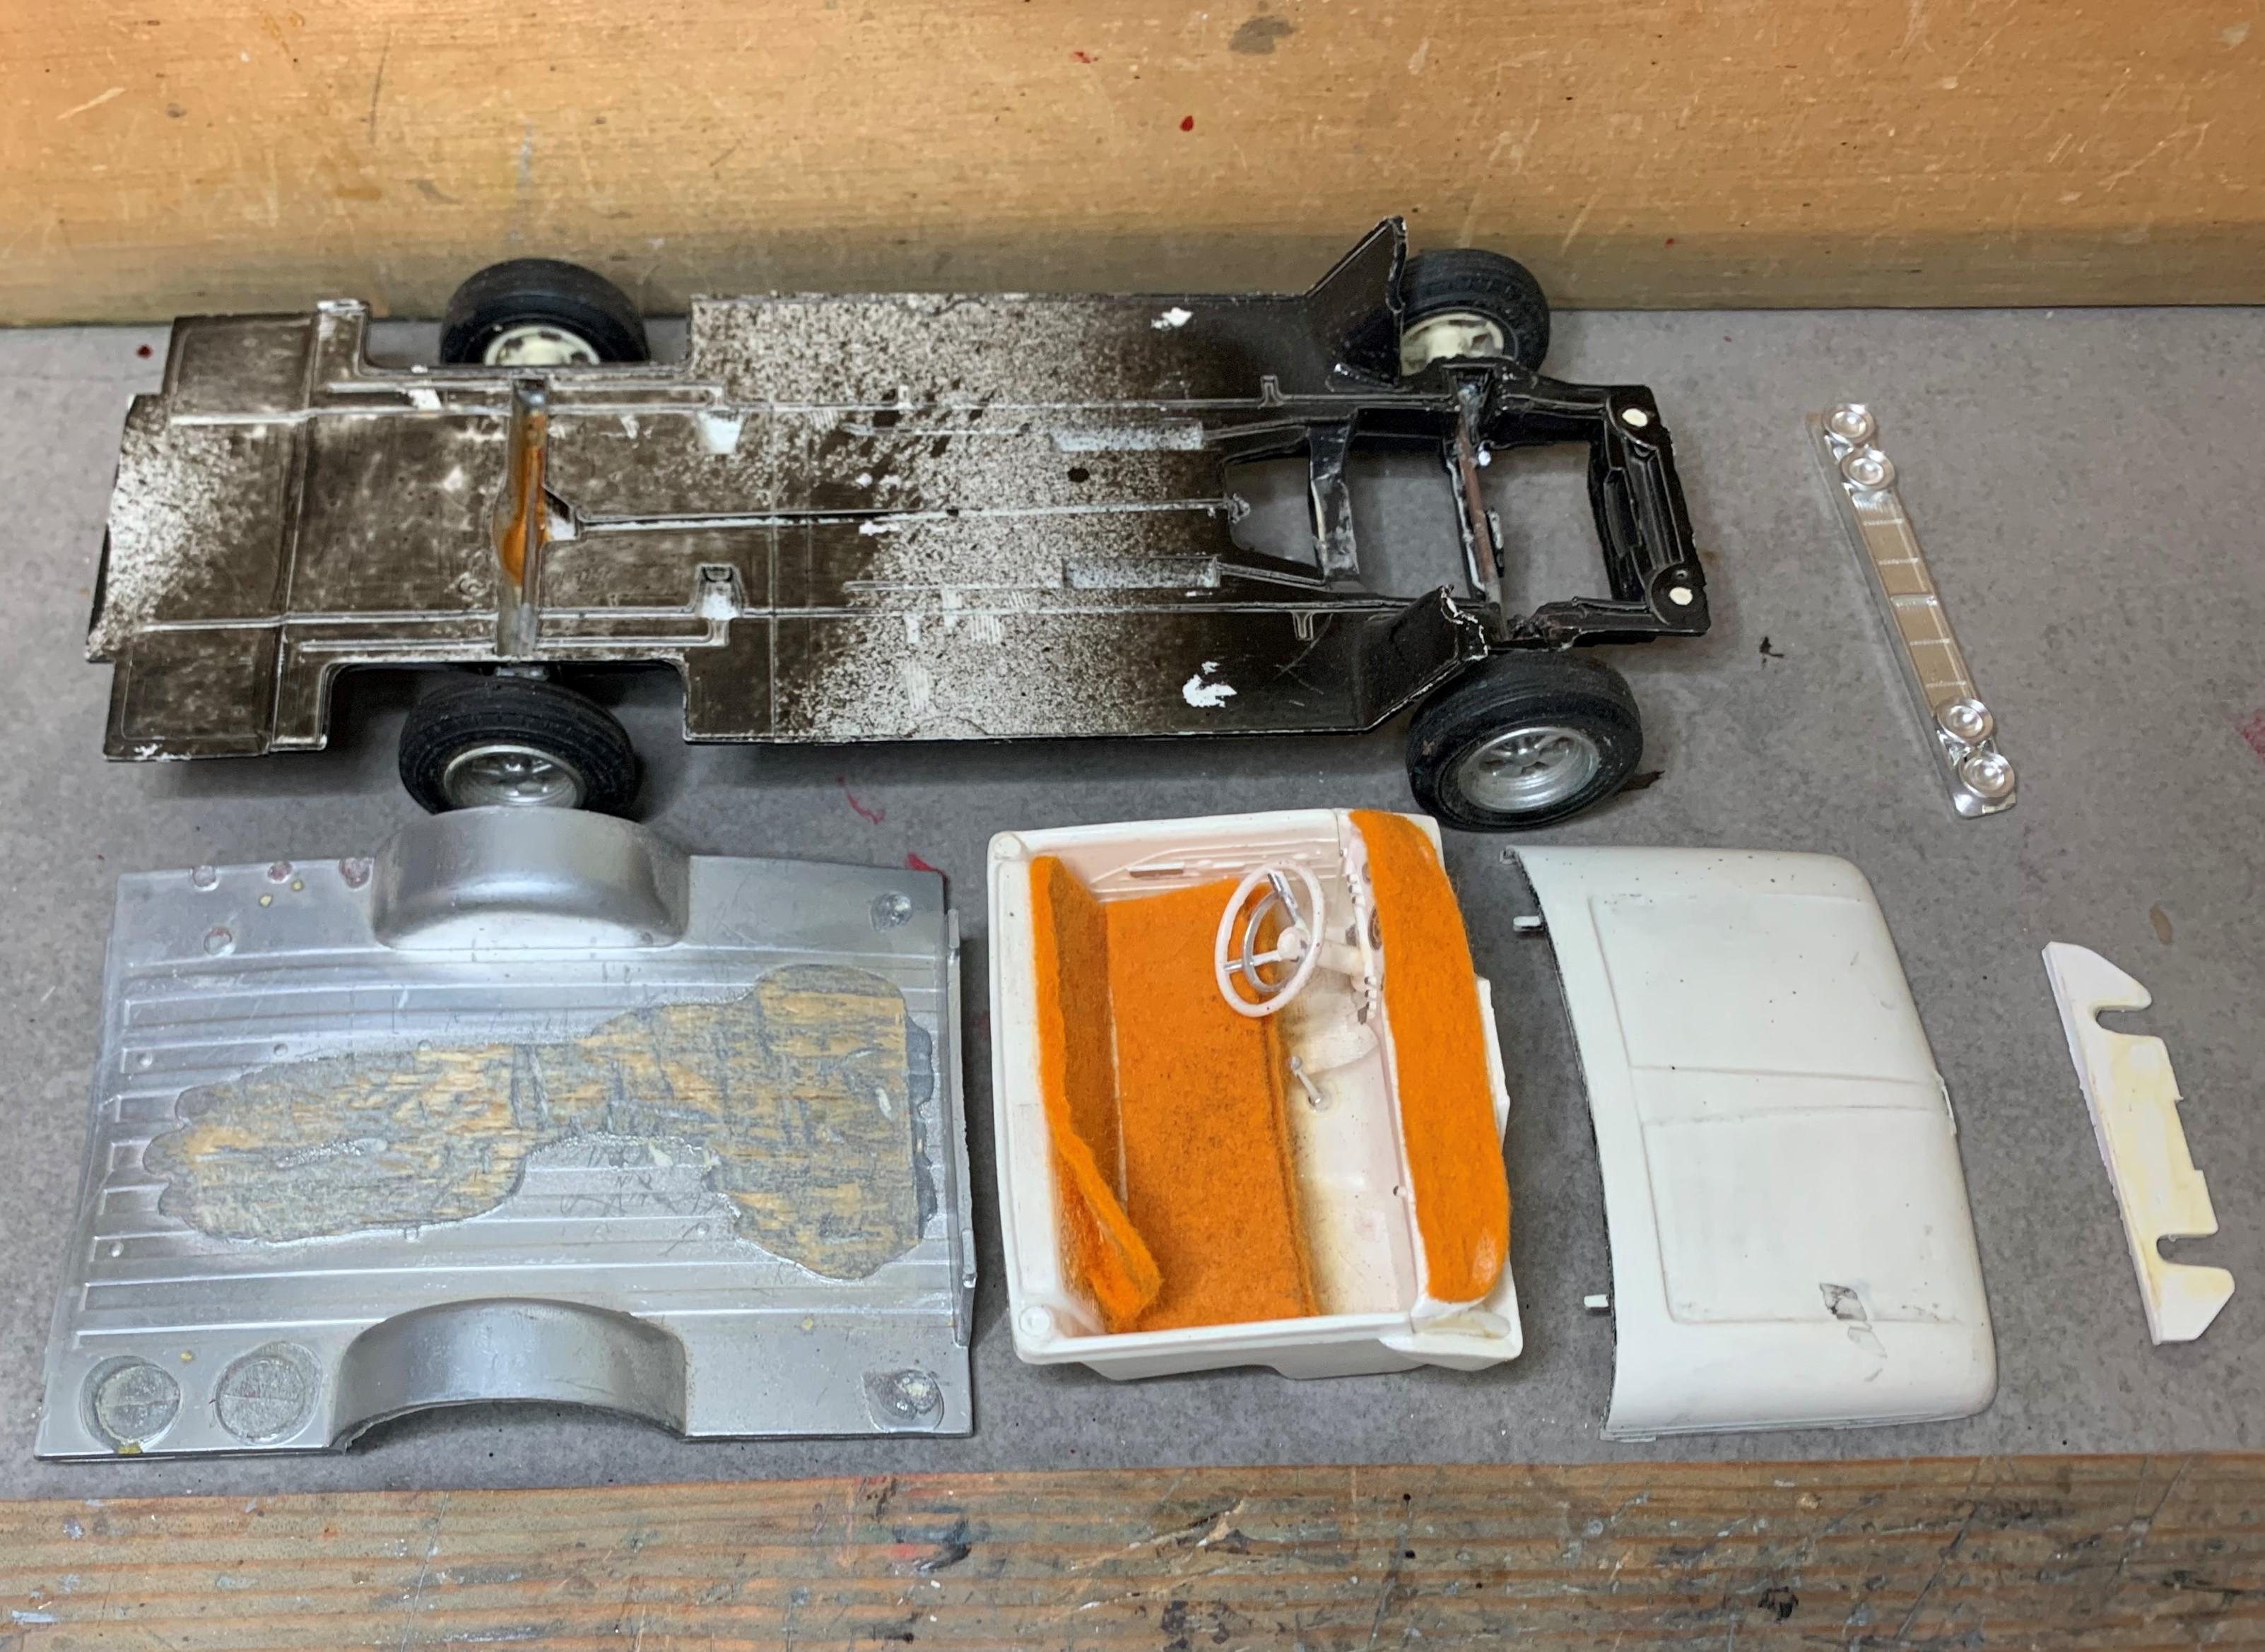
GLUE BOMB: Here's one I got to take apart and rebuild, built when it was new by someone who, as most of us did, used way too much glue!
-
Looks like a great project, I'll be watching, sitting on my "padded" seat!
-
It sure looks cool in your mock-up though!