
stump
-
Posts
985 -
Joined
-
Last visited
Content Type
Profiles
Forums
Events
Gallery
Everything posted by stump
-
Haha, thanks Tyrone. Hope it all goes to plan.
-
Tyres are HUGE ! From Terry @ Flashpoint. Fabricated 11inch rear housing This is the awesome motor from Paul. BAE 521 "blown". They show up on eBay every so often....Keep an eye open in the 1/16 search. NOT cheap, but well worth it IMHO. Cast in "Bondo" and are almost bubble free....+ a choice of scoops. As delivered, all packed in foam, inside a ziplock bag. Even has decals included for dash, batteries and MSD. Barrel valve and oil pump are old Revell items.... The small stuff..... And molded leads/plug tops and a belt..... EDIT: Almost forgot....have some of DirtModelers awesome parts on the way. 4-links, engine brackets, tab set and a seat. Thanks Michael. Stay tuned.....more to follow this weekend. Cheers and thanks for stopping by Greg
-
Hey guys, this may be slow going at first, but hoping things hot up real quick. I've only titled it as a "ProMod" so far, as I'm not sure yet whether to go full ADRL rules, or one which would compete and be legal down here.. Body is from Terry @ Flashpoint Motor Sports, slicks, rims, chutes as well, motor come from eBay (Paul Rowe).. After studying Barts awesome build progress, I have (and will be) following a lot of his fabulous ground work. If you see a few ideas/concepts show up that might look familiar to some of your own work, that will be because I'm drawing ideas from ALL the great builds I've seen right here @ MCM. So much greatness within this group, it's just so inspiring to be able to follow and share. This will most likely get interrupted once in a while by the 1/12 build......we can only hope so, Ok, slow start.........Body first. As delivered..... Initial cuts..........Man, this was tougher than I thought it'd be. I'm onto my second draft of plans, the first were a bit skewed.....guess you get that when you download free stuff. Blocks are glued in place to help alignment this time. Lesson learned. Continues......
-

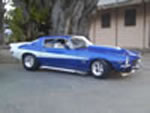
10.5 tire outlaw Twin Turbo Mustang BACK TO WORK ! :)
stump replied to nitrousnick4710's topic in WIP: Drag Racing Models
Hey, no problem Nicholas. Post will be the only hold up for you. I've ordered from them before and received in 2 days down here in Aus. Good luck with things and stay healthy mate. -
Bart and Joe, thanks for your very kind words of encouragement guys, Yeah, it's probably not going to be a big deal pulling things apart.....having done so twice already. Just can't face it at the moment. I'll distract myself for a while and come back at it later, with fresh thoughts and a clear head. Bart.....nah nah nah......you can't be waiting to see what I do on the 70 Camaro..........(shaking head) (j/k) I'm following your lead man.....cause I reckon you're on the right track with your build. Got all your pics saved so far. Joe, yes...I had thought about contacting Tim, but I already have nearly $300 worth of parts in my "cart" there....just waiting for me to hit the "buy" button. I will attempt the tyres myself at some stage, maybe I can even jag a good set of rims from a rubber mold.....Time will tell. Updates at ...............hours, minutes.....2012. cheers guys Greg
-
Looks TUFF ! I like it. Nice work on the chassis, interior floor and the door conversion. Motor looks pretty sweet too. Tagged and watching.
-
10.5 tire outlaw Twin Turbo Mustang BACK TO WORK ! :)
stump replied to nitrousnick4710's topic in WIP: Drag Racing Models
Hey there Nicholas, you're off to a great start here. Nice work. I may be able to help with regard to a turbo. This is an online shop down here in Australia. They do ship worldwide. BNA Model World Scroll down this page a way, he has several varieties in stock. -
Man, that's some clean technique right there.... Beautiful quality work again Clay, a pure joy to watch. Thanks for sharing (and the great ideas of course. )..
-
Bart, that is perfect my friend. Gives me a clearer indication of where the upper bars/mounts need to go. I'm on it.............. Thanks heaps mate.
-
Hey guys, this post can be deleted real quick if I can gain a quick response. Ok, I have some of Michael's 1/16 drag parts on their way. Engine plates, rear end plates and some Dzus tabs..oh, plus a seat. I already have a Camaro (70.5) in the work shop with the two main chassis rails done. Could someone please give me a measurement of the 4-link brackets.?? Top to bottom, either including the notches (for the frame) or without. I should be able to work it from there. I know I could just wait it out......but I'd really like to get in and have the chassis to a stage where I can just "add" them when they arrive. Any help would be great, and thanks in advance.
-
Joe, LOVE that wheelie bar set up mate. And I must agree, the red beadlock makes a pleasant change from the blue and black you see all the time. Nice touch.
-
Scott, they look fantabulous to me. And I think someone mentioned in Dave's Camaro build about the crank trigger ring....? That may come in very handy. Also thought (even though easy to make) of some "generic style" levers. Chute levers for example ??
-
1-8 scale 69 camaro pro mod (mike hill's car)
stump replied to comp1839's topic in WIP: Drag Racing Models
I'm with Rick on this one Dave. What you are doing is beyond description. Totally awesome just doesn't seem to be fitting.... We await the next fascinating installment mate, keep at it. -
Bart, PM sent mate.
-
Hey guys, thank you all for such very positive feedback. Nicolas, yes, the decals I have made myself. I have decal film from Bare Metal Foil Company in both clear and white. Most of my pics I use are only downloaded from the internet. Seeing they are only for my personal use, I really hope no one will mind. I set them up in a "Word" document, that way you can move them around to suit, and also it makes it easy to re-size them. Guys, sorry there is no update yet..... I've hit the wall in a few areas and have really gone off the rails a bit. The rear bar work is too high, hitting the body when I placed it on. So that's all going to get torn down. So much for trying to plan ahead..... Still had NO luck at all regarding wheels and tyres.....They are going to be instrumental in the next stages of chassis development, so without them I'm stuck between a rock and a hard place. Dave was too kind sending his own work on the masters down to me, but without a whole lot of casting/molding experience, I'm at a loss as to the next step....I contacted a mate down here who does resin work, but for a "one off" job like I want, he couldn't help. Anyways, should things improve soon, I will gladly get this back near the top for you all. In the mean time, I thought I might delve into something a bit more do-able......something 1/16........More on that later.
-
Bart, this is going beyond awesome mate..........waaaaay beyond. Glad you sorted out the drama concerning your rear. Ah, sorry, bad attempt at humour..... And I'm with Jack, I'm saving all your pics as perfect reference for my next build (70 ProMod Camaro) which is already on the planning board.
-
1/16 Scale Army Vega Funny Car - Finished 10/14/2018
stump replied to Mooneyzs's topic in WIP: Drag Racing Models
Hey Chris, I LOVE all these little fiddly fabrication bits you keep adding. The tank and tabs look ace buddy. Don't mind the looks of those rims either......very nice indeedy...... -
57 chevy pro mod w.i.p (updates 11/11/12)
stump replied to tyrone's topic in WIP: Drag Racing Models
Tyrone, you're off to a cracking start man. This should be an interesting build, and looking forward to seeing your approach at the "blower motor". Good to see you're having a crack at the chassis, 100%......I know you won't disappoint man. -
Clay, amazing quality craftsmanship mate. Would you believe I'm gaining more satisfaction from watching your (and others) great work come together, than I do from working on my own.
-
Hey, thanks Joe, Scott, Tyrone, Bill and Dave. Well, this is a little embarrassing...... Kinda pleased that the Racepac didn't have hundreds of hours machining thrown at it........................ This pic will give you an indication of what I mean......... As you can see (even with nothing else to gauge by..) I ....um.......made it just a tad on the largish side........................ Didn't even give it a thought until after I placed it in the cockpit area......and I was thinking, that just looks BIG ! So, off I went to my friend Google and happened to find the CORRECT sizes......... And we have "spec II" Smaller, more compact, and much more accurate, for now....... And the brake work so far....................... Dave, I added thin (.015) sheet to the back face and re-drilled everything....Kinda looks ok, and just made them a little stiffer. They won't have a proper "fully floating" look to them, but once I get all the studs mounted and fill the recess', all should hopefully look alright. Another weekend approaching, which I hope will give me more time for more work.....at least there will be no gardening this weekend. Plus I'm having an extended break after Easter, not due back at work till the following Monday.....so more leisure time. Or bench time. Thanks again for tagging along guys..... cheers Greg
-
All in good time Nicolas.. Loving the idea of the fully "gutted" interior too.....That should really make a huge difference.
-
Man, still so many great ideas flowing into this......brilliant ! Scott, all in good time mate, great planning doesn't happen over night dude. When it happens, it will be worth waiting for.
-
69 Daytona Pro Mod 1/16th scale updated 4/3/12 ..It's a wrap!
stump replied to Romell R's topic in WIP: Drag Racing Models
Yep, gotta admit, I would not have thought about leaving them on the ground either.... It has merit. and would look different at least Rom. -
1/16 Scale Army Vega Funny Car - Finished 10/14/2018
stump replied to Mooneyzs's topic in WIP: Drag Racing Models
Aye, no problem Chris....popcorn and a cold drink are within arms reach....just chillin'.....waitin'.......we'll be here when you're ready. -
Waaay over the top......................and I LOVE it ! Bill, those couple of small parts (pedals and lever) are true works of art mate. Oh, and the gauge too.... As a side.....this little dude, if I offered him a month down here in Aus. (just south of the Gold Coast ) Would he be interested ?? I got a mate running 1/16 Airbuses for Qantas.....cheap flights.................................................