
stump
-
Posts
985 -
Joined
-
Last visited
Content Type
Profiles
Forums
Events
Gallery
Everything posted by stump
-
Thanks guys.. Hans, cheers mate. Yes, doing the chassis this way with the 71 Charger parts is a bit fiddley, but worth it in the long haul...If you have the bits spare to do it, go for it..If you check Frank K's link from my Fotki page, it'll go through the whole process in better detail than what I've actually shown....Frank's work is amazing..... Marcos, she's getting closer mate....I'll be a bit sad to see it finished..(in a weird, twisted kinda way... ..) Bill, yes, I'm a bit of a blue fan....This one is Tamiya TS-50 Mica Blue, over Tamiya FINE White primer. Really pleased with how it turned out..Hope the second colour doesn't over power it...... I'm thinking that once the underside receives some subtle weathering, it'll look ok, hey.. Did a small update earlier...assembled the wheels/tyres, and sprayed the front buckets (forgot them yesterday.... ..) Hope to tidy up and finish the interior the next night or two... cheers Greg
-
Hey Marcos, you got a killa shine on that Ferrari mate, great work, paid off.. The seats and interior look fabulous too man, s'pecially lovin' the mats with the FERRARI logo's in the corners....too kool.... I'm going to have a look for something similar to those "rub'n'buff" tubes next time I get a chance...awesome results. Abe, that chassis really come to life with the use of the above, great work too mate.
-
Looking real good Ron. The foil work looks top shelve from here.. The traction bars are a nice touch too..Are they a kit item, or owner made..? I have some from the Amt B/M Camaro, but thought they looked a bit too toy like... Look forward to seeing her done mate. cheers Greg
-
Hey guys, progress is not what you'd call, lightning fast..... , but I have progressed....... I did manage a colour coat the other week, still need to mask and apply the second colour......maybe next w/end...... The front'n'rear marker lights (park lights.?) will be added, they're on the decal set from Keith Marks. The chassis has the main brake line run, fuel lines will follow once the tank is in place.....I could've done with some more overspray under here, but once some black and brown wash goes on, it should look ok.... Wheels are stock and wide Mopar (?) steelies....they'll have Mopar dogdish caps added... The dash has been drilled for gauges to be added, again, from the beaut decal set from Keith. I scribed the panel lines around the glovebox a bit deeper as well...It's sprayed with Mr. Model/Mr Hobby (?) rattle can. I was really impressed with the coverage of this paint.. The interior tubb was extended at the front to reach the firewall...it gives it more depth. I'll add some semi-gloss to the seat areas as well as the door panels. All going well, I can wrap this one up in the coming weeks...I should get the interior and most of the chassis out of the way this week...The Hemi is still in da shop, but nearly ready to fire..... Bit more action here...Cuda workshop More soon gang....stay tuned...... Greg
-
Nice start man.. Will you be applying some of your weathering skills learned from military modelling...? I really really want to have a go at weathering, but haven't got the b**** to try it yet...... cheers Greg
-
Thanks Jery. Progress is slow, but it's getting there..... Last day or two I've made/modified the radiator panel (JoHan original) to accept a larger "aftermarket" radiator..and adapted the fit to the Amt inner guards...Did some more on the interior, including making the drivers seat look like it's had a couple of years use....they are/were very convex....like they had too much padding in them.....I heated the seat and carefully pressed it so it looks a lot flatter, concave maybe....Now at least you sit in it, not on it..... Made up the torque boxes for the rear as well.... With some luck and decent weather, I may get some colour shot around tomorrow.....Pics to follow...... cheers
-
Managed to get a little done over the weekend....had to scratch around to dig it out of hibernation..... 1:1 house painting project....the guys are coming round tomorrow, weather is ###### today........so I guess I'll be helping there.......s'long as I don't get in the way.. I decided to re-attach the drip rail molding around the roof line..They were very fine and got sanded off initially....and I'd decided to go with the "clean" look...Having put'em back on...I'm glad I did. Looks better.... Also opened up the fuel filler behind the number plate...haven't fully worked out what I'll do here..... Started removing the trunk last night and finally got it free this morning....man, what a tuff one....Added a lip around the exposed edge and I'll add hinges later... I then tackled the front end.....I made up some steering links from solder, drilled them to suit and set it up, just for a trial fit.. I know the nuts and the bolt I used are over-scale....but it should look ok when done....I hope..Once I'm happy with it's function, I'll add a drag-link (?) to it. It will give the option of posing the wheels either way.. Here's a couple of pics for yous... The new drip rail Boot, or trunk if you prefer, fuel inlet... Front end steering bits... I should get some more done by later today.....the weather isn't really that much fun today, so no good for working outside.. Check back later guys, thanks. Greg
-
Great save MJ.. I love the colour you chose for it too....suits it very well man. I like the way you got it to blend in....looks factory done....Nice work.
-
Holy schmolly......Man, what a very kool concept.. I like the way it's coming together for you mate, looks great so far. Keep her going, look forward to more....
-
Thanks Ron. I'm going to have to try and find some Krylon or similar down here in Aus.....It gives a nice finish. cheers Greg
-
Small steps......... Didn't get a great deal done today...between household chores etc.....but I did sneak some time.. I wasn't overly happy with how the tunnel ram was shaping up, so I stripped it down to start over.... I had been using the runners from the kit...now it will be all scratchbuilt....why do I do this to myself...... The bare bones valley.....you may notice the thin strip that has been added to lengthen it..looks kinda rough here.... This is with new flanges added, plus the valley has been sanded to remove the branding and ribbing. The join is also a lot smoother now... You may be excused for thinking that I have a monopoly on these Motion cars..... But, geez....I do love'em..... Also finished (almost...) grafting my scratchbuilt L-88 scoop onto the hood for my 1/12 '74 Motion Vette... Still a very long way to go for both these monsters.....time will tell..... Hope you like and don't fall asleep with this speedy progress.. Stay tuned folks... cheers Greg
-
Ron, for a FORD guy, you're doing alright mate..Looks great so far.. What brand (?) of paint do you use on the interior..? That has a very realistic look to it. The motor and chassis look fantastic too mate. cheers Greg
-
Thanks Al (old hermit). Thank you too John. Man, yes..sorry I hadn't got to see your fantastic build before now mate....I LOVE it. Still a bit "new" around these parts....I've been mainly checking out the bench and general sections....but now I've found the right place to hang out... I've just started a 2 week break from my work, so I'm hoping to get some quality time at the bench here... Stay tuned guys..... Cheers Greg
-
Wooa......Hey John, I like this very much. As has been stated several times here, if it weren't for the fact she's sitting on a 1:1 hood..........very hard to pick as a model. I love your motor conversion, it looks so right. Paint is flawless as well. You have every right to be very proud of this build mate. Cheers Greg
-
..Thanks George. Mate, yep...if I ever win LOTTO.....I'ma comin' over to get me a real one...... I would loved to have been around and living in the U.S. during that time.....we had our own home grown muscle down here, but nothing compared to what you guys had....I've had my share of "hotties"....cars, that is... Clay, I think the odd one may still be had from some stores (old stock..? ), they were re-released only a year or two ago, if memory serves me correct...?? They always pop up on ebay, the last two I got from there. 1 for me, 1 for my nephew.. Cheers guys.
-
This is one of my long term projects which really needs a kick along..... I fell in love with this car (the 1:1) the first time I spotted it... This, is my attempt to recreate this awesome BEAST....in 1/12 scale. I'm using the Monogram Z-28 as a basis, though much will be changed/altered along the way.. Motor is a 427BB, lifted from one of my Monogram Vette's. The Lakewood Scattershield was scratchbuilt, and it is mated to the Camaro M22 (cause it has better detail..) The tunnel ram is from the Z28, modified to match the BB. I smoothed the Moroso covers to make finned MOTION clones. I'm still working on the Dominators, as the Holleys from the Z28 are too small...I'll use their fuel bowls. I intend to feature lots of opening panels (doors, trunk..) and will make up the hood to suit. There's not a whole lot to share as yet...but that'll change soon.....I hope.. Here's a little teaser post for you....Hope you like. I've had some great help from a couple of guys at the Musclecar forum, without their help, I was really struggling to find some decent photoes....I've also had contact from the currant owner (anonymously)..and hope he contacts me again soon... Cheers Greg
-
 Ah, yes..that'd be the fellow. Kool screen name. I know he posted a bit at LSM (Large Scale), but I haven't logged in there for ages.. Would love to get my hands on a TH400 box.....I've thought of trying to make one myself....never got around to it....
 -
Hey Bradley, This is a pic of something done by a fellow modeller in the U.S. Ralph H(?)..not sure if he posts here. It's a trick I wish to try myself one day.... Ralph used the tyres (and wheels I think) from the 1/18 Muscle Machines.. They have good tread detail, similar to a M/T tread, and Ralph cut out their sidewall and neatly fitted the kit tyre sidewall in it's place....With careful trimming it looks very convincing I think..

-
Hey Marcos, I do LOOVE the way this build has gone mate. The final pics look amazing mate...particularly liking the stance this badboy has......PERFECTO !!.. I'm gonna have to finish mine now, aren't I...... Thanks for sharing my friend, and just for being a friend.
-
'70 Camaro Pro Street..I actually painted and glued something!!
stump replied to KT EASTMAN's topic in WIP: Model Cars
Oooh, niiice....Ok, you have my attention.. That's a great start KT, I like the colour choice..the matt hood looks evil...(no punn intended.. ..) You have some monster motor lined up for it..? Look forward to seeing some more...I can see this inspiring me to dig mine out again, thanks. -
Ok, kool..I thought I may have been missing a Televised broadcast.. ..(not that I have pay or cable anyway.. ..) As a spectator...?, I think it would be pretty kool..though I'd hate to have to walk the perimeter.... I'm going to miss the finish....only a bit over an hour to go, but I have an early start tomorrow...and it's almost 9pm down here. Monaco....be missing that too....oh well.
-
Hi CAL, I've been keeping track, on and off all day...bit weird watching via "live streaming"... Do you get it from a pay to view channel through FOX or similar ?, or are you watching through 24HOUR @ the "Ring 1 1 Porsche 911 GT3 RSR 125 19:59:17.318 2 23 Porsche 911 GT3-MR 122 19:59:41.639 3 121 Porsche 997 120 20:00:45.229 4 64 BMW Z4 M 118 19:54:51.654 5 26 Porsche 911 GT3 Cup 118 19:56:00.917 6 10 BMW M3 E46 GTS 118 19:58:41.113 Still a ways to go....would LOVE to be there.....
-
That is most excellent, thank you Bill and Len.. Yep, totally agree with Luc J., the dome light is a nice added bonus. (not being molded in I mean..) The final build up looks awesome guys, and I'm even more eager to get my mitts on a couple now...hope it's not too long before we have them available down here.. I like the tip on glass placement too....that's one I'll be trying..( I hate gluing in glass...) cheers Greg
-
What a fantastic topic...sorry I'm a little late getting here. Maybe it should have a photo included......you know, put names to faces.......yeah, you're right, maybe not.... I work as a factory hand. We make timber floor boards, or Manufactured Timber Flooring by BORAL It is classified as "Manufactured" because, unlike regular floorboards which are solid timber, ours go through a production line building them up from a veneer base, a composite core and a hardwood top layer. The hardwood top layer is just 4mm thick once all is processed. By doing this, we are helping to sustain our old hardwood forests because we're able to get six floor boards out of the timber generally required to make one floor board in the old manner..All our top layer timber is sourced from Native Australian timber plantations, which makes it kinda unique..we also Export around the World. BORAL also make solid flooring, but we think of ourselves as kinda special.... I'm still a ground level "feeder", though I do have my own section. We've just recently finished a new work station (area) for the making of our "sample" packs. I'm in charge/control over all the display packs which go out Nationally to all the Flooring Warehouses and display rooms. (I think there is still room to move up the chain.... ..) I've only been with them a couple of years, prior to that I had 30 years in retail selling/delivering electrical household items..I finally tired of "man handling" large refrigerators and washing machines up and down stairways...usually by myself..
-
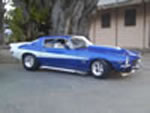
Nothing like a 2 day build to feed your soul
stump replied to ismaelg's topic in General Automotive Talk (Trucks and Cars)
..Ah, good stuff Ismael. Hey, just make sure you don't give in too easily... It's a great looking build in any case man, and I'd be proud to display it and boast, "my brother built that for me.." Thank you for your thoughts too Jason.. I think I know where my main problem lies mate..I have too many on the go at once....I'll try sticking to one (1) for a while, just nibble away when I can and see if I can't get it done..Cheers mate.
