Dennis Lacy
-
Posts
2,499 -
Joined
-
Last visited
Content Type
Profiles
Forums
Events
Gallery
Everything posted by Dennis Lacy
-
Looks awesome, Dan! Just-right stance, proportions and color scheme. Enjoyed following the project on your channel. 😎
-
Done!
-
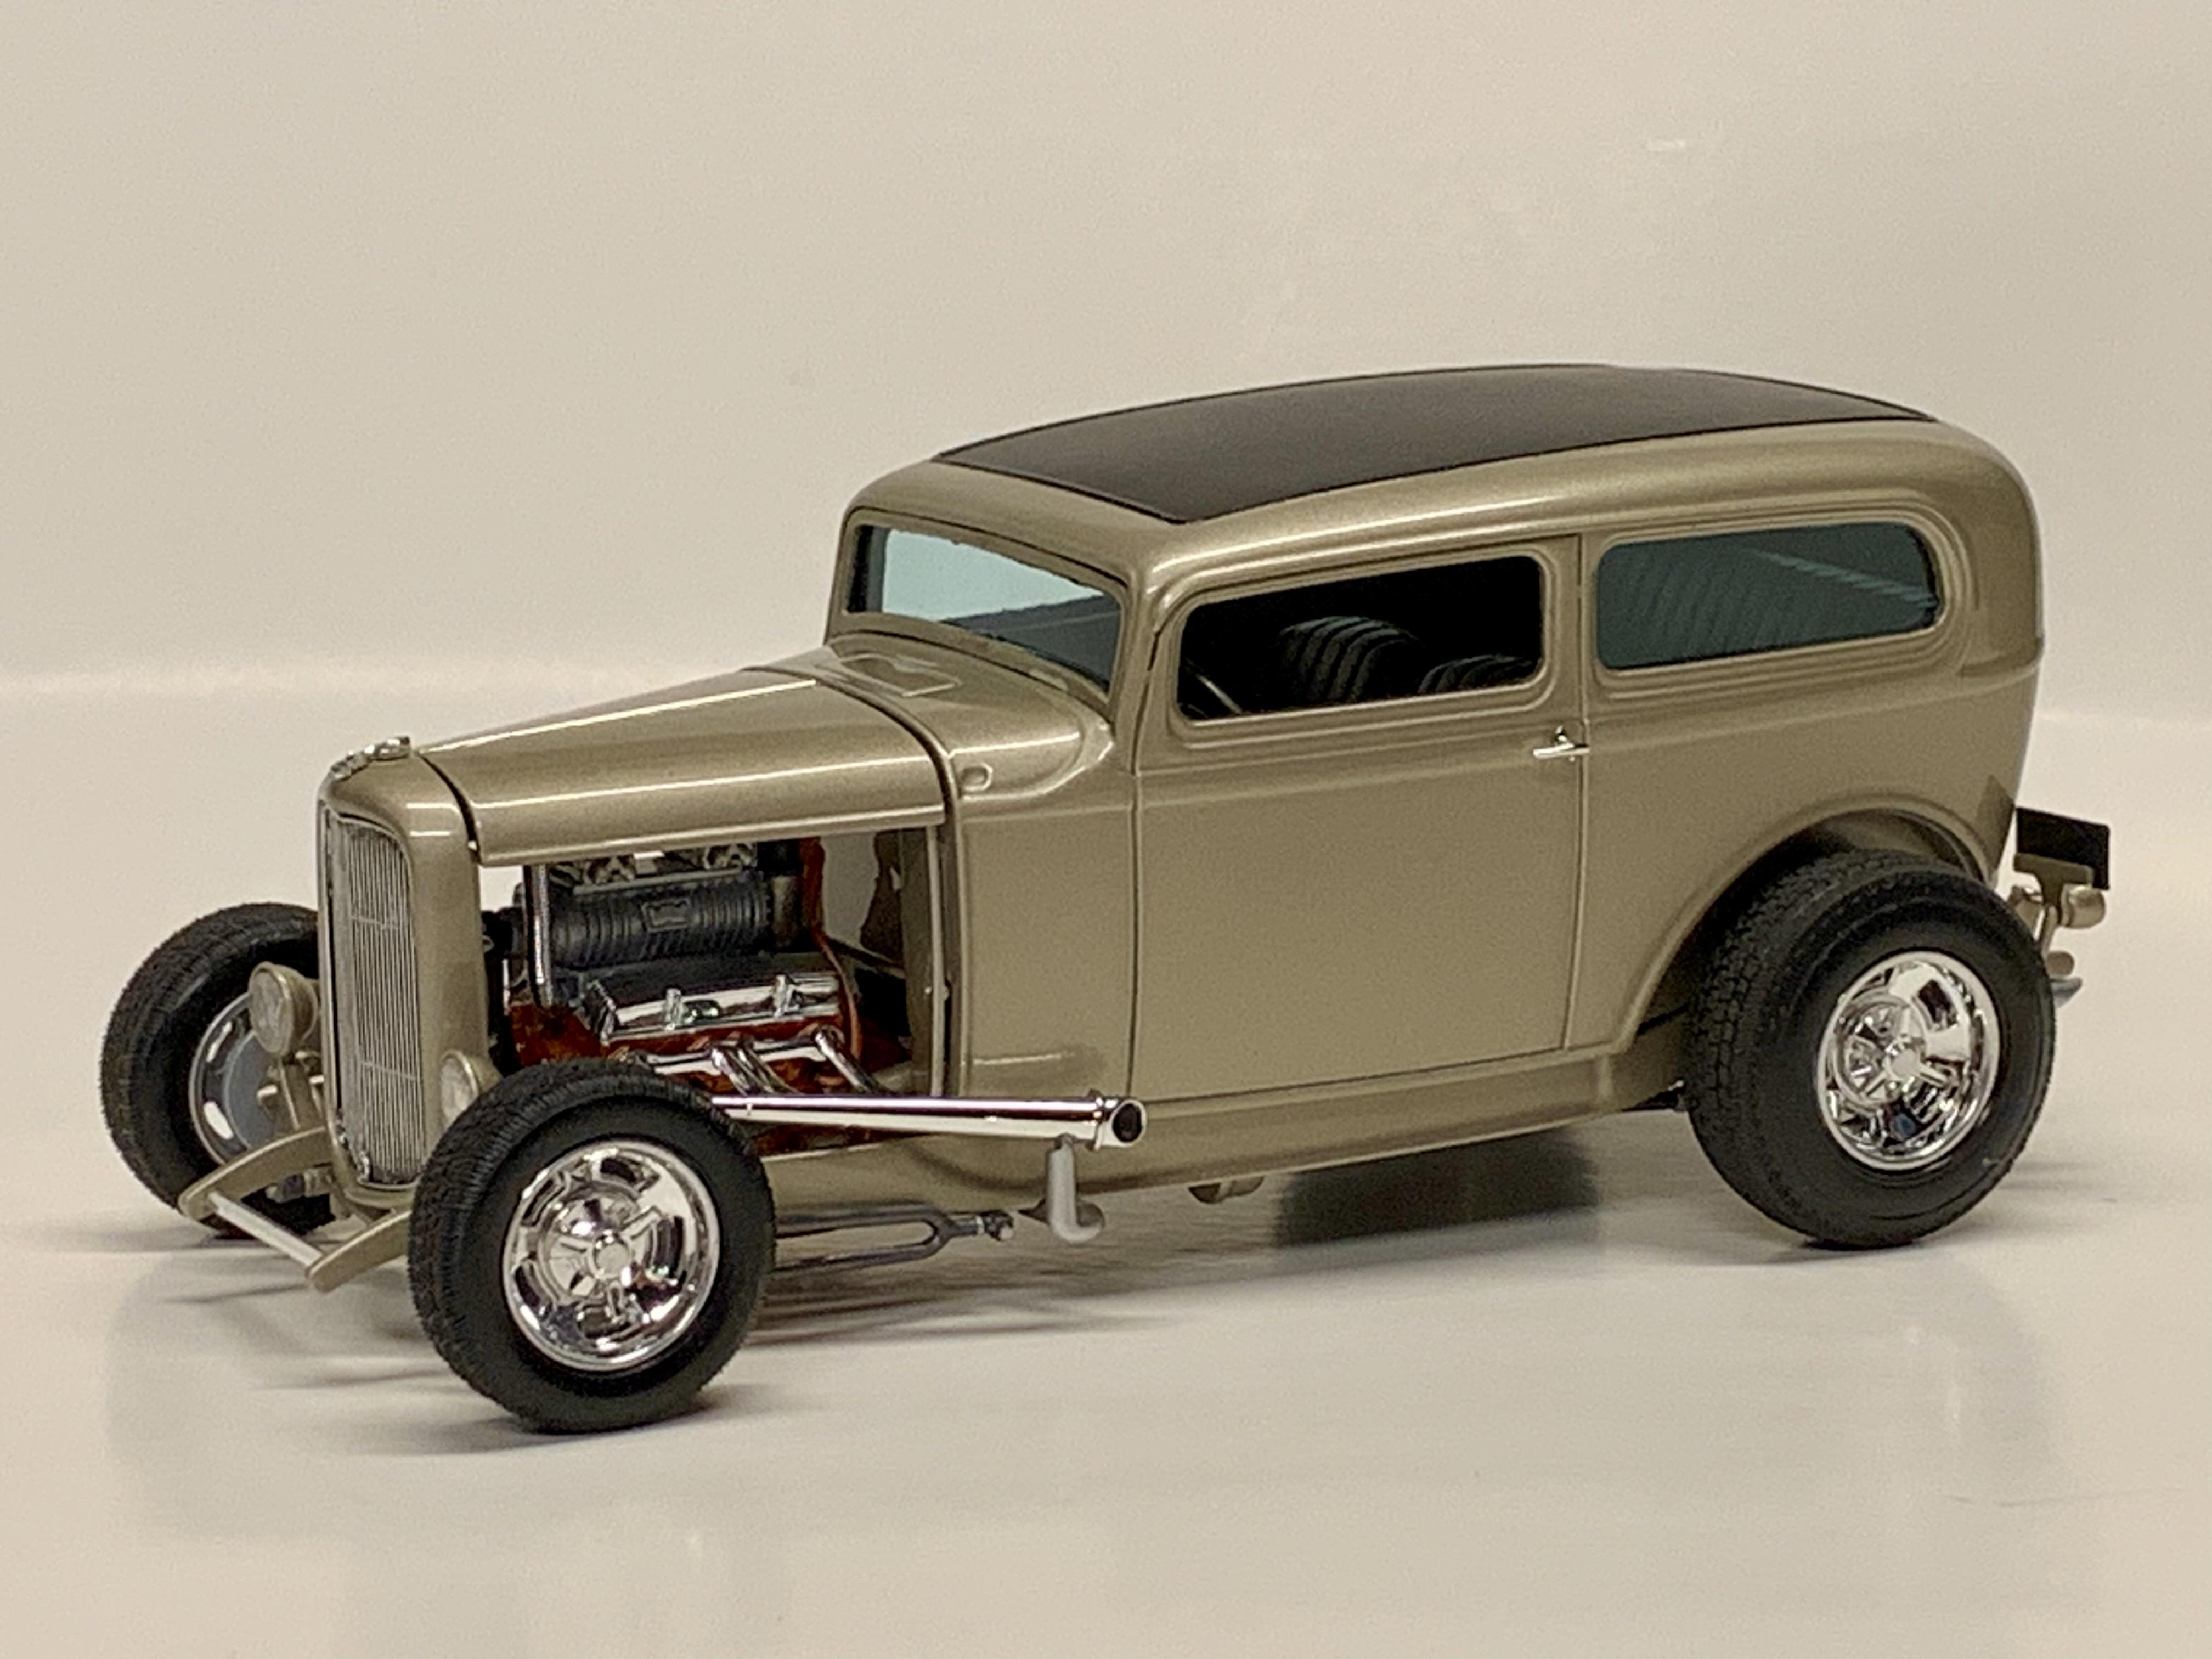
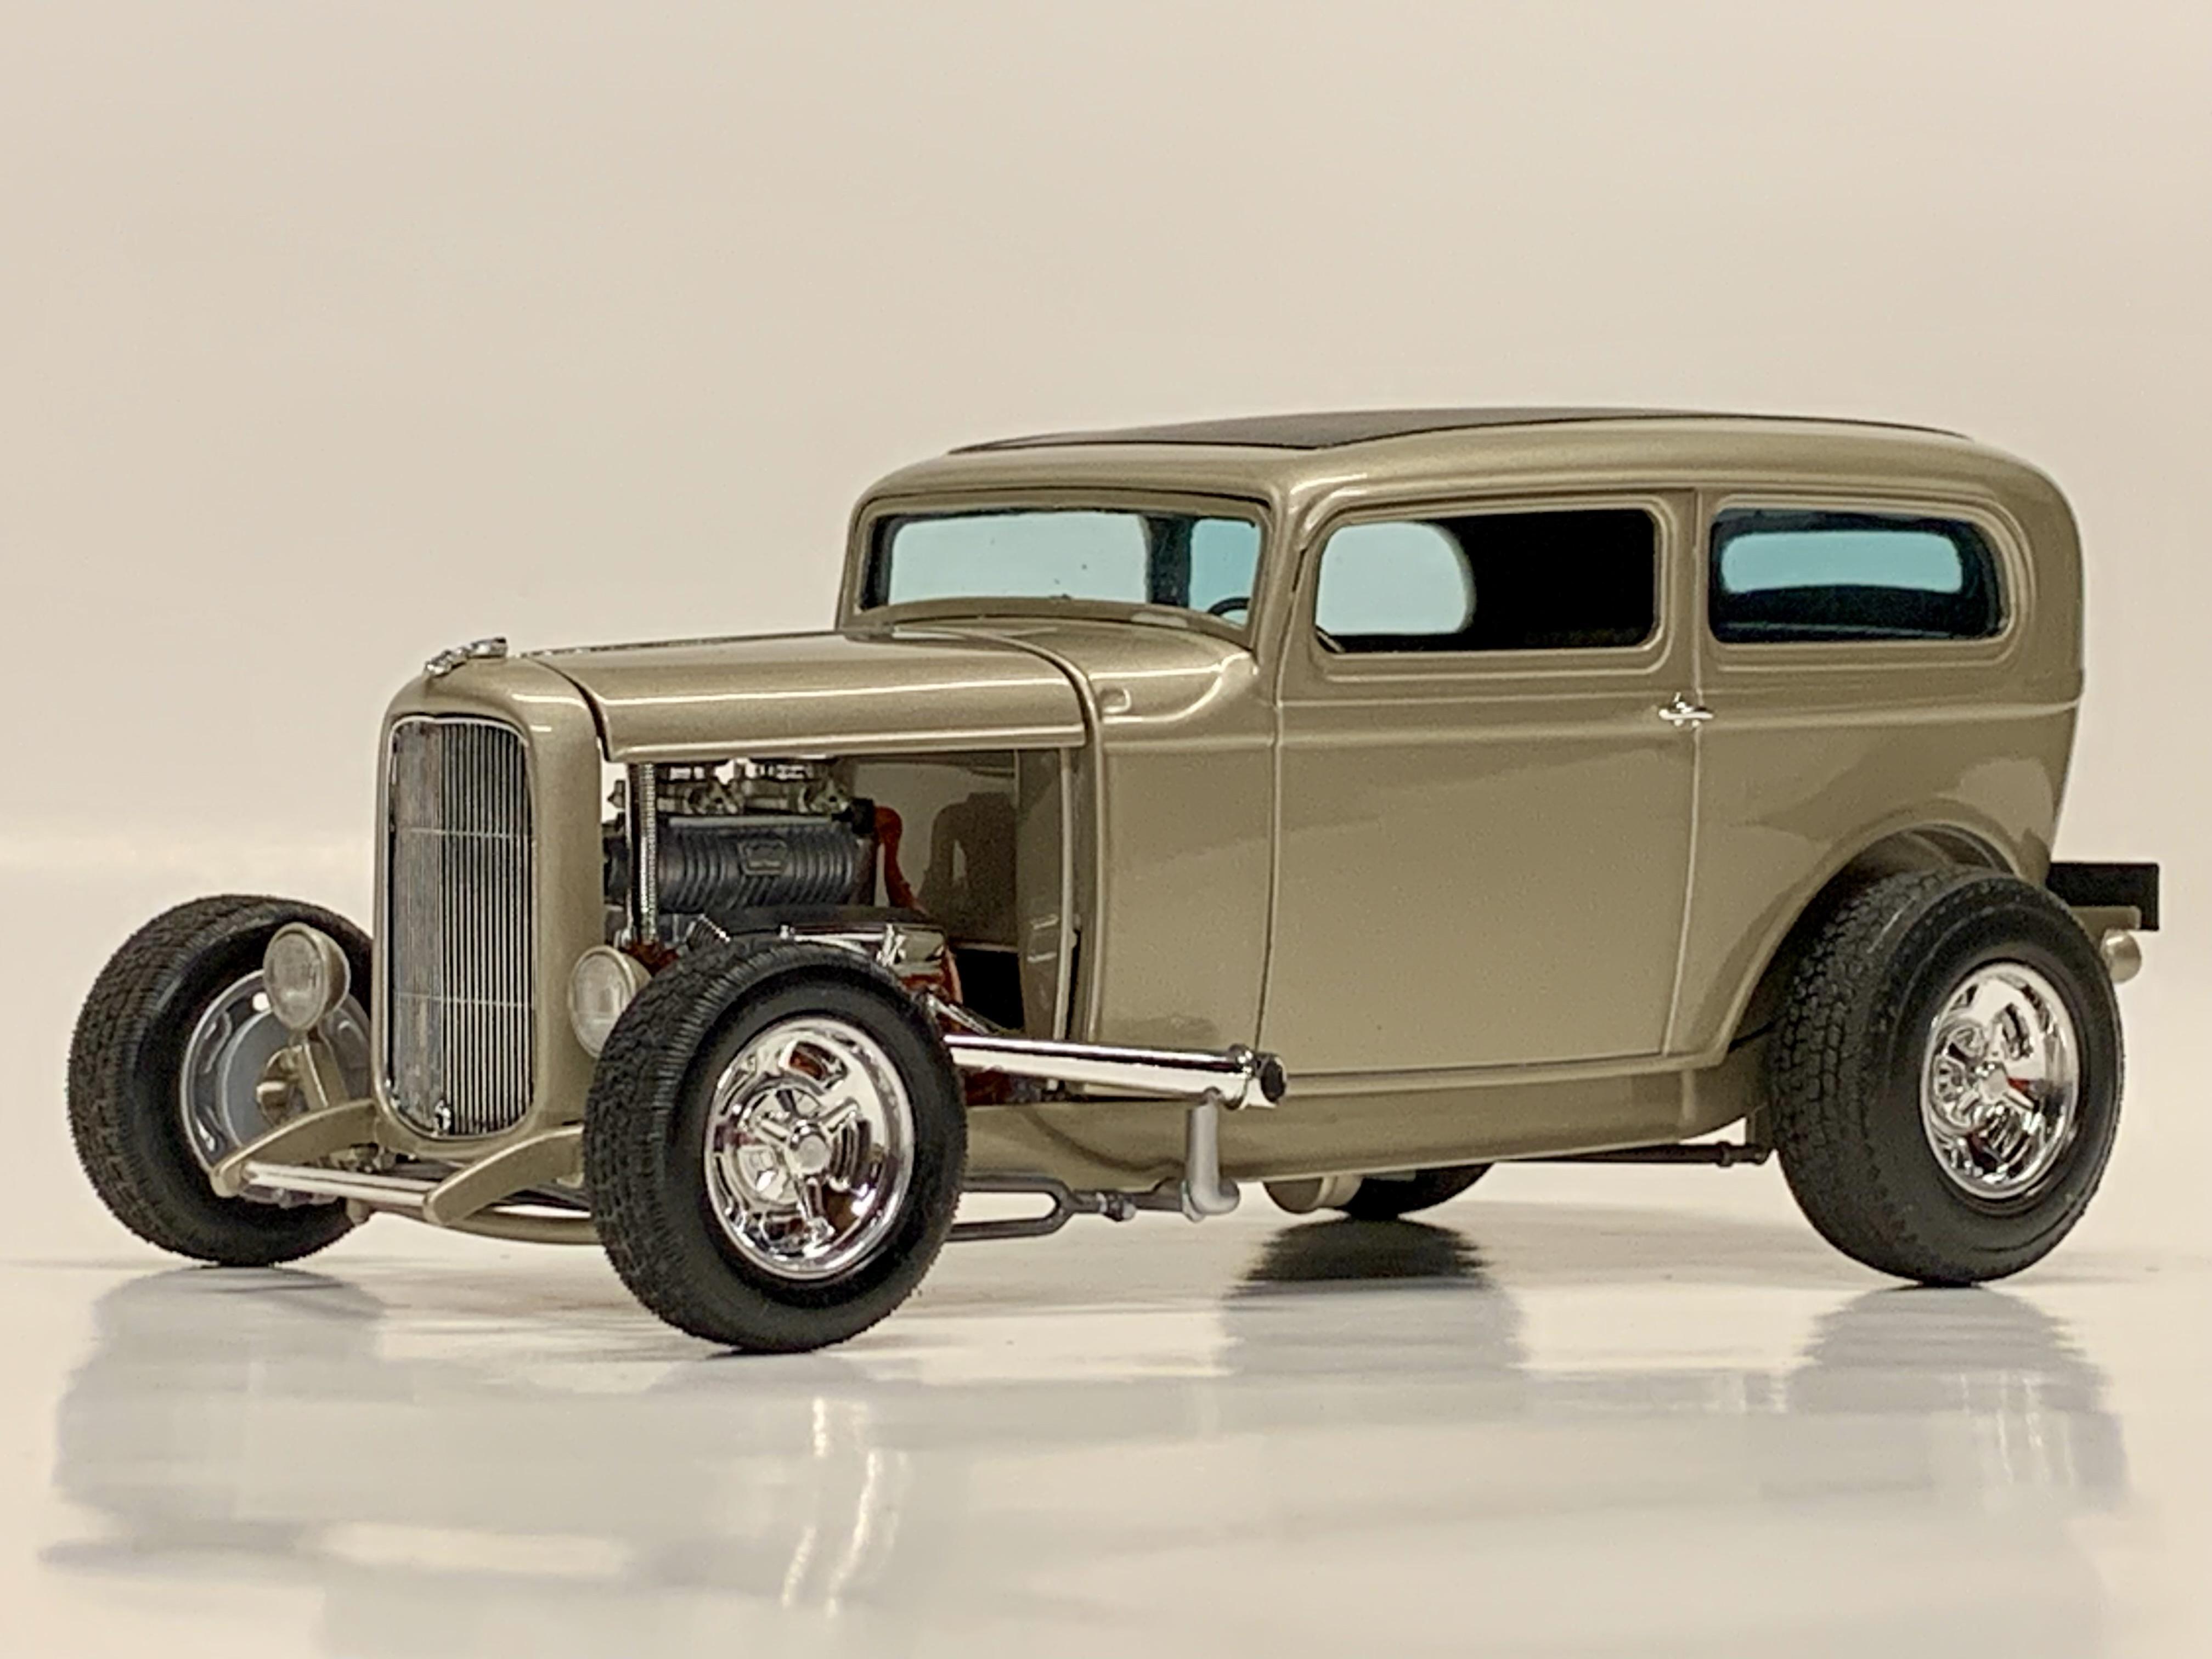
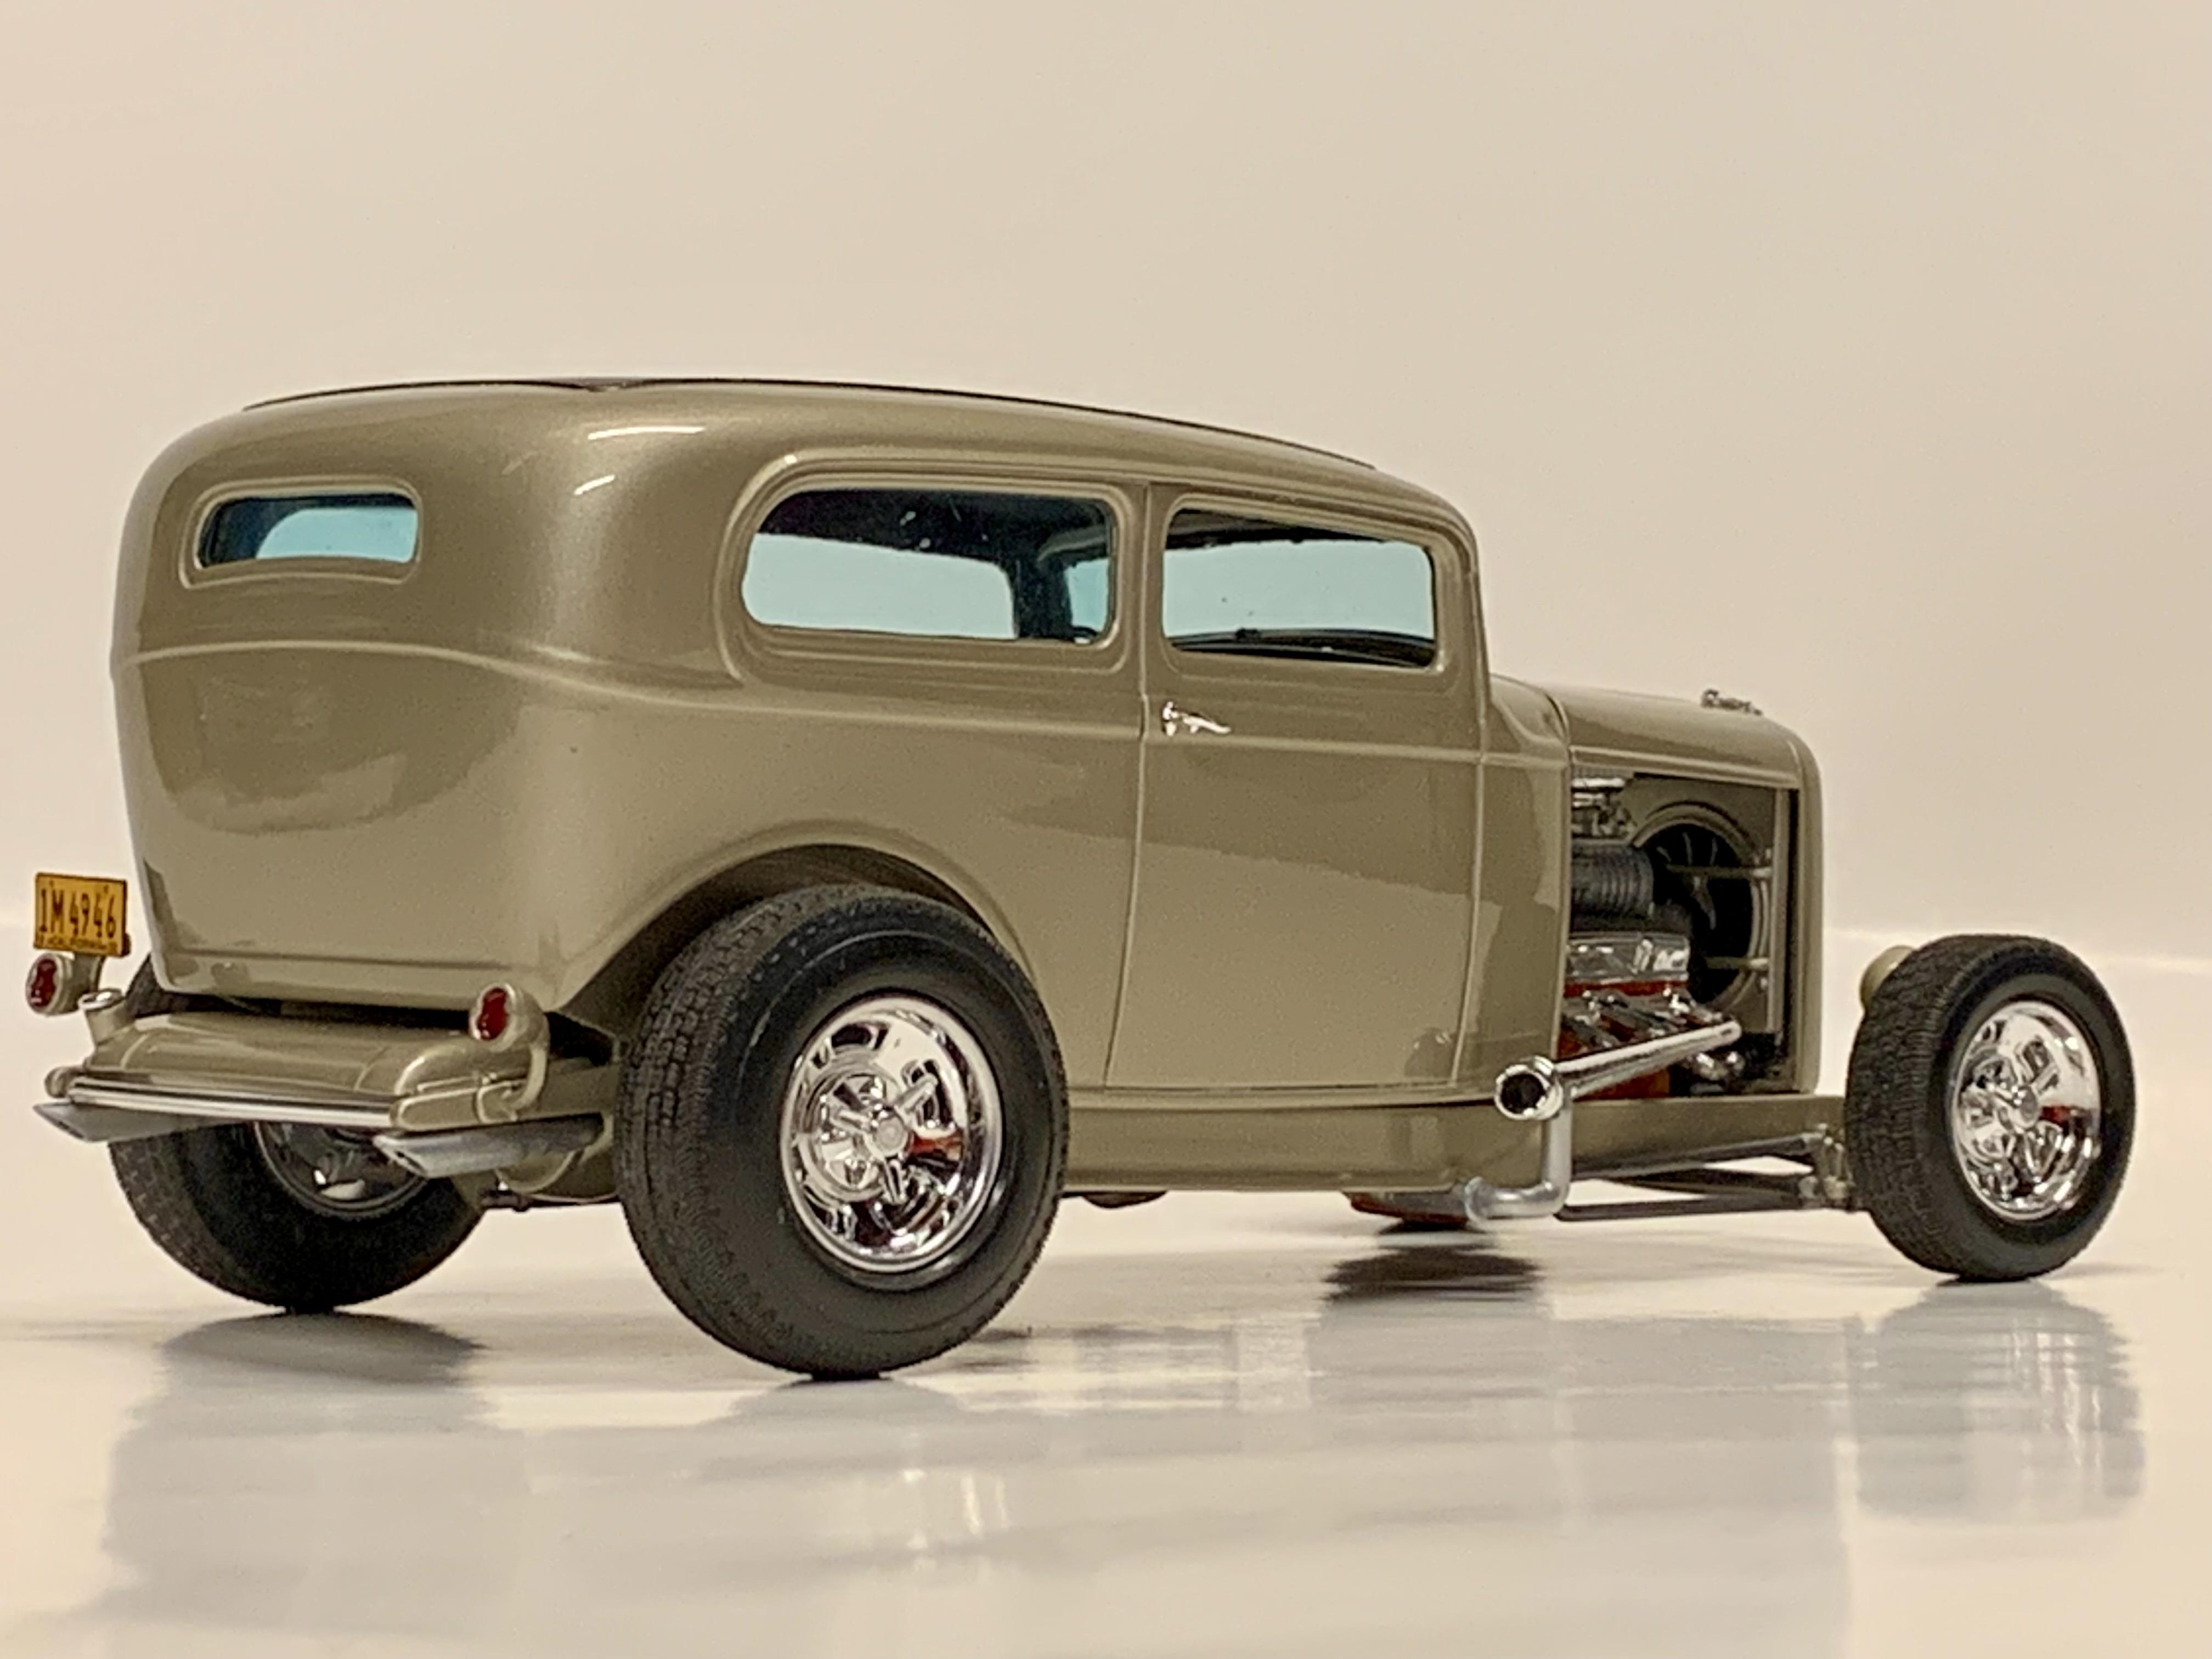
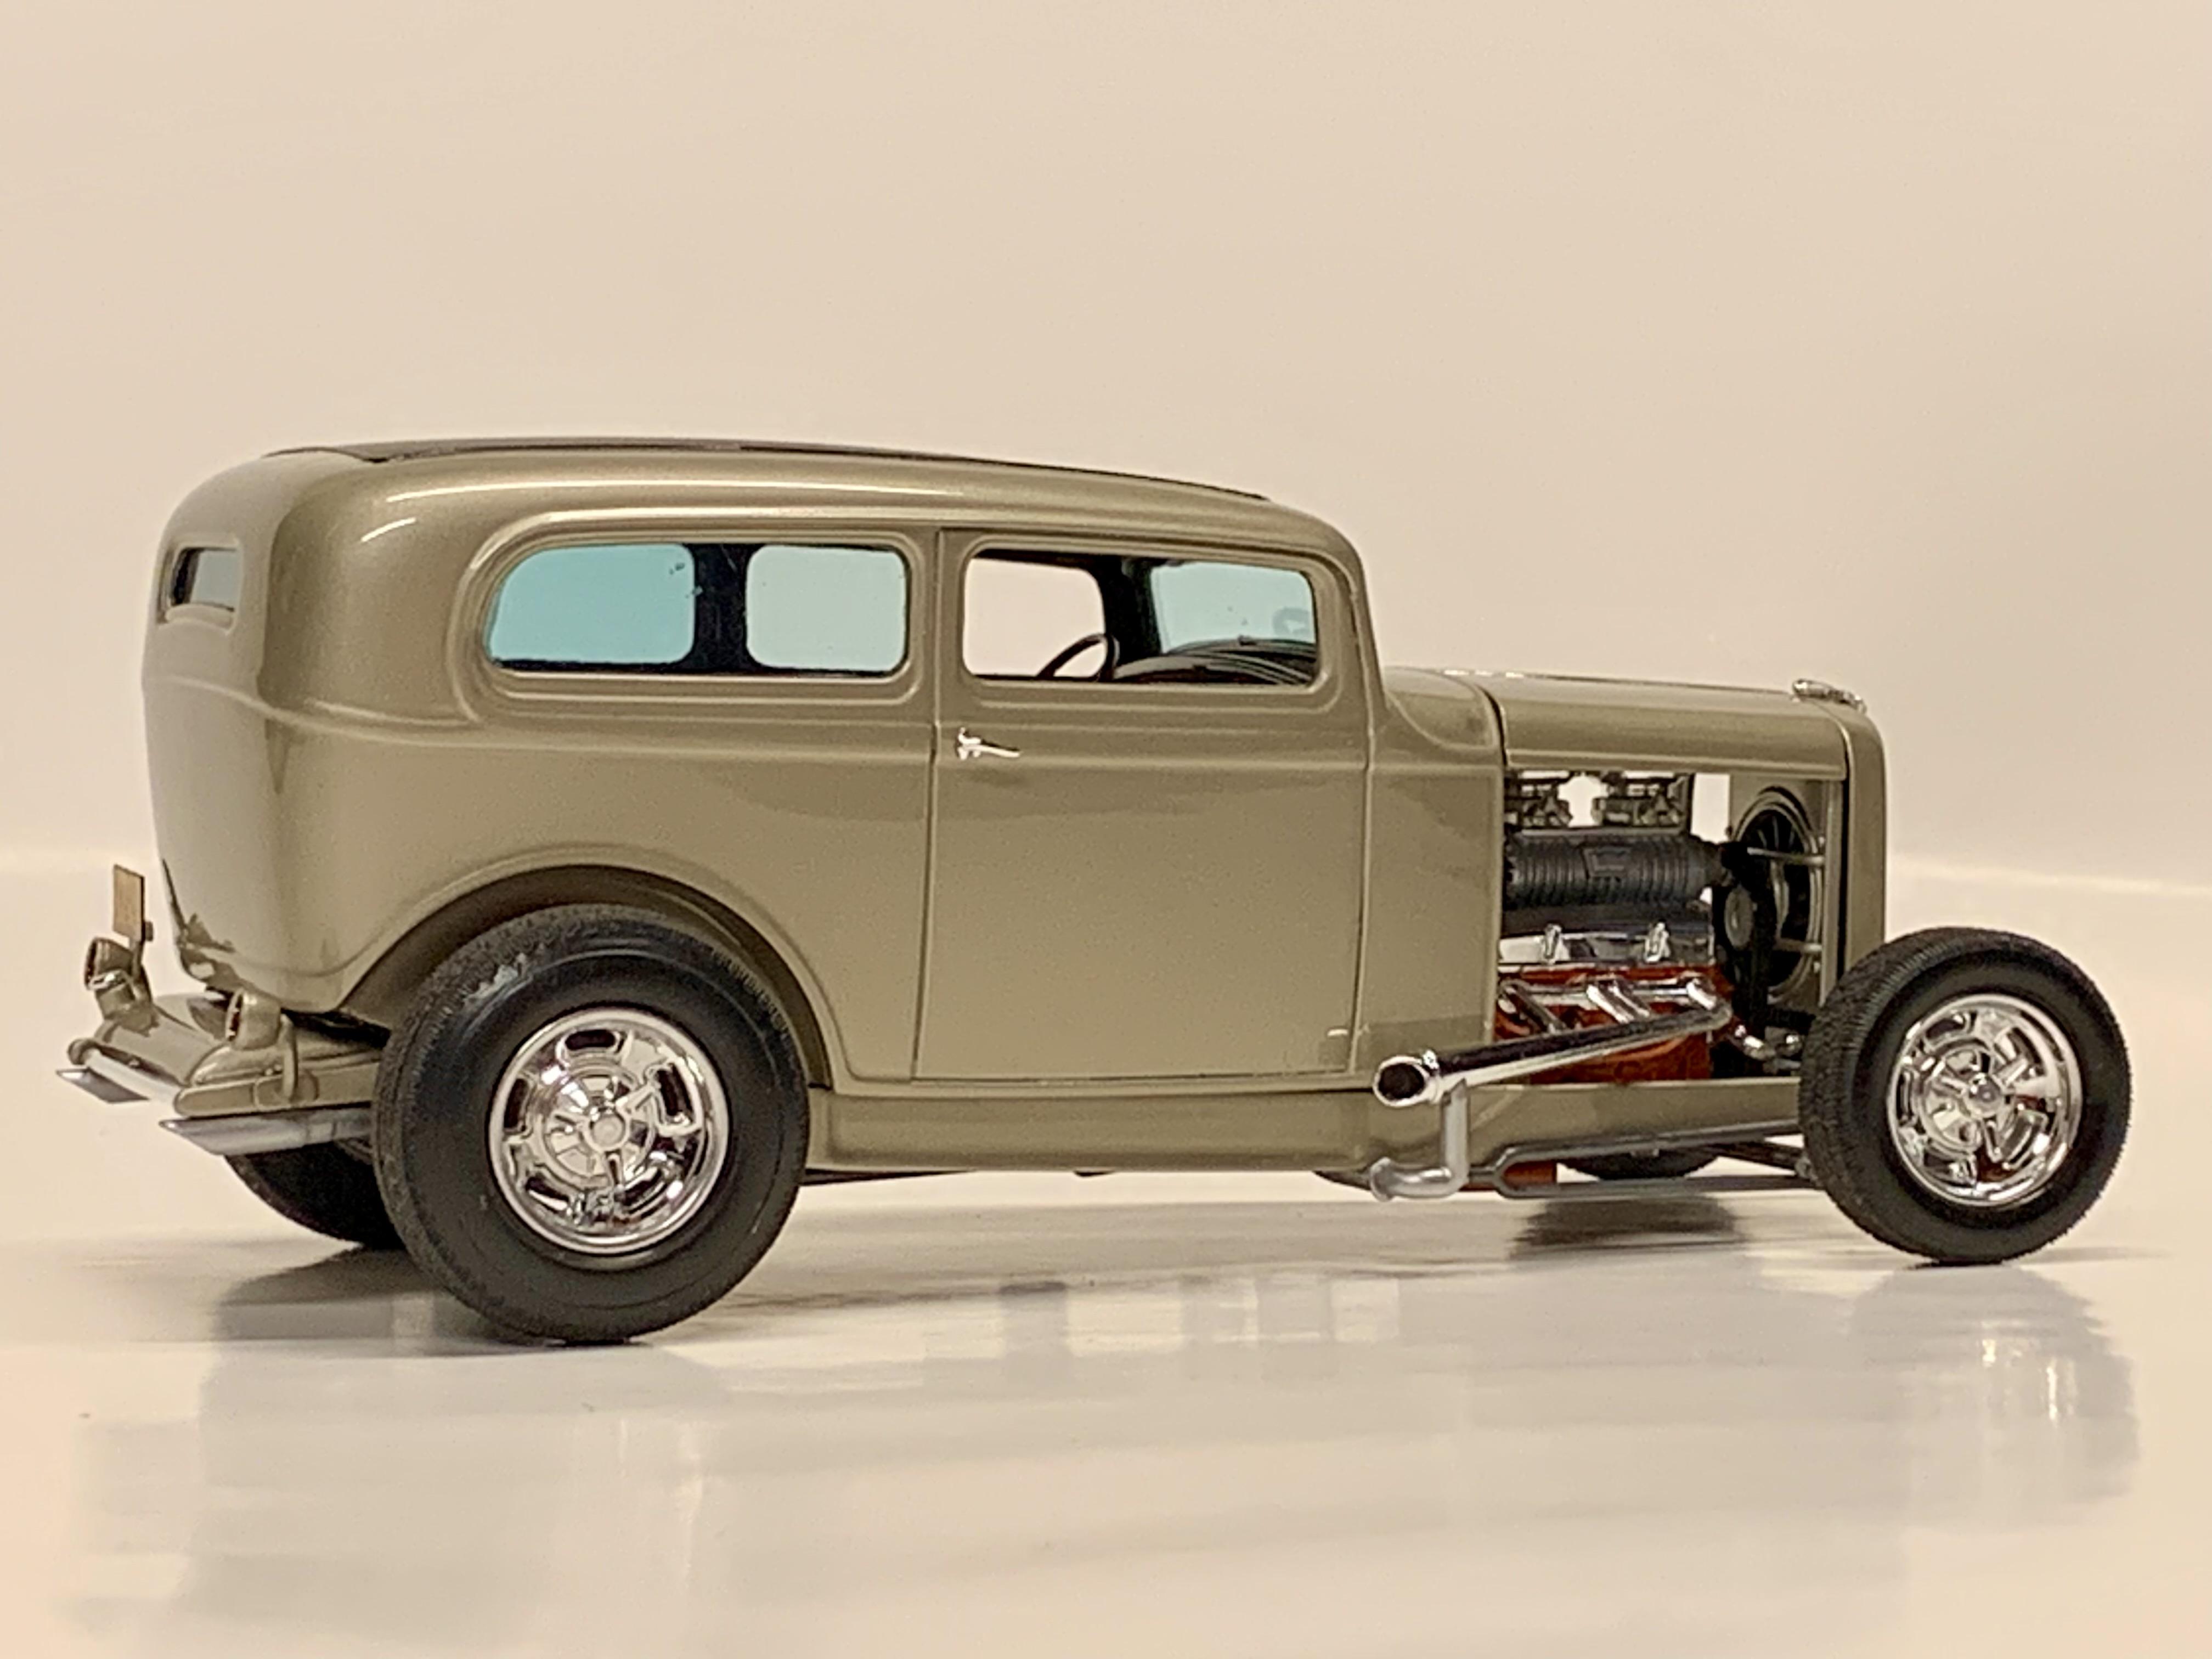
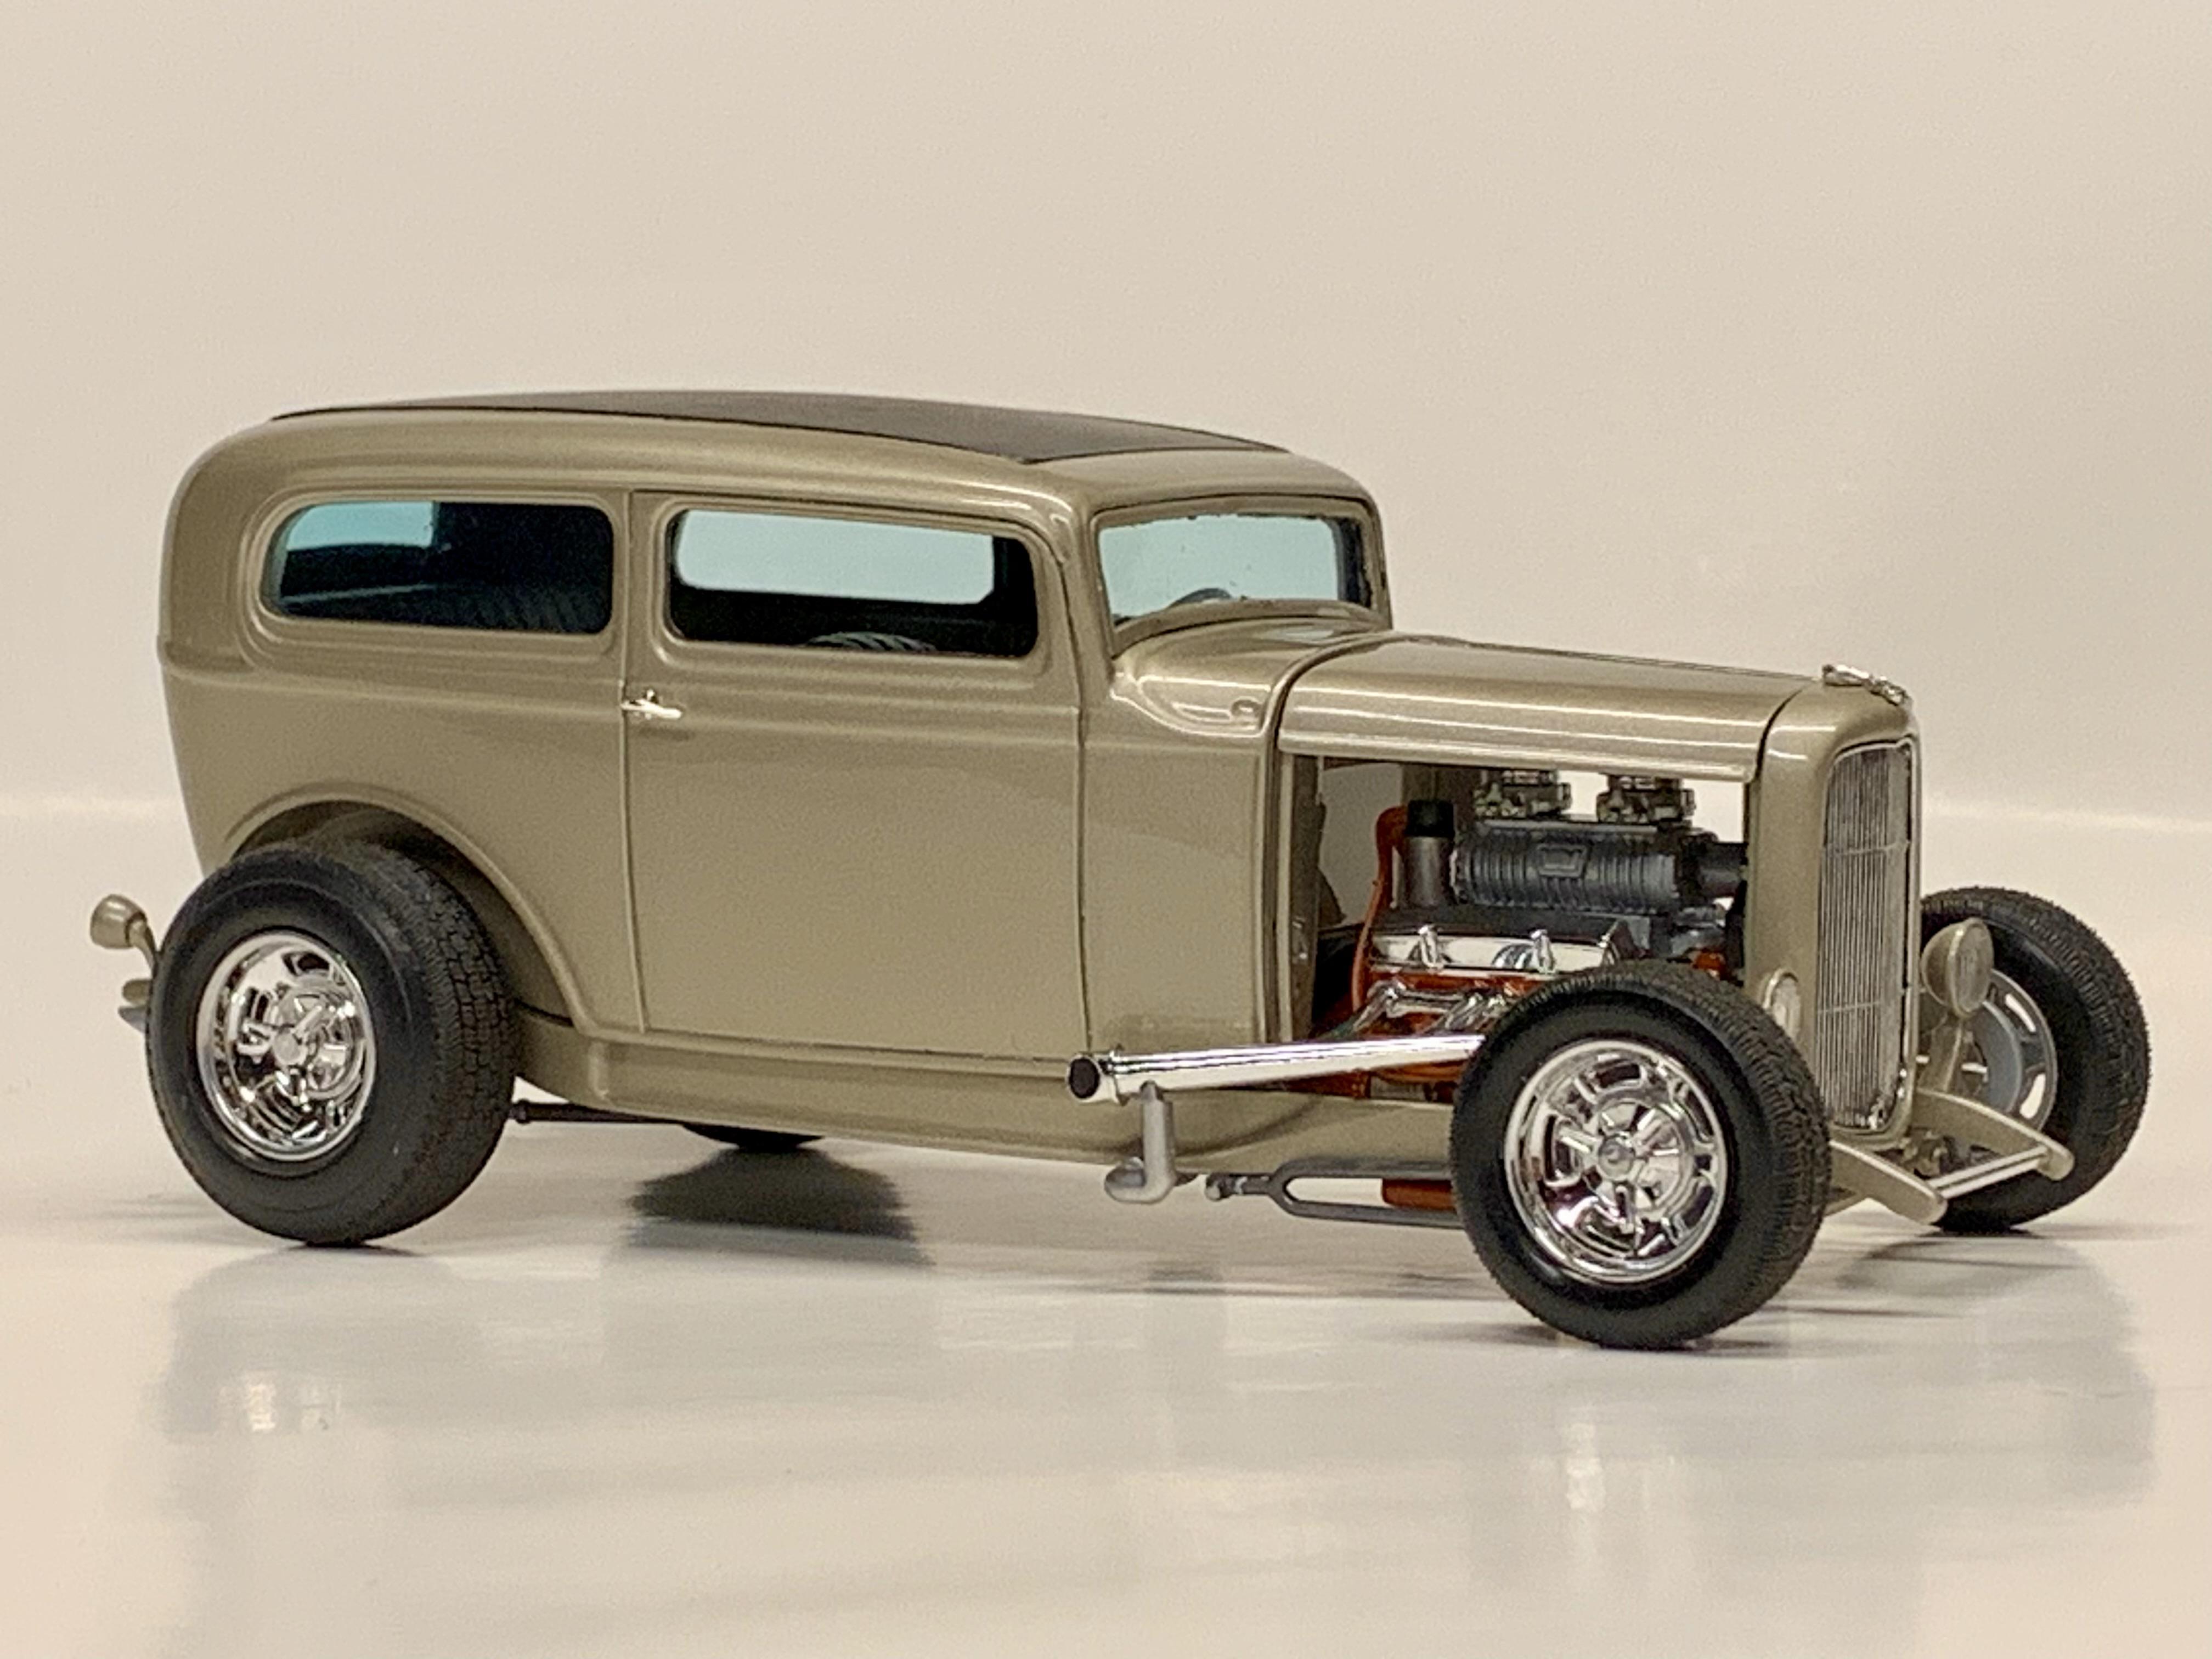
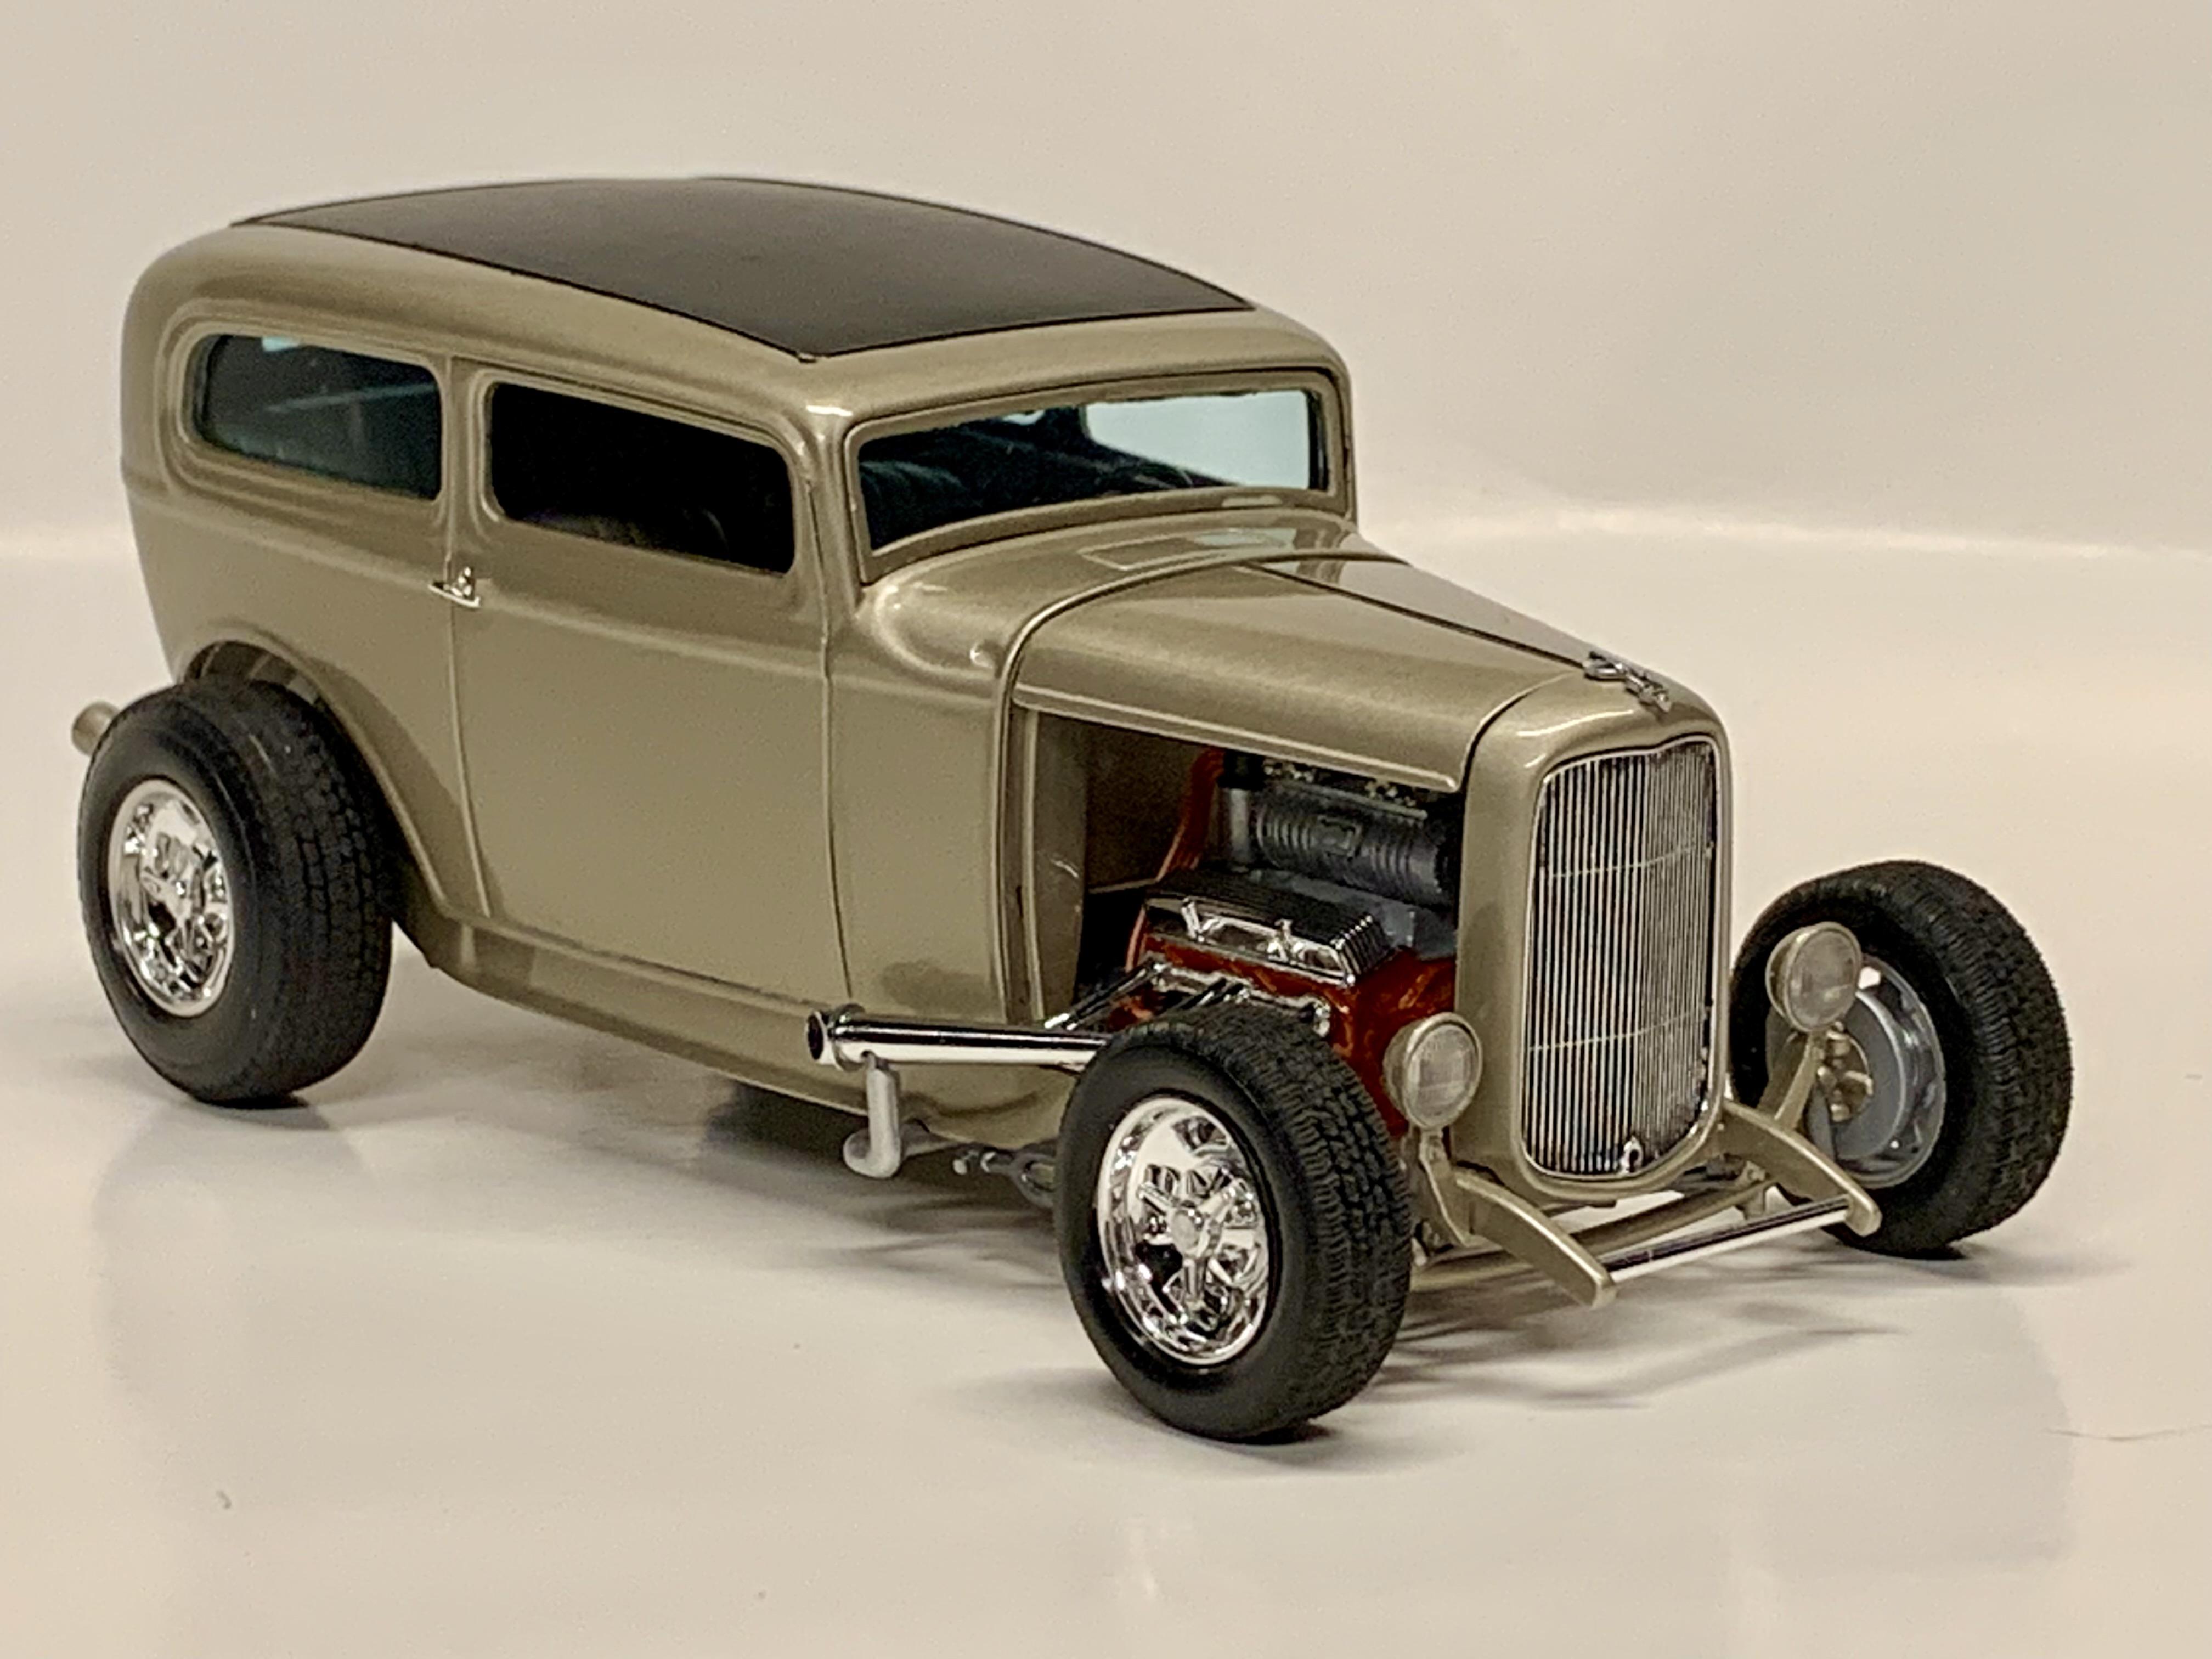
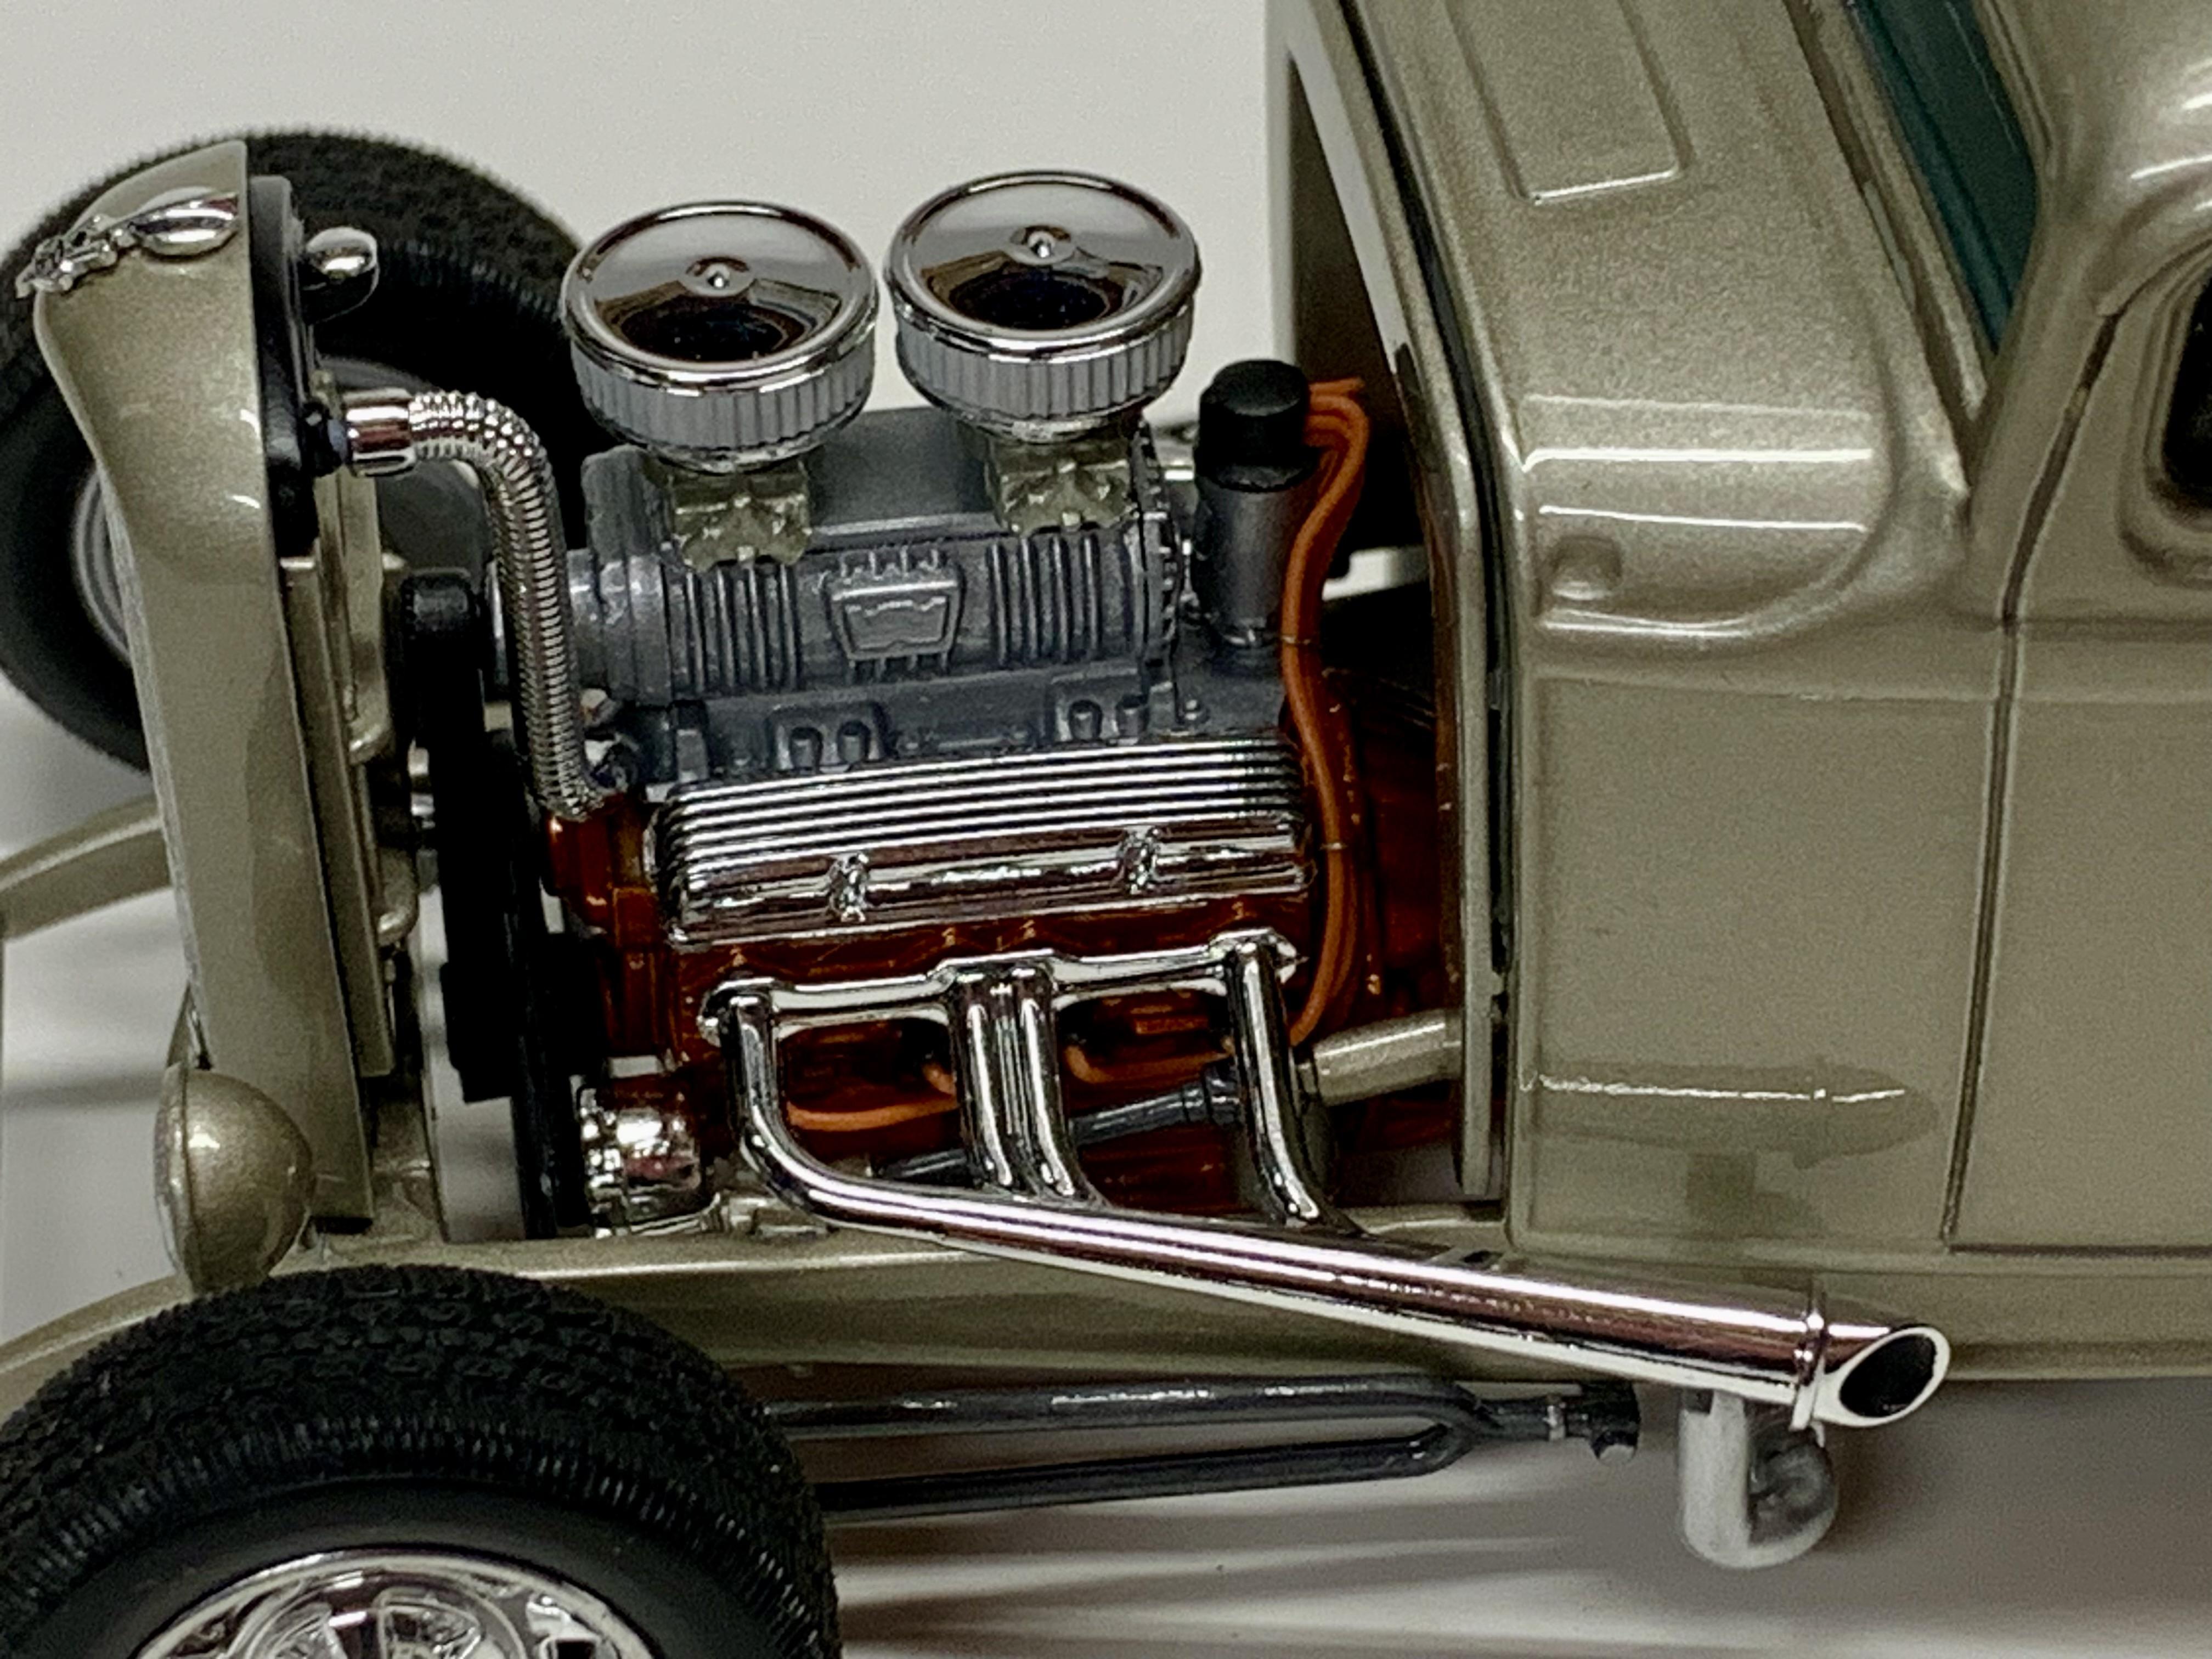
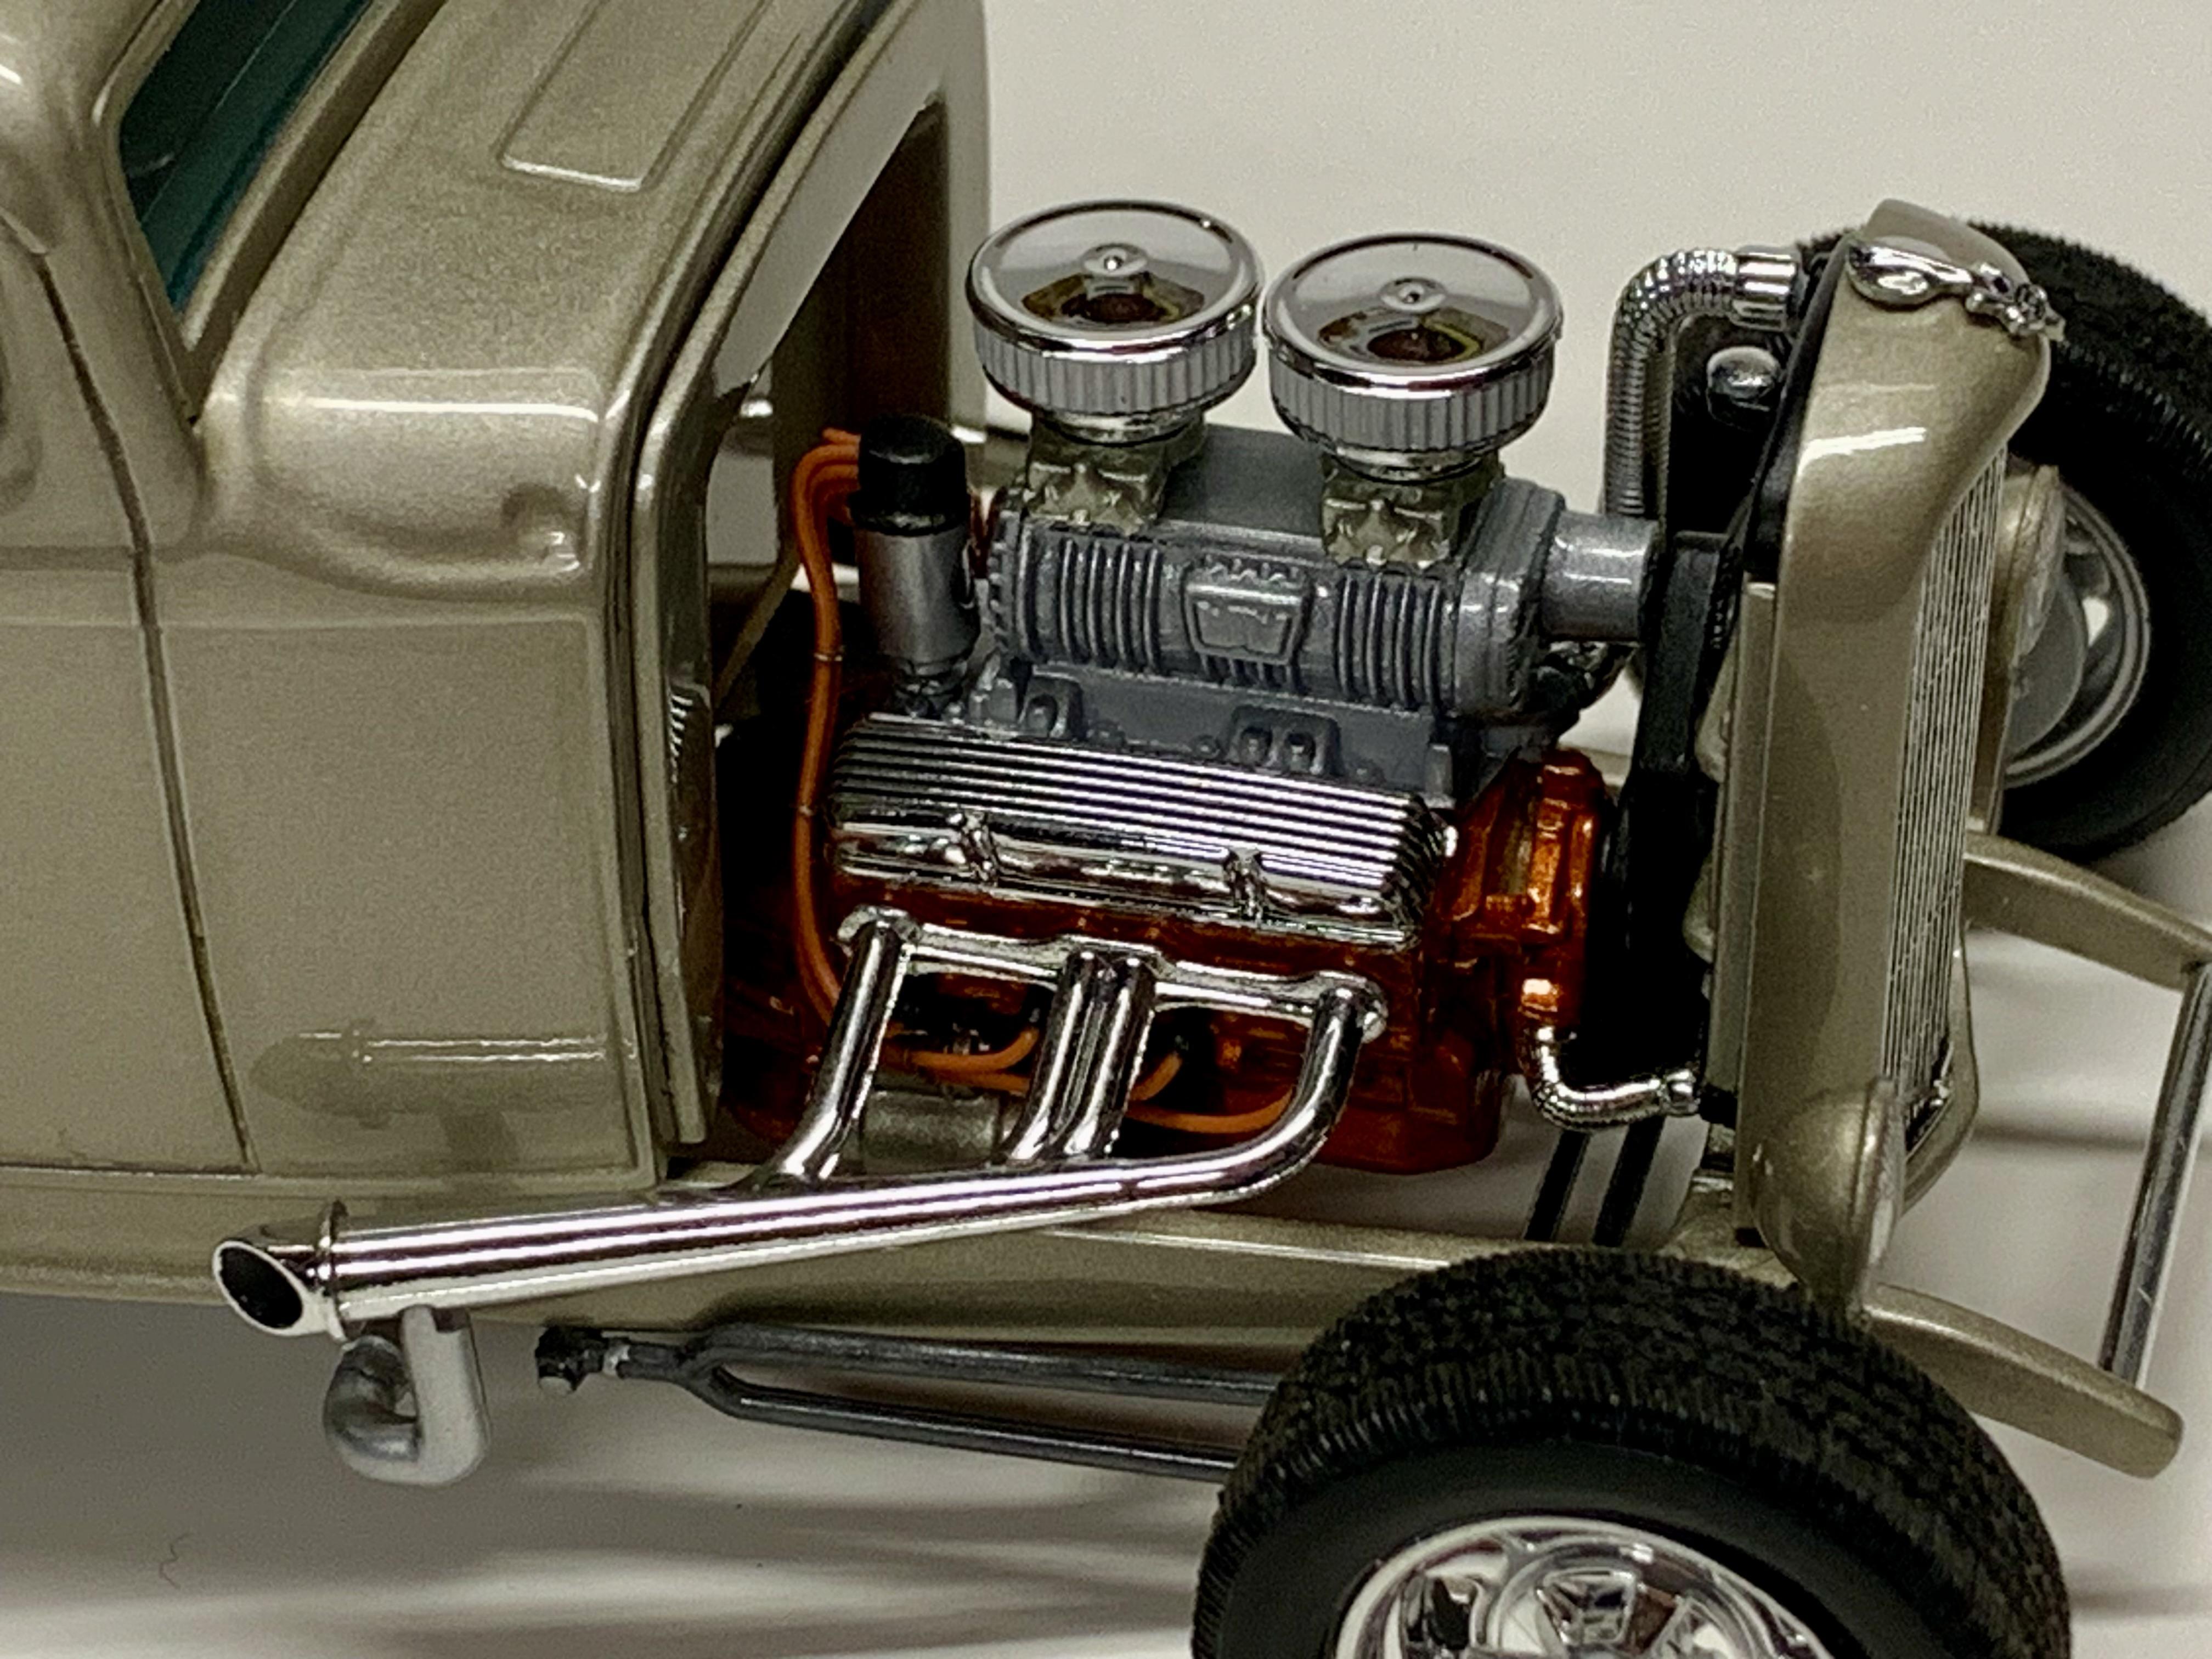
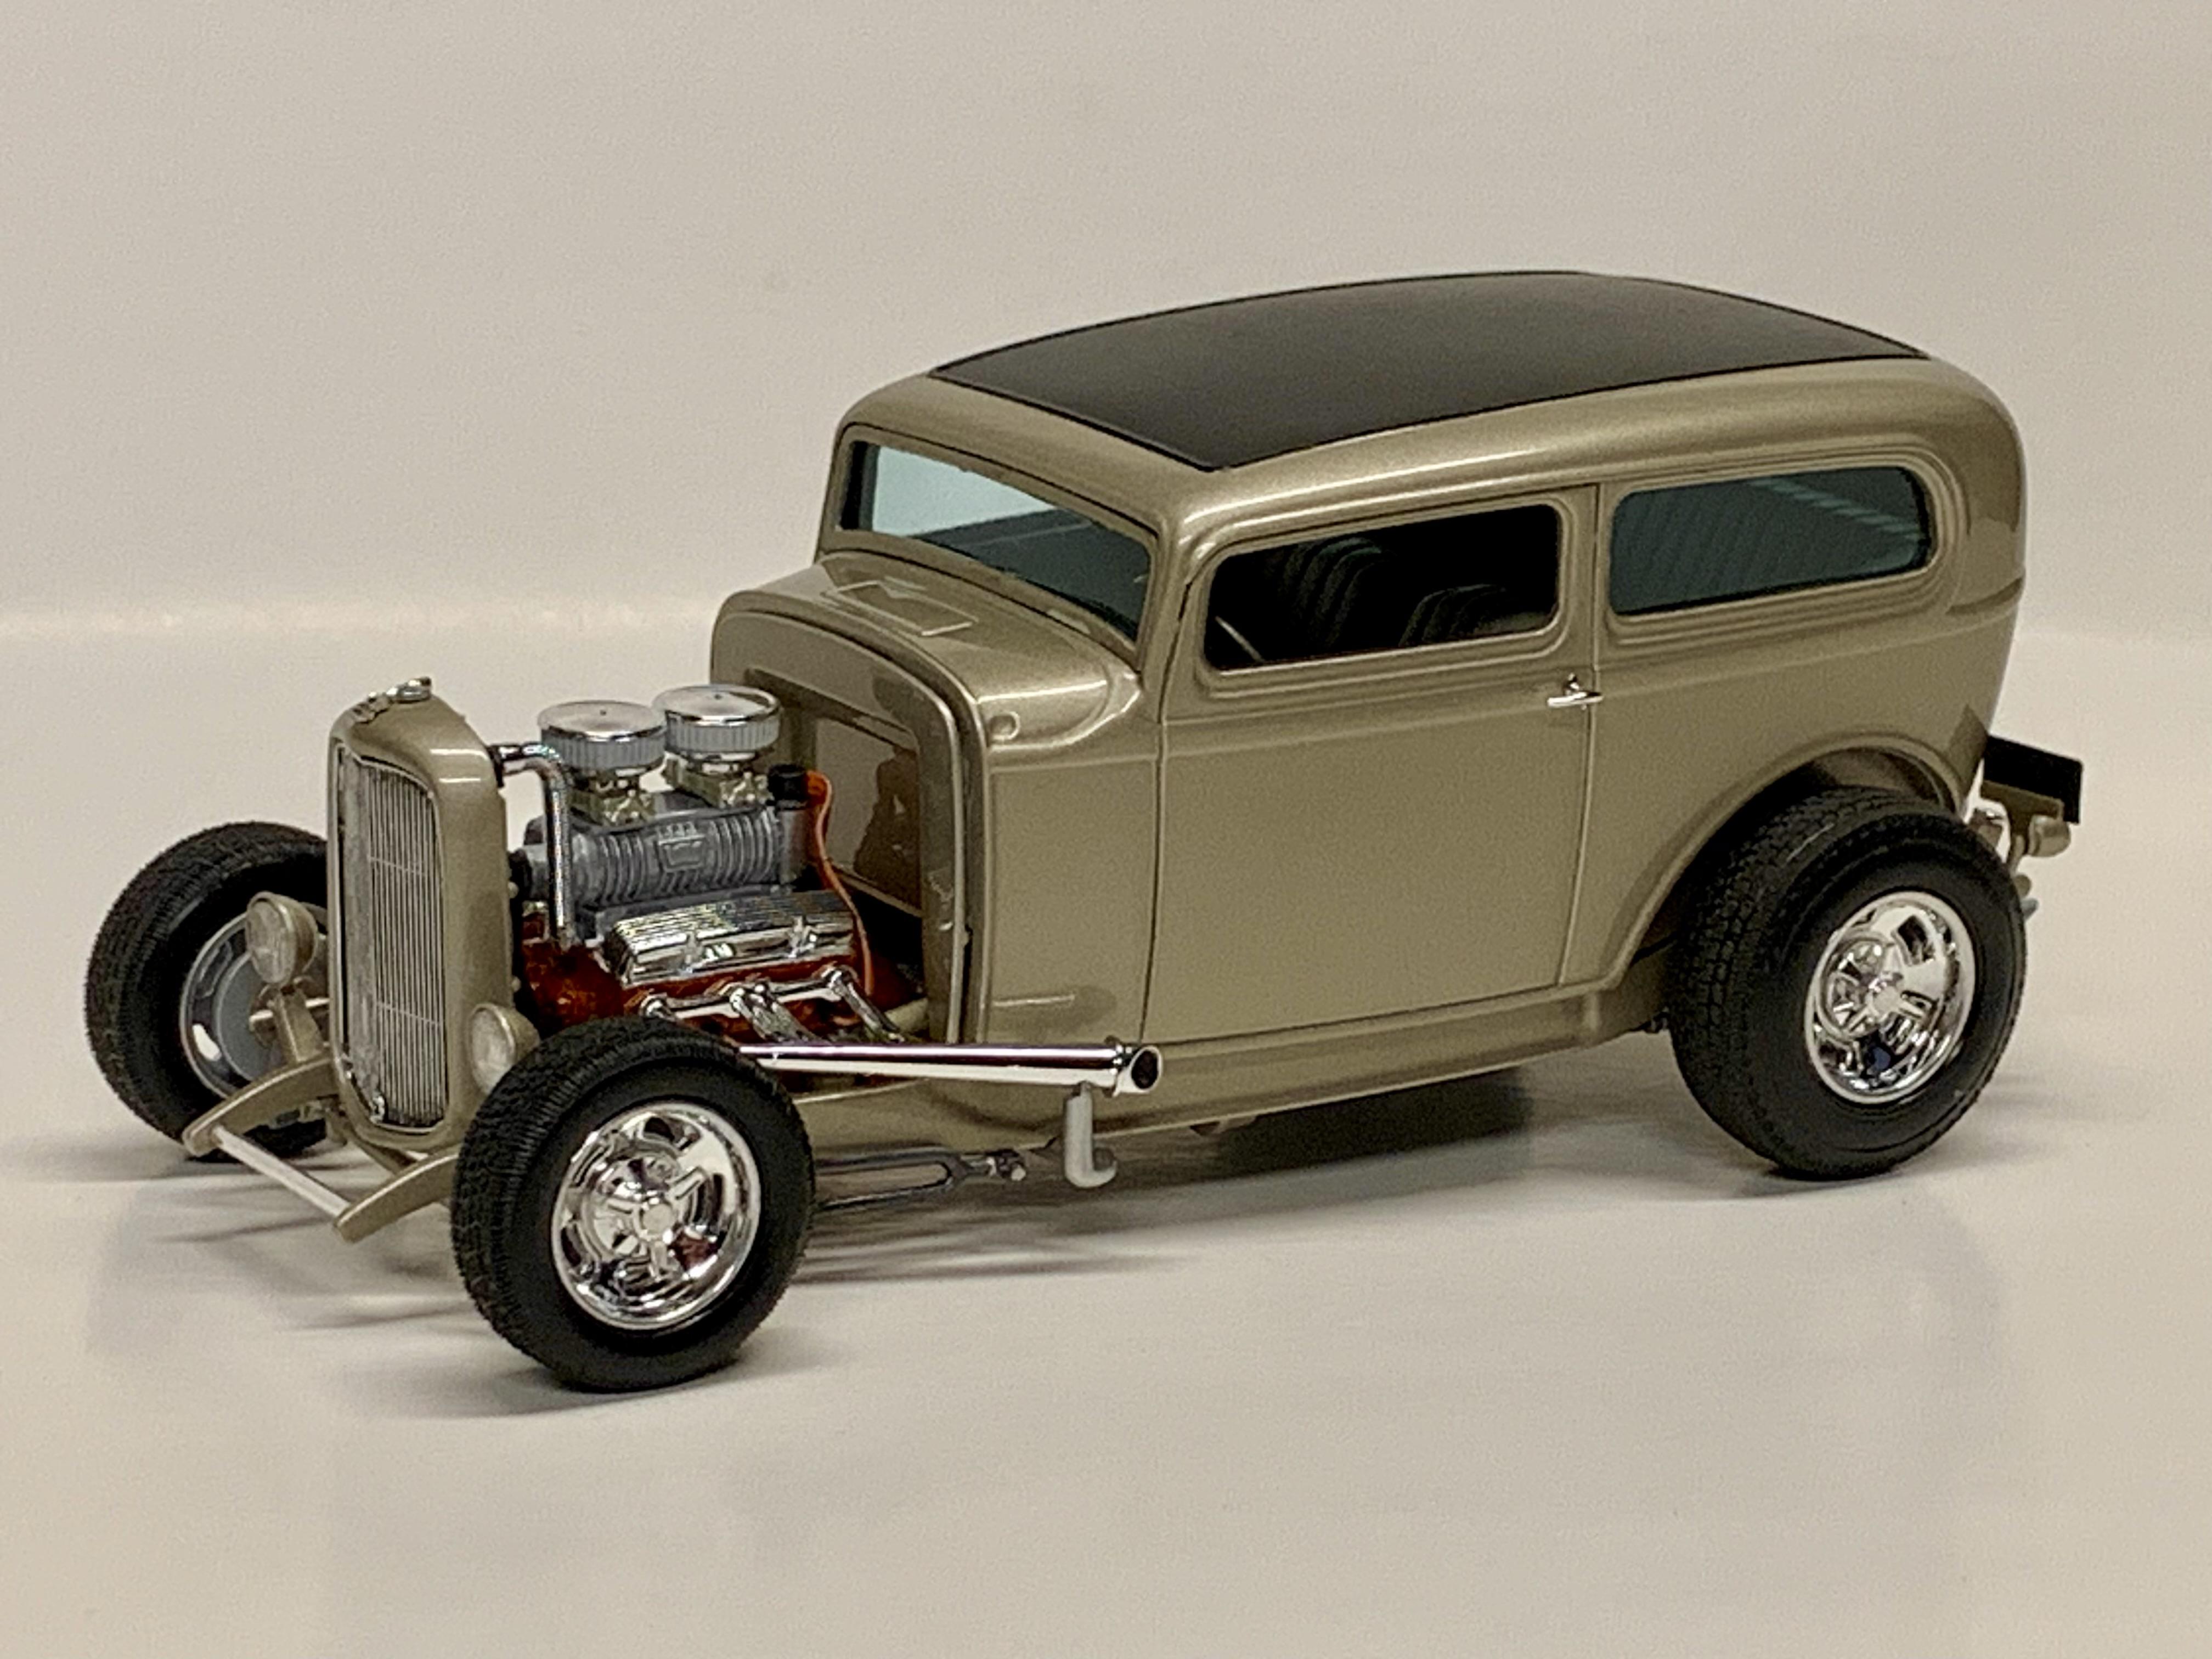
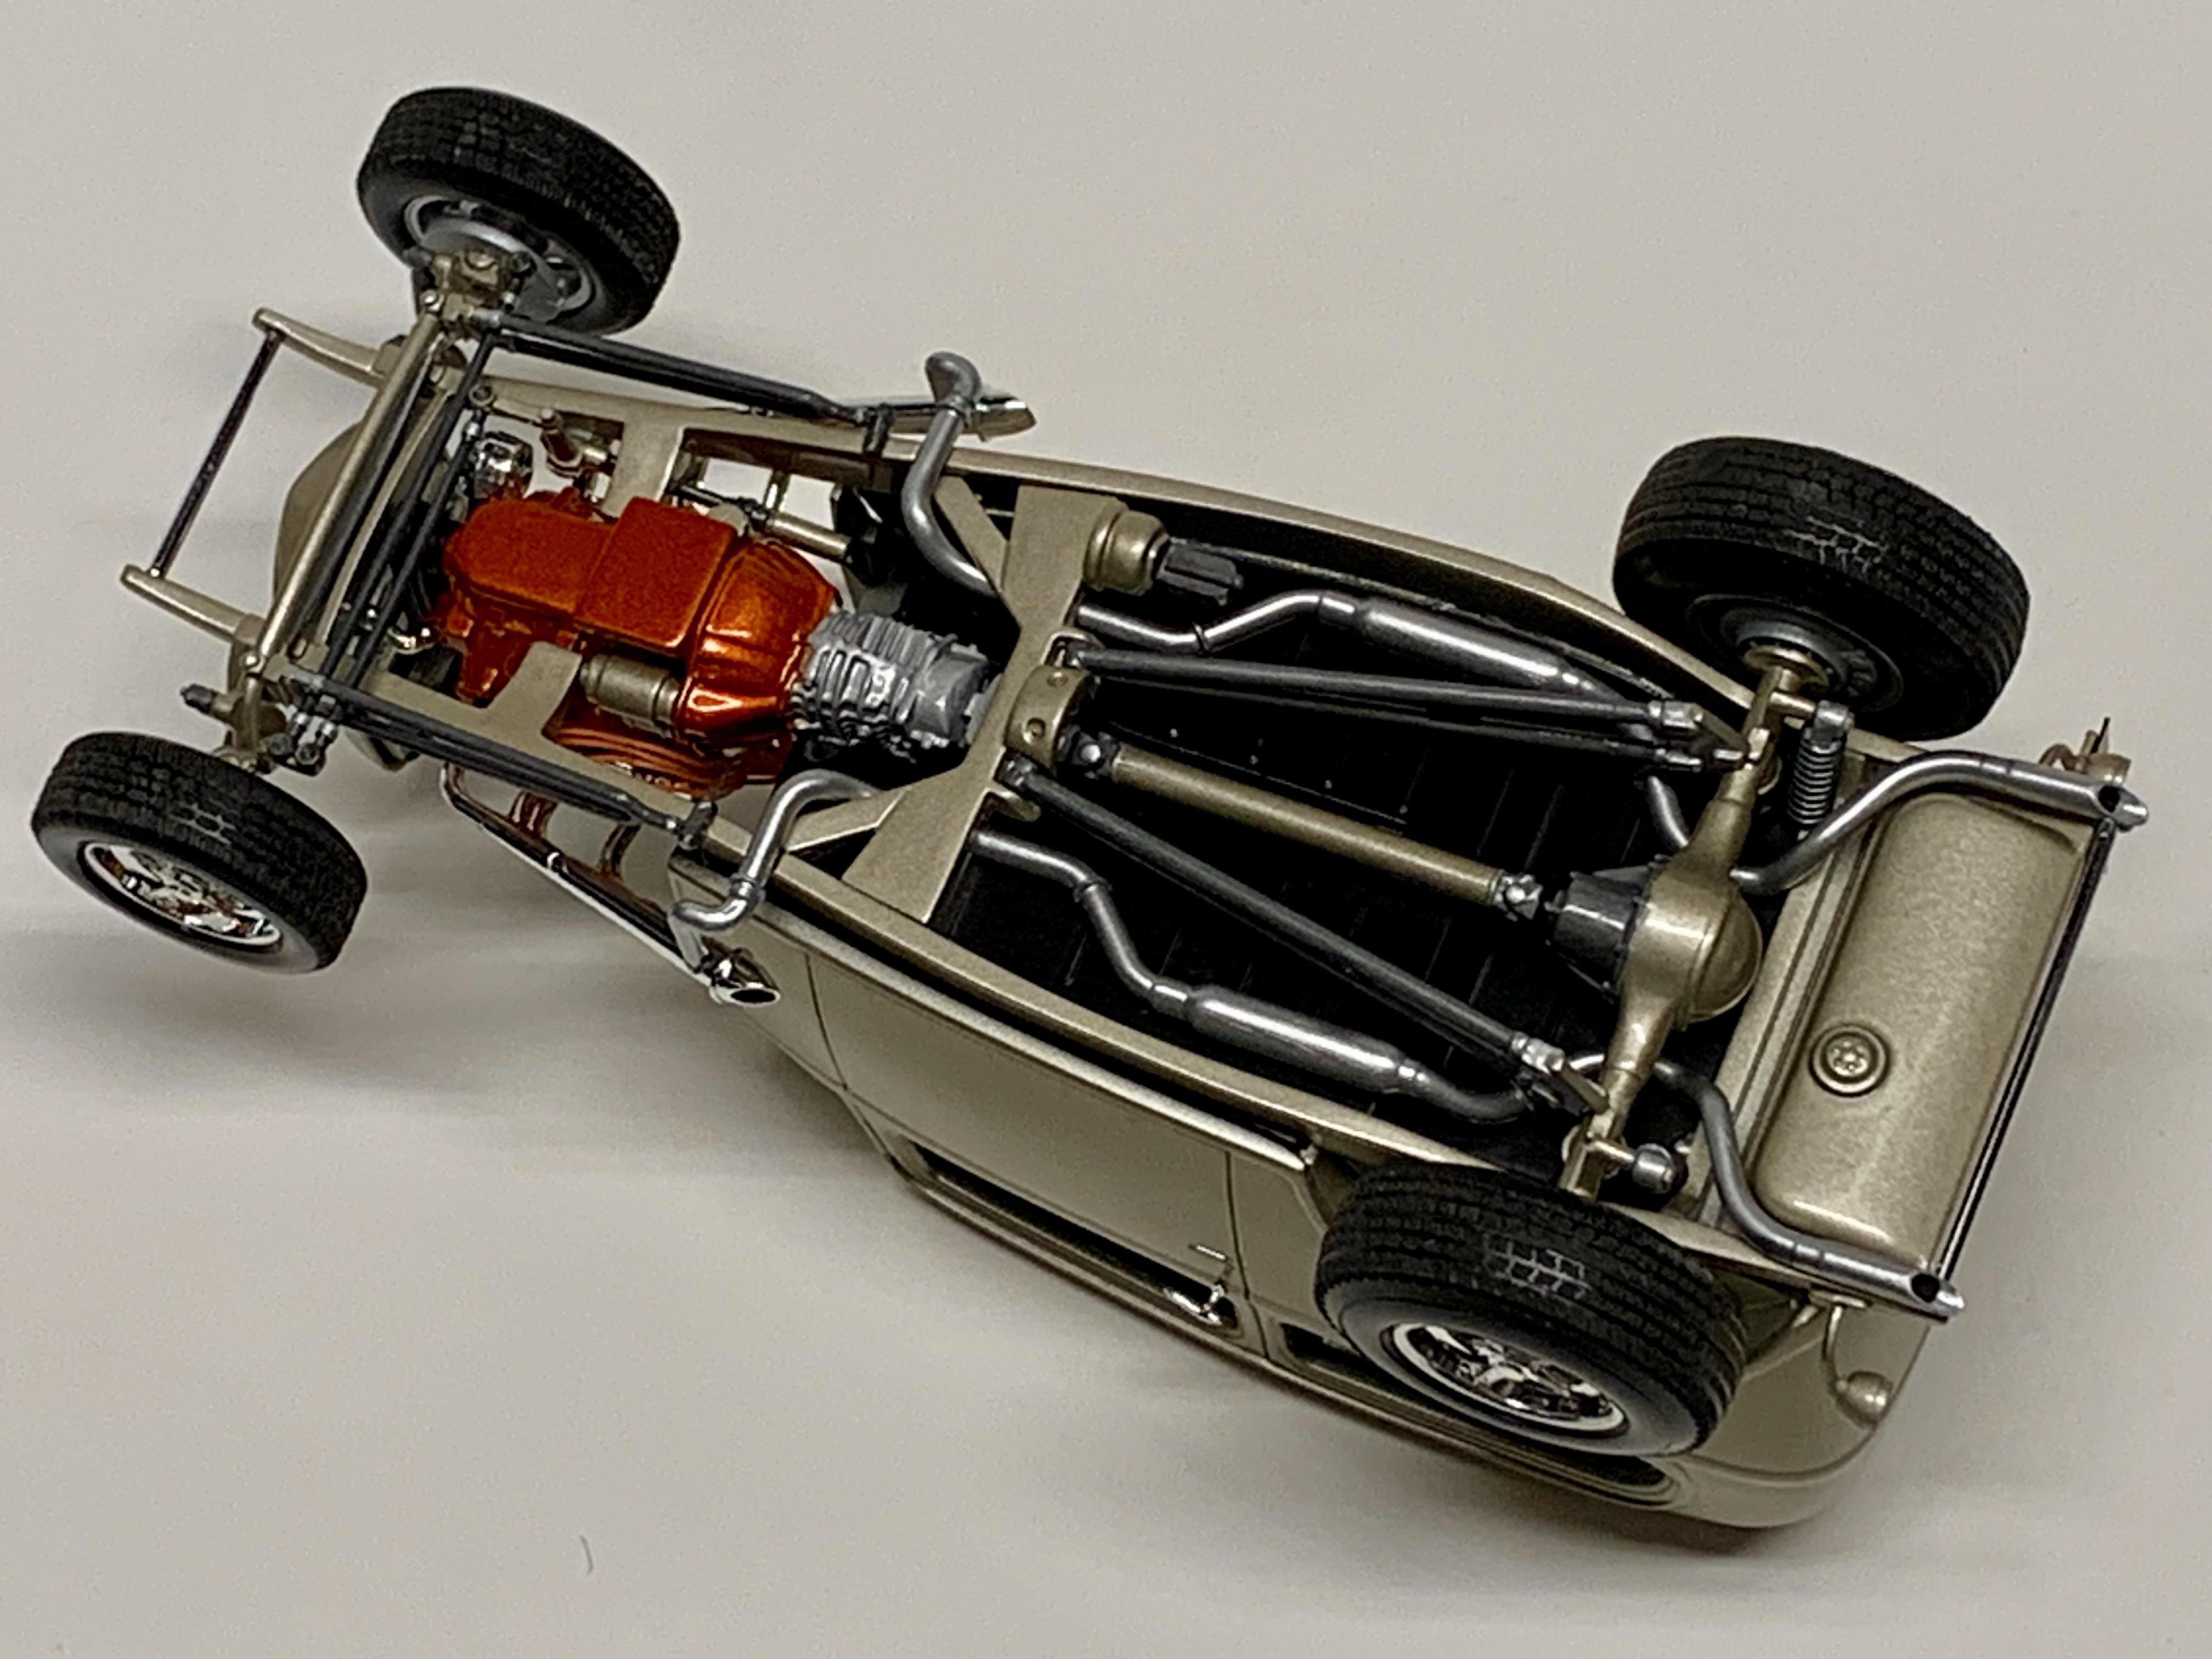
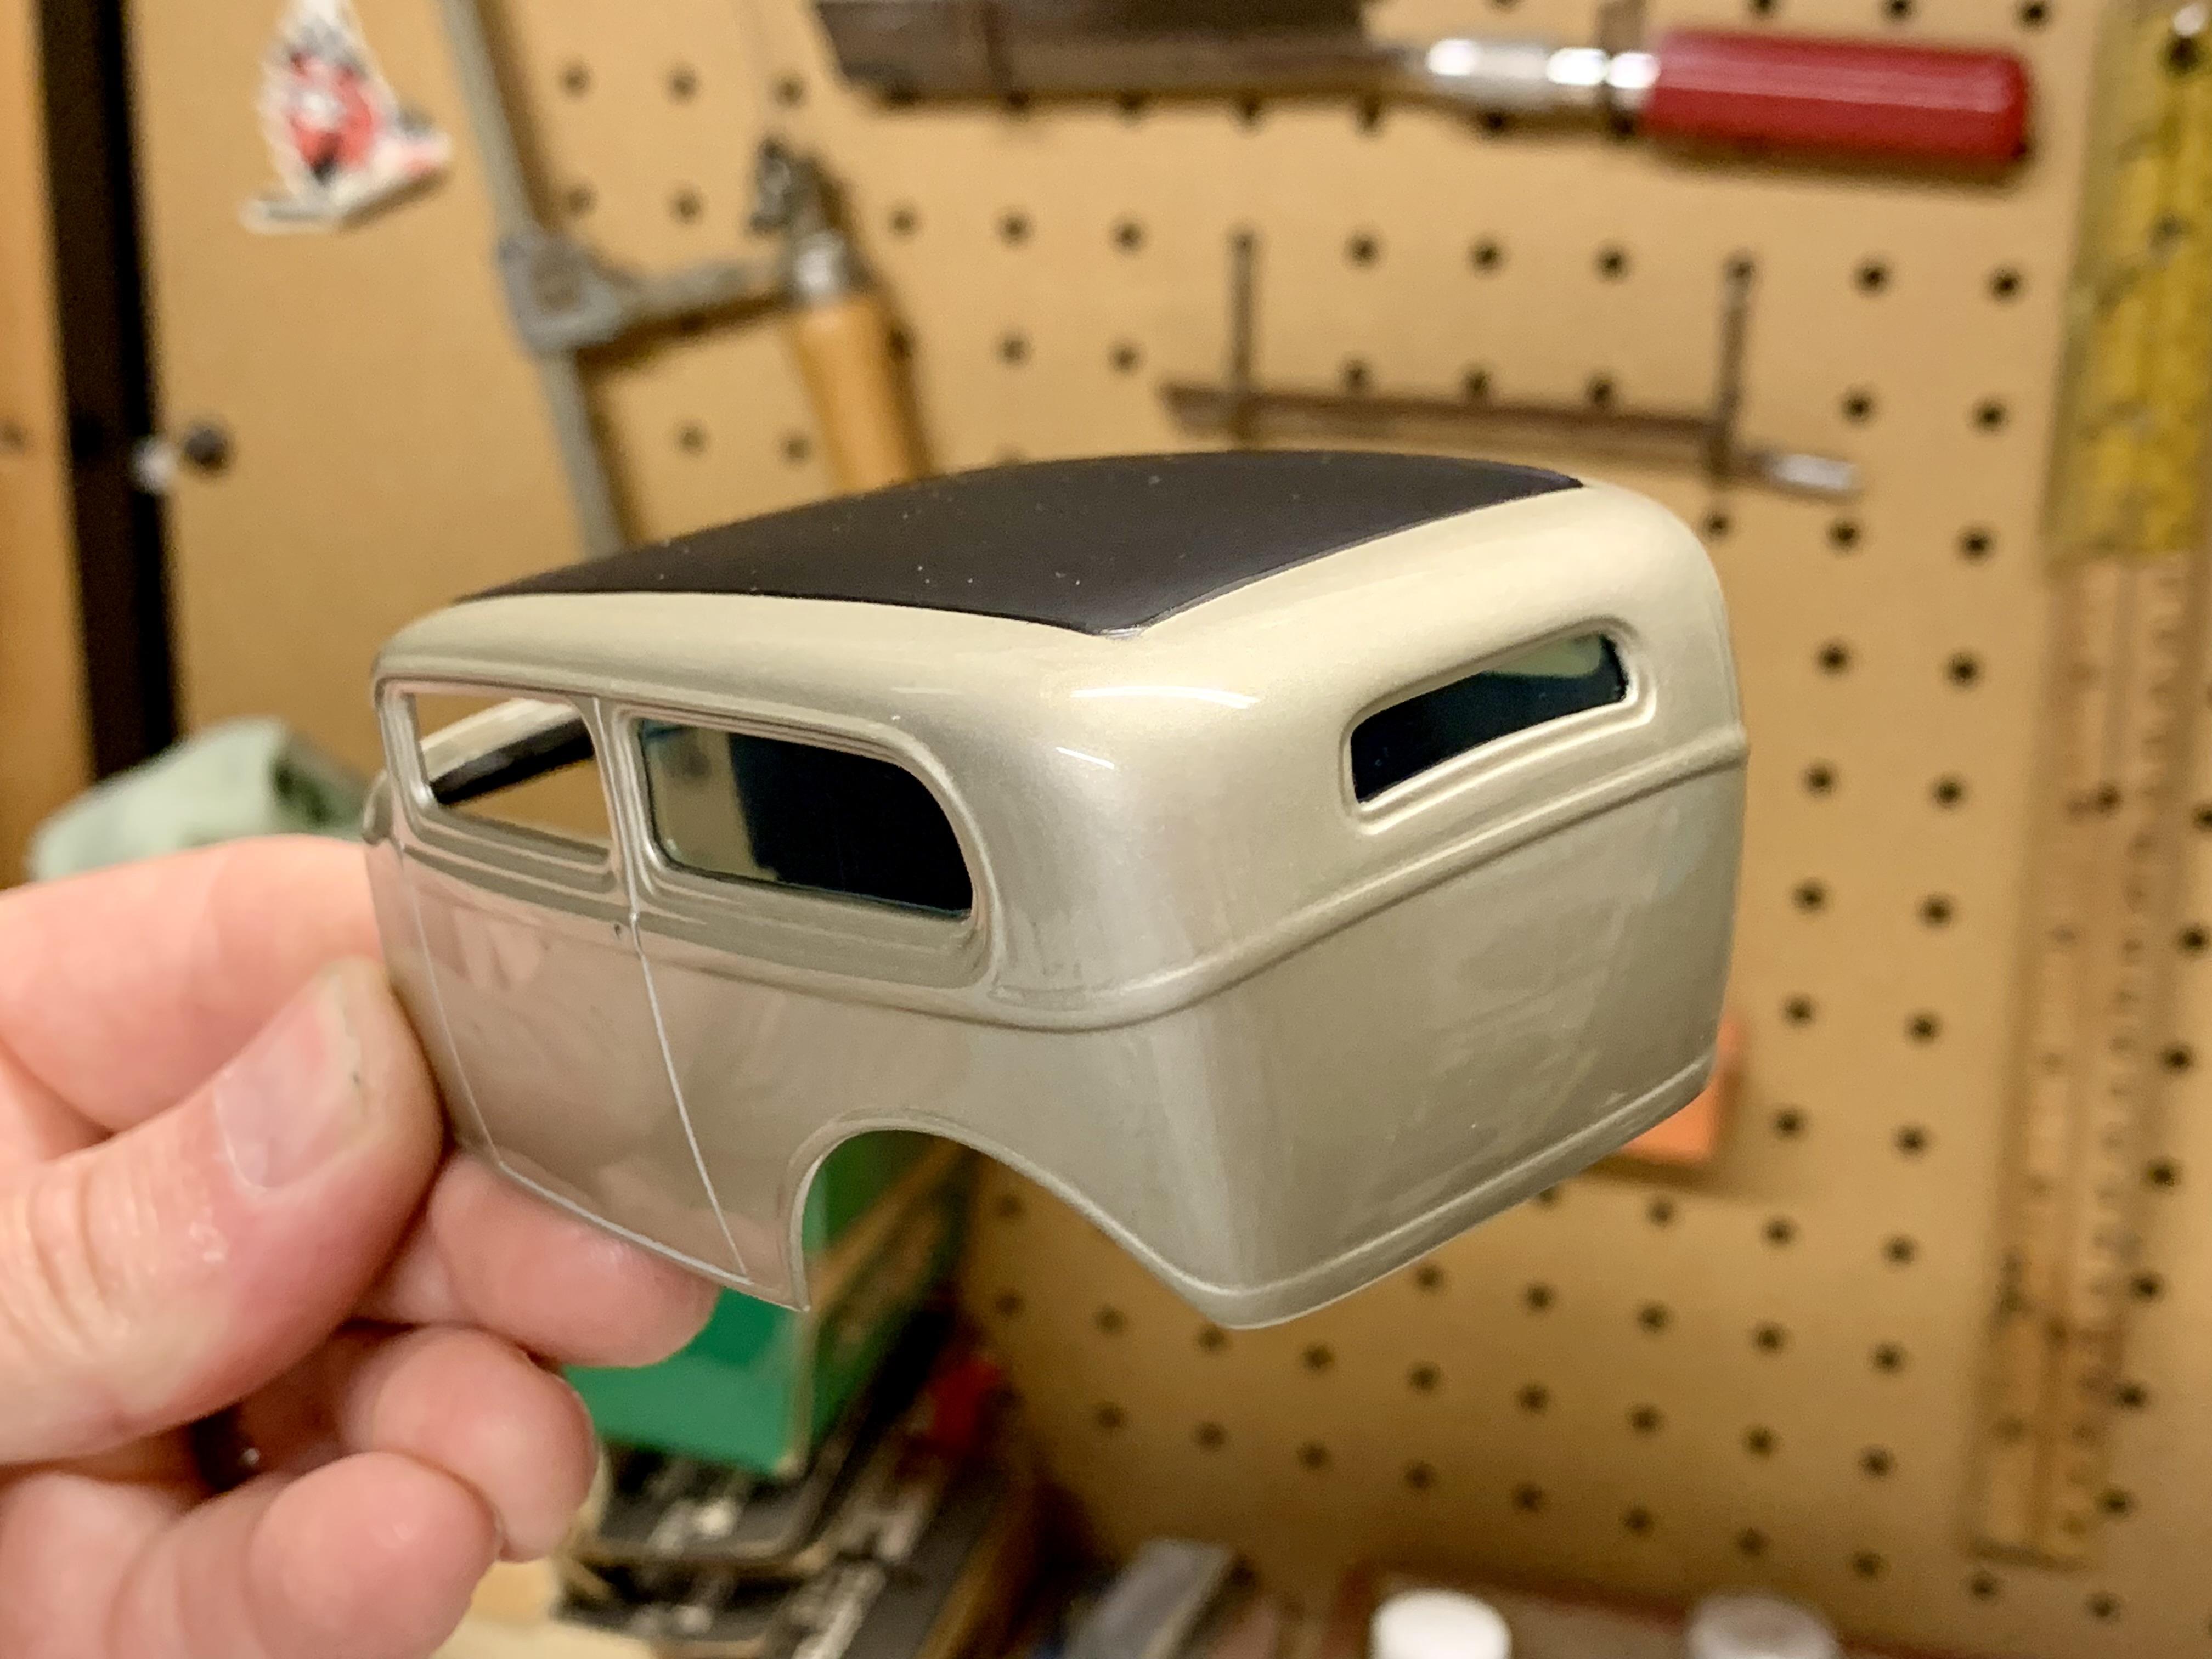
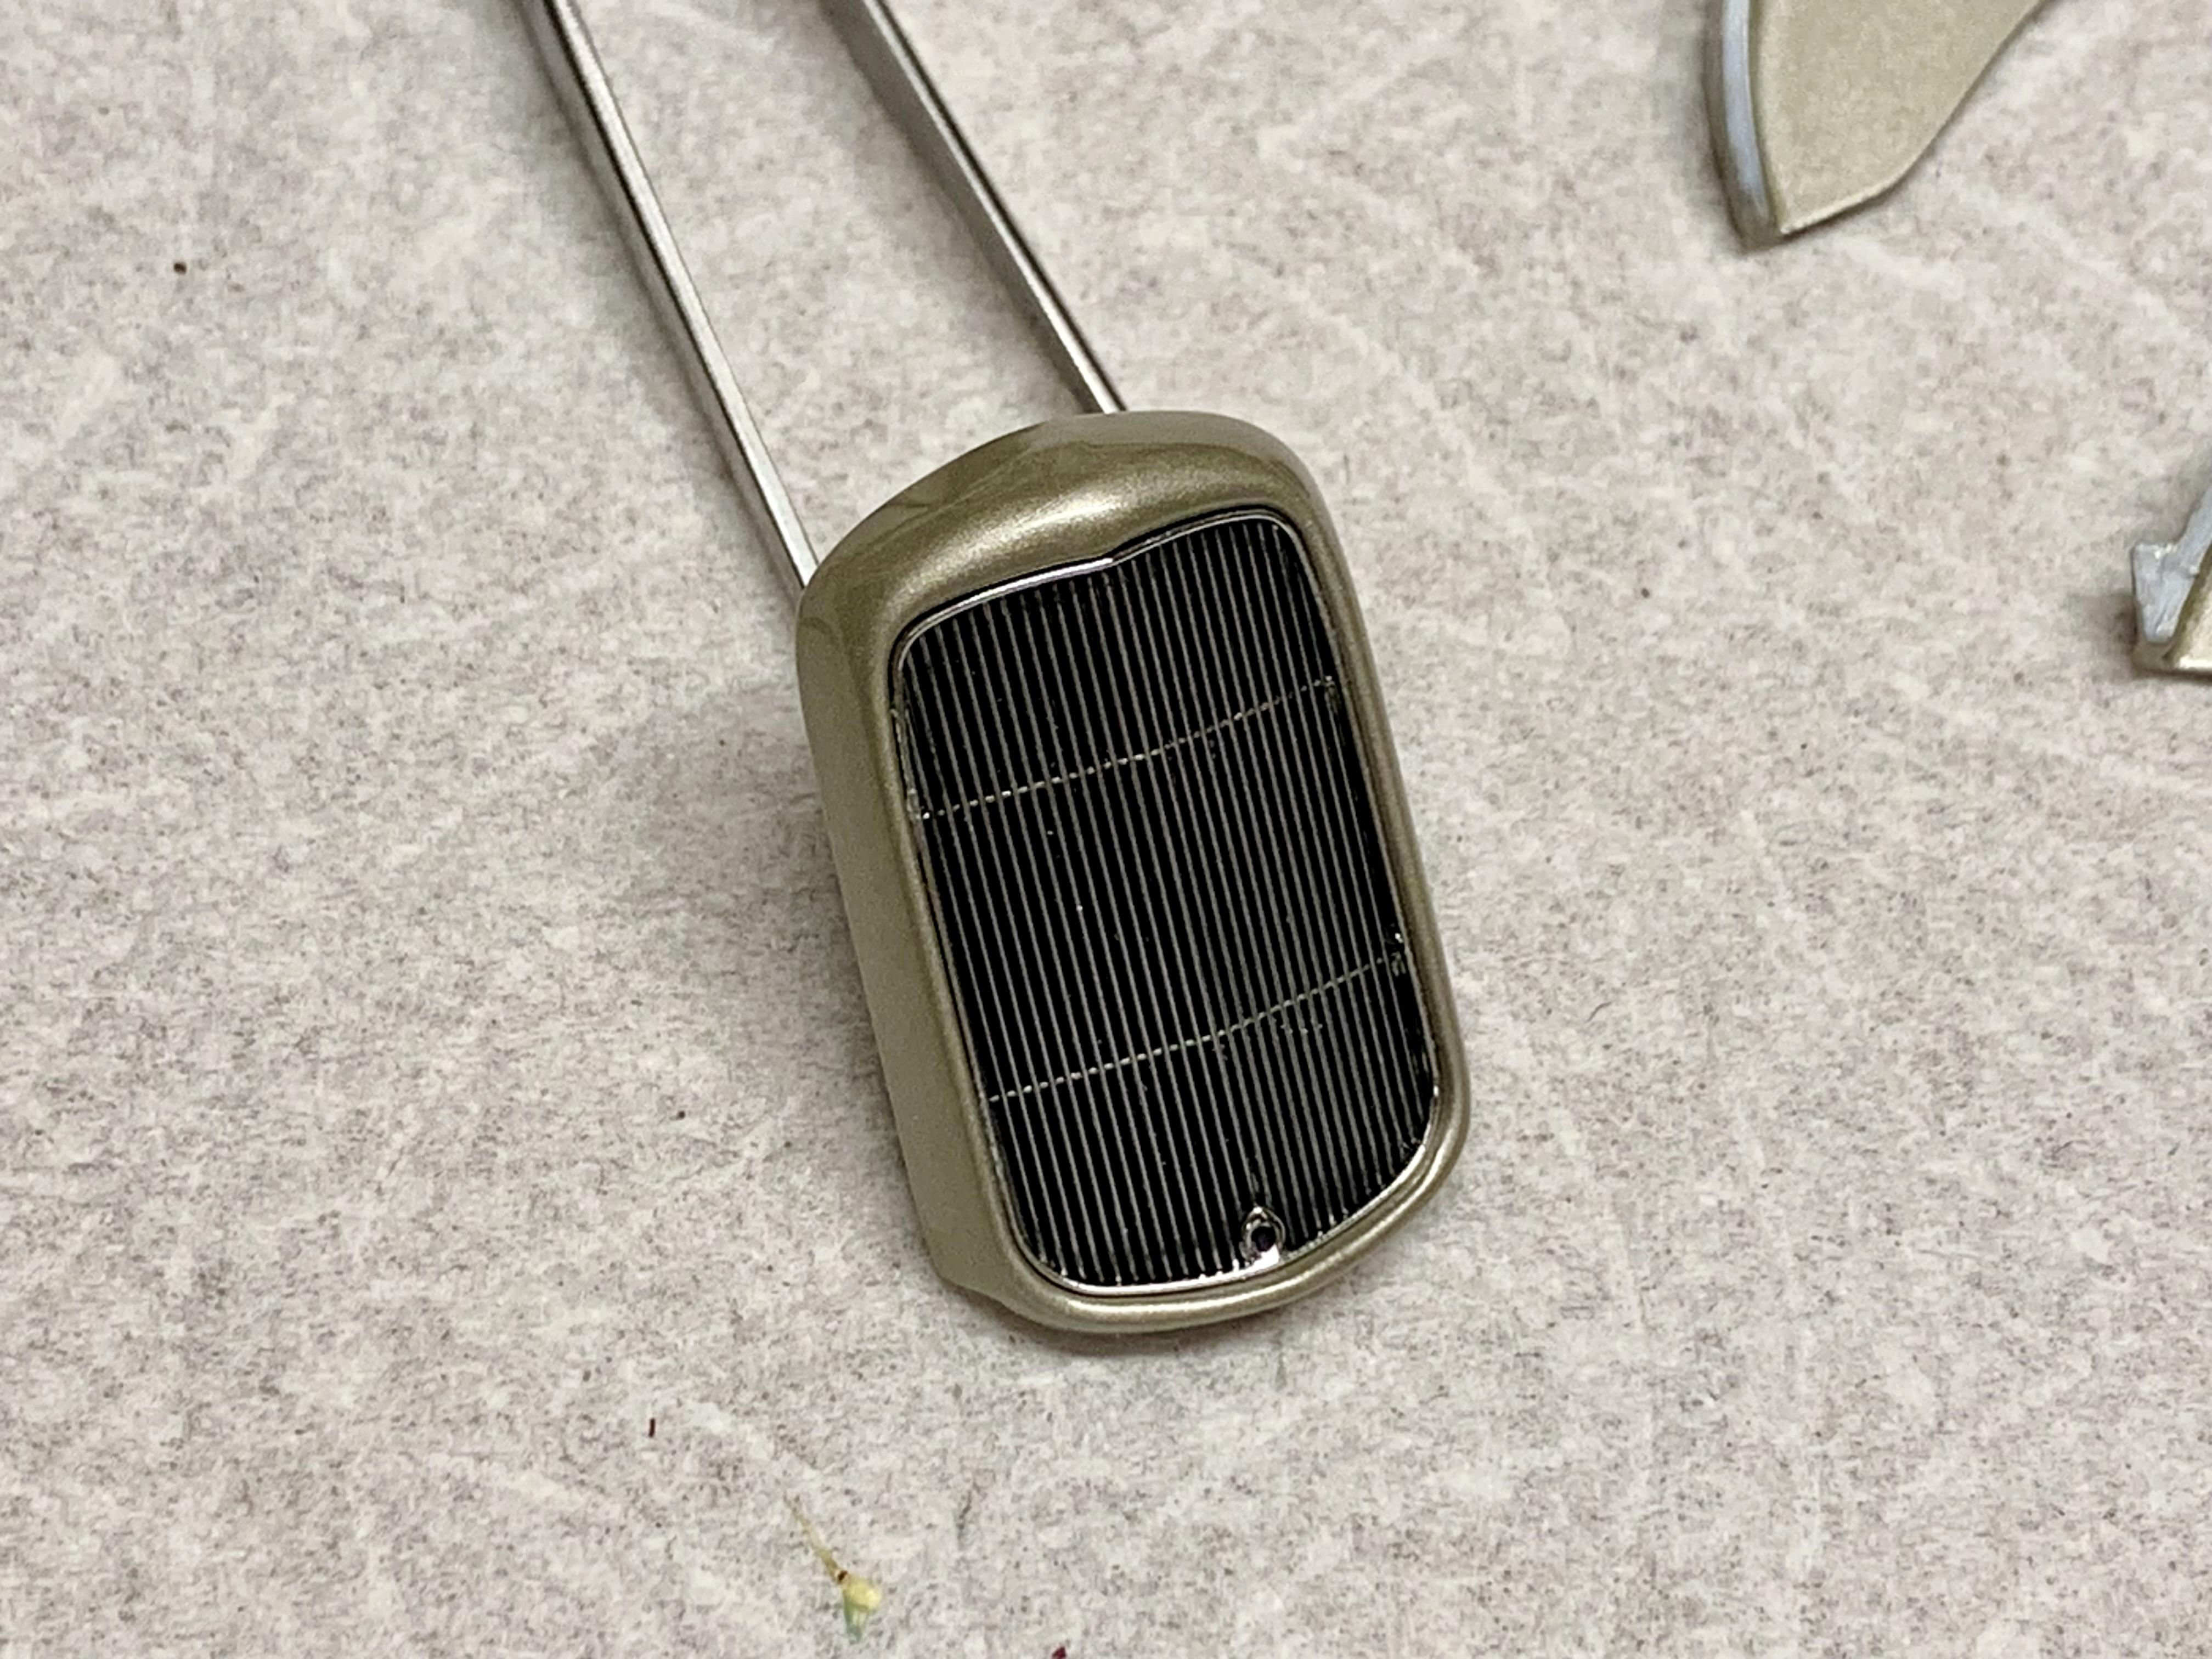
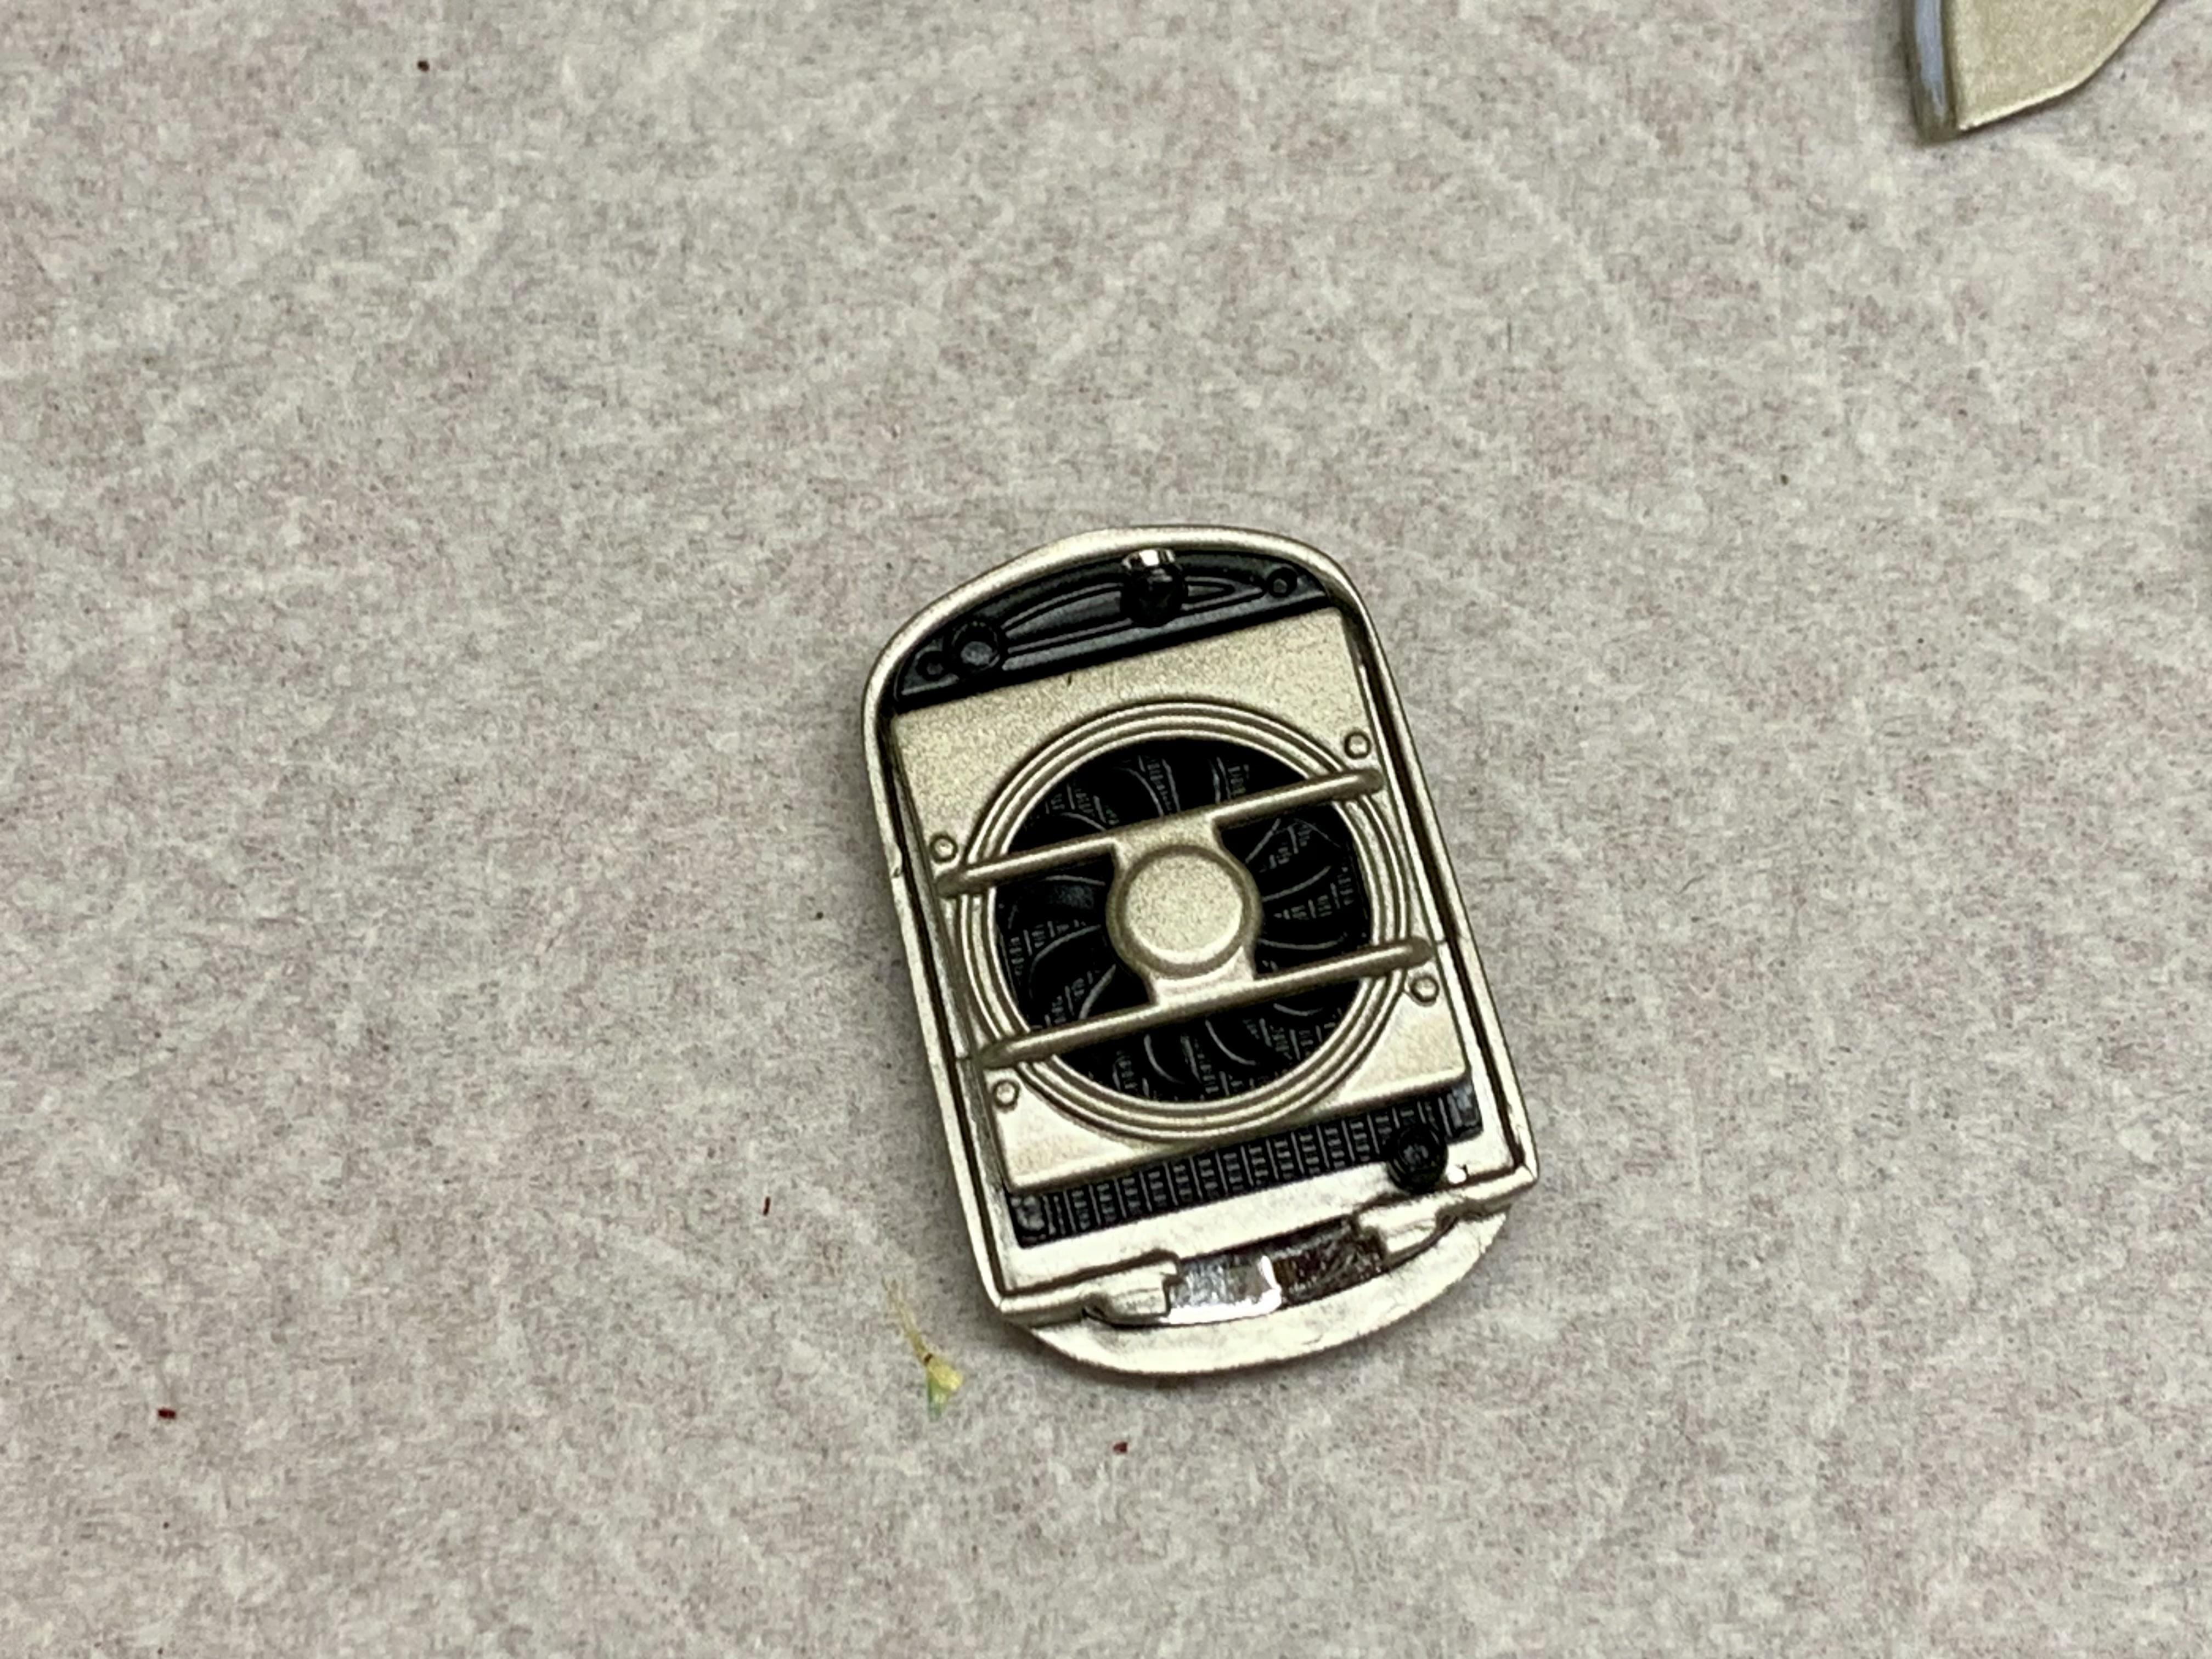
I built this model to participate in The Official ‘32 Tudor Sedan Build Off. My goal was to create a timeless modern hotrod by kit-bashing within Revell’s series of ‘32 Ford kits. The complete chassis, supercharged small block Chevy and grill/shell come from the most recent Roadster kit. The chopped sedan body is a very high quality piece from my friend Ed at Drag City Casting, for which I created the original master. The wheels and large rear radial tires come from the original issue HiBoy Roadster while the front tires are from a Revell ‘40 Ford Coupe. The firewall, hood top, taillights and interior are from the Sedan except for the ‘40 Ford steering wheel from the 5-Window Coupe. Paint is Tamiya TS-88 Titanium Silver over their primer and under their gloss clear, polished and waxed. I’m a year late for the original end date of the build off but, better late than never! 😎

- 26 replies
-
- 27
-

-
 This is really neat, Tim. At first glance it looks like a clean Red Chariot. Nice. Then a second look reveals there’s a lot of differences but they’re so cohesive it looks like it could be out of the box. So cool!
 -
Hands down the most detailed 1949 Ford model I’ve ever seen. Excellent work!
-
Great project and a good pile of parts! Longer wheelbase is just right. Looking forward to following along.
-
Very nicely done! Perfect example of what was called a “Resto Rod” back in the late 70’s and early 80’s. The folded down luggage rack and trunk are a great touch.
-
Nice work so far! The firewall looks like it fits like a glove. It’s really neat to see the old Aurora body get used. Should be a really tough looking car! PS: Glad you could glean off one of my old projects for the front spring perch. Sadly, that project got the axe.
-
@Dtimmerman89 Awesome start! Looking forward to following along.
-
Thanks! The paint is Tamiya TS88 Titanium Silver over their light grey primer and with their gloss clear. I really like it, too. Not your garden variety hot rod color.
-
I didn’t catch that, what a good idea! I think I’ll be trying that next time I use those lights. Thanks! These last few years I’ve finally figured out shiny paint jobs. It also helps that Ed’s resin bodies are highly polished right out of the mold. When I came across it I had to use it. It immediately reminded me of that factory tint used in the 50’s and 60’s. Not like bright blue Lexan.
-
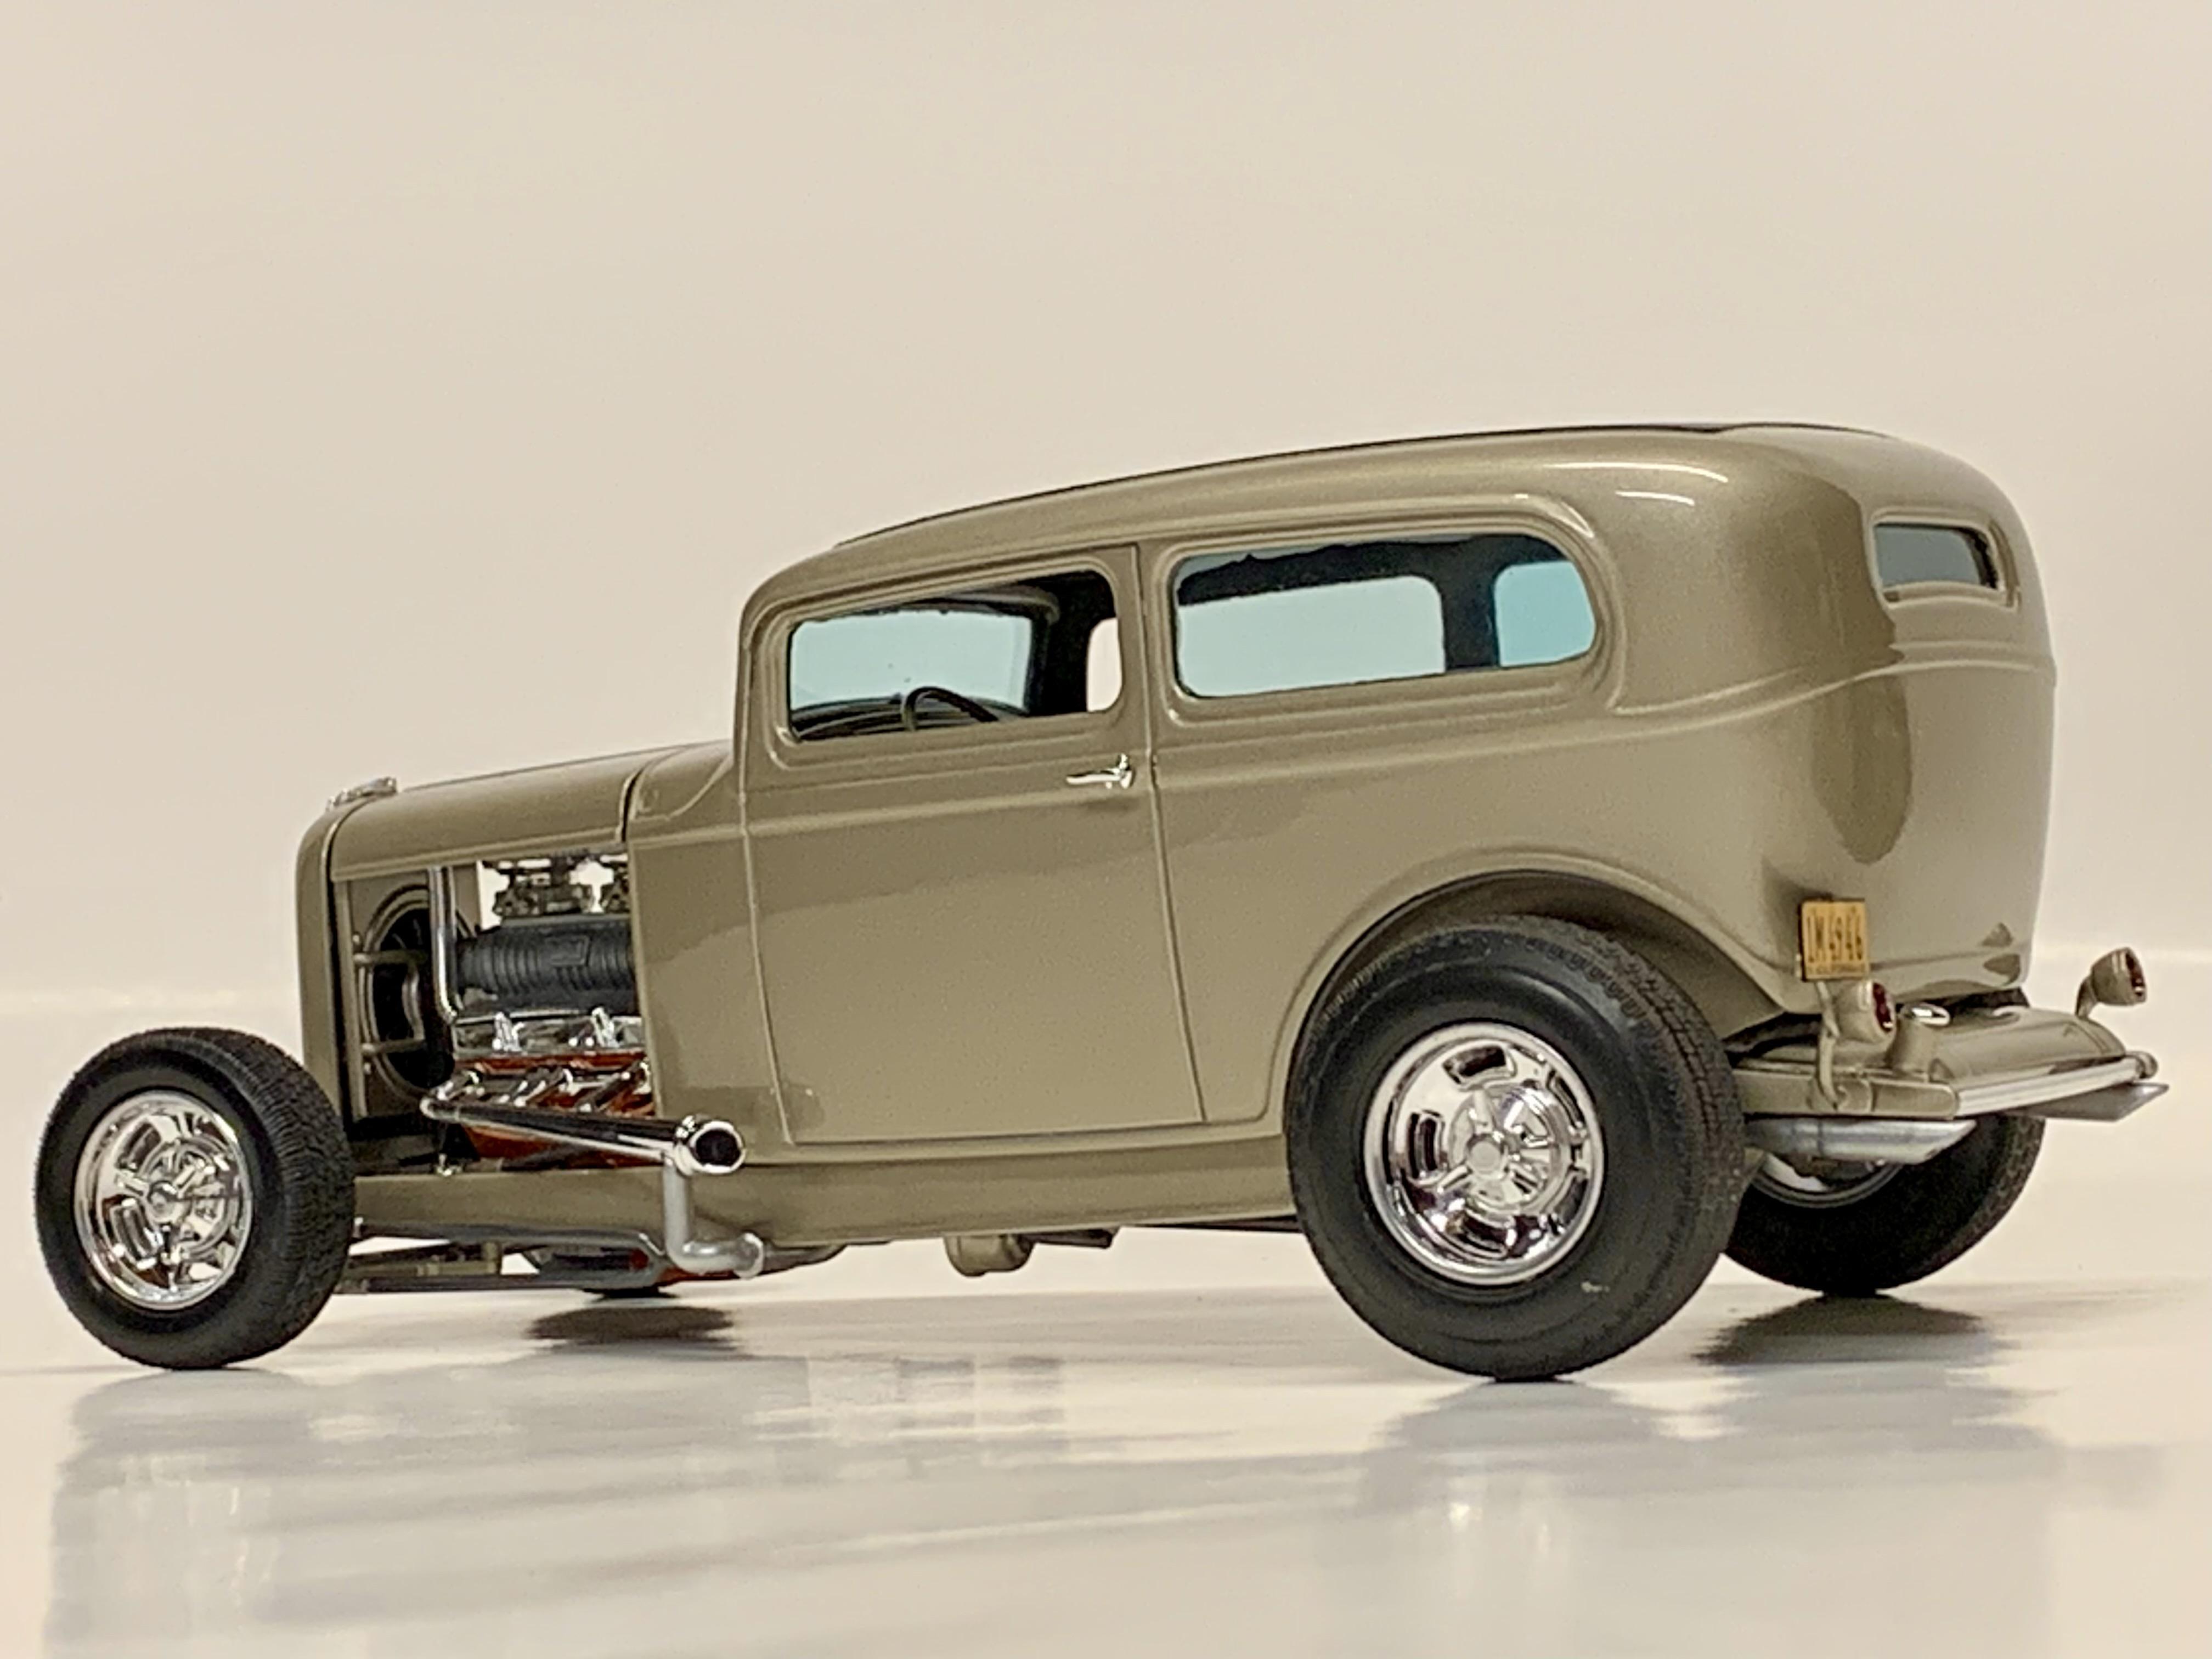
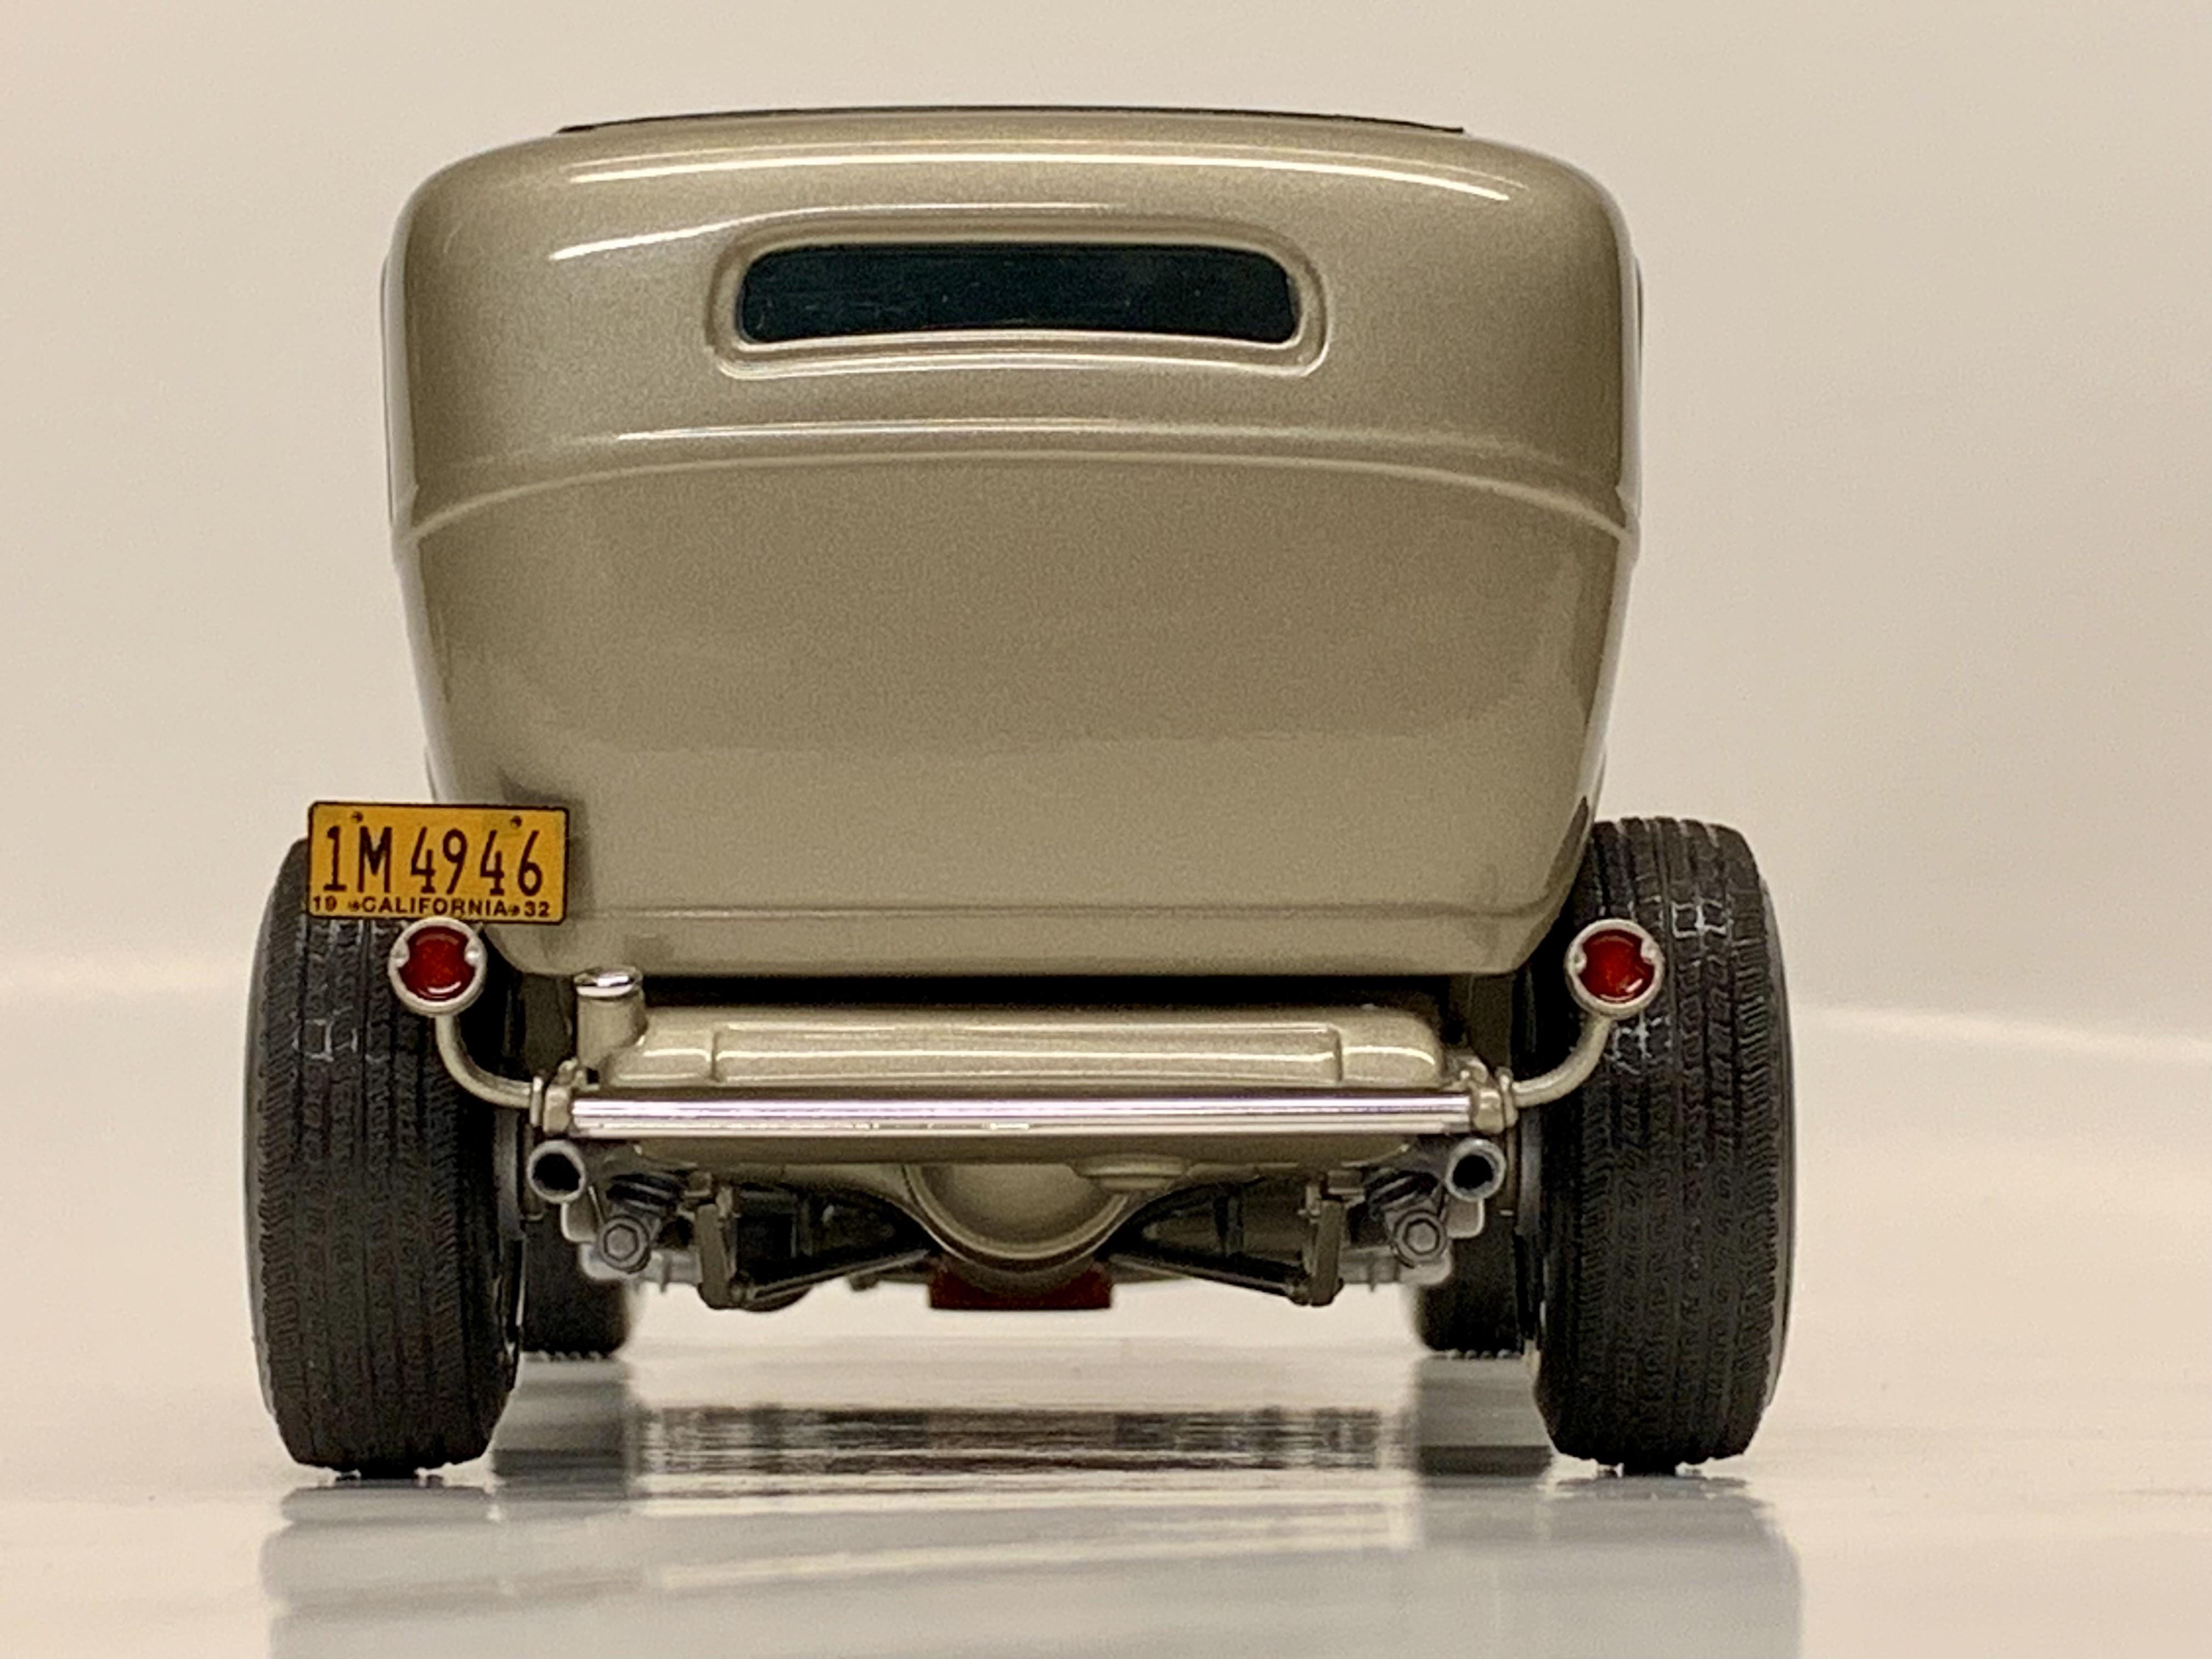
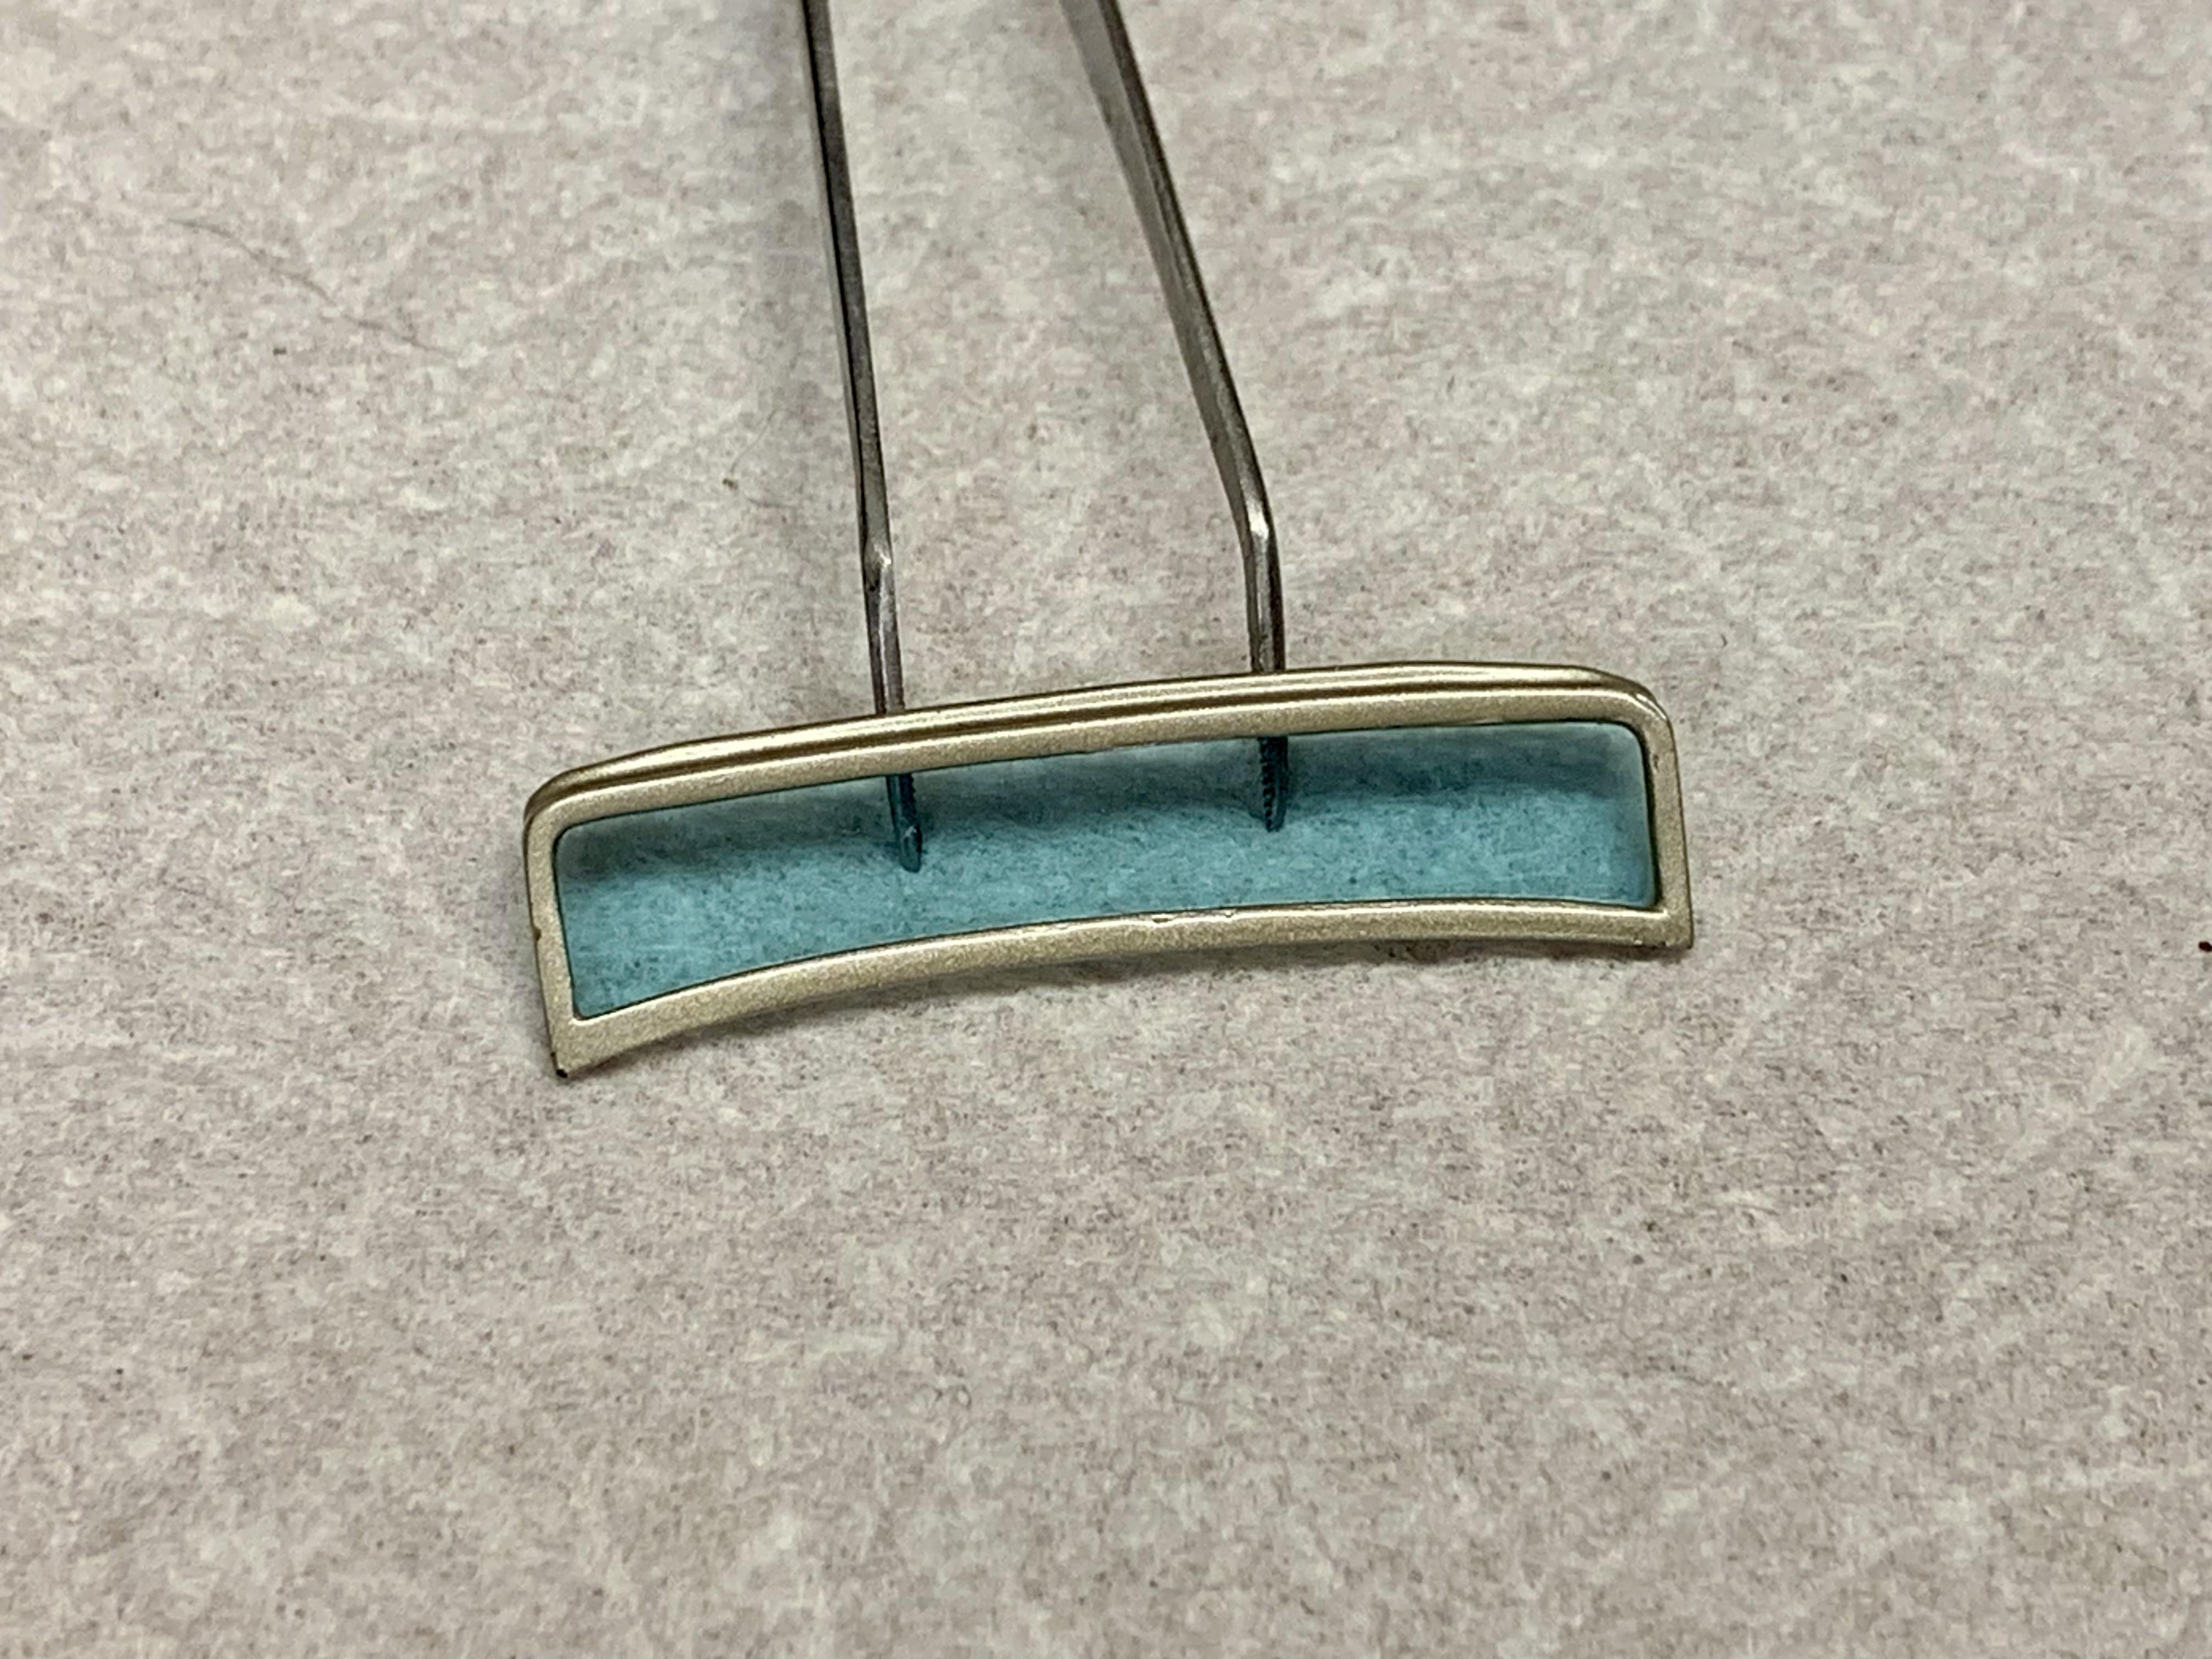
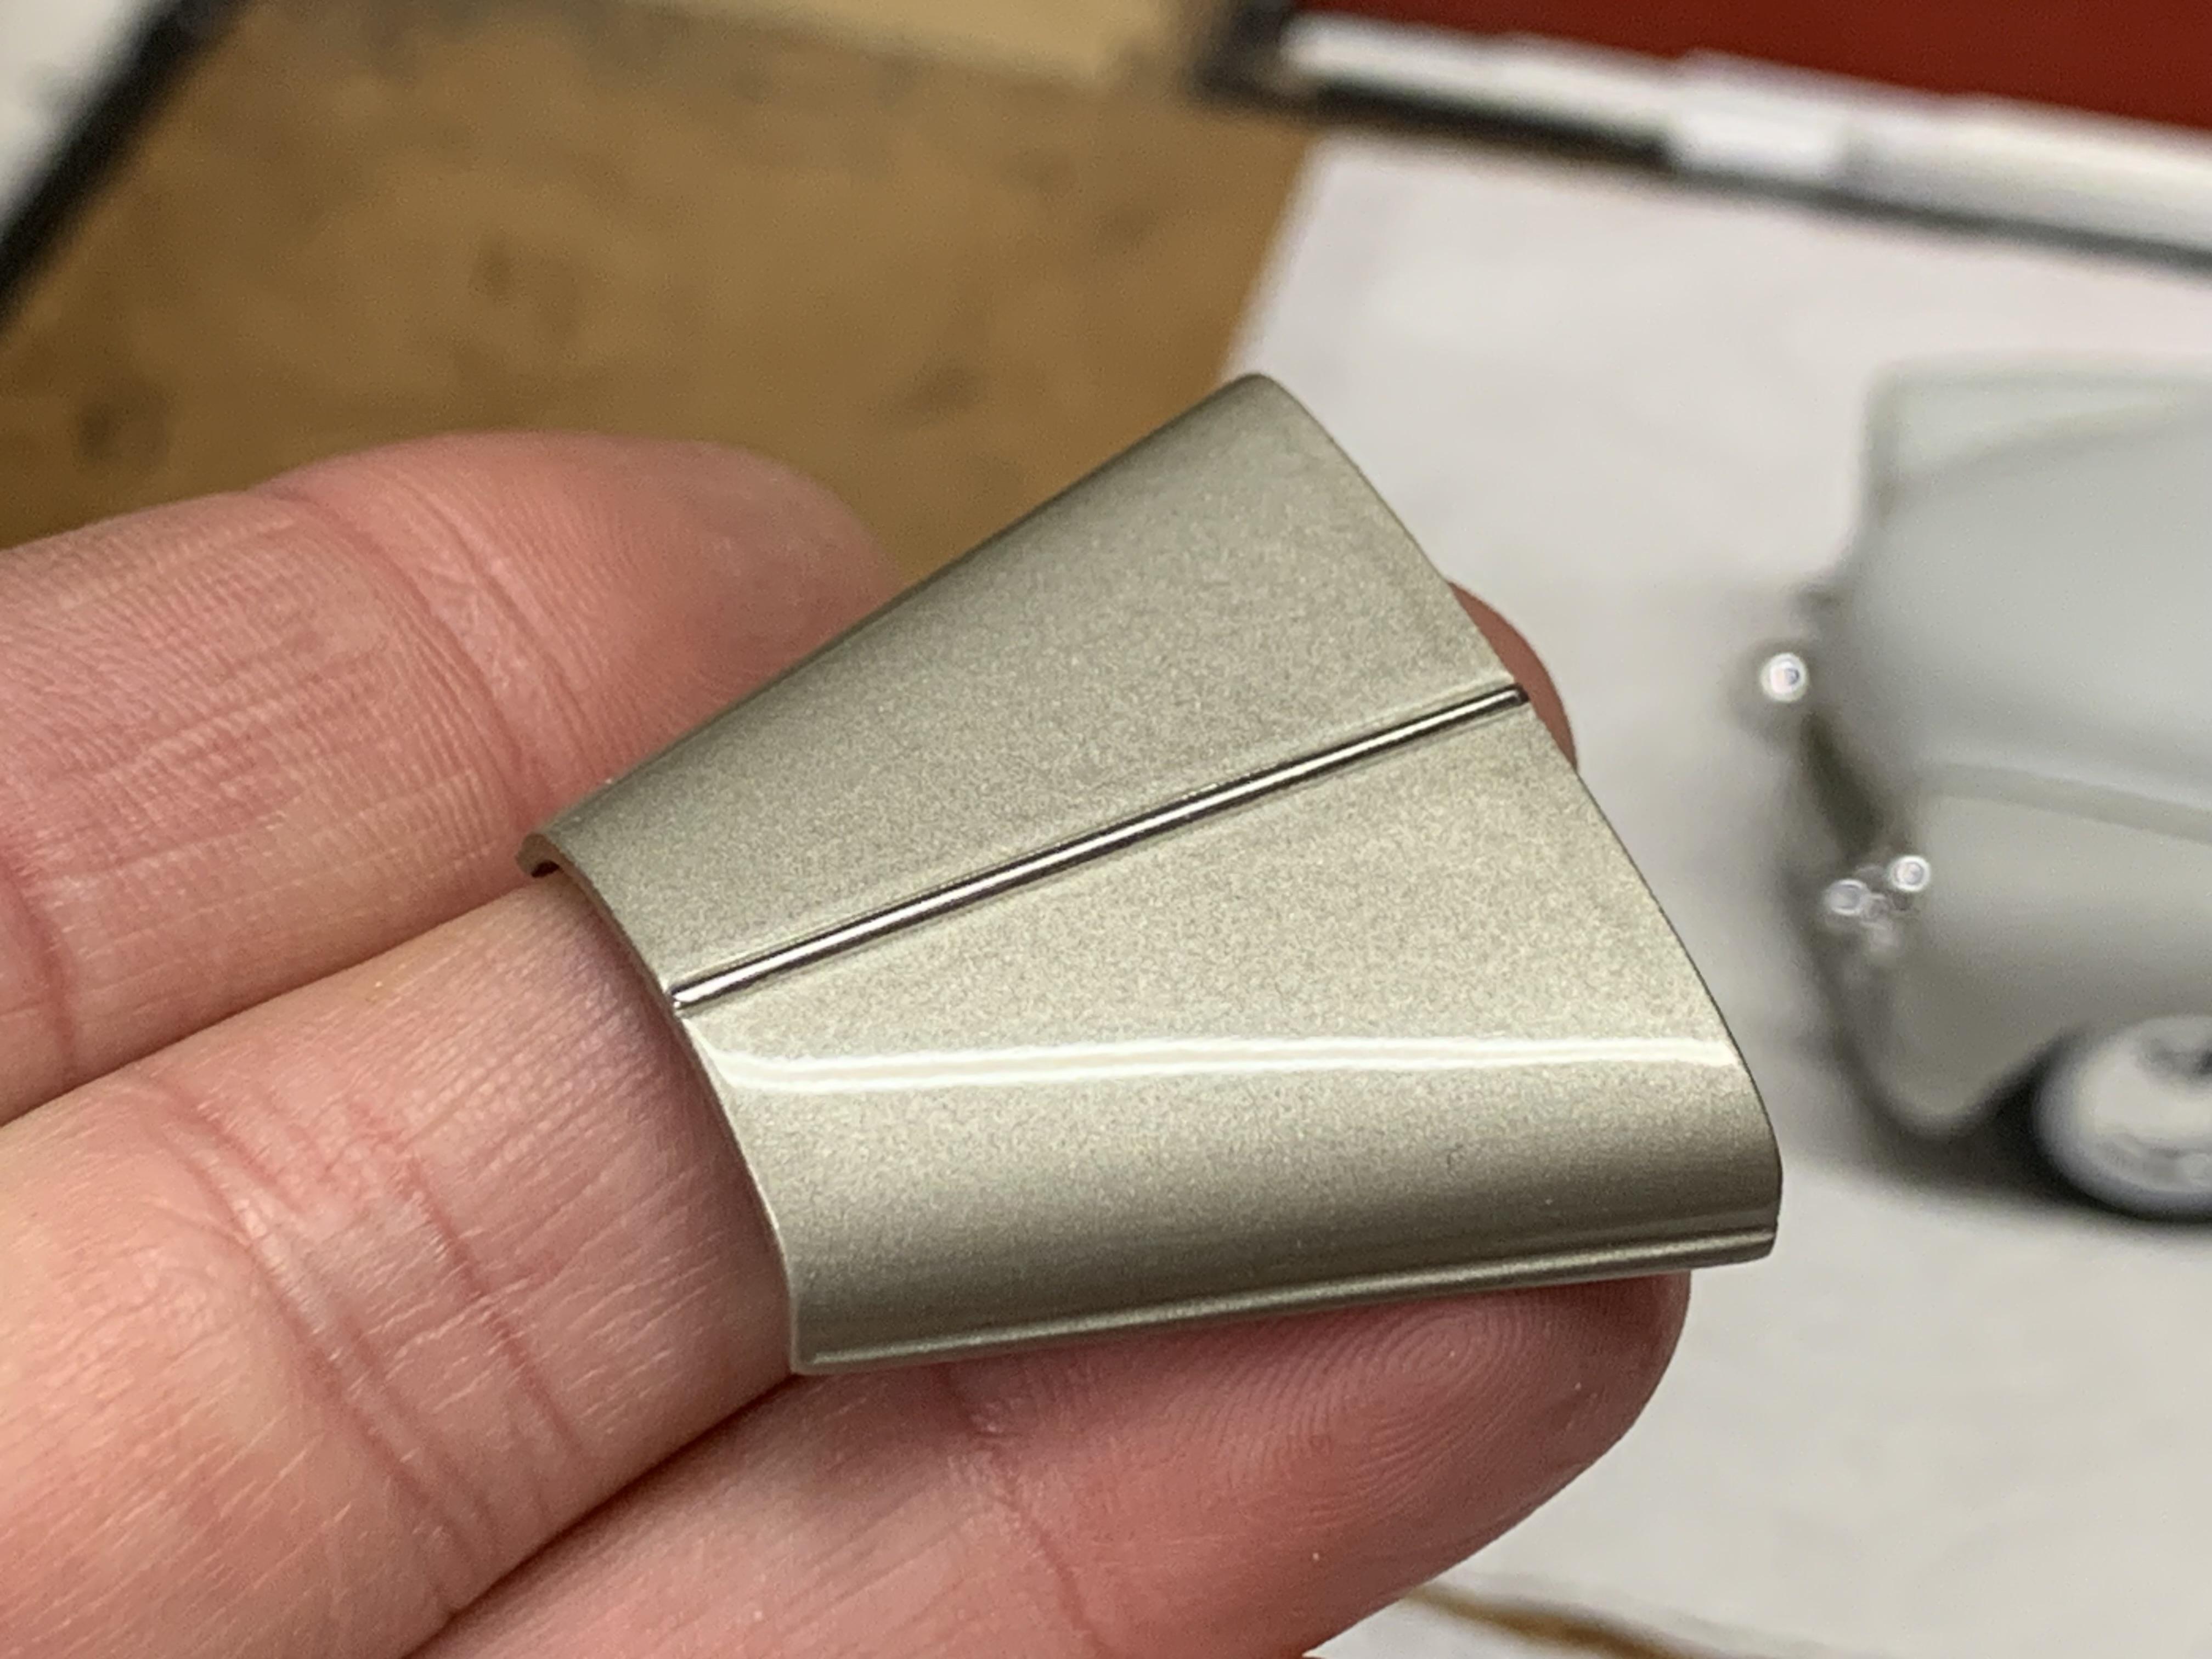
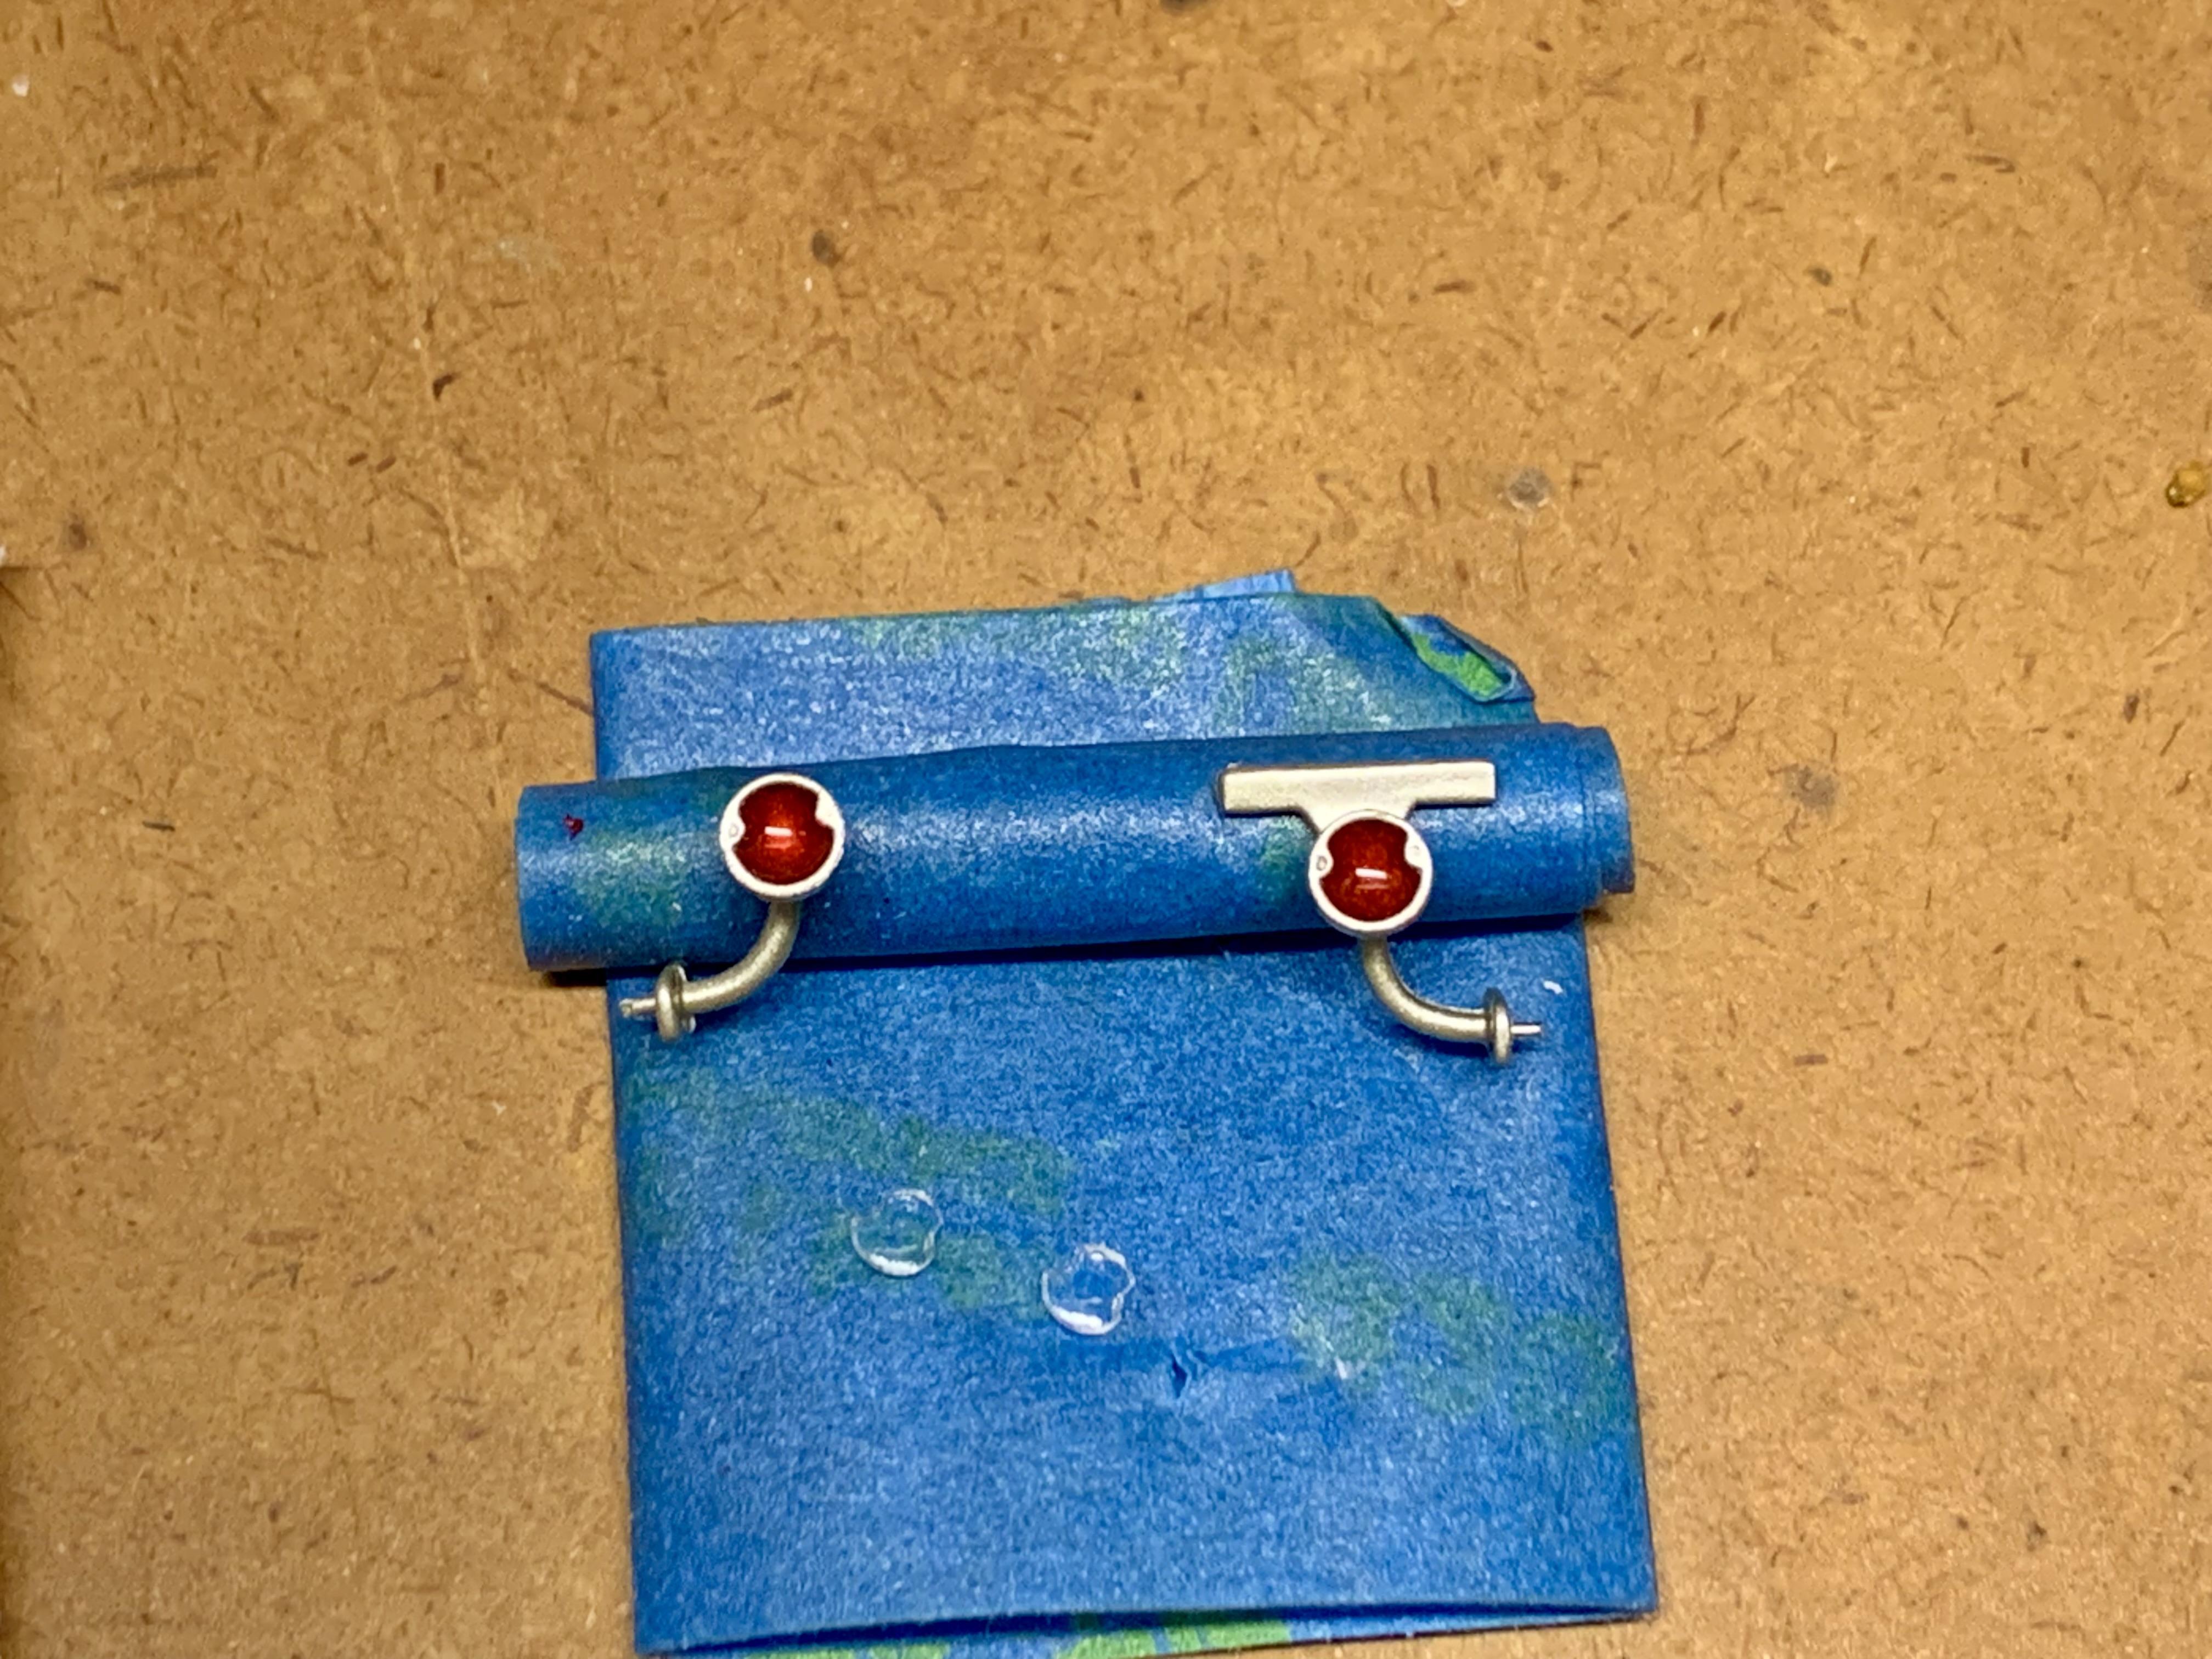
I’m still here and made some more progress on my project. Last weekend I painted the inside of the body flat black then polished & waxed the body, hood top, grill shell and wheel wells. Yesterday I tackled the last of the fiddly things that will allow me to finish it out. One of my least favorite tasks, making and installing window “glass.” I found a new sheet of blue tinted window material in an older issue Revell Miss Deal kit and the shade is more like factory blue-ish tint and I think it looks really good. You can also get a sense of the polished in waxed body here. I added a strip of BMF to the hood top center “hinge.” The grill shell, grill insert and radiator are all glued together. And lastly, I painted the taillight lenses. Actually what I did was pool Testors stop light red in the cavities where the lenses go because the Sedan kit comes with clear lenses. I think the pooled paint looks just fine and has depth to it. So that’s it. Next workbench session should finally have this thing finished.
- 732 replies
-
- 14
-
-
Foose F100 build
Dennis Lacy replied to SteveKnox's topic in WIP: Model Trucks: Pickups, Vans, SUVs, Light Commercial
Supercharged Y-block is a GREAT choice! File that under “Why didn’t I think of that?” -
Man, this is looking so rad. I love me some 80’s and early 90’s Pro Street!
-
AMT 34 Ford PU
Dennis Lacy replied to 68shortfleet's topic in Model Trucks: Pickups, Vans, SUVs, Light Commercial
I like it! Looks like something Posies might have built back in the 90’s with the combo of the cast finish Halibrand’s and whitewall bias ply’s. Hard to say what could be a better wheel on it. I think these look good! -
This is RAD!!!
-
When comparing this kit to Revell’s 41 Willys Pickup, one area I much prefer about the Revell is the short bed and more abbreviated fenders. Now I’m wondering how this would look with a larger radius on the front outer corners of the fenders? Nice work making the wheels steer!
-
Very nice start! The shorter bed has much better proportions and it looks better with the little running boards ahead of the rear fenders deleted. I also really like the front fender and supercharger mods! 😎
-
Thanks, Tim. All those nice sentiments mean a lot coming from you! This is a much simpler model than I tend to build (in terms of modification and fabrication) and I had a laid-back, fun time with it. I’m stoked with how it turned out and it reminded me that just because I’m capable of building heavily modified models, they don’t all have to be. The rear wheels are from AMT’s 49 Ford. I don’t know if they’ve been in there since the original issue but at least since the 90’s. Thank you and so cool of you to say. I hope so! Thank you so much for all of that. I try to make my kit-bashing look as cohesive as possible. Thanks! I think “sanitary” is a great compliment. Thank you! My Dad built models back in the 60’s when these kits were originally issued. He still has a handful and this is how he did them, albeit with brush painted bodies. 🤣
-
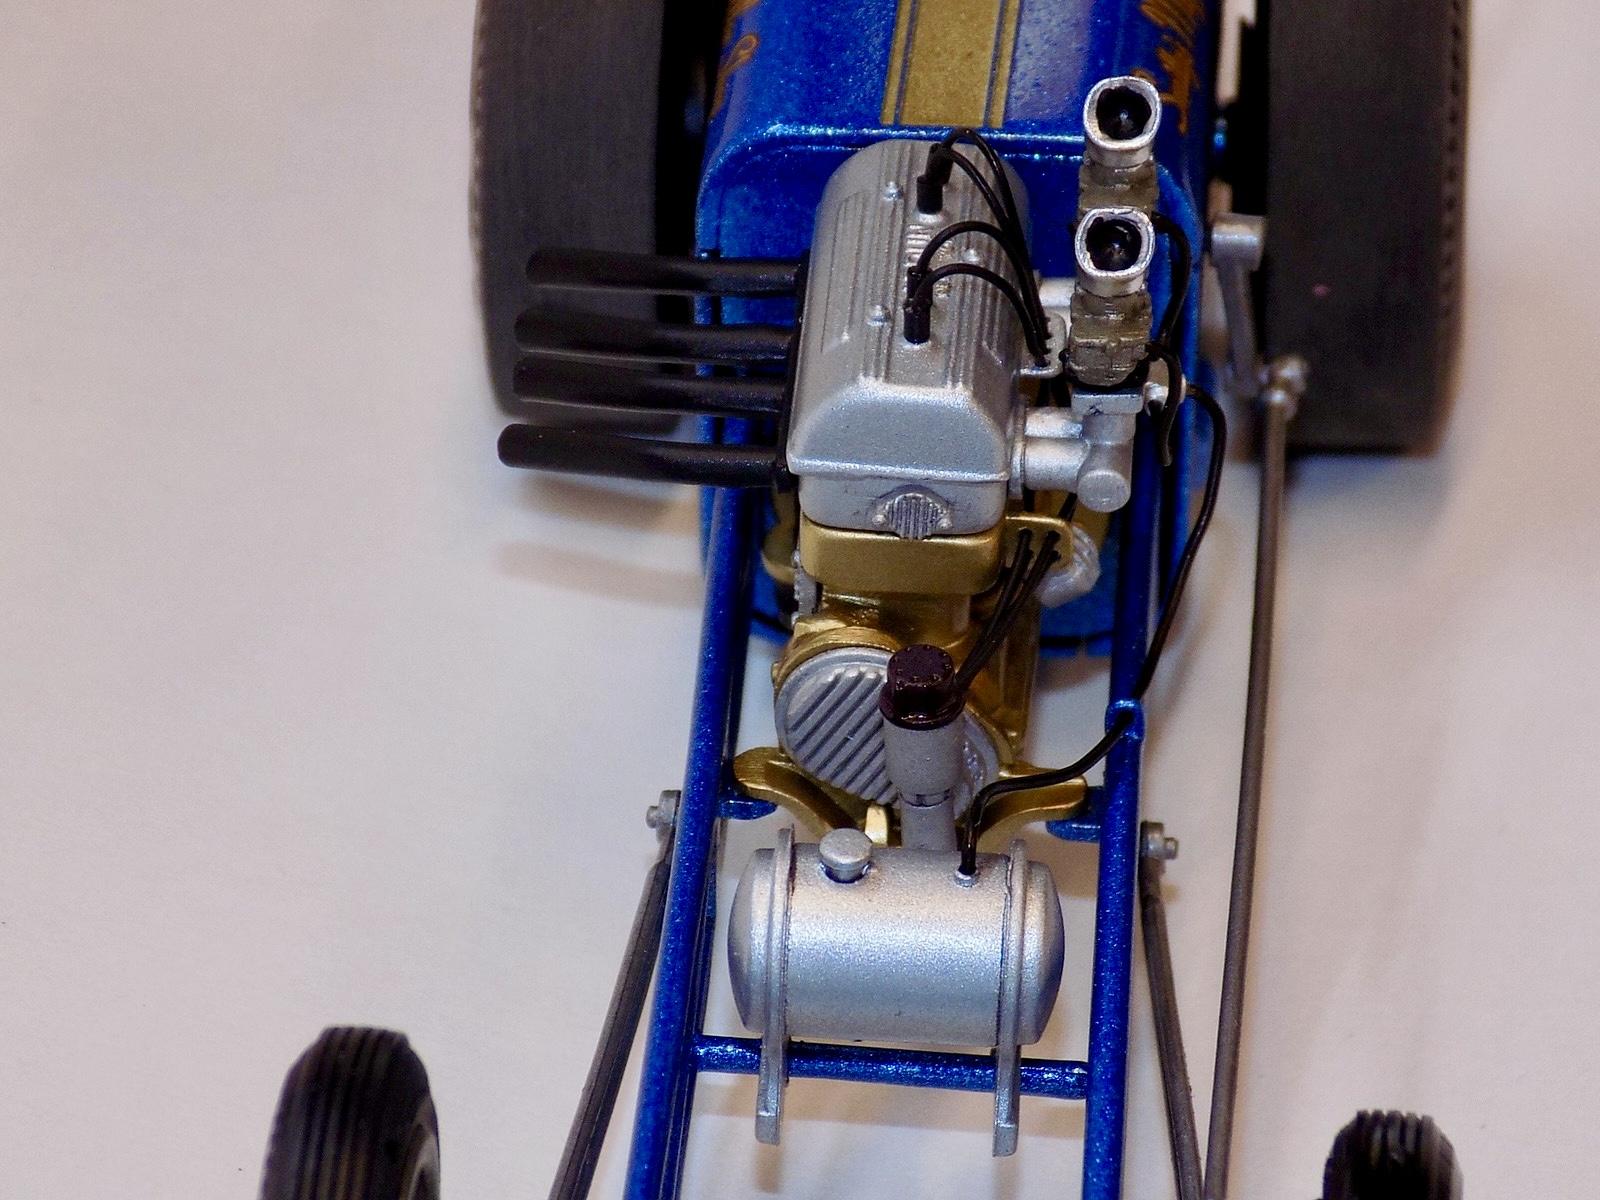
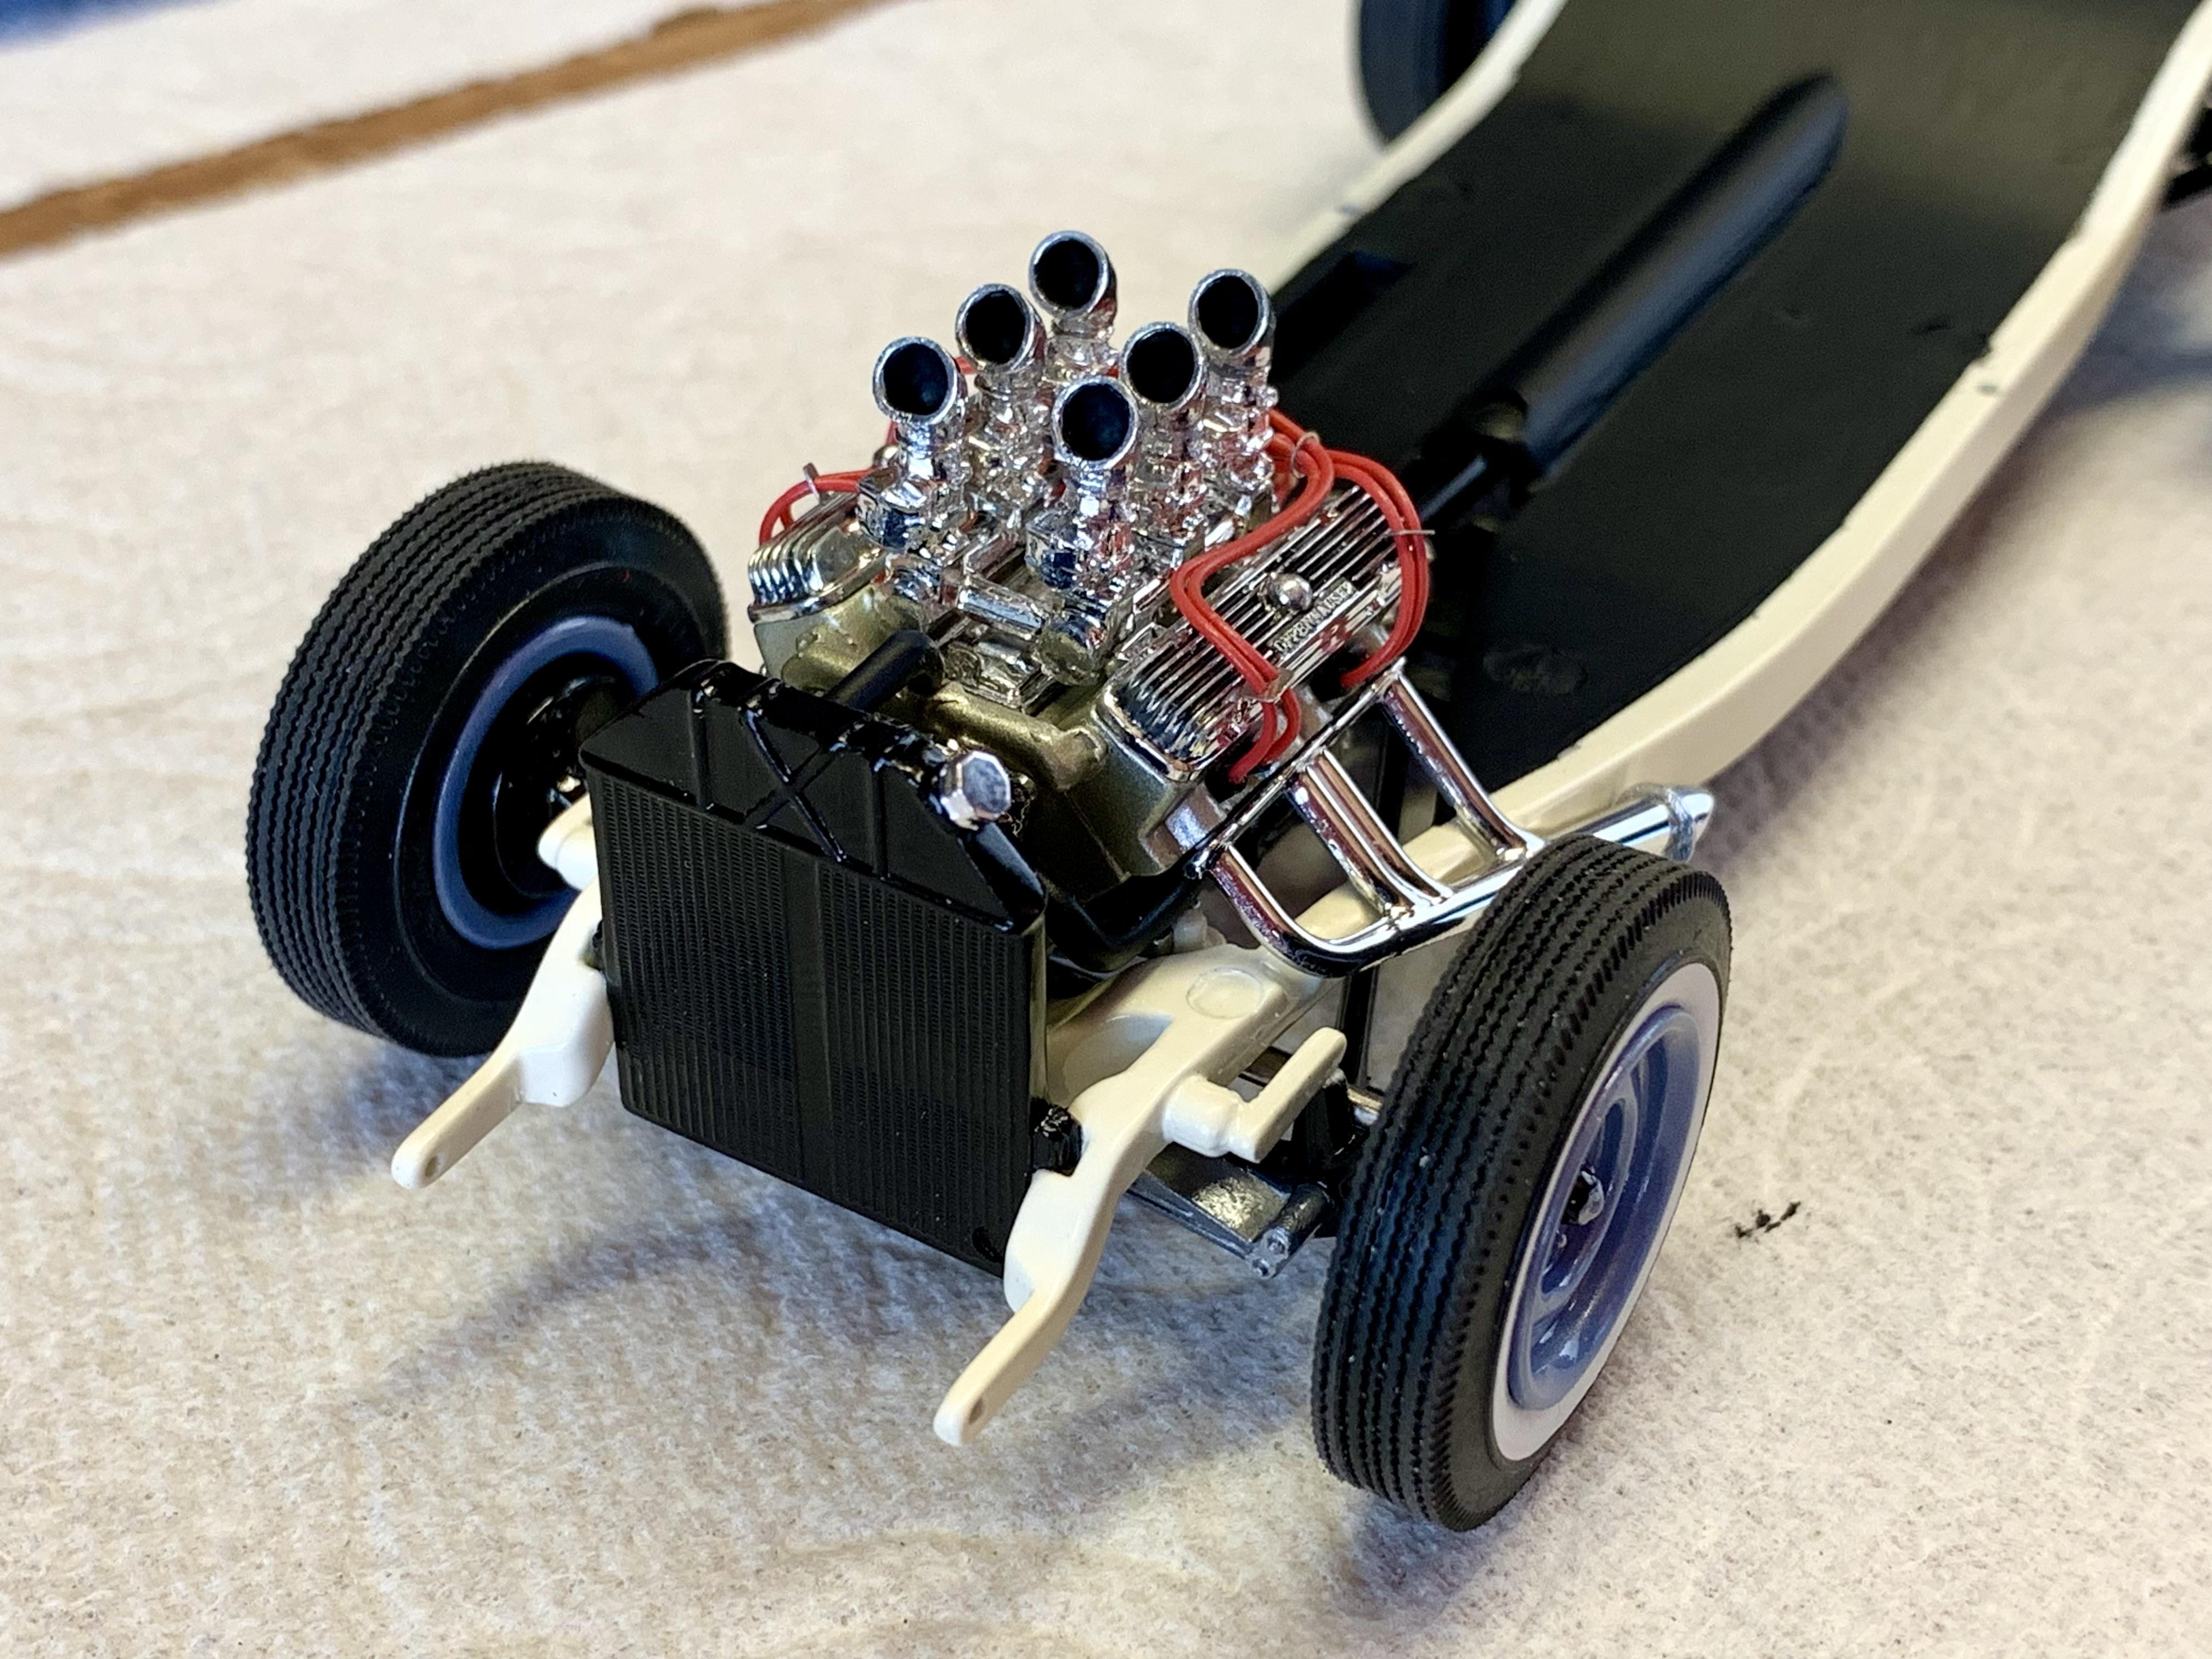
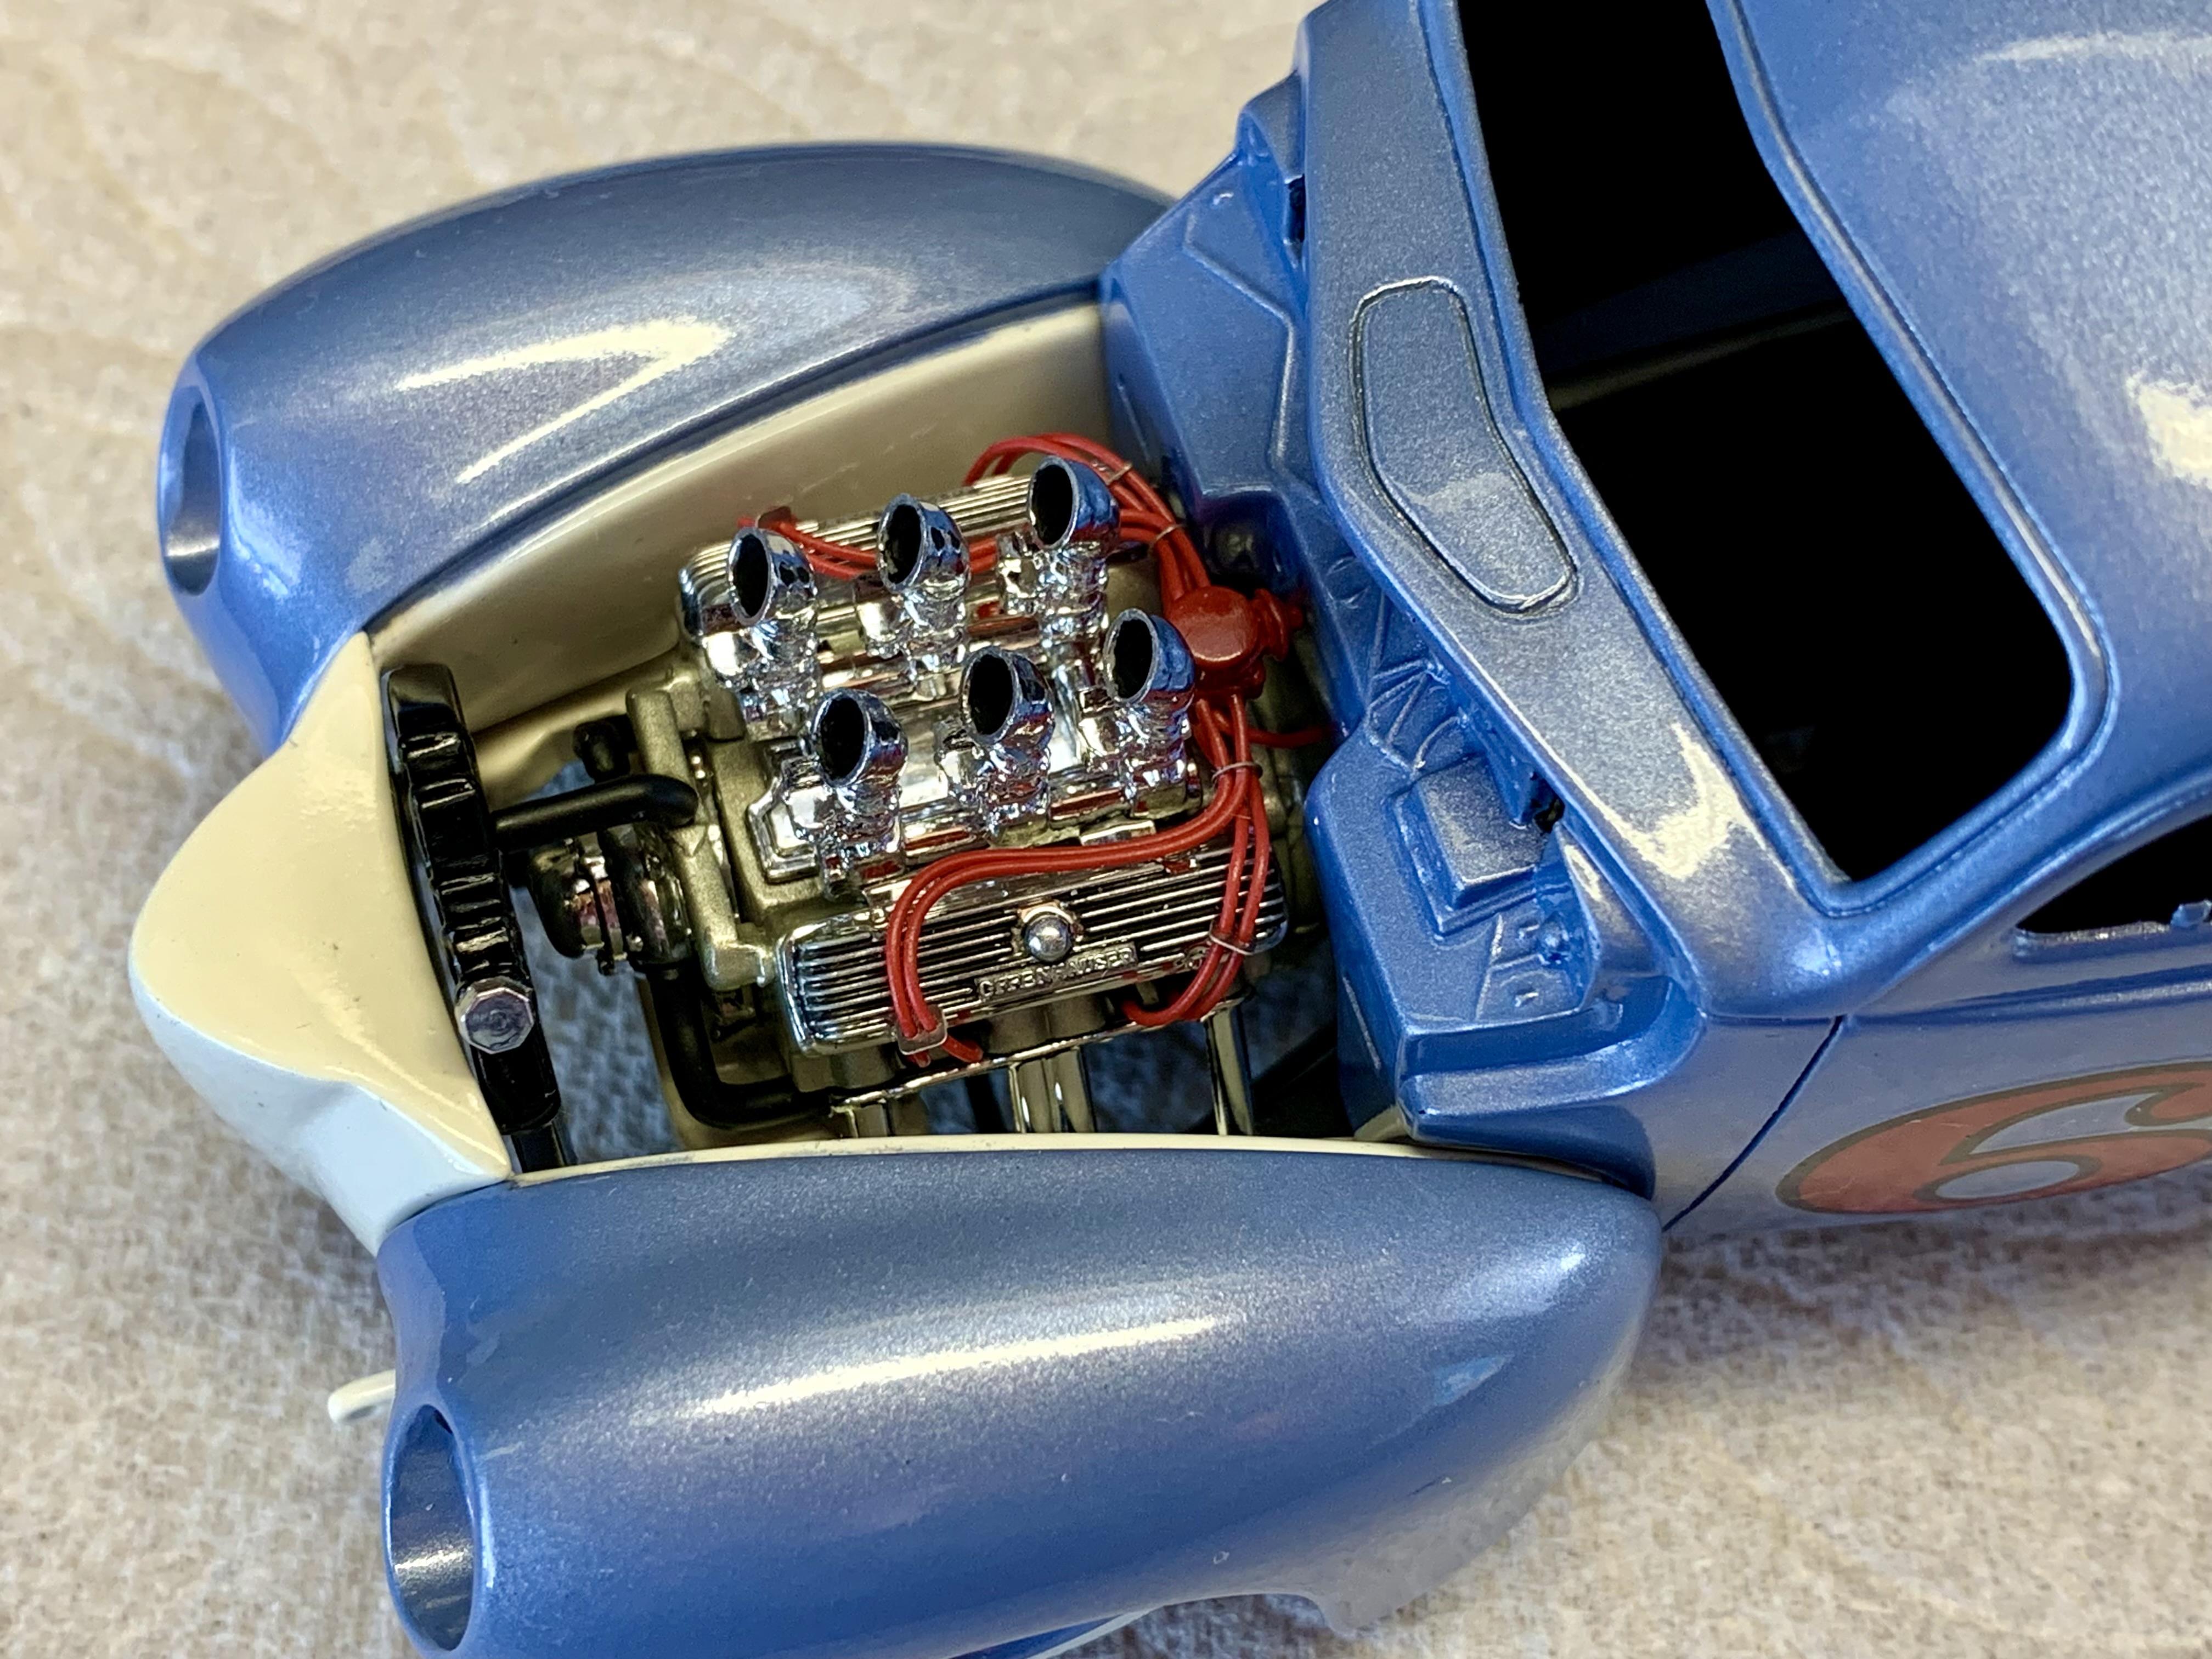
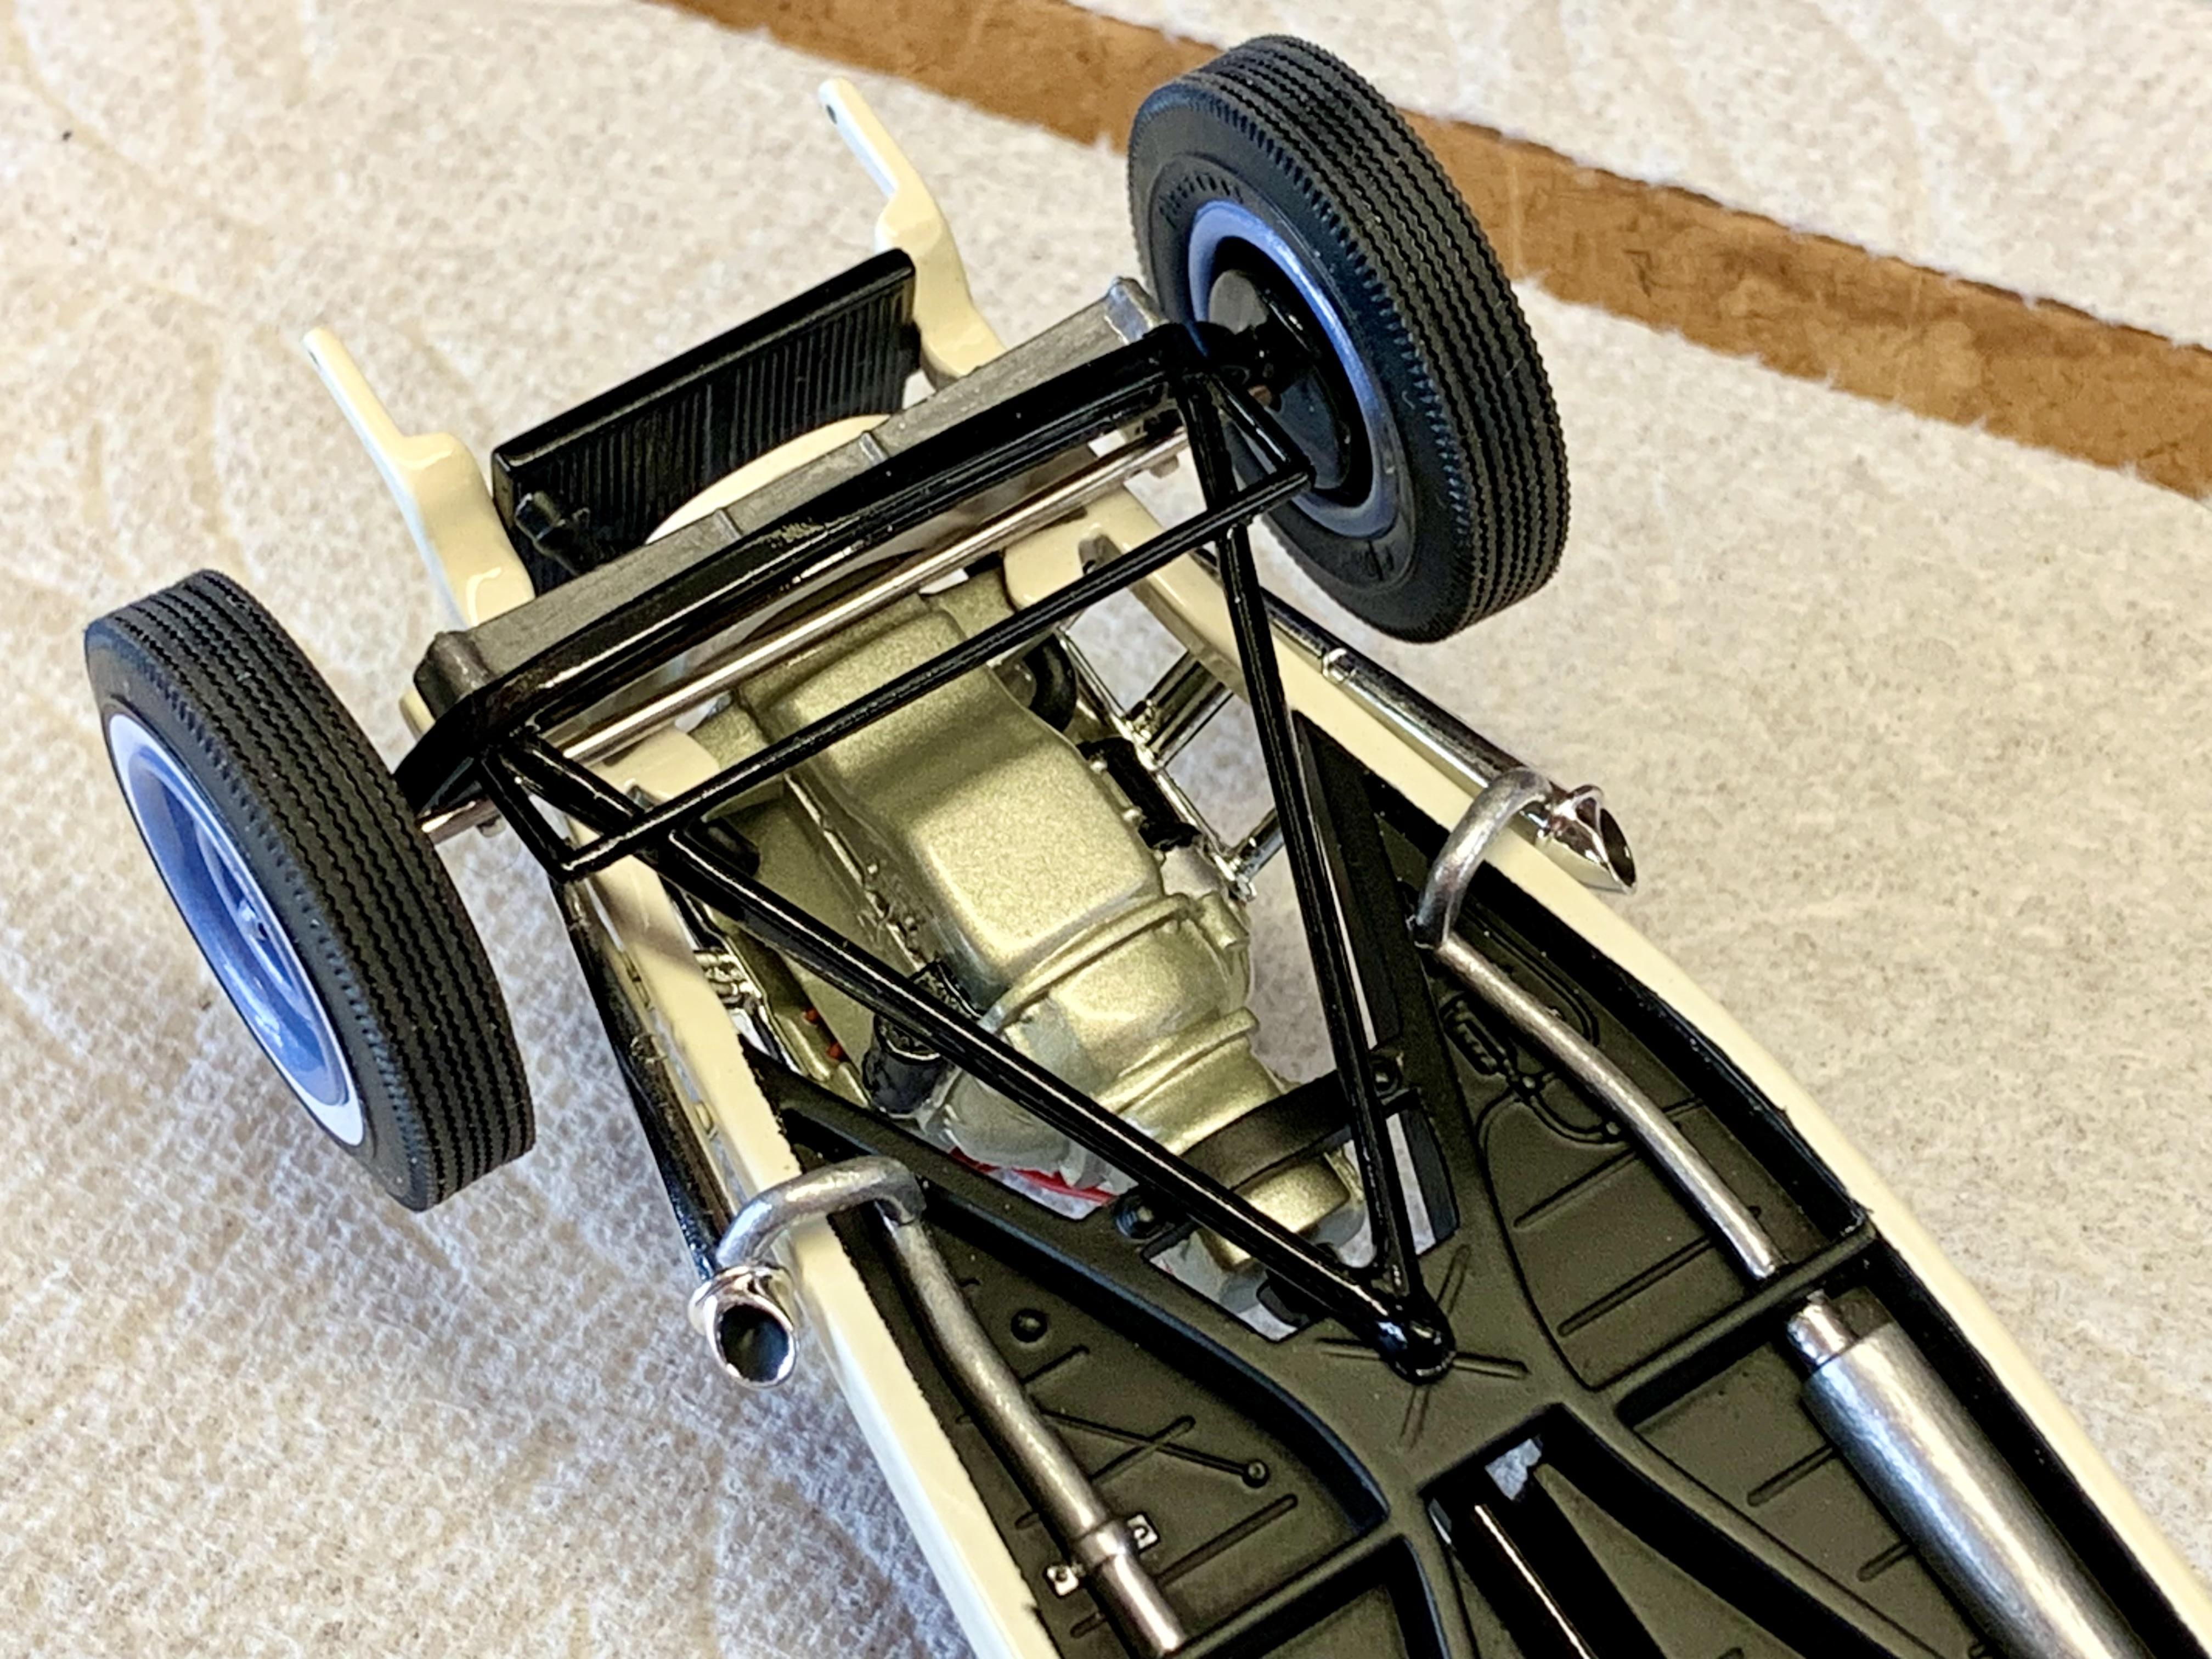
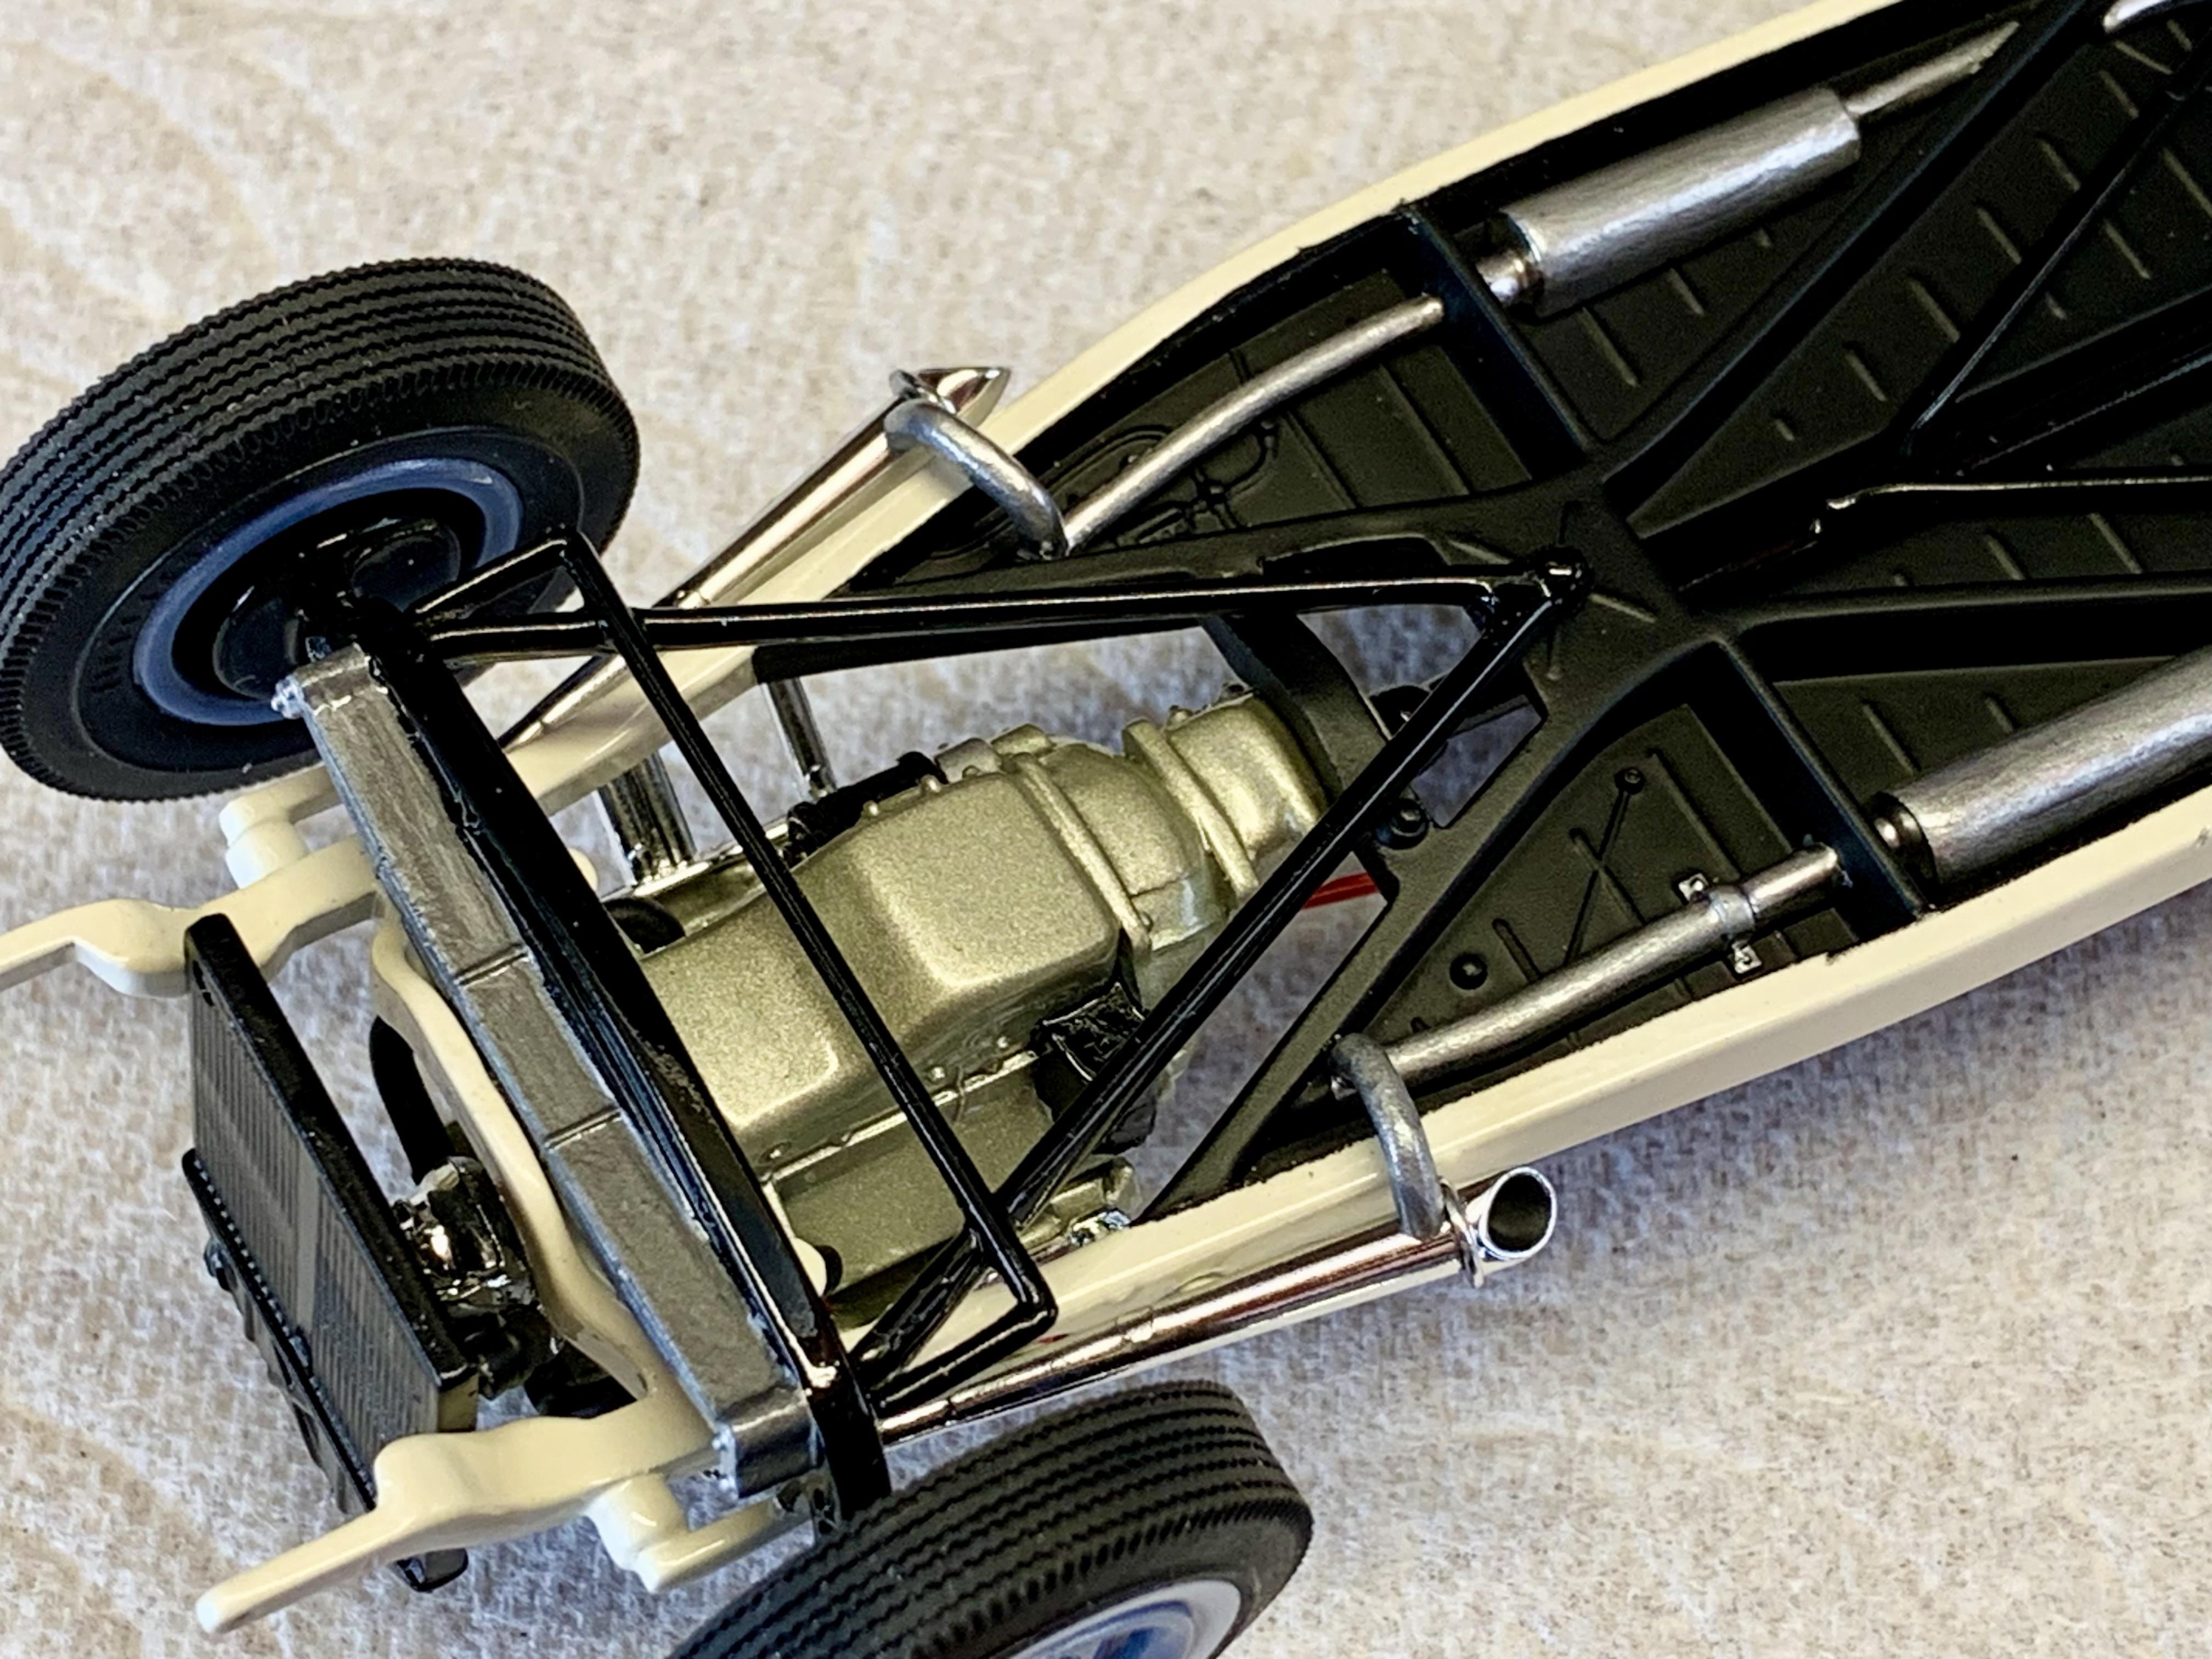
@bill-e-boy This sounds like a fun project. There was a resurgence of interest in early Ford 4-cylinder performance in the 60’s thanks to the formation of the Forever Four Cylinder club. They even ran a rail dragster. ARDUN never originally made a Model A/B head but they do exist now as a modern day creation. I knew a guy that ran one in his 29 Roadster Pickup. It sure looked neat! Inspired by that, some years back I created an ARDUN 4 in scale using a Revell block and a head & rocker cover from a Revell 50 F1 Pickup kit with a scratch built intake. I put it in an old Revell parts pack Dragmaster frame. I’ll leave a few pics to help inspire your conversion.
-
K&R Kustoms+Rods '34 5ive Window Chopped Coupe
Dennis Lacy replied to Kit Karson's topic in WIP: Model Cars
I didn’t know you were awarded custody of this body. 😆 Neat to see it getting built! -
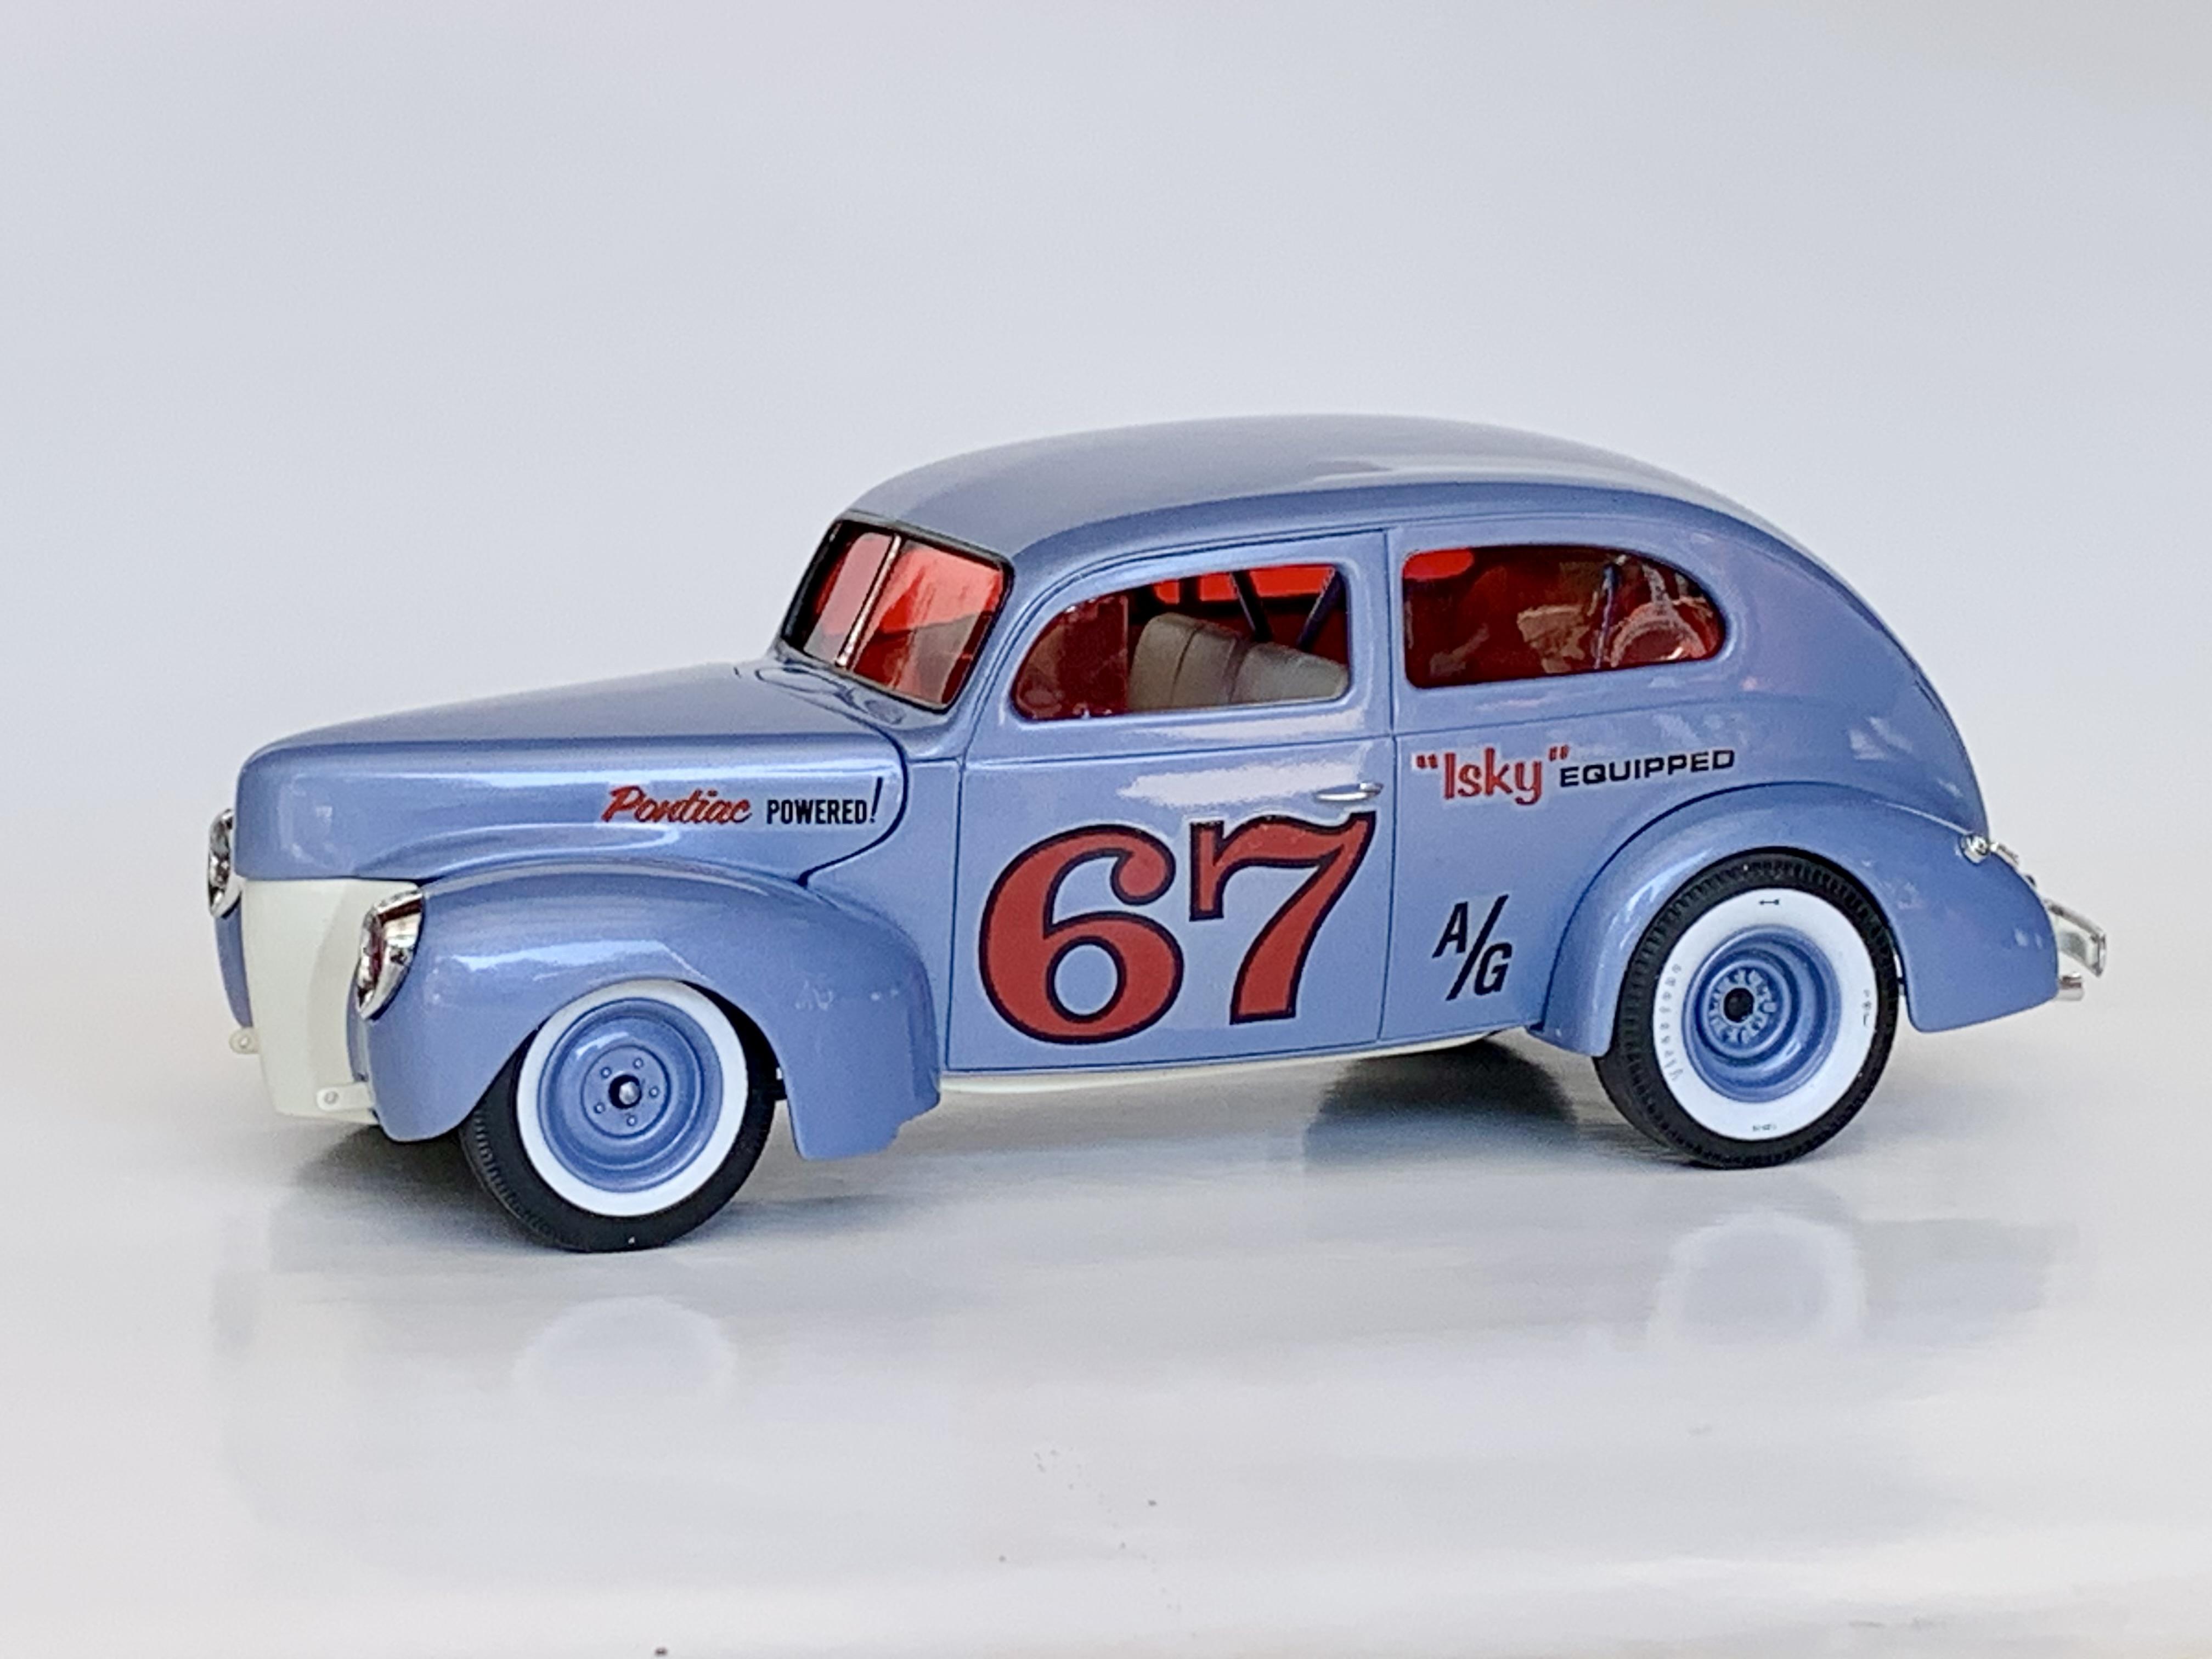
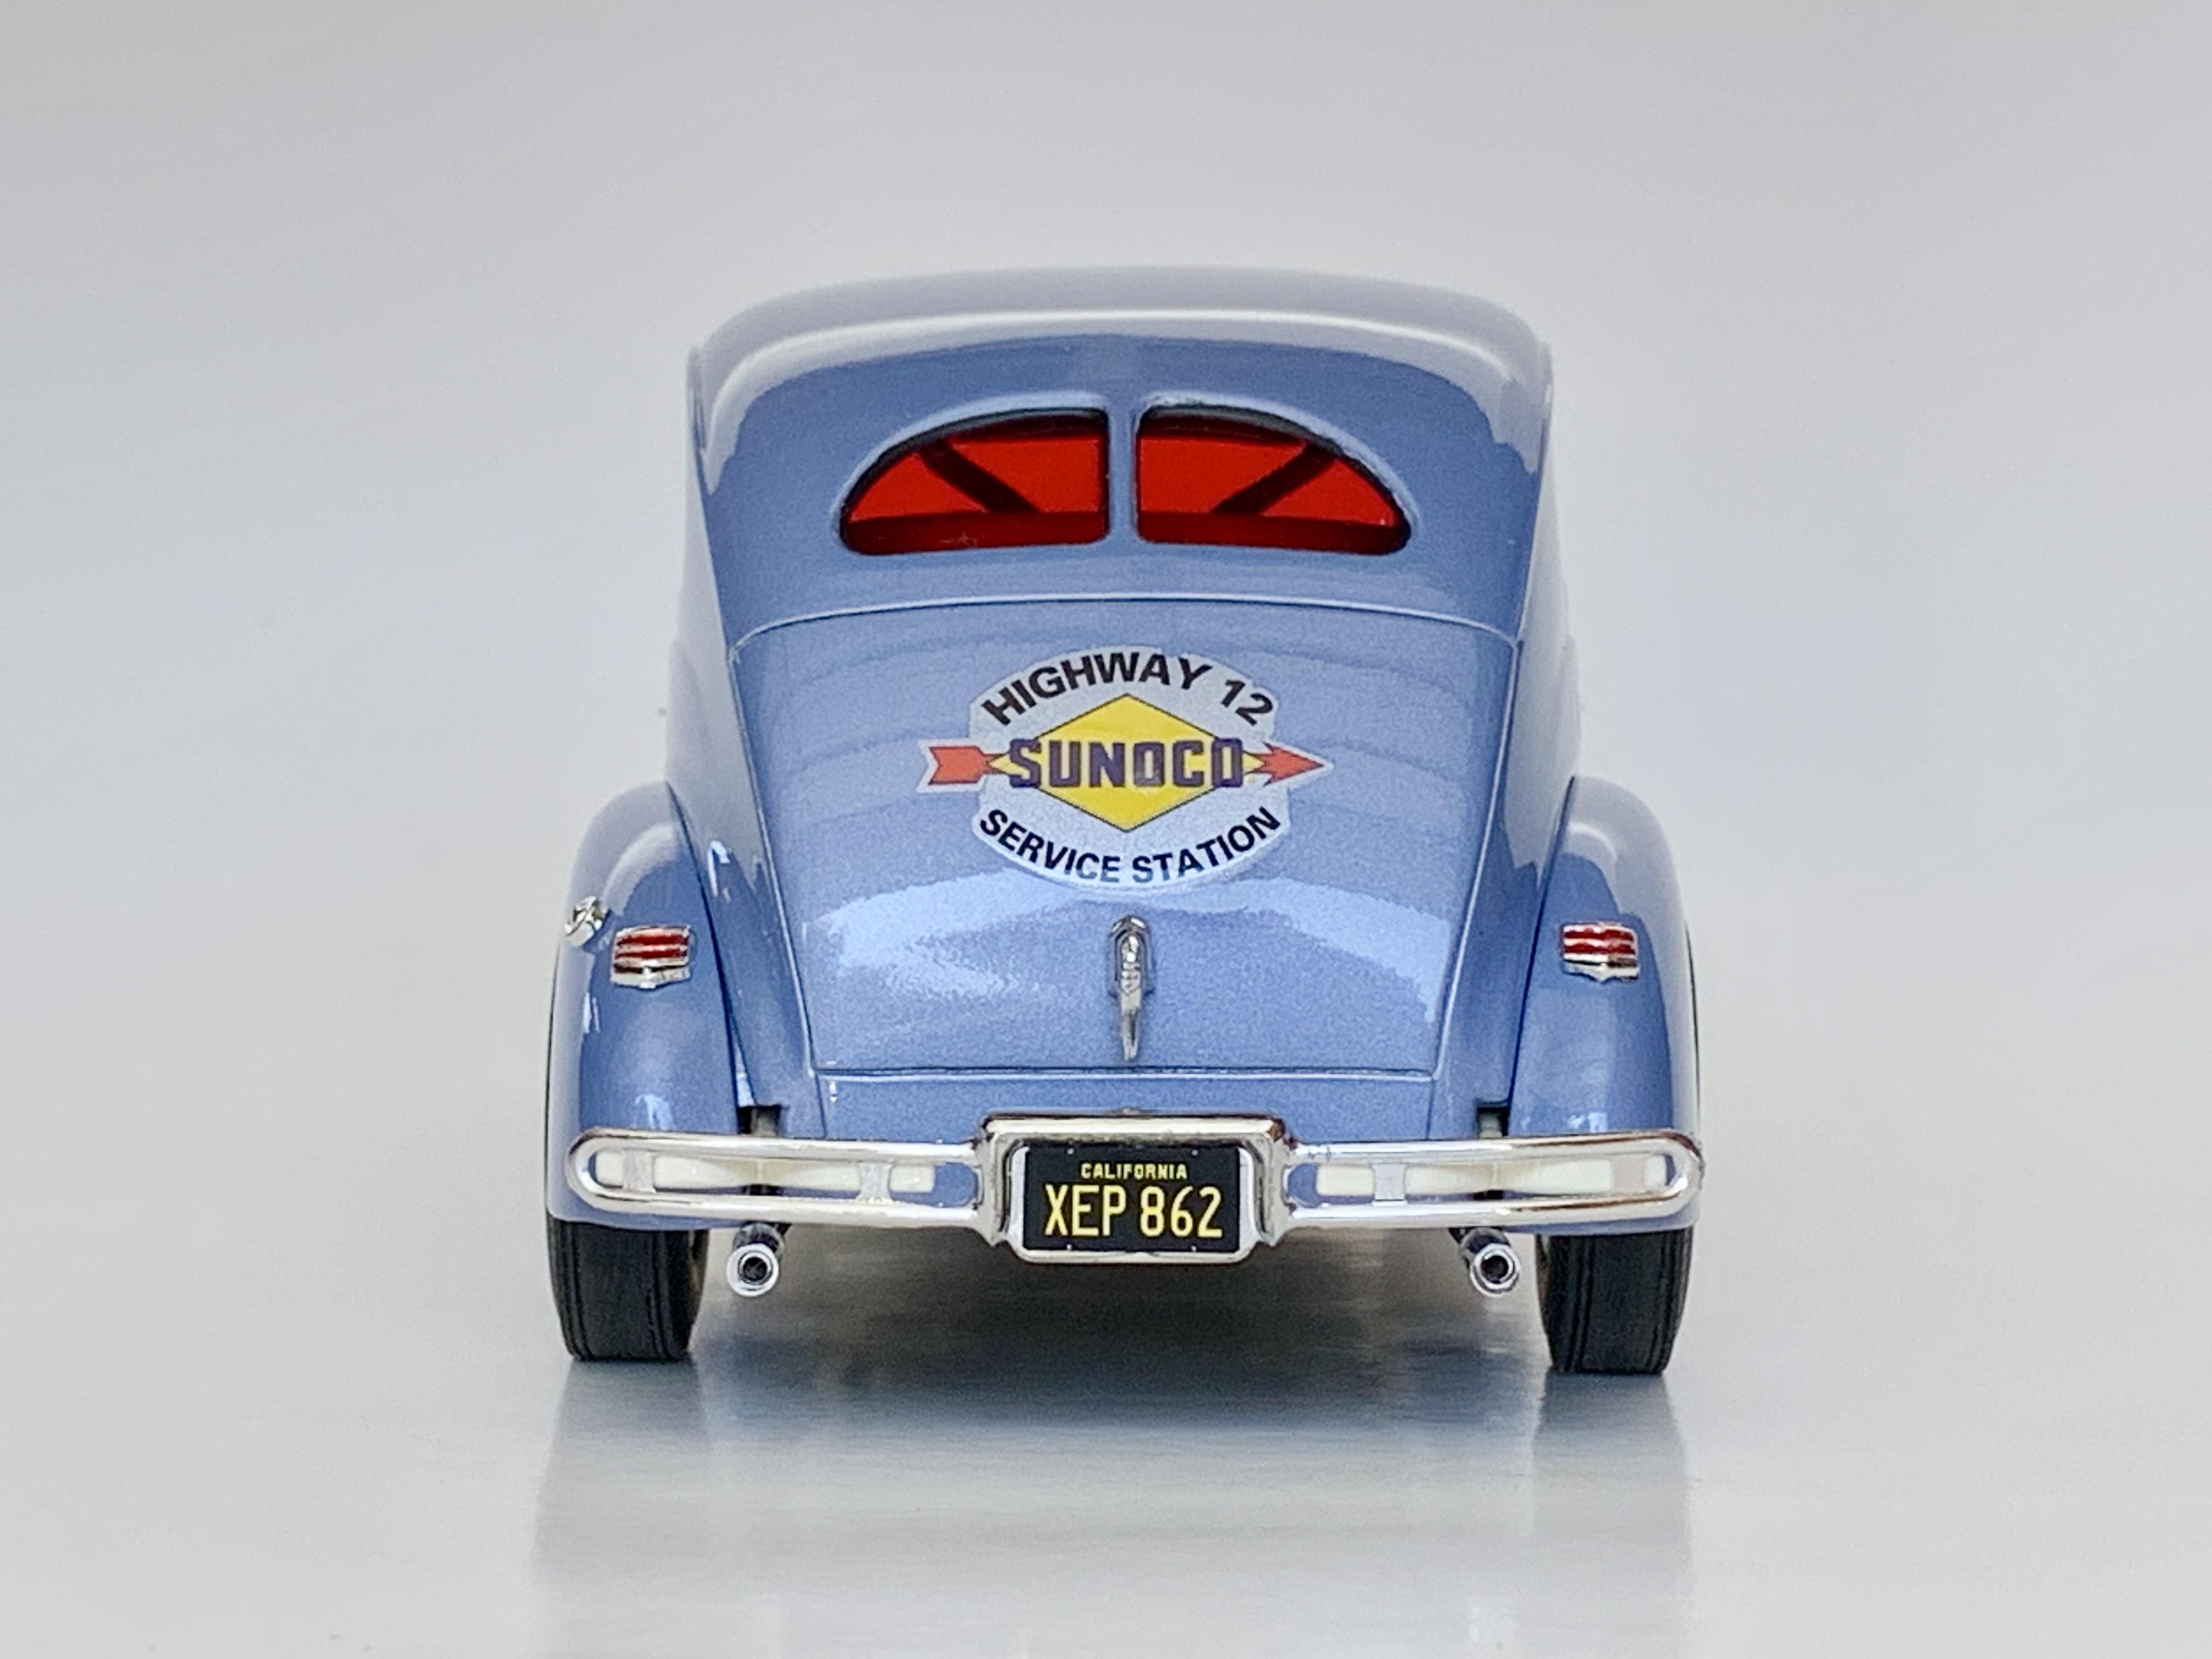
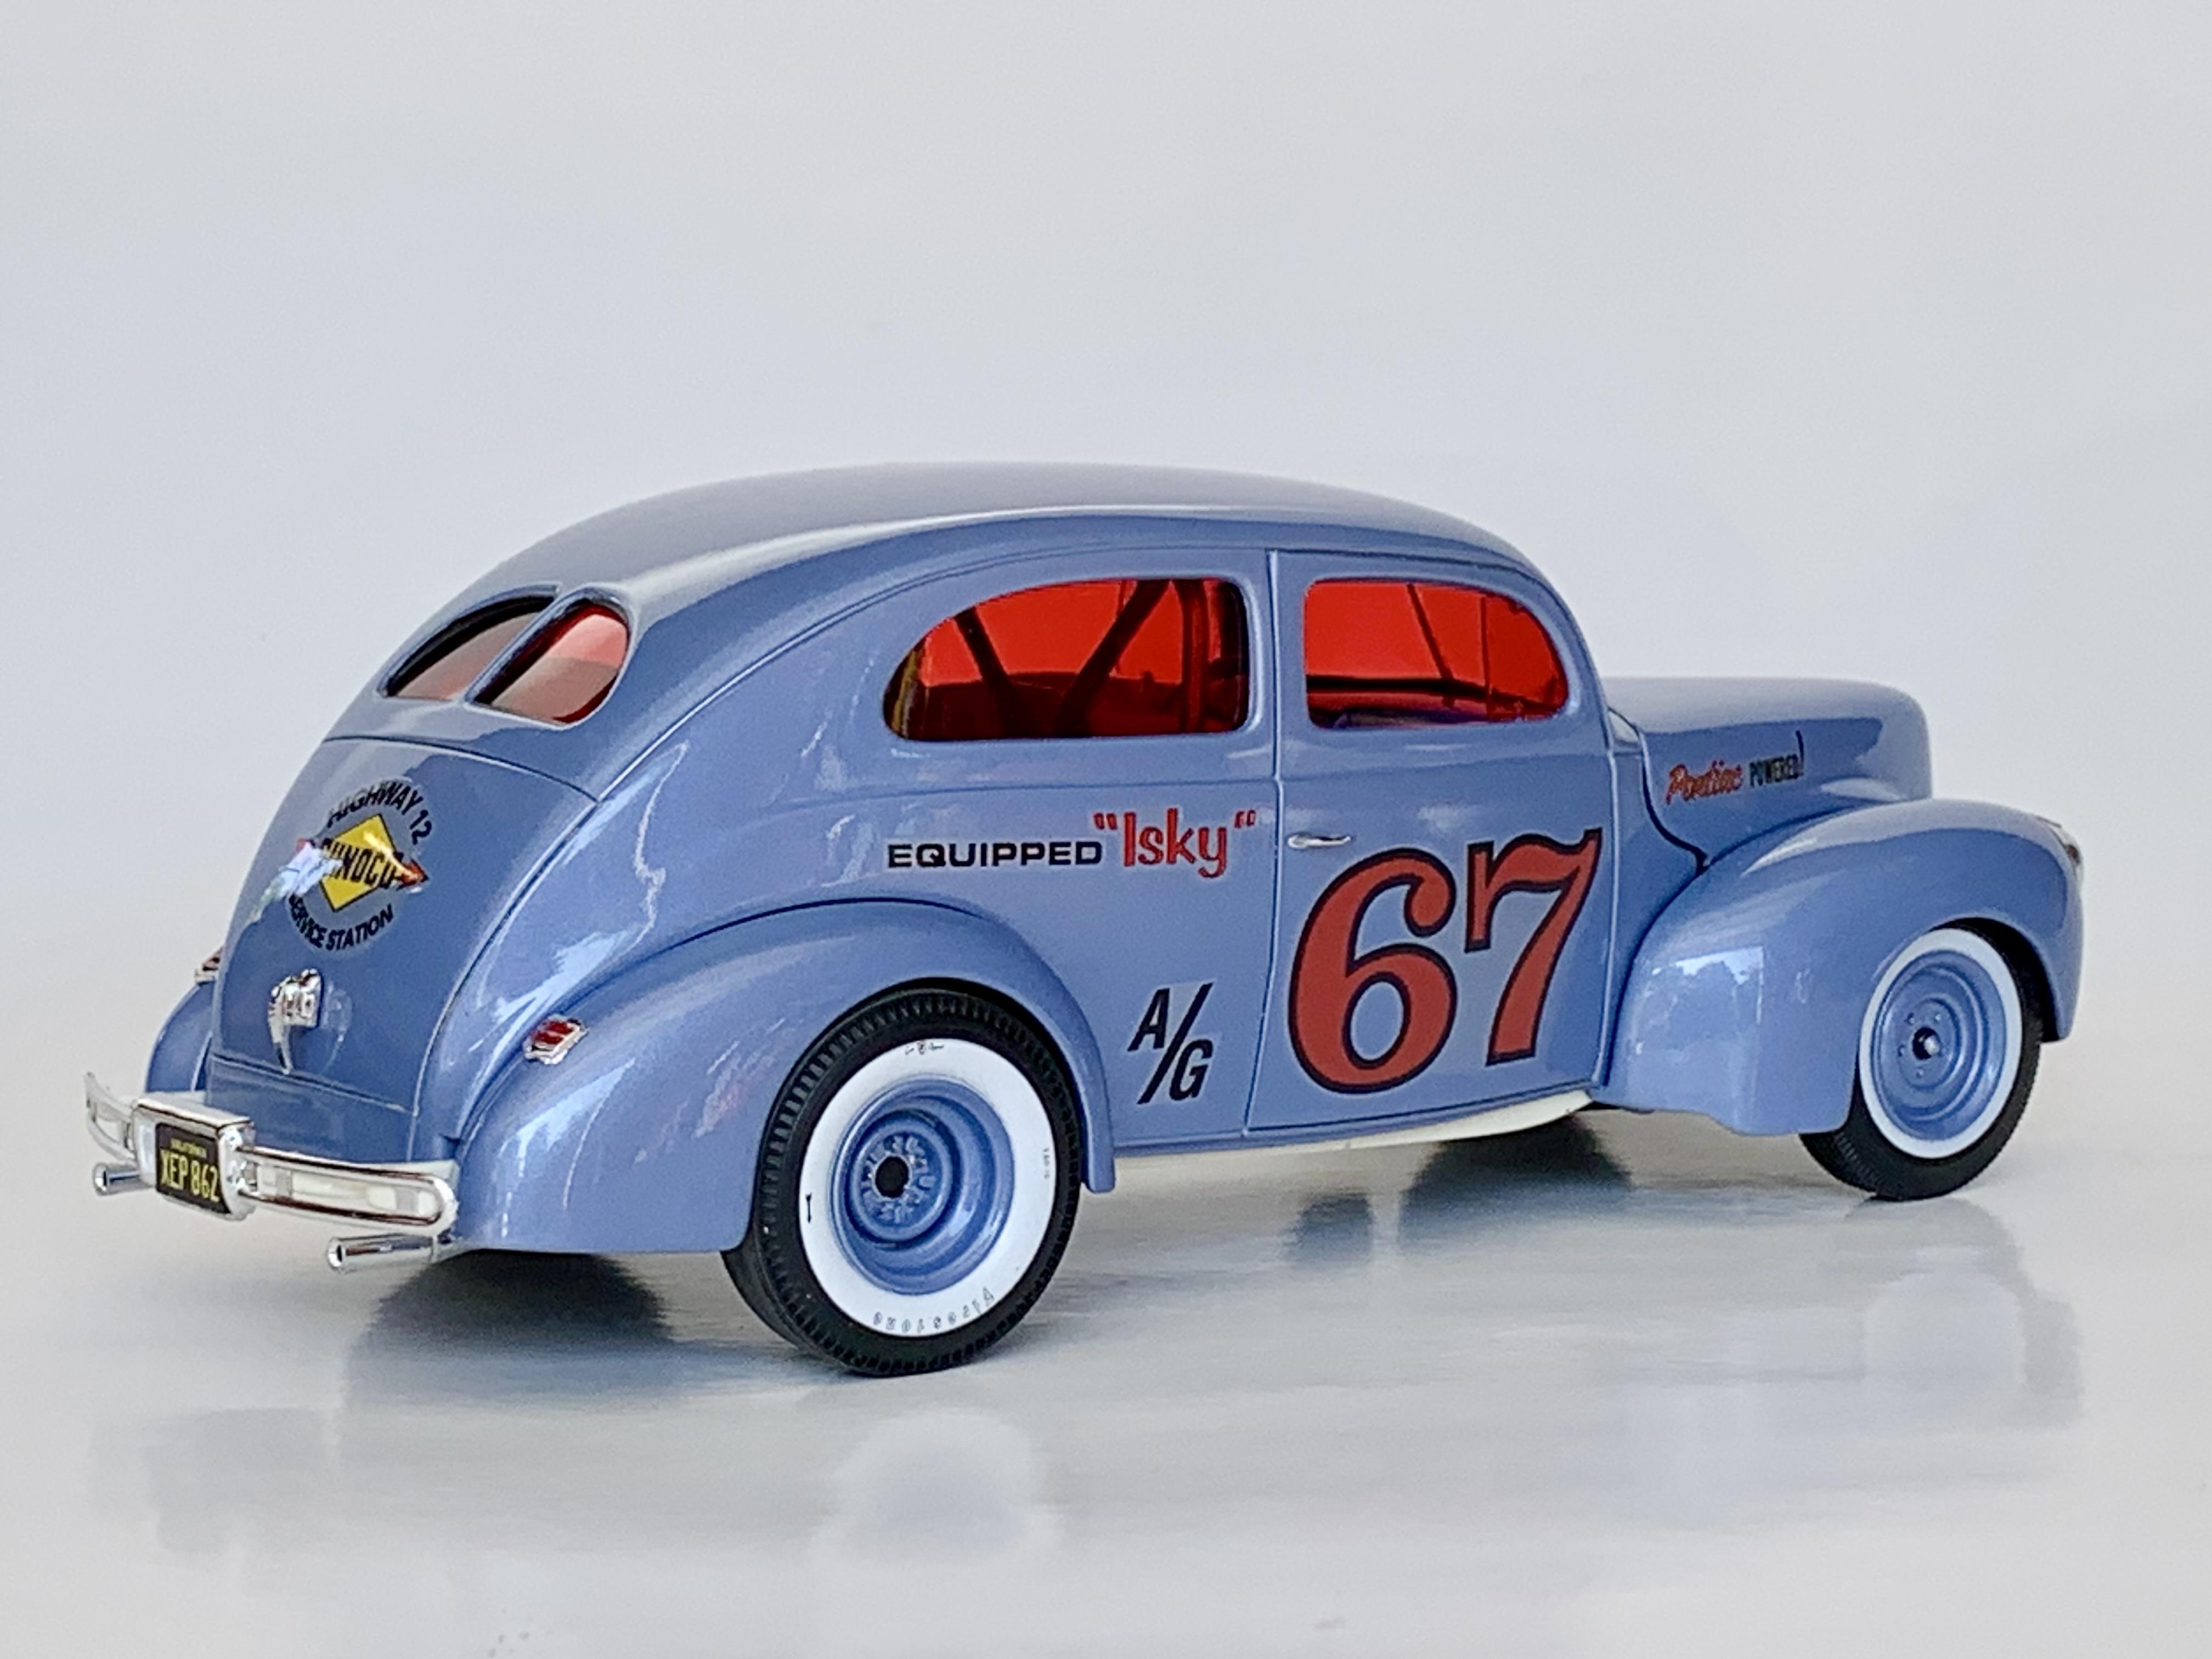
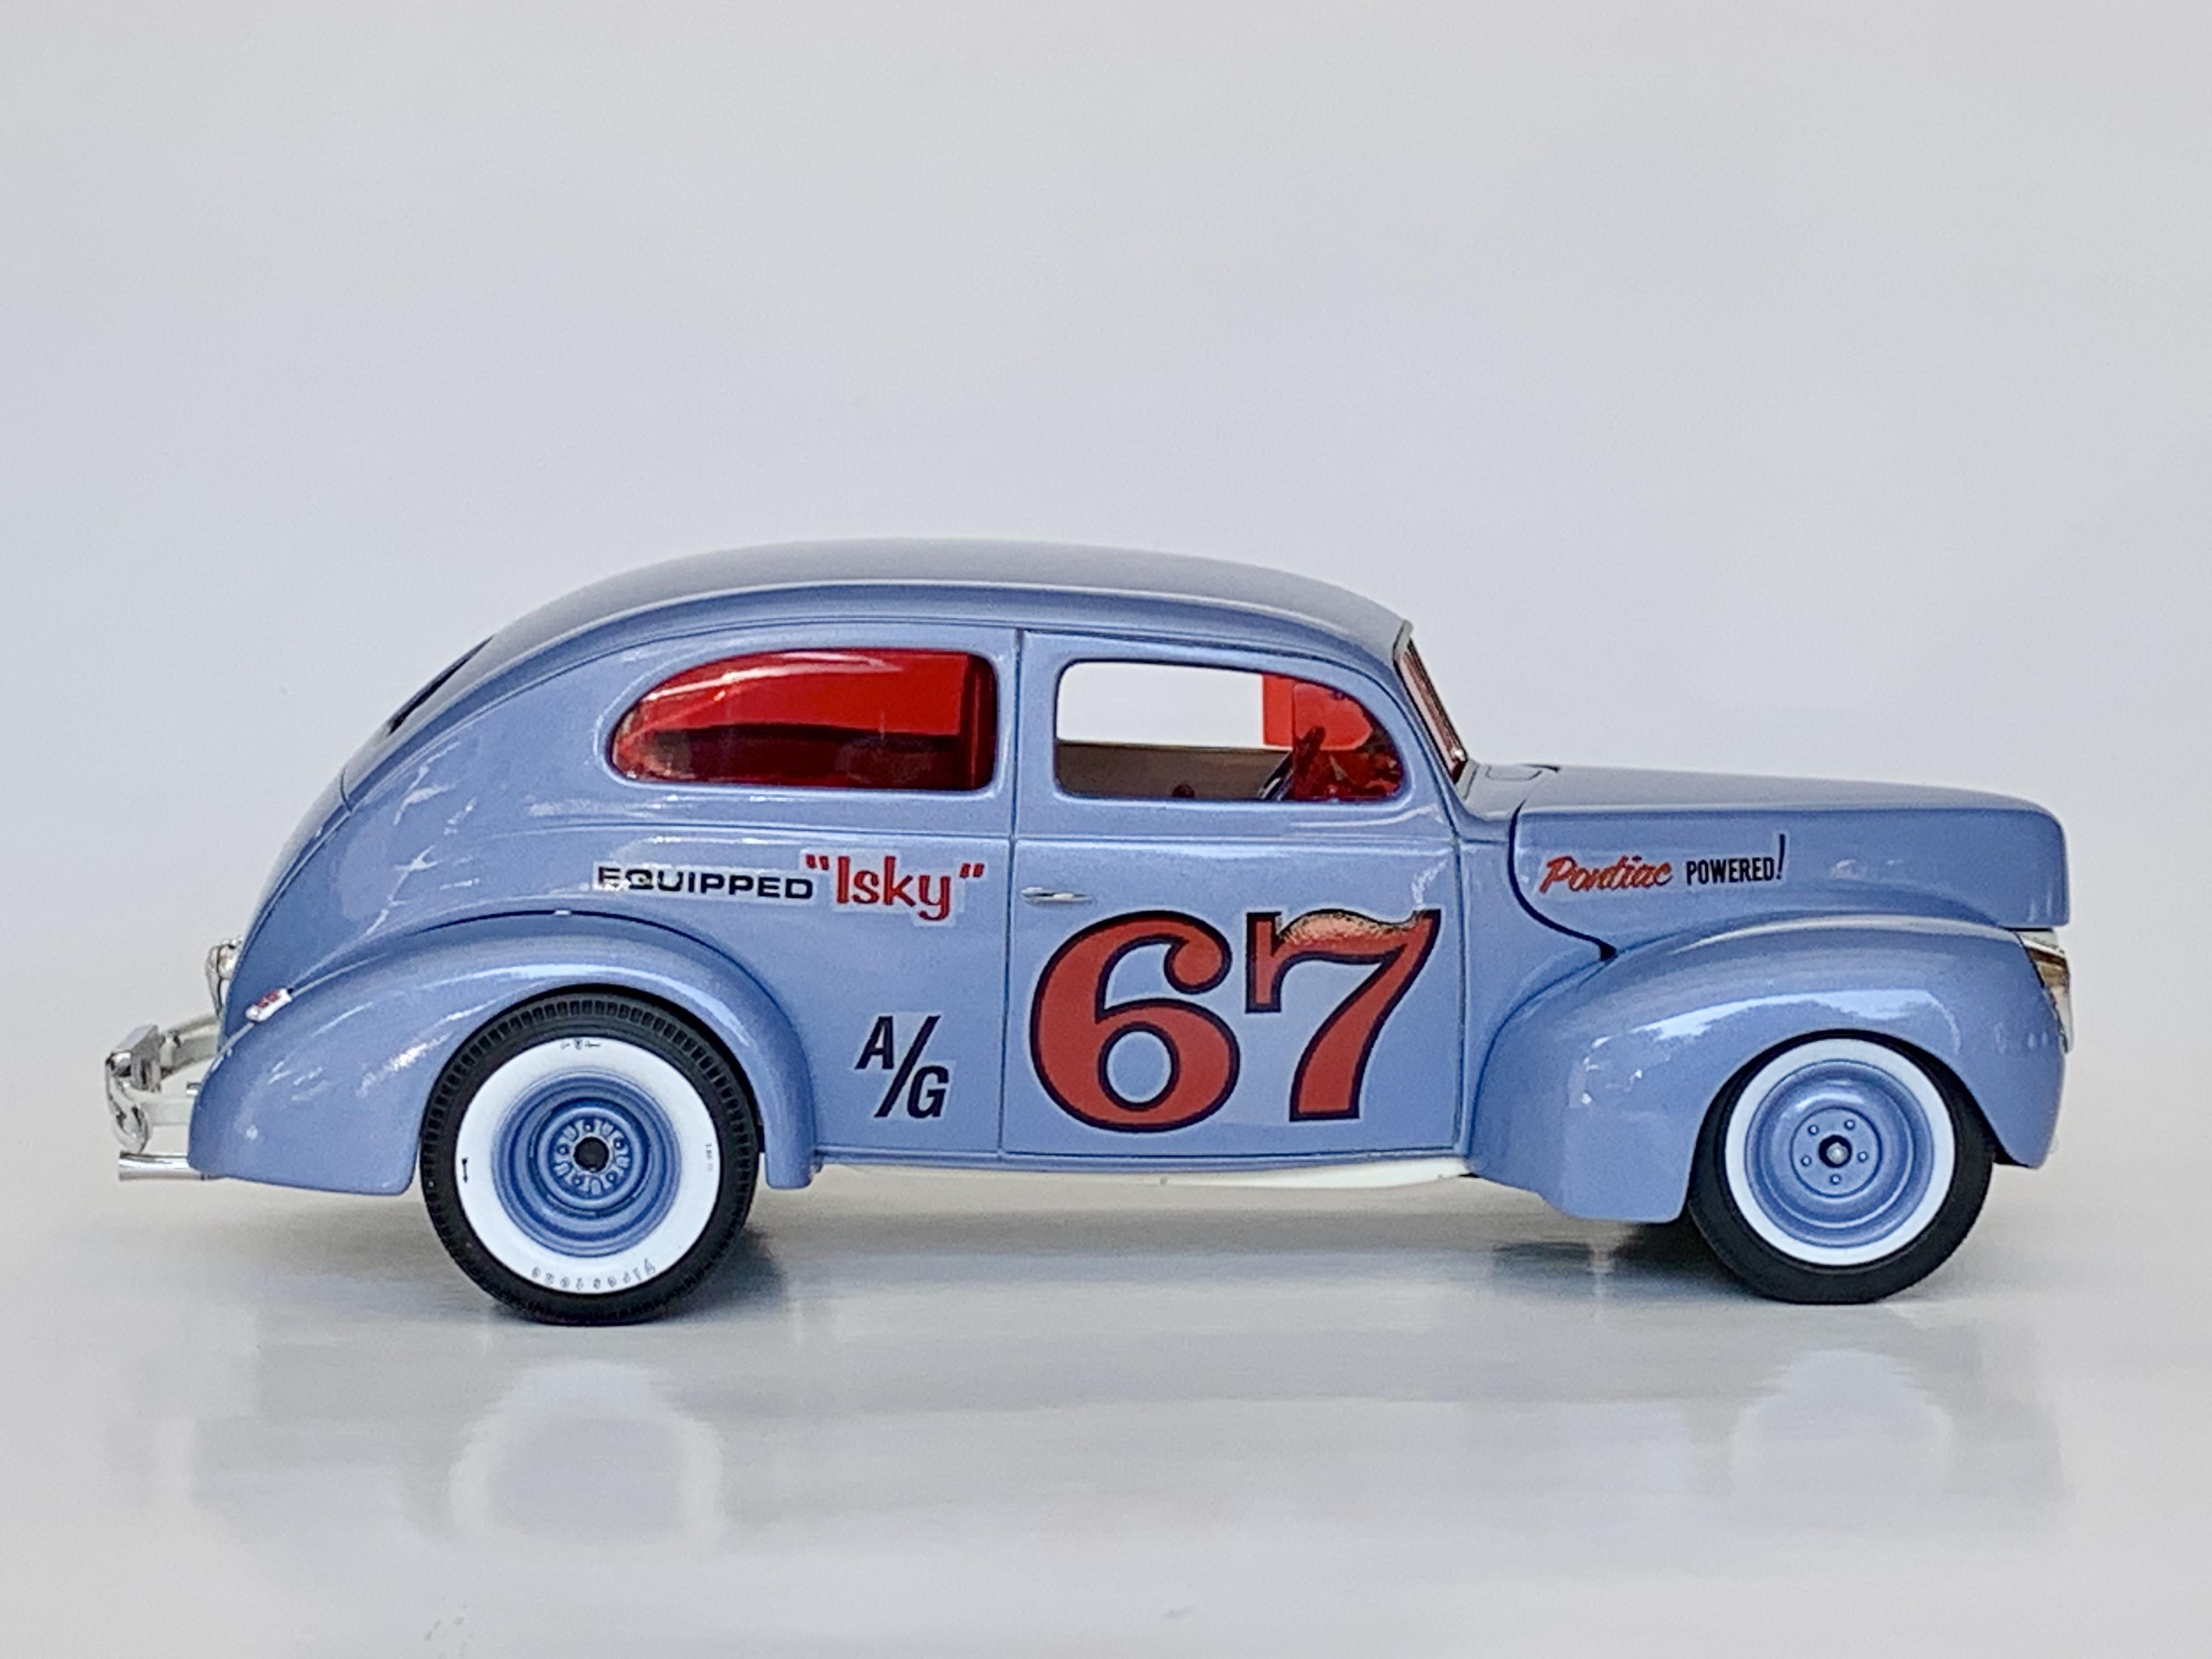
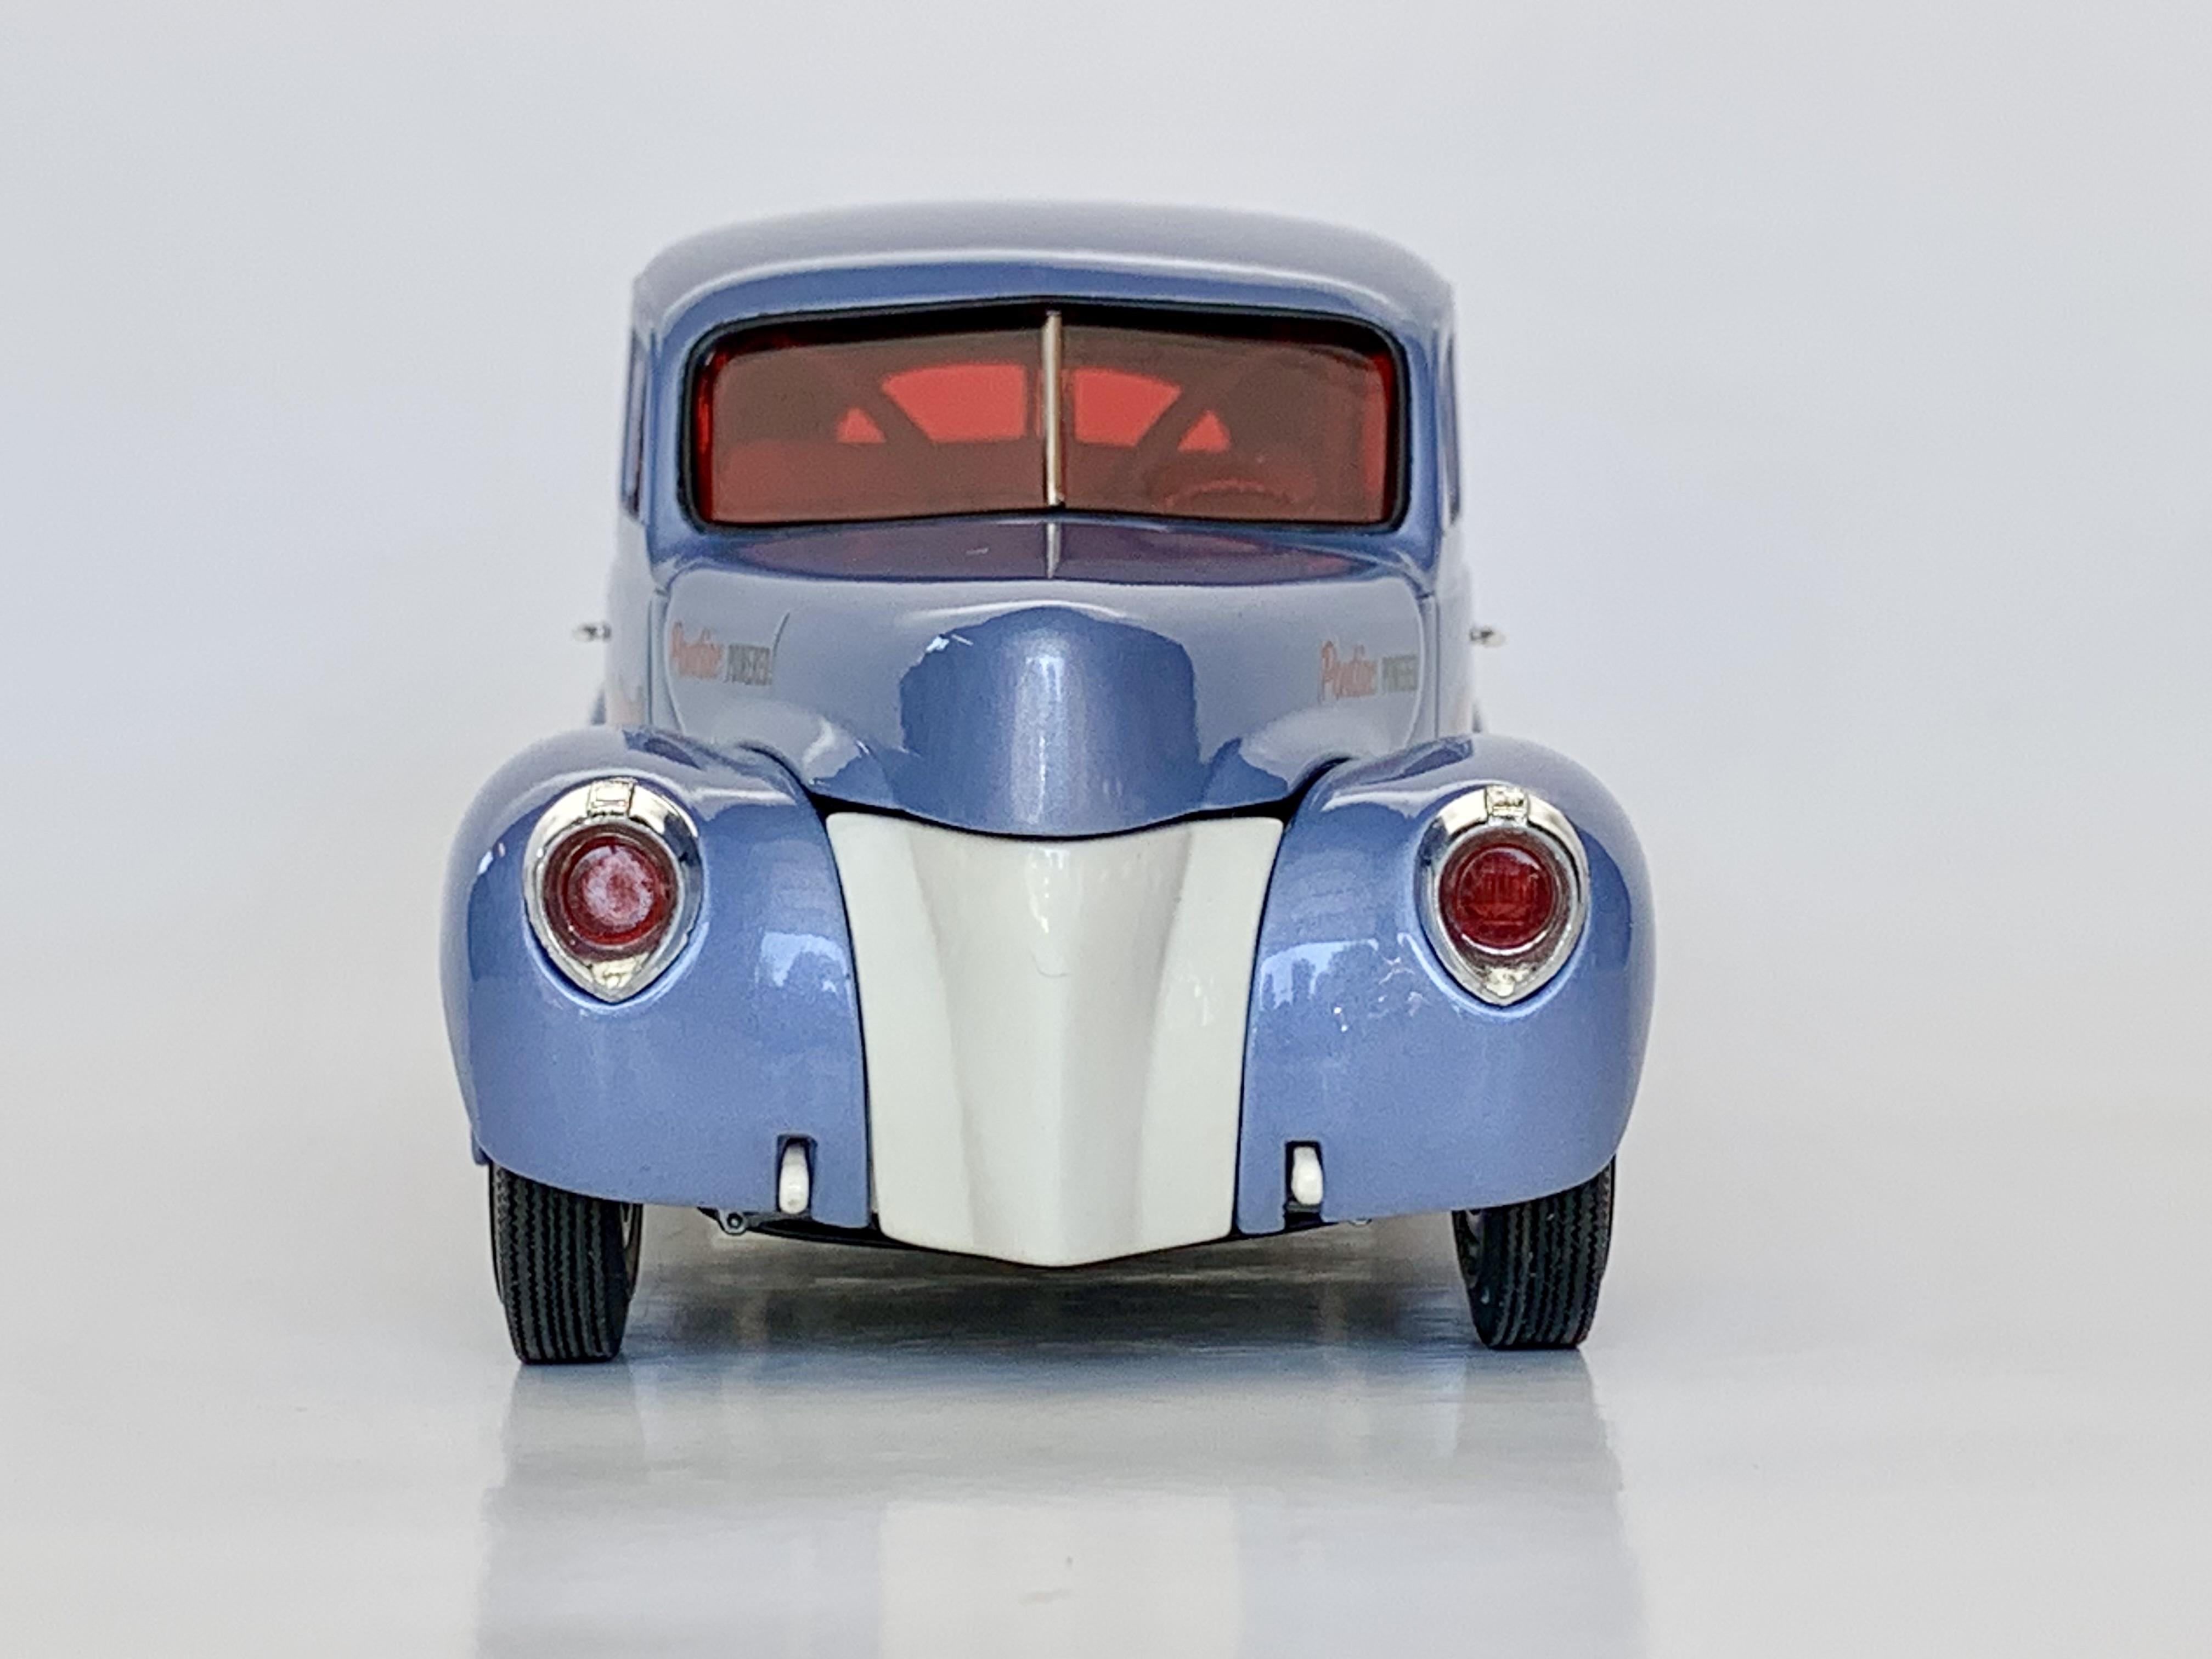
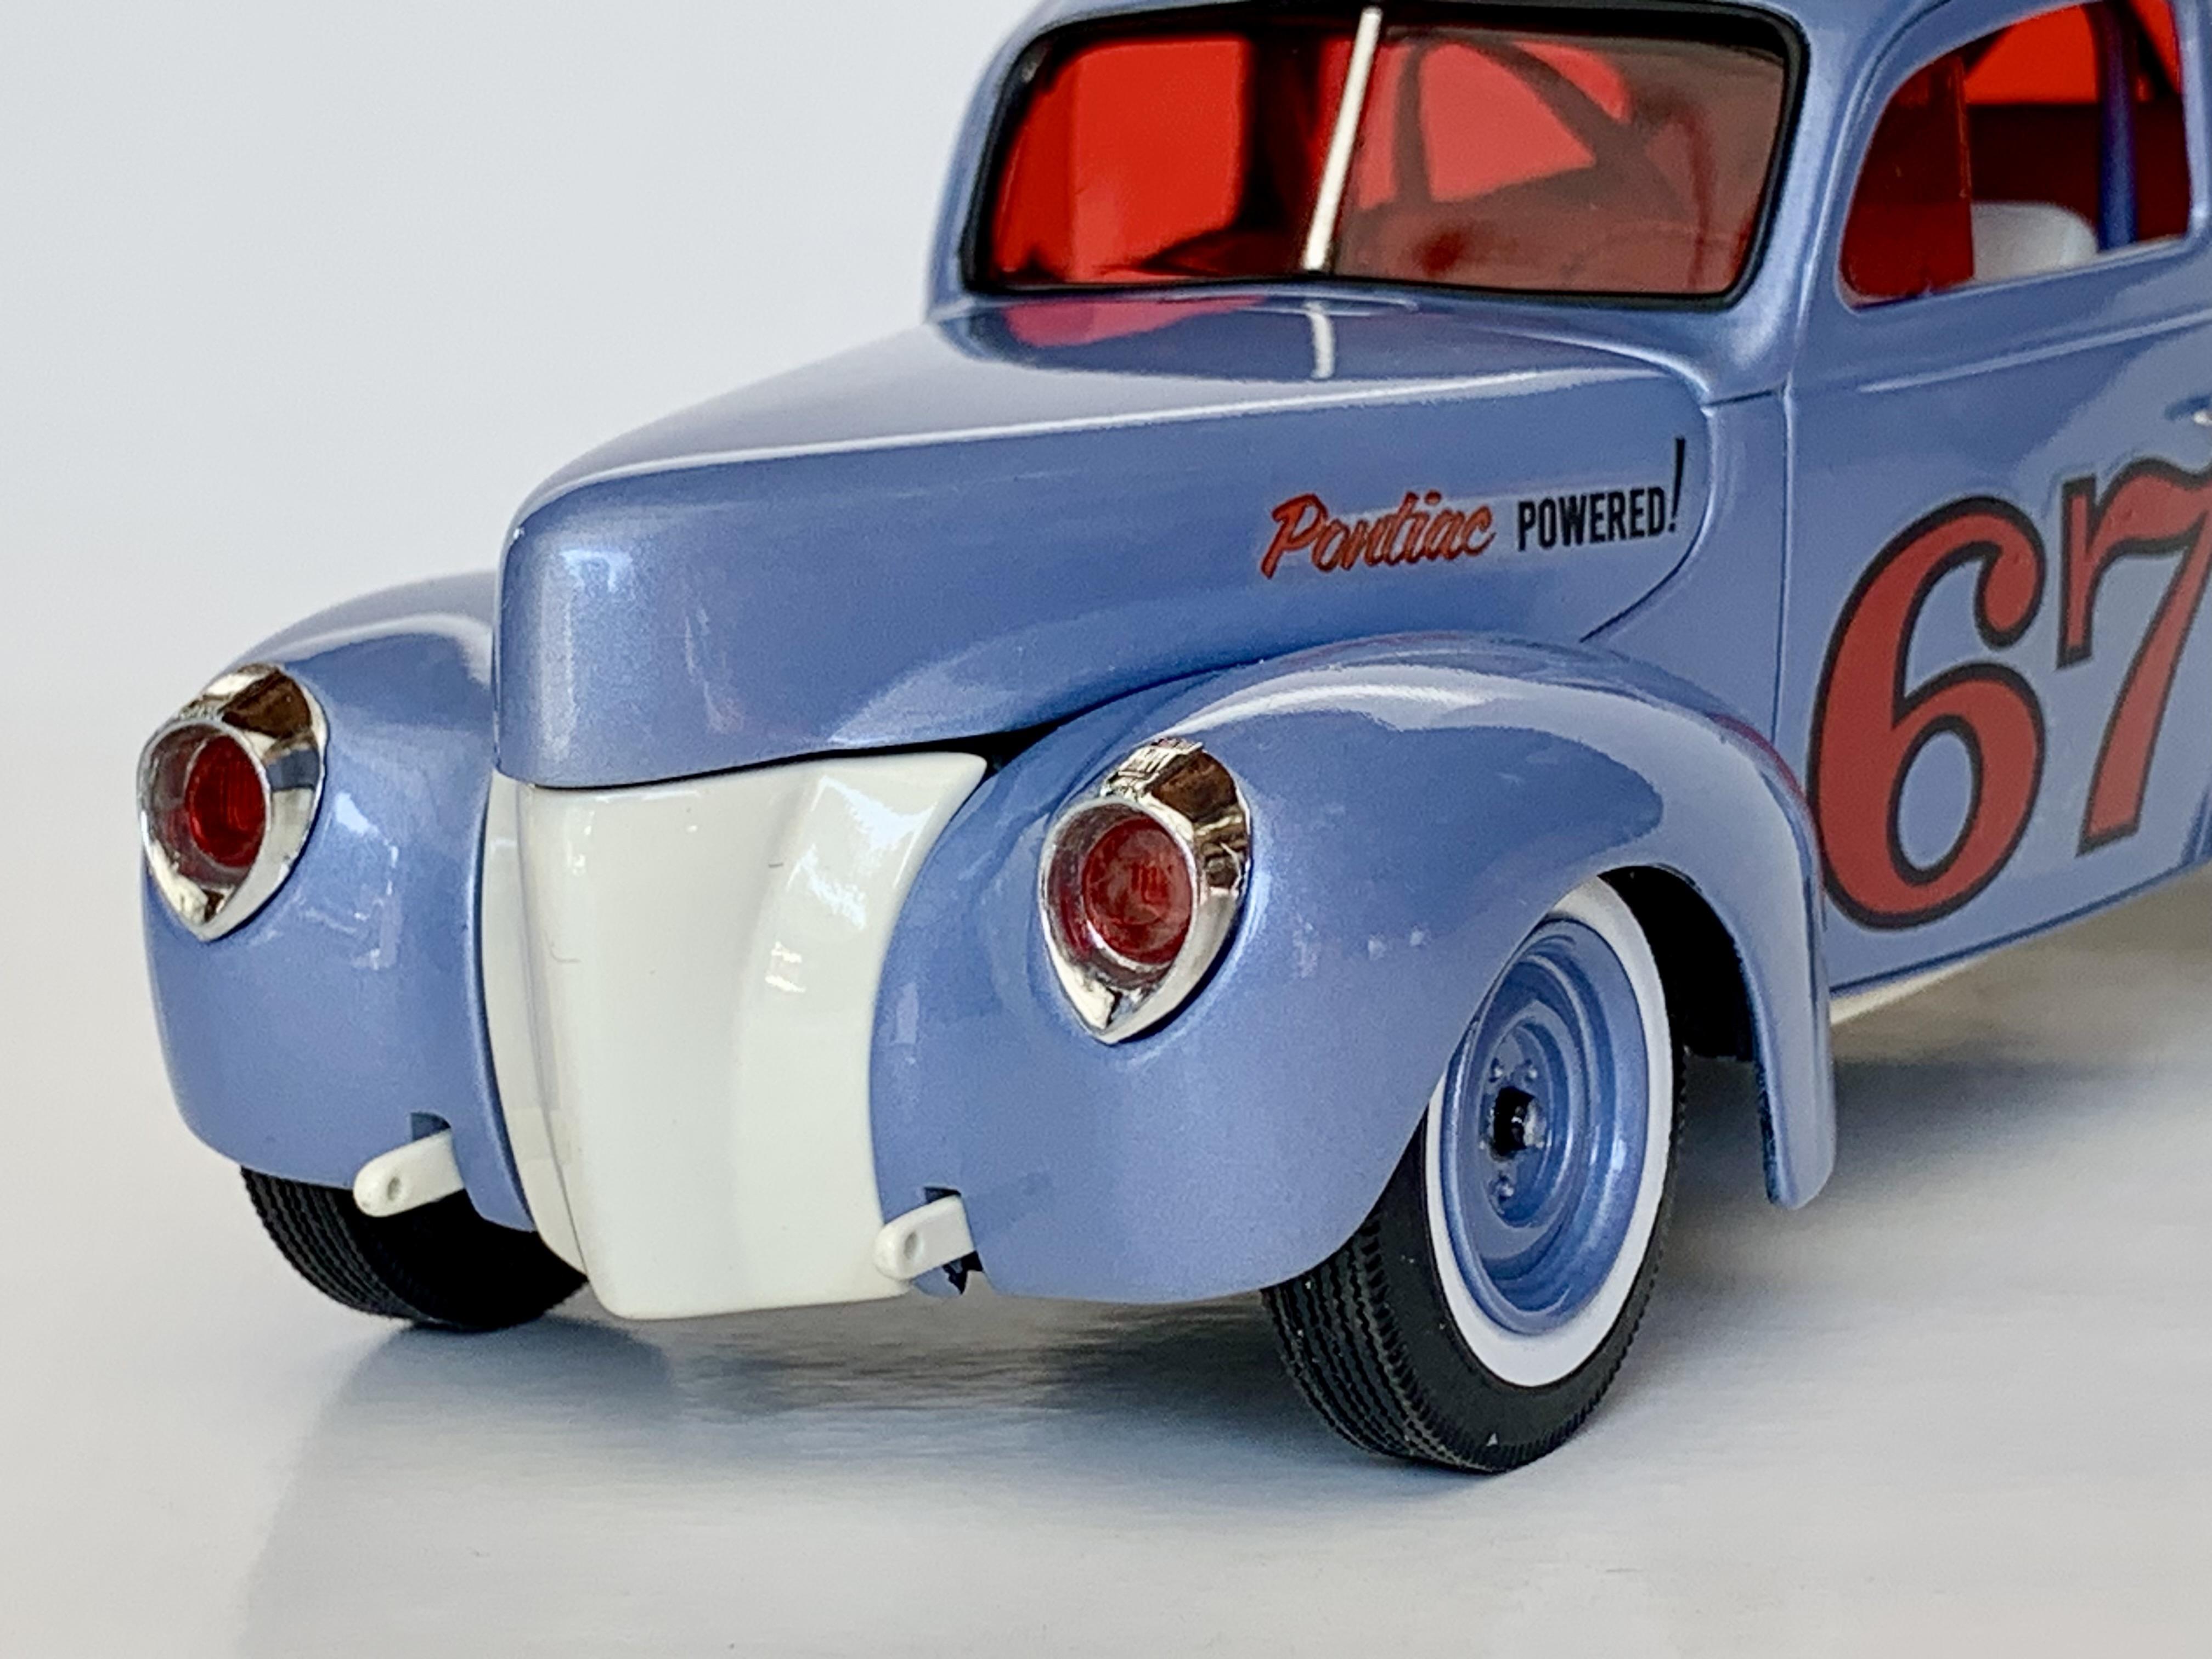
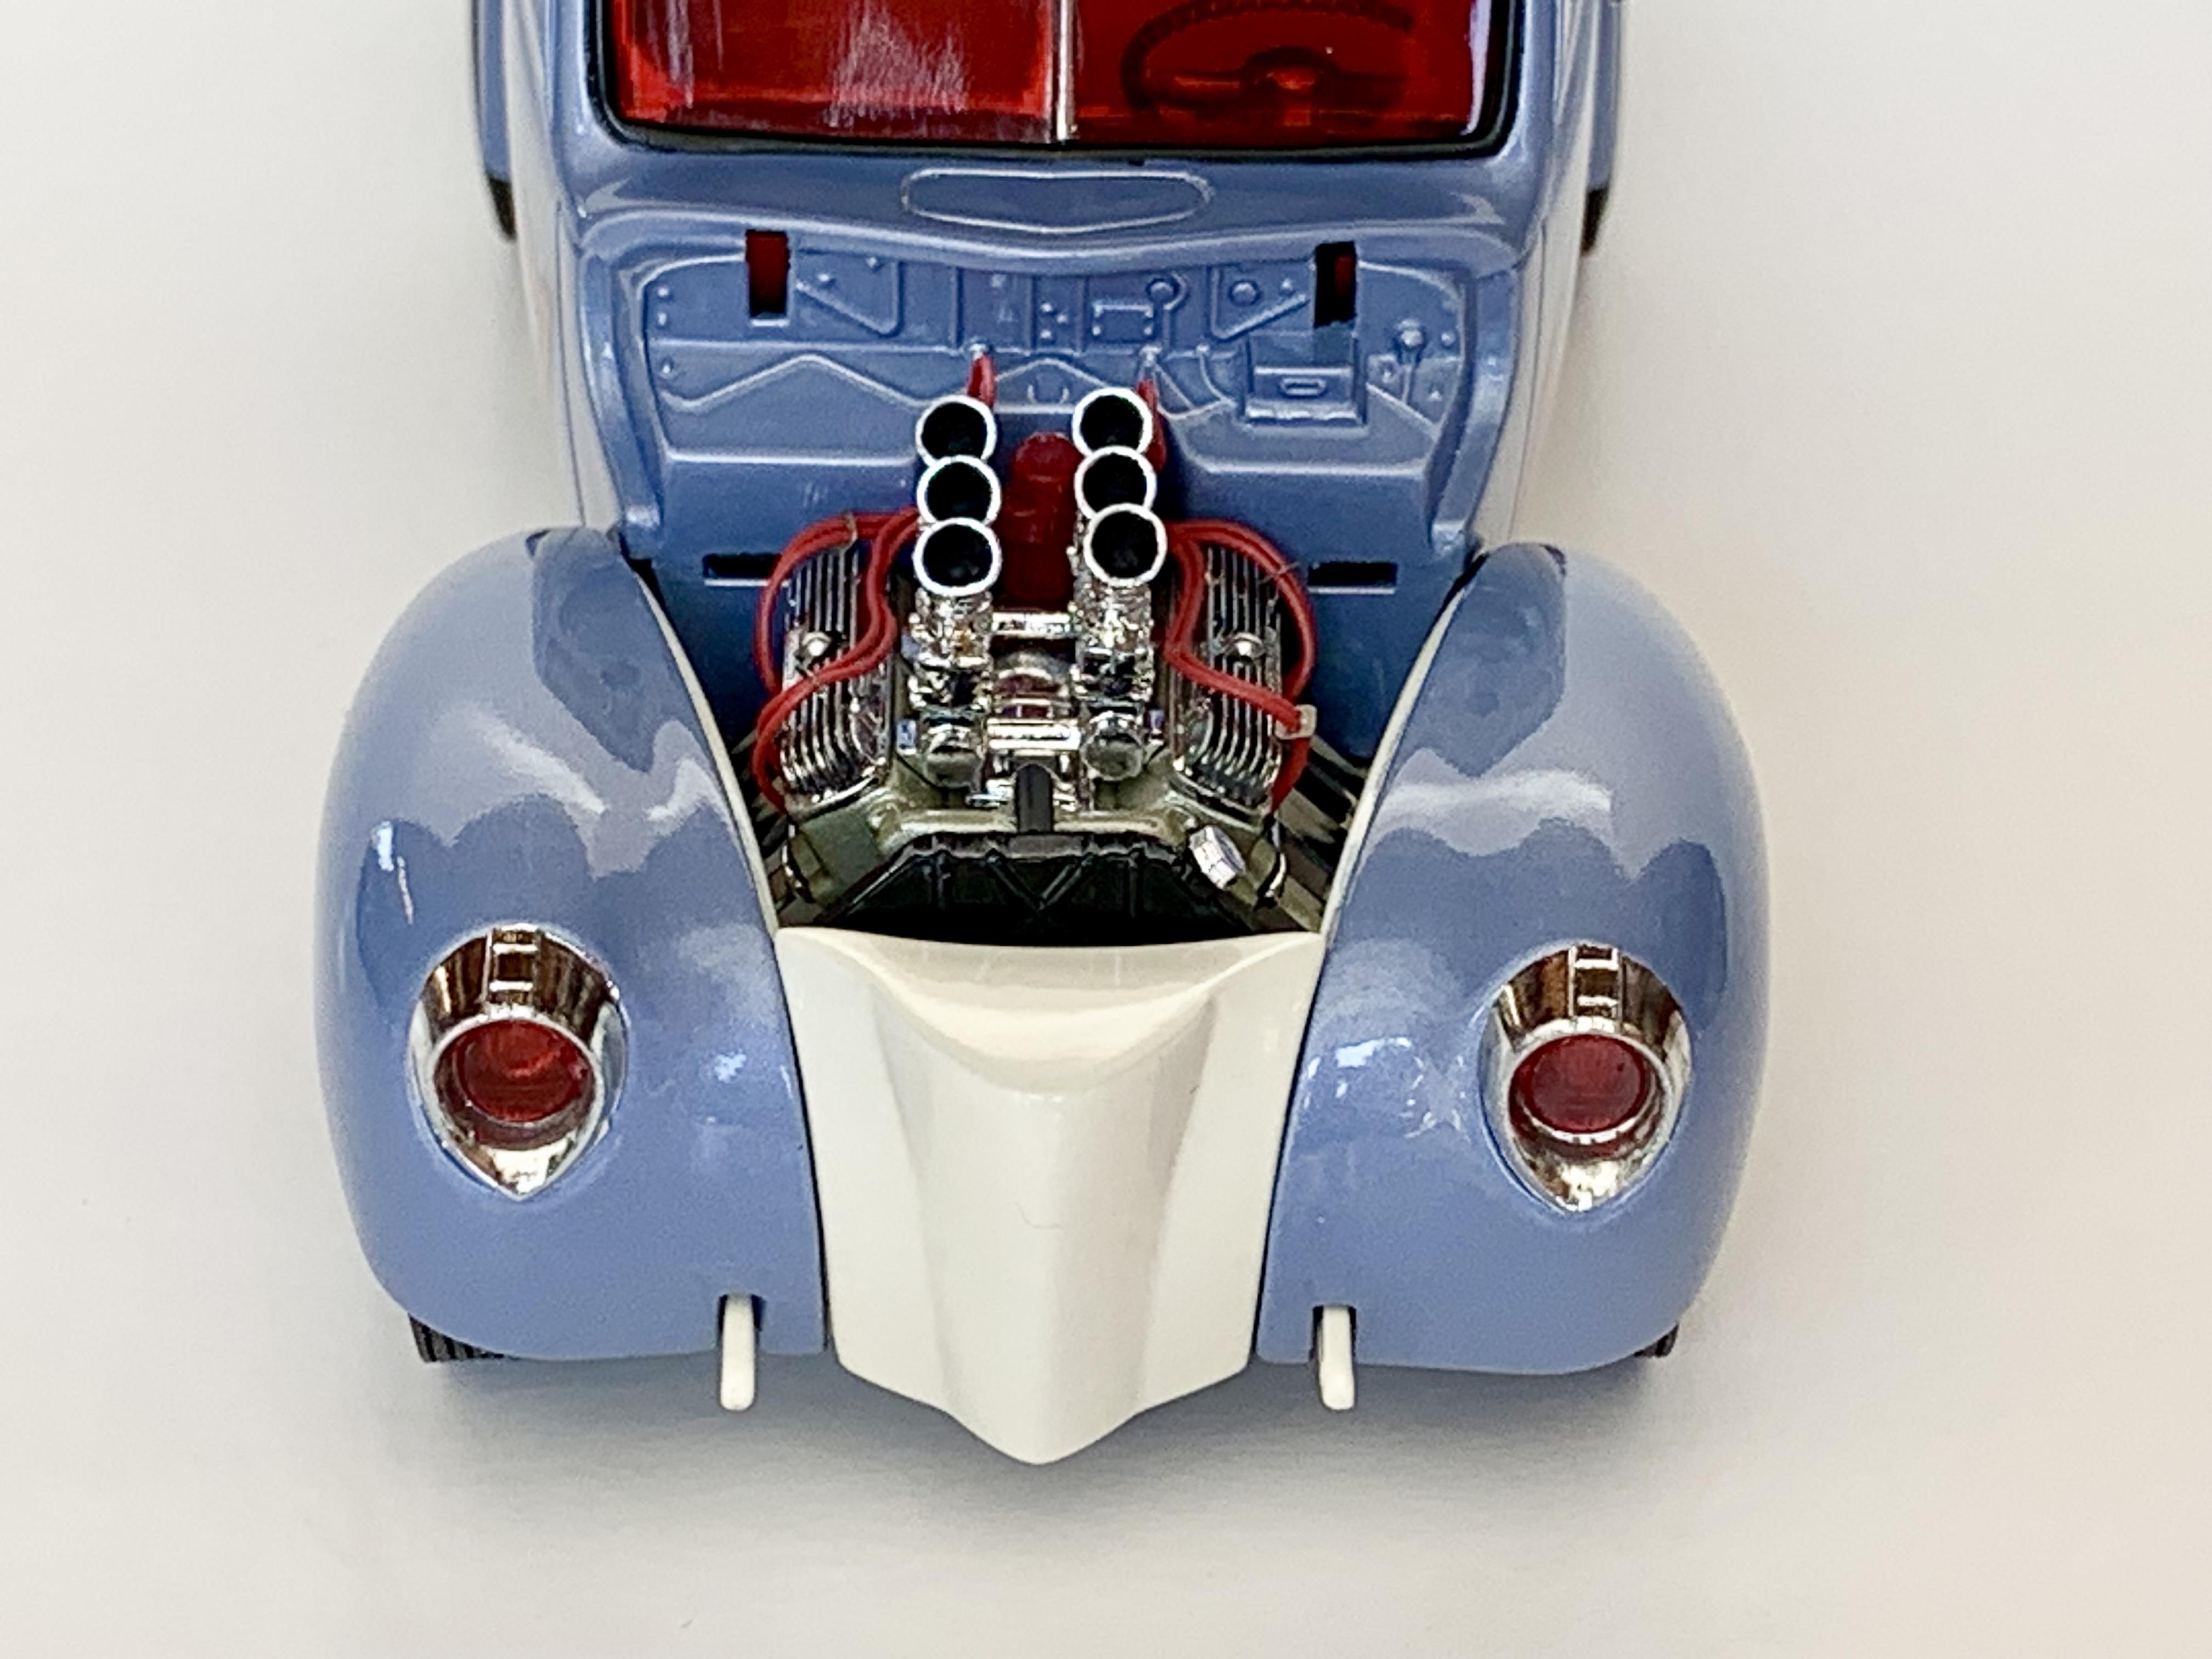
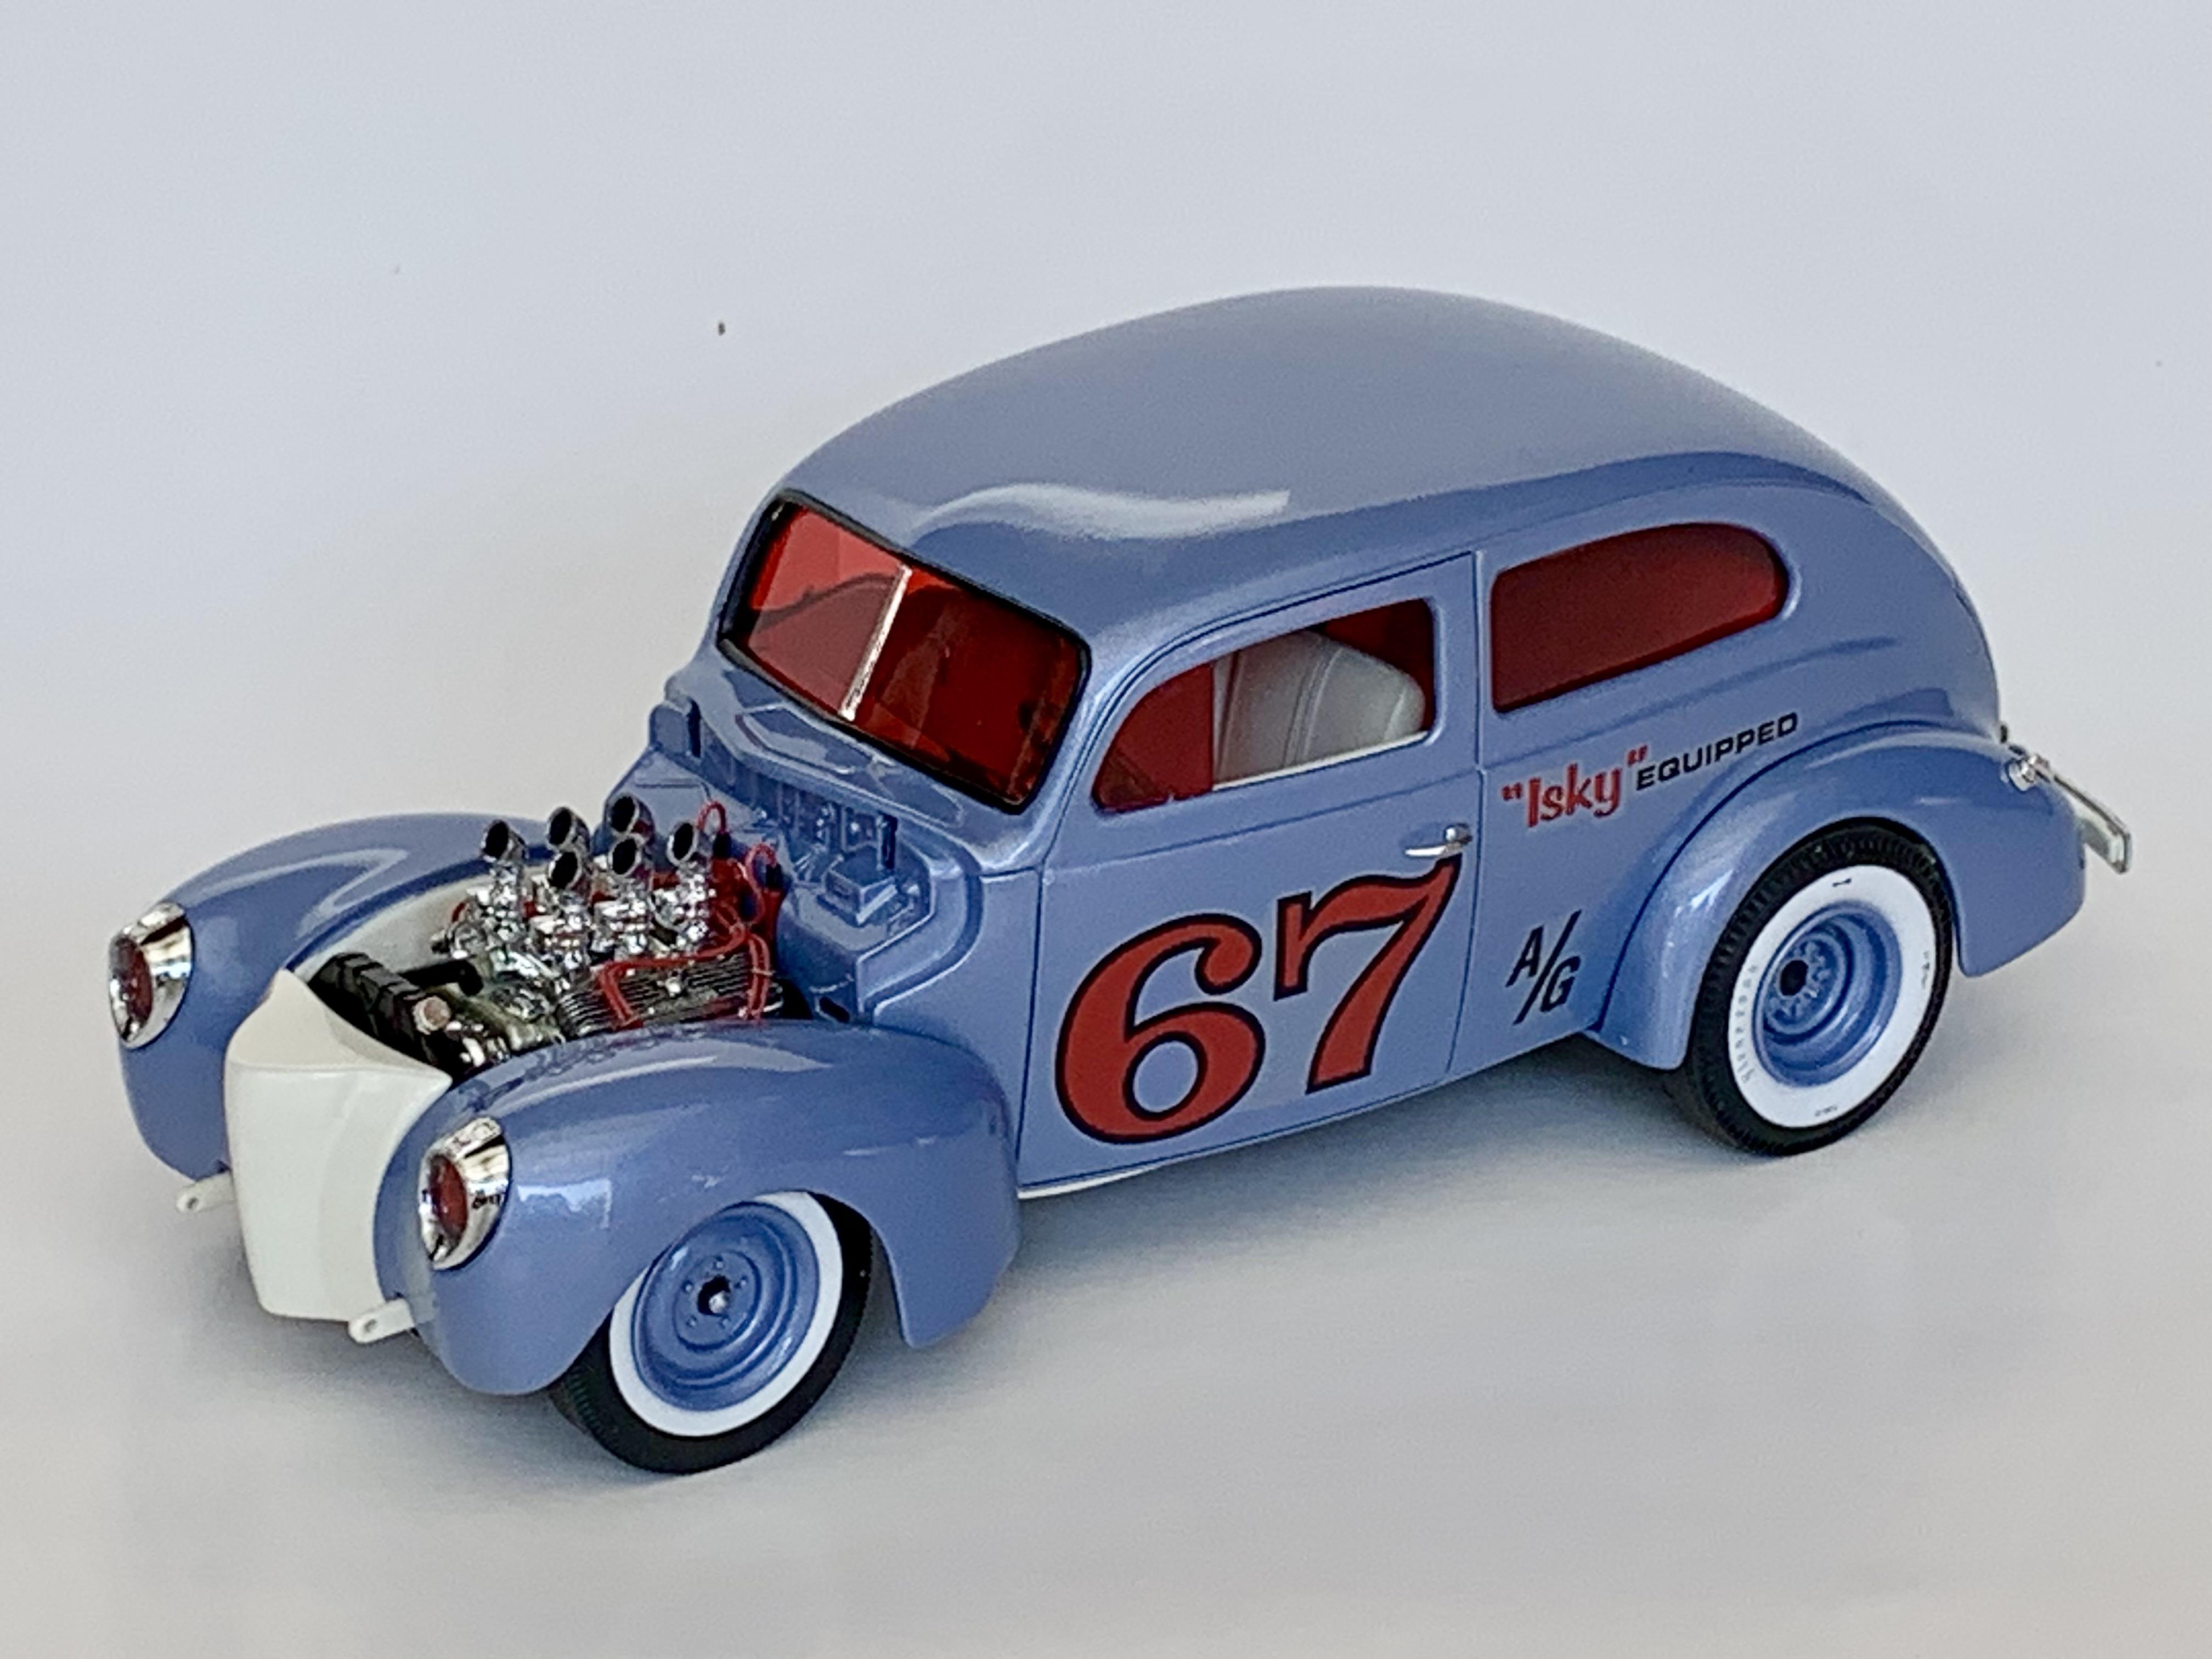
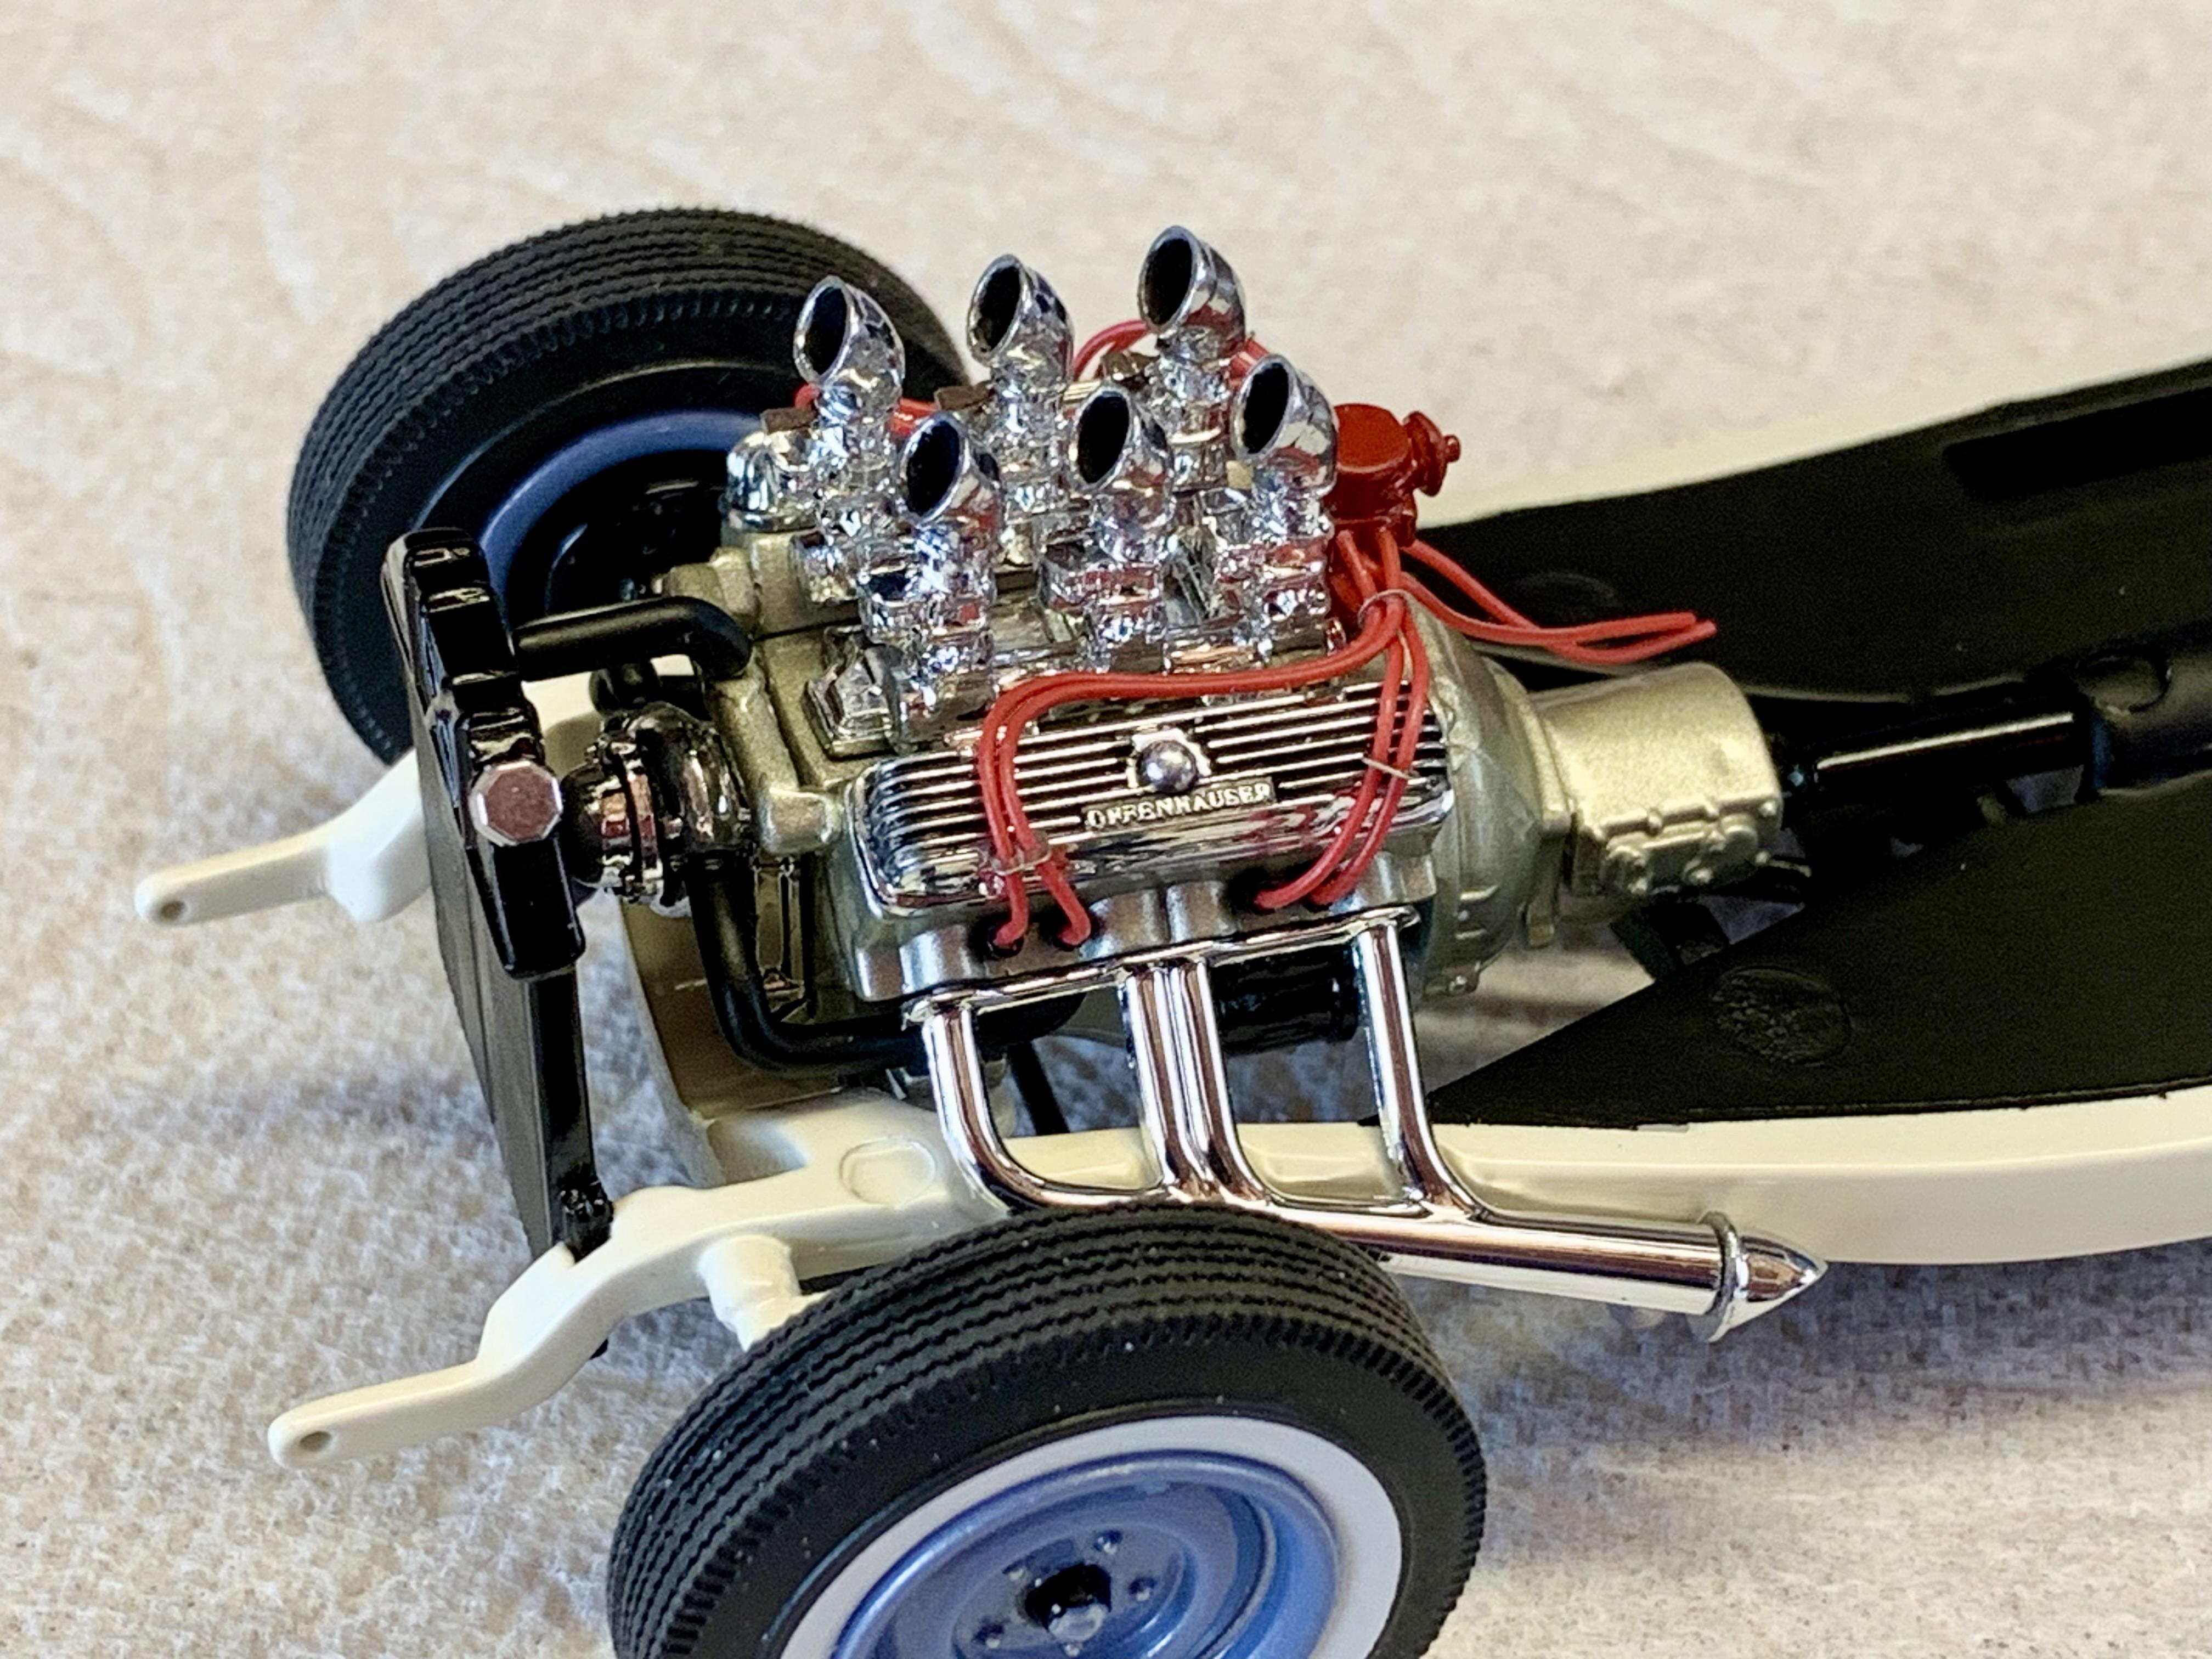
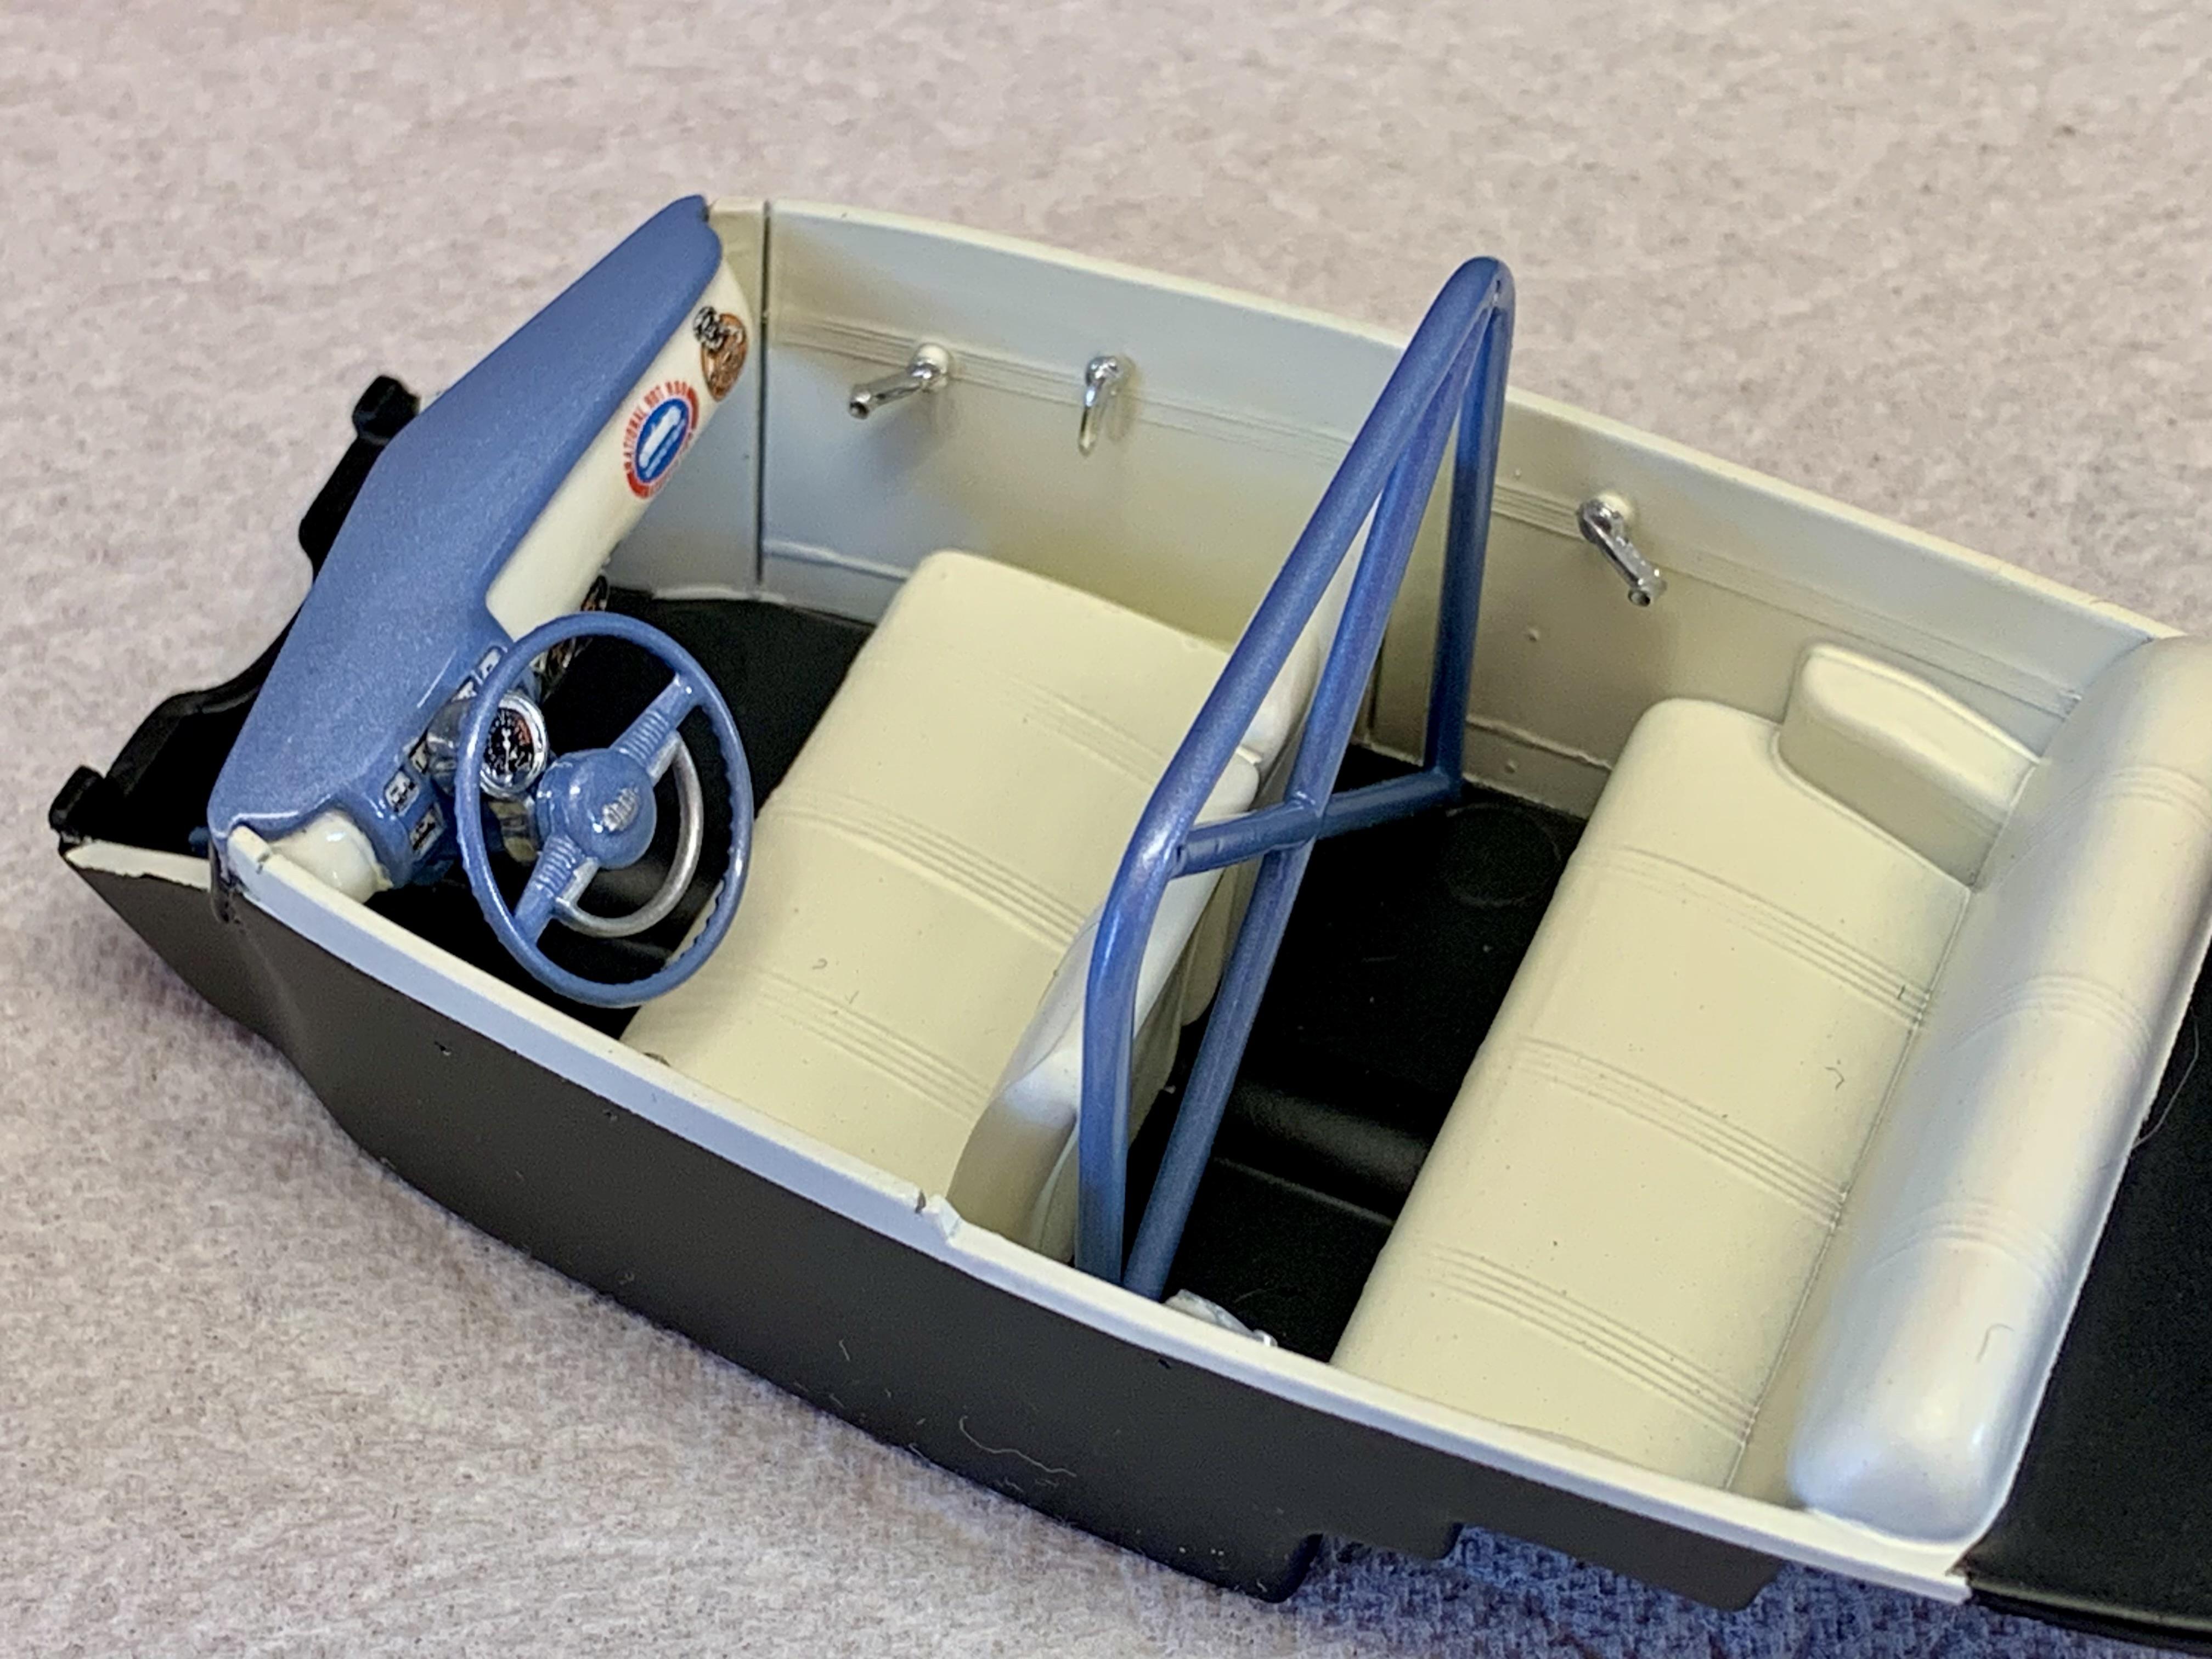
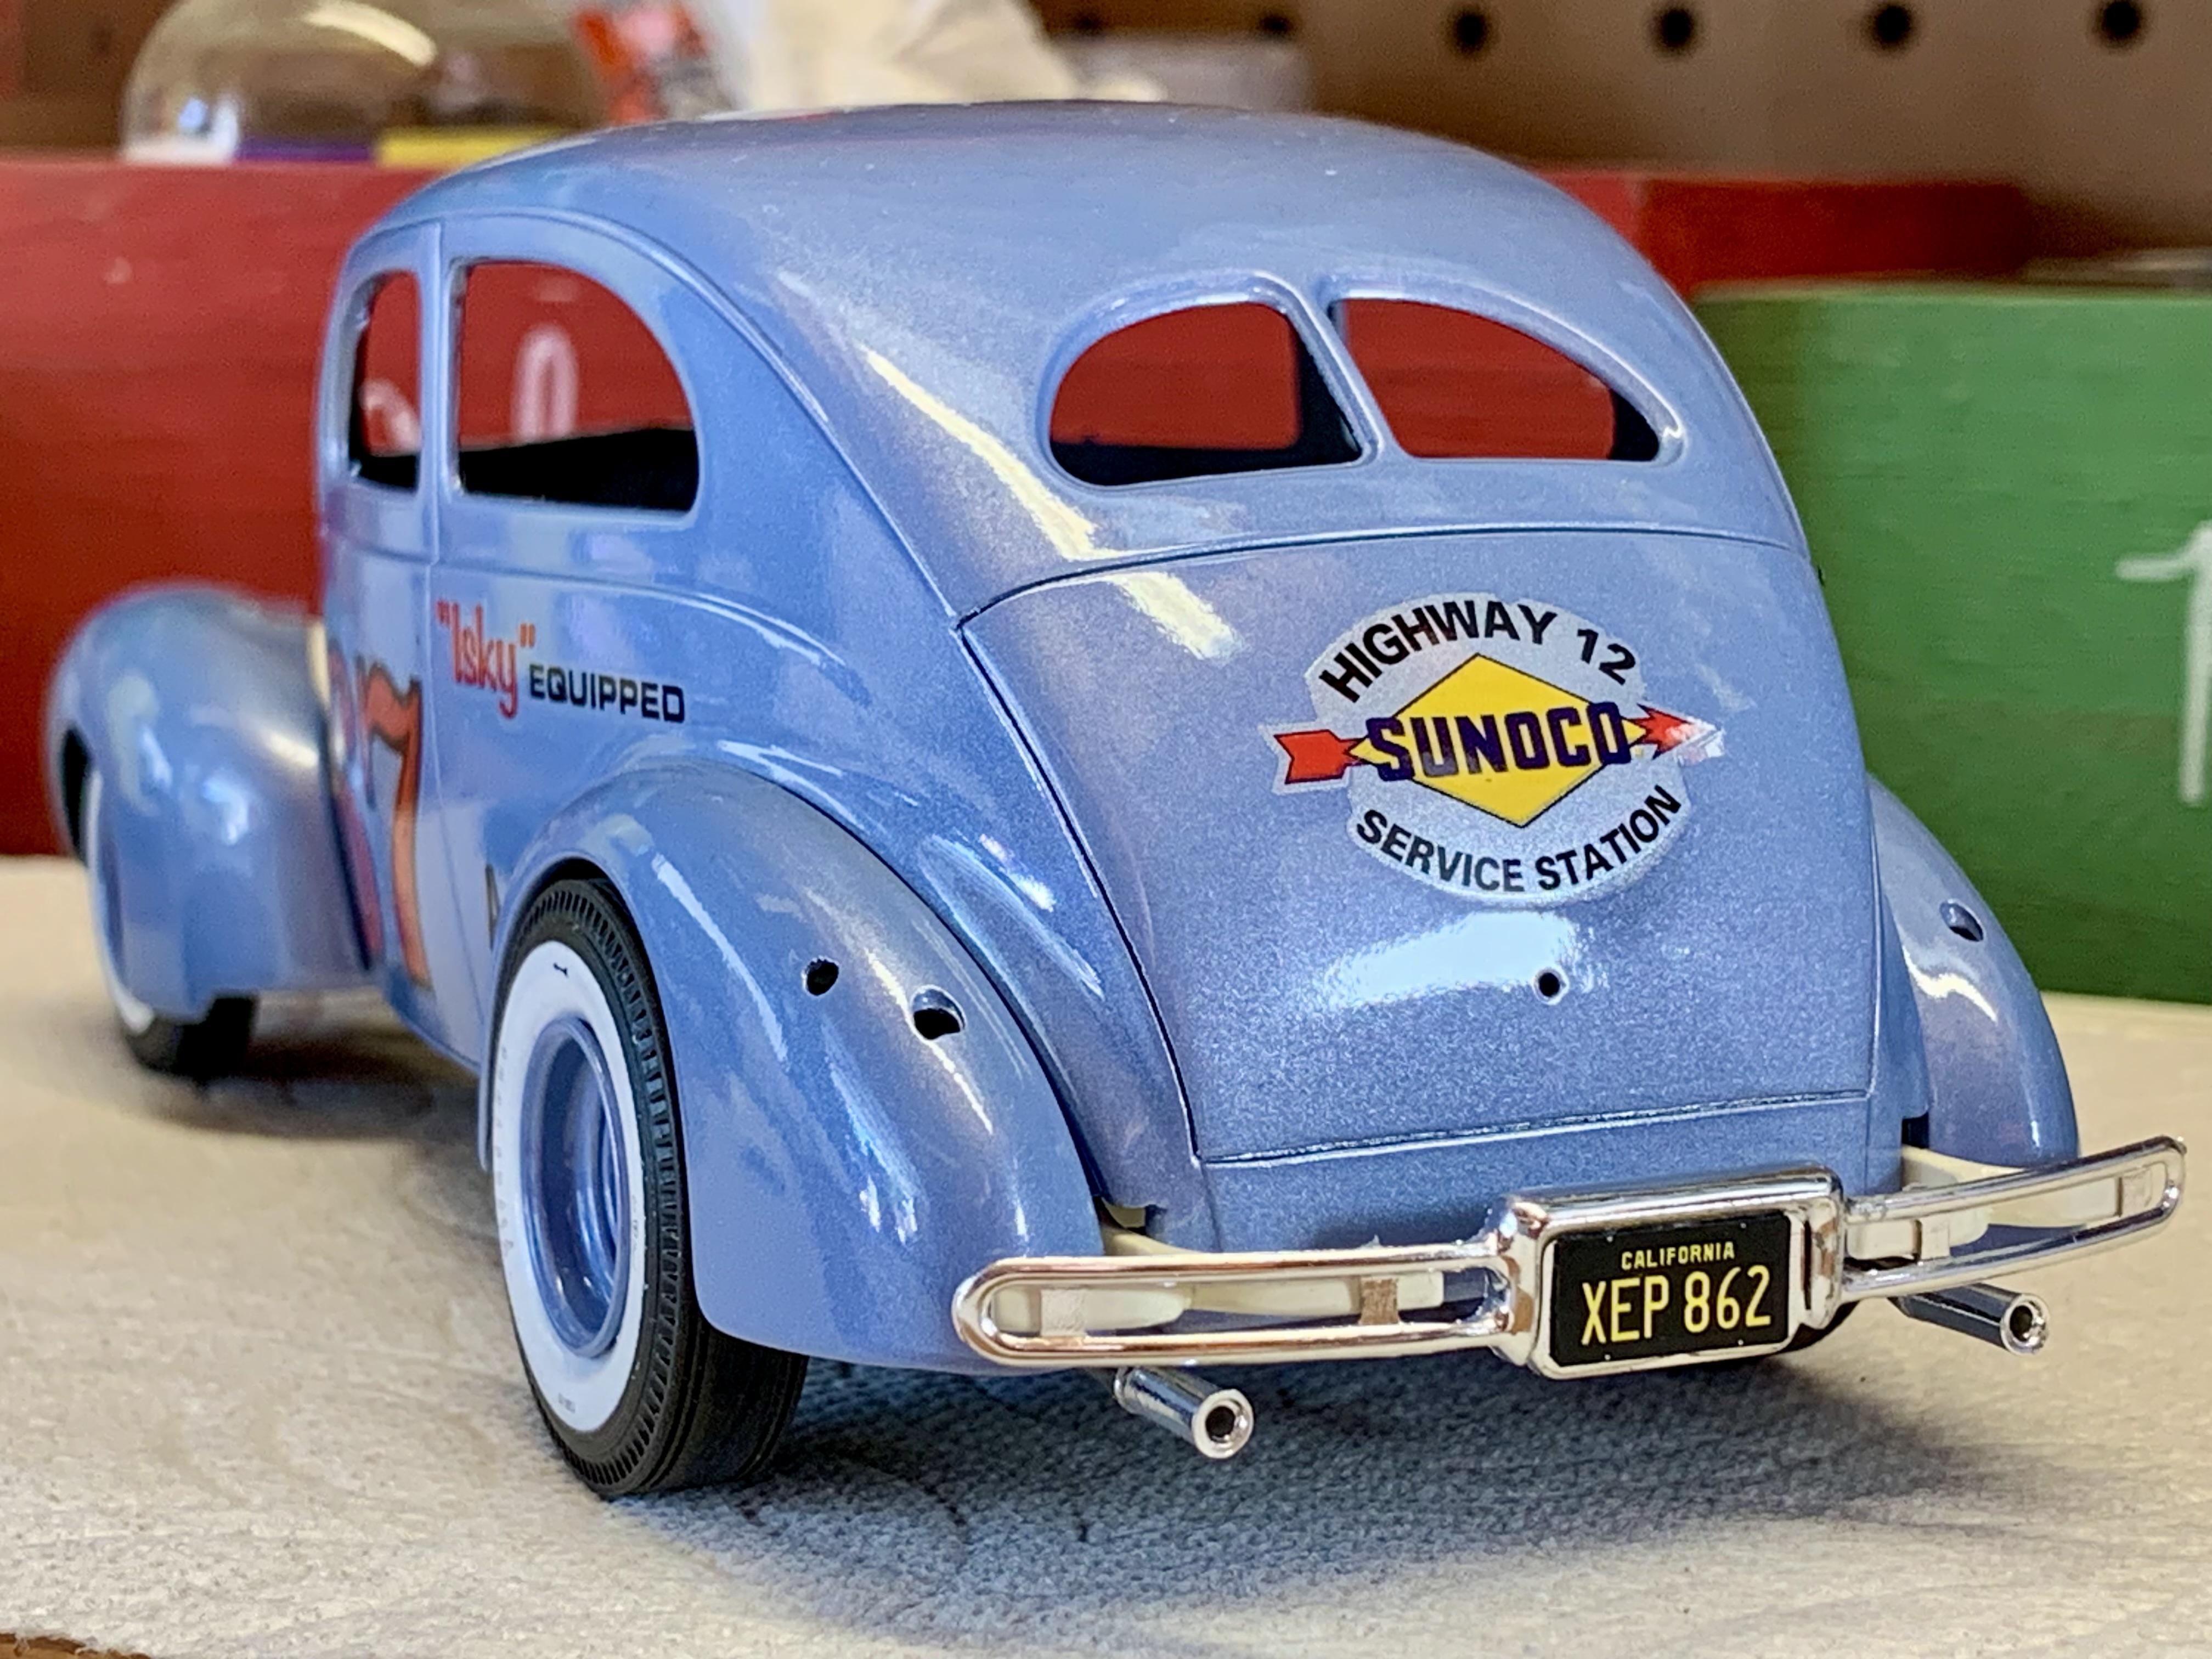
This project came about to participate in an AMT Trophy Series build-off on the niche forum, Traditional Rod and Kustom In-Scale. It wasn’t necessary to use an original Trophy issue, reissues were welcome as long as the original release was in the Trophy series. I started with the most recent retro reissue of AMT’s 1940 Sedan and set out to make a generally period correct Gas class competitor focused on about 1961. To achieve that the following changes were made - AMT 36 Ford optional Pontiac engine block/trans. AMT parts pack Pontiac engine heads, valve covers, front cover and Spalding Flamethrower dual coil distributor. AMT 32 Vicky 2x6 log intake. Revell 40 Ford Stromberg carbs. Replicas & Miniatures scoops. AMT 40 Willys Lehman cam-driven water pump. Revell 32 Roadster headers. - Kit stock front wheels. AMT 49 Ford tires, special narrow slicks and rear wheels. - Kit roll bar, auxiliary gauge panel and tachometer. AMT 49 Ford steering wheel. - Kit optional solid grill panel. Shaved trim and running boards. Revell 40 Ford door handles, trunk handle and fuel cap. AMT 40 Coupe tubular rear bumper. Front bumper and brackets shaved with drilled stubs to mount a tow bar. - Kit optional red tinted glass. - AMT 40 Ford Coupe add-on left side exhaust pipes with rearmost tailpipe sections and tips from Revell 40 Fords. - Various AMT retro decals. - Tamiya rattle cans, Pearl Light Blue and Racing White. Thanks for looking and comments welcome!
- 23 replies
-
- 24
-
-
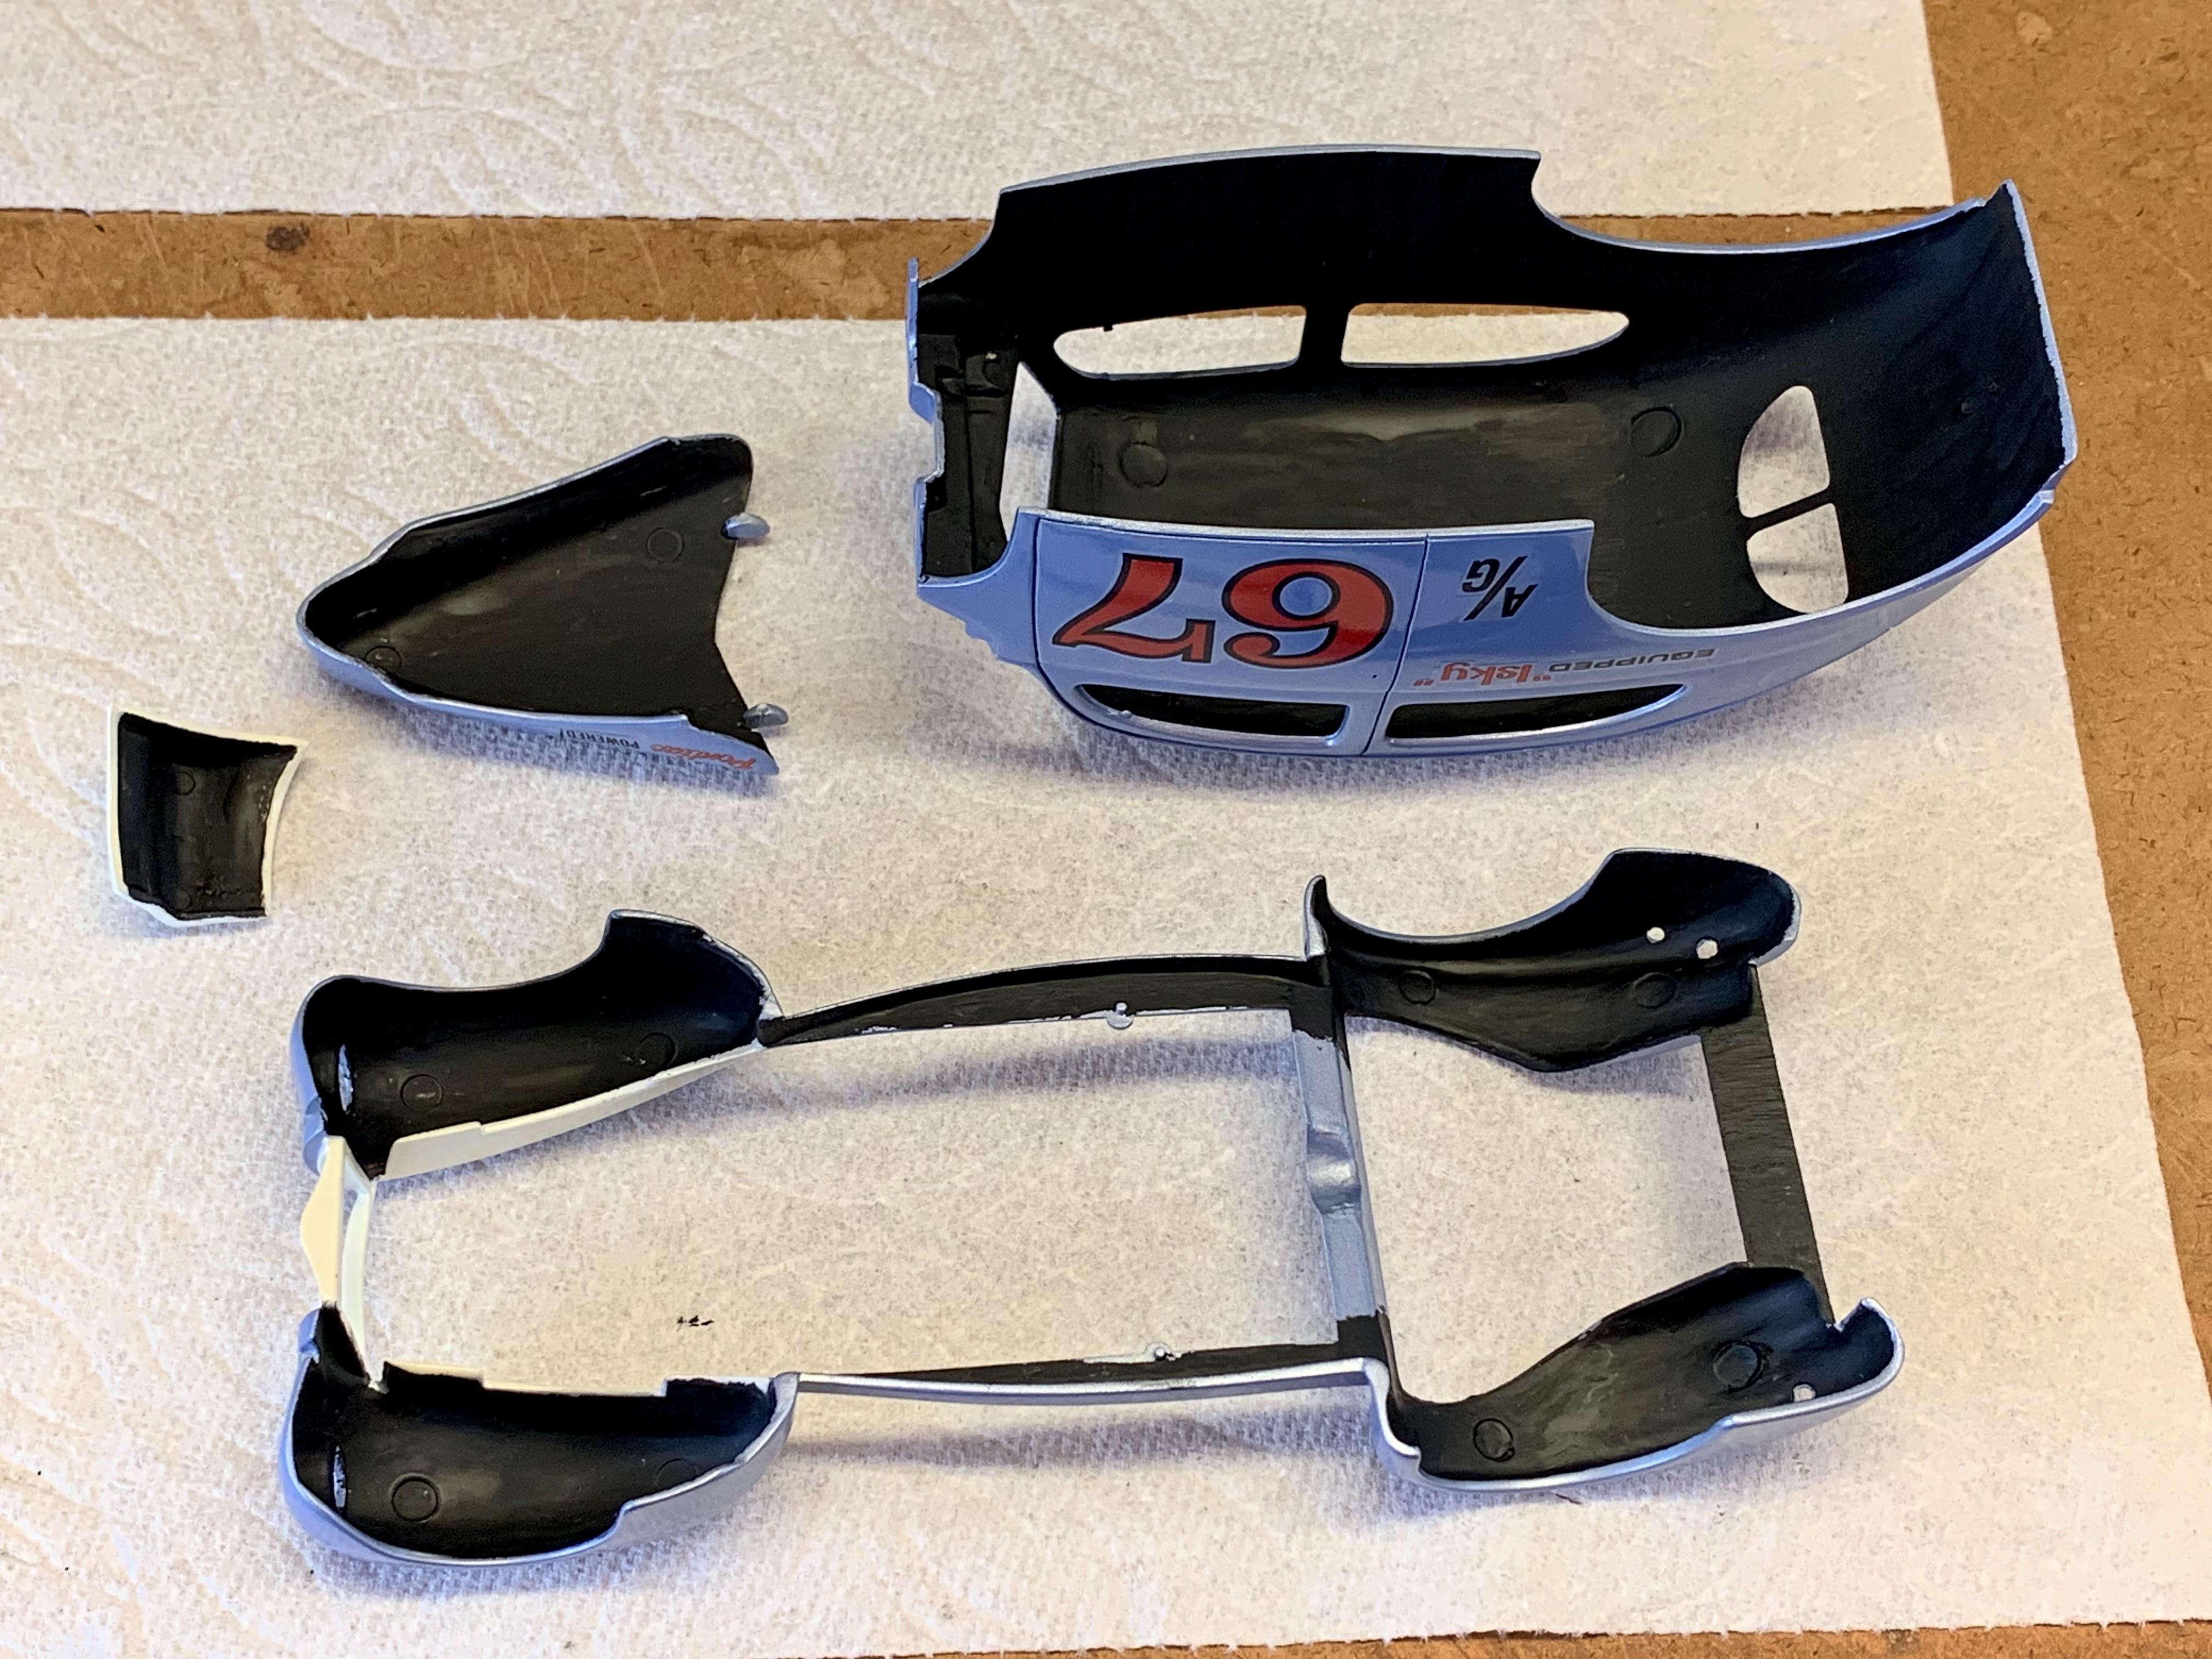
My last post in this thread was November 2 of last year, back on page 22. At that time I was just needing to paint the roof insert flat black and blackout the underside of the body, hood top and firewall. Well, look what finally happened today. It only took 10 months! 🙃
- 732 replies
-
- 13
-
-
1940 Ford Sedan Early 60’s Gas
Dennis Lacy replied to Dennis Lacy's topic in WIP: Drag Racing Models
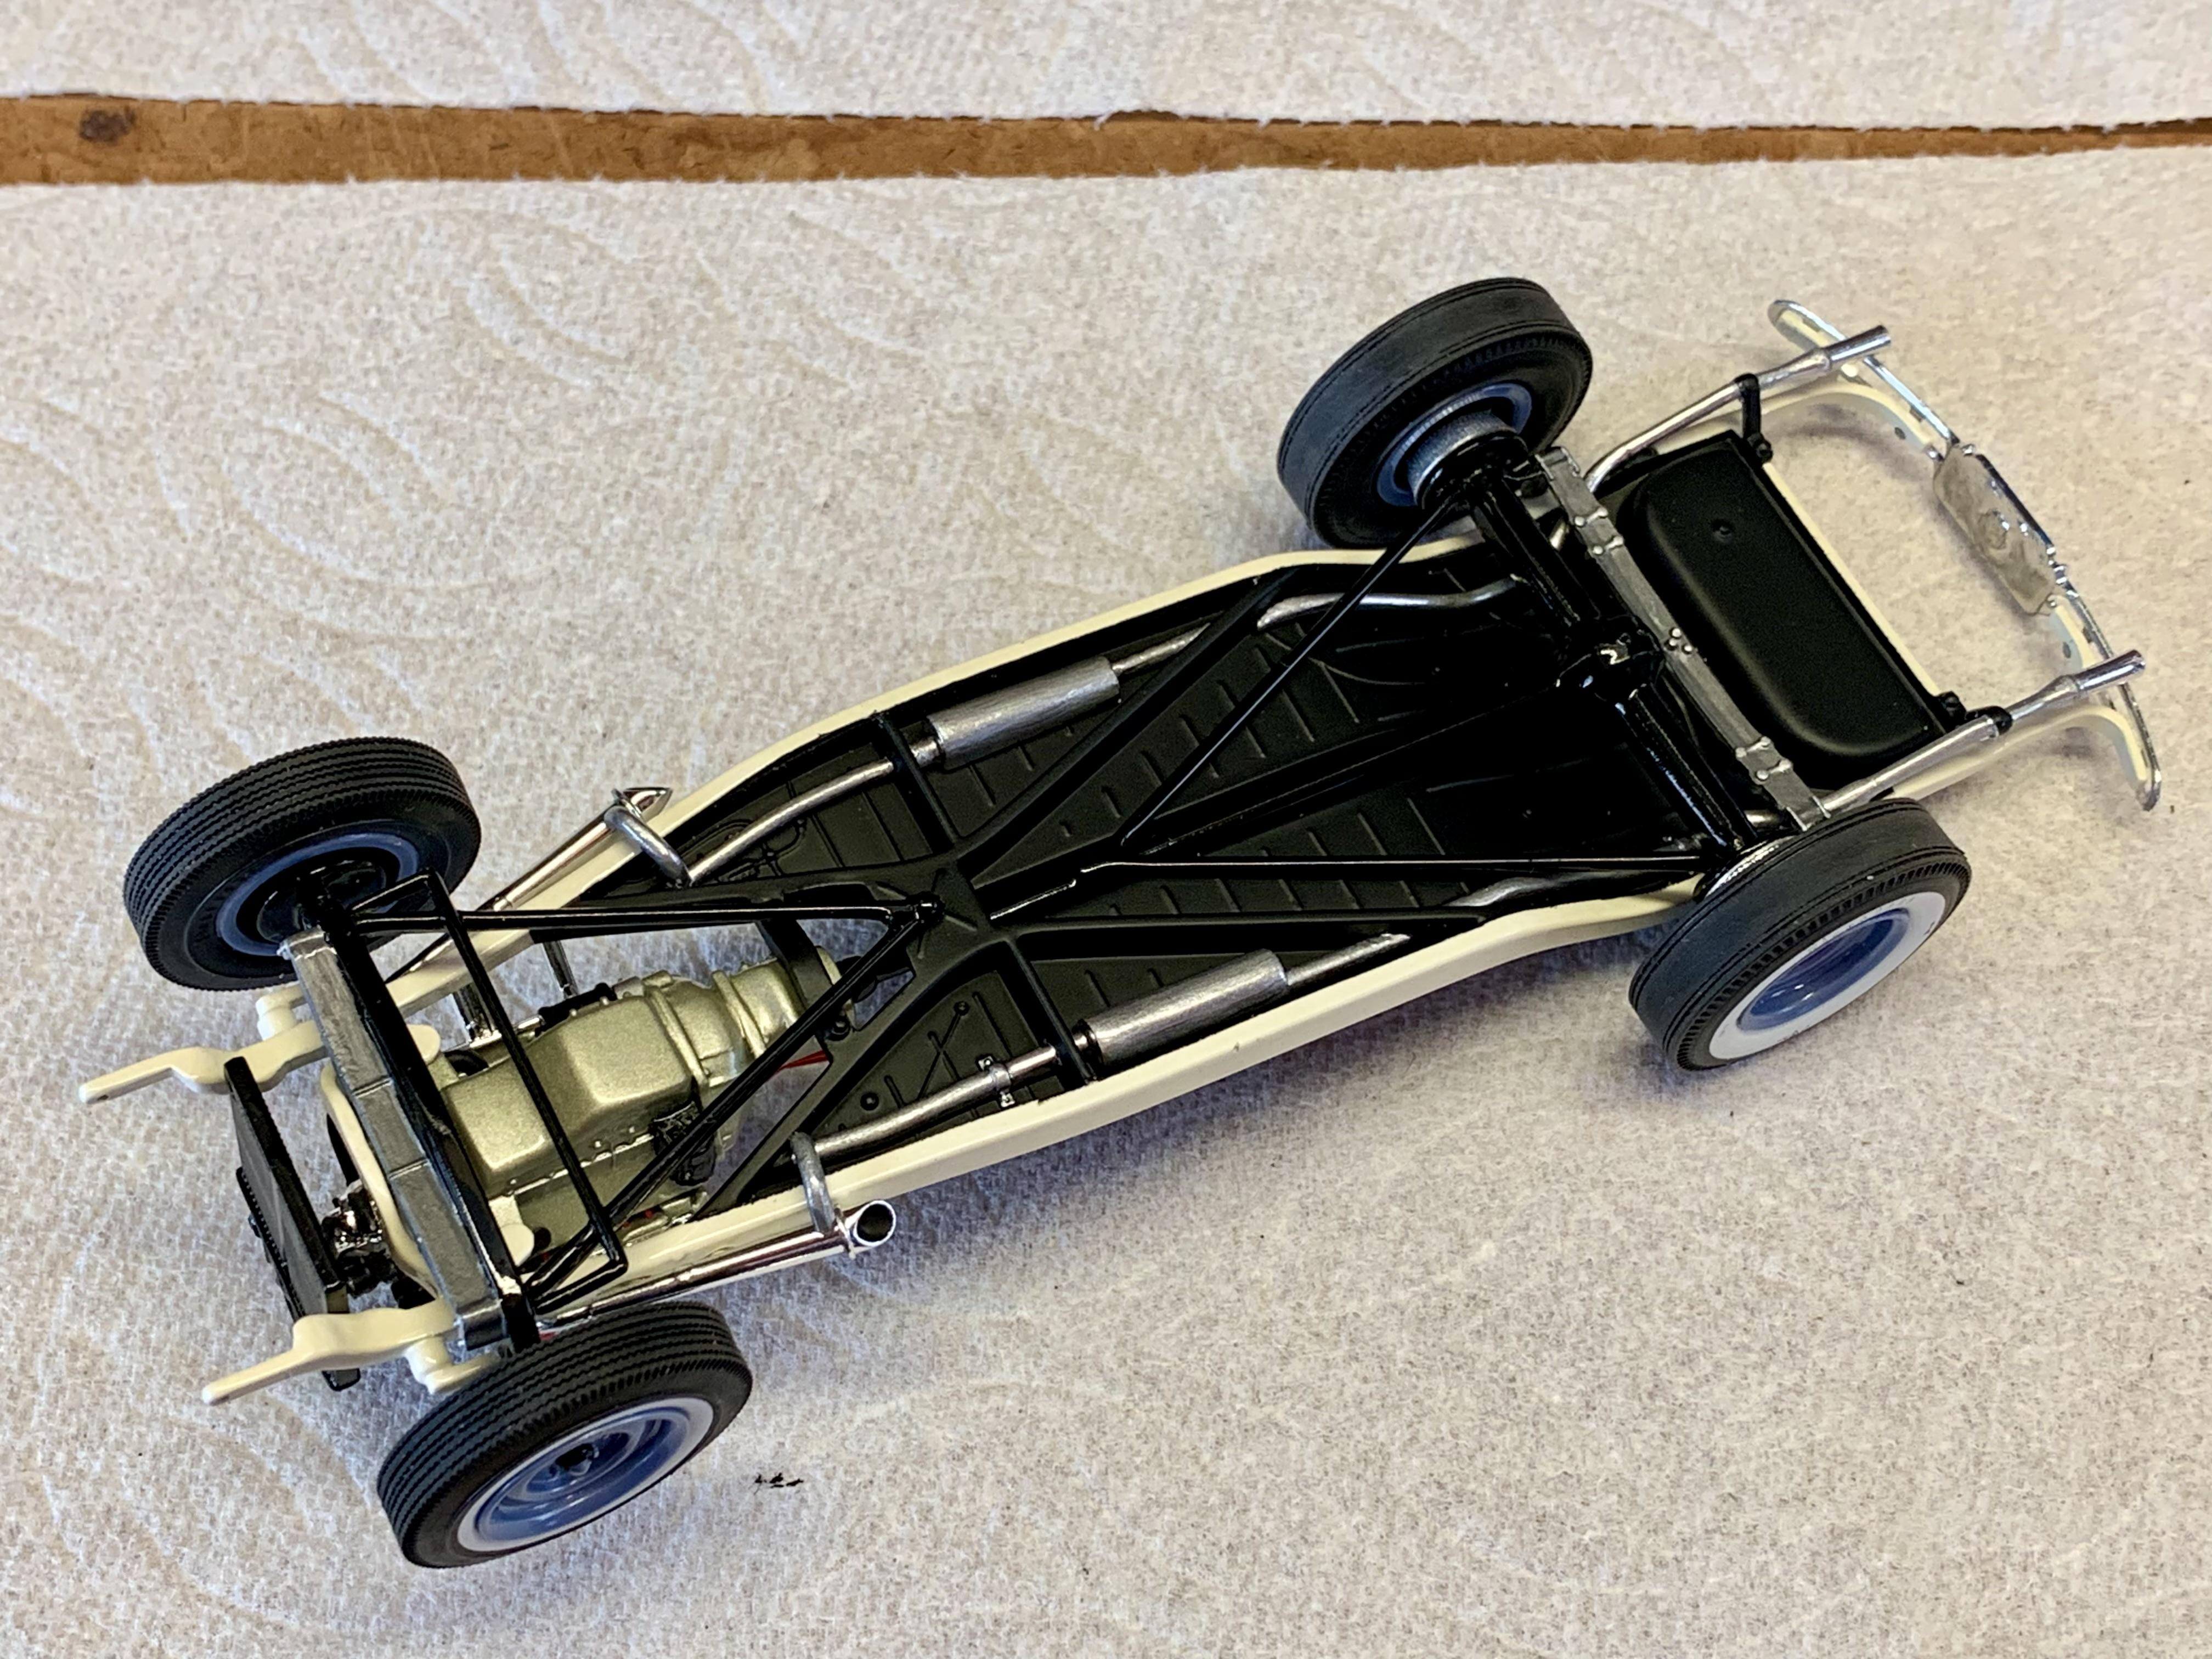
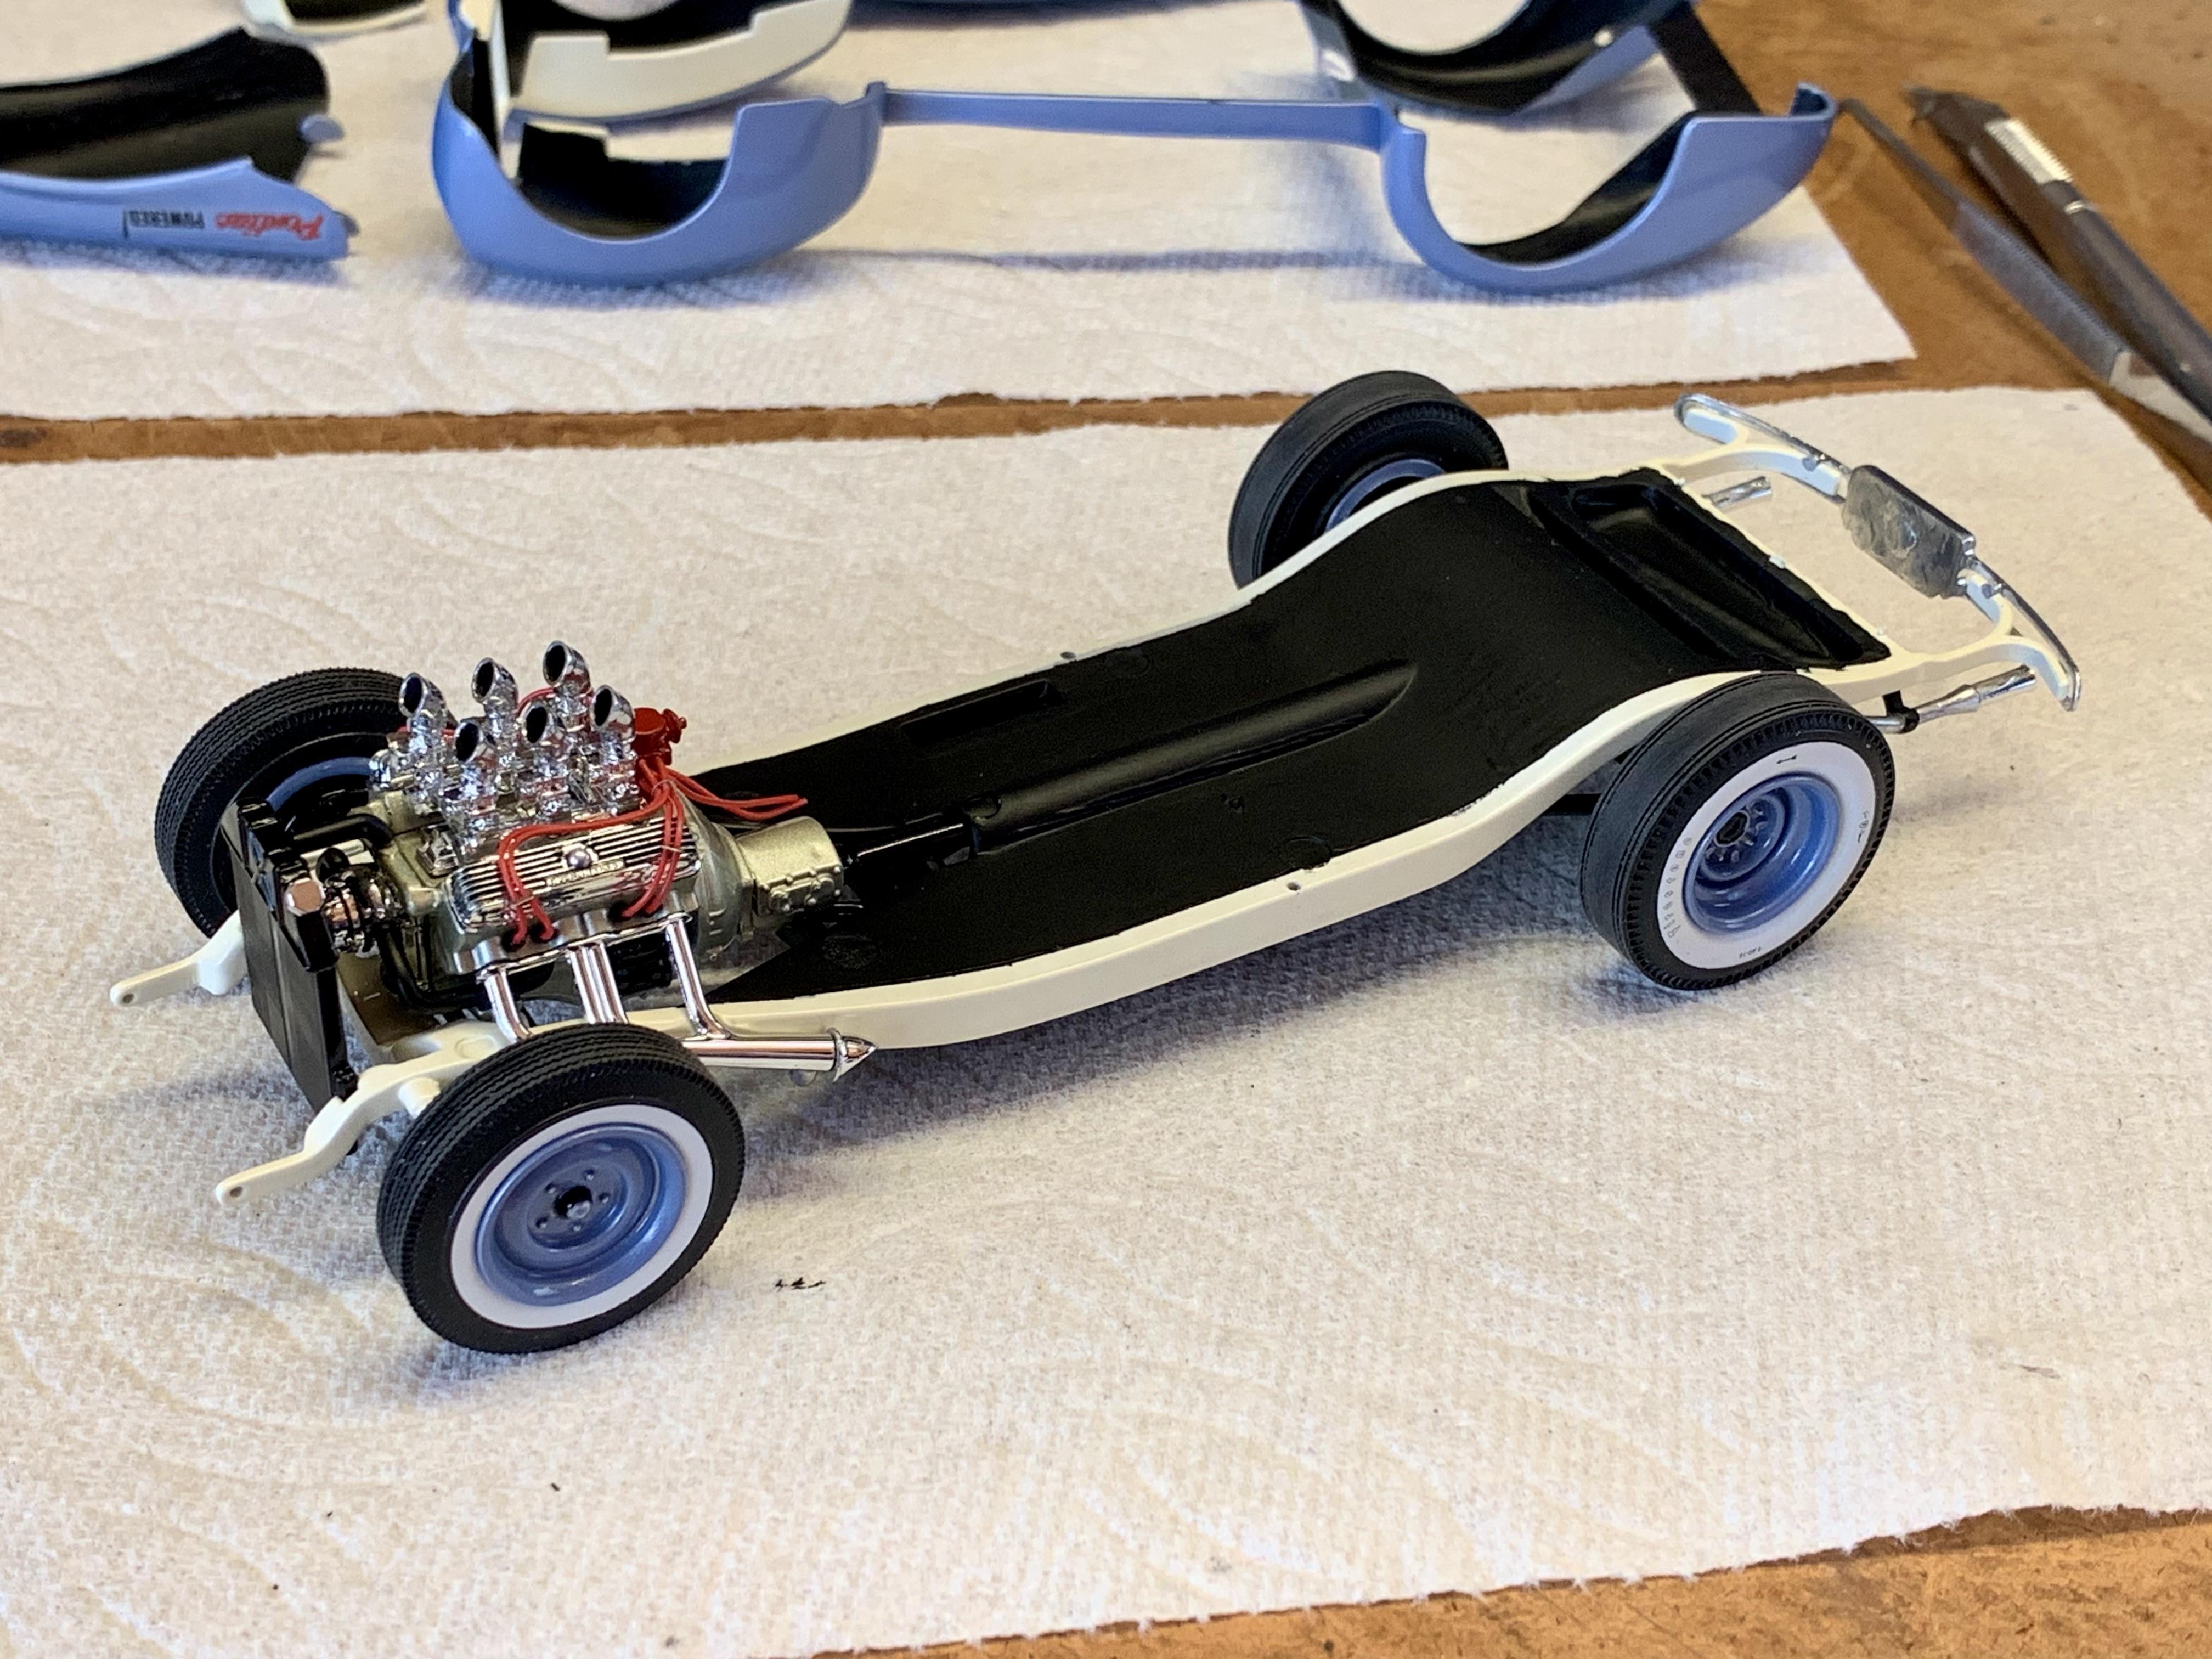
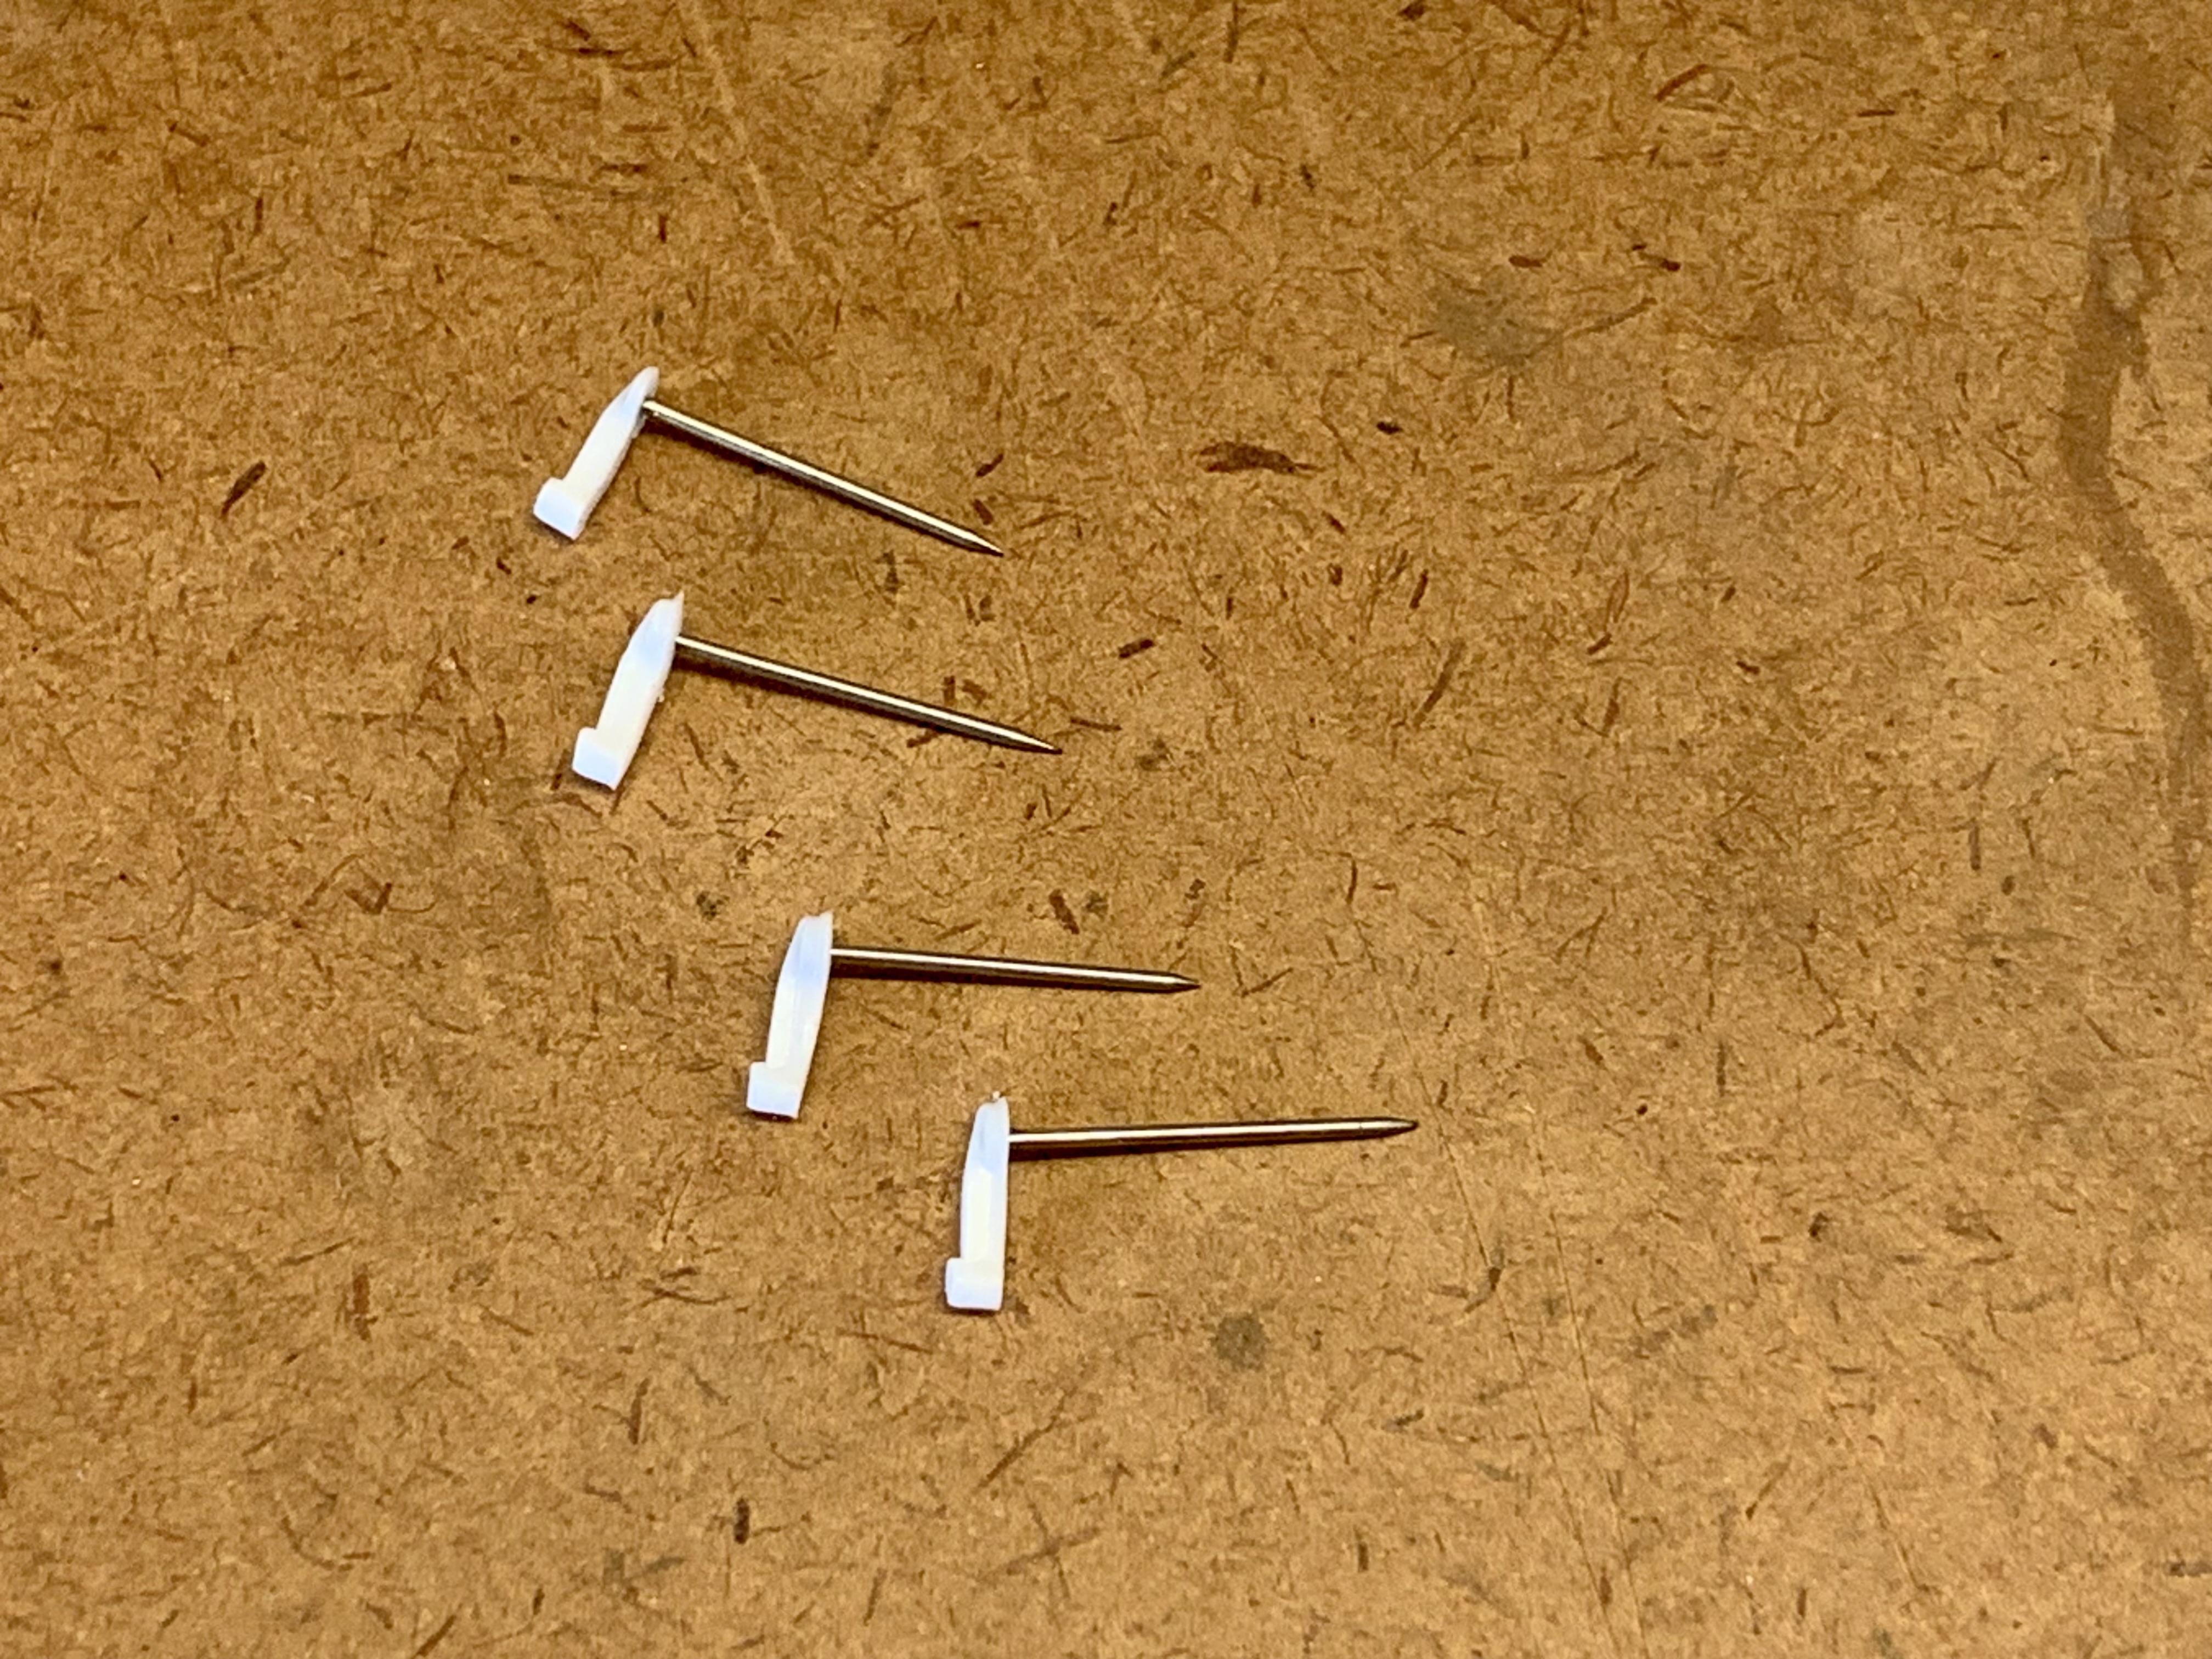
Got the last of the details finished for this project. At this point the only things holding up final assembly is needing to paint the front and rear window trim and then polishing & waxing the body. Engine is glued down for good along with the radiator and hoses. The connector pipes from the headers to the exhausts are installed and painted. Finished chassis. The undersides of the body, fenders, hood and grill are painted flat black. After some arm twisting of my friend Ed at Drag City Casting, I convinced him to make me 30 sets of interior door handles and window cranks that he used to supply with his now discontinued tuck & roll interior sets but still had the molds handy. I received those last week. I had previously come up with the door handles so I fixed up 4 window cranks with pins, “chromed” them with a Molotow pen then installed. Last but not least, mounted an early 60’s license plate to the custom rear bumper. Hope to have it finished and Under Glass this weekend.
- 69 replies
-
- 10
-
-
Building the AMT Double Dragster Streamliner (again…)
Dennis Lacy replied to OldNYJim's topic in WIP: Drag Racing Models
I think this is the best approach I’ve seen to the streamliner body. Good thinking! Ya know, as an original Trophy Series kit, this definitely qualifies for the KISS group build and nobody has entered a Double Dragster yet…