

diymirage
-
Posts
3,599 -
Joined
-
Last visited
Content Type
Profiles
Forums
Events
Gallery
Everything posted by diymirage
-
that buick is awesome any more pics of it ?
-
i like it how there is no hood but the hinges are there, makes it look very authentic
-
nice job i like the personal touches 5 buxs you say ? i needs to find me a big lots
-
thanks i think the clear was still curing when i wrapped it up the whole thing took me about 3 weeks to build, pretty intense weeks what really cost some time was the roof, the kit got started as a ragtop so there was a tone of primer sand primer sand primer sand to get the vinyl look of. then i had to graft it to the body and that took some trail and error but all things considered i am really pleased with it
-
i just used a 70 CFM bathroom fan build into the bottom of the booth
-
thanks, it is tad higher then i wanted it to be but i ran into a snatch i used the aftermarket rims that spike provided and when i had them installed the rims were recessed closer to the center of the car so they would not spin freely. i decided to install the rear risers from the yankee challenger kit to bring the wheel up out of the tubs i do think it looked better when it was a little bit lower to the ground but i was willing to sacrifise that for free spinning wheels (i thought the origenal stance was too low anyways: this is without the risers)
-
moved to the under glass section http://www.modelcarsmag.com/forums/index.php?showtopic=16644
-
well, here she is the kit is the AMT jhonny lightning 1970 R/T challenger mods include a steel roof (the kit is a ragtop) custom roll cage and rims 426 hemi this was my first attempt at wiring an engine as well as flocking the interior so here is the car suposidly inspired by this one and here is the car itself let me know what you think
-
i remember following the WIP of the camaro that would be my vote
-
SPIKE, dont worry about it. it might have just been me, too anxious to aply them. its no bi deal, i still have 2 weeks to finish this UNFORGIVEN, i love the paint these guys make, its 4 dollars a can at meijers and the sheen is very deep it is the same paint as i have on my deathracer now, dont get my phone confused with the wifes mine is about 3 years old and has NOTHING on it, other then a phone, these pics were taken with her blackberrie storm i got her that for Christmass because she needs some sort of PDA for school GREG, thanks for the offer but i think i have something worked out with biggary so there should be a set on the way soon if that falls through or goes south i will definalty take you up on that
-
ran into a few more problems one of them was in the spray can so i bought different paint this is called painters touch deep blue i think it is pretty close to the concepts colour my biggest problem however came when i went to aplly the decals , they fell apart im guessing they were too old or i tried to slide them off to fast , either way, they are toast so if anyone has a set of T/A challenger decals ...pretty please anyways, here is a quick mock up picture
-
yeah they do. i ran into a little problem mounting them, it seems the rear tires sit to close to the differential and they were rubbing the inner wheel wells so i used the risers from the yankee challenger (im guessin this kit uses the same tooling since i found some extra parts with it) to raise the rearend of the car up it has a wicked cool stance now and the wheels spin freely
-
added the first coat of colour to her today i used a spraycan i've had for several years now and the nozzle was a little bit clogged up so it will need a decent sanding once it dries but no biggy so this is just a preview of the colour
-
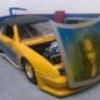
here is a little mock up guys, just to get the flavor of it as you can tell the engine is done (minus fanblade) and the wiring did not come out too terrible for a first try after all i attached the top and ill pick up a can of sandable primer later on today to make sure it all gets smoothed out. i also smoothed out the seam of the front bumper, the gap was too big imho. (well i aplied the putty, ill smooth it out before clearcoat, i promise) love the way these wheels look on there (thanks spike) they will sit a tiny bit further back behind the wheelwells during final assembly once every thing comes back apart ill snap some shots of the interior (snatched the wifeys blackberry storm, cant believe the camera on this thing) let me know of you have any suggestions or questions and dont forget i still need the "342 hemi" badges
-
love the bungee strap its little touches like that that set a build of, its like the topper to a great buid thanks for sharing
-
"The Fast And The Furious" 99 Mitsubishi Eclipse
diymirage replied to Car Crazy 81's topic in WIP: Model Cars
got to love the idea though, i have a boyd ford coupe my mother in law gave me for Christmass a few years ago and i dont care much for cars from that era (40s) nor for fords but it makes it a whole new challenge same with you eclipse, make something out of it, it would be fun to build it because it is different from what you are used to but whos stopping you from slapping a slant 6 or even a hemi in there ? make it your own man -
practice makes perfect i guess ill have some decent pictures when the wifes forwards them from her storm (early Christmass present) i should also me able to ad some pics of the top attached to the body before the day is over. im not sure if i trimmed those wires anymore since that first pic or not but i agree, they were way to long to start with it looked like i bought 4 sets of plug wires and only used the ones for cylender 7 and 8
-
got some decent progress again last night i painted and flocked the interior, that was a first for me but i didnt think it went too bad its not as nice and smooth as i want it to be but i guess i cant really expect that the first try right? i also ran into some problems with the bondo, it seems my hardner didnt work so i had goo all over the top, had to scrape it off with a knife and start all over right now the top is attached again and the whole body primered im guessing tommorow night ill be able to start bondoing again
-
needed a whole box for it huh thanks alot bro i just might get this baby done in time for Christmas
-
thanks i think when i build that car i dubbed it "muscle made modern" still lots of chrome and 440 sixpack power but with a modern paintjob and tainted windows (still looking for window tint)
-
made some progress over the last days friends. i maneged to get the roof smoothed out to a satifectory level and just now glued it on. i will need to do some bondo and more sanding to make it look like a complete shell but the worst part is over (i hope) i also finished my very first wired dizzy im not sure of im proud of it yet but i guess for a first time it is acceptable. the only other big progress is the main body of the roll bar the concept has a roll bar with a complete cross in the center so i think i need to ad one more bar but again, the worst os over sorry for the louzy pic, and as always, remarks and suggestion are always welcome (so are those two missing "426 hemi" badges)
-
cris' parts have made the favorites lists how much does he charge for shippings ? anyways, i thought i would post some progress as you can tell i was to eager to get started to head to every good word spoken, it will NOT happen again. but i managed to get the wires in (except for the dizzy feed) im now waiting for the gleu to dry, then ill route them to the valve covers and trim them (sorry for the louzy pic)
-
looking great i love the details and i for one think that is a very sexy colour for a RR thats what i painted my 74 GTX
-
thanks guys the dizzy i have is predrilled and i did not manage to drill all the way down into the block, my main problem was that my model glue just wouldnt hold my wires in place i guess ill give sure gleu i try. i did find the firing order online and was trying to go by that now, does it make a difference where i start, engine or dizzy ?
-
allright guys, i bought a wired distributor for the chalenger but i cant figure out for the life of me how ti attach the wires to either the alluminum dizzy nor the valve covers i drilled small holes in the covers that the wires fit in but not the boots but the wires still keep popping out i tried glueing them in but no luck how do i do this ? (i also need to know how to attach them to the dizzy)