

diymirage
-
Posts
3,599 -
Joined
-
Last visited
Content Type
Profiles
Forums
Events
Gallery
Everything posted by diymirage
-
looks awesome , but i too have to point out something you missed the seatcovers seriously thoug, looks good very nice. who made this kit ? i bought one a while ago and it didnt come with the roadrunner stripes so this is how mine came out (not quite done yet) if i ever got the chance to build a replica of my 1990 opel E kadett (pontiac lemanse stateside) i'd be all over that kudos on the achievement of building something you owned
-
where to find dioramas
diymirage replied to diymirage's topic in General Automotive Talk (Trucks and Cars)
awesome, thank you. and just in time seeing as how i got a birthday coming up -
where to find dioramas
diymirage replied to diymirage's topic in General Automotive Talk (Trucks and Cars)
i would like the fujimi if i could find an affordable one where would i find chris? -
i mean, the easy kit ones, like the garage that comes with a floor two sides and some tools i see them on ebay every once in a while but it happens so rarely prices are pretty high. is there a website i should go or a fellow member looking to donate ?
-
death race car build off (official WIP page)
diymirage replied to diymirage's topic in WIP: Model Cars
finally mounted that cowplow and in case you guys didnt qiute get it, i choose the 69 charger because of its durability shown on a certain tv show just thought i would pay homage to. -
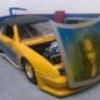
almost 2 months later and shes coming together pretty nicely everything is just mocked up because i still want to tint the windows other then that, all that is left to do is aply one or two more coats of clear and buff the snot out of it oh yeah, i also need to finish detail painting the rear end the kit came together very nicely, my only real complaint would be that it did not come with the same decals as the box art car had. it did come with some optional parts i did not expect, there was the installed aircleaner, the massive wing and a fully chromed steering wheel, aswell as bucket seats and a 3 paint roll bar i think it looks good like this aswell though, the "plymouth GTX" decals belonged to the car, the "plymouth" windshield banner was left over from the hemi cuda, plates came out of the parts box and the *440* came from the 68 charger streetmachine this was also the first time a tried flocking an interior and even though all i had was tiny sand i think it looks pretty decent.
-
dogdishes it is (that gunmetal came out kinda light didnt it?) anyways, i think it will look good on steel and dishes, thats the way i plan on doing mine (my 68 charger is last in line, after the 69 charger deathracer, the 74 plymouth GTX the chevy bell aire and the dodge truck)
-
i got it i got it i got it you should build [insert drumroll/] the buick 8 from the book "from a buick 8"
-
awesome. i asume i can pick those cloths up at any autozone like shop ? i did mean vinyl=final, thats how it sounded in my head i think semi golss black would be the best match with the interior which way are you going with rims?
-
that paint looks awesome what cloth did you use to shine her up like that ? i was thinking of waxing my GTX model with turtle wax (this is the first model i actually cleared and will wax so im still looking for the right way) and if i can get it to shine like yours ill be very pleased so what is the vinyl word on the top? (lil wordplay there)
-
looks good, very well weathered but if it were me i'd run it oh wait, i do :
-
i severly hate snow i live in western michigan and on a bad day well get over a foot of snow in a few hours not much fun at all (althought i do kinda enjoy snowplowing on my lawnmower)
-
finished her up today added a stand for it with a shelf so i can stash rattle cans on my shelf and the air compressor underneath it. i also finished up the wiring, now the fan has a switch right on the front of the booth, and i added two grounded outlets, one for the air compressor on for who knows what. the light is hard wired in (has a switch on the back of it) i also recesed the light, i cut a hole in the top just lagr enough for the entire light to fit through and then i screwed a piece of clear plexiglass underneath the hole thing is attached to a 12 foot cord so i can put it pretty much wherever (the exhaust tube is 25 foot) i also went through it and seal of every seam with silicone ill post up pick prolly over the weekend , camera is out of batteries
-
welcome aboard that flame job looks awesome you'll fit right in here. we have a very extensive tips and tricks area which it doesnt look like you need to visit looking forward to see more of your work nice display dio to BTW
-
here ya go Ge 6:13 And God said unto Noah, The end of all flesh is come before me; for the earth is filled with violence through them; and, behold, I will destroy them with the earth. Ge 6:14 Make thee an ark of gopher wood; rooms shalt thou make in the ark, and shalt pitch it within and without with pitch. Ge 6:15 And this is the fashion which thou shalt make it of: The length of the ark shall be three hundred cubits, the breadth of it fifty cubits, and the height of it thirty cubits. Ge 6:16 A window shalt thou make to the ark, and in a cubit shalt thou finish it above; and the door of the ark shalt thou set in the side thereof; with lower, second, and third stories shalt thou make it.
-
make it a budget build steelies with dog dishes wrapped in slicks
-
looking good man all the paint seems to be spot on one of these days ima build me a rally car maybe do a theme car, like the cop evo in taxi 2 that be awesome or a redneck rally car you know, with the KC covers over the lights
-
you guys inspired me so here she is.......my spray paint booth some assembly required thats more like it. on the bottom of that beauty is a 29,95 bathroom fan from the home depot rated at 70 CFM on the top is a light fixture from my old 50 gallon aqarium (the aqarium died long ago but i cant throw anything out) all the wood was donated by my job (i fished it all out of the junk pile) i had to buy some glue, silicone, a caulk gun the fan and 12 dollars worht of 3 inch tubing (25 feet worth) grand total is just over 55 dollars out of pocket. now all i need to do is caulk the seams and find me a thin sheet of plexiglass to go under that light. i already have the wood cut for the "door" but i cant decide if i should hinge it from the top or from the bottom anyway, lets take her for a test drive i totally love it, no more picking coloured boogers for me
-
What does everyone use for a Convertible Boot cover?
diymirage replied to white00gt's topic in Tips, Tricks, and Tutorials
i have not tried this on entire tops but i was readin an article online a while ago concerning the ragtops and how to make them look authenthic. the author showed pictures of a 4x4 with a ragtop he build that looked very awesome what he did was paint the top and while it was still wet cover it with the cheapest toilet paper he could find (the single sheet see through without a design in it stuff) and then once that was dried it he painted it the desired colour and the texture looked great (ill try and hunt down the URL for you) like i said, i have not tried this yet but i have aplied this idea to my junker ford. i wanted it to look like there was a rip in the upholstery so i painted a tiny dirty yellow triangle in the front seat then i got some of the same toilet paper and glued it on (with paint) in such a manner that it looked like it was the upholstery that was ripped and revealing the foam underneath. i was very pleased with it. i know this doesnt quite awnser your question (unless you decide to go with the top up) but you might be able to scratchbuilt a cover using the technique. -
my second car ever was a lemans but by then they were no longer the poor man's got, they were just the poor mans car mine was a 90s 4 door model with a 1.4 engine i would love to replicate it sometime but i dont think anyone ever made a kit of them at any rate, i really love the color combination of the interior on the GTO and the rims look very interesting, the look stock, but not for that particular car cant wait to see paint on it though
-
much like yourself i just got started on the modifying aswell the only mods i have done so far have all been on my deathracer model i opted on two different thicknesses styrene sheeting (though i forgot what the exact thicknesses were one of them was comparable to the thickness of a body panel and the other is much thinner and therefore flexable) i also went with 1/8 inch tubing for sidebars and roll cage sections like everyone said, i totally based it on the model i was building and went by that here are some reference pics of my work so you can maybe get some ideas from that here i removed the fuel tank and added some of the thicker styrene to make it look stock i chose the thicker styrene here because it only needed a very slight curve with tank with styrene the snow plow bumper is also made of the thicker styrene i cut 4 seperate sections and glued them all together (i first build a paper version so that once i had all the angles exactly the way i wanted them i had templates i could copy unto the styrene) the last thing i used the thicker styrene for was the top of the gulwing door i glued a tiny edge of the thinner styrene to part of the roof where the headliner would be and the door is basically laying on that edge. if you get the right thickness styrene it will lay flush if you do it right then i used the thinner styrene to finish up the door and block of the tront windshield in this picture i was not fully done forming the door but the thinner styrene is a little easyer to mold i used the 1/8th tubing to brace the frame and expand the roll cage they also make wicked barrels
-
that is an awesome looking bike bro, nice job that is exactly the secret to his succes, he isnt an over average driver, he is 15 years younger and subseqentially 85 pounds lighter then his opponents and 85 pounds make a heck of a lot of difference on a 320 pound machine
-
looking good lets just hope it doesnt rain
-
why not build the high toned son of a beach from the dark half ? think it was a toronado jantrix, you need a guy on the hood of the car with a guitar playing eve of destruction
-
death race car build off (official WIP page)
diymirage replied to diymirage's topic in WIP: Model Cars
nope, just gonna blow you up into teeny tiny pieces, so small a hook coudlnt even grasp one i wonder if i could put nuclear warheads on there ?