
charlie8575
-
Posts
9,102 -
Joined
-
Last visited
Content Type
Profiles
Forums
Events
Gallery
Everything posted by charlie8575
-

Happy Canada Day!!
charlie8575 replied to Tony T's topic in General Automotive Talk (Trucks and Cars)
Canada Day is your independence day, as I remember? Enjoy your celebrations. Curiosity begs...what is Victoria Day? Charlie Larkin -
Early Chevs from the 20's and 30's
charlie8575 replied to Speedster's topic in General Automotive Talk (Trucks and Cars)
I don't think I've ever seen any 1920s Chevy, except possibly one or two in HO scale, but even that I wouldn't swear to. MPC made a very nice 1932 Roadster, which AMT re-issues periodically. They're not terribly expensive from what I can gather on the used market, you might even find a shop or two with one on hand. I believe MPC also did a sedan delivery, which got irreversibly changed into some custom monstrosity. AMT also did a 1937 roadster and coupe. They look decent built, but from what I've been told, getting there can be a challenge. Monogram makes/made a 1939 SD and coupe as rods, but from what I've seen and heard, can be made stock without too much trouble. There are a few resin bodies to fit the above, too. Charlie Larkin -
I agree with Ed. Very, very strong start, but it needs some other details to tie the scene together. If you don't want to do a tree, how about a fence? You can make one very easily out of strips of balsa or bass, or even popsicle sticks. I'd suggest making the fence "less than pristine." A figure or two might be a nice addition, too. The car itself looks great. Very good job with that. Charlie Larkin
-
Outstanding. Phil, one question. What were you using to engrave the brick pattern on the foam? It looks like a mechanical pencil, but I'm not certain. Charlie Larkin
-
Enamel Paint Source
charlie8575 replied to Tim Wilhite's topic in General Automotive Talk (Trucks and Cars)
Welcome back, Tim. Have fun with your model. As to satin or semi-gloss black, another good paint is Tamiya's X-18 semi-gloss black. It covers well and dries nicely. Testors re-formulated their paints, probably due to some nonsesne purported by the "greenie goblins" so they don't cover as well as they used to. I've found that priming underneath them is an absolute must now for adequate coverage, even with black. I've also found the re-forumulation has made them start taking an eternity to dry. I'd recommend hitting the parts with a hair dryer on low to help speed up the catalyzation. When air-brushing, use lacquer thinner, it thins them out very nicely and they dry almost immediately with excellent gloss in gloss paints. As far as primer, I'd recommend either Plasti-Kote sandable primer (I use gray usually,) or Valspar Lacquer primer that you can purchase at the large chain craft stores, and possibly other sources. The Valspar primer is more-or-less Plasti-Kote at a much more reasonable price. I do find though, that the Valspar primer is a little less heavy-bodied which helps to avoid hiding details, and works well as a substrate for any paint, enamel or lacquer. Charlie Larkin -
Actually, when amber-colored bulbs began to appear in the early 1960s in American cars, you used to be able to buy a special transparent paint that you could put over your clear lenses, making them an amber color. David- GREAT work! And what a beautiful paint job. I will attest that thinning Model Master with lacquer thinner works very nicely. Charlie Larkin
-
Second the question. Second the motion. Another fantastic build of yours! Charlie Larkin
-
I believe R&R does the '58 convertible. I remember seeing one sonmeplace. As to the LaSalles, Buicks and Oldses....yes, I'll take one of each, please. Charlie Larkin
-
That's coming along very nicely. I must agree, the ivory and black (or is it dark blue? I can't tell) go very nicely together, whatever it is. I'll enjoy watching this one. Charlie Larkin
-
On the general subject of getting this stuff to work... I decided to try the MicroScale adhesive and kitchen foil on my GTO. For my first time really foiling, I'm rather happy with how it came out. Not perfect, but I think it'll get better. Does anyone have any suggestions for getting the stuff to go around wheel lip moldings? That was the worst part by far. Charlie Larkin
-
I really like that idea, Pete. It's a unique spin on a modern car, many of which are now just "strange." I understand the 300 has been redesigned for 2011, but I haven't seen any pictures. I'll be curious to see how yours stacks up against it. I must say, though, I think you've come up with a really interesting design. Charlie Larkin
-
That looks great, Raymond. I like the colors, the little custom touches and the dry-ice A/C. Great job. Charlie Larkin
-
Very impressive. Does the photo-etch include an option for the heater/radio controls? Getting a late 50s/early 60s Pontiac interior to come out right is a challenge, and you're most certainly up to it Marcos. Great work! Charlie Larkin
-
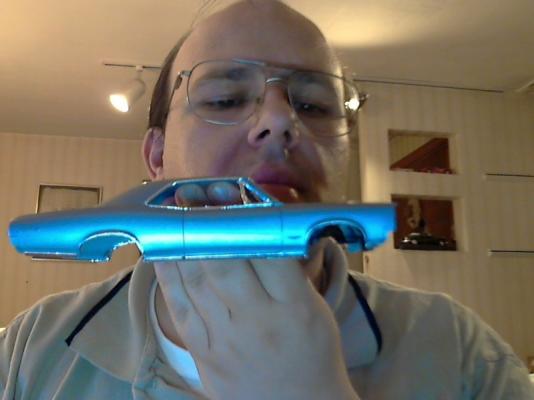
Tonight, I finished the interior. I was rather surprised Revell didn't supply seatbelts. Having neither the money for aftermarket ones or spare parts I can put my hands on conveniently, we'll have to do without. The GTO should have five total with the bucket seats. Putting that decal/clear lens sandwich together was one of the more frustrating things I've done in recent memory. Contrary to most, I actually like molded-in detail. Partially because it'll last longer than printed items, and partially because I detest decals. I also dry-brushed the scripts and tried the rear window garnish. I'm going to go with the Micro-Mask adhevsive/foil method for the window and other trim. I was quite pleased with how the dry-brushed scripts came out. I used to be really good at that, and this is the first time I've done it in a very long time. Here are a couple of interior shots. This is an exterior shot of a mock-up, with a partial interior installed, taken outside under a tree so as not to wash out the color too badly (very sunny day today.) Charlie Larkin
-
Very interesting, Wayne. I really liked that weathering technique, too. Charlie Larkin
-
How do you BMF the doorlocks, can't make circle..
charlie8575 replied to bigmikevee's topic in Tips, Tricks, and Tutorials
I generally dry-brush chrome silver on things like that (key: DRY brush.)I like the idea of the foil/91% alky, at least for bigger pieces. I might give that a shot. Charlie Larkin -
Nice mild custom. That'll be pretty when you're done. Charlie Larkin
-
*Searching for inner Gary Owen for voice-over...* "MCM Forum! Putting the 'fun' back in dysfunctional!" In all seriousness, this is a nice forum with lots of great people and you'll learn a lot from them. You said you like Ricers. Unofortunately, many of the Japanese car models are quite expensive, as most of the kits are made in Japan and the Yen/Dollar ratio and shipping costs puts the prices up quite high. I would suggest starting out with a good, fairly simple glue kit or one of the better snap-together kits made by AMT Lindberg or Revell. A nice snapper that's very satisfying to build is the Revell 1994-96 Chevy Impala SS. It looks REALLY good when it's done and it's challenging enough to be interesting. For supplies: Nippers for cutting off parts from the sprues. An X-Acto #1 hobby knife, or equivalent, with #11, chisel and razor saw blades. You might need the razor blade for removing parts you can't get the nippers on/around/near easily. Testors tube cement. Many here will scream at this. I like it for big, fiddly assemblies or when I want something that sets up slowly and buys you time to play with parts. Liquid cement. I like Testors, but Tamiya and Ambroid Pro-Weld are both good, too. A good assortment of paints. Start out with Testors enamels. They're not expensive and when applied properly, look good. Testors Model Master line, Humbrol and Tamiya are all good products, too. A spray can of gray automotive primer. I use Plasti-Kote T235 or Valspar sandable primer available at the big chain craft stores. Most guys use Dupli-Color. Make sure it says "sandable" on the can. This is necessary for getting the best coverage out of any paint you'd choose. A wide variety of wet-or-dry sandpaper, from 150 to at least 1500. Any good hardware store should have that. A pair of tweezers for small parts. Small clamps. Toothpicks for stirring paint and holding small components. Good-quality brushes. You don't have to buy all at once, but spend a little extra for the tools. They'll last longer and you'll get better results. Any competent hobby shop can point out what you need. To that end...go to a good hobby shop, not one of these box stores. Yes, you will pay more, but the advice and help is indispensable. The good shops will also carry the subject matter of your overall preference, so it's good to acquaint yourself with them. Welcome aboard. Charlie Larkin
-
Very nice work, Brian. Especially on the foiling. Charlie Larkin
-
Well, one quick update. I may end up shooting a coat of Dullcote over the interior to tame the shine. I'll see how this coat of paint dries. I painted the carpet with Testors Flat Sea Blue, which is a nice match for the GM blue carpets of the time. I think it'll also help darken/tone-down the interior shine once assembled. I dry-brushed the door handles and window cranks with Chrome Silver. I'm pleased with how well they came out. Charlie Larkin
-
I think I needed this to see the problems with the kit. Eeesh... Very creative fix, Jon. I'll be interested to see how you replace the moldings. As an idea, you could make it a Savoy seeing you have all the trim off anyway. The Savoy trim is much, much simpler. I didn't like that that molded in the annodized trim. That was an option, most cars from what I've seen, had that area two-toned to match the roof. The texturing made this impossible unless you wanted to sling lots of putty. Charlie Larkin
-
I'm right there with you, Gary. I have a 1977 Estate Wagon (first car,) and I had a 1979 Pontiac Catalina Safari that died of a combination of mechanical problems and severe rust. Dad had a 1978 Caprice wagon. The 1977-90 B-body wagons are great cars and I'd like another one. I think in may respects they're far better than the 1991-96, especially for a quality of materials standpoint. Your Electra would be a pretty easy car to straighten out. The headliner is super-easy to replace, any good trim shop can handle it not too expensively. The trans...you're stuck with 200-R4 if you have the 307 in it, but those can be rebuilt to be fairly strong. There's a shop that advertises in the Buick Club's magazine that's made something of a specialty of the 200-R4 and 700-R4. It might be worth your while to check into it. Charlie Larkin
-
Very interesting link. Thanks. Charlie Larkin
-
Coming from you, Bruce, high praise indeed considering the marvels you create. I just blew one more coat of paint on the hood. It was about a shade off, probably because of the re-priming I had to do. Now, it looks about right. The heated can of spray paint evacuates very nicely and leaves a nice, fine spray pattern. For those of you that don't do it....why? You'll get all the paint you can out of the can and it looks better. Within the next 24 hours, I'll be re-doing the interior, I hope. I just need to find someplace I can put the tank for the time being. Charlie Larkin
-
Actually, my ex just kinda used to laugh at it. She thought it was "cute." Oy.... She also had trouble understanding the concepts of realism and having it look right, her very avant-garde artist streak coming out (her abstract and quasi-abstract drawings and paintings are breathtakingly good.) That conversation came up while I was building an HO scale boxcar to at least display on the shelf until a layout can be built. She didn't seem to quite get why it had to look real, hence the pre-decorated body, etc. Back to helping the hobby....make it public. When I used to substitute-teach, a lot of the time, there was really very little for me to do other than babysit, make out bathroom passes, or perhaps answer an occasional question, so I'd read to prevent excessive boredom from setting in (yes, many assignments got that bad.) Sometimes, I had more serious magazines like Businessweekor a book of some kind, but just as often, I'd have a modeling mag or two stuck in my briefcase. A lot of the kids were actually interested in how things got done. Many were in awe, especially of the model railroads. Go to youth groups, like Boy Scouts, De Molay or Columbian Squires. Maybe between model builders and some other people passionate about their pursuits, you can put together a recreation and leisure exposition for youth in your area. I'm working on putting together a program for career planning for De Molay and Rainbow in Massachusetts, and have been considering approaching MassCar with helping me do something along the lines of what I described above. By promoting interest, you'll help the manufacturers. Even if they make stuff that kids are more into (tuner rice rockets, for example,) it might help bring in enough money to help tool up more adult-oriented models, too, such as another '72 Cutlass. Subjects like that, incidentally, have a lot of appeal to the youth market, too, as a lot of the boys I know just simply do not like new cars. That's a win-win if ever I saw it. Other things: perhaps sitting down and actually making a real typed or hand-written letter thanking them for releasing something with suggestions for other releases off of that tooling. Old-fashioned? Very. Effective? It never hurt anyone to show or receive a little courtesy, and many times, those small gestures can go a long way by showing a simple appreciation. By the same token, if something gets kitted that's very poorly done or has a lot of little ticks, the real, hardcopy letter might still be effective. Instead of moaning about it, take the time to write. The mold-makers and engineers are, after all, only human. Encourage them to do better and perhaps take the time to explain where the failings, as perceived by you, are. If, however, you can't be courteous or respectful, I'd beg you for all our sakes to put your pen down. There are many ways to help our hobby. These are but a few suggestions. Charlie Larkin