Modlbldr
-
Posts
6,887 -
Joined
-
Last visited
Content Type
Profiles
Forums
Events
Gallery
Everything posted by Modlbldr
-

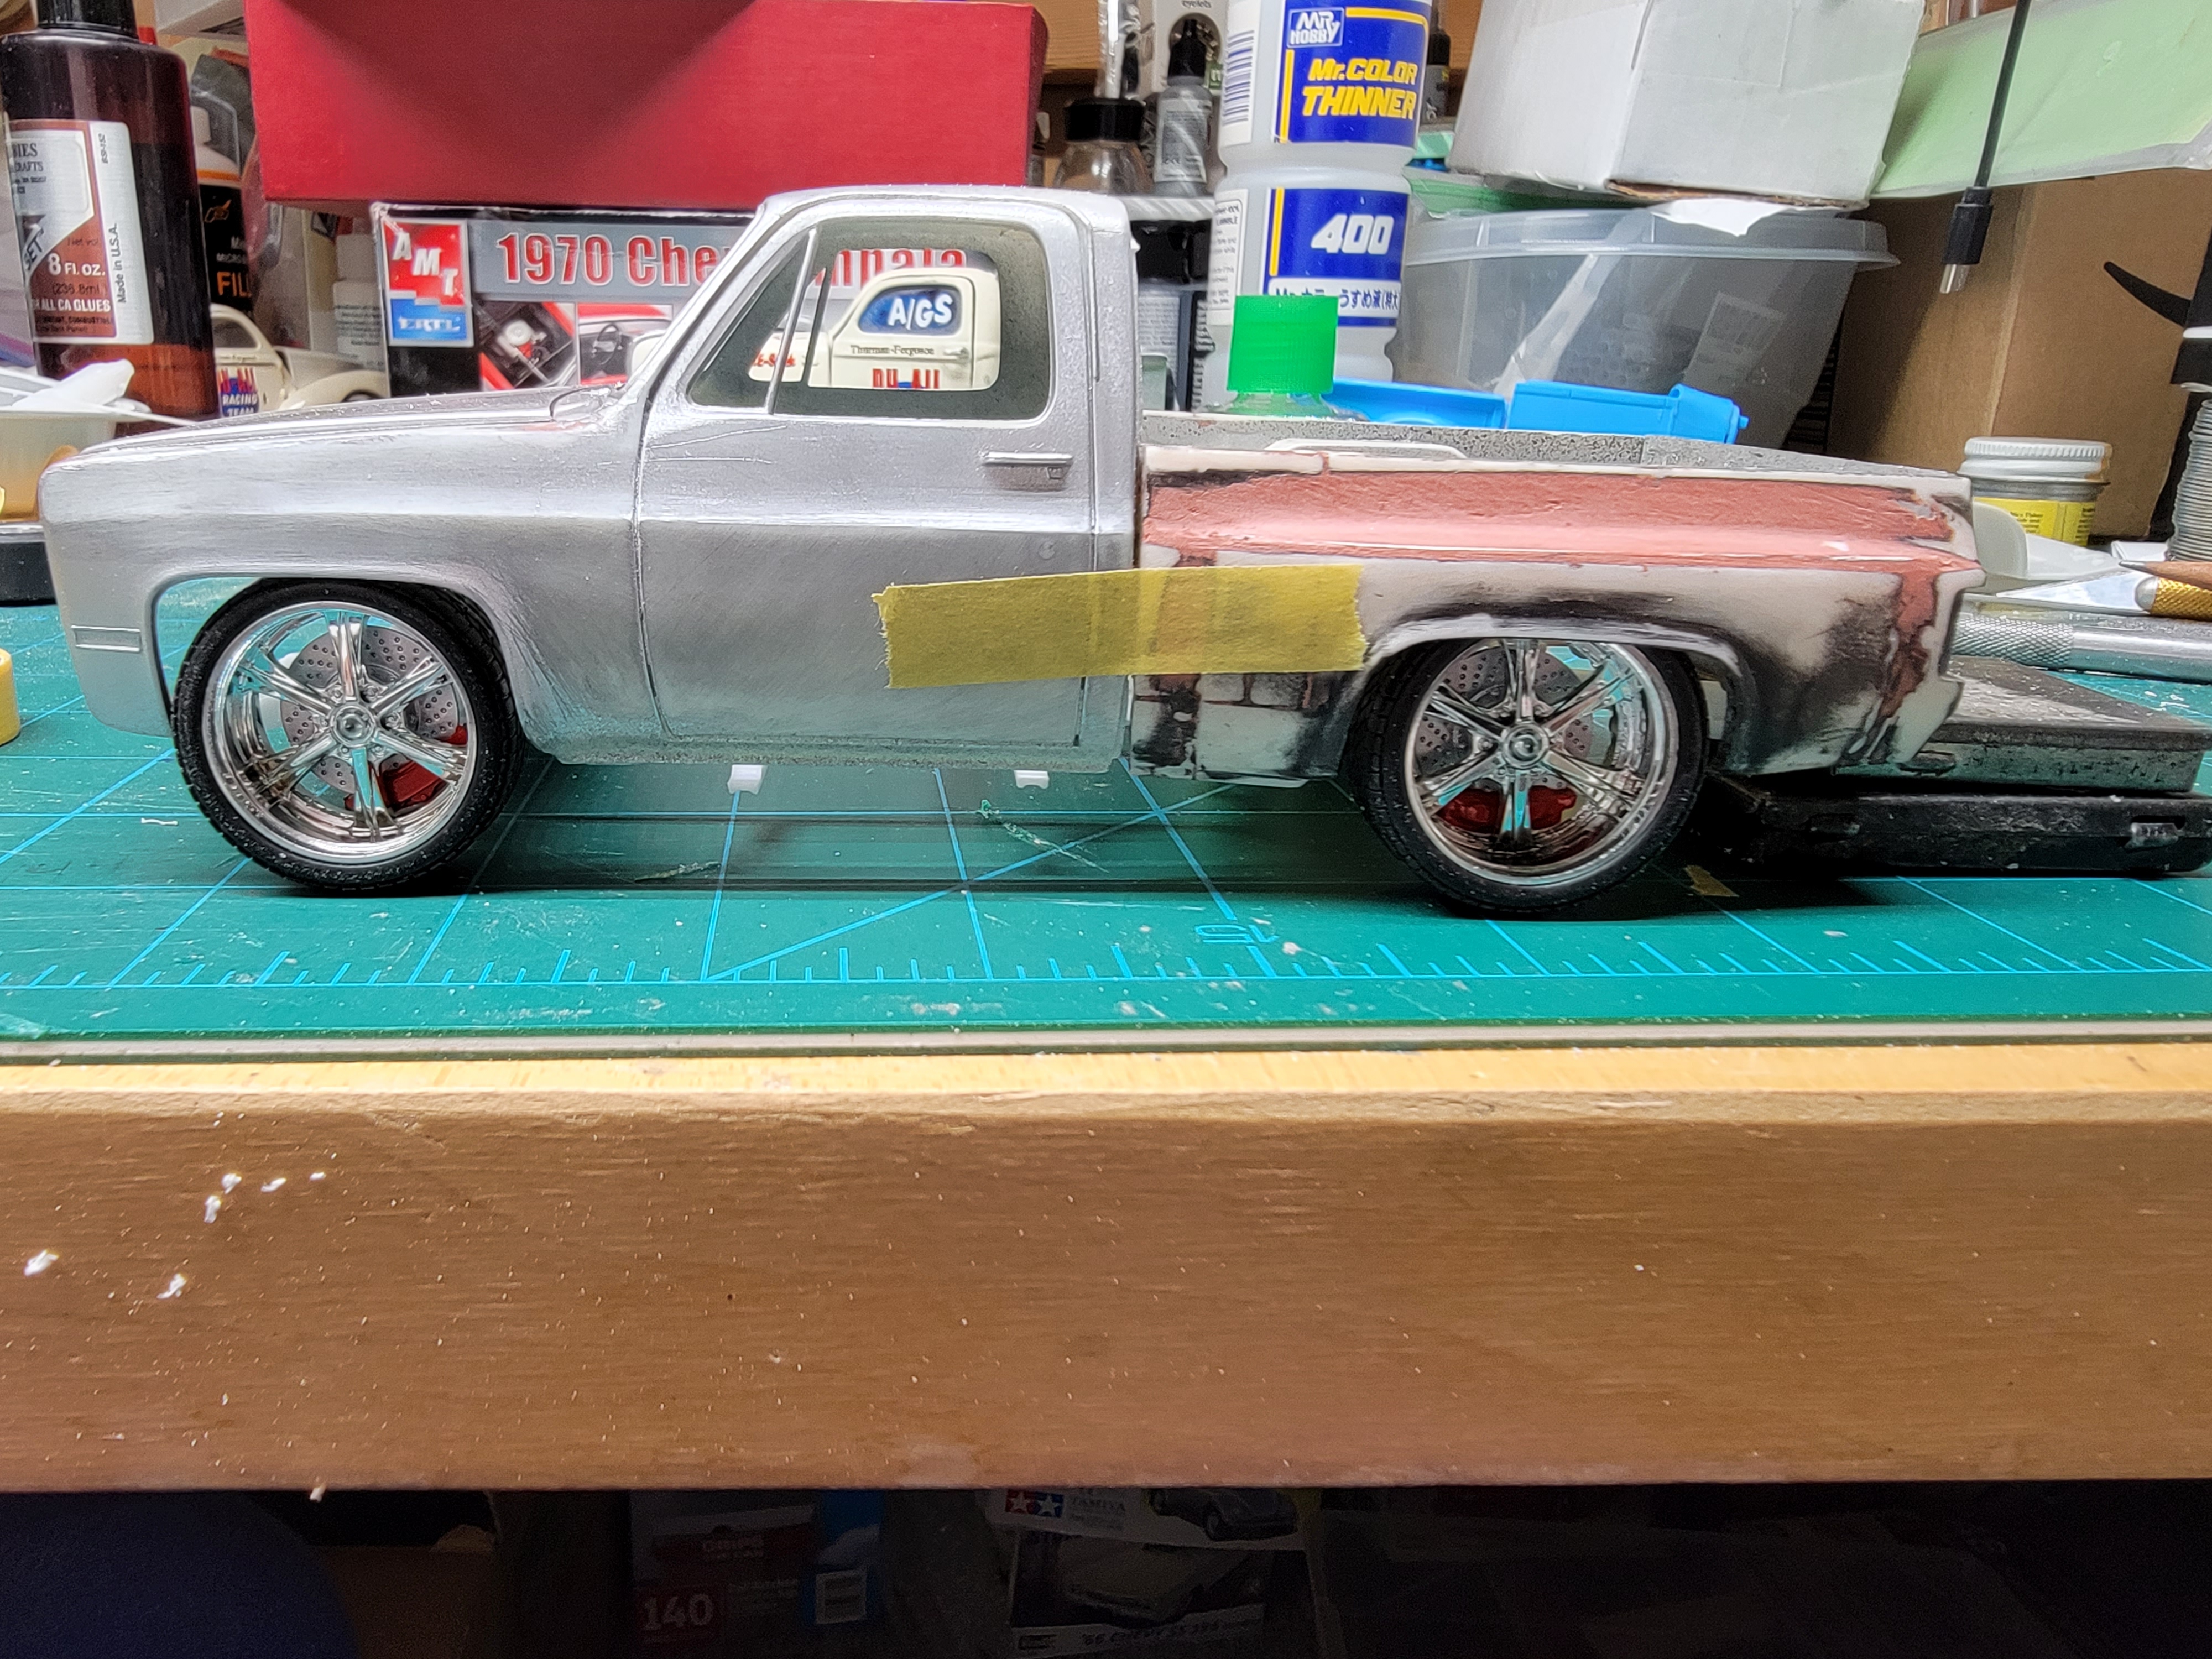
84 GMC custom widebody
Modlbldr replied to Modlbldr's topic in WIP: Model Trucks: Pickups, Vans, SUVs, Light Commercial
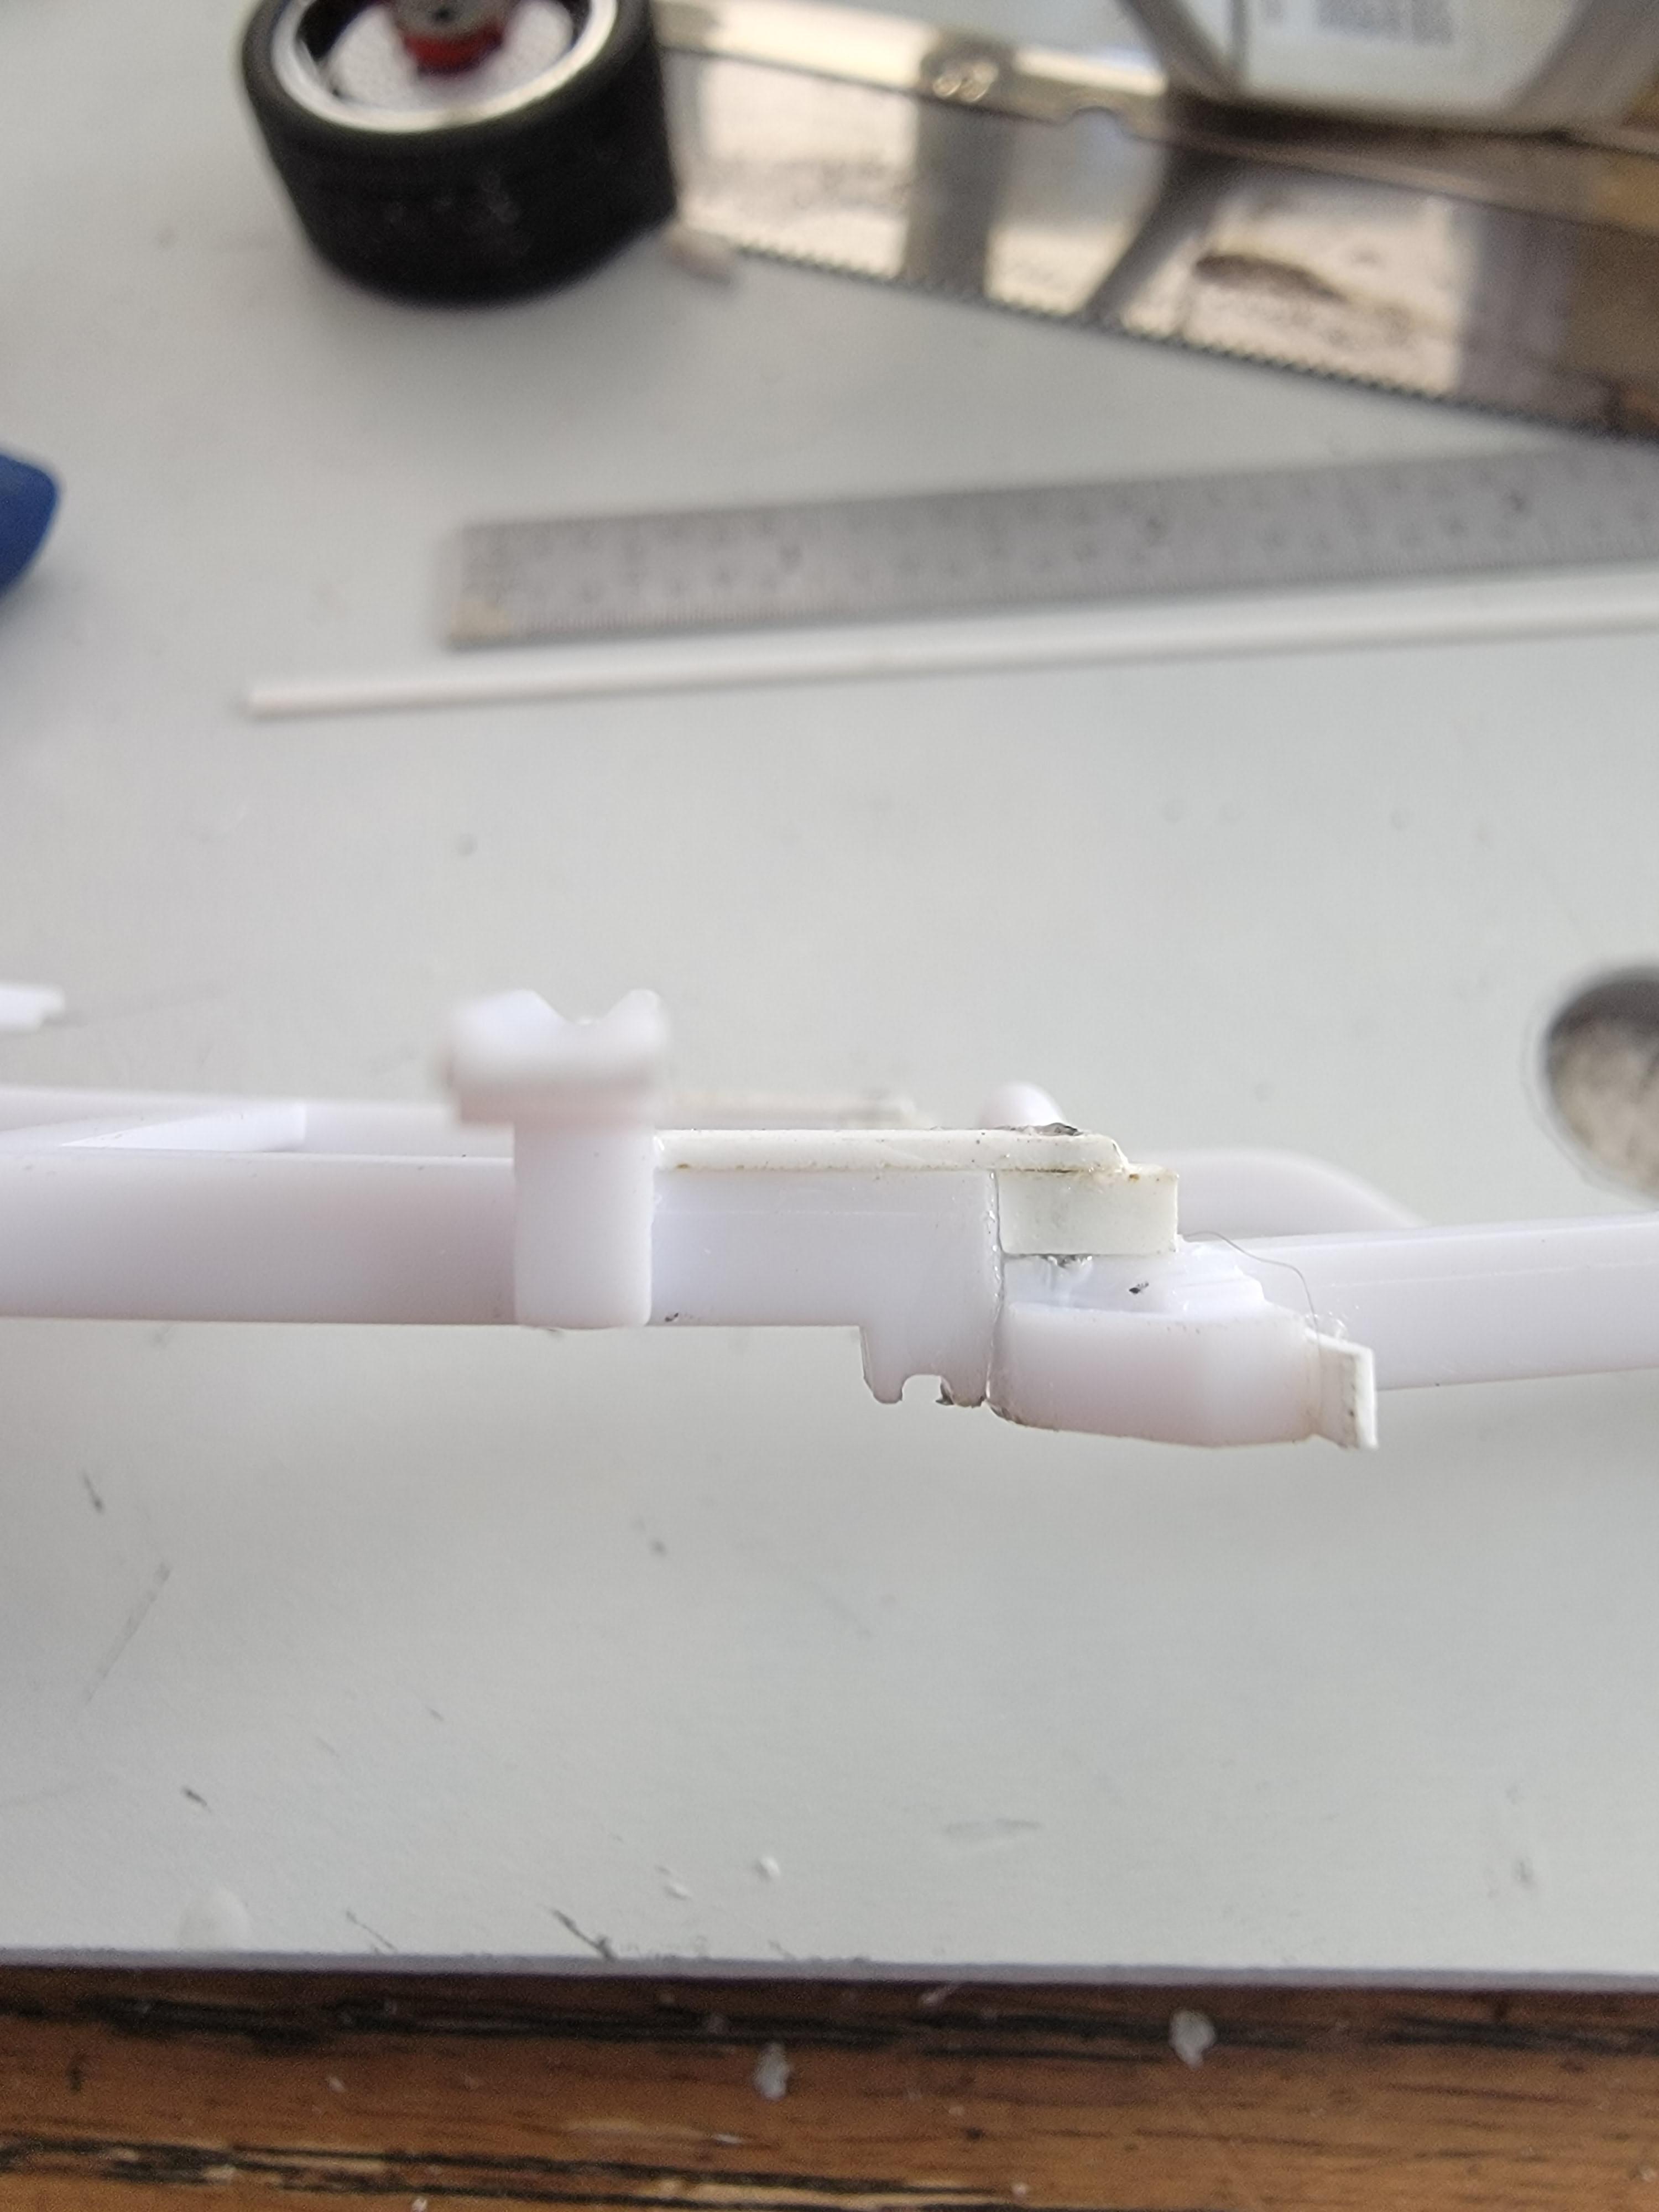
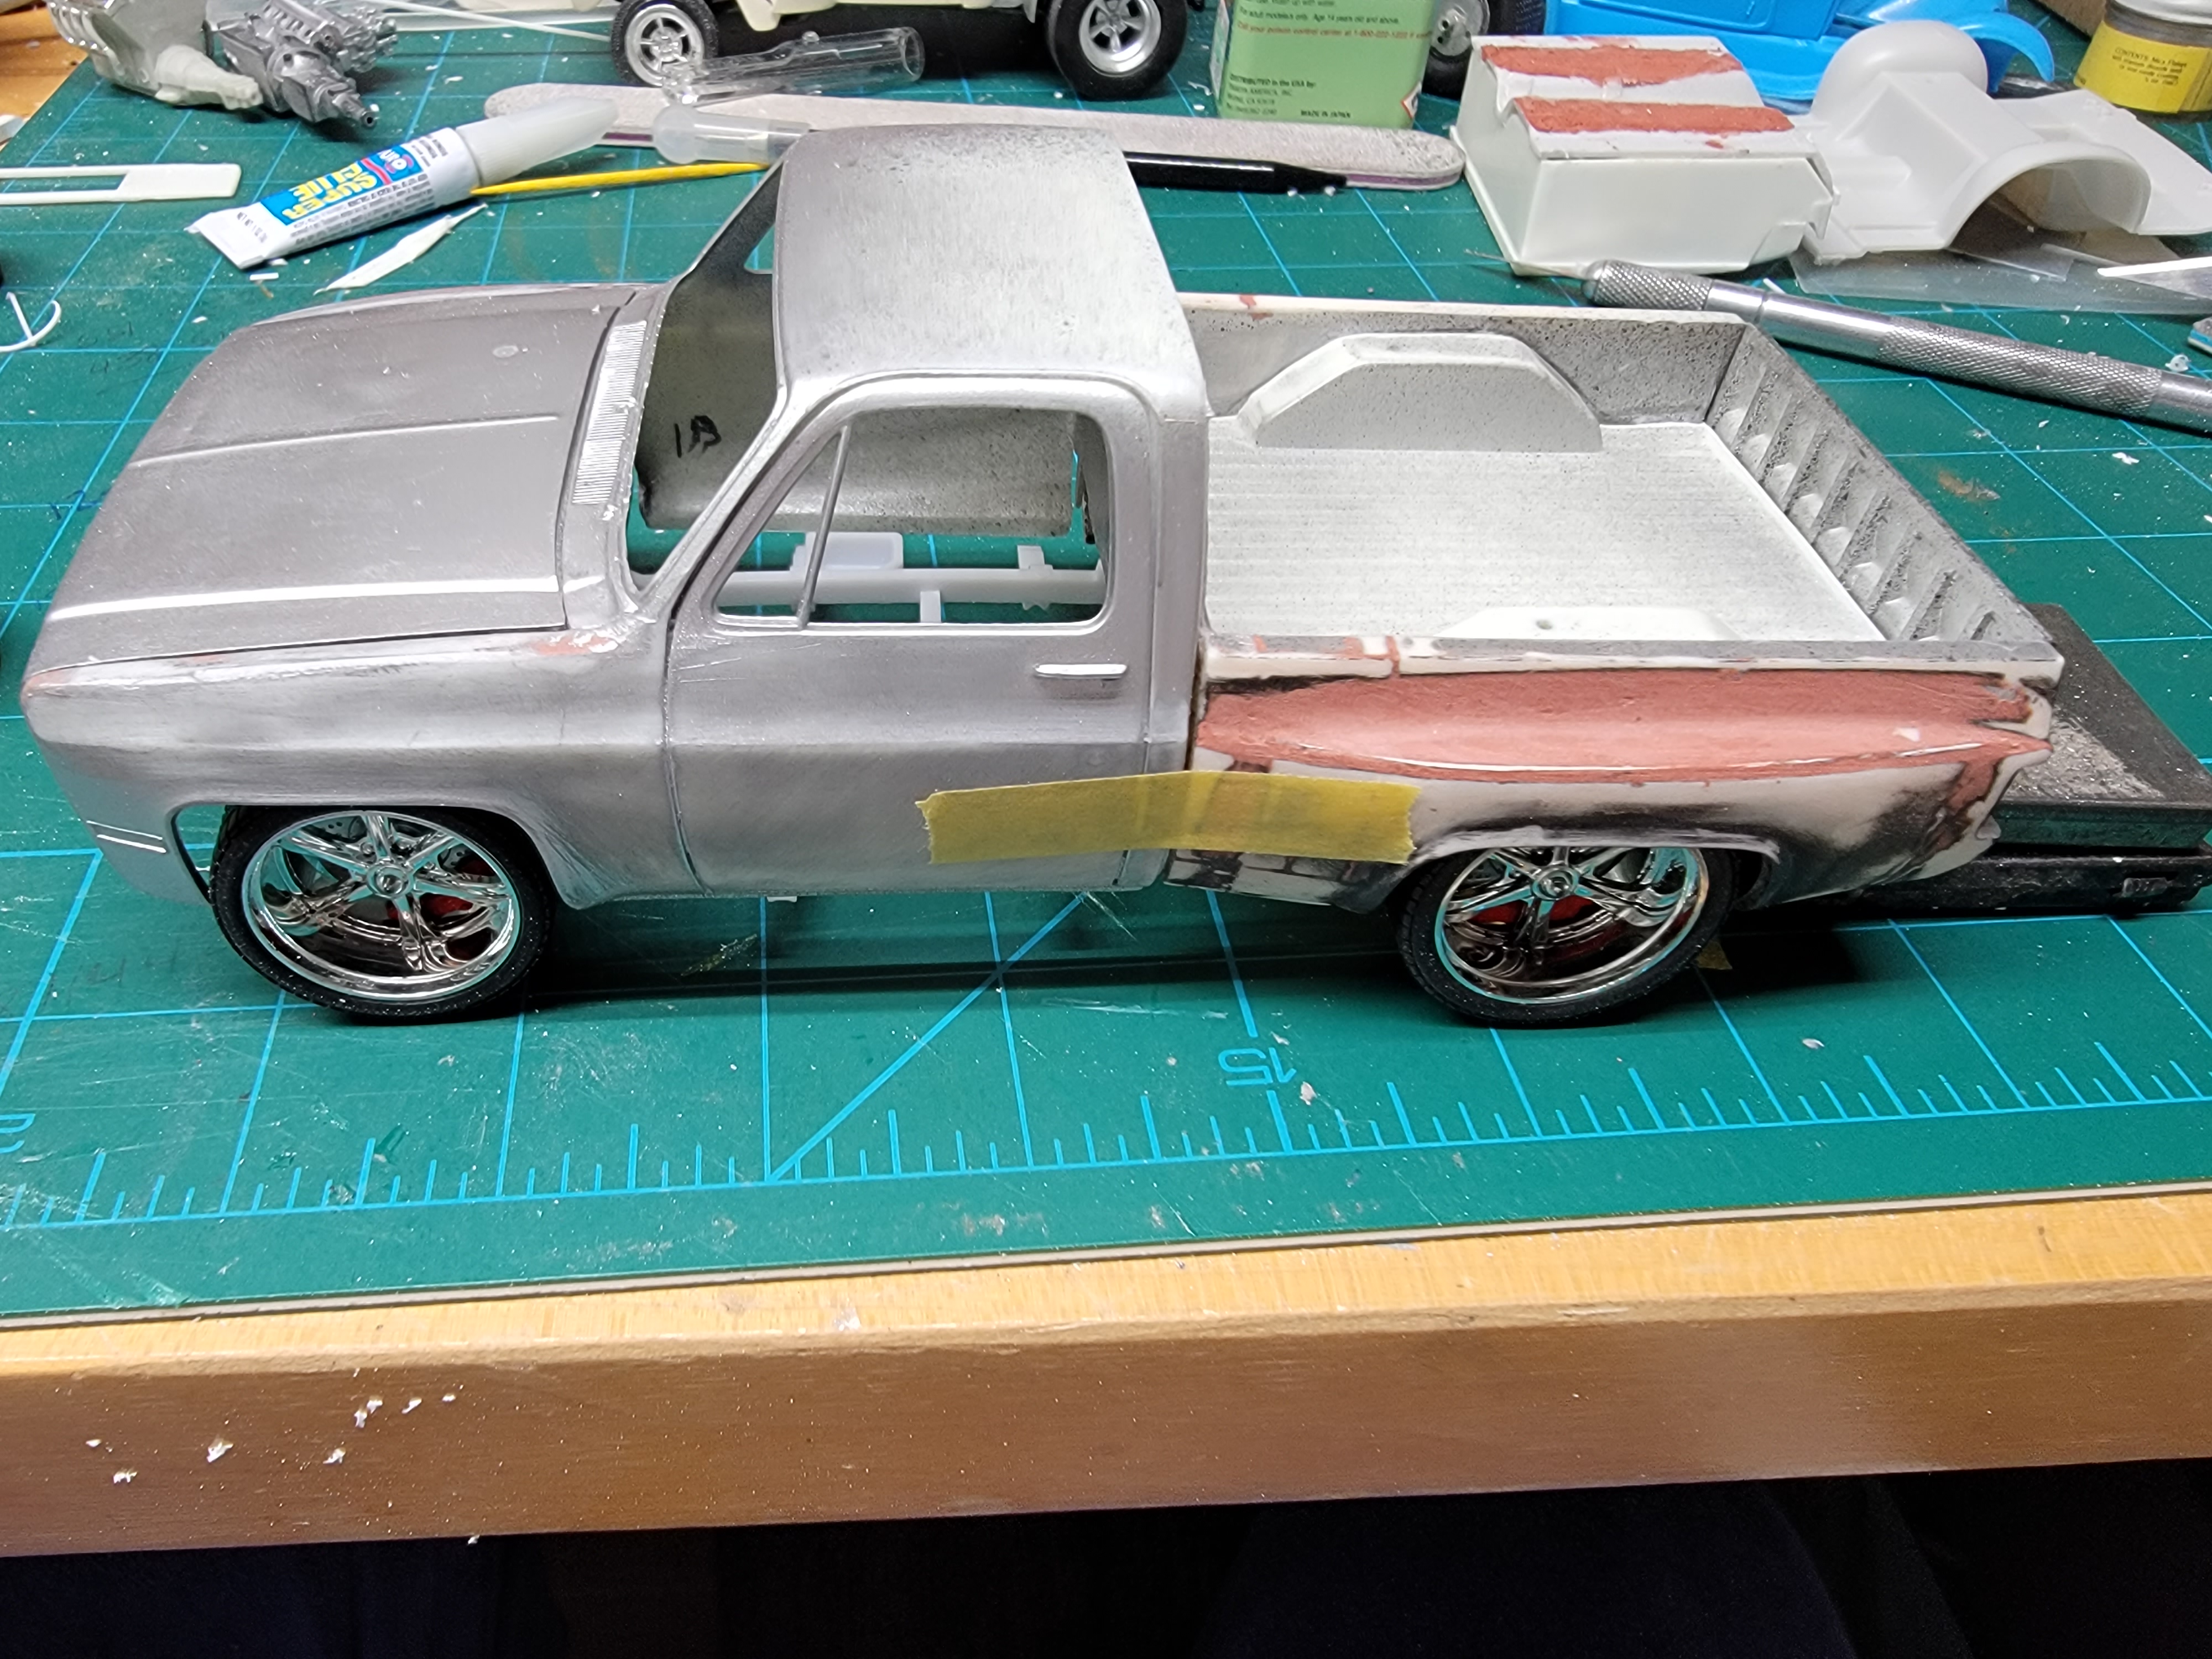
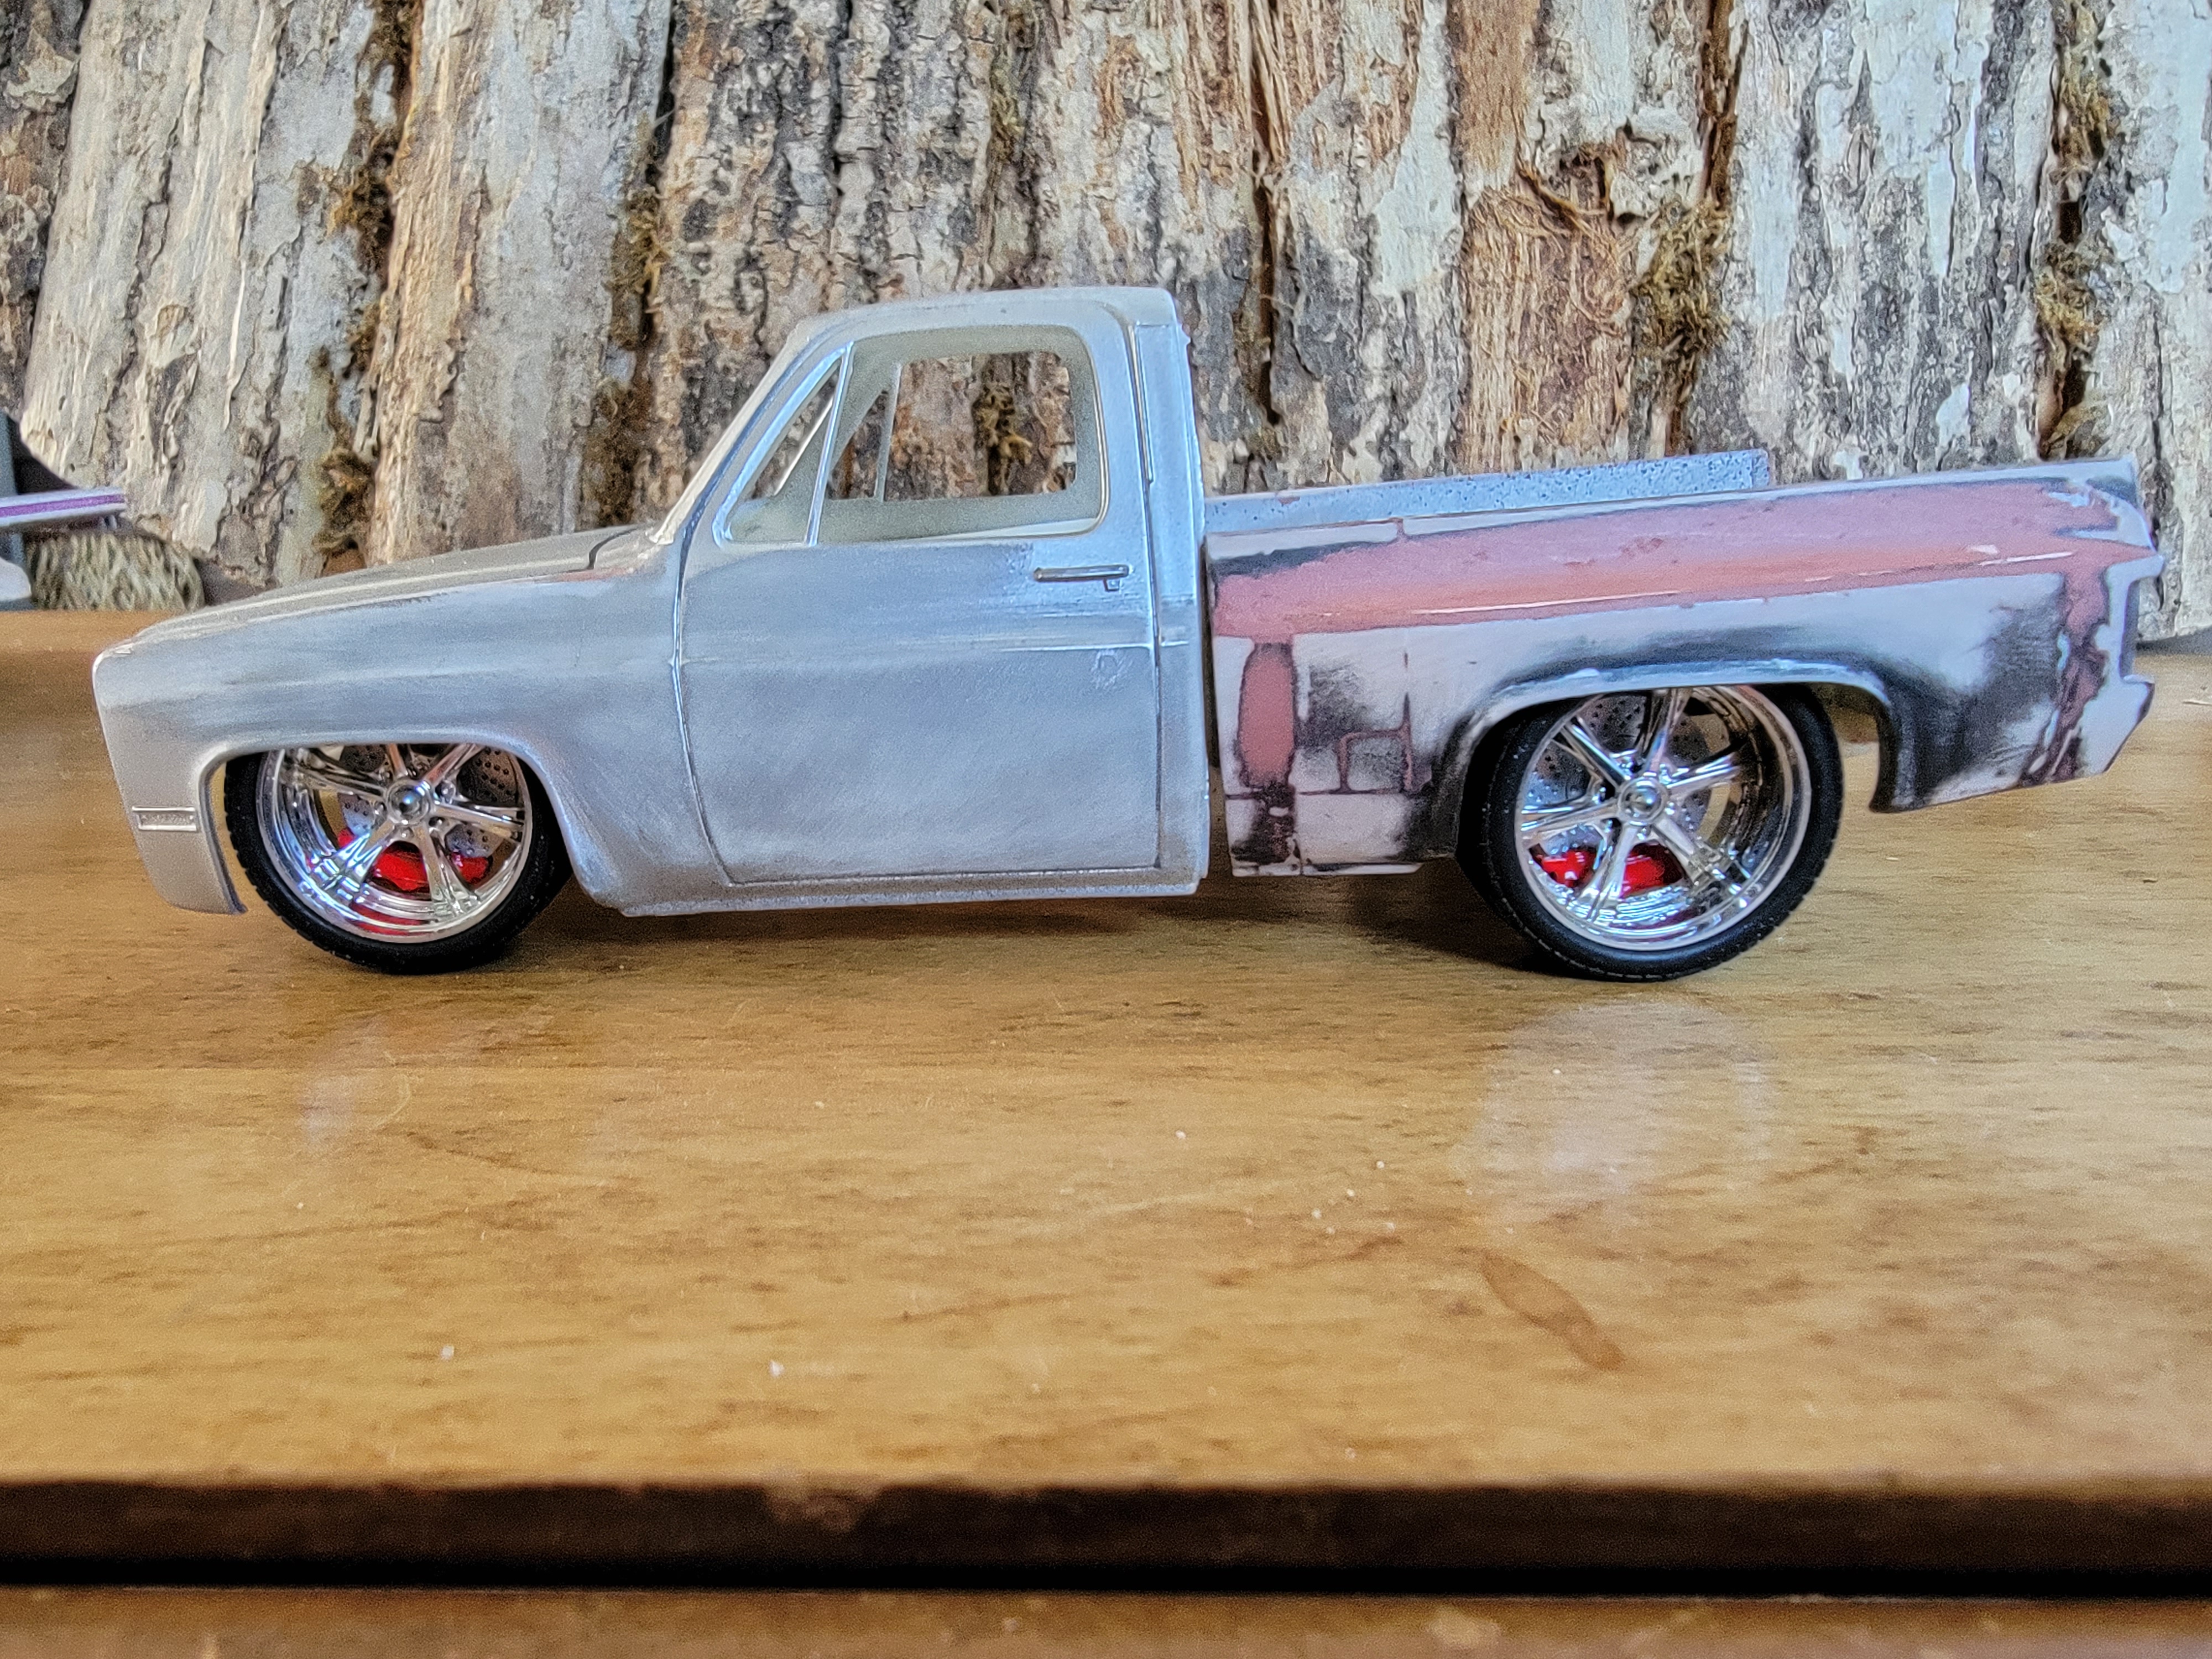
I made a quick mod to the frame in the rear. Ill clean it all up on my next bench session. I cut the frame just past the Cab and added a block to raise the rear of the frame a bit. I did this for a couple of reasons. Now I will not have to add such a tall block between the frame and the bed floor and now my rear axle does not touch the frame. Later-
-
84 GMC custom widebody
Modlbldr replied to Modlbldr's topic in WIP: Model Trucks: Pickups, Vans, SUVs, Light Commercial
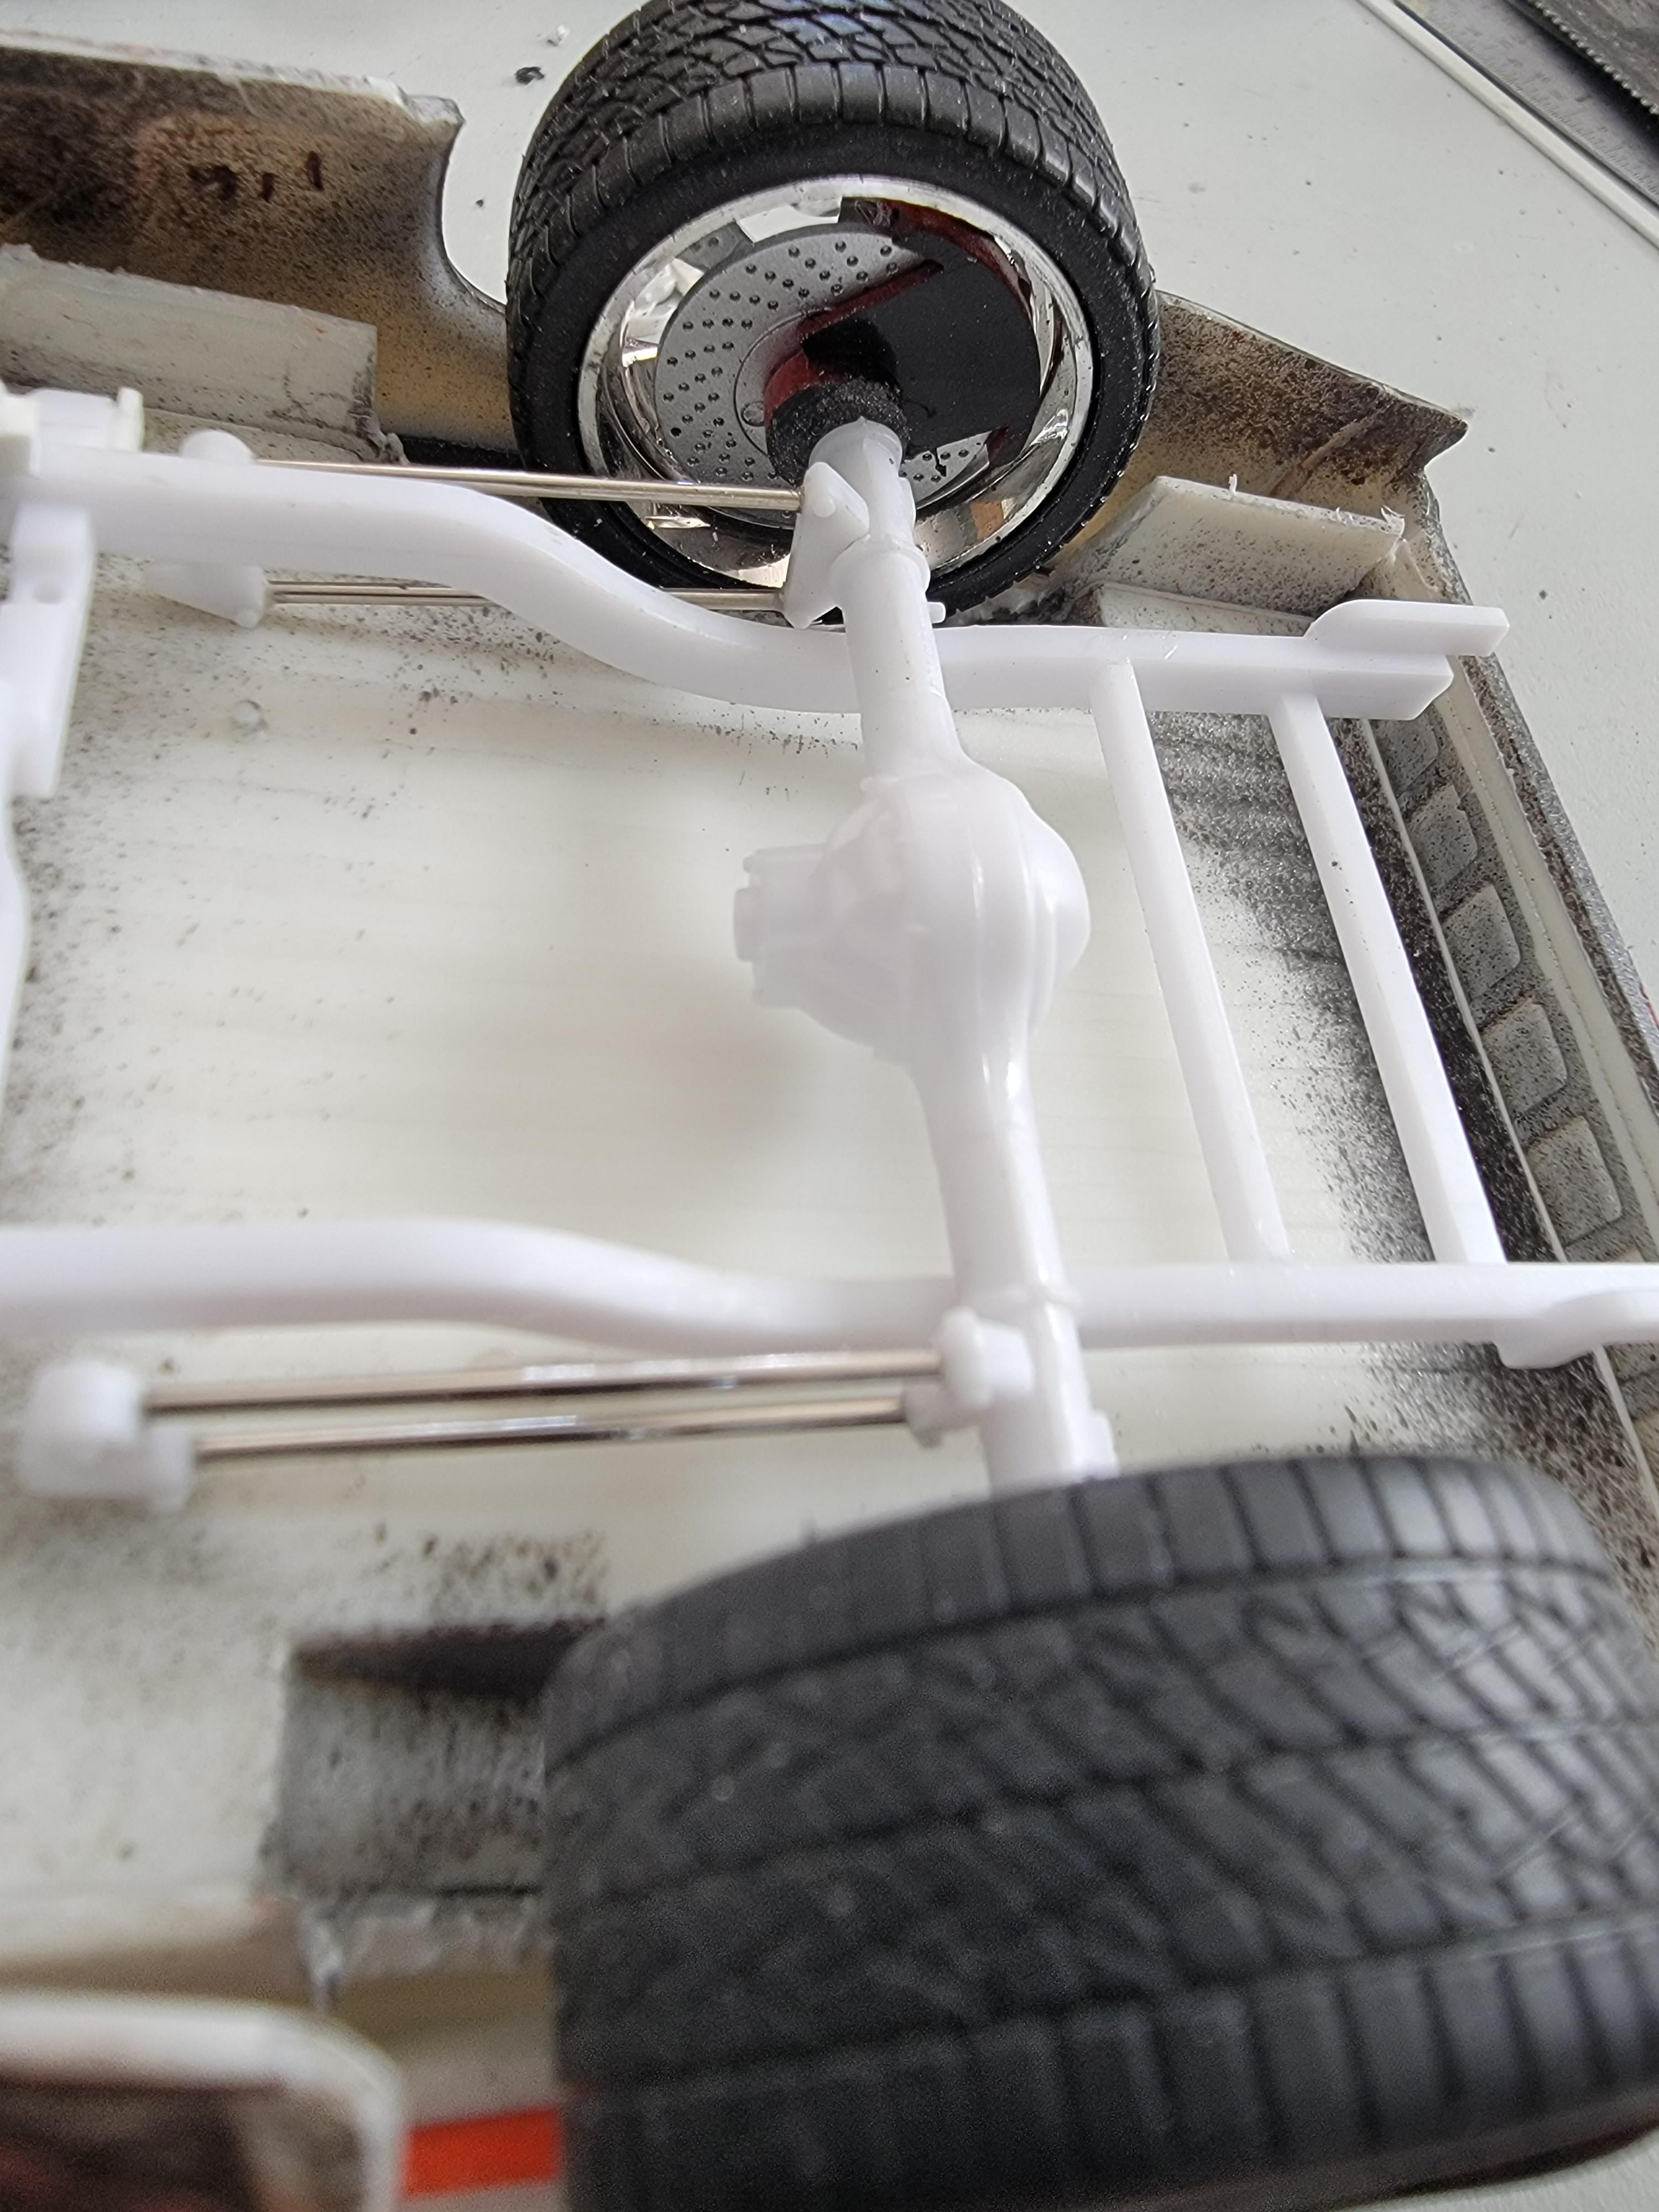
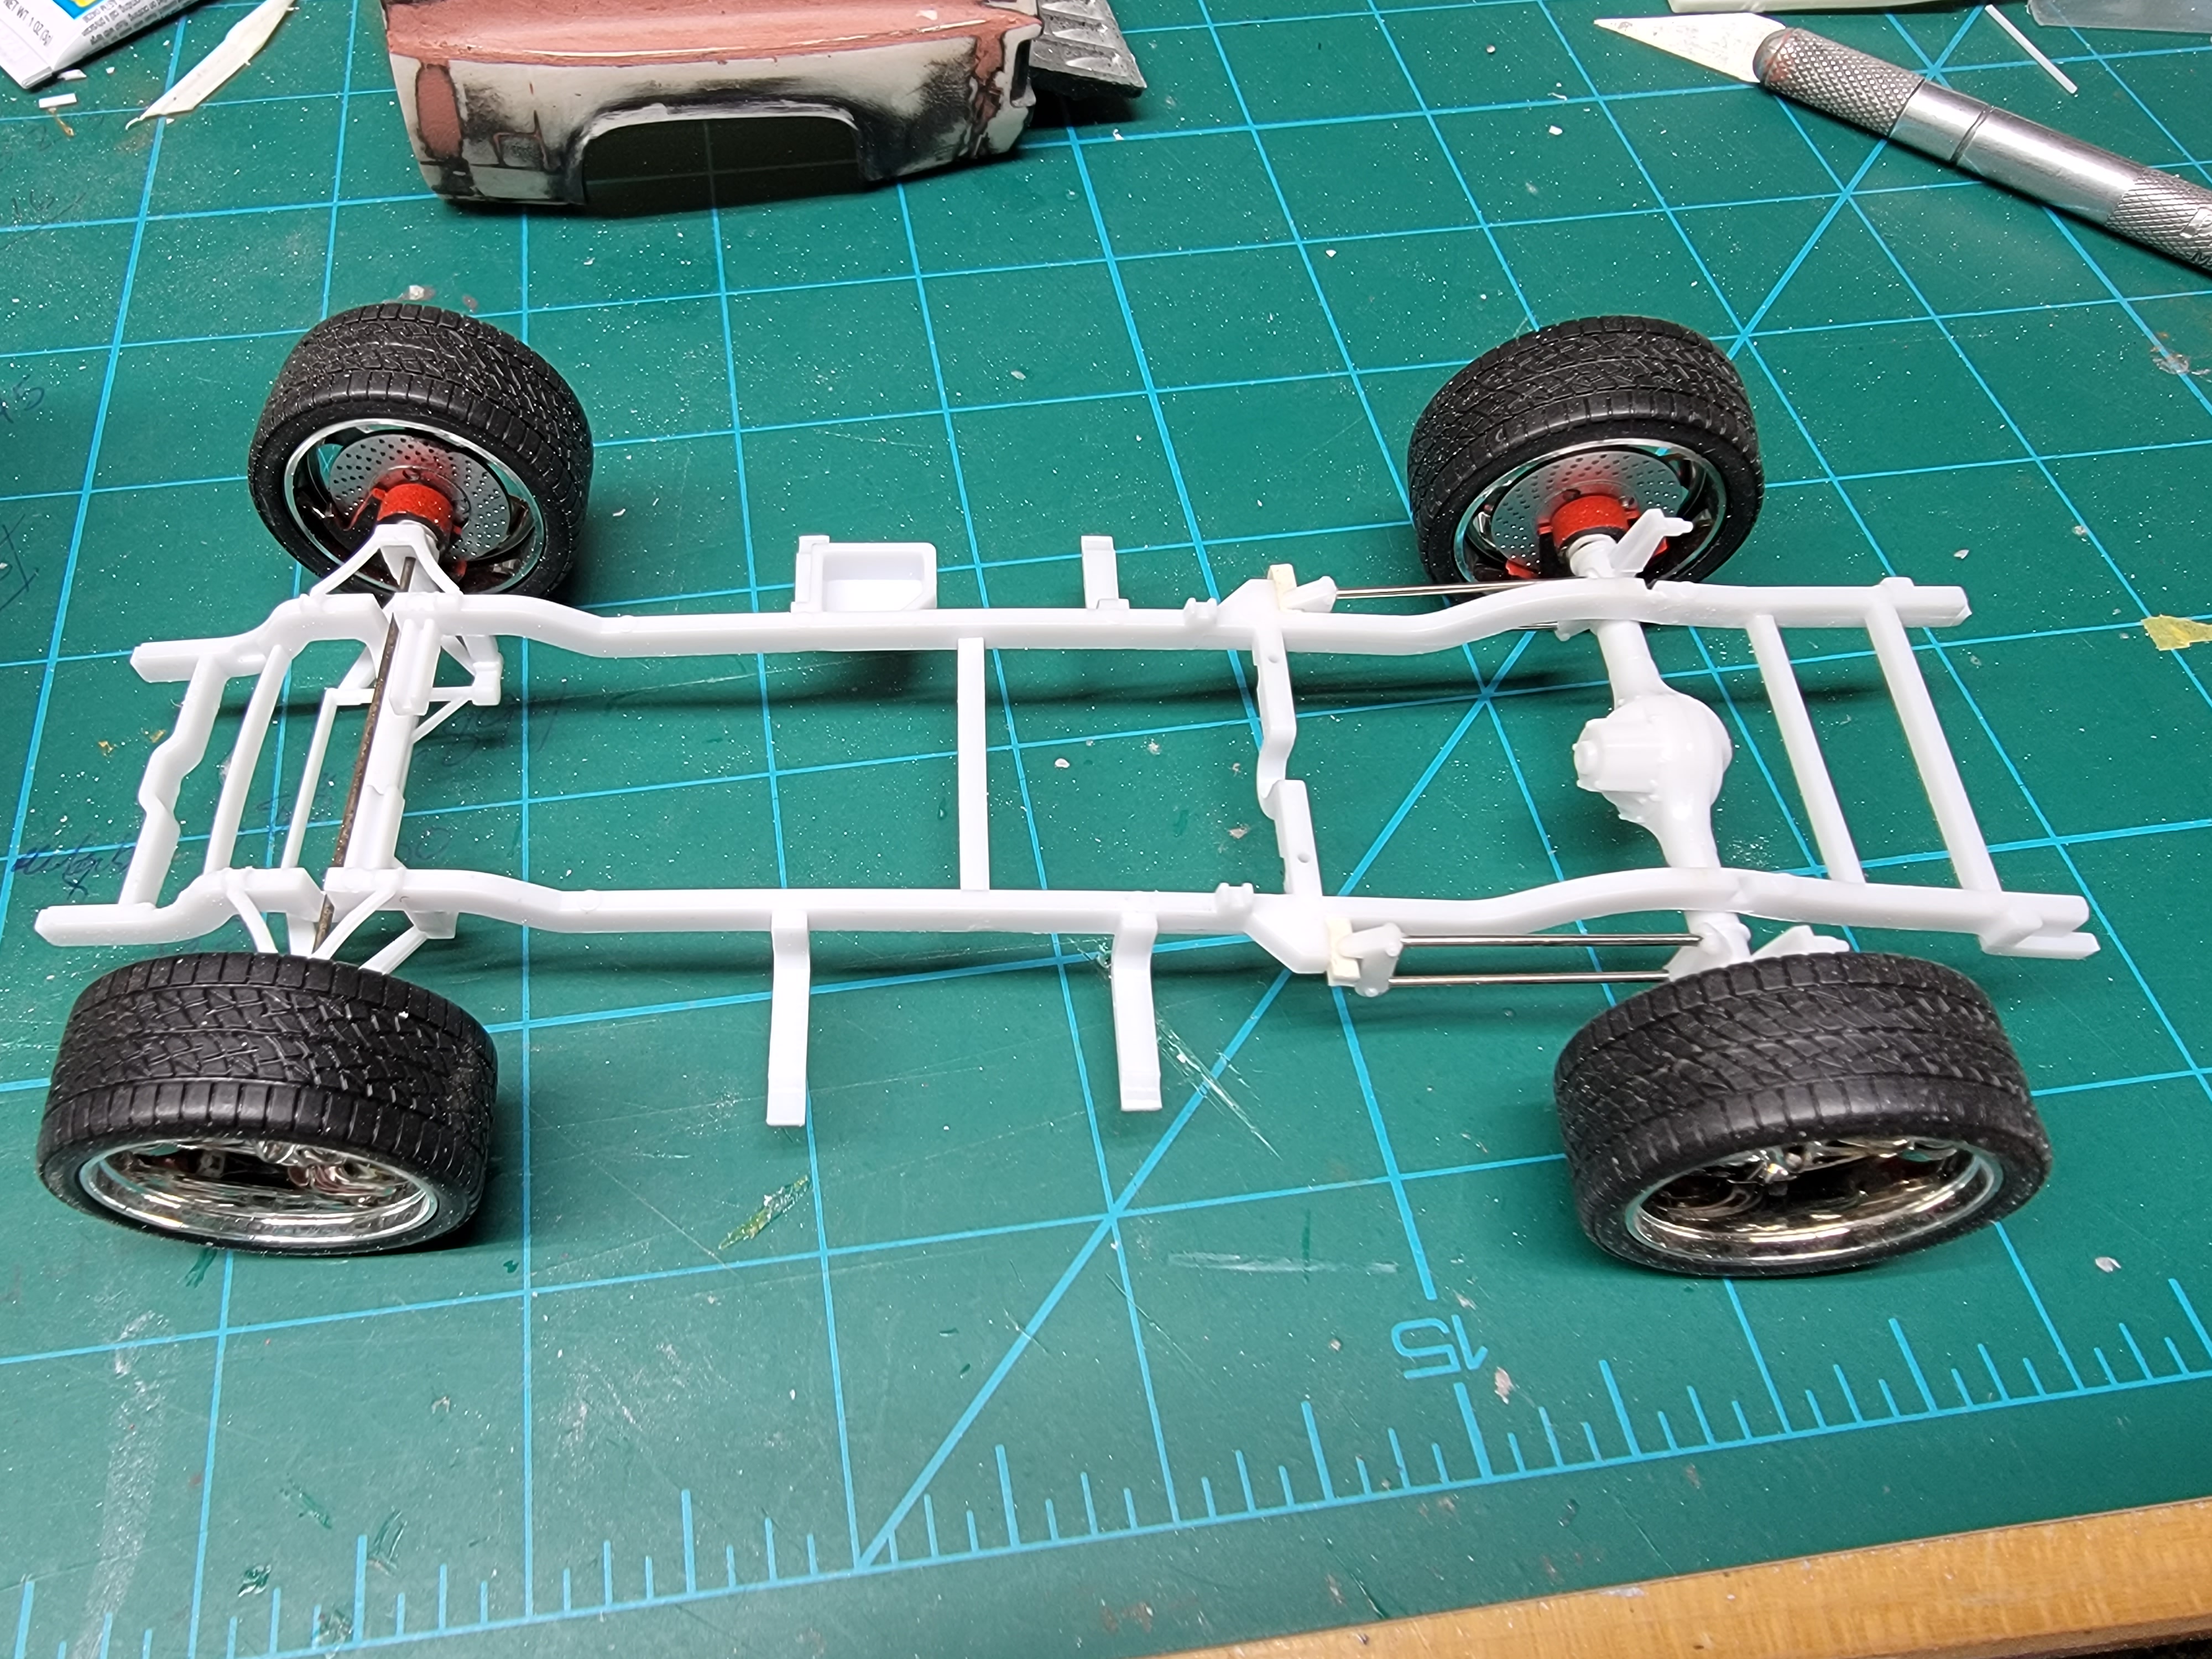
Got a bit more adjusting done on the suspension. In the rear I had part of the plastic where the inner wheelwell wells had been that needed cut out. (Second pic) In the front the wheel hubs needed to be shortened to get the track narrow enough to fit inside the fenders. I wouldn't mind getting it a bit lower but the rear fenders will not allow it. Plus, as it is it sits level now. Later-
-
84 GMC custom widebody
Modlbldr replied to Modlbldr's topic in WIP: Model Trucks: Pickups, Vans, SUVs, Light Commercial
Thanks guys! Later- -
84 GMC custom widebody
Modlbldr replied to Modlbldr's topic in WIP: Model Trucks: Pickups, Vans, SUVs, Light Commercial
Been working a bit at a time on this lately. Using the frame from the Foose F100. I reworked the rear four link by removing the plastic bars and putting in longer metal bars to improve the.look and move the rear axle back a bit to the center of the wheelwells. I also raised the bed floor a bit. Tonight I temporarily set it up on the wheels to see what it looked like. Still needs some modification. The first order is to narrow the front track. Easy enough by cutting down the mounting posts on the wheels. Next is o get it a bit lower somehow. That's it for tonight. Later-
-
Just picked this up for a good price. Complete. My first one of these Galaxie kits! Never got one when they were first out and then couldn't justify the high price. Extremely happy. Later-
-
Beautiful work! I like the non stock color idea. Your dash gauges look great too! This is going to be a sweet build. It's funny how certain kits manage to keep working their way back into my stash. I've had two or three of these kits over the years and got one to the final stages before losing interest. I just managed last month to finally give it away and two days ago I ended up having one given to me that looks just about how this one looked when you got it. Maybe I need to redo it and get it across the finish line. Later-
-
WIP: AMT 1951 Chevy Convertible from Sun Cruiser box
Modlbldr replied to MrMiles's topic in WIP: Model Cars
That is the perfect color for that car! Beautiful work. Looking forward to seeing how it turns out. Later- -
I've sold 8 or 10 in the last week and bought 2. Later-
-
Stretched SSR
Modlbldr replied to Modlbldr's topic in WIP: Model Trucks: Pickups, Vans, SUVs, Light Commercial
Will do Sam. Later- -
Stretched SSR
Modlbldr replied to Modlbldr's topic in WIP: Model Trucks: Pickups, Vans, SUVs, Light Commercial
Yeah, the windshield is raked quite a bit on a stock SSR. I'm not sure if he raked it any more. I'll have to check it against the stock body I have. Lol. I was repairing the door hinge and looking at trying to make the hood hinge work on the pickup. It is one of Mike's builds that Dorothy wanted to keep and I am trying to repair it for her. The coupe is just a painted body and chassis with nothing else. I was looking through some boxes for some shoes for it. Later- -
Luis, I'm glad you were able to get some vacation time in. A good break on occasion is needed. I'm looking forward to seeing where this goes next. Keep the updates coming on the build when you get them. It's looking good. Later-
-
Got this delivered today and got it blown apart for a rebuild. Going either a stock-ish maroon or dark blue like the two I drooled over back in 79-80. Later-
- 39,276 replies
-
- 1
-

-
- johan
- glue bombs
- (and 1 more)
-
Great looking car and models! Nice to see that it is still in the family and on the road. Looking forward to any progress- even slow progress. Later-
-
Stretched SSR
Modlbldr replied to Modlbldr's topic in WIP: Model Trucks: Pickups, Vans, SUVs, Light Commercial
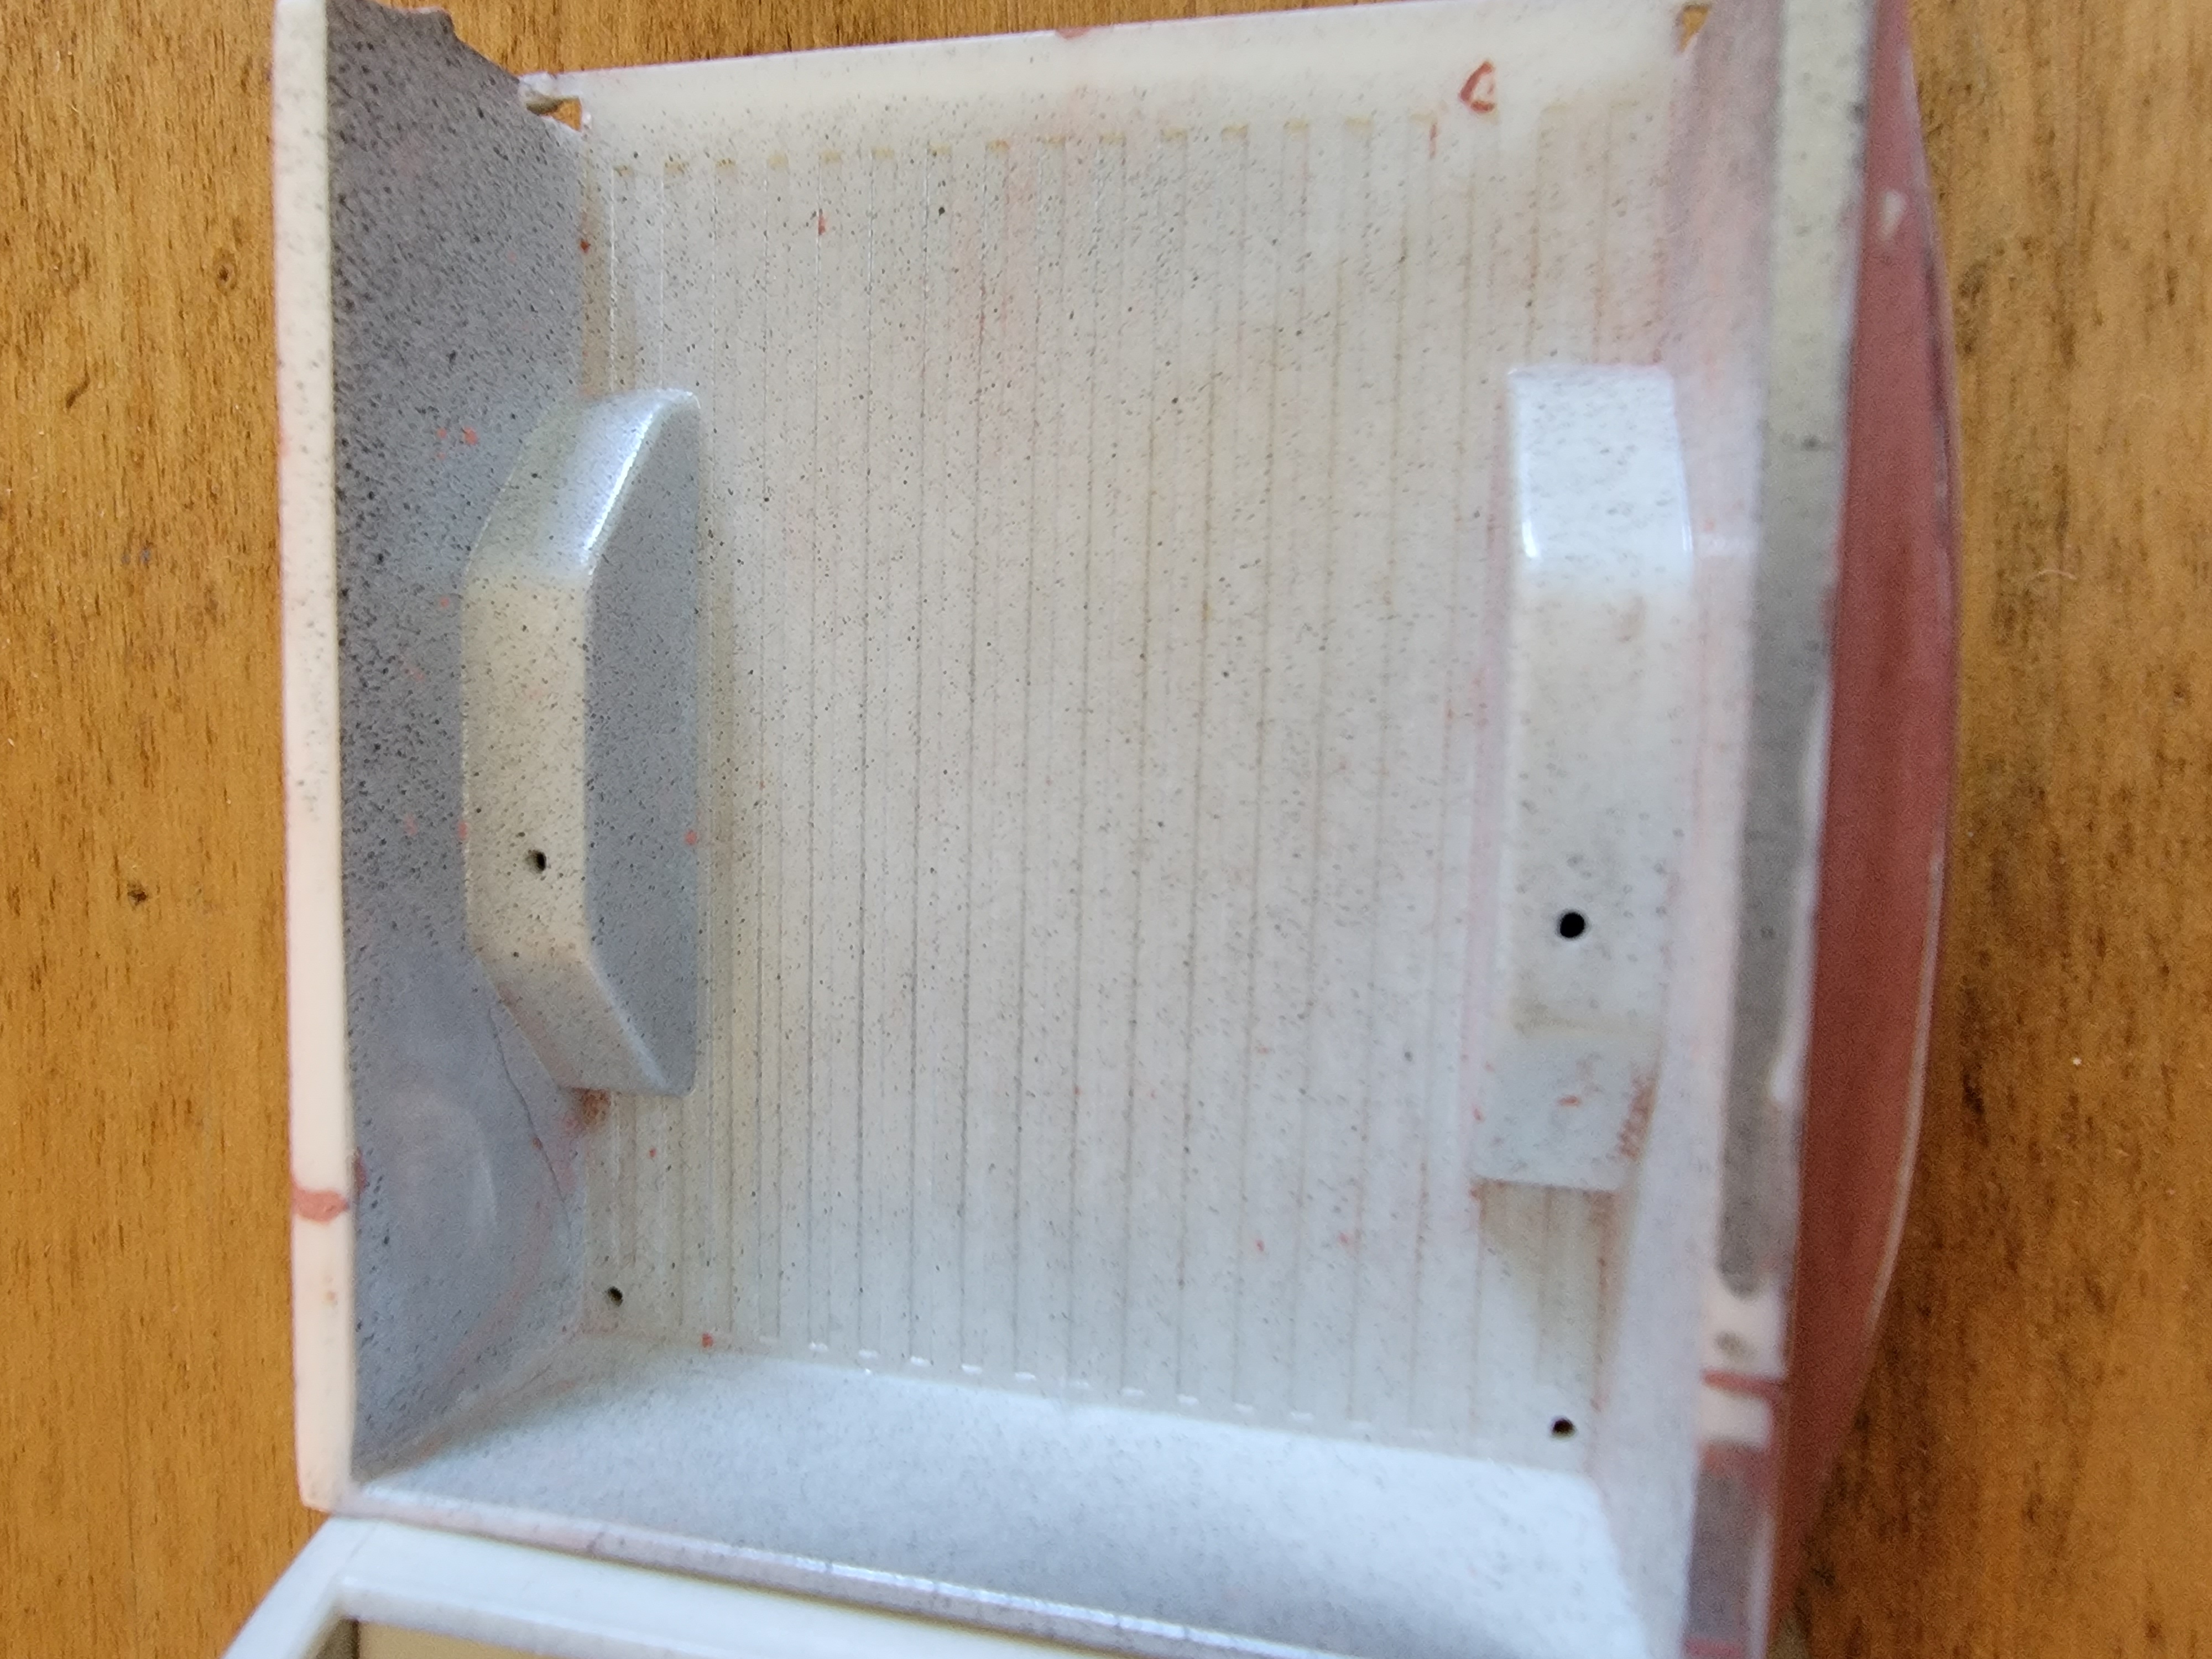
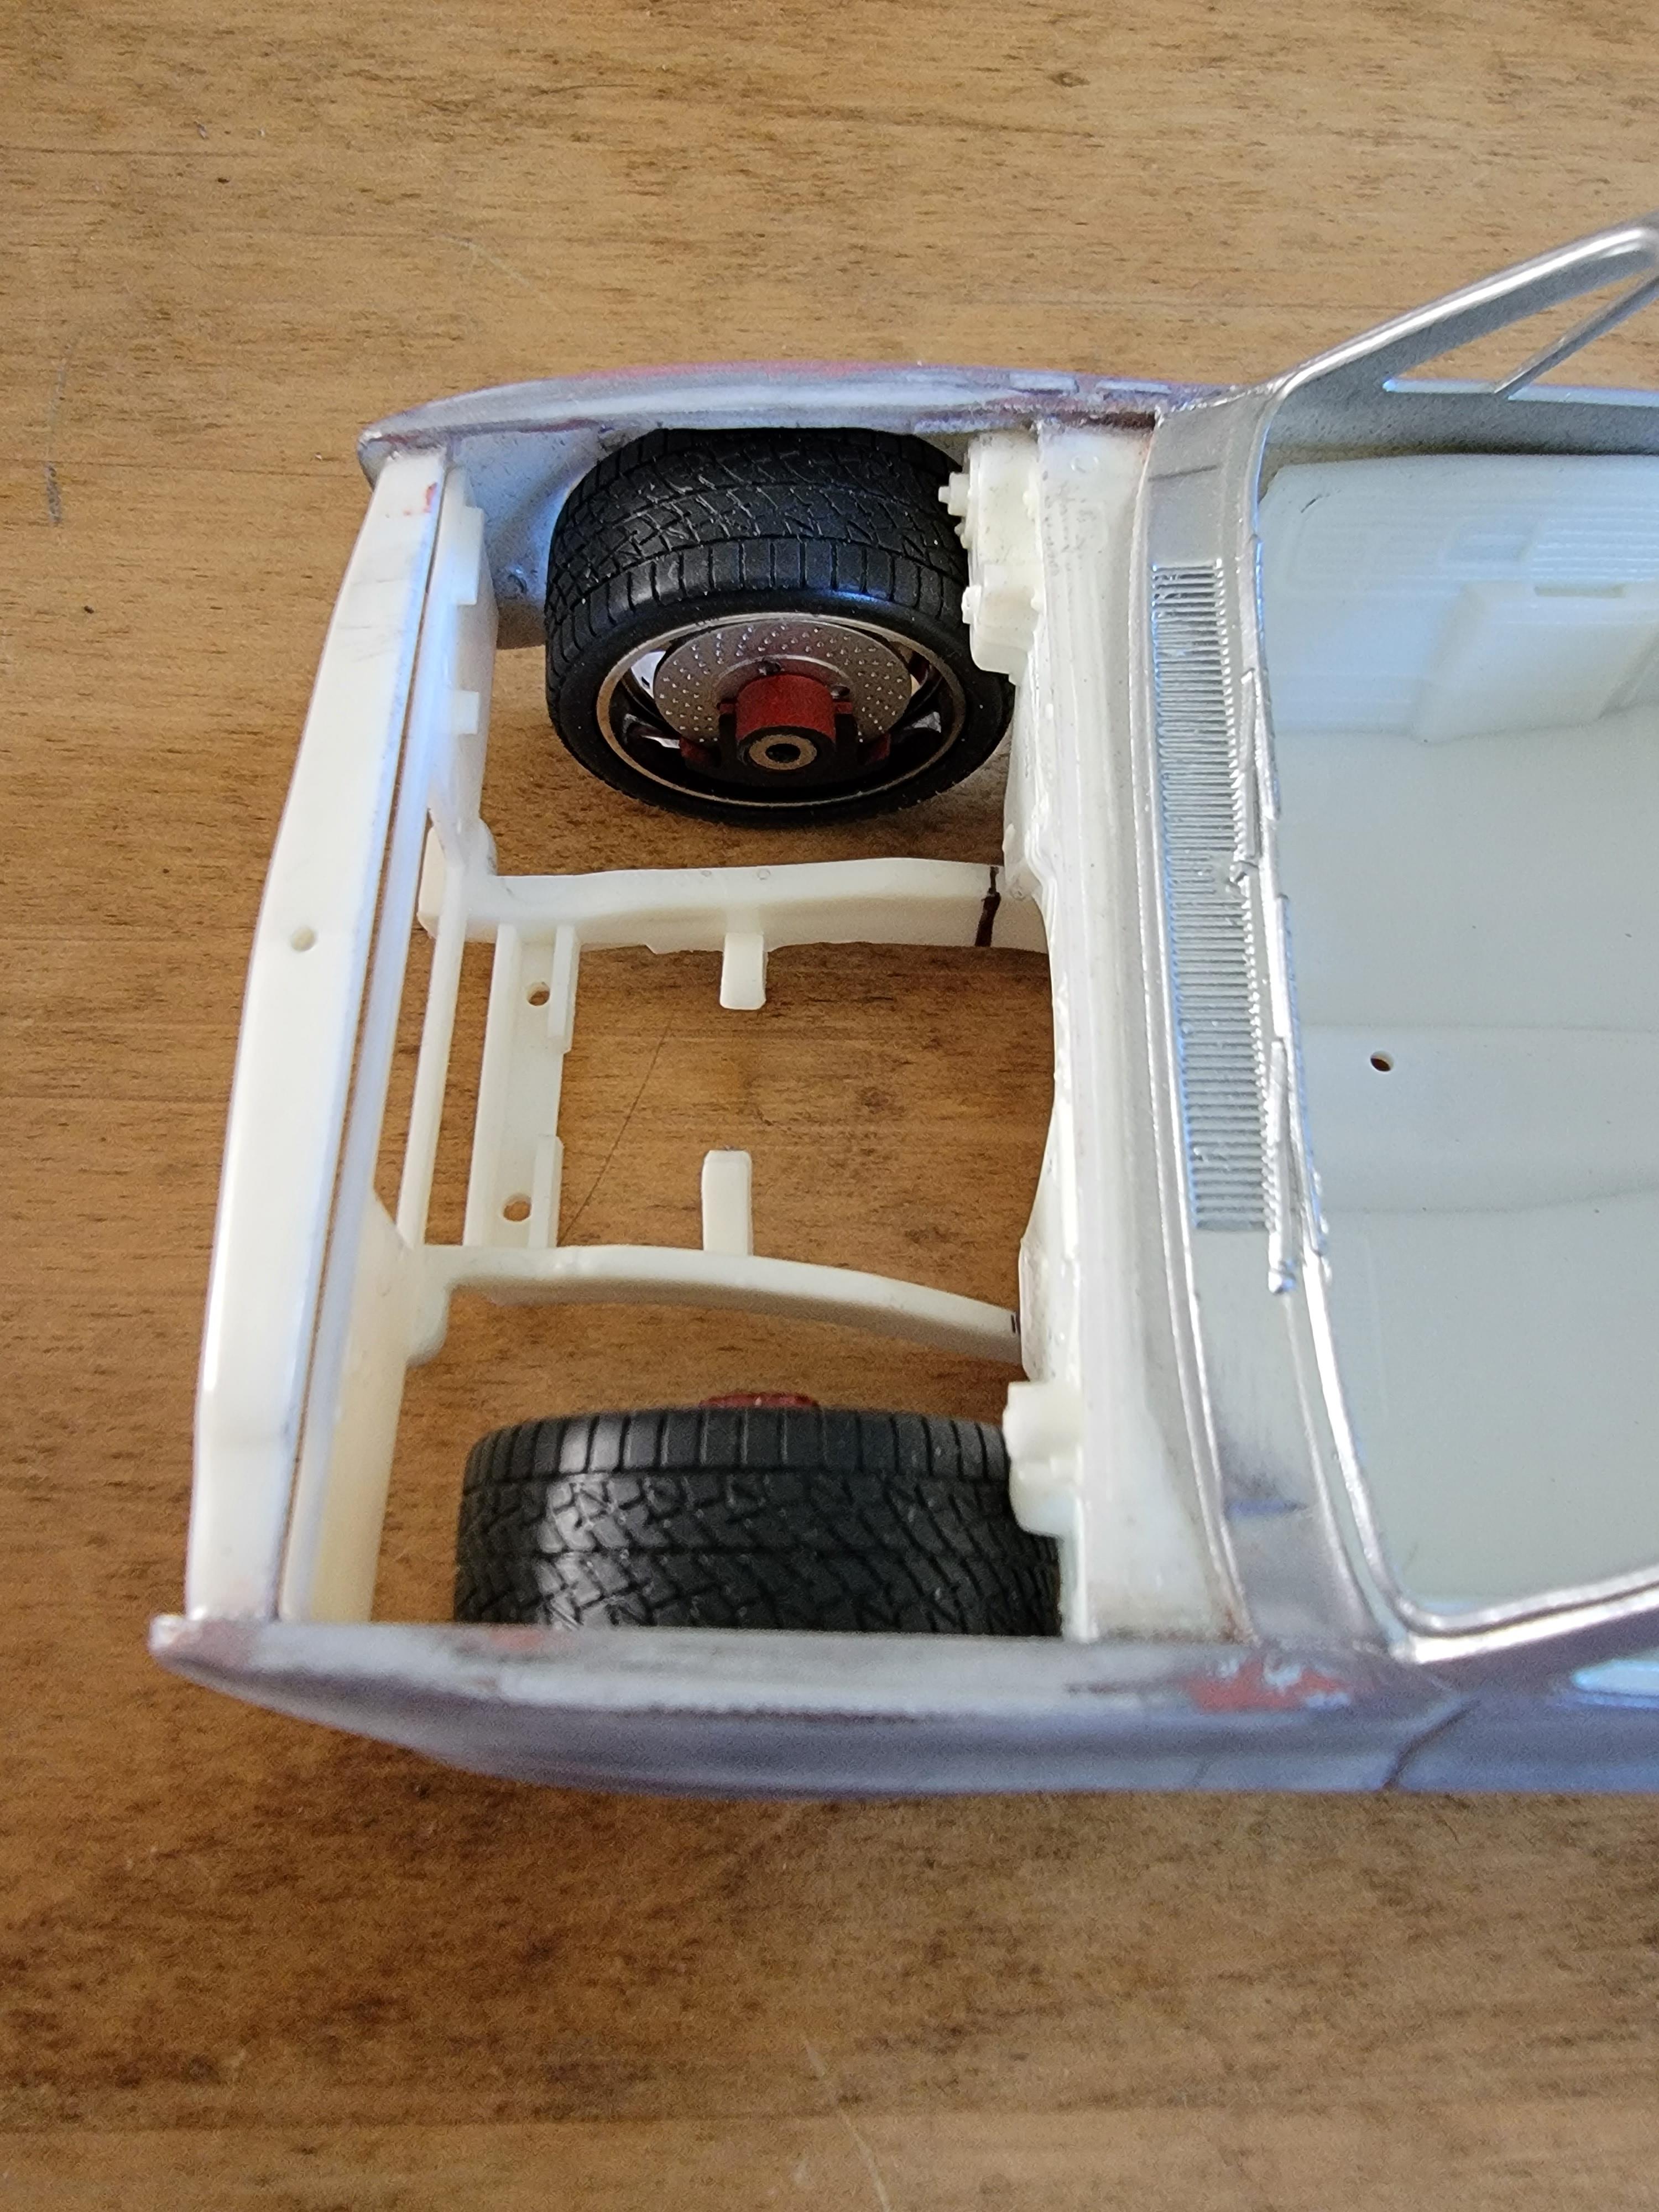
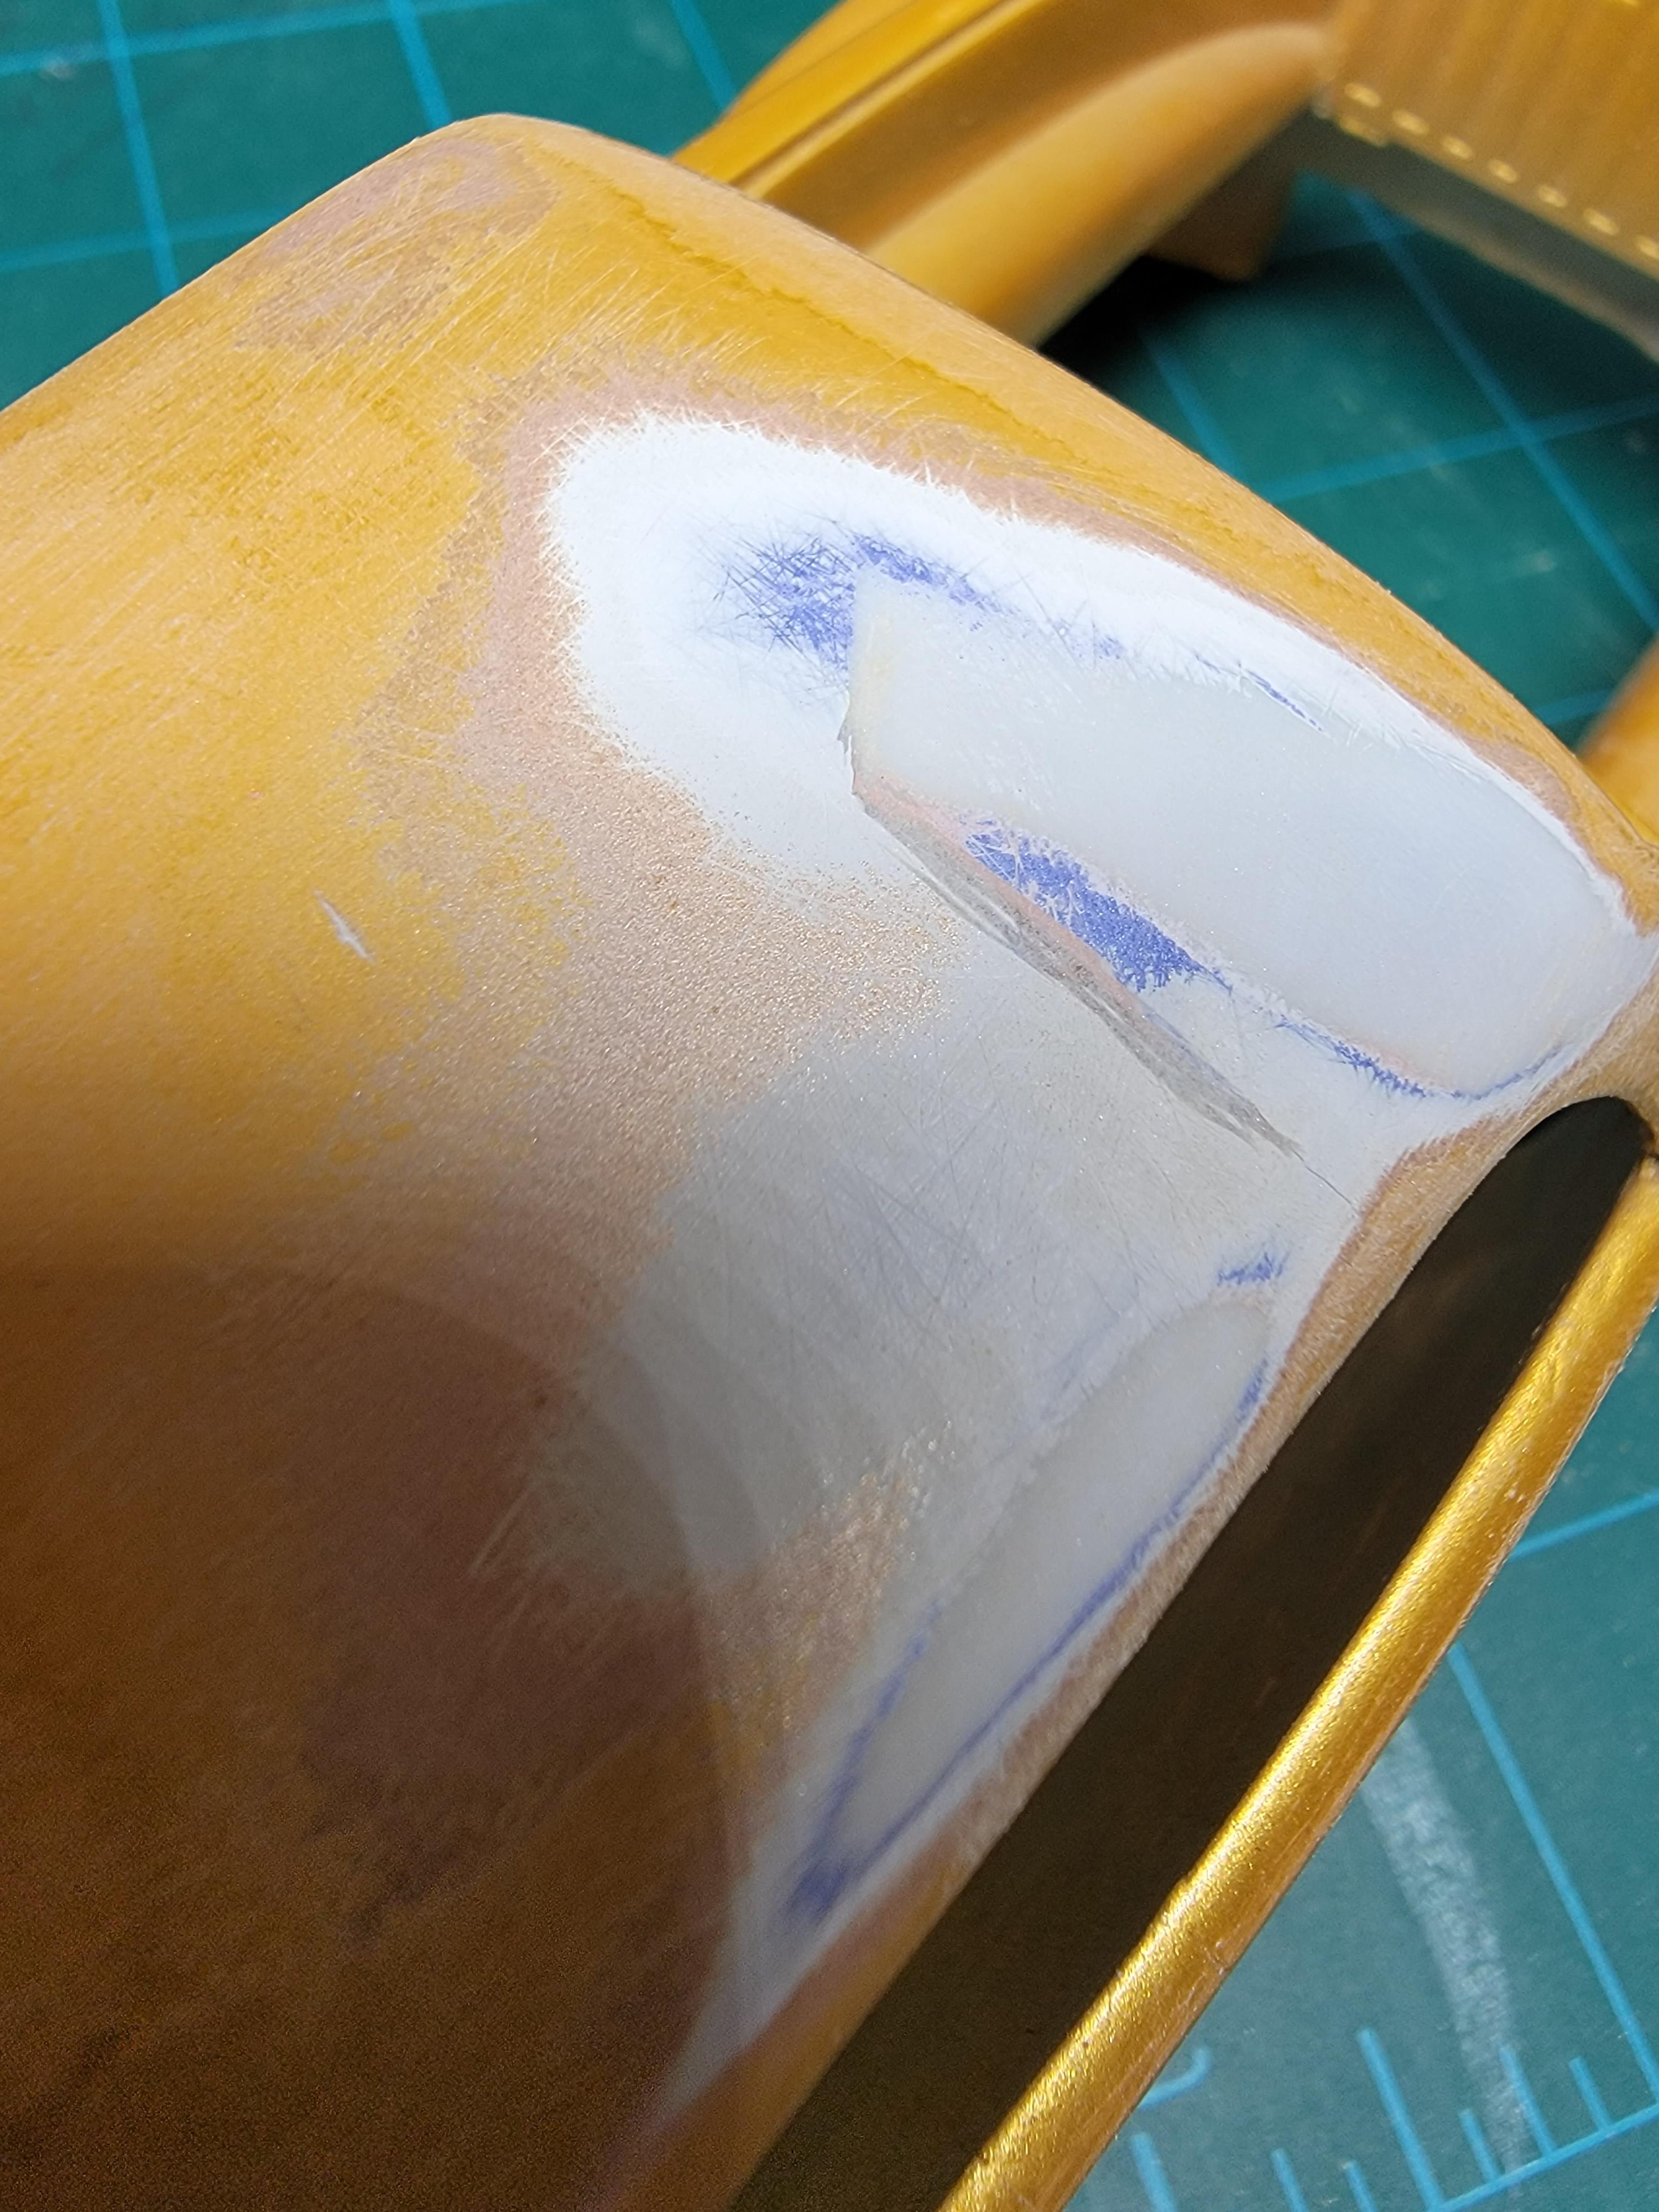
It just dawned on me as I was sitting here working on this tonight that I managed, yet again, to.put a WIP in the wrong section. This really should be in the pickup section. Anywho, doing some more work on this tonight. I got the roof sanded out and looking fairly smooth and even again. We will see how it looks with primer on it. I also began straightening out the lower tailgate line. It rose slightly from left.to right. I started by taking measurements down from the top of the gate at each corner and fount that it rose about 1/32. Not much, but definitely noticeable over such a short distance. I used a metal ruler as a guide and scribed a new line with my panel scriber. Then, using the scriber and a sanding stick I cleaned paint out of the old line and roughed up the area for the putty to stick better. As I did this I thought to myself that I should have filled the old line with .010 styrene first. Oh well, if this doesn't work I'll try that next. I also sanded a bit in the center of the tailgate as I saw a ghosting of a lock cylinder. Later-
-
Any updates on this build? You've got me excited! Later-
-
Early 70’s Suburban
Modlbldr replied to cargostar's topic in WIP: Model Trucks: Pickups, Vans, SUVs, Light Commercial
That looks nice. You molded the bed and cab together before extending the roof? Later- -
84 GMC custom widebody
Modlbldr replied to Modlbldr's topic in WIP: Model Trucks: Pickups, Vans, SUVs, Light Commercial
Thanks espo! Trying hard to get back into a routine of sorts for model building. I've been dealing with a lot of sorting and selling of my Buddy's collection and a lot of changes at work have left me little build time. Later- -
That's some good progress. Still watching to see what you do with this. I still haven't done anything with my rebuilders. Later-
-
84 GMC custom widebody
Modlbldr replied to Modlbldr's topic in WIP: Model Trucks: Pickups, Vans, SUVs, Light Commercial
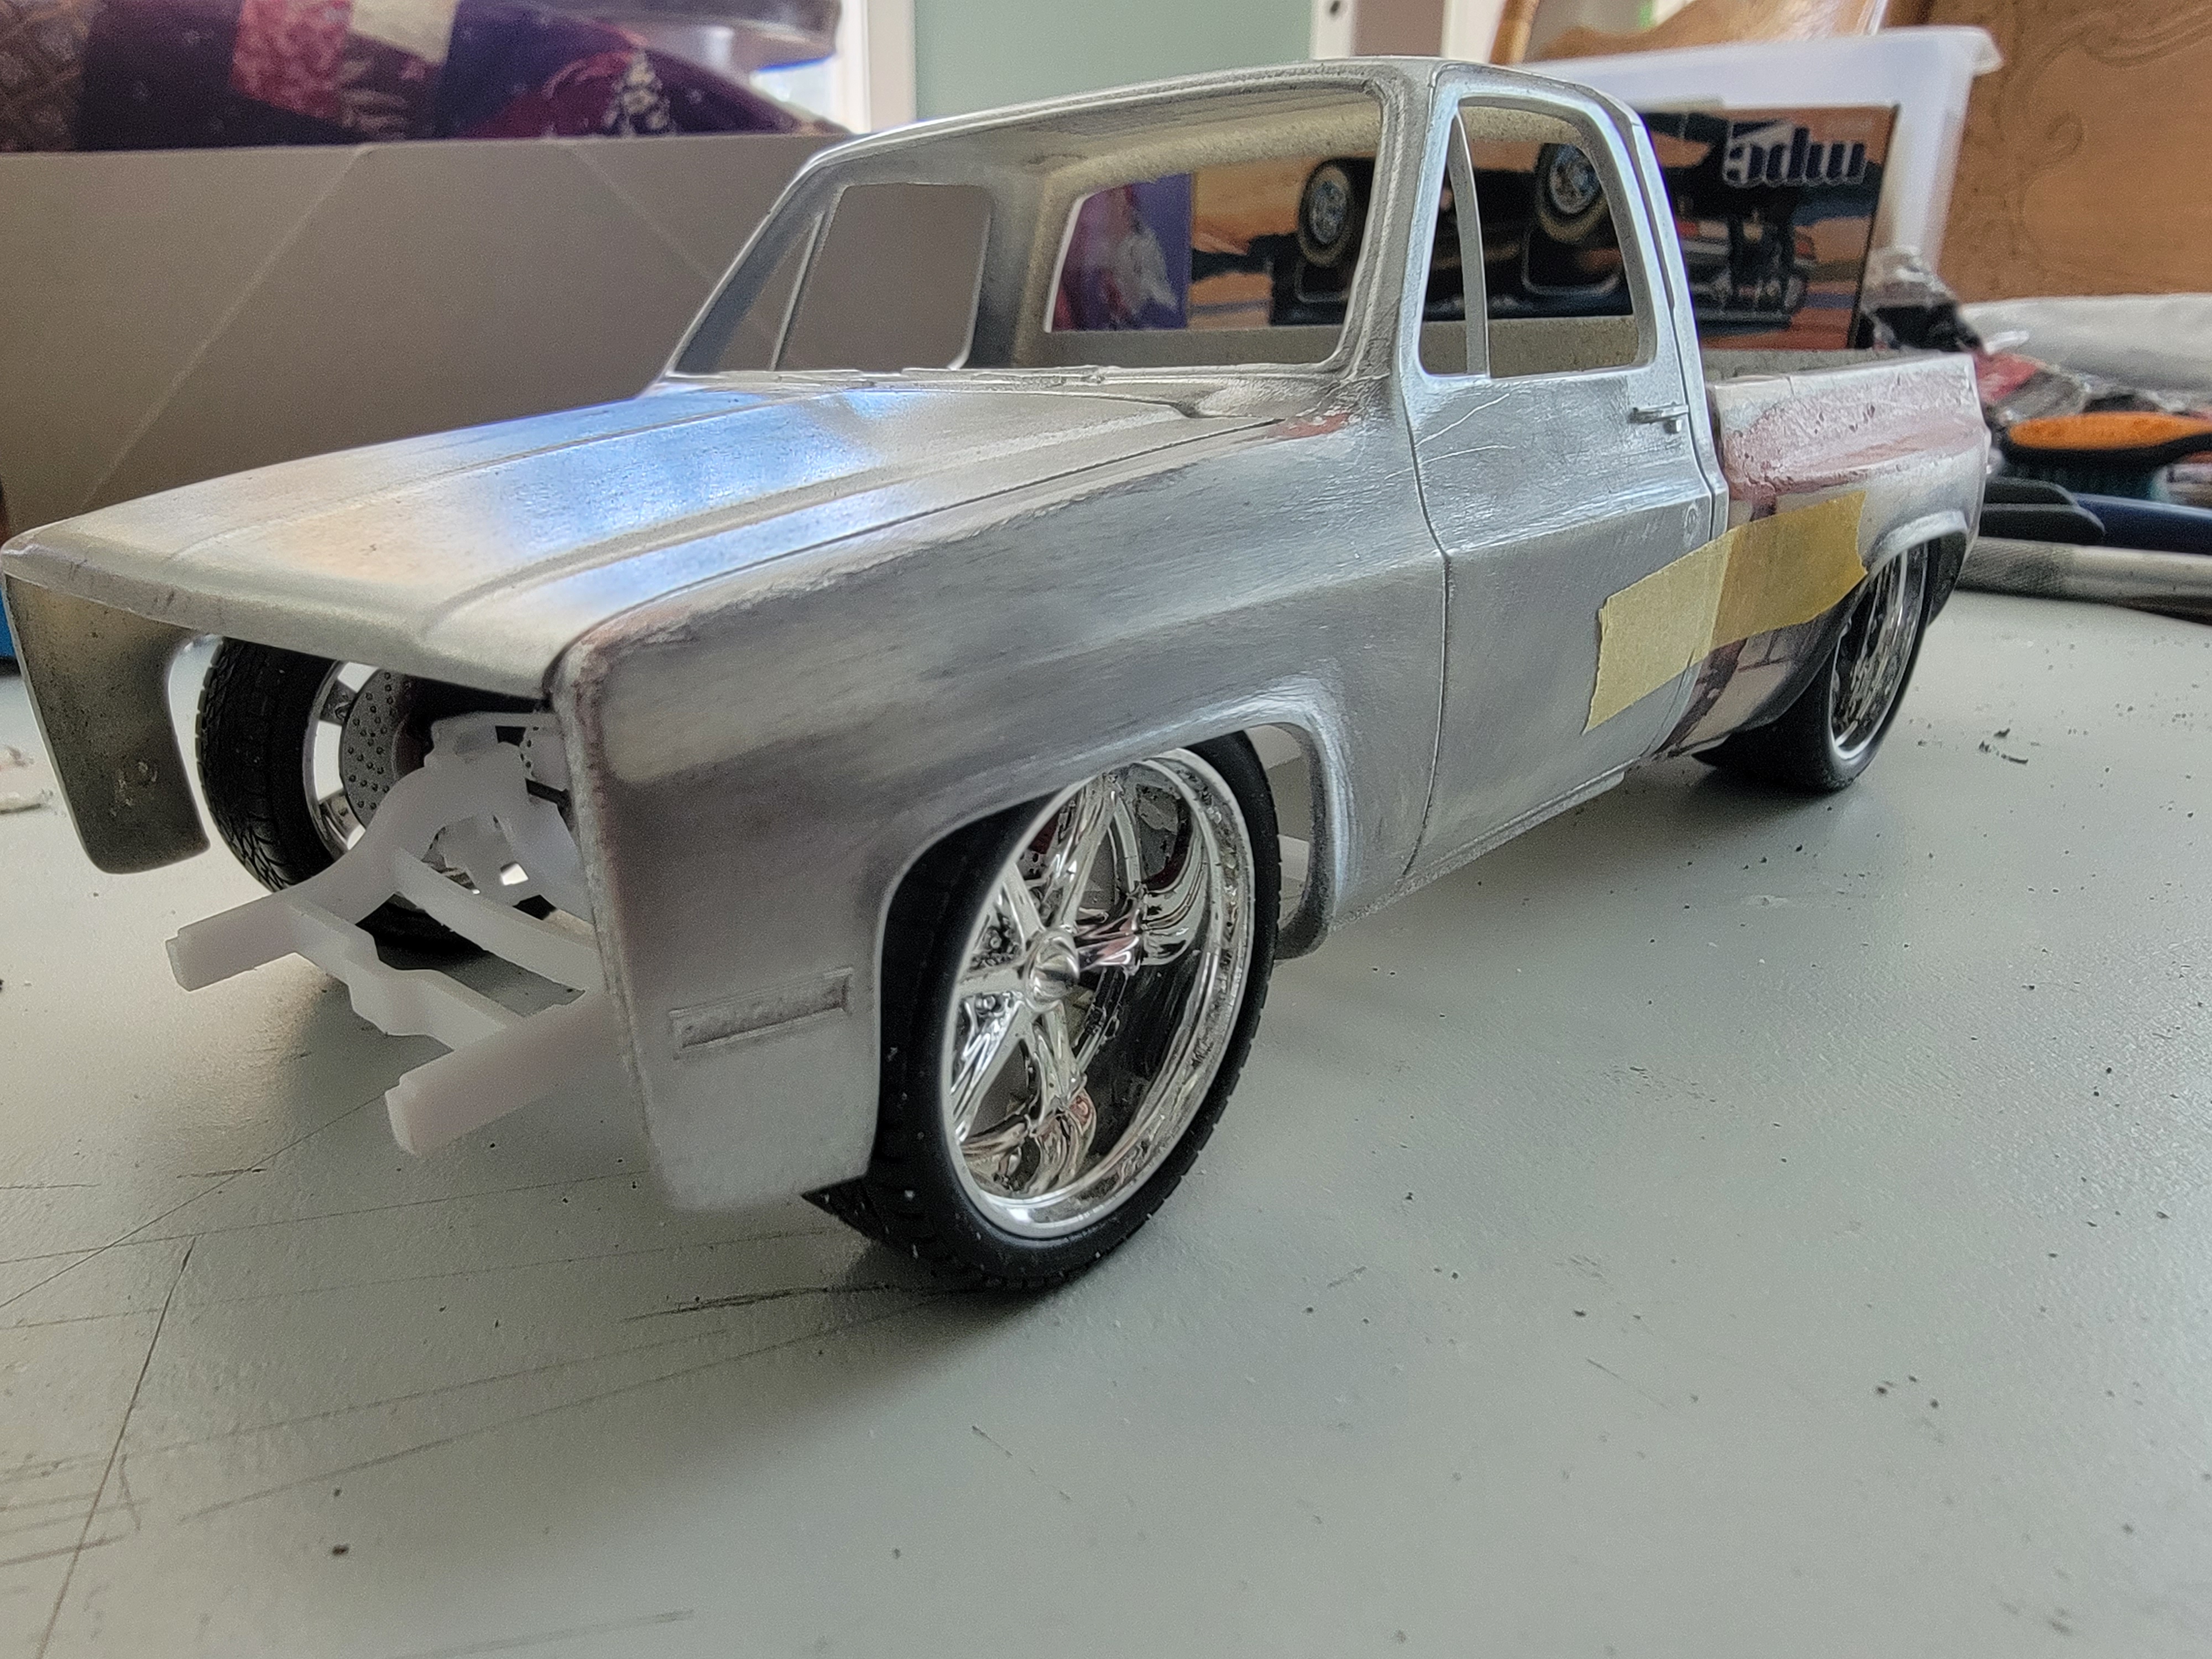
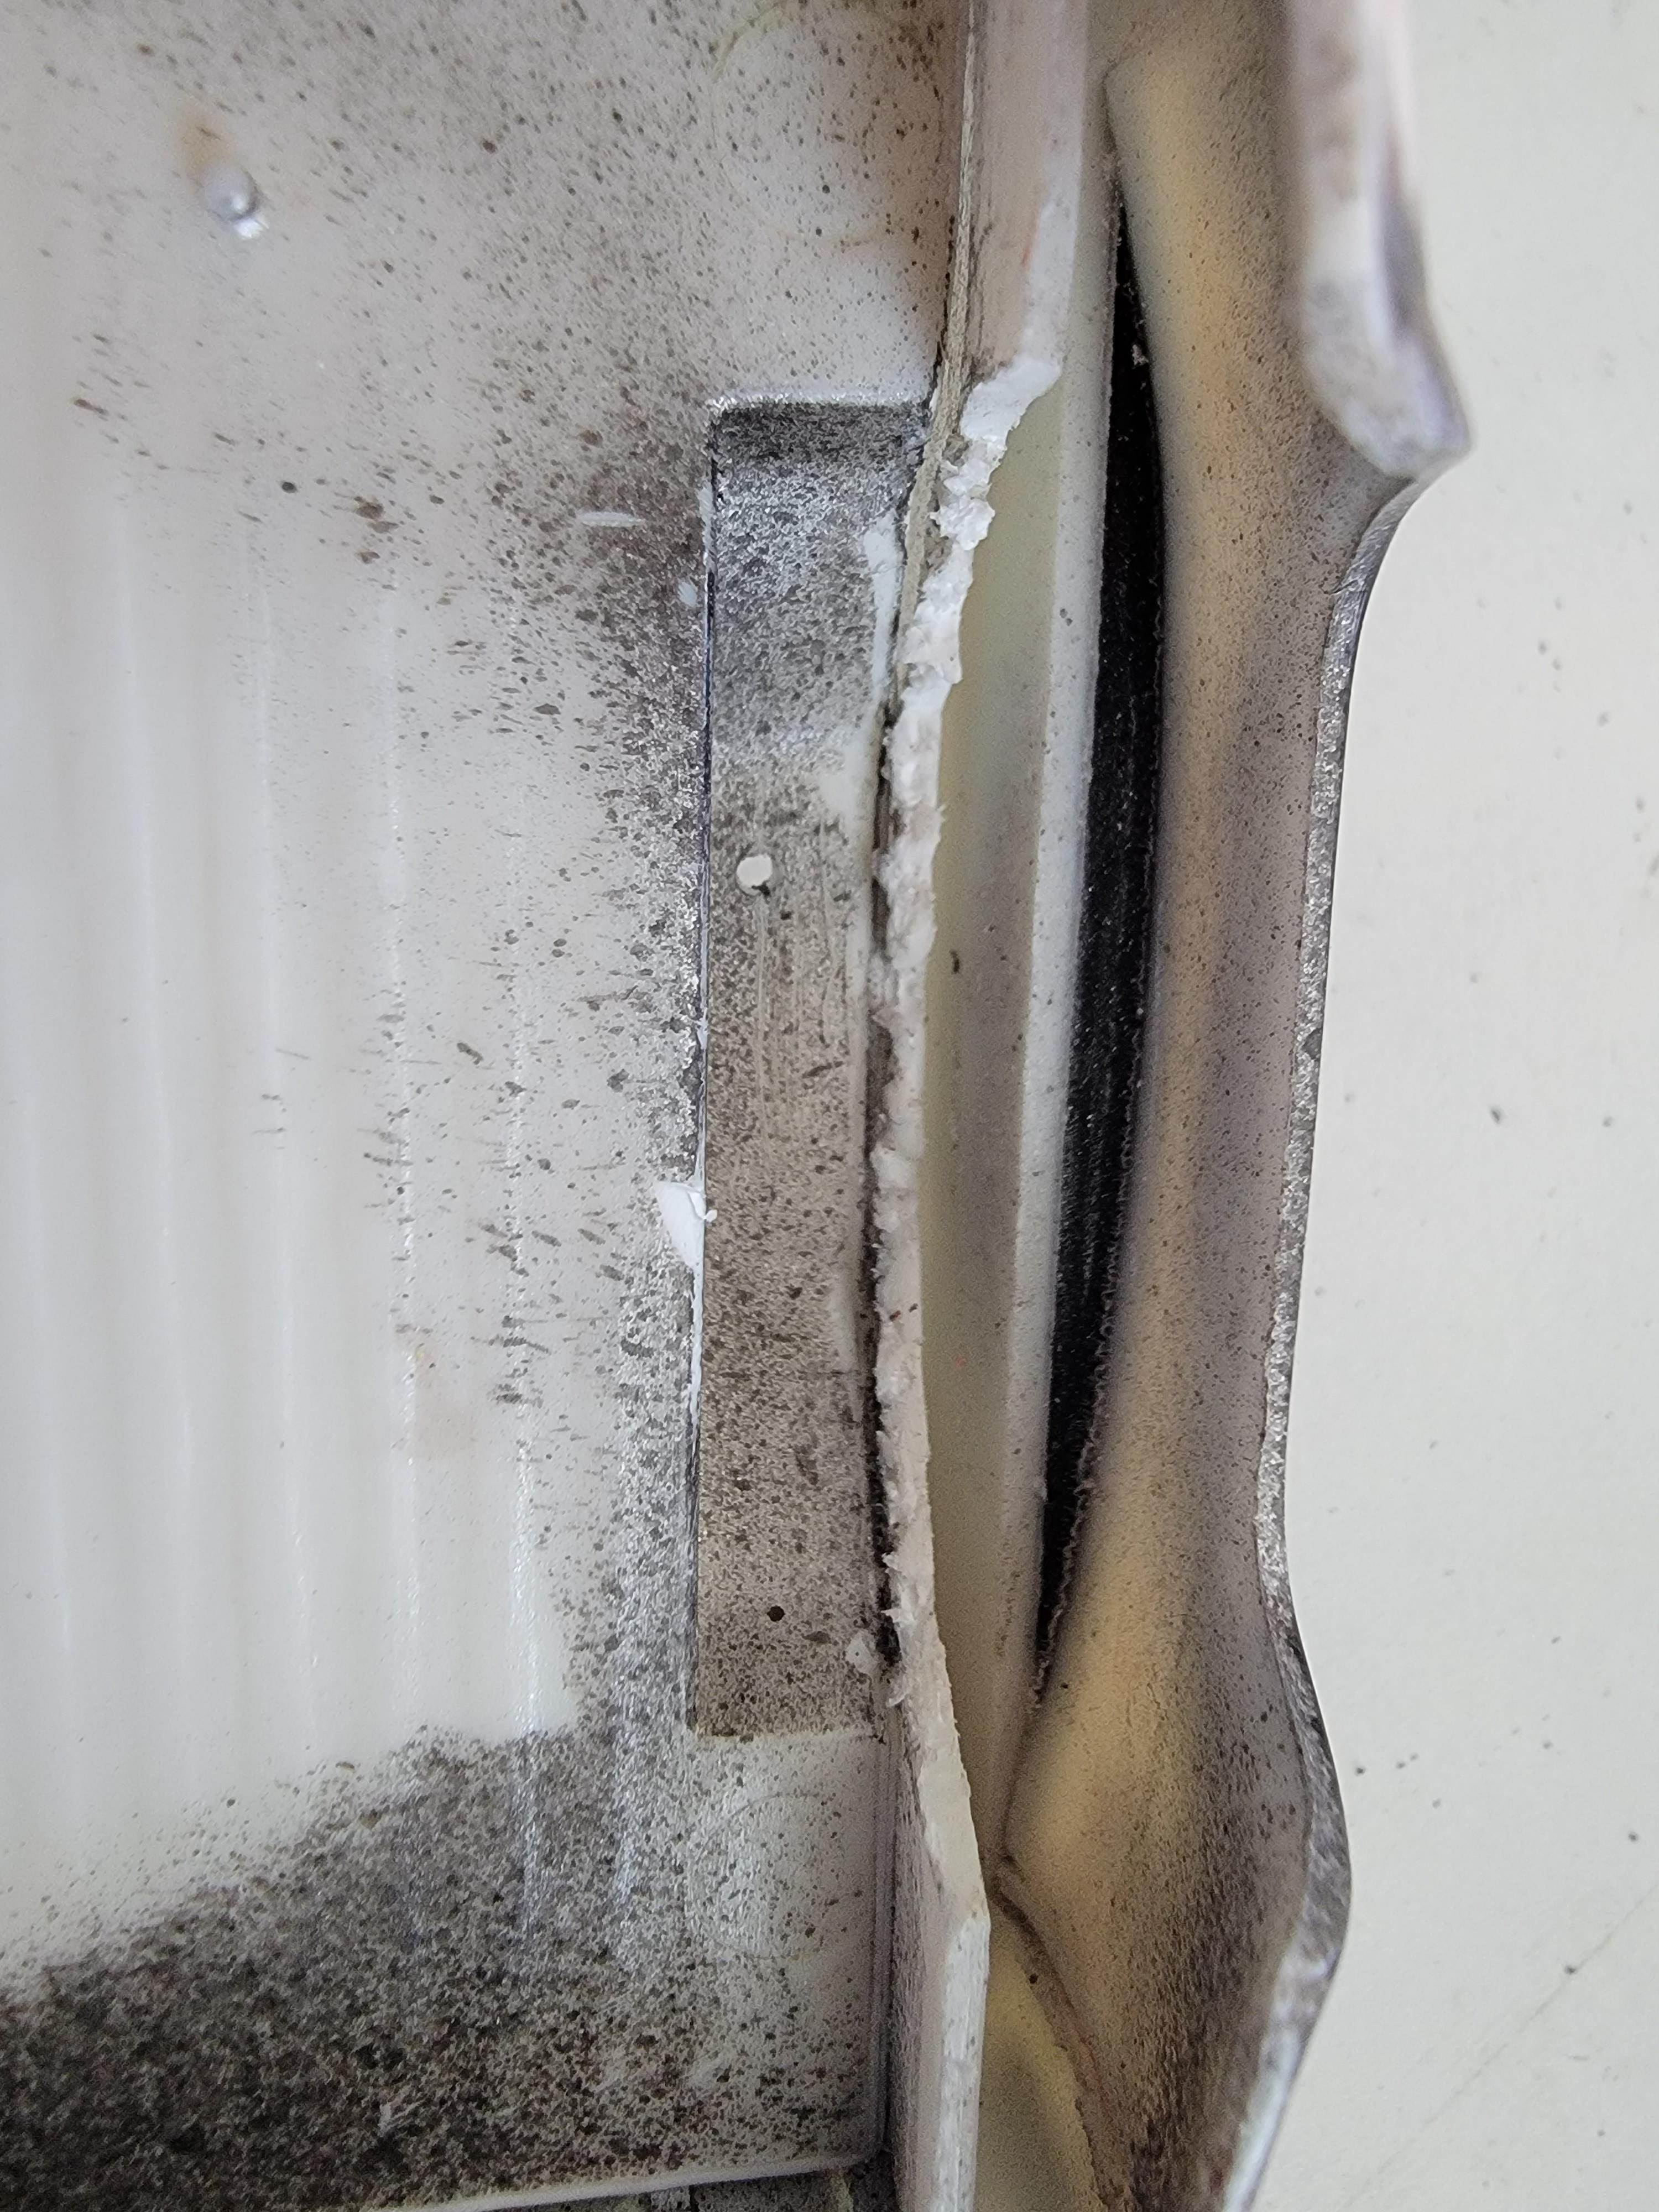
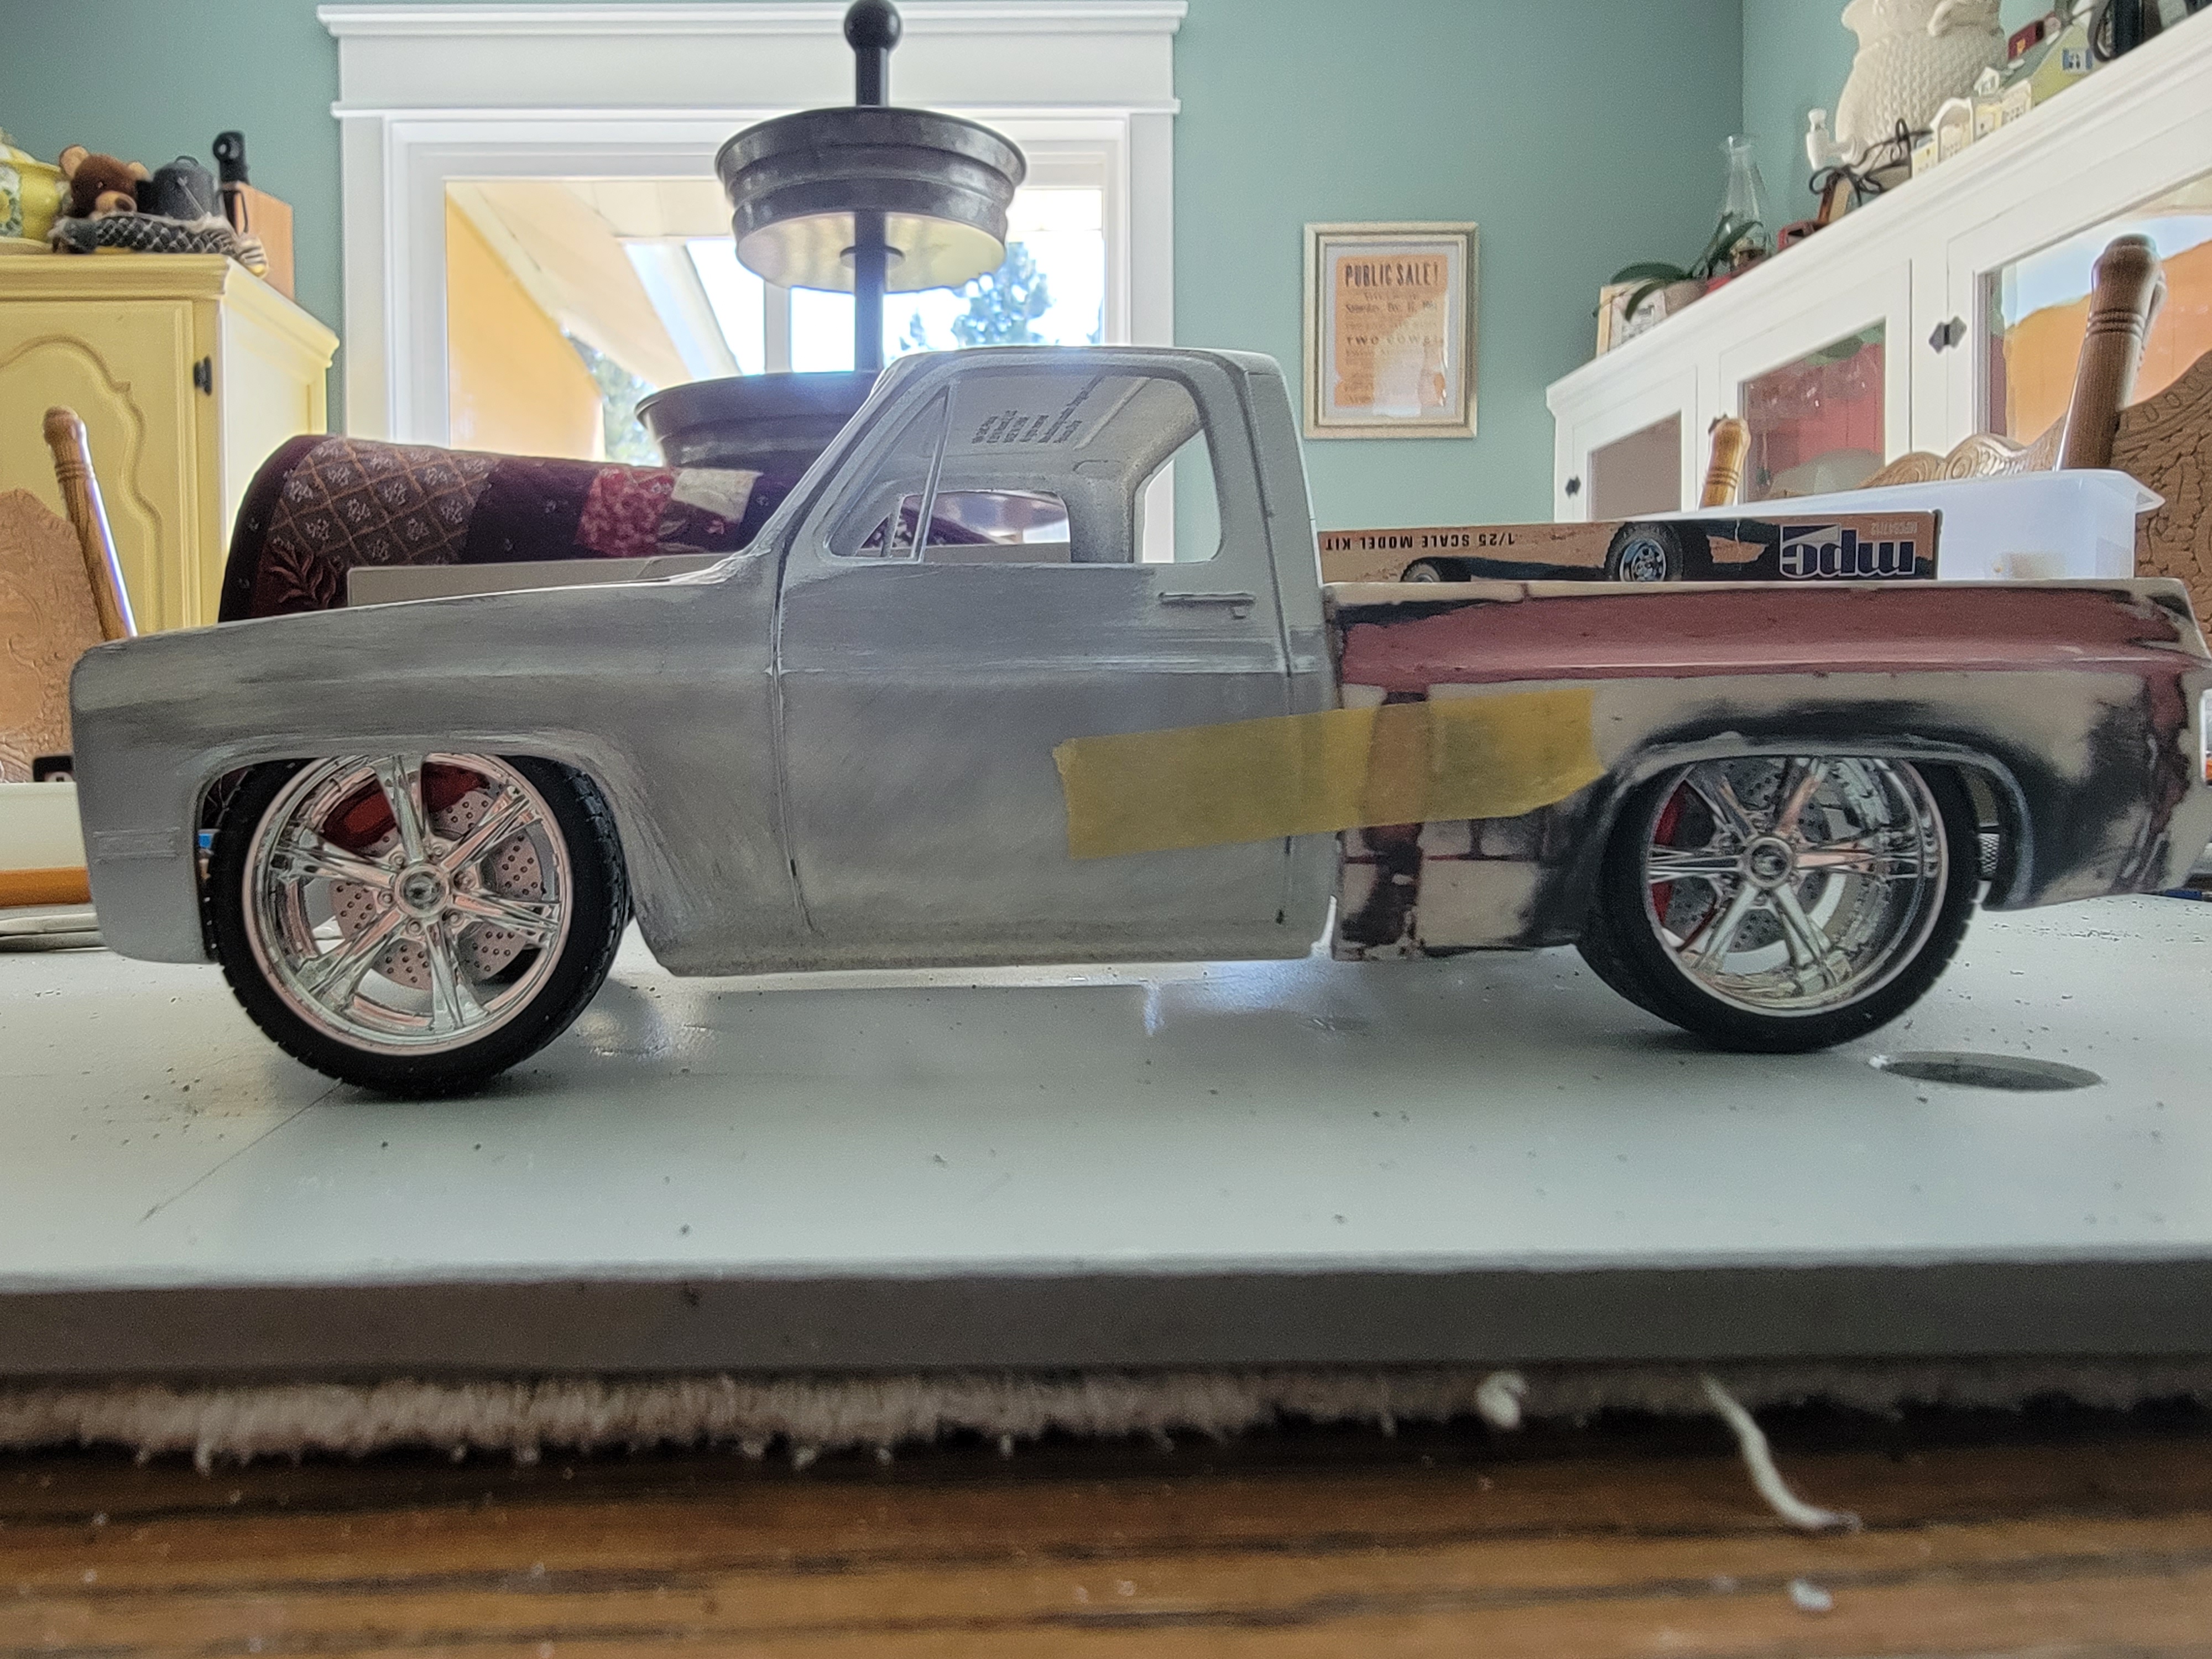
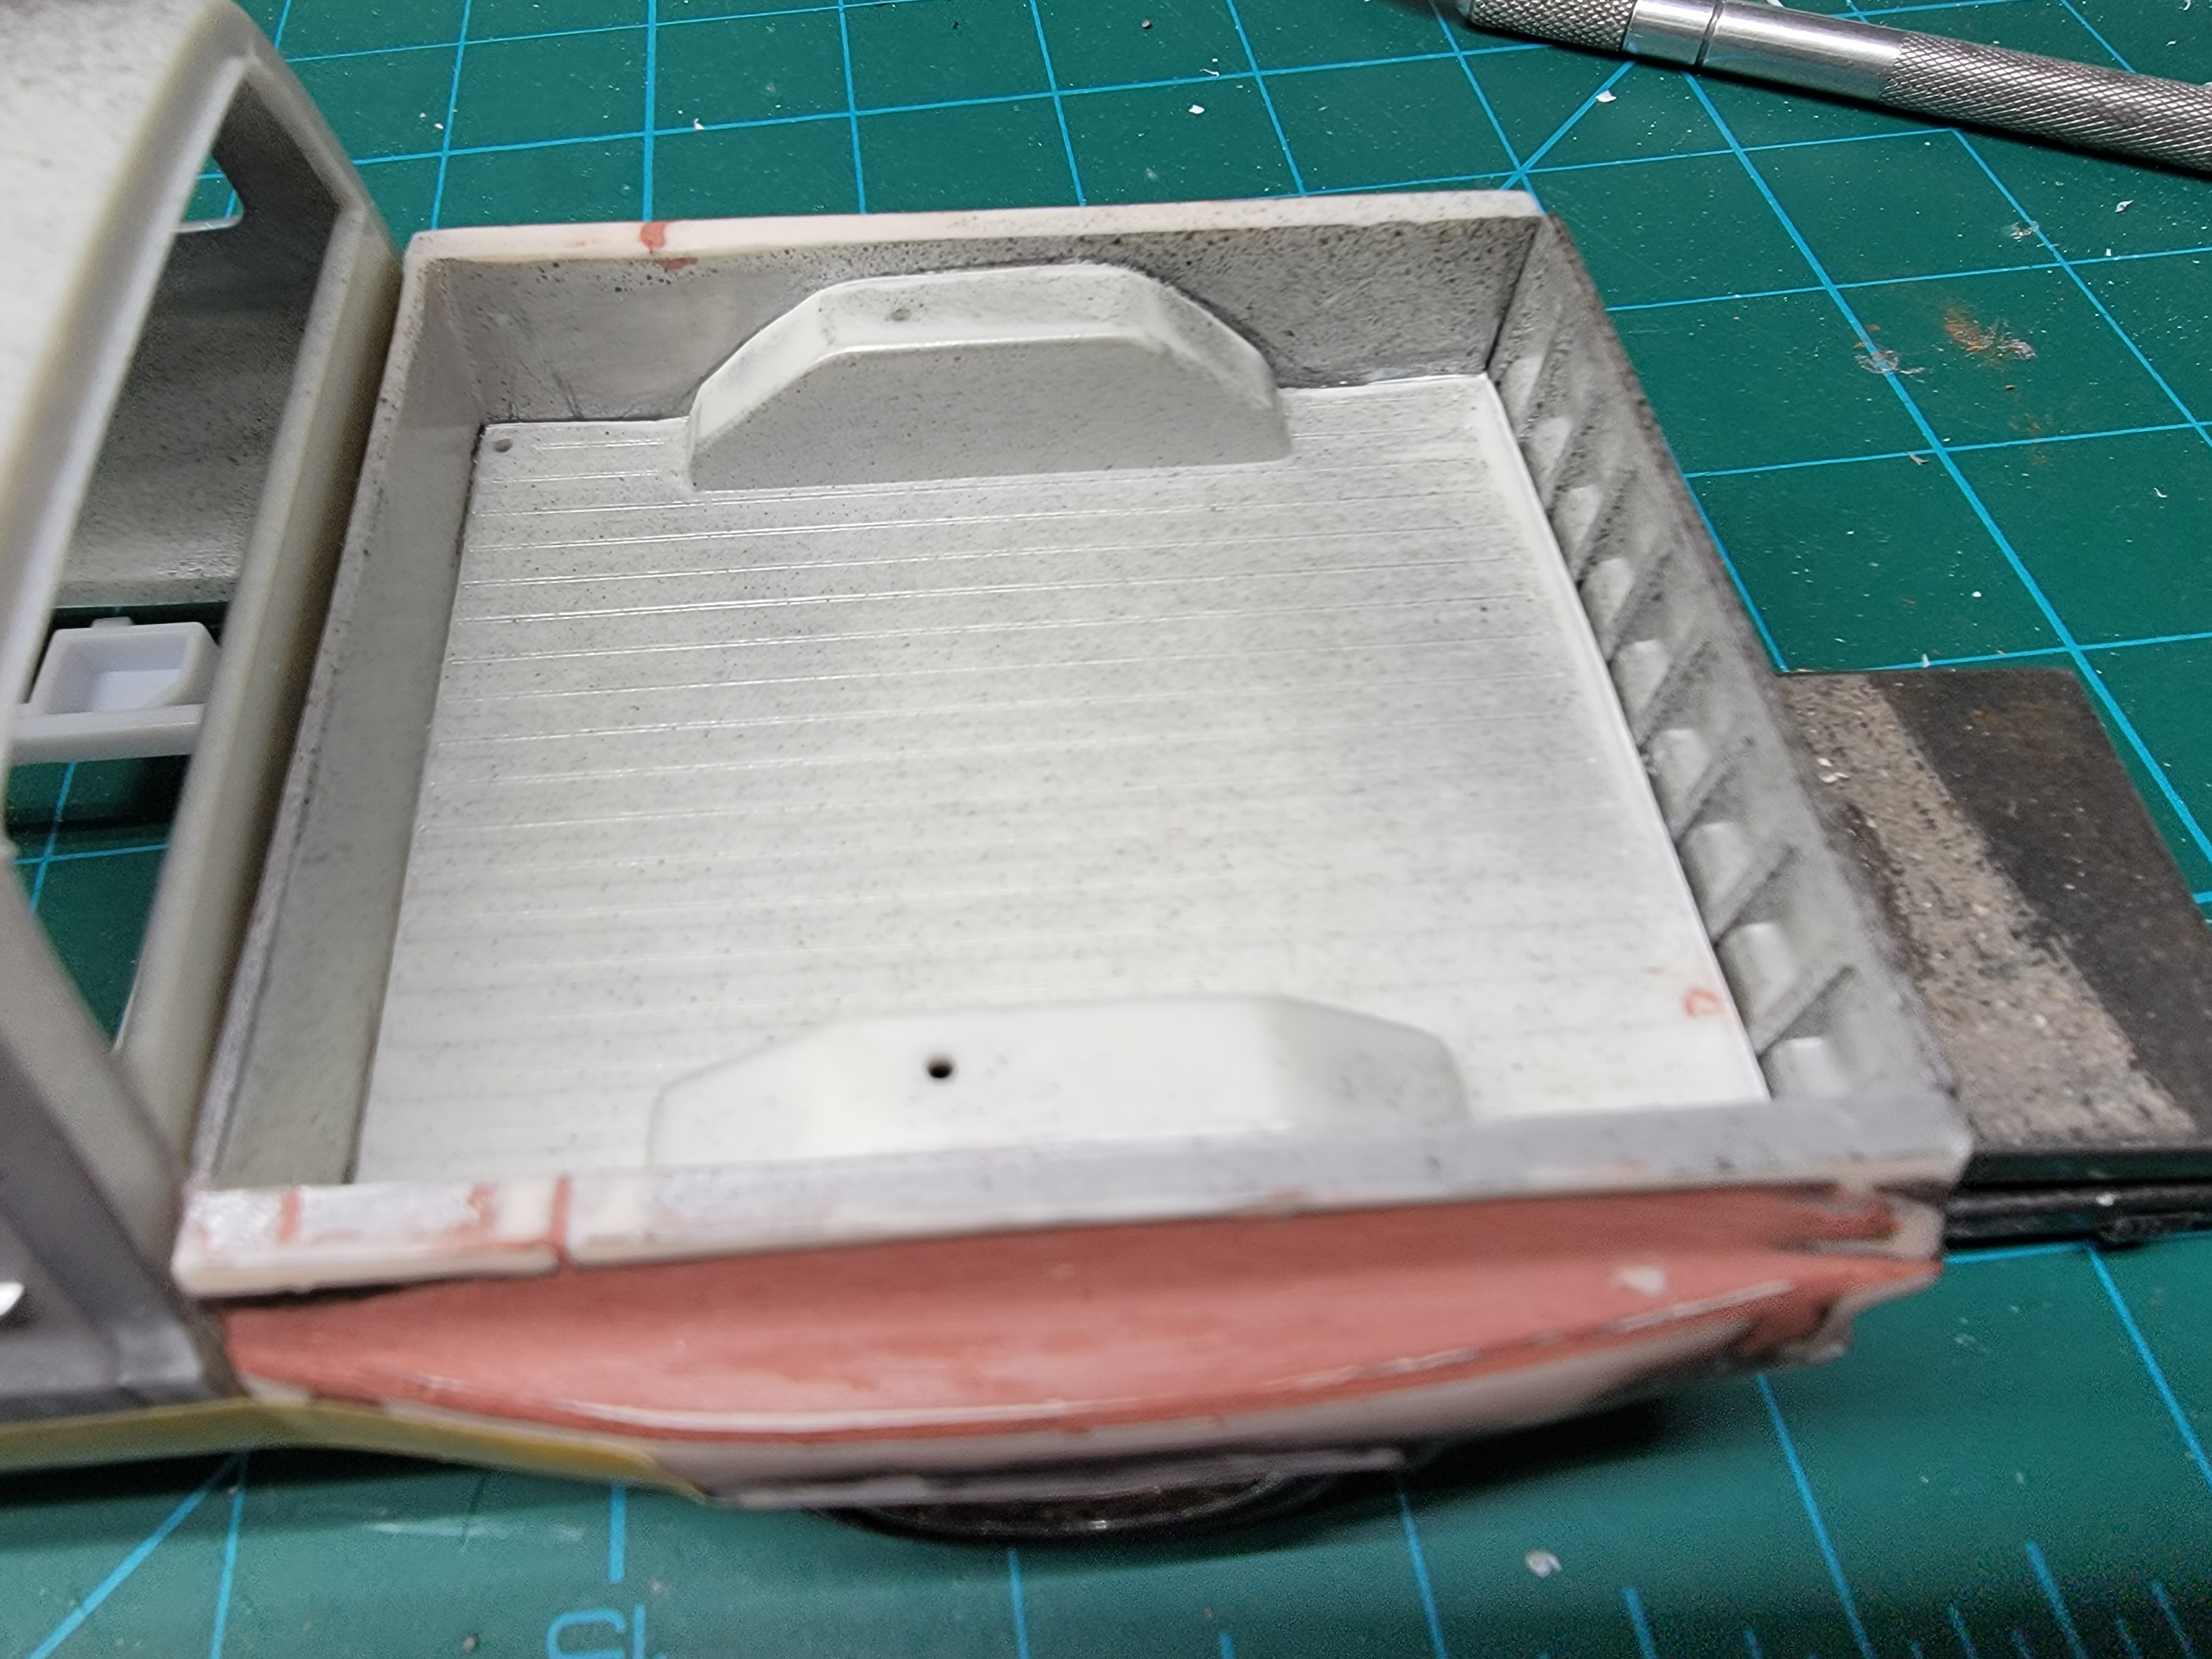
Brought this one back out and did some putty work on the bed. Getting excited about it again. I like that I only need to cut the tops of the inner wheelwells and not the bed floor to lower the rear. Going to start work on bagging the chassis. Later-
-
You hope we like it? We LOVE it!! Very creative use of parts. The entire concept flows nicely and the paint is gorgeous! Can't wait to see any others you create. Later-
-
Stretched SSR
Modlbldr replied to Modlbldr's topic in WIP: Model Trucks: Pickups, Vans, SUVs, Light Commercial
Been extremely busy lately and this morning before work was the first opportunity in a long while to do any model work. I sat down and carved a shallow trench where the crack in the roof was. Then I filled it with Microballons and super glue. Lastly I sanded it to rough shape. May need a thin coat of filler to reshape the roof. Pretty exciting, I know. But it is progress. Hopefully this will keep it from cracking. Later-
-
Sorry about that. Rough way to get some good kits. I'm going through that now.. Never seen the bike. Would love to find a Warlock or Pumping Iron. Later-
-
Nice score!! Great old kits there. Later-
-
Amen!! Later-
-
Stretched SSR
Modlbldr replied to Modlbldr's topic in WIP: Model Trucks: Pickups, Vans, SUVs, Light Commercial
Thanks for the interest guys! I like the work he did on this too. I just wish he would have finished it. I remember when these came out too. I had a co worker who got one. I saw him drive it only a few times. Seems strange to me that you never see them around nowadays. Funny story- Just recently I while driving around town I had the thought that I never see the new (2000 ish) Tbirds. Within the next couple of hours I had four drive by me at different times. Later-