Farmboy
-
Posts
518 -
Joined
-
Last visited
Content Type
Profiles
Forums
Events
Gallery
Everything posted by Farmboy
-
You know, I've had an H for decades, upgraded to a VL double action, and after that honeymoon, reverted back to my H for 90% of my spray jobs, and not once did I consider an easier way to work with it. I keep the allen key standing in a hole drilled in the corner of a nearby shelf. Nice one! The search begins. 😄
-

Gassers and rear spoilers?
Farmboy replied to Farmboy's topic in Model Building Questions and Answers
Thank you Daniel. Hard to beat the rule book. Guess I'm building an altered 👍 -
Gassers and rear spoilers?
Farmboy replied to Farmboy's topic in Model Building Questions and Answers
Thank you Harry -
Gassers and rear spoilers?
Farmboy replied to Farmboy's topic in Model Building Questions and Answers
David, it's going on lol. I don't think having a spoiler will get me kicked off the gasser table 🙄. -
Gassers and rear spoilers?
Farmboy replied to Farmboy's topic in Model Building Questions and Answers
Something that ran before half frame pony cars hit the scene, despite the Henry's tube frame (gasser?altered?). With nose high attitude and weight to the rear, I was wondering if a spoiler would increase rear traction at speed or if it would really matter. why didn't they use them? Was it a rule not to? Extra weight not worth it? Im a period fan, not copying anything specific. Just a question. -
I've narrowed a spoiler to suit the rear deck of my wip Henry J, looks bitchin' imho, and I will probably add it but I can't really recall seeing spoilers on many gassers. Any reason for this? One could obviously just take the hint and abandon the idea but it doesn't answer the question. Just wondering.
-
this is one i built a few years ago....

-
Straightliner, you are a man among men, lol! Many thanks for the follow-up pages, they will occupy a spot in my reference detail binder.
- 17 replies
-
- 1
-

-
- hawaiianfc
- detail
- (and 2 more)
-
Unraveling The Snakepit. In my view probably the most useful real photo article on race engine detailing that the top fuel modeling community has ever had the good fortune to see published. That was followed up by the two part article Building A Monster, the basic basics presented in 1/25 scale for top fuel engines. These two tutorials are now fading to old school reference but that's where my alky/gasser/showrod passions live. I don't thnk I'm alone. Any reference articles taking in current tech and detailing for current top fuel engines out there or planned?
- 17 replies
-
- 1
-

-
- hawaiianfc
- detail
- (and 2 more)
-
Hey Steve! A bit different from the box top fer shur. Thanks for the comment.
-
Well, it does have some simulated marble added to it so that could qualify as simulated art I guess, lol! Thanks for the kudos meatman, appreciate the shoutout.
-
Thank you much Carl.
-
Garry, I never really thought of the model as a whole, but treated each section (sink/pedals/tub/boudoir etc.) as a separate build, adding the odd detail. Believe me, after making 32 aluminum headers and scratching the fuel system on 4 Buick engines for Ivo's Showboat one tends to compartmentalize one's thinking lol! As for plumbing, to my great sorrow, styrene and a butane torch do not get along well. You needn't ask how I gained this nugget of wisdom. Thanks for the kind words. ☺️
-
Larry, Chris, thanks for the shout outs...appreciated!
-
Just went where it took me Don. Thanx for the kudos.
-
Hey Kenneth I knew a man back in the early 80's, Herman Lamm. I would produce a half hour radio show with him called "the netherlands call". he ran a travel agency. I just don't see the name very much is why I mention it. You must have the Eldon model of a dual bathtub show rod. Barris claimed it as his, but he actually bought it from the guy who designed it....I think. Many thanks for the kudos. Keep an eye out at swap meets, garage sales, ebay for the bathtub buggy....one is bound to pop up.
-
Thank you all for the comments everybody. Bill, some of the detailing was simply adding a radiator so the upper rad hose wasn't just hanging in the air anymore. lol. Keith, If memory serves it was last reissued in 2009. Not a very detailed kit so it's wide open for mods. Emre, always nice when a kit turns out. My pleasure to post the build, hope you enjoyed.
-
a couple of more pictures I missed. The step is made from a ribbon clamp, chrome. A closer though slightly out of focus view of the header ends, and a view of the accelerator with scratchbuilt spring return. just in case the previous photos were too dark... Comments and observations welcome.
-
Thanks much for the comments and kudos everybody. This is one showrod I really wanted for quite a while. Just got lucky I found one. Glad it turned out ok.
-
Finished up the George Barris Bathtub Buggy. Started out as a glue bomb I swapped a kit for with a friend of mine. I went my merry way with this, adding detail I thought maybe should have been there and changed a few things that just looked like they needed changing. There are plenty of mods added to the build, only a couple of pre-planned details were forgotten or simply left off. The shower spray diffuser heads were the only two aftermarket auto parts used in the detailing of this model simply because I had them on hand...and they fit. The buggy build isn't perfect, but as my wife says...it's cute. . 'Comments and observations welcome.
-
Bathtub Buggy Build
Farmboy replied to Farmboy's topic in WIP: All The Rest: Motorcycles, Aviation, Military, Sci-Fi, Figures
Yowza, Dave, that's a heck of a kudo! Really pleased you like the results of the wip! Thanks for the comment! -
Bathtub Buggy Build
Farmboy replied to Farmboy's topic in WIP: All The Rest: Motorcycles, Aviation, Military, Sci-Fi, Figures
And here's the immediate result for the pipe ends. The ends were drilled out for depth, some dark accent paint will be added later. That's it for this build. I think it turned out ok. The pipes are a pain. They have a seam the full length on the top and after removing it, I had no way of duplicating the finish. Decided to hide it in plain sight by adding a brass bar to give one the impression of a heat shield. I'll post pics of the build in the Model Cars Under Glass section when I get back. Many thanks to those who stopped by. Comments and observations welcome. -
Bathtub Buggy Build
Farmboy replied to Farmboy's topic in WIP: All The Rest: Motorcycles, Aviation, Military, Sci-Fi, Figures
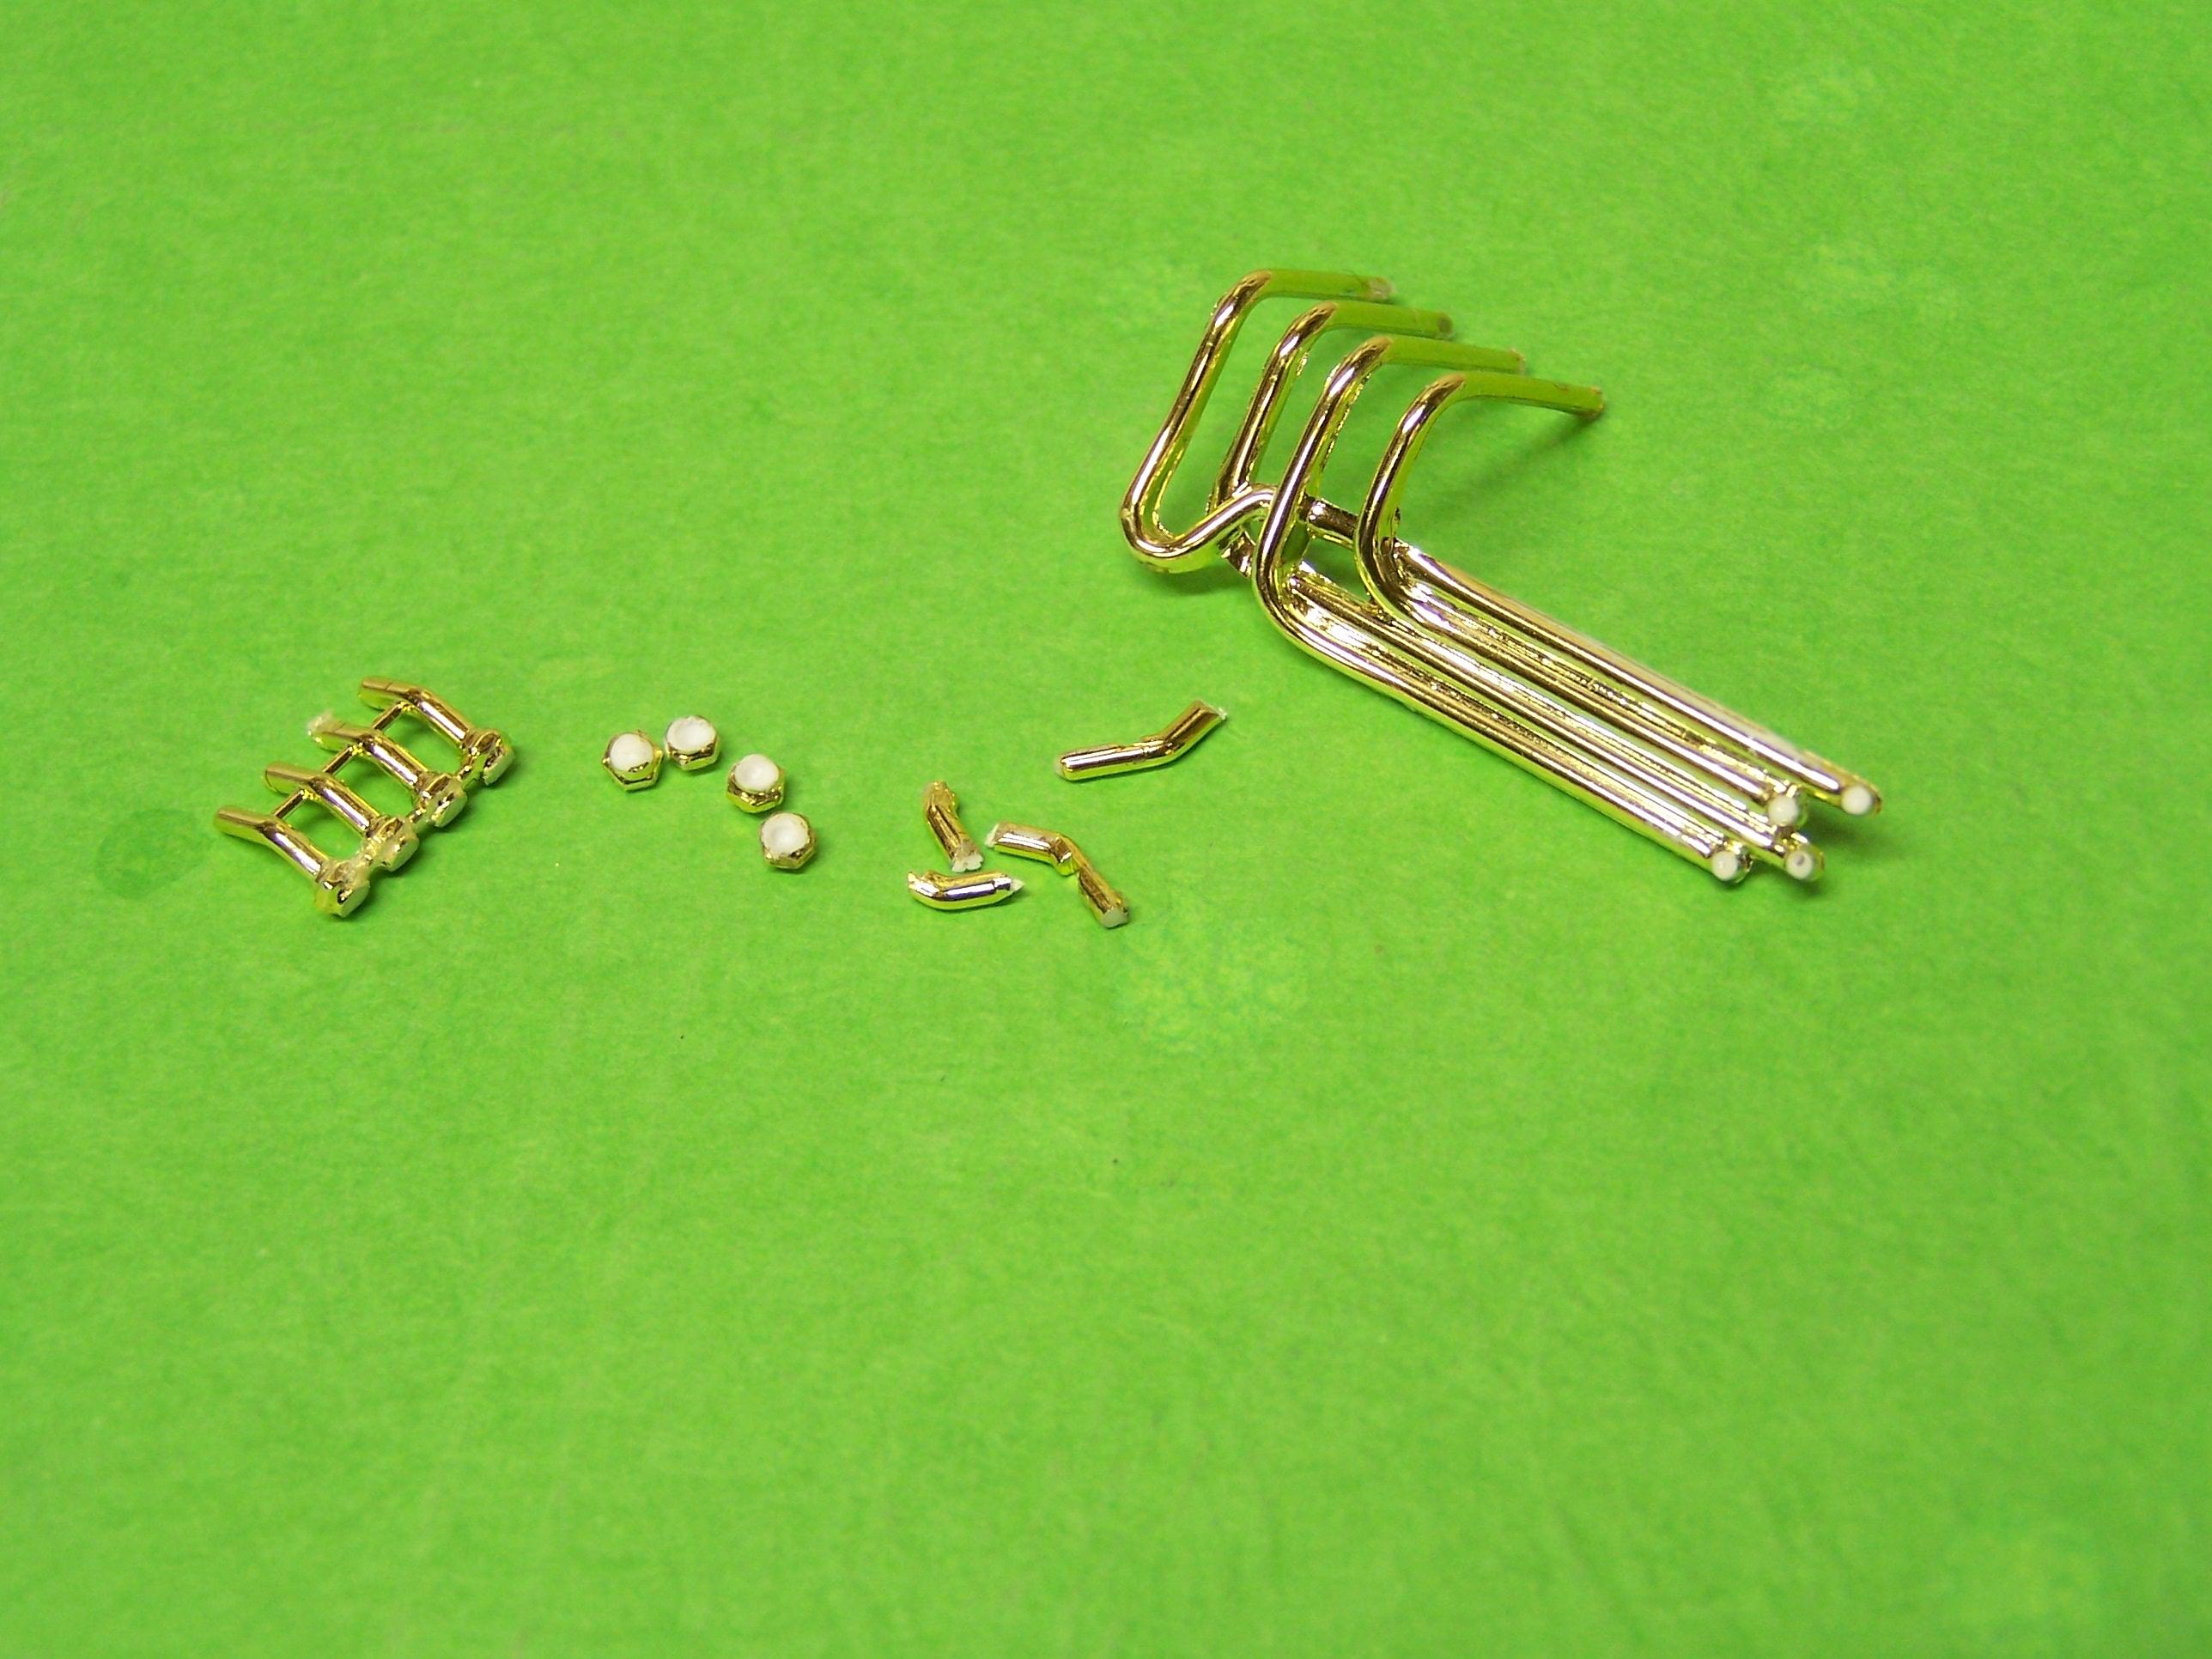
I decided to try my hand at modifying the exhausts to more or less mimic how they looked on the real deal. Here's the sequence in one easy photo: From left to right: One of 2 sets of air intakes coming from the top of the mystery box on the kit engine. Hex fittings cut from the intake pieces. They've been drilled out for depth. Next to them are the separated shaft pieces. The header assembly. The header ends are moulded 90 degrees to the pipes. Filed flat, they will be where the hex fittings go. The model is finished. I'll have photos soon.
-
Bathtub Buggy Build
Farmboy replied to Farmboy's topic in WIP: All The Rest: Motorcycles, Aviation, Military, Sci-Fi, Figures
Thanks for the shoutout Carl. Just about finished this build. I added copper water lines to the tub this afternoon and the car is now all together but for the headers. If I hack the exhaust pipes I'll show how I did it (kinda forgot to show a few things I had done along the way with this build) but other than that, the next shots will be the completed model here, then the Under Glass section. Your kind words appreciated. -
Bathtub Buggy Build
Farmboy replied to Farmboy's topic in WIP: All The Rest: Motorcycles, Aviation, Military, Sci-Fi, Figures
I appreciate the comments Dave. The end is in sight. Throttle linkage, a couple of water pipes, scratch built header supports and I'm almost done! I'm experimenting with using the large hex union couplers (I'm repurposing the no longer needed kit air intakes) as header pipe endings like on the 1:1. It's not so much the building but giving them a good finish that'll make the decision. So glad you're enjoying the build.