David G.
-
Posts
11,307 -
Joined
-
Last visited
Content Type
Profiles
Forums
Events
Gallery
Everything posted by David G.
-
The fuel tank is as neat as neat can be, simple and tidy yet effective. That is an odd thing about the directions for the pedals but I've occasionally seen strange omissions and errors in kit directions. I've always chalked it up to changes made late in the kit's development cycle. In any case, a good solution to a minor issue. David G.
-
I'm sorry to learn of the paint issue but at least it wasn't a total loss. I'm looking forward to seeing more. David G.
-
Thank you Len. I thought about doing that but the "tubes" provided in the kit are pretty small, not much bigger than the 26 ga wire I would use for wiring the plugs. I do have some plans for a little extra added detail but thins one will be OOB for the most part. That's a great reference photo! I grabbed a copy of it for my research file, thanks for posting it. =D-
-

Model factory hiro Porsche 935/78
David G. replied to Brudda's topic in WIP: Other Racing: Road Racing, Land Speed Racers
It's nice seeing this one back on the bench Bruce. I think the Gulf livery is a great idea! One of my favorite paint schemes. David G. -
Good progress on this David! Making a fuel tank seems like a fun idea, something I would probably do too. It must be a "David" thing. David G.
-
I admire your patience Daniel. My frustration wouldn't necessarily be in working with the tiny pieces but against the decreasing dexterity of my fingers and hands. Fabulous work! Thanks for continuing to post these updates. David G.
-
Hello Everybody! This time of year, for various reasons I don't get much time at the bench. So here's what I was able to get done during my last build session. I have the basic engine assembly completed. All the reference photos I've found on line show the engine and transaxle painted gloss black with aluminum cylinder heads and intake manifold. Not very much visual interest but I'll throw some washes and a little more detail painting at it to bump up the eye-peal a bit. It's time to start smoothing out the parting lines and other casting remnants. That's all for this round. As always, thanks for taking the time to have a look and please feel free to post any comments you may have. David G.

-
Thank you Noel, I'm glad to know that you're enjoying the build. I have one of those Pyro/Lindberg Auburn Speedsters in my stash. I opened the box for a look when I first got it. When I saw the raised panel lines around the doors, I was immediately turned off. I'm thinking about making it into a period Batmobile. Thanks for the information you provided about those kits Noel, I always enjoy learning more about the kits I'm working on. David G.
-
Thank you Ken! David G.
-
Monogram's 1955 Lincoln Futura Concept Car: Finished
David G. replied to David G.'s topic in Model Cars
Thank you Thomas. Thank you Bill. I have to admit, opening the box for the first time and seeing what was in there I did have concerns. I knew I could build it and get... something. I'm glad I was able to get it to come together as well as I did. Thanks again. David G. -
Thank you Dann, I'll be glad to have you along for the ride. Is it close to what you expected? David G.
-
Monogram's 1955 Lincoln Futura Concept Car: Finished
David G. replied to David G.'s topic in Model Cars
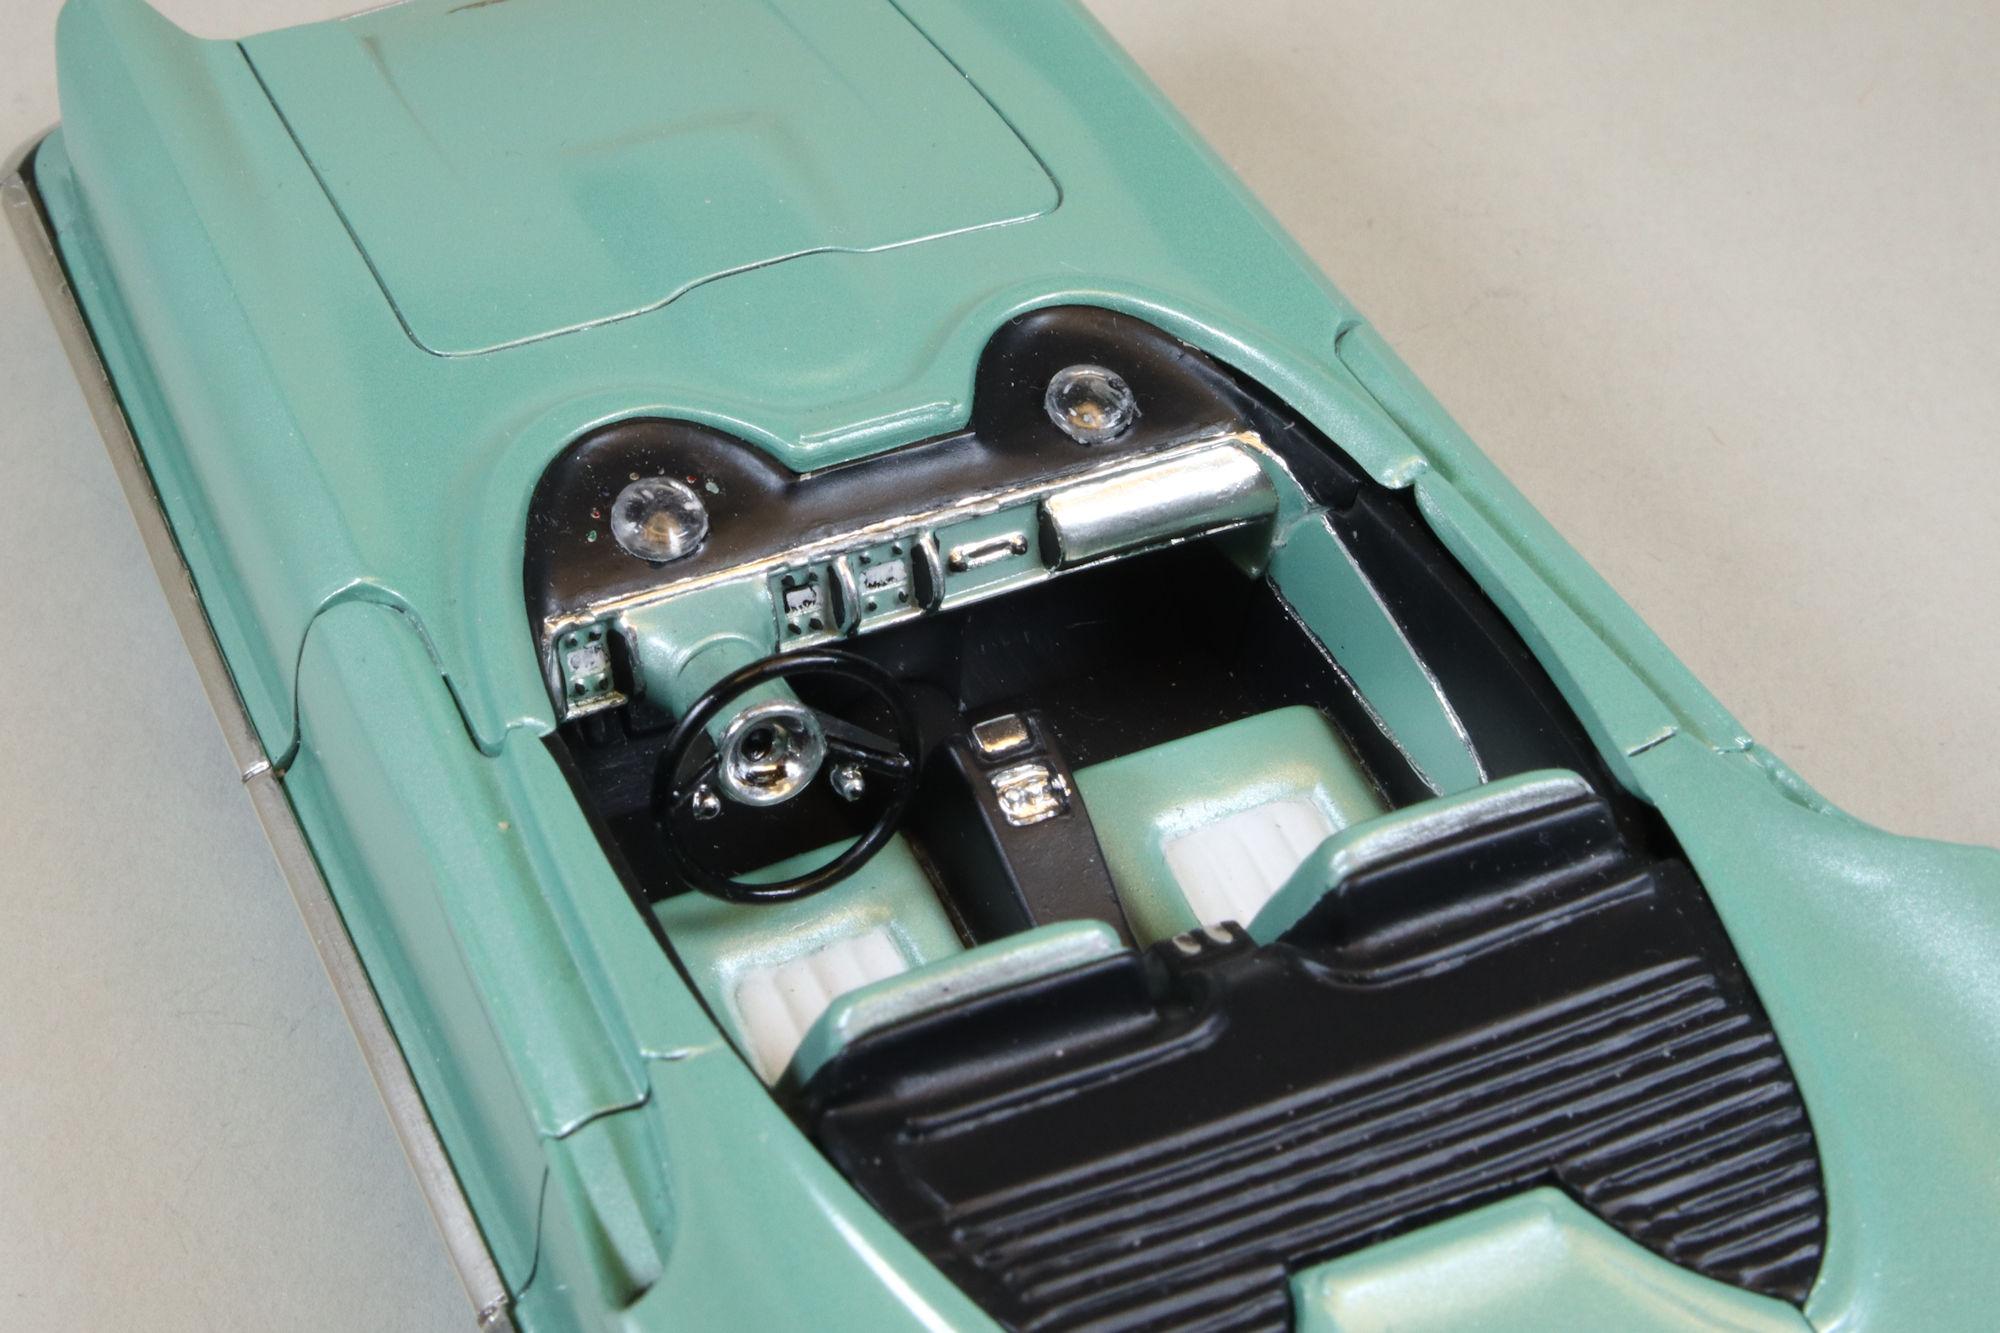
Hello Everybody! Here's the next to the last photo set for the Futura. I don't often paint figures but I usually will when they are included in the kit. The figures are supposed to be glued in before the steering wheel is installed but I wanted the option of displaying the car without them. So with the use of a couple of 3mm magnets, I made the steering wheel removable. Without the figures, the sparsely detailed interior can be viewed in all its underwhelming glory! There's just one more set after this one. Thanks for your patience. David G.
-
Nice looking interior. David G.
-
That's cool! I love the wire bundle coming out of the back. And I thought that I was clever running two wires out of the old dash-mounted Motorola 2-way on my '59 Ambo. Nicely done Daniel! David G.
-
That's one great looking Woody Donald! David G.
-
That's a clever bit of engineering you worked on the distributor David. Impressive! David G.
-
I wish all my paintjobs looked as good as yours does. Nicely done John! David G.
-
That makes sense. Thanks for the information Gregory So far it looks like it will be a good build, you should have a good time with it Greg. Thank you Carl, I'm glad to have you along for the ride. David G.
-
Monogram's 1955 Lincoln Futura Concept Car: WIP
David G. replied to David G.'s topic in WIP: Model Cars
Mark, this is one of the main reasons I post these build threads. Back in 2009 when I started building again I ran into some problems with a kit I was working on and I was uncertain of how to proceed. In the searching for a solution, I happened upon this very community. Needless to say I was blown away by what I saw other builders producing with ordinary model car kits. The experience opened my mind to a whole new world of possibilities. It's great knowing that you can use the information in this WIP to help you along with your version of this car. Helping others is one of the reasons that I post these threads. Thanks for sharing that with me Mark. I look forward to seeing what you do with your Futura. David G. -
Thanks Len. I'm glad to know that you'll be following along, I always enjoy your comments. I agree Bob, it's a beautiful design. Thank you much Bob. It sounds like AMT (or MPC) should fire their designer! I think this is what happens when the kit designers are "designers" and not car guys. Thank you kindly Niko, it'll be great having you follow along. Thanks again, David G.
-
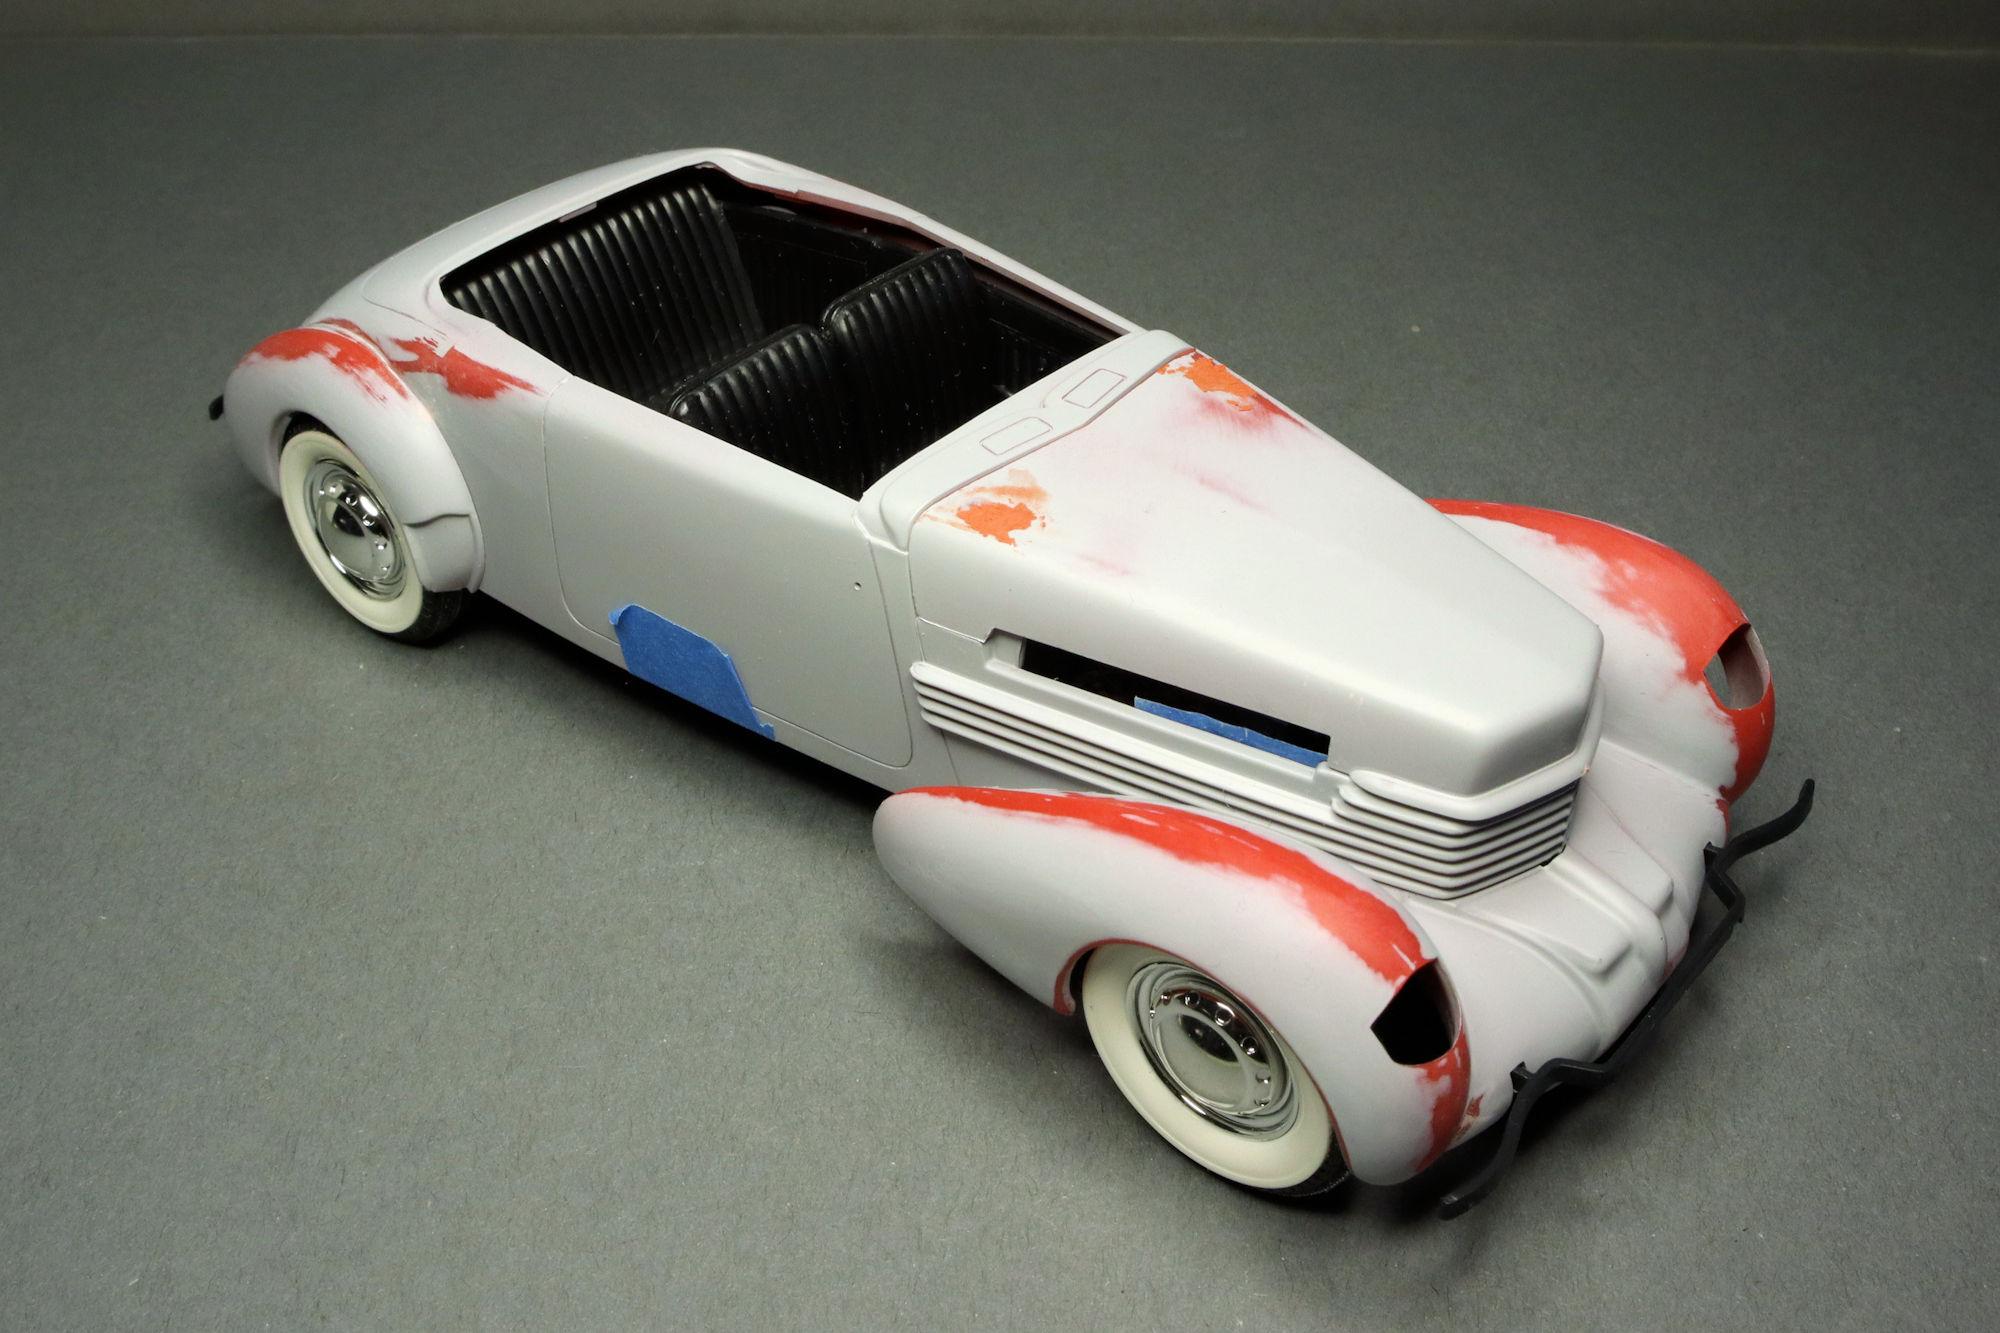
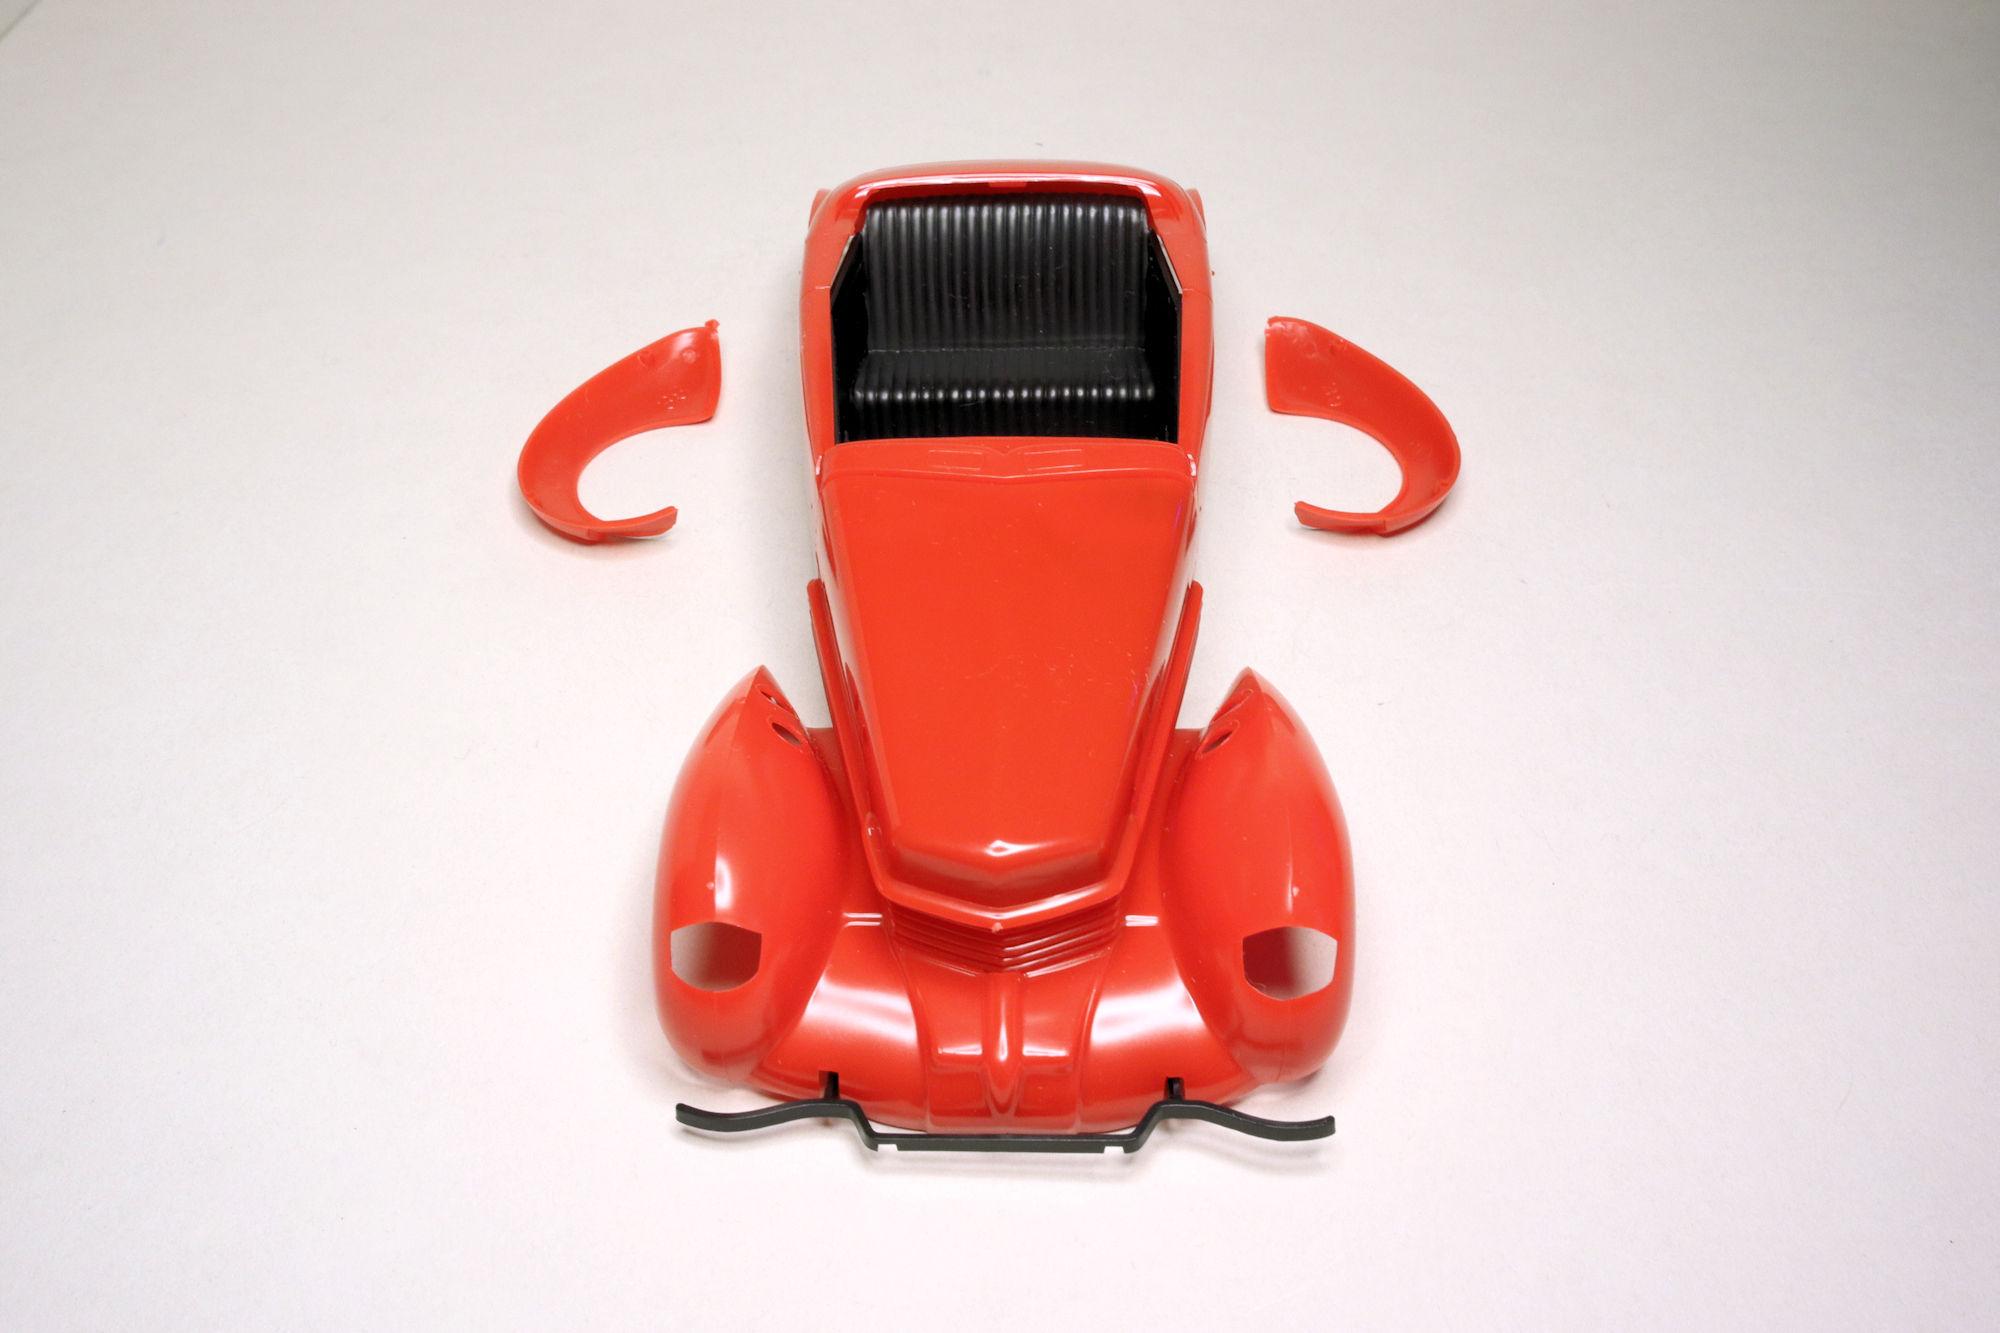
Hello Everybody! The Monogram 1937 Cord 812 kit #8204-0100 or #8204-0350. This is kit of another one of those cars that I immediately became infatuated with the first time I saw it. There are a couple of kits available for building, this one and the Lindberg kit. The Lindberg kit has that dreaded multi-piece body which can challenge even the most competent and skilled of builders. The car body Monogram kit consists of five parts: the body shell, the outer half of the rear fenders, the front fenders and front apron as a unit and finally the hood. This Monogram kit is an original release from the early Seventies. The most recent copywrite date I found on a promotional insert is 1974, so the kit is at least fifty years old. The molds are more than sixty years old, their copywrite date is 1965. Also, there's no UPC code on the box which is in line with the 1974 copywrite on the advertising insert. It truly is a vintage kit. Largely, there are two types of model kit aficionados. Those who buy vintage kits to collect and keep them and those who buy vintage kits to build them. I'm in the latter group, in case you haven't guessed. I buy 'em and build 'em. Considering that I paid only $5 for this kit, I don't think it's among the more prized collectable kits. So on with the build! This is Monogram's 1937 Cord 812. It's a vintage kit that I picked up at the Phoenix Desert Scale Classic Model Car Show & Swap Meet for $5. The kit is complete, not only having all the parts for the model but the original promotional inserts. There's no UPC code on the box. Being an early edition of the kit, the castings are all in good shape with very little flash. The body is cast in red styrene which is fine in this circumstance because I plan to paint it red anyhow. The chassis and interior are cast in black styrene, also not a problem. It only took a couple of quick build sessions to get the chassis assembled. I did paint most of it flat black as I felt the black styrene was a bit too shiny. Unfortunately the tires are cast in that shiny, slippery vinyl or nylon that rolled off in what looks like plastic cobwebs when I tried to sand the tread to roughen it up. With the wheels temporarily under the chassis and the outer fenders glued in place and a shot of primer on the body, it's time for a mockup to check the ride height and general fit and stance of the car. The good news is that I don't see the need for any adjustments but the body will need a little attention. Here's a quick shot of the advertising inserts from the box. Neat! As always, thanks for taking the time to look and please feel free to post any comments. Thanks, David G.
- 152 replies
-
- 12
-

-
Shelby Cobra Daytona
David G. replied to 2whl's topic in WIP: Other Racing: Road Racing, Land Speed Racers
I just love all the detail you're putting into this build. In some photos it's hard to tell that it's a model and not the real thing. David G. -
Very cool! I like the cork in the nose! It reminds me of one of those old Avon bottles. Best of luck with the paint Joe. David G.
-
Monogram's 1955 Lincoln Futura Concept Car: Finished
David G. replied to David G.'s topic in Model Cars
Thank you most kindly Pierre. I'm glad knowing that all the work I put into it was worth the effort. I am quite pleased with the outcome. Thank you. Thank you very much John. I too am surprised that I only invested 52 hours in this build, it felt like a lifetime while I was building it. But I'm glad to have it done and I'm happy with the result. Thank you. David G. -
Monogram's 1955 Lincoln Futura Concept Car: WIP
David G. replied to David G.'s topic in WIP: Model Cars
You're welcome Mark, glad to help. =D-