David G.
-
Posts
11,331 -
Joined
-
Last visited
Content Type
Profiles
Forums
Events
Gallery
Everything posted by David G.
-
It looks good. Do you have plans for a cooling fan? David G.
-

Rolls-Royce No Chemicals, No Paint, No Harmful Glues
David G. replied to Anglia105E's topic in WIP: Model Cars
Nice work getting the masking for the wheels sorted. I missed that detail on my build. The engine is looking fantastic. David G. -
Nice work on the radiator Chris. David G.
-
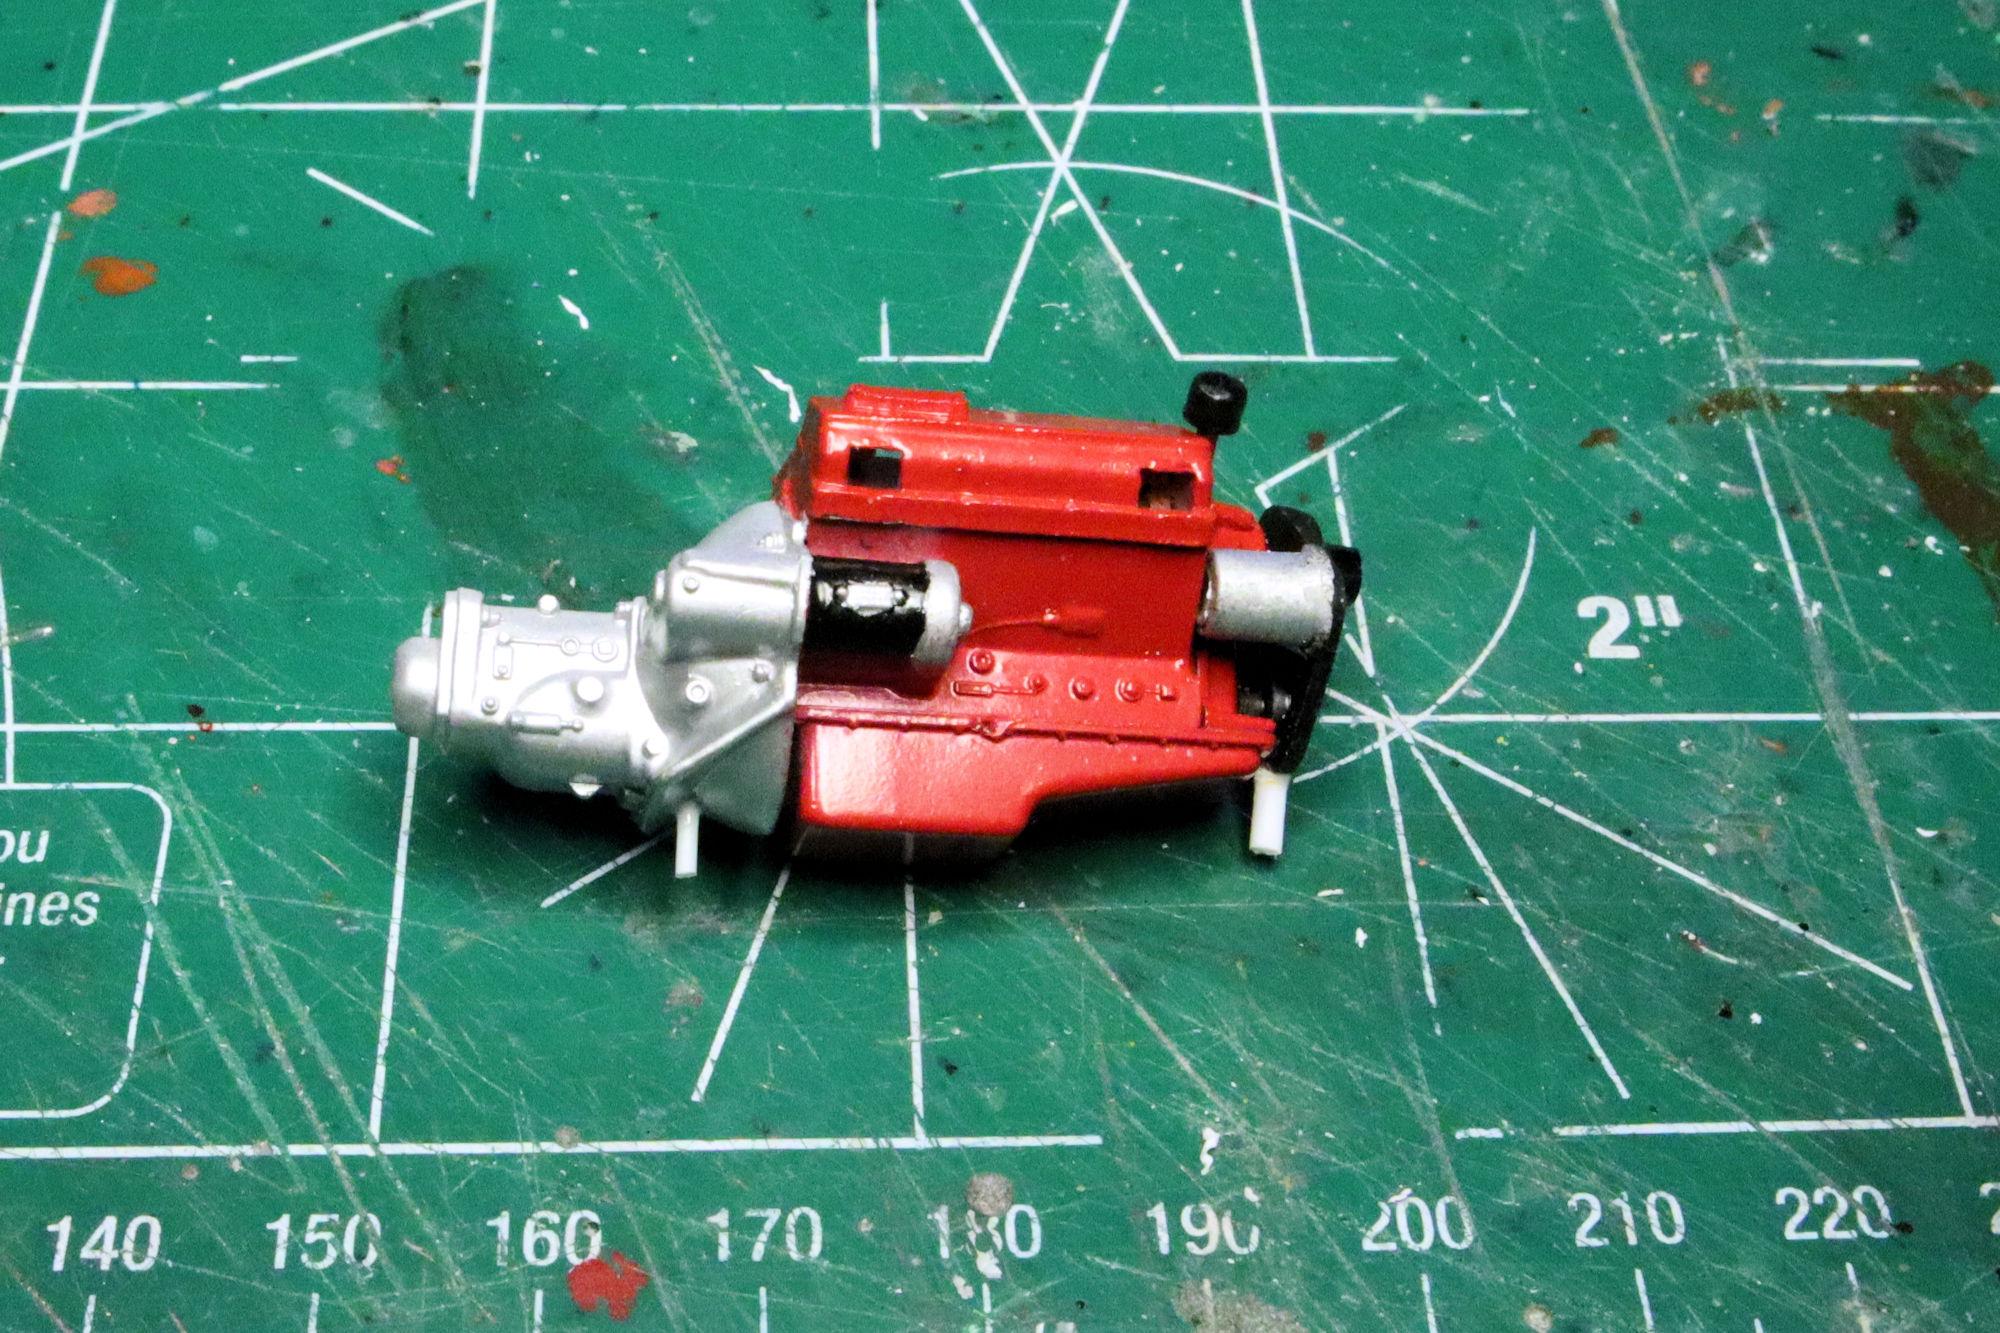
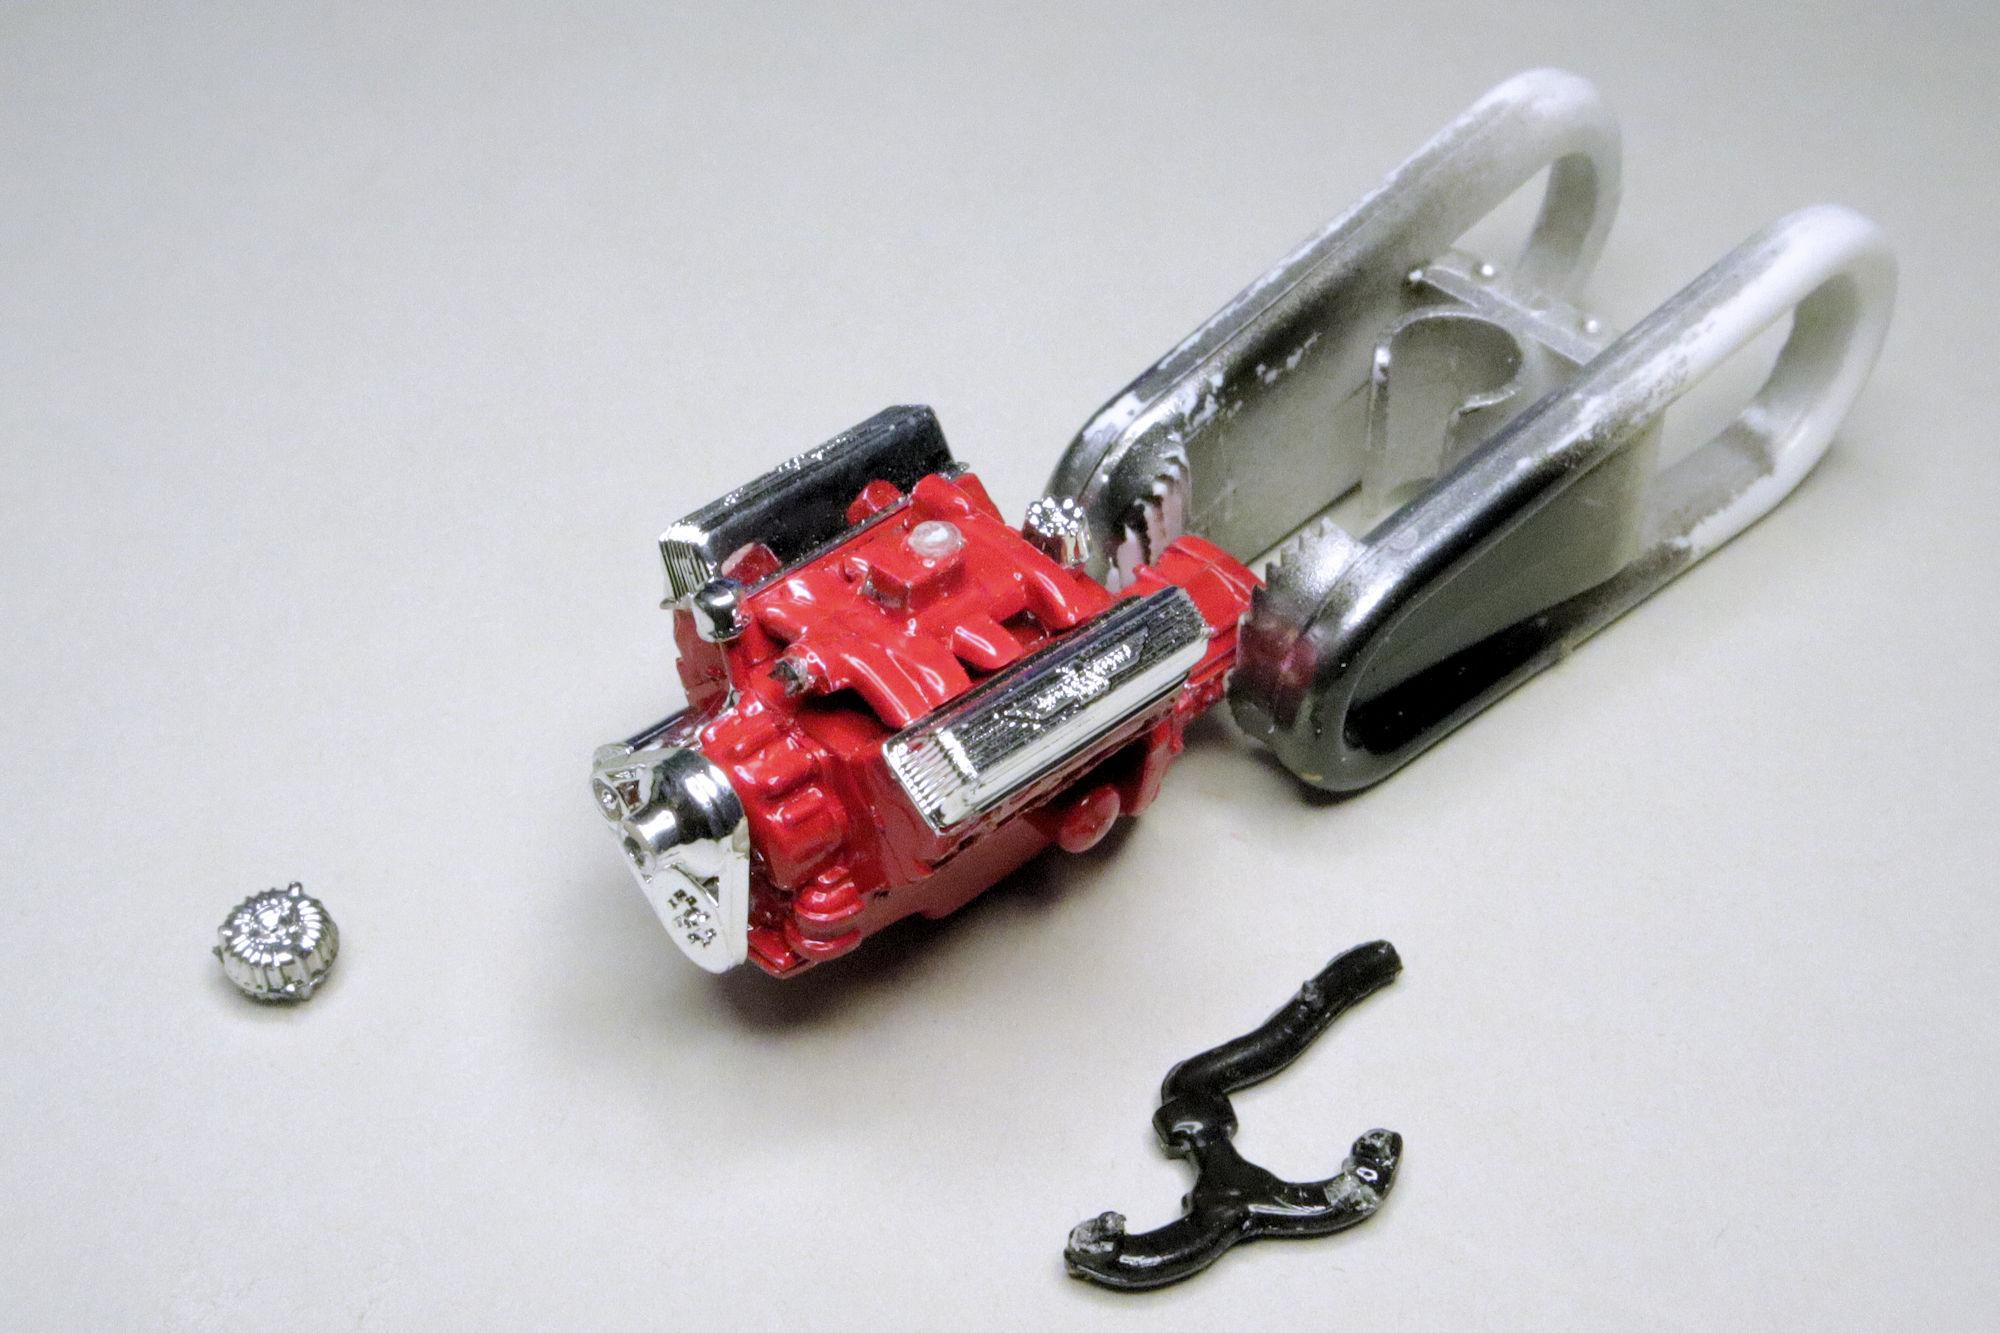
Hello Everybody! I know it's been a few weeks but here's another chapter in the seemingly unending saga of AMT's '29 Woody. It's time for teardown and cleanup. Those other parts were in the engine bay I pulled this from. I uh... don't think they really belong with this engine! Luckily the previous builder painted everything before gluing it together and never bothered to scrape away the chrome plating. Cleaned, painted and partially assembled. I've already made some modifications toward installation by adding my own set of locator pins. That's all I have for now. As always, thanks for taking the time to look and please feel free to comment. David G.

-
Very cool, love the color! Thanks for posting.
-
1962 Rolls Royce Silver Cloud II by Minicraft Models: Finished
David G. replied to David G.'s topic in Model Cars
Thank you Noel. His was a few years newer, a '65 limousine I think. Thank you very much Philippe. =D- -
That turned out great Anton! There are tons of hidden details in this one, I remember watching you put many of then in. Thanks for posting this. David G.
-
Rolls-Royce No Chemicals, No Paint, No Harmful Glues
David G. replied to Anglia105E's topic in WIP: Model Cars
Thank you kindly David. Yours are coming along quite nicely too. I think the vanity mirrors you're adding will help give this kit's sparse interior a more complete appearance. David G. -
Oh yeah! I should pay closer attention. 🙃
-
I believe you're correct though I don't recall seeing that one. =D-
-
Rolls-Royce No Chemicals, No Paint, No Harmful Glues
David G. replied to Anglia105E's topic in WIP: Model Cars
Yeah, having one of the tables opened would be great but I just took the easy way out for mine. I just glued some styrene shapes to the seatbacks and painted them. Cheers! =D-
-
I'm glad to know that your surgery went well Chris. It must be nice being back at the bench. Driveshafts I usually paint for a steel or black rusty iron color. But that depends on what you want your build to look like. Didn't some of the cars of that era use some kind of leather torque tube as a driveshaft? David G.
-
Rolls-Royce No Chemicals, No Paint, No Harmful Glues
David G. replied to Anglia105E's topic in WIP: Model Cars
Great progress on this David! When I built mine, I did make a set of snack trays but I missed the mirrors. I don't recall seeing them in any of the photos I saw during my research. Were they an optional item? David G. -
1957 Ford Del Rio "Shooting Brake" Ranch Wagon
David G. replied to LennyB's topic in WIP: Model Cars
Great work getting the engine and transmission sorted Len. David G. -
That's one sweet looking engine. From the '60 Starliner I'm guessing? Thanks for sharing it @sidcharles David G.
-
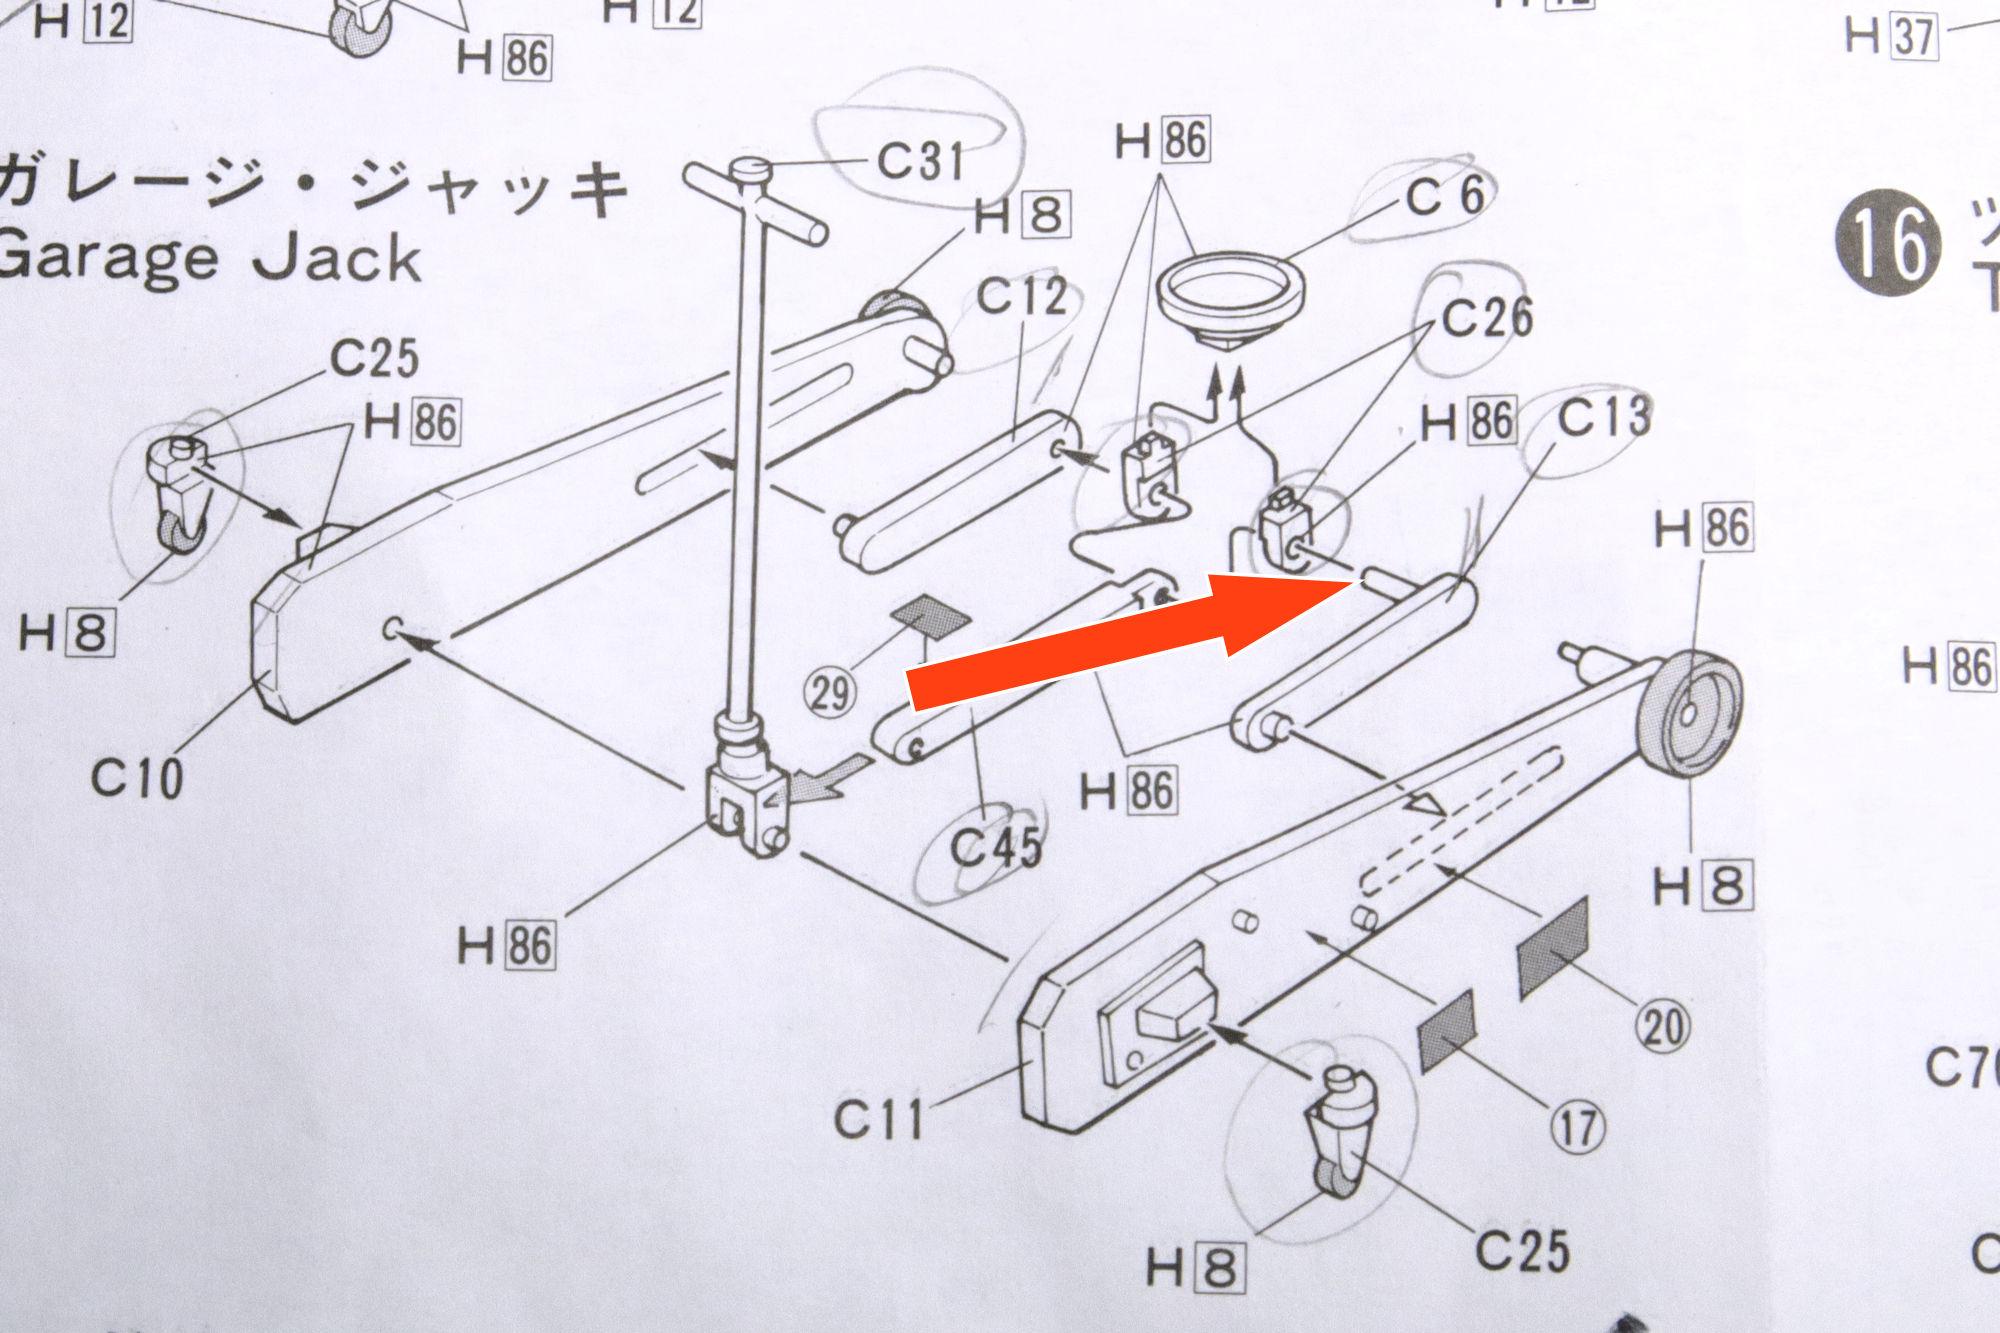
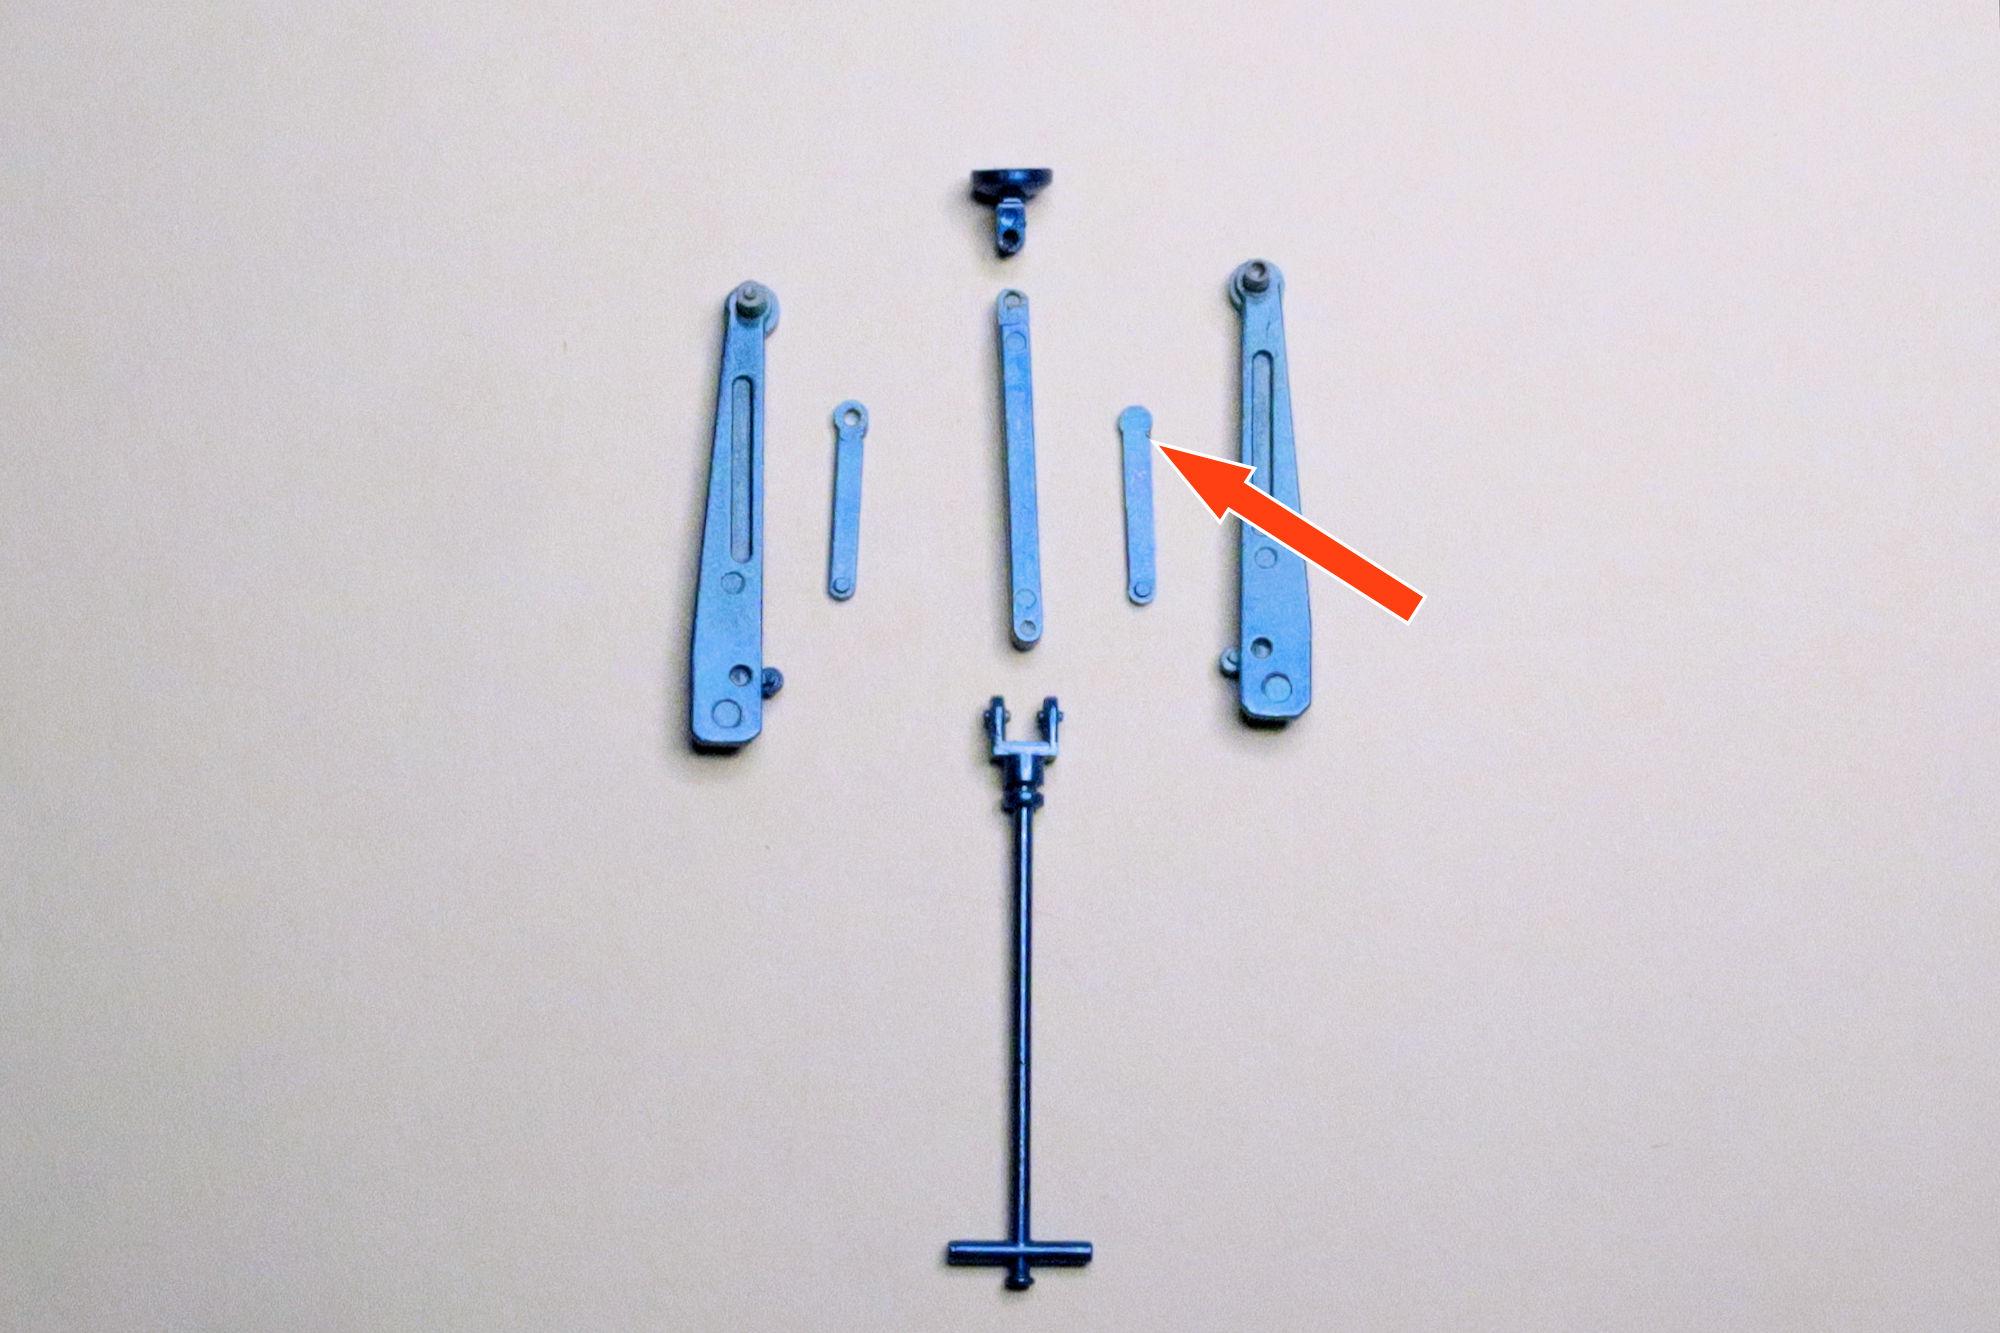
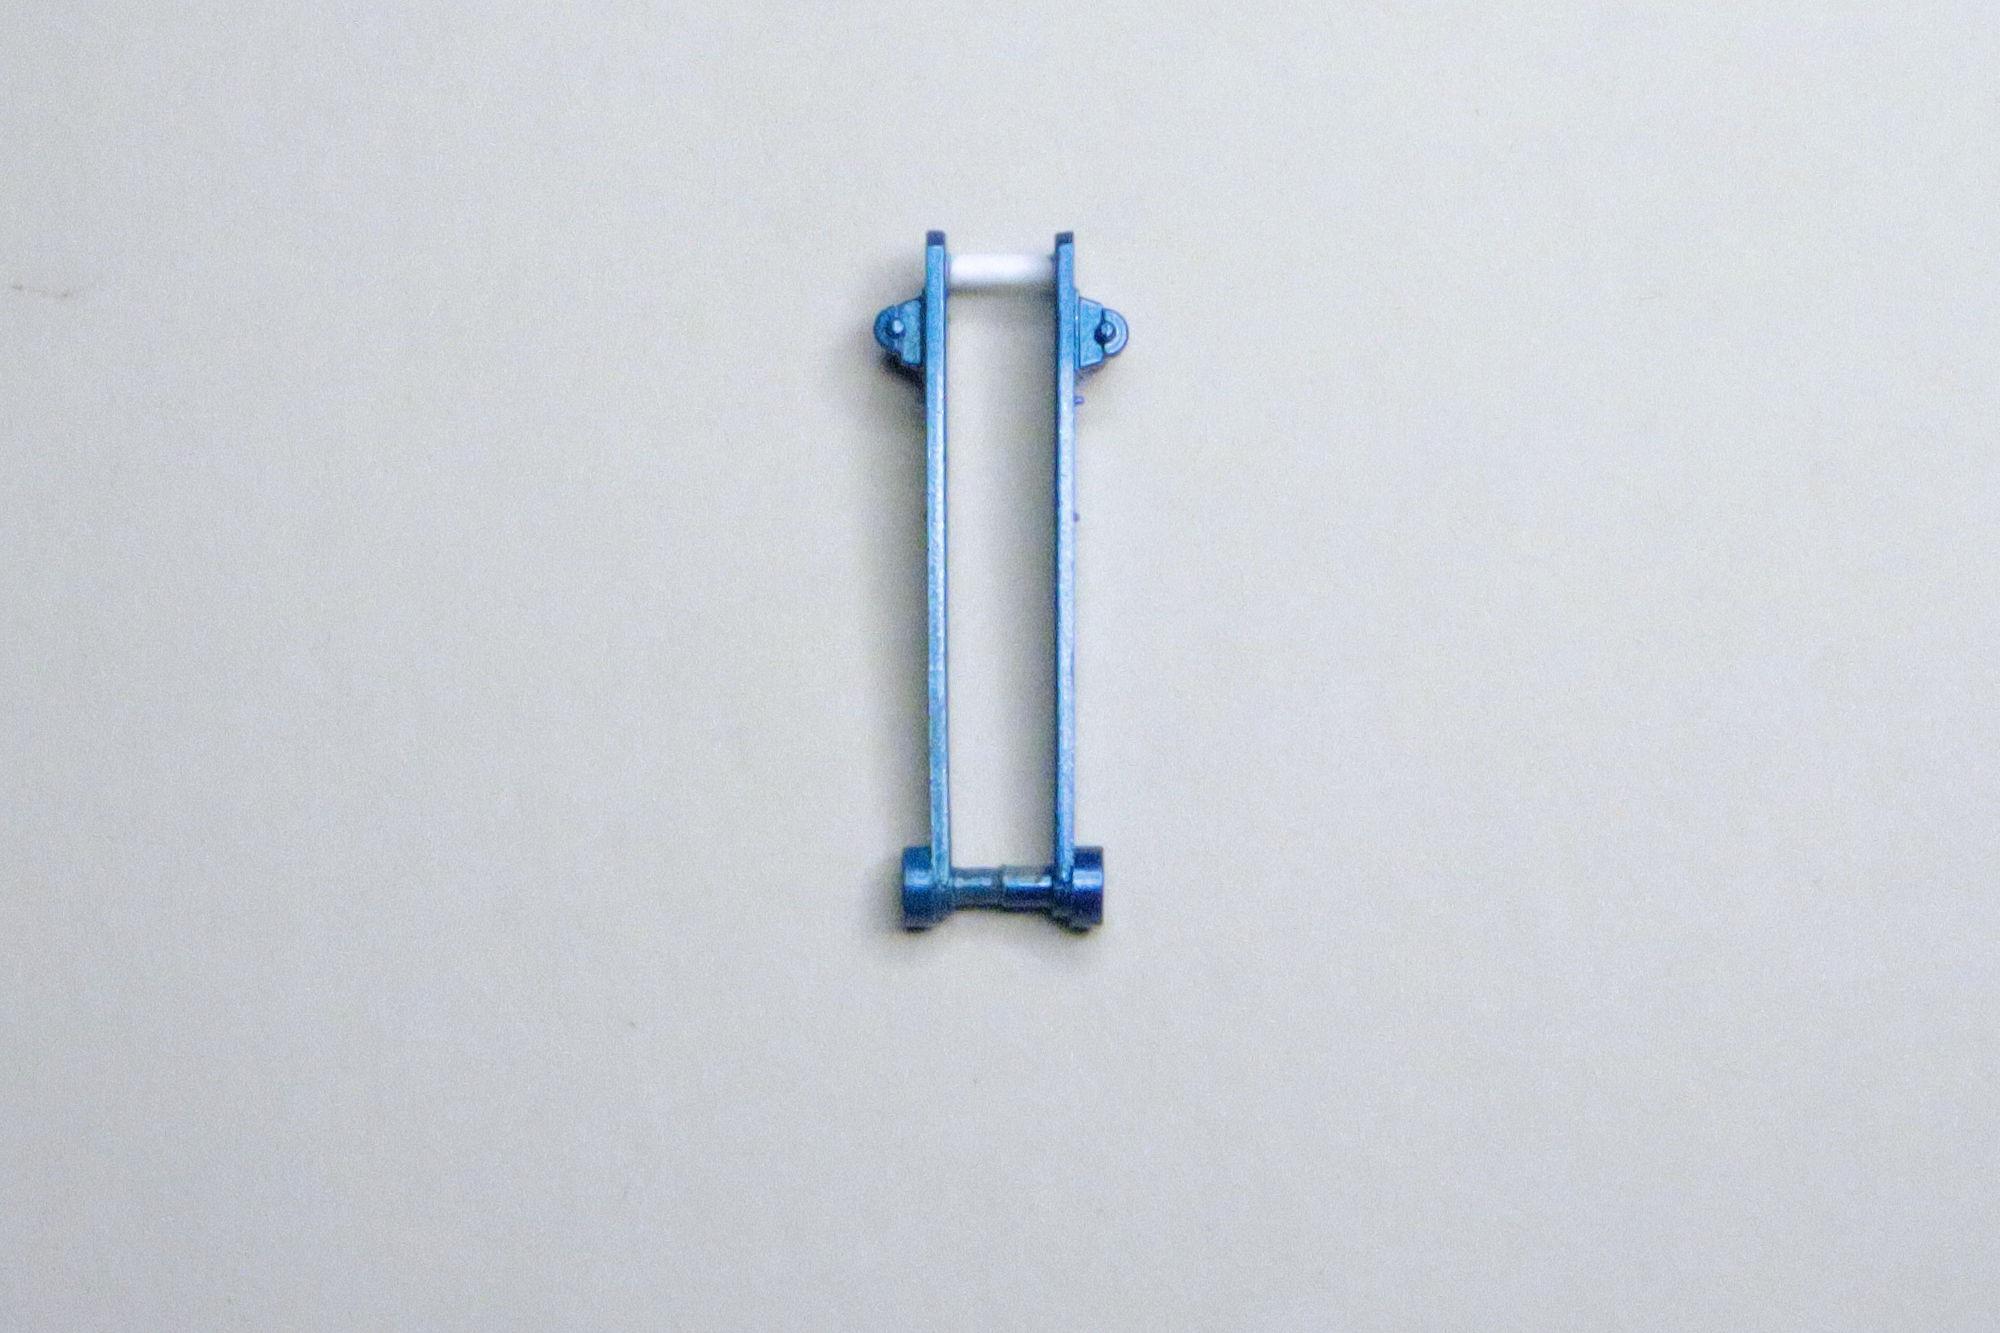
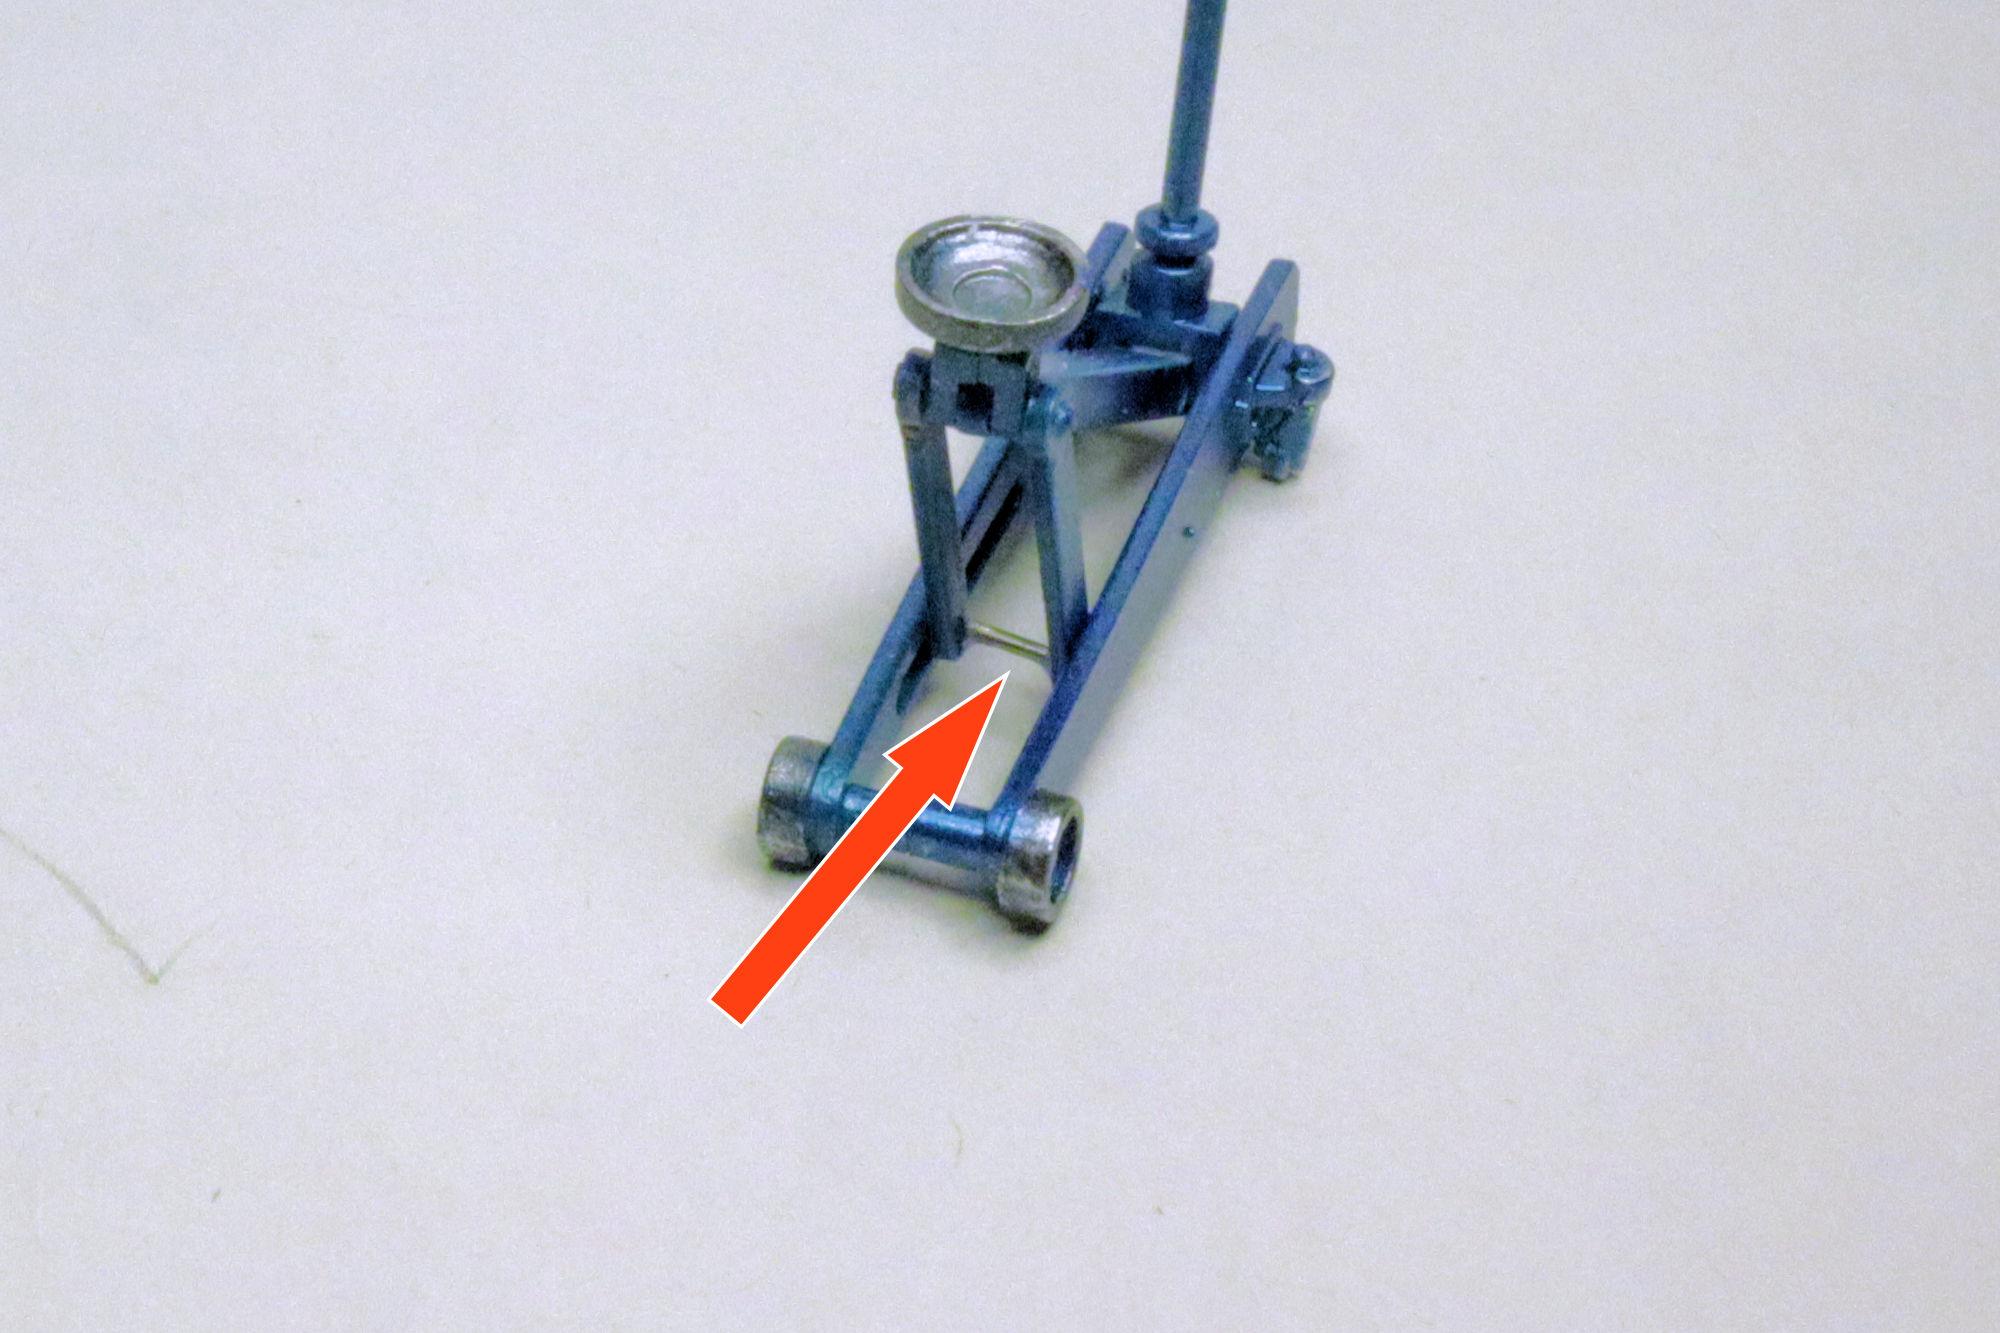
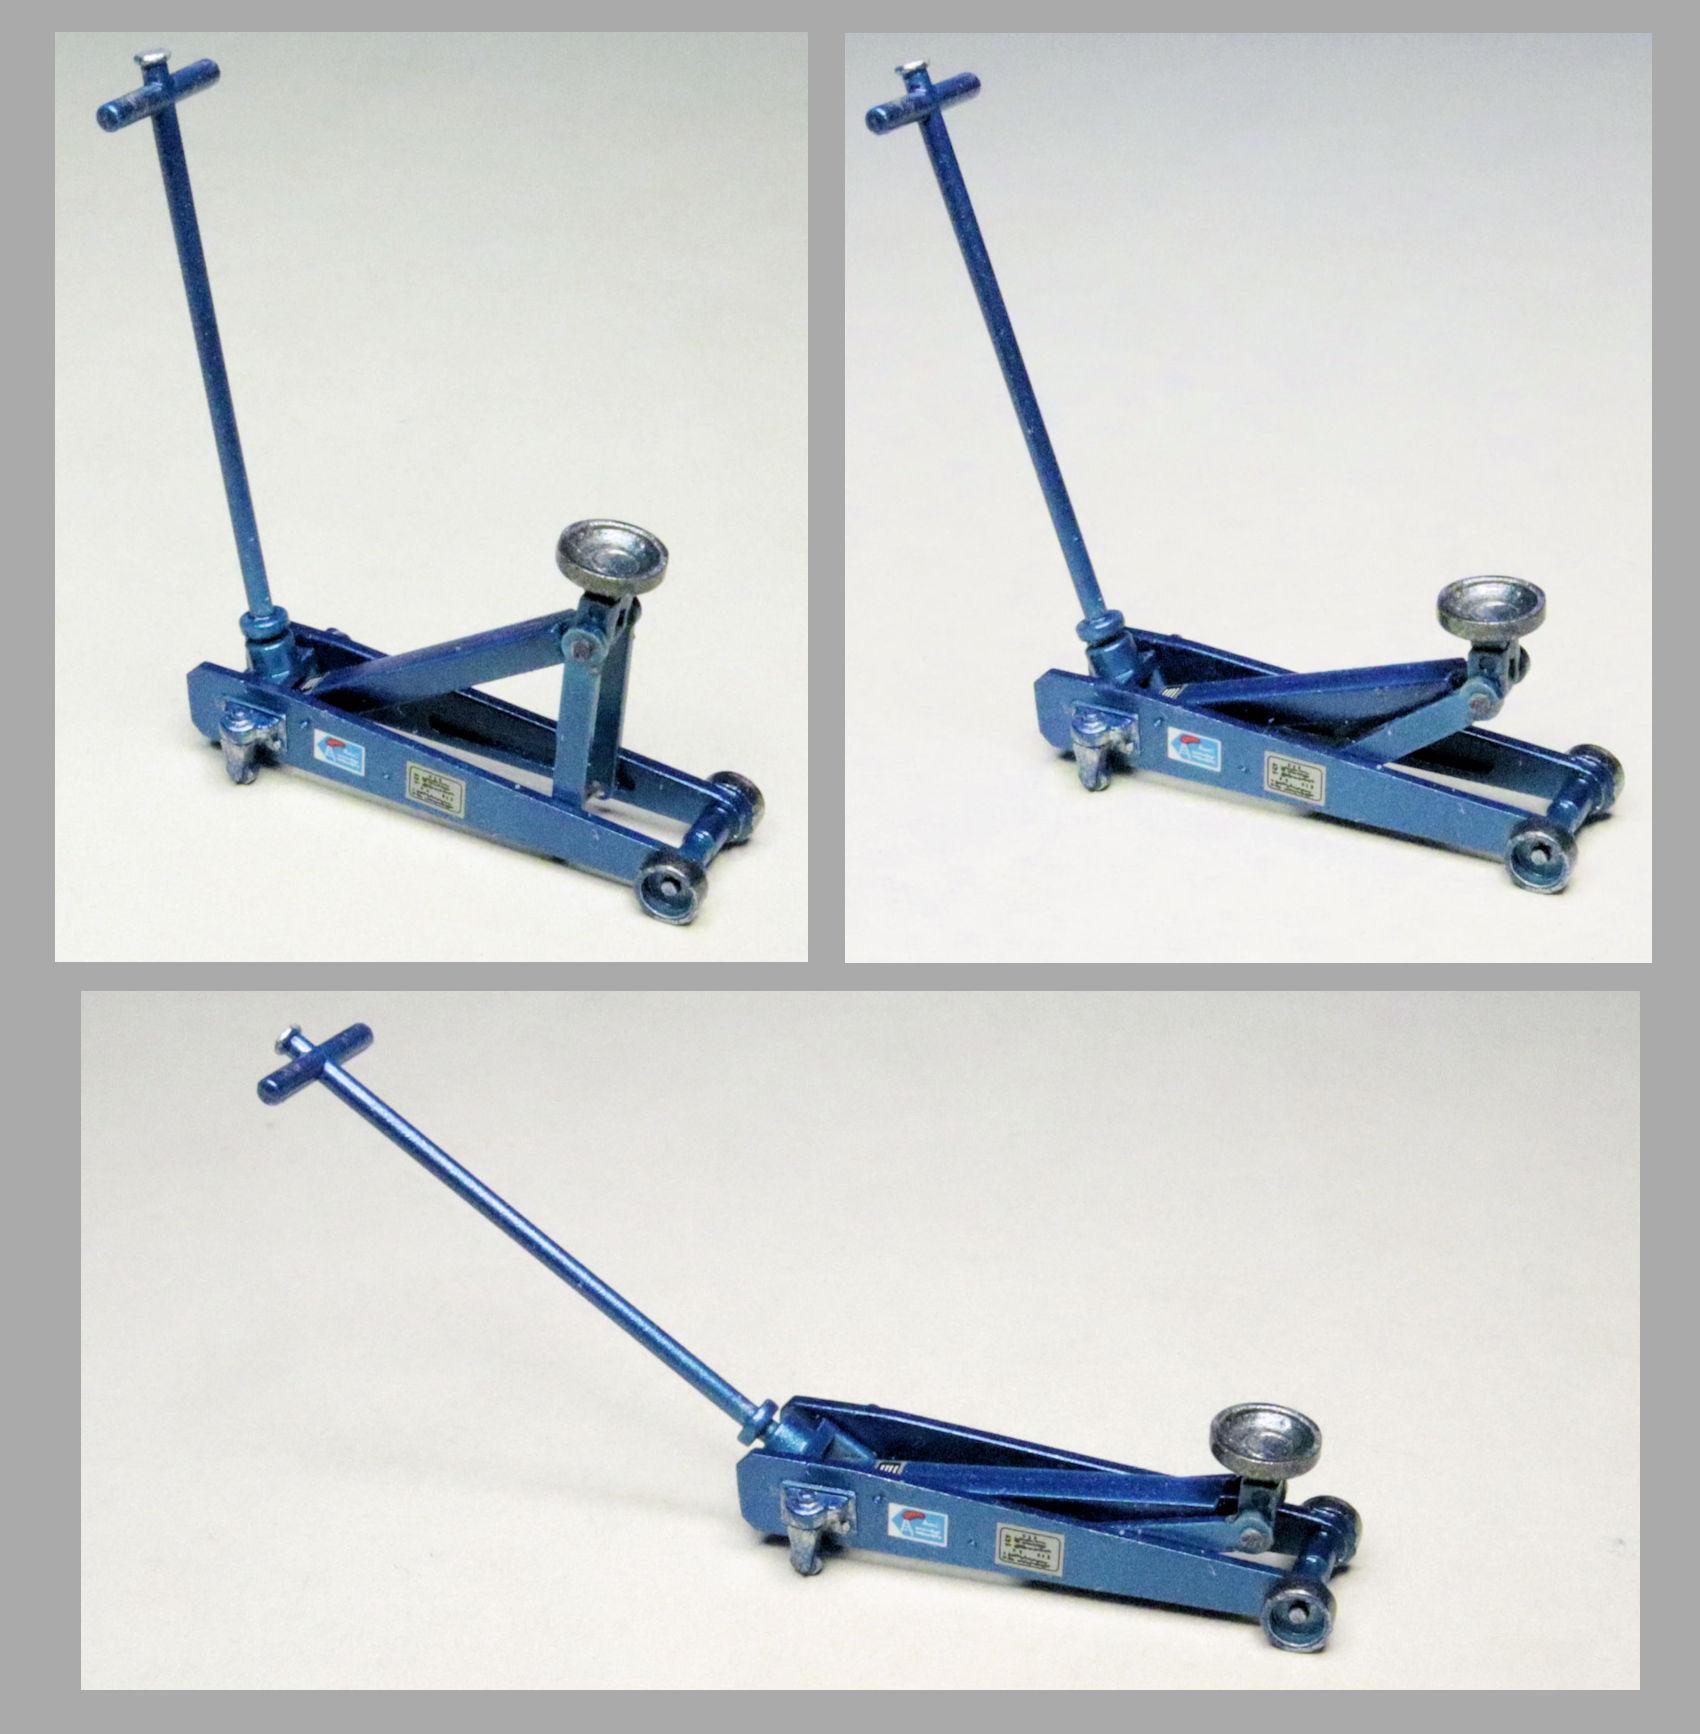
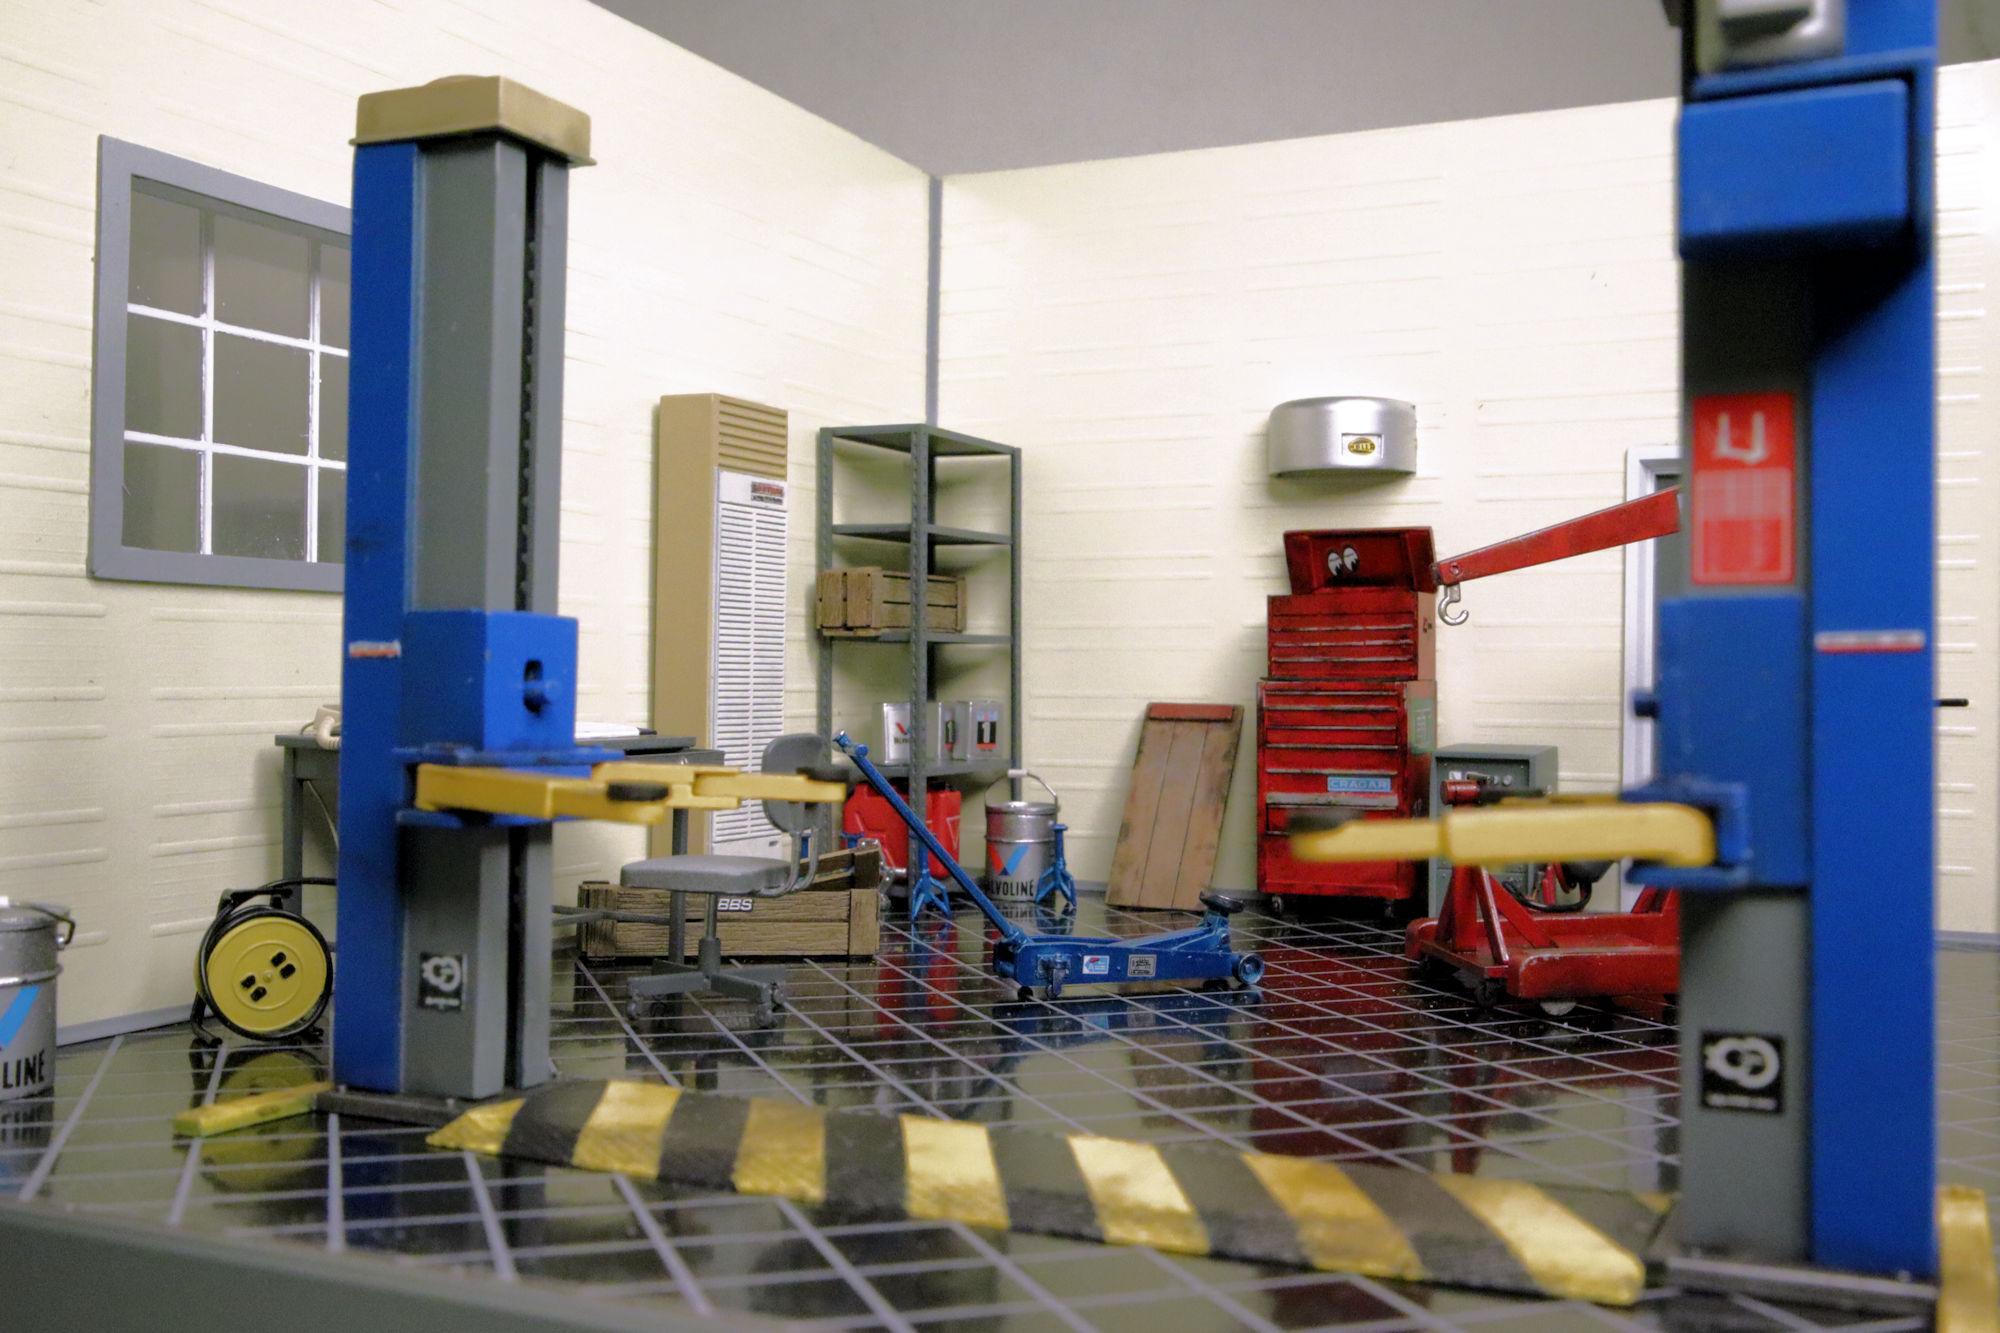
Hello Everybody! Thank you all for following along. As always, I do appreciate your comments, questions, pointers and suggestions. Moving on to the floor jack, Fujimi has left me with another error to correct. On part C-13 there is supposed to me a shaft that during assembly, passes through the cup support brackets and central lifting arm before anchoring in part C-12, pretty much holding the entire lifting mechanism together. As cast, part C-13 has no shaft to pass through the other assemblies. (first panel) I've drilled out part C-13 (on the right) to accept a piece of styrene rod that I pre painted. The rod is glued in place with some Tamiya cement. Part C-12 is on the left waiting in place for C-13 to cure before I cinch the whole thing up for final assembly. (second panel) The central mechanism with everything cinched together, glued, trimmed and touched up. Now on to the frame. One end of the jack's frame is held together by the connectors at the bottom, the other end by the lifting mechanism and handle. The jack frame seems to be designed to both capture the lifting mechanism and be held together by it. 😕 The implication of this design seems to be to make the jack poseable. I don't see this working out very well as it is, so I've added a reinforcing brace of styrene rod. I'm hoping this will allow it to be poseable once it's assembled. I've added another support piece to brace the arms and keep them engaged with the slots in the side frames of the jack. The jack is completed and I managed to retain the poseability feature! And of course, the floor jack at home in the shop. Thanks for taking the time to look and please feel free to share your thoughts. David G.
-
1962 Rolls Royce Silver Cloud II by Minicraft Models: Finished
David G. replied to David G.'s topic in Model Cars
I agree. I just didn't have access to one at the time. Thanks, David G. -
1962 Rolls Royce Silver Cloud II by Minicraft Models: Finished
David G. replied to David G.'s topic in Model Cars
Thank you most kindly Scott! It's nice seeing this one float up to the surface again.. David G. -
Thank you most kindly Scott. I'm pretty pleased with how it turned out. =D-
-
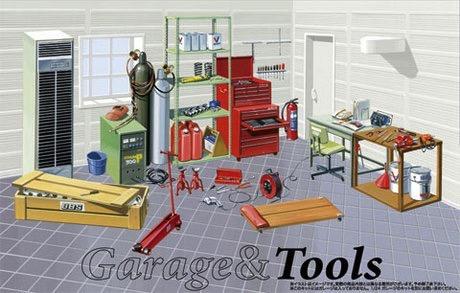
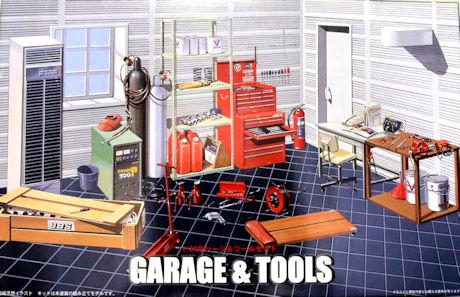
Thanks, I'll keep that in mind. Thank you Devin. Yes, everything you've seen in this post is included in the kit and a little more. I'm currently working on a floor jack. I'll be posting photos of that soon. But when you go to buy, be aware that there are two versions of this kit. One is "Garage Tools" which has just the tools and the other is "Garage and Tools" which has both. I hope this helps. David G.
-
Thank you kindly Jon! =D-
-
Link-Belt HC-218 Truck Crane
David G. replied to redneckrigger's topic in WIP: Model Trucks: Big Rigs and Heavy Equipment
I'm still following along and I'm still tremendously impressed with your engineering and fabrication skills. I'm also sorry to learn of your health challenges. I'm facing a few of my own as many of us in this community are. I'm glad to know that you're doing relatively well. Hang in there Tom. David G. -
Dang Anton! That looks fantastic! Well worth all the time and effort you've put into it. BTW, I'd leave the lenses a little fogged. I've learned that when a project is this close to completion it's best just to let some things slide rather than taking a chance on messing everything up for a 3% improvement. Cheers! David G.
-
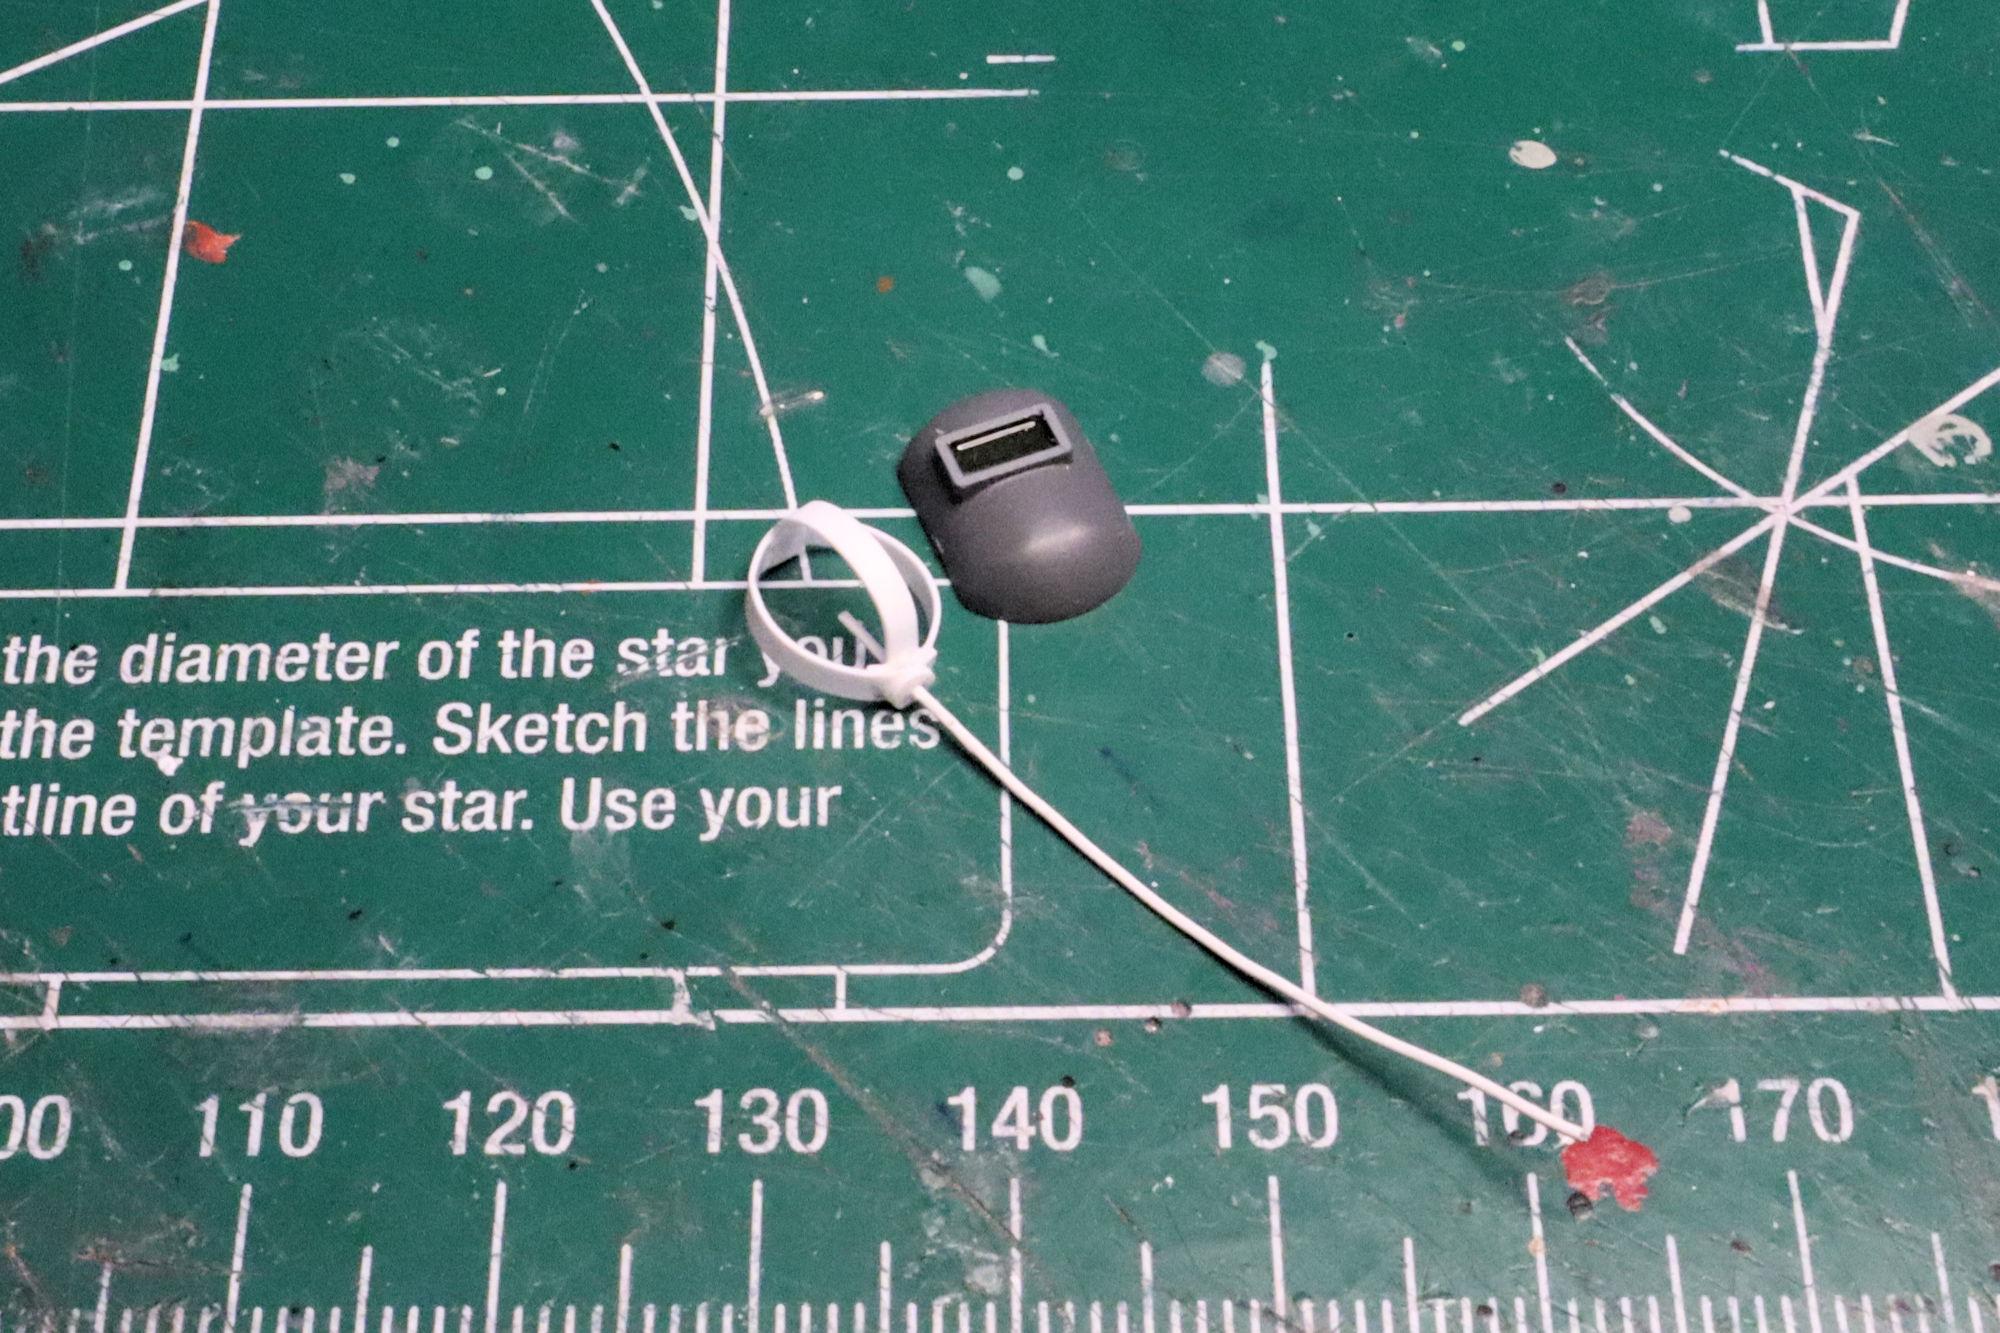
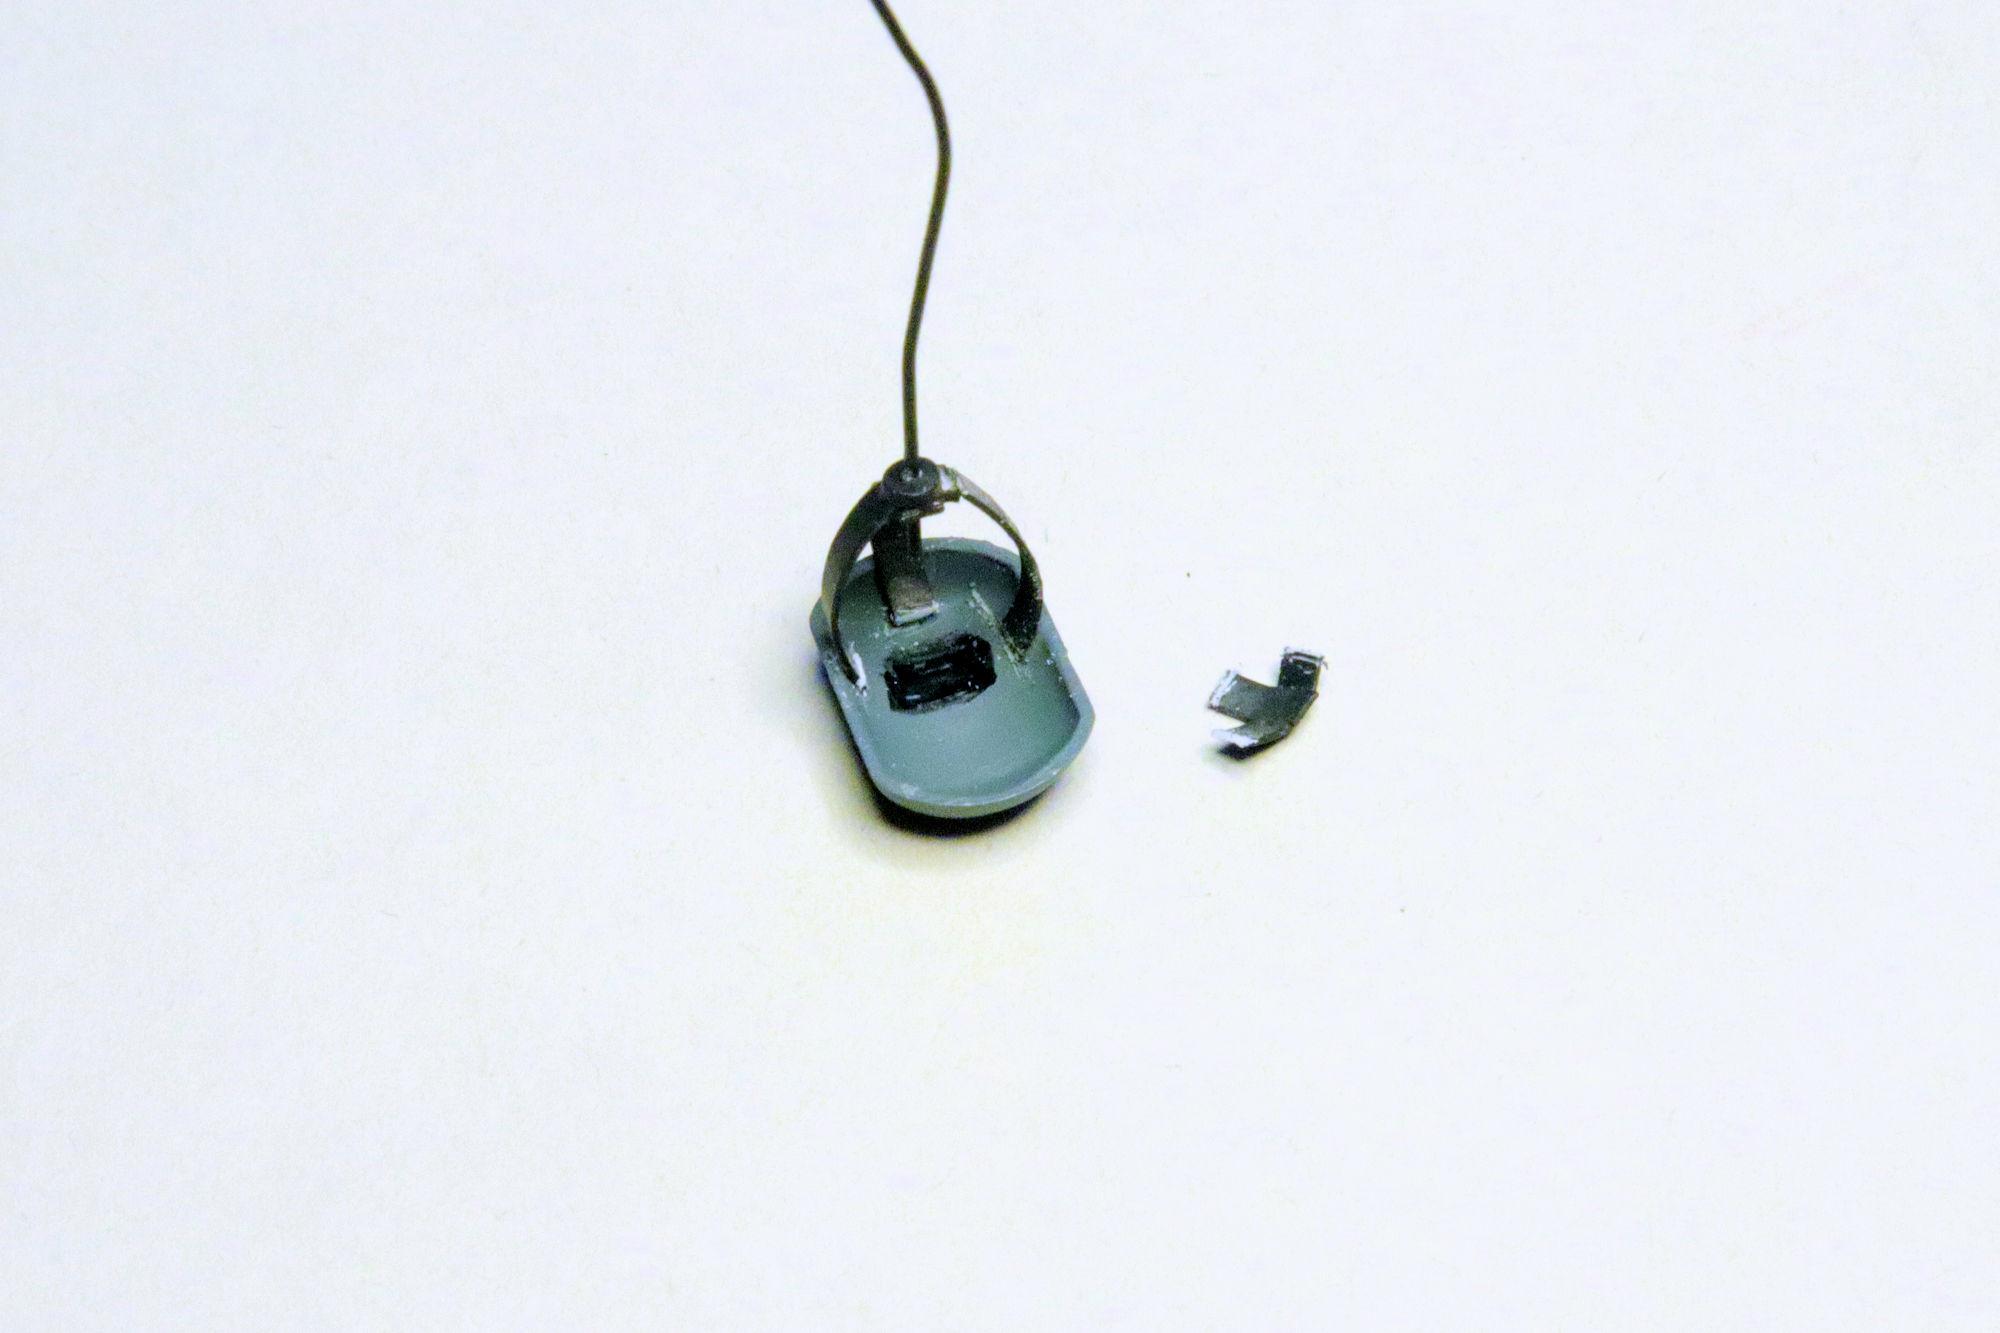
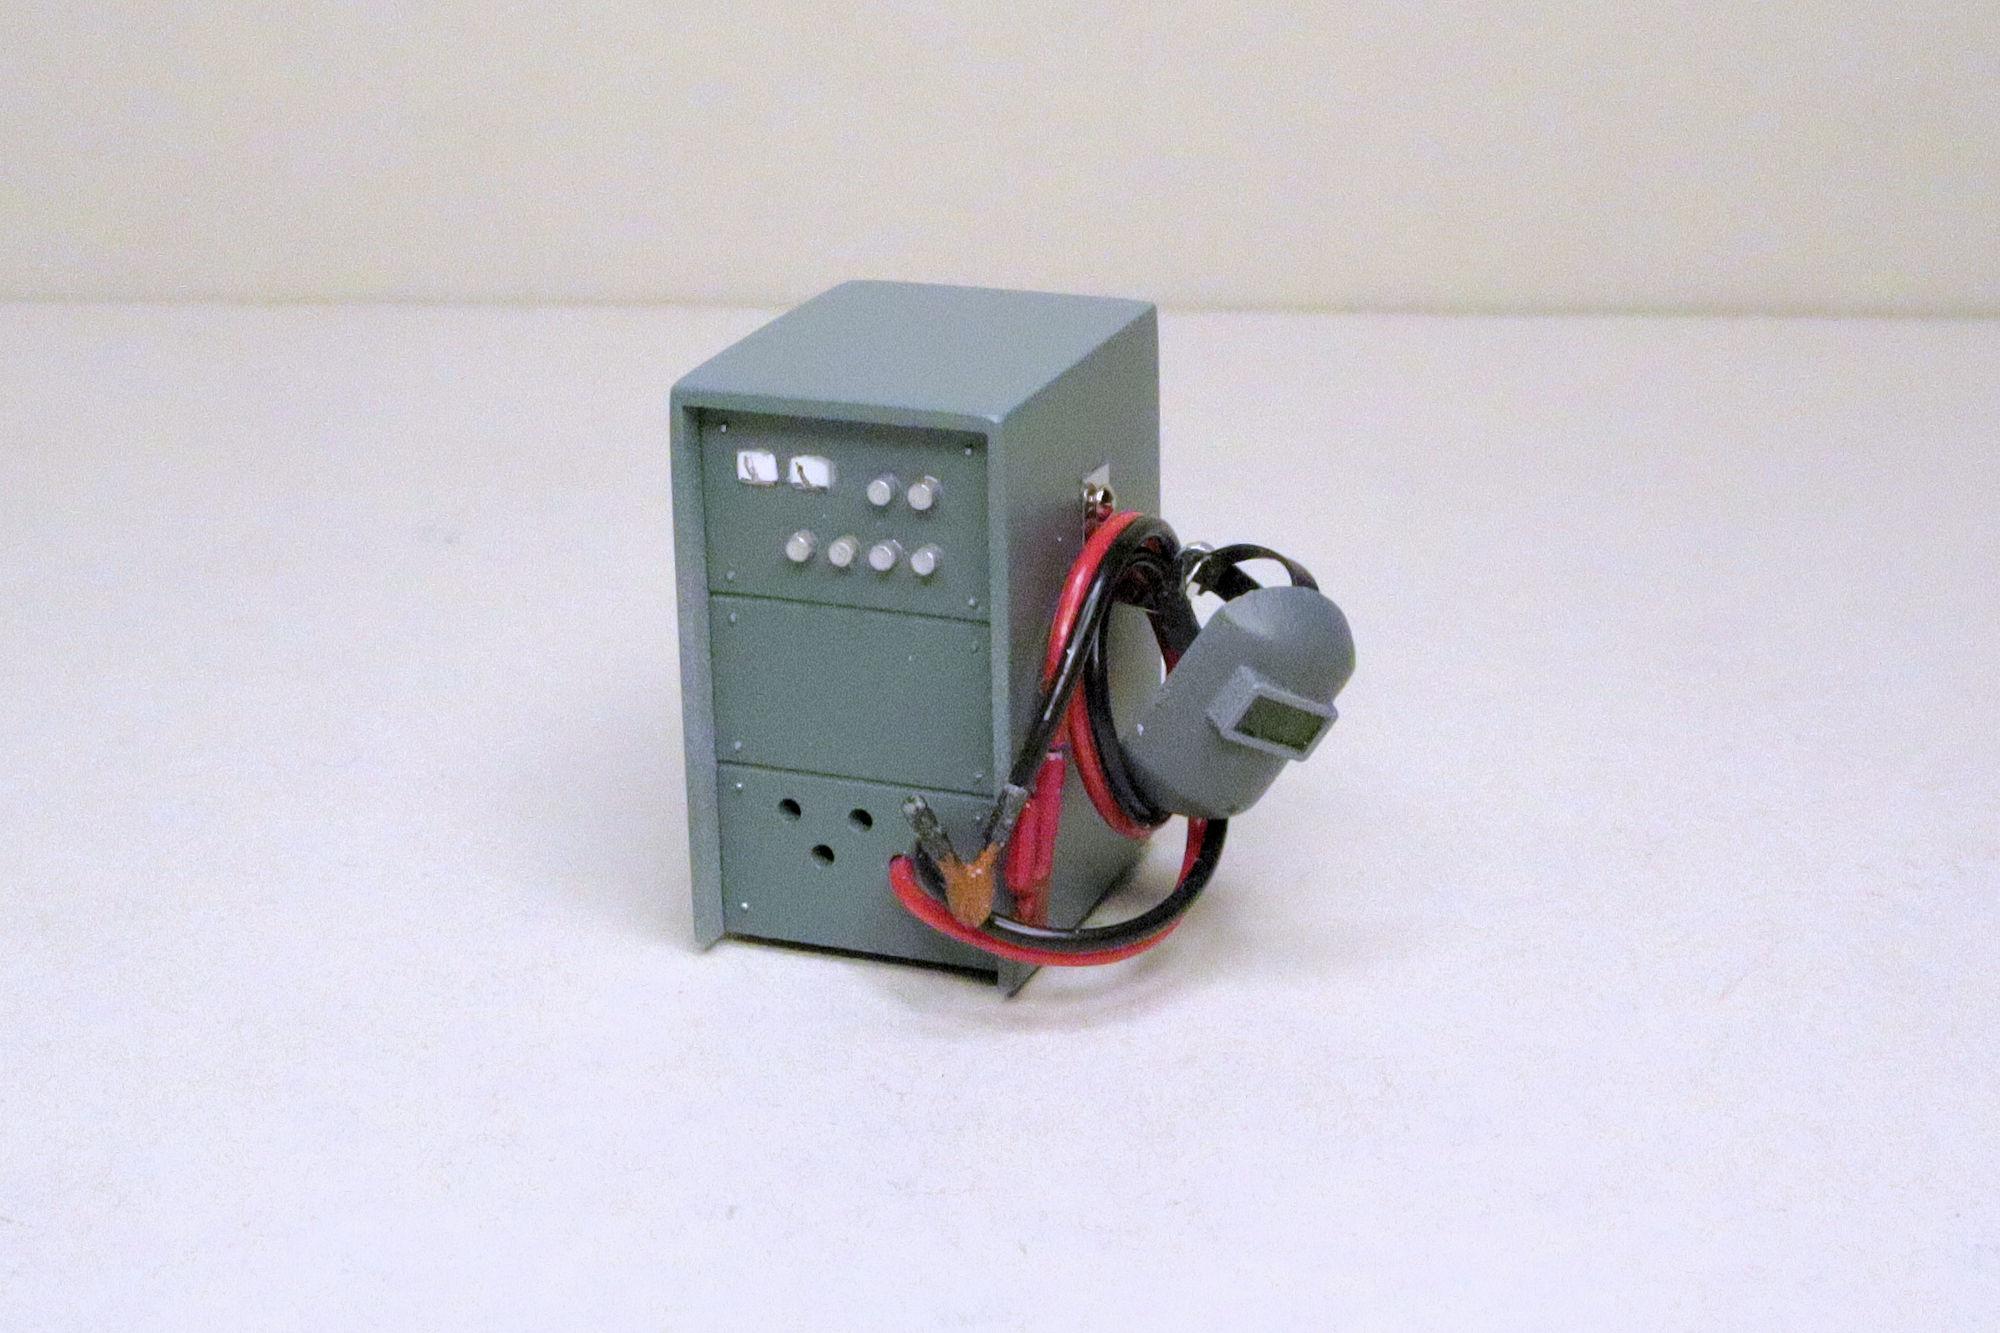
Hello Everybody! I have another installment for the Fujimi Garage and Tools kit. There's a welder's hood that goes with the arc welder. I've painted it but there's no way for a welder to wear it. So using some strip styrene and wire, I've made some headgear... complete with ratchet adjuster! After painting the headgear and gluing it in place I removed a section so the welder can see what they're doing. The completed Welder's hood. With the safety equipment in place, the arc welder is ready to go. Here's the shop with the arc welder placed. It's starting to look a little crowded and there's still more equipment to build. I'm going to need a bigger shop! As always, thanks for taking the time to look and please feel free to comment if one wishes. David G.
-
I'm running some options through my mind. Thanks again! =D-