David G.
-
Posts
11,326 -
Joined
-
Last visited
Content Type
Profiles
Forums
Events
Gallery
Everything posted by David G.
-
 Great work on both of them Kimmo! It must be a good feeling to still have the one from your youth. Thanks for sharing those. David G
 -
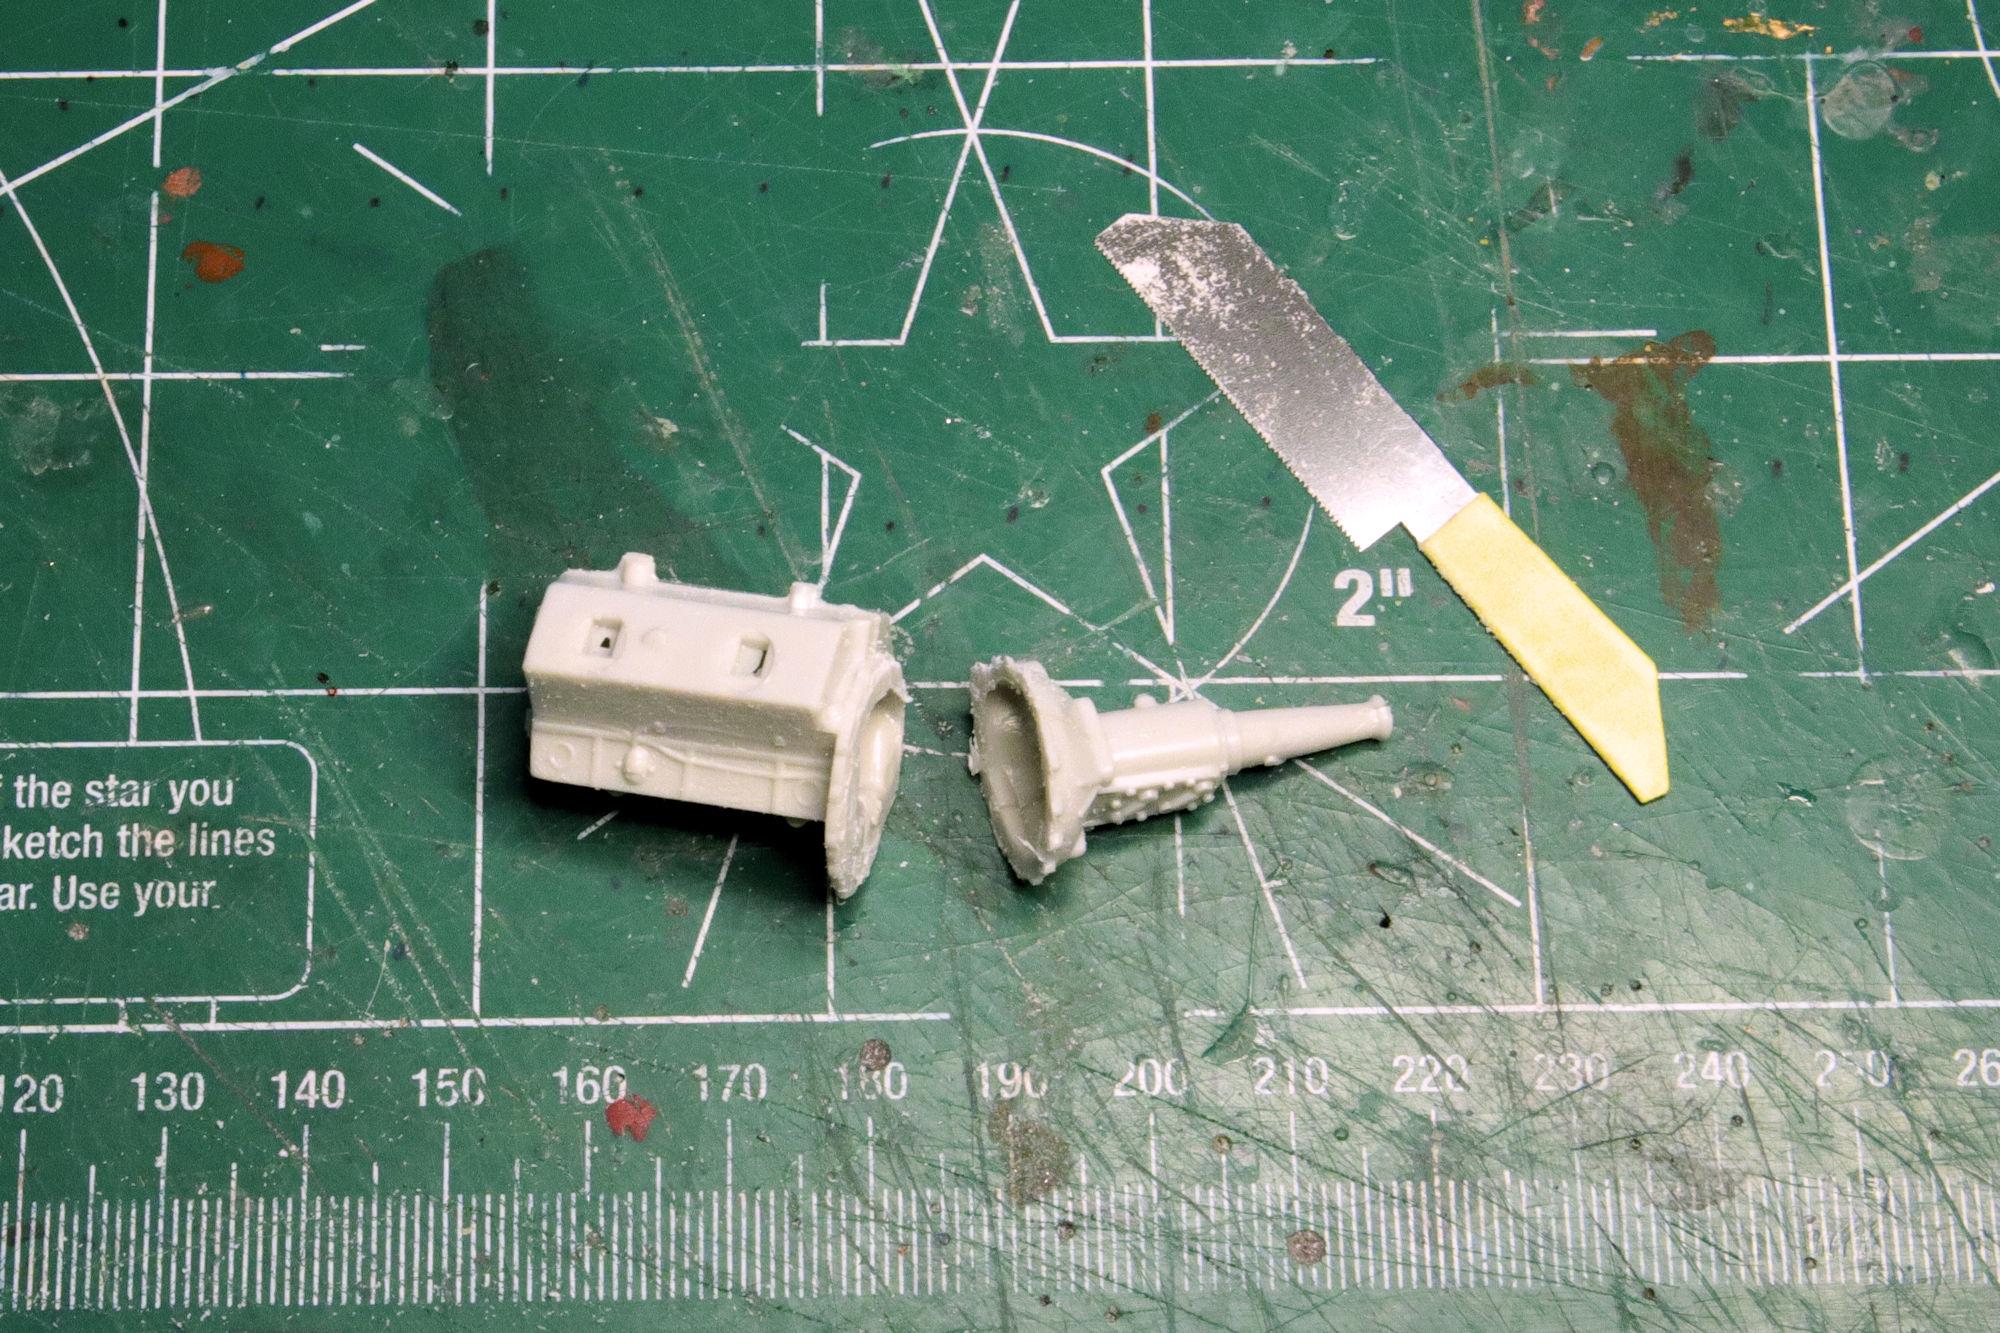
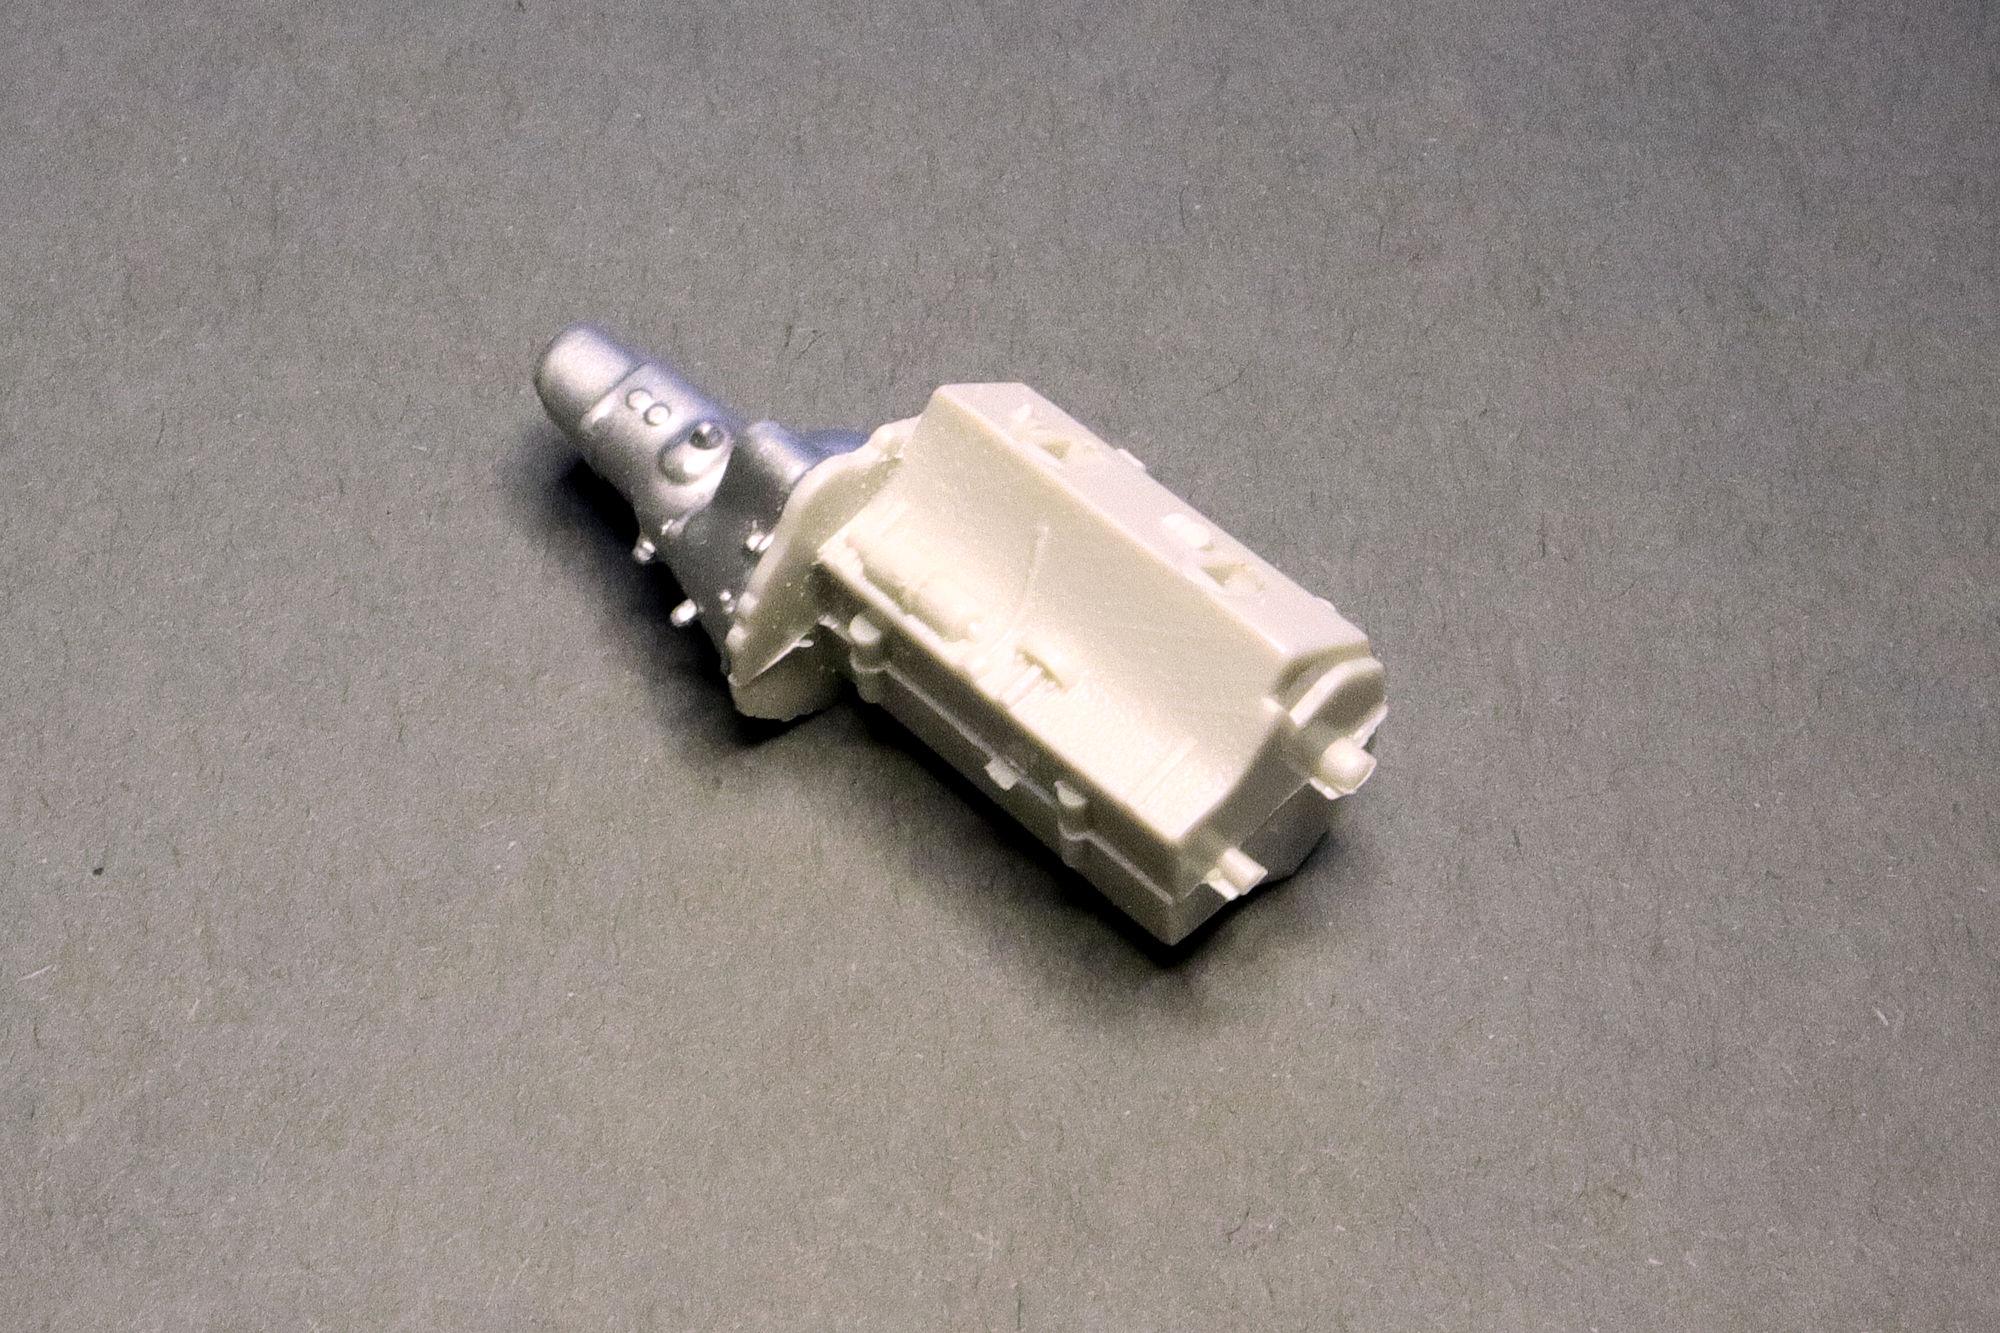
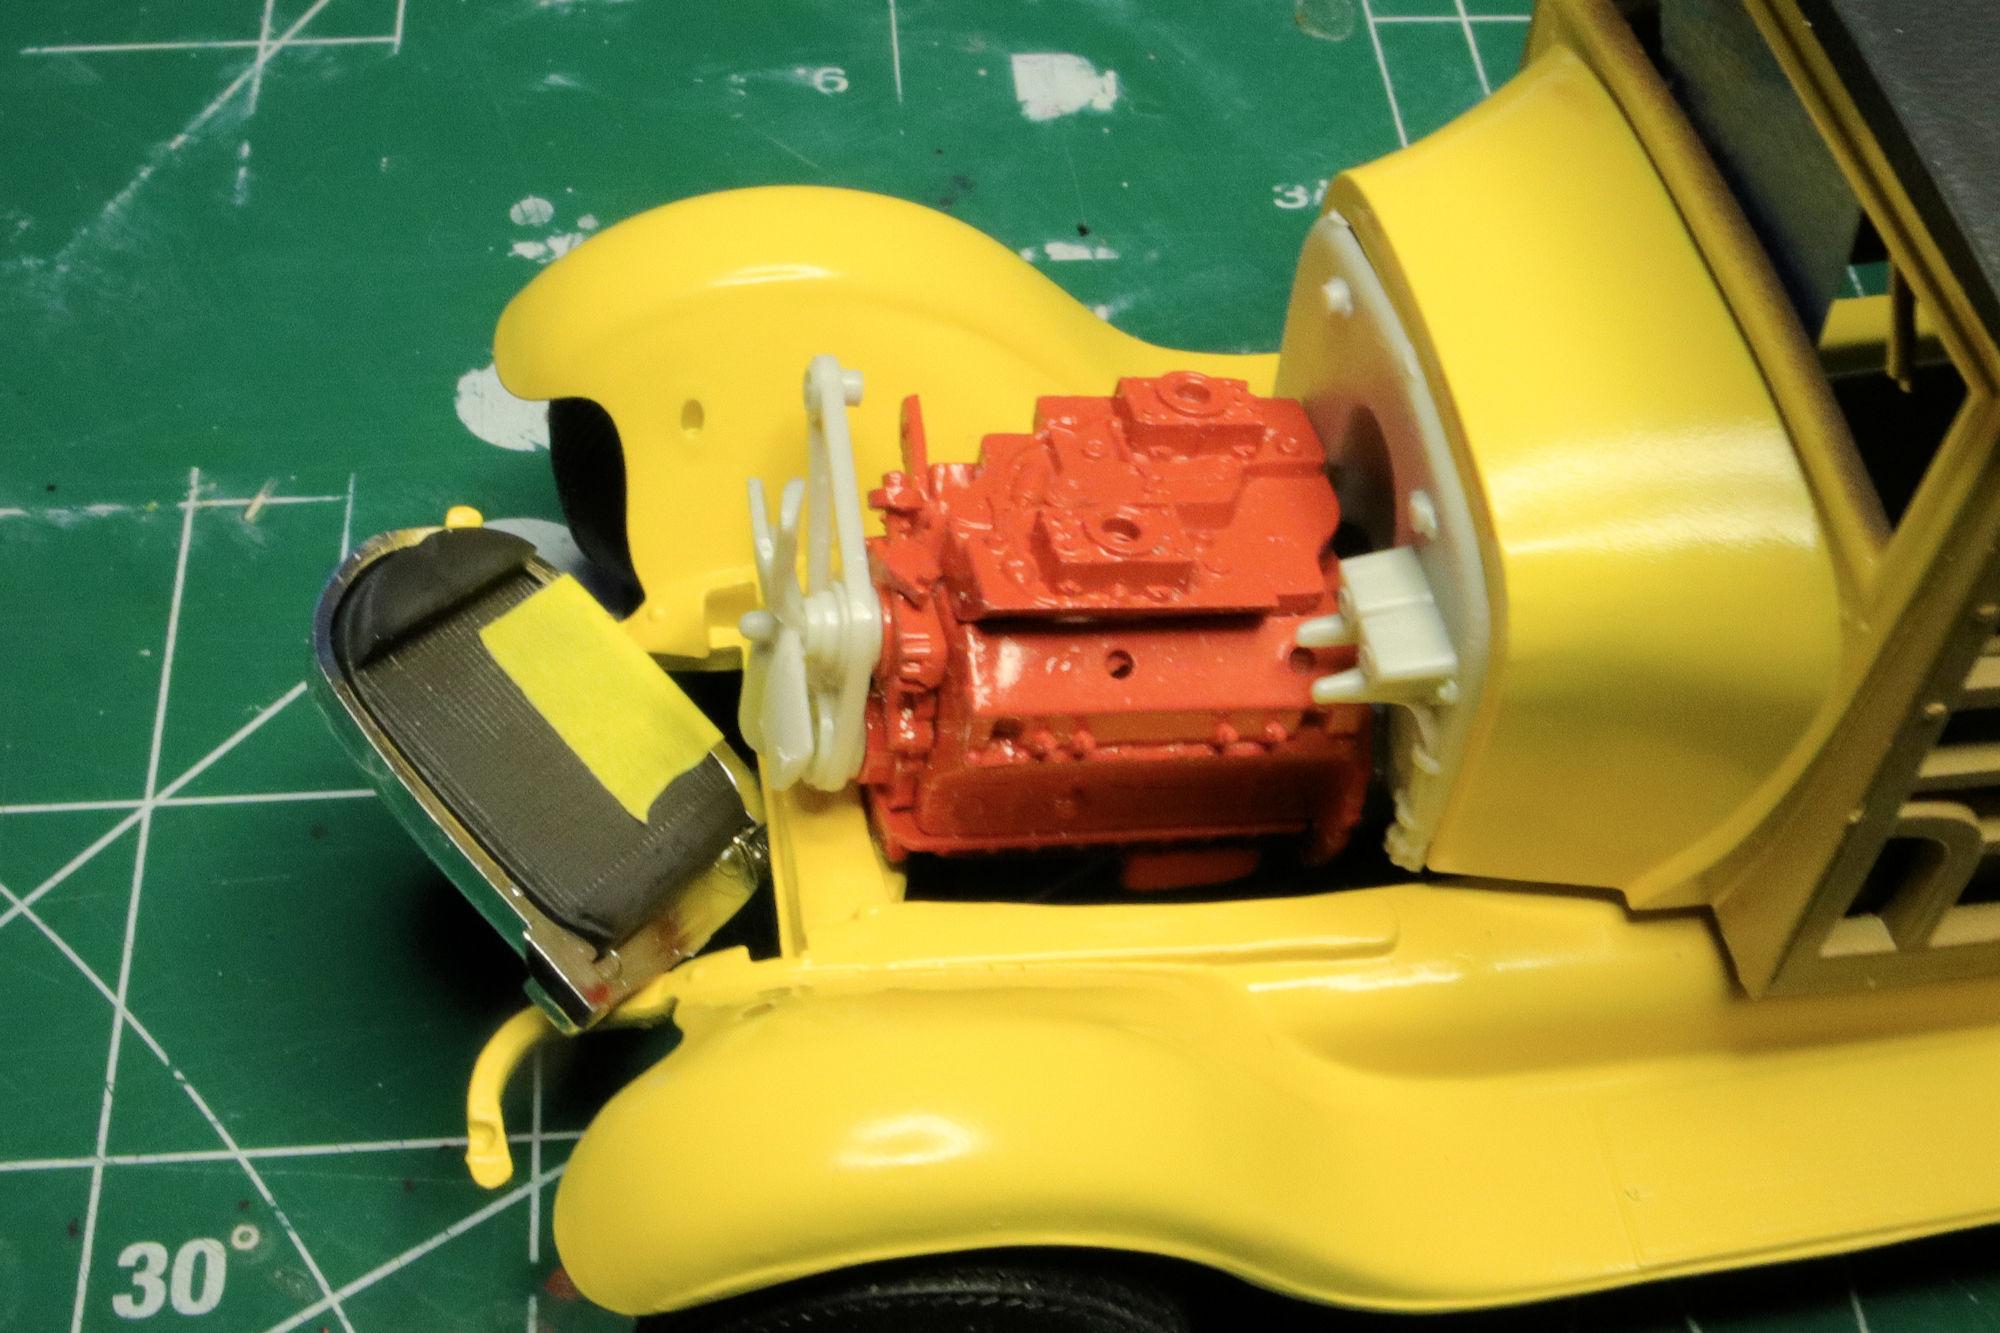
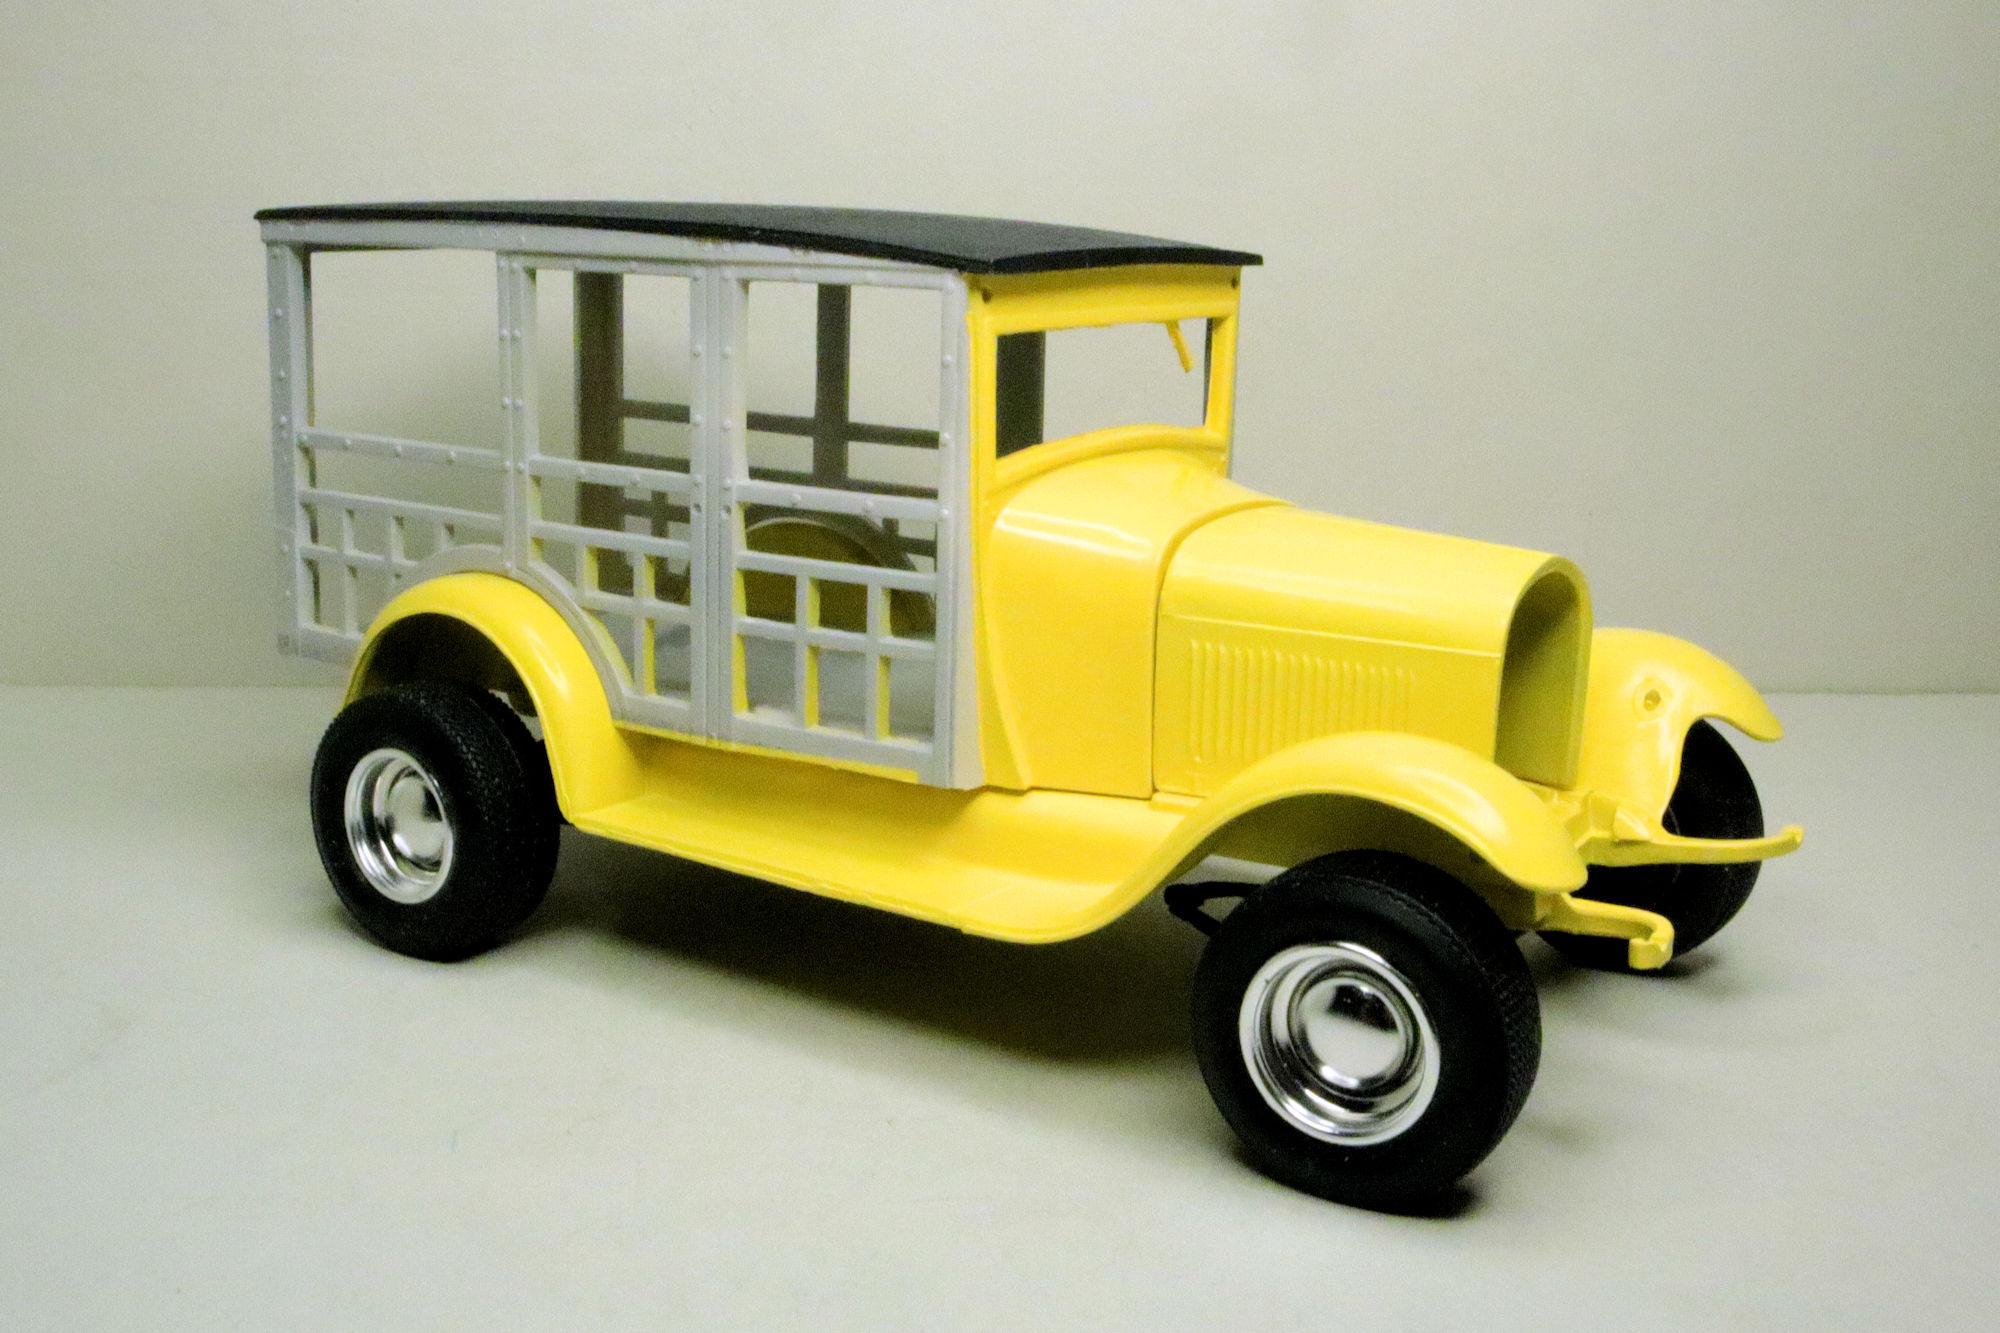
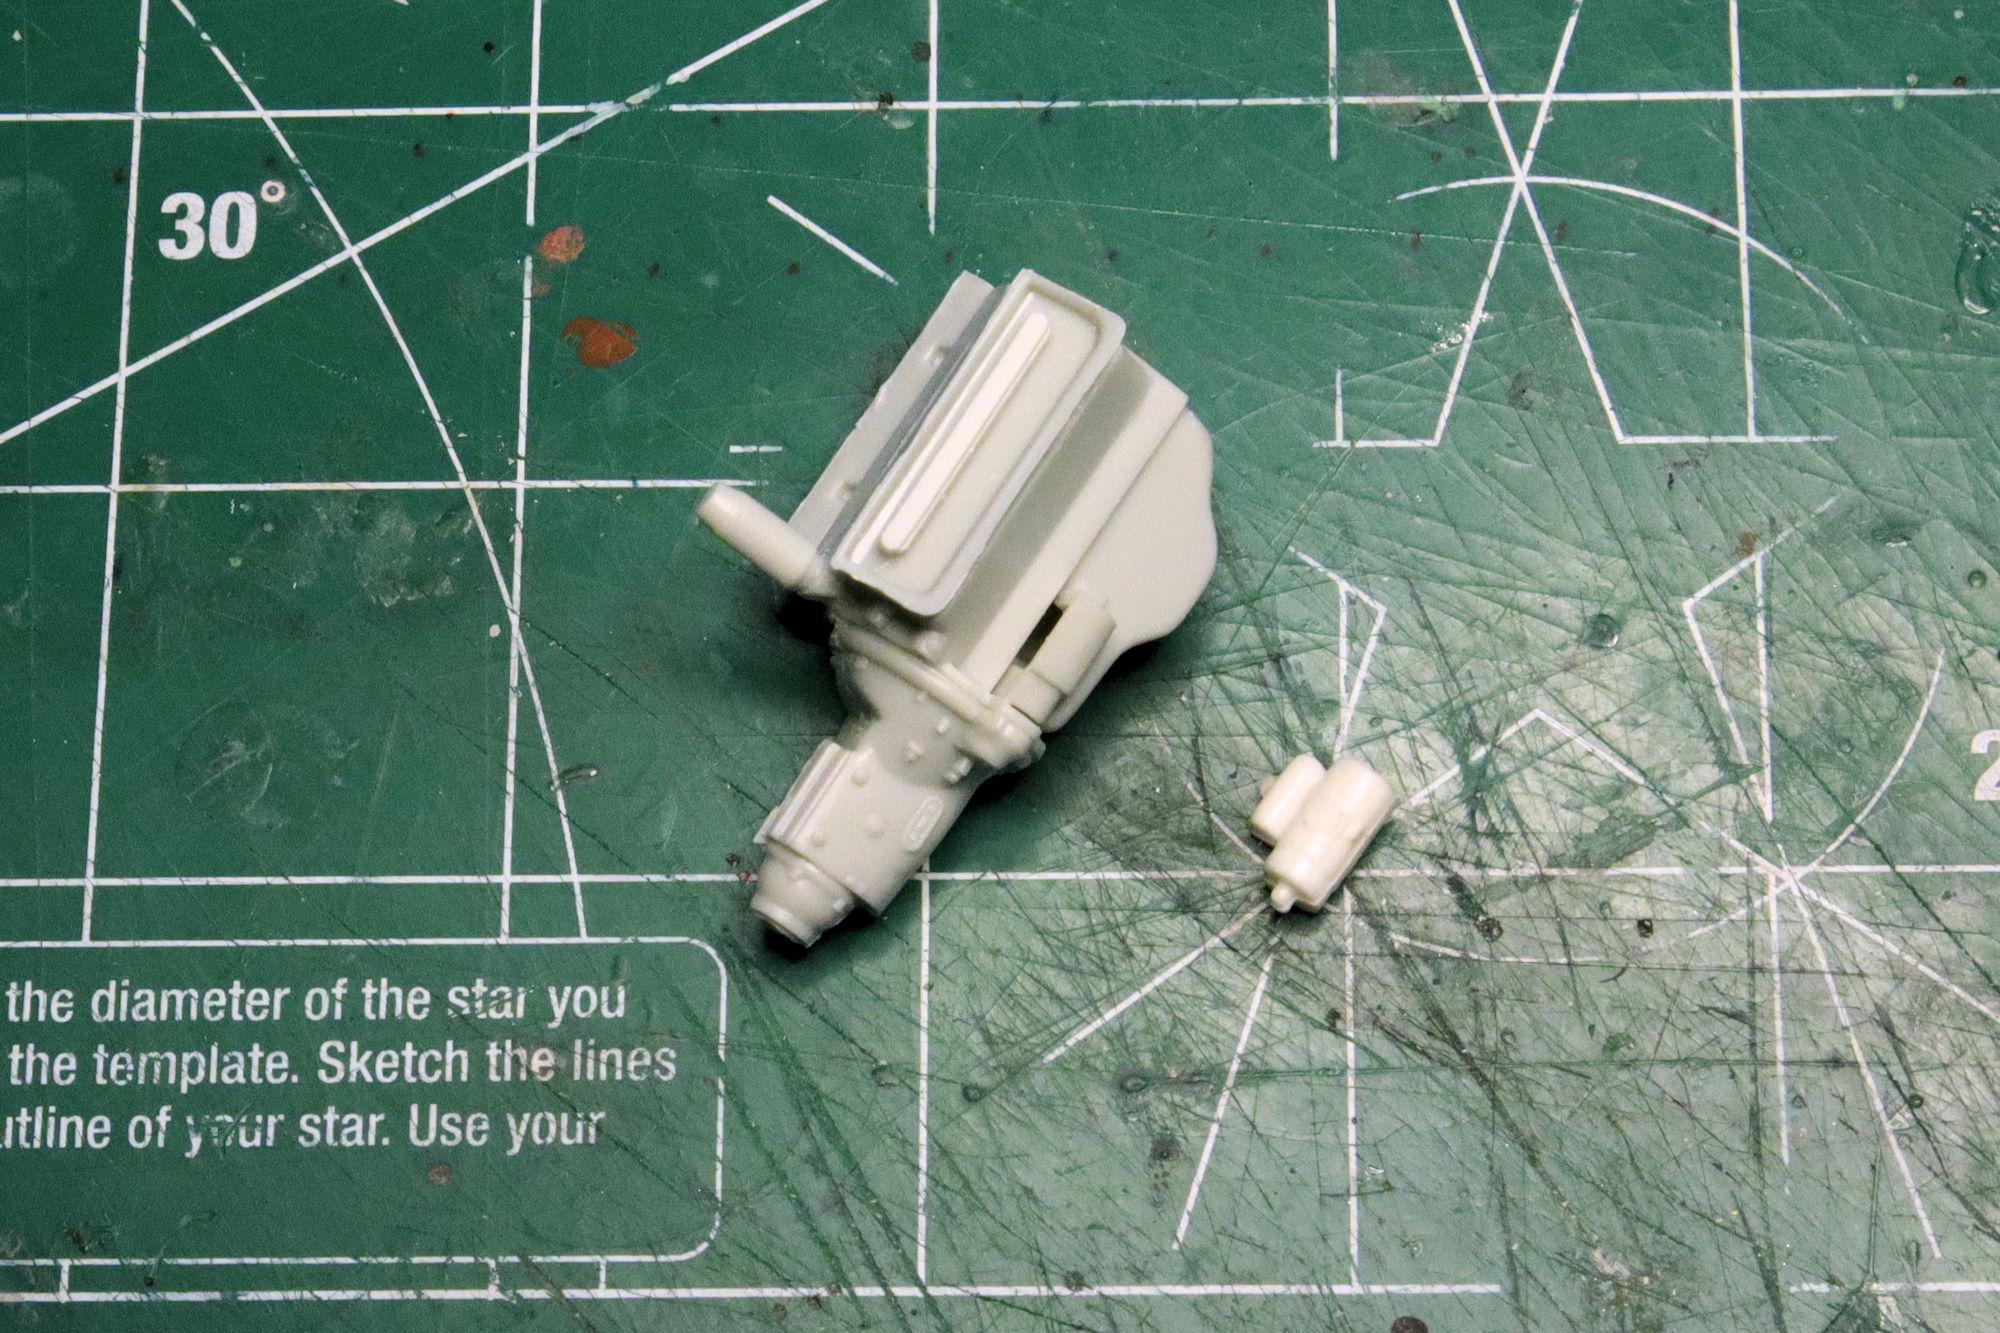
Hello Everybody! The quest for a suitable engine for the Woody continues. This time I'll try the Chrysler Max Wedge from AMT's '49 Mercury. Removal of the automatic transmission is the first step. It looks like a good match between the Woody's transmission and the Mercury's engine. Since I plan on displaying this model without a hood I want to add a little extra detail to it. Here I'm fabricating a bracket to support the alternator. With the alternator bracket in place, it's time to move on to other things. When fitting the transmission I discovered that cutting off the old one left a gap near the top of the engine block. I cut and glued in some scrap styrene to fill it. Unfortunately, once the fan belts and fan are added, there's not enough room between the firewall and radiator for this engine. In its proper position, the engine barely clears the thinner custom fire wall, and the fan is clearly intruding into the radiator space. Fortunately, I do have other options. I'm looking at the T-Bird engine from AMT's '60 Starliner. Which is the one I originally wanted for this build. So since I'll be coming full circle on this, maybe it'll be the one. 😕 As always, thanks for taking the time to look and please feel free to share any comments or questions you may have. David G.

-
Thank you Carl. Thank you Elliot. I've already lowered the back a little and I think the front will come down a little too once the front axle is properly in place. And I am currently considering a rear axle swap; mainly so I can have the option of a shorter driveshaft. Actually, I swiped the boards from the Surf Shark. You're three for three so yeah, I guess you can see where this build is going. Thank you Ken. =D-
-
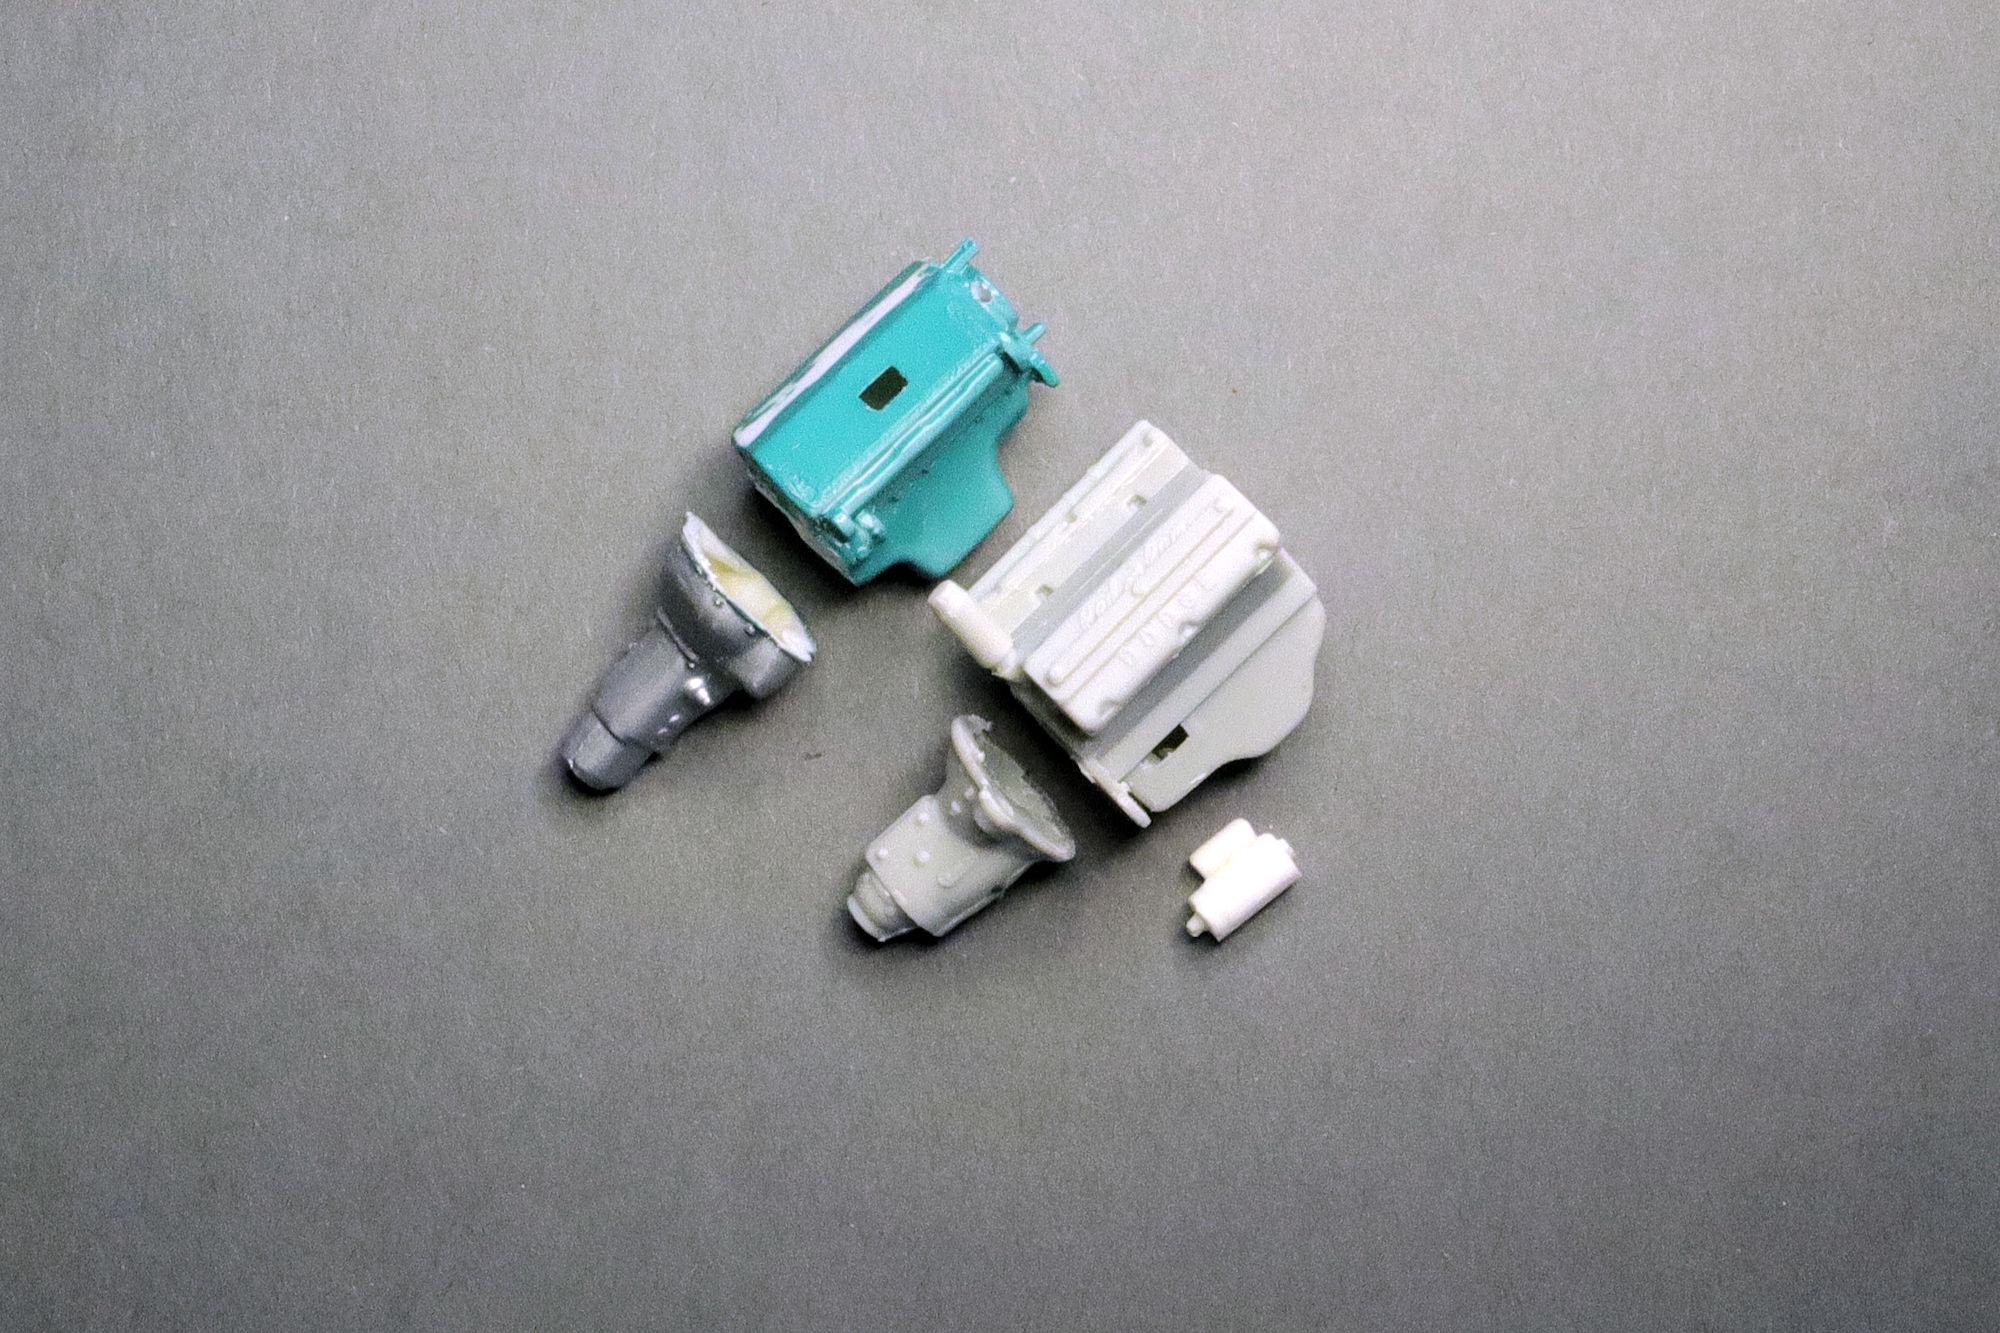
Thank you Lenny, I'm glad to have you along. Thanks Greg. There are a number of questions and suggestions offered. I'm going to respond below and try to address them all in one shot. Thank you Alan, that was my thought too. I plan to make this a surfer wagon and the Max Wedge is a much better choice when it comes to driving to the beach with your buddies every weekend. Okay Folks, I appreciate all your questions and suggestions and I hope this response covers them all in one pass. My first choice for replacement of the less than stellar custom engine option for the '29 Woody was the Thunderbird engine from AMT's '60 Starliner. Unfortunately the automatic transmission prevented it from fitting without cutting and swapping the transmissions. I wanted to avoid doing that so I started looking for a suitable engine with a manual gearbox. The one that filled that bill was the Red Ram from AMT's '29 Model A Roadster. The transmission on the Red Ram turned out to be too short and I realized that I would end up doing what I wanted to avoid. Cutting and swapping transmissions. I figured that the best option at that point was to keep the Woody's transmission as a central anchor and work around that. I knew that the Woody transmission would fit the Woody chassis and all I had to do was make the engine work with that. When I discovered that the Red Ram's starter location didn't match the bell housing bump on the transmission, I considered moving the bump on the bell housing, modifying the Red Ram transmission to fit the Woody chassis or just putting the whole thing together and pretend that I didn't notice. Previous life experience has taught me that adjusting multiple factors at the same time is a recipe for disaster, or at least failure. For example, if your engine is running rough, it's not a good idea to adjust the carburetor, points and timing all at once. Hit 'em each one at a time and get what you can from that and move on to the next activity. Again, I figured it best to stick to keeping the Woody's transmission as the central anchor point and working around that. Though I did like the blower on the Red Ram, I wasn't happy with its overall lack of detail. Letting go of it was not a difficult choice. So I looked through my kit remnants and found the Max Wedge from AMT's '49 Merc ( I do have kits from other manufacturers, I promise! ) I did have to cut and swap the transmission but at this point it looks like everything else should work. The casting detail is much better on the Wedge than it is on the Ram so it'll look better without the hood. Though it is a rather wide engine so if I do run with a hood I'll probably have to ditch the side curtains. And I don't like the header-manifolds that Chrysler stuck on this engine so I'm scratching around in my parts box for a set of aftermarket headers. Because... hot rod And the Thunderbird engine, my original choice is still an option I'm considering. Wow! I hope that hits 'em all. Thanks for taking the time to read through all that and thanks for taking the time to offer your comments and suggestions. David G.
-
Congratulations! Well deserved. David G.
-
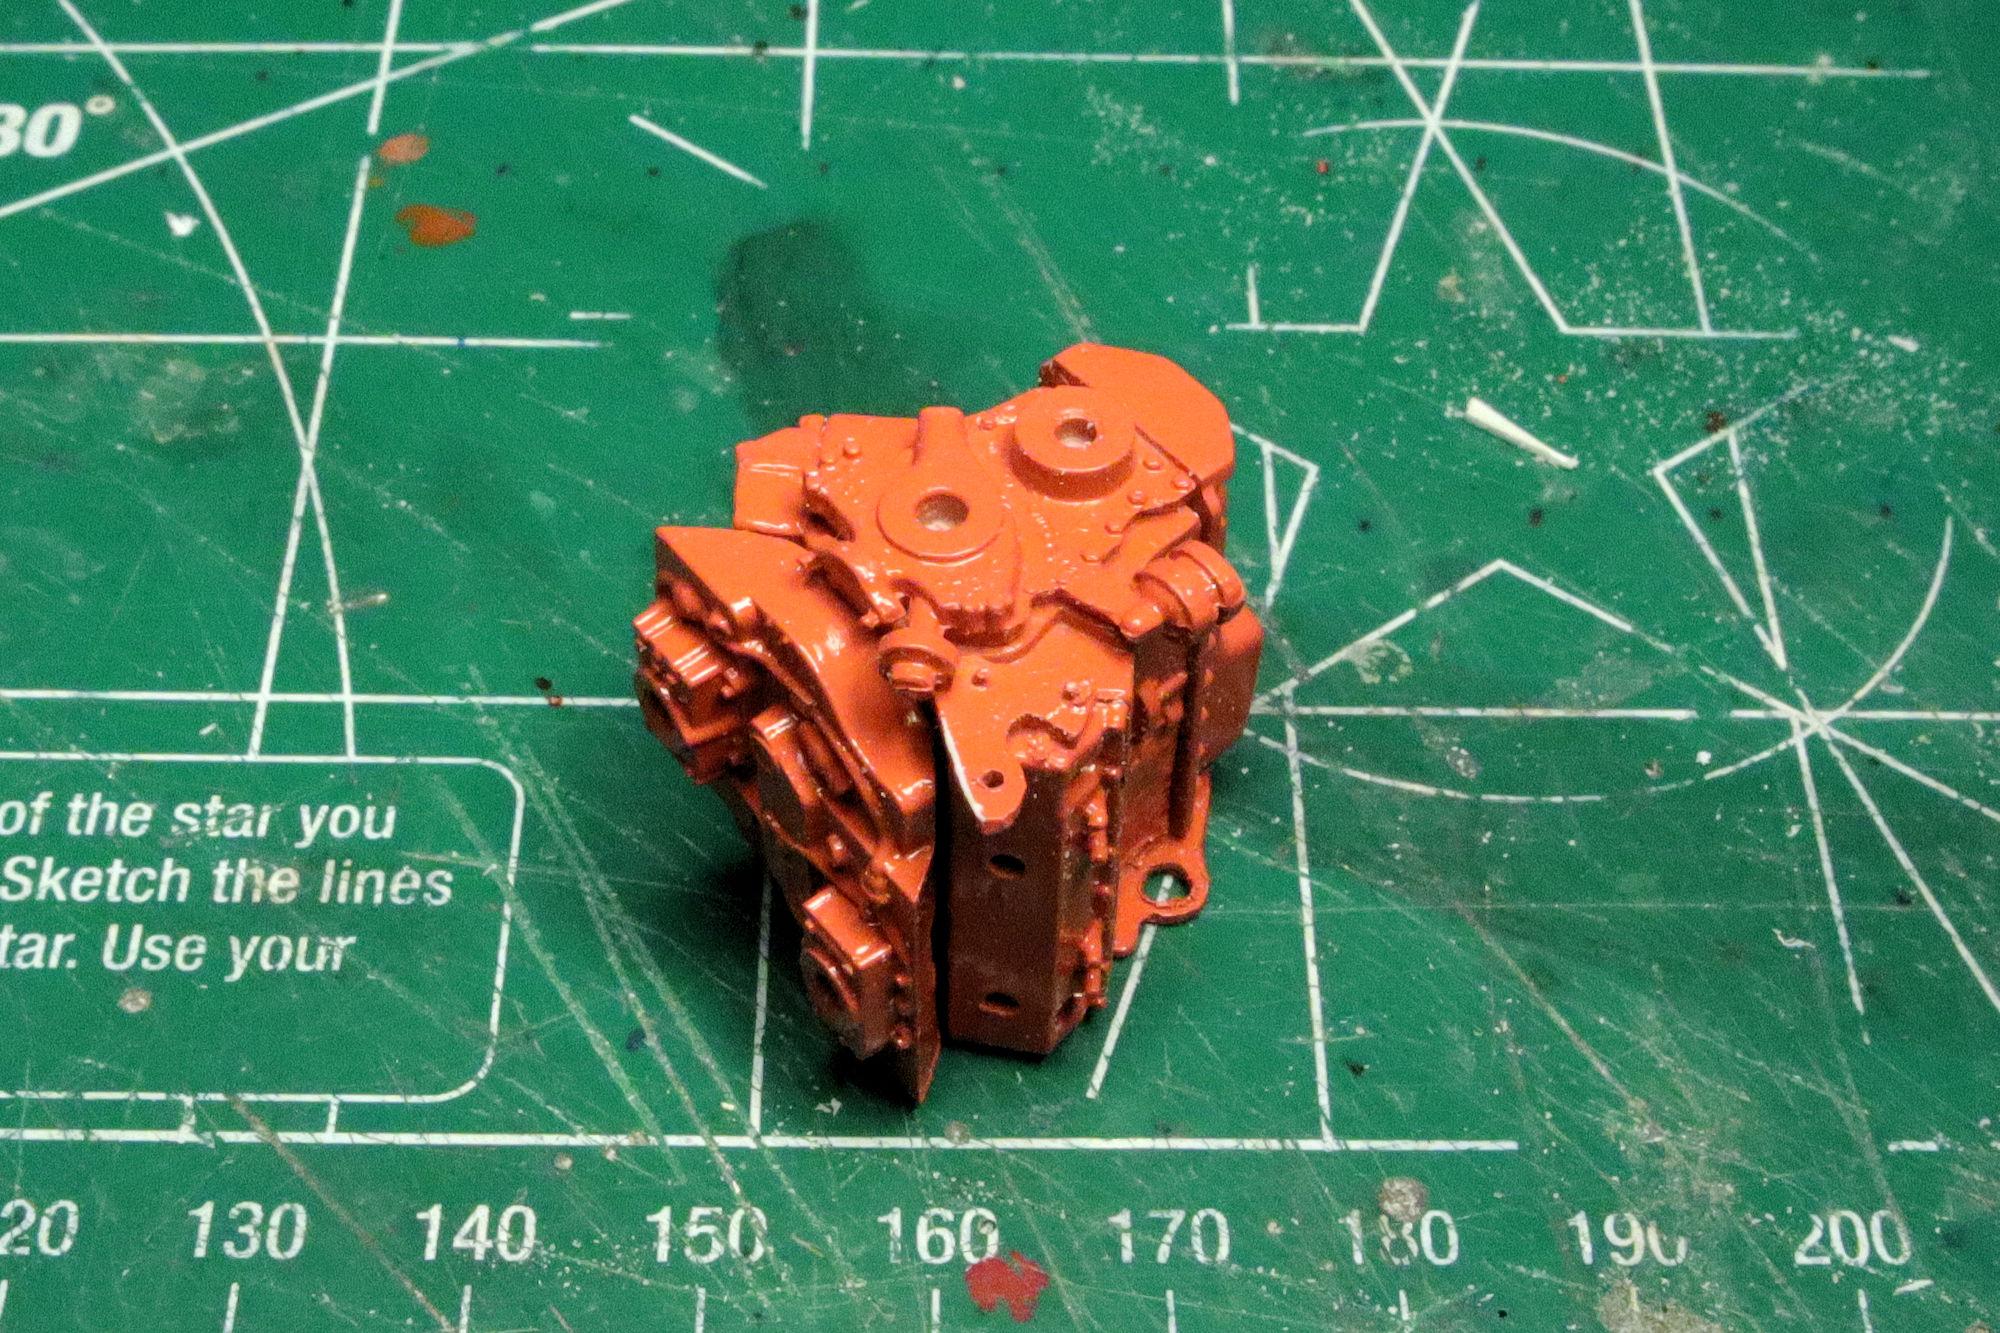
Thank you Greg. No, where the starter bump is on transmission is too high in relation to the engine block. It would place about 1/4 of the starter inside the cylinder bank. Thank you much Alan, that yellow certainly does seem like a good color for a hot rod. I really do like the Red Ram but I've moved on from that one. The one I found to use in place of it is the dual carb Max Wedge from AMT's '49 Merc. It has much better casting detail and without the blower it should allow me to put the hood on if I choose. And it feels like more of a daily driver engine than the blown Hemi... it's a little more realistic, I think. Thanks, David G.
-
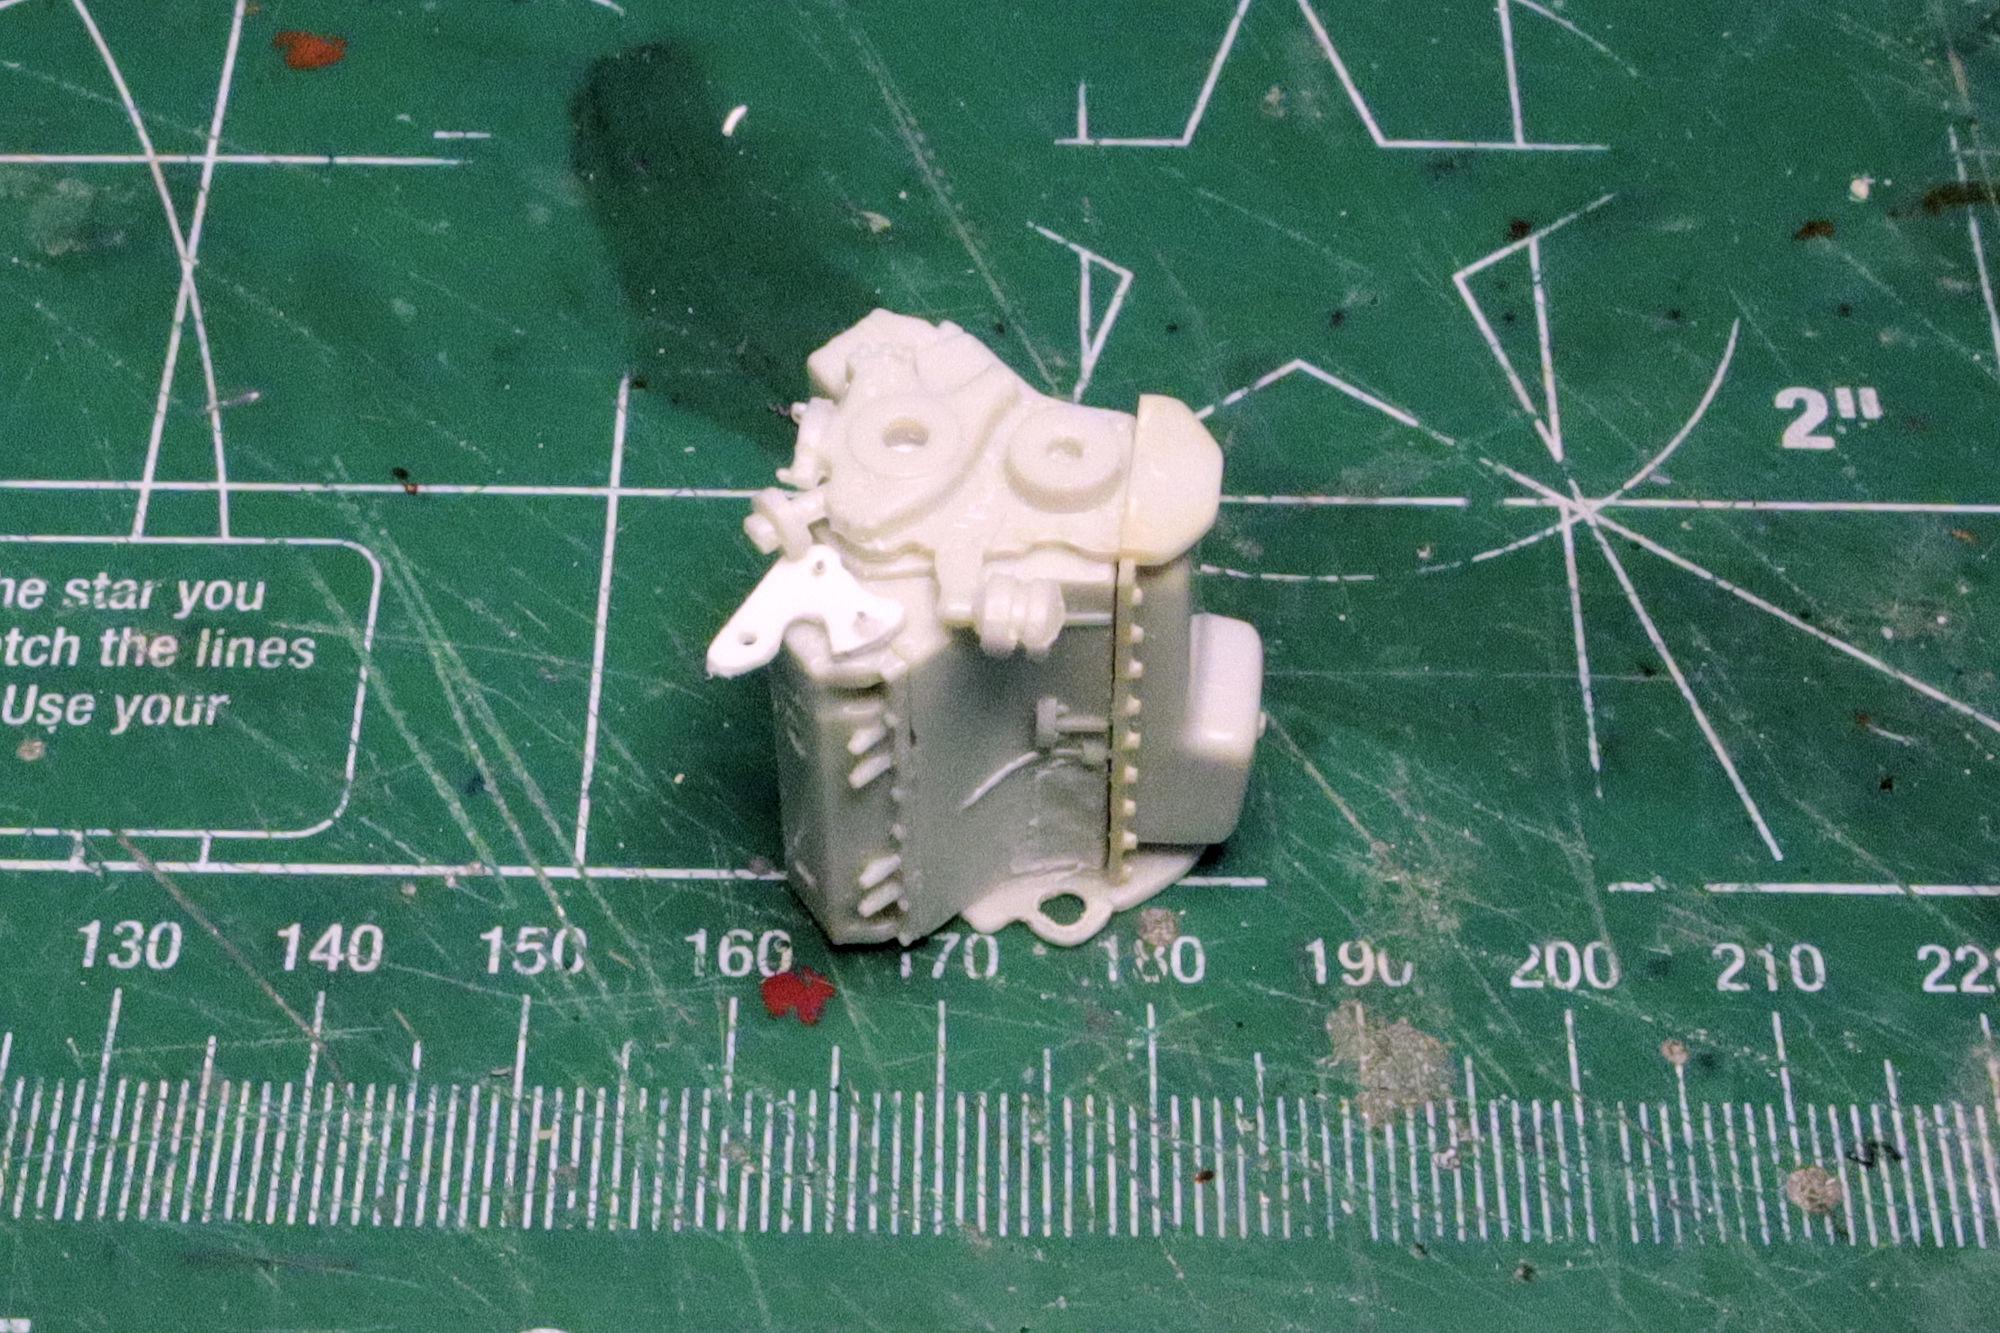
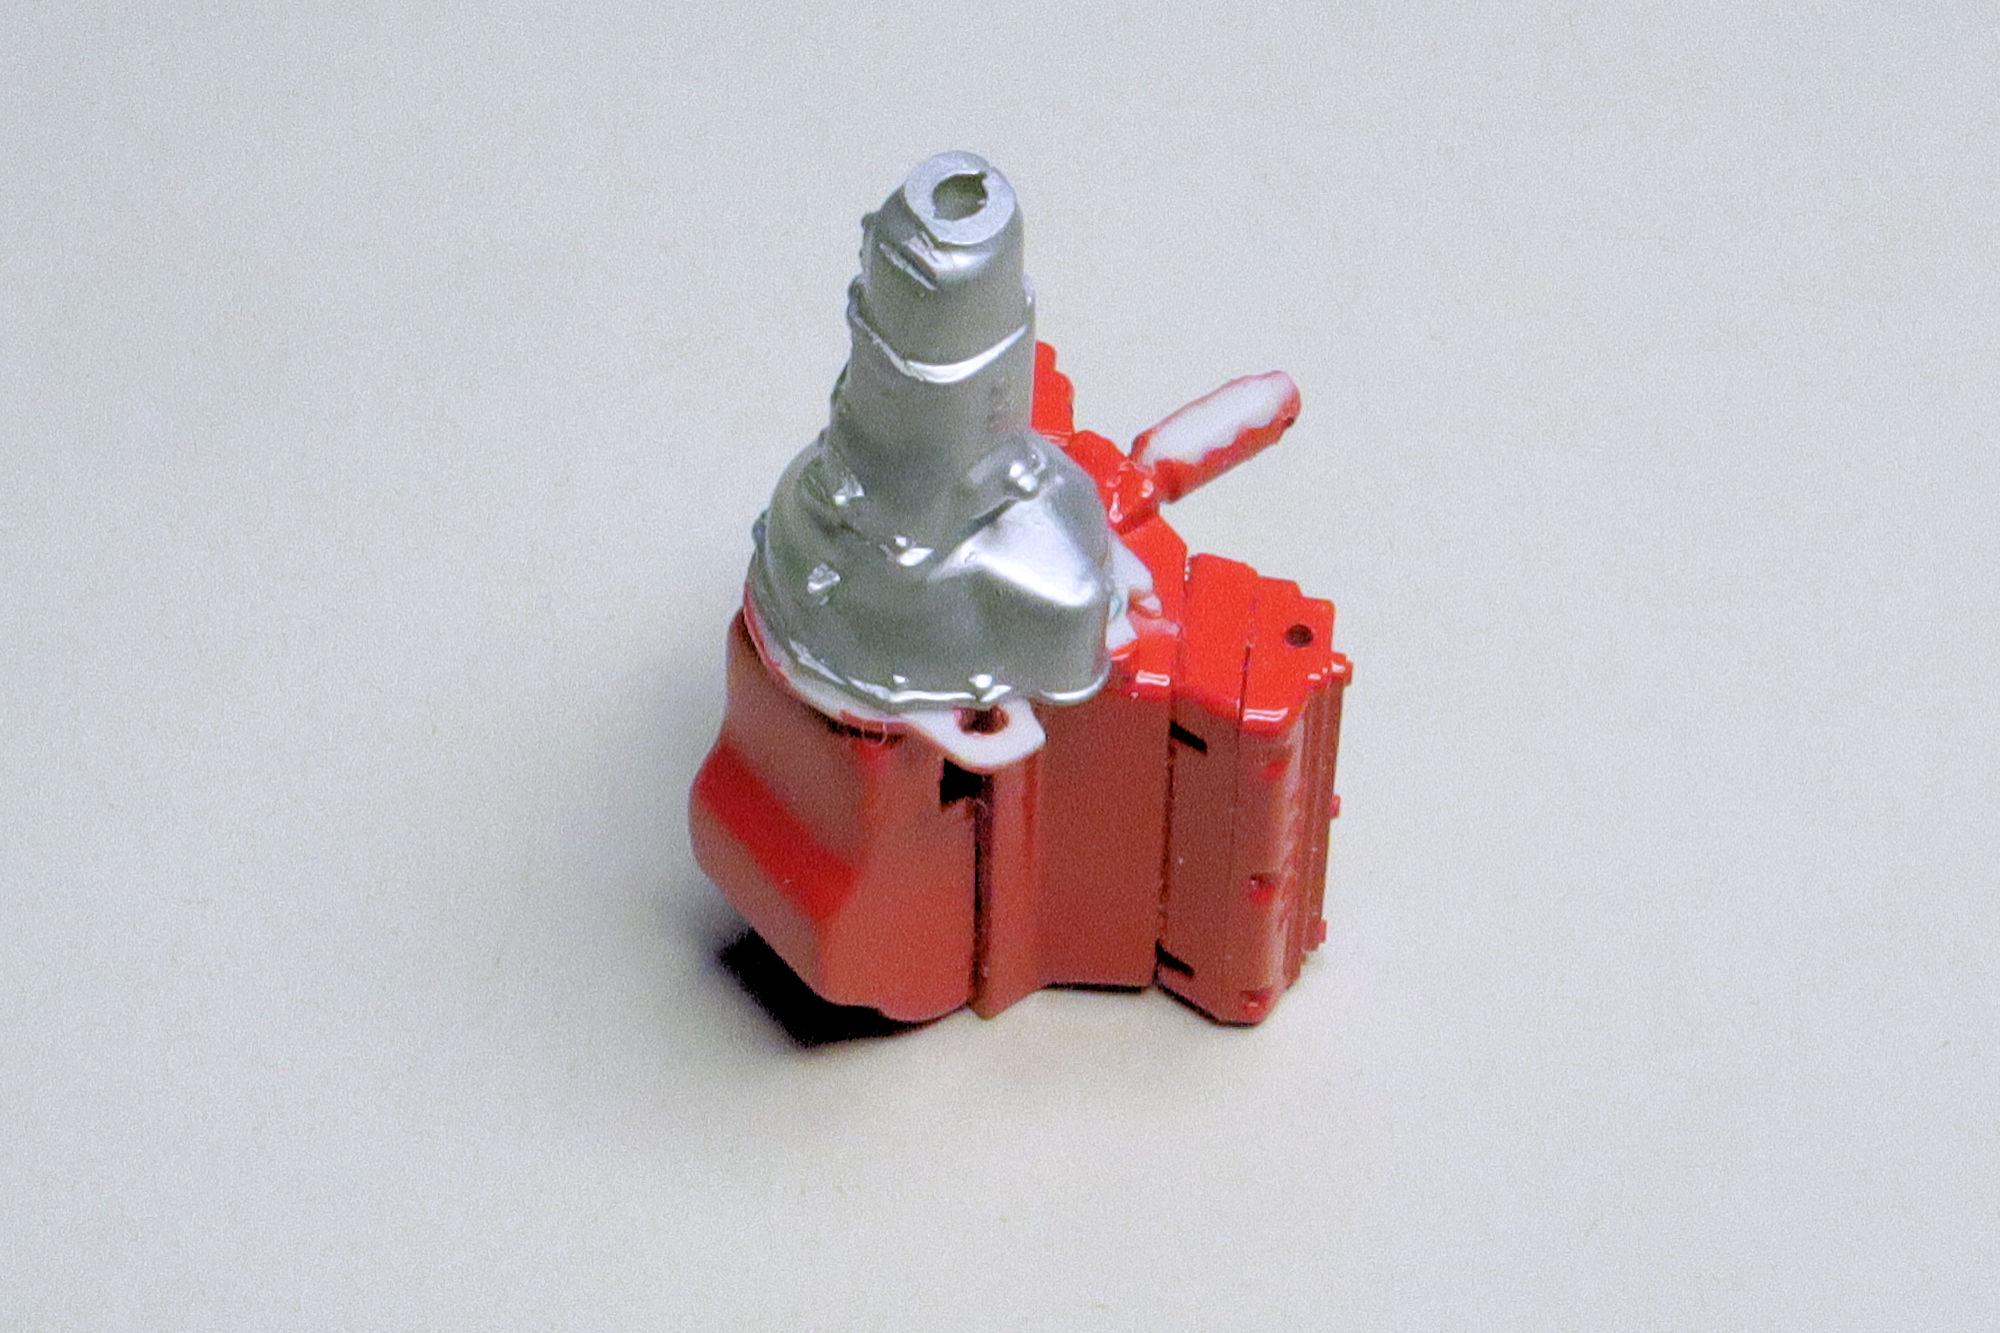
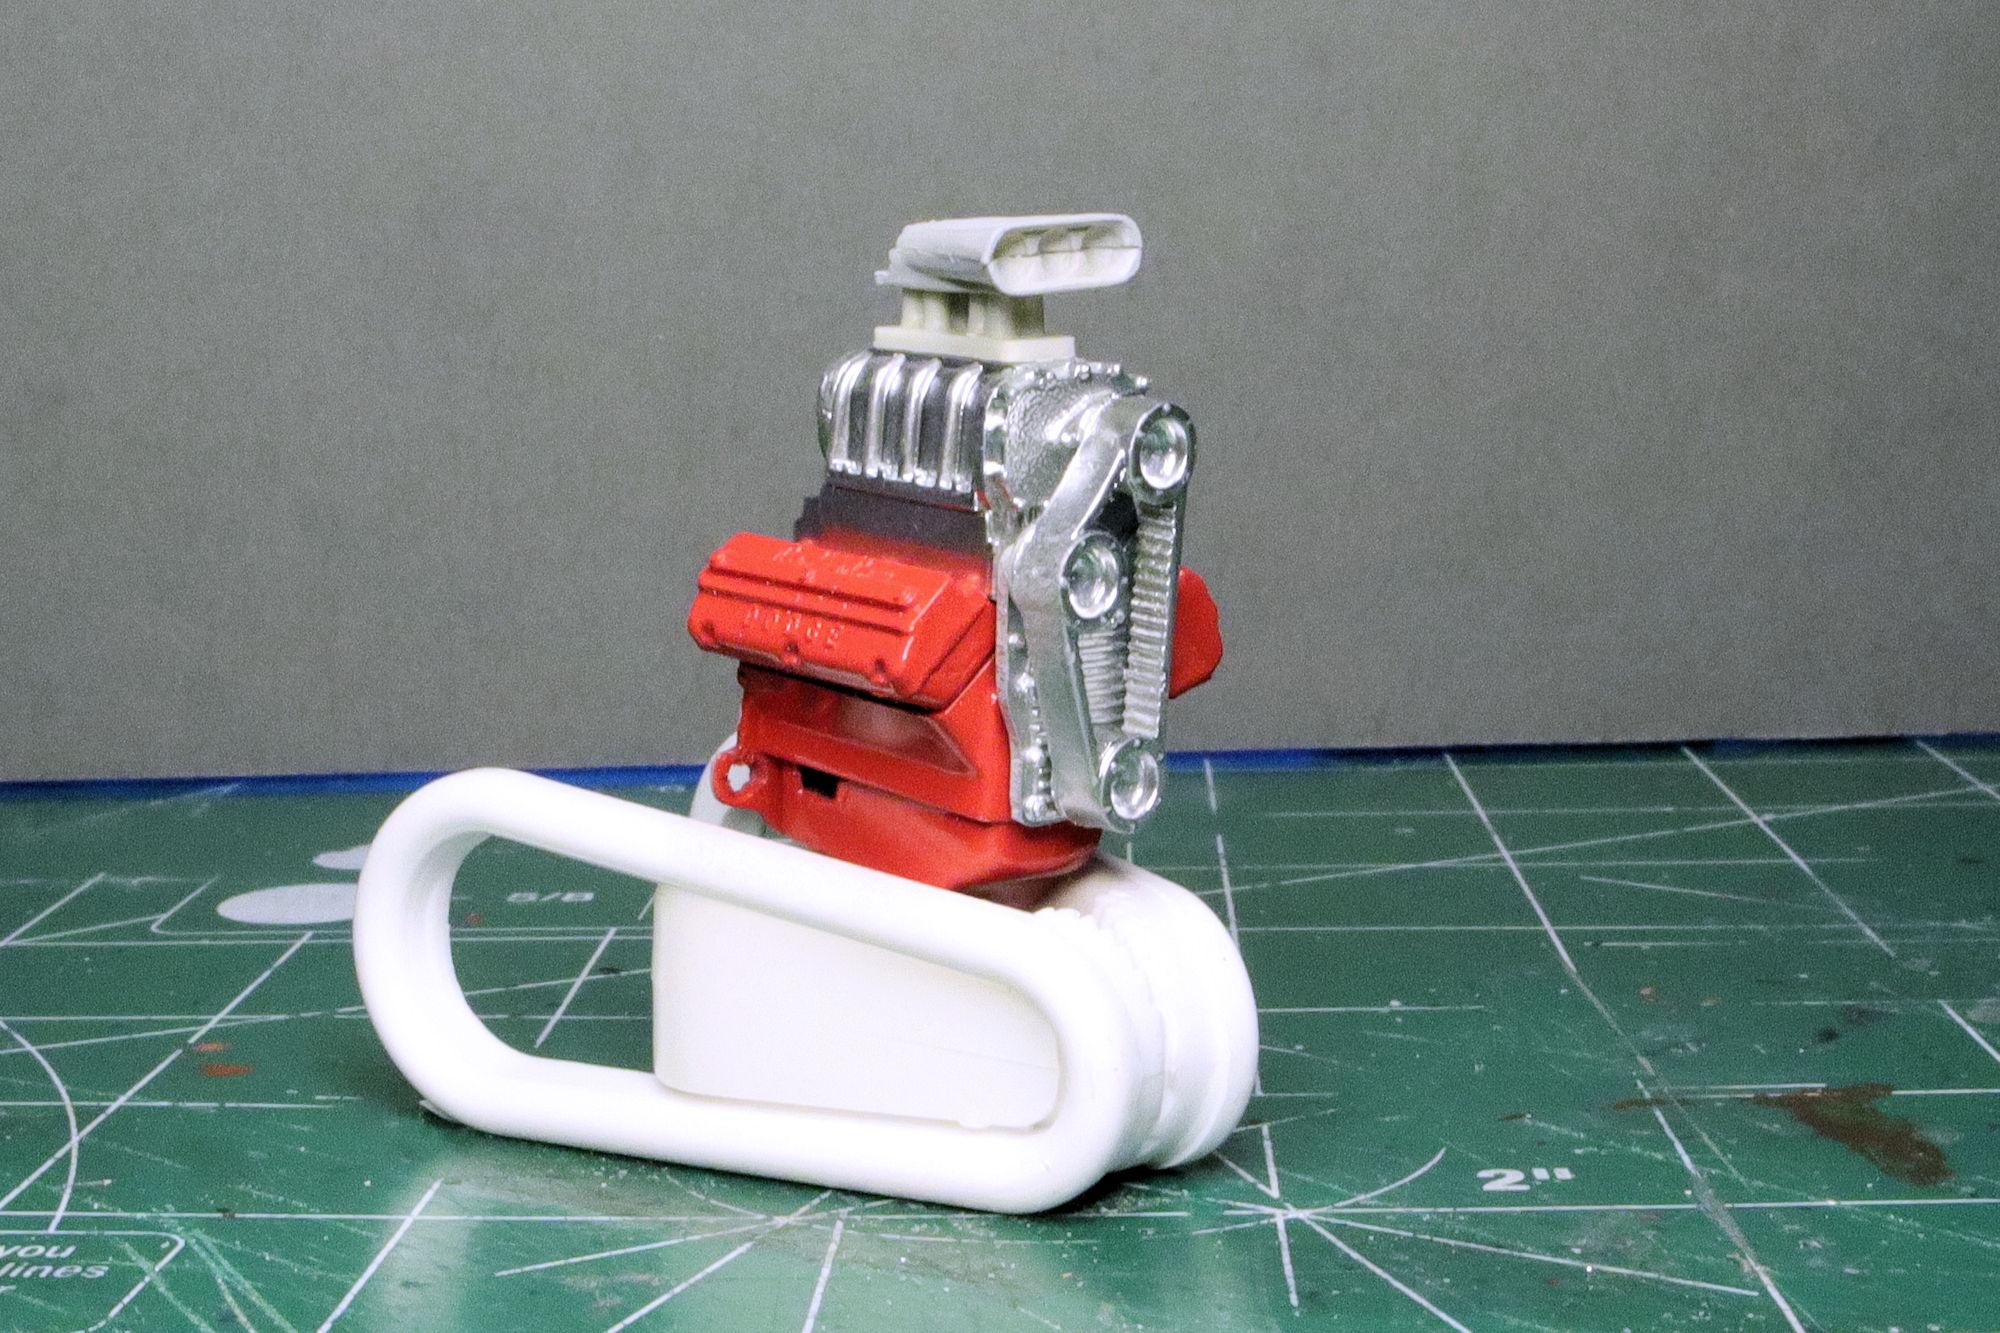
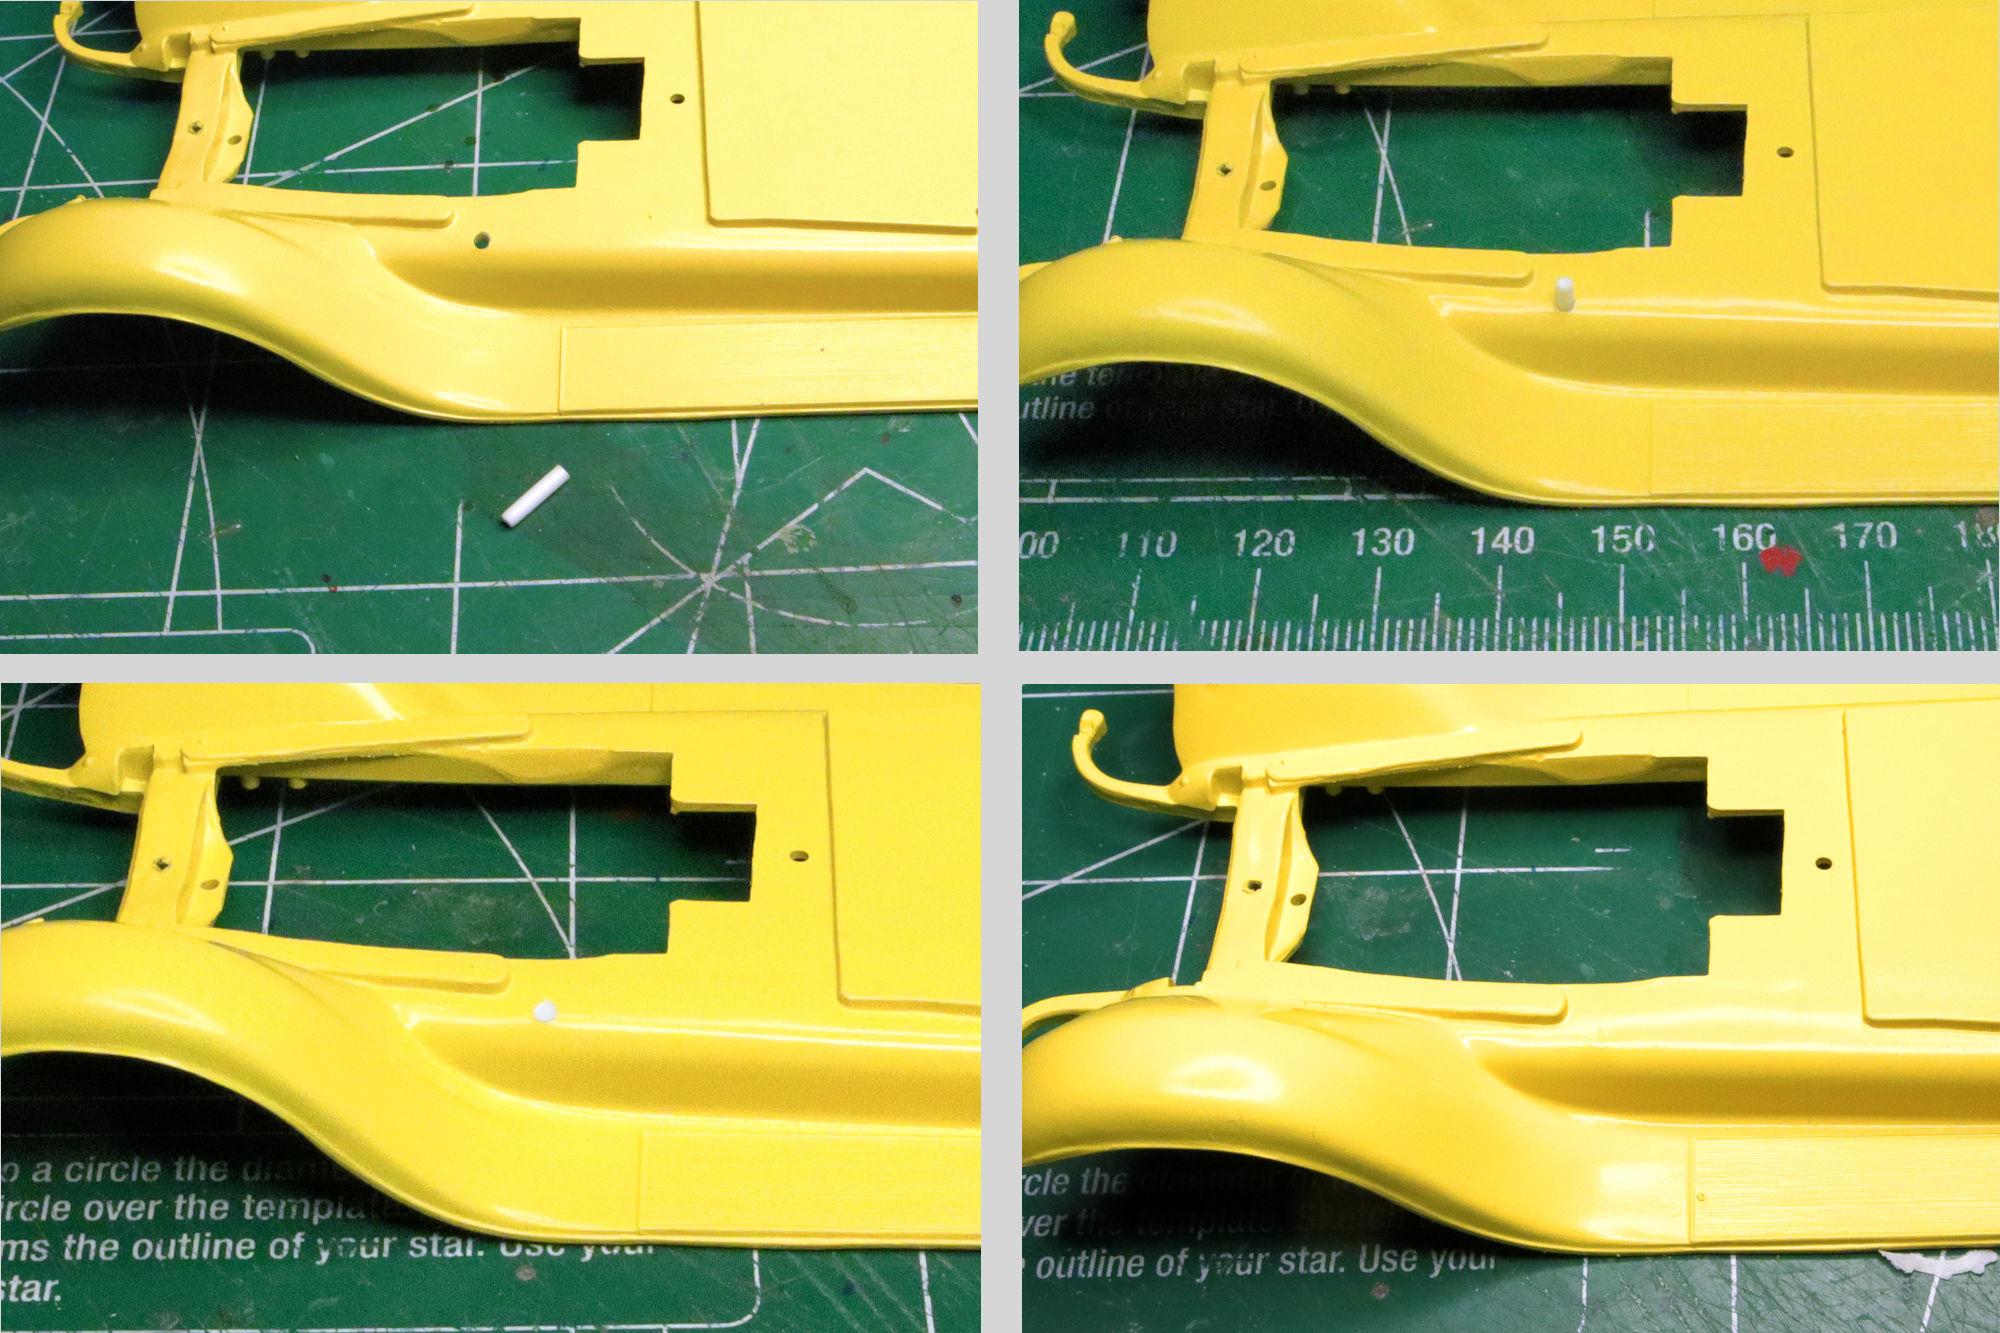
Hello Everybody! I know it's been a little while since I last posted anything to this build thread but I have been working on it. After the first coat of yellow I realized that there was a hole in the running board apron that is meant for the stock spare wheel mount. I'm not building stock so it must be filled in. After spraying some yellow on the body, it's time for another test fit mockup. I really want to display this one with the hood off showing a nice beefy classic hot rod motor. I found one that I think may suit the need. It's the unused optional Dodge Red Ram engine from AMT's 1929 Ford Model A Roadster. I built that kit a few years ago and went with the stock version which left the optional engine available. Unfortunately it's a little lacking on detail and this half-assed starter really needs to go. One of the reasons I chose the Dodge engine is because it was about the only parts box motor I had with a manual transmission... that and the blower. The transmission on the Dodge engine turned out to be too short to allow the engine to fit properly to the Woody chassis so I'll be doing what I was hoping to avoid by selecting this engine, swapping the transmission. After doing a little prep work to get the new engine ready, I decided a test fit was in order. It looks like we have a problem. The starter bump on the transmission bell housing doesn't line up to the mounting location on the engine block! I suppose I could ignore it but I don't think I will. It's time to look for another engine. It's kind of a shame that I won't be using this engine. Prep work aside, I was really looking forward to using this one. In spite of its shortcomings I think it could have made a good looking engine. Oh well. As they say, back to the drawing board. As always, thanks for taking the time to look and please feel free to post any comments or questions you may have. David G.
-
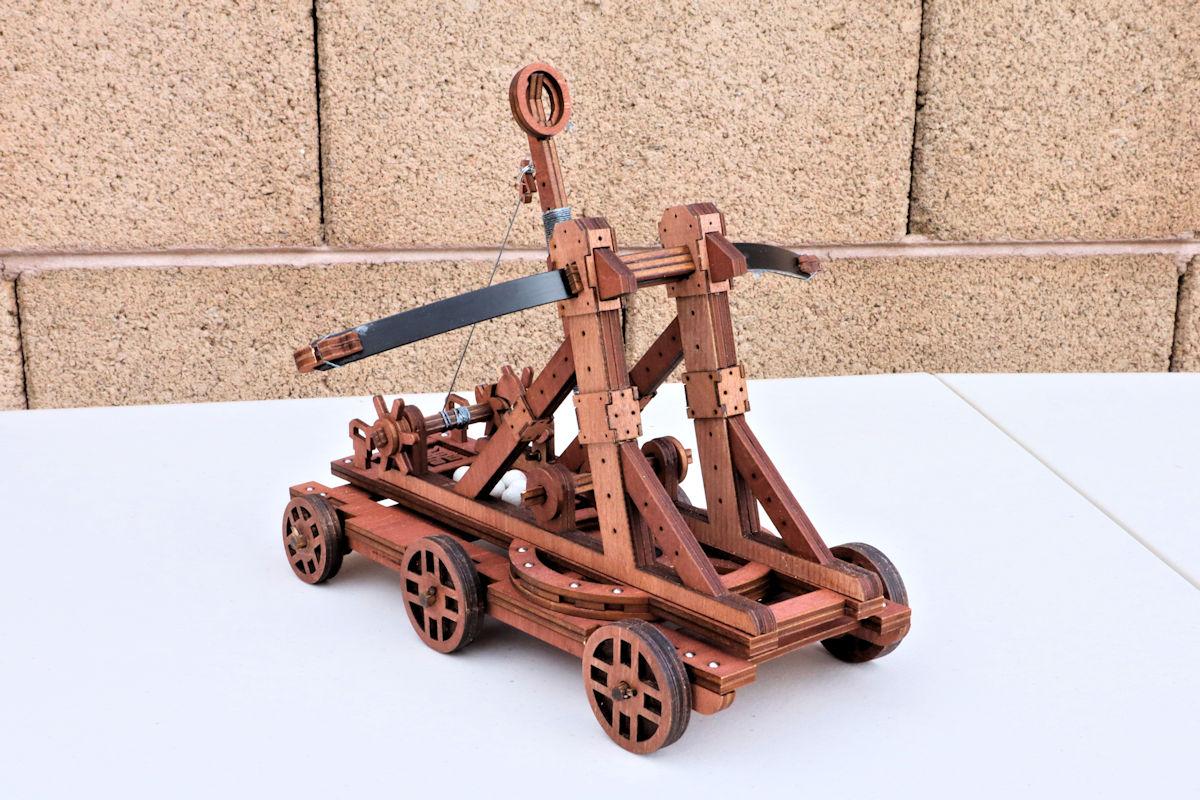
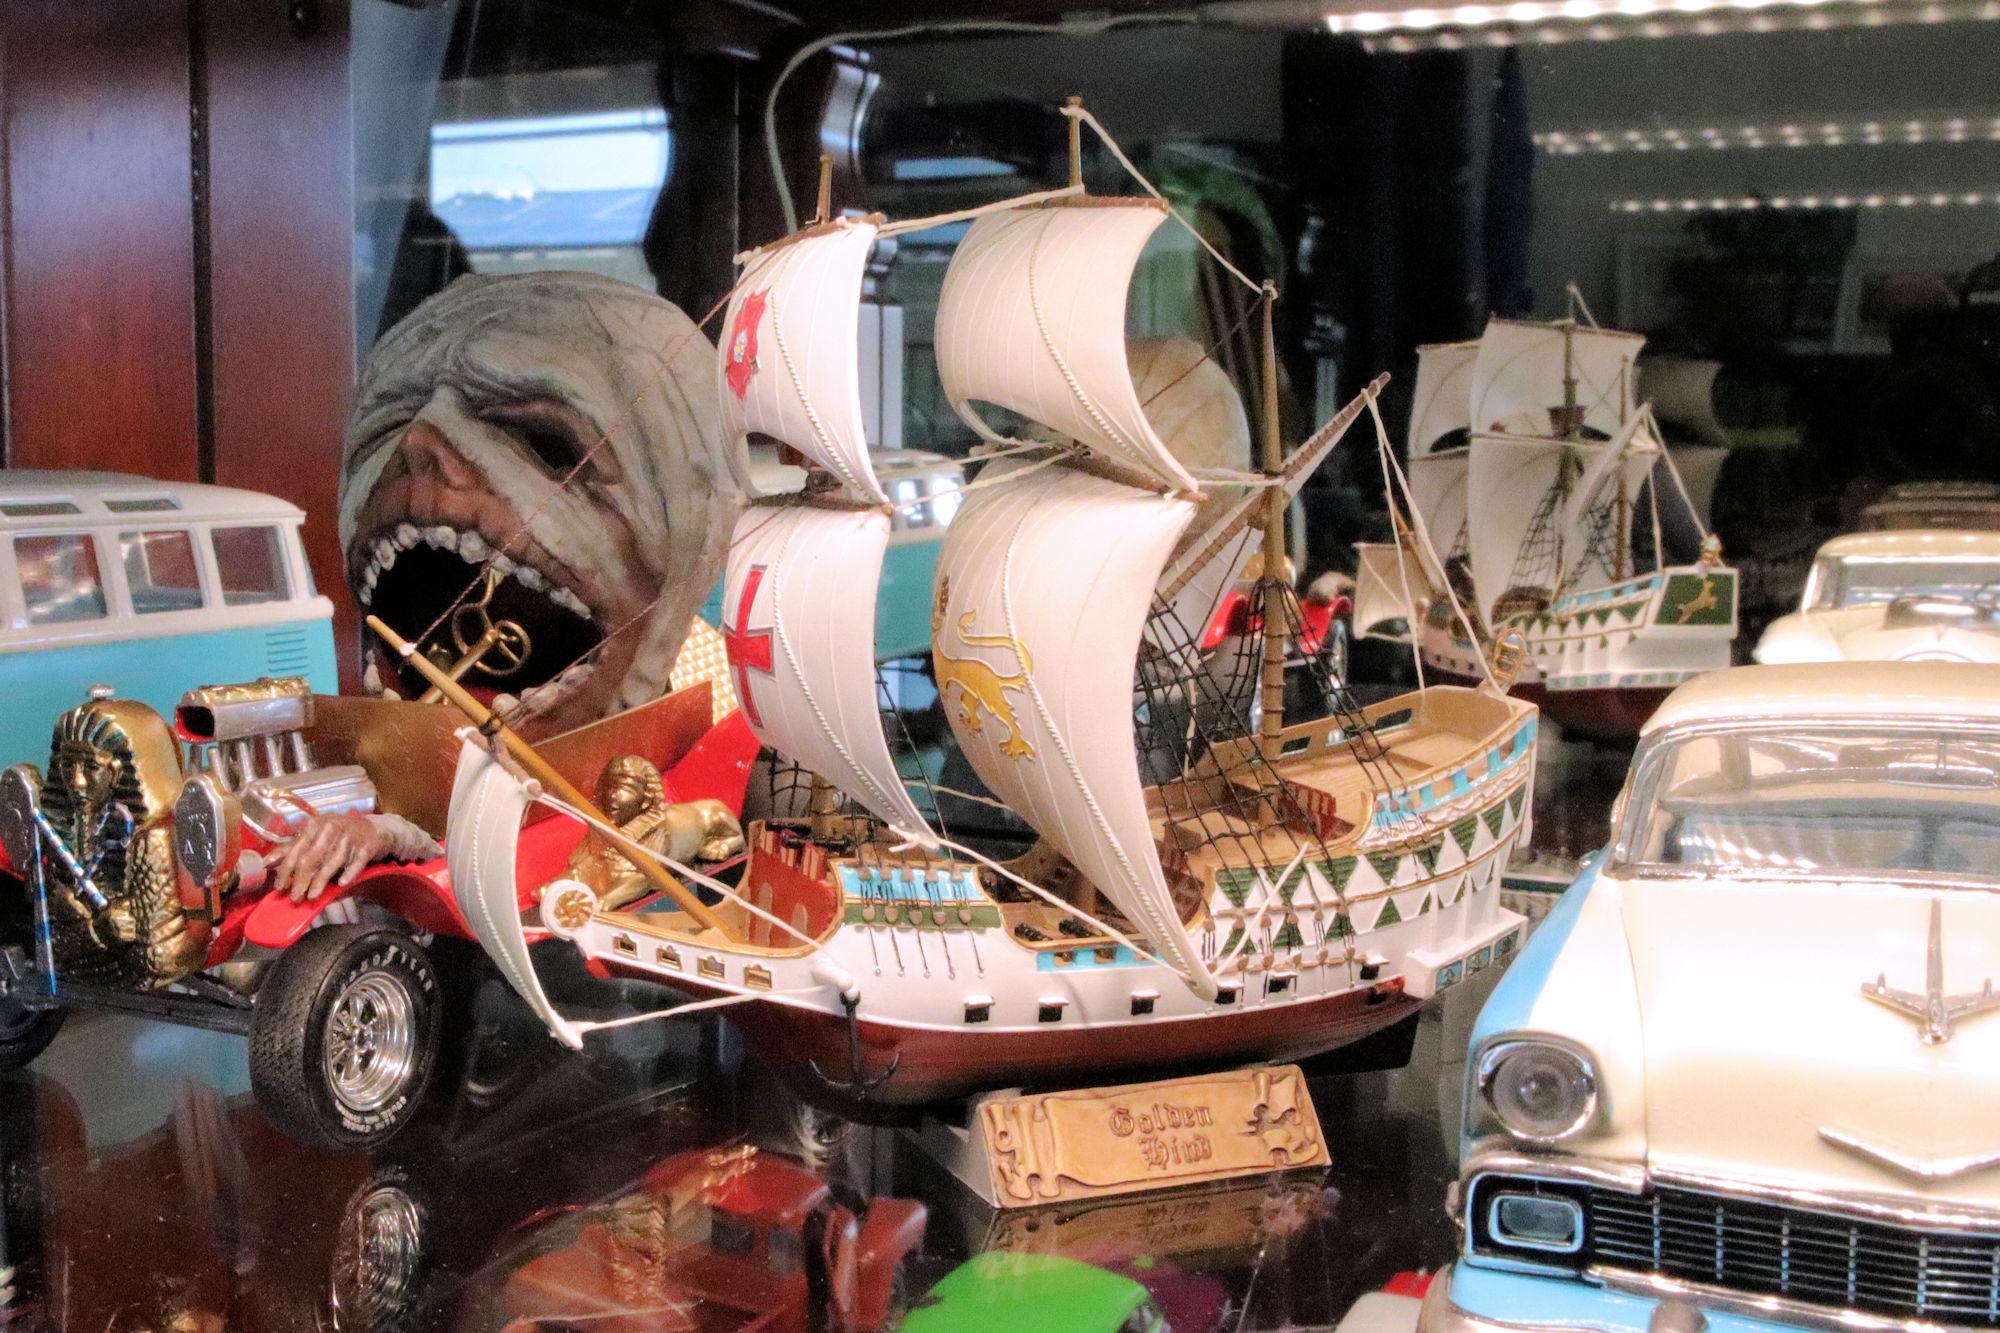
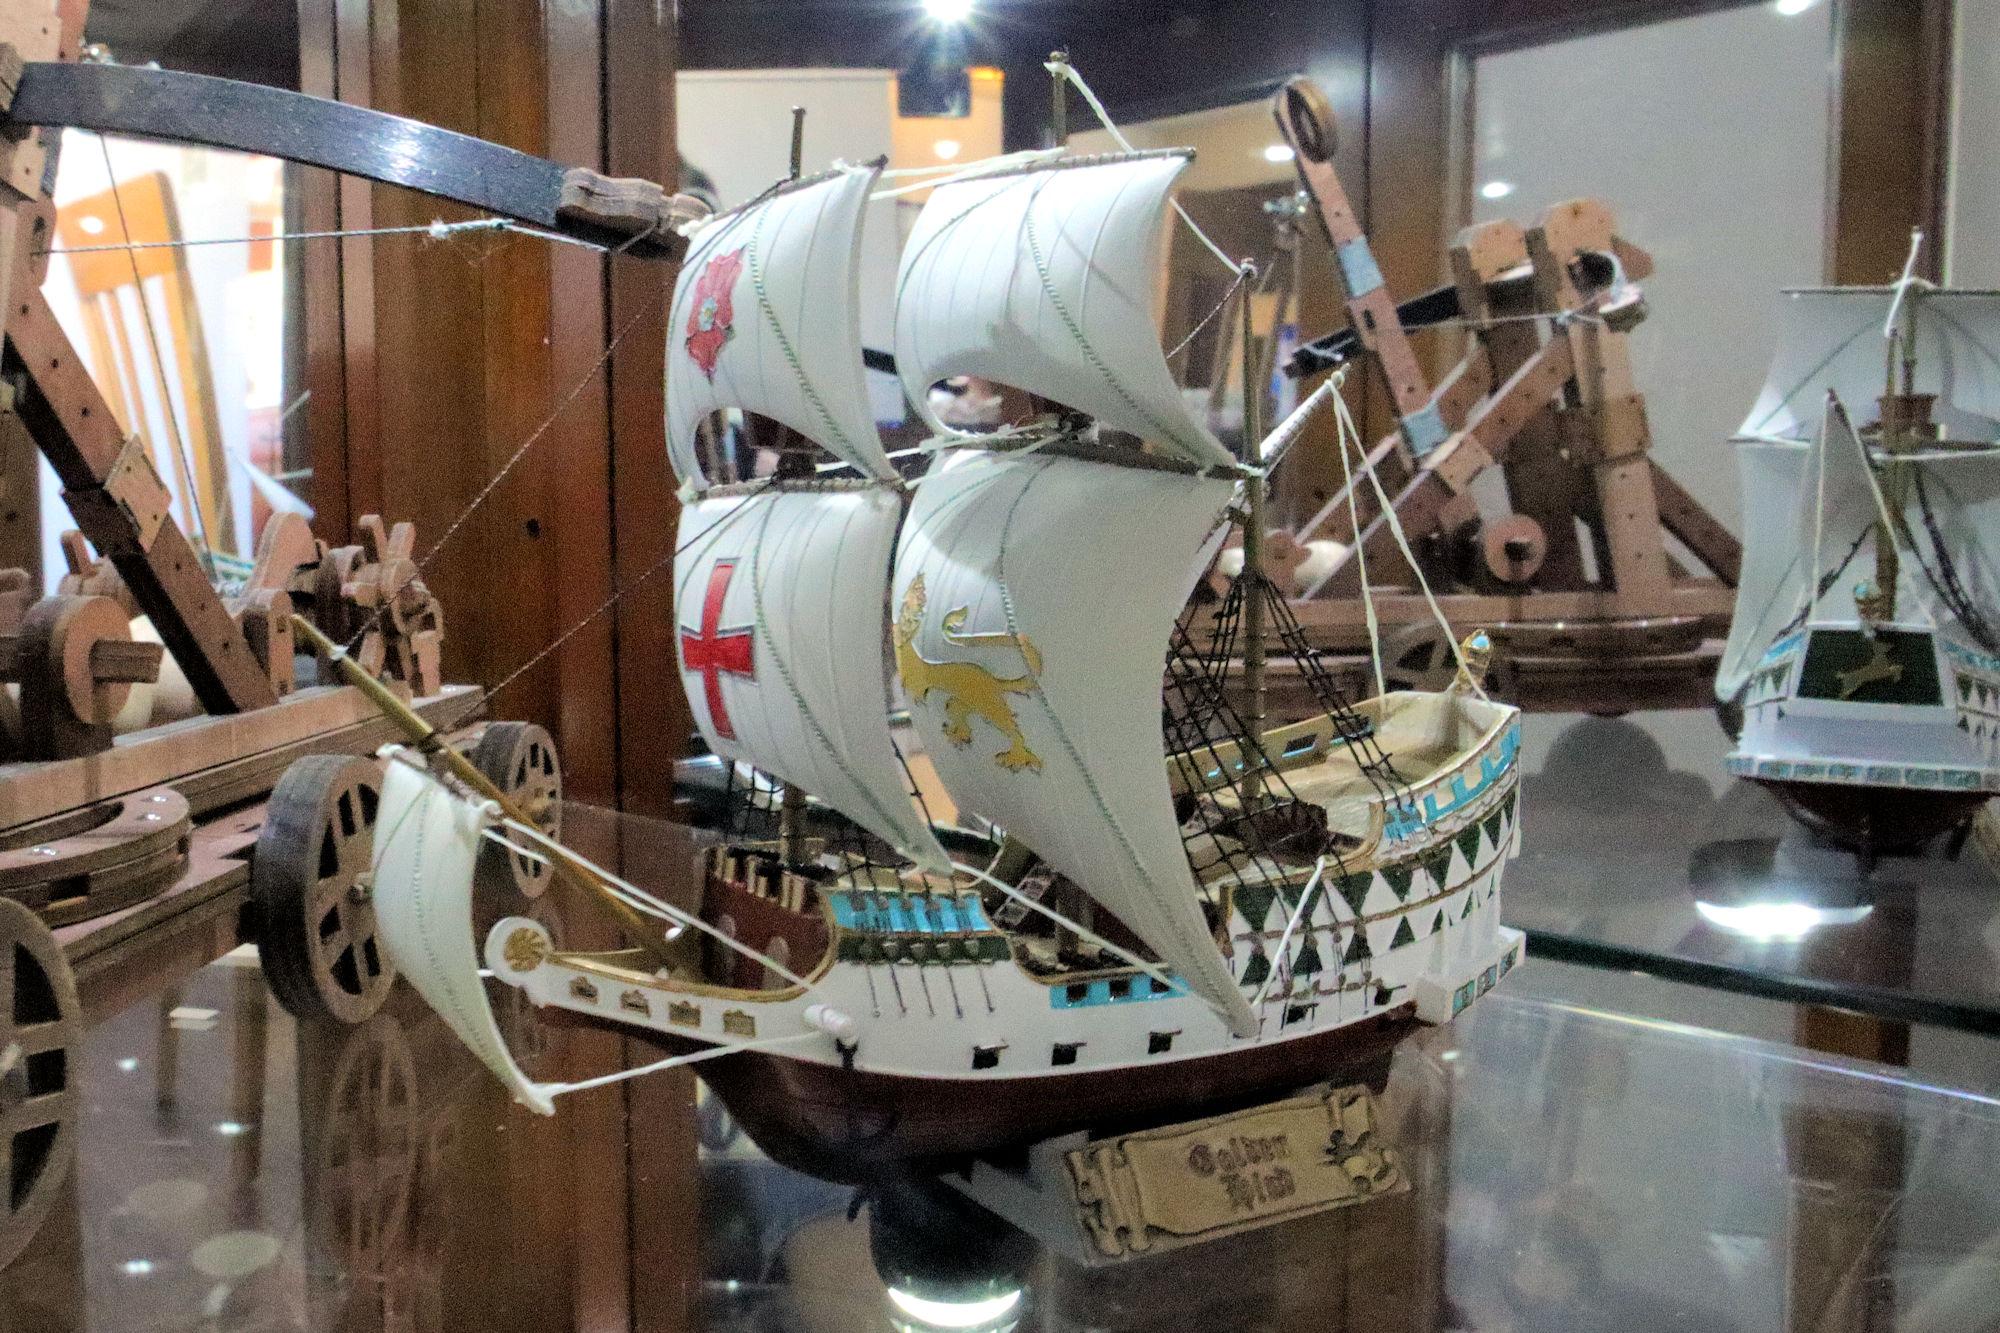
Hey Mike. Sorry I was so long in responding. If you mean this... It's actually a siege engine. The company that made if calls it a "Super Trebuchet" but it's actually more of a combination ballista and catapult. Unless you're referring to the reflection of the stern of the Golden Hind in the mirror of the curio cabinet. In either case, I hope that answers your question. Thanks for asking. David G.
-
Indeed it does, thank you Alan. =D-
-
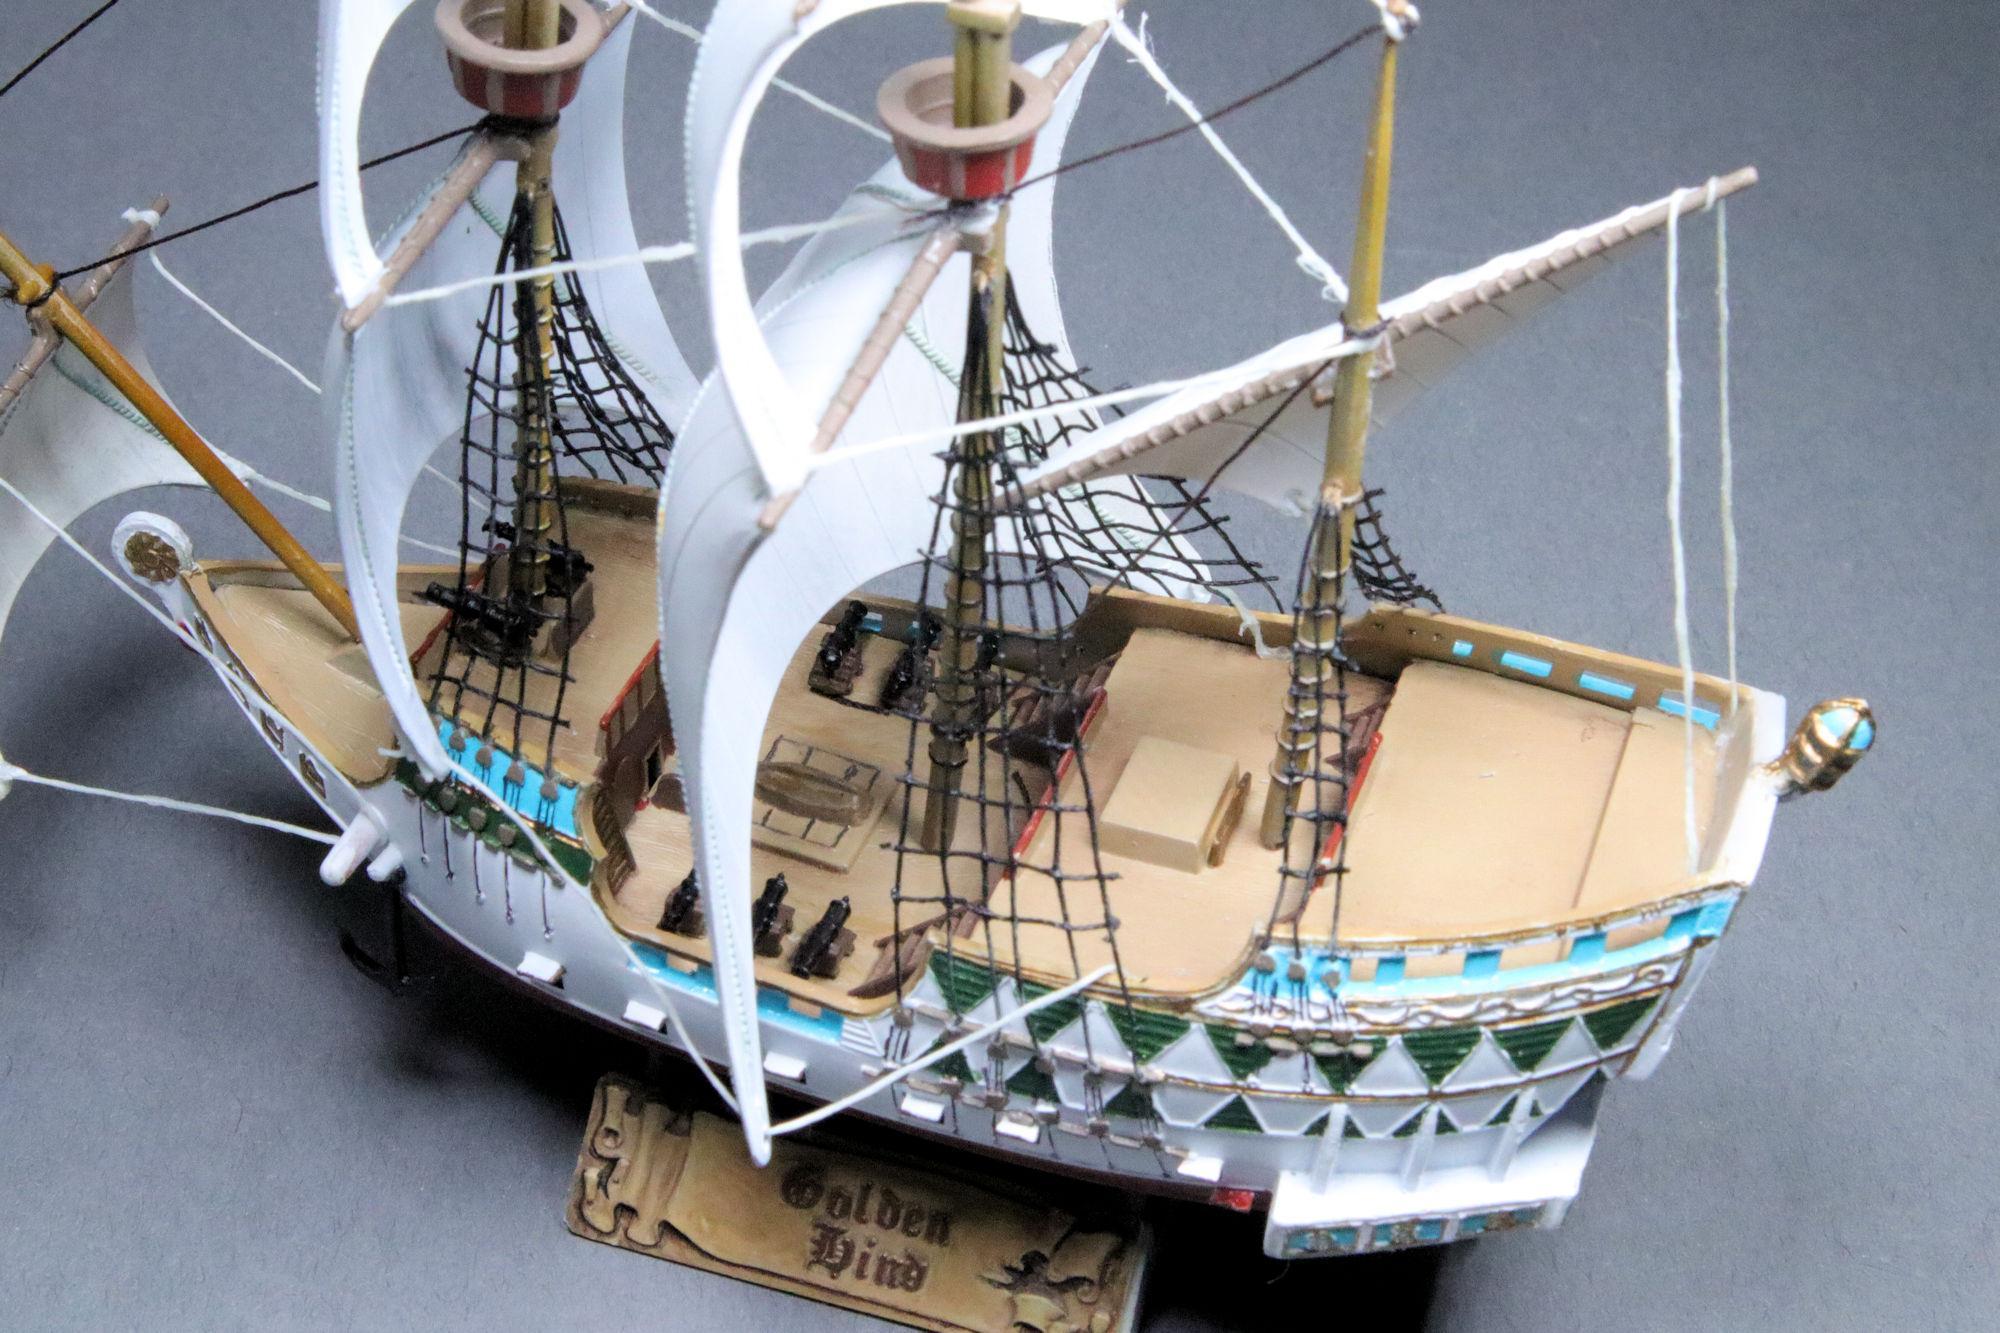
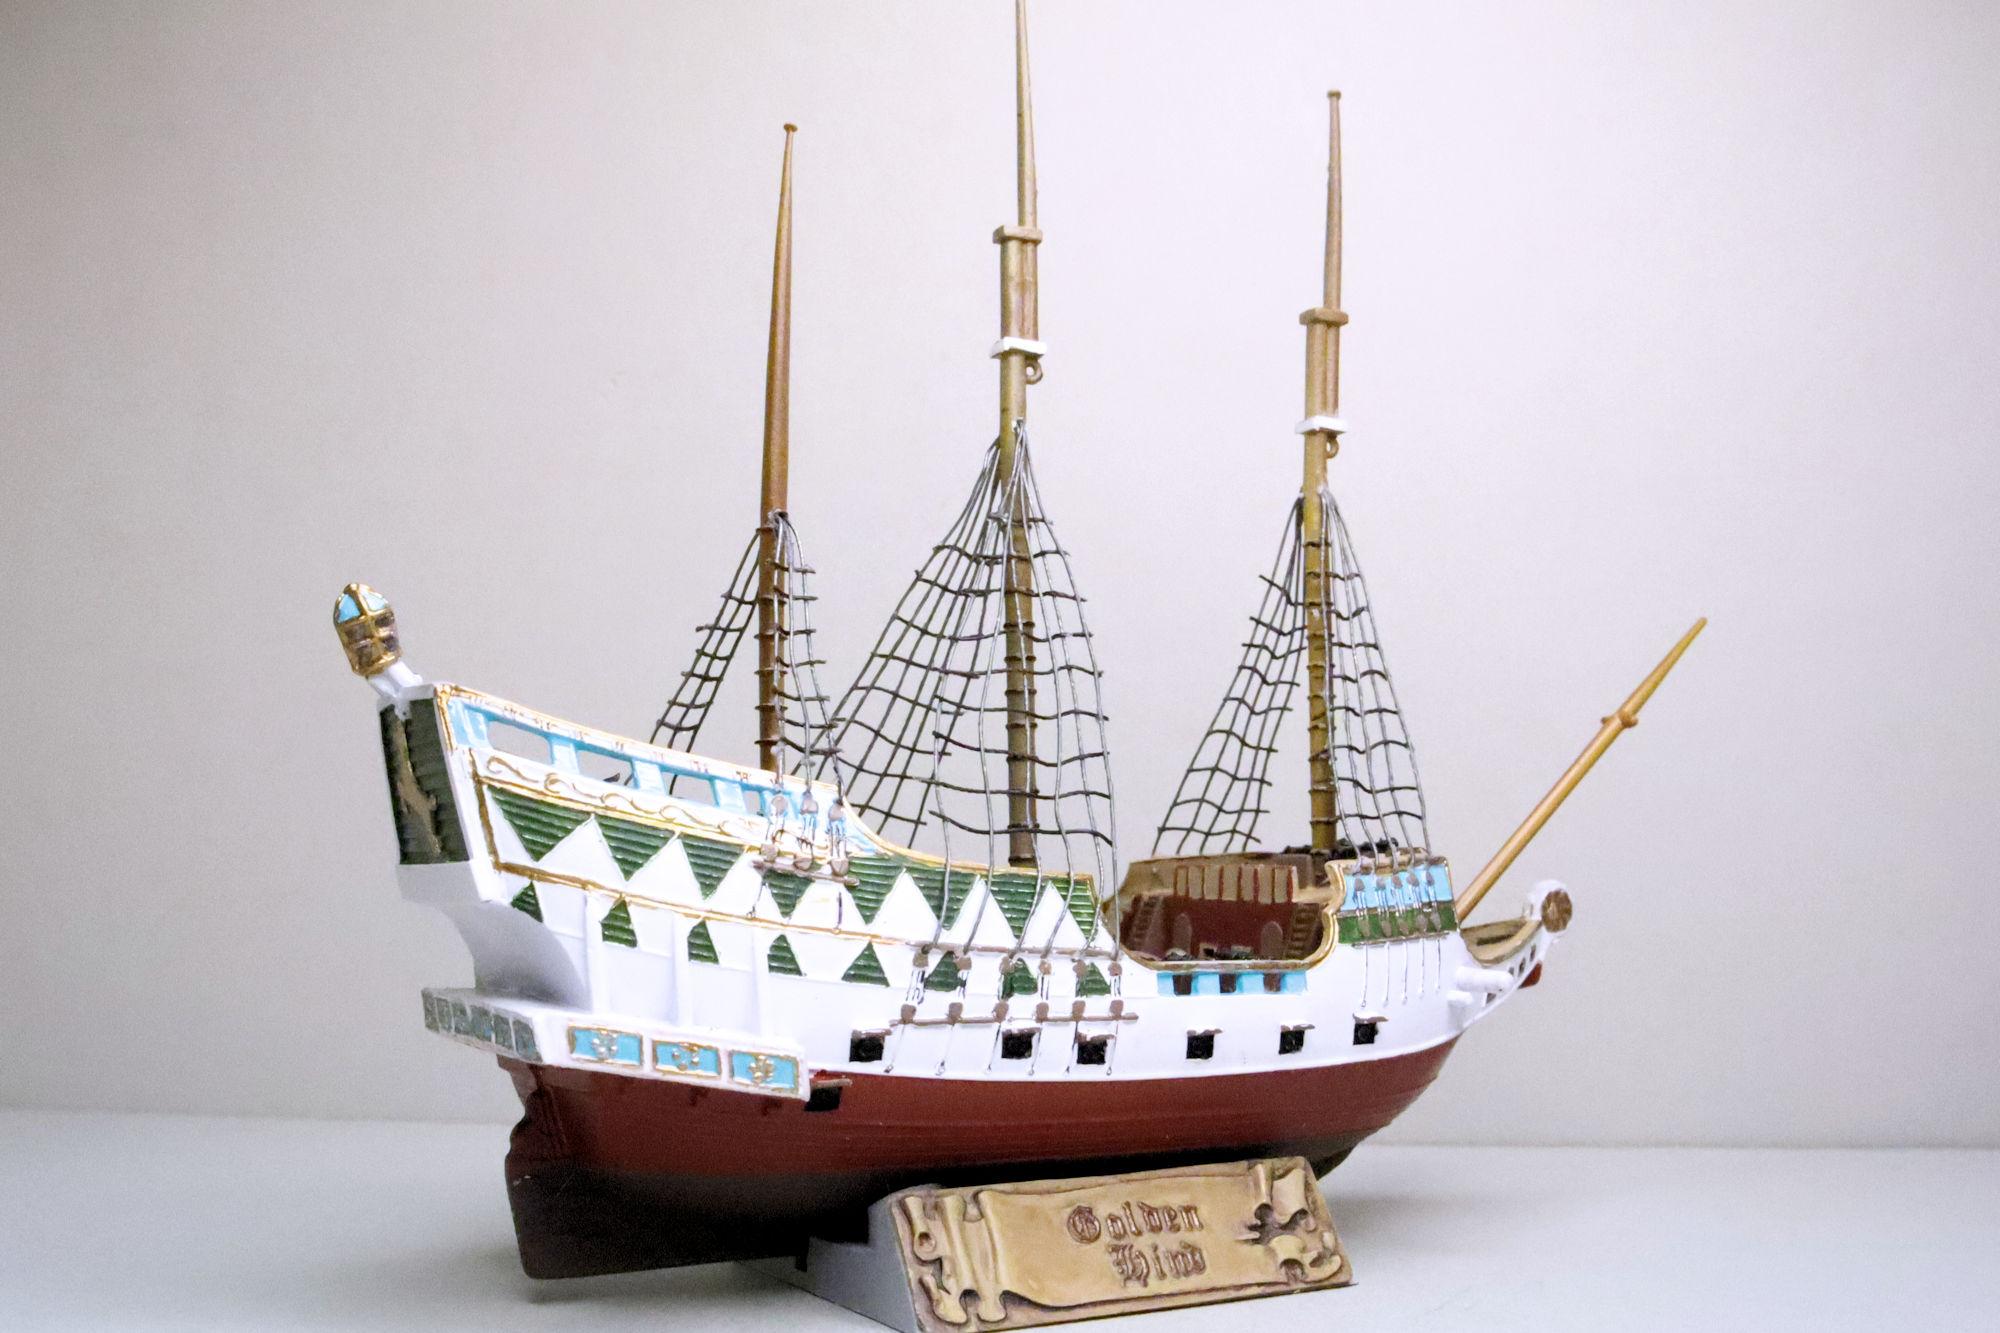
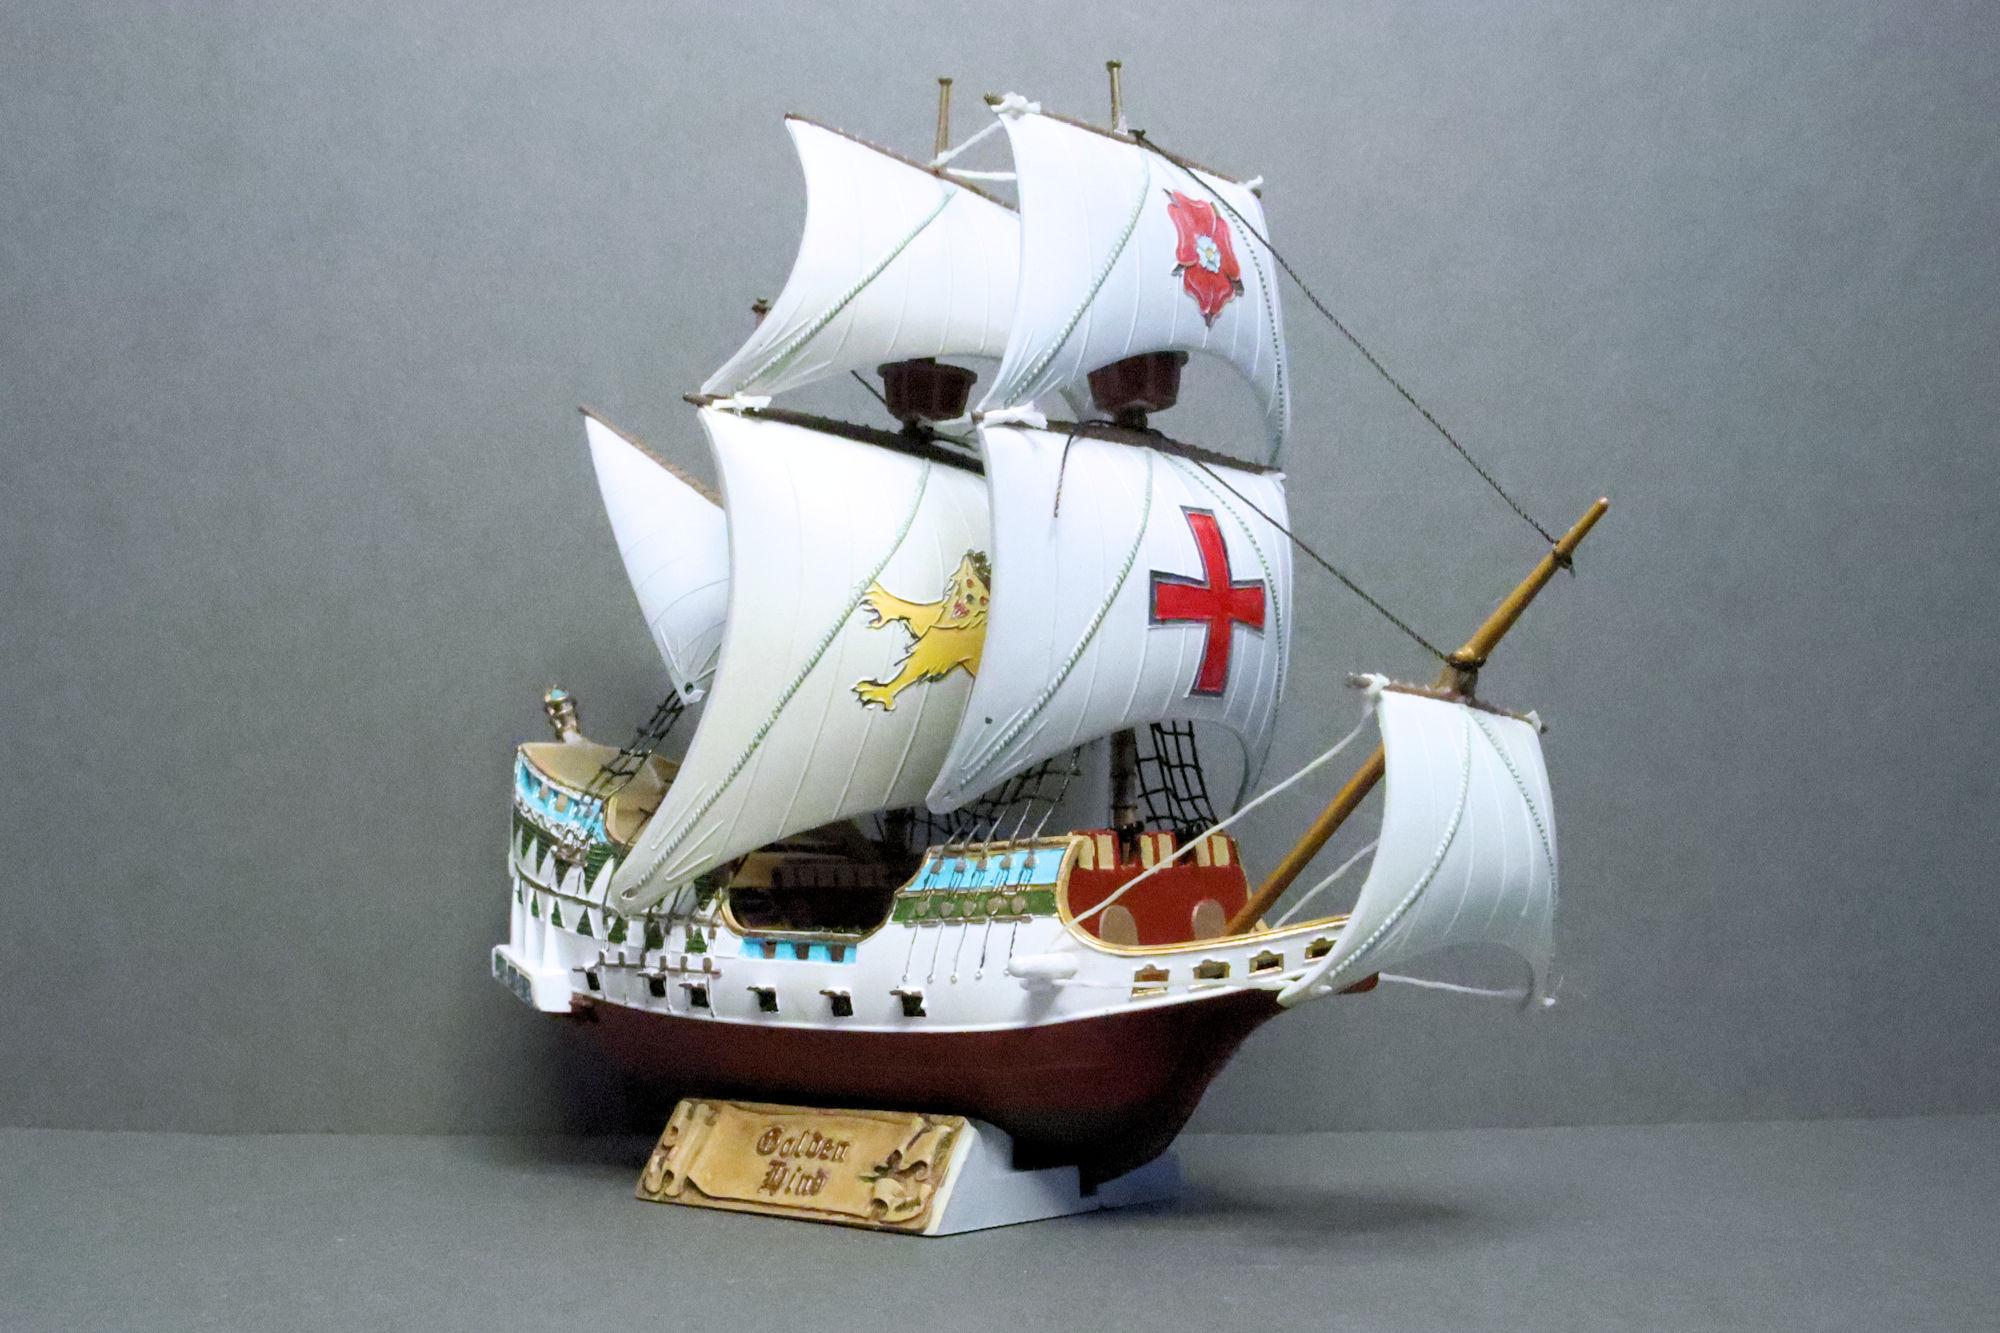
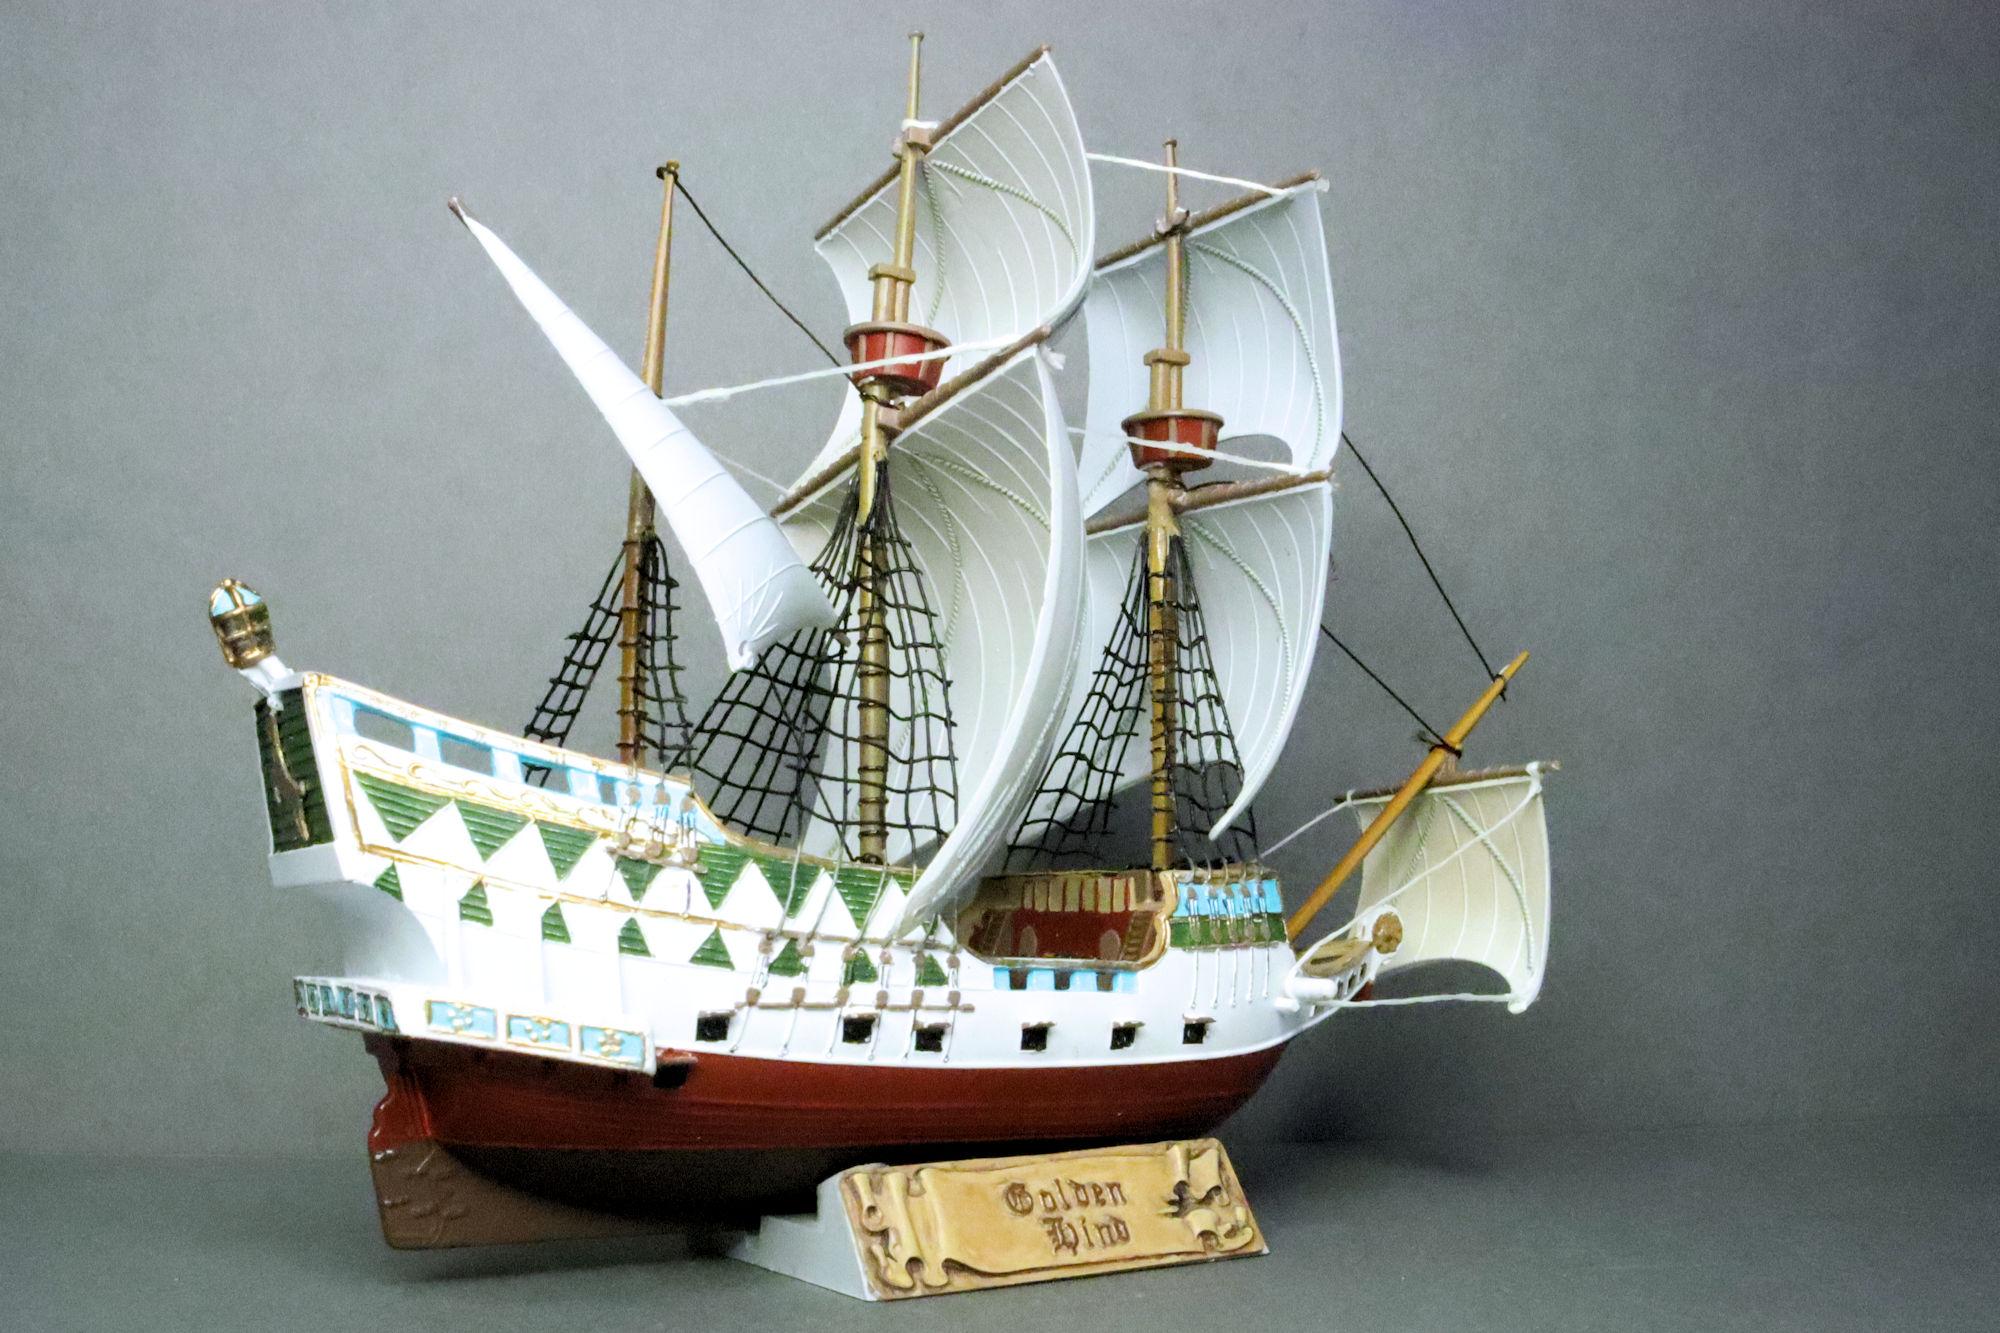
Hello Everybody! These are the last of the photos for this build... I promise. I think the scratch built ratlines make a big difference. This will be the cover shot. There's not much deck detail, but there it is. This is my traditional Display Case Photo, but it seems out of place with all these cars. My plan is to keep it in the curio cabinet. I think it looks much better here... right next to the catapult. As always, thanks for taking the time to look and thank you for your support patience. Please feel free to share any comments you may have. David G.
-
Thank you very much Carl. =D-
-
Thank you kindly Larry. =D-
-
Thank you Joe. I'm truly flattered knowing that I can impress such a highly skilled builder as yourself. Thank you Jim. This is my first ship model and I probably won't build another one soon. So yeah, I know what you mean. They're a whole different type of adventure and I have a lot of respect for those builders who can tackle those large wooden ship models. David G.
-
Thank you Keith, I'm glad you like it. =D-
-
Thank you Jim. I think that's why they put all that ballast in the bottom. Thank you very much Brian. Thank you most kindly Alan. David G.
-
Hello Everybody! This one is finally completed and I've begun posting photos in the Under Glass section. Here's the link. As always, thanks to all of you who supported me through this build with you kind comments, suggestions and tips. David G.
-
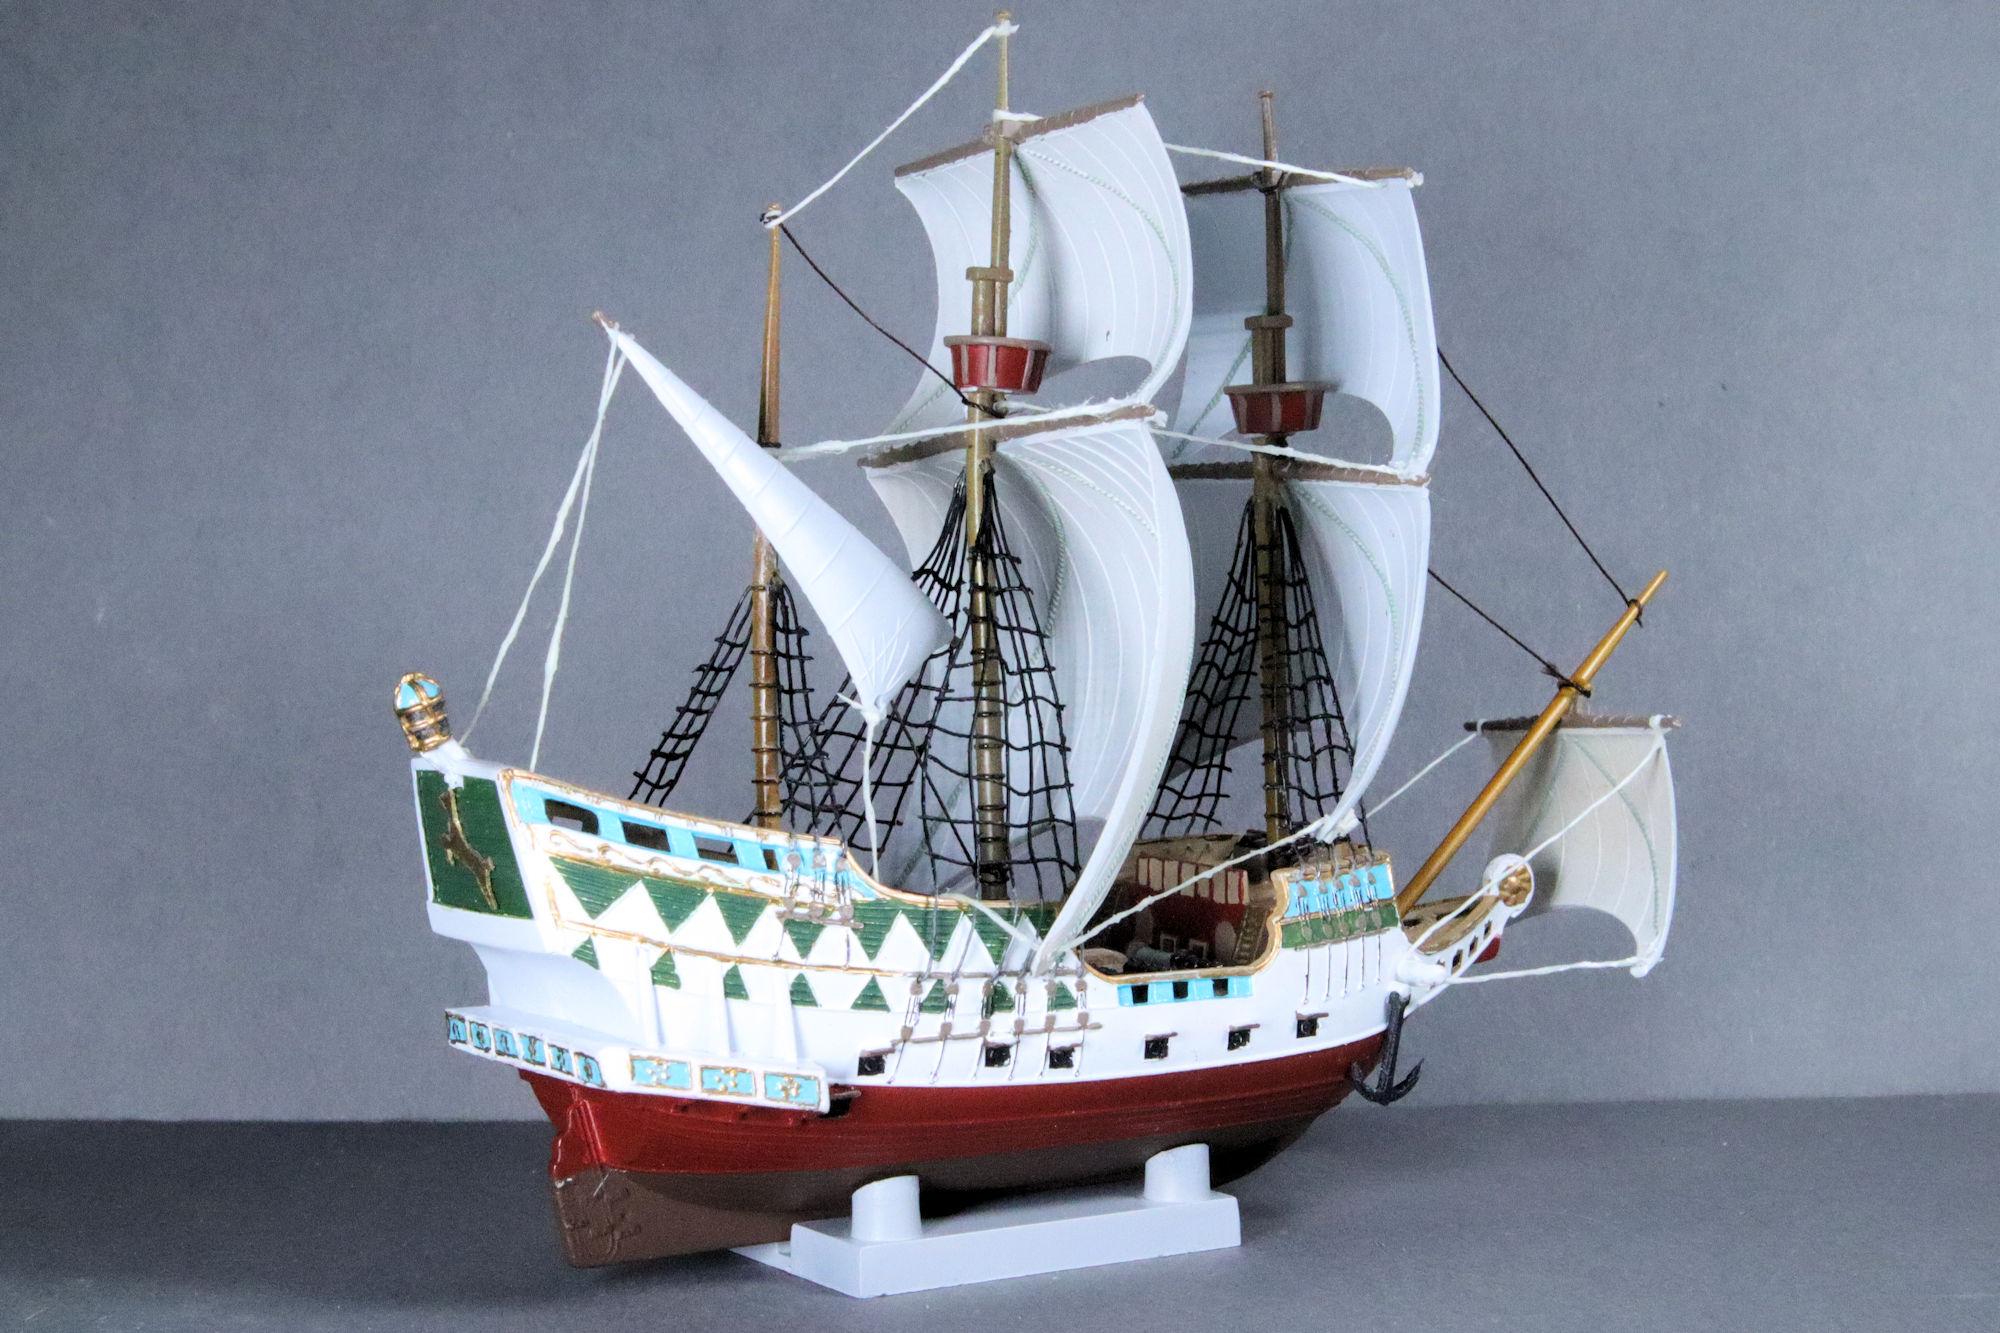
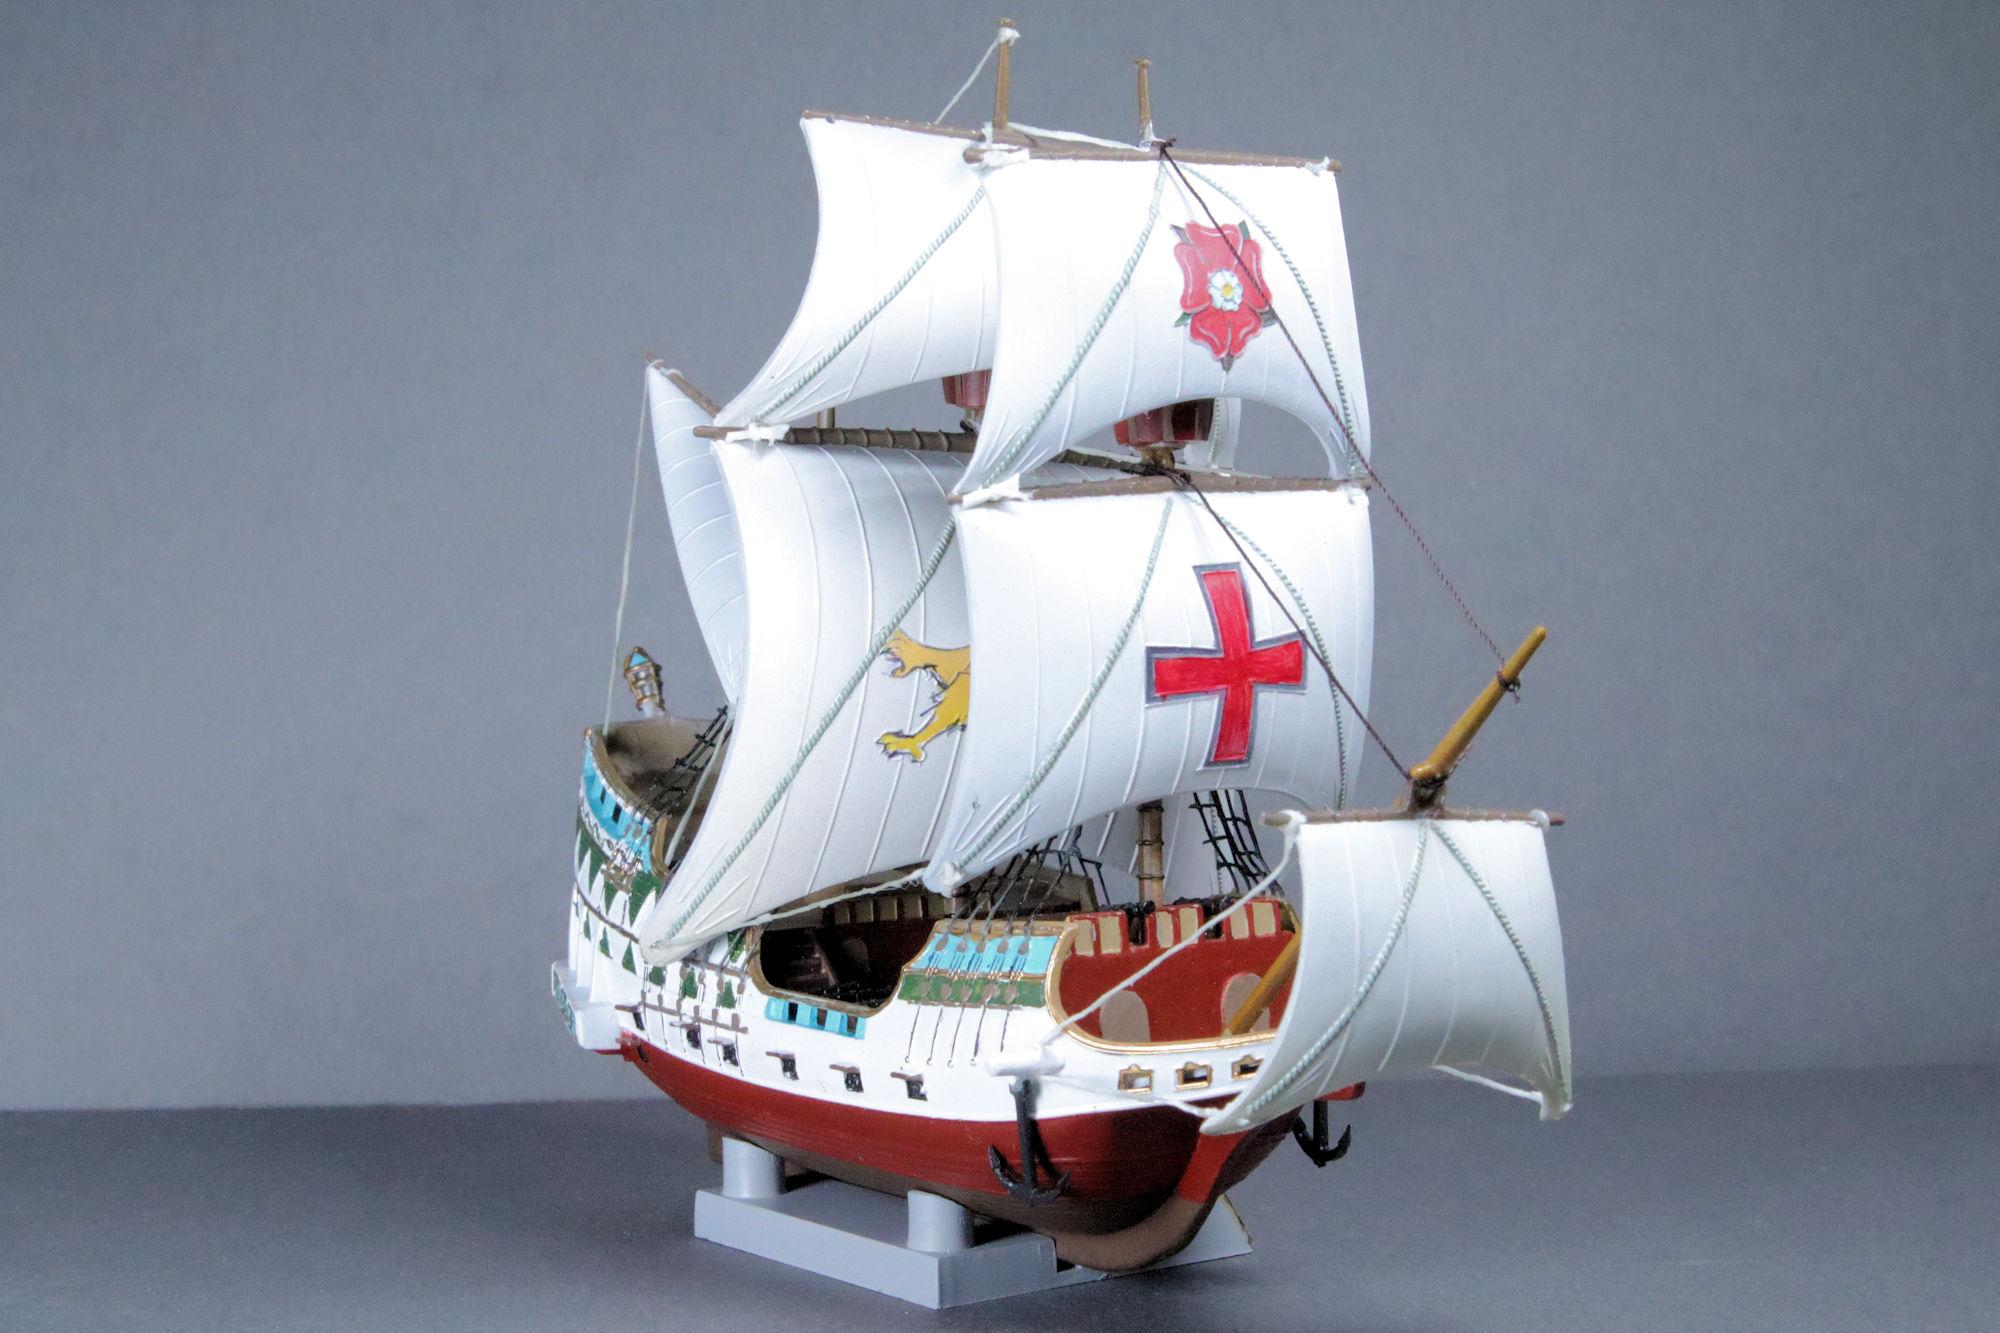
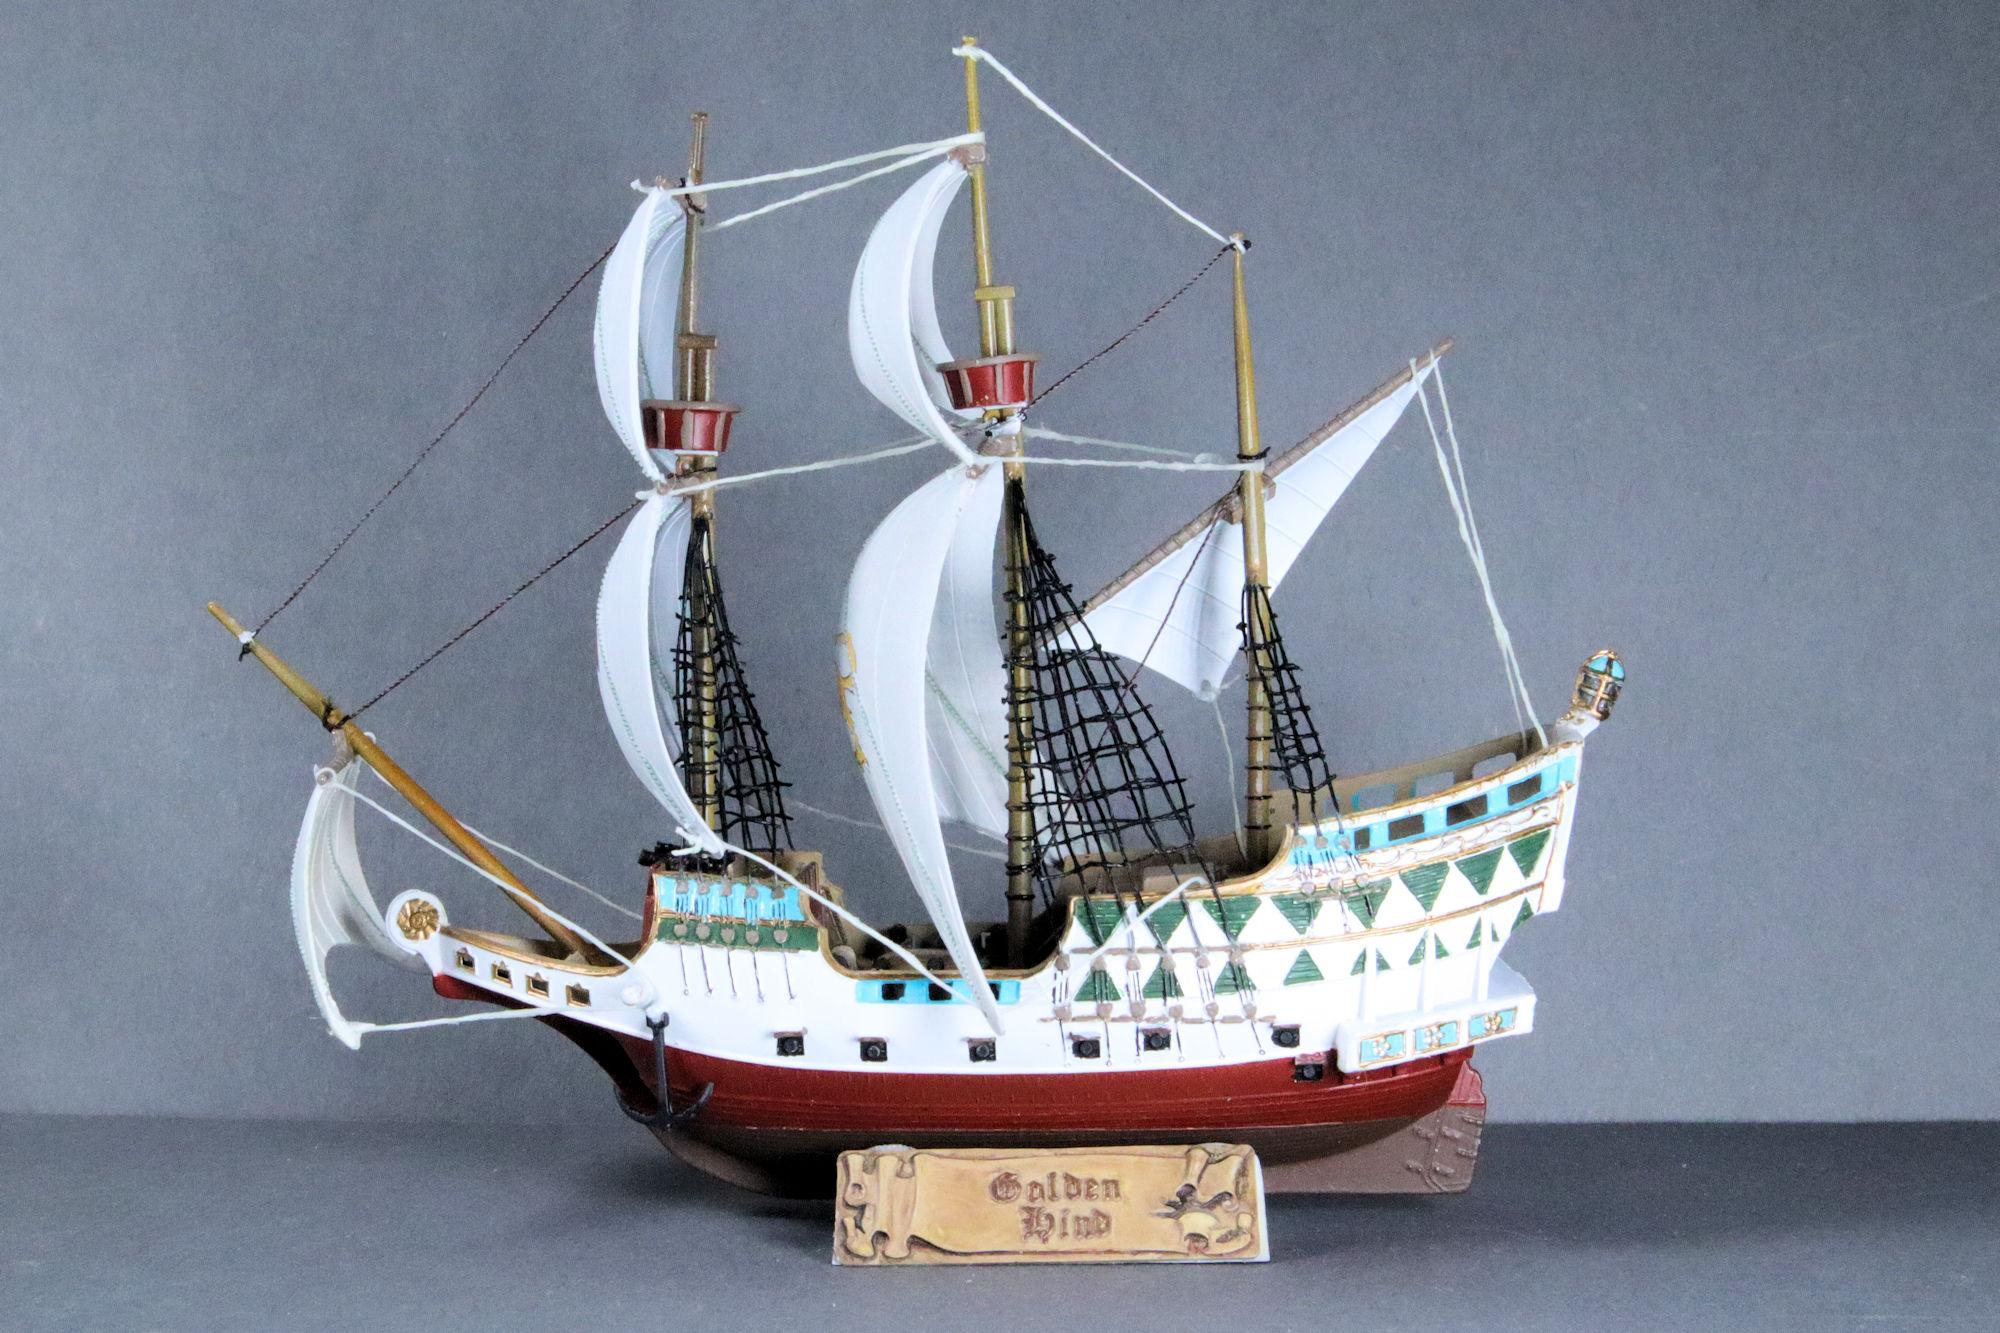
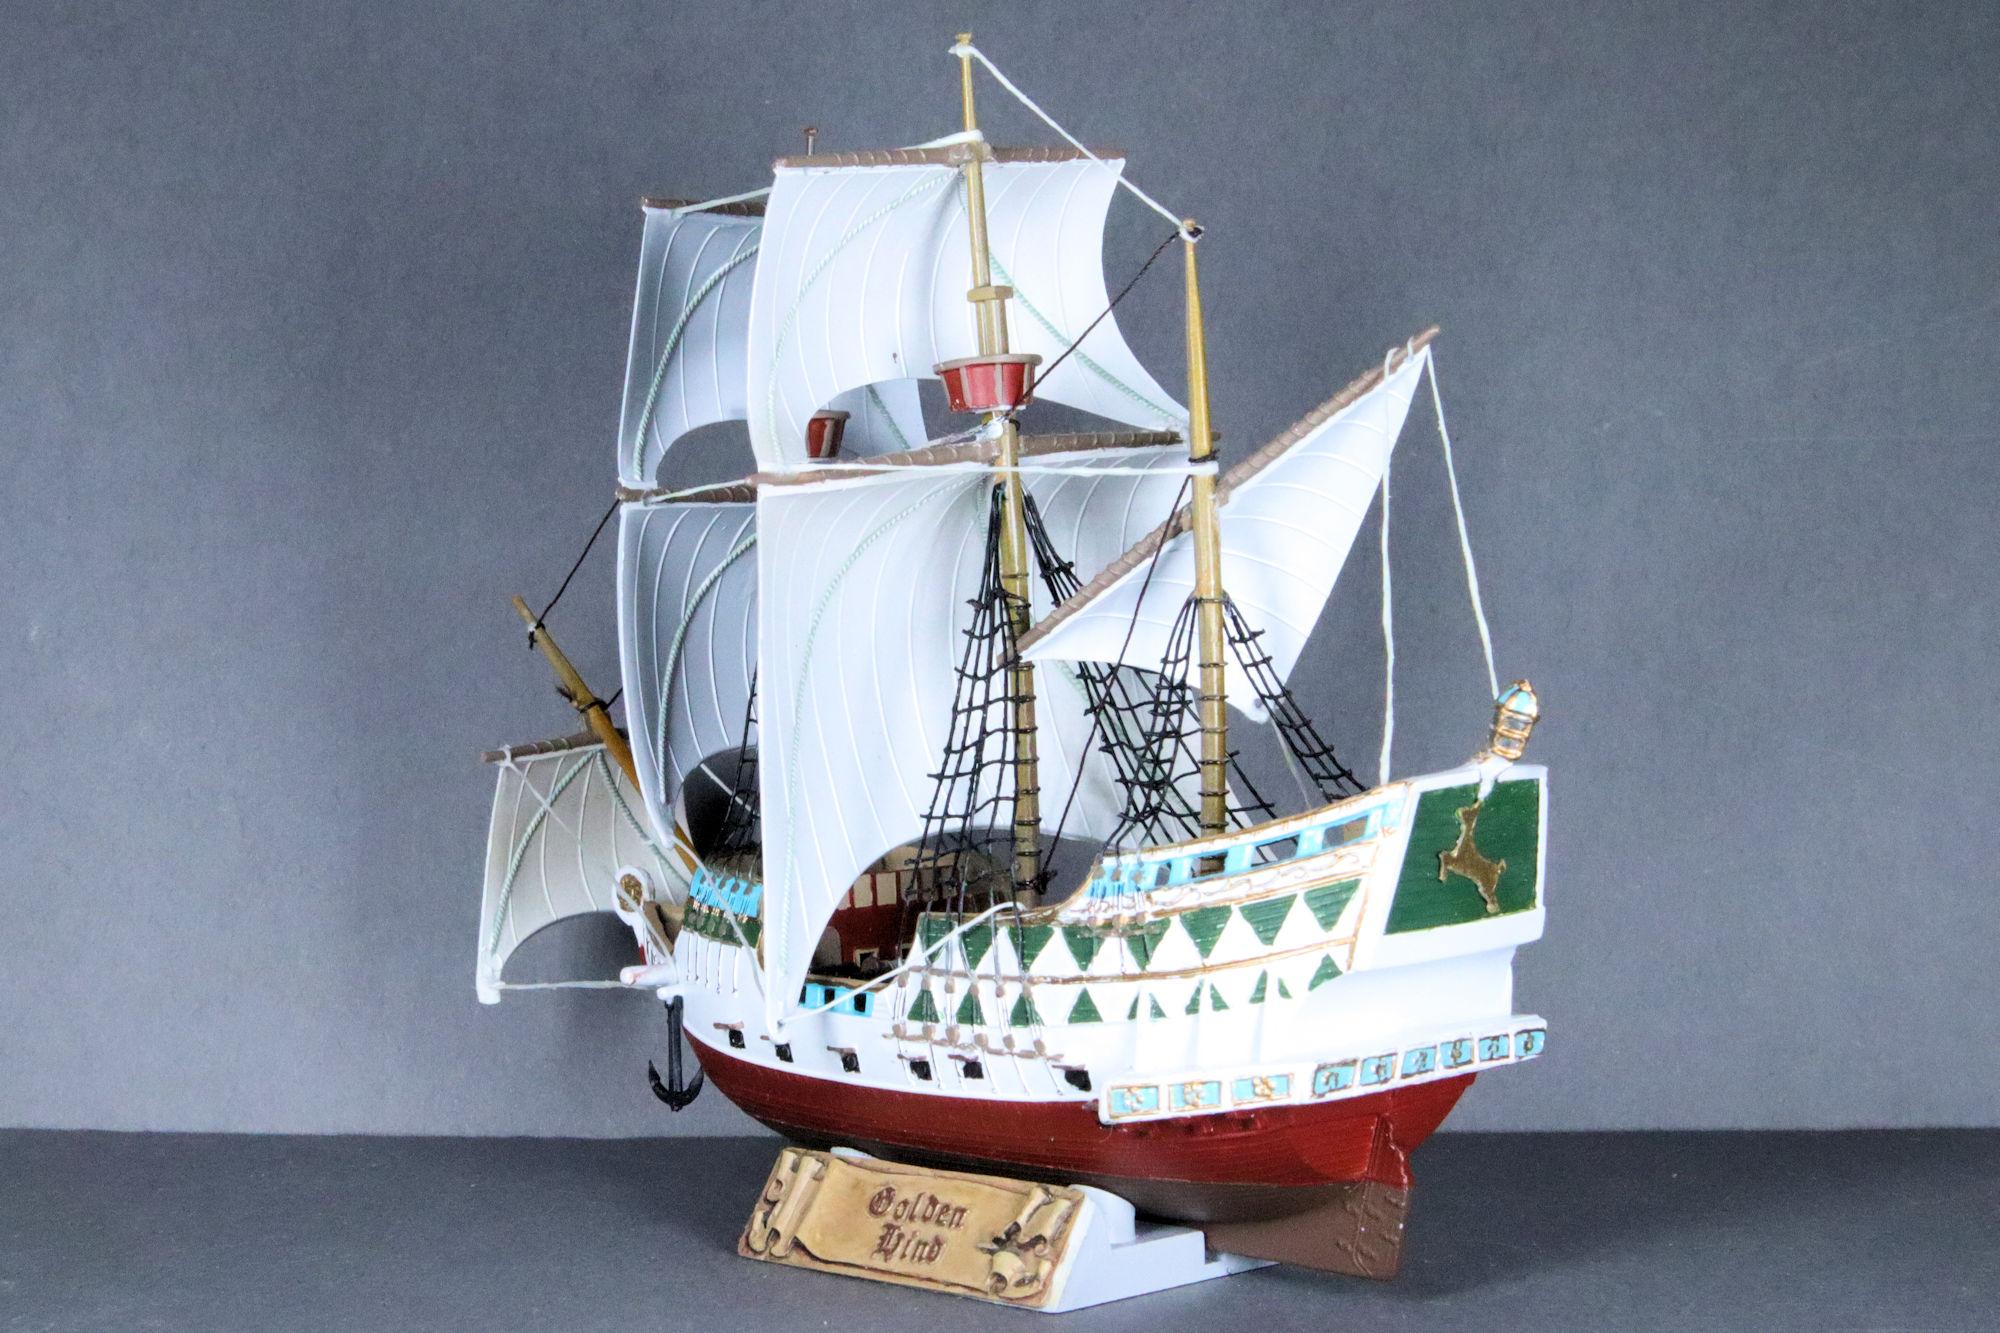
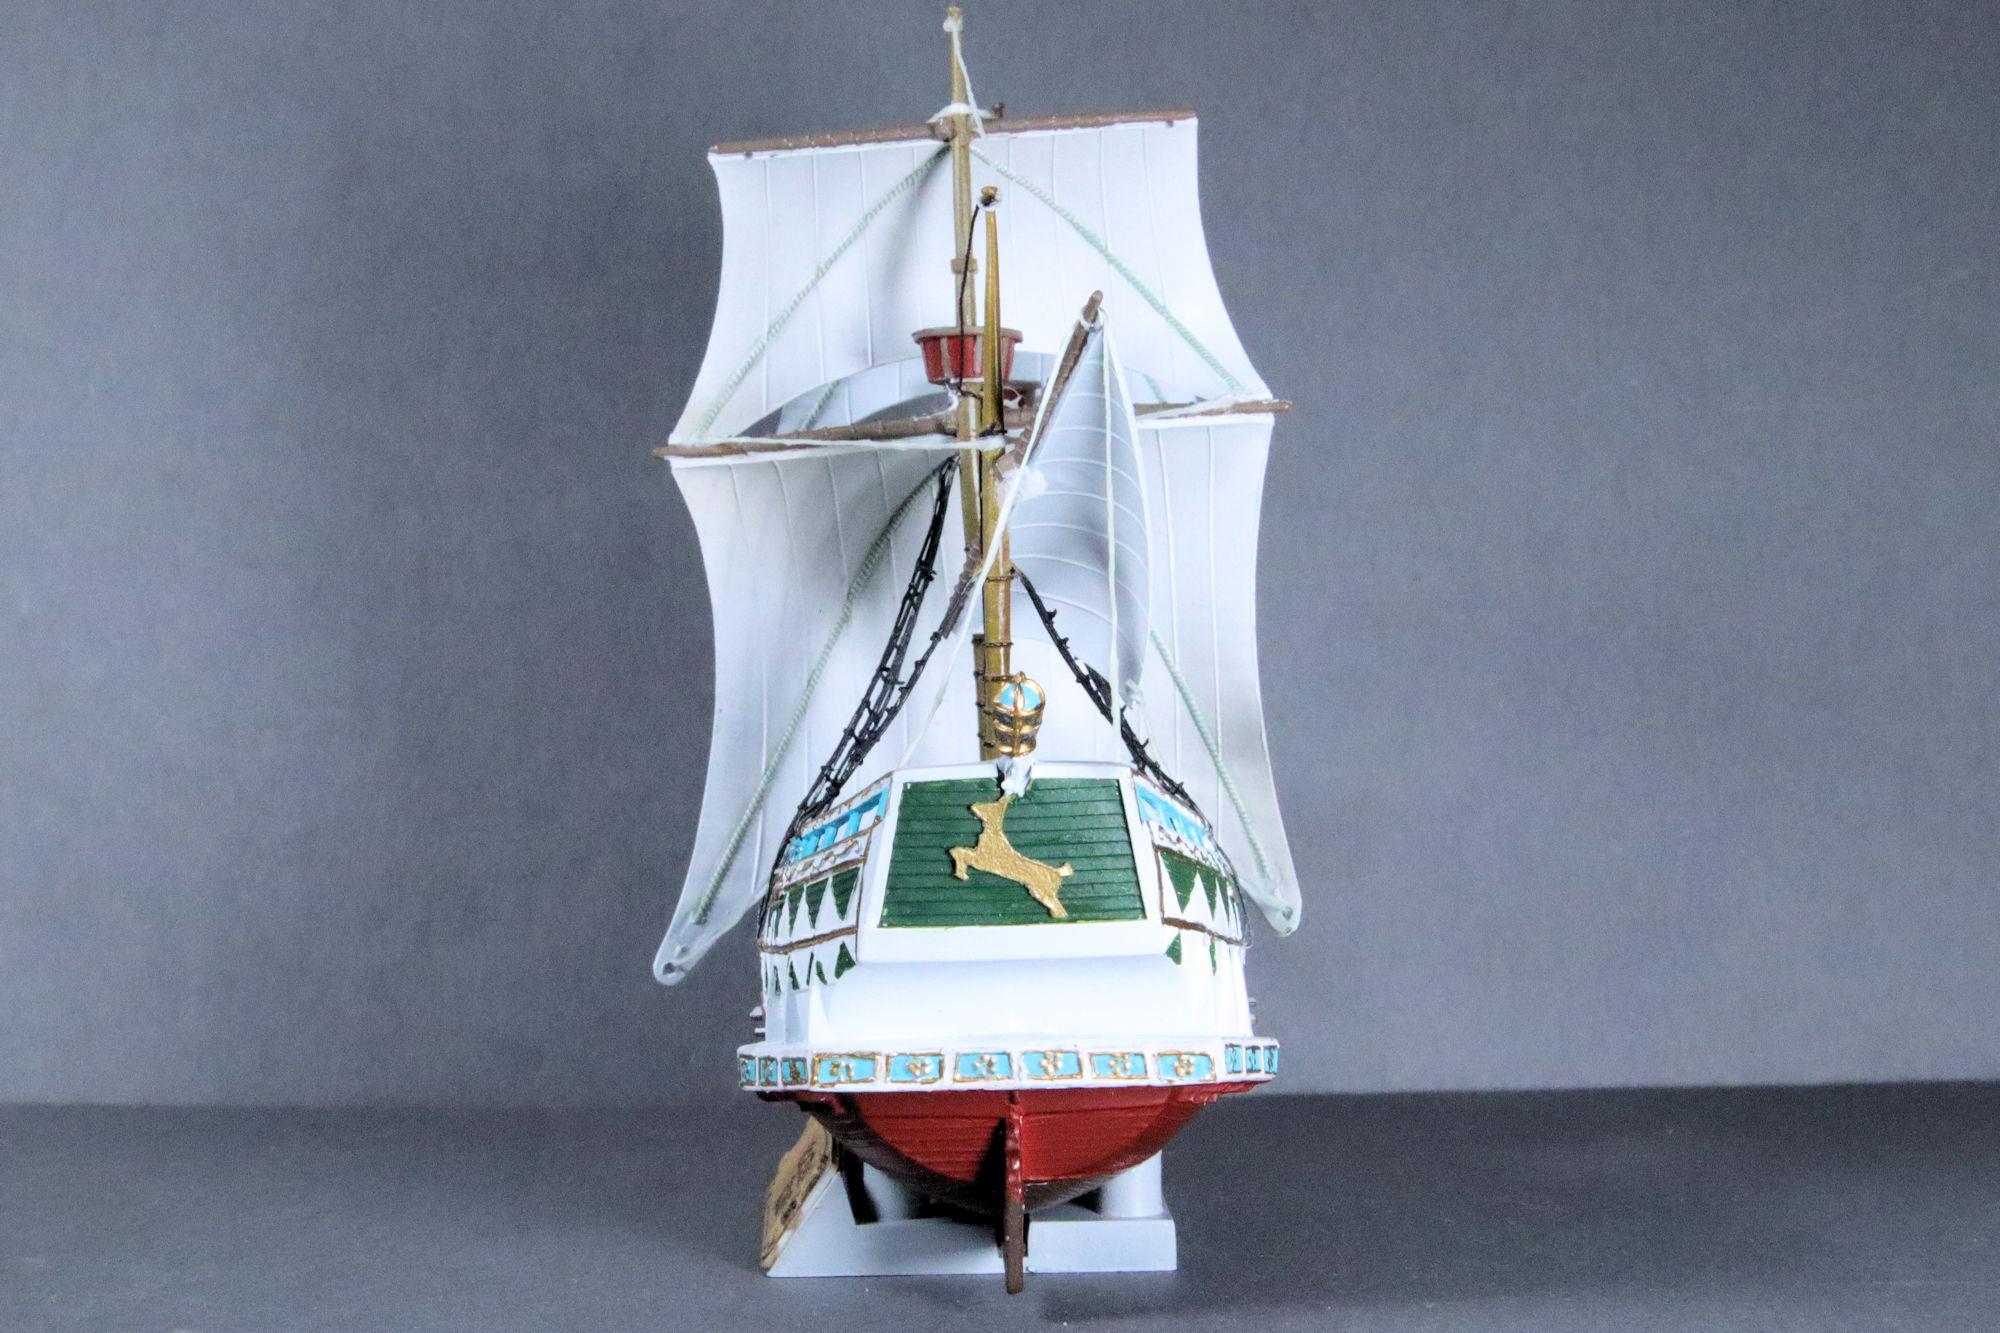
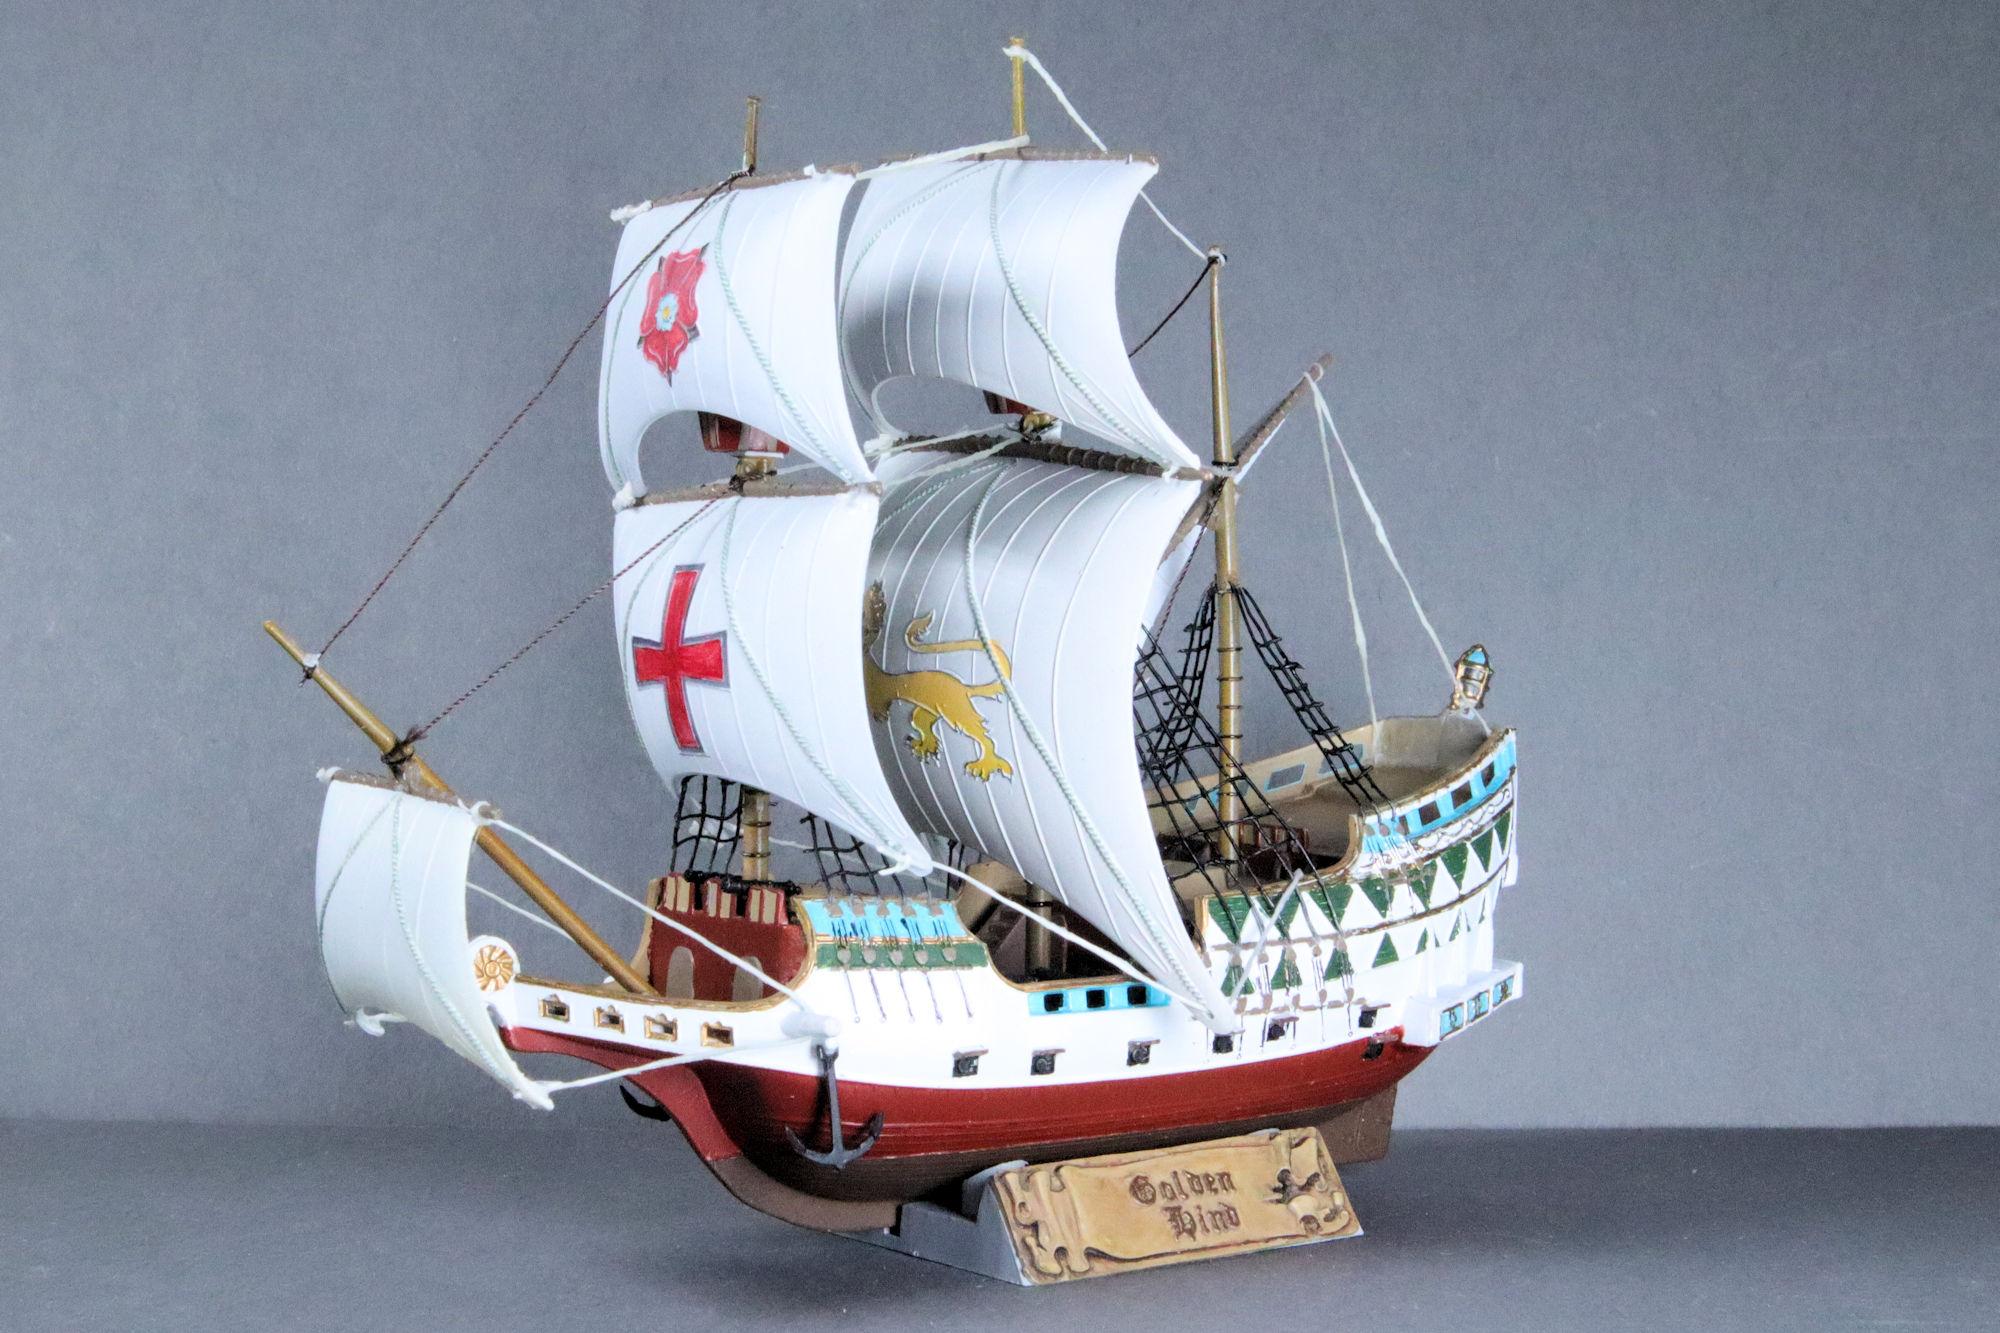
Hello Everybody! This kit is supposed to be a rendition of the Golden Hind captained by Sir Francis Drake in the 1570s. The actual ship which inspired this kit no longer exists but a few replicas have been built and this kit holds little resemblance to any of them. The kit seems to be based on an entirely different style of ship. It's probably the standard base master from which all the other ships in Lindberg's series were derived. Needless to say, I'm not particularly concerned about the historical accuracy of this build. For those who may be interested I have a complete WIP thread that details the whole build process. That being said, on with the show. This kit was more of a challenge than it had a right to be. Using wire and string, I fabricated the ratlines to replace the clunky plastic ones that were missing from the kit. The deer silhouette on the stern is cut from photo paper and painted gold. There are a few other photos I want to post and I still have to get my traditional Display Case shot. So until then, thanks for taking the time to look and please feel free to post any comments you may wish to share. David G.
- 20 replies
-
- 10
-

-
Wow Chris, I'm really sorry to learn of your health issues. I have a few of my own so I can understand the frustration you must be feeling with the limitations they impose on you. The hot rod is coming along quite nicely. You came up with a neat solution to the rear axle assembly. David G.
-
Rolls-Royce No Chemicals, No Paint, No Harmful Glues
David G. replied to Anglia105E's topic in WIP: Model Cars
Impressive work with the Sharpie pens! The chrome ink looks much better on the car than I thought it would. I'll have to keep this method in mind if I need an alternative source for chrome treatments. Thank you for taking the time to share it with us. The build is coming along quite well. Given the quality of the kit itself, you have it looking much better that it has a right to. David G. -
Thank you Peter, I'm glad it turned out to be worth the effort. David G.
-
Thank you most kindly Joe. =D-
-
Thank you kindly Alan. =D-
-
Link-Belt HC-218 Truck Crane
David G. replied to redneckrigger's topic in WIP: Model Trucks: Big Rigs and Heavy Equipment
Wow Tom, you've really been making some great progress on this! I may not comment very often but I still like following along and keeping up with your impressive engineering and fabrication skills. David G. -
Rolls-Royce No Chemicals, No Paint, No Harmful Glues
David G. replied to Anglia105E's topic in WIP: Model Cars
It took a good bit of time and effort but I'd say you found an excellent solution for the window trim. It seems that you have the polishing down pat too. Well done David! -
Hello Everybody! After several build sessions, the ratlines are done! They turned out almost as good as I had hoped. I think they look better than those clunky plastic ones that were missing from my kit. Another couple build sessions and I have the sails attached most of the rigging... rigged. After I finish the rigging, touch up the paint and install the anchors, this one will be complete! Ad always, thanks for taking the time to look and please feel free to comment. David G.