David G.
-
Posts
11,331 -
Joined
-
Last visited
Content Type
Profiles
Forums
Events
Gallery
Everything posted by David G.
-
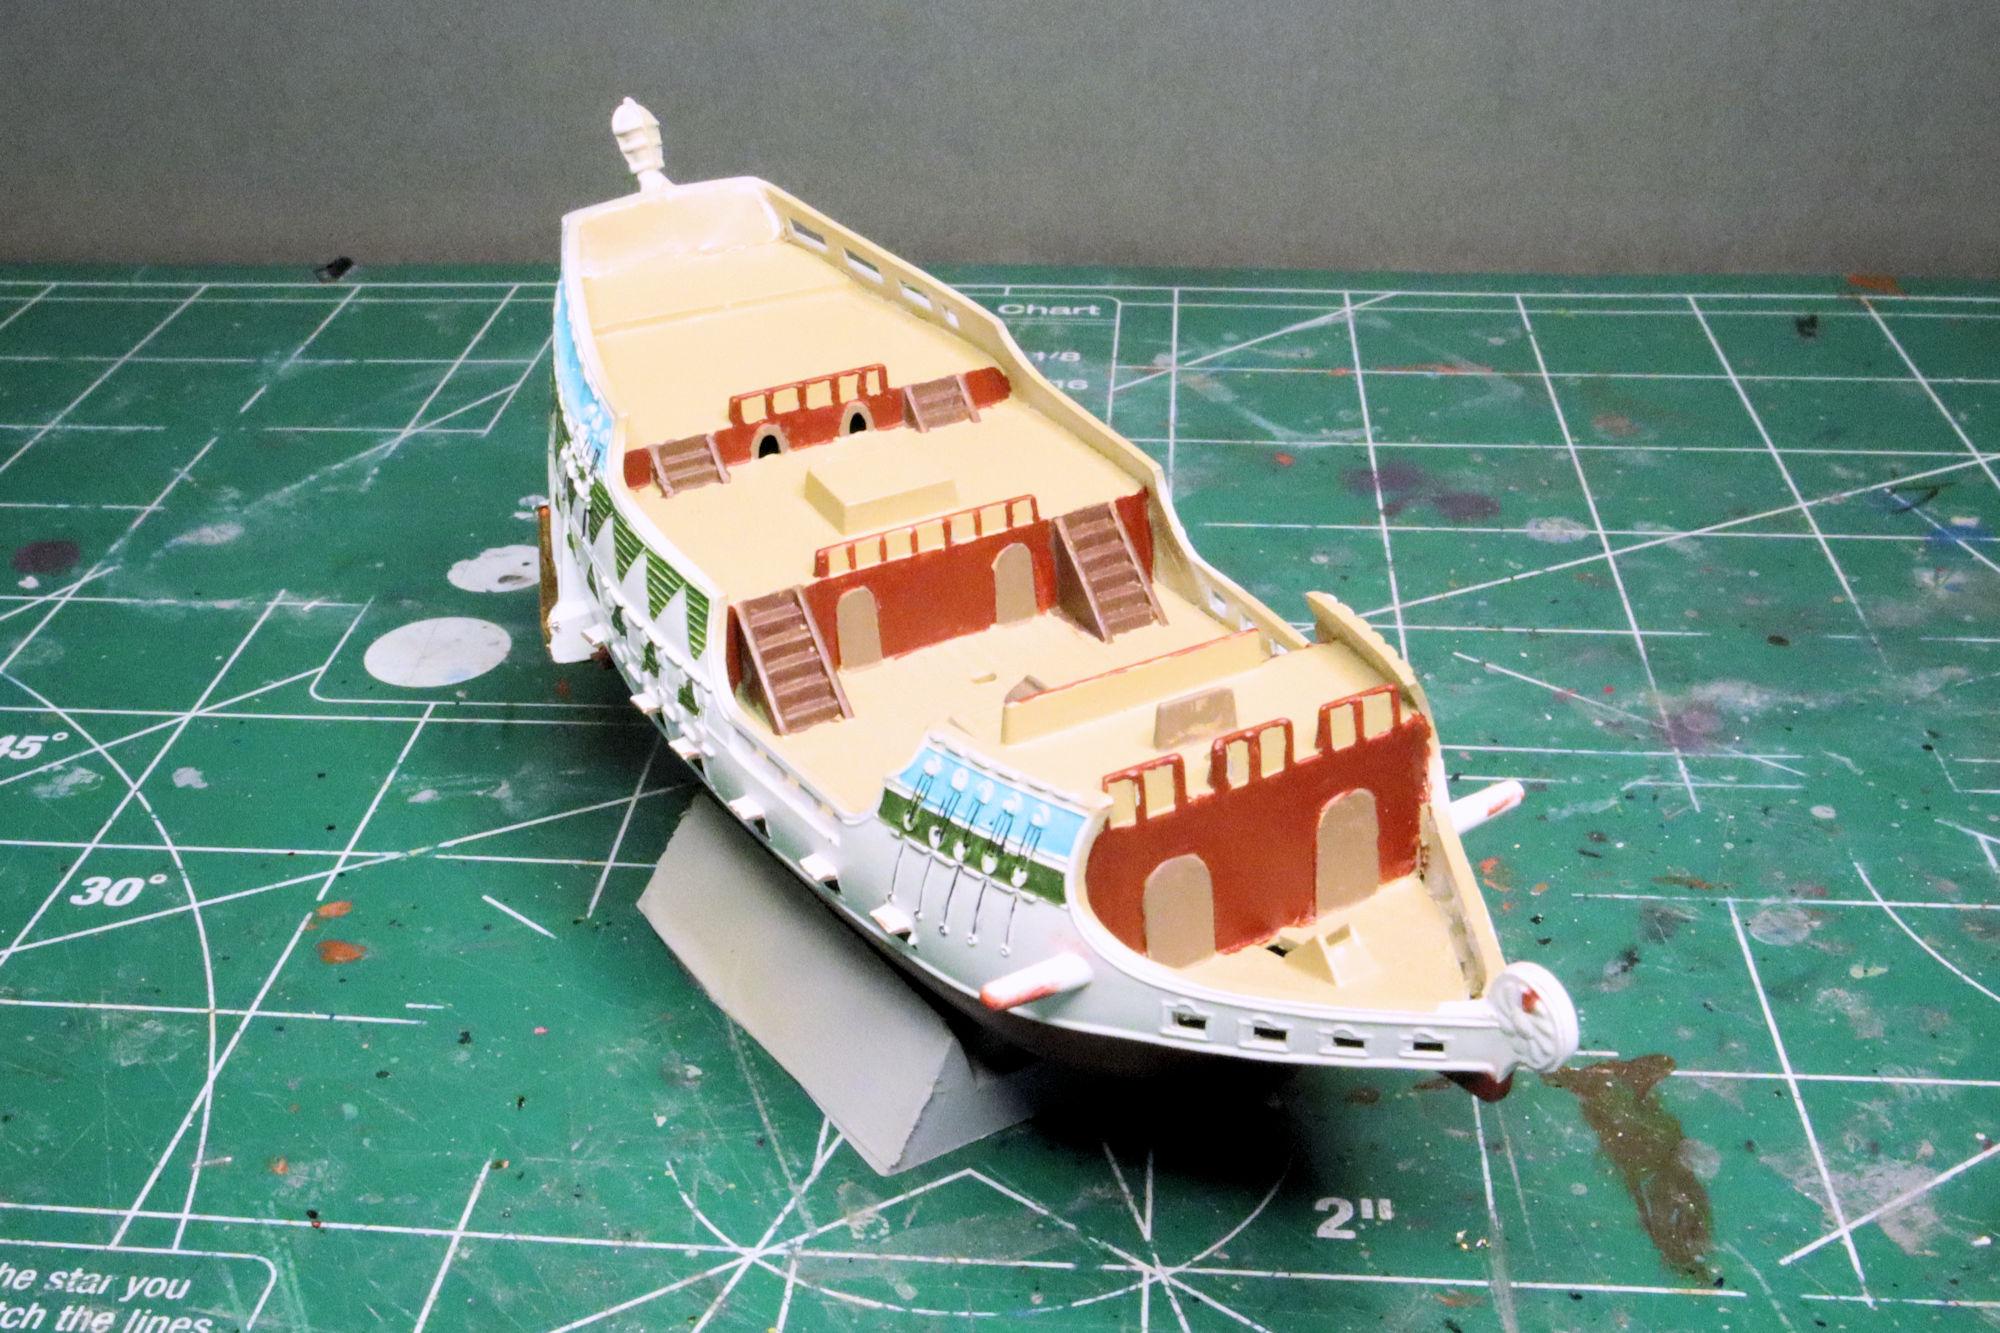
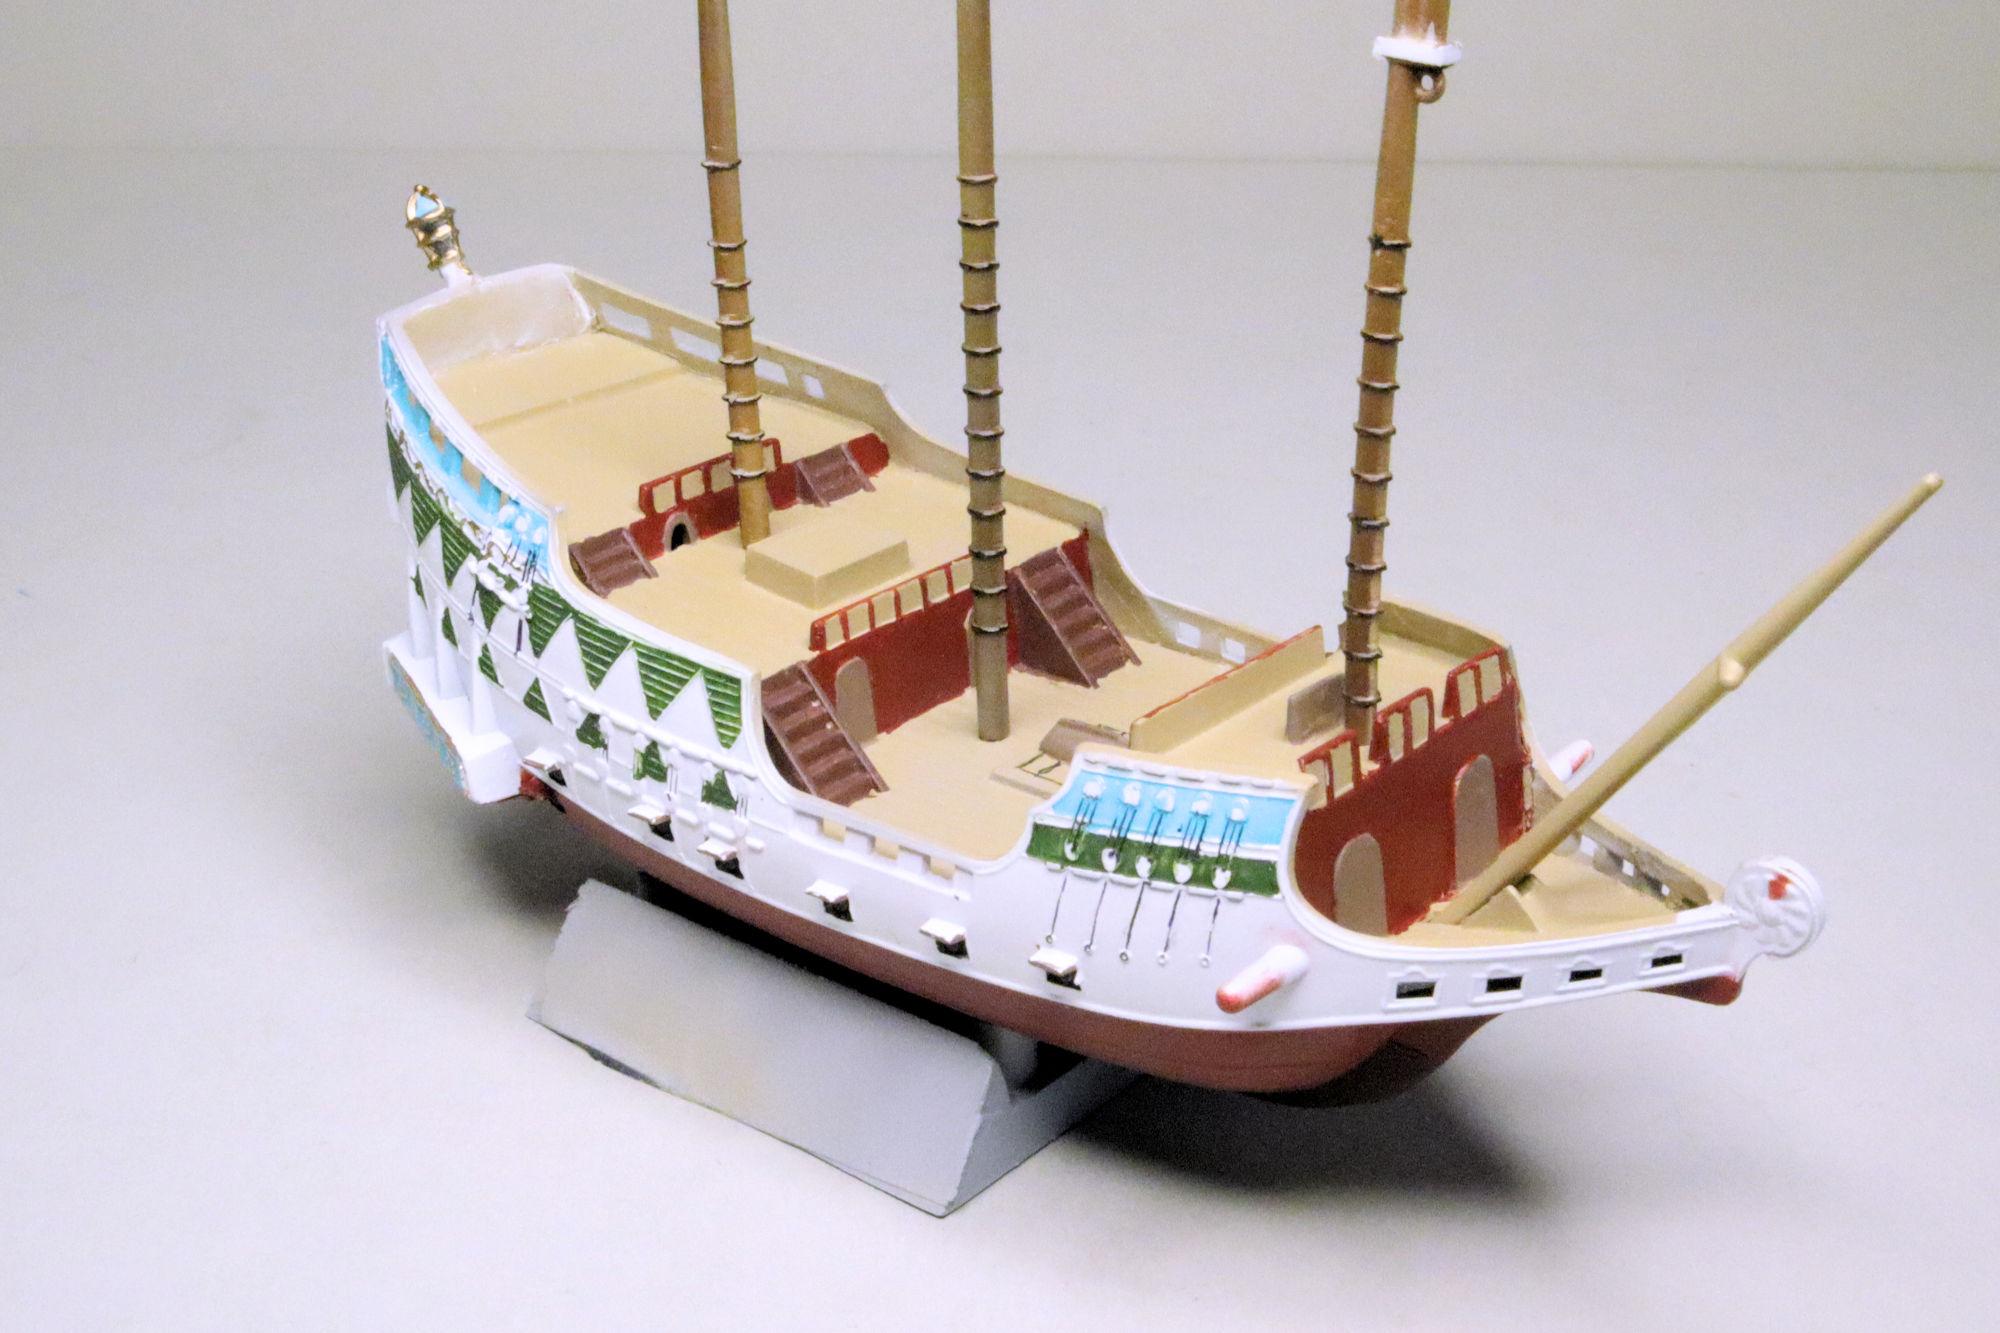
 Hello Everybody! I do plan to finish this one. It's not particularly difficult just more of a slog than anything else. To try to replicate the blue and gold of the rosettes on the gallery area I decided to start with some gold BMF. I brushed on a coat of turquoise enamel paint, let it dry for a few hours then cleaned off the frames and rosettes. It'll need a little more effort but I think I can make it work. I made a first pass at throwing some color at the decks. I expressed some of the Tamiya TS-33 Dull Red from the can and brushed it on along with some XF-68 NATO Brown and XF-52 Flat Earth. The second pass at the deck detail got things cleaned up a little but there's still more to do. As always, thanks for taking the time to look and please feel free to post any comments you may have. David G.
-
Wow Jim, you're right. This one has been going on for a while! It does look great though and it's been a lot of work to get here. The decal on the package shelf is perfect! David G.
-
Rolls-Royce No Chemicals, No Paint, No Harmful Glues
David G. replied to Anglia105E's topic in WIP: Model Cars
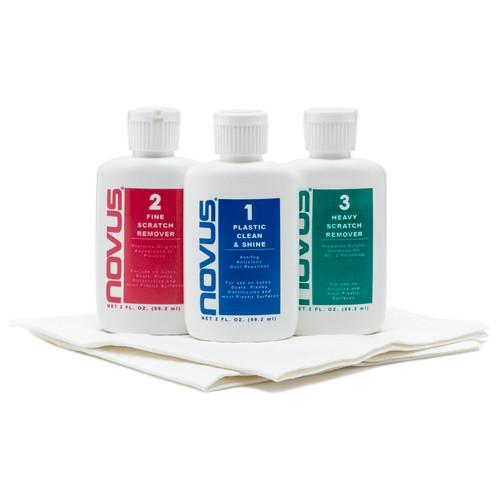
It's nice seeing your progress on this endeavor David. The polishing technique you've worked out seems to work very well, I'll have to keep it in mind for future use. I think I may be the forum member you're referring to. As far as the mixed results, the polishing actually came out rather well. The only problems I had were some issues with my attempted clear coat. I did of course paint the livery markings but the Gulf blue is as cast. The build turned out to be one of my favorites. In fact it's the one I use for my avatar here and on my Face Book page. Back onto the polishing topic, have you considered Novus products? I believe their phase 2 & 3 compounds are water-based, at least they have no odor that I can detect. And their #1 seems to be a thin acrylic solution. Just another suggestion. I can't wait to see more of your work on the Rolls. I'm glad you were able to find the other one that's still left on the planet. David G.
-
Oh yeah, the dreaded "axle hole" Nice work filling that and on the other details too. Great looking engine! Thanks for posting them.
-
Rolls-Royce No Chemicals, No Paint, No Harmful Glues
David G. replied to Anglia105E's topic in WIP: Model Cars
Maybe the reason you're having difficulty finding any more of those old Minicraft Rolls kits, David is because you have most of the ones still in existence! For paint have you considered Tamiya acrylics? I know they're a solvent based acrylic but their solvent is essentially the same as glass cleaner. Though I'm not sure if even that is within your safety zone. David G. -
You have a great attitude toward this whole situation David. Diet, exercise and lifestyle may sound cliche but they do make a difference in providing a foundation on which the physicians can build their care plans. Medication can only do so much, the rest of it is up to the patient. That Rolls looks like the same monstrosity that I struggled with a while back. The engine looks like a good fit. It's difficult to imagine that the makers of such a large and heavy automobile would put anything other than a V-8 in it. But maybe I'm just thinking like an American here. David G.
-
I love being able to find a use for those left-over customization bits from other kits! That will look much better than the other one. David G.
-
Thank you Michael. This has been one of the more enjoyable builds I've done lately. Thank you Dennis. Thanks Bob, I really appreciate that. David G.
-
Great looking build, love your photo set too! David G.
-
That is just so cool! You haven't just built a model or diorama, you've built a little world! David G.
-
Wow David, I'm terribly sorry to learn of your unfortunate diagnosis. I do hope you can find some satisfactory alternatives to the VOC-based paints and adhesives we use in this hobby. There are many options out there so I'm certain you'll find a way to continue building. All of that aside, how are you doing? Aside from the obvious, I hope you're feeling well. It almost seems flippant to mention it now but great work patching up those light leaks. David G.
-
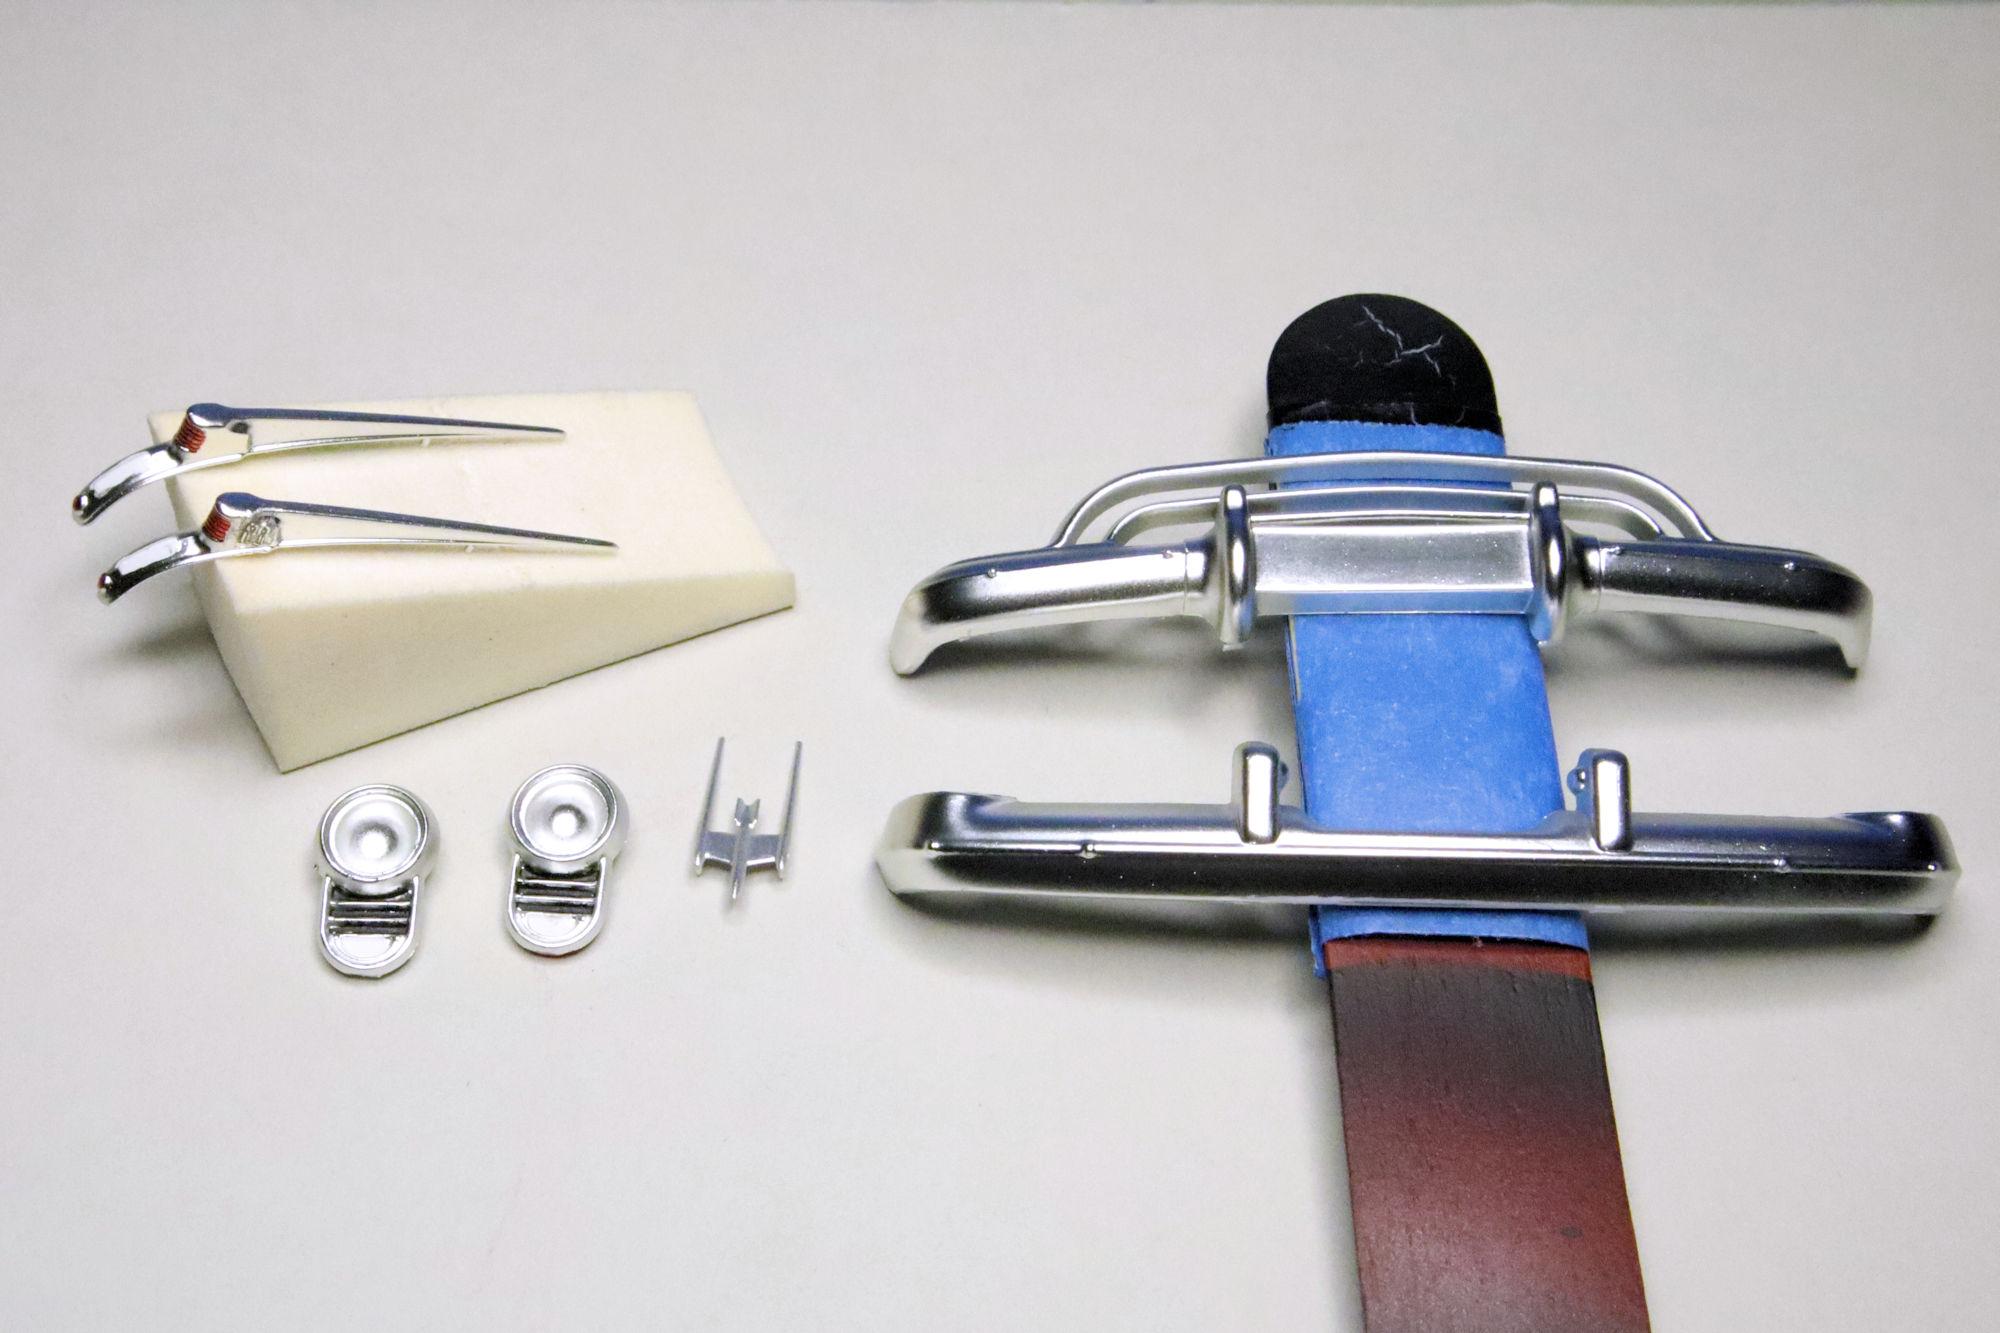
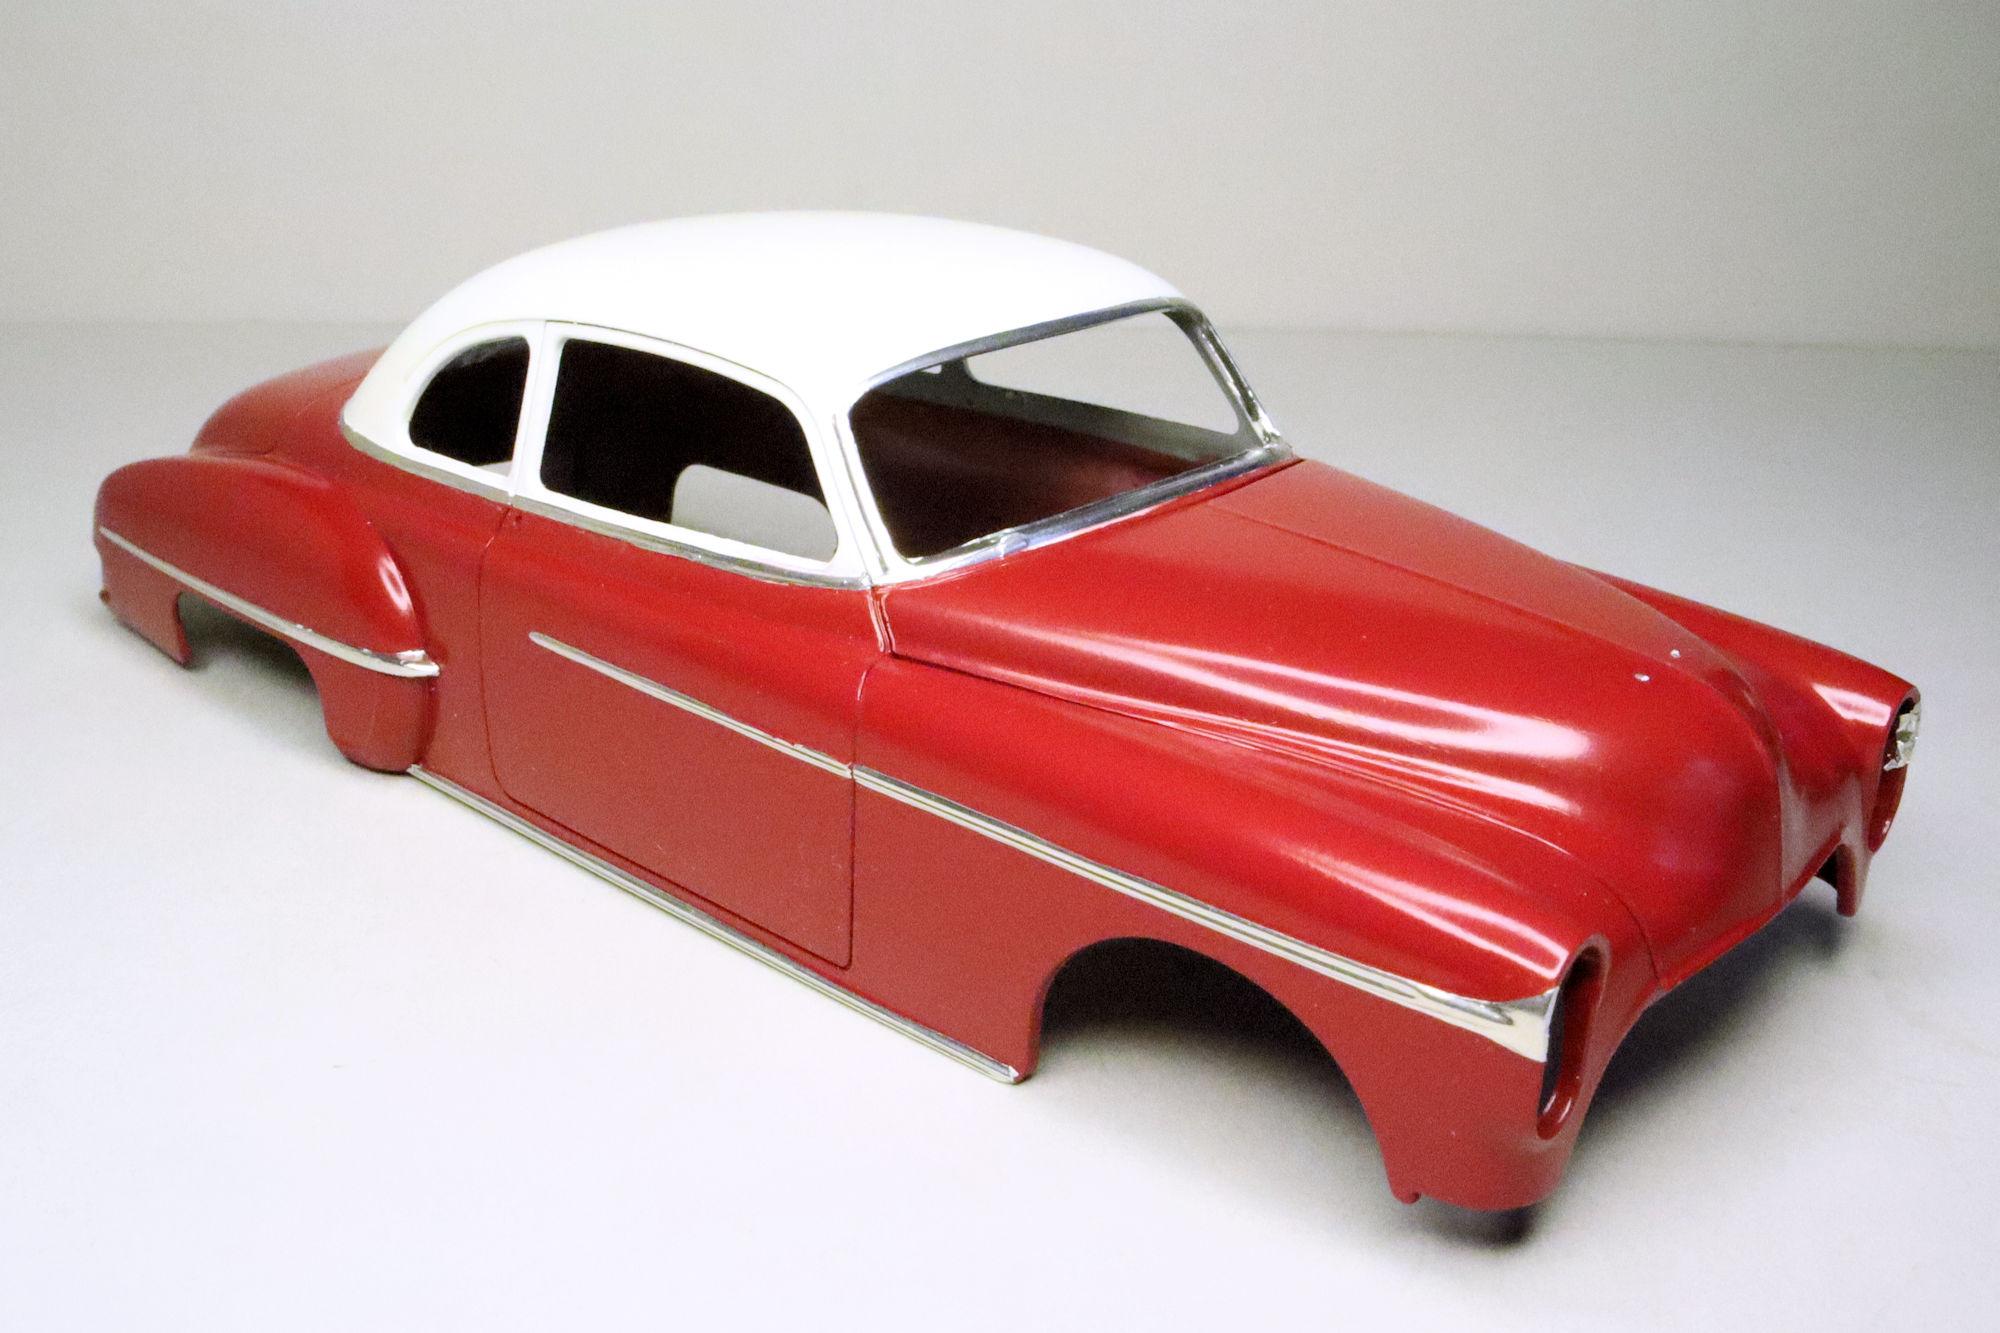
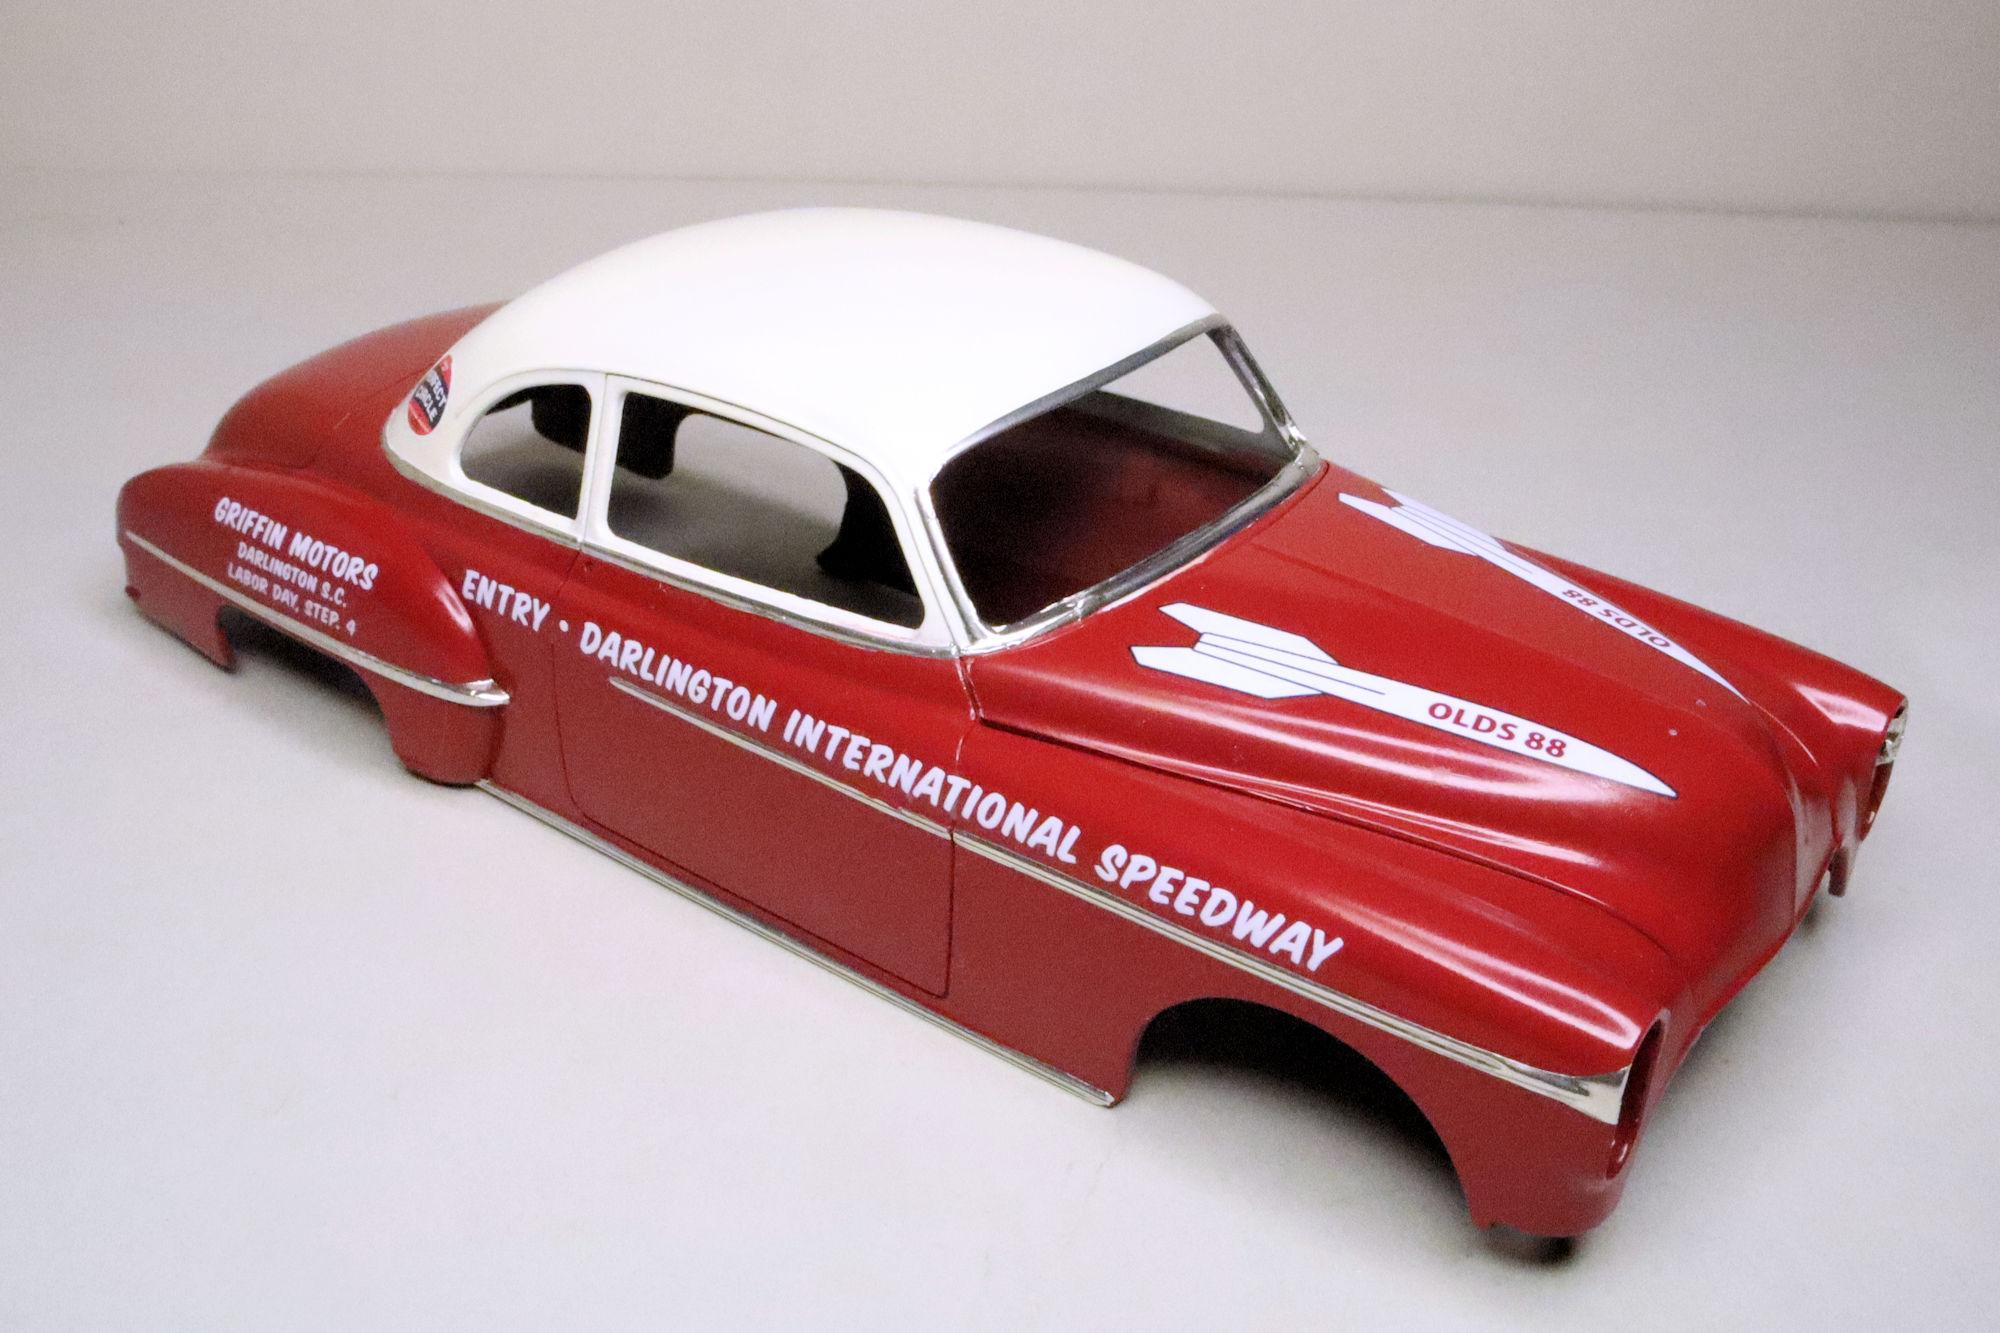
Hello Everybody! Here's the next installment of the '50 Oldsmobile Club Coupe Darlington Version saga. It took three build sessions but I got the brightwork foiled. I also drilled the holes in the hood for the jet-plane ornament. Next come the decals. This is about half of the ones called out for the Darlington version. I also started detailing some of the chrome bits. As always, thanks for taking the time to look and please feel free to post any comments you may wish to share. David G.
-
That does look cool, thanks for the pointer. Though I don't plan to make mine look quite that well detailed. =D-
-
Thanks, I do try to keep it under control. I once figured that at my current rate of building, I would have to live to be about 106 years old to build them all. It's literally a life-time supply. =D-
-
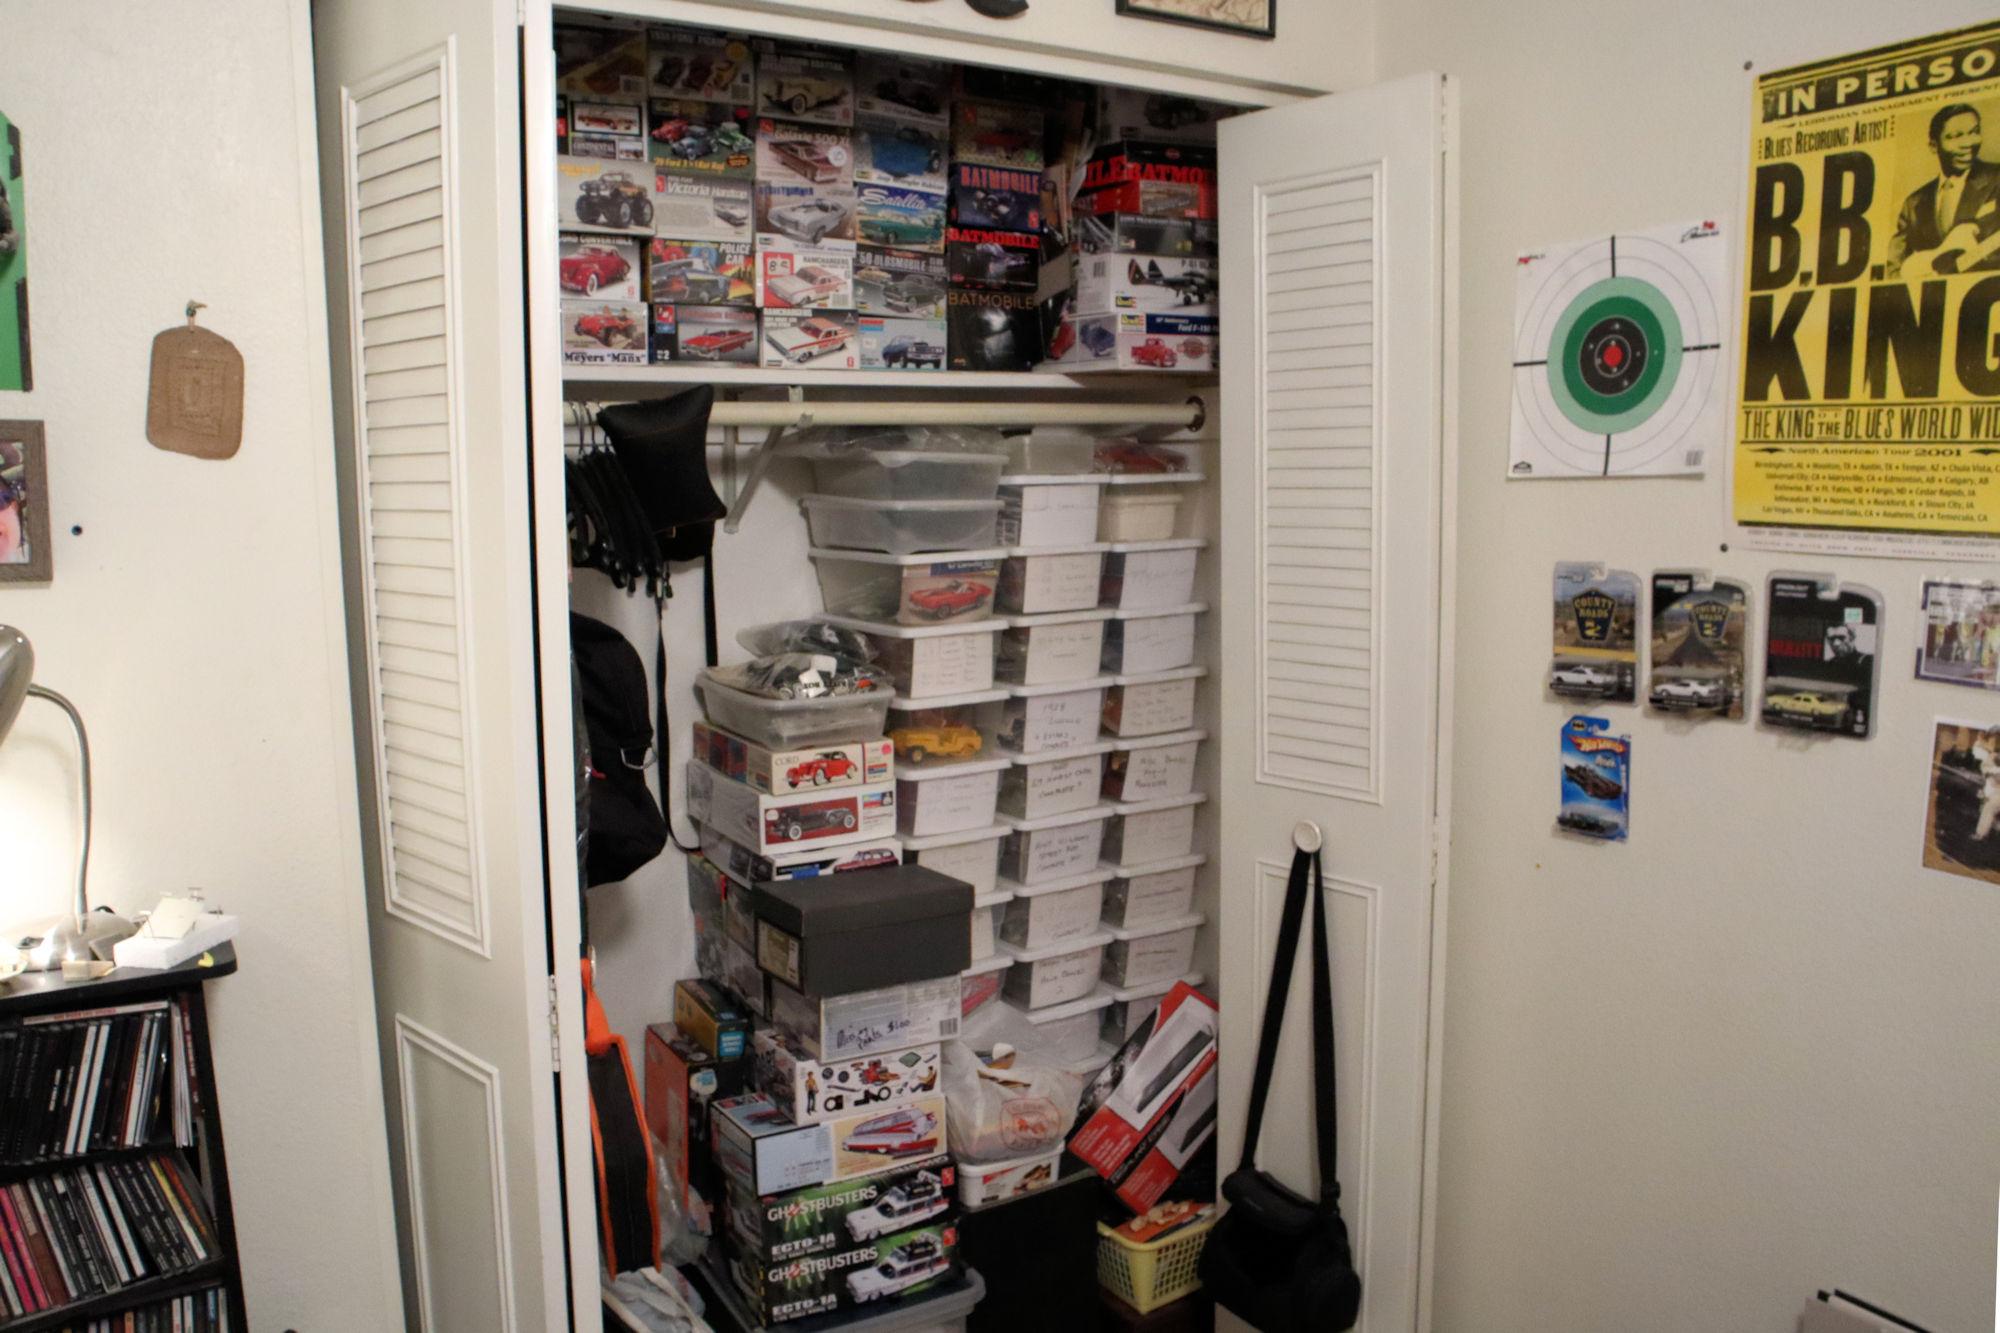
Yes, those were my thoughts almost exactly, sort of like a friendly reacquaintance with a troublesome person. Maybe we'll get things worked out this time. Actually, I have been considering options for my next build. I've found myself standing in front of my stash closet searching for the perfect combination of fun, easy and challenging. The perfect combination of which probably doesn't exist. But I do tend to make even the easiest of builds more challenging which is usually where I find my fun. =D- Thank you Michael, I'm glad to know you're enjoying the posts. Thank you Alan, I do try to get the best out of each kit I build. David G.
-
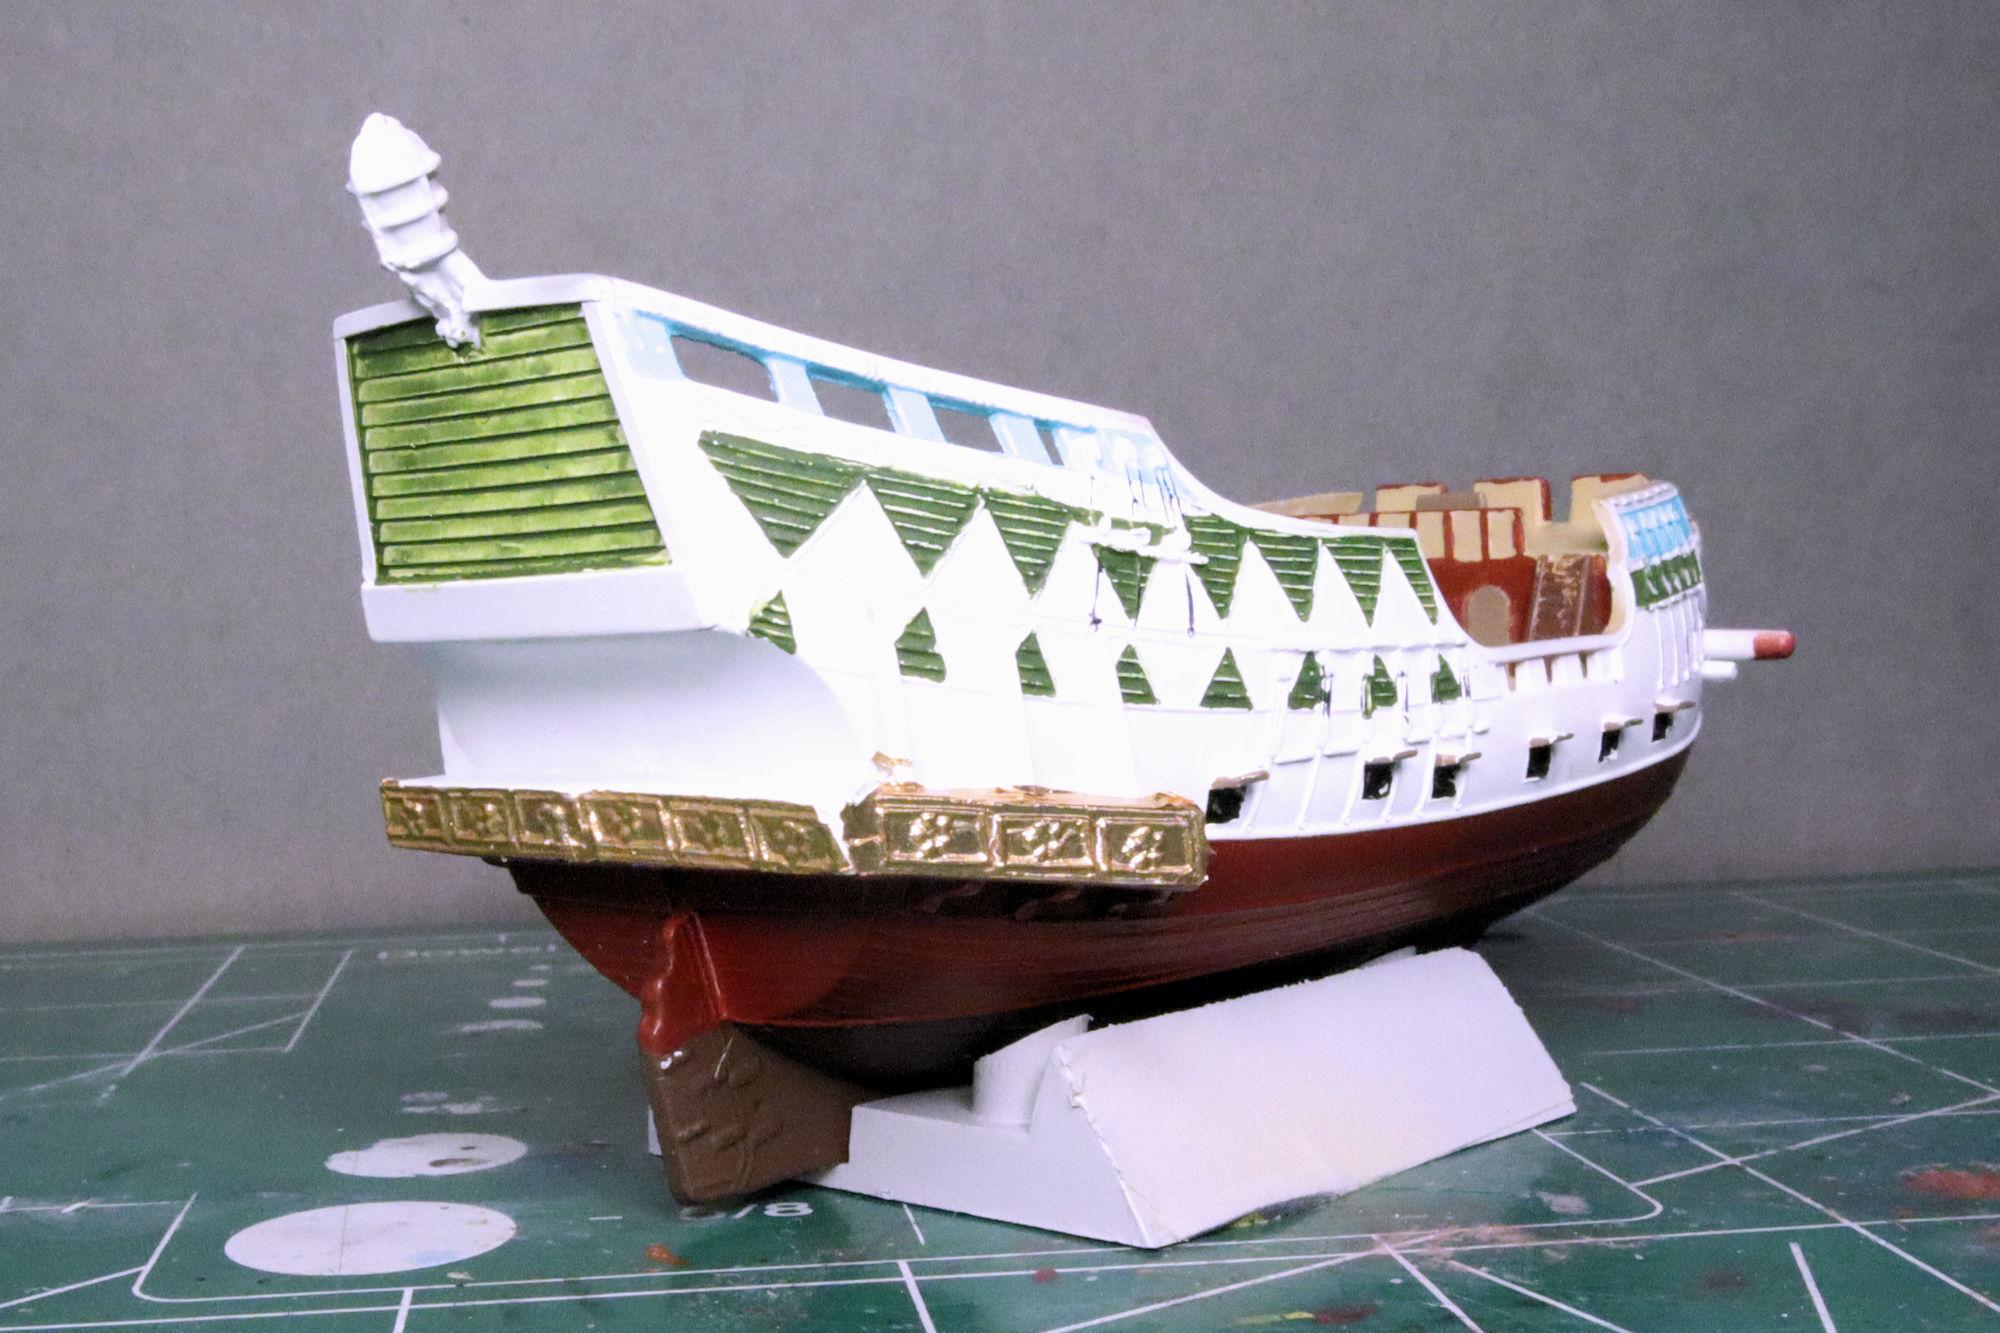
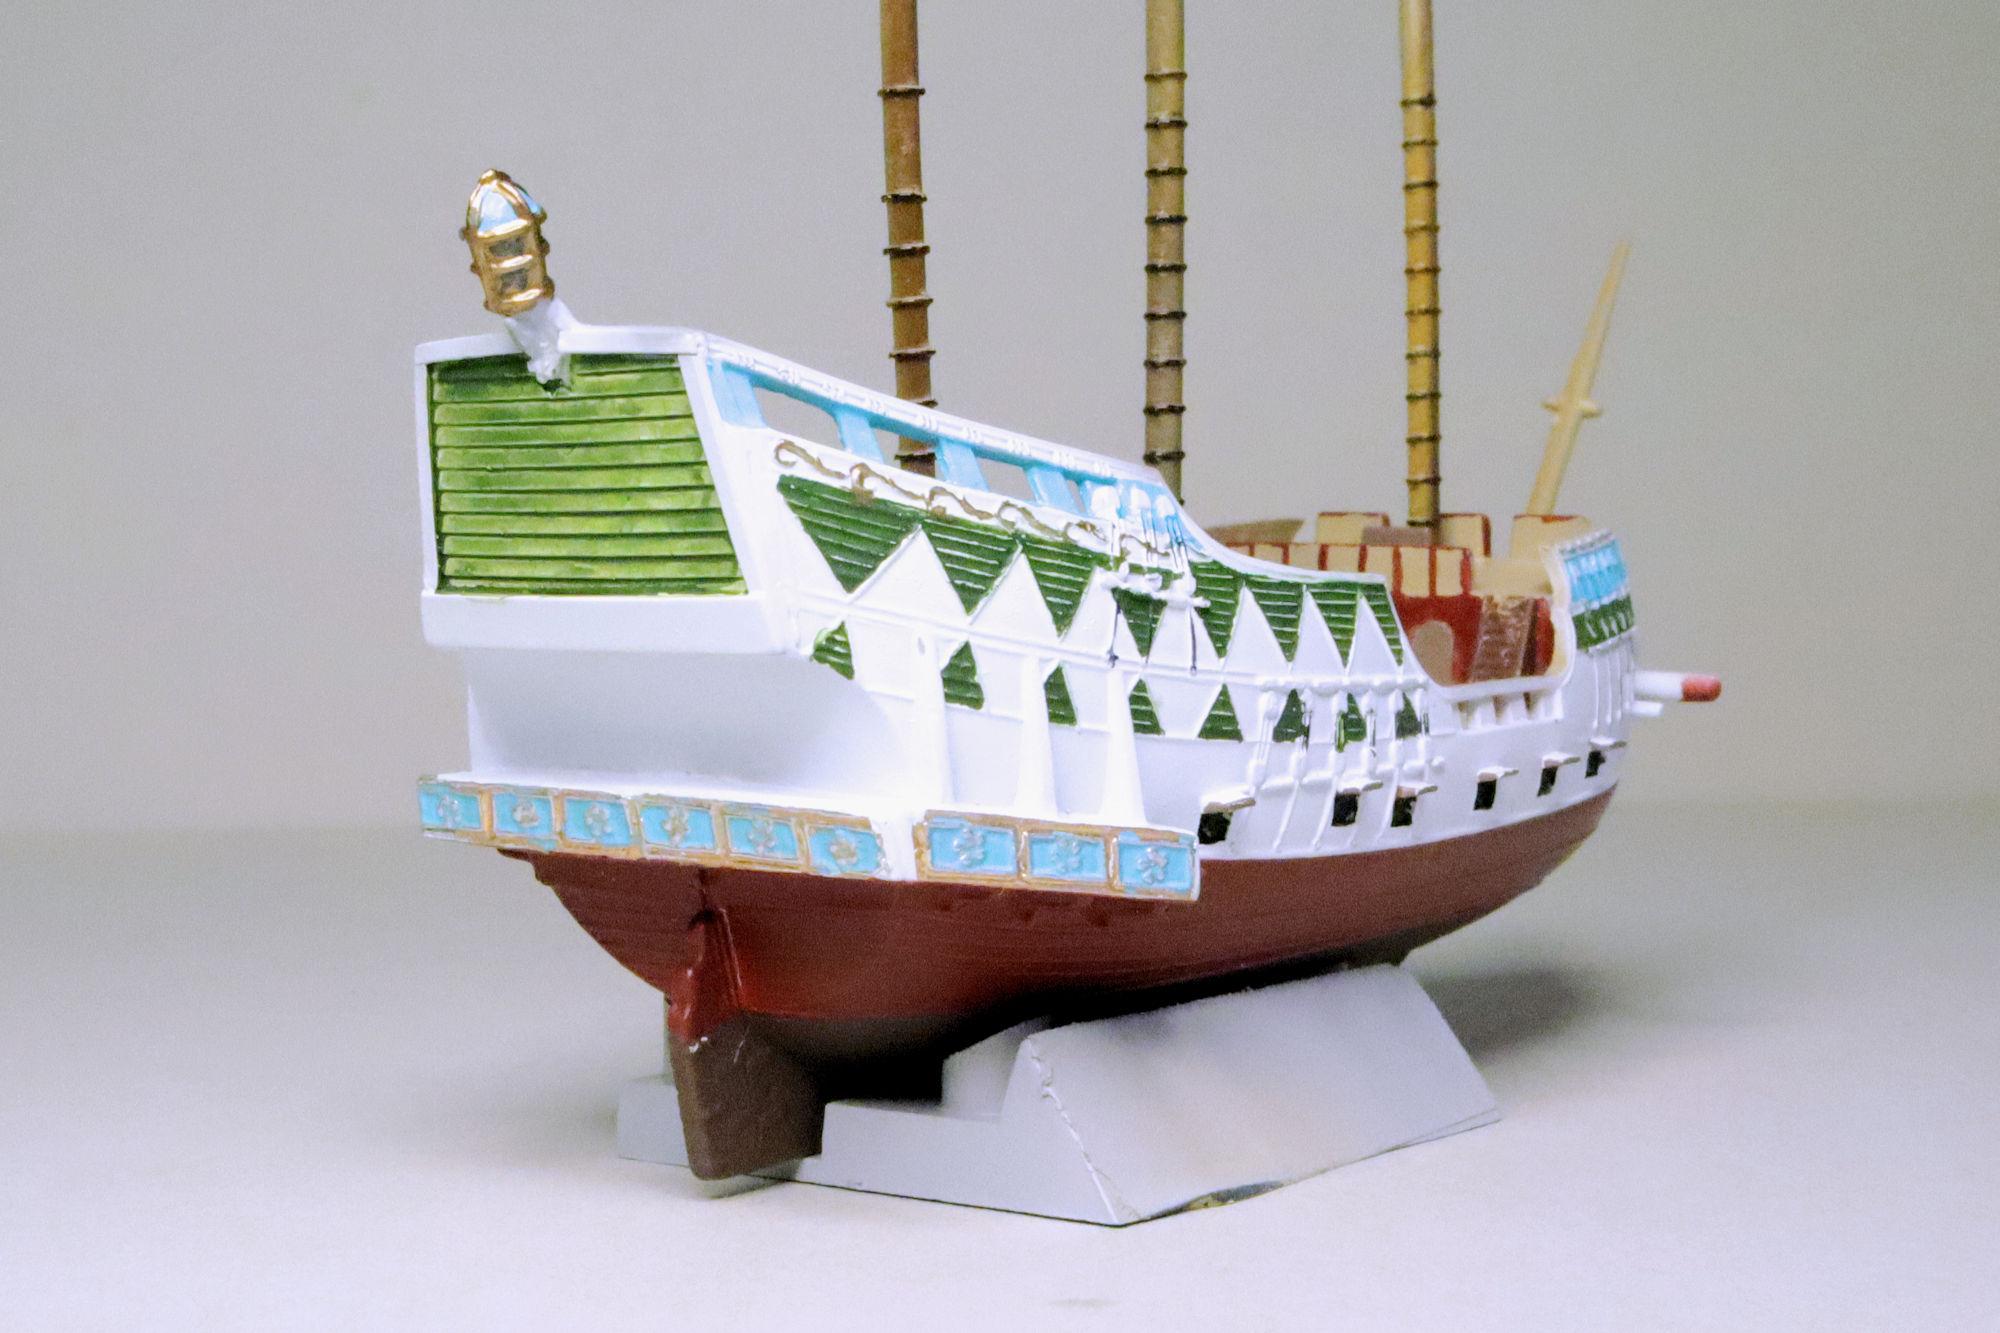
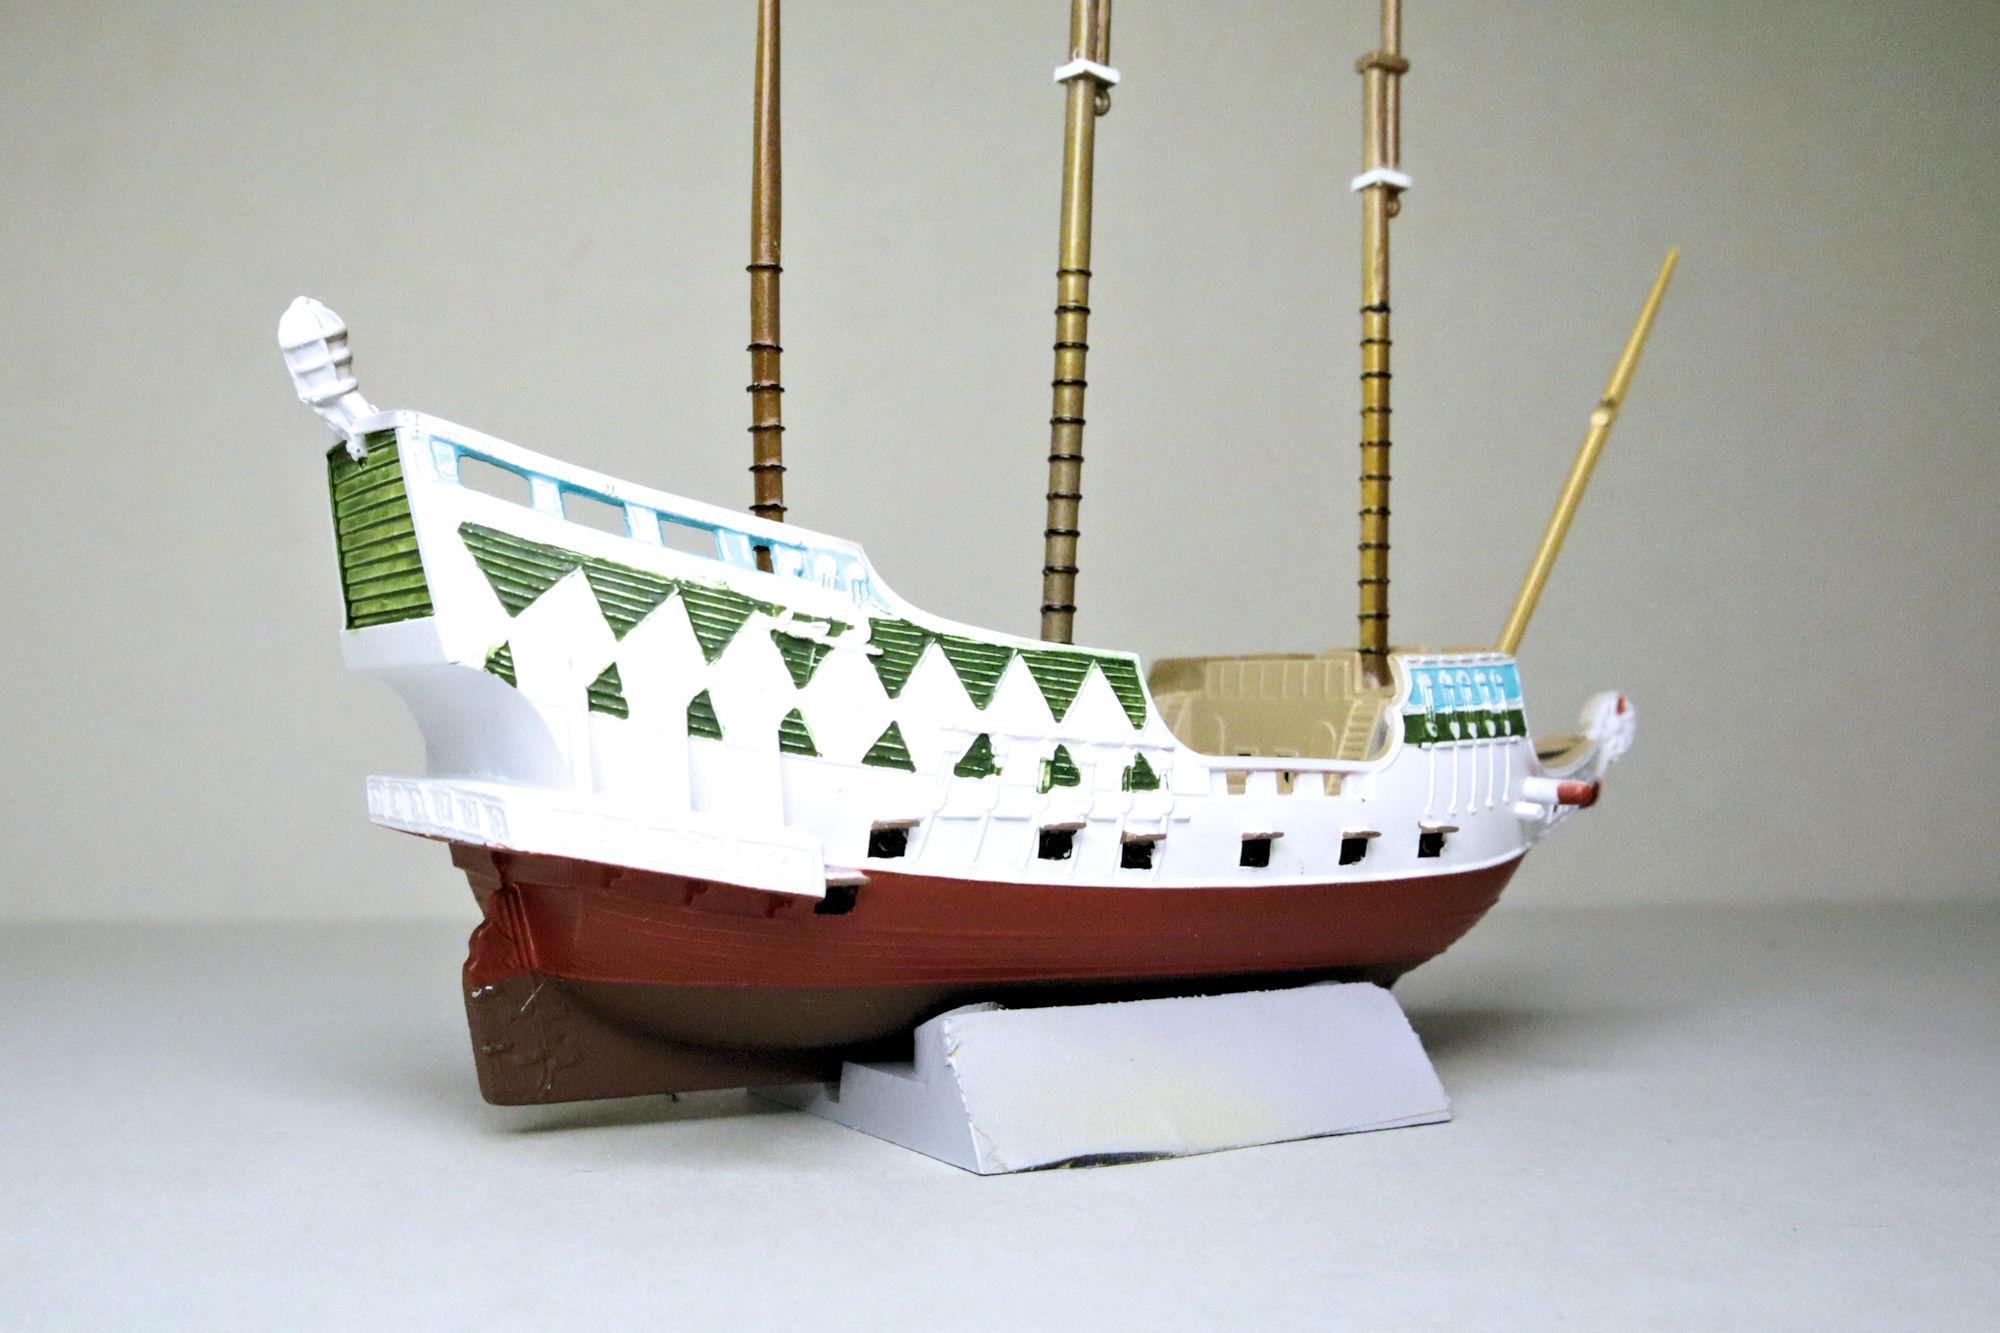
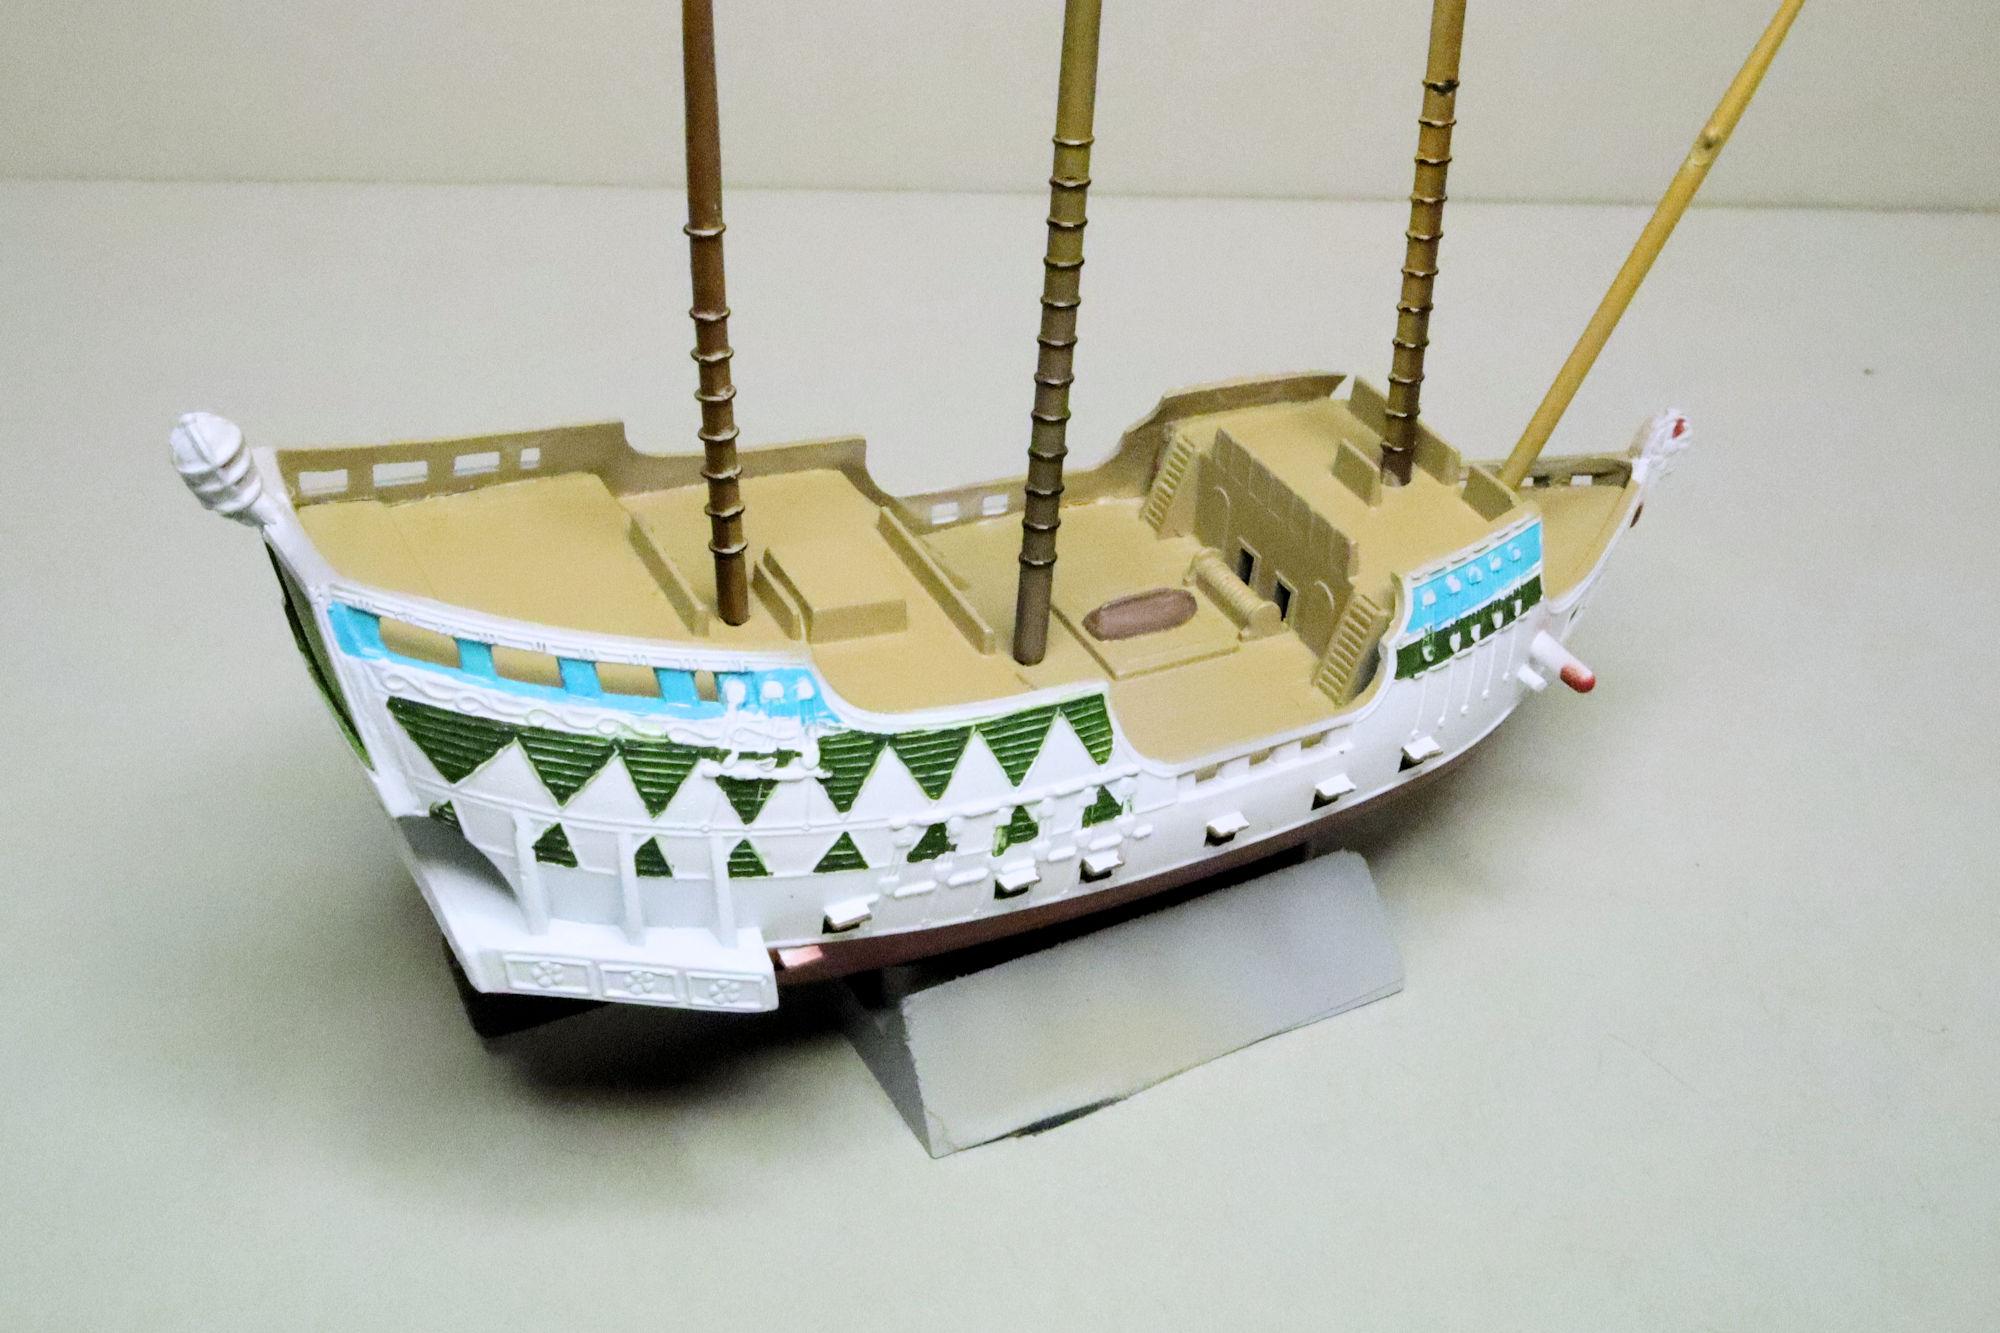
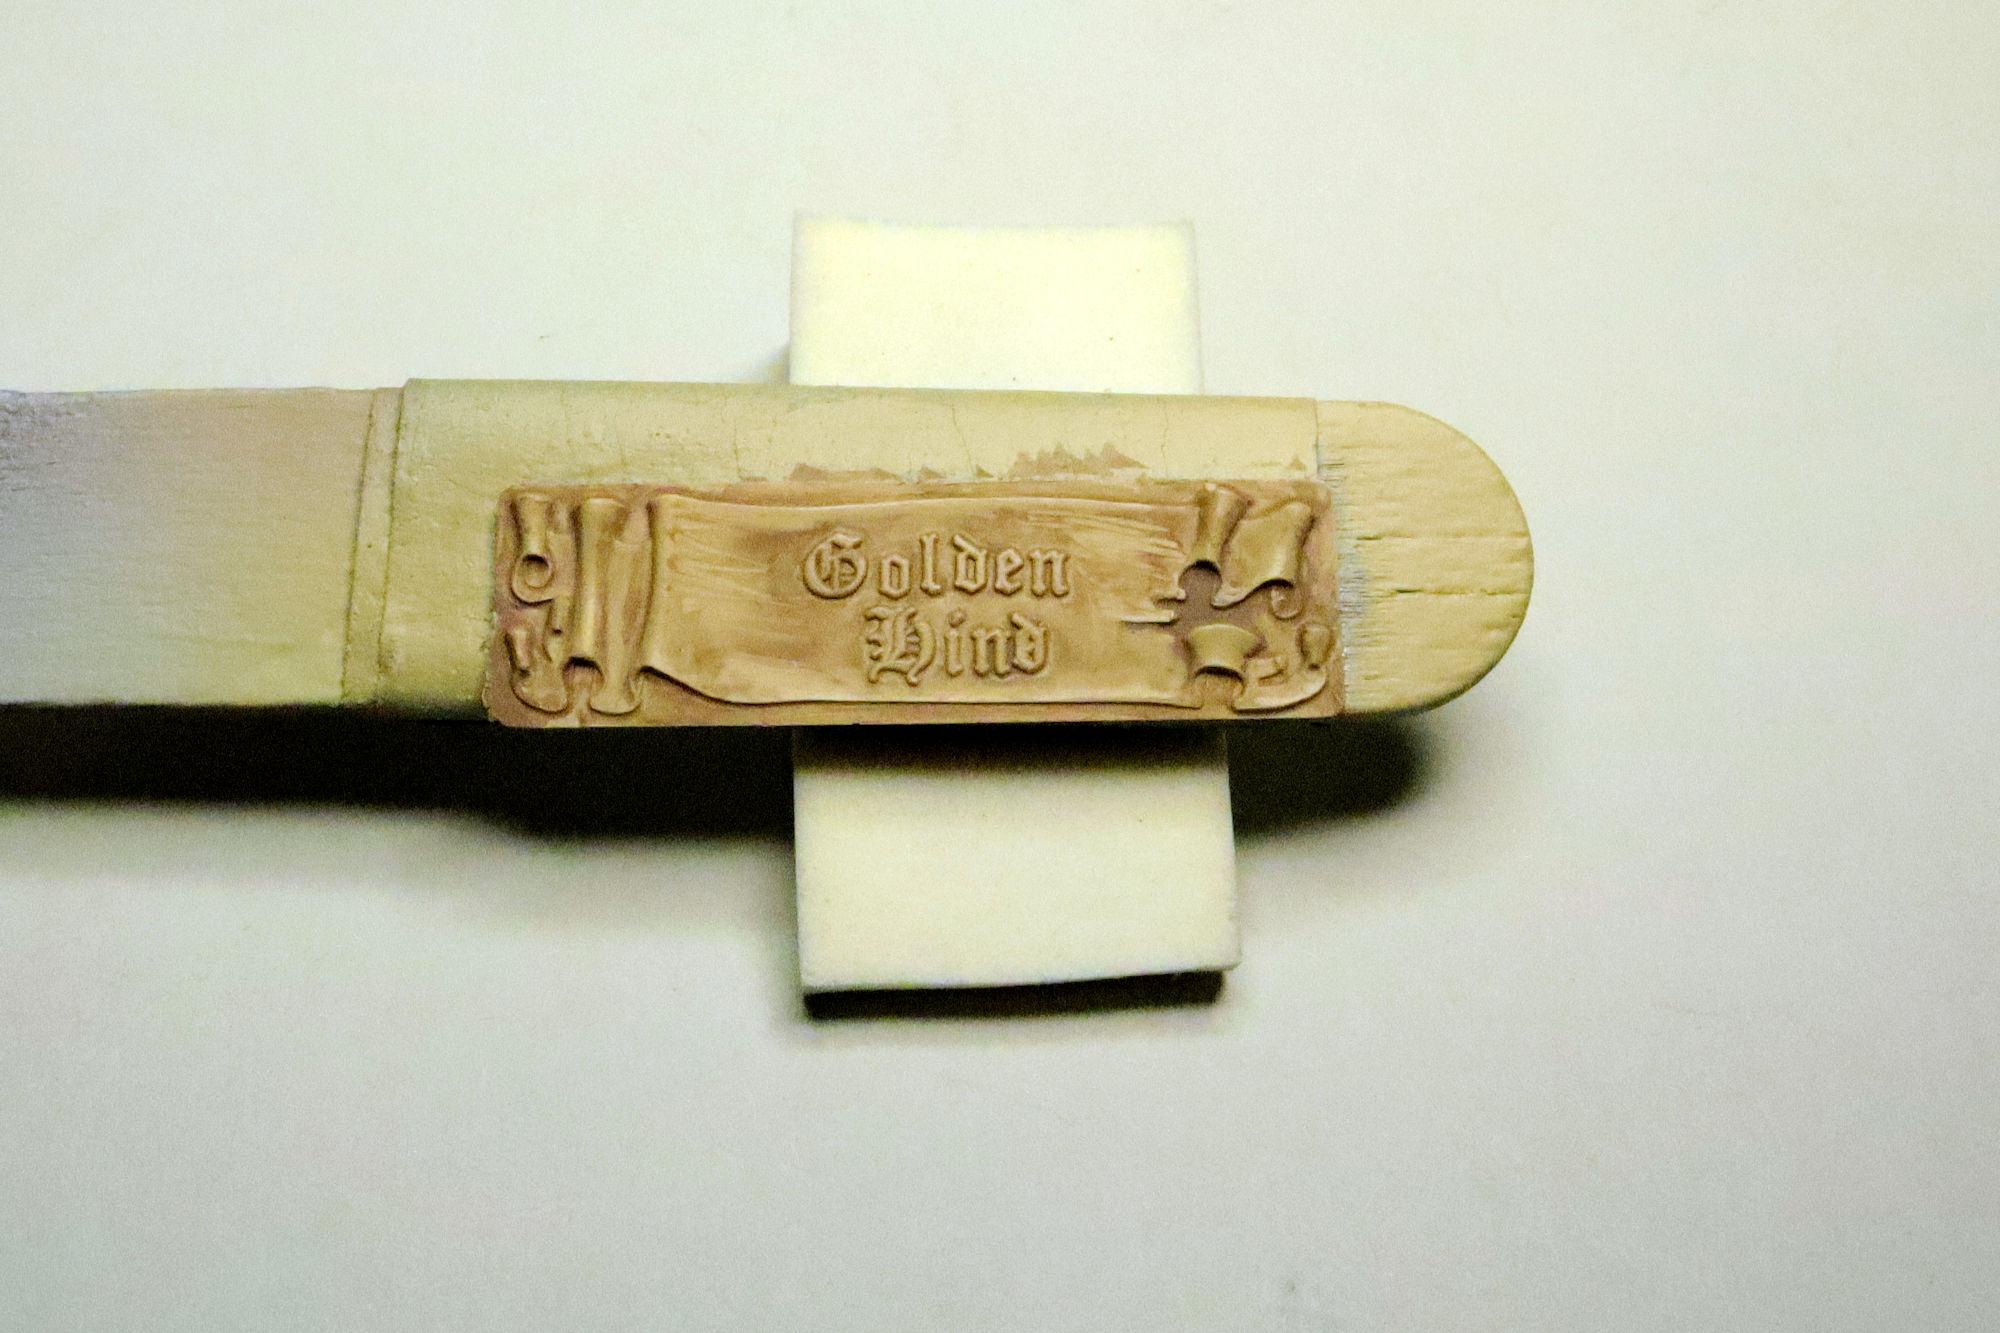
Hello Everybody! It's been a few weeks since I did anything with the Golden Hind and I've hit that point where I either need to do something with it or pack it up. I decided to work on some detail painting. I want to come up with a couple more shades of brown & tan for the deck details. I also applied the first wash on the name plaque. I just may finish this one in spite of myself! As always, thanks for taking the time to look and please feel free to share any comments you may have. David G.
-
Nice work on the trim Pat. David G.
-
68-72 Suburban scratch build
David G. replied to 64SS350's topic in WIP: Model Trucks: Pickups, Vans, SUVs, Light Commercial
It's all coming together so well and it looks great too. David G. -
Thank you Jeff. Over the years I've learned quite a lot of useful information from the members of this community. It's nice knowing that I can give a little back now and again. David G.
-
Thanks Craig, I'm always happy to help. =D-
-
I built one of these a couple of years ago, totally stock of course. The area where the front fenders meet the doors is a nightmare! 😮 I spent most of my time with this one correcting that. It looks like these rough spots even show in the box art on your version of the kit. I'm very interested to see where you go with this, I'll be keeping an eye on this one. David G.
-
Thank you Bob. Thanks Carl. =D-
-
Thank you very much Craig. =D-
-
Thank you Craig. It's a little tricky to build but not difficult. If you haven't seen it yet, I did a WIP thread of the whole build. Thank you Bob, I'm flattered. If there was a way to safely ship it, I would consider sending it to you. David G.
-
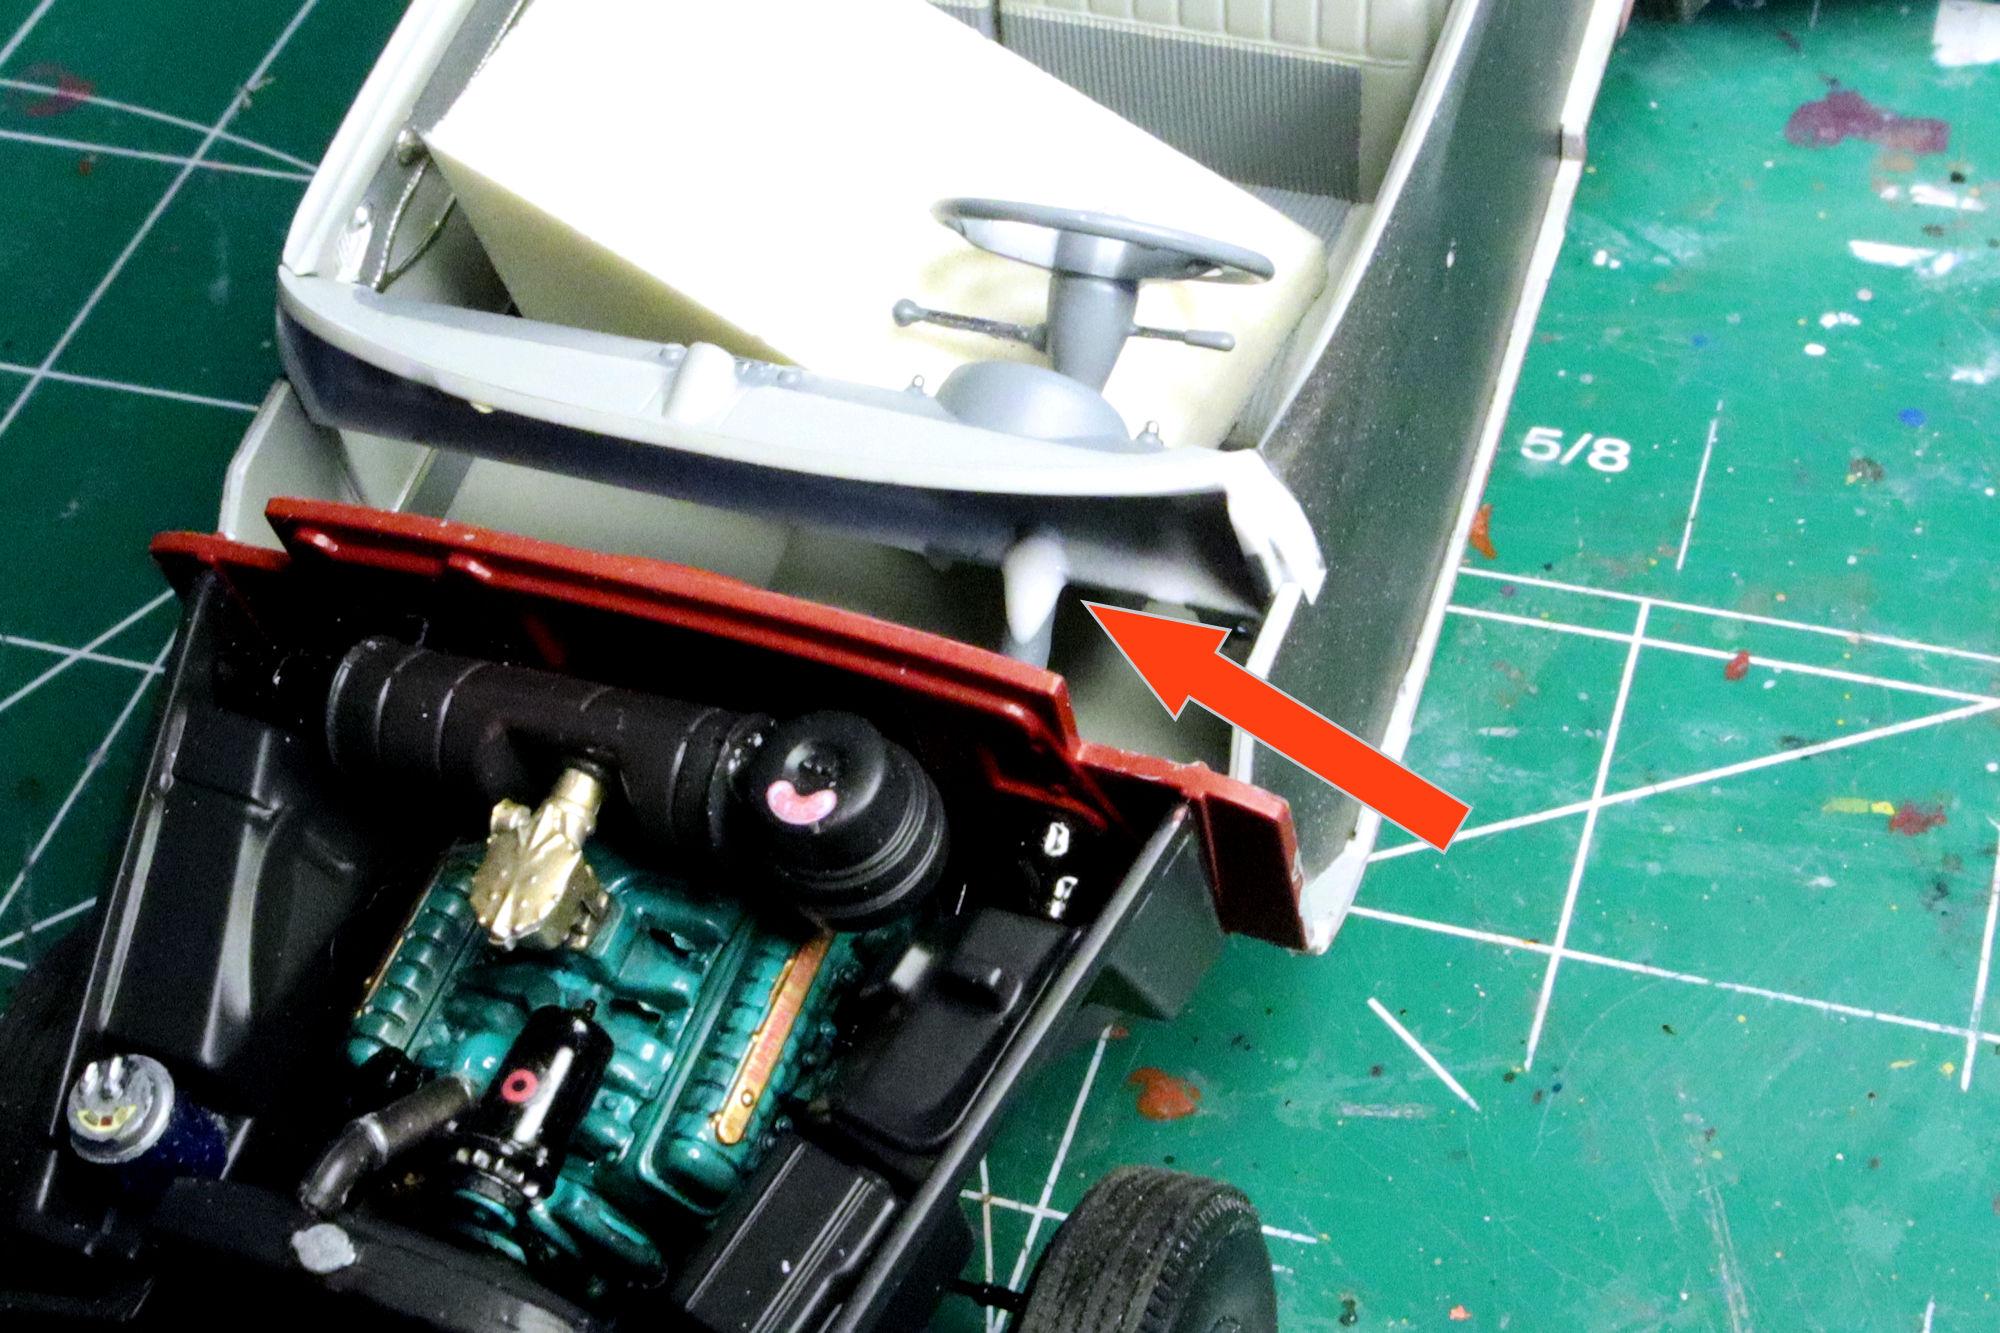
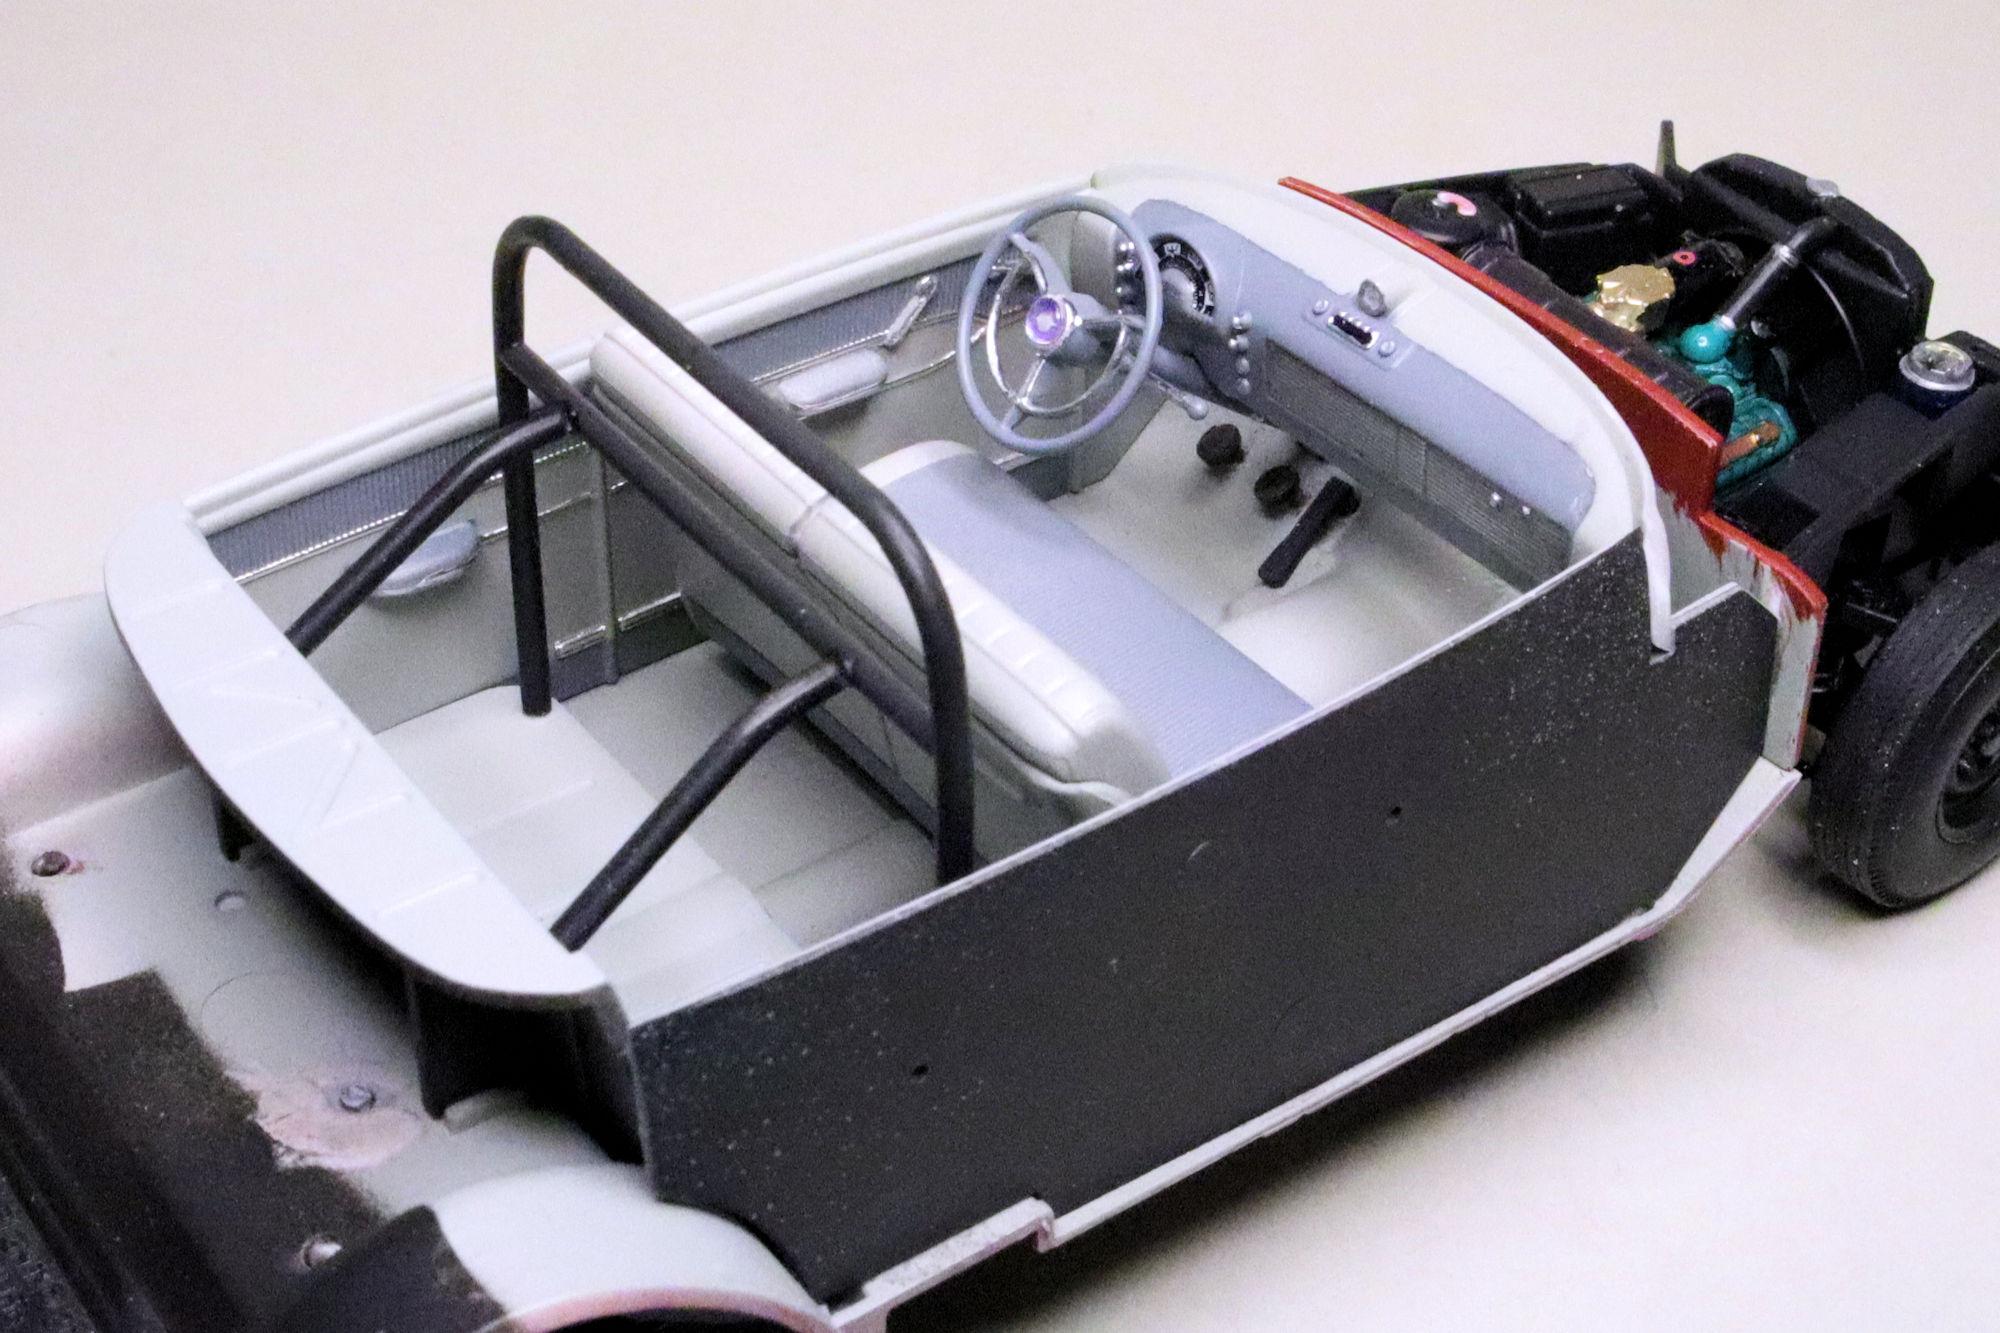
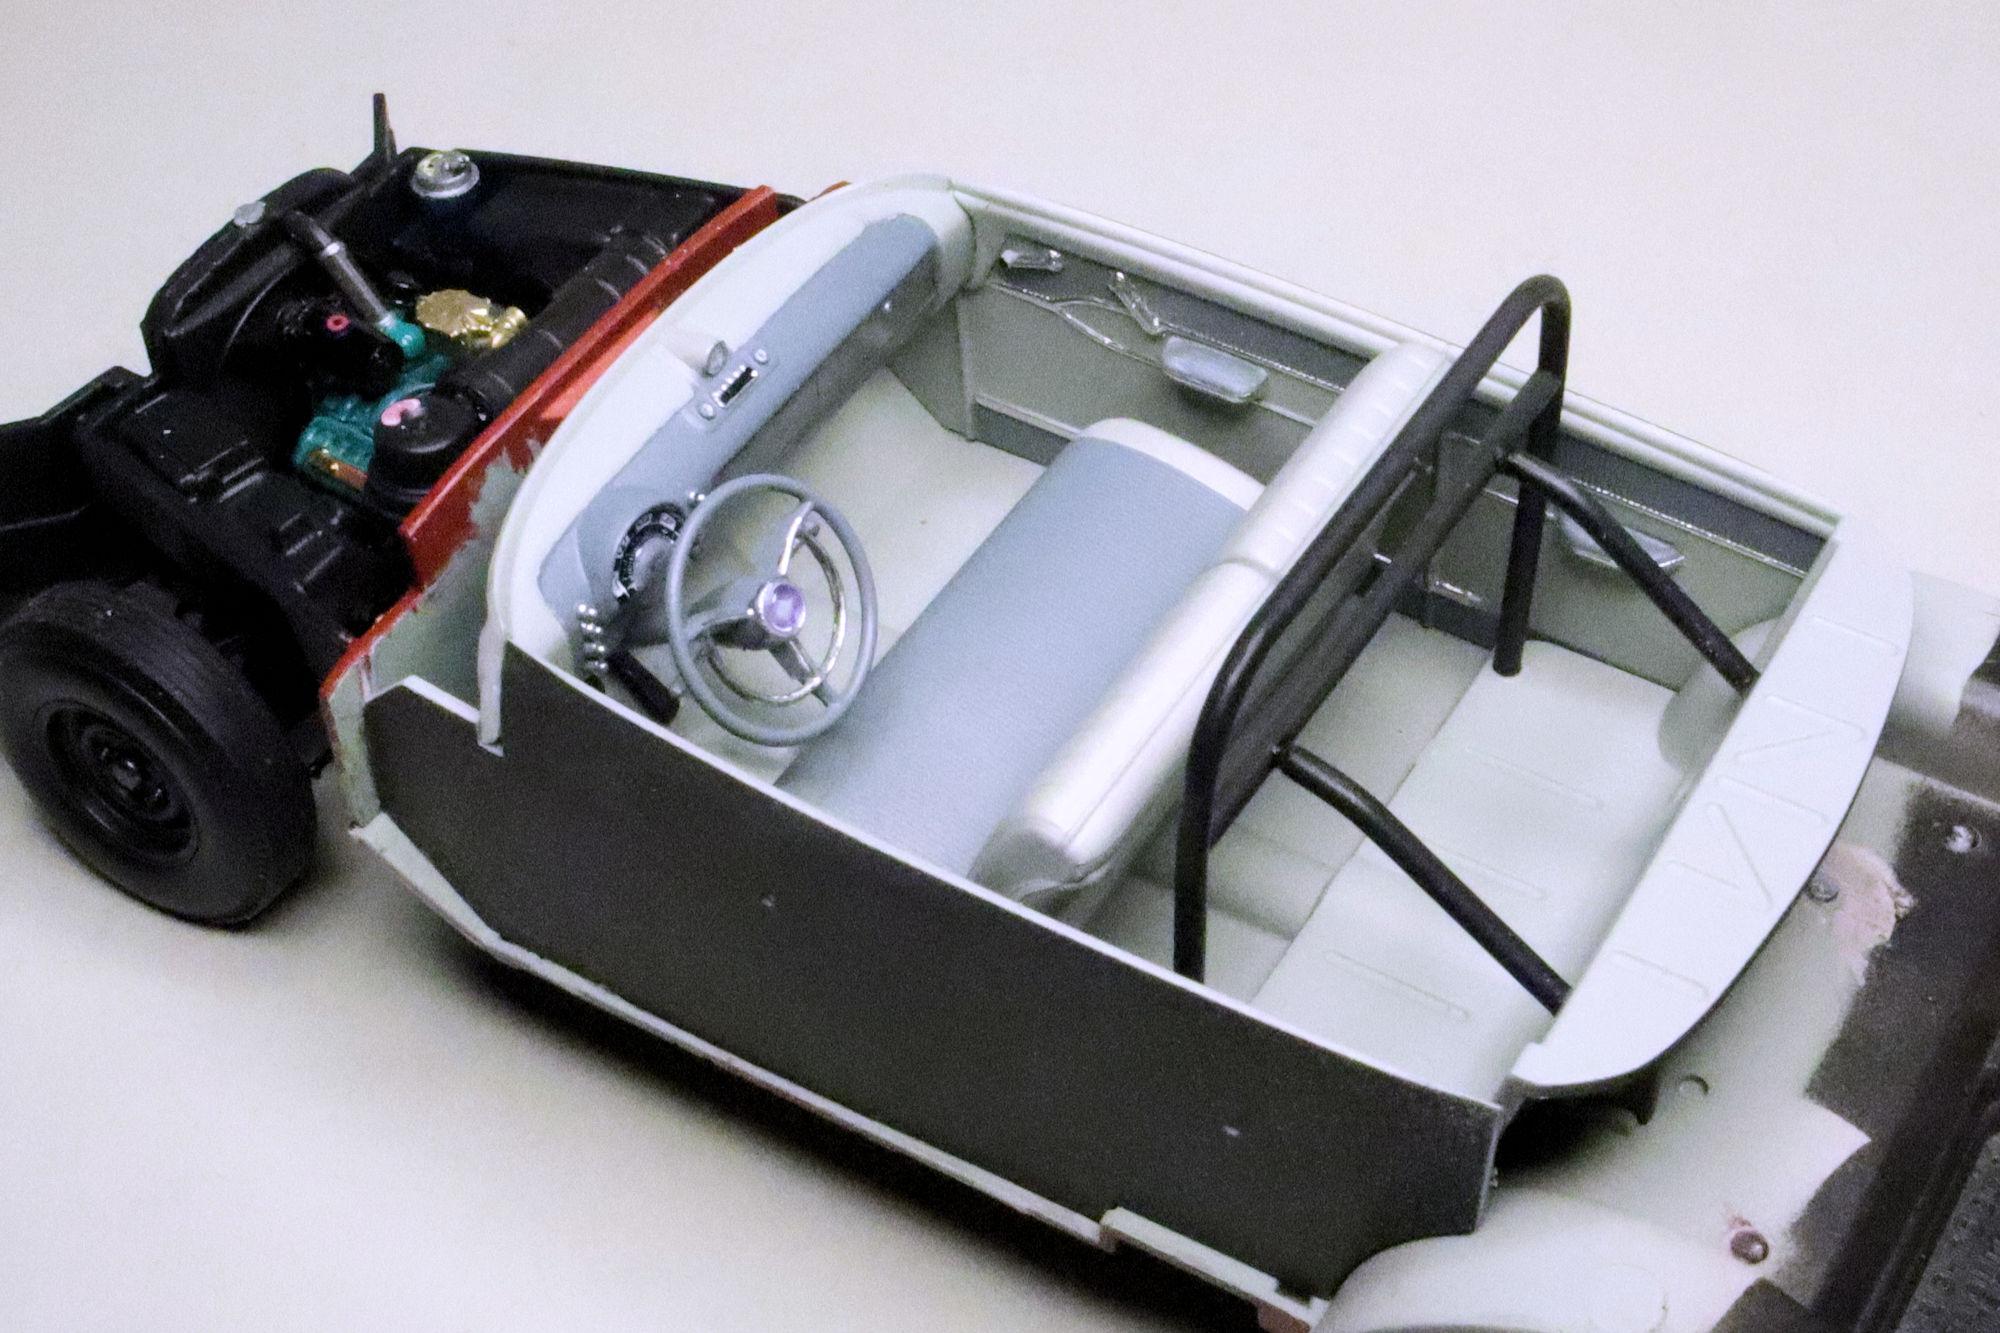
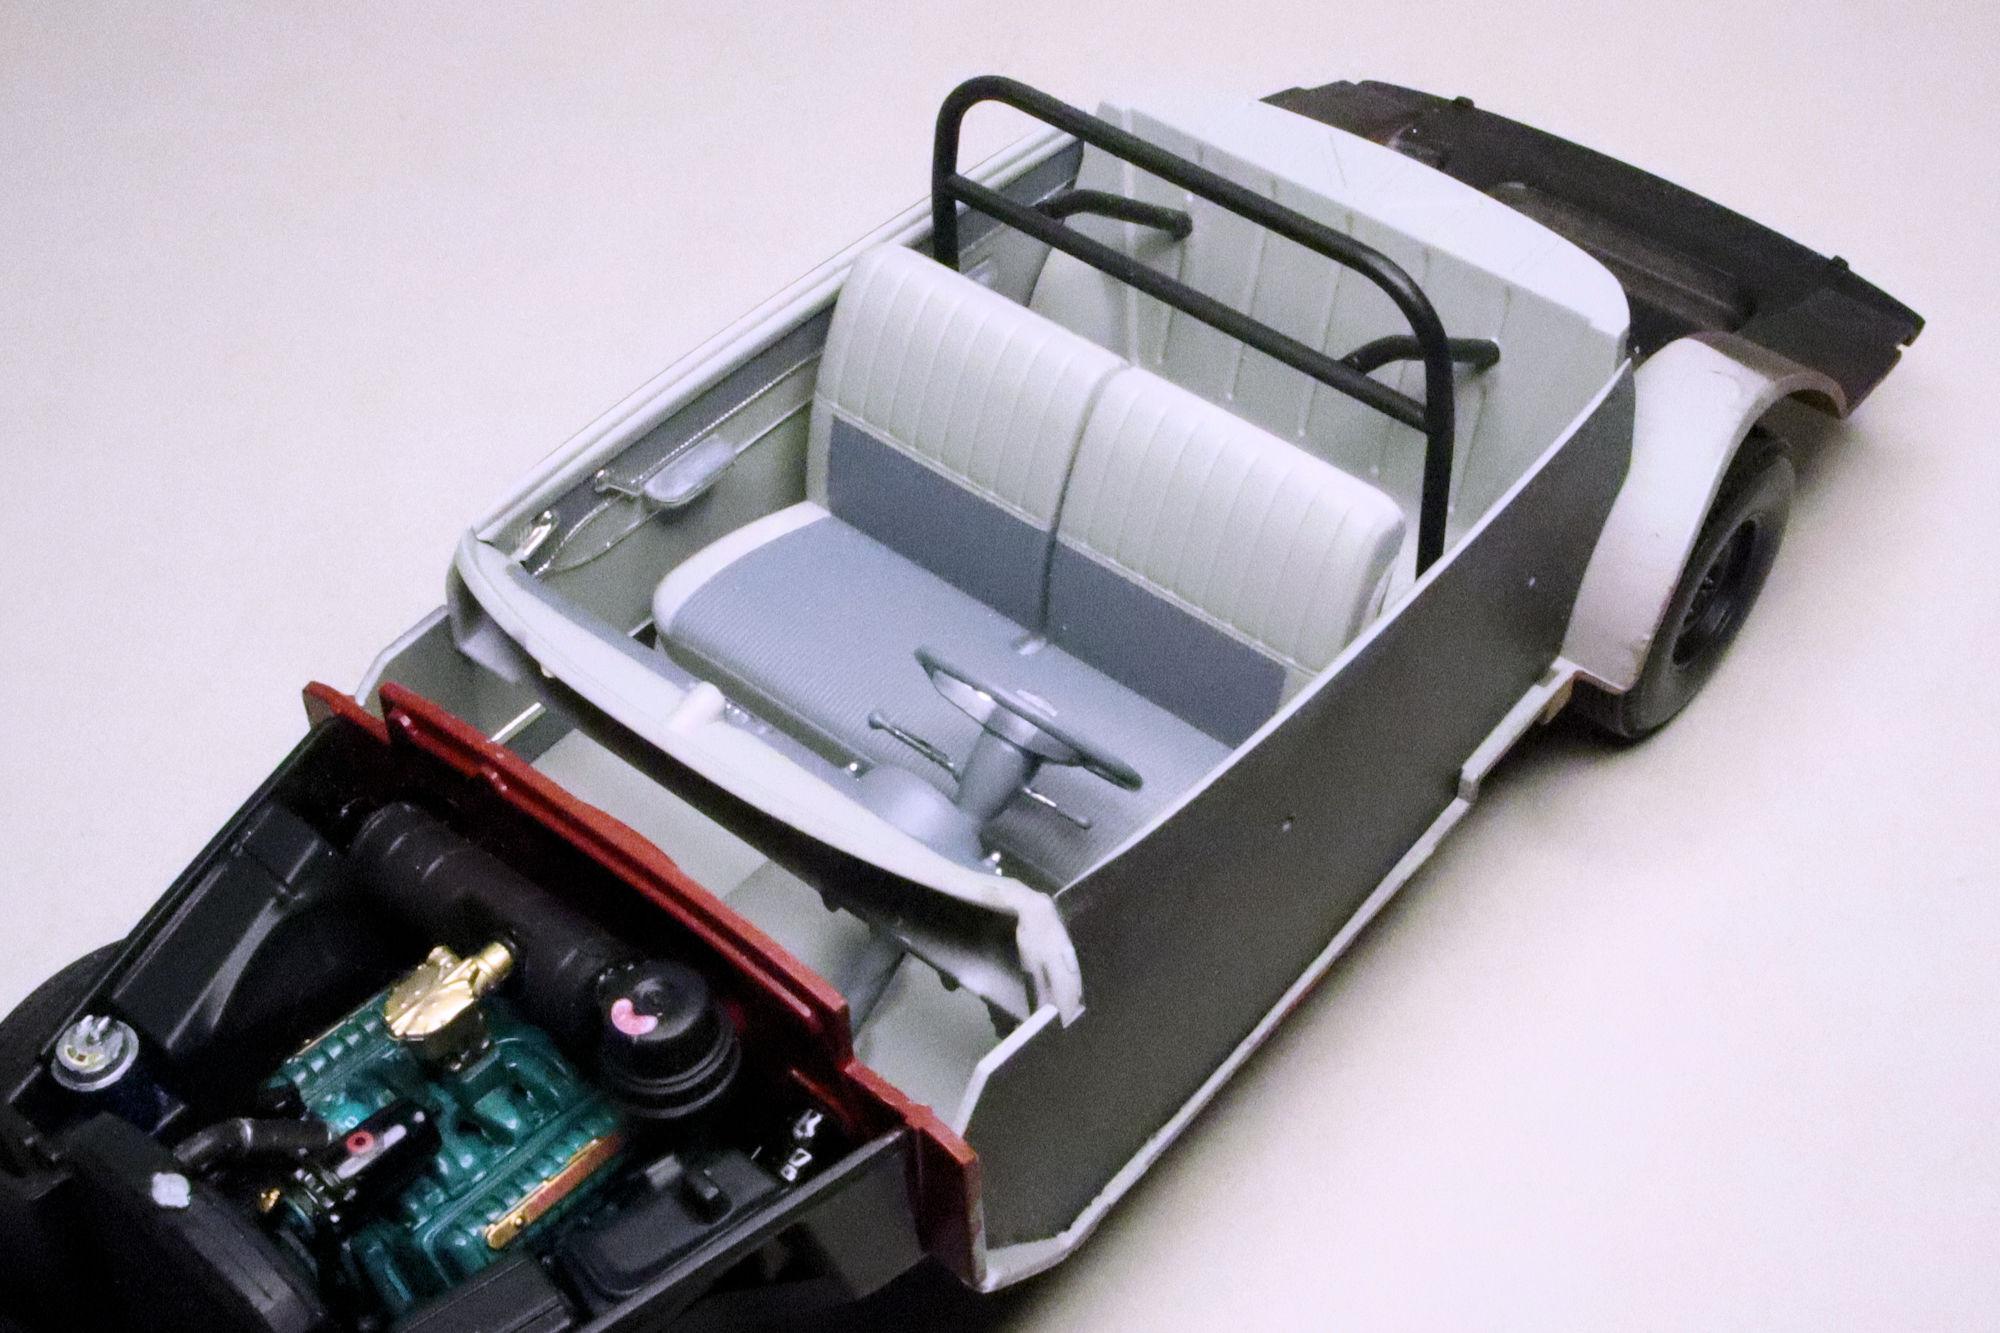
Hello Everybody! Here's a little more progress. The interior is completed. Revell provided a couple of nice decals for the dashboard and I did the rest. I used BMF on the door card trim strips, the door handles and window cranks are done in a combination of BMF, Molotow and Sharpie. I do like the rear seat plate that Revell provided but the roll bar... well it's there. One small problem I did have was that there was no support for the steering wheel. I had to hold it in place with a foam block while a blob of PVA I applied cured over night. Other than that, no complaints. As always, thanks for taking the time to look and please feel free to post any comments you wish to share. David G.