David G.
-
Posts
11,326 -
Joined
-
Last visited
Content Type
Profiles
Forums
Events
Gallery
Everything posted by David G.
-
That block on the stand will be a great addition to your diorama Anton. It has just the right amount of weathering and shading. David G.
-
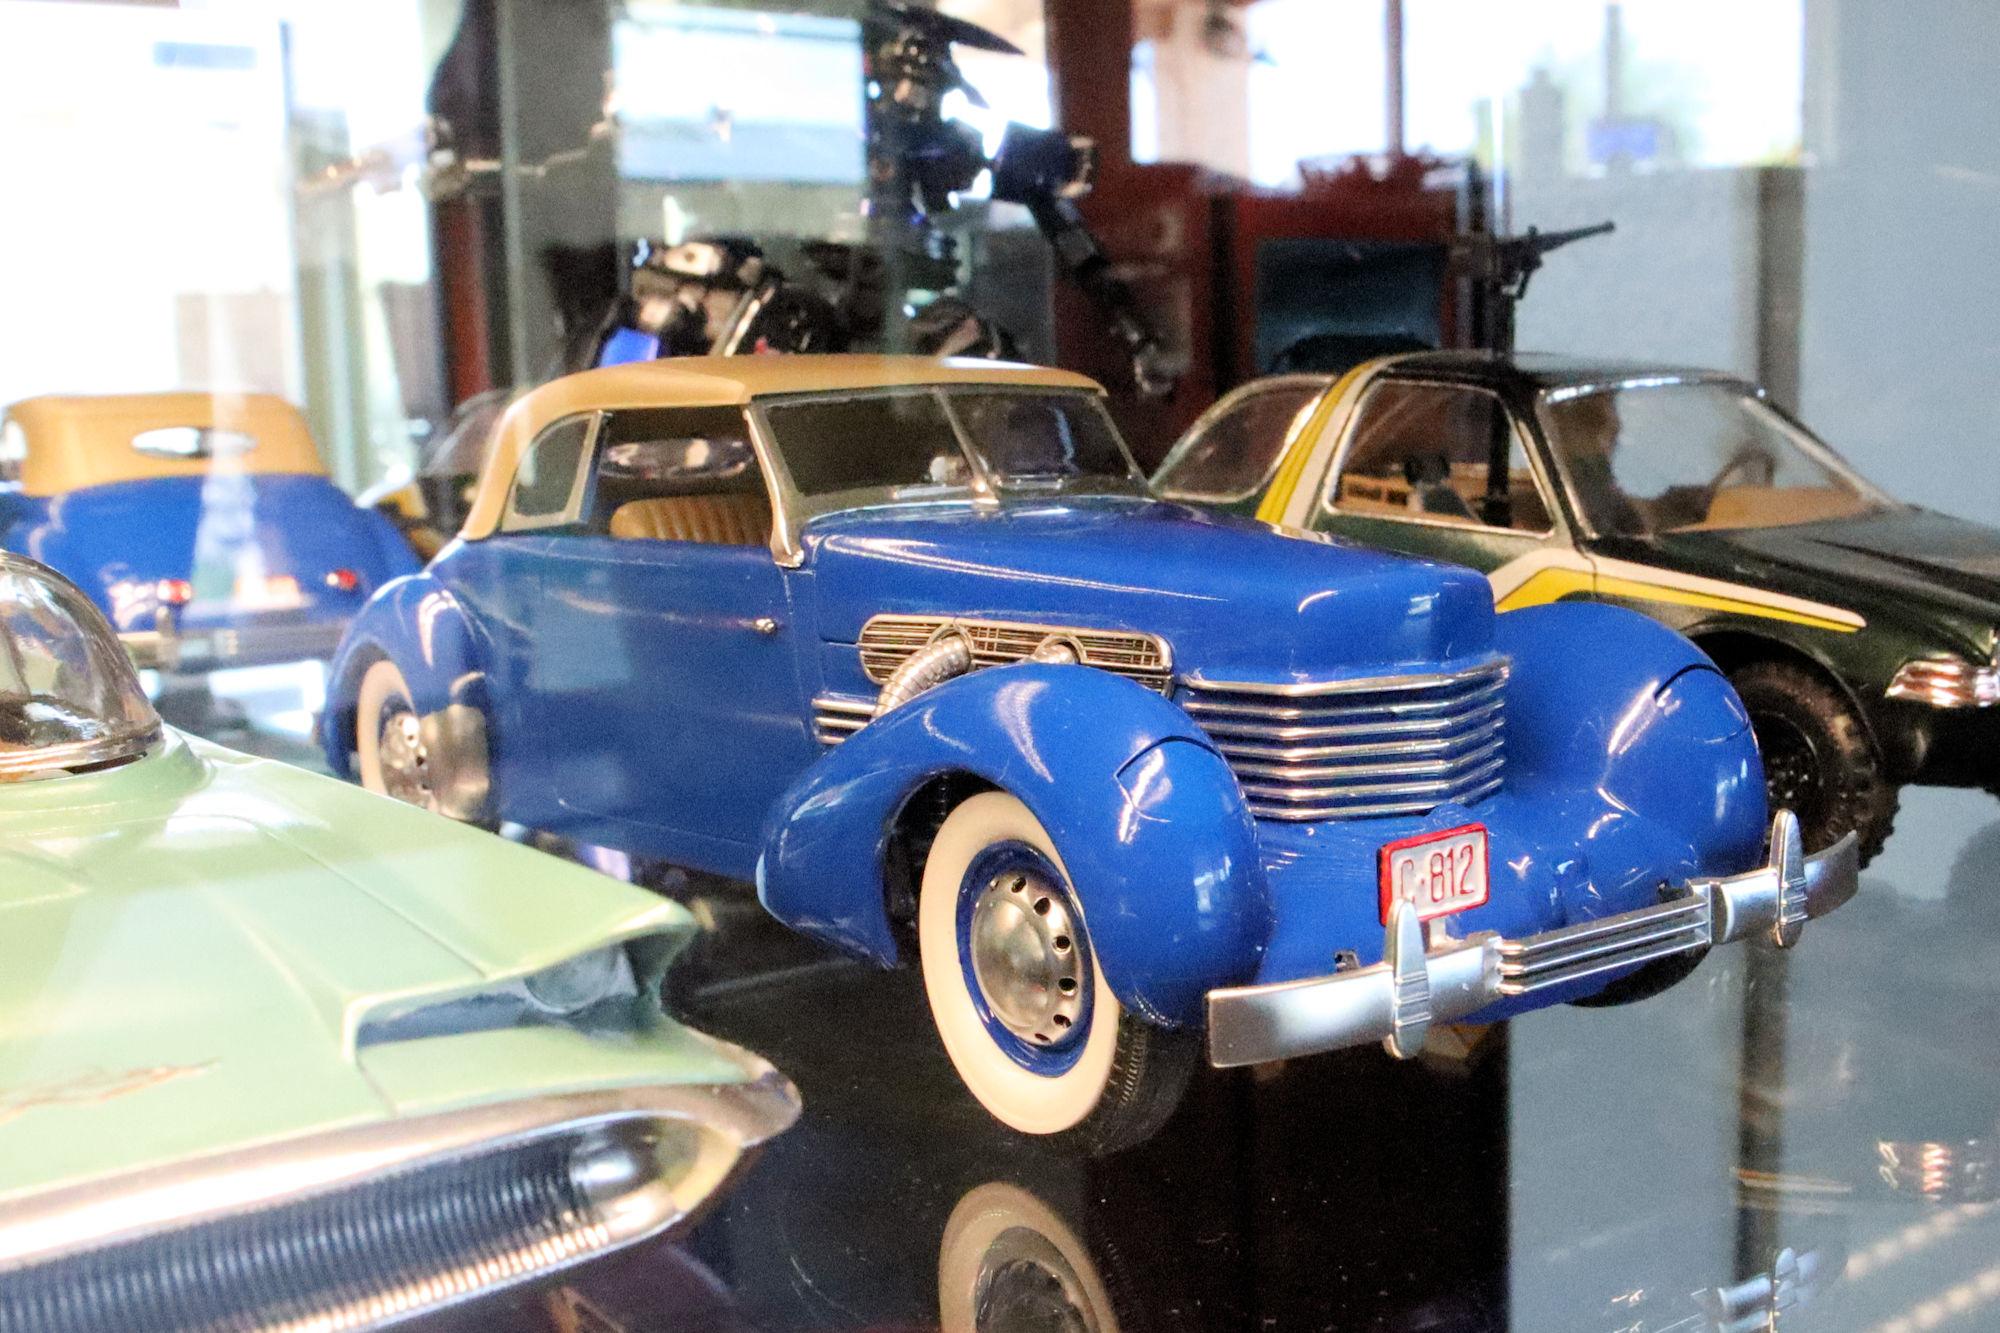
The figures will make a nice addition to your diorama Anton. Seeing those figure with the car in their natural casting color reminded me of many of the architectural renderings I've seen over the years, most of which include human figures for scale. As the rendering is supposed to depict the building in its completed, idealized state, the human figures are often monochromatic silhouettes. The thought occurred to me that it might not be a bad idea to do something similar with figures like this in a diorama setting such as yours. Paint the figures in either a neutral color or maybe painted as typical figures would be but in muted tones so as not to draw too much attention away from the subject. Hmmm... just a thought. I do enjoy painting figures but I may try that at some point. David G.
-
Thank you so much @A modeler named mike I'm glad I was able to change your opinion of the kit. Thank you very much @Tyreman. People can say what they want regarding "zombie threads" and "necro-posts" but it's a nice feeling when these old builds can grab someone's attention again. Thanks for that, David G.
-

8 Car Transporter (71 Mopar’s)
David G. replied to Mopar - D's topic in WIP: Model Trucks: Big Rigs and Heavy Equipment
That's a great commercial-looking color Dan. I also like the weathering you did on the ramps, the wear is very convincing. David G. -
Revell's Peterbilt 359: WIP
David G. replied to David G.'s topic in WIP: Model Trucks: Big Rigs and Heavy Equipment
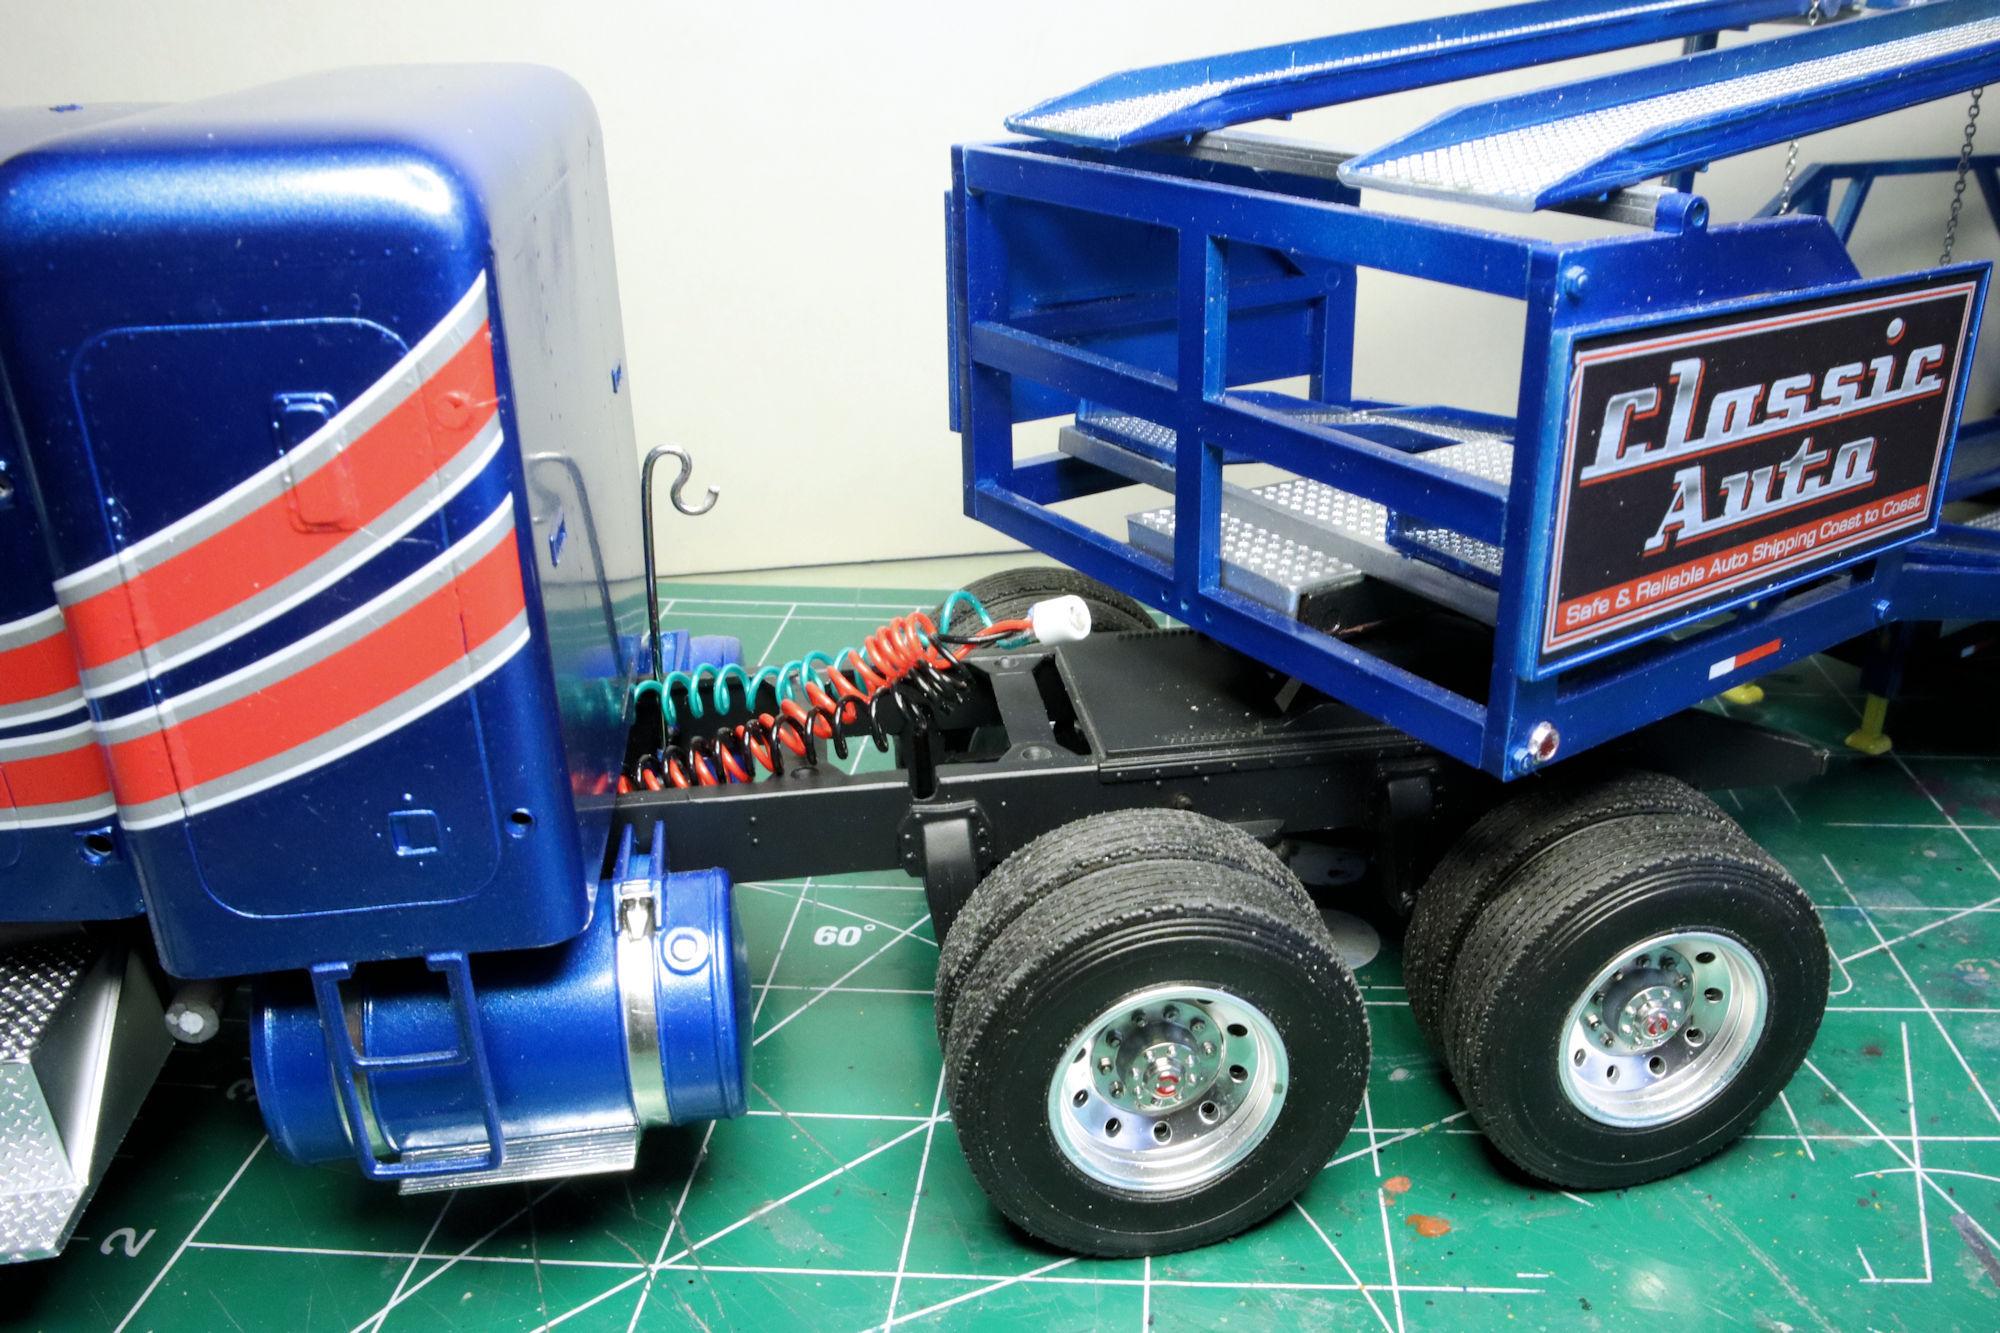
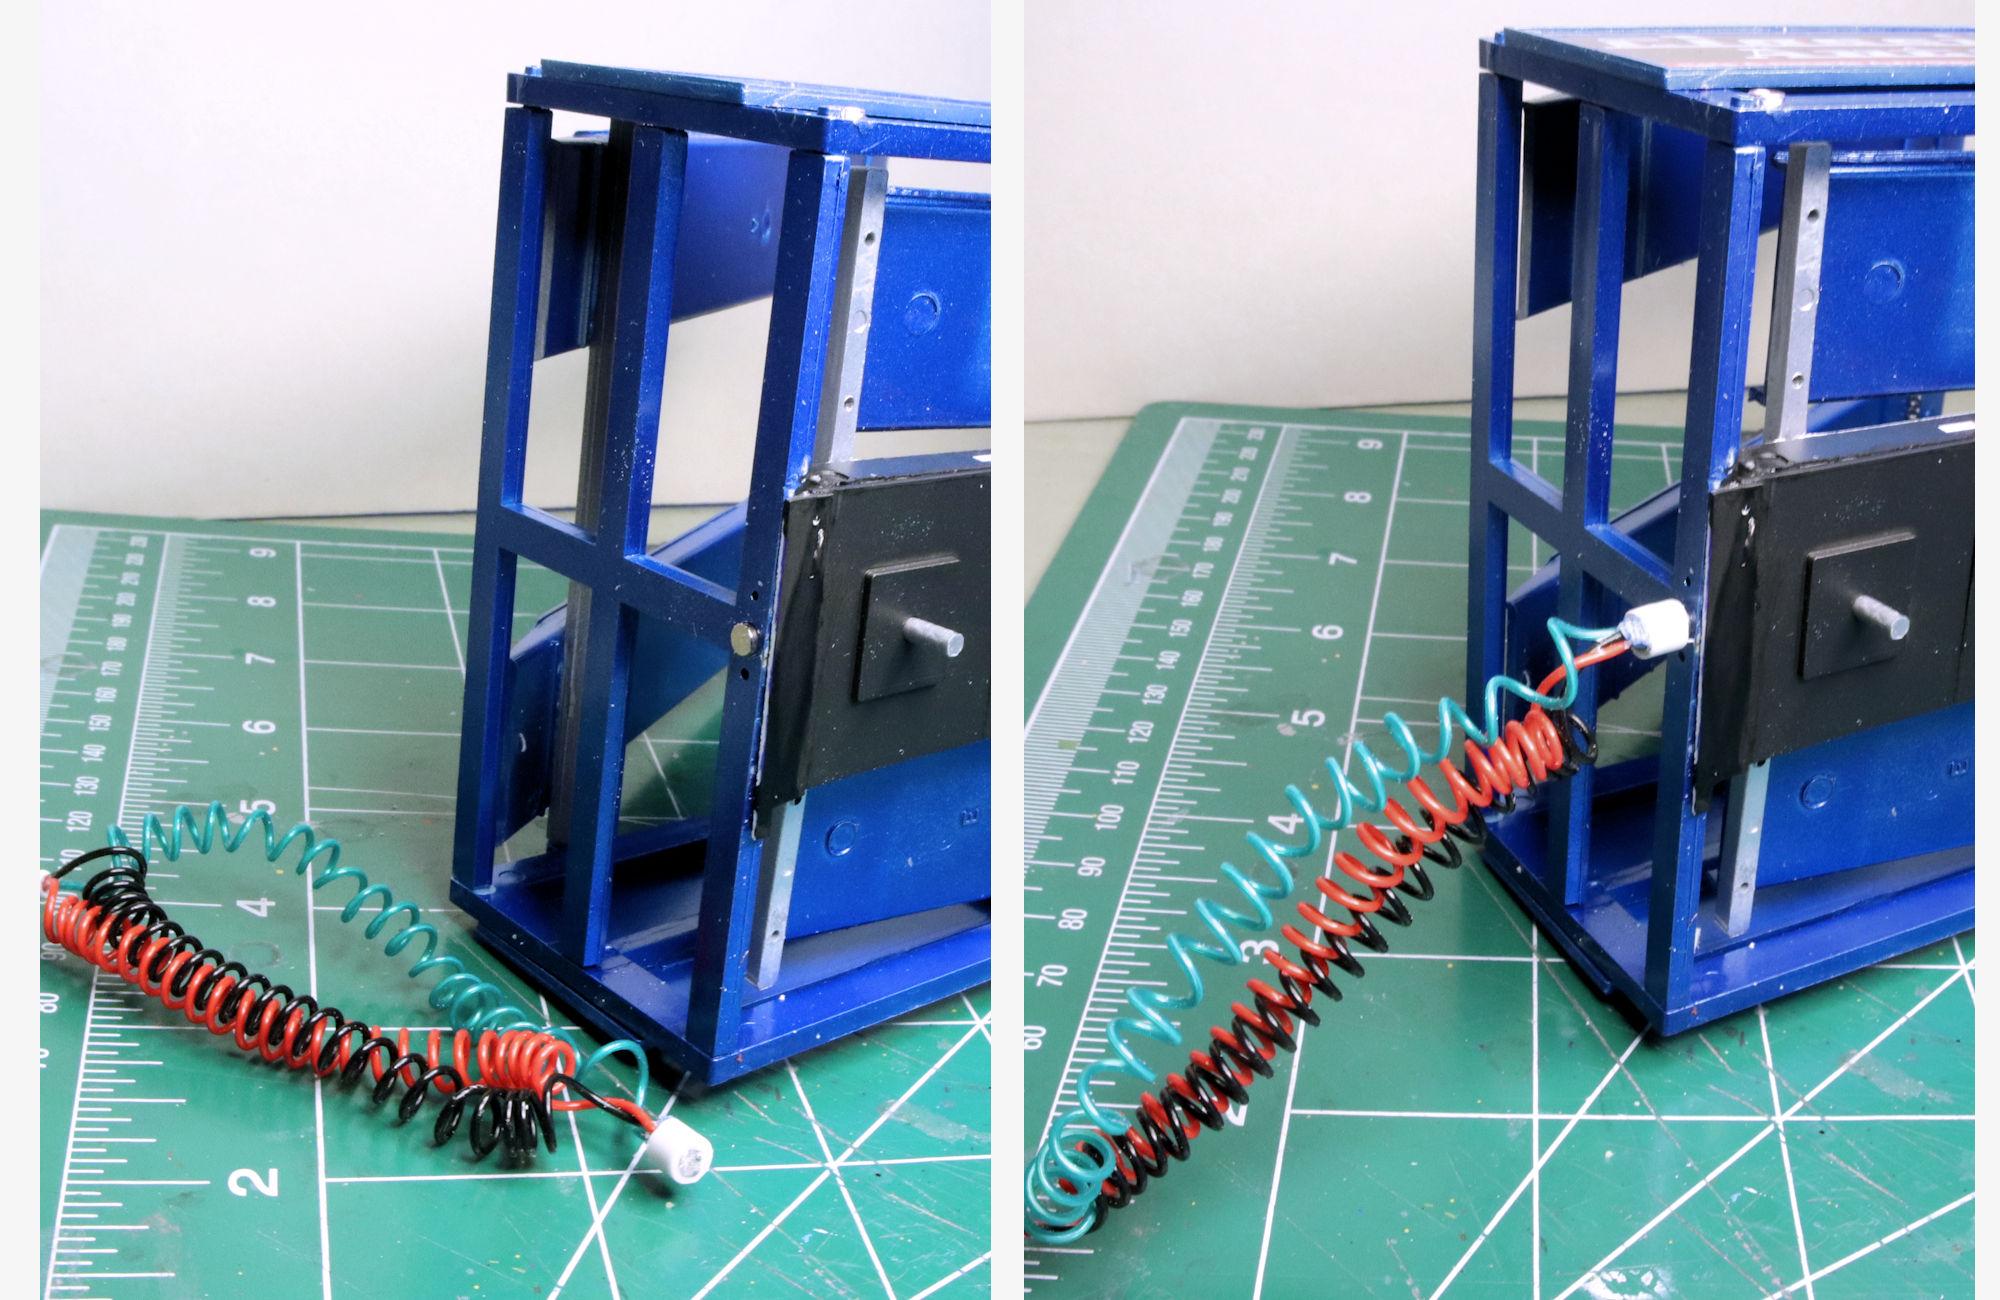
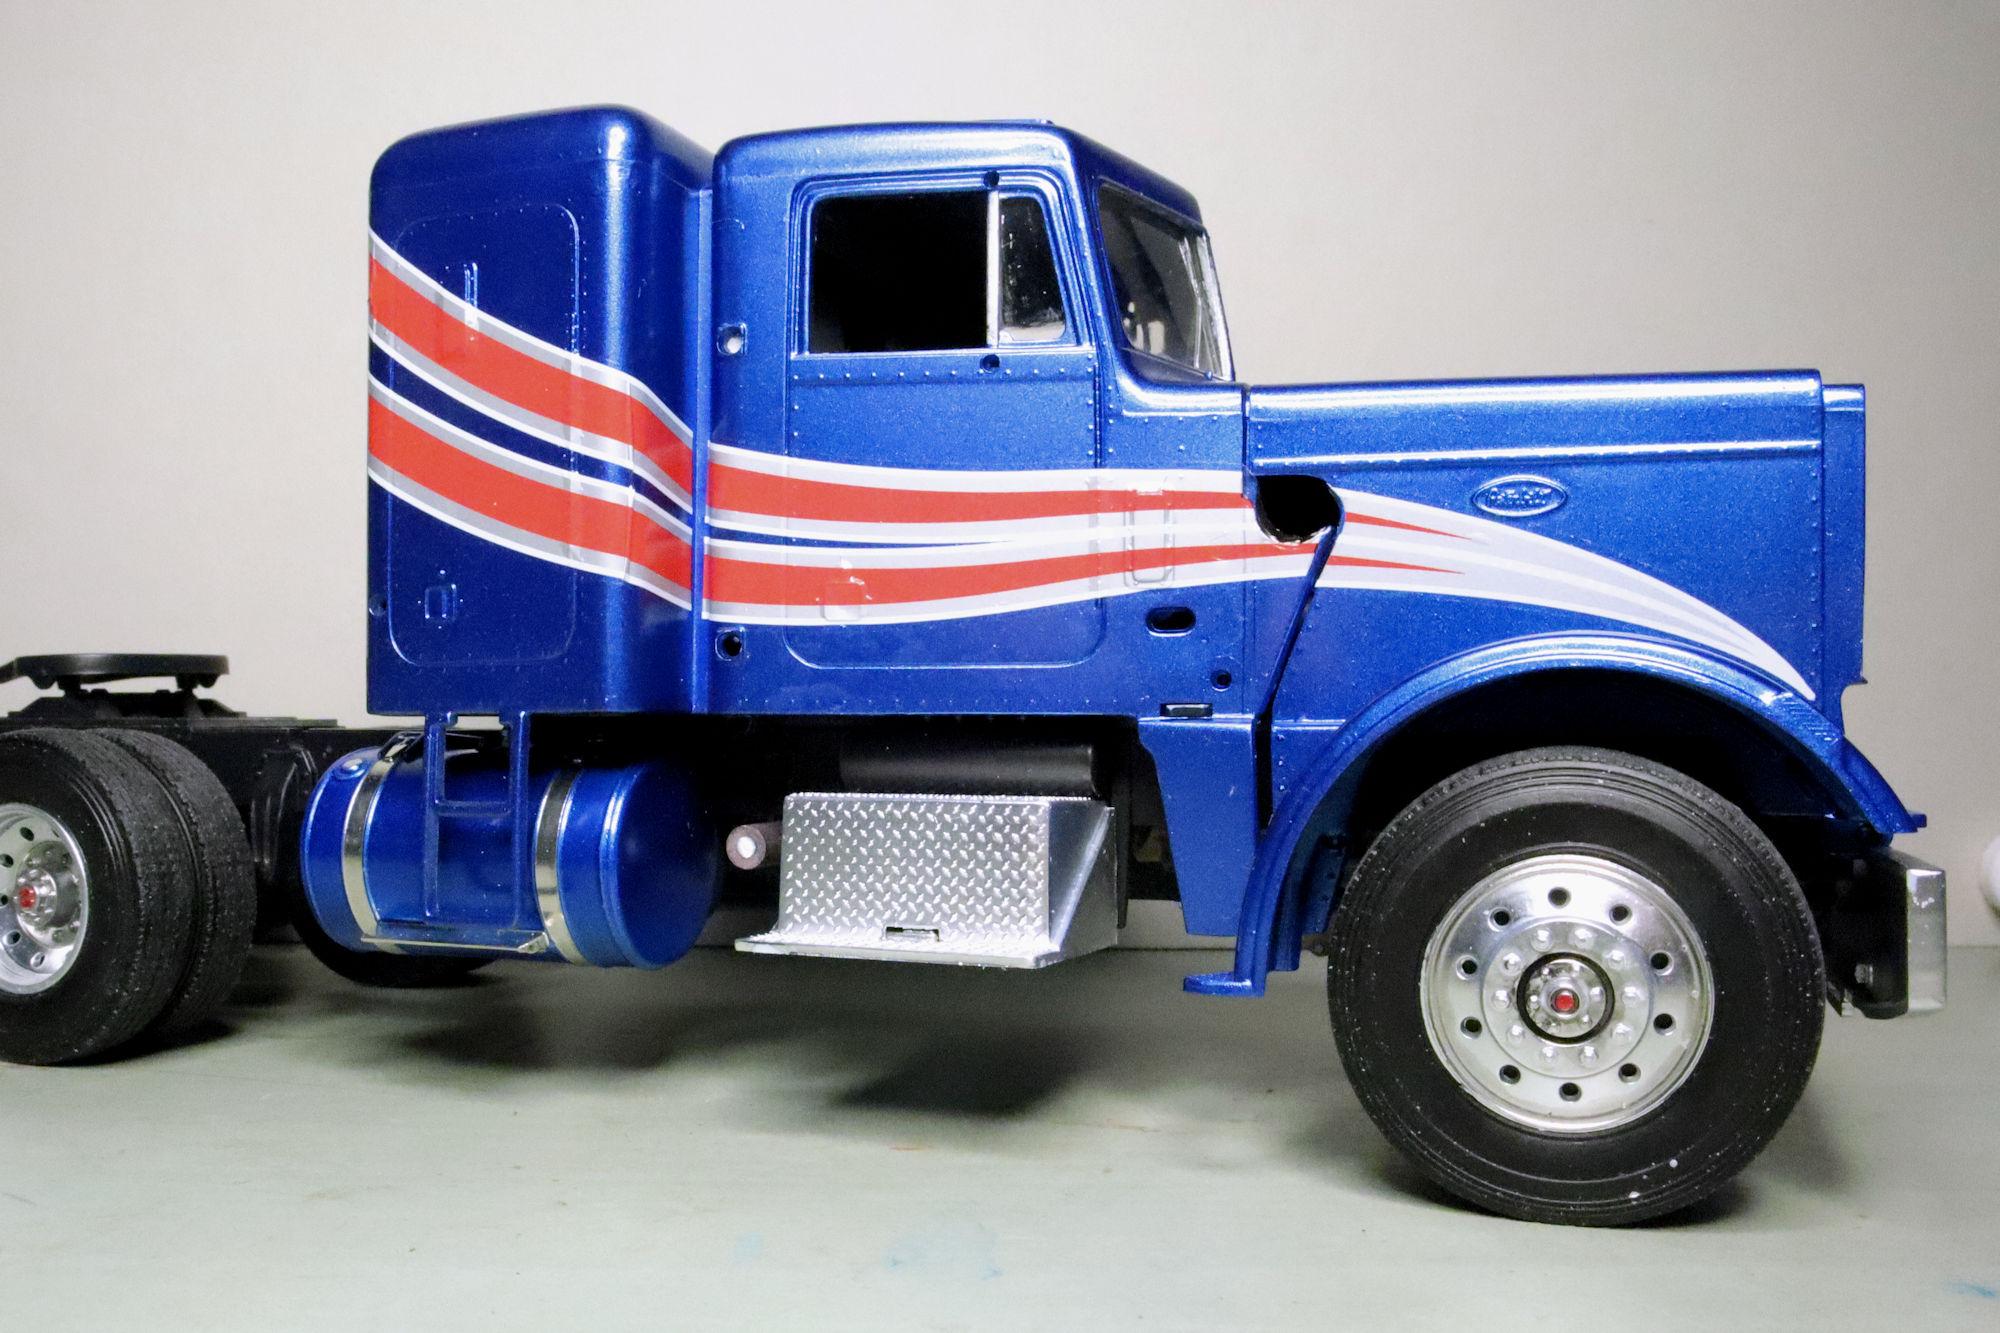
Hello Everybody! I had hoped to have this one completed today. And I probably could have but I decided that I needed some kind of connection between the tractor and trailer. So with some bits of wire, a paperclip, aluminum and styrene tubing and a couple of 3mm magnets, I came up with this. With most of the fittings assembled and installed, I just needed to drill a hole in the trailer to install the receiver magnet. The receiver magnet gives an easy and positive connection point. I also added a strip of styrene to reinforce the connection between the trailer frame and cage. I'll touch up the paint later. The green wire just wasn't working well so I removed it. I also took the time to make those tab slots look a bit more like tail lights. It took several build sessions but I think the end results are worth the effort. And there's still time so I may get a chance to finish this one up today. We'll see. As always, thanks for taking the time to look and please feel free to post any comments you may wish to share. David G.
-
That interior is awesome! Now that you have the paint all polished up, it makes a world of difference. Just remember, it's a hobby and the point is to have fun and get better as you go along. As I say: "Each kit I build is really only practice for the next one!" =D-
-
You'll learn to read the blade. With practice, you can learn to feel the resistance of cutting just the foil. A little touch up paint might work well. Thin it down a little and do some practice strokes somewhere where they won't be seen or on a practice body. David G.
-
Revell's Peterbilt 359: WIP
David G. replied to David G.'s topic in WIP: Model Trucks: Big Rigs and Heavy Equipment
Thank you Germán, I should have more pics to post tomorrow. =D- -
Revell Peterbilt 359 Conventional
David G. replied to Brenton's topic in WIP: Model Trucks: Big Rigs and Heavy Equipment
Nicely done! David G. -
That dresses up the scene nicely. David G.
-
That looks like a great first attempt Anton! With practice and patience you'll ger even better. David G.
-
What a cool looking mashup this promises to be! With that Corvair boxer in the back, those large rear tires and short wheel base, it'll be one mean wheelie machine! 😮 David G.
-
Hello Everybody! As many of you may already know, I like to upload photos in small blocks of no more than 5 or 6 at a time. I do it this way for a couple of reasons. First, I don't always have all the photos ready at the same time. Taking the photos and editing them to be suitable for uploading can present me with certain challenges and sometimes getting everything pulled together takes a little longer than I would like. Second, I often find the "wall of photos" posts a little overwhelming. When looking at such posts, my mind can really only appreciate the first 10 to 12 photos. After that, my brain stops processing the "newness" of the experience and I begin to lose interest in what I'm looking at. Uploading the photos in small blocks helps to avoid imposing the possibility of this situation on others. Allowing them the option of coming back to see more photos (or not) as they choose. So, thanks for your patience with my situation and my explanation of it. And... maybe there's a third reason too. It's just a hobby and this is how I choose experience it, enjoy it and express it. Again, thanks for your patience. On with the show! Right rear 3/4 view. The bumper doesn't look so crooked from here! Right side view. I think I found the cover shot. The engine bay. Fitting these header tubes was a challenge to say the least. Some dash detail. (Ignore the fuzz.) The undercarriage. Not much to see but there it is. Finally, my traditional Display Case photo. A sincere thanks to all of you who supported me throughout this build with your encouraging, insightful and supportive comments. David G.
-
Thank you very much Ken. Thank you kindly Carl. =D-
-
Revell's Peterbilt 359: WIP
David G. replied to David G.'s topic in WIP: Model Trucks: Big Rigs and Heavy Equipment
Thank you most kindly Gary. =D- -
Revell's Peterbilt 359: WIP
David G. replied to David G.'s topic in WIP: Model Trucks: Big Rigs and Heavy Equipment
Hello Everybody! I'll be on summer vacation for the coming week so I've been working on getting this one wrapped up before Sunday so I can leave with a clean deck and return with a clean slate. We'll have to see how that goes. First application of decals... The "Big-N-Uglies" They still need a little working to get them to lie down properly. After a couple of days of working the "Big-N-Uglies" into place, I applied the other decals. Aside from some cleanup and detail painting this side is done (as far as decals go). And I still have one more side to do! 😮 I think it's cool that the blue stars match the body color well enough that they look like cutouts. As always, thanks for taking the time to look and please feel free to comment. David G.
-
It's nice to see this one back in play. What part did you use the BMF on? David G.
-
Thank you very much Trevor. =D-
-
Thank you. Fair winds and following seas for you.
-
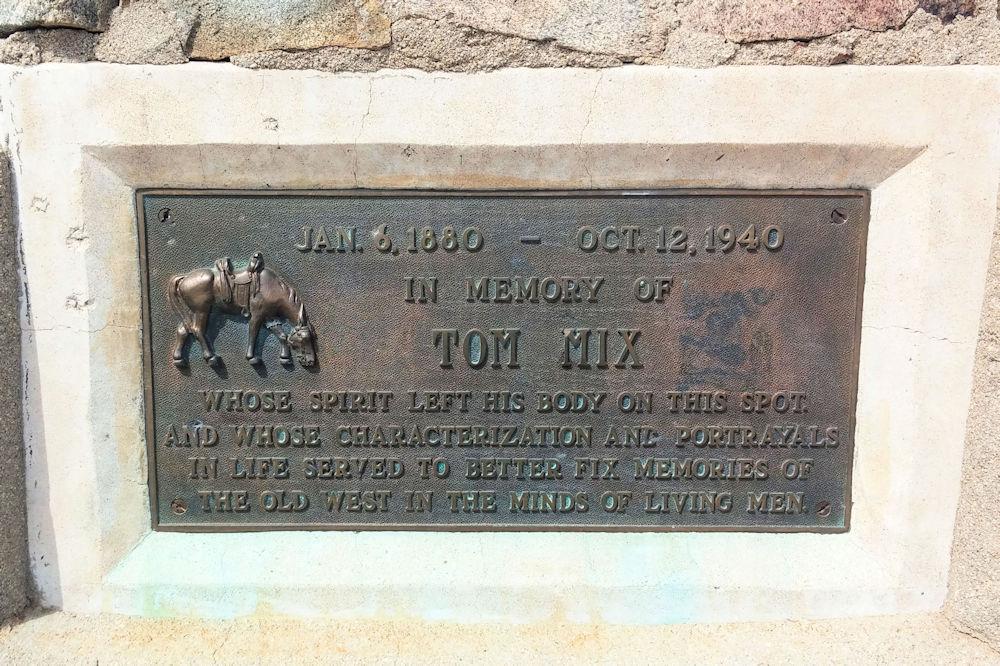
Thank you kindly Claude. Thanks Tony, I appreciate that. Thank you @89AKurt Kurt. That should be an interesting build. I don't recall that anyone has ever built a replica of his car. I remember that story about Tom Mix. Back in 2015 we stopped at his memorial site in Florence, AZ on out way to the Biosphere 2. Thank you Tom, it would be nice seeing a re-pop of this series. If the molds still exist. Tossing those out is a bit of a bummer but we've all discarded things we wish we hadn't. I guess that's why they become valuable... eventually. Thank you very much David. Thank you Larry. Thanks again to everybody who commented. David G.
-
Revell's Peterbilt 359: WIP
David G. replied to David G.'s topic in WIP: Model Trucks: Big Rigs and Heavy Equipment
Thank you Carl. =D- -
Everything looks good. The roof is coming together quite nicely. It does feel good to be making steady progress on a project like this, doesn't it David? Enjoy your holiday, we ourselves are leaving for a week in the mountains on Monday. Safe travels! David G.
-
Thanks Chris. David G.
-
Thanks Bob, that's most kind of you to say. =D-
-
Thank you Greg. I'm glad to know that someone will find the information in this thread useful. Thank you John Thanks Michael. Thank you John @papajohn97. Yeah, I just couldn't live with the red plastic that the kit was cast in; I thought the blue looked good and would be dark enough to sufficiently cover the red. In some form or another, I use all the methods you described for working with chromed parts. Which one I use depends largely on how the chrome looks when I pull it out of the box. For this kit, the chrome looked pretty good so I used my most basic technique wherein I spray the part with Tamiya dull coat, do my detail painting, clean up & repair any casting artifacts, etc. When that's done I hit it with Tamiya clear. This is the only kit of this series that I've had the pleasure to build and it was indeed a pleasure. The only complaint I have is the lack of locater pins for the manifold tubes. Fitting those was without question the most challenging part of the build. But yeah, if I see any other kits of this vintage from this series, I do plan on picking them up. Thank you so much for your comment. Thank you kindly Carl. Thank you Dennis. Thanks Jim, I appreciate that. Thanks Glen, besting (or at least bettering ) the box art is always a goal of mine. Thanks Mathias. Thank you all for your kind and thoughtful comments. David G.