David G.
-
Posts
11,326 -
Joined
-
Last visited
Content Type
Profiles
Forums
Events
Gallery
Everything posted by David G.
-

8 Car Transporter (71 Mopar’s)
David G. replied to Mopar - D's topic in WIP: Model Trucks: Big Rigs and Heavy Equipment
It looks great Dan! I see the hydraulics junctions there on the desk. I'm curious to see how you place and route the lines. David G. -
You have some really cool mods going for this one Bob. It's always fun watching you knock these together like this. David G.
-
Revell's Auto Transport Trailer: WIP
David G. replied to David G.'s topic in WIP: Model Trucks: Big Rigs and Heavy Equipment
This one is completed and I've posted the final photos in the Under Glass section. Here's a link. Thanks again to all of you who took the time to offer your kind, inciteful and informative comments throughout this build. David G. -
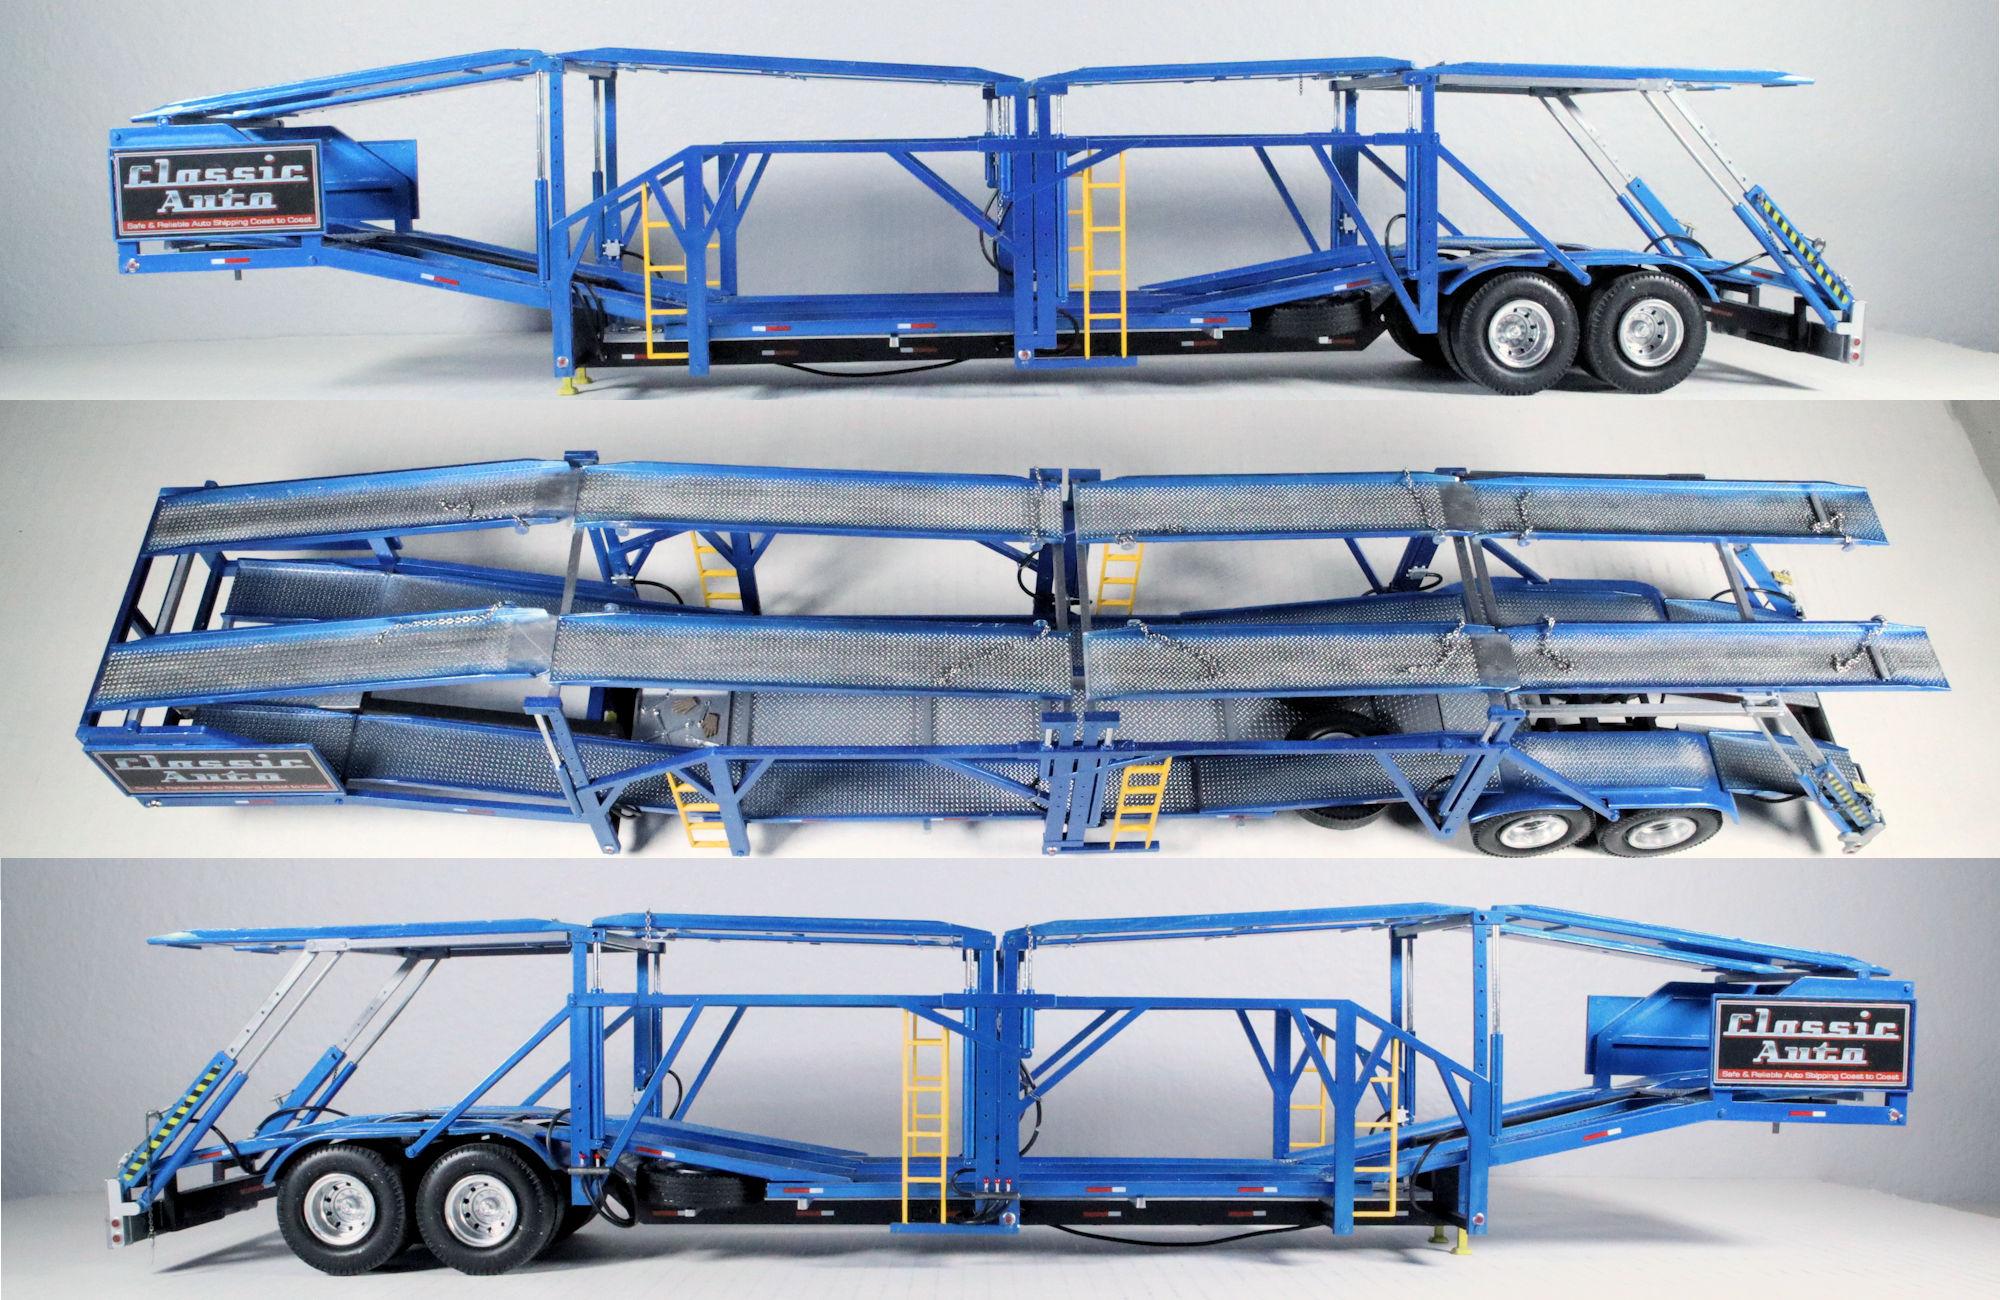
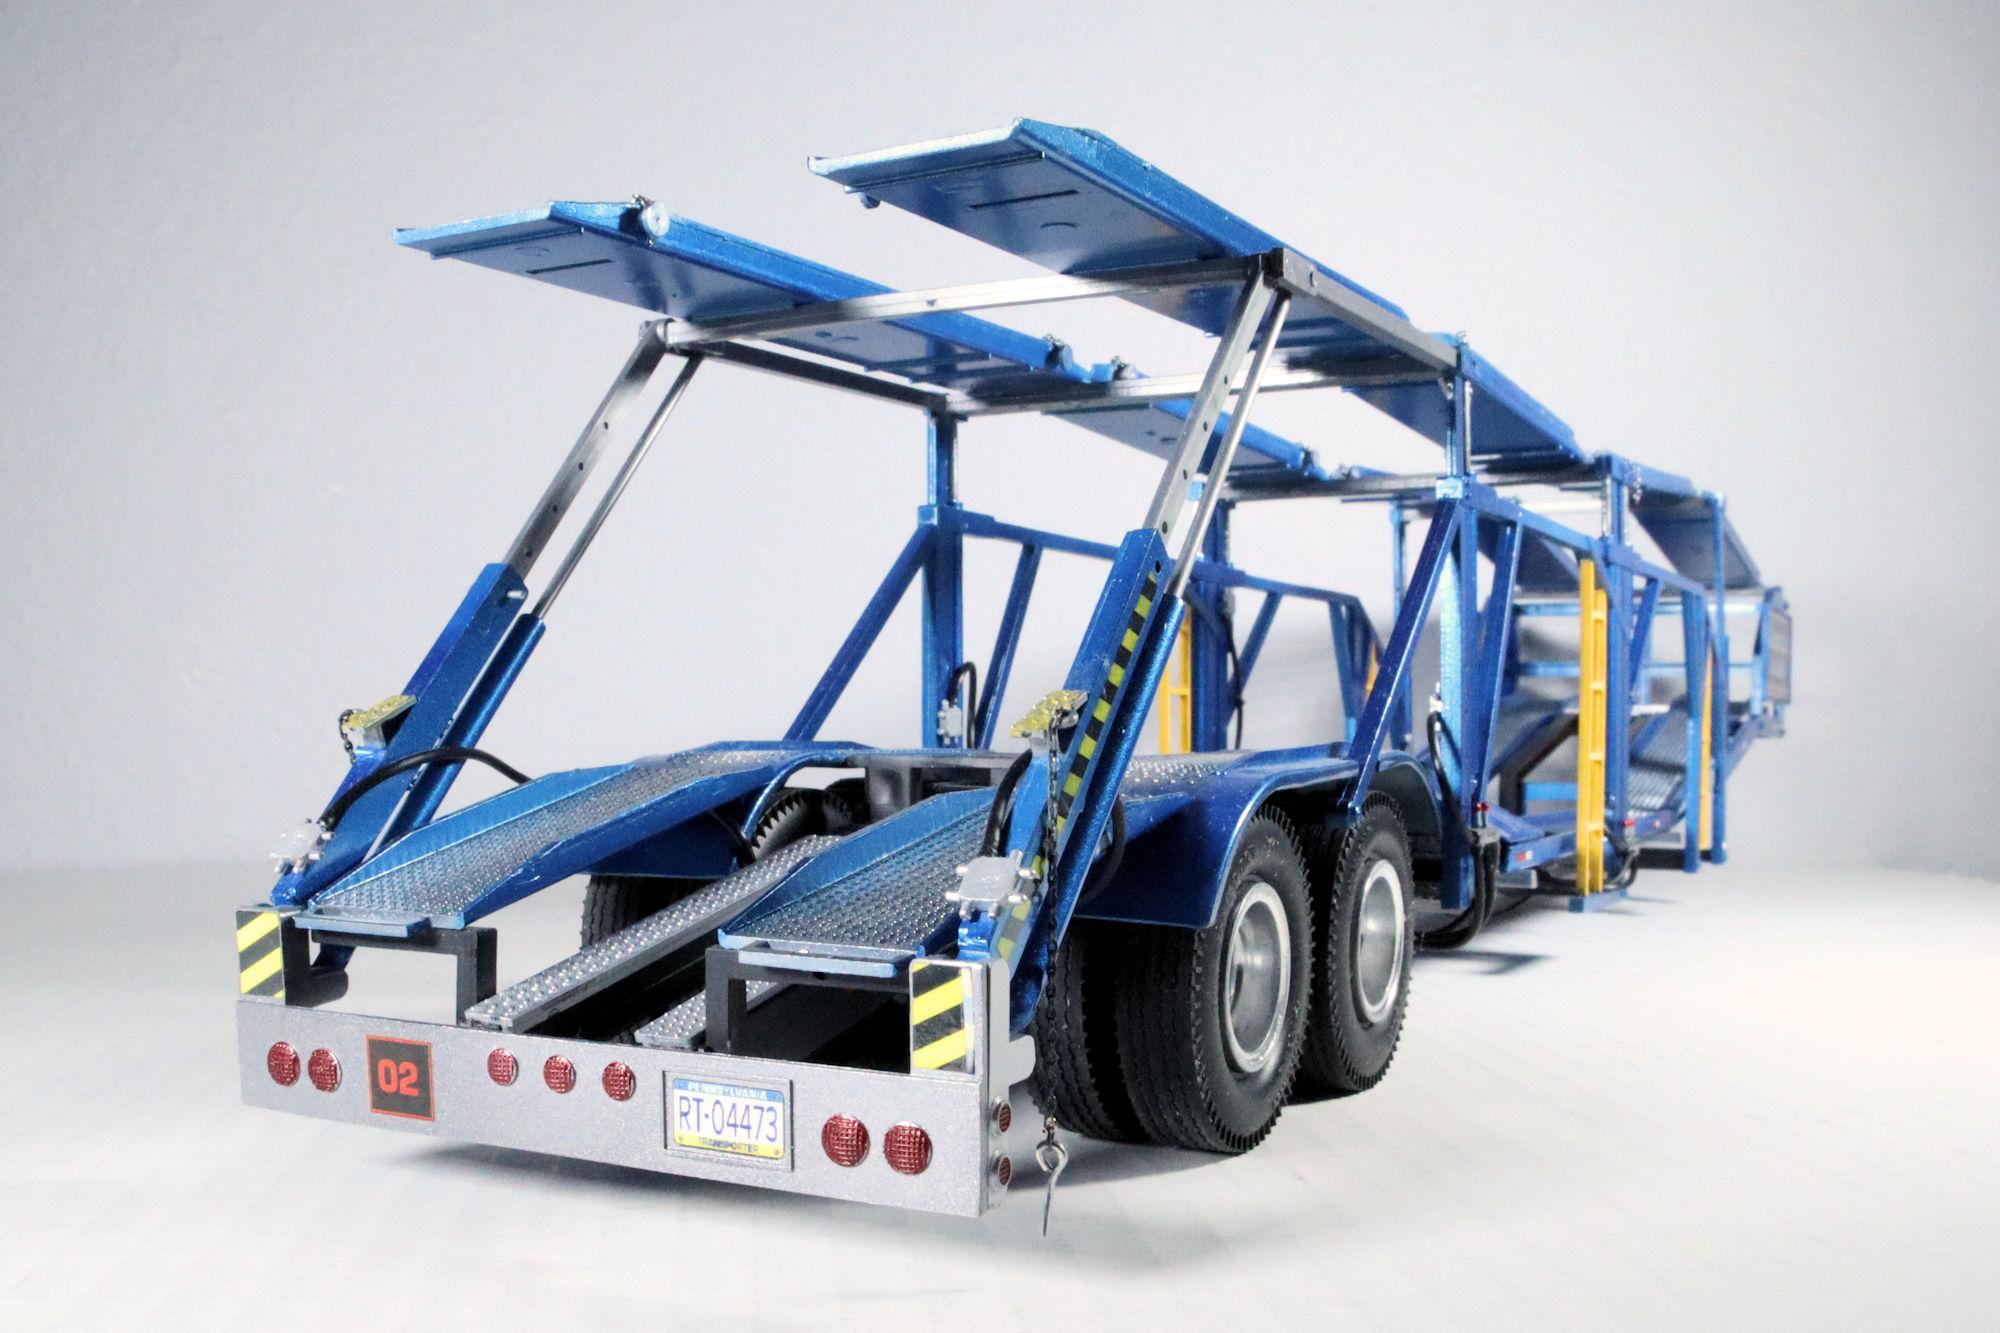
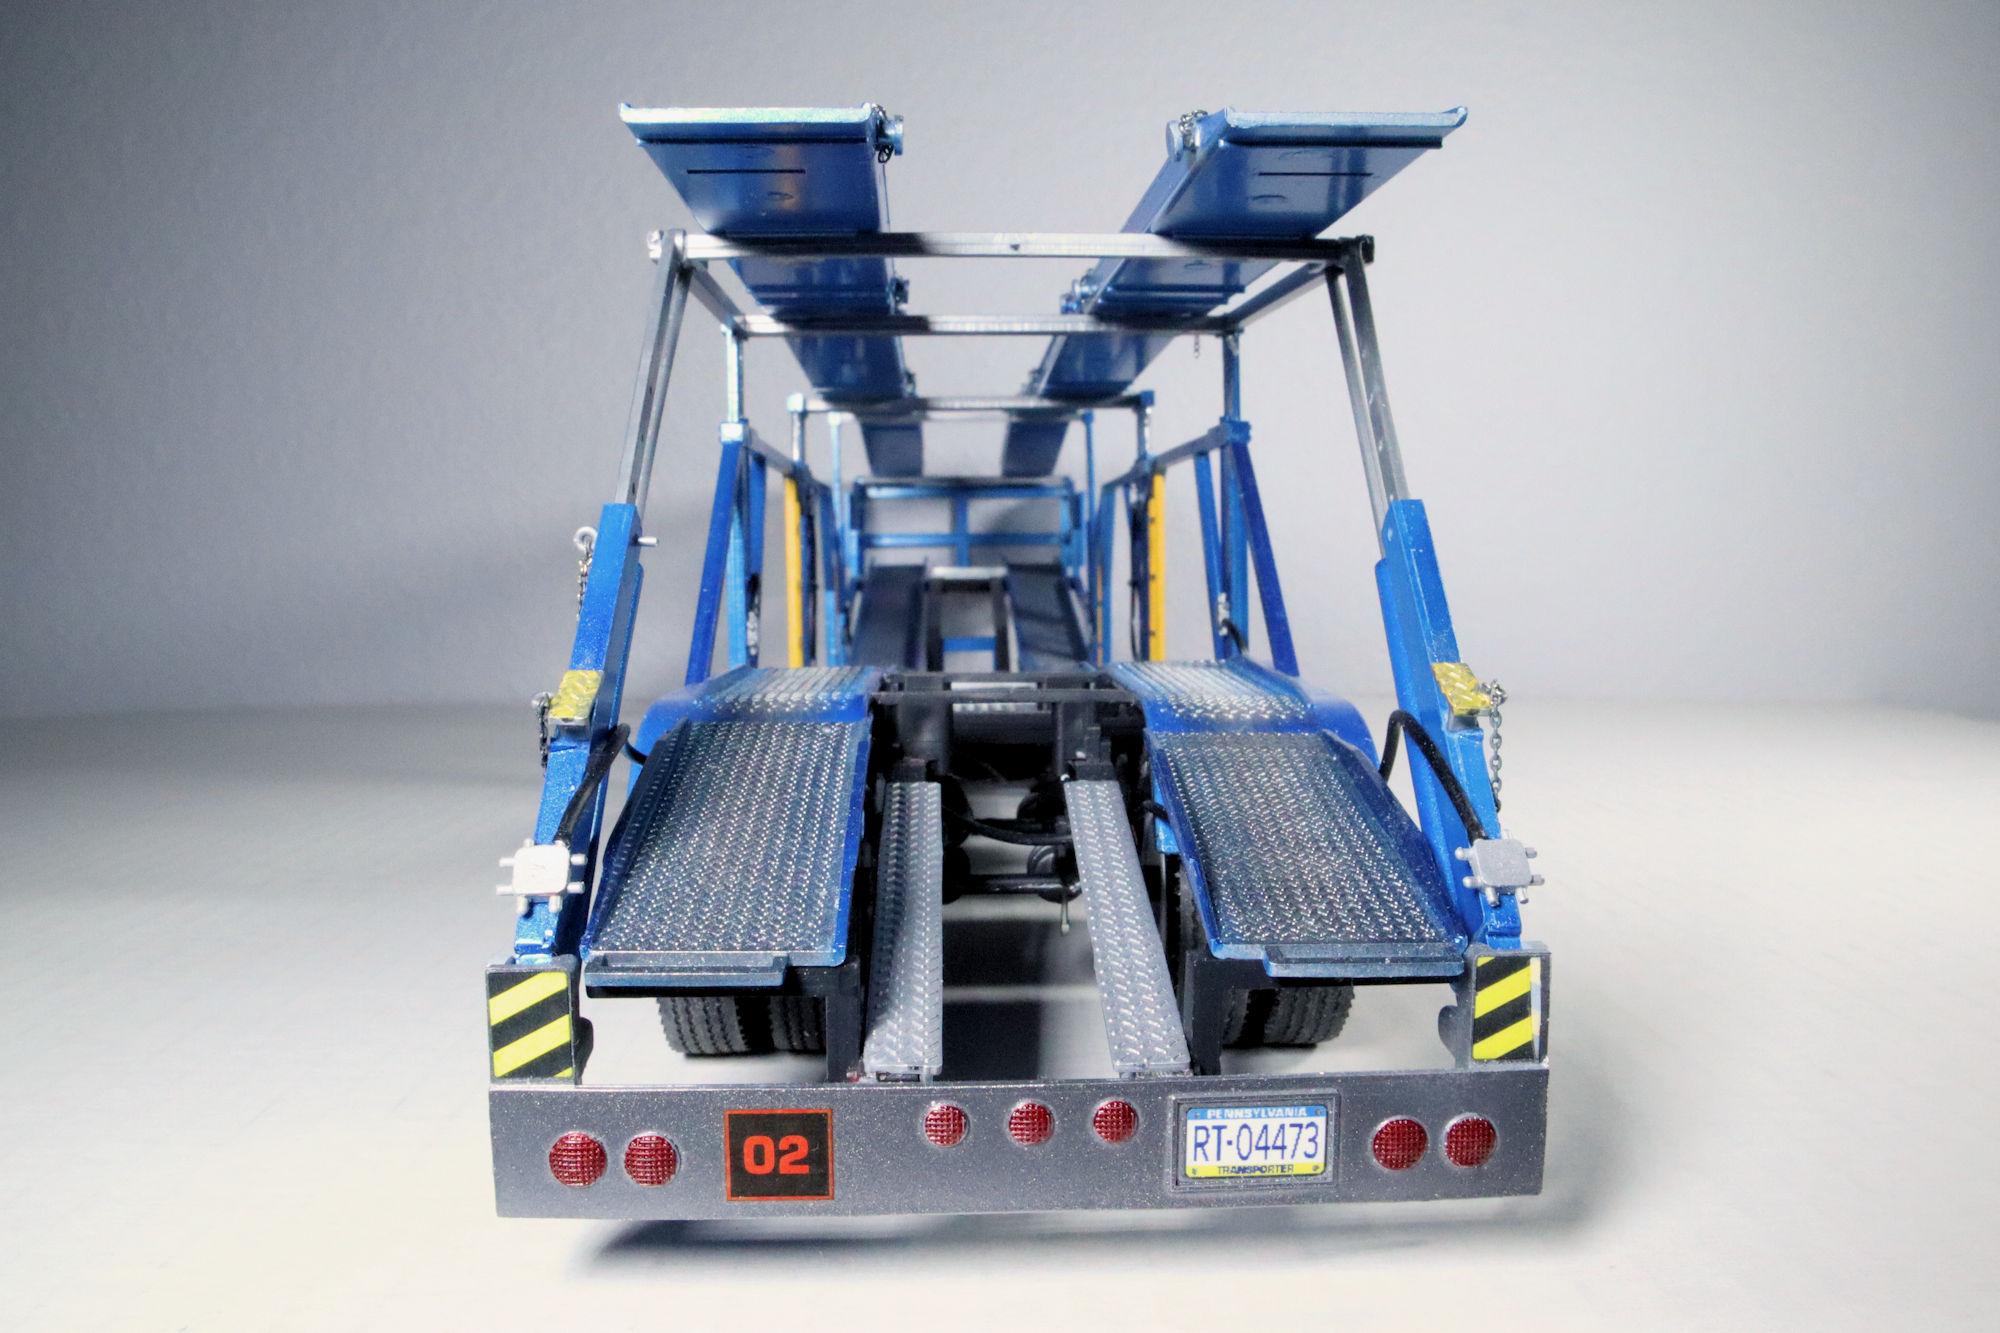
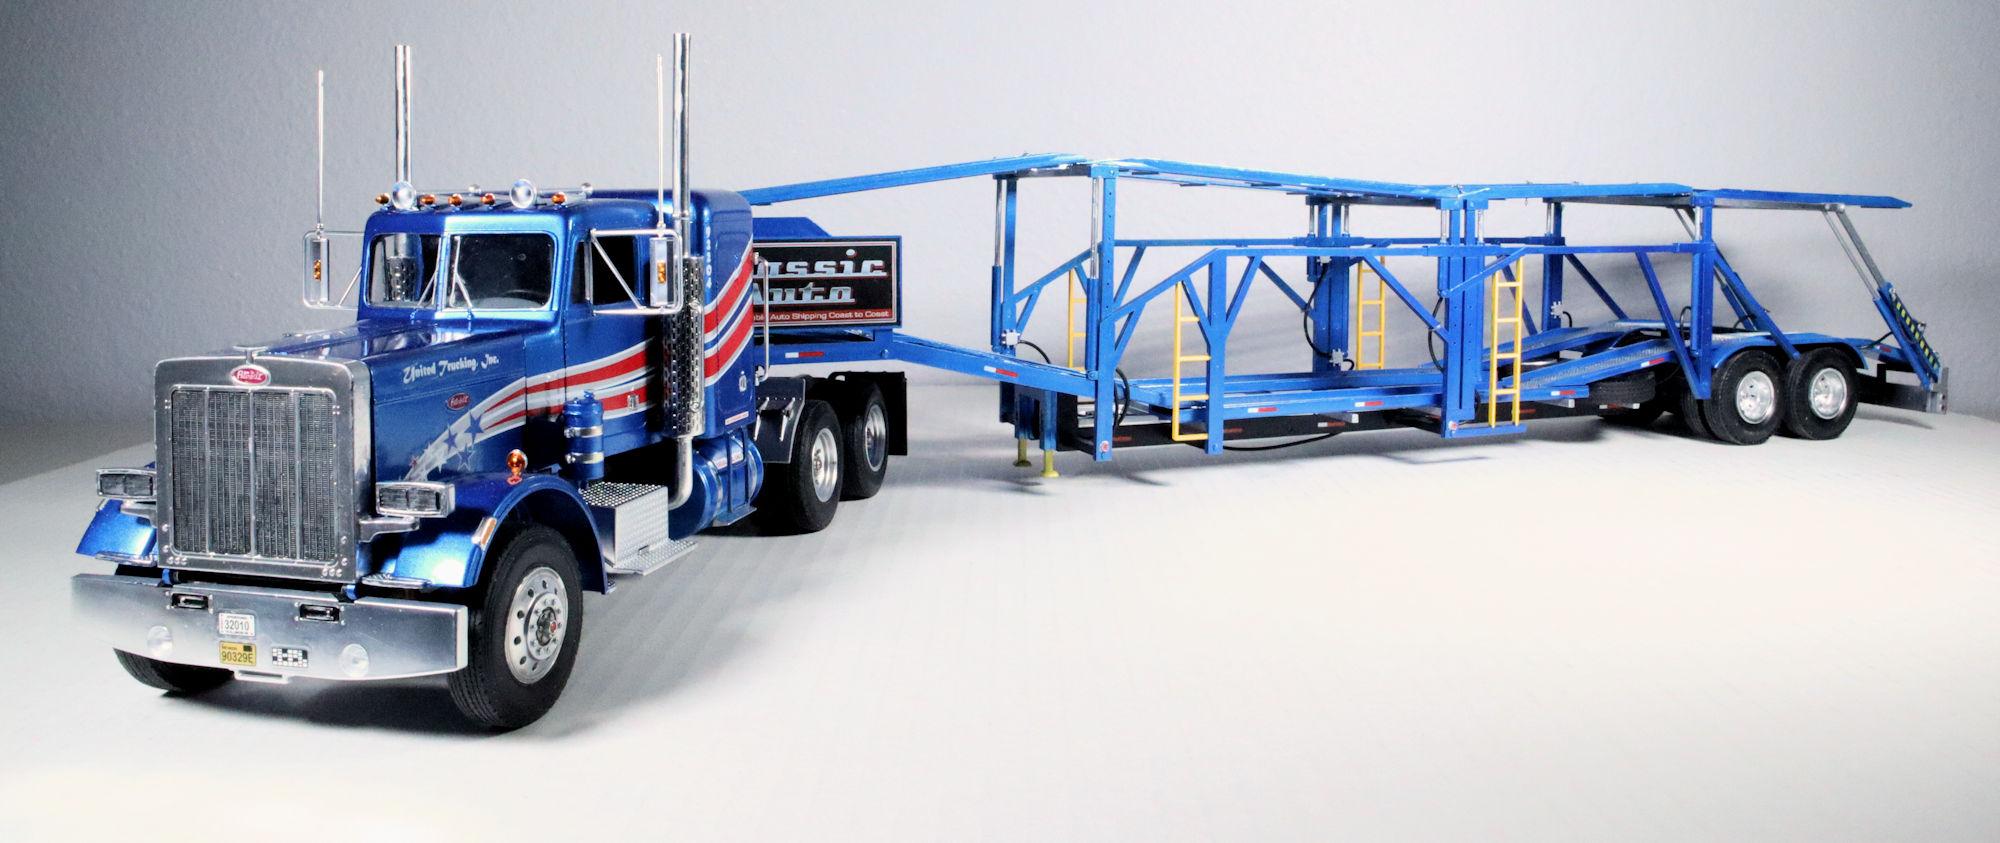
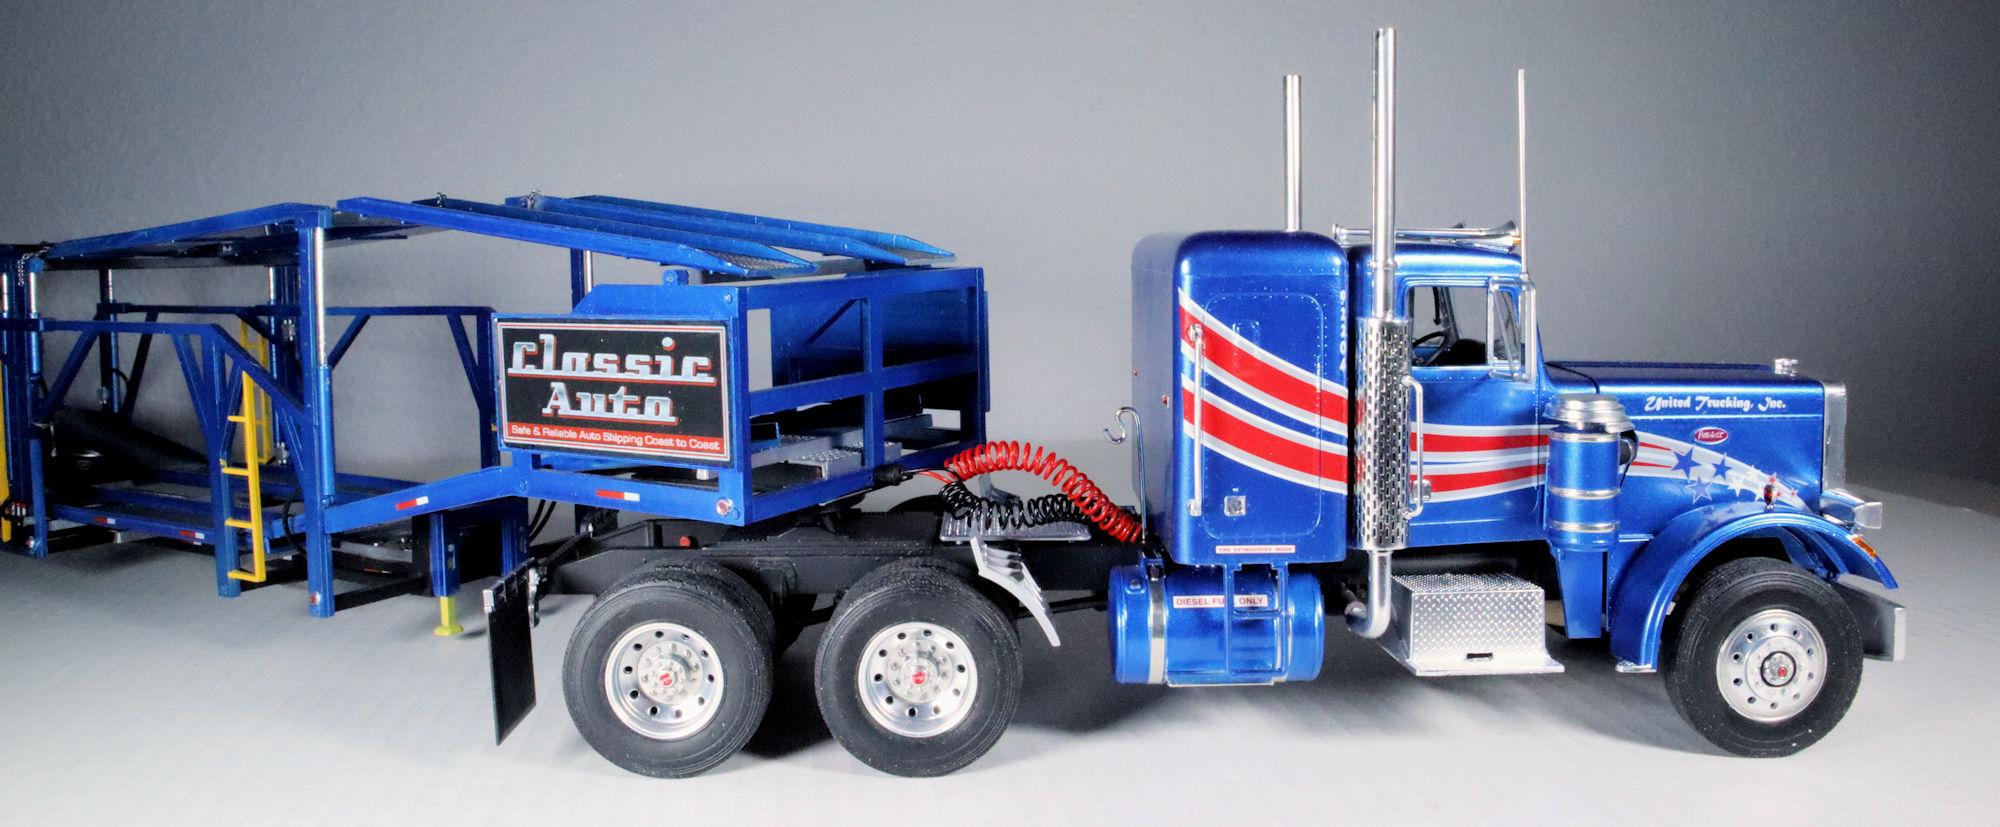
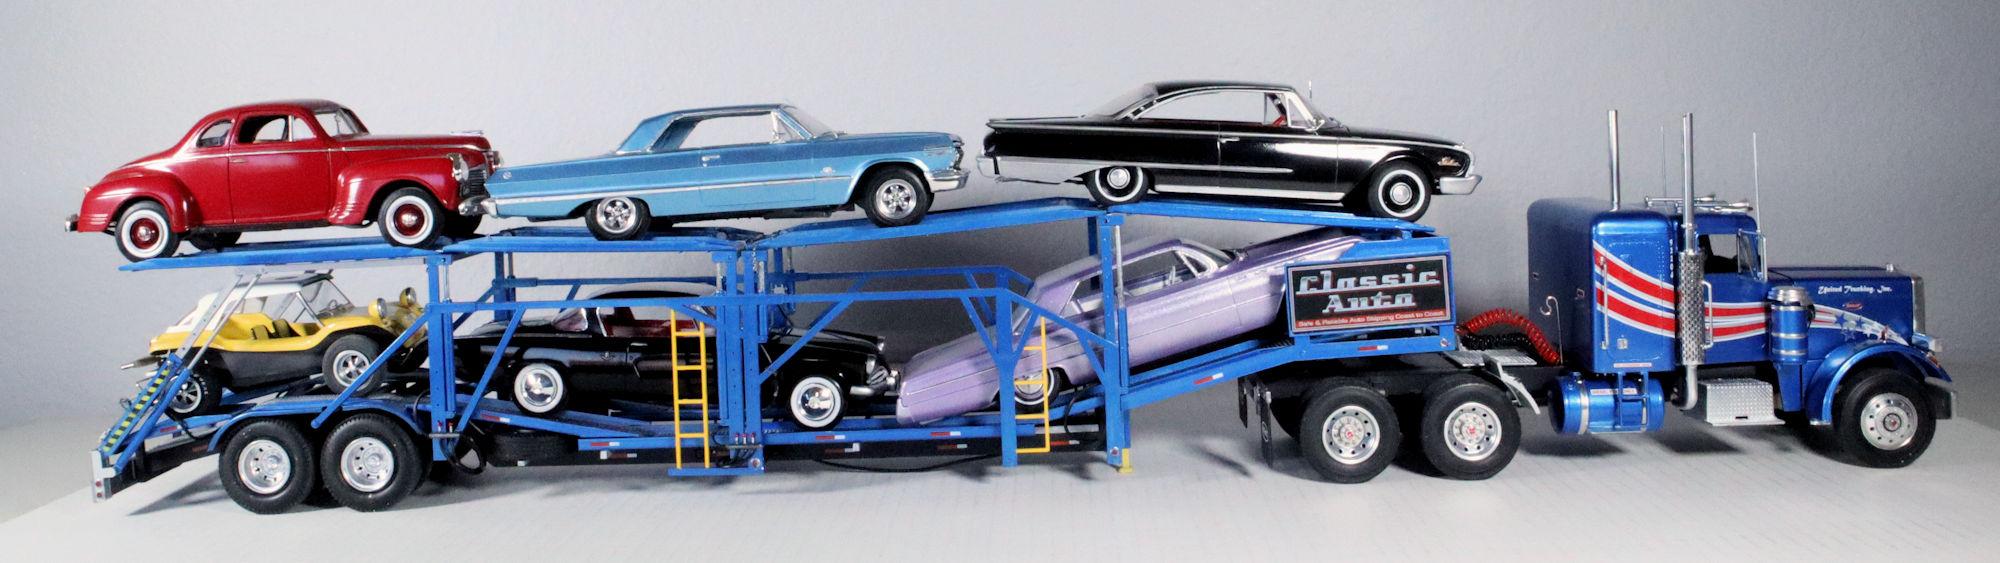
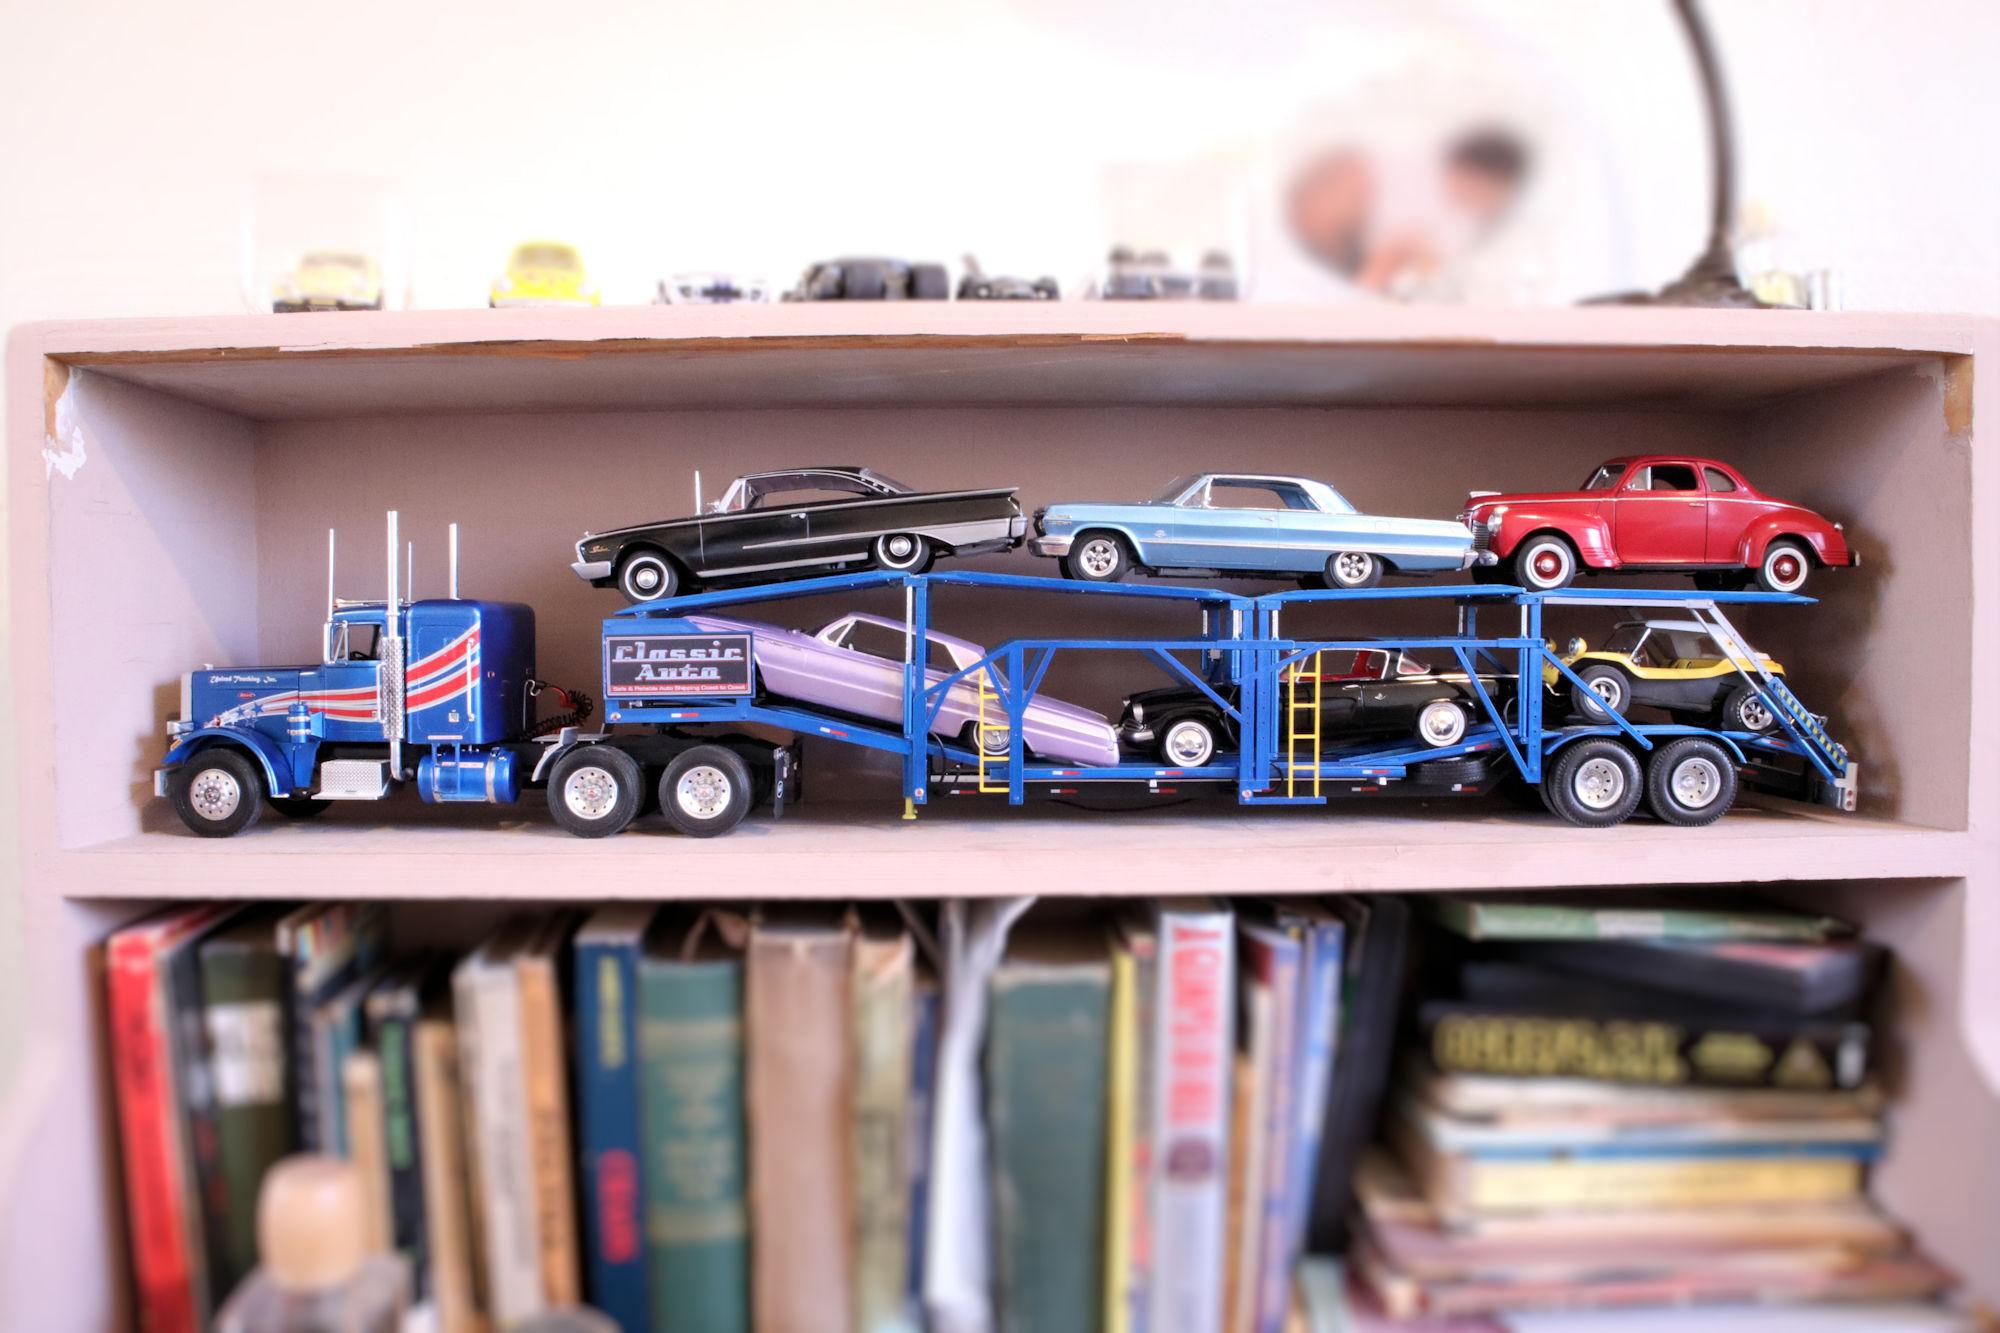
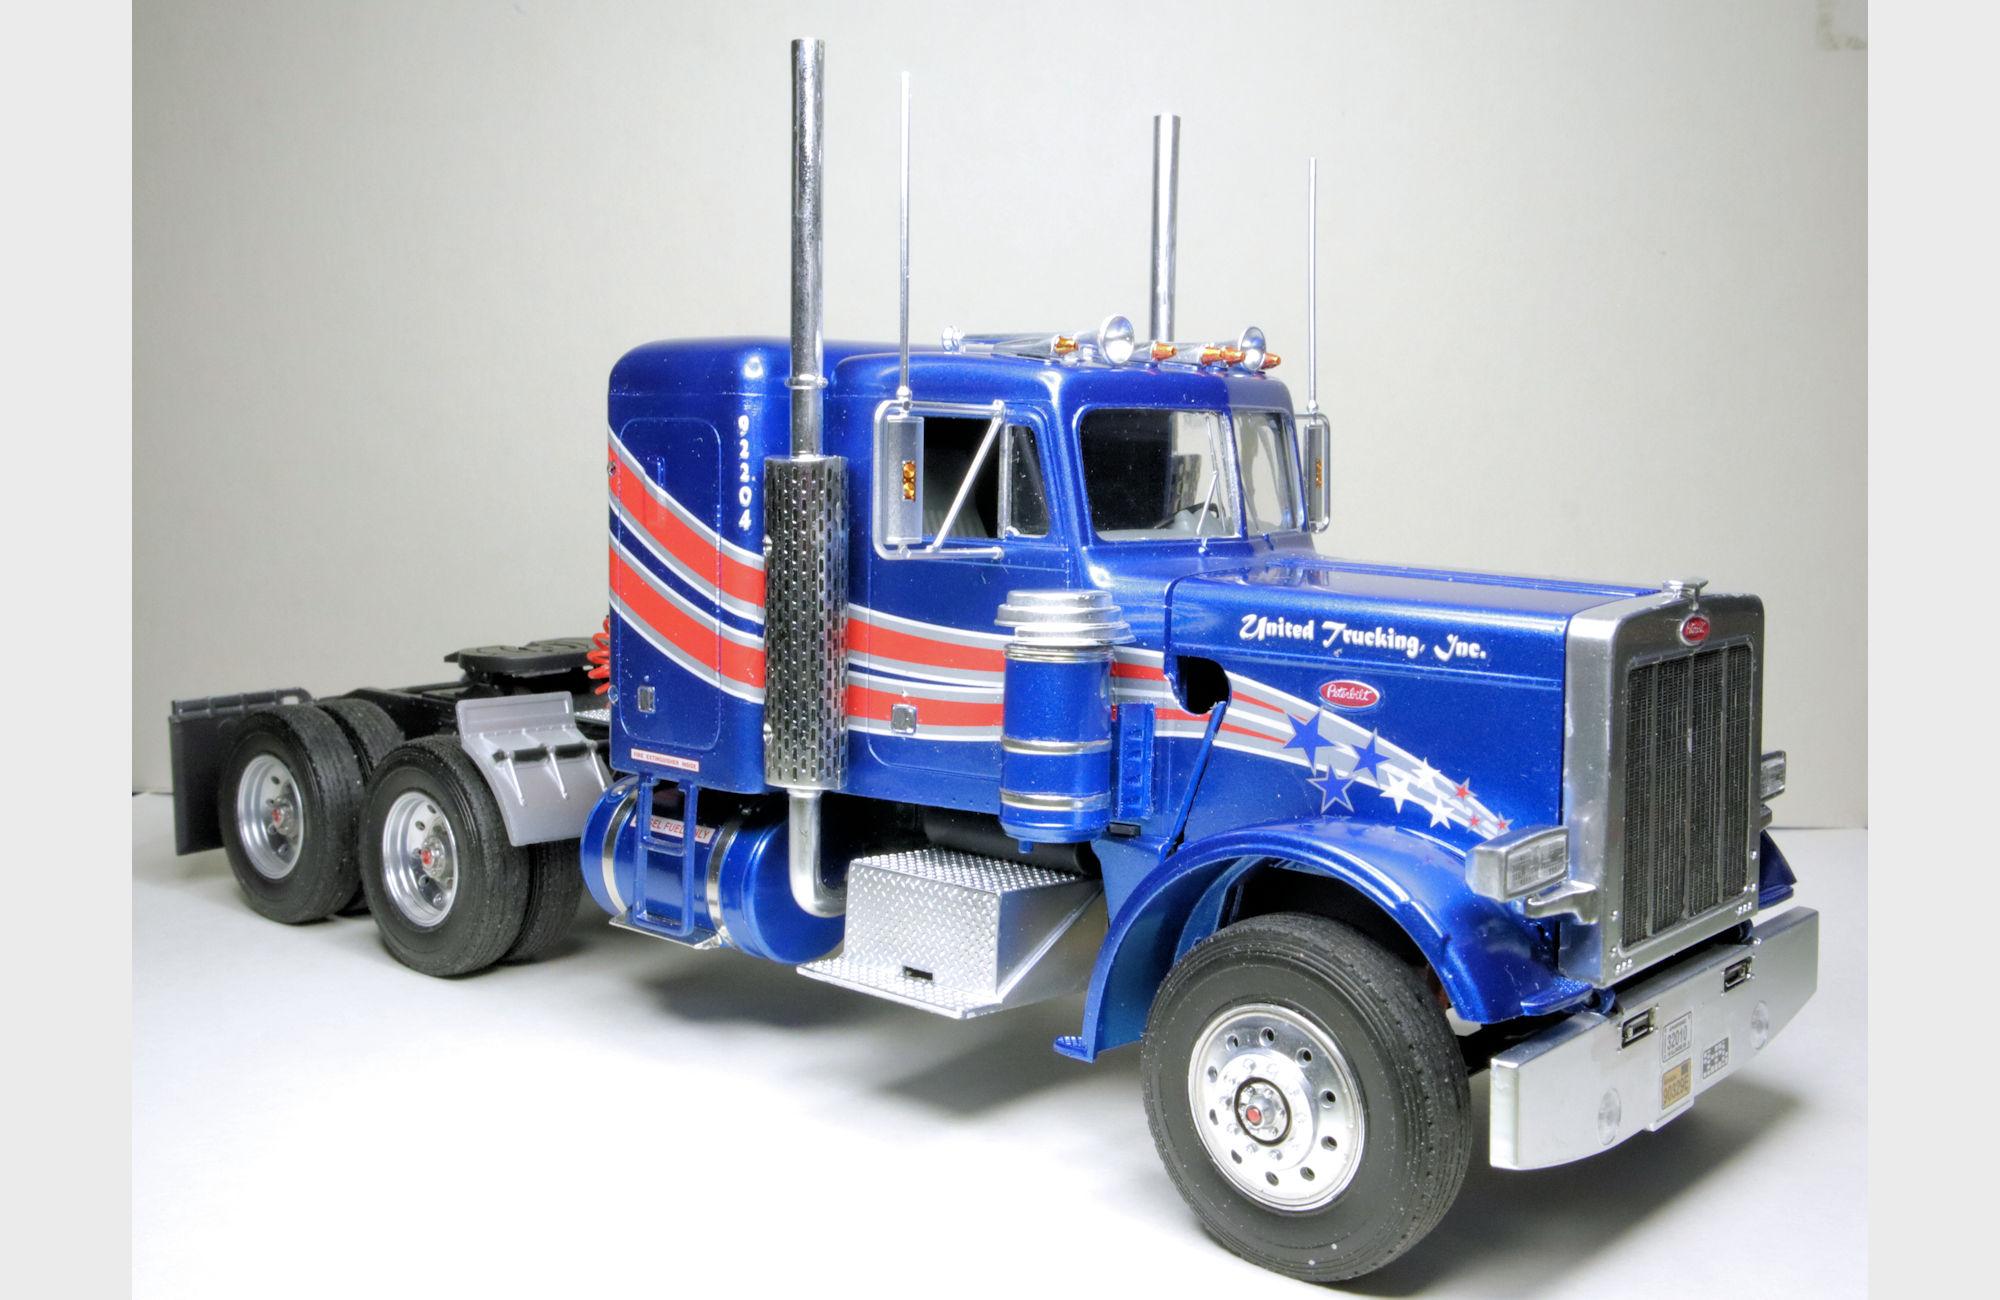
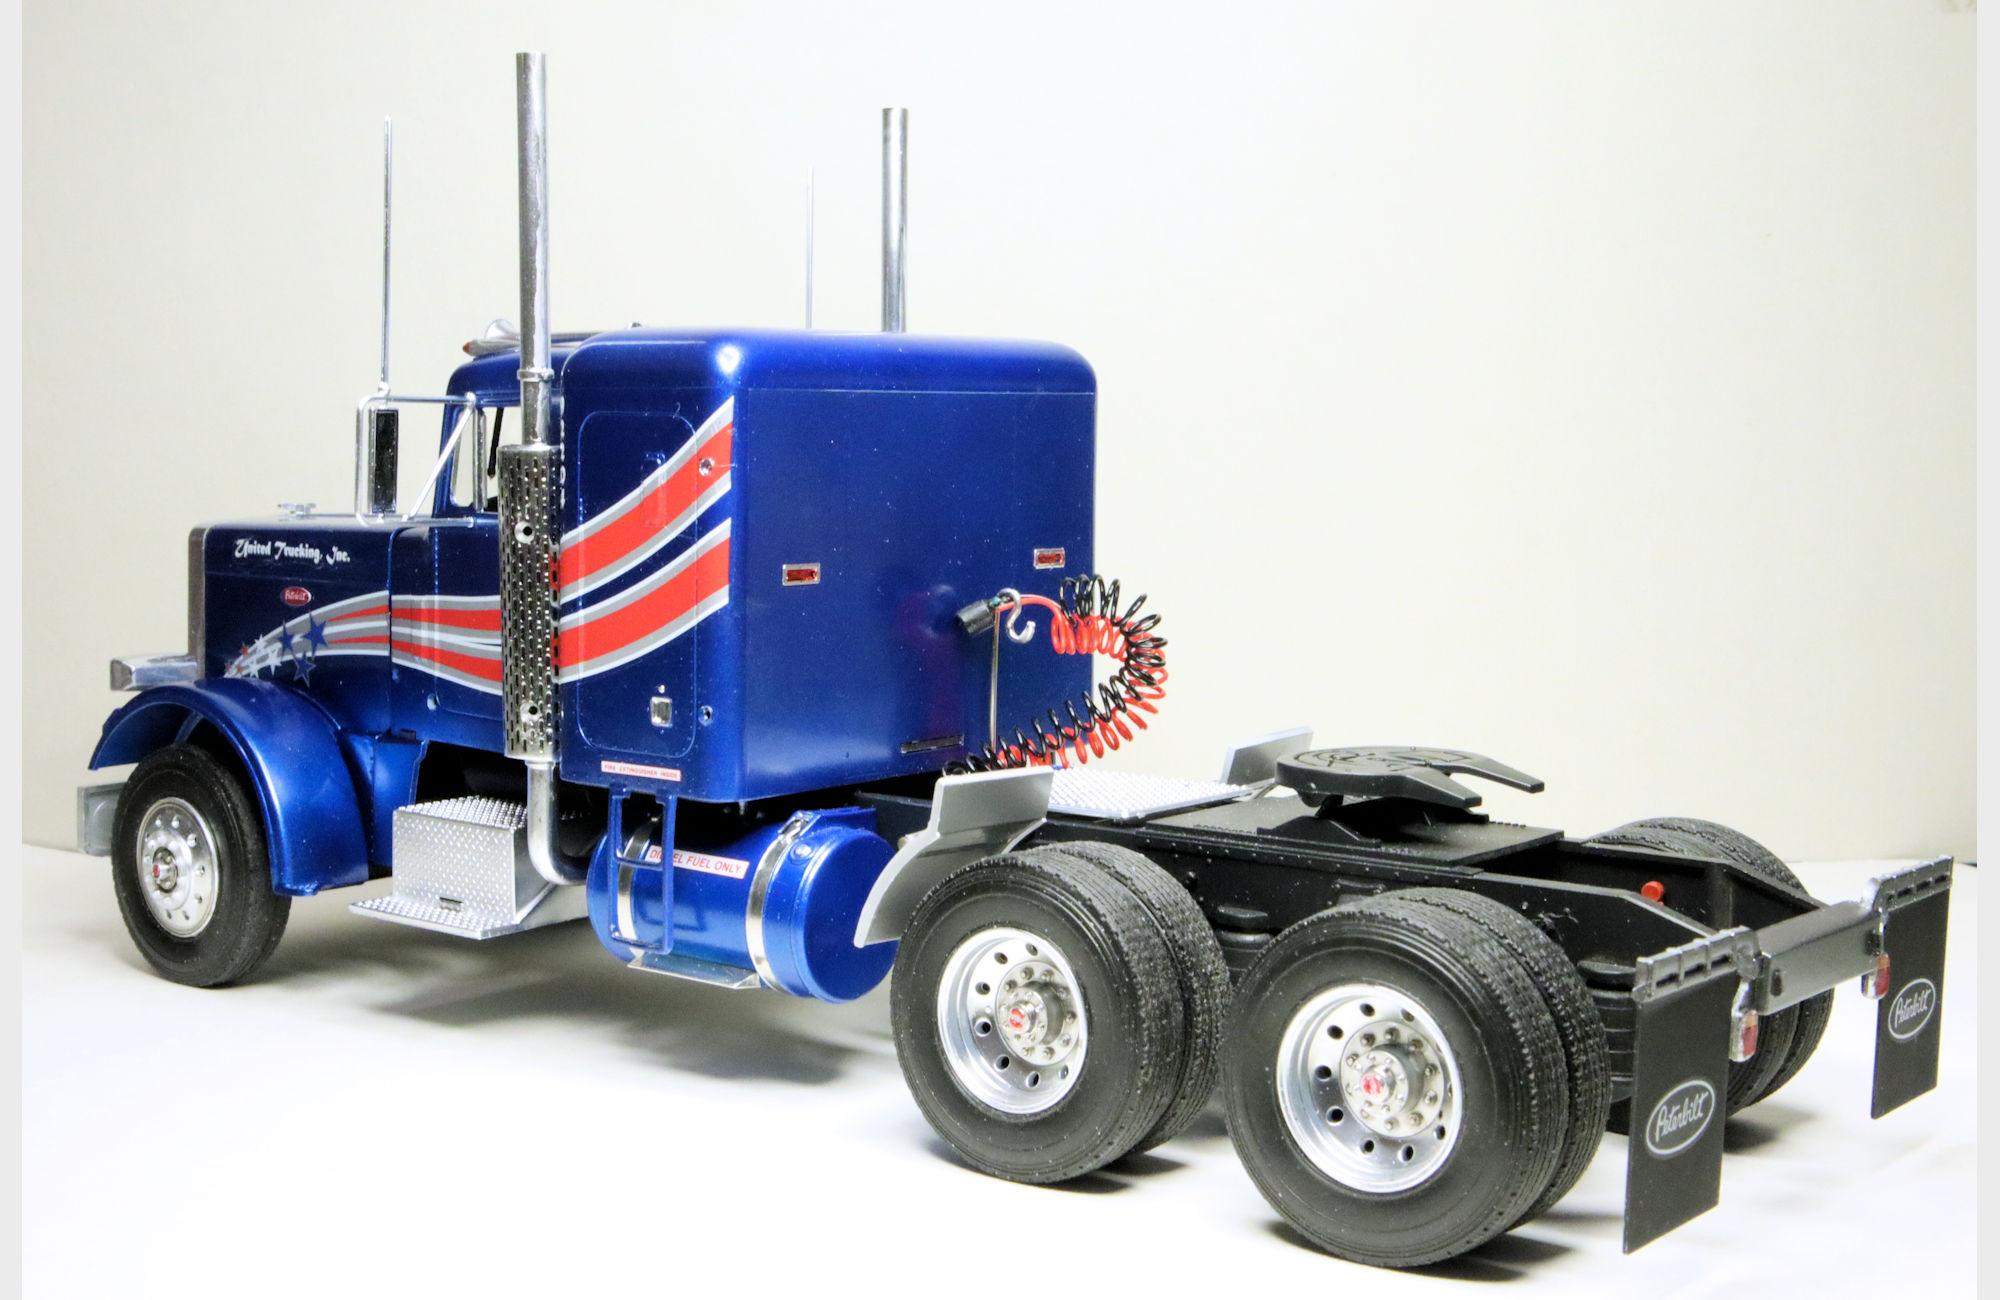
Hello Everybody! It's been a long time coming but I'm finally posting the photos for the completed Revell Auto Transport Trailer! I started this build back in December of 2024 and completed it in March of 2025 with a little over fifty hours of build time. The reason I took so long to take the final photos was I wanted finish the Peterbilt 359 road tractor that I planned as a companion to the trailer. I wrapped that up at the end of May. I did post a WIP thread for this kit. If you're interested, here's a link to that. I'll be posting photos of the Peterbilt sometime in the near future. Three views in one image: left, top oblique and right. Some of the loading area detail. Just a neat looking shot of the cargo area and ramps. Here's the trailer coupled with its companion Peterbilt 359 road tractor. Since there's so much space between the tractor and trailer I decided to make a pogo stick and connector lines. And what's the reason that we want to build an auto transport trailer model? Why, to load it with model cars, of course! My traditional Display Case photo is actually a bookcase photo. This is the one place that I have to display this monster safely. I do have plans to dress things up a bit to make a more suitable display area. As always, thanks for taking the time to look and please feel free to post any comments or questions. David G.

- 28 replies
-
- 10
-

-
Excellent work on the exhaust! All the fittings look great and the color of the metal looks just right. David G.
-
I continue to be amazed and impressed with this project and your work on it. David G.
-
Thank you most kindly Alan. I'm always up for a challenge and this kit certainly offers its share. David G.
-
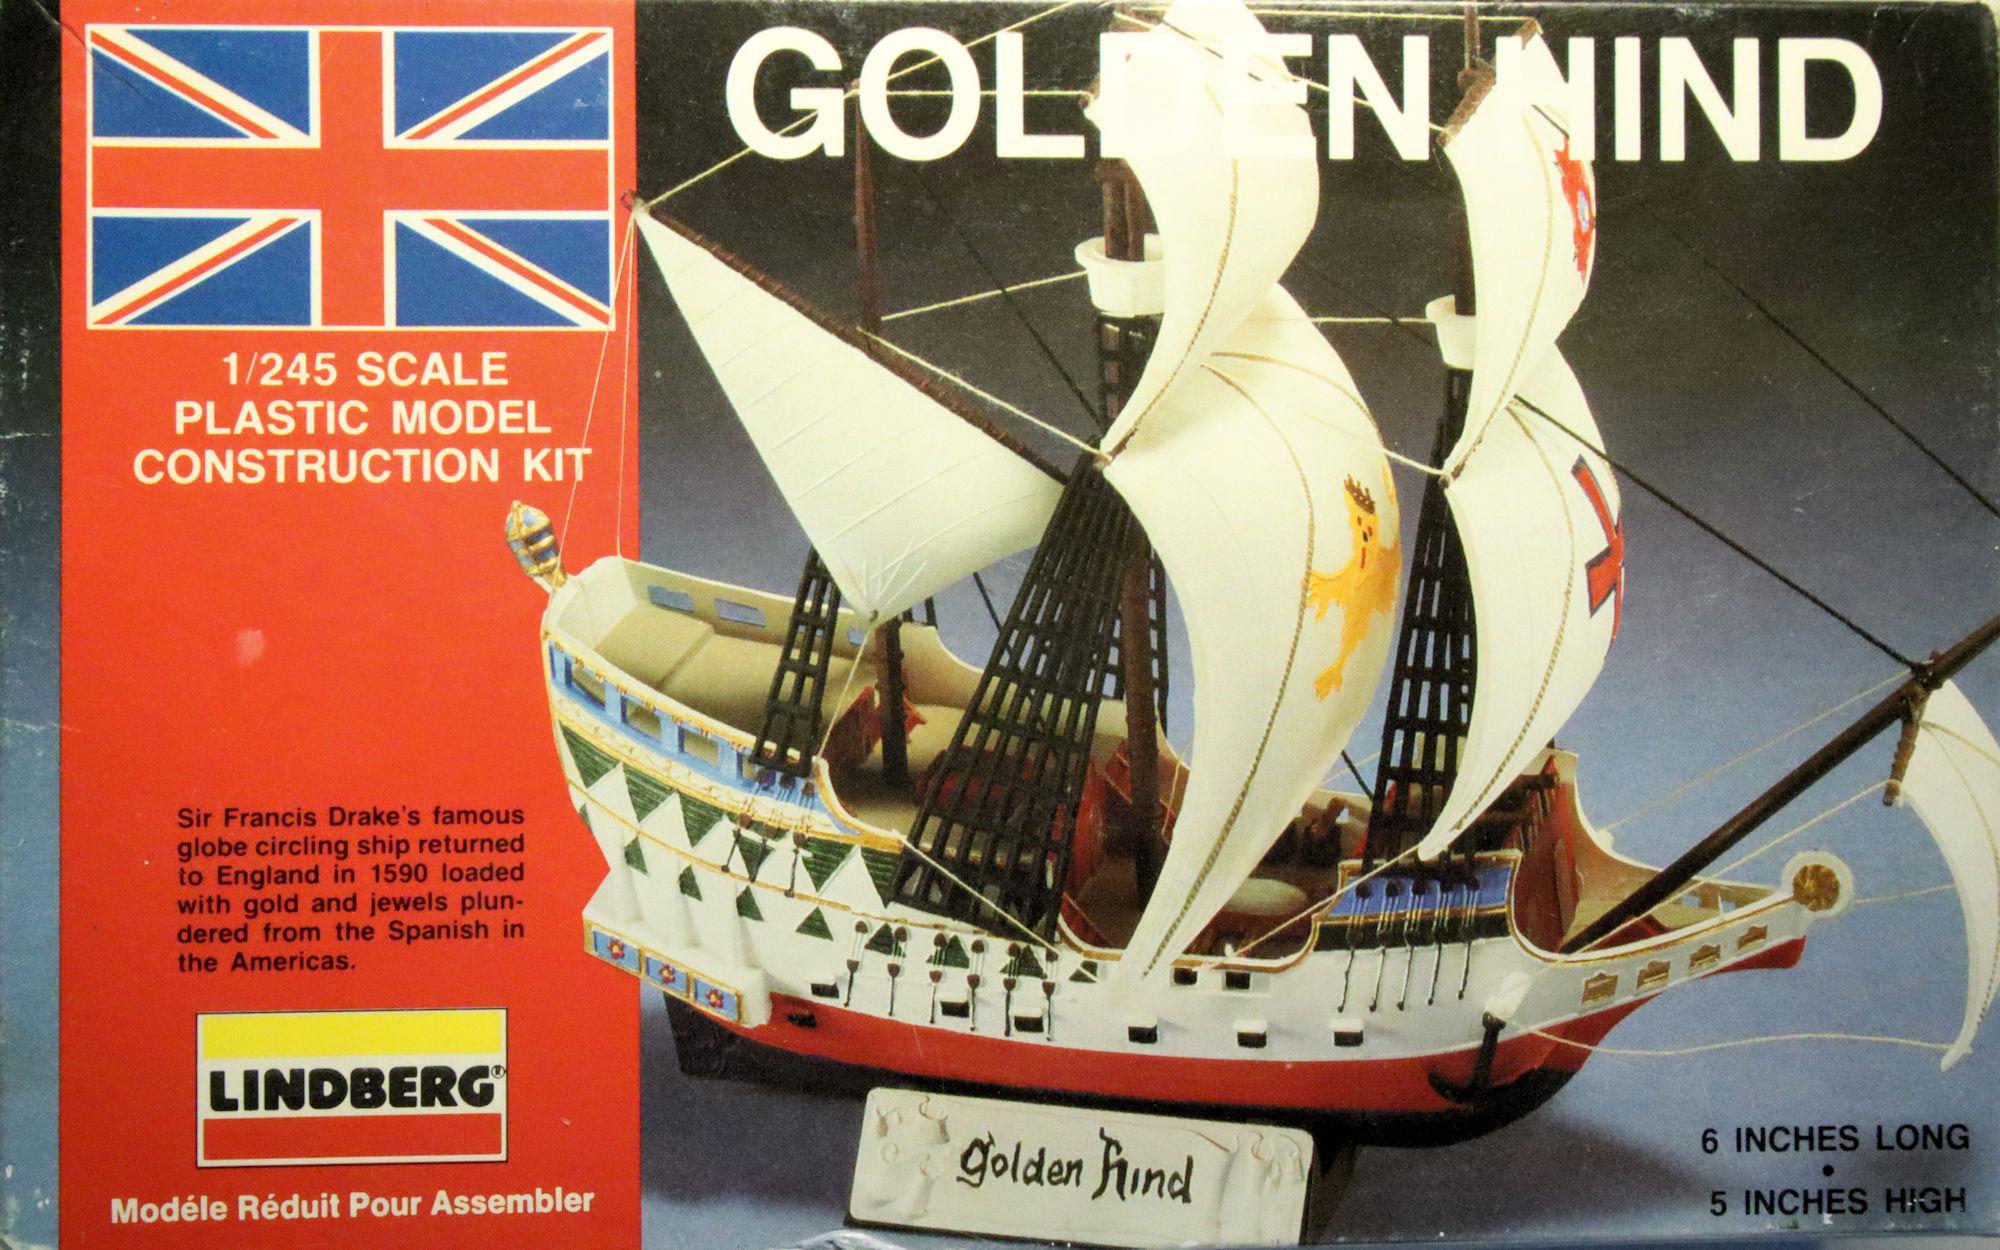
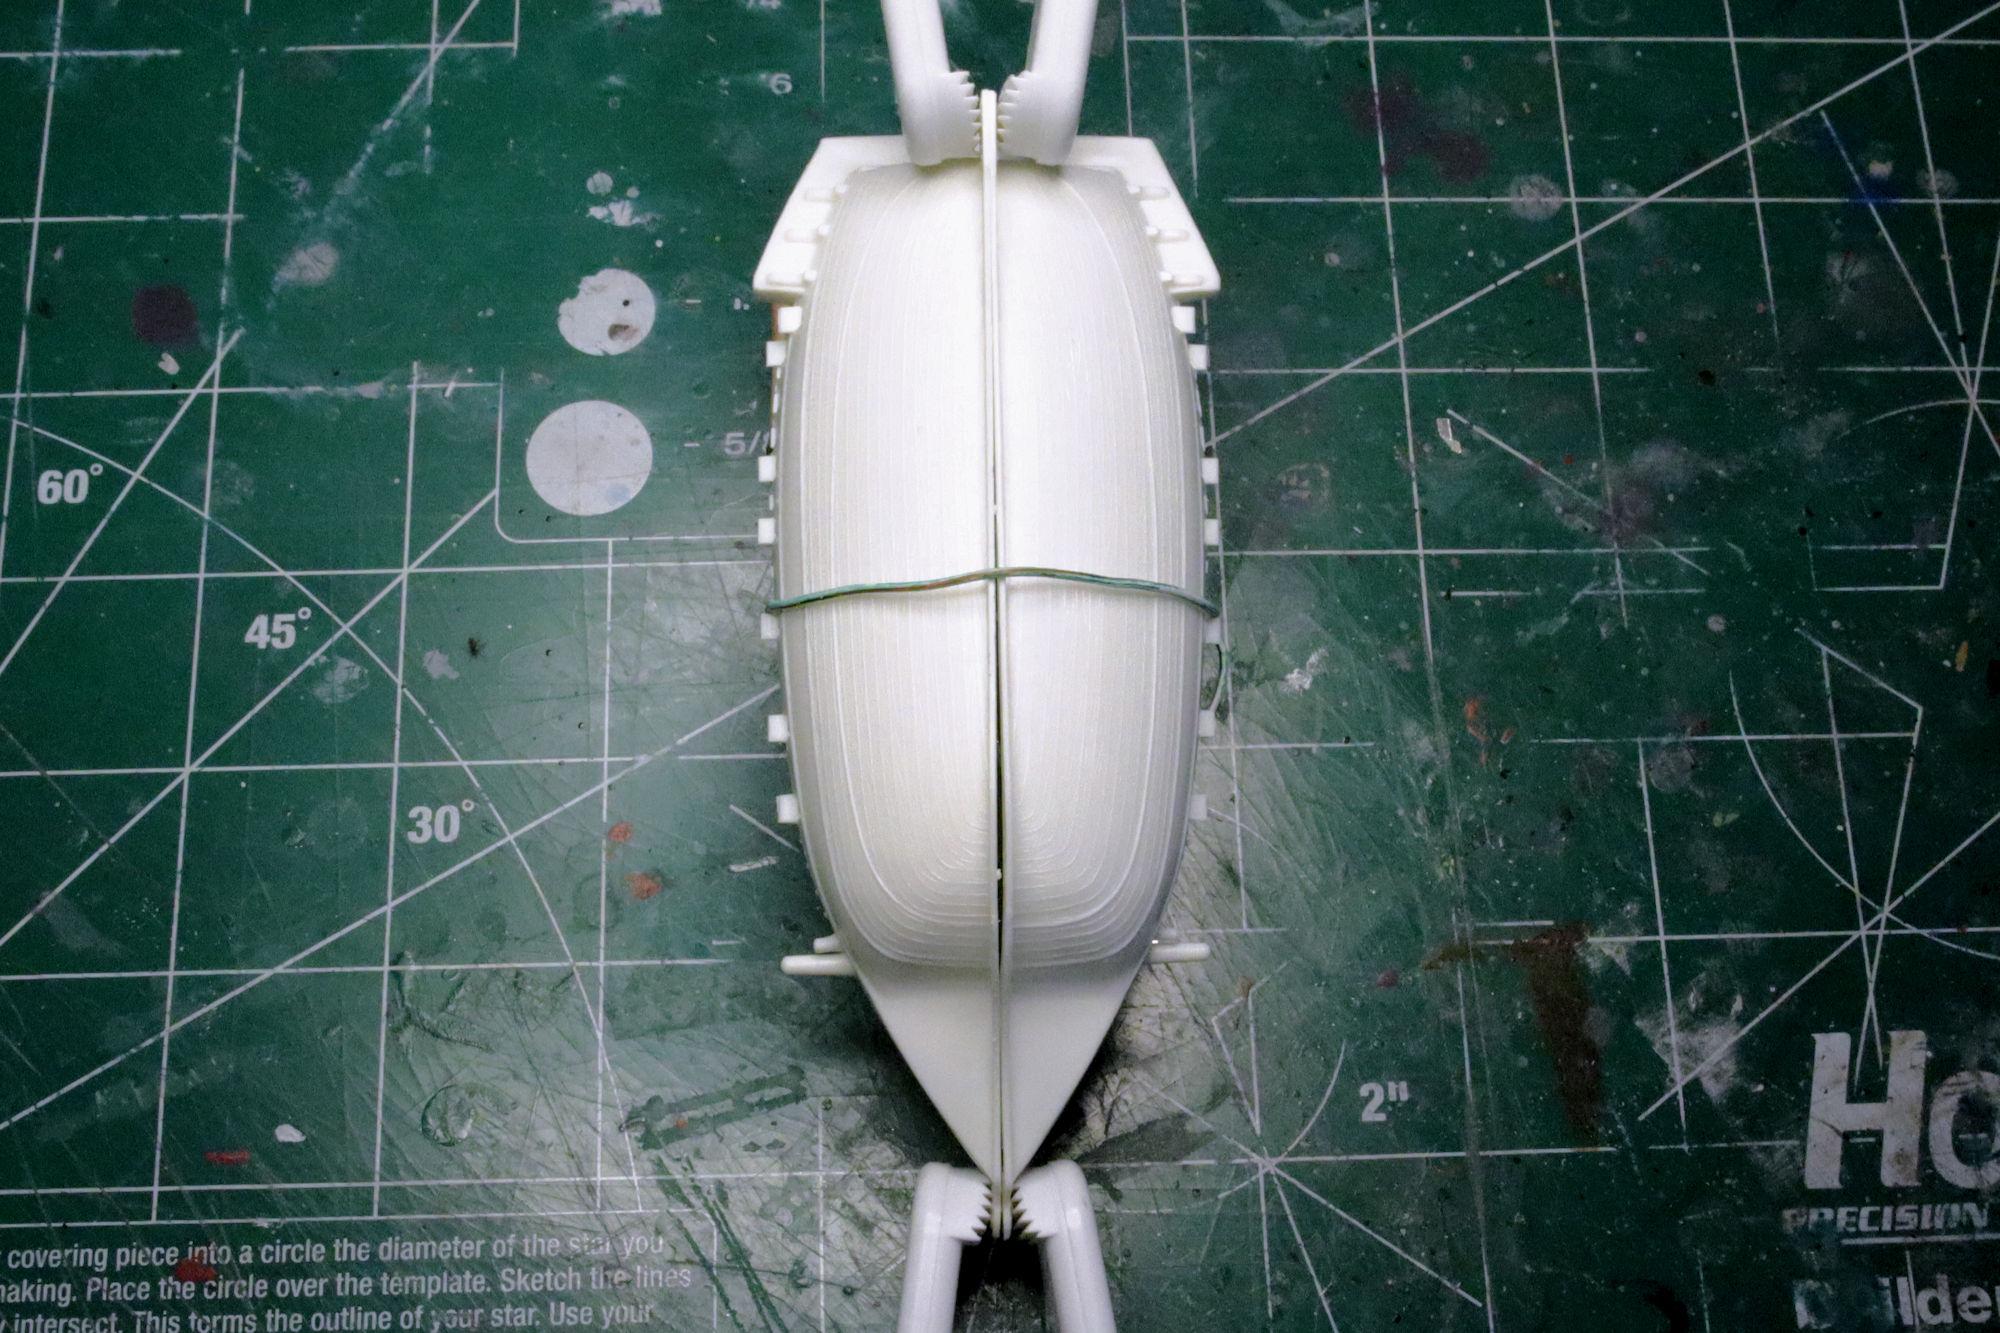
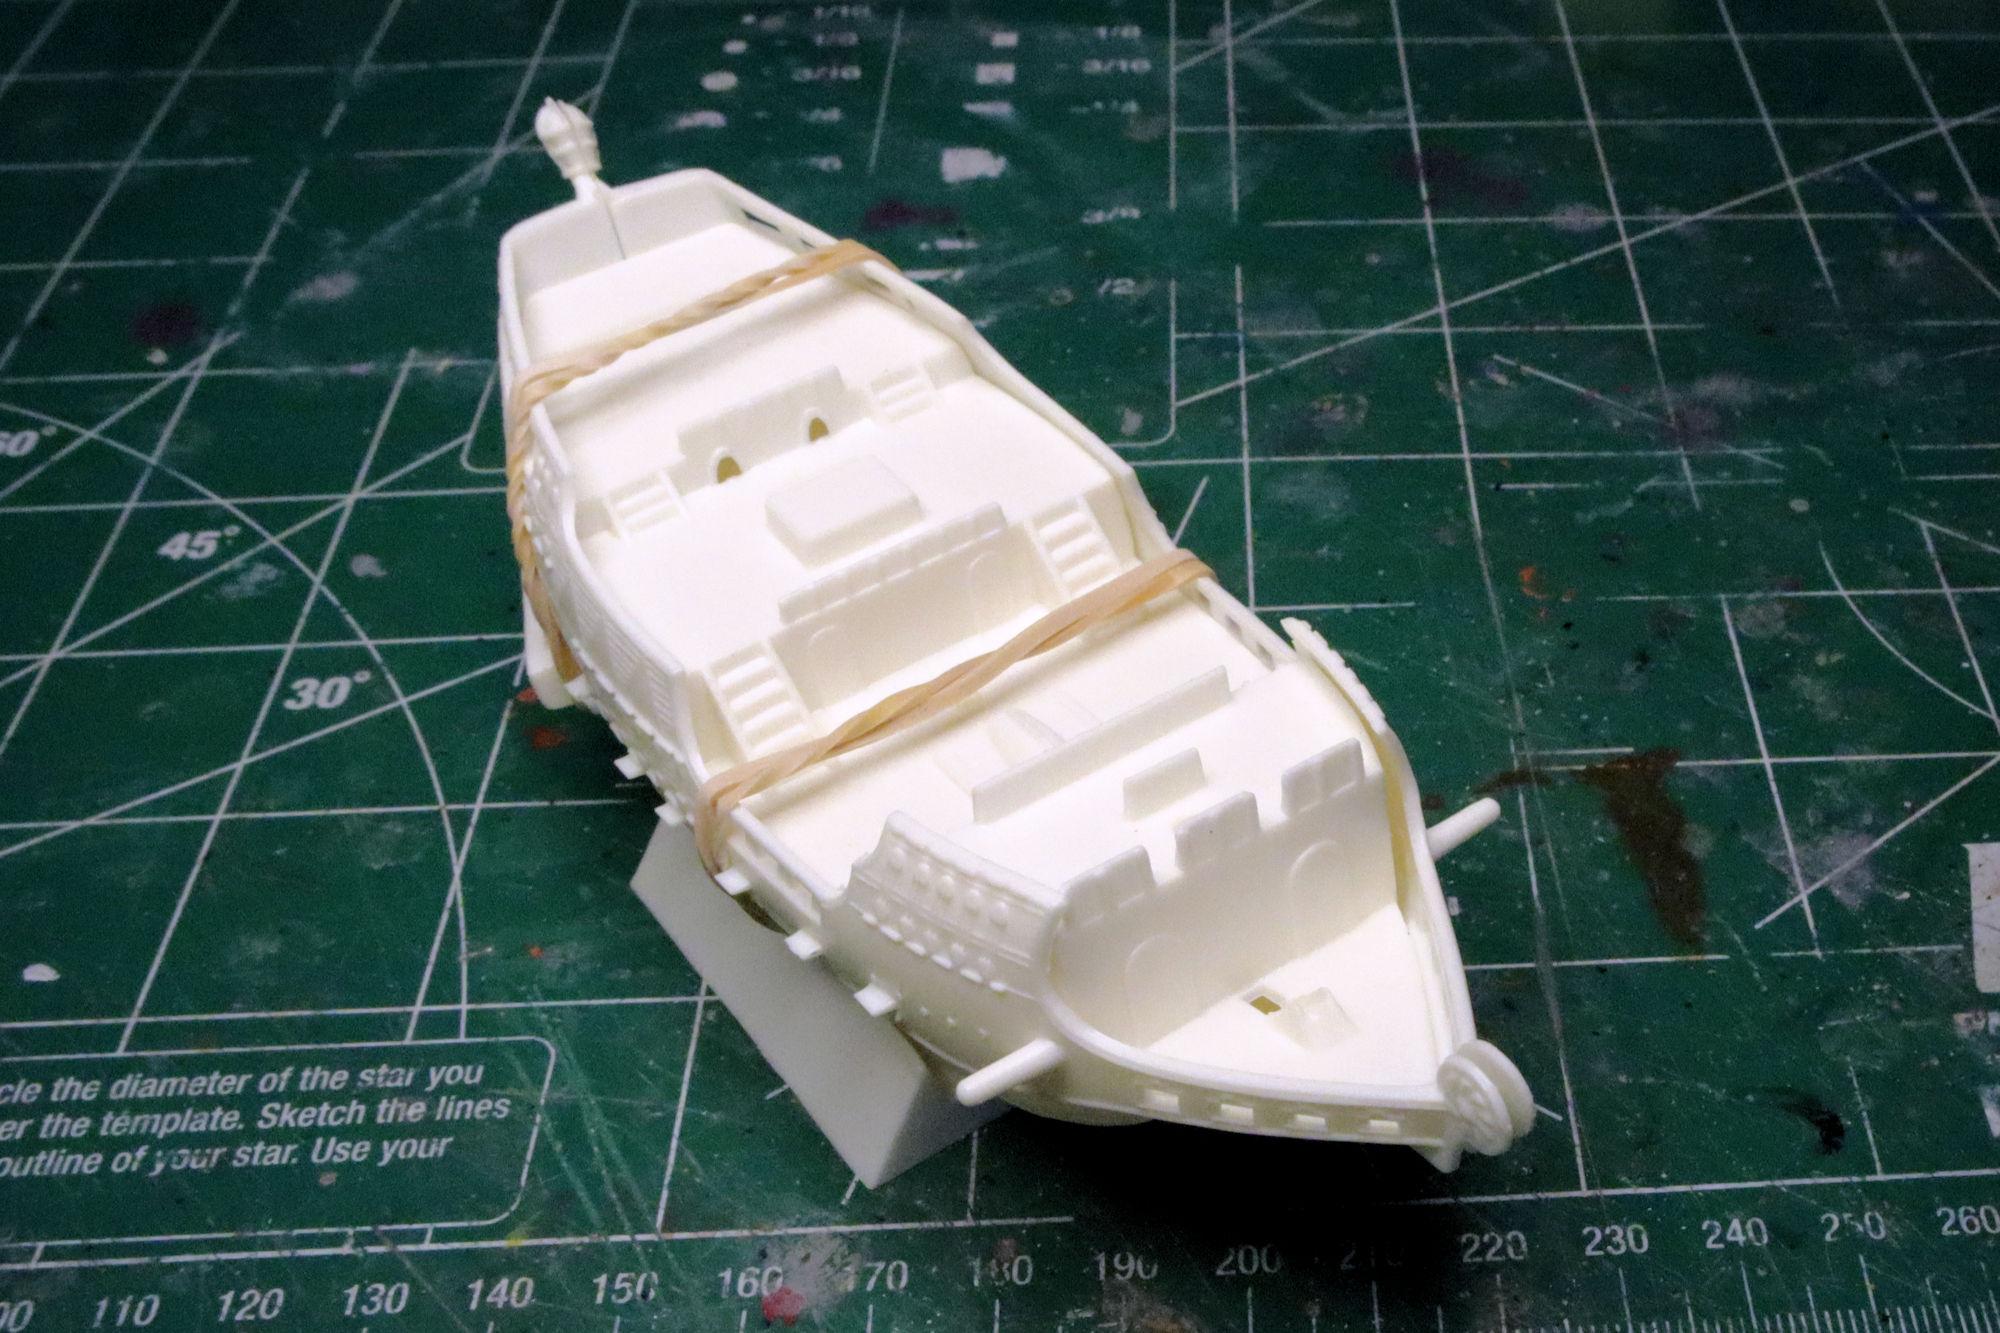
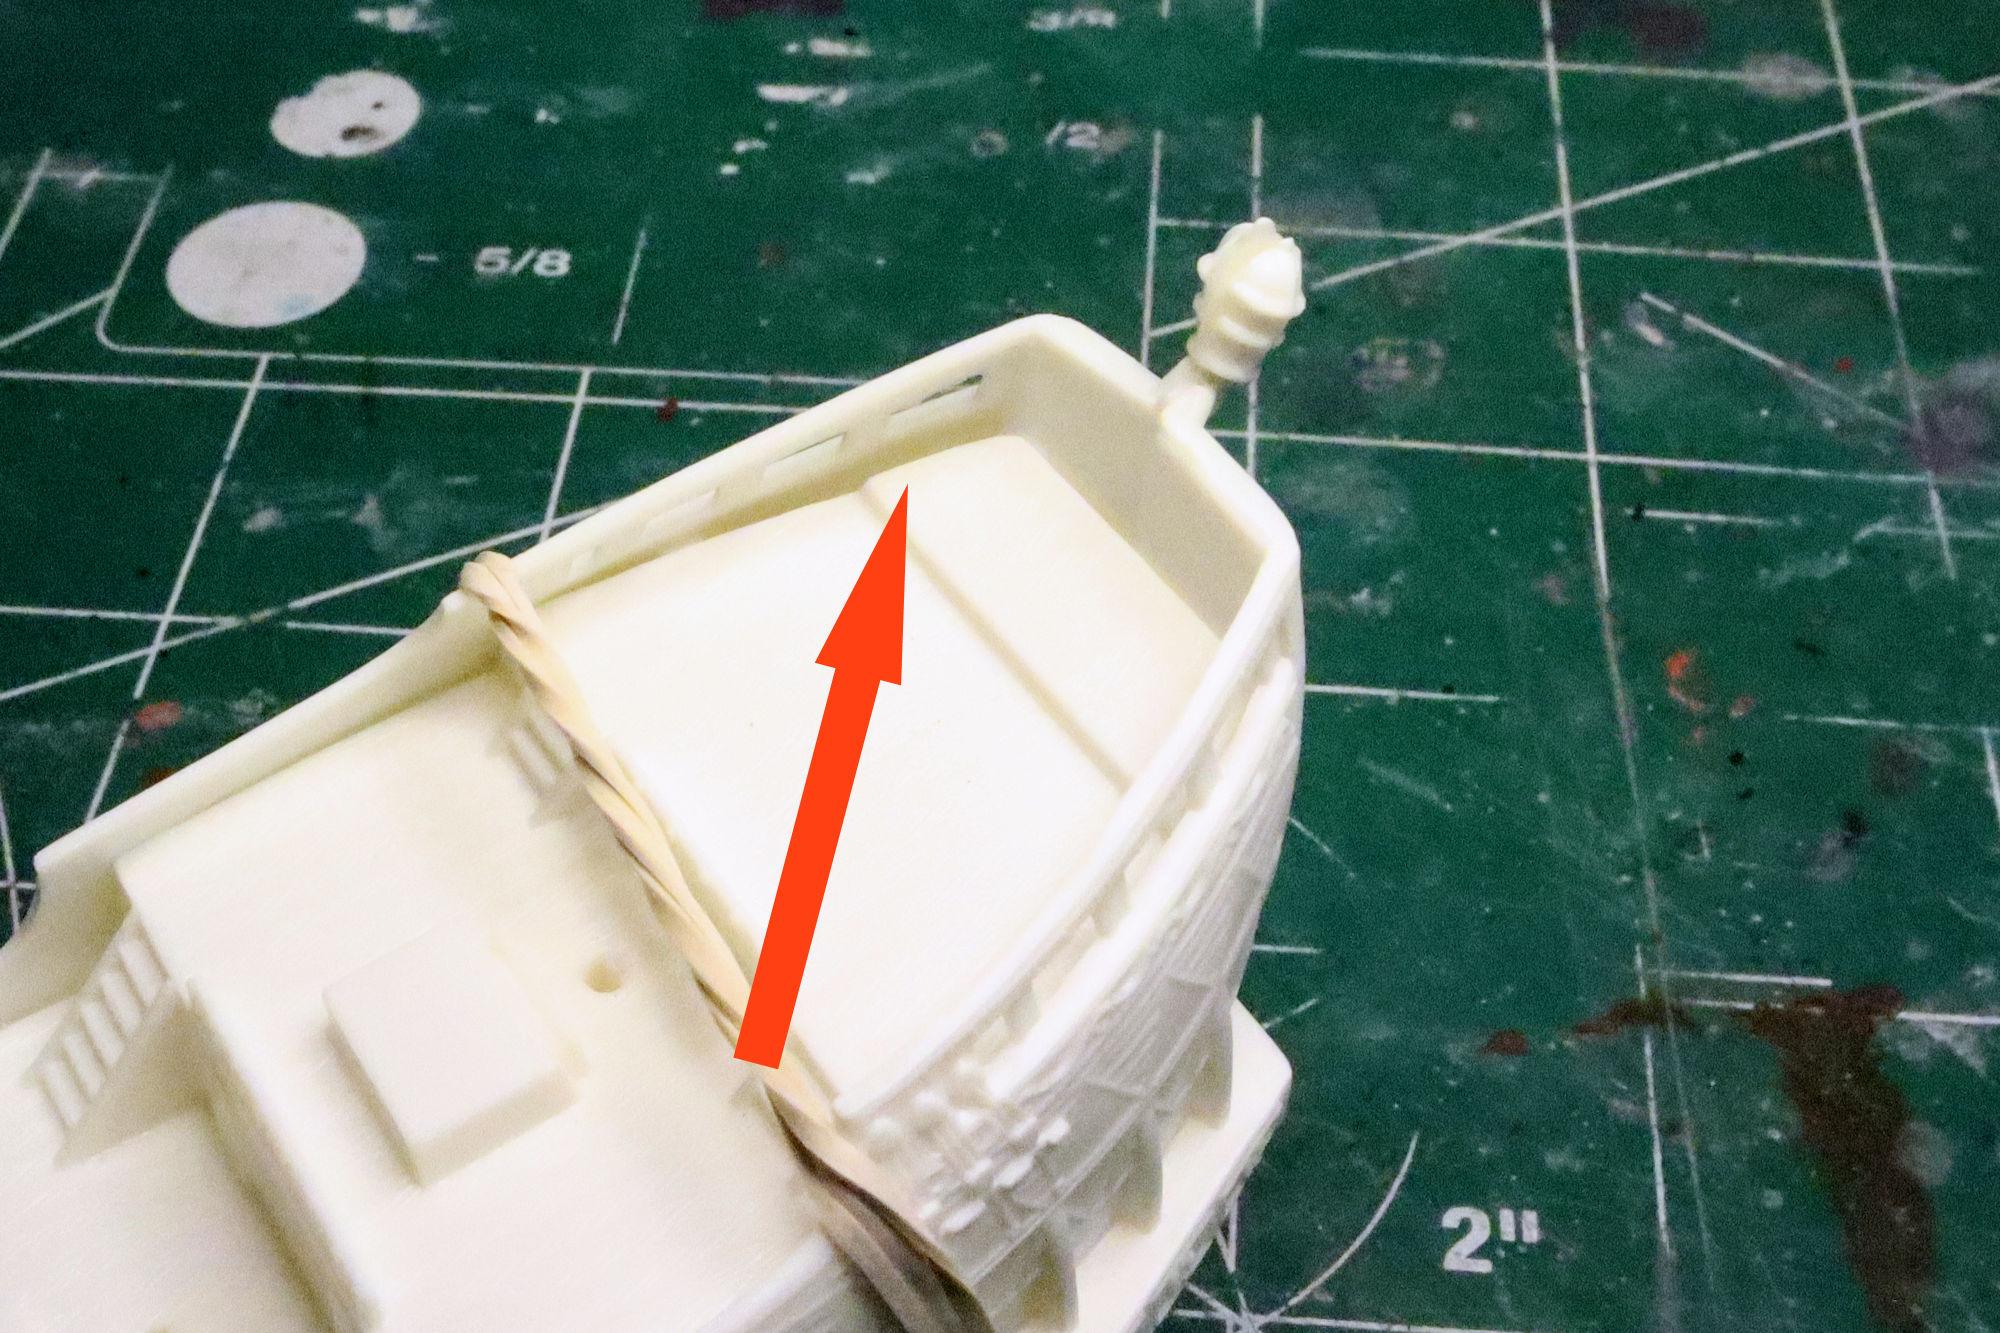
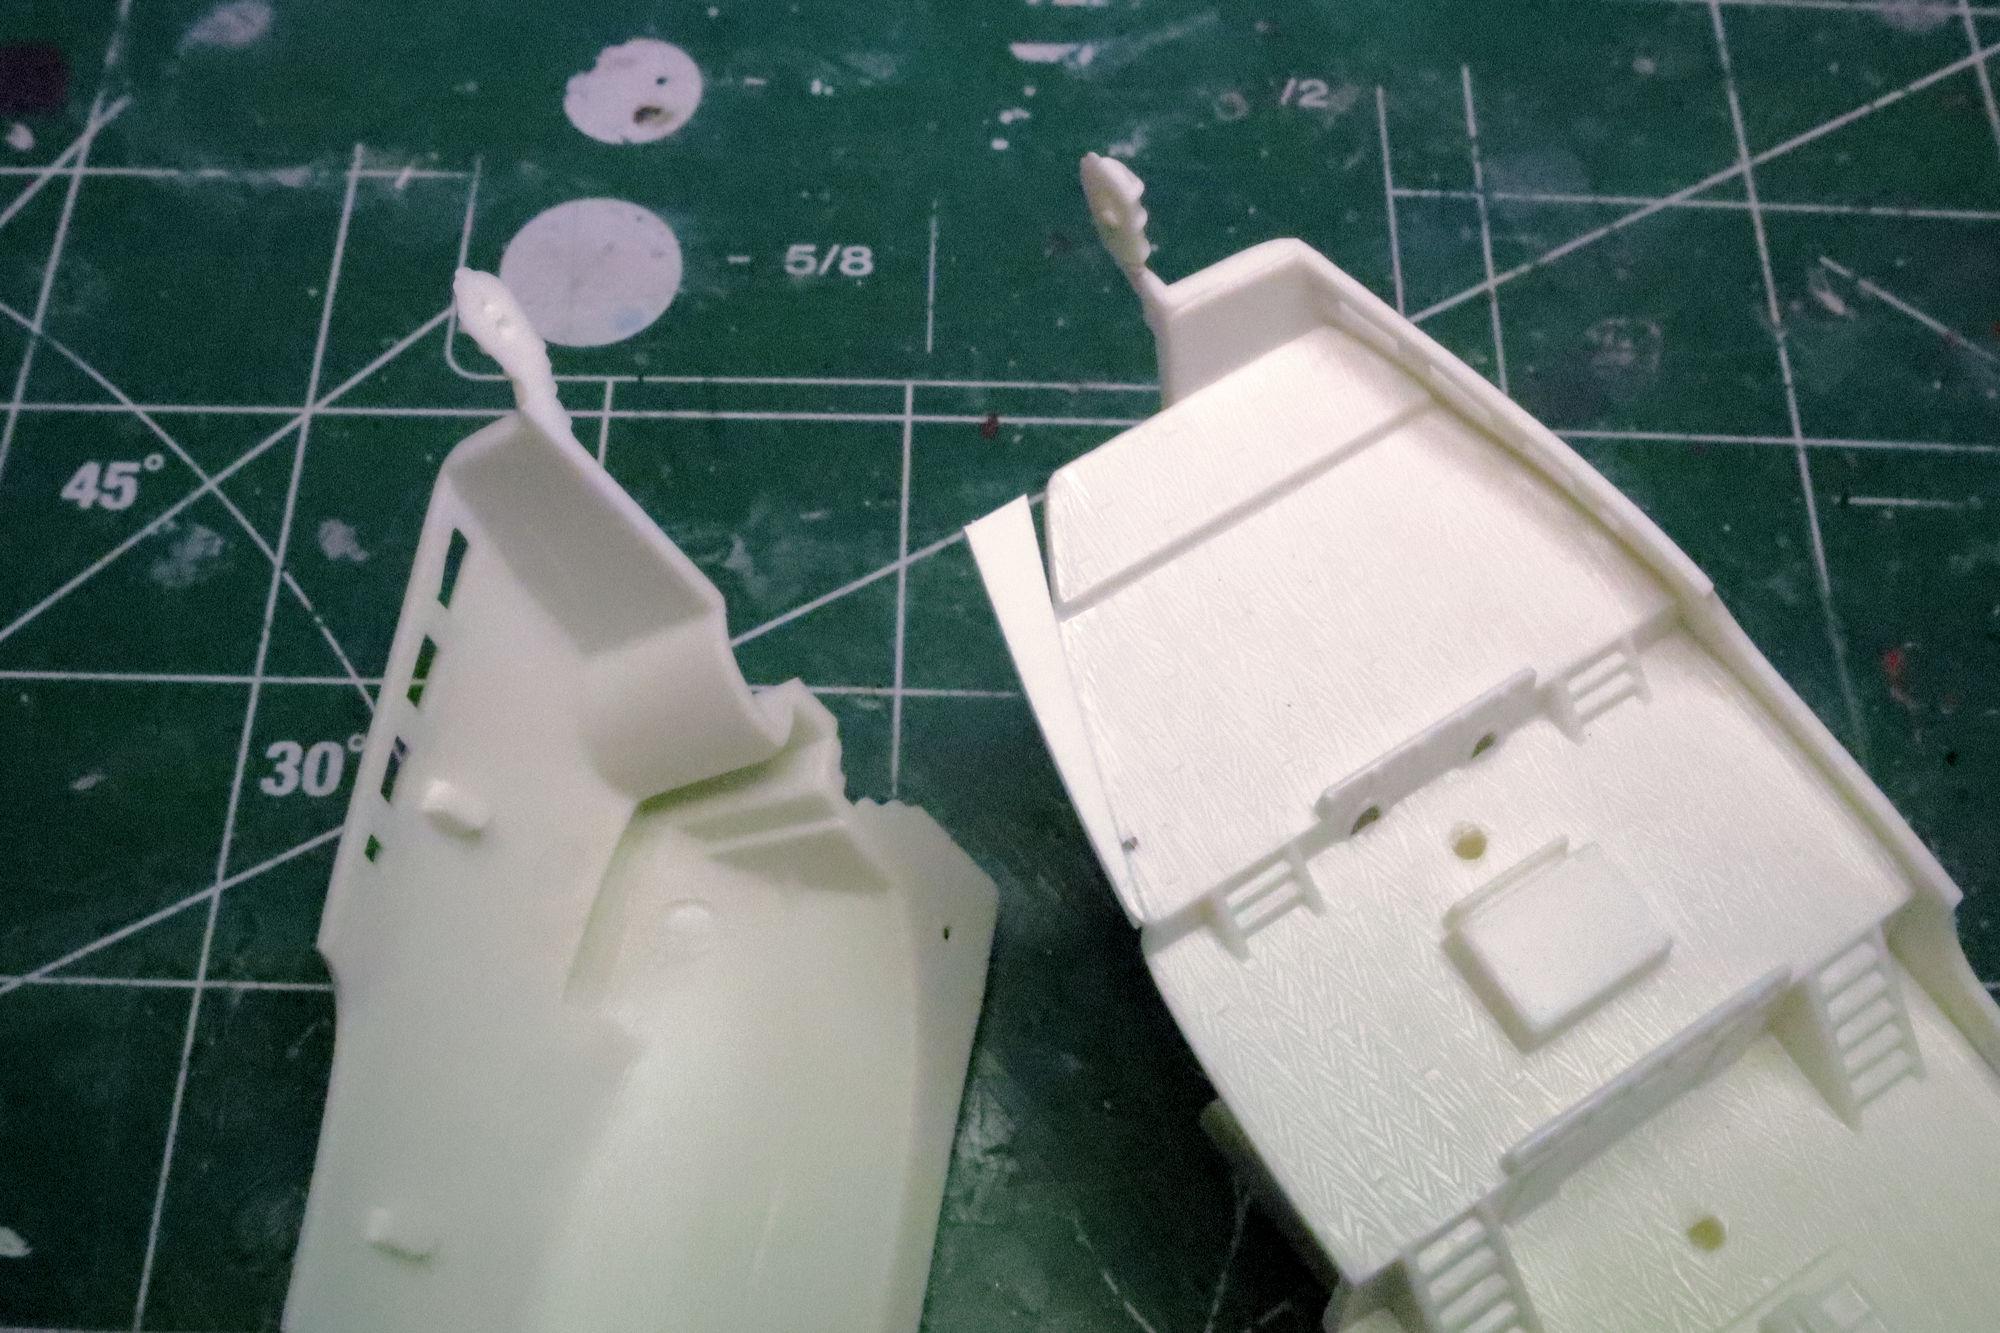
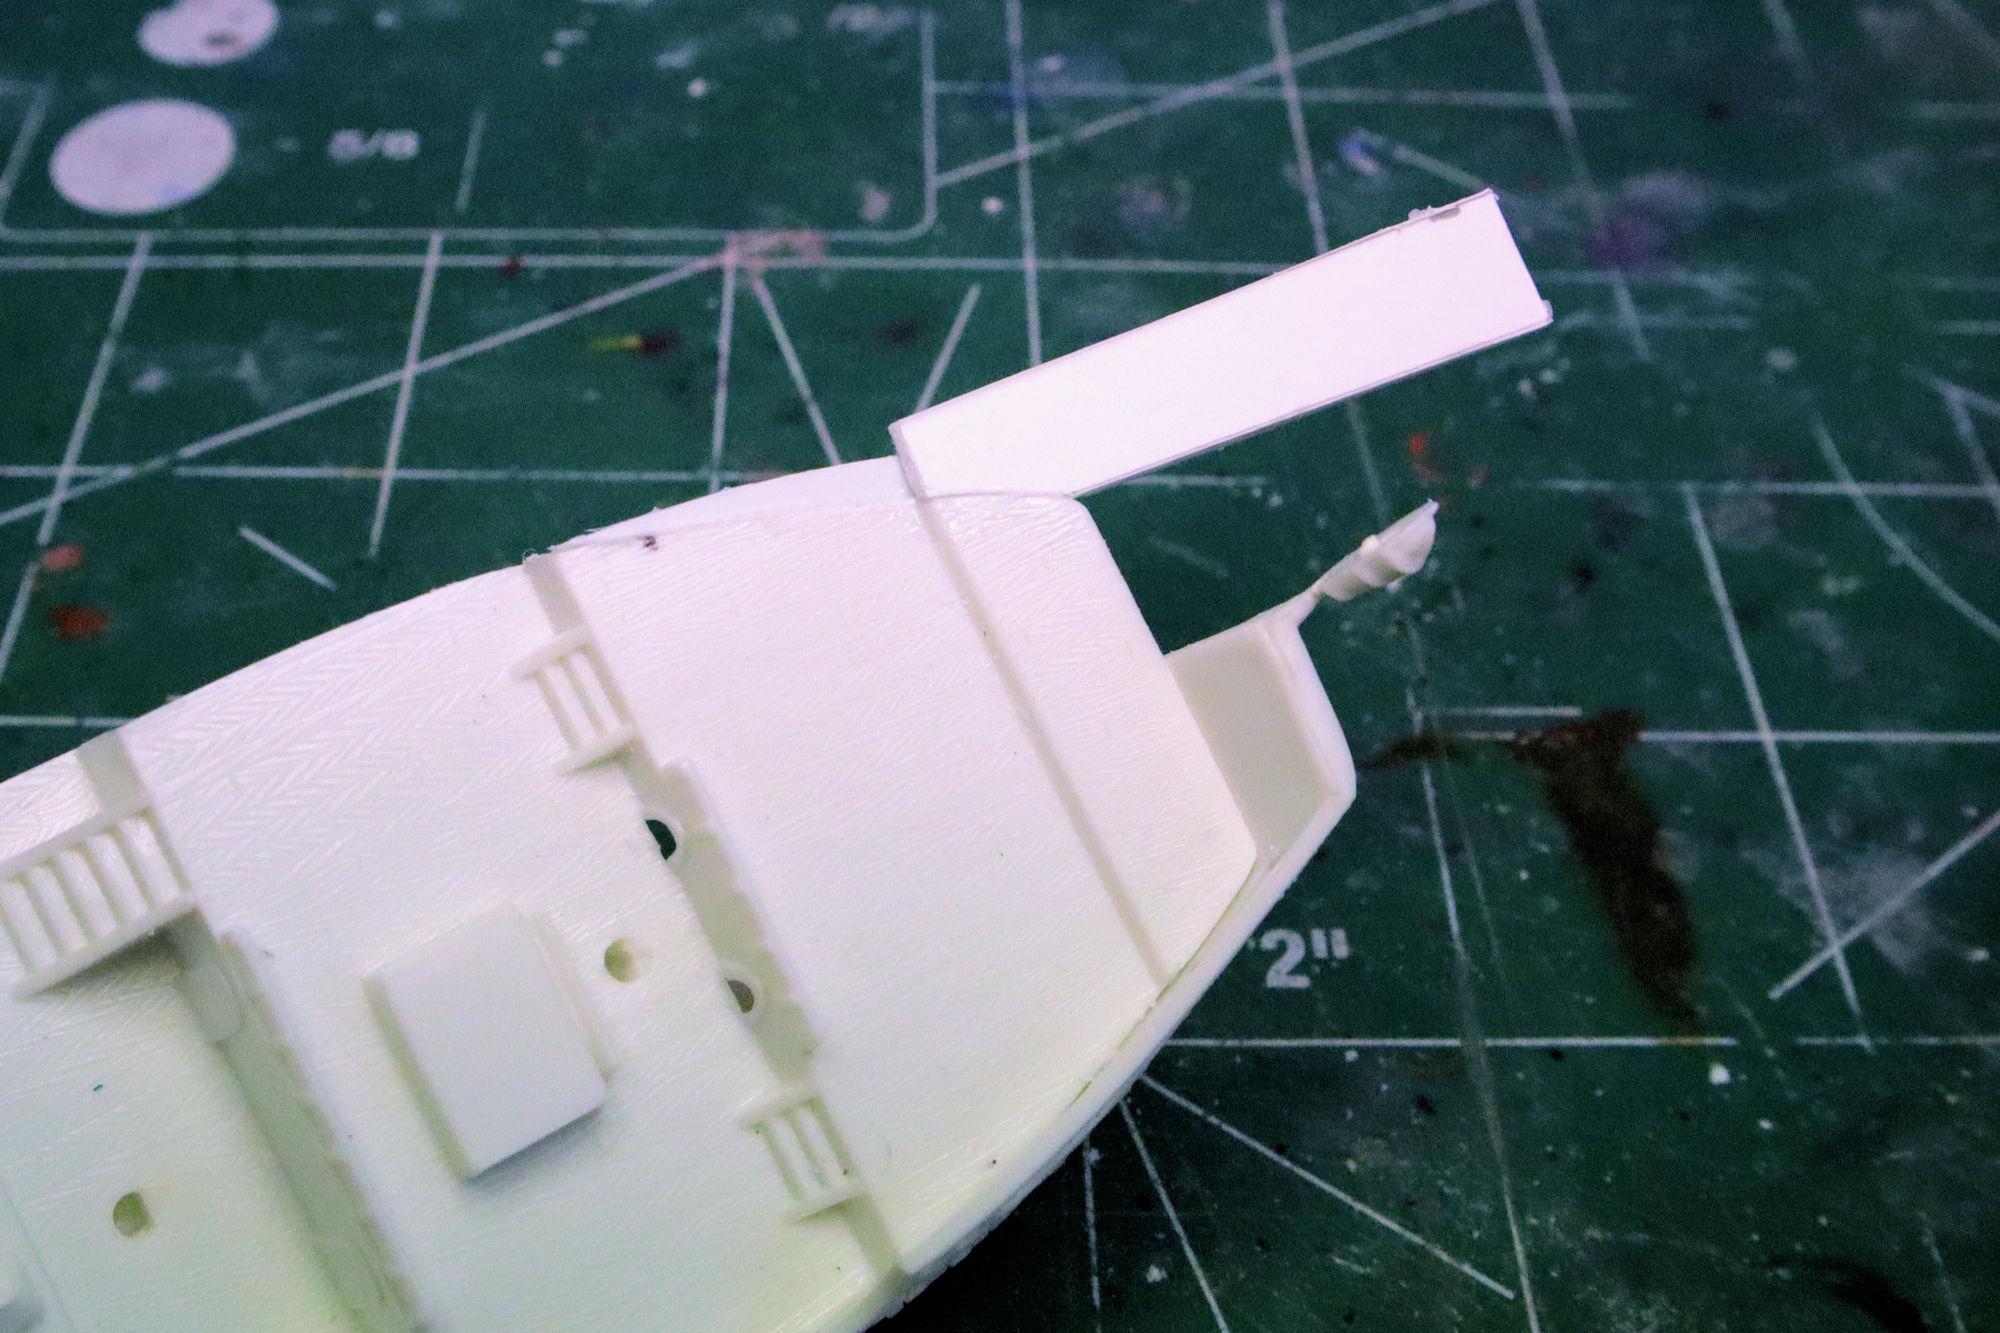
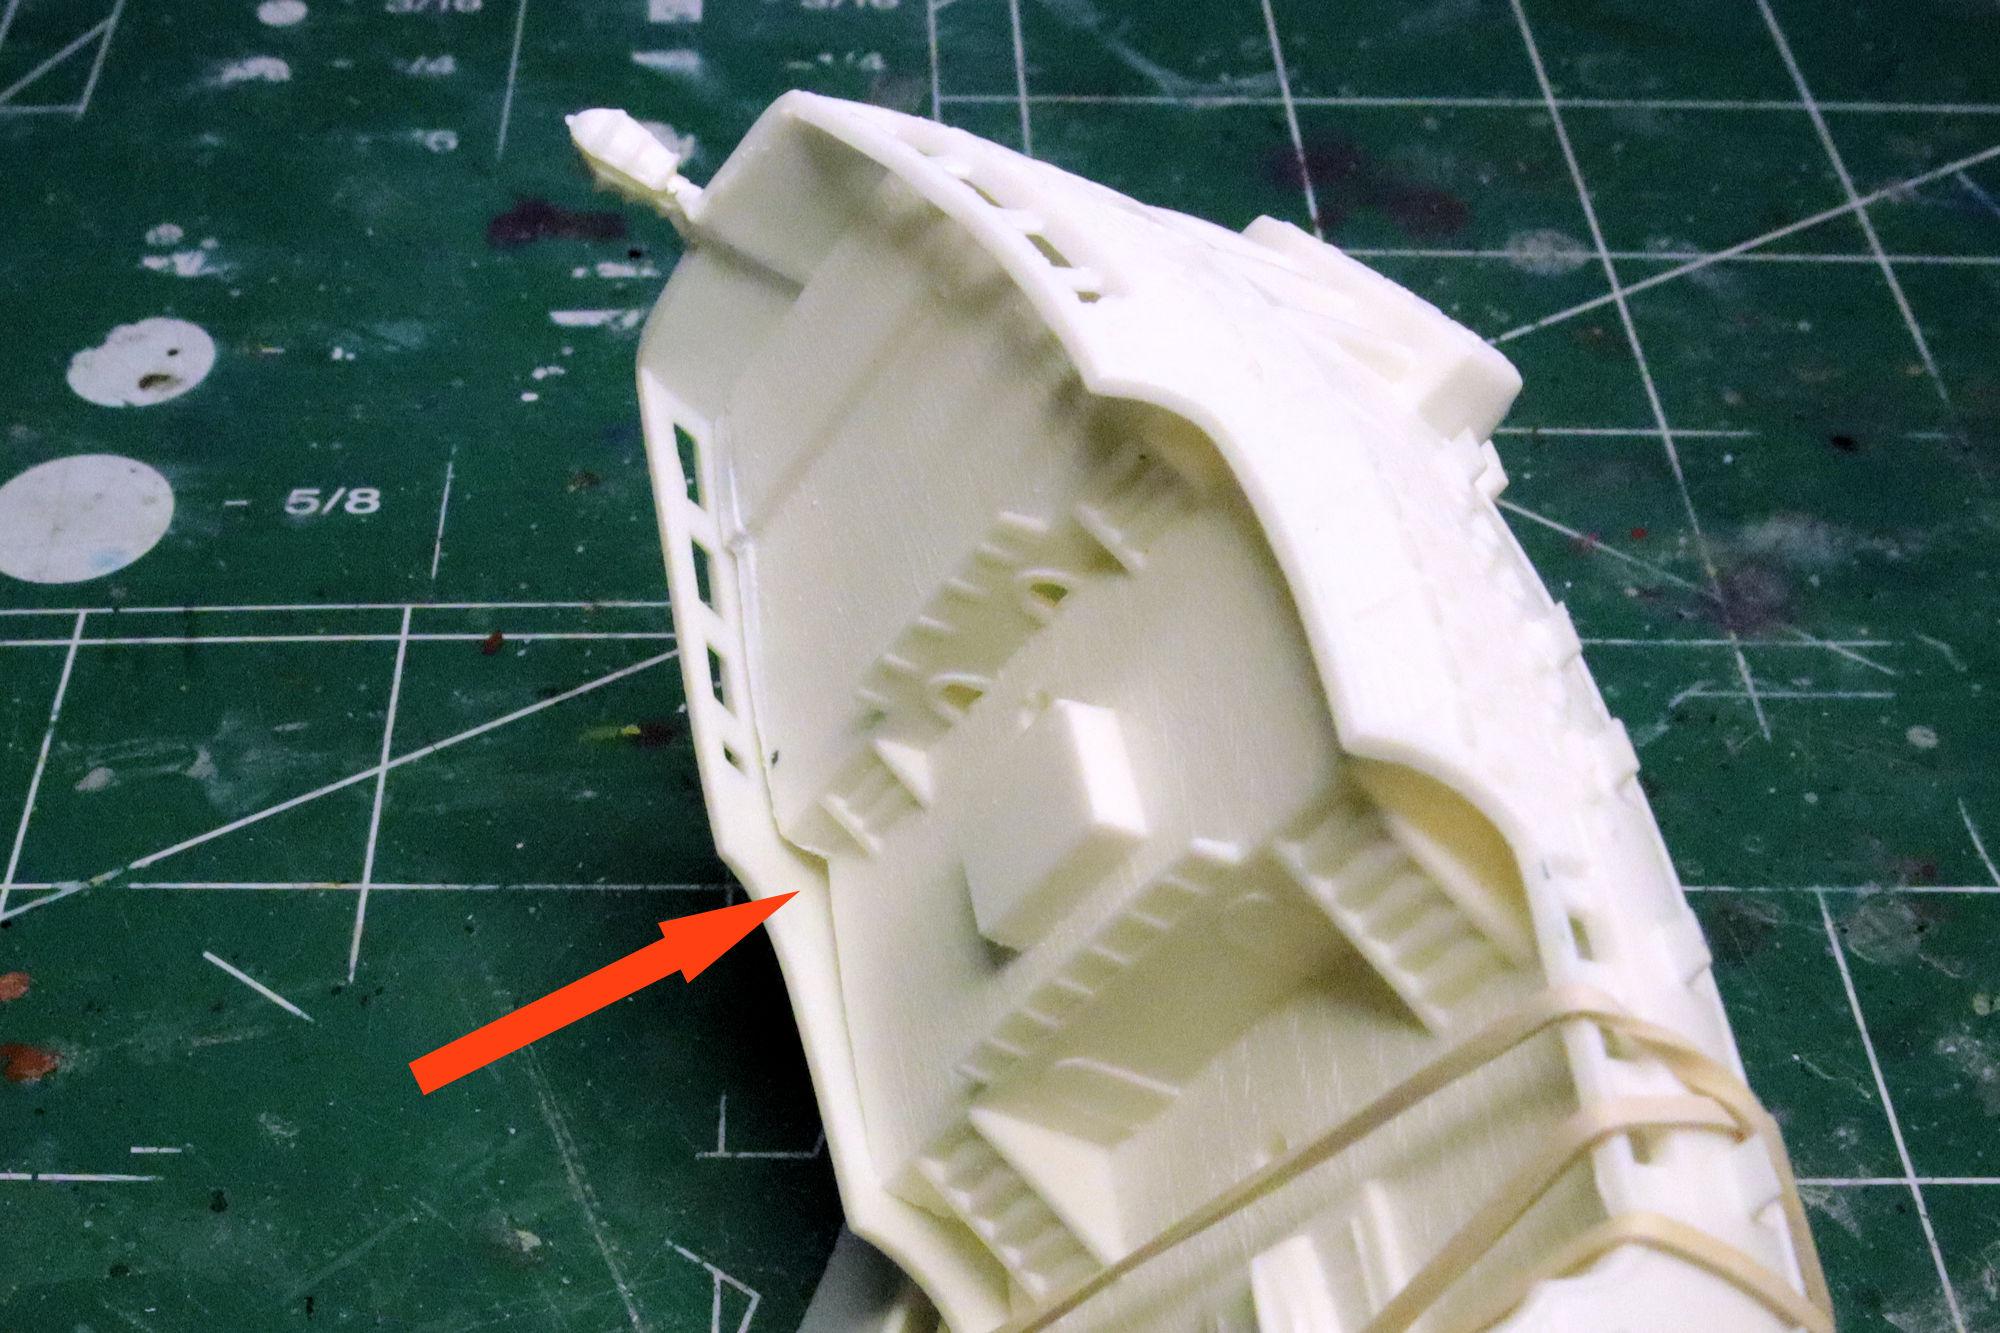
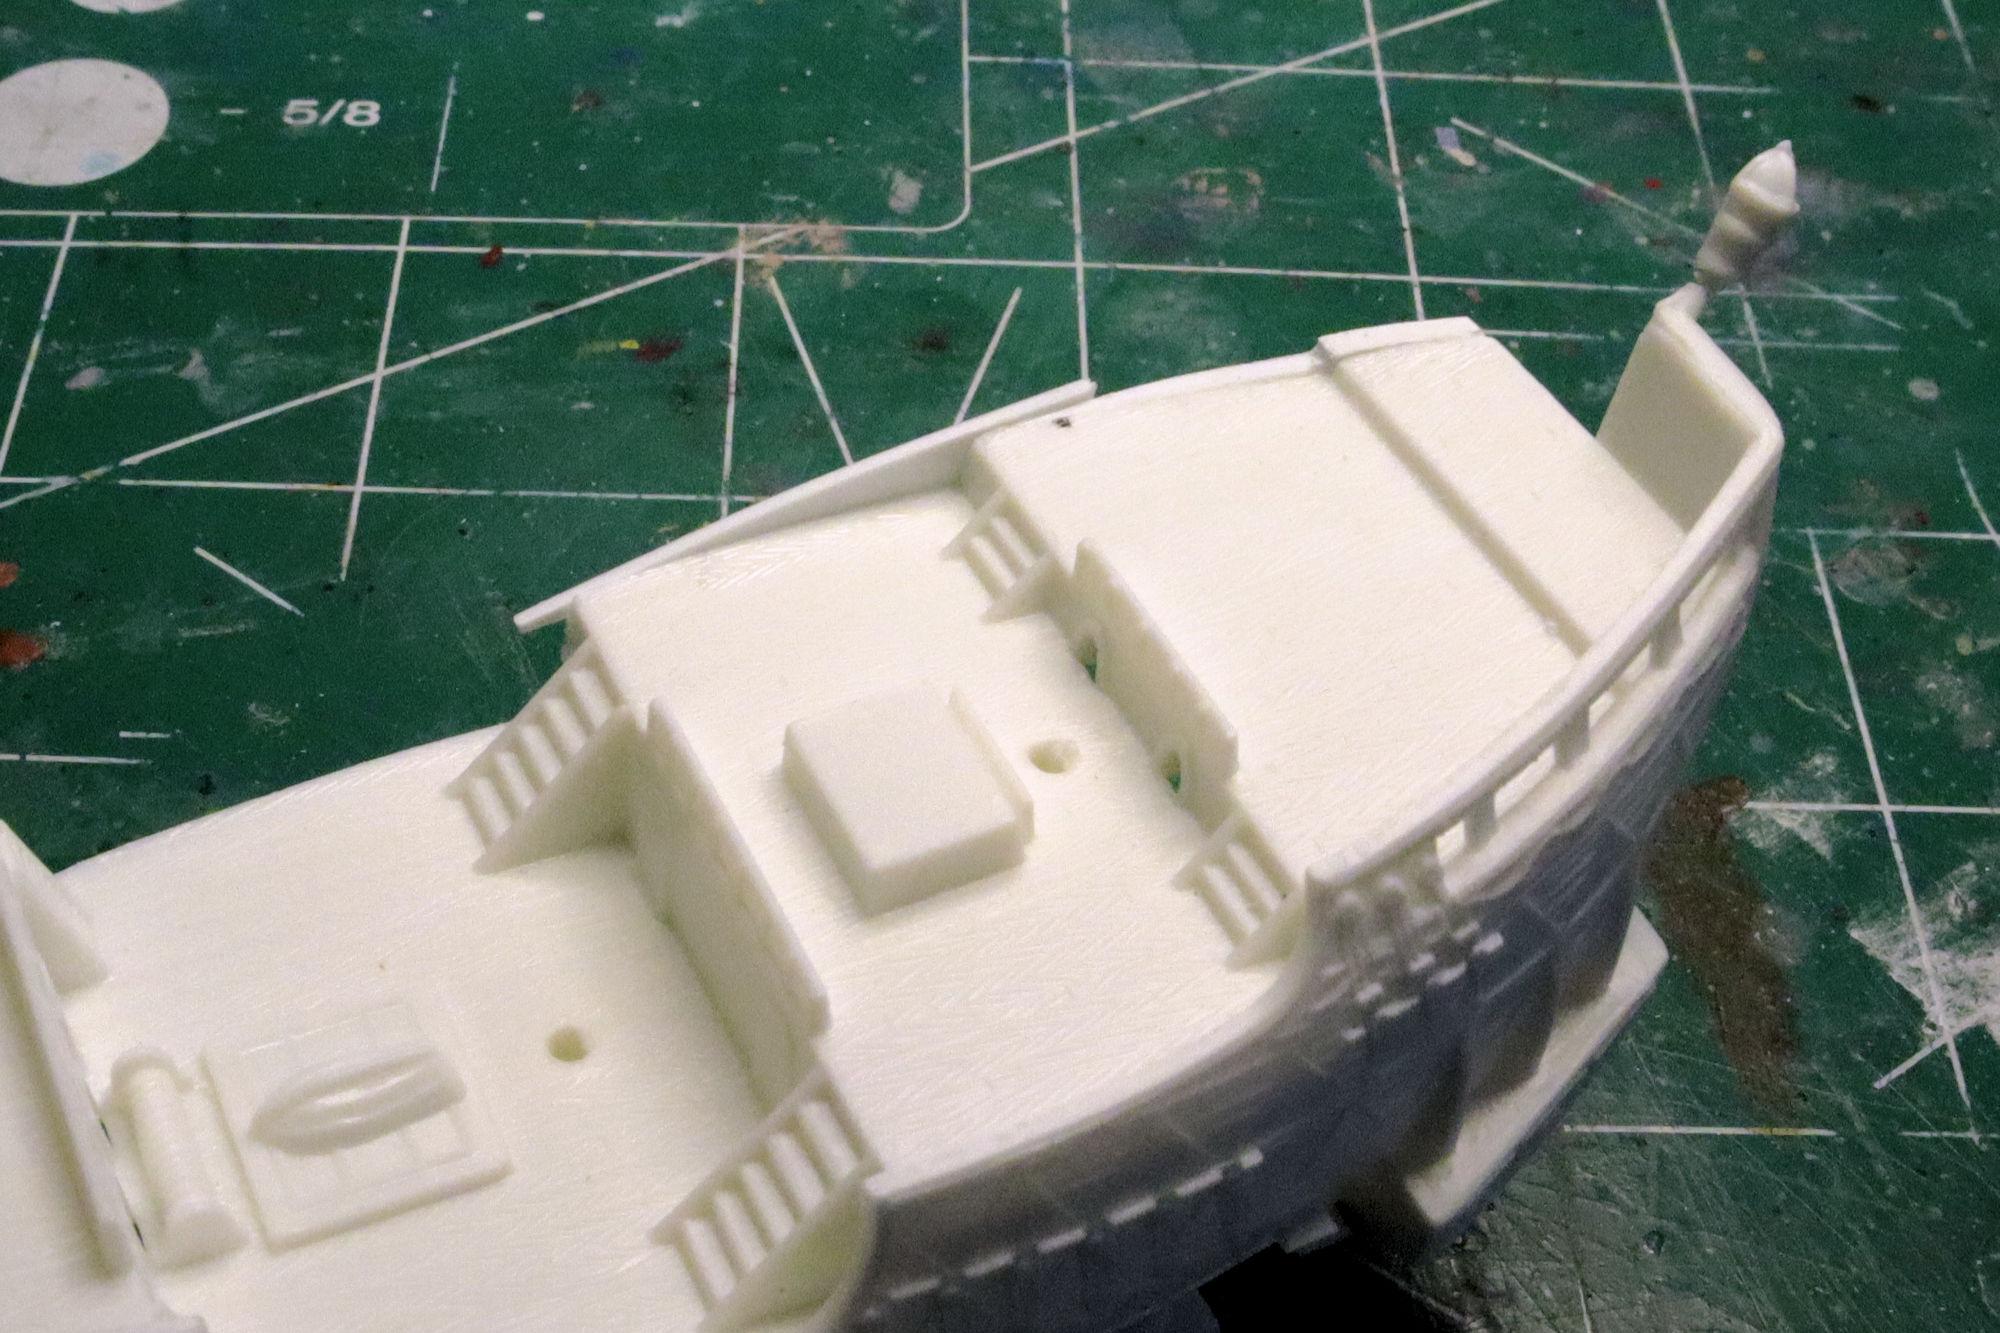
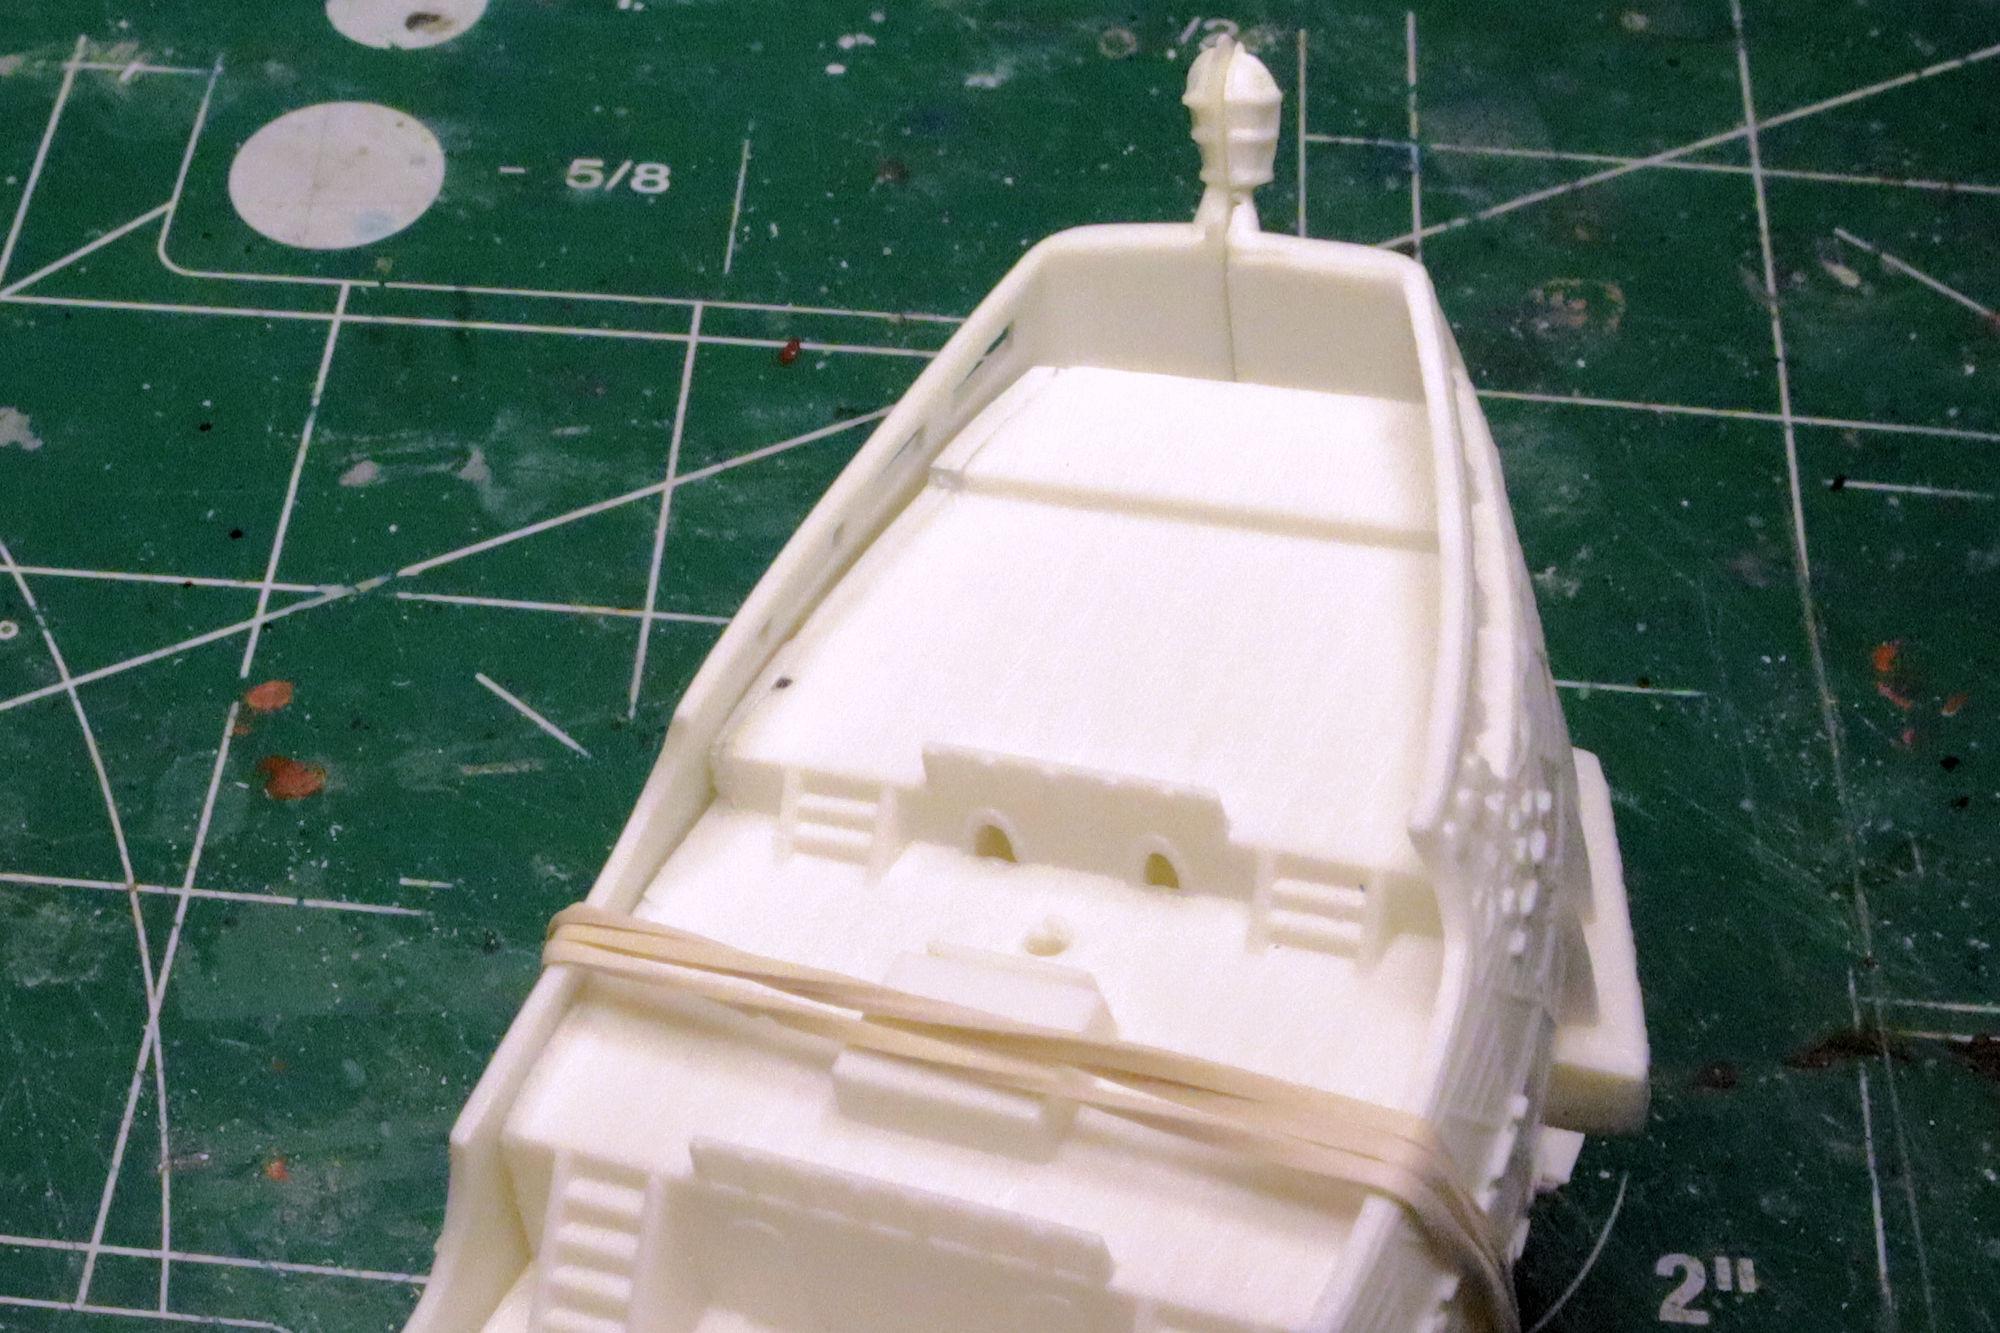
Hello Everybody! This is the Golden Hind Sailing Ship 1/245 Scale Lindberg Kit #70891. I don't recall that I've ever built a sailing ship before but this kit was given to me by a family member. I was looking for a simple kit to fill a gap between some other projects I thought "This one looks simple enough." Yeah, we know how that sometimes works out. This kit is supposed to be a rendition of the Golden Hind captained by Sir Francis Drake in the 1570s. The actual ship which inspired this kit no longer exists but a few replicas have been built and this kit holds little resemblance to any of them. The kit seems to be based on an entirely different style of ship. It's probably the standard base master from which all the other ships in Lindberg's series were derived from. Needless to say, I'm not particularly concerned about the historical accuracy of this build, I'm just going to pick the design elements I find most appealing and go for it.. This is what I would consider a "dime store kit" and the fit quality reflects that. It looks like some corrections and adjustments will need to be made. This gap in particular will require some attention. Starting with some scrap sheet styrene trimmed to shape. A second piece is added for the rise in the deck. After a bit of filing things begin to take shape. Filling one gap of course creates another. Which requires another bit of styrene. Another test fit reveals that a little more work needs to be done, but the situation is much more easily managed. As always, please feel free to post any comments you may wish share. Thanks for taking the time to look. David G.
-
Thank you most kindly @meechum68. I don't recall if I finished the one I built way back then but it was nice having a chance to re-live the experience. I look forward to seeing what you do with one of these kits. David G.
-
8 Car Transporter (71 Mopar’s)
David G. replied to Mopar - D's topic in WIP: Model Trucks: Big Rigs and Heavy Equipment
It looks so cool all loaded up and hitched! Not to mention the load itself. David G. -
Steady and noticeable progress. I have to say I'm a bit surprised to see those blocks in the attic. It must be structurally sound to support that kind of weight, credit to the builder. David G.
-
A lot of excellent detail and it just keeps getting better! David G.
-
Revell's Peterbilt 359: WIP
David G. replied to David G.'s topic in WIP: Model Trucks: Big Rigs and Heavy Equipment
Thank you Carl! It's completed now, hopefully I'll soon get the time to take some photos for the Under Glass section. =D- -
Revell's Peterbilt 359: WIP
David G. replied to David G.'s topic in WIP: Model Trucks: Big Rigs and Heavy Equipment
Hello Germán, thank you. Yes, please feel free to use any any techniques or tricks that I share. I'm glad knowing that the build threads I post can be helpful. Thank you kindly Brenton. They are good kits and build up quite nicely, it seems that they would be a good starting point for customization. David G. -
Welcome back David. The shingles are looking good on the bungalow. David G.
-
Clever work Anton, using the bumper stickers to cover the errors. I do that kind of stuff all the time. Like this custom '62 Buick I built back in 2013. I made this "award plaque" to cover up a glue spot on the dashboard. Cheers! David G.
-
Revell's Peterbilt 359: WIP
David G. replied to David G.'s topic in WIP: Model Trucks: Big Rigs and Heavy Equipment
Hello Everybody! After my trip to the mountains, it took me about a week to reinsert myself back into my regular routine. Here are the results of my most recent efforts. My most recent build session was a rather productive one. Most of what's left to do is attach is the grab irons, clean up the water spots and give 'er a little polish. This will probably be the last entry for this one in the WIP. It'll take me a while longer to finish up the remaining details, then it's off to the photo studio for the "Under Glass" pics. I'll post a link here. Thanks again to all of you who followed along and offered your supportive comments and insights. David G.
-
Thanks @VanGoGo, I'm glad to know you enjoyed it. There were a number of these themed show rods, but the Mummy Machine was my favorite of the set. I think my brother had the werewolf. BTW I have a build thread for this if you're interested. Thanks again for the kind comment. =D-
-
What a great vehicle to replicate, too cool! "When you need to go on holiday... fast!" I never knew there was such a class, let alone a record. Do you also plan to build the trailer and towing mirrors? The towbar looks great BTW. David G.
-
Thank you Ken. No fit issues that I can remember other than the headers, those were a little tricky. As I recall, I kind of "faked" 'em in there if you know what I mean. =D-
-
I really enjoy seeing all this come together. Thanks for taking the time to share it with us Anton. David G.
-
We all do our part. Thank you again for your kind acknowledgement. =D-
-
Thank you kindly Anton. =D-
-
This is shaping up to be one fantastic build Anton. I believe that all the little details we add, seen or unseen, contribute to the overall impression of realism. One of my little sayings is: "The mind still perceives what the eye cannot see." BTW: I googled "whey tissue" because it's not a common term here in the States. All I found were references to sequestering cheese protein. 😆 My curiosity is getting the better of me, could you enlighten me please? David G.
-
Thank you Anton. =D-