David G.
-
Posts
11,314 -
Joined
-
Last visited
Content Type
Profiles
Forums
Events
Gallery
Everything posted by David G.
-
Excellent work, love the color! David G.
-
Thanks Mike. Thank you Donald Thanks Sam, I just couldn't use that... thing... that AMT provided as a spare wheel kit. Thank you Jay. Thank you Don, couldn't change it if I wanted. Thank you Bernard, it's nice of you to say so. Thanks Chris, David G.
-
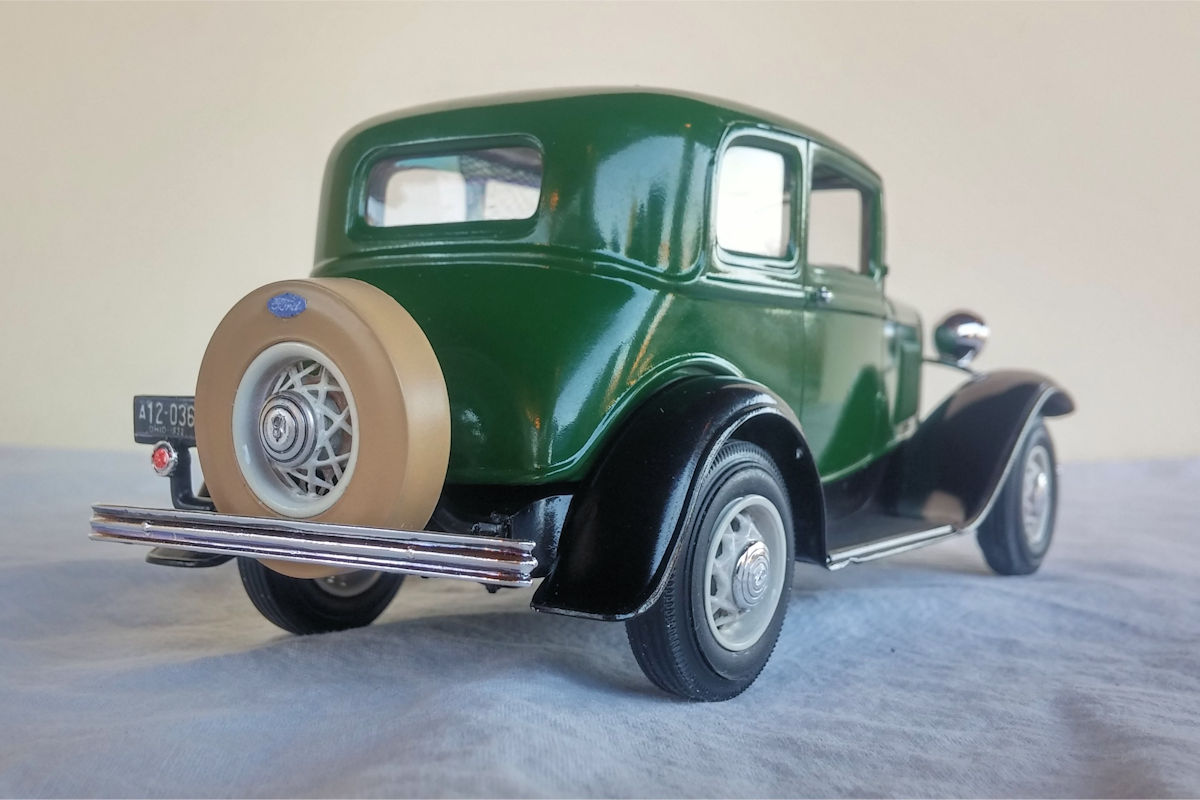
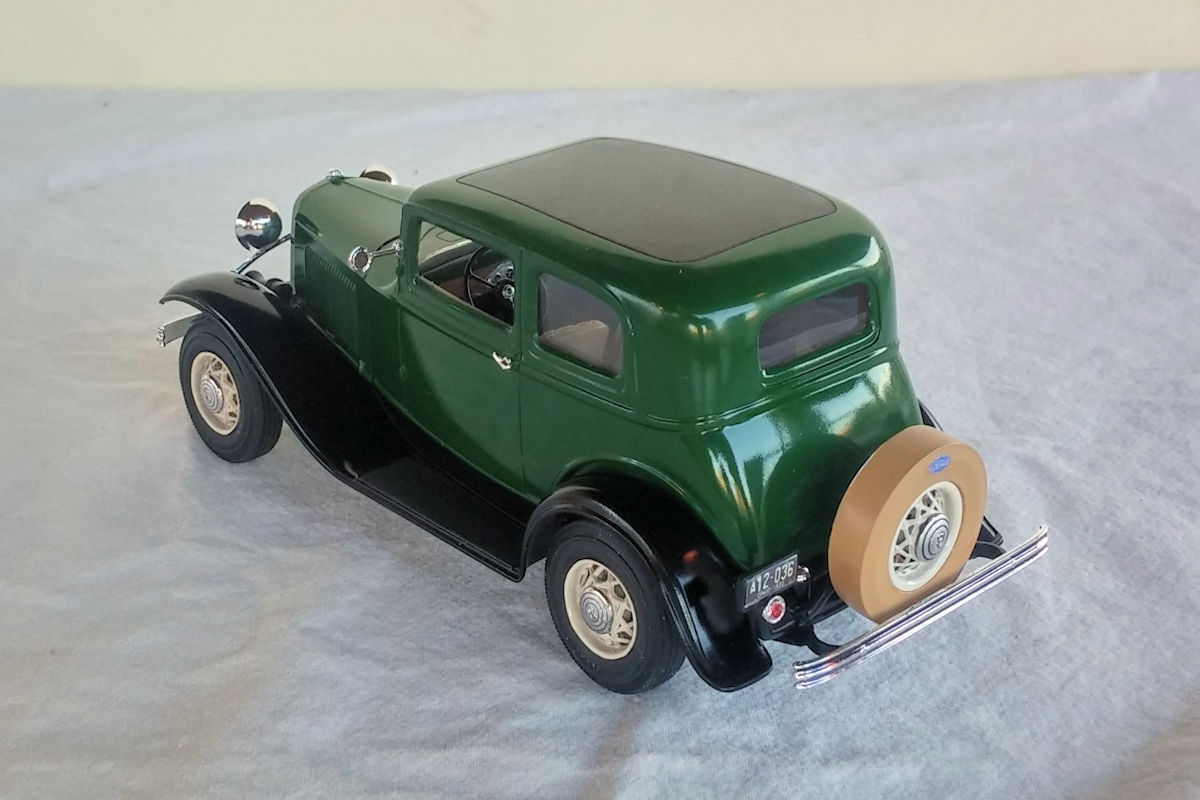
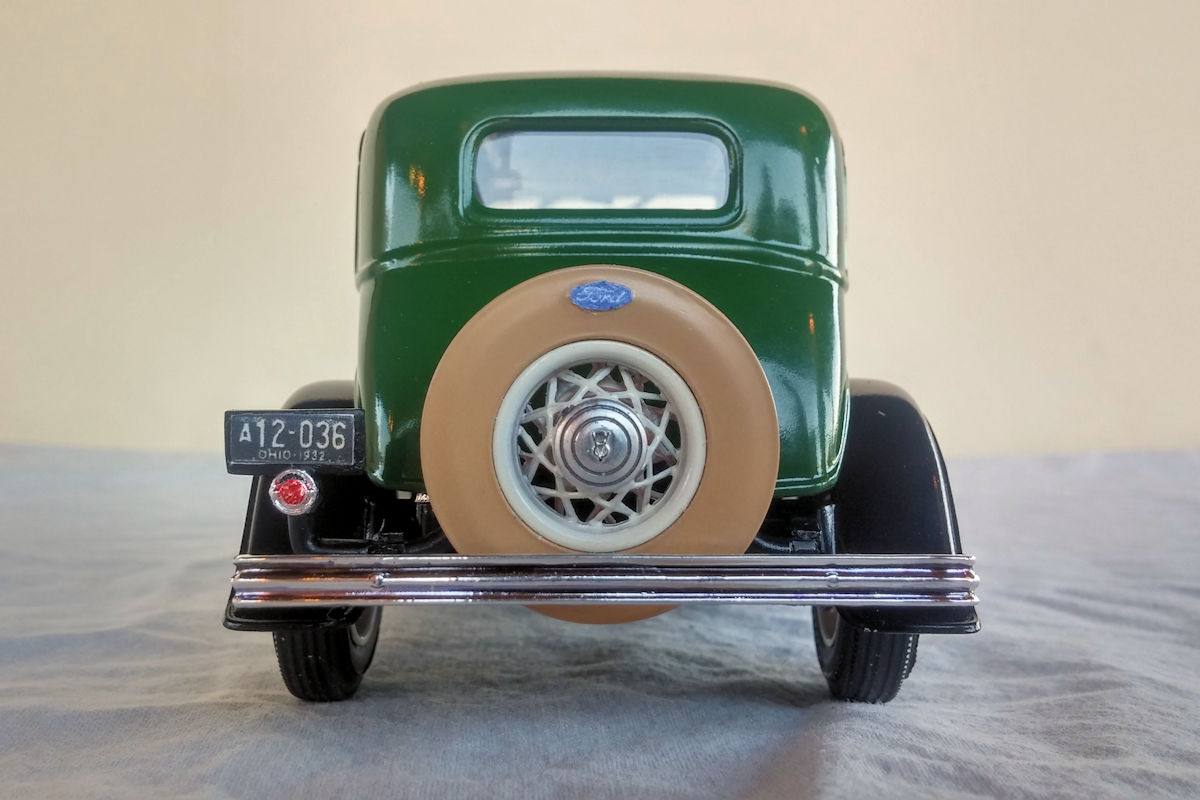
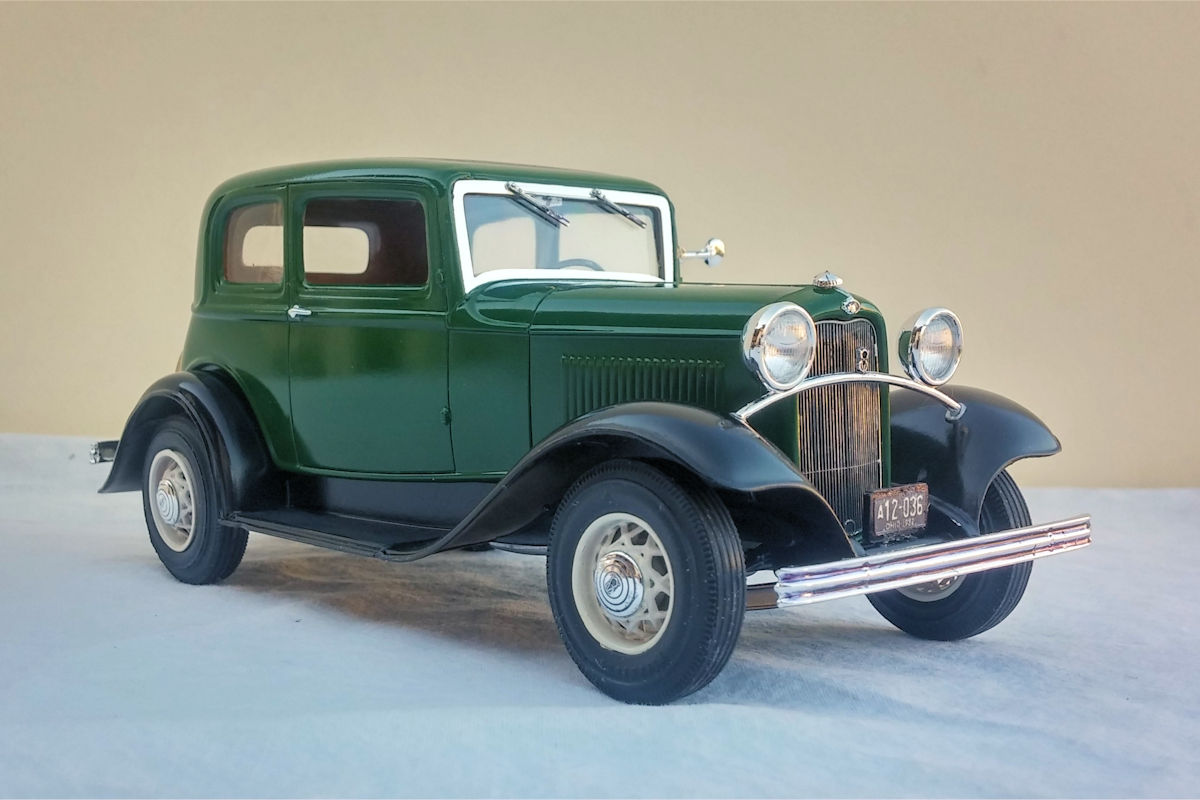
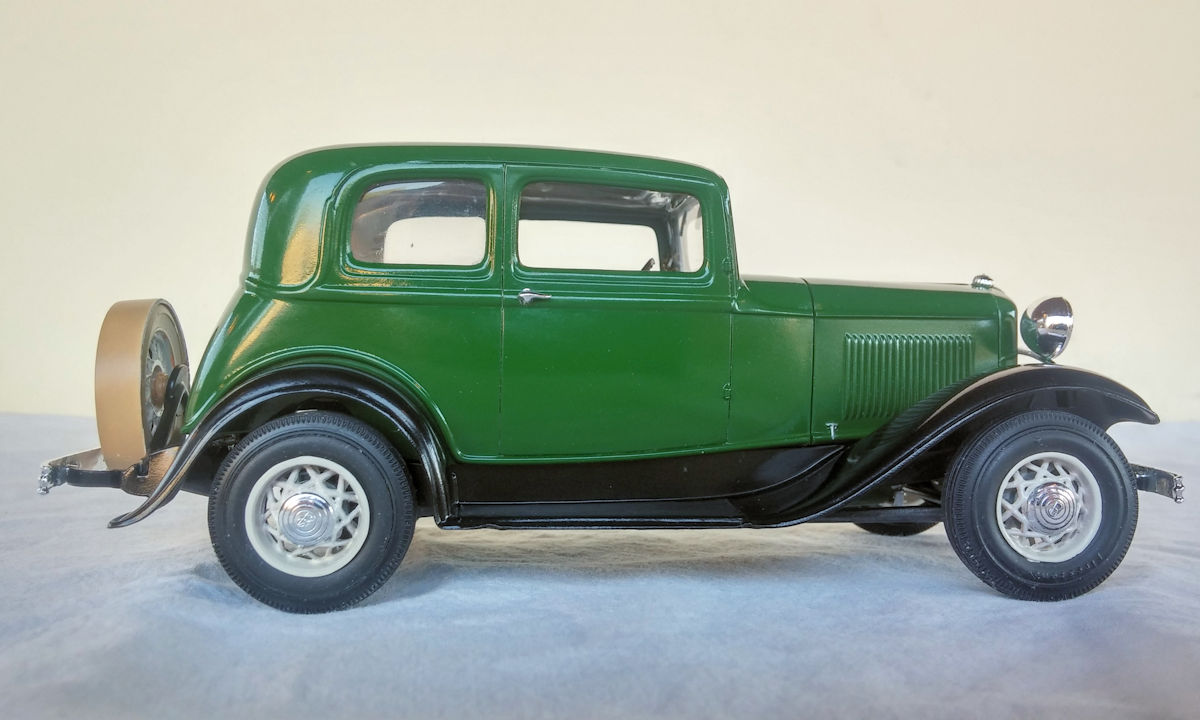
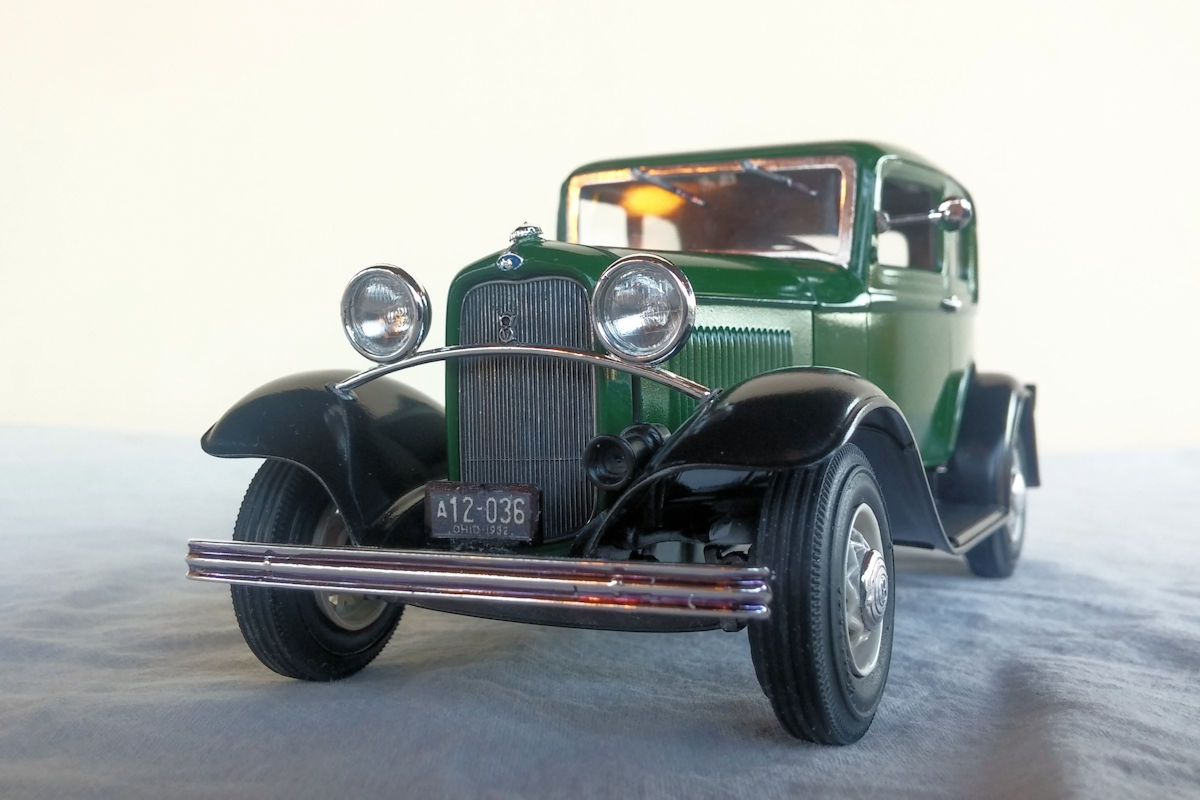
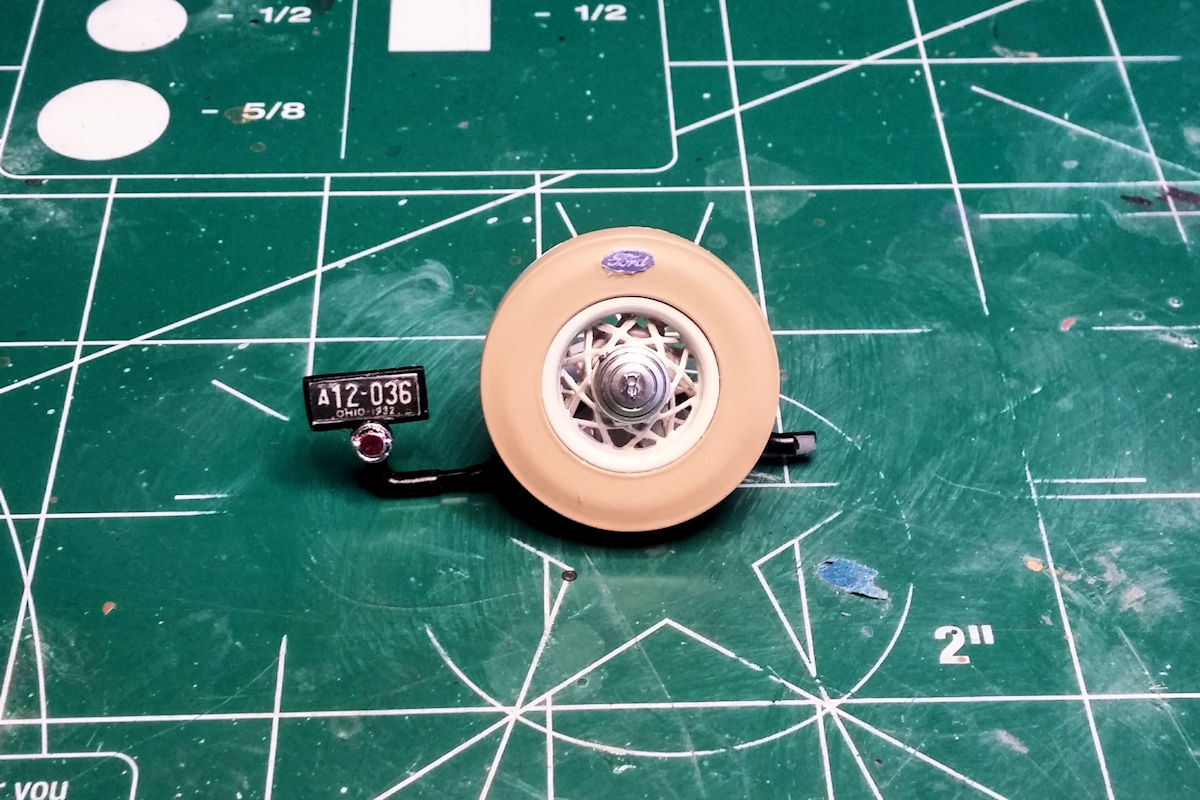
I had one of these kits when I was 12 or 13 years old. I don't recall that I finished building it but I do remember that I enjoyed working on it. When I found this kit at a swap meet a few months ago, I just had to get it and take another shot at it. If you're interested, the "On The Workbench" build thread is here. On with the show! Beauty Shot. I had to manufacture a front license plate mount for the front plate... which I also made on my printer. Here is the spare wheel and cover that I put together, donated to the parts box from some long-lost kit. Worm's Eye View. Safe at home in the display case. As always, thanks for taking the time to look and always feel free to comment. David G.

-
Excellent engine and interior detail! David G.
-
Excellent work! Everything is spot-on! David G.
-
Good rescue, nicely done! David G.
-
Love the color, excellent work on the wood.. work. David G.
-
Finished now! Grabbed a quick snap last night. I'll post more in the "Under Glass" section soon. Thank you all for your support and kind comments, I do appreciate the feedback. David G.
-
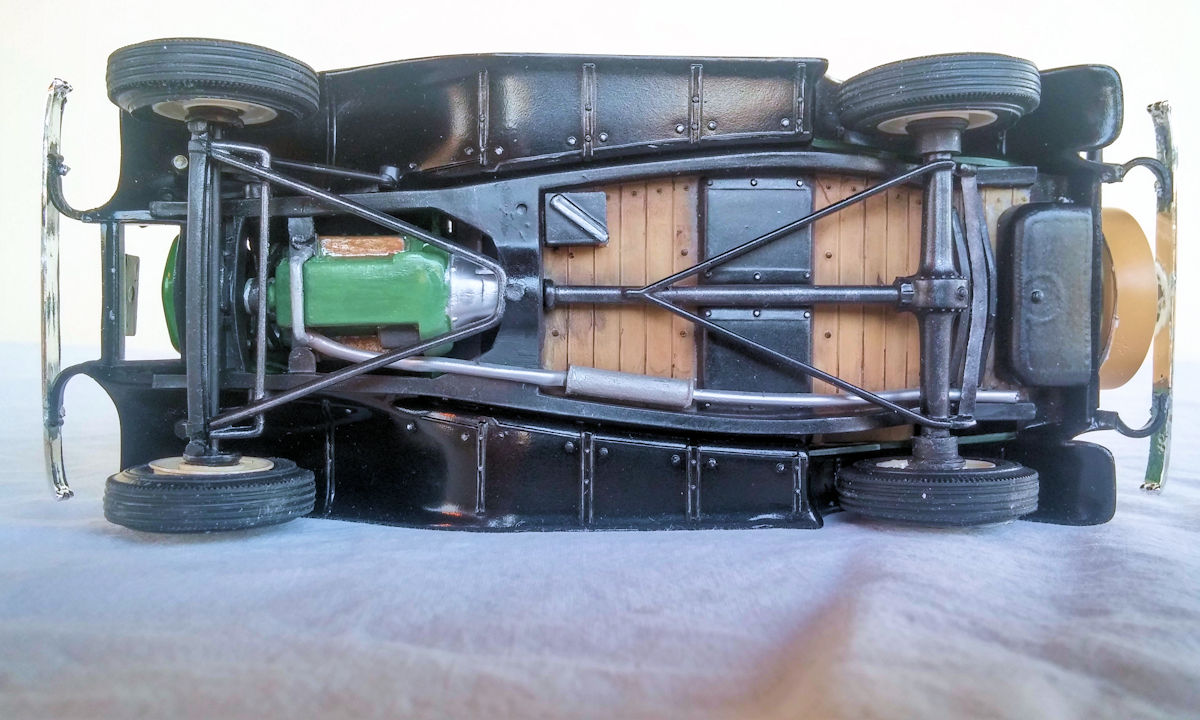
Thanks Mark. I just couldn't live with the one that came in the kit. It just seemed... wrong. I tend to favor stock builds- a custom or hot rod Deuce is almost a cliche'. Thanks for your comment Bob. Hello Mike and thank you. If you mean the wood on the dashboard, I painted it with Poly Scale Rust, which has been discontinued, but any medium brown acrylic will do. After it dried, I used a brown fine-point Sharpie and made some light lines on the paint to simulate wood grain. The initial lines were a little too dark for my liking so I moistened a cotton swab with rubbing alcohol and dabbed and rolled until the lines looked the way I wanted them to. If you are asking about the wood on the undercarriage, I painted it with a rattle can and used a thin black wash then weathered it with Black and brown pastels. David G.
-
Nicely done! David G.
-
Looks like excellent work so far. "Makin' a silk purse from a sow's ear." as the saying goes. David G.
-
 Nicely done! David G.
 -
Rapid Transit System " paint code cuda "
David G. replied to dragmodels44's topic in WIP: Model Cars
That is sweet! Top notch all the way! David G. -
Vintage Popcorn Wagon
David G. replied to gasser59's topic in WIP: Model Trucks: Pickups, Vans, SUVs, Light Commercial
The original food truck, cool! David G. -
Looks Great! David G.
-
OK, Vicky the Deuce is pretty much done. I just have to place the bumpers and a few other little fiddly bits then get some good photos. In the meantime, this should be about the last update before going "Under Glass". The spare wheel and license bracket are finished. A little rough, but finished. As always, thanks for looking and please feel free to comment. David G.
-
Rapid Transit System " paint code cuda "
David G. replied to dragmodels44's topic in WIP: Model Cars
Every time I see this build, it just brings a smile to my face! Thanks for sharing it Steve. David G. -
1978 Dodge Monaco Gotham City PD (Photos Restored)
David G. replied to David G.'s topic in Model Cars
Thanks Ron! David G. -
1978 Dodge Monaco Gotham City PD: WIP (Photos Restored)
David G. replied to David G.'s topic in WIP: Model Cars
I think you Monaco came out really good John. I enjoy all the extra detail you've put into it. David G. -
Rapid Transit System " paint code cuda "
David G. replied to dragmodels44's topic in WIP: Model Cars
Cool project, looks great so far! David G. -
Excellent weathering! David G.
-
Great work in spite of the setback. David G.
-
Love the interior detail! David G.
-
Amazing Work! David G.
-
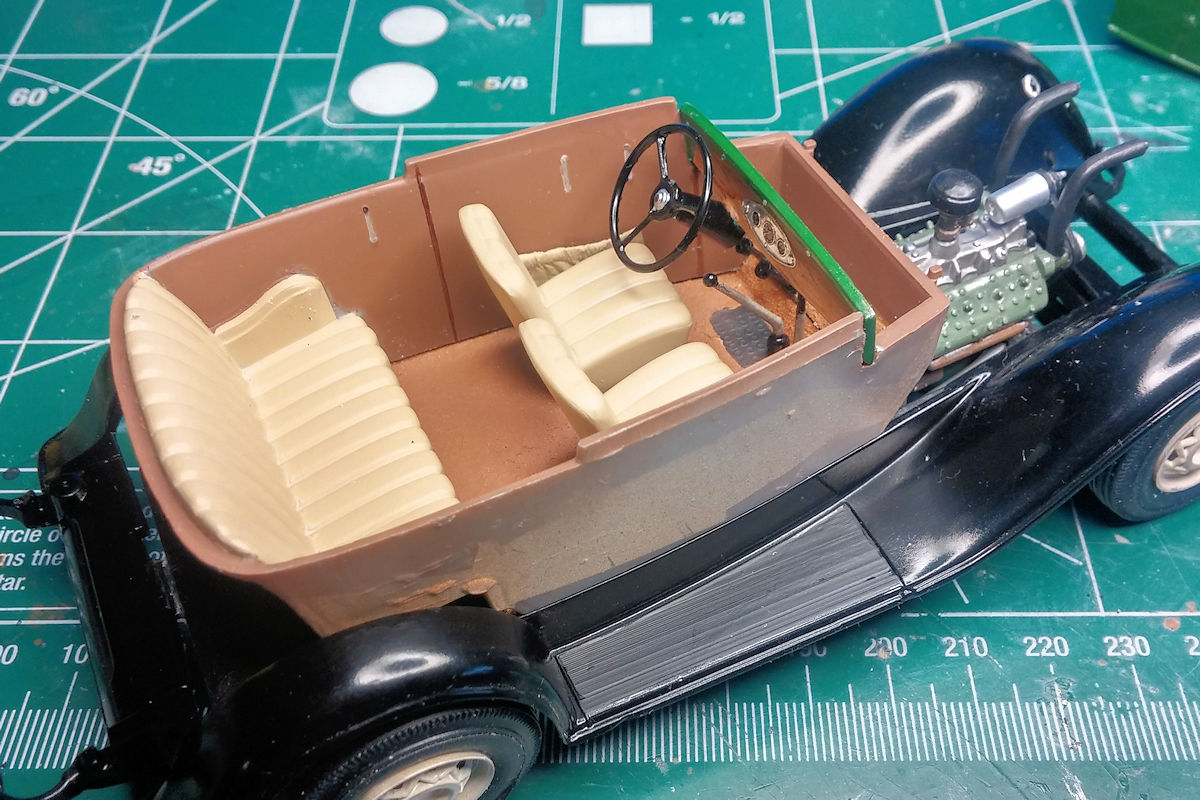
While I was waiting for paint and putty to dry on the spare wheel kit, I managed to get the interior done. A very simple, very plain interior most of which will not be visible after assembly. I dressed it up a little by making some side pockets for the doors out of masking tape. I also added some dash detail. As always, thanks for taking the time to look and please feel free to comment. David G.