MrObsessive
-
Posts
9,785 -
Joined
-
Last visited
Content Type
Profiles
Forums
Events
Gallery
Everything posted by MrObsessive
-

Resin Half Up Top
MrObsessive replied to StevenGuthmiller's topic in General Automotive Talk (Trucks and Cars)
That might be in scale, but then there's the issue of attaching it to the folding frame and then looking neat and not 'ungainly'. Years ago, there was a 1/25 scale Chrysler Sebring Convertible promo that had a folding top. I don't remember who made it and while the top did fold into the rear well, the raised portion of it to my eyes was waaaay outta scale and would have been more suited for something much larger. At least 1/12 or bigger. -
That 300SL Gullwing.............I'd break the bank for that! Wasn't that supposed to be out a couple years ago? I know they like to focus on European subjects, but I'd sure like to see a couple more American ones. '63 Corvette Stingray '55-'57 T-Bird How 'bout a '68 Shelby GT500KR Convertible?? If their '67 Shelby is any indicator, that would sell like hotcakes!
-
Just got notified of this big boy coming from DeAgostini and ModelSpace. Just when I have ONE LAST PAYMENT to make on that 1/8 scale Shelby of theirs, they drop this bomb on me! If I get too many of these things, I'll need a bigger house! The Shelby has already taken up about 25 medium boxes of space with parts and such to be done stacked on one side of my build room. Hmmm.............this one has me drooling for sure and you VW guys are sure to love this one!
-
Amt '66 Riviera: your input, please
MrObsessive replied to Ace-Garageguy's topic in Car Kit News & Reviews
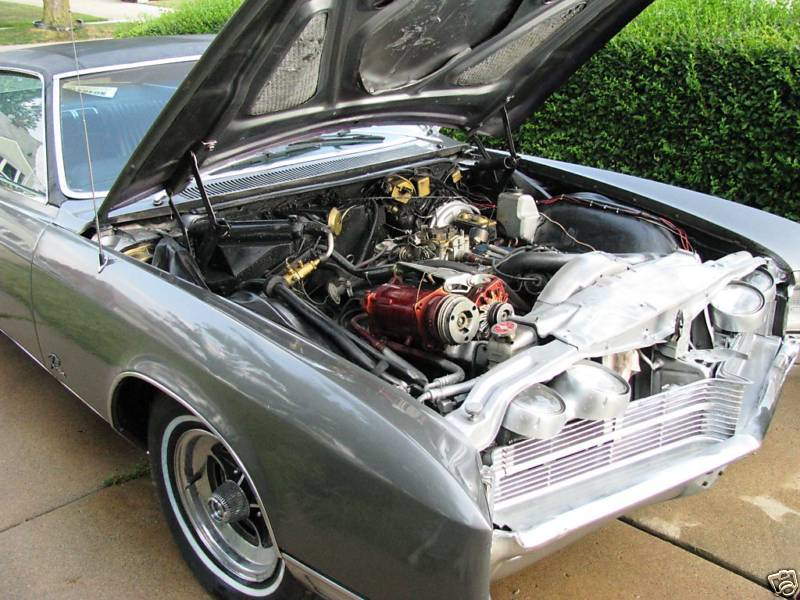
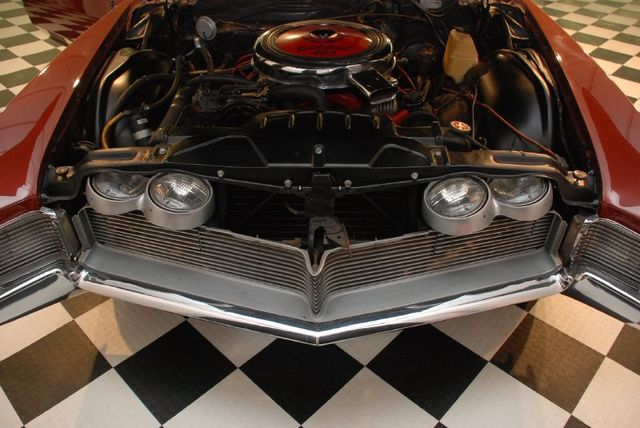
It's been mentioned, but that's one of the things I don't like about that kit------the lack of headlights when the hood is opened. That's one feature that's VERY conspicuous by its absence! Without those it looks 'incomplete' to me. If/when I'd ever build this, it's one detail that MUST be in my WIP!
-
I have HRM's Daytona and while it is spendy.............it's worth every penny! So much improved over the Gunze kit as you'll get a complete engine and other parts that were left out of the plastic kit. Gunze's Jag I have also, but the one to get is the E-Type that had the removable hardtop included (green car box art). That one is as scarce as hen's teeth! I can't even remember the last time I saw one turn up on eBay. If/when they do show up, either the BIN price is outta sight, or it'll get bid up into the stratosphere!
-
I think that the Grand Prix's, Venturas and Catalinas all shared the same wheelbase. The rear quarters could stand to be a tad shorter but yes........find a suitable 1965-66 GM B Body two door hardtop roof, swap it for the Grand Prix with some other changes and there you go.
-
Absolutely BEAUTIFUL!!
-
Resin Half Up Top
MrObsessive replied to StevenGuthmiller's topic in General Automotive Talk (Trucks and Cars)
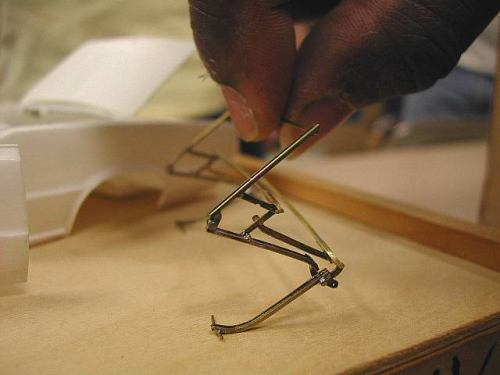
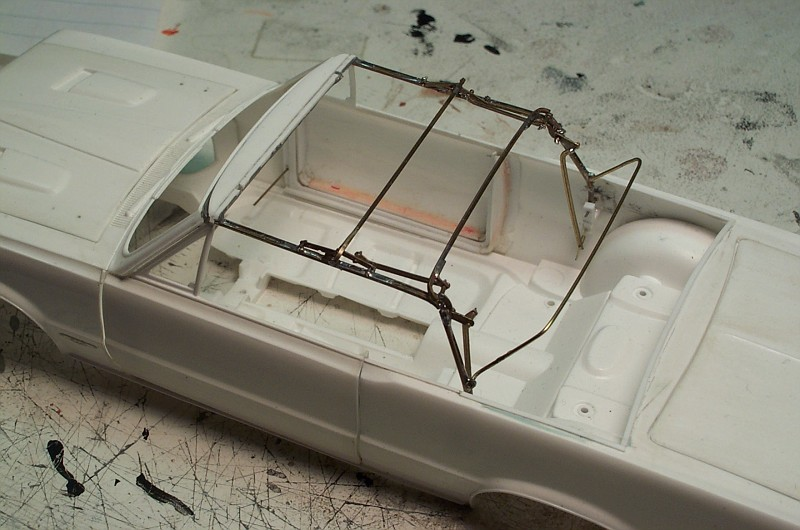
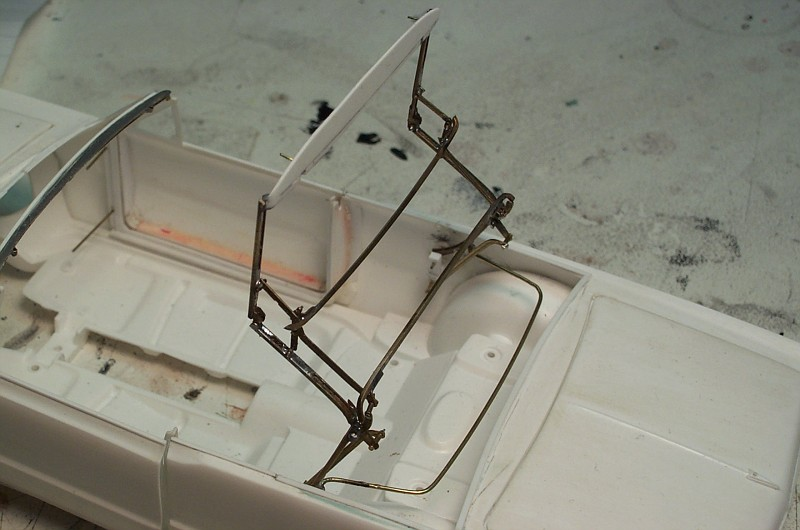
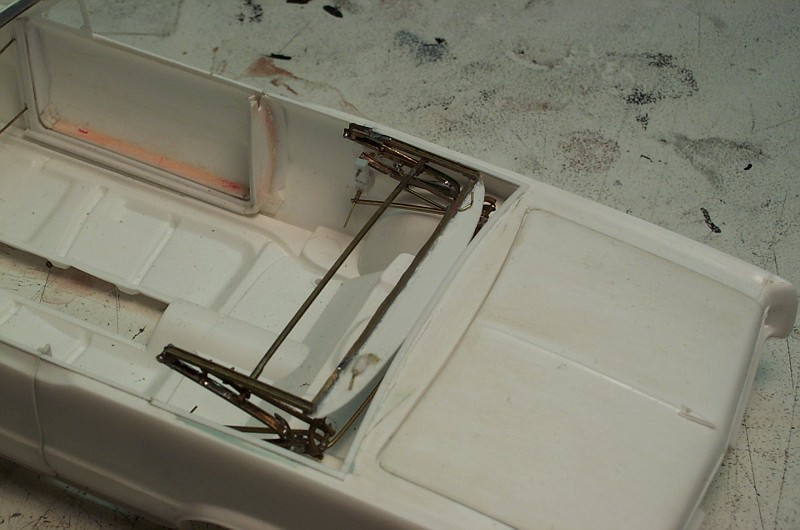
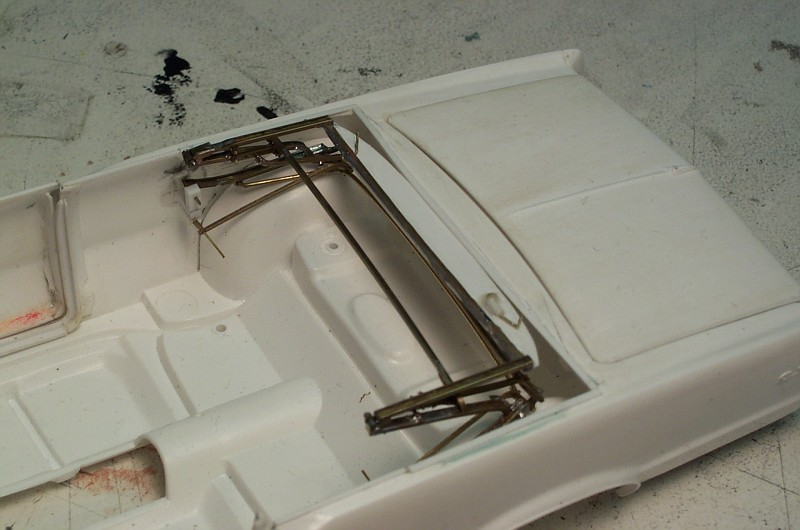
Joe, I built that long before I had digicams and whatnot (2003). I tried using the fabrics you mentioned, but the problem came in with it looking in scale and looking neat. You know how I hate things that are out of scale and flat out don't appear correct. A larger scale that would look OK.............I have several of those 1/12 Danbury Mint cars that have folding tops and in that size they look OK for me. As far as parts layout..........everything I did back then was eyesight engineering with pics from a GM assembly manual, just simplified for 1/25 scale. -
Resin Half Up Top
MrObsessive replied to StevenGuthmiller's topic in General Automotive Talk (Trucks and Cars)
Believe it or not, I still have this frame although it's no longer in the car. Never did find a suitable fabric for it and at this point I'm no longer interested as my building style has changed a bit over the years.
-
Resin Half Up Top
MrObsessive replied to StevenGuthmiller's topic in General Automotive Talk (Trucks and Cars)
Hell, I can do that! A whole lot cheaper than $45! I have to say that looks pretty cool..............nice idea for a diorama for example. $45?? That's a bit steep when you can get entire nice resin bodies for less than that. -
Auto quiz 398 - Finished
MrObsessive replied to carsntrucks4you's topic in Real or Model? / Auto ID Quiz
Yup............got this one too! -
Heresy! A six in an AMX! Just kidding........very nice work and where did you source the chassis? Looks MUCH better than anything I've ever seen from Johan!
-
Disassembling an old model
MrObsessive replied to Againmikewins's topic in Model Building Questions and Answers
Hmmm..........that can be a tough one. You might want to try running some mineral spirits around the skirts to see if that will soften the glue up a bit. It won't hurt the plastic though. You can also try dunking the body in some water and then putting it in the freezer. The icing action may pop off those skirts, but it'll depend on how much glue they used. That stuff can be tough no matter the age! Hope this helps! -
Some eBay Weirdness...
MrObsessive replied to Mike999's topic in General Automotive Talk (Trucks and Cars)
One thing I miss about the old days of eBay is seeing who the actual bidders are. I could see who I might be bidding against and that might have determined if I really wanted that item or not. Some of the eBay users I knew personally, and I may not want to bid against a friend for instance, especially if I know it was something they wanted really bad. Now eBay hides all ID's for good reason------lots of scammers popping up over the years and eBay wants to try to stay out of as much legal issues as possible. -
Some eBay Weirdness...
MrObsessive replied to Mike999's topic in General Automotive Talk (Trucks and Cars)
Been on eBay since 2002, and I did that very thing just the other day. The kit was the old Airfix Aston Martin DB5 (built with original box) and it sat for DAYS with no takers. Right at the last day, it started to get bid on and I raised my maximum at least three times as I really wanted this. No one tried to snipe at the end however...............got it for $33.00! -
Autoquiz 397 - Finished
MrObsessive replied to carsntrucks4you's topic in Real or Model? / Auto ID Quiz
Yup! Sure did! He had responded back and said I had the right answer. I had sent him a PM via his avatar. -
Autoquiz 397 - Finished
MrObsessive replied to carsntrucks4you's topic in Real or Model? / Auto ID Quiz
Kinda easy.......I think I got this one! -
It would be great to see this on my shelf someday............... It would require some bucks though as I have a '70, but not the '71 to make this. Too bad this never made production.........it was to be the '71 AMX, but AMC decided against it due to lackluster sales of the '70. I don't want to trash the '70 I have, maybe find junkers someday to do this.
-
It's safe to assume that if you're planning to build an accurate Johan '69 AMX, get ready for LOT of corrections including the engine. The only thing really correct about that kit is the body-----everything else is either flat out wrong, or not quite accurate for the car. This was originally on my to do list to build, but the Shelby won out. I have all the bits and pieces to do a correct car including the engine, air cleaner decals, and PE. I'd like to shorten up a Mustang chassis as I don't like the Johan chassis at all. Modified inner fenders would be in order too as the kit ones are woefully wrong.
-
I'm not sure the Johan '68-'69 AMX's are represented accurately at all as far as the interior. At least the last reissues of the '69 appeared to be more out of the '70, than the '69. Exterior wise the cars were identical save for slightly different wheels between the model years, and some other very subtle changes. Here are some door panel pics as I've got a ton of 'em since I once owned the 1:1........... 1968 1969 1970 Last time I looked at my kit (buried with others on my third floor), the door panels looked more like the '70 above than '69. Johan's original annuals might have had the correct interior initially, but through the years they used whatever they had on hand to make a particular kit as the tooling aged. Hope this helps you out!
-
Yup! Sure does! Besides stopping the bleed through, it will seal the plastic as far as not letting the hot solvents in the paint get through the plastic and cause the crazing. As I mentioned earlier, today's plastic is not as tough as it was 15-20 years ago. It's been reformulated (read: cheaper to manufacture) and at the same time unless you want to stick to the very basic enamel paints for body colors, that'll be as far as it goes into painting the bodies with actual 1:1 paints. I remember years ago this was a VERY big issue on the Hobby Heaven board (now Spotlight) where guys were SCREAMING about the crazing issues with the then new kit of the C6 Corvette and the 2005 Mustang. It was addressed to Revell and Revell later responded that they could not duplicate the problem that many were having. I can just about guarantee they were not using automotive paints, but the regular hobby enamels and while that might be OK for some, if you want the realistic colors that the cars on the road have, you have to use the hotter paints. What they weren't telling us is that the plastic had indeed changed as I was building kits that were molded in the '90's and I didn't have this issue. Just regular airbrushed Plastikote primer and automotive paint mixed by my local paint shop. Here's another good example of a model I did that was painted in the way I just described................ This Daytona was built back in 2000, and the kit I think came out around 1997-98. It was painted in the way I described----no sealer, no barrier coat, just primer and airbrushed automotive Hemi Orange. You'll see there is no crazing and interestingly enough, this is one of the few metallic paint jobs I was able to rub out and polish with no mottling of the metallic flakes. I had no idea this was a metallic paint till I got it as it's very, very subtle. I wouldn't do this today with this kit if it were molded presently. I just don't like to take chances with paint jobs and I want to be able to get it right the first time as I HATE stripping paint and starting over! This is where it's also VERY important especially today to test your paint out. Hidden areas of the body (under the hood for instance) or plastic spoons is good, but those plastic spoons I think are still a tougher plastic than what the kits are today. HTH!
-
Well, I airbrushed just about everything. Gave up on spray cans for bodies back in 1985 as like you, I tried three or four times to paint the model and for whatever reason the paint kept curdling. I got my first cheap airbrush (a Badger 150?) and have been using airbrushes ever since. In the case of my Cougar II, I used a barrier coat of Future Floor Wax (actually an acrylic liquid) as I stopped trusting kit plastic since about 2004-05. I then airbrushed on a several coats of Plastikote T-35 Gray primer, then the color coat was Duplicolor 'Claret Red Metallic' (don't remember which car manufacturer), which was very close to the Cougar's metallic red. Believe it or not, the whole works was clearcoated with Tamiya's X-22 water based acrylic (airbrushed), then rubbed out with Detail Master's polishing cloths and polished up with Meguiar's Car Cleaner Wax and a chamois cloth. A bit time consuming, but I'm a BIG believer in not doing body painting till everything else is built up first. I learned a long time ago that painting the body first can lead to big troubles as you have no idea how things will fit in the end. I want to make sure I have a method of getting things in without ruining a paint job with scratches, or breaking something on the body due to lack of test fitting. Hope this helps!
-
I'm restoring an MPC '74 (haven't started a thread yet) and I had to do some corrections in the sail panel area particularly. AMT's never quite looked right in the cowl area, particularly the convertible's windshield always seemed to 'low' for me. At least that's just me noticing that.......others may feel differently! It's curious why those chose to shape the rear window that way.....
-
I know how you feel! This was the model back in the mid '80's ("Those Famous Fords" reissue) that turned me off to spray cans forever! And yes, this can be a particularly fiddly kit as I did finally build one years ago. Neat kit with lots of detail though, and it's very interesting to see this turn into a drag car!
-
That is super nice and cleanly done! That's the Revell kit though........MPC and AMT never quite got that roofline right, and Revell's is 'bout spot on.