Gluebomber
-
Posts
322 -
Joined
-
Last visited
Content Type
Profiles
Forums
Events
Gallery
Everything posted by Gluebomber
-
Yamaha V-Max
Gluebomber replied to Gluebomber's topic in WIP: All The Rest: Motorcycles, Aviation, Military, Sci-Fi, Figures
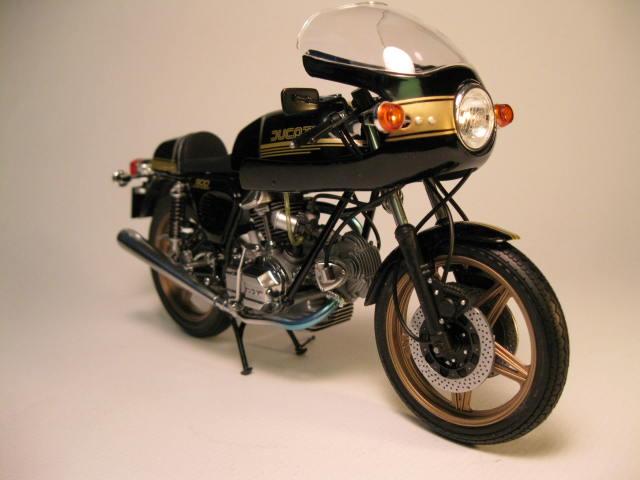
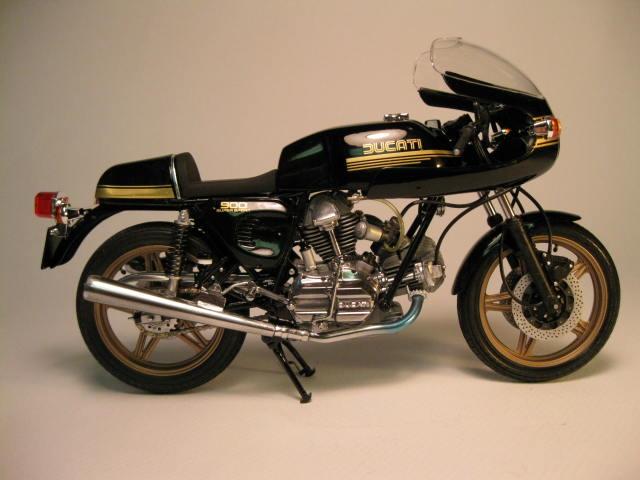
Jim, I built a 900SS a couple of years ago. I stripped the chrome from the exhausts, glued the muffler halves together, sanded the seams, and refinished with Alclad Chrome. I attached some pics below. Hope that helps!
-
Looks great, Ray!
-
Yamaha V-Max
Gluebomber replied to Gluebomber's topic in WIP: All The Rest: Motorcycles, Aviation, Military, Sci-Fi, Figures
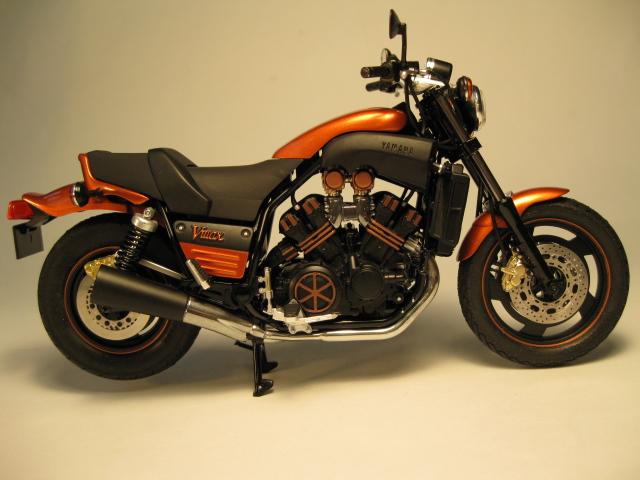
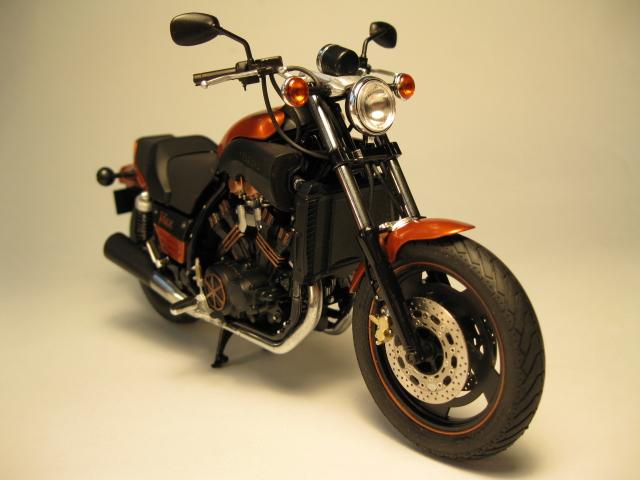
Thanks, Guys for the kind words. Joe, the kit I used was the Vmax 1200, No. 30 in the Naked Bike series. I got it in 2003, so I'm not sure if they're still around, but I doubt there's very much difference among the versions. Here's a link to a picture of the box from my kit: http://www.1999.co.jp/eng/10011072 Hope this helps! -
This is the Aoshima 1/12 kit with the Hobby Design detail set. The p/e engine details are painted Alclad Copper. Paint is House of Kolor Cinnamon Pearl. All comments, positive and negative, are welcome. Thanks for looking!
-
I like it!
-
Really nice work, Shane.
-
Thanks, Curtis. I used black gouache on the window trim. You can get a tube any place that sells art supplies, like Hobby Lobby here in the US. I thin it with water with a tiny drop of dish soap and brush it on the trim a neatly as possible. For any place where I go "outside the lines", the excess can be cleaned off with a toothpick dipped in water. If I totally mess it up, it can all be wiped clean with a wet Q-Tip. The process is pretty risk-free. Hope this helps!
-
Looks good, Chris!
-
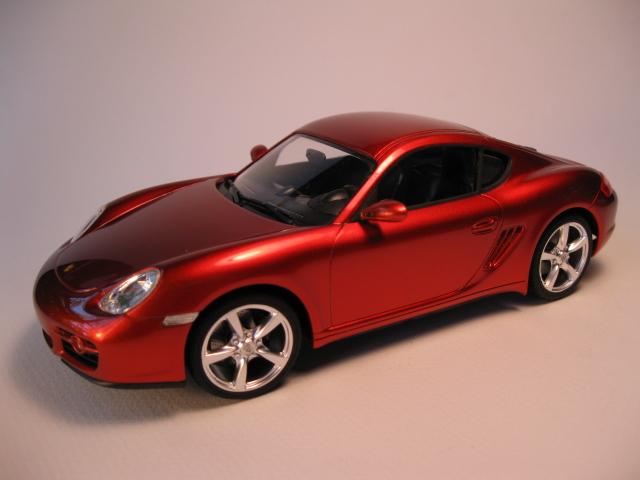
Thanks for the kind words, Chris. I have used Metalizer as an undercoat with no primer in the past, but it's been a while since I've done that. On the Cayman I used automotive primer and House of Kolor 3-part sealer before the painting the Brass undercoat. Since I discovered the sealer, I've been using it on all my models because it does such a good job of preventing "ghosting" of mold seams and other stuff that has to be sanded off the body. Unfortunately, my local HOK distributer isn't carrying the sealer in small bottles (4 oz) any more and is telling me the smallest he'll go is a quart! I'm hoping I can find an alternative before my current stash runs out.
-
Thanks for the kind words, Guys.
-
Nice work, Al!
-
This is a Fujimi Porsche Cayman I finished a while back. It's built box-stock and the paint is House of Kolor Kandy Tangerine over Testors Metalizer Brass, topped with HOK clear. Comments are welcome. Thanks for looking!
-
Really nice work, Mauricio. Did you you use the kit decals for the stripes? If so, how were you able to get them to lie down so well over the hood scoop?
-
Coventry Motors Cobra, ‘56 Ford F-100 BBW PU & trailer
Gluebomber replied to Phildaupho's topic in Model Cars
Really nice job, Phil! I've been interested in doing a Cobra in the Coventry Motors livery for a while now. Did you make your own decals for the Cobra as well as the pickup? Congrats on a great couple of models. -
You can get a set of 2E decals from Fisher Models for $6: http://fishermodels.com/?mainURL=/store/category/h9lh/Automobile.html They might be a little big because the Fisher Chaparral is 1/24 scale and the IMC kit is 1/25, but it shouldn't be too noticeable. Fred Cady also did a set for the Chaparral a while back, but those are pretty hard to find. Hope this helps.
-
Thanks, Guys, for the kind words. If you're getting bogged down with a bunch of super detailed projects, this kit is a good one to get back some momentum. It just about falls together.
-
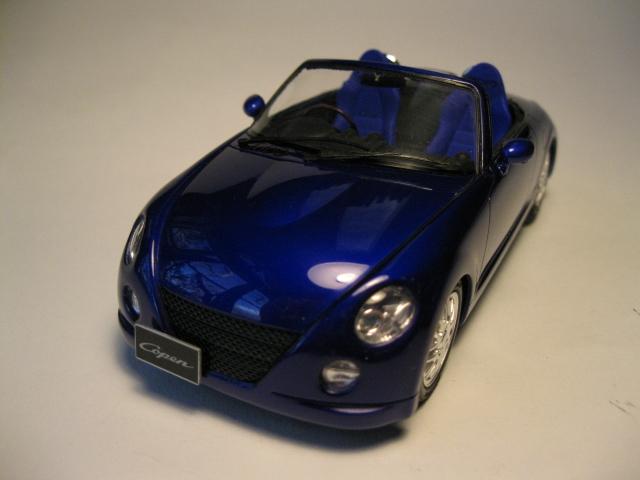
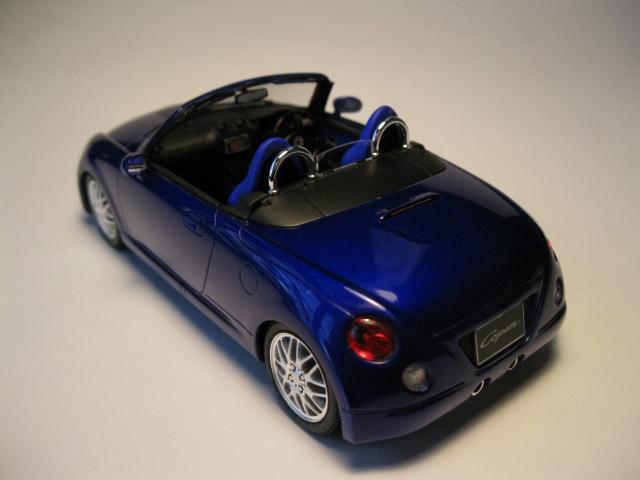
This is an Aoshima kit I picked up a few years ago that ended up being a fun out-of-the box build. The styling reminded me a little of an old Porsche Speedster or modern Audi TT, but I'm sure others would think it looks more like a jelly bean! Paint is House of Kolor Cobalt Blue. Comments, good and bad, are welcome. Thanks for looking.
-
Wow! Beautiful job, Steve. I'll be saving your pics to use as reference photos. Are these the Accurate Miniatures kits? If so, did you use any special tricks to get the rear body to sit so flush over the engine? I've seen several build-up photos of the AM kit, and in every one of them the builder couldn't seem to get the engine cover to sit correctly over the rear of the car. There is so much stuff packed in there, rear body panel always sits cockeyed. Yours looks great. Congratulations on a great couple of builds.
-
Really nice job, Scott. I've had this kit on my project list for a couple of years. Your model might get me going on it. Is all the chrome trim Bare Metal Foil?
-
Looks great, Chris.
-
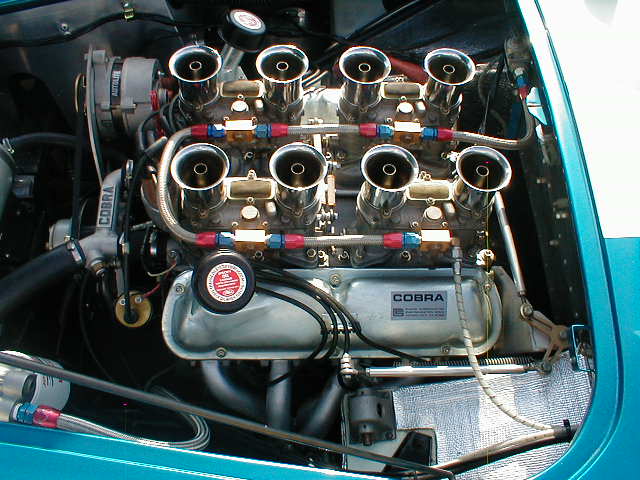
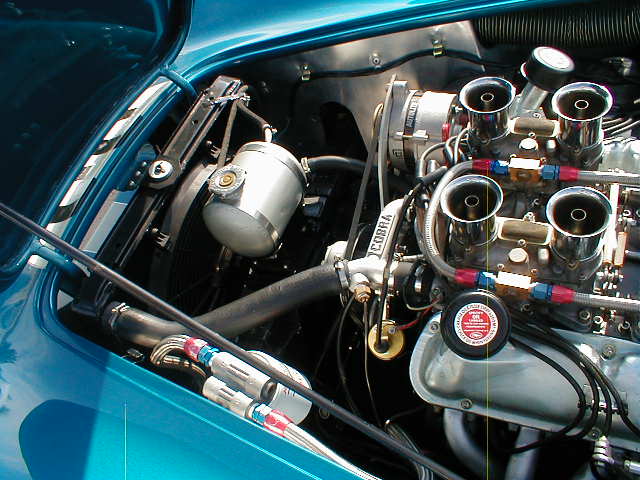
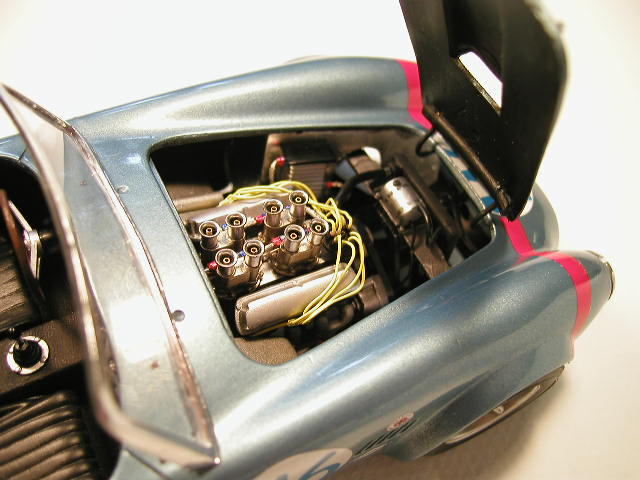
I've been interested in this thread because I tried a similar project a number of years ago. I really like some of the things you're doing, especially with the exhausts. Yours are going to be more accurate than the ones I fabbed. Also, your trick of widening the AMT 289 engine block was a clever solution to the problem of that engine looking "too skinny". In my case, I mated the now discontinued Scale Coachworks resin FIA Cobra body to the AMT chassis and used the 1/24 289 engine from the Revell Shelby 350GT Mustang with some Replicas and Miniatures Webers. I used the AMT 1/25 frame rather than the one from the Revell 427 Cobra because of the differences in the front suspensions between the 289 and 427 Cobras. I needed to widen track a bit and lengthen the frame by about 1/4", but other than that it worked pretty well. Here are a couple of reference pics of the engine compartment you might find helpful, along with the Revell 289 with the R&M carbs. Hope they help.
-
Boy, that is gorgeous! Congratulations on a great build.
-
Really Nice, Jim. Good detail and a great finish. SHINY Rules!
-
Great job so far, Jonathan. That color will look even better when all the black vents and trim pieces are in place. You've probably already thought of this, but don't forget to paint the insides of the door panels. The interior pieces only cover the center sections, so when you open the doors, the outer edges are exposed. I built the Fujimi kit and posed one of the doors open and realized this late in the game. It meant some tricky finishing and masking after I had the outside of the door painted and polished. Keep up the good work!
-
Very Cool, Jim! Great detail in the interior and engine compartment, I love the finish and water drop effect, and the antennas are trememdous. Super Job!