

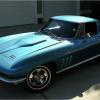
Duntov
-
Posts
1,318 -
Joined
-
Last visited
Content Type
Profiles
Forums
Events
Gallery
Everything posted by Duntov
-
HI: This is a work bench update on my current build – the Fujimi Ferrari 250. First the kit…. This is a very well designed and executed kit…. Some parts are delicate however and you do need to pay attention to the build sequence…it really does matter…. One word of caution…. EVERYTHING and I mean EVERYTHING needs to go exactly where it is intended…. If not you will multiply errors and the final fit of the chassis and interior build up will cause problems…. I made the following changes however… Pinned the radiator in place with .032 brass pins… Pinned the carb linkage to the base plate with .019 brass pins….. (YES you can drill this out… just keep breathing!!!!... ) Drilled out the chassis pan mounting holes so the pan will sit tight against the frame – this is a critical mod as if you do not do this the shocks will not reach to their intended mounting points on the chassis pan …just open them up enough to make the frame and the chassis pan touch when mounted.... DO NOT mount the shocks until the chassis pan and frame have been mated together permanently… if you mount them per the instructions you will break them off…. I drilled and pinned all four headers with .032 brass pins…this provides a firm mount for these critical parts…. I also did not mount them until I had the engine firmly glued (and dry) in place in the frame…. It takes a bit of messing around but yields a very good result….and the headers matched perfectly to the exhaust system!!!....you mount the forward set first and then the aft set..... My main problems with this kit are the opening hood and the wheels and tires…. I have been told the wheels and tires are over-sized and Jurgen (Silver 250 in “Under-Glass”) verified this fact…. I am generally OK with that problem but I seriously do not like the stock mounting provision…. It uses the common (to the high end Japanese kits anyway) neoprene mounting system… in theory this looks like it is a great system…and I have been successful many times… but NOT HERE… pressing the wheel tire pair onto the clear mounting boss generates way too much pressure on the VERY DELICATE steering and rear axle assemblies… I ended up drilling out the inside of the wheel hubs with a 5/32 drill bit and pressing in new brass sleeves…. Those sleeves in turn had 1/8 inch plastic tube pressed inside and drilled to accommodate the axle pins…I also relieved the mounting recess on the hub so I did not have to deal with the small lug on the brake rotor…Near impossible to line those up with the stock system….this results in a slightly loose press fit that benefits from a tiny dot of gap filling ACC to lock it all in place.... This all worked well as you can see from the photos below. The hood…well lets just say this is a family site and leave my comments out of it…. The hood fits perfectly but the hinge arrangement well…. Maybe I am just too old and grumpy or maybe too many Corvette models… SO the hood is going to be set in place…loose so it can be removed or posed….. “nuff said”… All the major components are done and here is the progress so far…. Two main components of body and chassis / interior pan with wheels and tires mounted… Body …just out of the paint shop…more coats and a rub out to come next…. Used Tamiya Italian Red….it looks orange here but really is a nice bright red color.. The interior close up shot… need to touch up and clear coat the steering wheel still… An overall shot of the engine forward interior set…..the kit has good engine detail and is built stock…. Pay attention to alignment if you do this kit…. It does matter…. There is plenty of plumbing but no wiring and I did not feel the need to add it…. And lastly …the engine itself…. The velocity stacks are tricky at best and I ended up pinning the carb linkage to keep it from falling off….. That’s it for now….. the paint needs to dry out and get rubbed… mate the body and frame / interior and add the details…. More later…. Regards Bill (Duntov)
-
I am in mid-build on the Fujimi 250 kit..... It is very nice....but many parts are EXTREMELY delicate......and that may be an understatement....so you need to act accordingly... Given that I have drilled and pinned several parts that have very small mounting lugs....that has worked well so far.... So far I have found that the fit overall is excellent..... The posable steering is really well done and with some care works flawlessly..... I can't vouch for the overall accuracy but see the previous posts about the tires and wheels....they are clearly oversized..... I will post some photos when I finish but be aware I AM GOING SLOWLY HERE!!!!!! This is NOT a "shake the box" kit by any stretch.... Regards Bill (Duntov)......yeah yeah I know .... a Corvette sick-o building a Ferrari!!!!!
-
Thanks Jurgen: This makes sense given the tires of the period were really pretty narrow...even the competing Corvettes in 1962 were running on very skinny tires. My Gunze kit tires look good in the box but you are correct...the real proof will be how they look when mounted.... The Gunze cars do have a major plus as they include some very well done photo etch wire wheels.... I am just still in mid build on the Fujimi car... I am enjoying it but it is a bit tough in places..... overall it seems to be coming together well though. Thanks!!! Regards Bill
-
Traditional Early '50s Deuce Full Fendered Hot Rod
Duntov replied to traditional's topic in Model Cars
Hey ,..... a "save" is a "save"....well done!!!! Regards Bill (Duntov) -
OK..... now were talking!!!!!!!! Nice!!!! Regards Bill (Duntov)
-
Hello again... This post enticed me into starting one of my un-built kits... the fairly recent Fuiimi 250 car.... very nice kit indeed.... As per Jurgen's comment I noticed the wheels and tires are pretty wide on this kit....same for Revell maybe???? Then I dug out my two Gunze Sangyo kits... they are essentially identical to each other except for the fact that one is a curbside (no engine) and the other is a full detail kit with engine...both have a very nice photo etch fret included.... Both however, have narrow wheels and tires and use a photo etch set of parts for the spokes.... I am wondering if these wheels and tires are in fact the correct width???? I just assumed that they are... Also... the tires appear to big and little.... both no name blank wall tires......any ideas? Regards Bill (Duntov)
-
There is one in the AMT Phantom Vicky kit....don't know if it will fit....never tried it...
-
Coca-Cola Dodge A100
Duntov replied to Scottnkat's topic in Model Trucks: Pickups, Vans, SUVs, Light Commercial
Here is a review of this kit that I did back in 2011: http://www.modelcarsmag.com/forums/index.php?showtopic=42230 As Scott states it is a reissue....and as you can see with a little work it builds p quite nicely..... great job Scott!!! Regards Bill (Duntov) -
This is some nice work on several levels.... Clean build.... Interesting subject.... Excellent craftsmanship.... Old and new technology.... AND>>>>>>>>>>>>>>> It looks like it could actually run and drive!!!!! NICE work!!!!
-
Nice work on this.... I especially like the door logo.....It really lends some character and believability to this one....
-
'96 c1500 shorty
Duntov replied to Jared Roach's topic in WIP: Model Trucks: Pickups, Vans, SUVs, Light Commercial
Nice work!!! -
'34 Ford pickup
Duntov replied to crazyjim's topic in Model Trucks: Pickups, Vans, SUVs, Light Commercial
Jim: I lost count of my friends...it was up there though.... No regrets here with regard to going over there..... thanks again for your service my friend.... I am sure we were there at the same time..... That said... glad you are back ....safe and sound.... relax and enjoy your life....you deserve it my friend.... Bill.... ********************* Your Build.... I NEVER get tired of seeing this kit in built up form.... it is so versatile....(maybe because it so SIMPLE???).... Nice job on this one!!! Bill -
I may be losing it here but I don't recall the 1960 issue as having any chrome in it....seems it was all a matte silver kind of color and of course the front bicycle wheels were clear disks with raised spokes as indicated in an earlier post....some chrome would be a welcome addition....but then again a little Alclad here and there on the parts that need it and no problem.....again I will be interested to see the final scale.... Regards Bill (Duntov)
-
Jurgen.... This is one fine piece of craftsmanship .... very NICE!!! (The Silver is different and very well done...) Regards Bill (Duntov)
-
So does this have a full stock seat with it as well or just the race prepared item?
-
34 flatbed hotrod,
Duntov replied to bpletcher55's topic in WIP: Model Trucks: Pickups, Vans, SUVs, Light Commercial
Well done... this is really classy.... -
AMT M&H Racemaster Dragster Slicks & Parts Pack Tires
Duntov replied to Gregg's topic in Car Kit News & Reviews
This is EXACTLY correct..... Hobby Lobby, Michaels ....even Hobby Town on occasion will have kits in the $17-$18 range.....much less with a coupon and for the same money you could get rolling stock AND an engine.....and I always seem to need suspension parts so......this is a nice set but the price is WAAAAAY off the mark...... -
I thought Gregg H. was the de-facto expert on these cars.... 1:1 version maybe? SO .....Gregg??? was it "Betty-Boob"????
-
Nice work indeed and an interesting part of GM history.....you are a real craftsman!!! If Harley Earl had his way in the fifties.... this car would have supplanted the Corvette and Zora Duntov would not have been hired or he would have been fired after a year or two as chief design engineer for the Corvette.....(he nearly was!!!)..... this car would have failed in the long run (as the Corvette nearly did in '54).... and GOK what we would be driving now!!!! Just my two cents from a Corvette sick-o... 1:1 & little.... Regards Bill (Duntov)
-
AMT '40 Ford Coupe Review (1983 Re-issue)
Duntov replied to Duntov's topic in Car Kit News & Reviews
Roger... thanks for the reply.... I posted this photo above as well... I made a Deluxe out of the convertible and the coupe.... but I still really like the AMT version too.. -
AMT '40 Ford Coupe Review (1983 Re-issue)
Duntov replied to Duntov's topic in Car Kit News & Reviews
John & Don: Thanks for these posts.... this is exactly why I did the review.... I like the Revell cars a lot but you really made the point of the review with your post of a built up AMT car....... Nice work!!! Regards Bill (Duntov) -
AMT '40 Ford Coupe Review (1983 Re-issue)
Duntov replied to Duntov's topic in Car Kit News & Reviews
Yep that is true...... so I did this with a convertible and the coupe.....perfect fit.... -
AMT '40 Ford Coupe Review (1983 Re-issue)
Duntov replied to Duntov's topic in Car Kit News & Reviews
I agree in principle but again after 50 years it is to be expected..... if this happened say in a new release of a full price kit I would totally understand.... but then again I have never seen a piece of resin without flash (different animal for sure)....... I have many Tamiya and Fujimi kits as well with no flash at all and I certainly appreciate that..... SO it can be done.... but I still maintain that flash is part of the game so to speak... I don't like it any more than the next guy but it is there and needs to be dealt with..... But again you bring up a good point in a well thought out manner..... let's hope the re-issue later this year has minimal flash.... Bill -
AMT '40 Ford Coupe Review (1983 Re-issue)
Duntov replied to Duntov's topic in Car Kit News & Reviews
Hi Rob... I heard that too... the Keystone mags are nice and the chrome in this is really good.... -
OK….this is a review of an older kit…. One that I am hoping Round 2 will re-issue…. Of course this one is a re-issue any way….but here goes. This is the 1983 re-issue of the AMT 40 Ford Deluxe coupe (narrow grille). It has some interesting additions and improvements over the original most notably the chrome parts. Most all of the original parts are there plus some well done Keystone mags, some Olds Toronado turbine type wheel centers and the original headers have dumps added to them. A few other changes as well but these are the main ones to note. It looks like some attention was paid to this fret as it is clean and overall flash free….perhaps a bonus of the added newer parts??? The tires are in a word “plentiful”…. Four of the original Firestone skinnies, two classic AMT Goodyear slicks and four street rod tires with markings. This is nice but I don’t build much anymore without using aftermarket tires such as Pegasus or Holthaus resin items….the later especially on the big fender cars like this one…..wide whites are just a natural here......but don't overlook the fact that the "Firestone" logo is on these tires and the slicks are perfect for a drag version of this car.... OK…. The main parts trees are the originals ….pretty much unchanged. This version is done in light blue vs. the original first issue black and subsequent grey (and other colors) so it should pose no issues with a good quality primer and some high quality rattle can or air-brush paint applications. As in the original there are two motors... a stock flat head that can be built stock or with a neat three 2 barrel carb set up, and a Buick nail head that can be done with the 3-2's or the blower ..... by the way the alternate motor is incorrectly called out as an Olds in the instructions.... small peanuts really..... Pay some attention to these motors and they will be a real highlight of the build.... spark plug wires and some extra plumbing with the right paint and you have a nice representation of the motors......there are also tons of Flat Motor after market parts that can be added too..... AND YES…. There is a fair amount of flash….but two items …really folks!!! 1) This is a 50 plus year old tool…. So just deal with it!!!! (It came out in 1960....so do the math!!!) And….. 2) C’mon…. most of the folks on this site chop, channel, drop, section, rip, cut, scrape, putty, mutilate and otherwise clobber the living daylights out of “nearly” everything they build anyway….. SO flash is an issue …..WHY???? I never understood that beef….Oh well….. it’s just me I guess…. Decals are a different version than the originals but I don’t think time has been kind to the carrier paper in this one… (1983 was 30 years ago!!!). But still there are some neat one off items.... just be careful here if you have one this old!!! The biggest issue is a mounting lug (two of them) that infringe on the drivers side doors. You need to carefully remove these and you may need to do some minor repairs…. Really nothing an average model builder should find overly challenging. Same on the running boards but to a lesser degree.... just use a new razor and work carefully and you should be OK with a bit of sanding..... Overall this is a nice old kit and I have built it countless times since I first picked up an original issue “Trophy Series” version when they first came out many many years ago…. Revell’s Standard coupe version (wide grill) notwithstanding this is a good kit for a number of modifications…or you can just do a very clean build with modern materials, paints and adhesive and have a great addition to your collection…. (By the way … I paid less than $10 for this on-line …sealed condition.....well worth it I think!!!!........but then again in 1960 I paid $1.59 at Fred Meyer in Portland Oregon!!!) Get one of these and have some fun….. it’s 1960 all over again!!!!! Also, there are countless other versions of this kit in re-issue form…. I still have several in my collection….all have different box art. I just figured it was time to drag another one out and build it and thought I would share this one before I put it together..... still not sure where this one will go but simplicity will be the rule of the day.....funny....I actually finish builds like this!!!!!!….. Regards Bill (Duntov)