Brutalform
-
Posts
2,837 -
Joined
-
Last visited
Content Type
Profiles
Forums
Events
Gallery
Everything posted by Brutalform
-
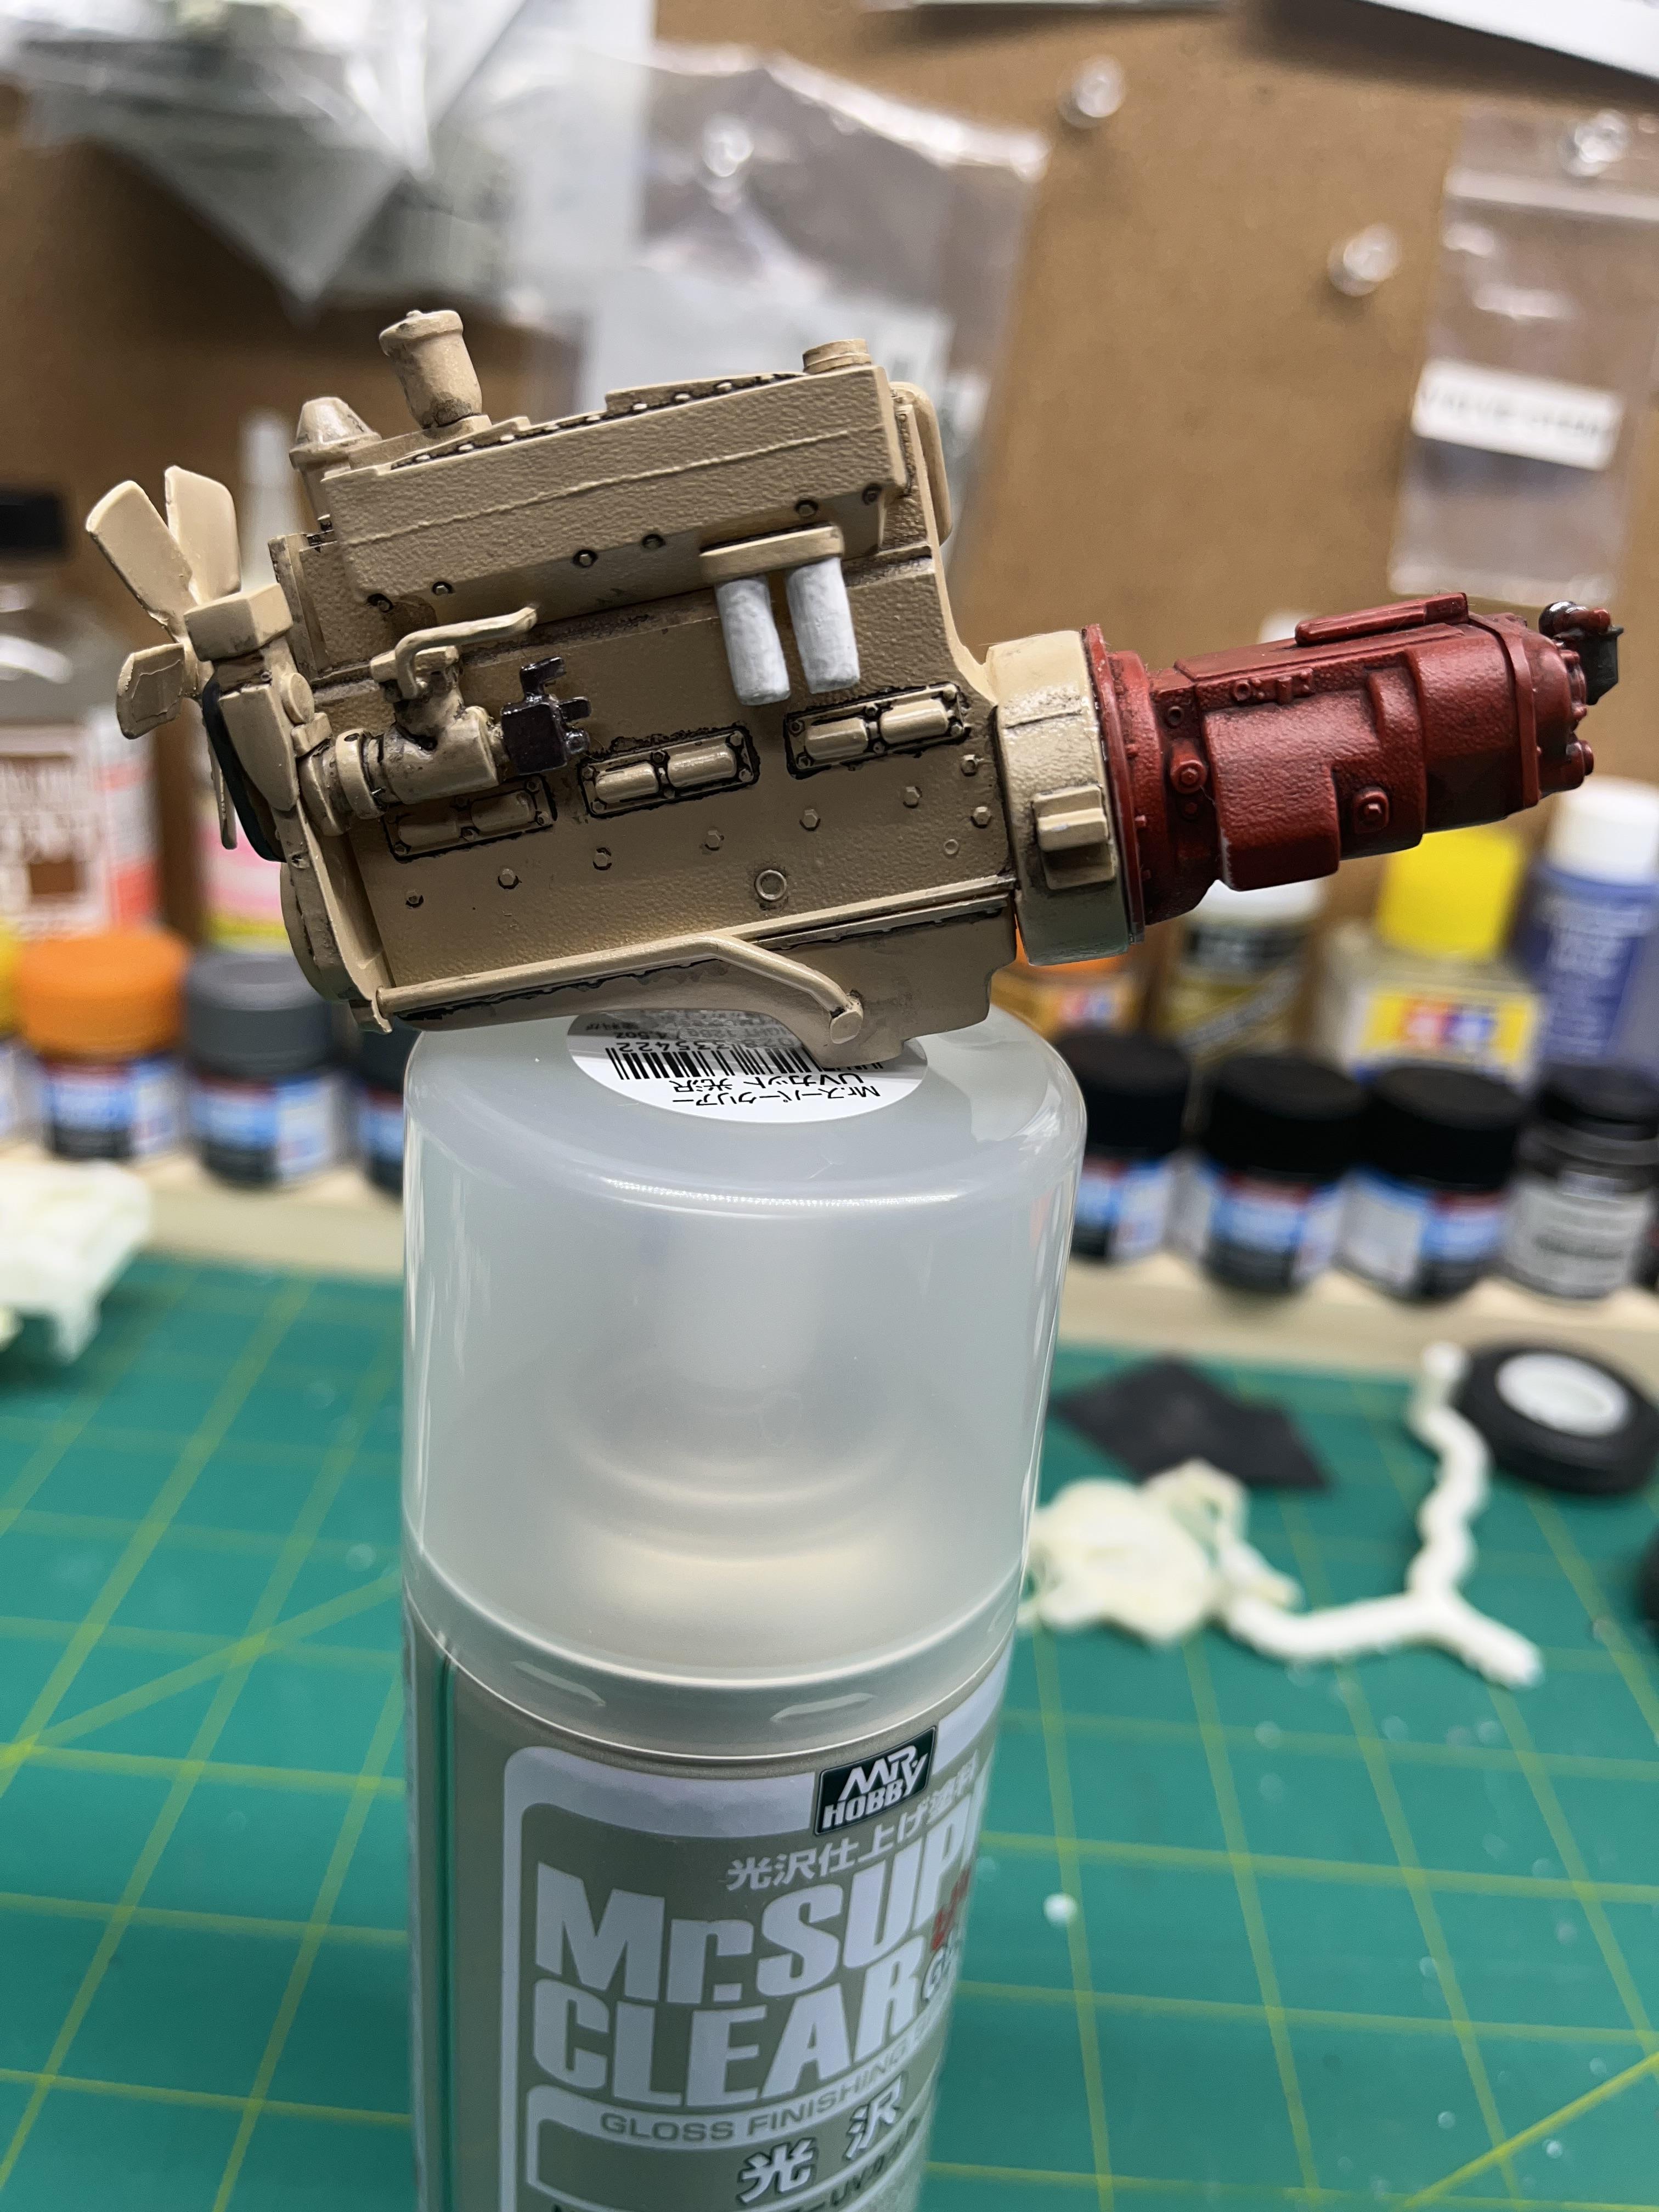
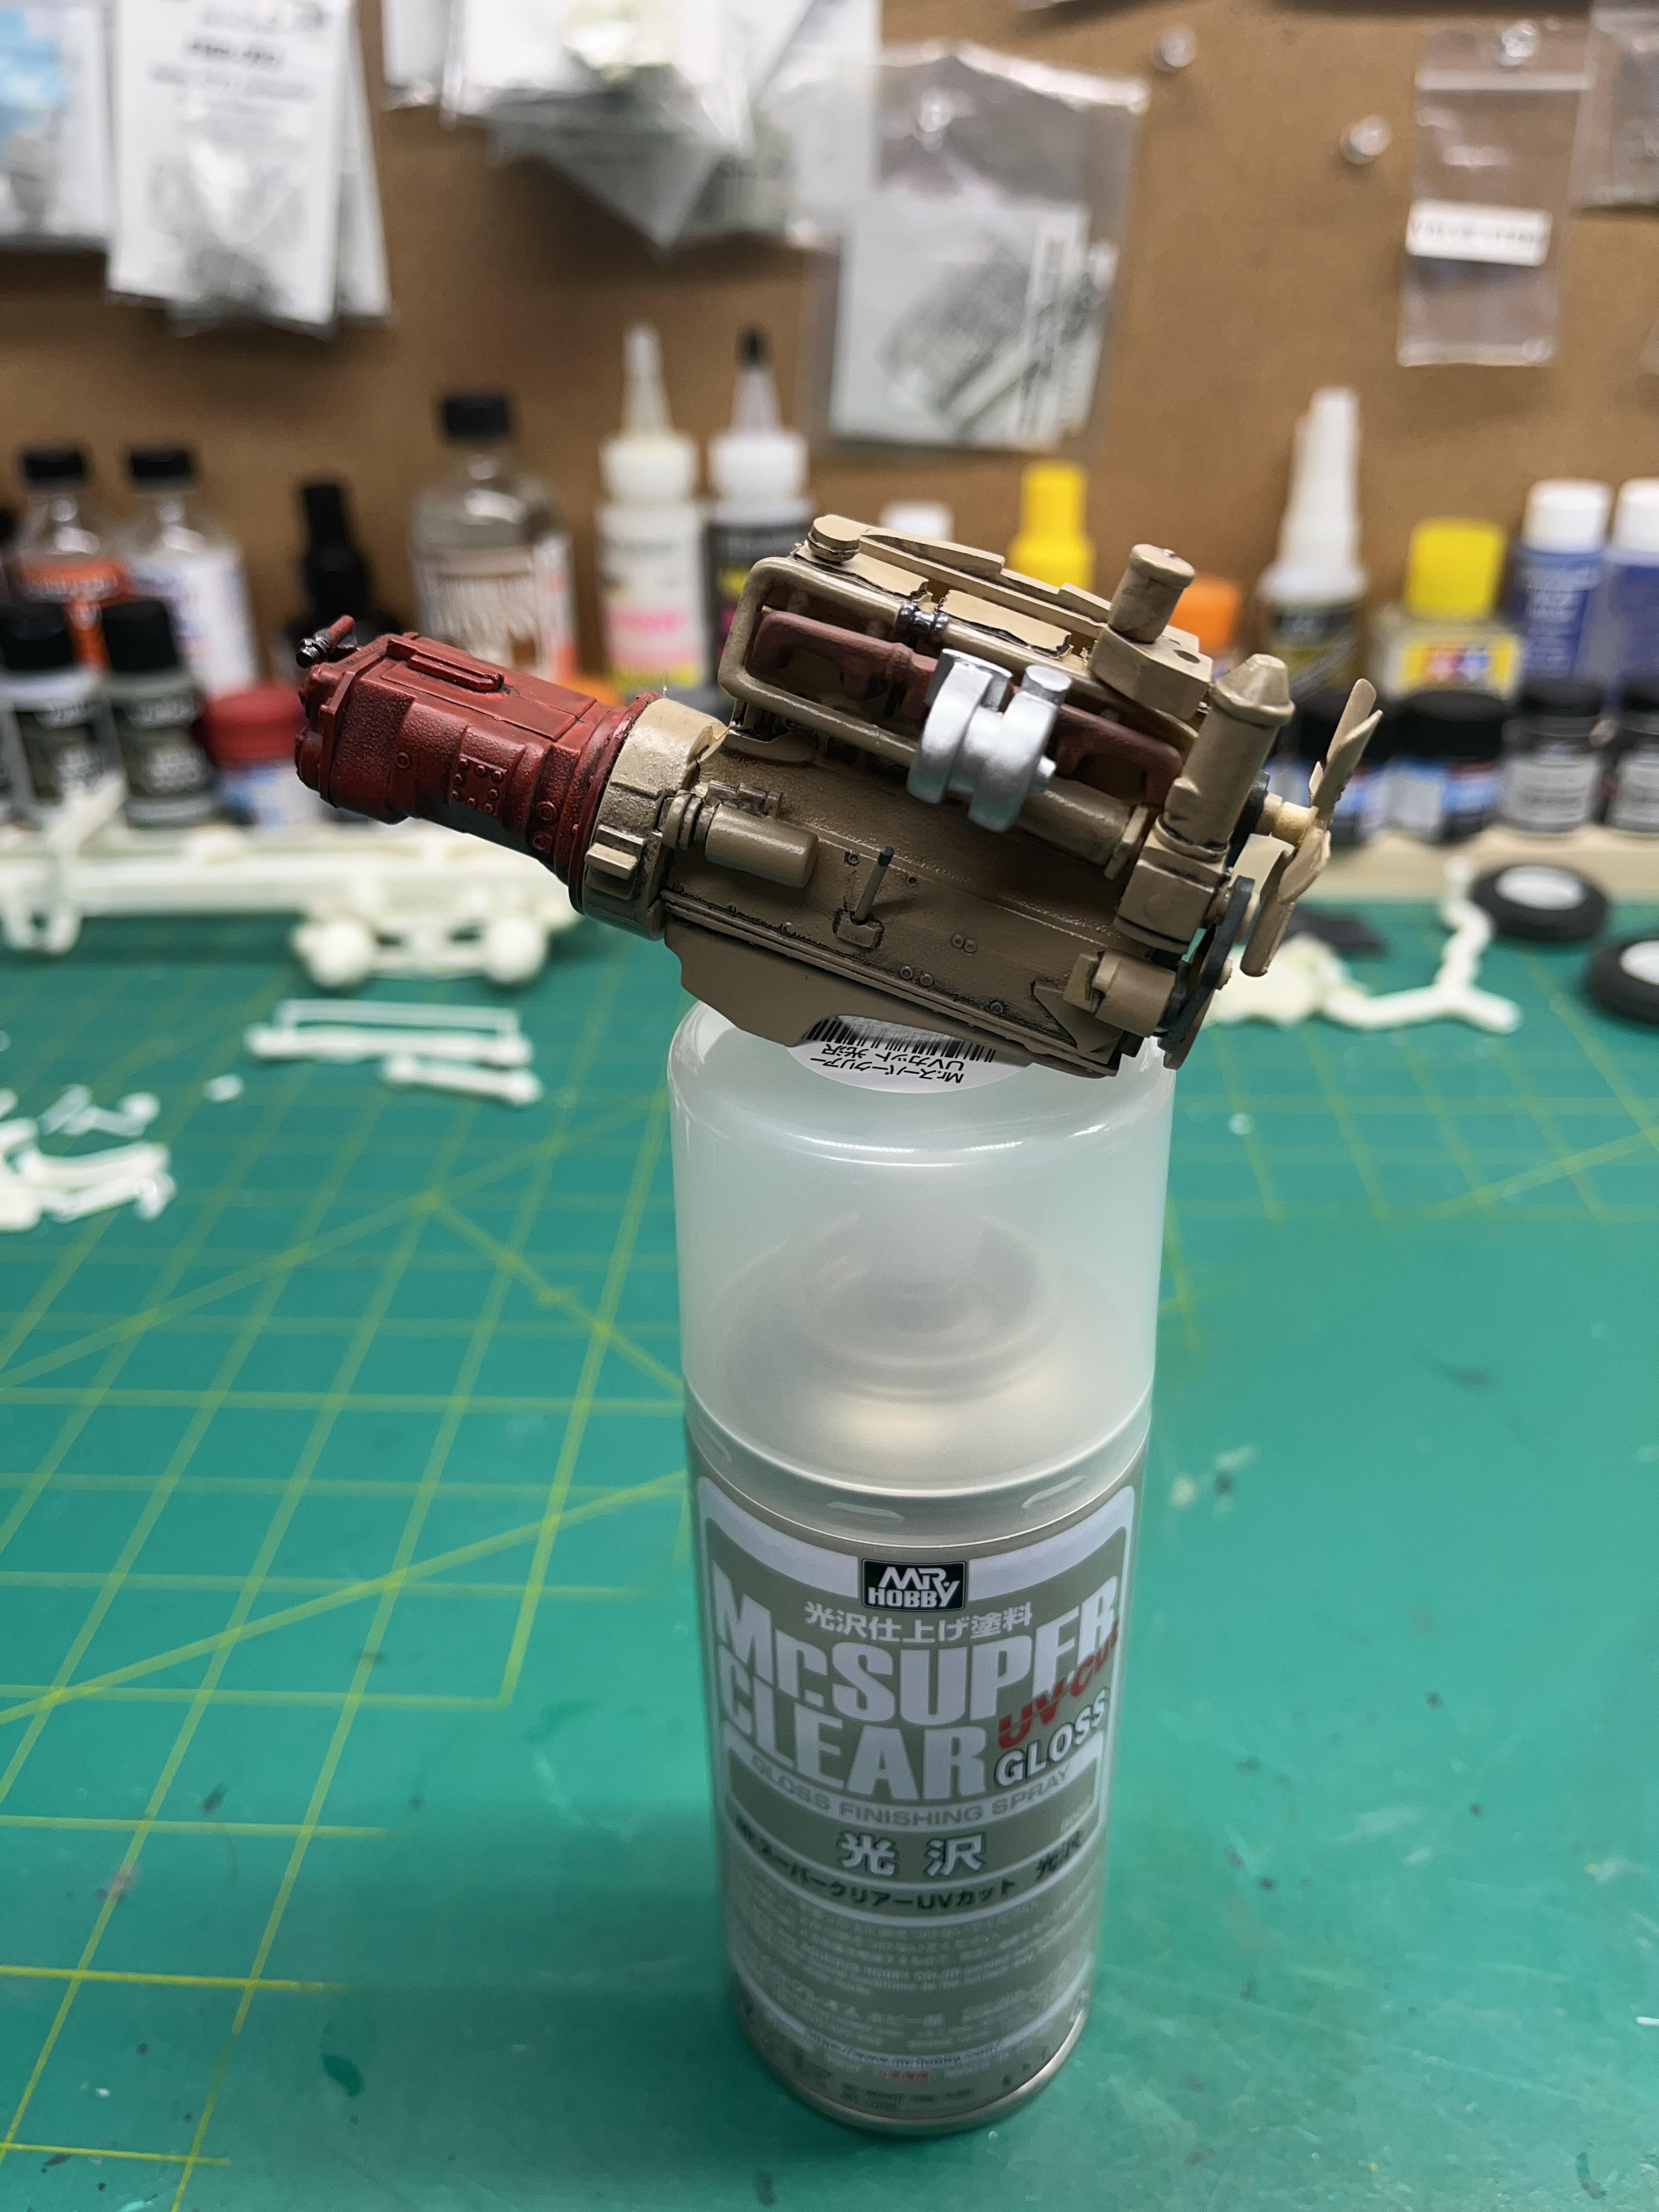
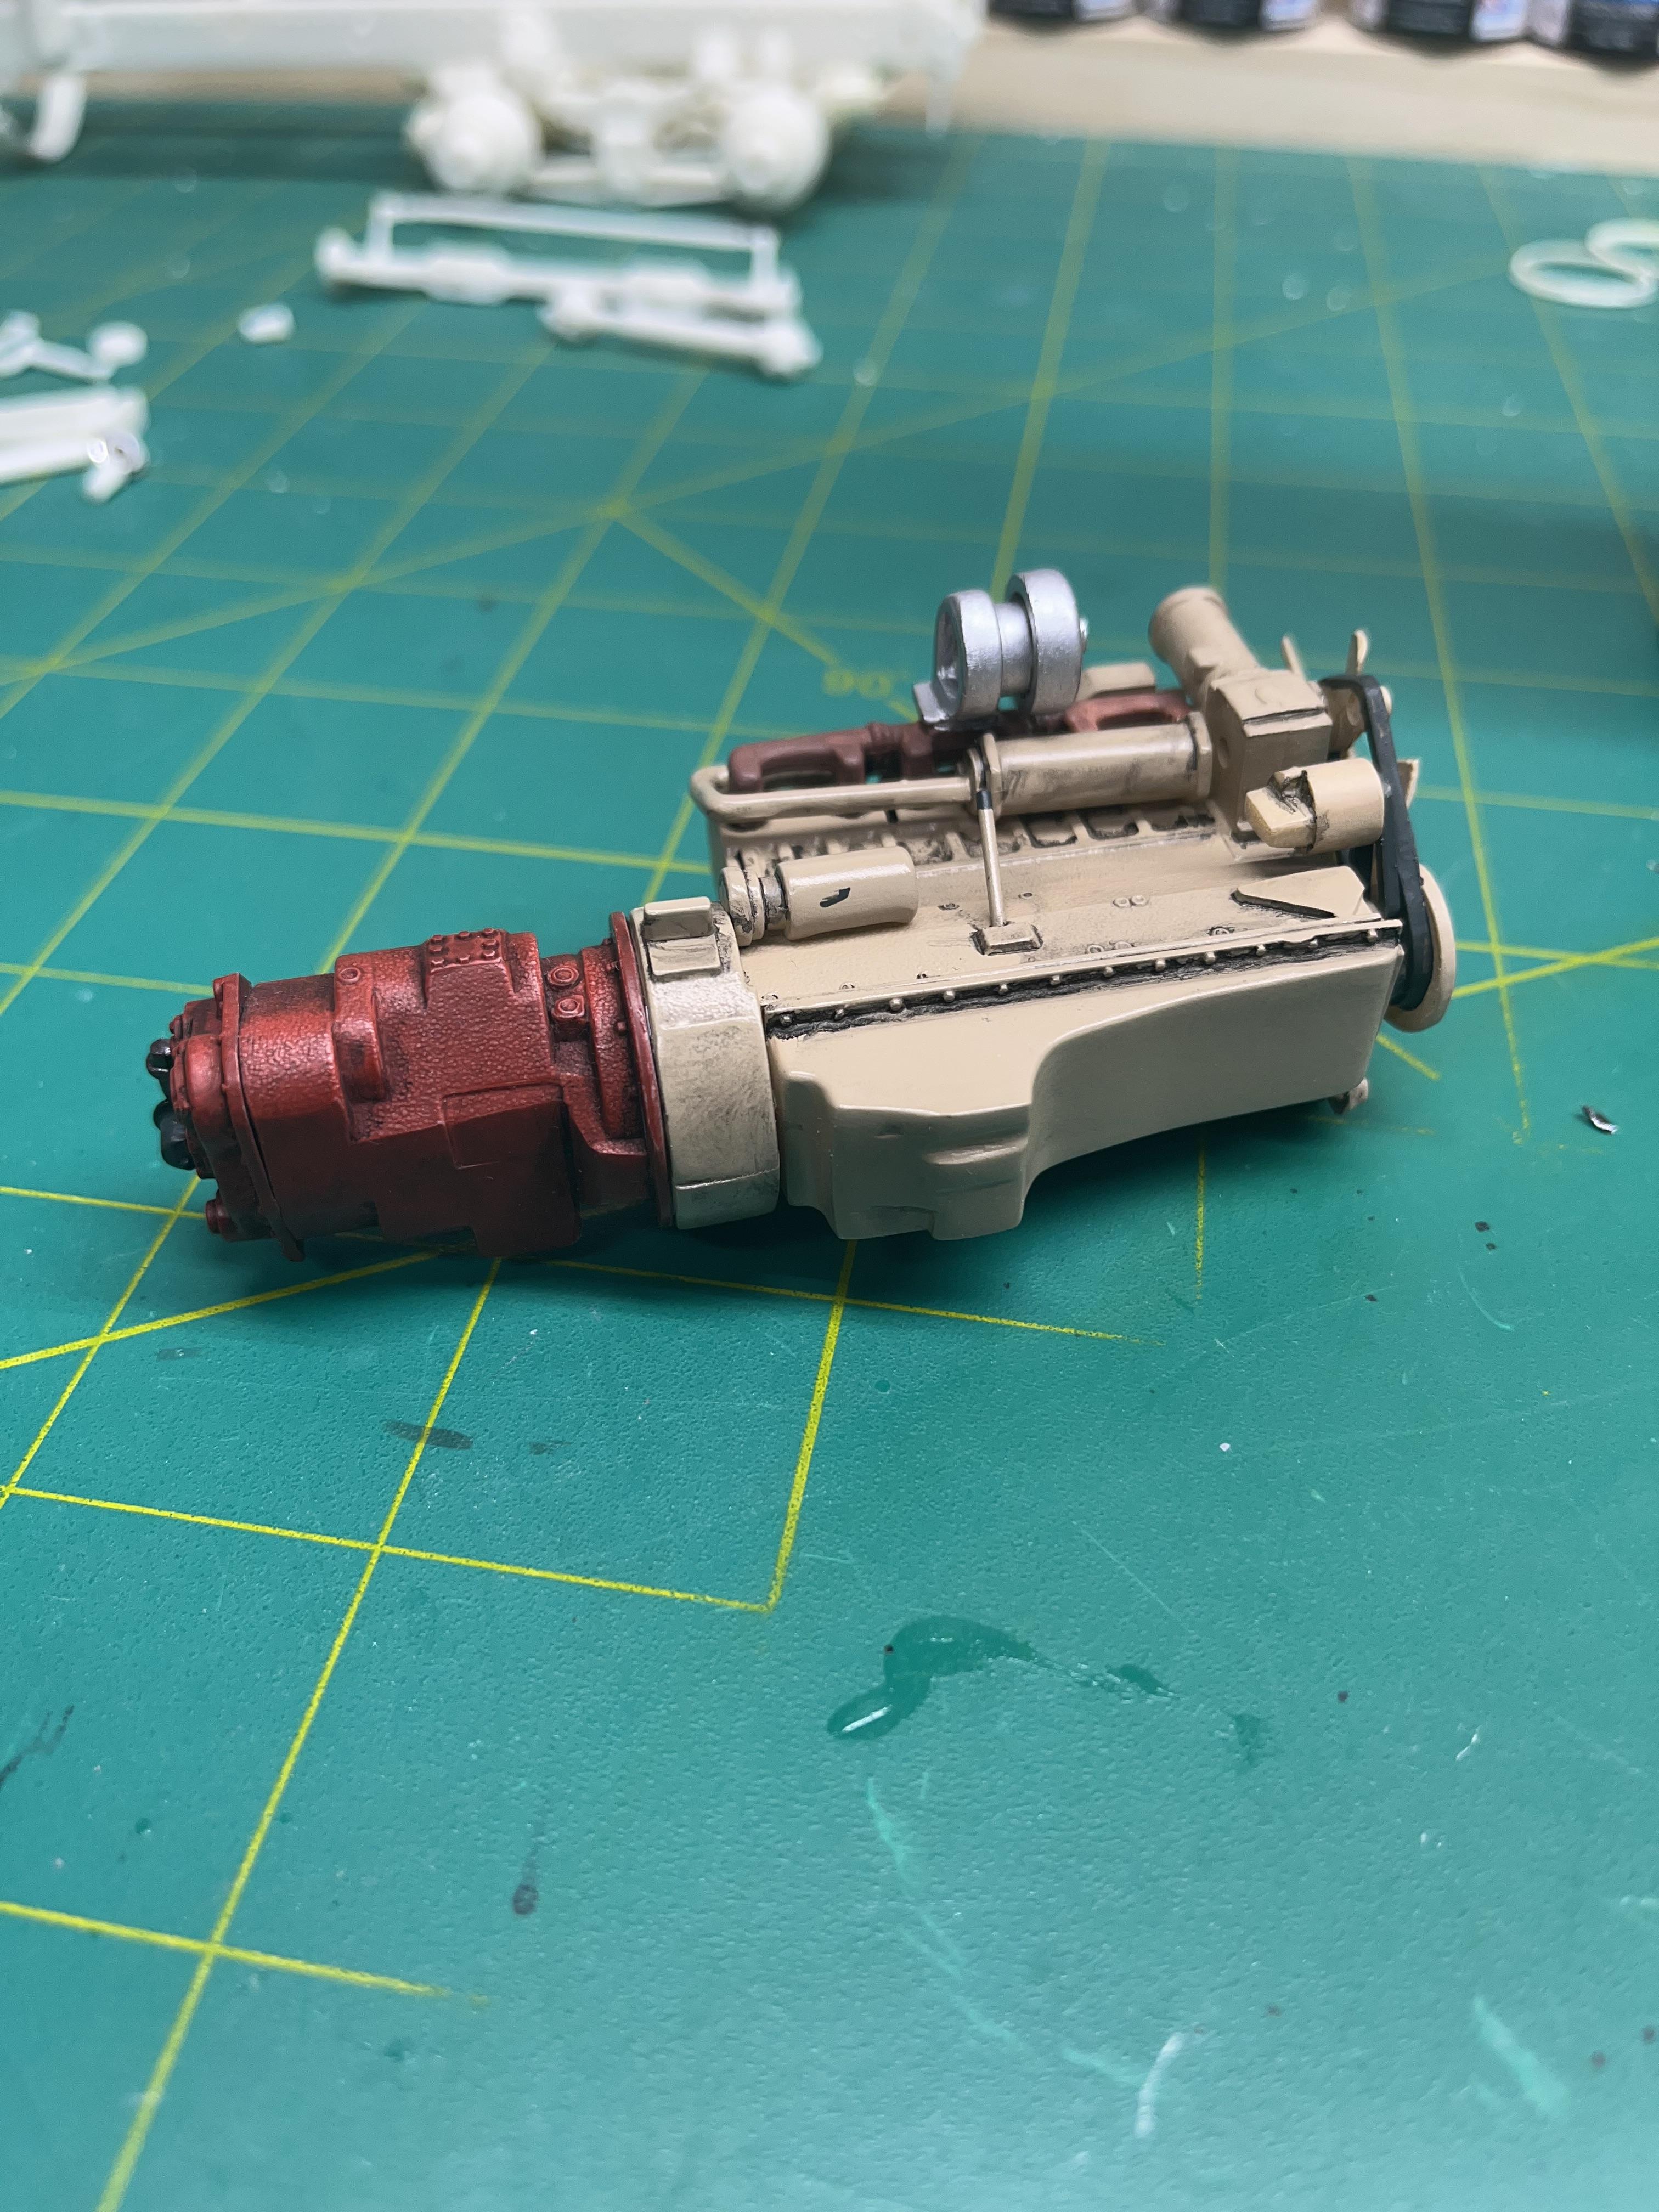
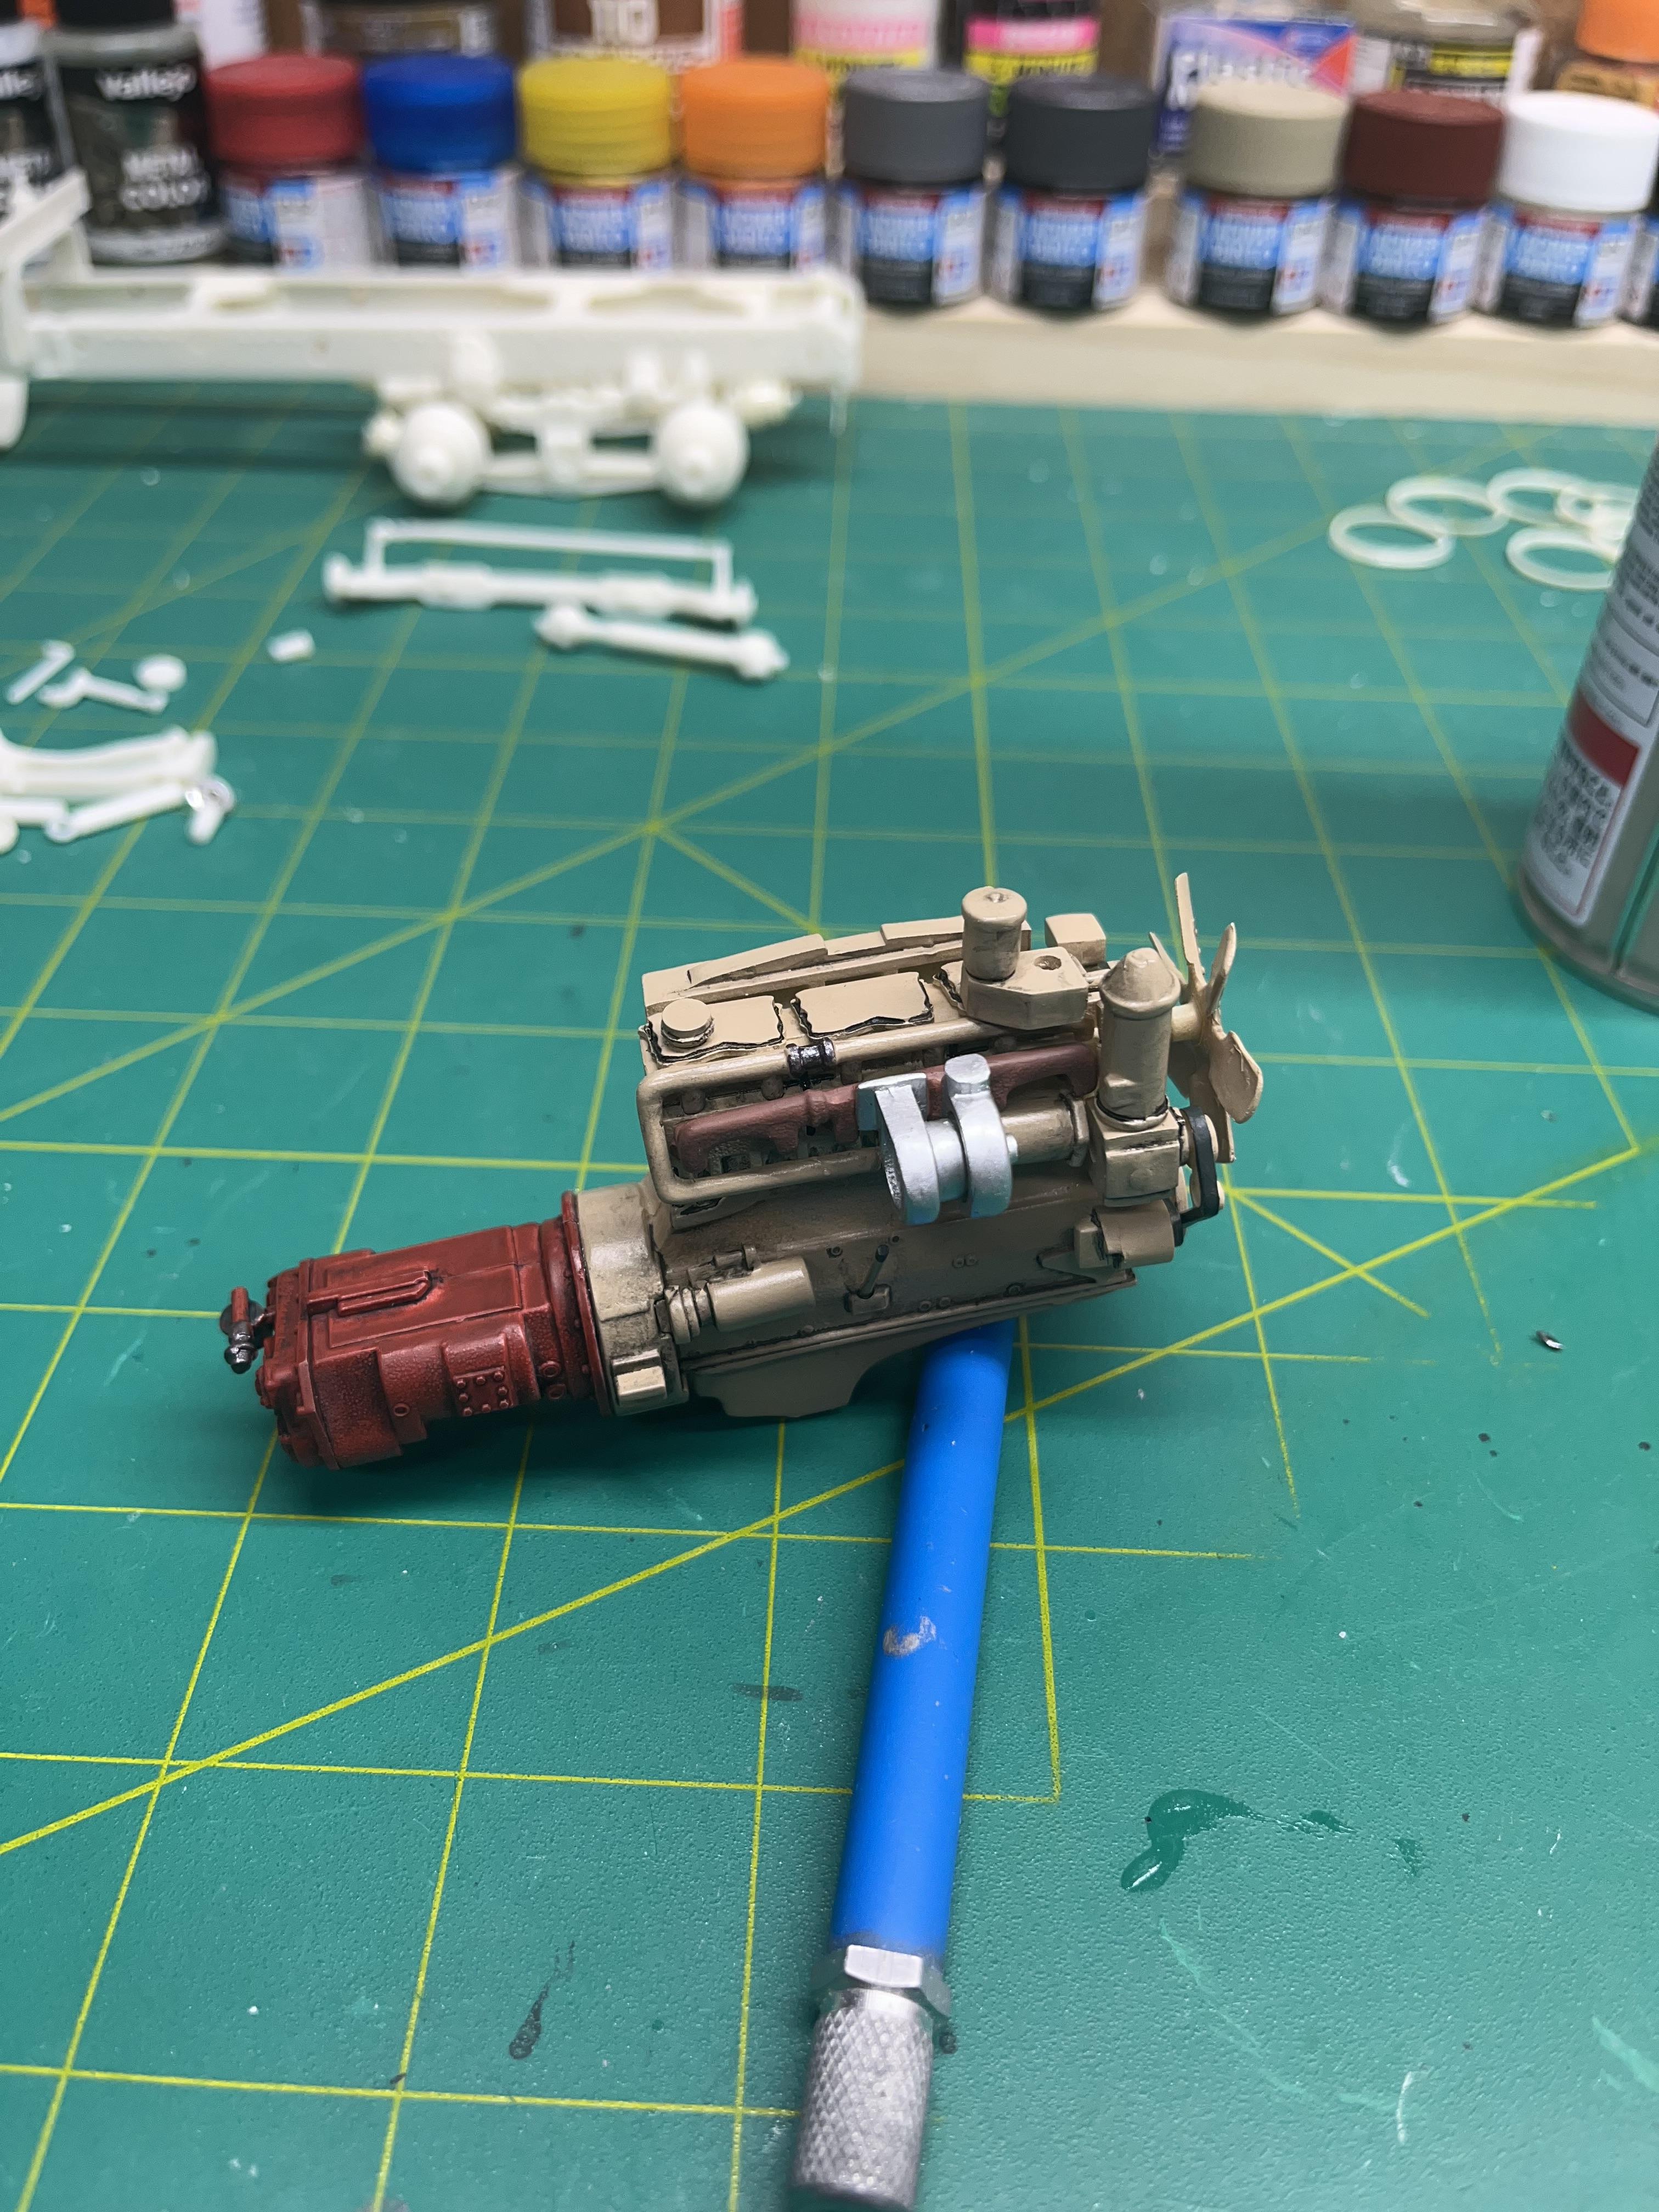
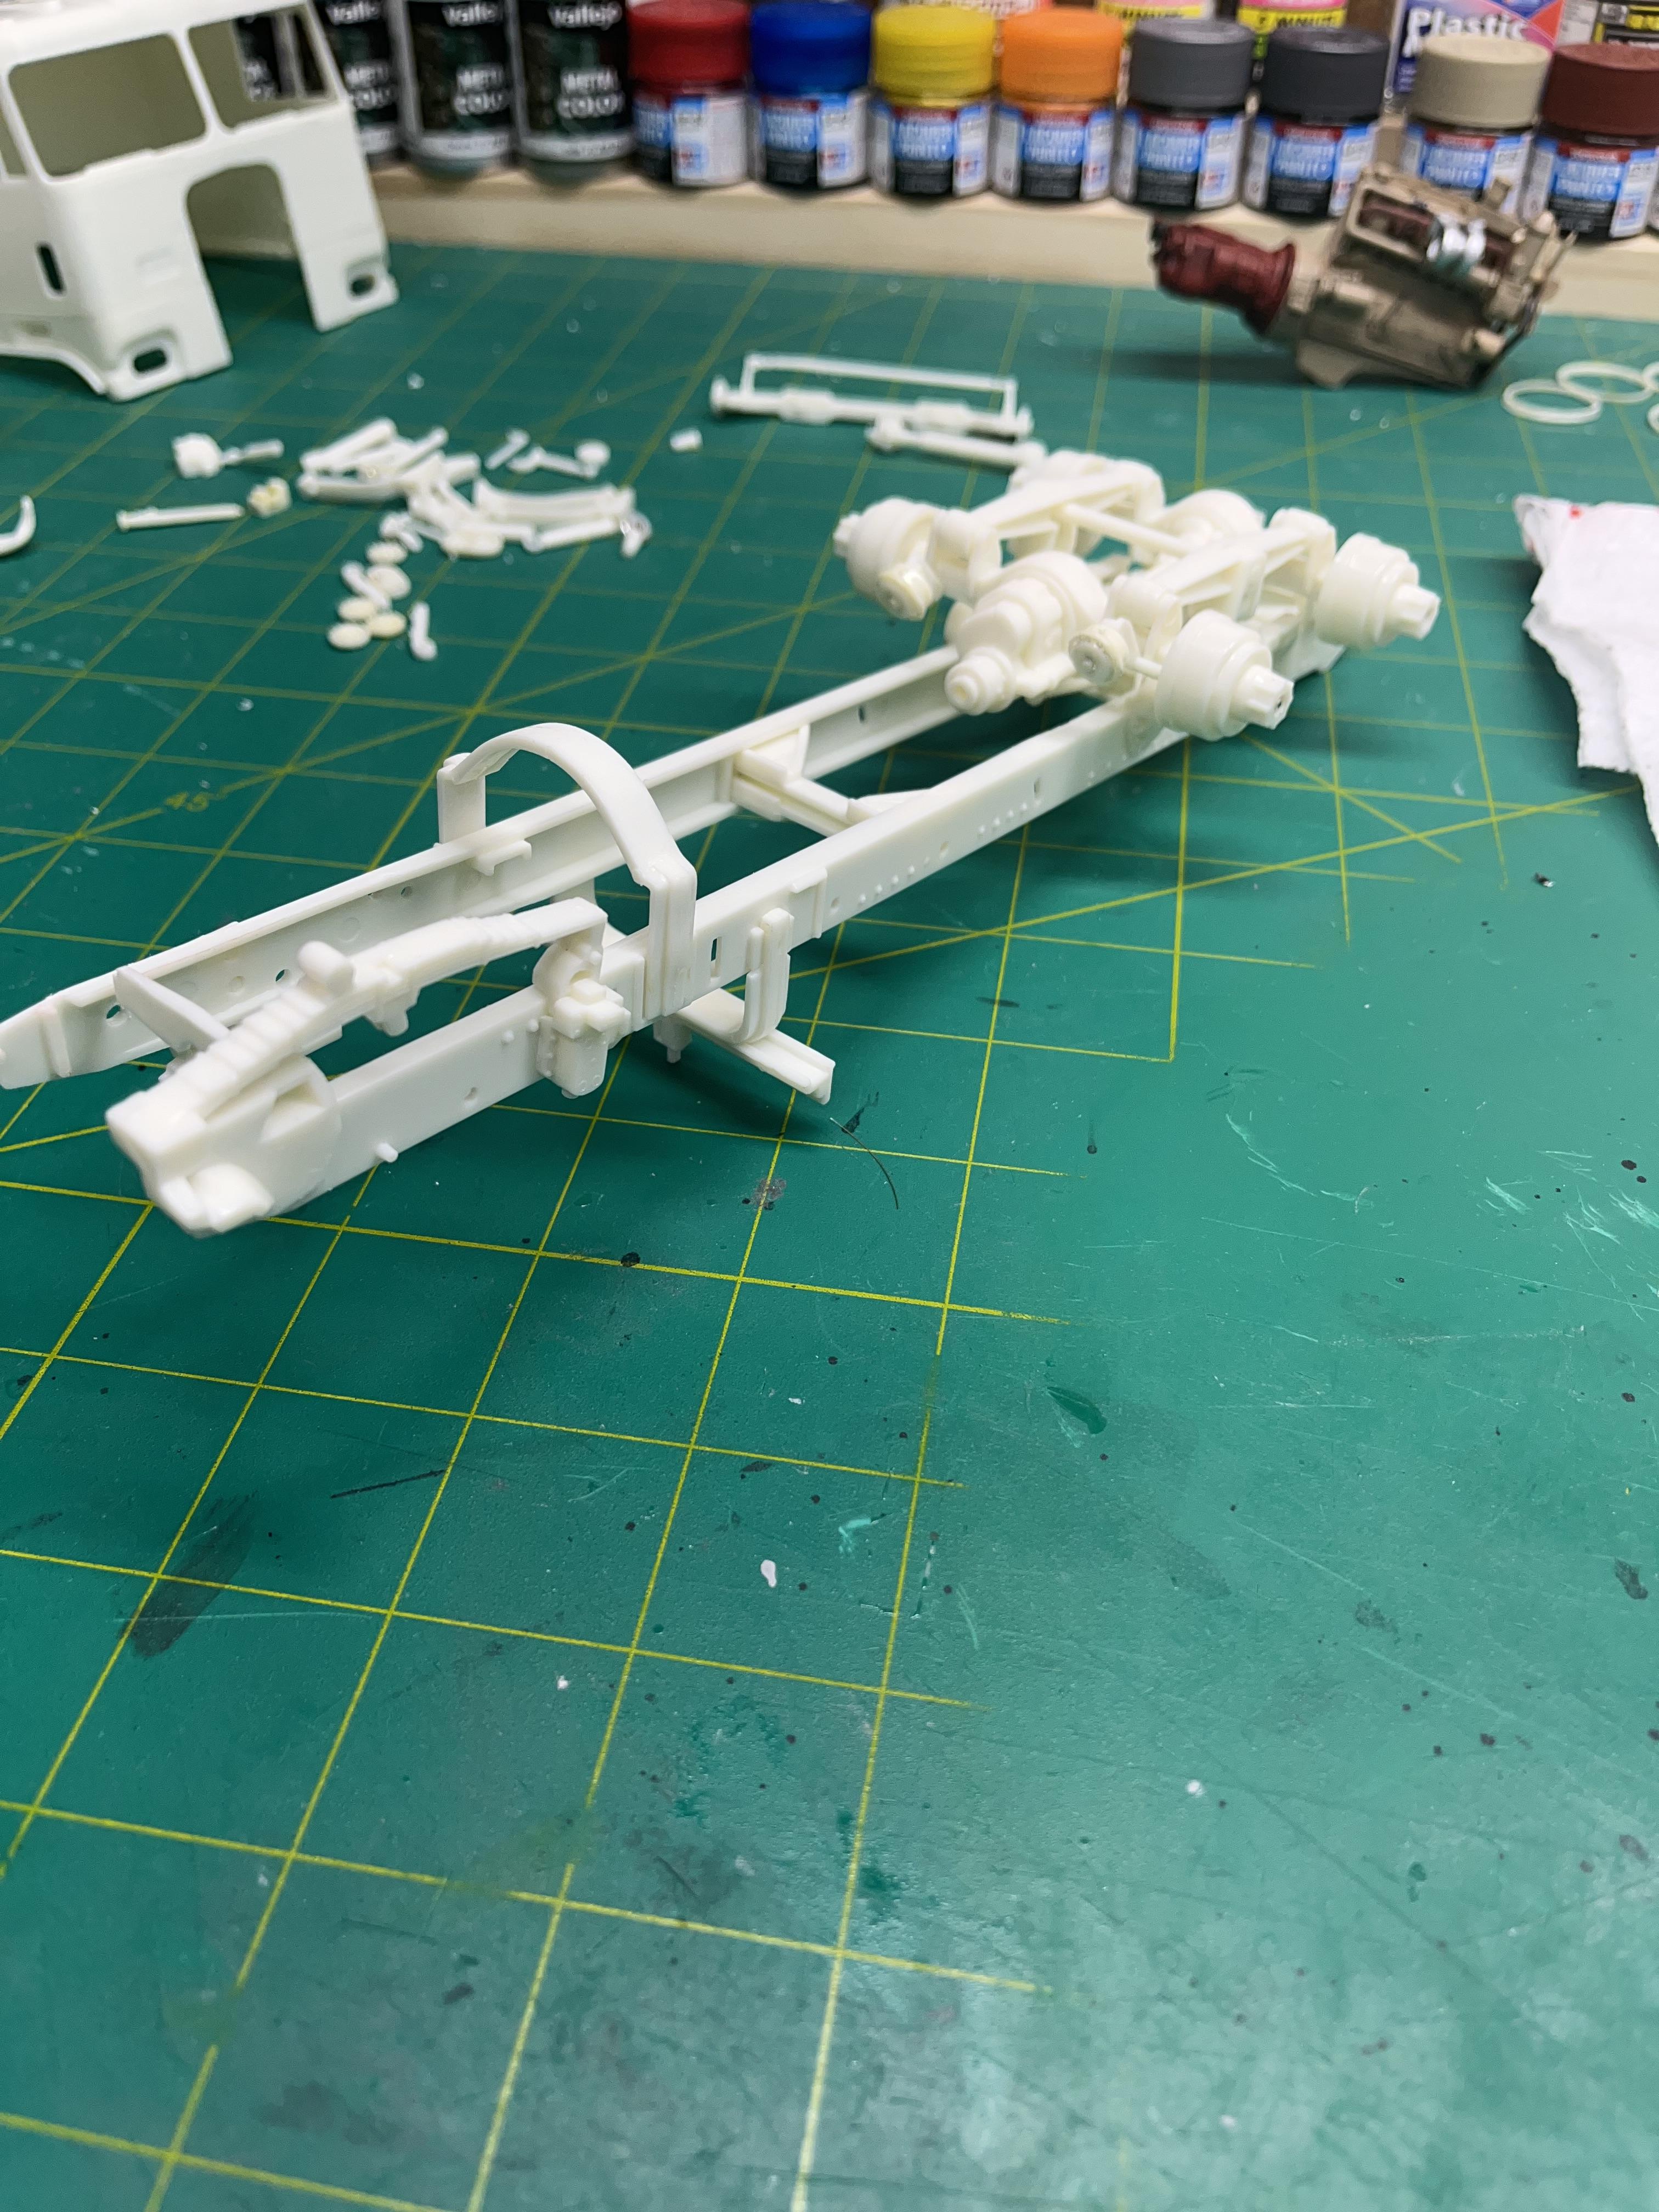
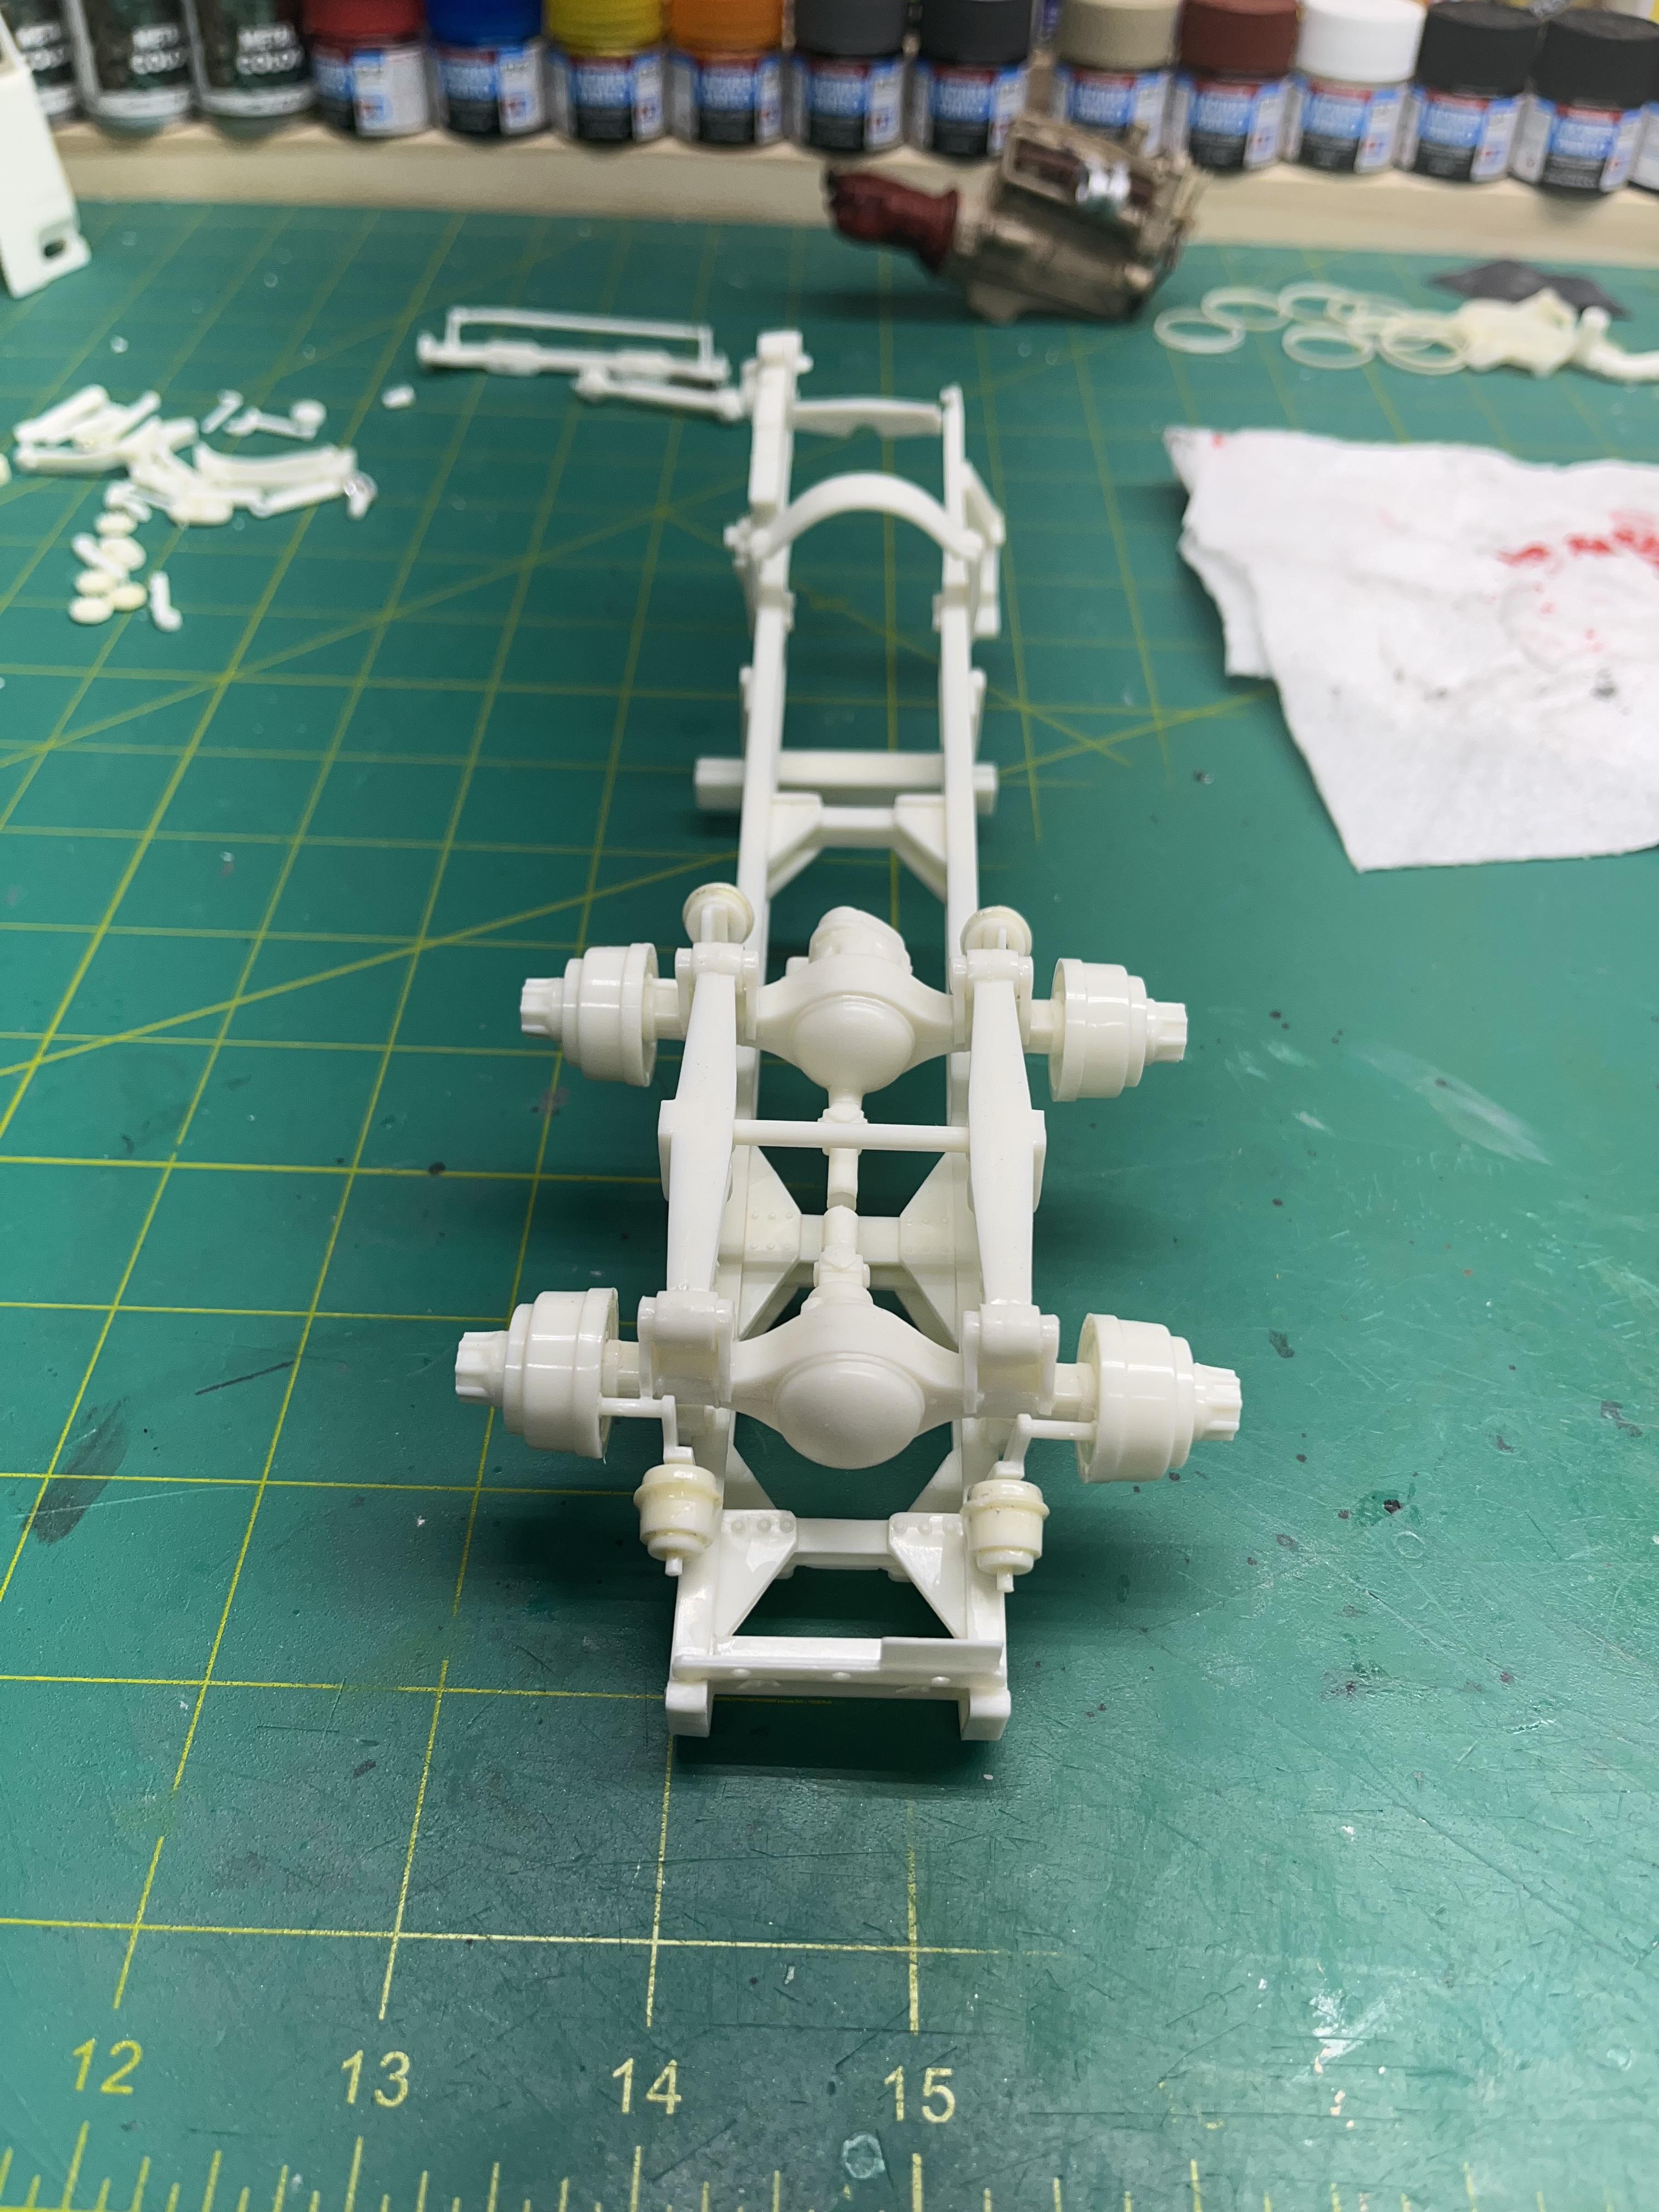
My first time to post a big rig WIP, but I was getting bored with some of the car projects, so here it goes. I bought this kit at Ollie’s a couple years ago, for super cheap. I’m waiting for a front spring from Round2 to arrive, (this one is molded half way) so it’s now at a stand still on the chassis at least. This kit is a bear to build. Every chrome part, except for the bumper, mirrors, cab lights, and pull handles, went into the stripper. I planned on keeping the rims chrome, and adding a little panel line accent, and/or flat clear, to tone them down, but around the visible edge, it didn’t look too smooth. So in to the stripper they went. Literally every part needed to be cleaned up, and trimmed to fit properly. I’ve built a few AMT trucks before, but this one is pretty challenging, to say the least. Still not sure on the color, but I was thinking just like the box art. I have the engine completed, and most of the chassis. Tires are weathered also. I don’t want to get ahead of myself with painting, because everything needs to be trail fitted. Can’t wait till the spring arrives. Here are a few pics. Opinions are much welcomed.

-
Would anyone have a left front spring assembly from this kit? I just opened the kit and started cleaning up the parts, and mine was only cast with half a spring.
-

Small Part Attaching
Brutalform replied to TransAmMike's topic in Model Building Questions and Answers
Are you using regular ole cardboard? Or the thin cardboard with a glossy sheen on it? -
Small Part Attaching
Brutalform replied to TransAmMike's topic in Model Building Questions and Answers
I have used masking tape for mixing epoxy, and also for putting a dab of paint on. But now, since the mailman brings some kind of placard, or cardboard advertisement daily, I just cut those into strips, and mix on those. They would just be thrown in the trash anyway, so I put them to good use. Also saves tape. -
Atlantis rolls out ex Revell 57 Chevy Nomad.
Brutalform replied to John M.'s topic in Car Kit News & Reviews
I just couldn’t believe the way the rear bumper is no where near the tail lights on the passenger side. -
I know exactly what you mean. I also have another plastic one, made by Zona. The slots are way better suited to fit the saw blade, as compared to the aluminum one. At least I can get straight cuts on larger stock, that normally would not fit into the MicoMark mitre. I really can’t think of any reason to use the aluminum one, as we work with much smaller scales.
-
Atlantis rolls out ex Revell 57 Chevy Nomad.
Brutalform replied to John M.'s topic in Car Kit News & Reviews
I believe this is from the old “H” part numbered Revell kits, correct? I have one of those, but it’s just a 57 Chevy, and not a Nomad. It looks like a 57 Chevy for the most part, but it seems like it has its quirks also. I was thinking of doing an open door, pro street car with it, so you can see the race interior with the doors open. -
Very nice, to say the least. The overall details you put into this build really paid off. Engine and chassis details are spot on. I especially like how nicely detailed the wheels are.
-
Amazing work Tim! I wish I had the cash to buy, and learn to use that kind of machine.
-
Very fine job on that Hellcat engine!
-
I’d most likely try the three that Luka used in the video, for starters at least. Looks like you can keep masking to a minimum, or not masking at all, since the tips seem to be fine enough to do so.
-
You beat me to posting this Mike. I have a regular mitre and saw, but rarely use it. This MicroMark saw I can not live without.
-
Small Part Attaching
Brutalform replied to TransAmMike's topic in Model Building Questions and Answers
For me, I never pin parts that are large enough to be pinned, like door mirrors, or door handles. But what I have been using for a long time, is watch crystal cement. I never have had a part fall off using it. You don’t need much, so it wont seep out, and as soon as the part touches the car with the cement, it stays put. -
Atlantis rolls out ex Revell 57 Chevy Nomad.
Brutalform replied to John M.'s topic in Car Kit News & Reviews
HPIGuy (Chris) did a build on this Nomad. All same tooling. Kit has some real issues. But, can be built into a nice car if you are willing to put a lot of extra work into it. -
Good to hear Dennis. After thinking about it, and already having the Dana rear already cut and added to the springs, I was planning on skipping the ladder bar set up. Your build sounds like it’s almost done. I would like to see pics when it’s completed.
-
Probably not too well known, but she was the cute girl in Eurotrip, that had a twin brother in the film. She passed away several days ago. She recently had a liver transplant, and was only 39. No official word on the cause of death. Pretty sad to be so young.
-
I always like the song “Frankenstein” by The Dolls. Was never really a Buster fan. I remember when MTV was pretty new, and he did a small medley of songs from the Animals under his real name. I thought that was pretty cool.
-
Thanks, I think I have all the parts I need for this set up in my bin.
-
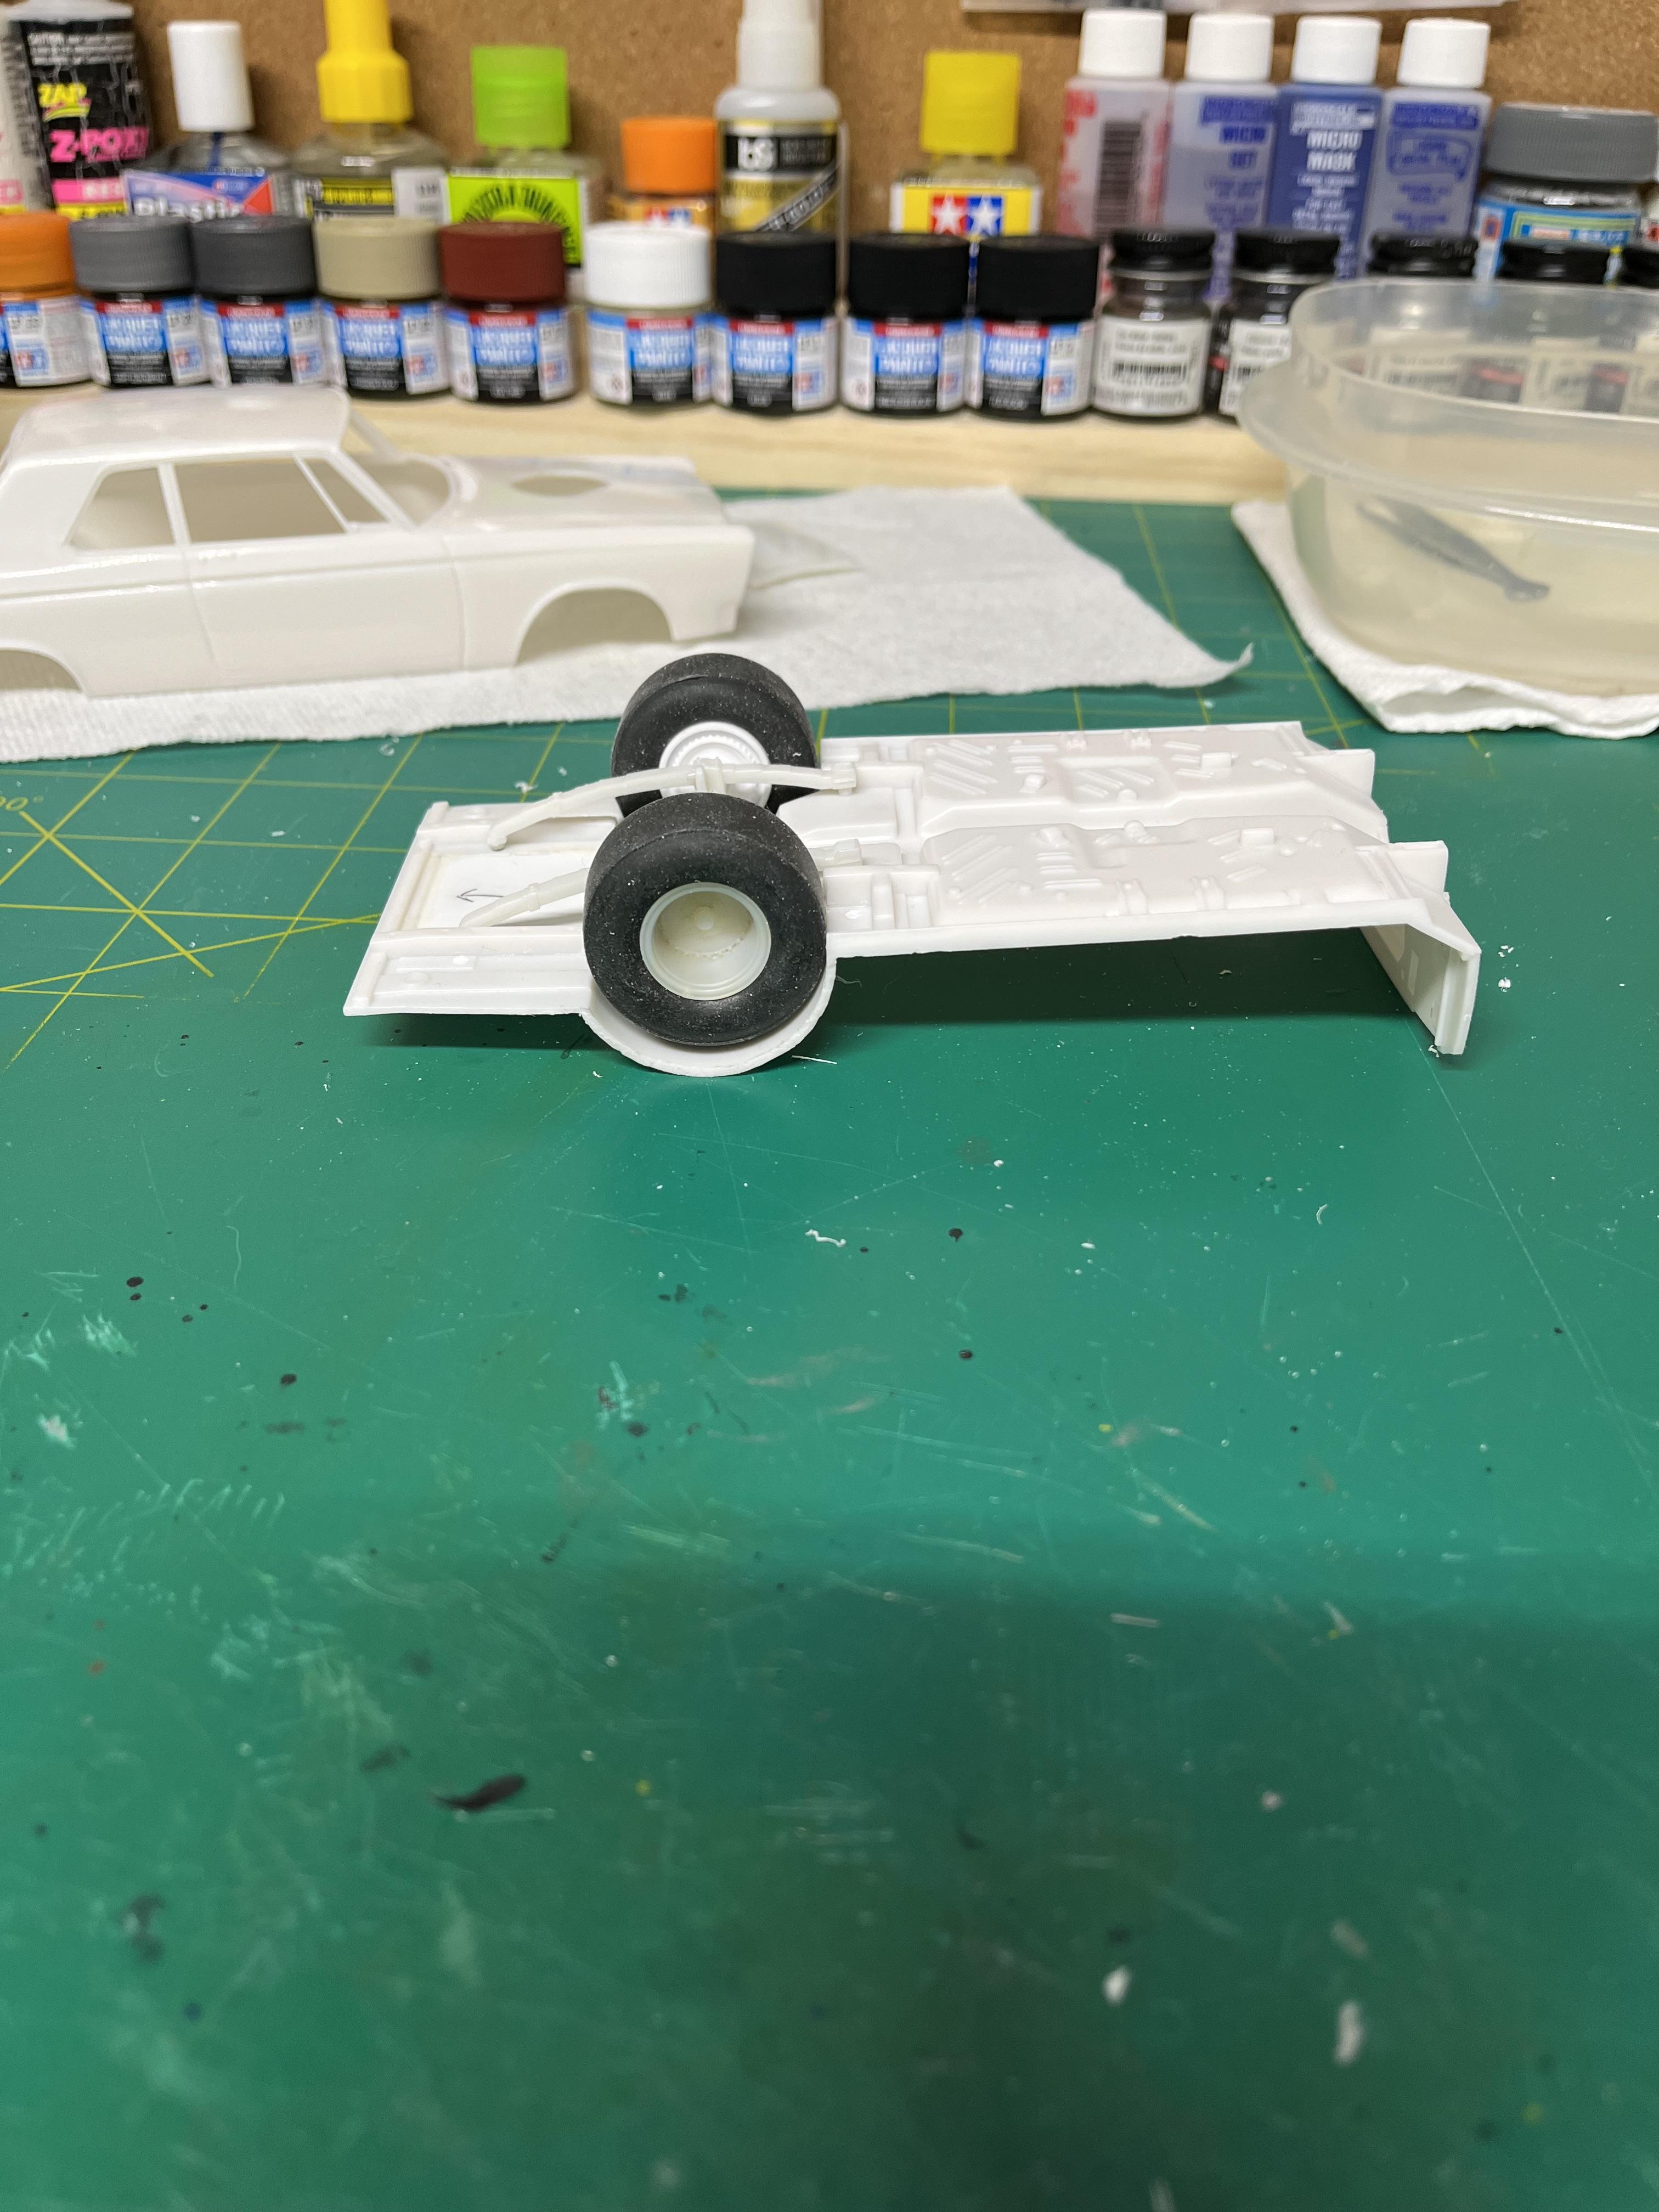
Thanks. Well that changes everything. I did graft a Dana differential I robbed from the AWB kit, onto the springs. I also started piecing in some styrene sheet pieces I cut out to fit the tires. I do have a Futurattraction ladder bar set in my bin. After everything was dry, I was going to do new frame pieces, and wheel wells. At least removing the springs and adding the ladder bars will not be difficult.
-
Thanks Bill. Much appreciated info. Sometimes it’s hard to find info on these old racers.
-
I’ll use one of the spare rears from the Hemi Dart kit. Trying to find out if this car had an 8.75, or a Dana? I might have it mocked up tomorrow.
-
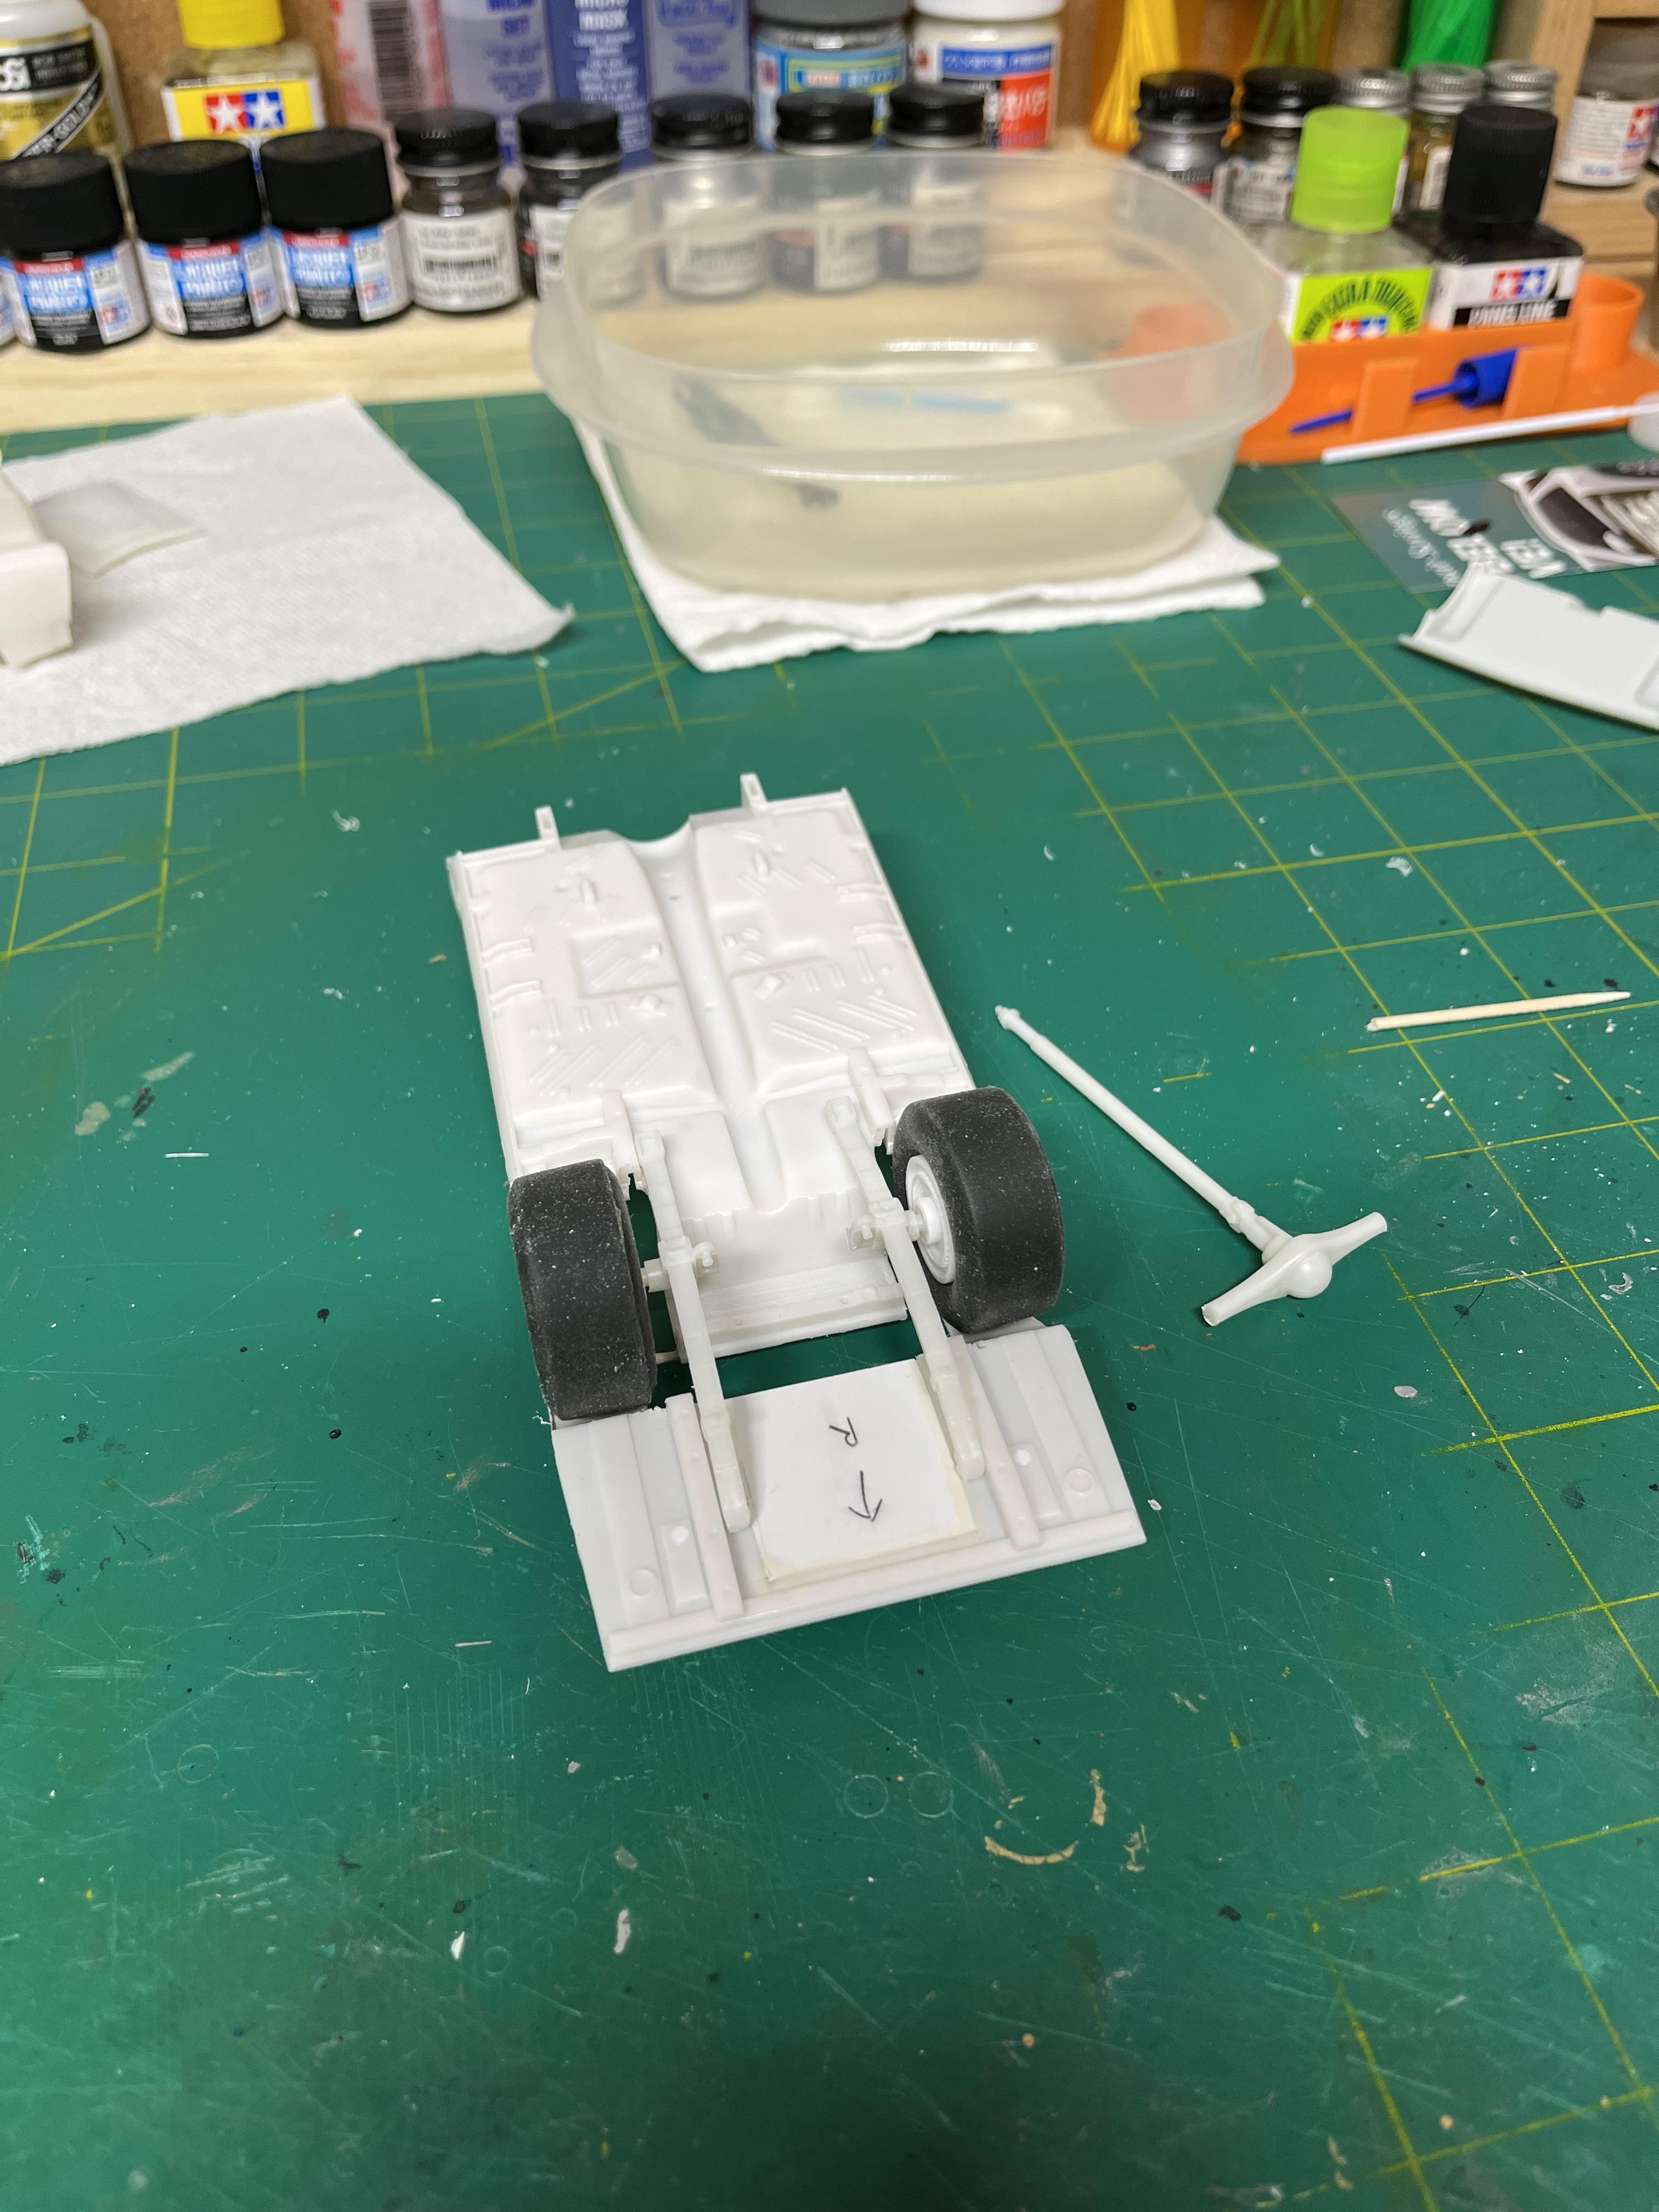
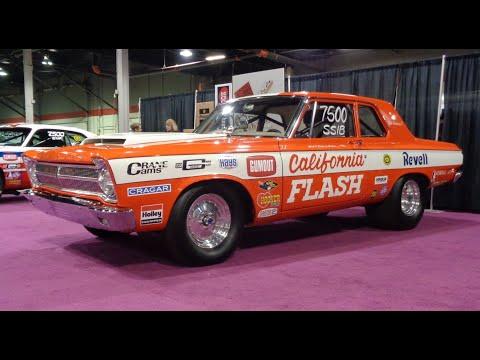
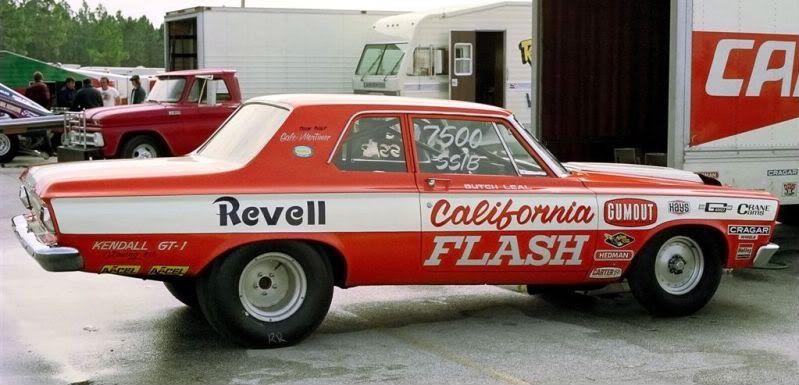
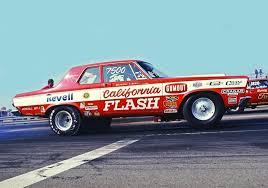
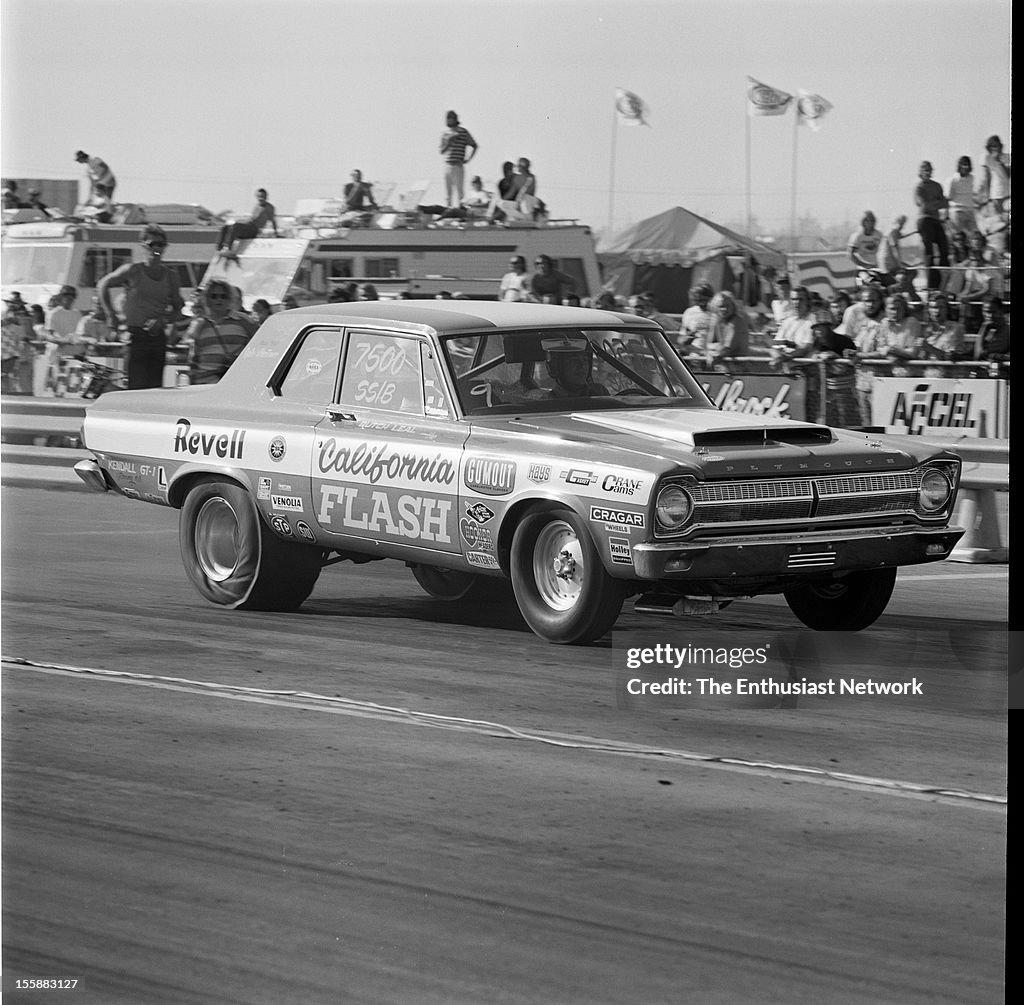
I guess it’s time to break out the Butcher Leal California Flash Plymouth. From the pictures I’ve found of this car, it seems to have been mini tubbed? Or was it always like this from the first times it’s been raced? But, anyway, I plan on building the version with the big tires on the rear. Still not sure if I want to paint the car white, and mask off for the orange, or just use the decals. I started to hack the rear floor pan, and removing the fuel tank, to move the springs inward to fit a set of Futurattraction slicks.
-
Thanks for the replies. I posted it in the Drag Racing section as it’s finally completed.
-
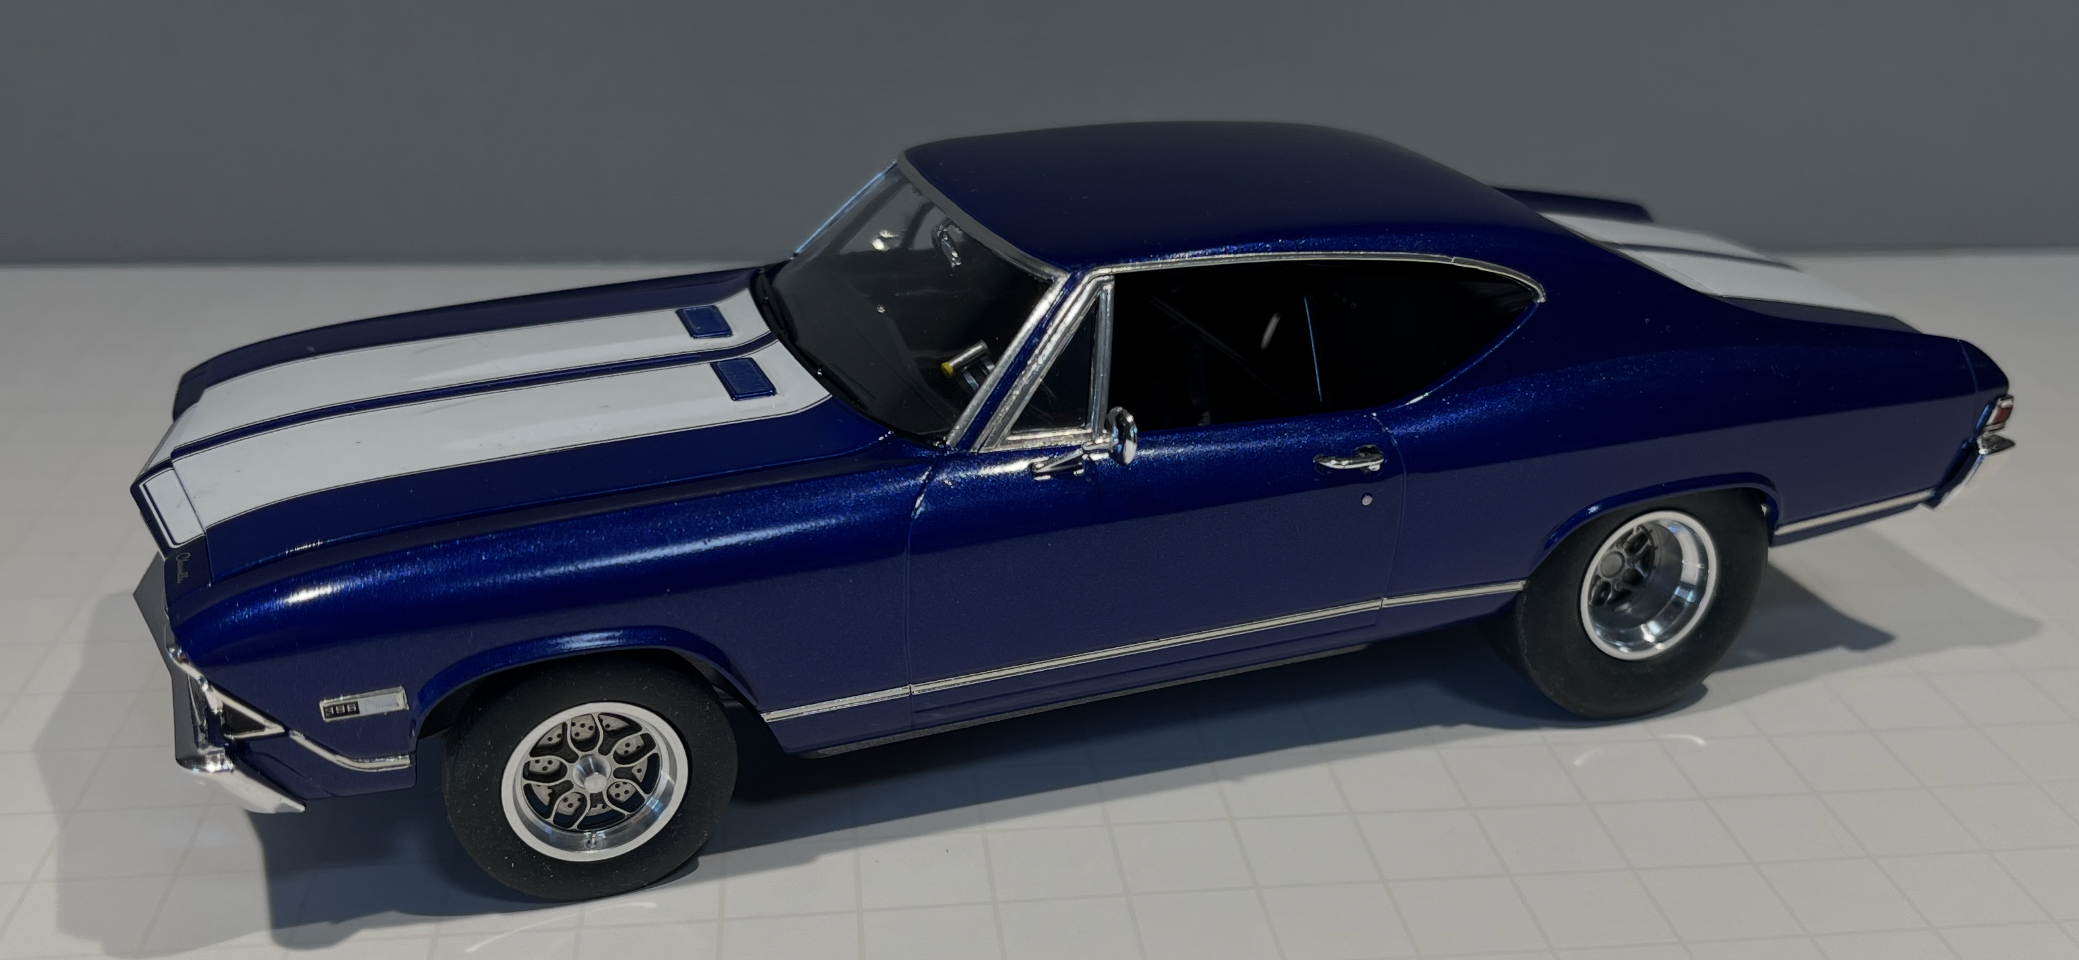
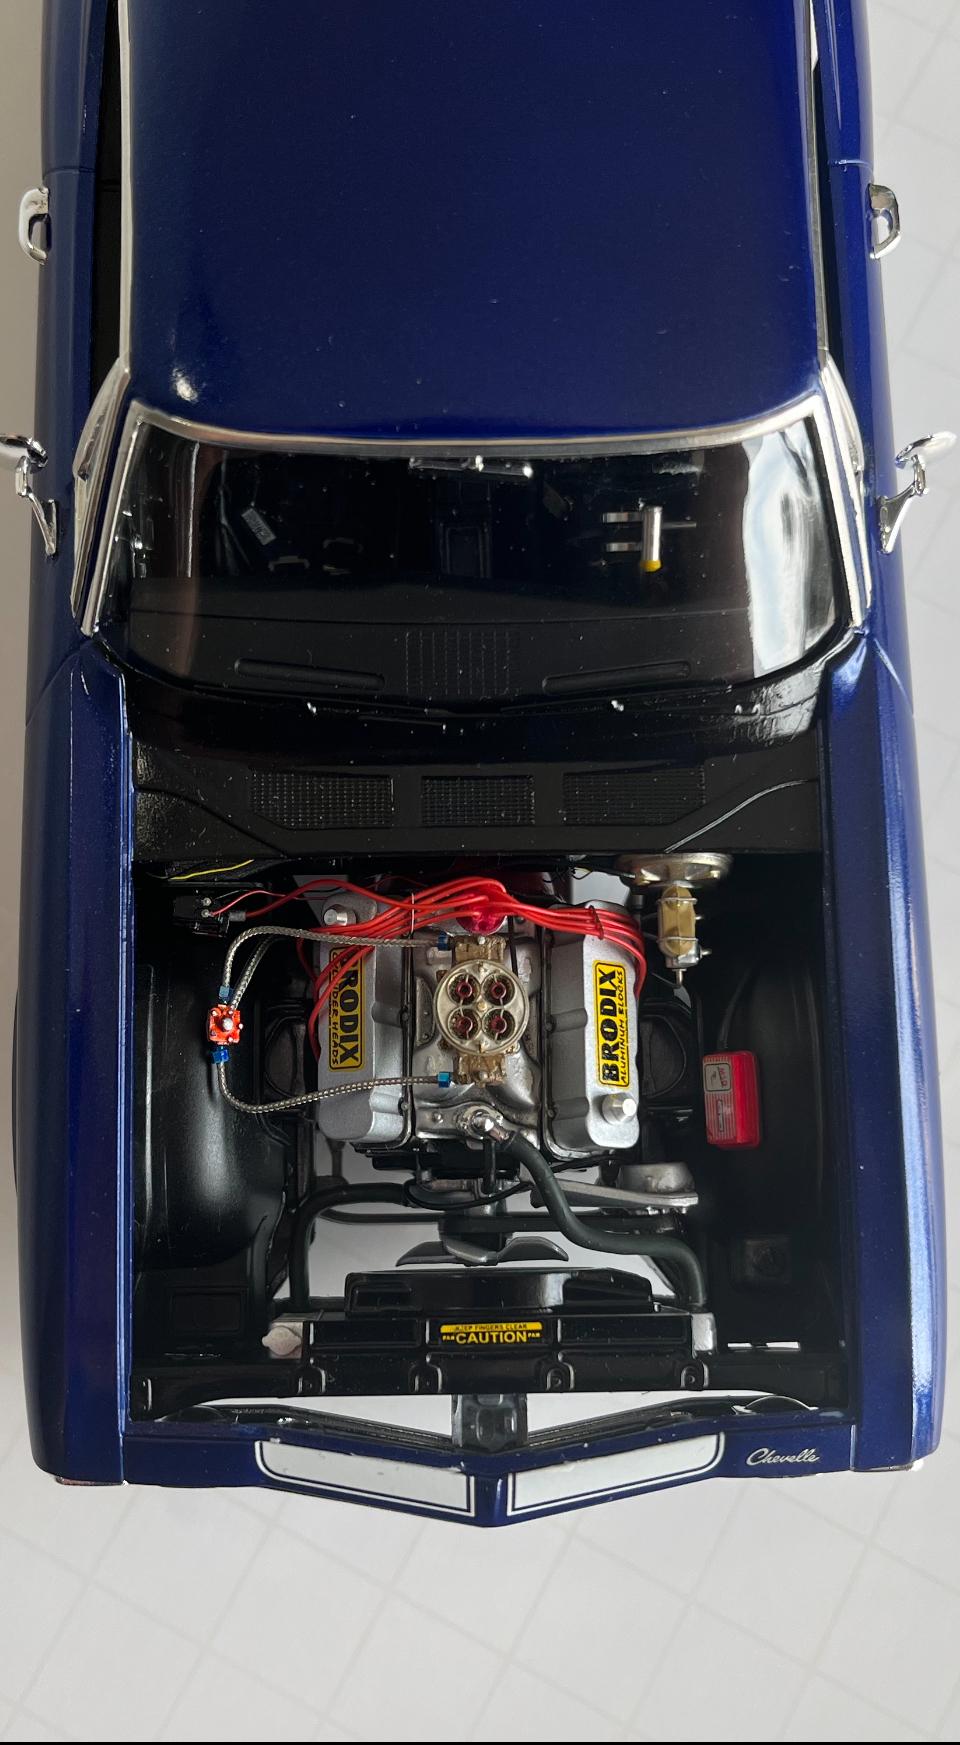
I finished the Chevelle up this morning. It’s a really nice kit. I probably should have built the front suspension out from the mounting points, instead of making those thick, ugly, silver things connected to the front rims. Maybe next time I’ll do it different. It’s my first time incorporating aftermarket aluminum turned rims to a build. Even with all the hacking I did, the kit pretty much just falls together still. Seats, and carburetor, wheels, and tires are Futurattraction. Fuel lines and fittings are Pro Tech. Maybe I’ll move on to the 69 Chevelle soon. But that one will be a factory stock.
- 21 replies
-
- 18
-